EDIT July 28, 2026: Finished! (and PHOTOS!!)
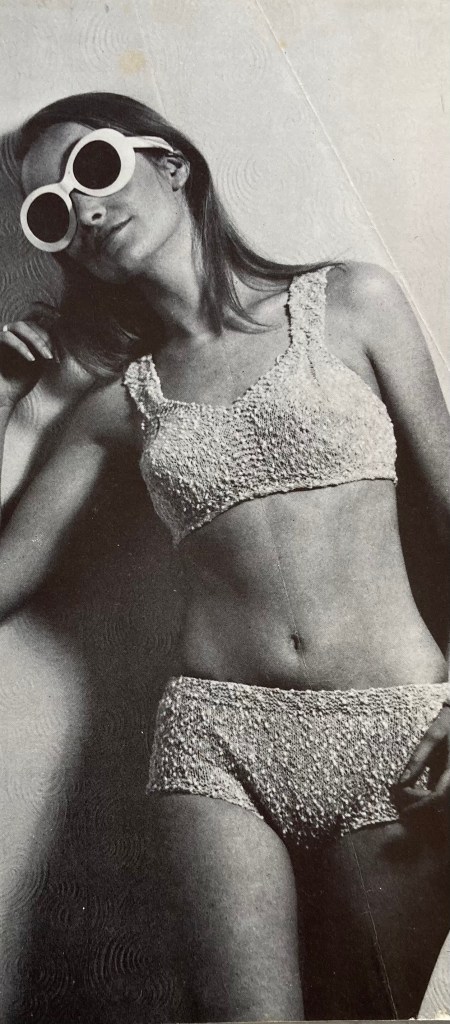
Summer is here! And the June 1968 issue of Stitchcraft has a glorious design to “sun yourself by the pool or on the sand”, “this season’s smartest beach look — the hand knit bikini set.”
The caption at the top of the page promises you can “Go Sunning and… Lazing”, but does not say anything about “swimming”. I can imagine why! Though have heard that the one-piece knitted swimsuits of the 1930s and 1940s didn’t stretch all too much when wet, I cannot imagine that this 1960s bikini with garter-stitch bands would cling to the body effectively in water. Nothing like having your bathing suit float off of your body on a wave to make that day at the beach truly memorable… I have a modern bathing suit for actual swimming (which I don’t do much of for fun anyway), and I try to avoid direct sunlight when possible, but I can definitely see myself “lazing” in the shade on a pool chair in a hand-knit bikini, so this was my project for June.
The three sizes for the top are for 32-33, 34-35, or 36-37 inch bust. I made the third size. Like me, the model seems to have at most a B cup. I imagine this style of hand-knit swimwear wouldn’t work very well for anyone built much bigger than that, since it doesn’t give much support and and more weight would make the bands stretch too much.
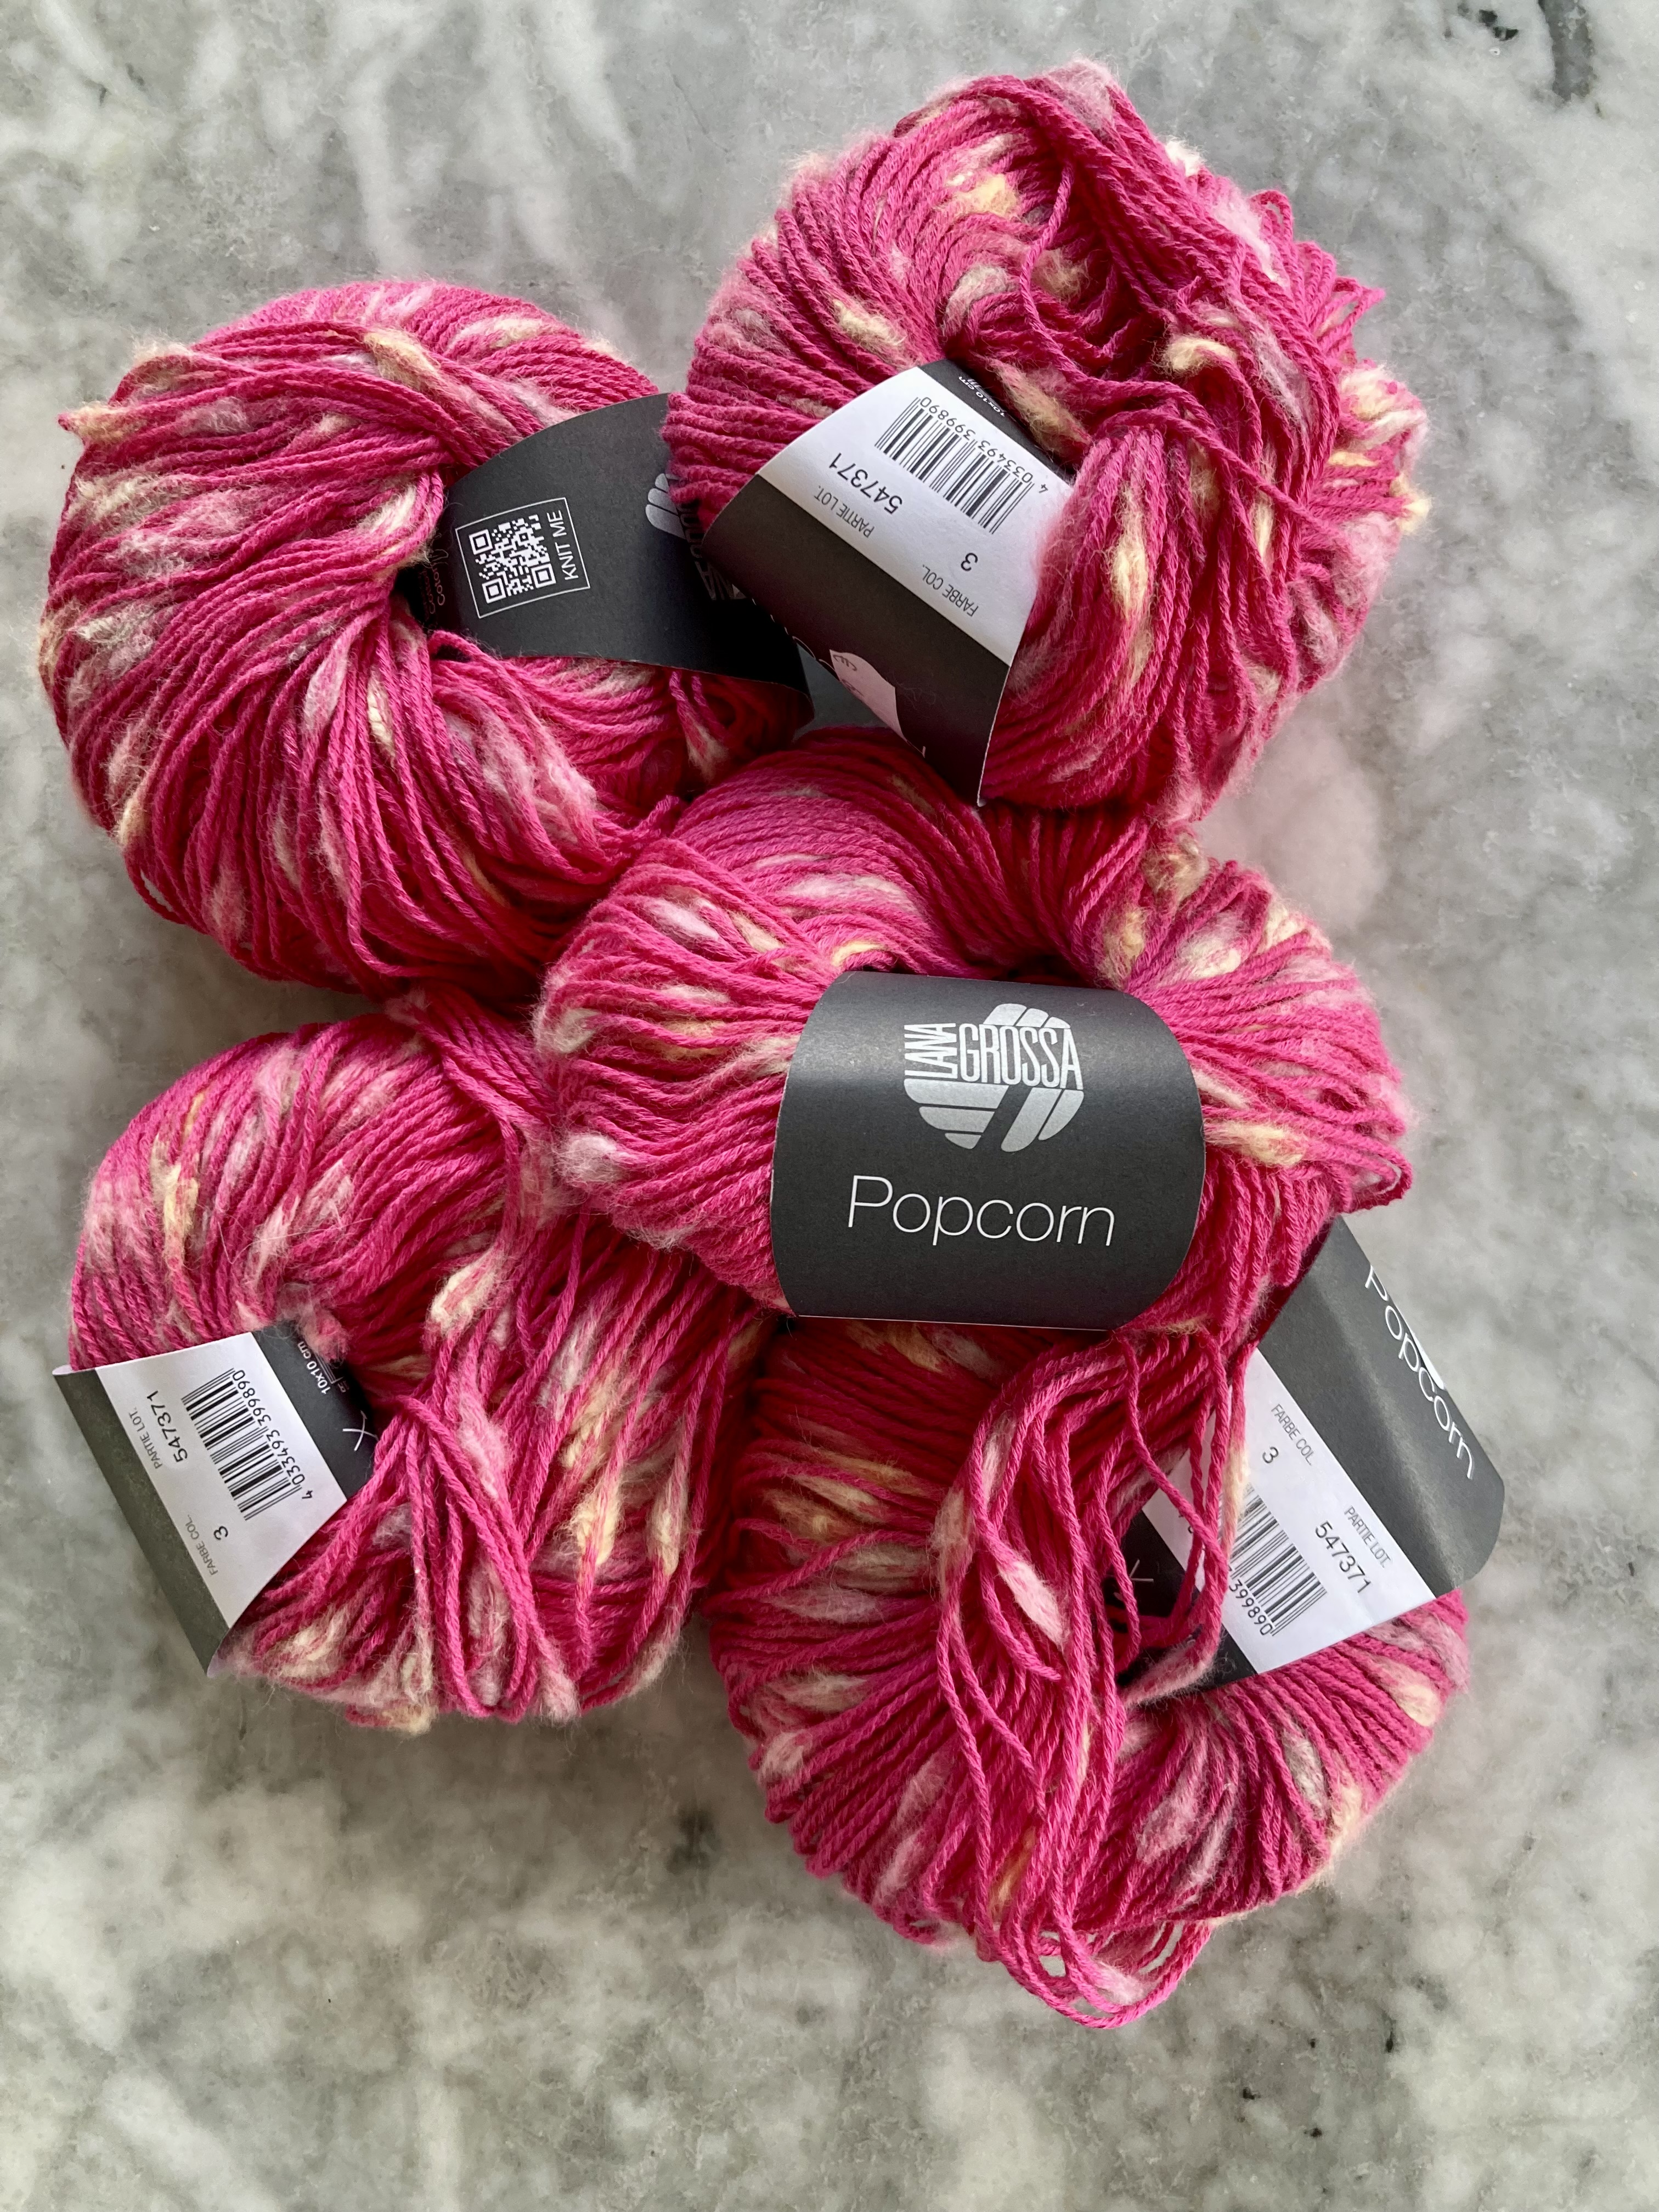
Finding the right yarn was a challenge. The original wool is Patons “Four Seasons”, a sport-weight mix of wool and synthetic fibres with a bobbly, “popcorn” texture, in “Surf Blue” colour. I found exactly one brand of yarn with the right weight and look and it is perfect — Popcorn by Lana Grossa — but it is also 100% cotton, so possibly even less appropriate for swimming than the original. It’s also probably a bit heavier, which was OK with me if it gives a thicker and less see-through fabric. It was also available in bright pink! If I was going to knit myself a bikini from 1968, I wanted it to be as bright and fun as possible, so that was perfect.
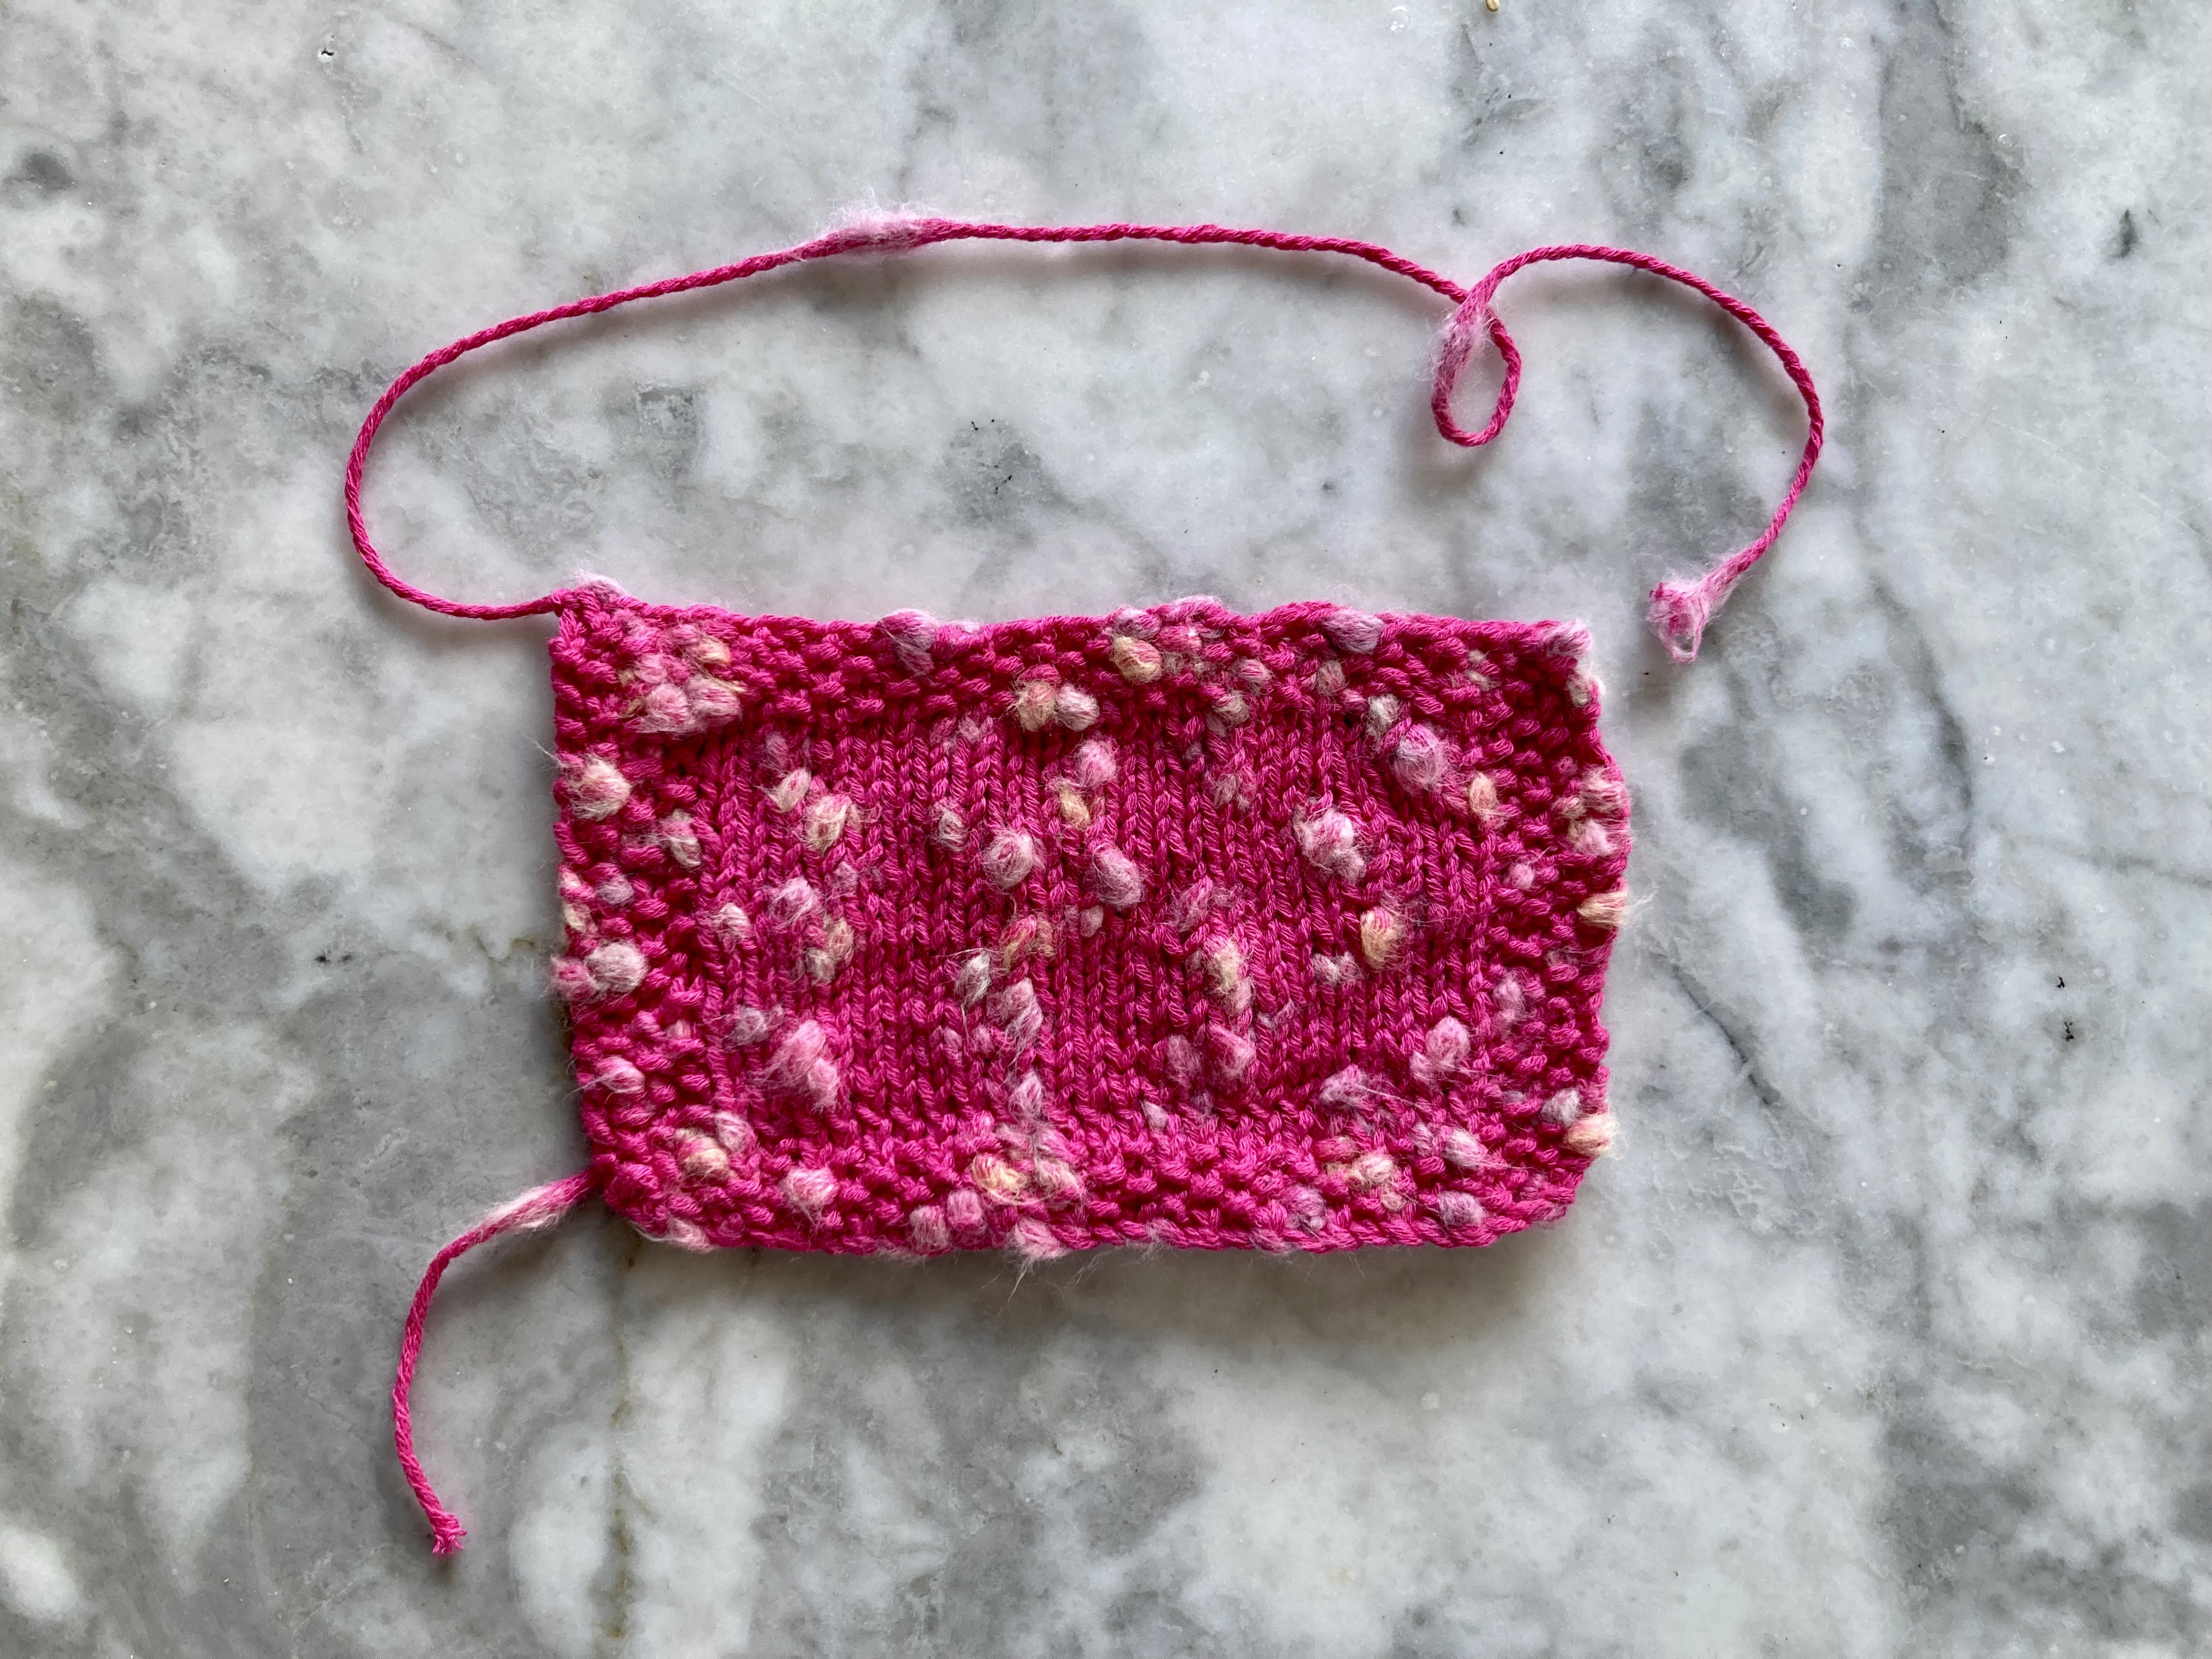
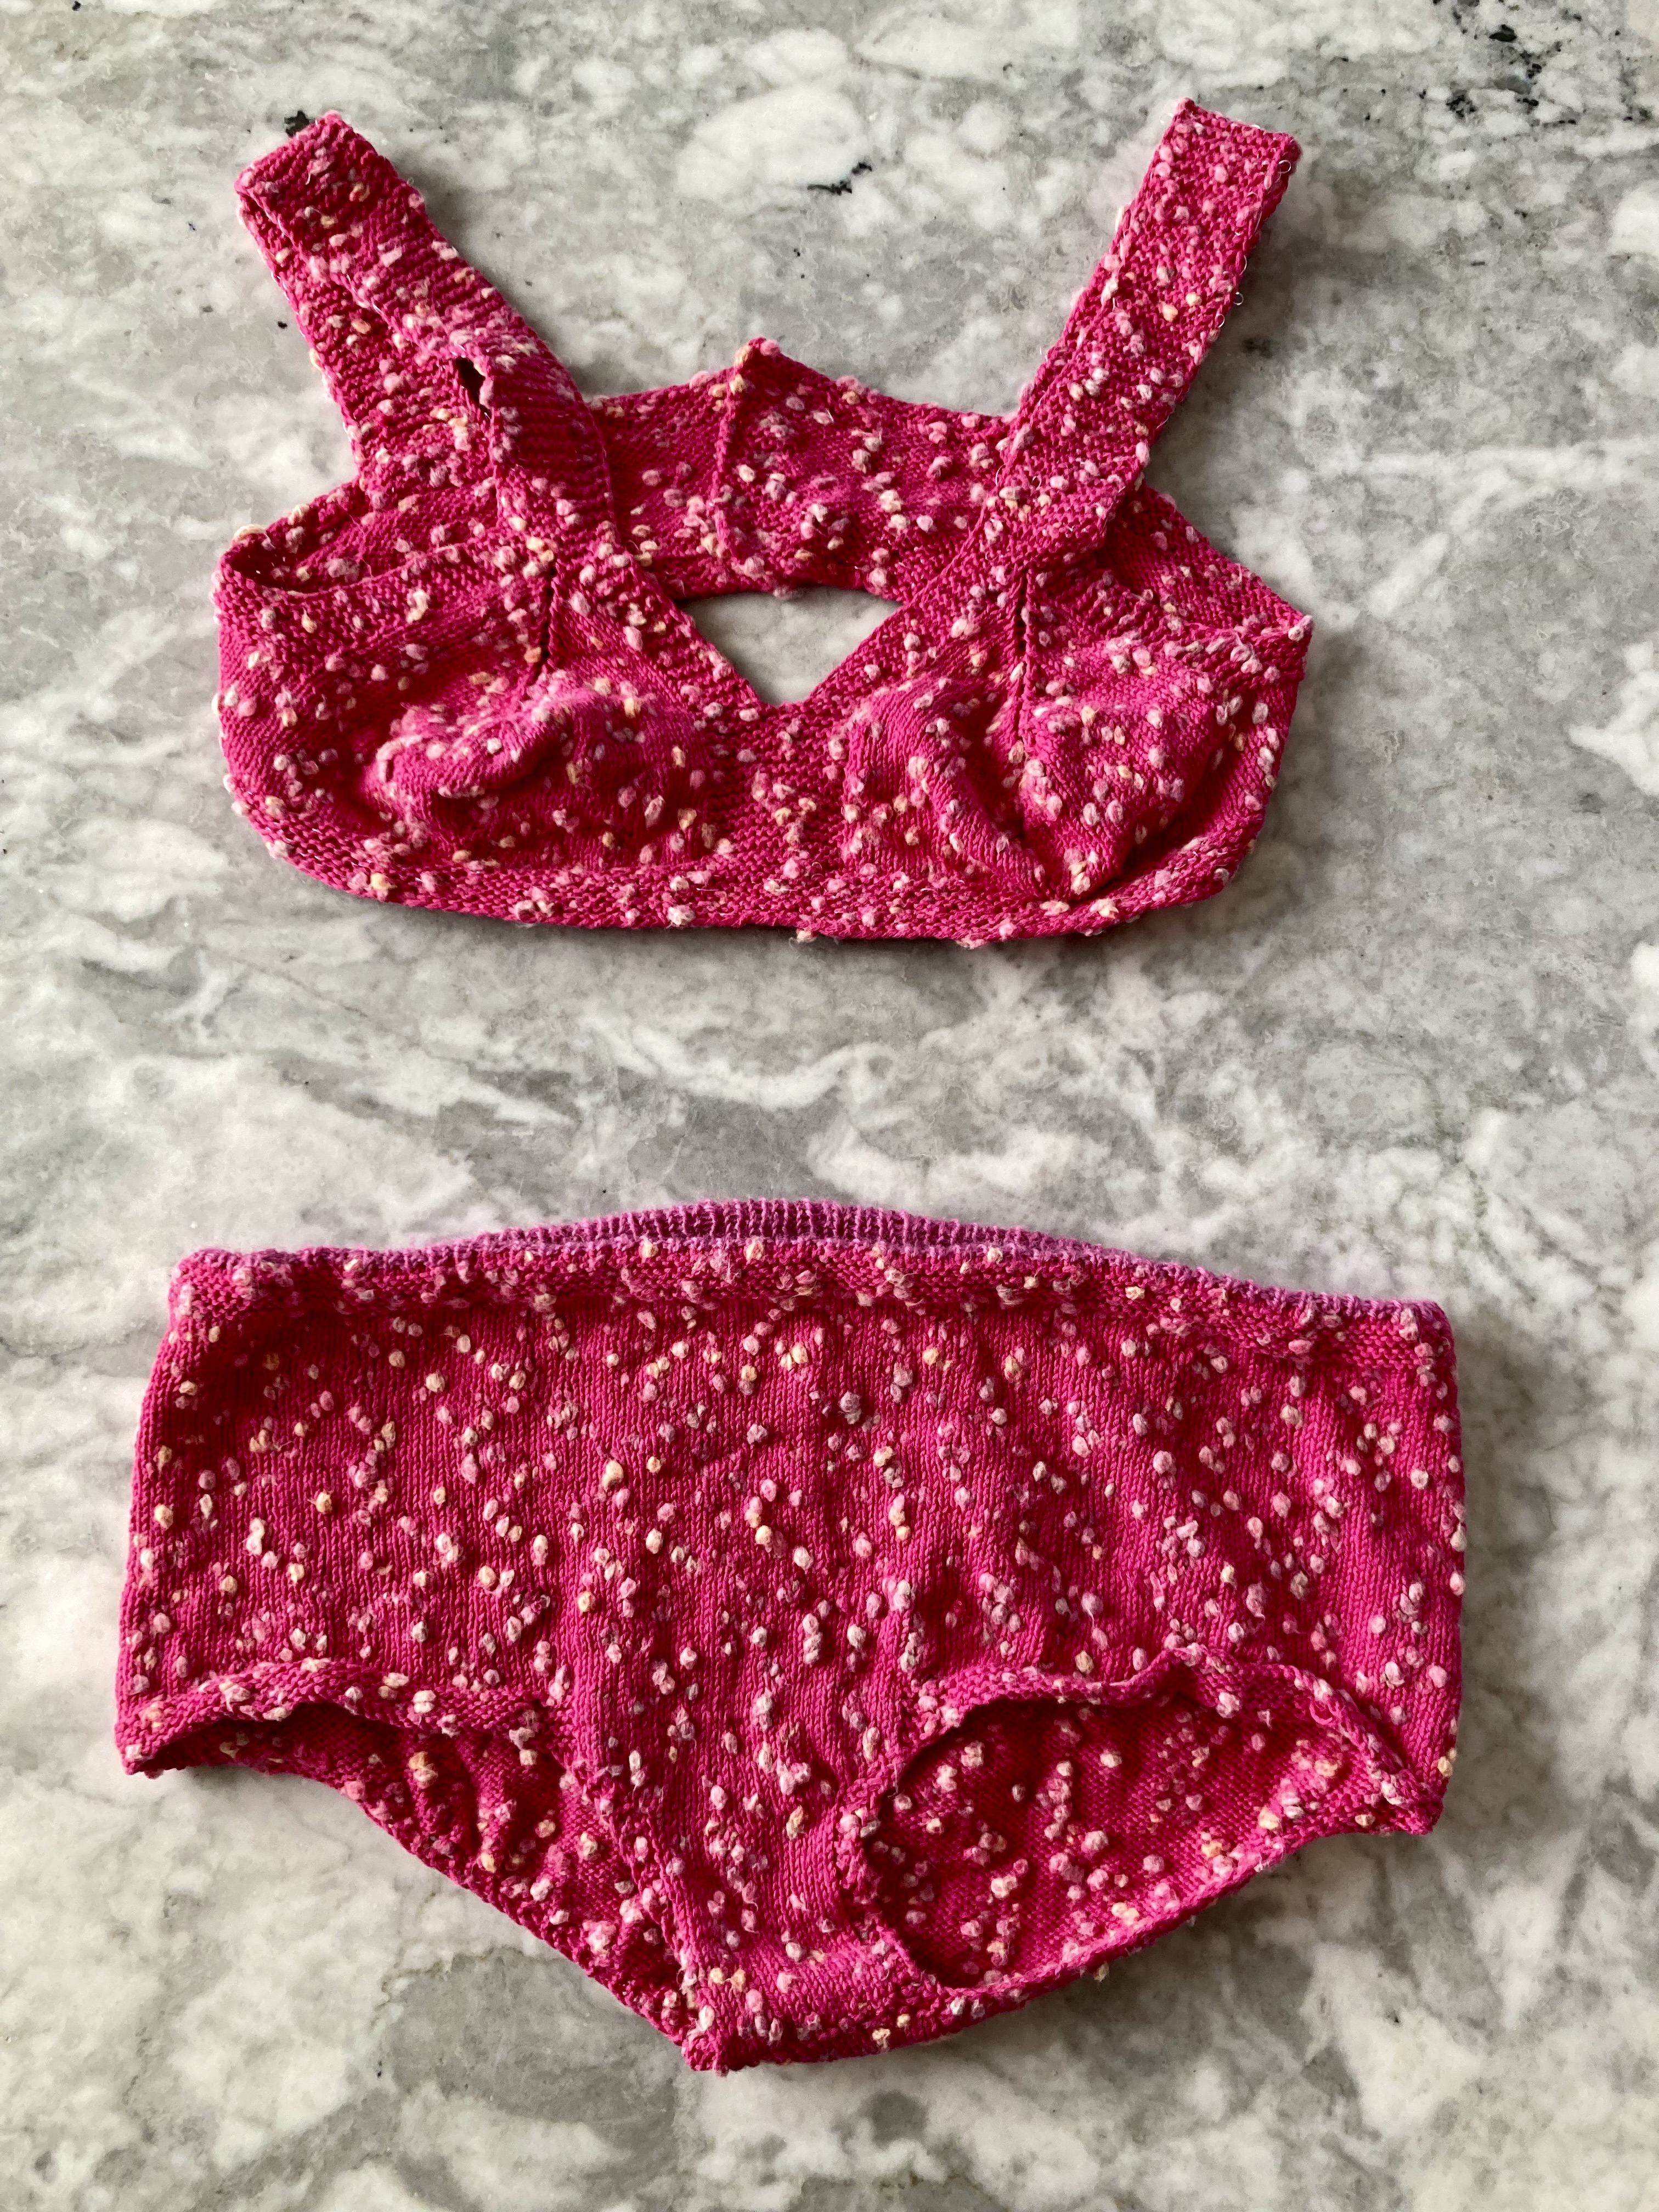
The top is knitted in stocking-stitch, from the band up to the straps, with garter-stitch borders. I was unsure of the suitability of garter stitch for a bra band, as it is just going to stretch horizontally, but ribbing was impractical for the rest of the borders (which need to lie neatly flat) and combining the two didn’t appeal to me. I knit an elastic thread along with the yarn on 3,5 mm needles, which made the band surprisingly firm and gave it some elasticity. If necessary, the band could be reinforced with a narrow strip of elastic. There’s a vertical band of 12 stitches garter stitch in the middle of the front.
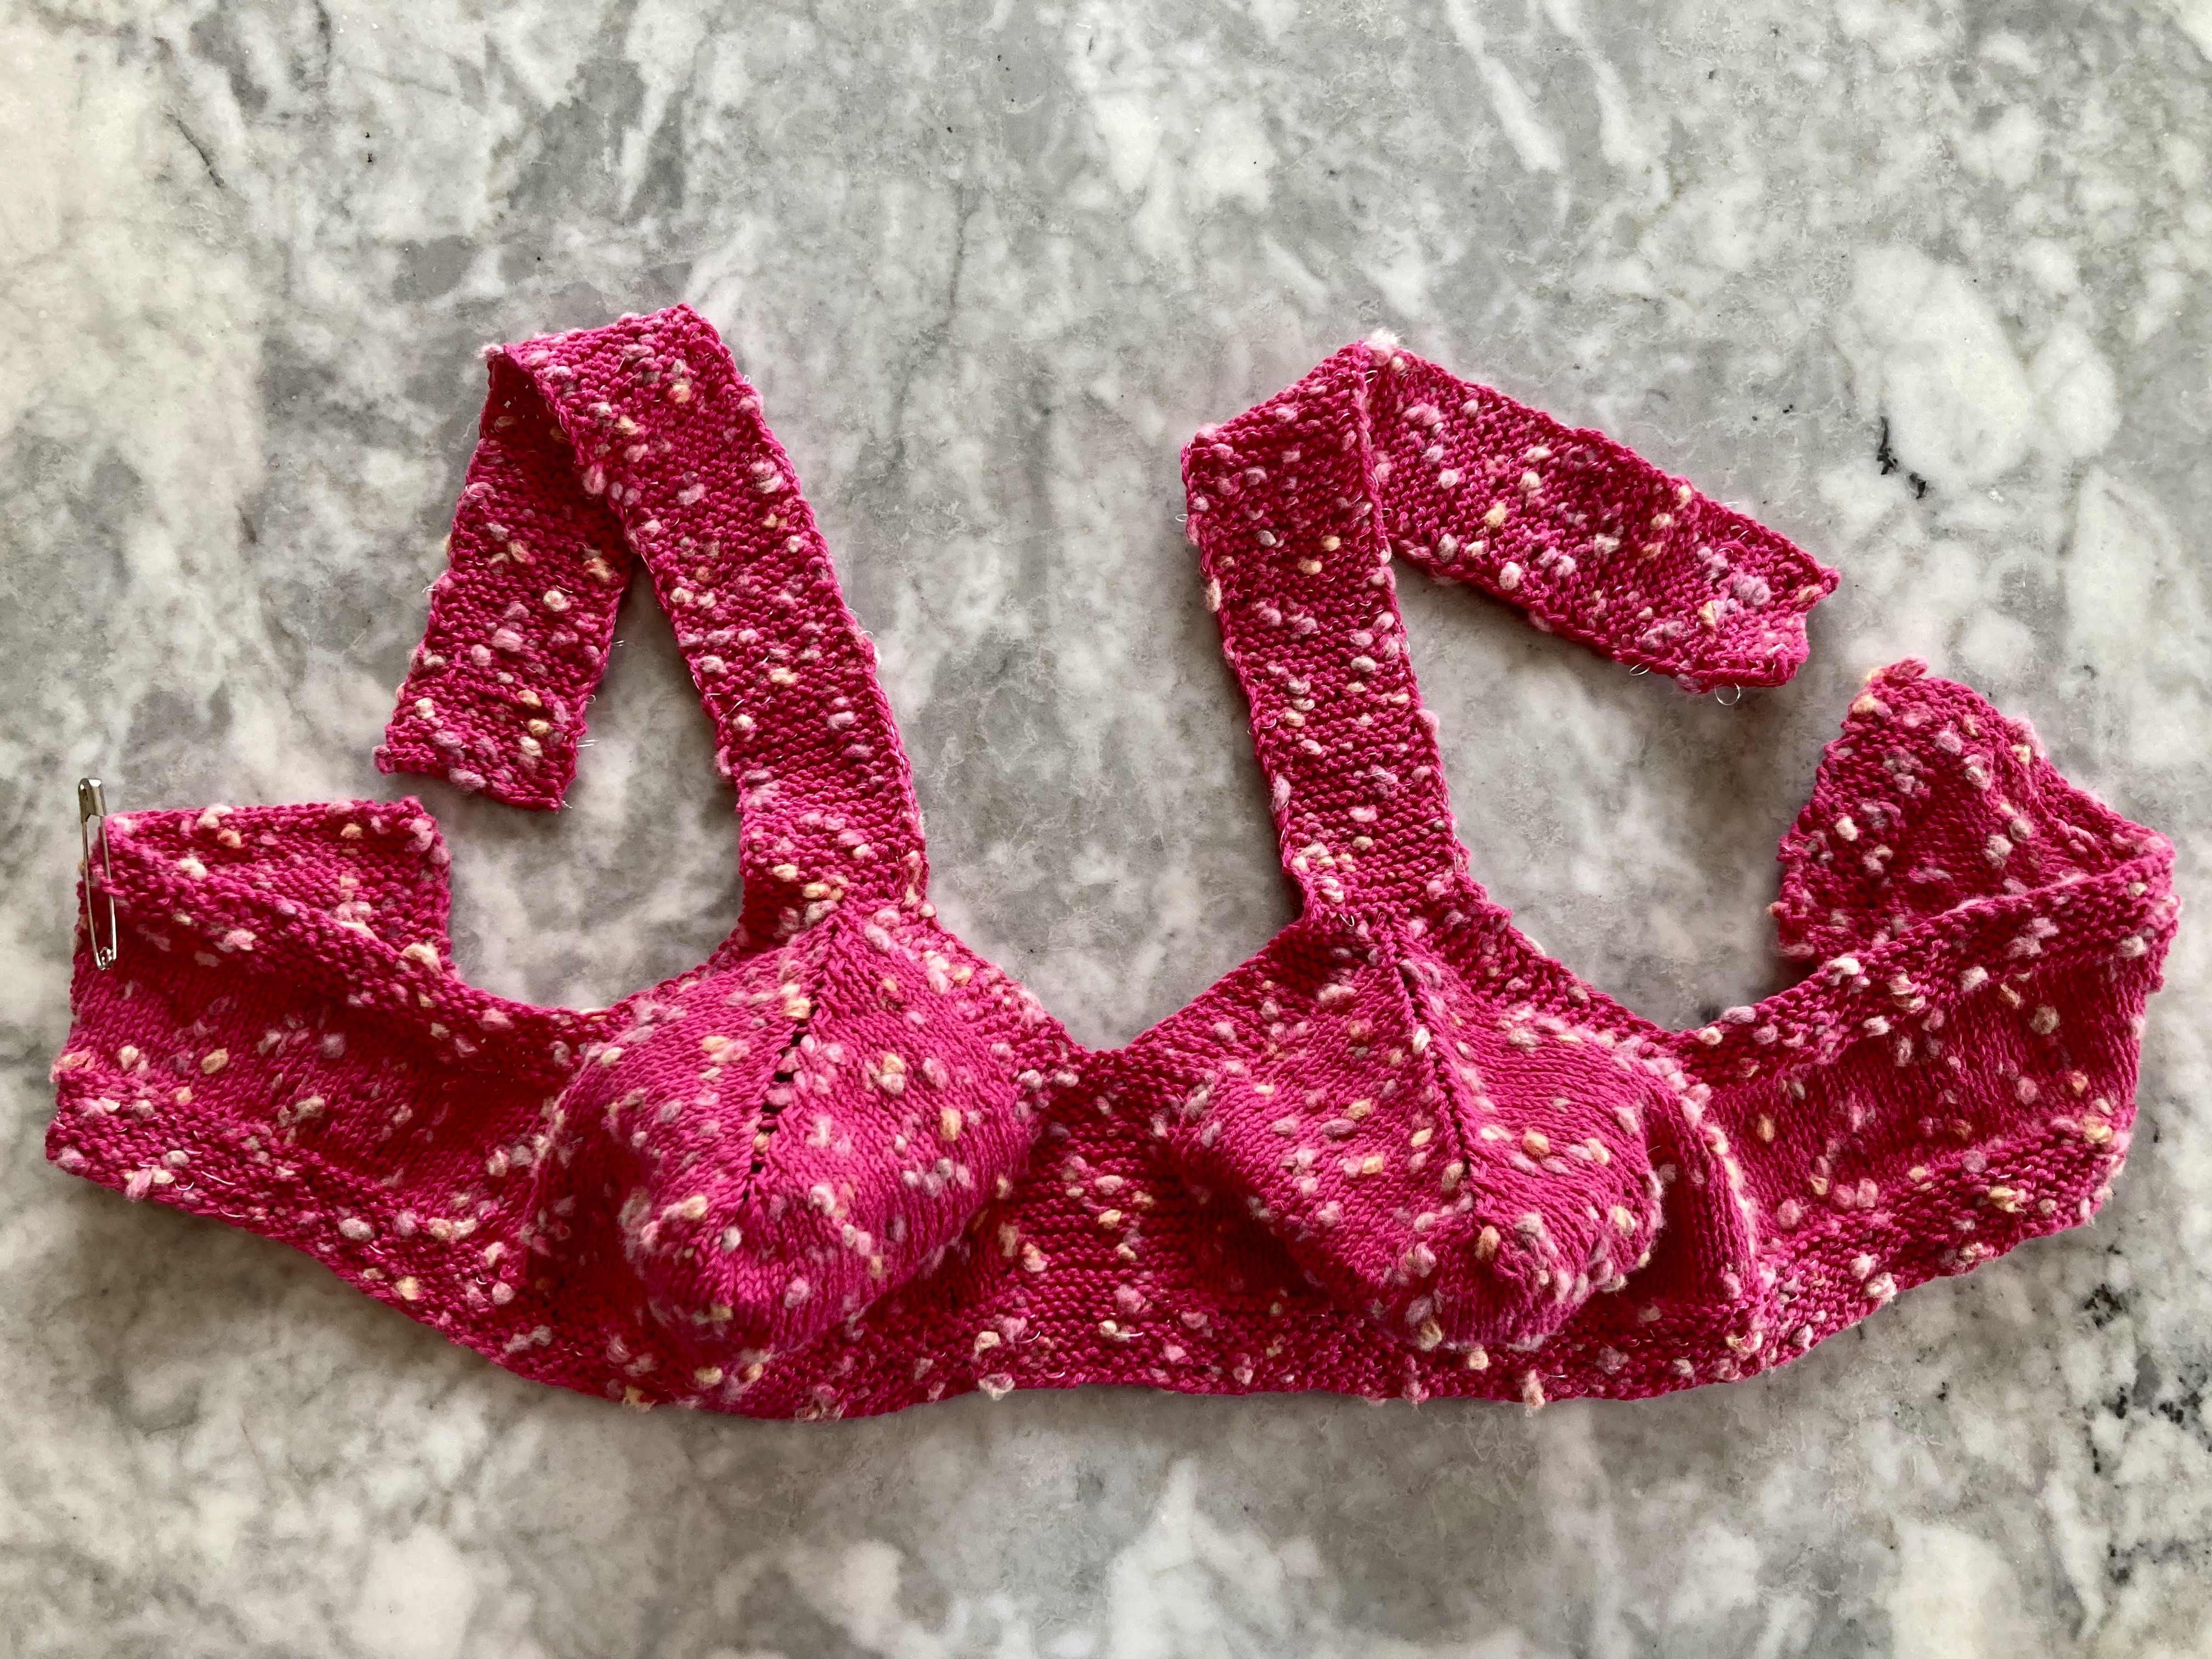
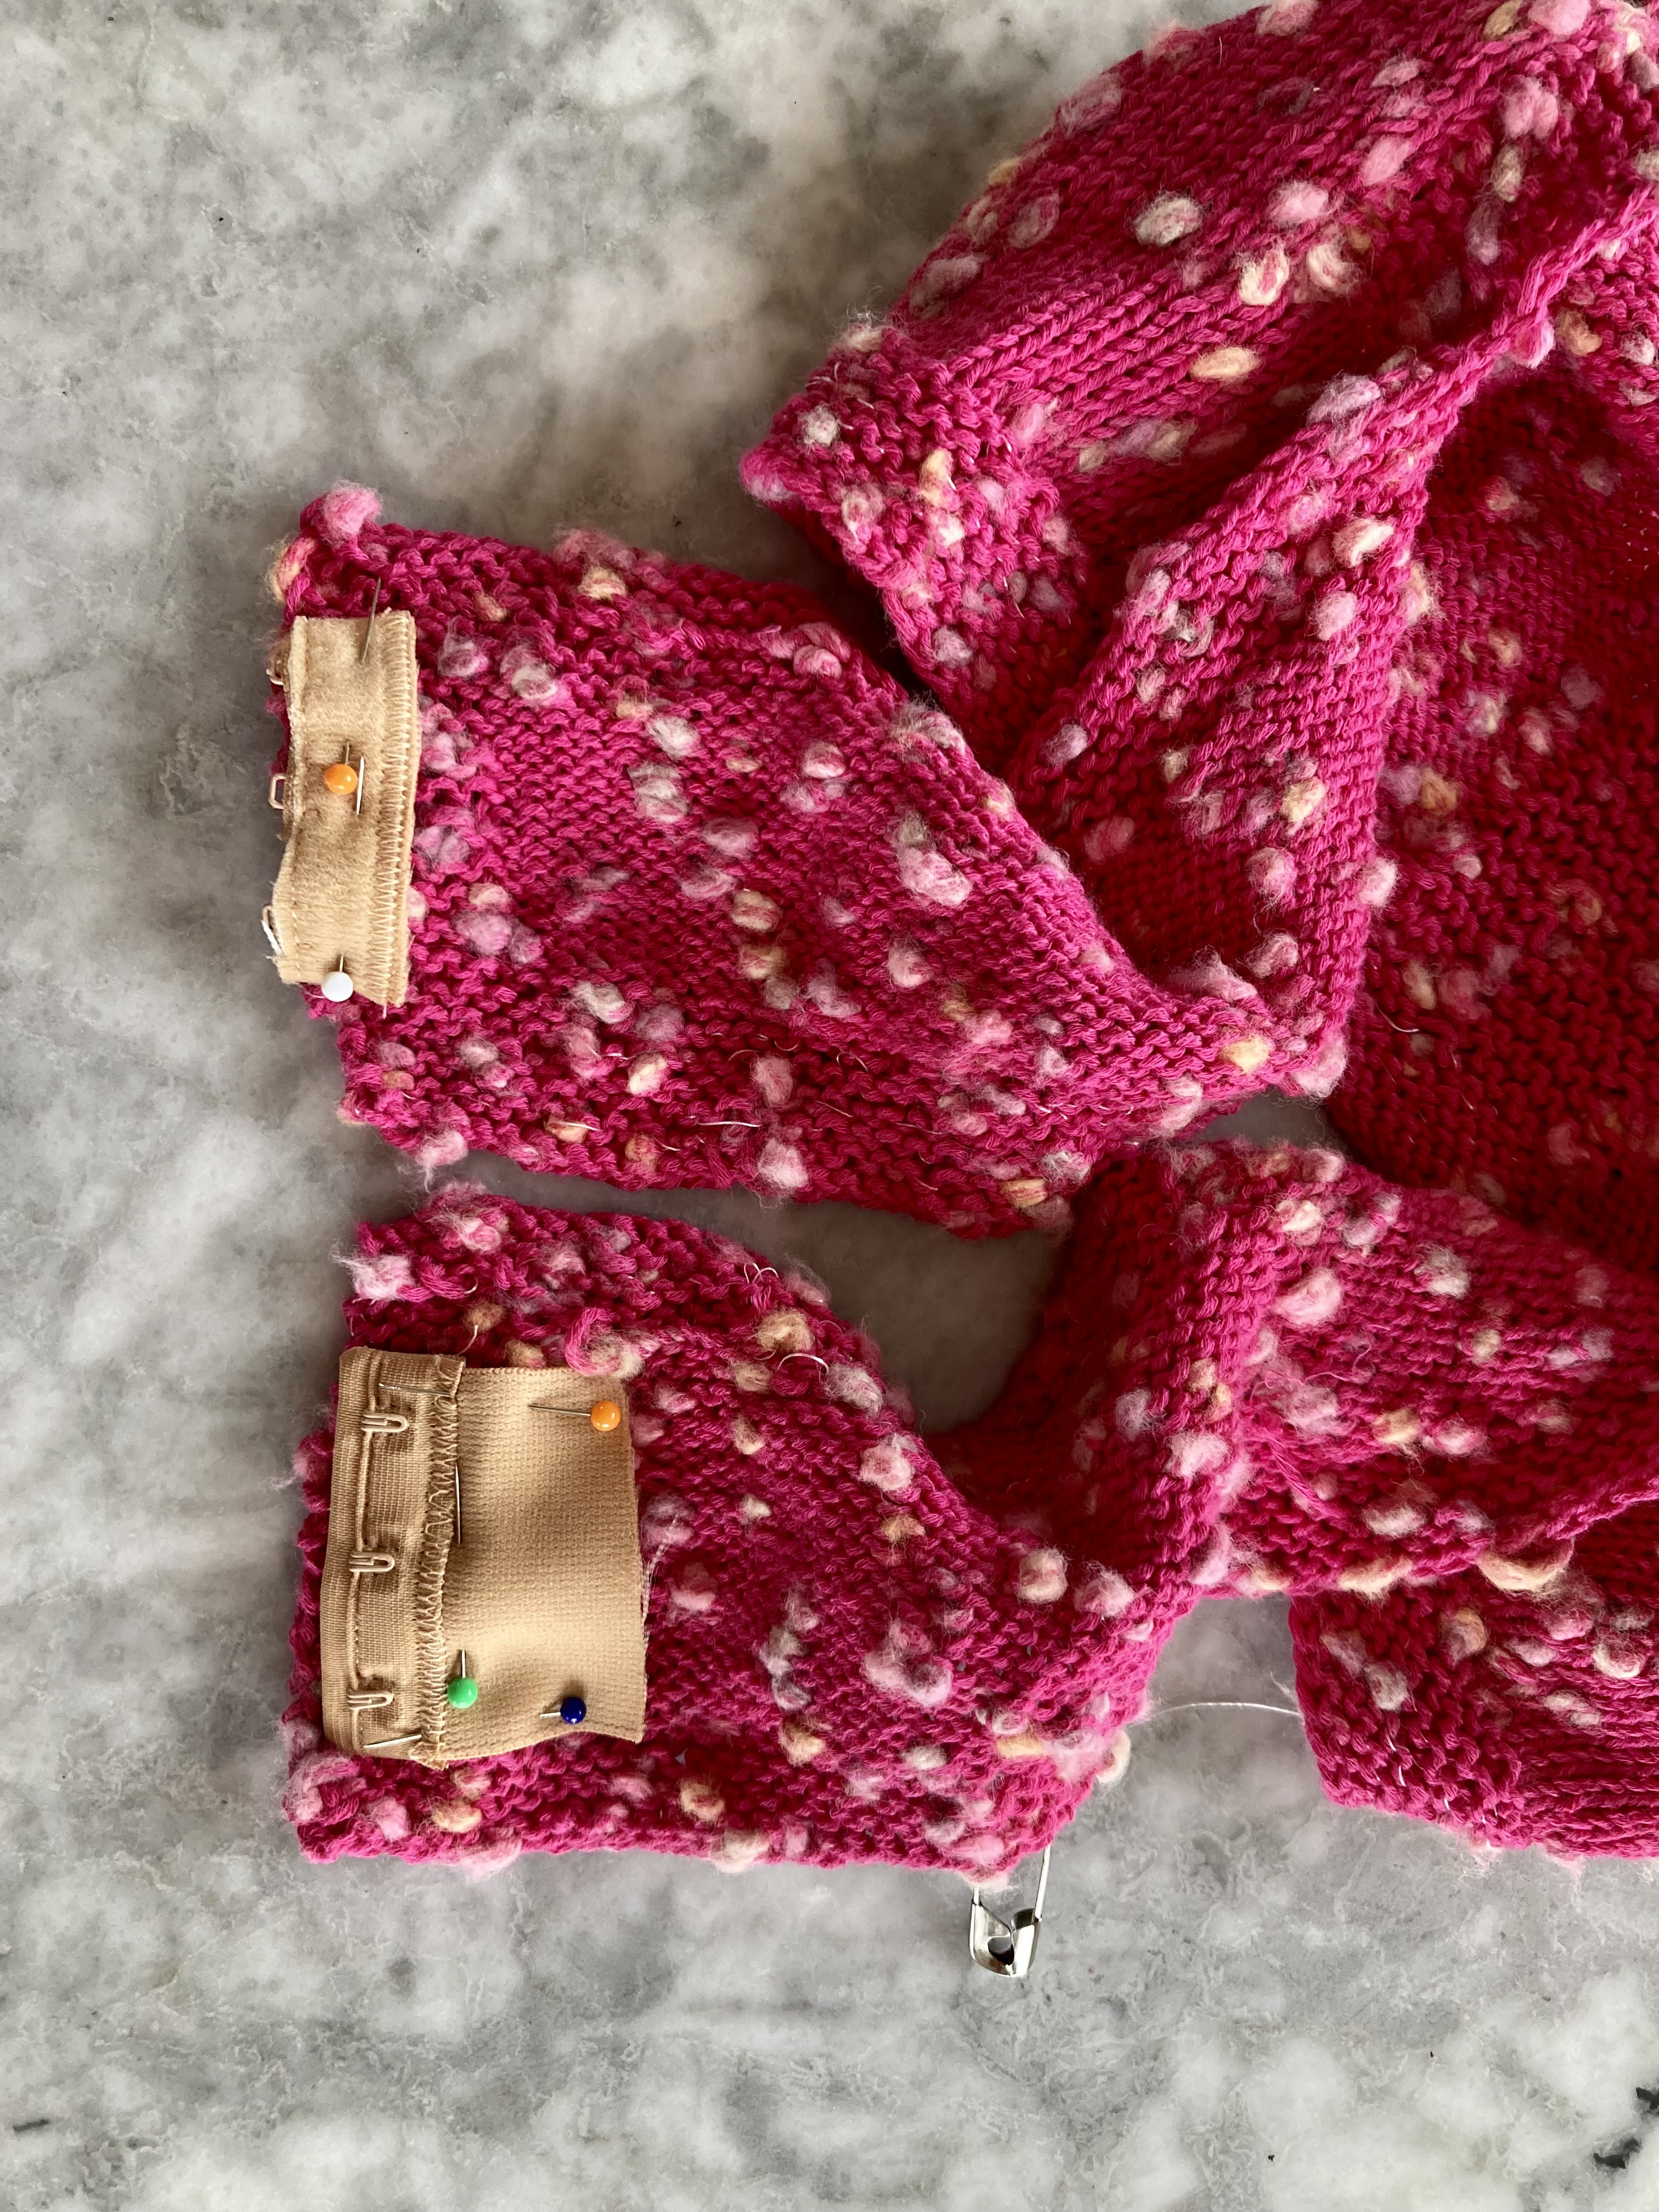
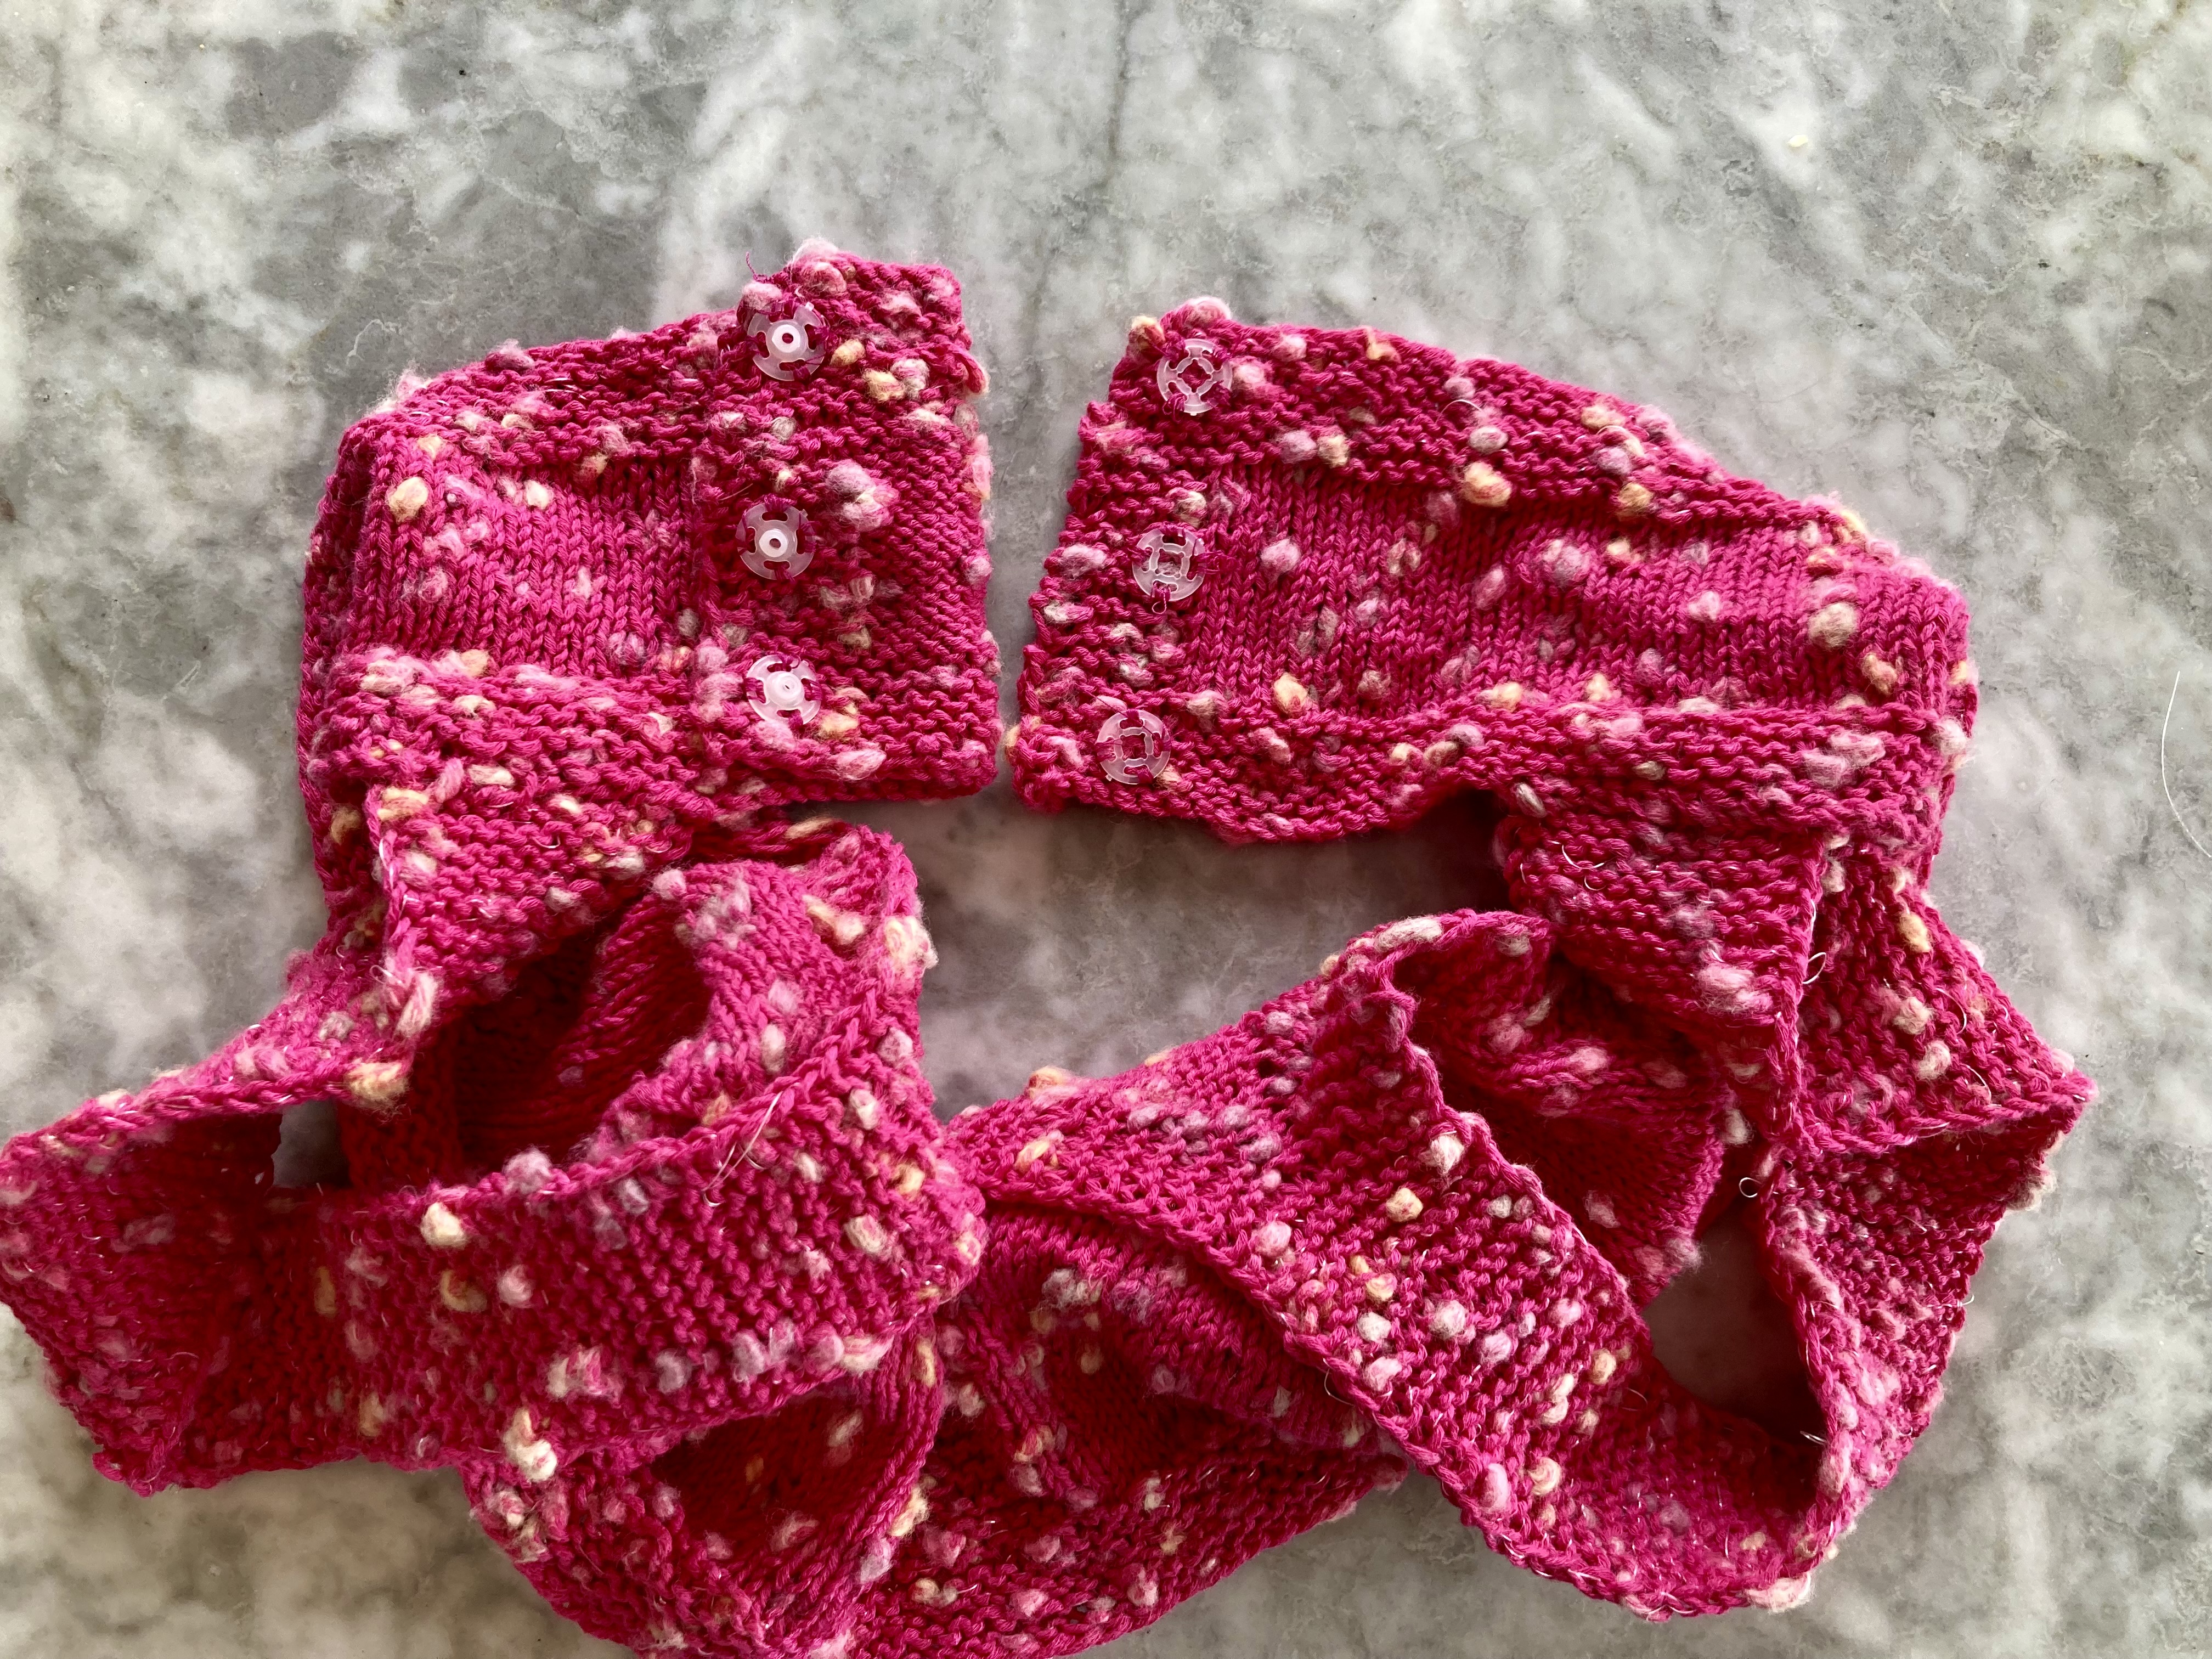
The cups are formed by increasing at the middle of each one, then decreasing rapidly at the same stitch. This makes them kind of pointy, in the old “bullet bra” style. But after finishing the cup shaping, I tried it on and it fit! I reinforced the straps with the same extra elastic thread. For the back fastening, I tried using a bra closure, but it didn’t look good with the overlap and was unecessarily difficult to fasten. I decided to use clear plastic snaps instead.
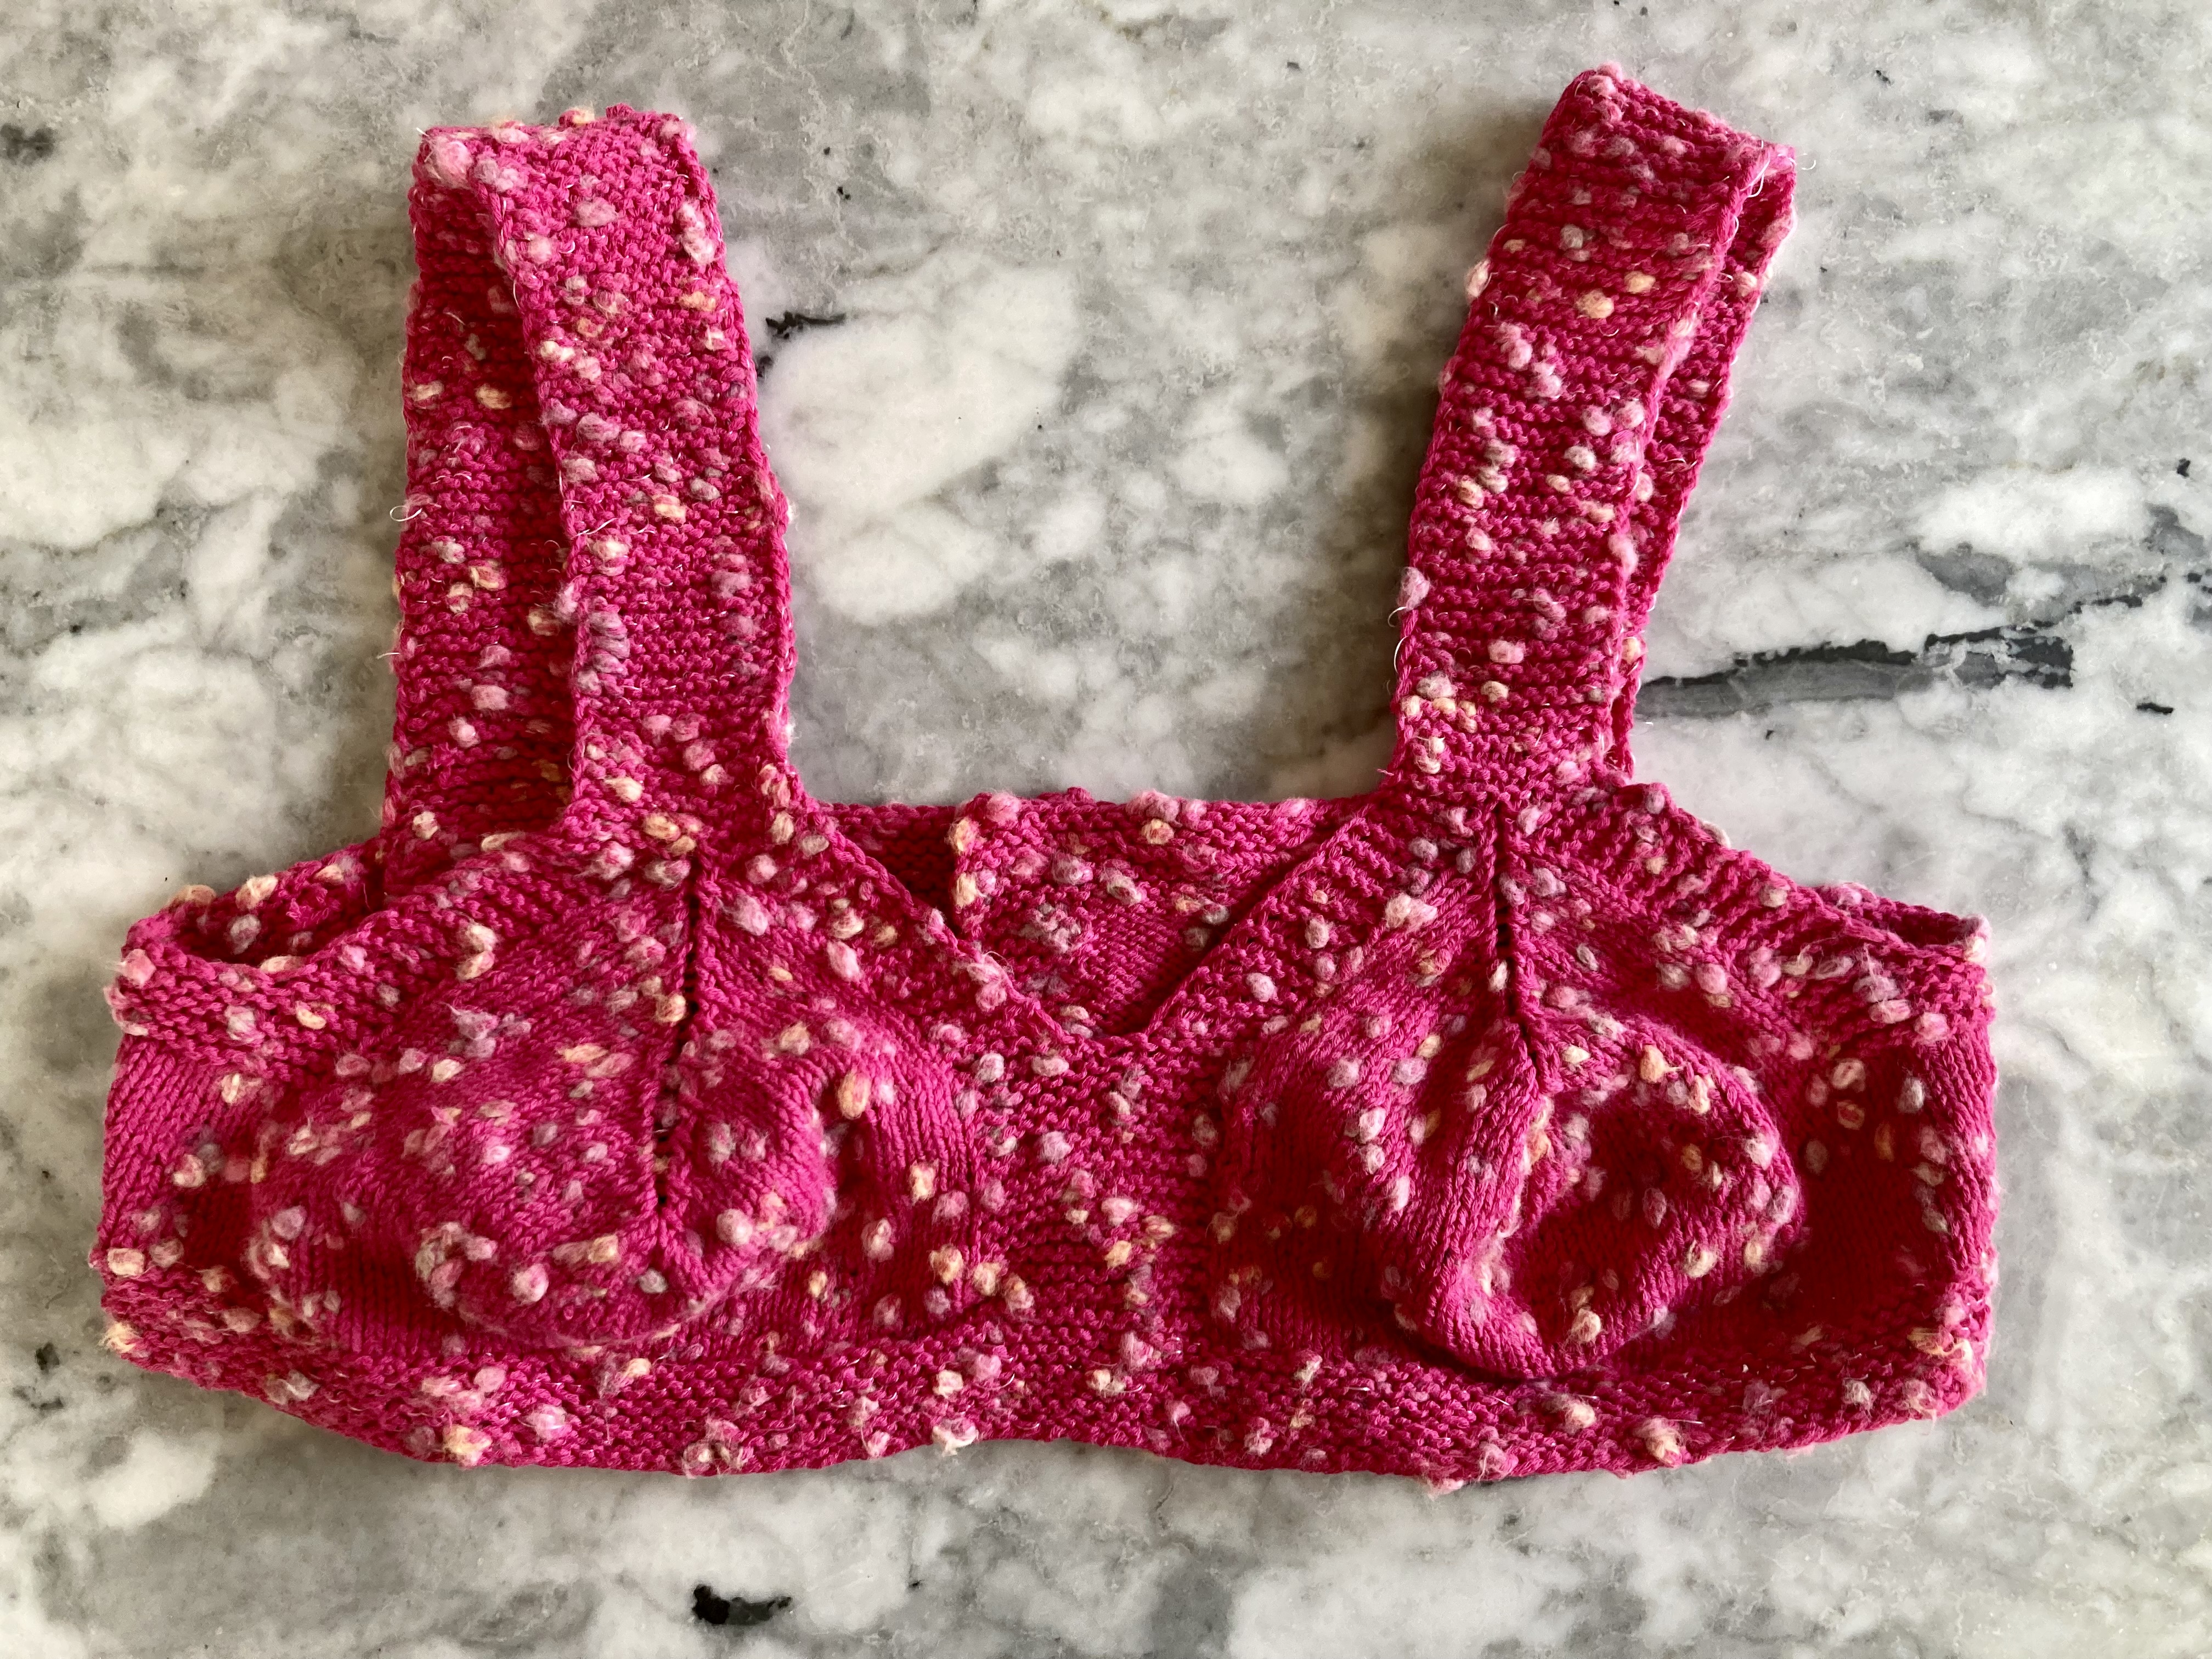
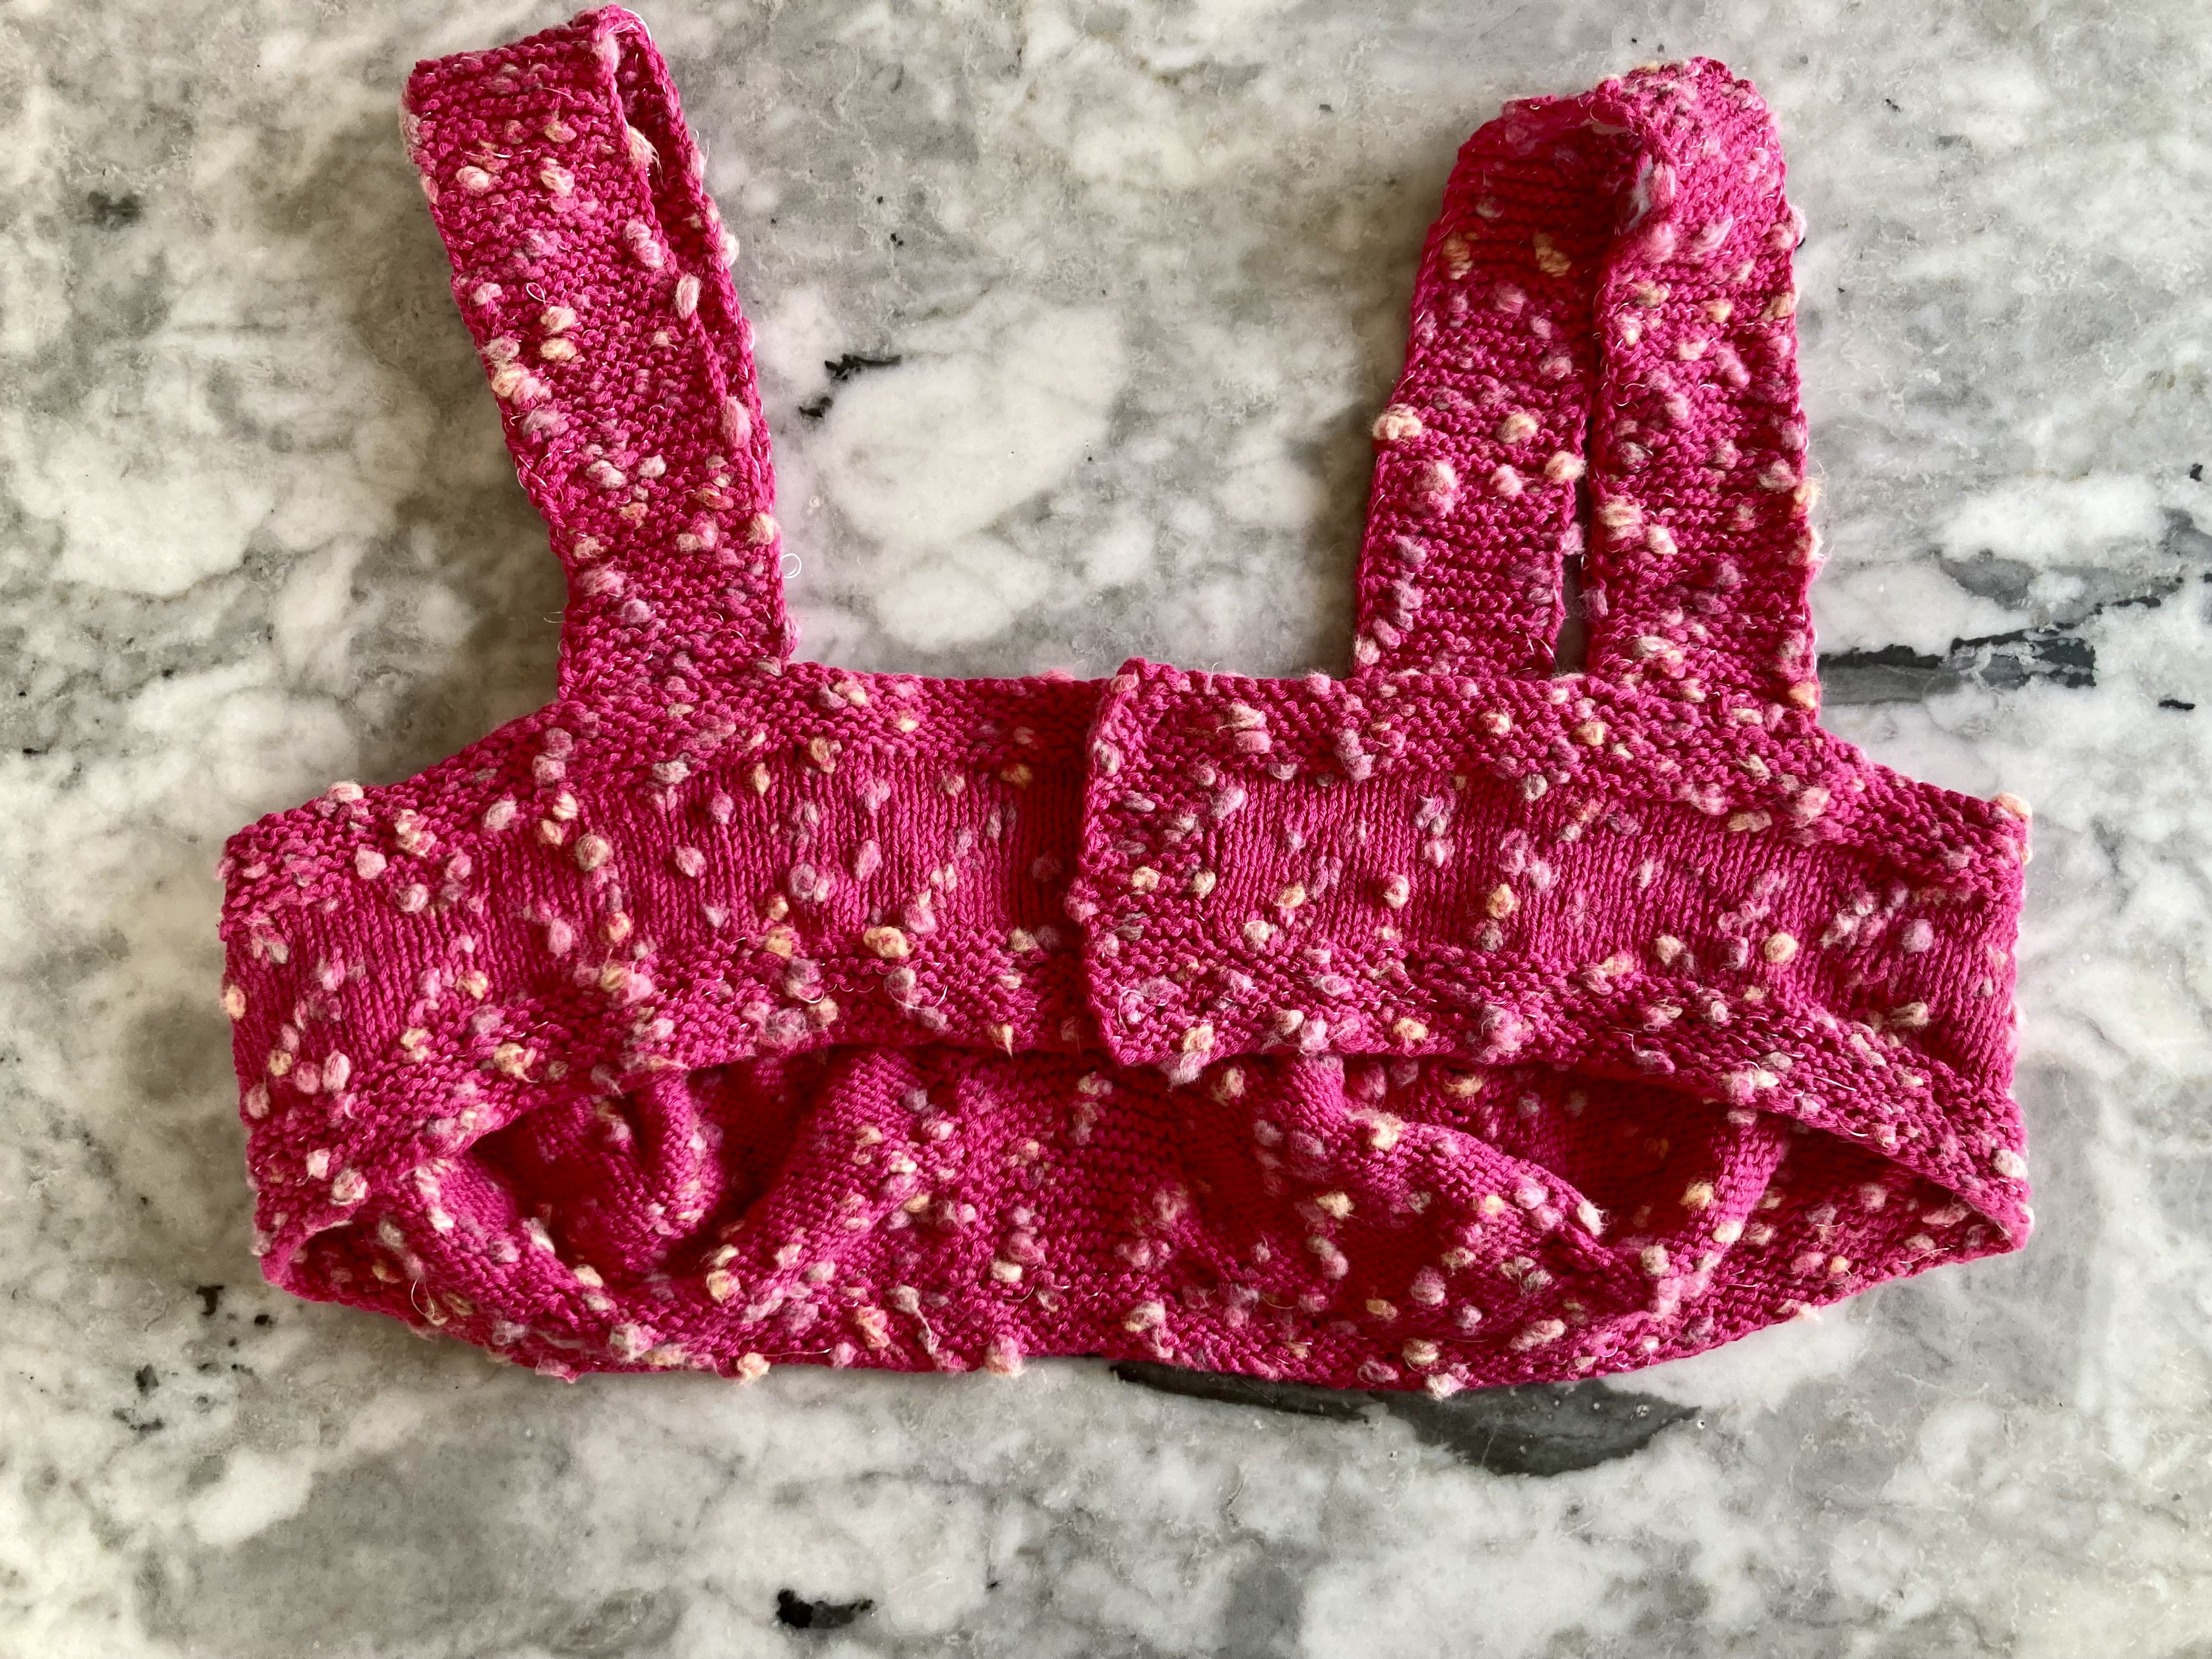
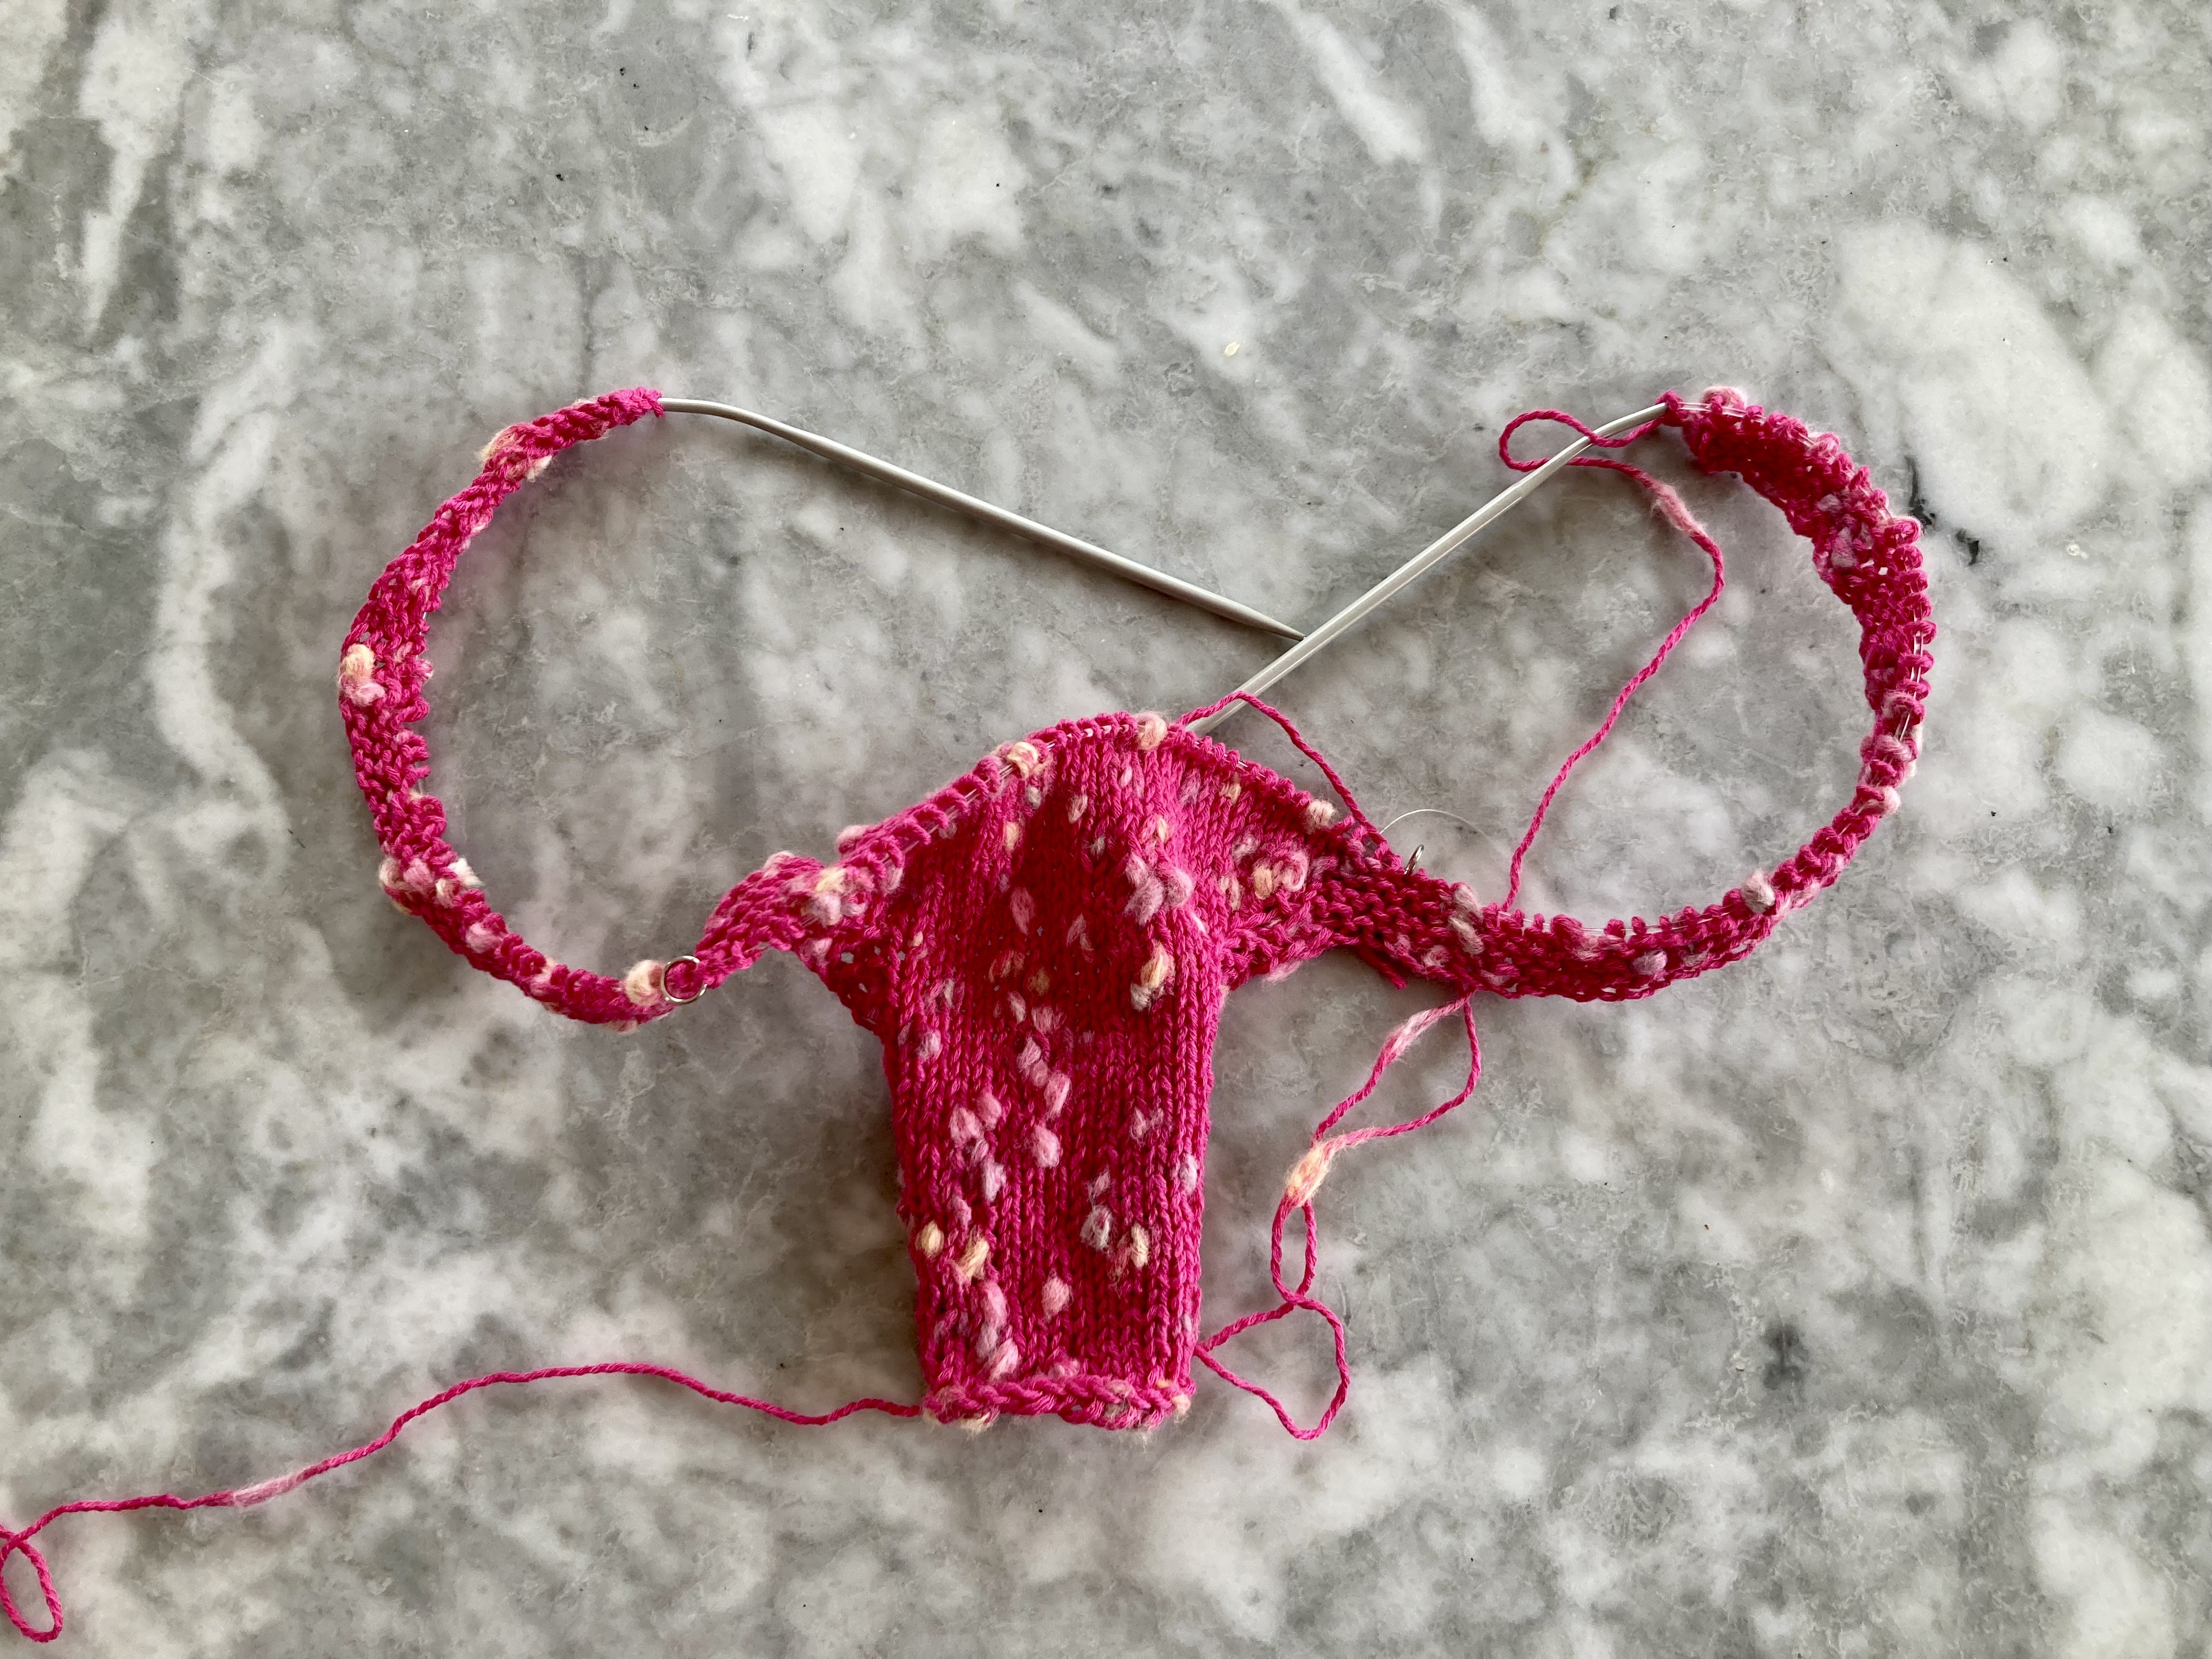
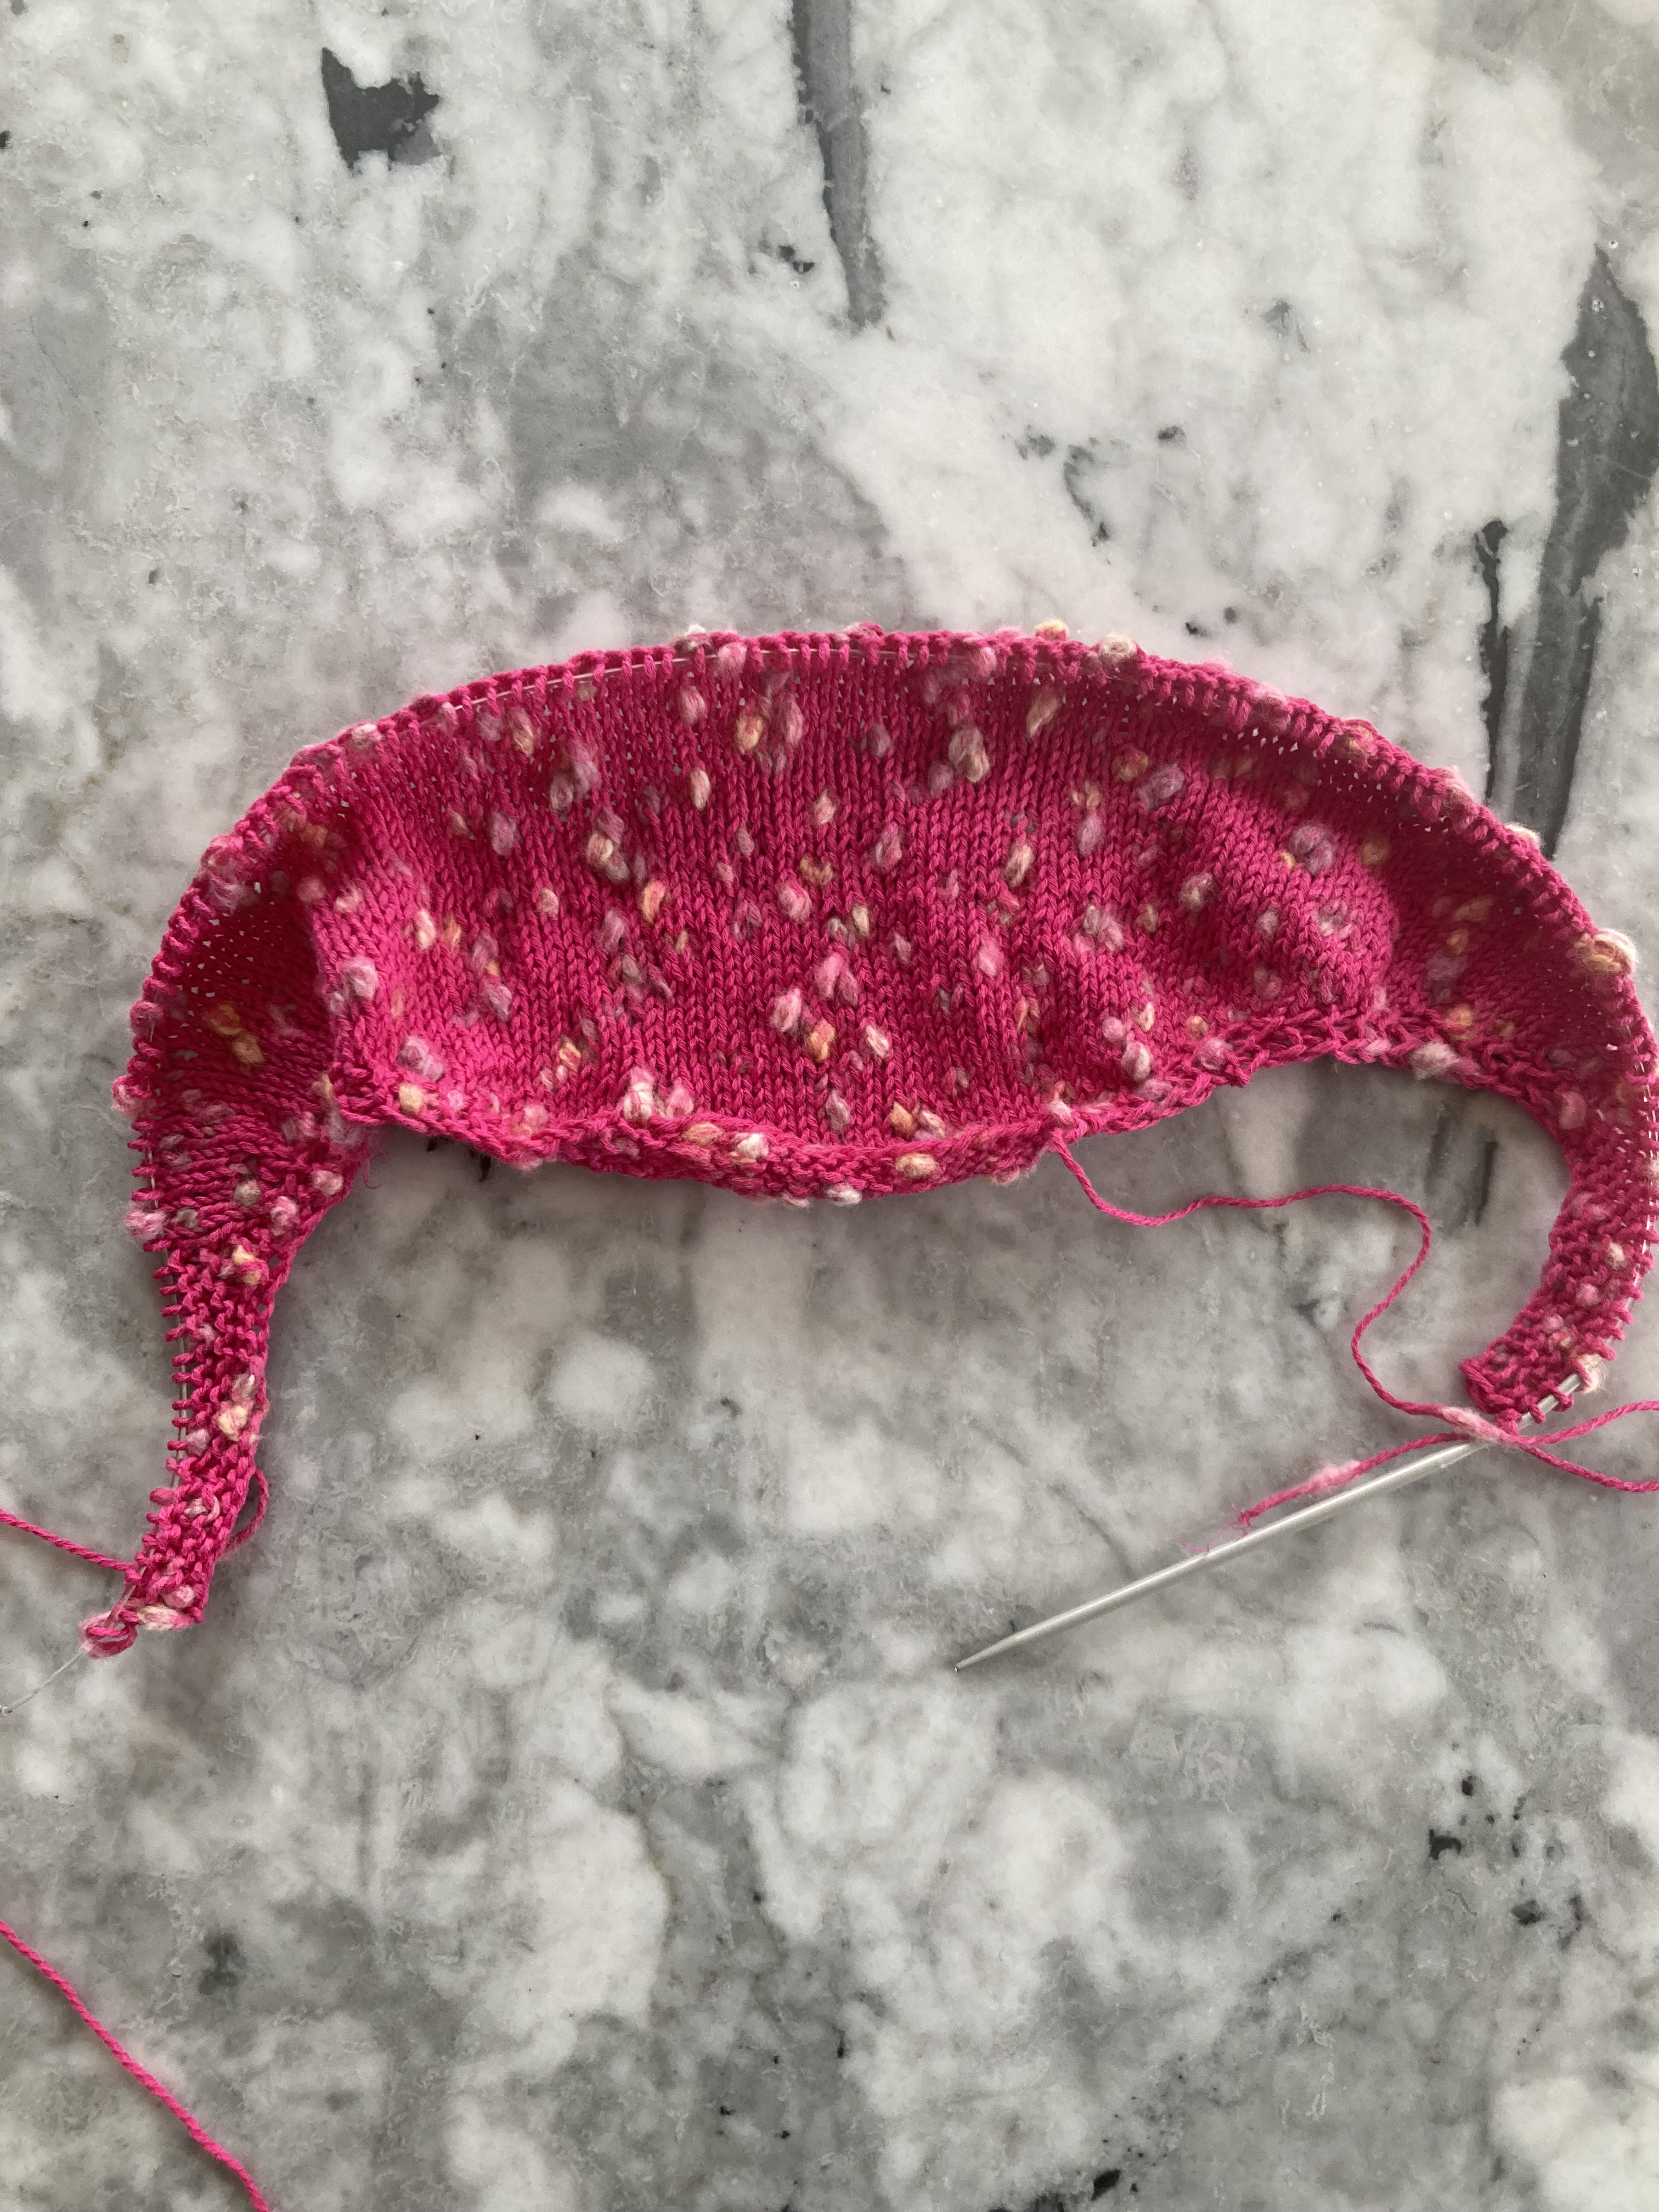
The briefs were fairly simple in design and nicely shaped. You start with a narrow strip of fabric with narrow garter-stitch borders for the crotch part, then cast on for the front leg part with a garter-stitch border and increase to the hip seam. At this point, it looked like an anatomical model of a uterus with fallopian tubes… Then I started the back piece, which is made similarly but of course less cut-out at the legs, then knit from the hip join up to the waist in one piece in the round. I meant to make a fake “side seam” with a purl stitch, or even a couple stitches’ worth of ribbing on both sides to make it cling better to the body, but I forgot.
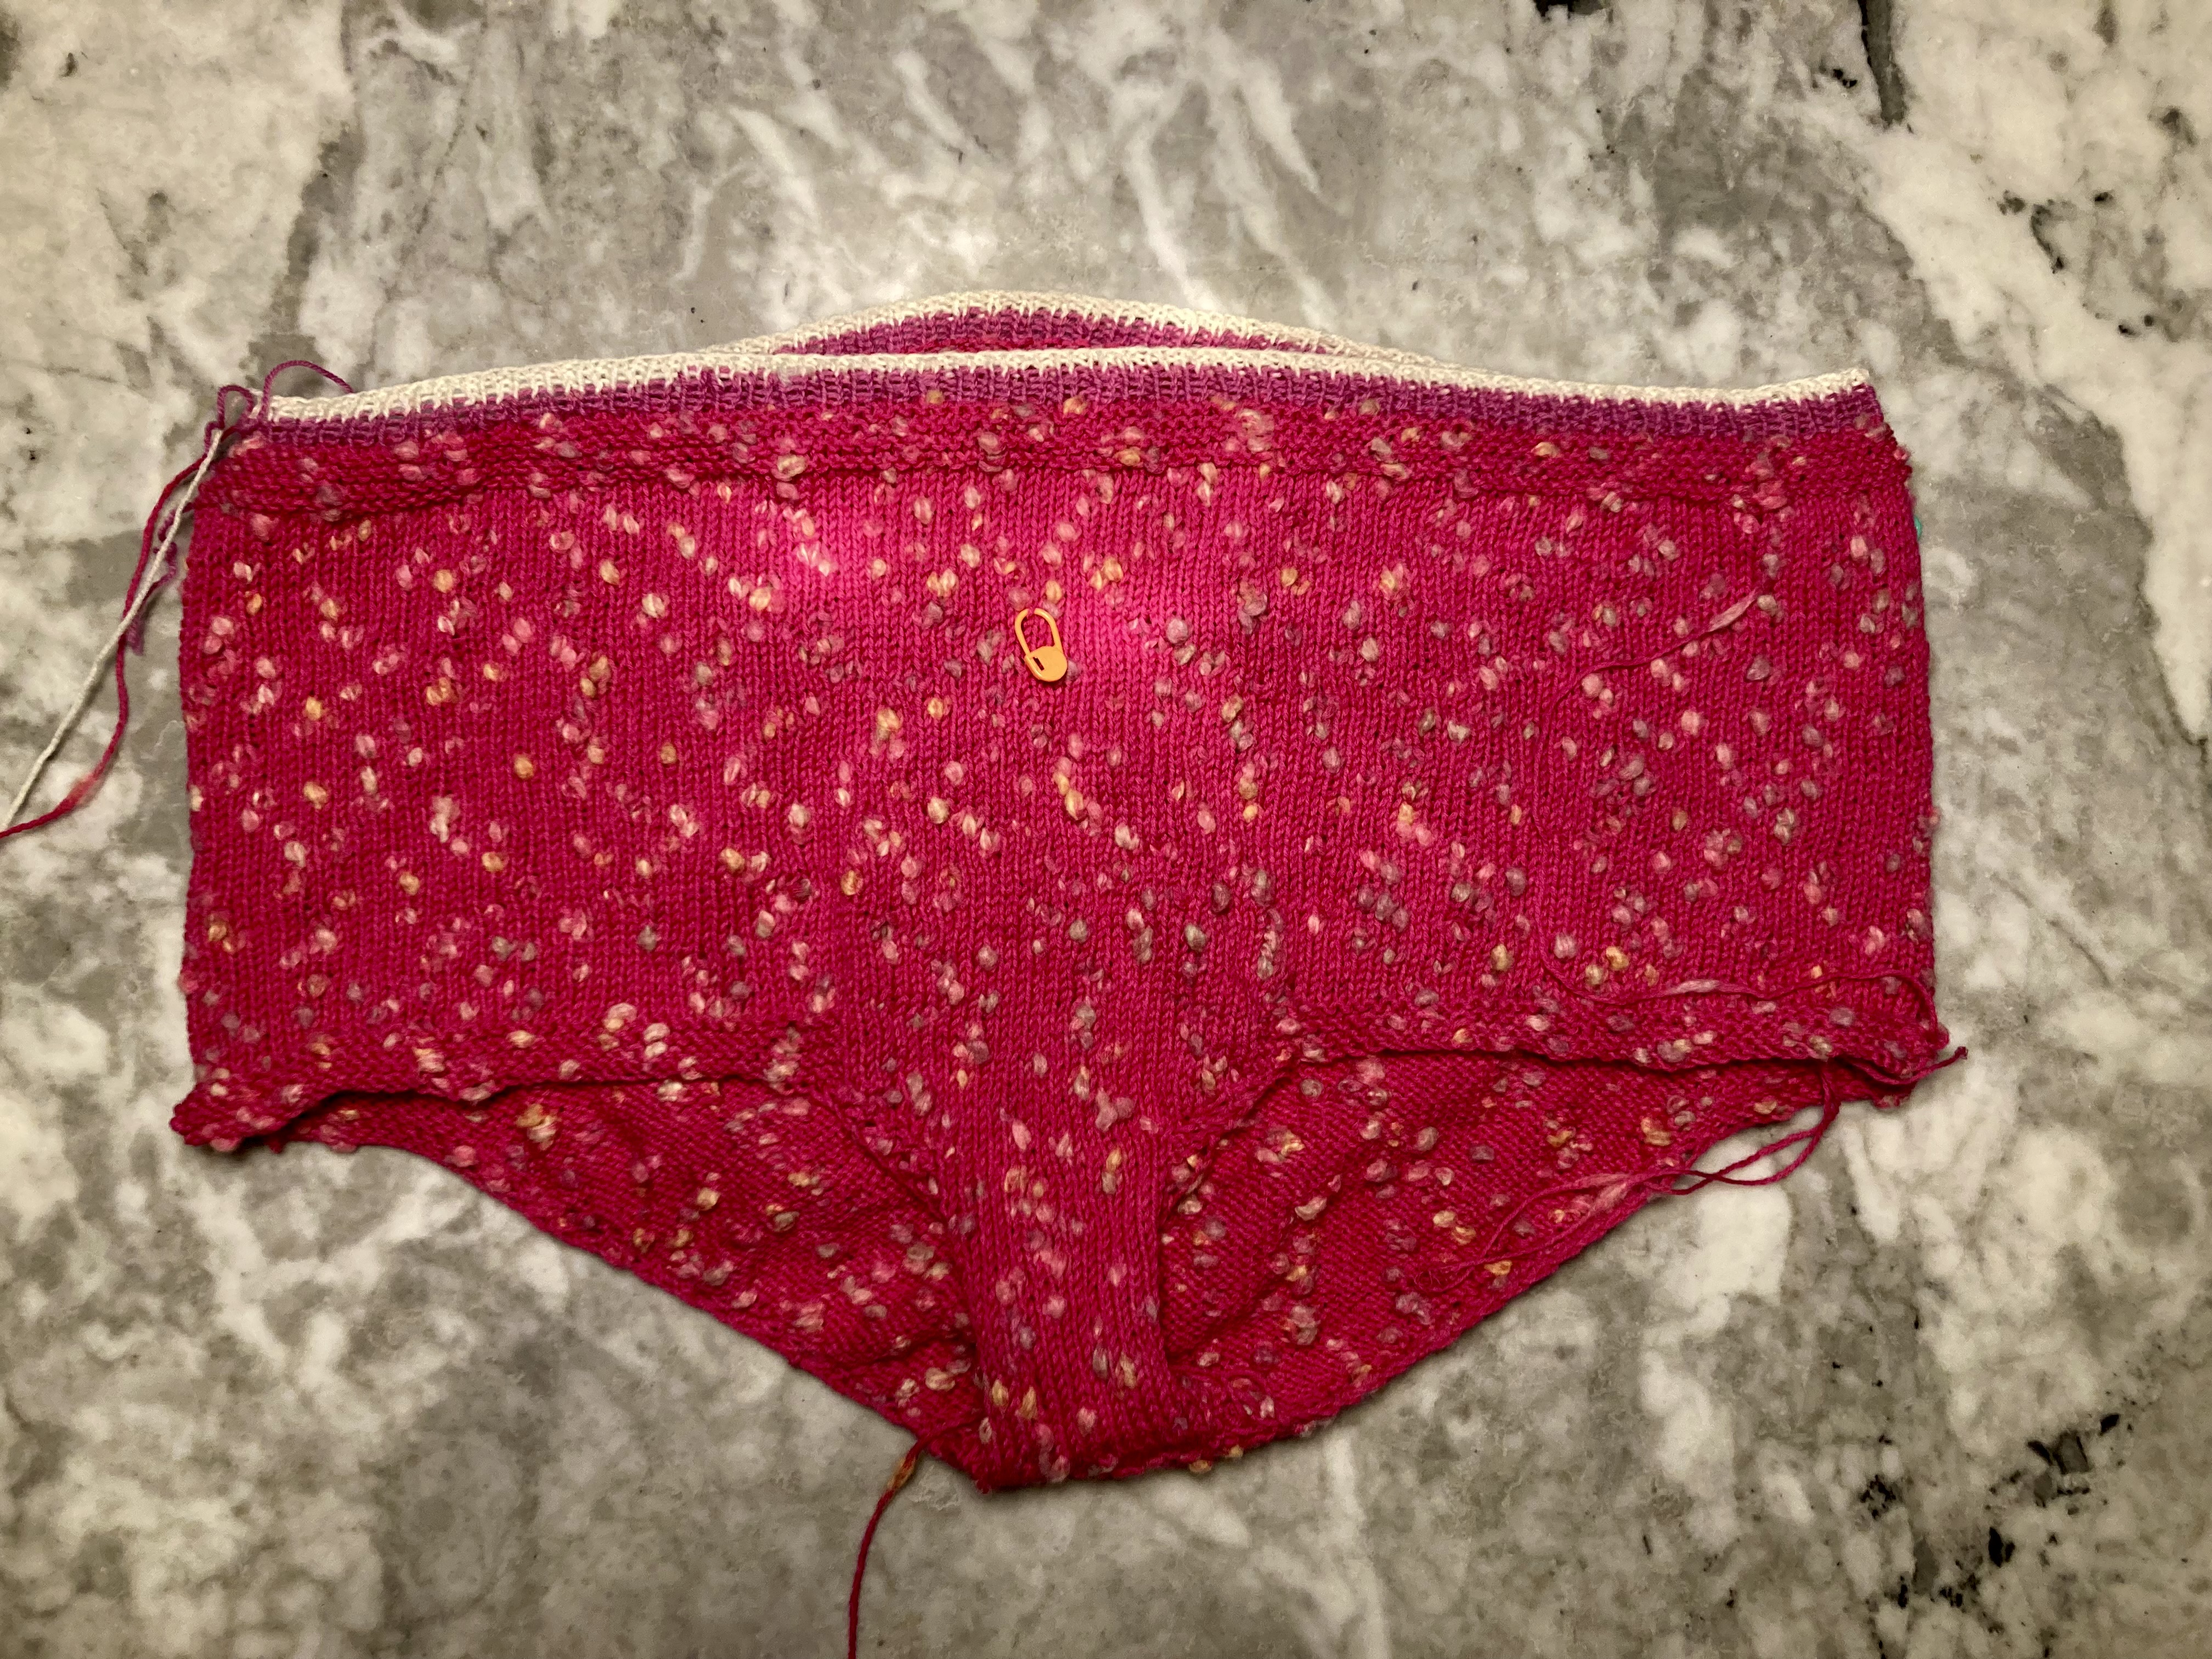
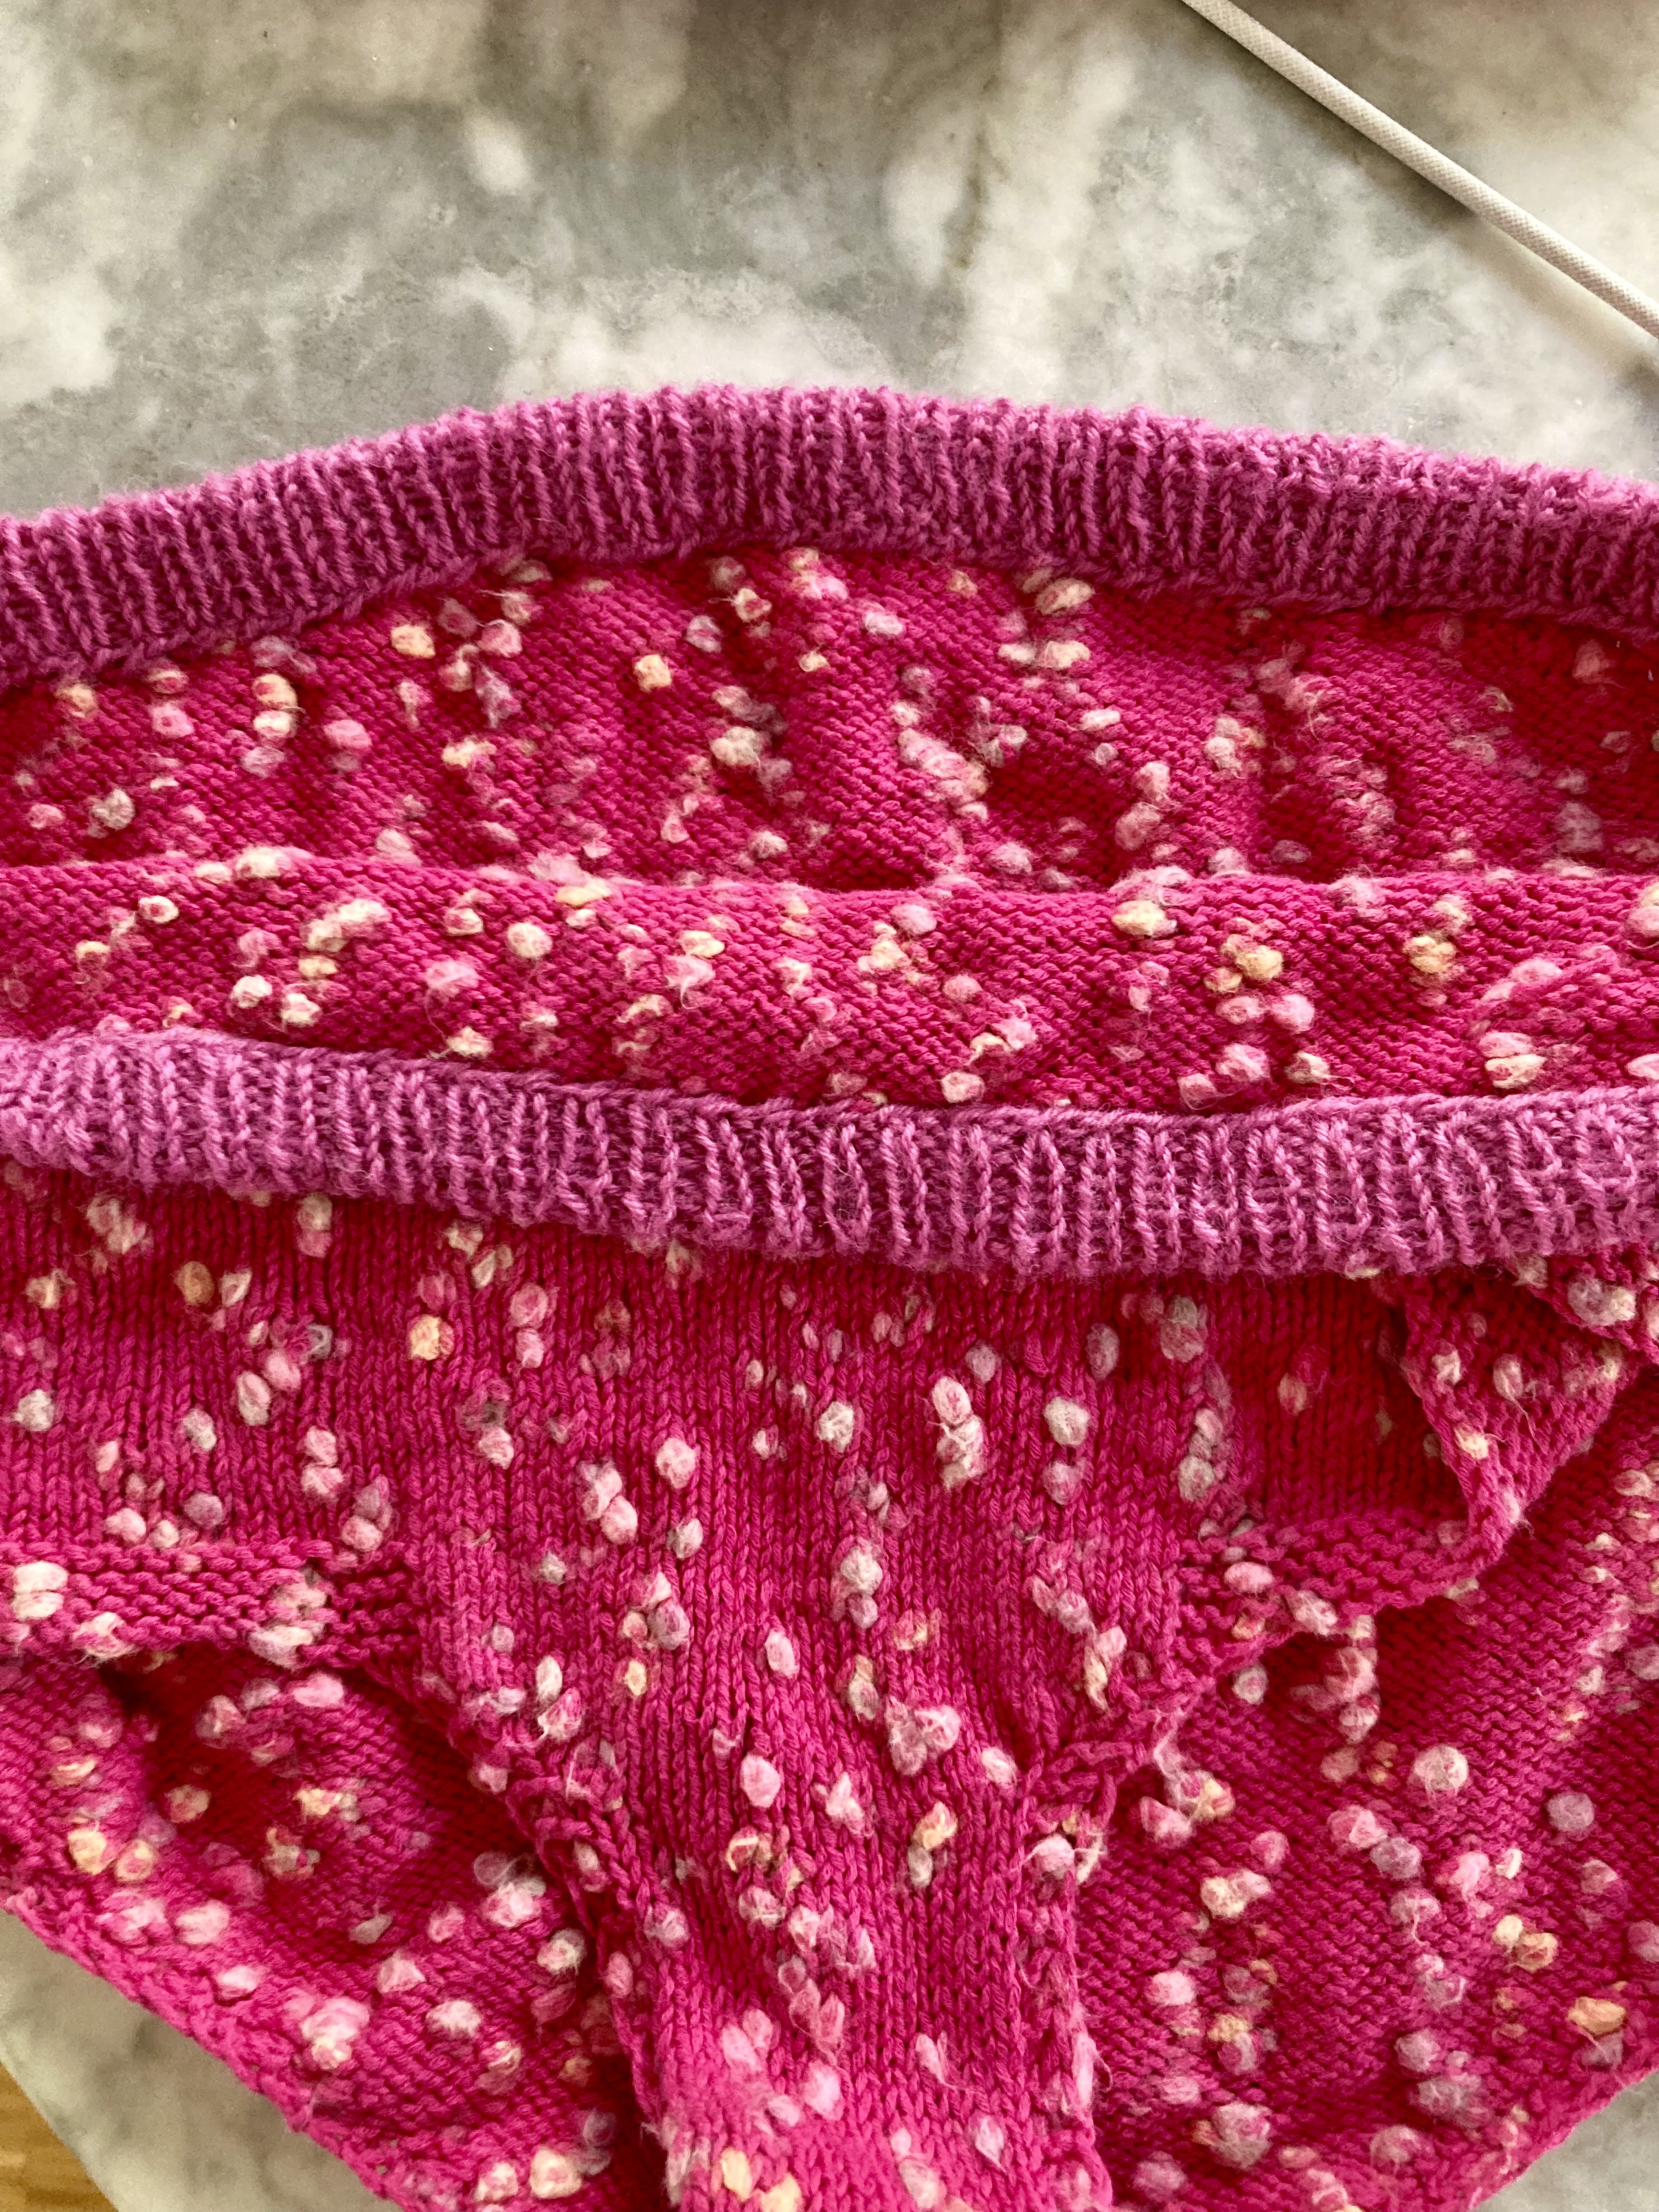
My first try came out too wide and looked saggy, so I ripped back and tried again one size smaller (once again forgetting the fake side seam / side ribbing option.) That worked much better. There are some short rows at the top of the back part to make it more round, which were possibly not necessary in my case, but which I made anyway. The waist is reinforced with a strip of elastic band, which is supposed to be held inside the garter-stitch border with herringbone stitch “to make a casing.” I did not like that idea, so I made a hem casing using pink sock wool in 1×1 ribbing. That did add a bit of bulk, but made the briefs fit quite well with no sagging. (At first I thought I didn’t have enough of the pink wool and had to finished the hem in white. Then I found more of the pink wool and ripped back again to finish it in pink. There was a lot more ripping back and re-knitting than there should have been.) Then it was done! Top and bttom both fit well and didn’t change size with blocking (hand-wash, dry flat with a short stint in the dryer on delicate cycle.)
Of course, the best part of this project was taking photos! I was lucky enough to participate in a week of art courses with my wonderful friend Sabine Mehlem, who was taking the portrait photography course (I stuck to drawing and sculpting.) She took the most amazing photos in some classic “pin-up girl” poses as well as perfectly re-creating the original photo from the magazine:
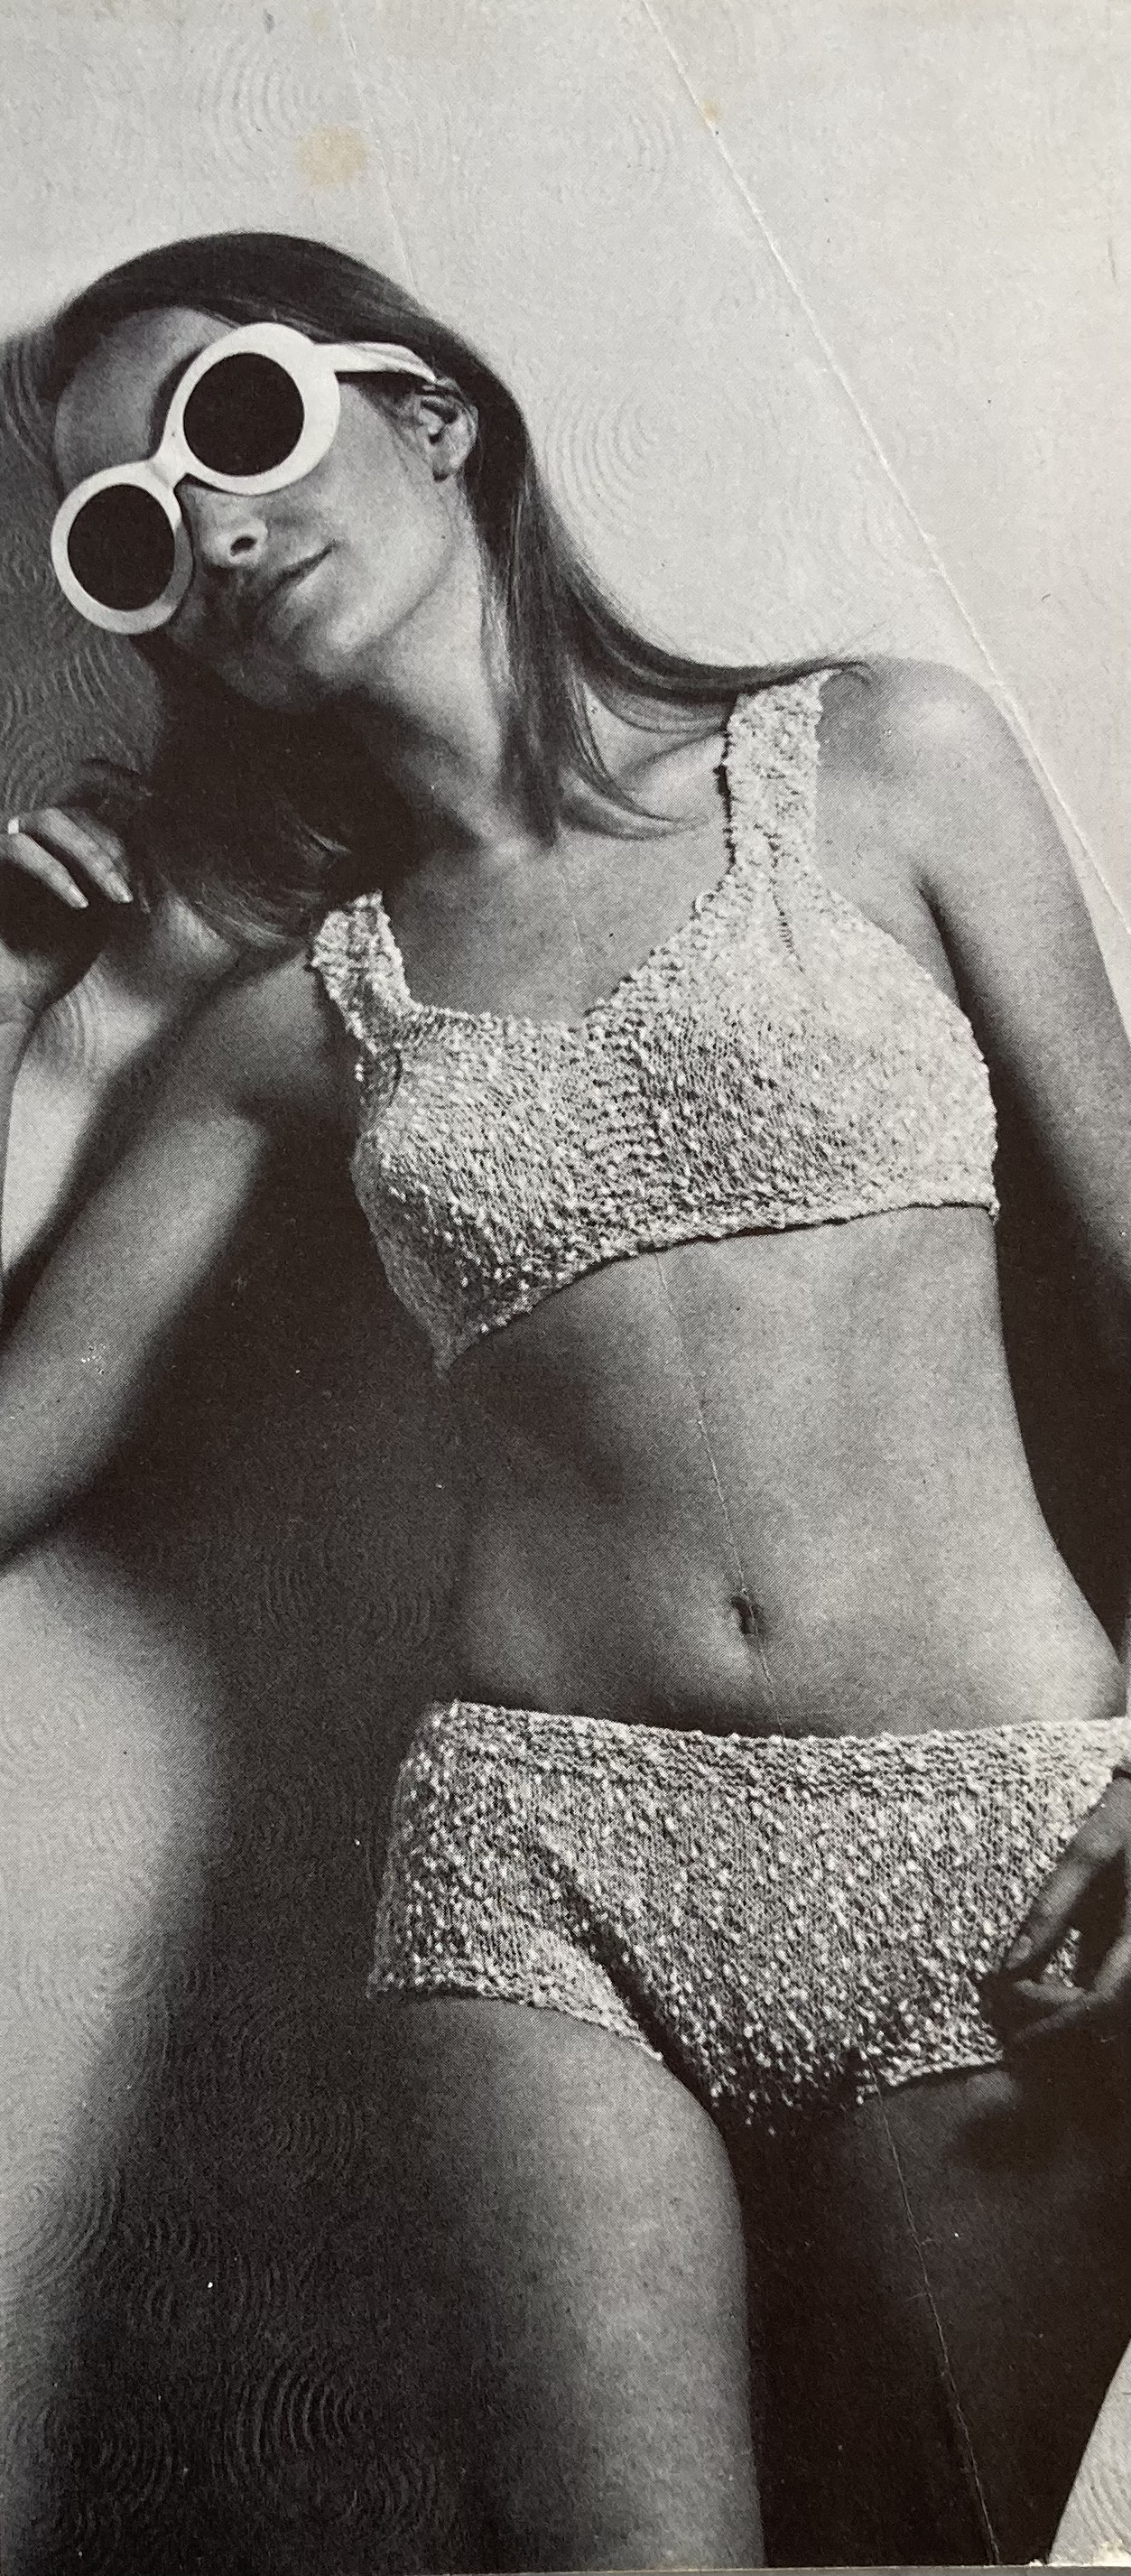

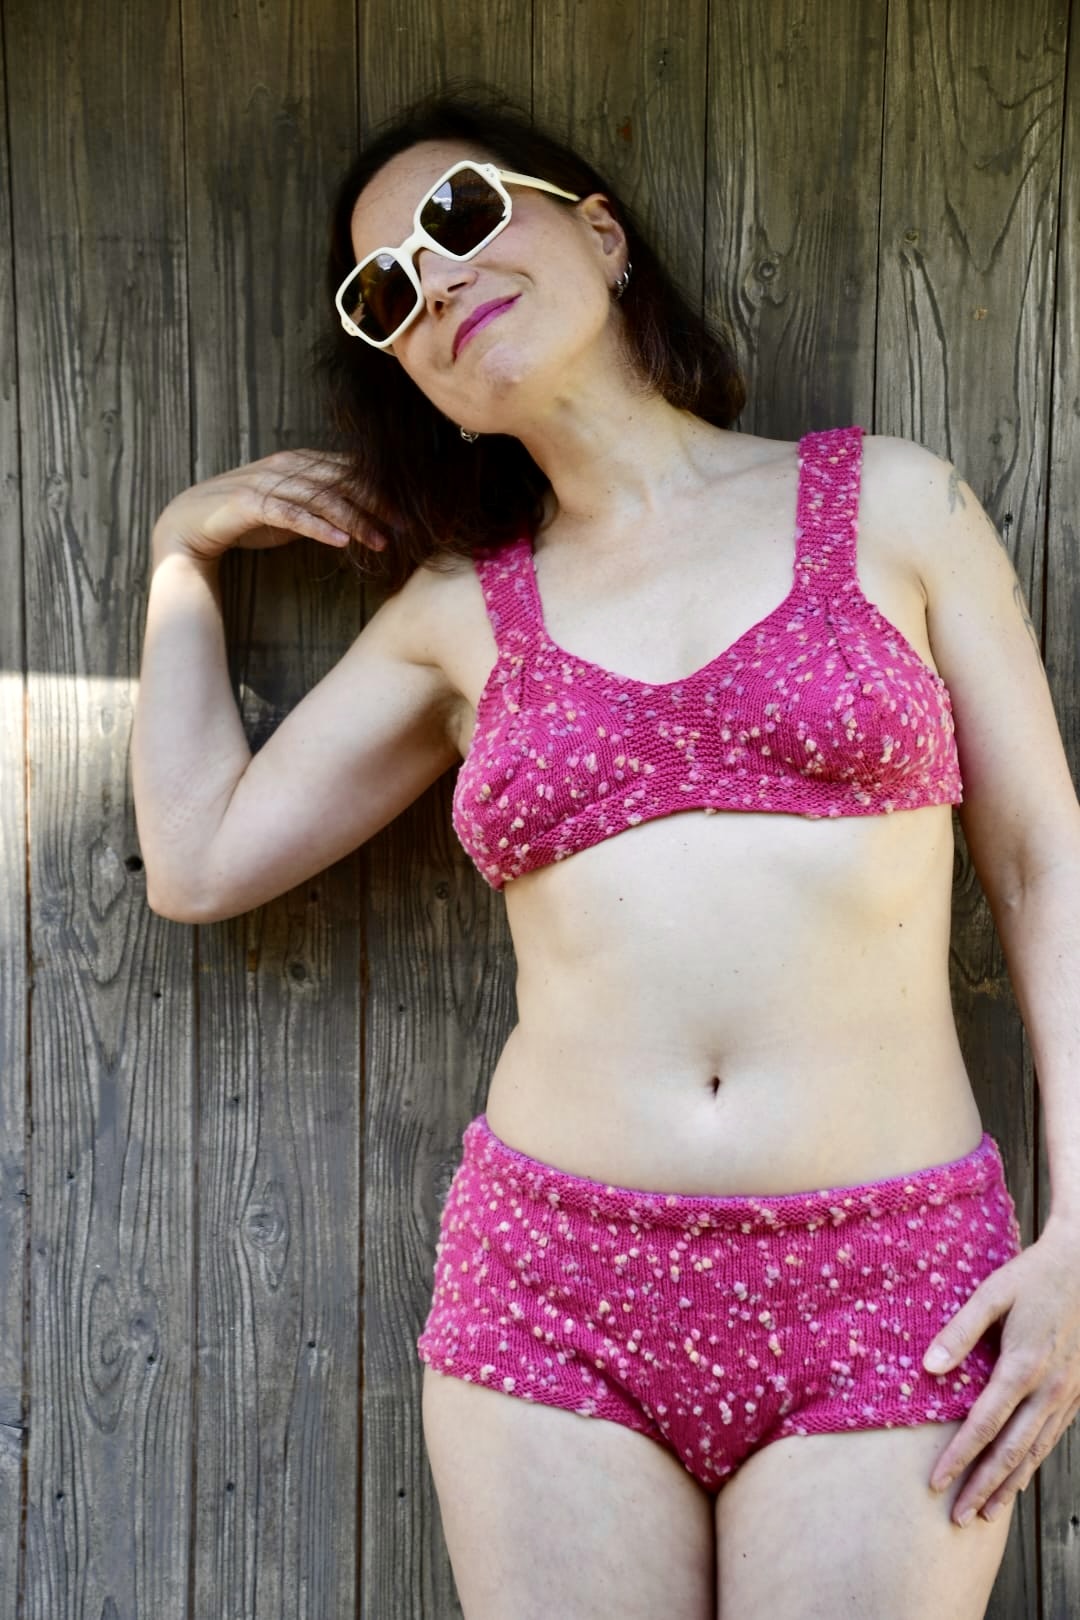
In case you can’t tell (haha), the first photo is the original; the other two are by Sabine. The photography teacher brought a detail to our attention that we hadn’t noticed: the model in the original photo has a thread tying the bikini tom and bottom together! I guess the top either rode up too much or the bottom sagged. We didn’t have that problem — our only challenge was taking a midriff-baring photo right after lunch during a week in which we were all extremely well and deliciously fed.
(Also, you wouldn’t believe how painful these 1960s poses are! The model looks so relaxed, but her hip is going one way, her shoulder another, her head a different way entirely and to top it off, her arm is twisted up and backwards. And she is definitely leaning against a wall in a studio, not lying on a beach lounge chair as the photo would like to suggest.)



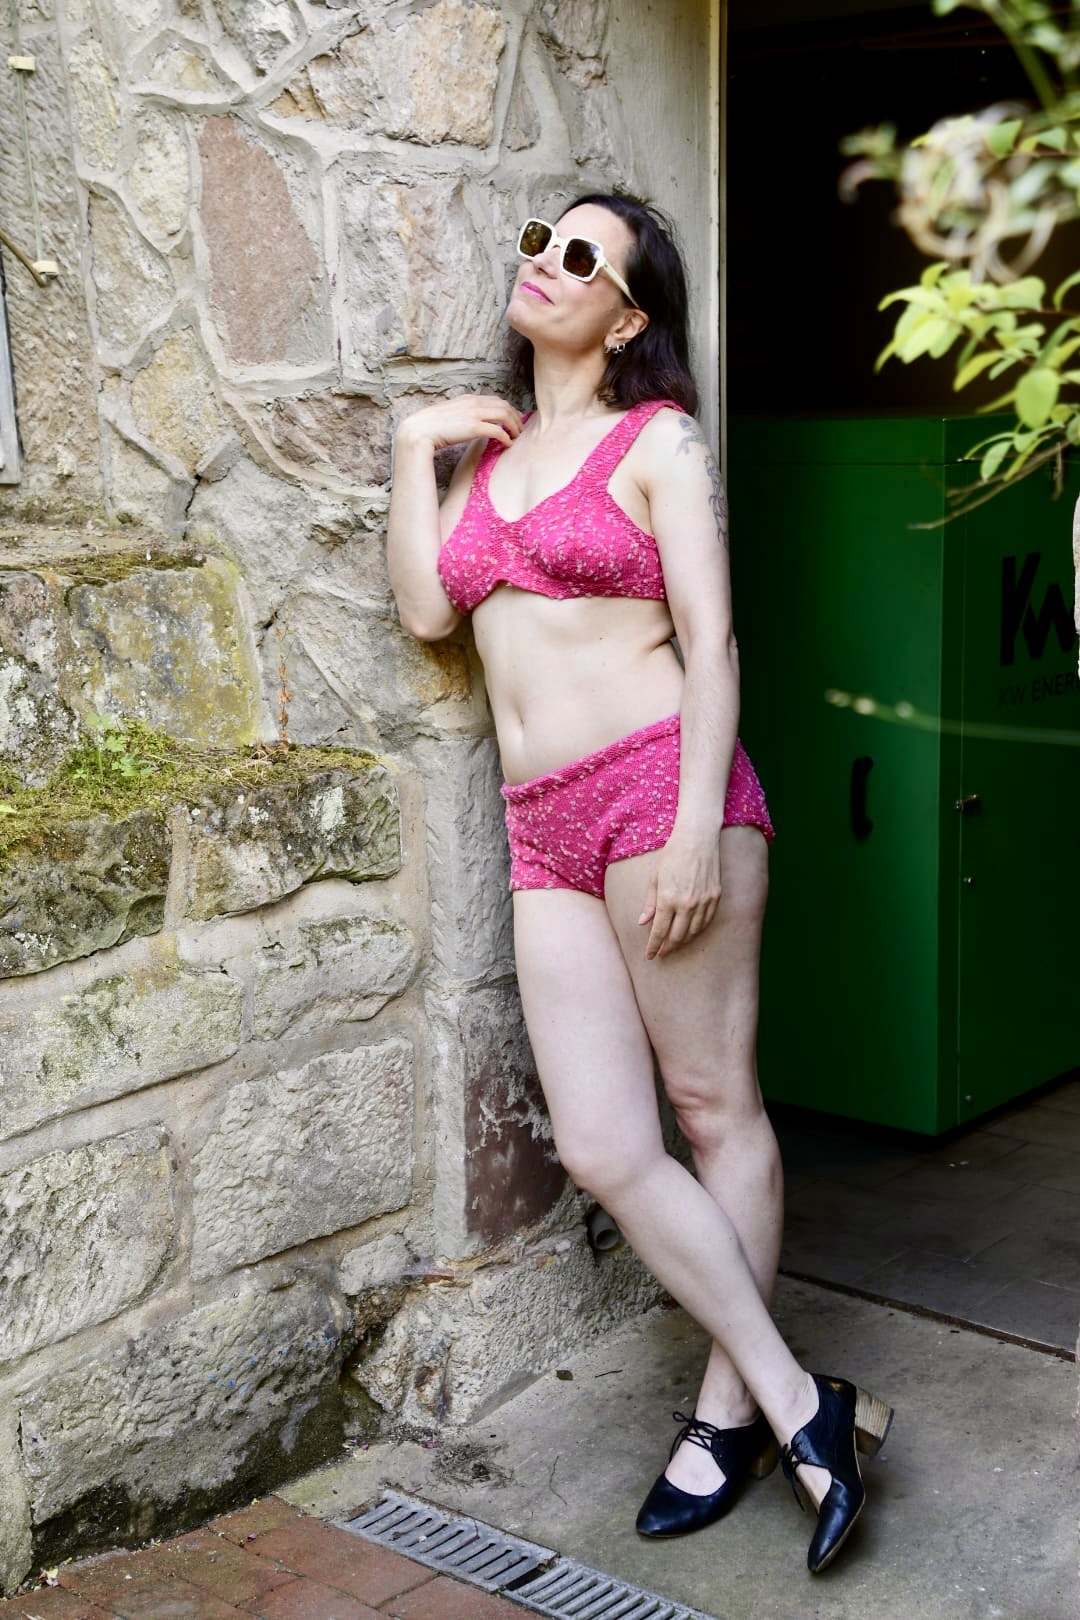
Here are some more photos! We really had fun. I guess I could have used that thread in the fourth photo after all…
This was one of my favourite projects ever. I am an indoor cat and don’t generally so any “sunning” (can you tell?) but I could be persuaded to do so if I could look like this while doing it. May all your projects be so glamourous, and have fun sunning and lazing! I know I will.
Original magazine photo (uncredited) from Stitchcraft, June 1968. Posed photos © Sabine Mehlem, 2026. Used with permission.