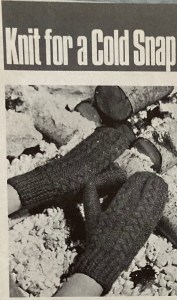
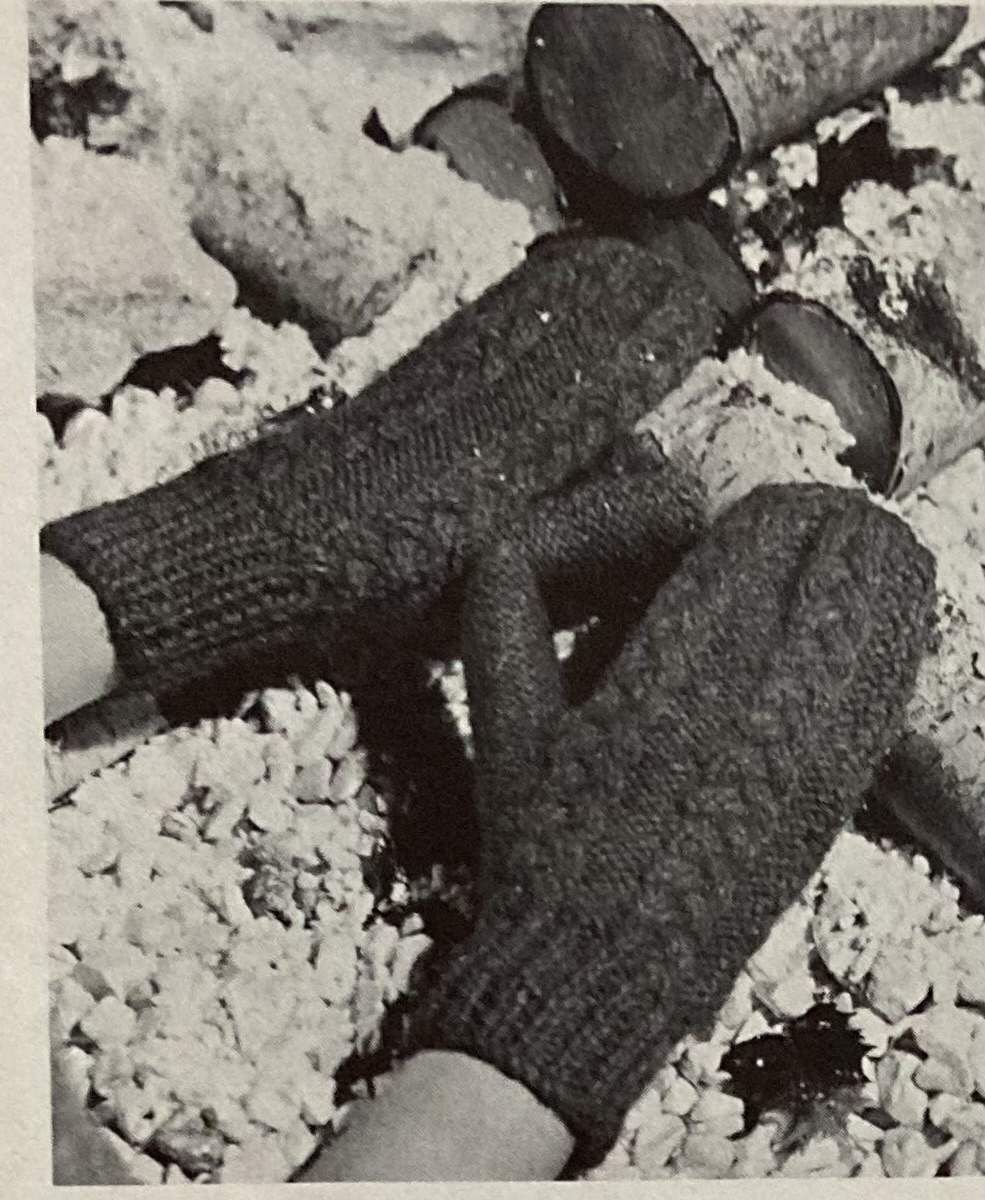
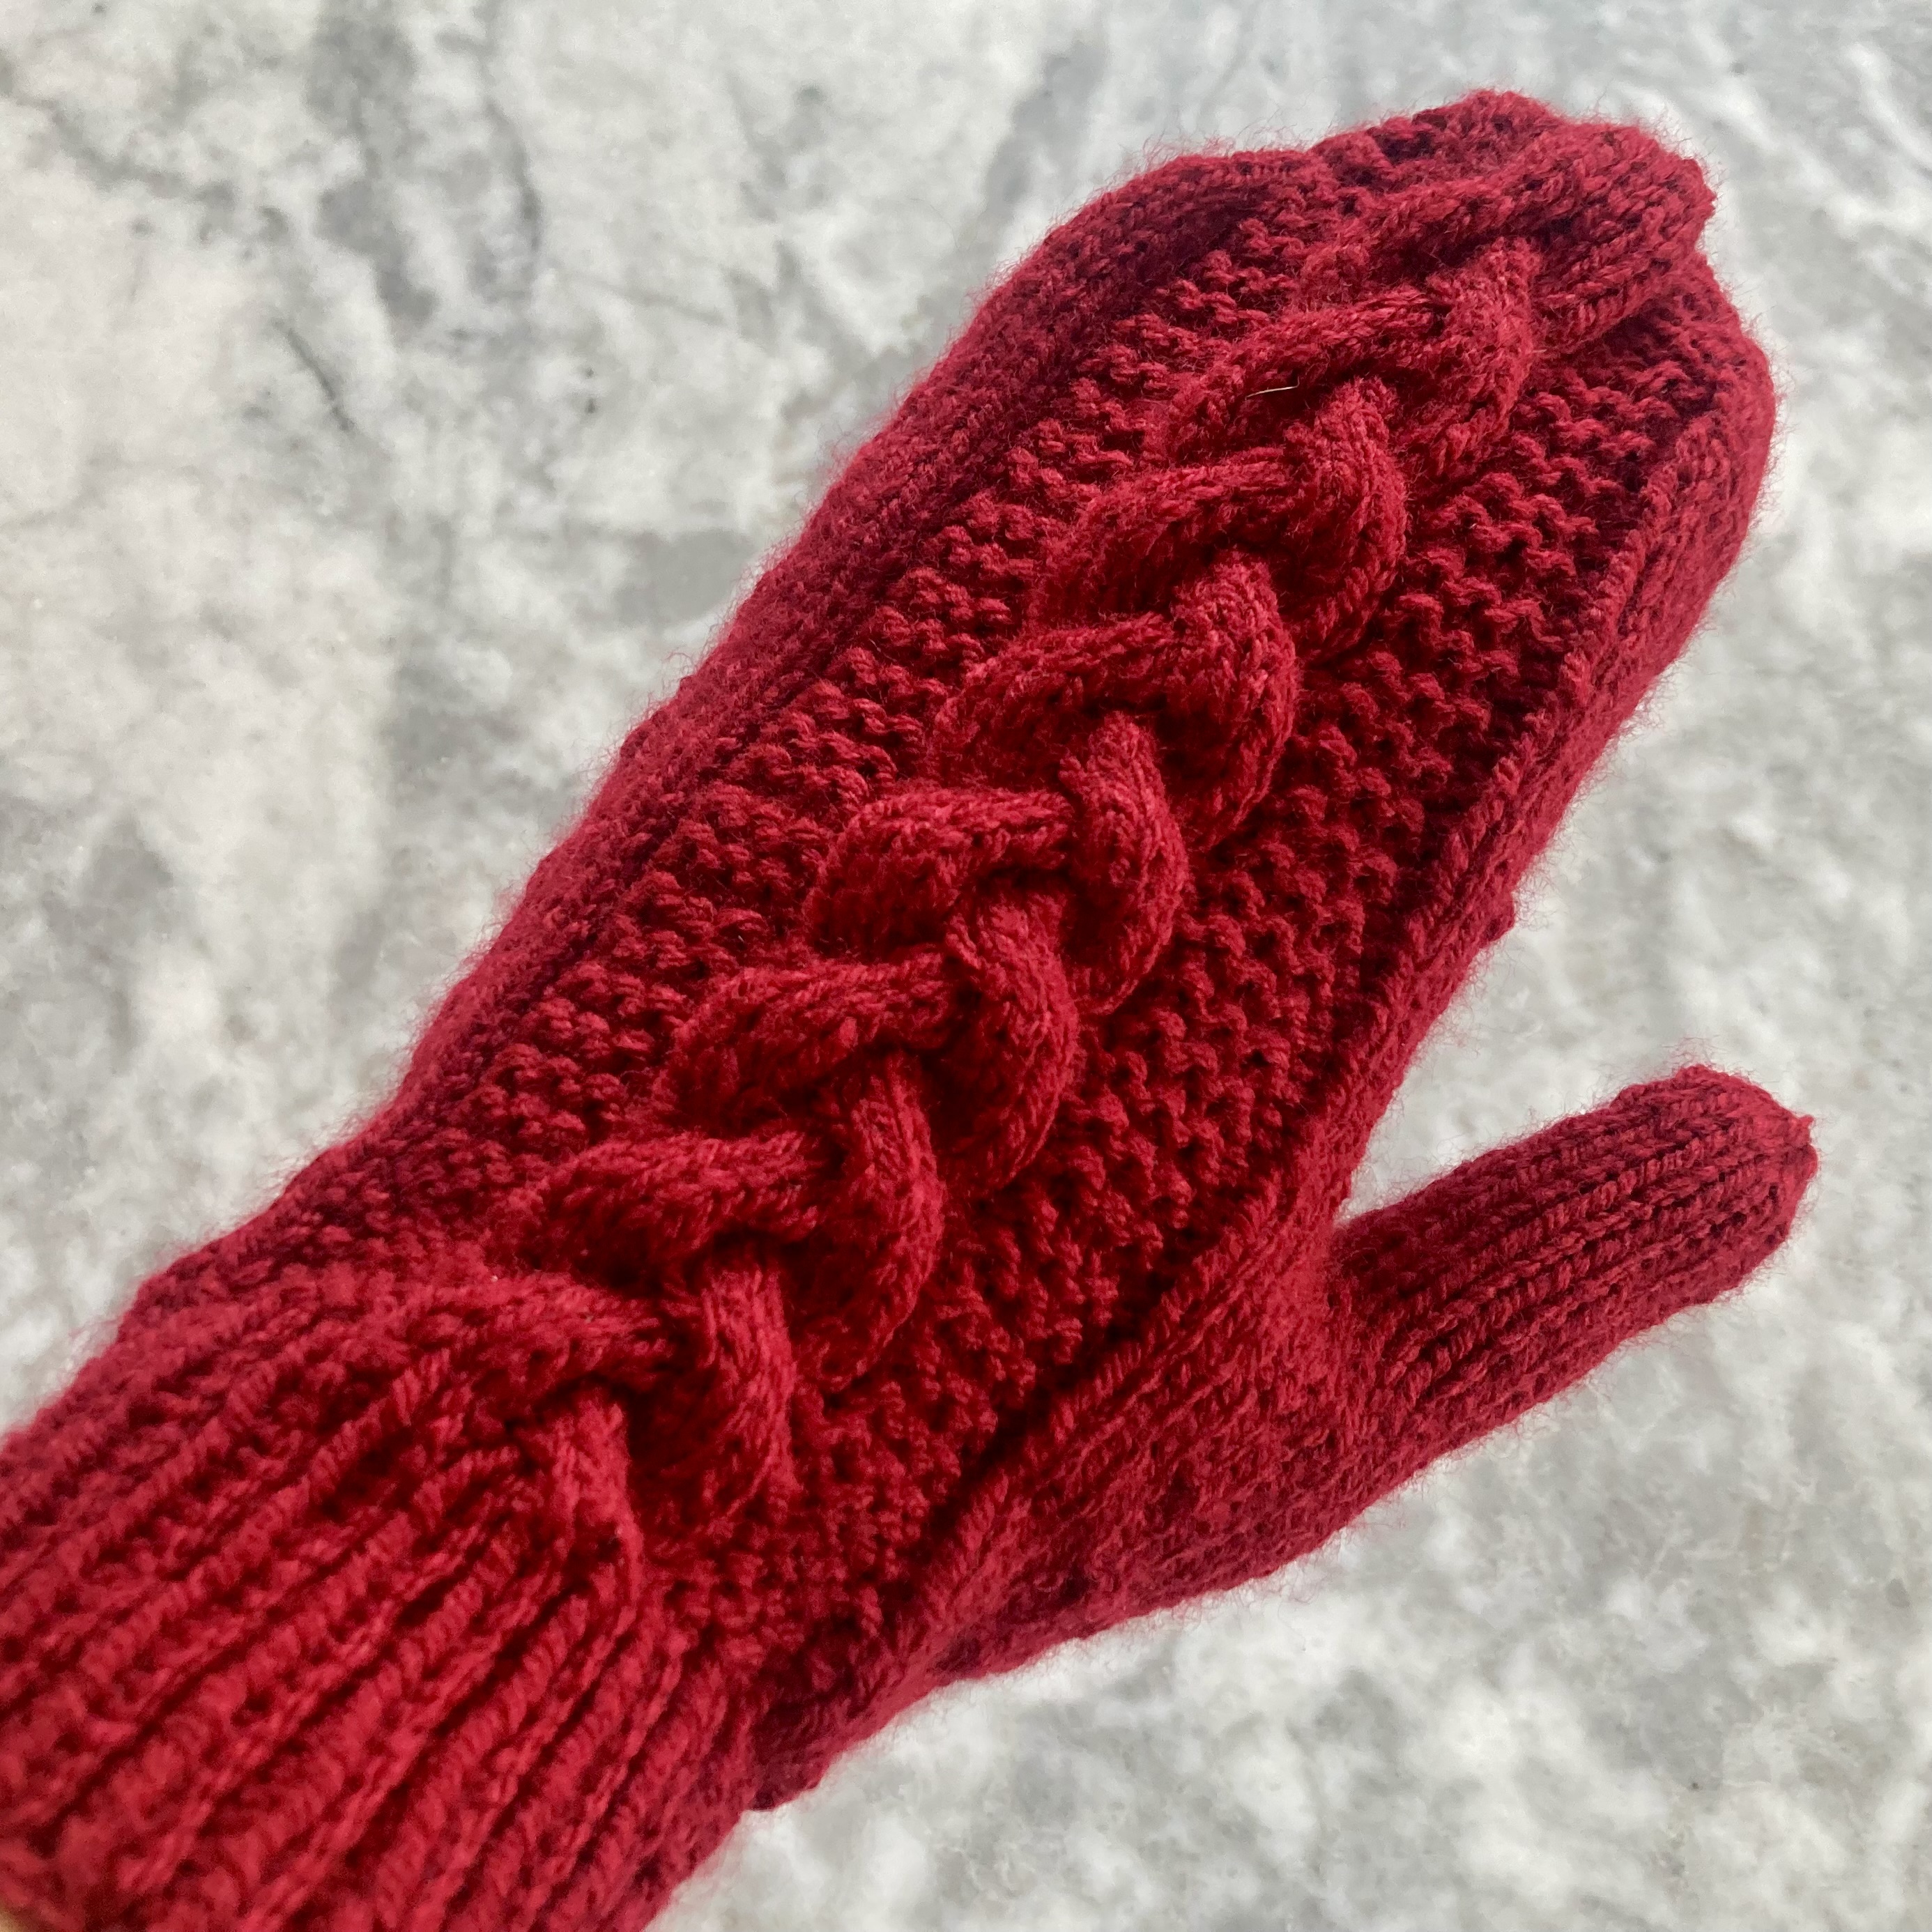
It is currently minus 13 degrees Celsius outside, so this caption from the January 1968 issue of Stitchcraft couldn’t have been timlier for this month’s project: cabled mittens (“mitts”) that promised me “Cosy fingers and thumbs”.
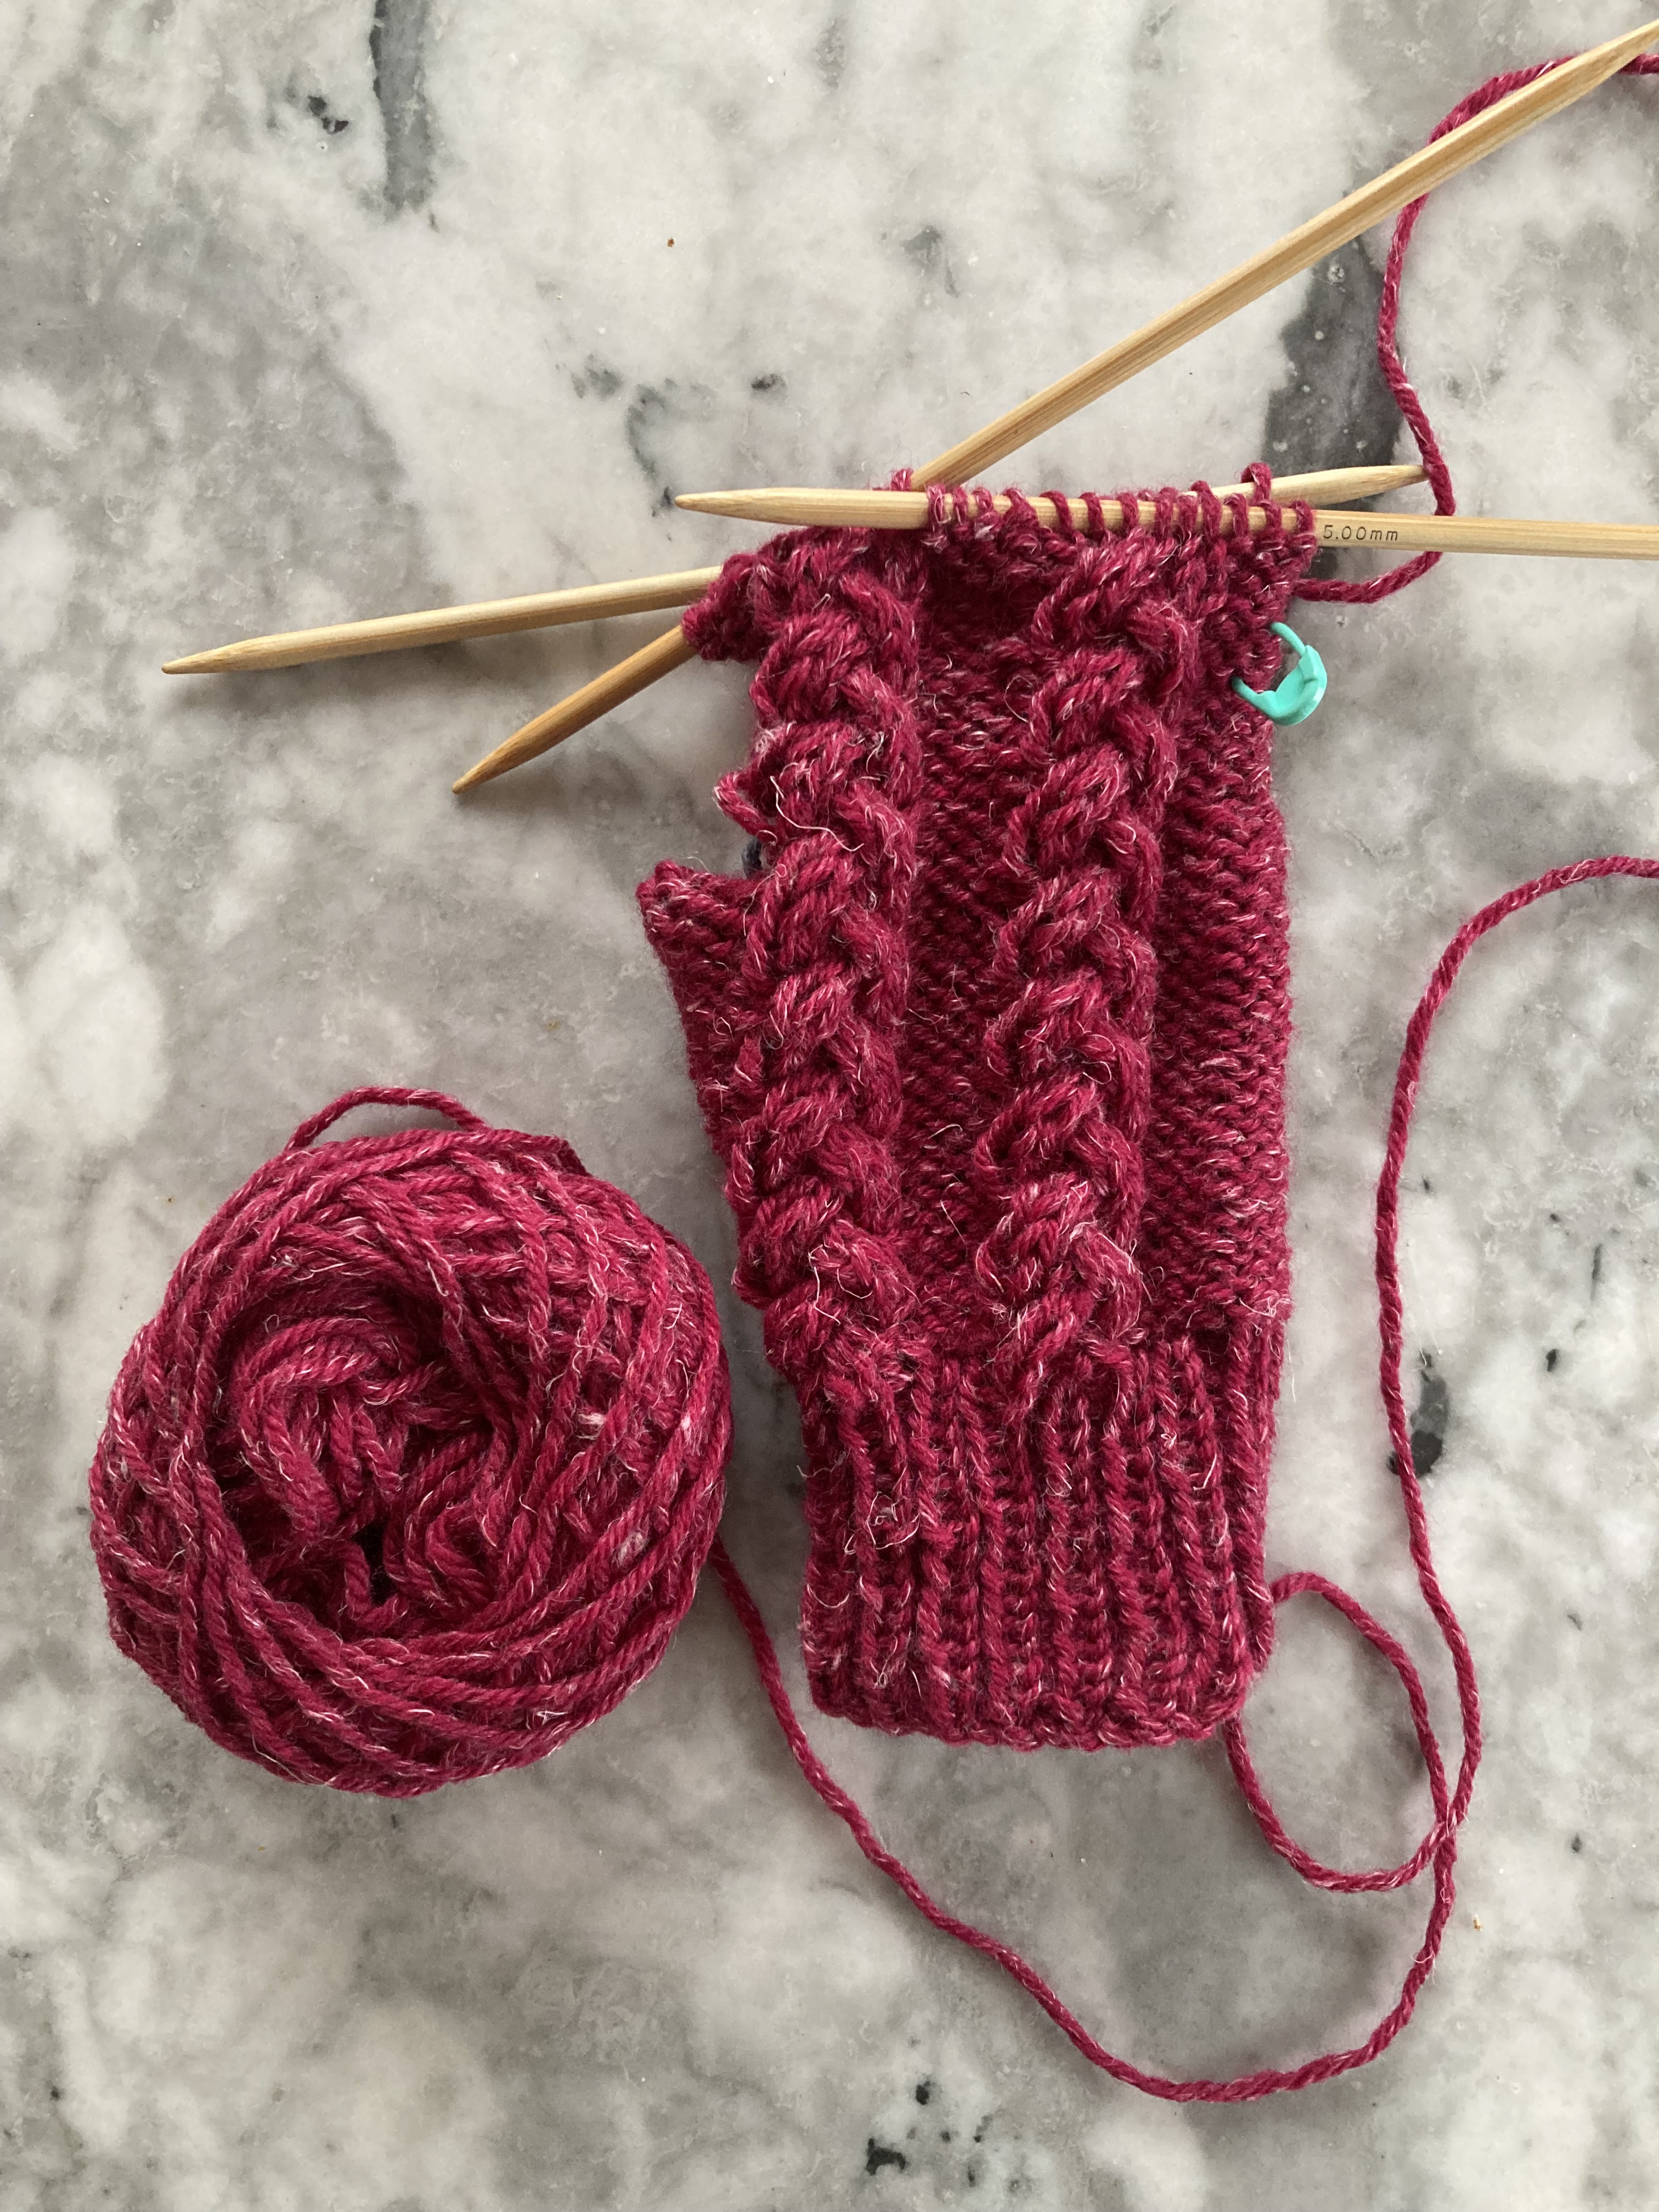
The pattern is written for Patons Ariel wool, which was marketed as being very airy (hence the name) and fluffy, so it would knit up quickly and be bulky, but not too heavy. It was made of 80% wool and 20% synthetic fibres. I used lovely Lana Grossa Slow Wool Canapa, bought a while ago from the “sale” bin, as it was sadly being discontinued. It is made of 90% wool and 10% hemp, which gives it tweedy white flecks.
The pattern is written to fit an “average hand” (women’s). I assumed my size 8 hands were larger than that, but also having never worked with Patons Ariel and being too lazy to make a swatch for such a small project, I went ahead and started with the suggested needle sizes and figured I could make any necessary adjustments while knitting.
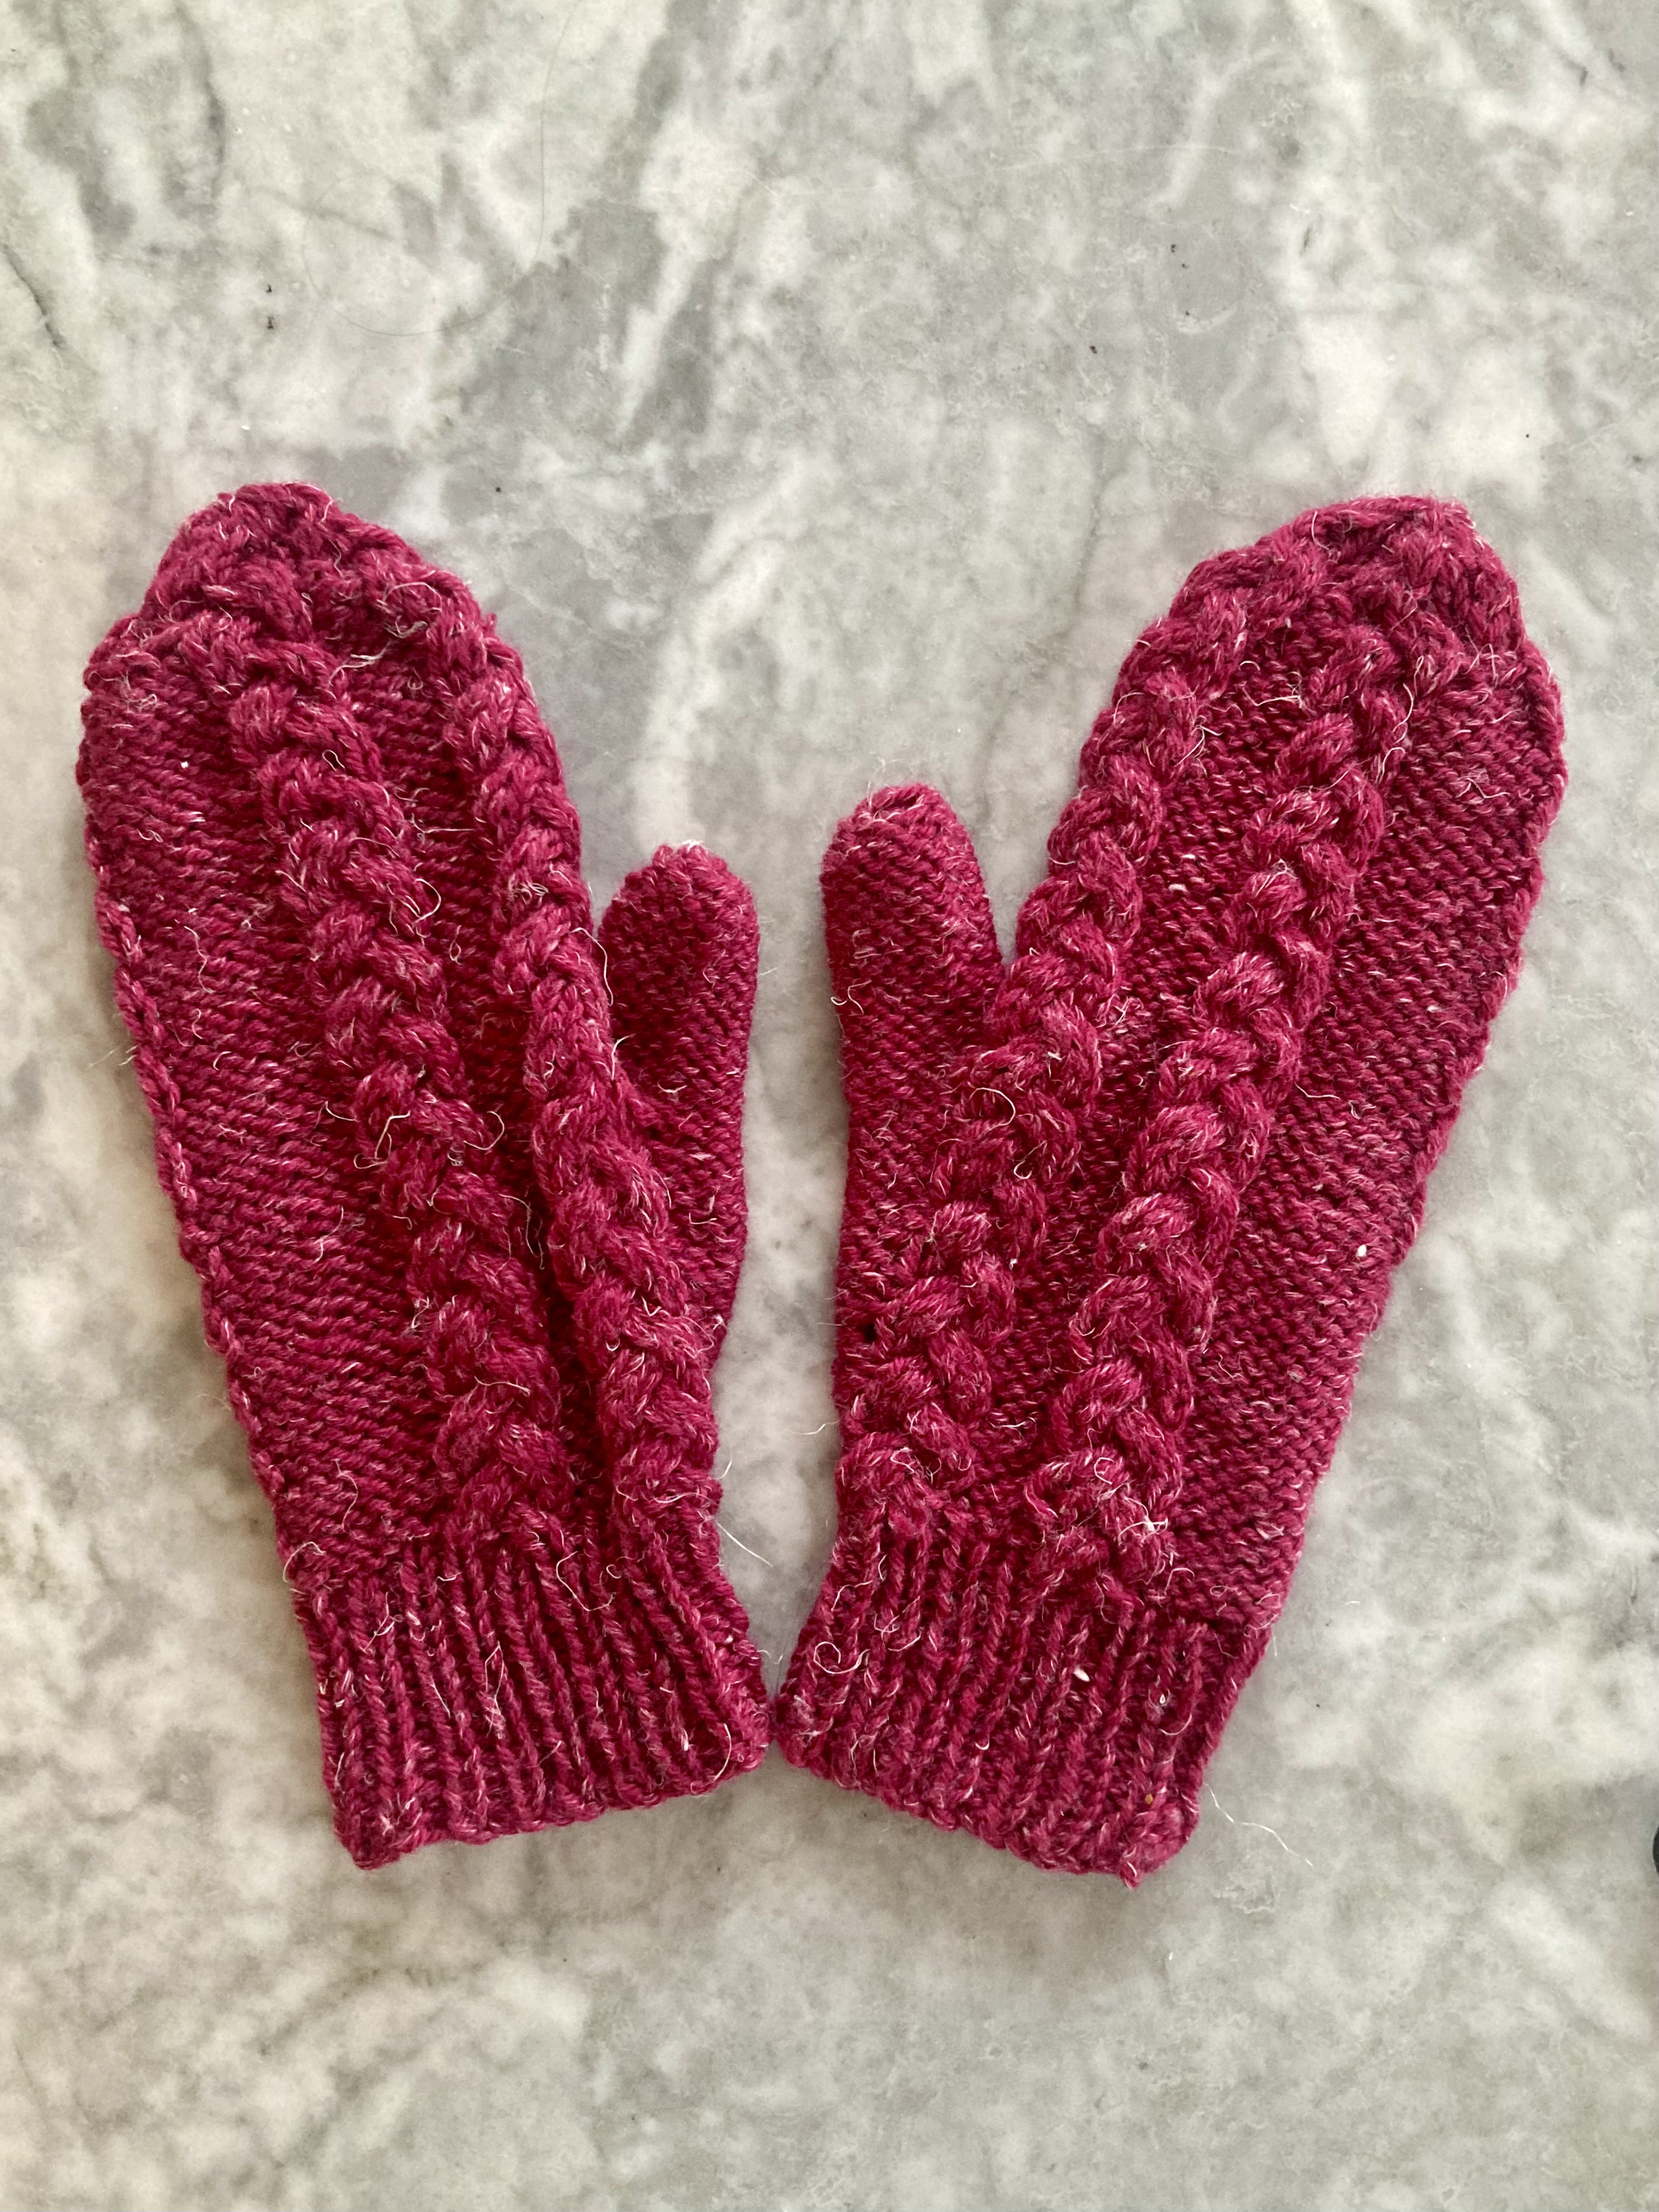
The pattern is intended to be knitted flat from the wrist ribbing to the fingertips and then seamed up on one side. There is a thumb gusset and you are supposed to knit the thumb (flat) at the point where the thumb starts, then go back and finish the hand, picking up stitches that were cast on on the left or right side of the gusset to shape for the right or left hand. I made everything in the round and finished the hand before knitting the thumb (also in the round.) That made the gloves basically identical, but I found a way to finesse the thumb pick-up stitches to make the thumbs lie slightly differently for the right and left mitten. The pattern itself is four regular 6-stitch cables on a background of reversed stocking-stitch.
They came out very nicely and the fit is perfect for me. The only problem is that I prefer to wear gloves with fingers, or “convertible” gloves with half-fingers and then a mitten top to fold over them. I also don’t have many if any clothes that match the colour (though they do match my hair!) So I don’t know if I will keep them for myself or give them to someone as a gift.
In any case, a success, and finished very quickly. I’m considering making the baby romper from this issue as well, or just using the “extra” time for finally finish my November project… and/or any of the many other winter WIPs. Stay warm!
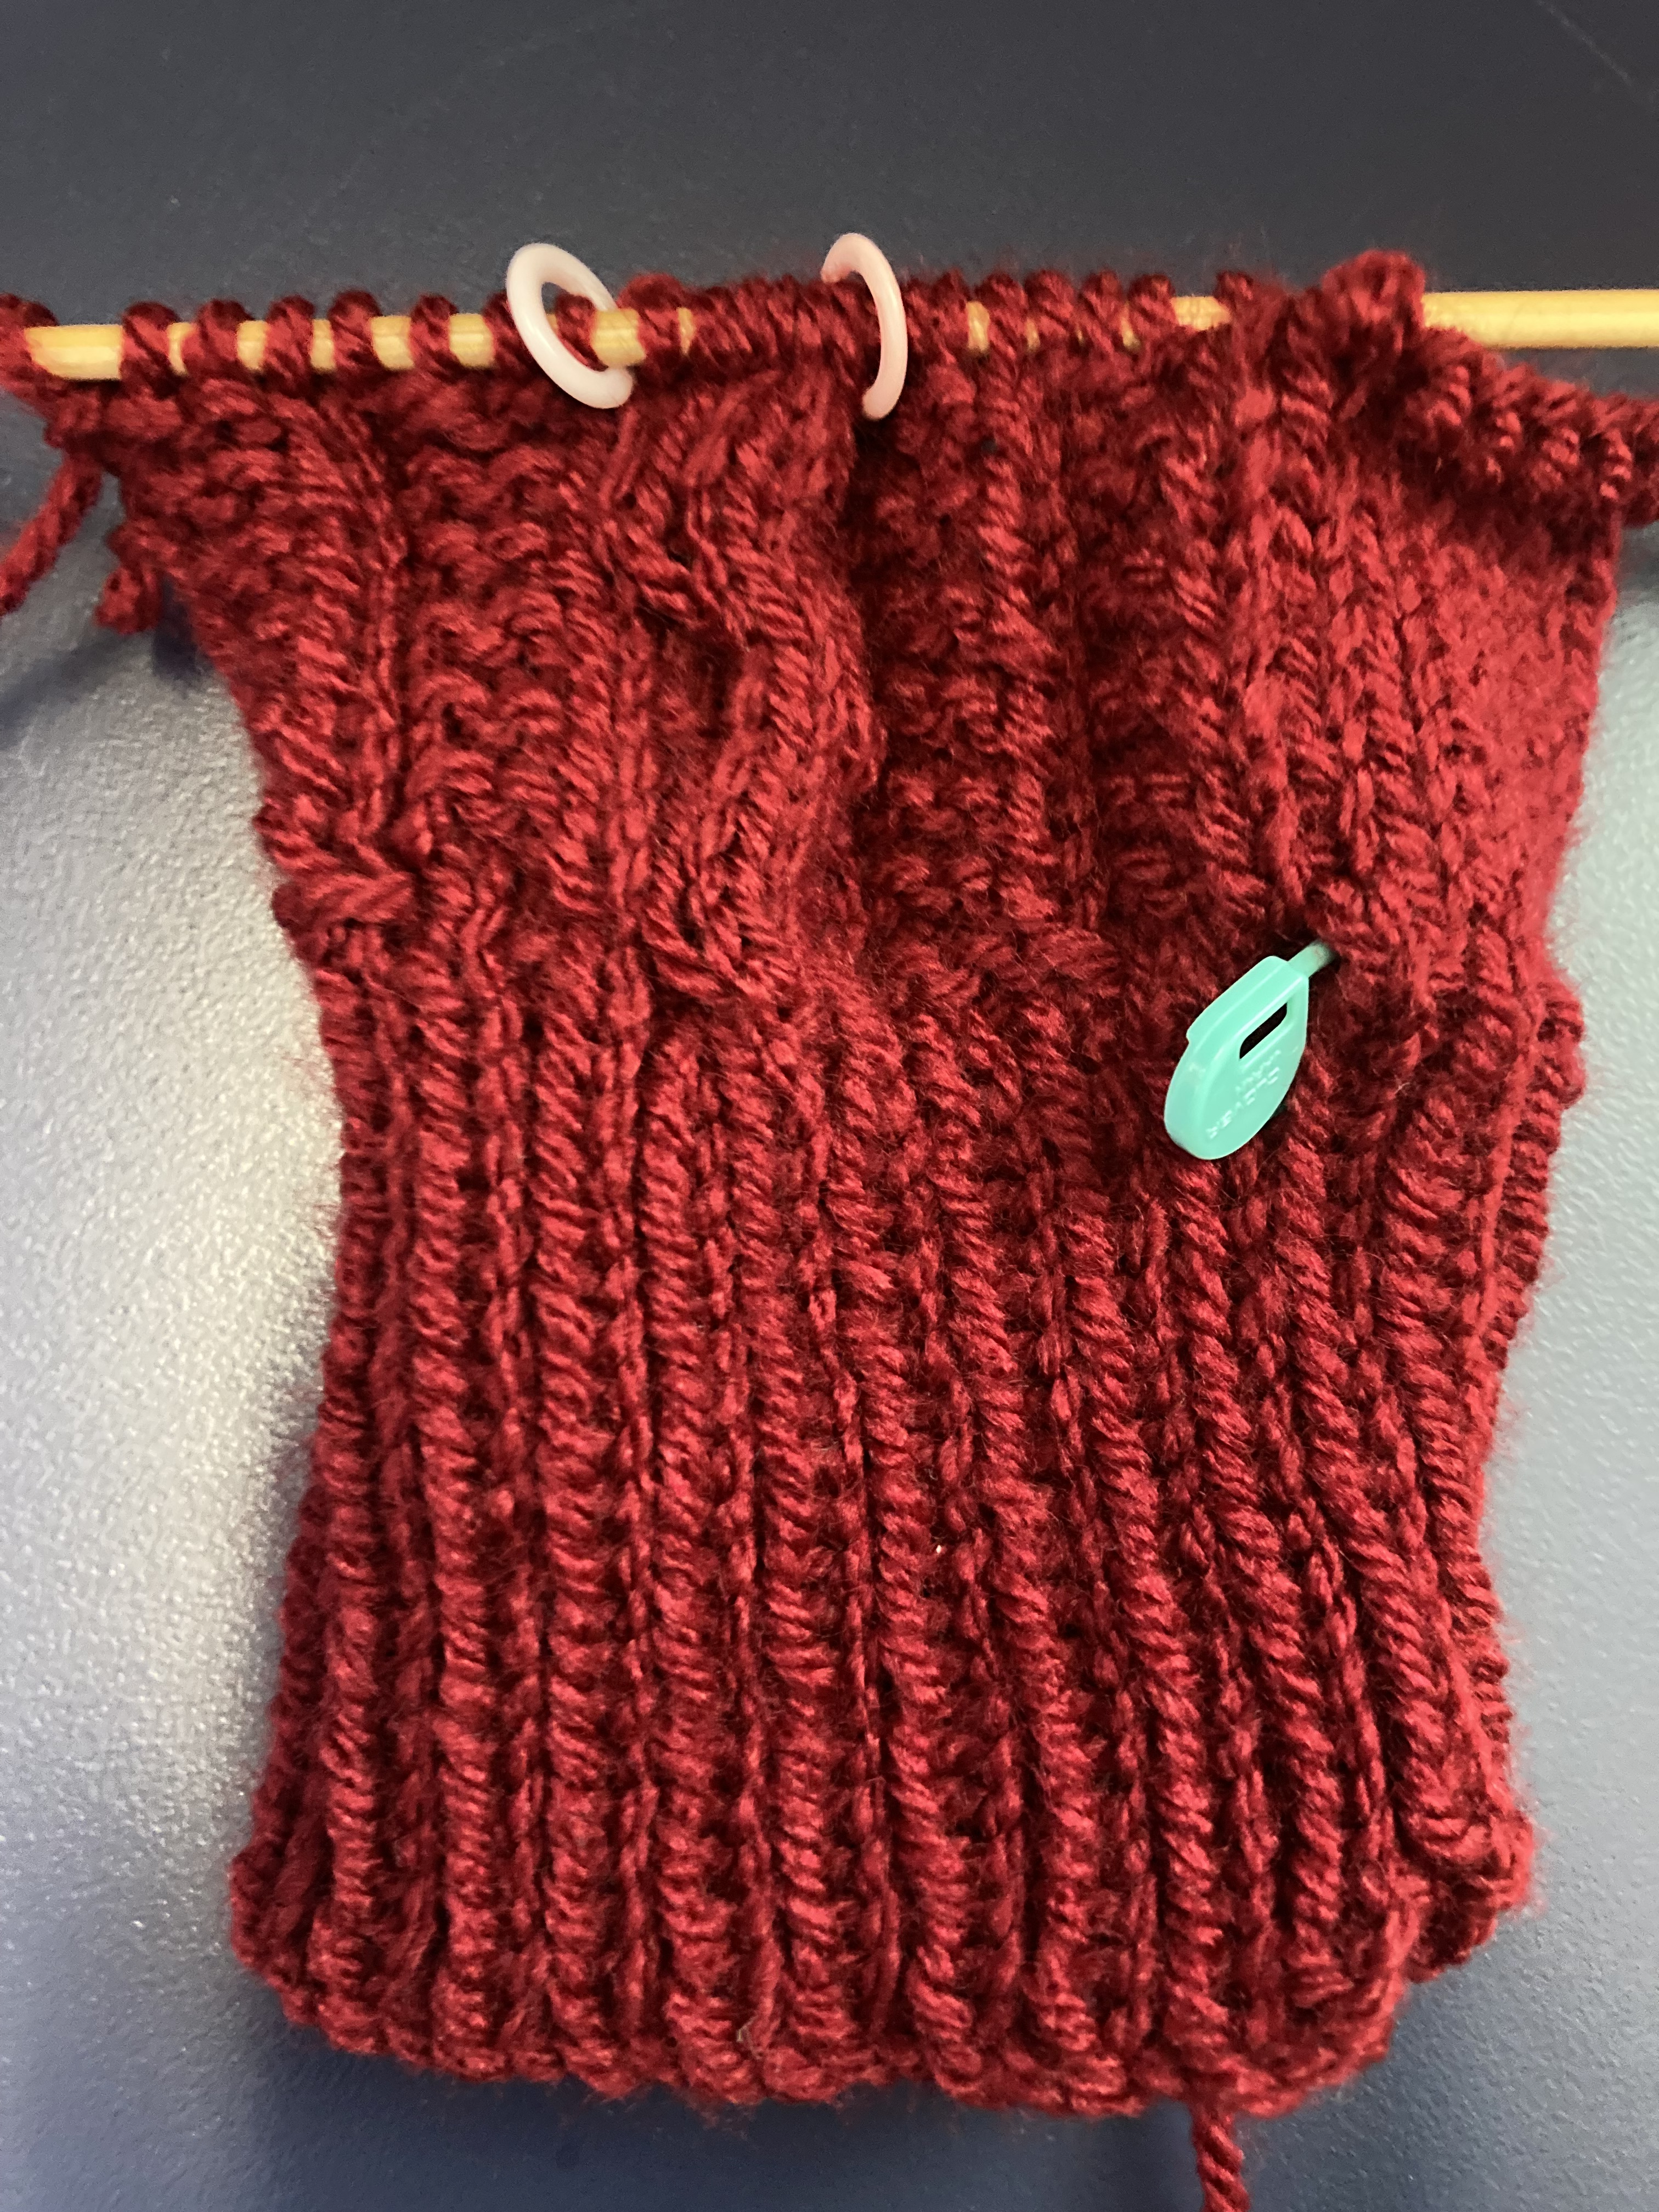
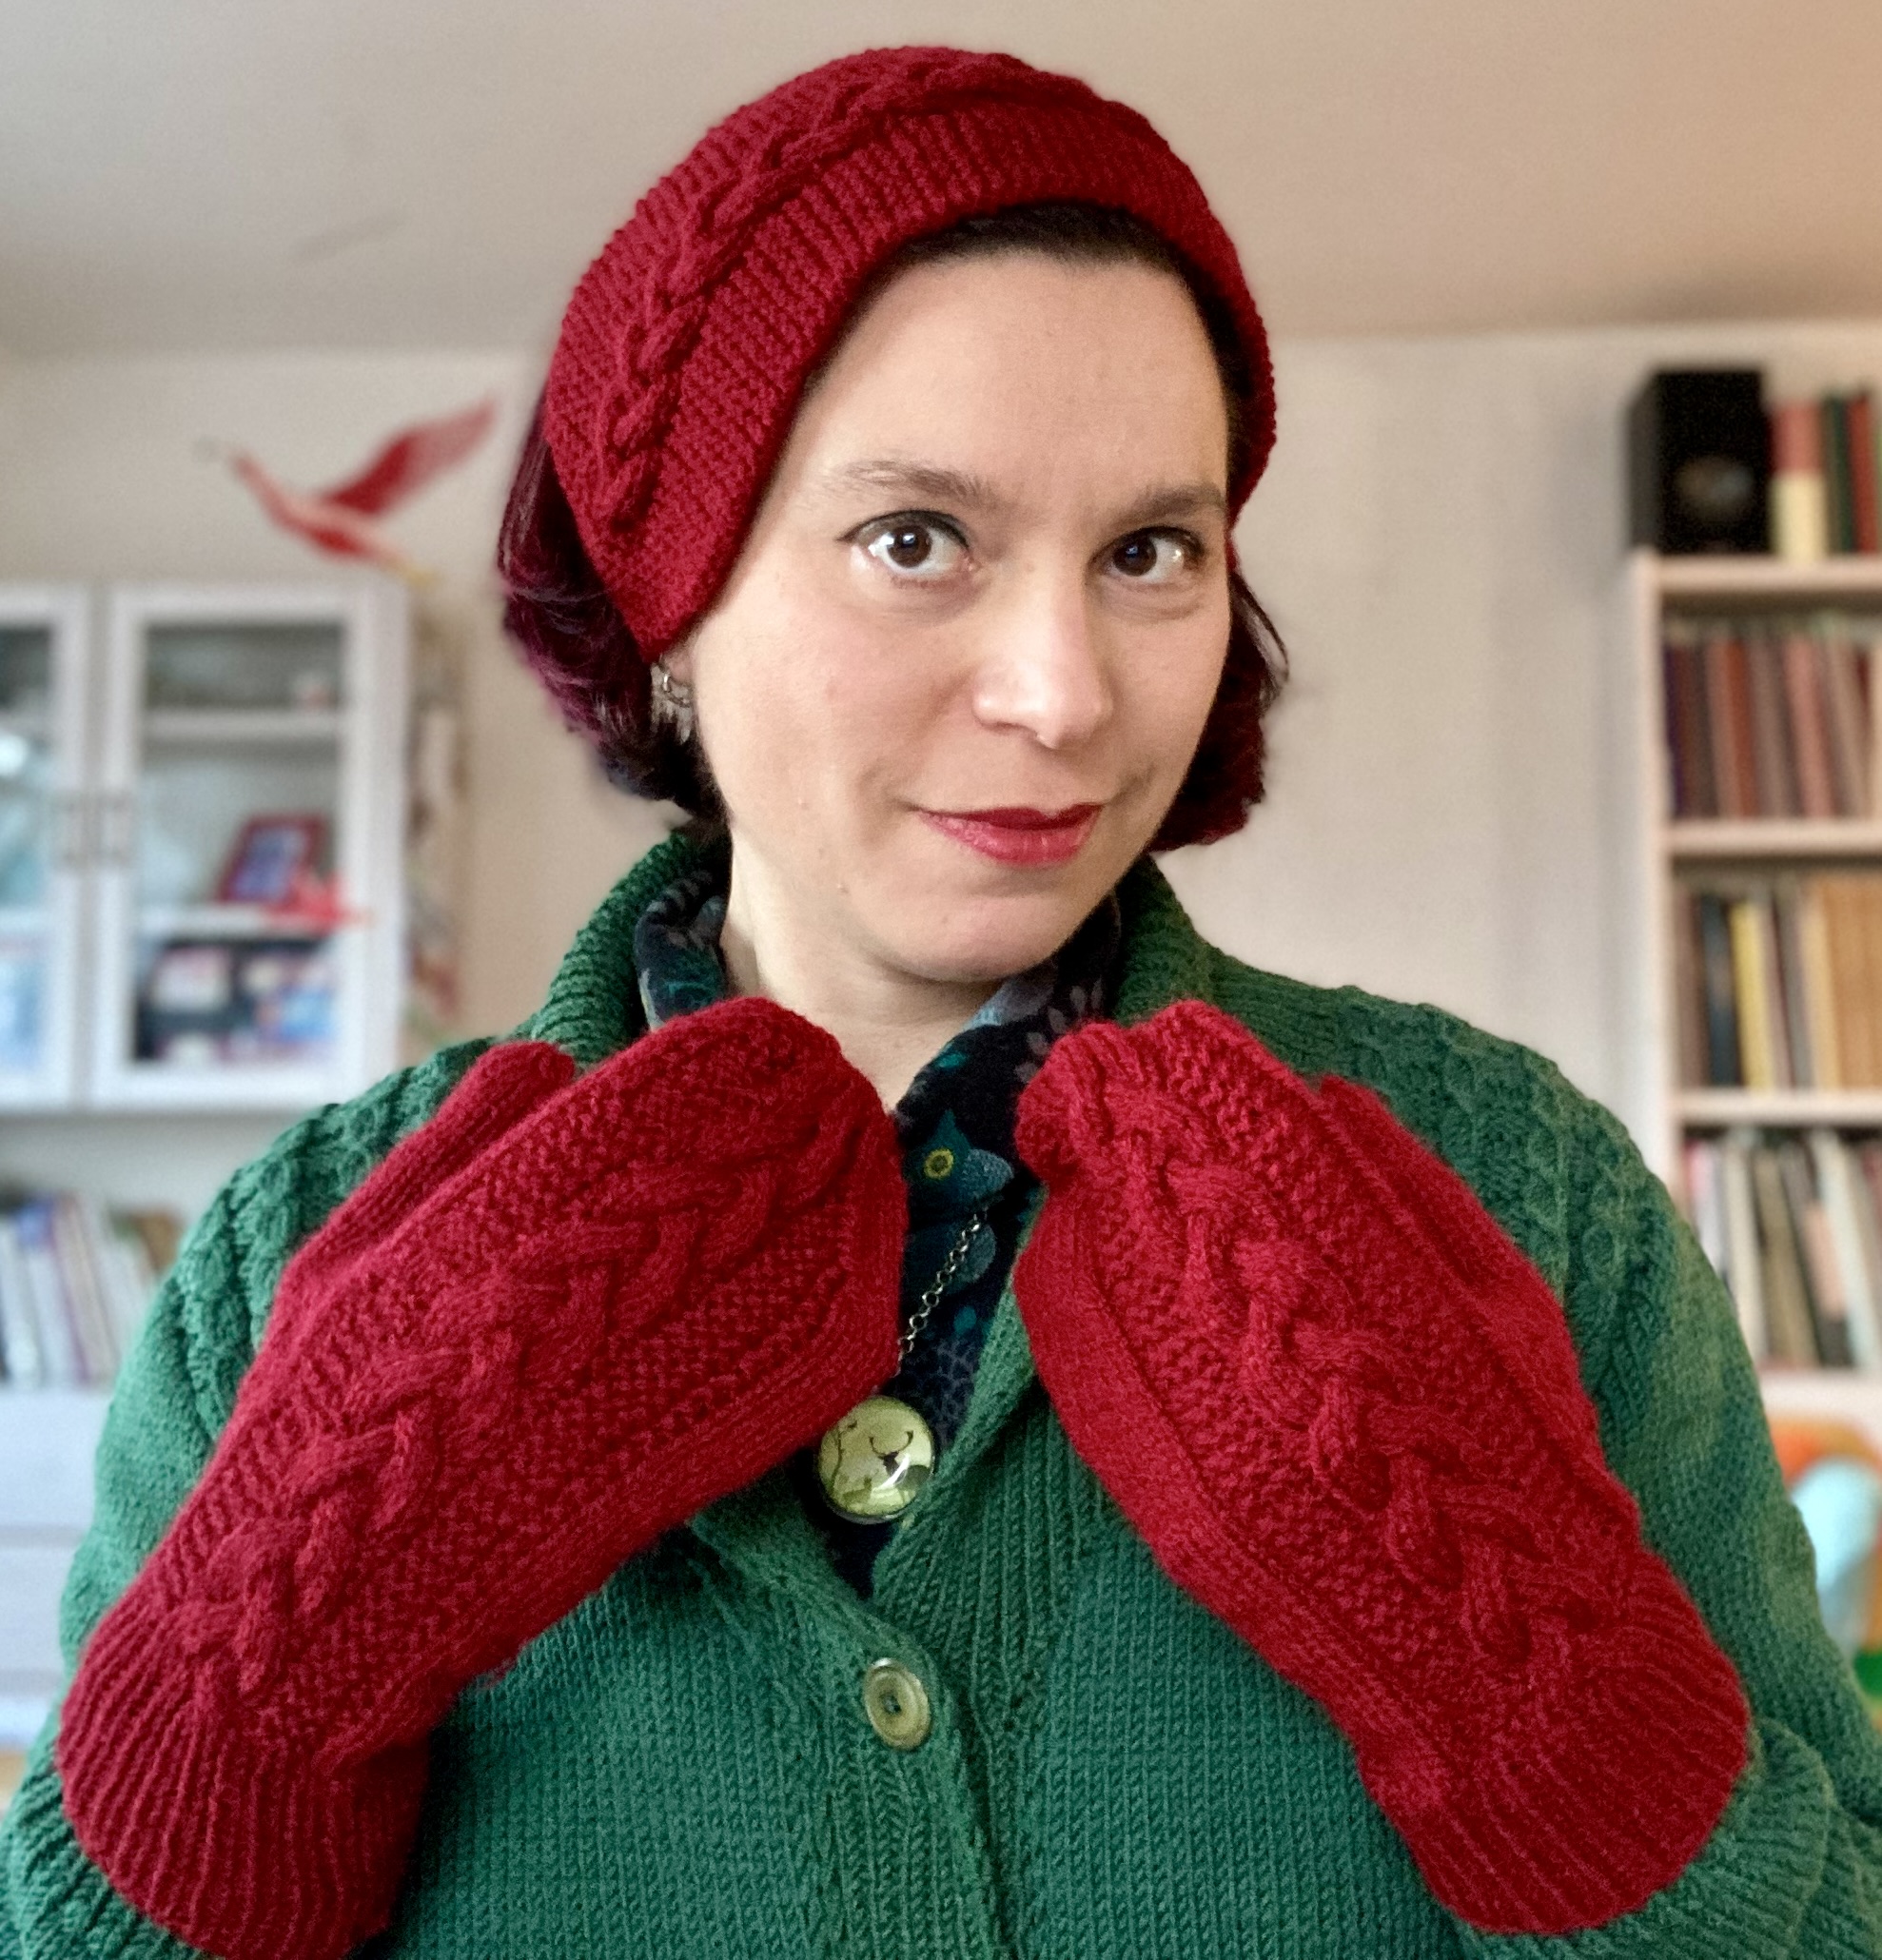
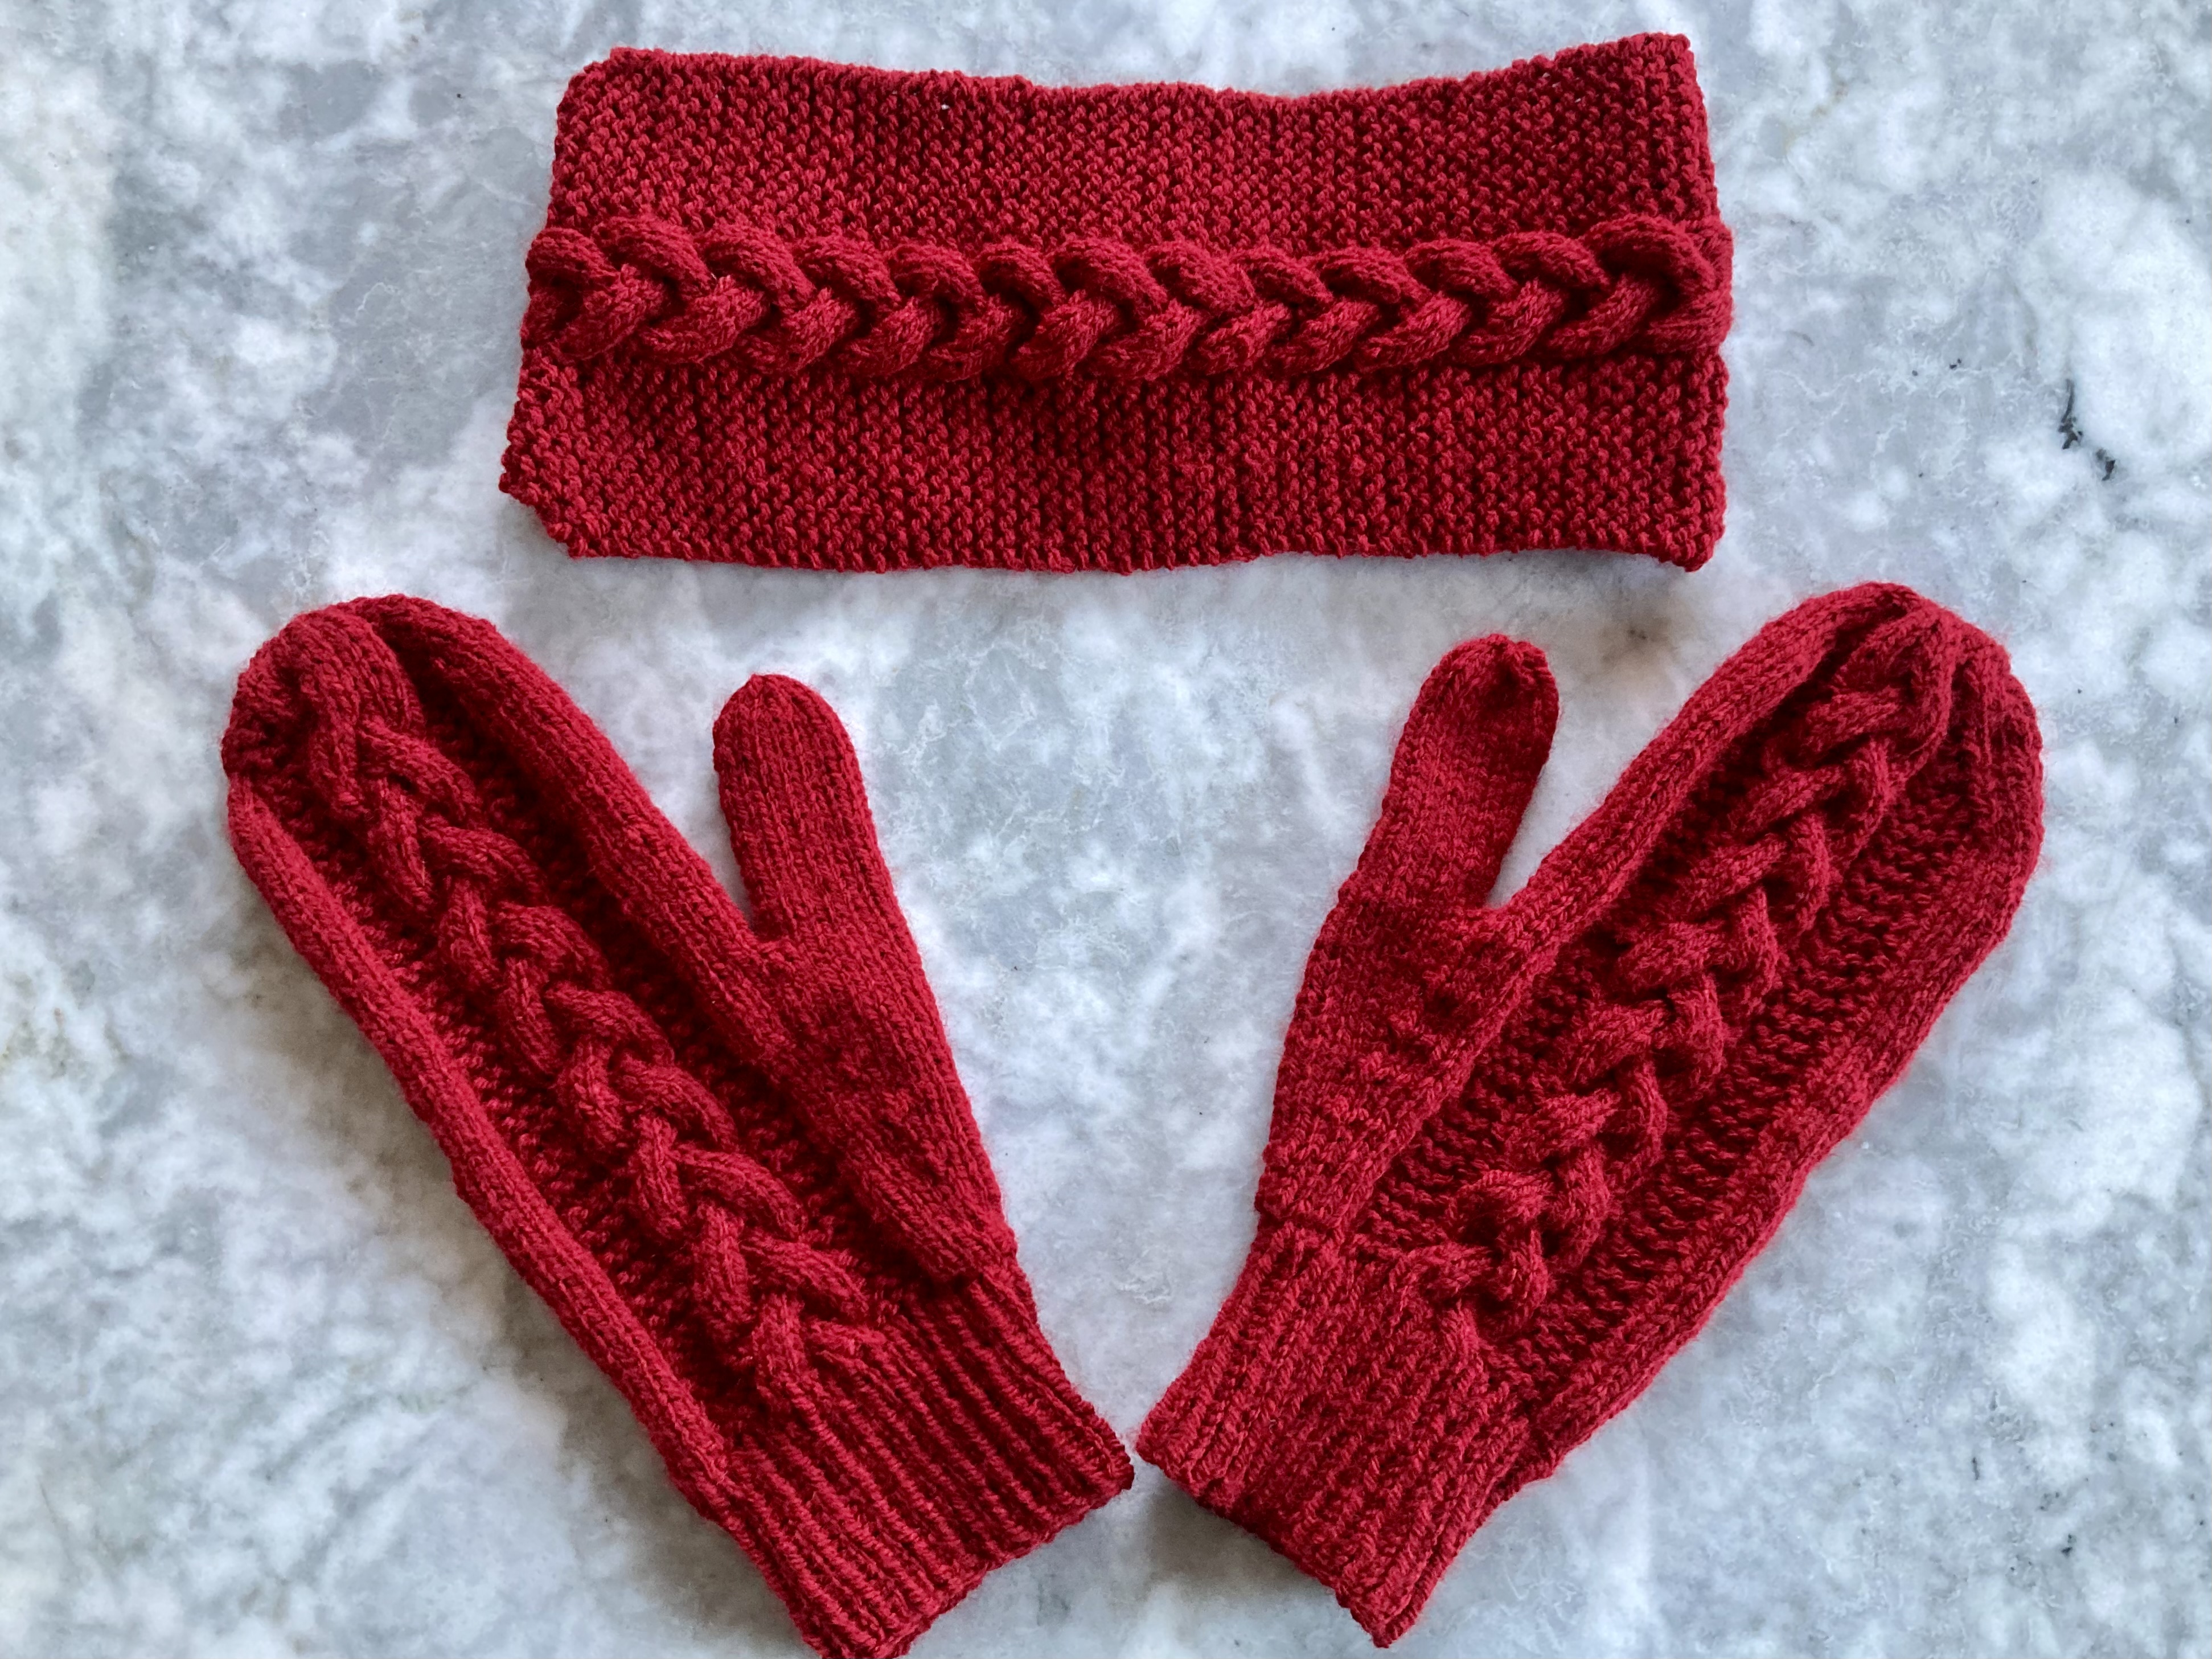
Welcome back to January 1967, one of my favourite 1960s issues of Stitchcraft. After making the failed “Pinafore Dress”, the successful “Lace and Ribs” pullover, and the the utterly cute “Fashion for Tots” jacket, I wanted very much to make the turquoise Fair isle cardigan on the back cover… but alas, it was not to be, as it is not possible to order wool from Scotland to continental Europe at the moment. But I won’t give up hope! While waiting for different wool to arrive, I made a simple headband-and-mitt(en)s set from the “Accessories for the Outdoor Life” page.
The mittens (Stitchcraft calls them “mitts”, but I’ll call them mittens to avoid confusion with fingerless mittens/gloves) and headband both feature a simple 9-stitch braided cable set in garter stitch (only 4 stitches on the mittens with the rest in stocking-stitch) with 1 stitch of reversed-stocking stitch on either side of the cable. The mittens are meant to be knit flat back-and-forth, but I wanted to make them in the round to save time and a seam.
Re-writing or re-thinking the pattern to accomplish that was… not easy. Of course the pattern doesn’t say, “Make a 9-stitch cable with 1 stitch of reversed stocking-stitch and 4 stitches of garter stitch on each side, and the rest in stocking-stitch”. It says things like “k3, (p1, k3) twice, C 6 B, (p1, k3) twice, k twice in next st., k to last 20 sts, k twice in next st, k 19” and then the wrong-side row is “purl to last 22 sts, k5, p9…” and so on. I tried to chart it out and was even more confused than before. The cable was all wrong and didn’t cover nine stitches. I finally figured it out, but the pattern wording didn’t help.
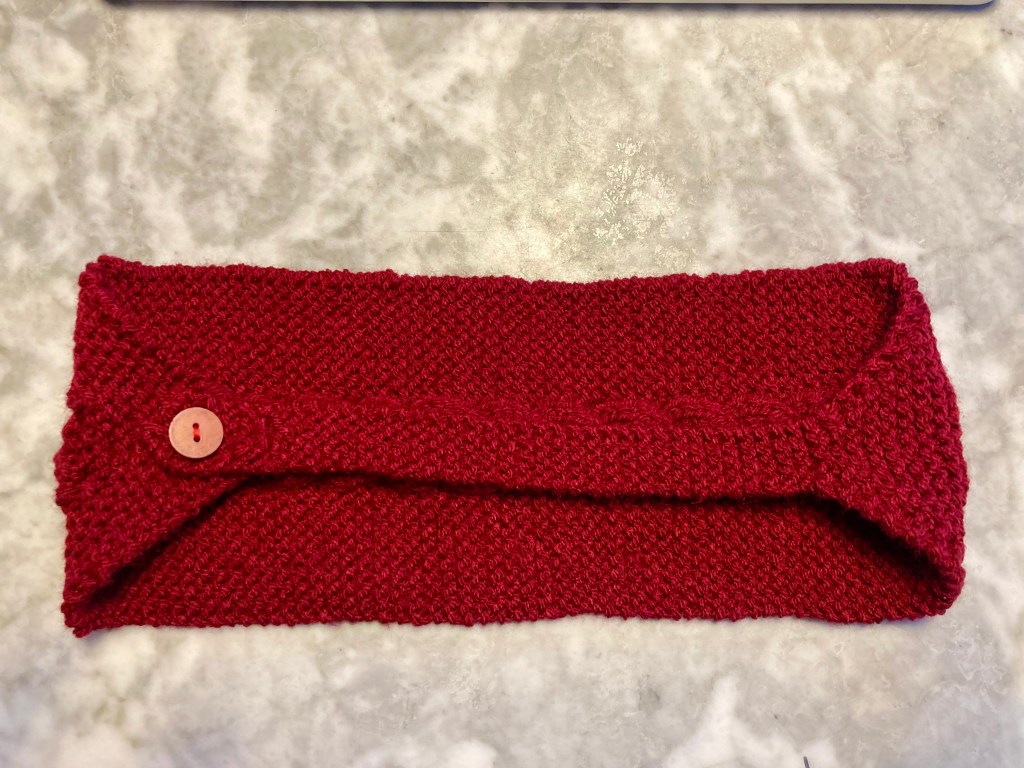
The headband was very easy and took two evenings. It fastens around the head with a buttoned strap, which I found very charming. The strap as given in the pattern (3 inches) was too short, so I made it to fit. It’s a little loose on me, but my friend has fluffy hair. Of course, she can always move the button if it doesn’t fit her properly.
Friend is wool-sensitive, so I made these in 1960s-appropriate 100% polyester yarn (Pro Lana Star). For a synthetic wool, it’s quite nice — soft and doesn’t feel too plastic-y. I chose a lovely cherry red colour to feel festive in winter.
That was it! I will return to this issue when the substitute wool I ordered for the Shetland cardigan (Rauma 3-trads Strikkegarn) arrives and make an extra post. I don’t mind that it didn’t work out to make the cardigan this month, as I probably would have overlooked the headband and mitts. They were fun to make and look really cute, so maybe I’ll make a set for myself sometime.
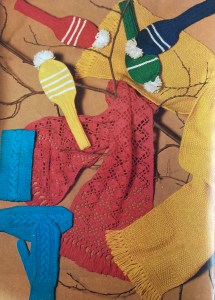
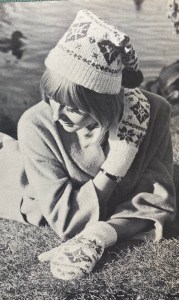
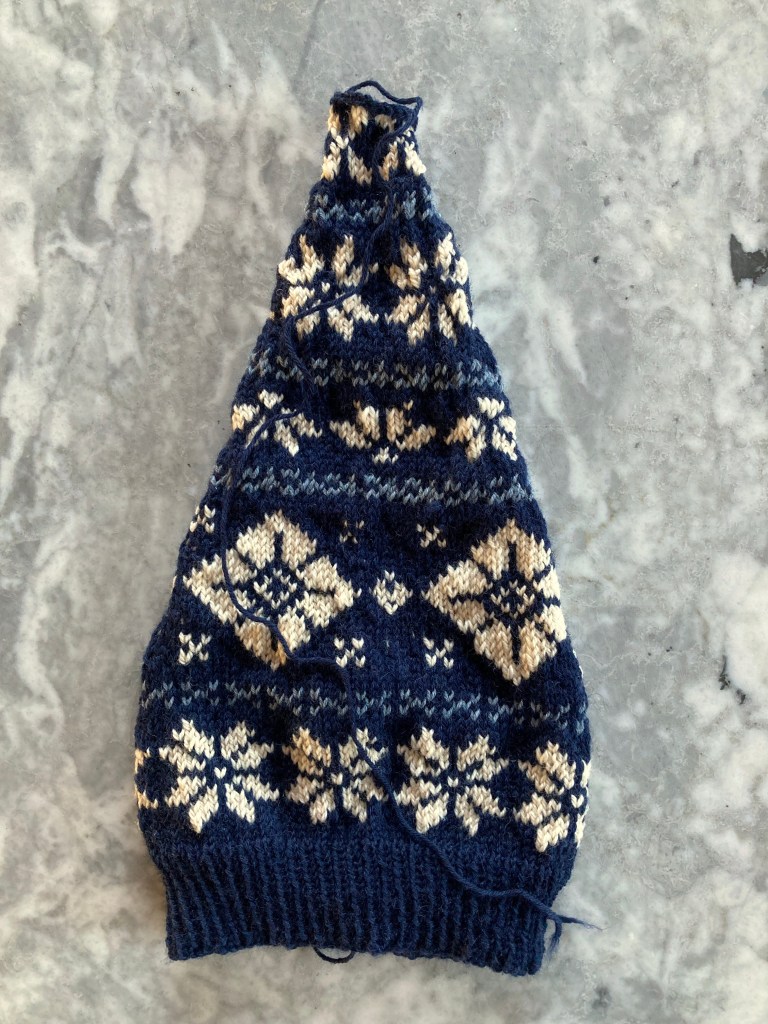
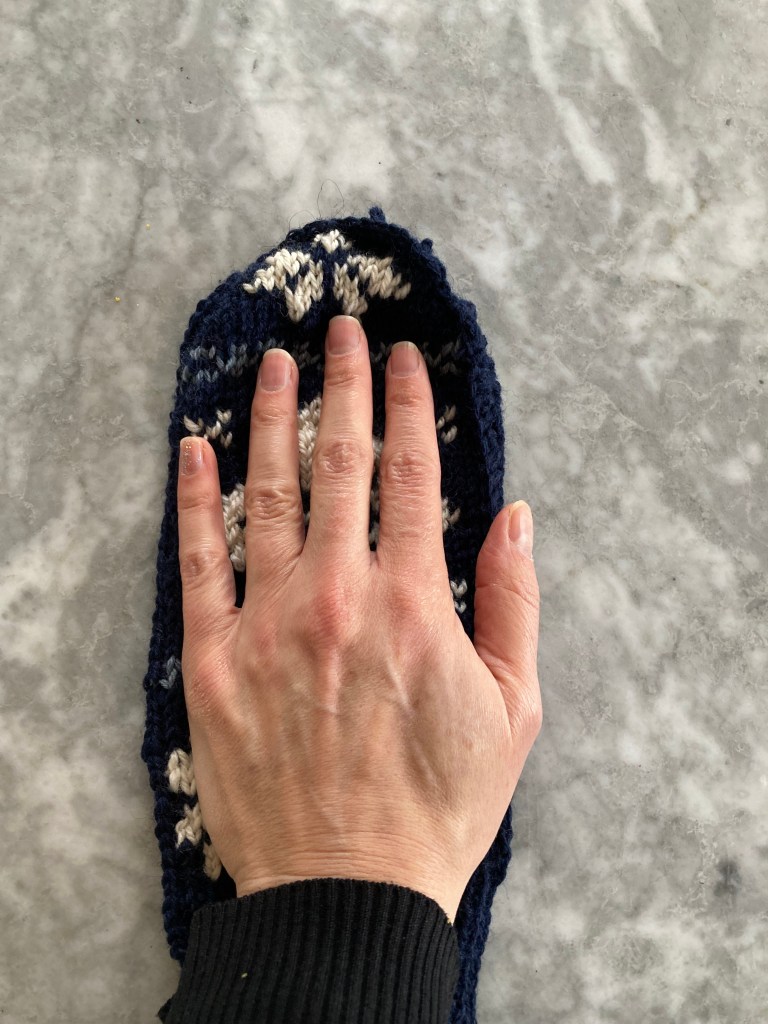
I had long admired this cap and mitten set and was very happy to arrive at this issue in order to knit it.
… That is, until I actually took a better look at the pattern and made it! The snowflake pattern and folded stocking-cap design looks great in the photo, but the pretty setting and pose detract from some of the design flaws, which became glaringly apparent once I started work on it.
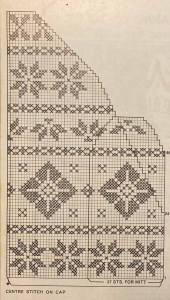
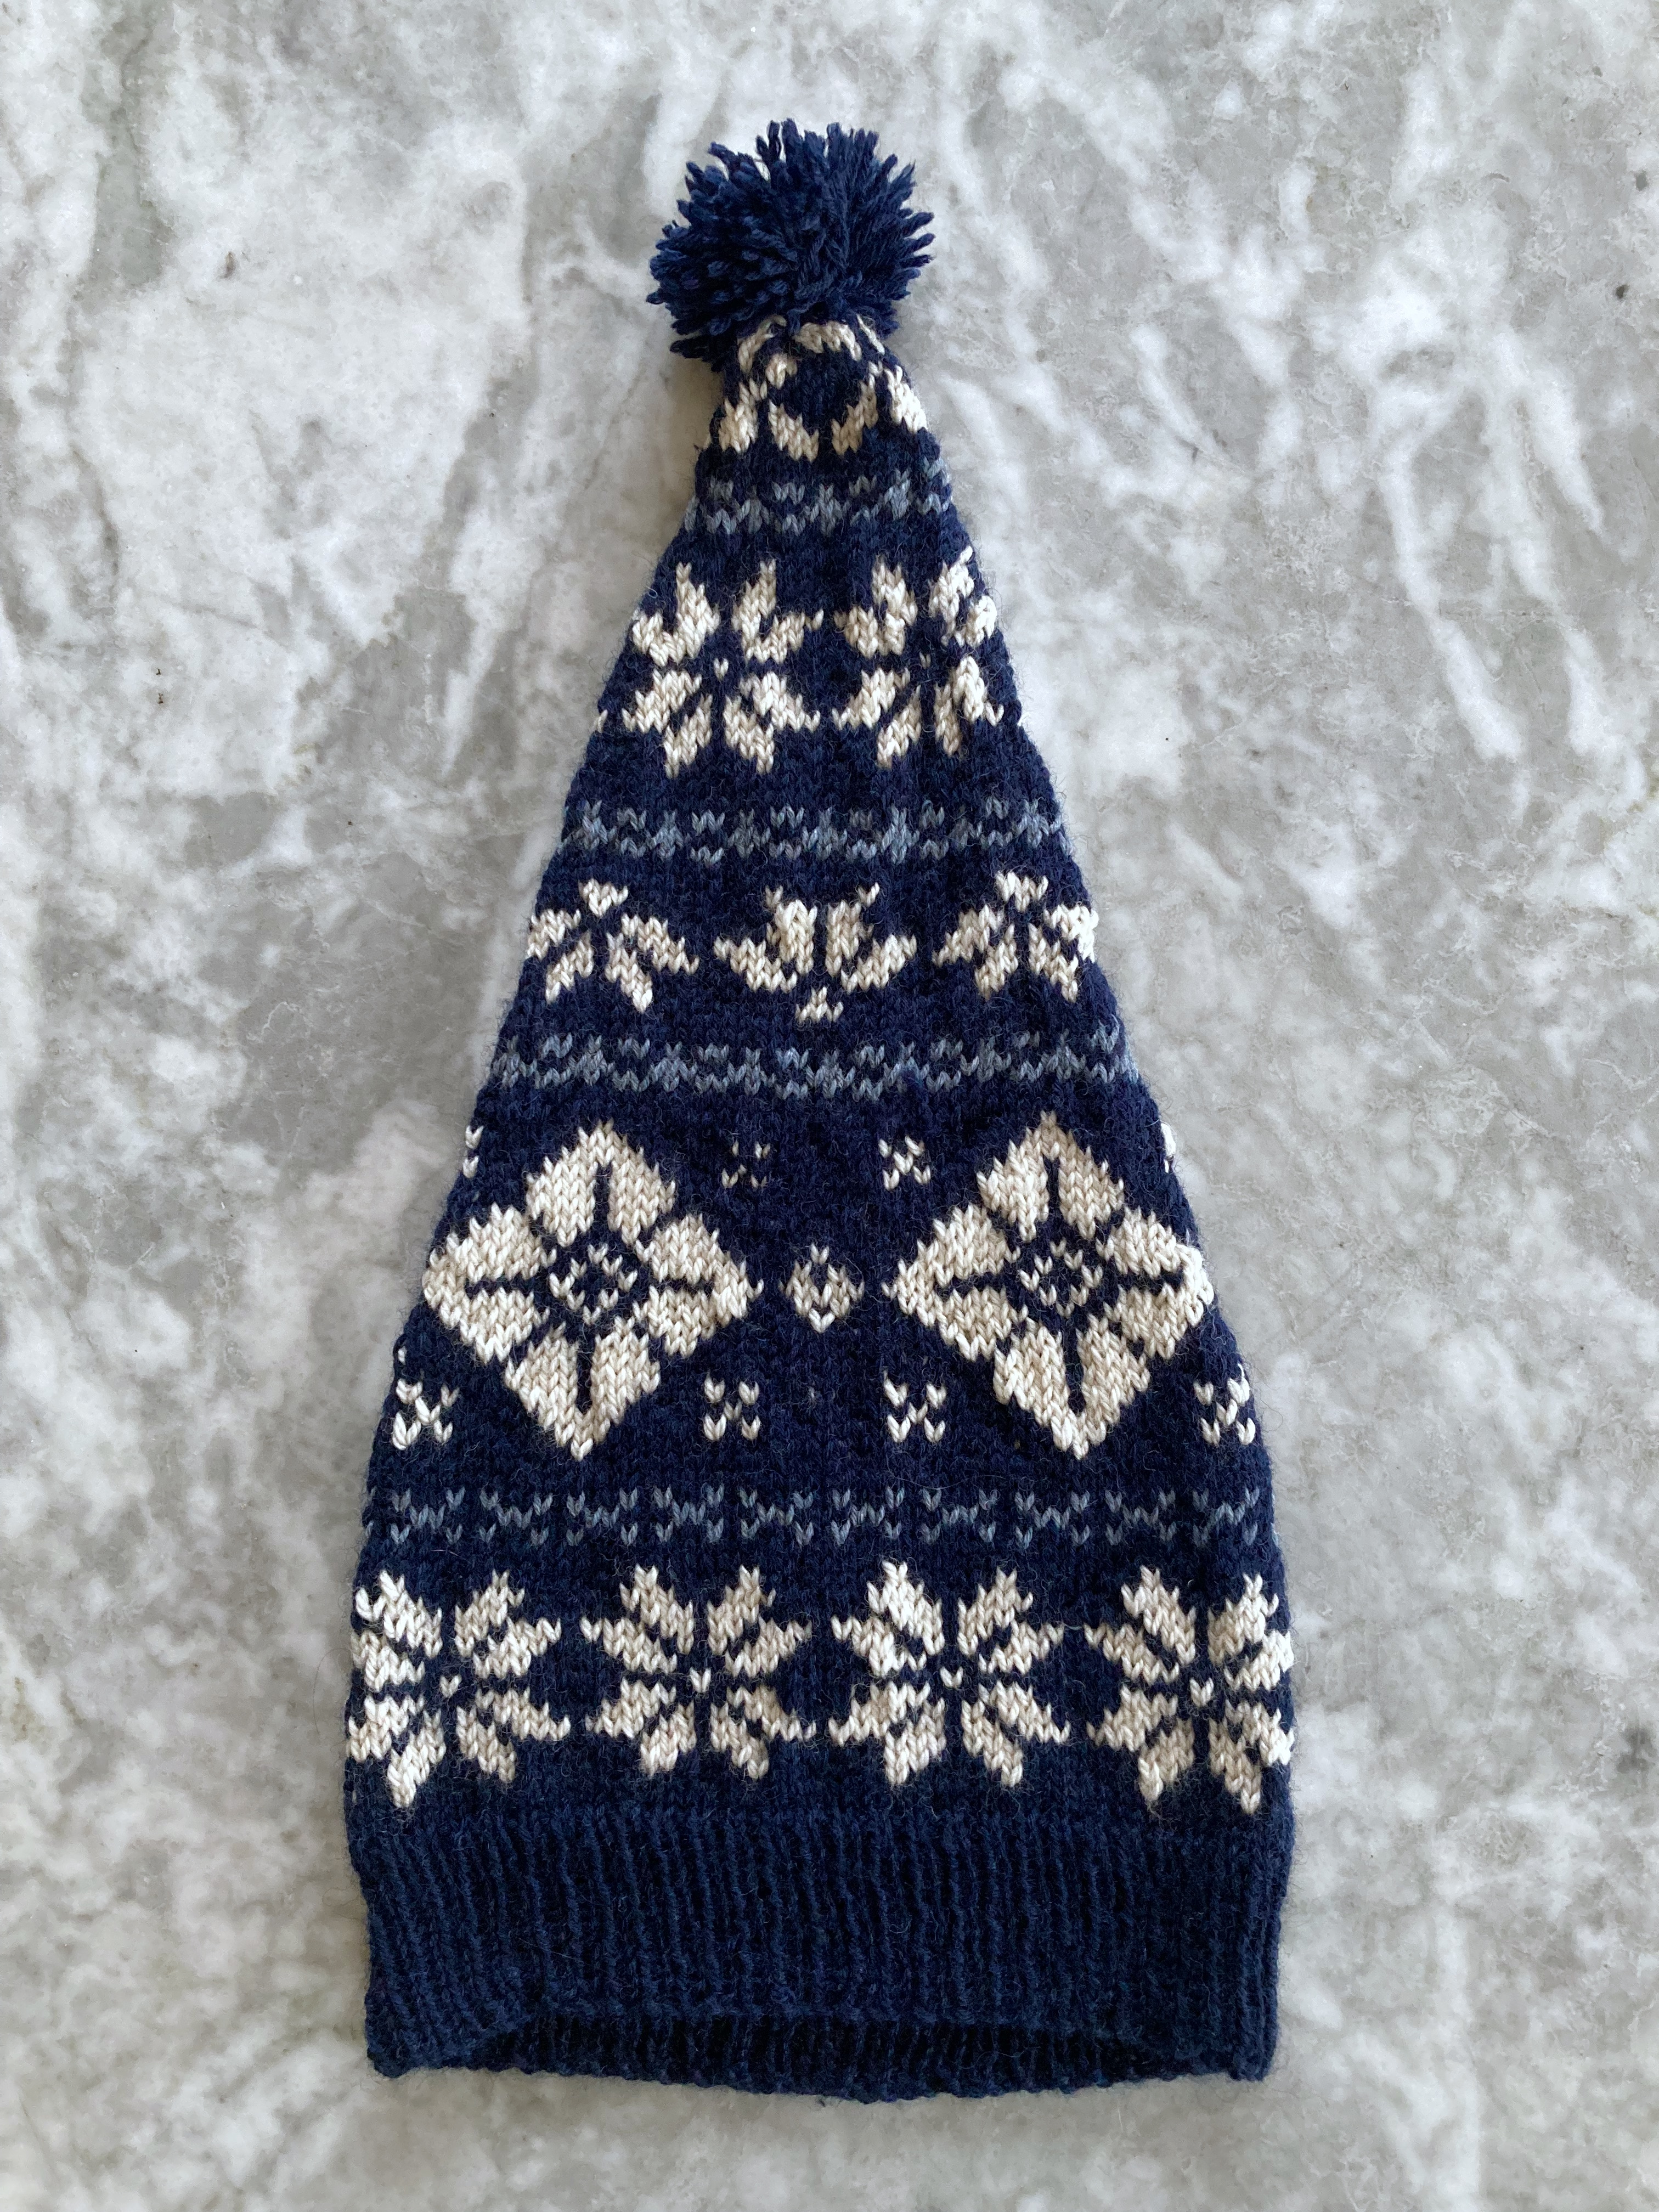
But first things first: It’s written for Patons DK yarn, 100% wool, in white with “Lipstick Red” pattern. I have a good stash of leftover DK wool from other projects and decided on a dark blue background (Schachenmayr Regia 6-ply sock wool) with the pattern in white (Wolle Rödel Soft Merino) and blue-grey (Lana Grossa Cool Wool Big Mélange) to really bring out the snowflakes. The written pattern gives no row gauge and assumes a tension of 6.5 stitches to the inch over the stranded pattern on No. 10 (3.25 mm) needles for the mittens, and 6 stitches to the inch on No. 8 (4 mm) needles for the hat.
6 and especially 6.5 stitches to the inch is quite tight for DK wool, but I did my best on 3.5 needles (I don’t have 3.25 needles — the pattern is written for old UK sizes) and started with the hat. I noticed it was meant to be knitted flat and seamed up the back, but no worries, I could just make it in the round. There was even a chart (not a given with vintage patterns), so everything seemed fine.
Well — after the first snowflake, it was clear that this hat would not fit any adult head, even that of the friend it was intended for, whose head is quite small. Knitting stranded DK that tightly just made it impossible to stretch, as well. Looking back at the photo, I noticed that the finished hat is just sort of perched on the of the model’s head, not pulled down over her forehead like one would normally wear a hat…! Yeah, 6 stitches to the inch is too tight. So I started over with 4 mm needles for the pattern and 3.5 mm for the ribbing.
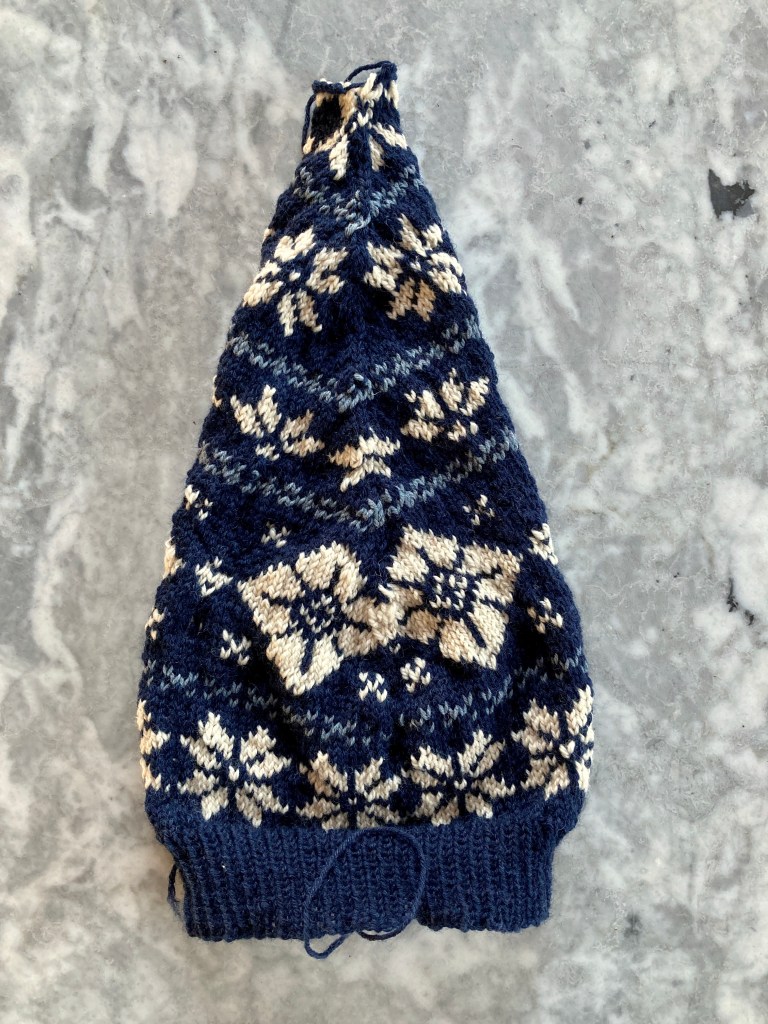
That solved the first problem, but as soon as the large diamond pattern started, I noticed how badly designed the colourwork pattern was. There were huge gaps between colour changes, necessitating weaving-in the wool constantly, and even then, the white wool showed in the gaps. I can’t imagine how this would have worked with stranding bright red behind white! Even worse, the pattern doesn’t match up in any way at the “seam” / round change. The large diamonds just get swallowed into each other like in of all those Netflix opening credits that use mirror effects. I was able to finesse it on the smaller snowflake and the repeat of the medium-size snowflake at the top of the hat, and the back “seam” does get covered by the long upper part of the hat when it fold over, but still, it looks messy.
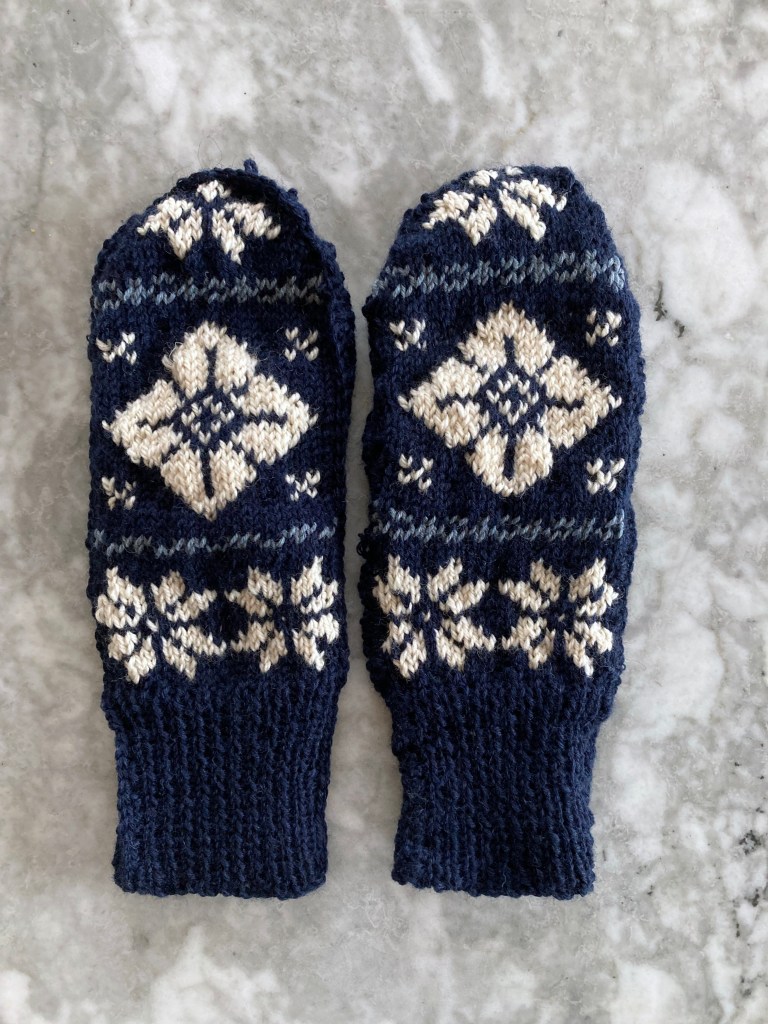
Starting on the mittens, it became obvious why the hat pattern was so badly designed: The mitten pattern is perfectly centered and balanced and looks fine. There’s no problem with patterns bleeding into each other because the decreases only happen at the top of the fingers, and no big problem with weaving in across the back, because the back-of-the-hand and palm pieces are knitted flat and separately and there is no patterning on the palm, so the pattern motifs are made in sort of stranded intarsia. It seems the designer designed a pattern for mittens and, when instructed to make a matching hat, just extended the pattern out to hat size without much though about pattern placement or correct sizing.
Speaking of sizing, though… The finished mittens were way too long! I have size 8 hands and really long fingers, but even they look stubby on this photo, simply because the mitten length is out of all proportion. Looking at the magazine photo again, I think they are too long for the model’s hands as well. Yes, I should have checked it as I went along, but of course I didn’t, so I only noticed the problem after all the pieces were made and seamed together. (Using a crochet seam as directed in the pattern.) I thought I could block them shorter… Erreur fatal! Blocking not only made no difference in the size, it cemented that crocheted seam so solidly that it was not possible to undo it in order to frog and re-knit the mitten tops in a better size. By the time I was finished “undoing” the first mitten seam, the whole mitten looked like it had been mangled by a dog.
I will give the hat to my friend as intended, as it turned out OK and the weaving-in blotches mostly disappeared after blocking. It does look cute, especially with a pompom on the tip. As for the mittens, I consigned them to the upcycling drawer, as I just didn’t want to deal with them any more.
This project was no fun to knit, but I will call it a learning experience and move on. And I do think my friend will like the hat, at least.
February’s project was pretty simple: a crocheted cap and “mitts” with a cute bobble pattern. I couldn’t decide on the colour (lavender or purple) and didn’t have quite enough of either to make both cap and mitts, so I ended up making the cap twice and using up leftovers of both colours plus a little extra of a different purple yarn to finish the mittens.
Apropos “mitts” and “mittens”… Stitchcraft calls them mitts, though I guess these days most people would call them mittens. What we now call mitts, i.e. fingerless gloves, were not in fashion in the mid-20th century.
The cap is made in the round from the top down with double crochet and bobbles, then stranded with fringe around the crown, which in turn is held down by a plait (braid). The crocheting was easy even for a non-crocheter like me, but the fringe was really difficult to hold in place with the proper tension.
The mitt(ens) have a really interesting construction — back and palm done separately from the middle out. You make a chain and work on both sides of it, back and forth and back and forth until it is wide enough. The thumb is a sort of loop of chain stitch added on and worked in double crochet with the rest of the palm, then sewn up.
I used contrasting dark purple wool for the wrist and the making-up (the lavender was used up) and crocheted palm and back together on the right side for a decorative effect.
Here are the finished caps — both slightly different, both fairly imperfect, but I think the intended wearer will like them. Modeled photo to come when she receives them!


 February’s project was pretty simple: a crocheted cap and “mitts” with a cute bobble pattern. I couldn’t decide on the colour (lavender or purple) and didn’t have quite enough of either to make both cap and mitts, so I ended up making the cap twice and using up leftovers of both colours plus a little extra of a different purple yarn to finish the mittens.


