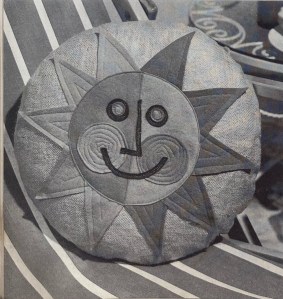
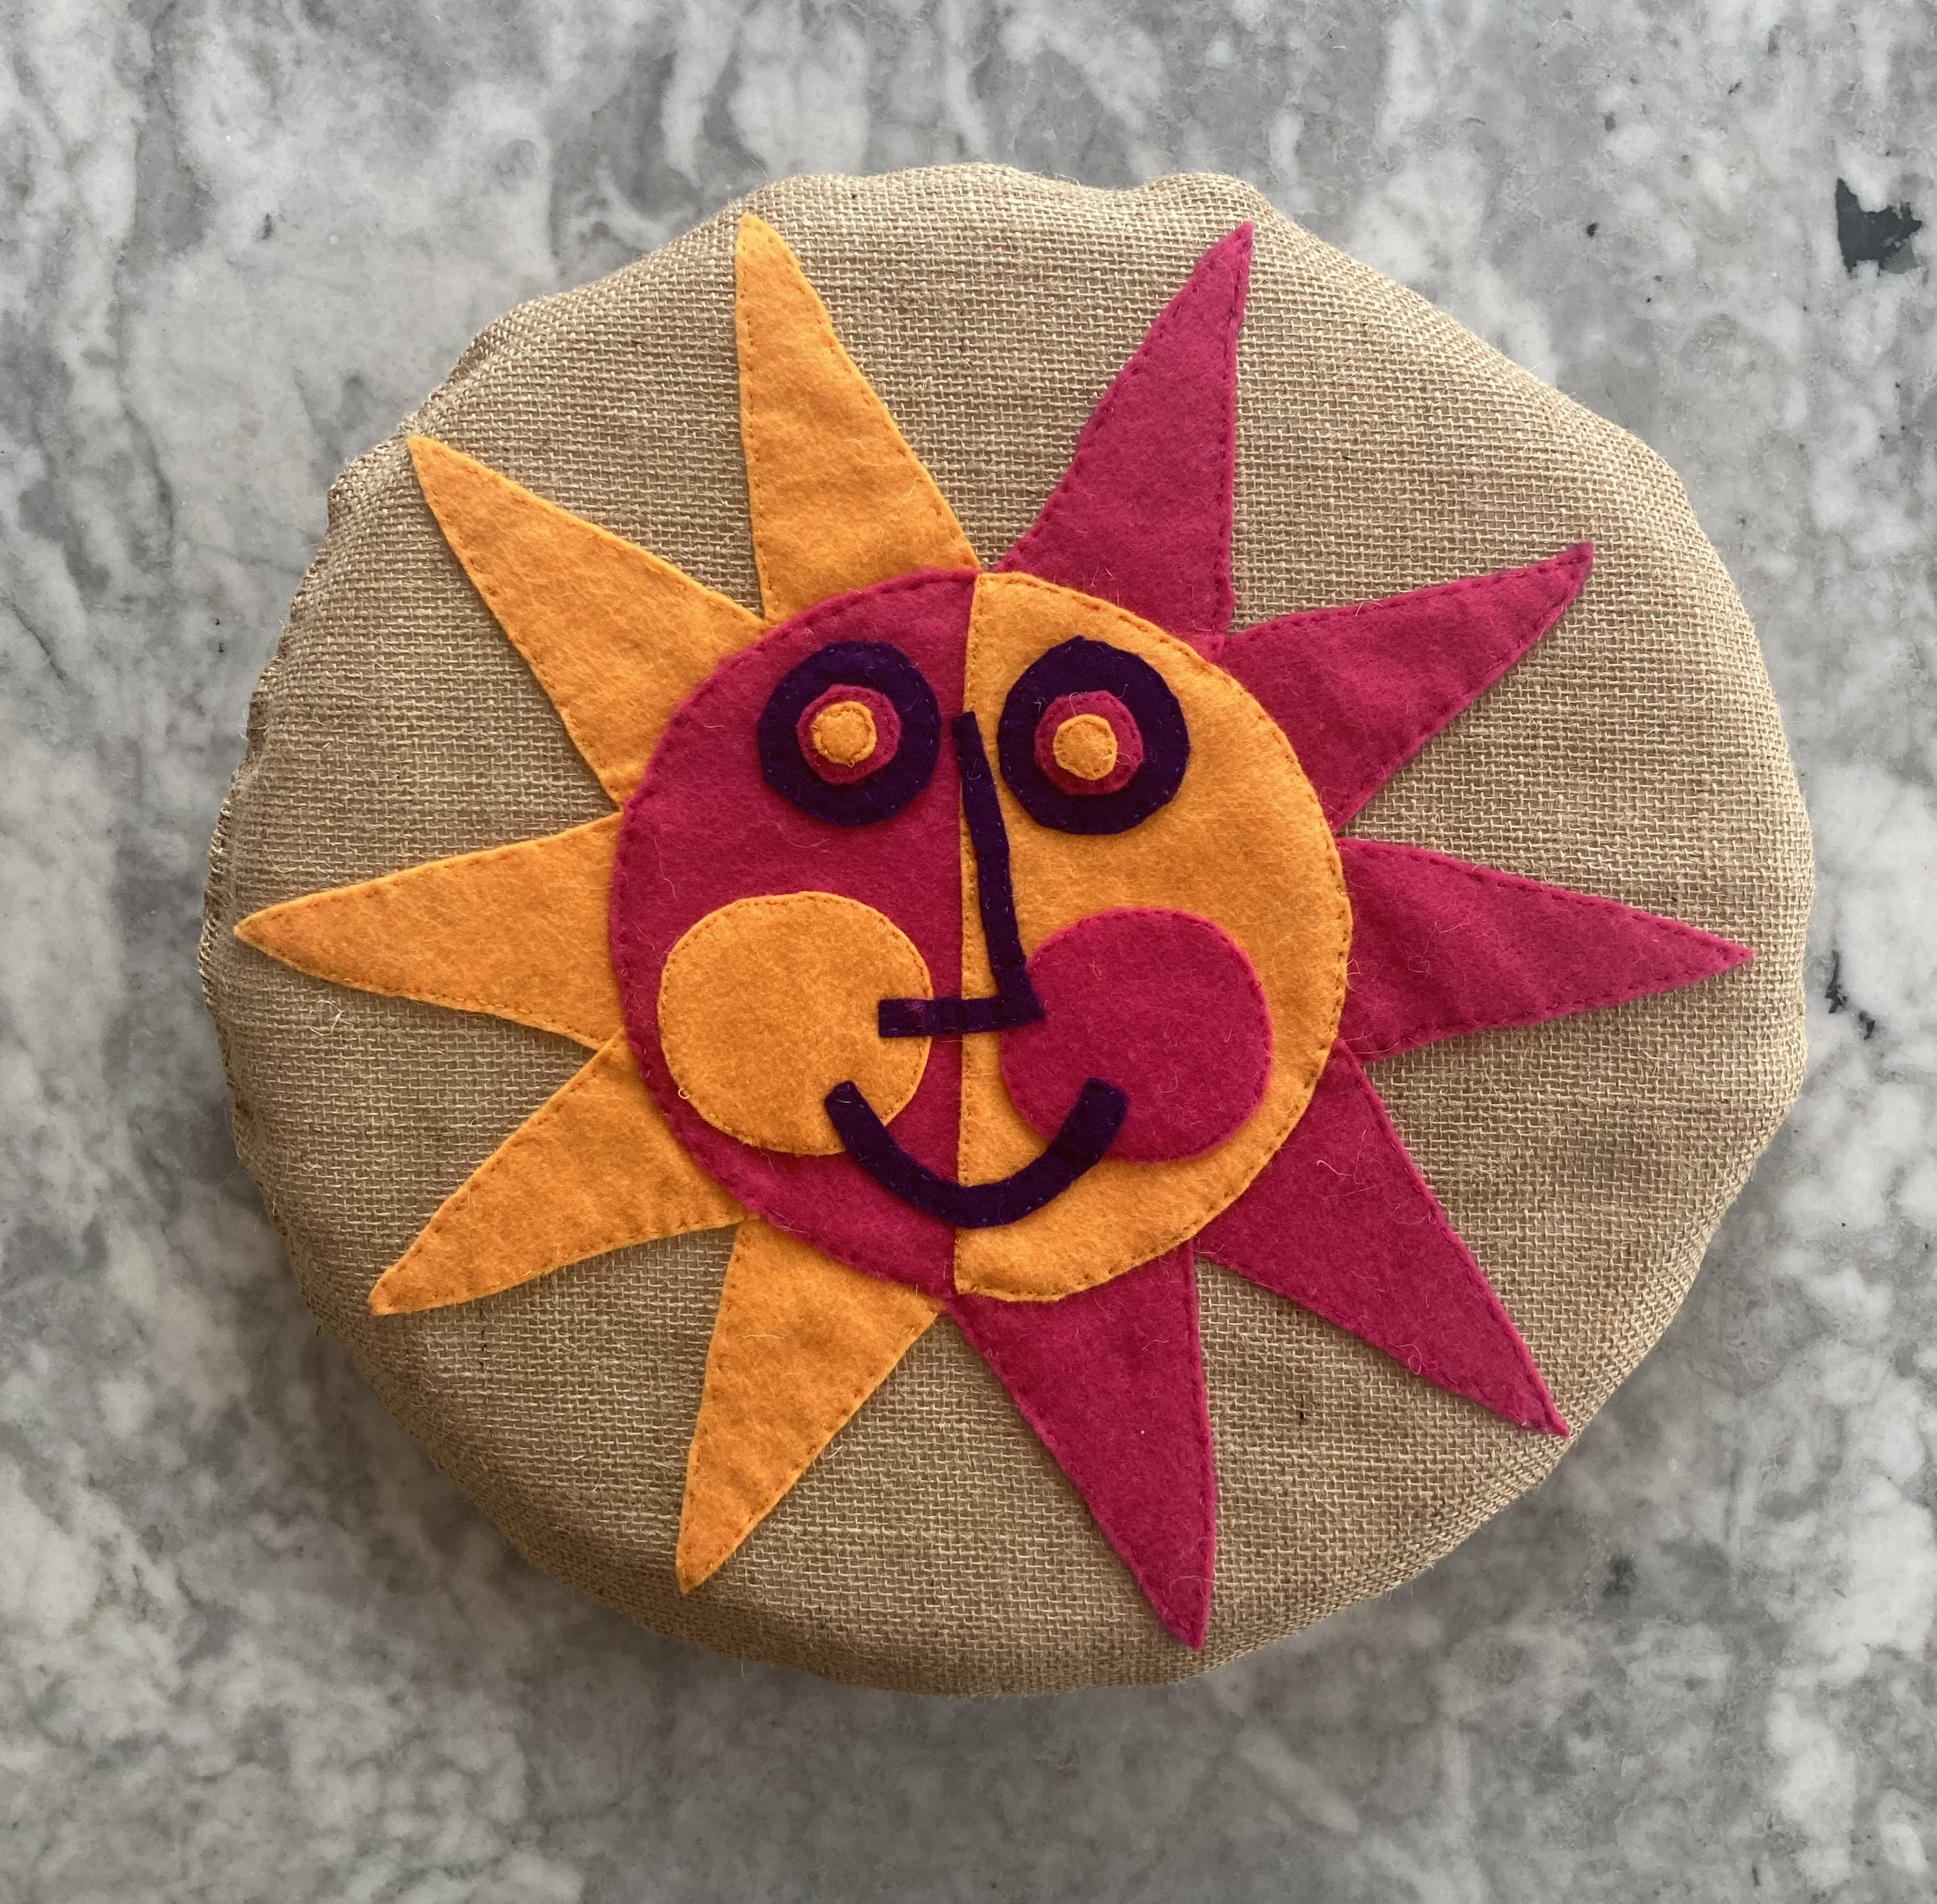
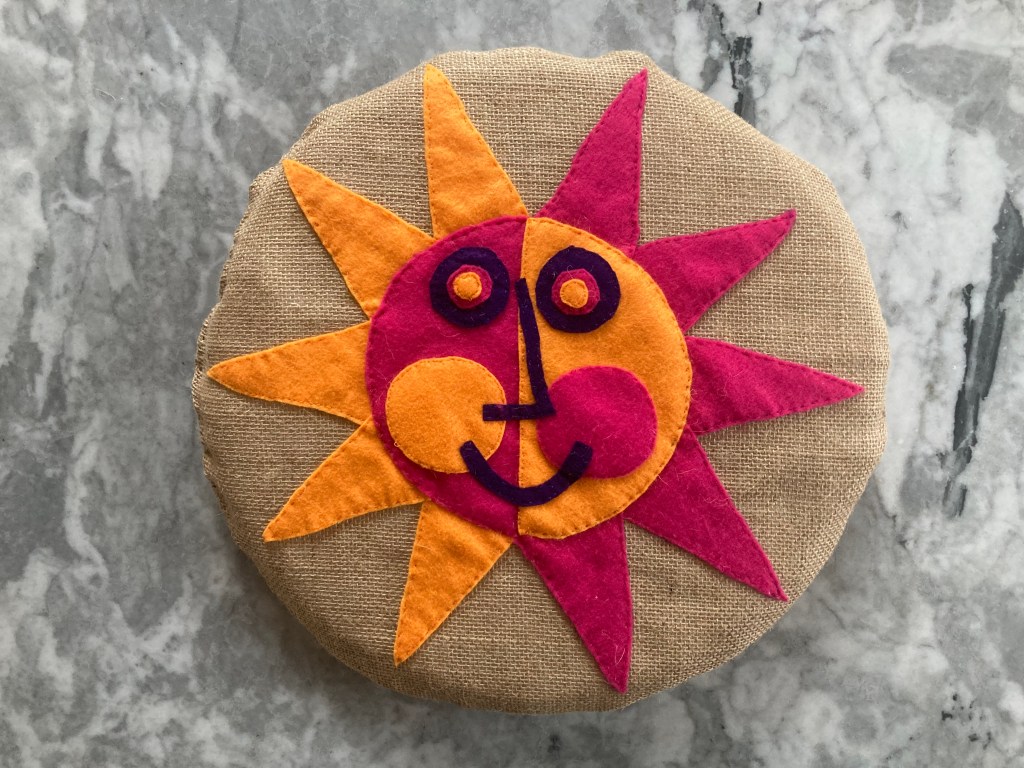
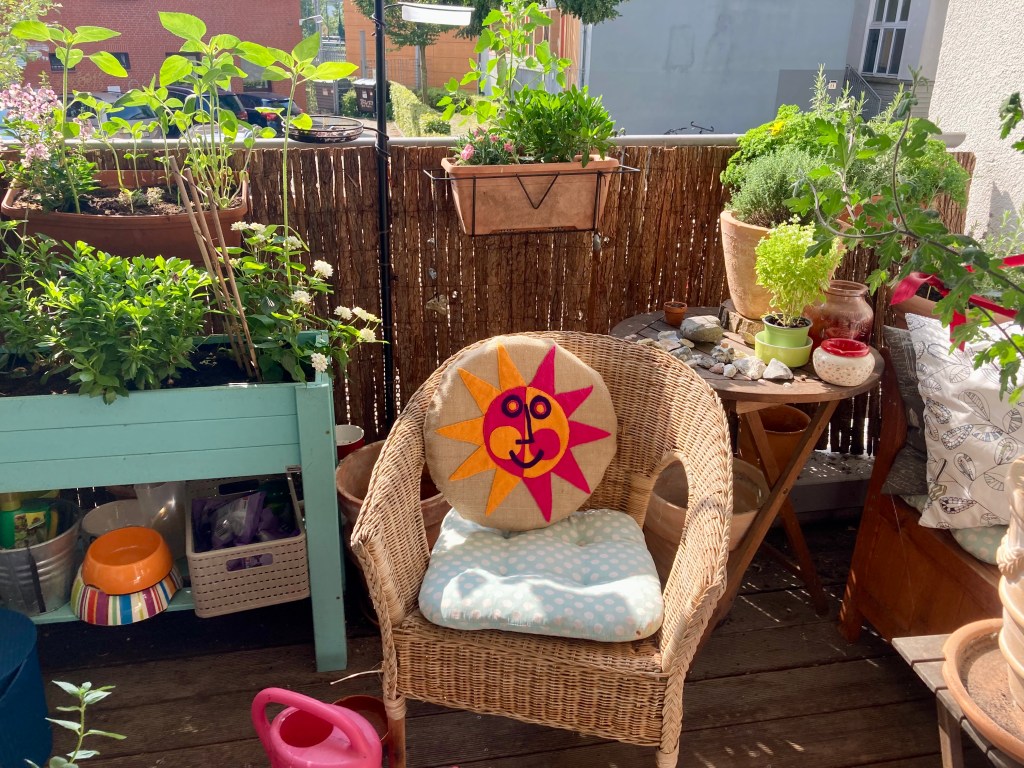
The June 1966 issue of Stitchcraft had multiple projects that interested me and the July 1966 issue not really any, so I made another project from the June issue this July. It was one of those designs that I have been looking forward to for a long time and was thrilled to finally make it — a cushion “for sunny days in the Garden”. Very bright, very psychedelic (is this what Stitchcraft meant when they wrote “Get ready for High Summer”?) and very, very 60s! I love it! Here’s some music to listen to while you read this post!
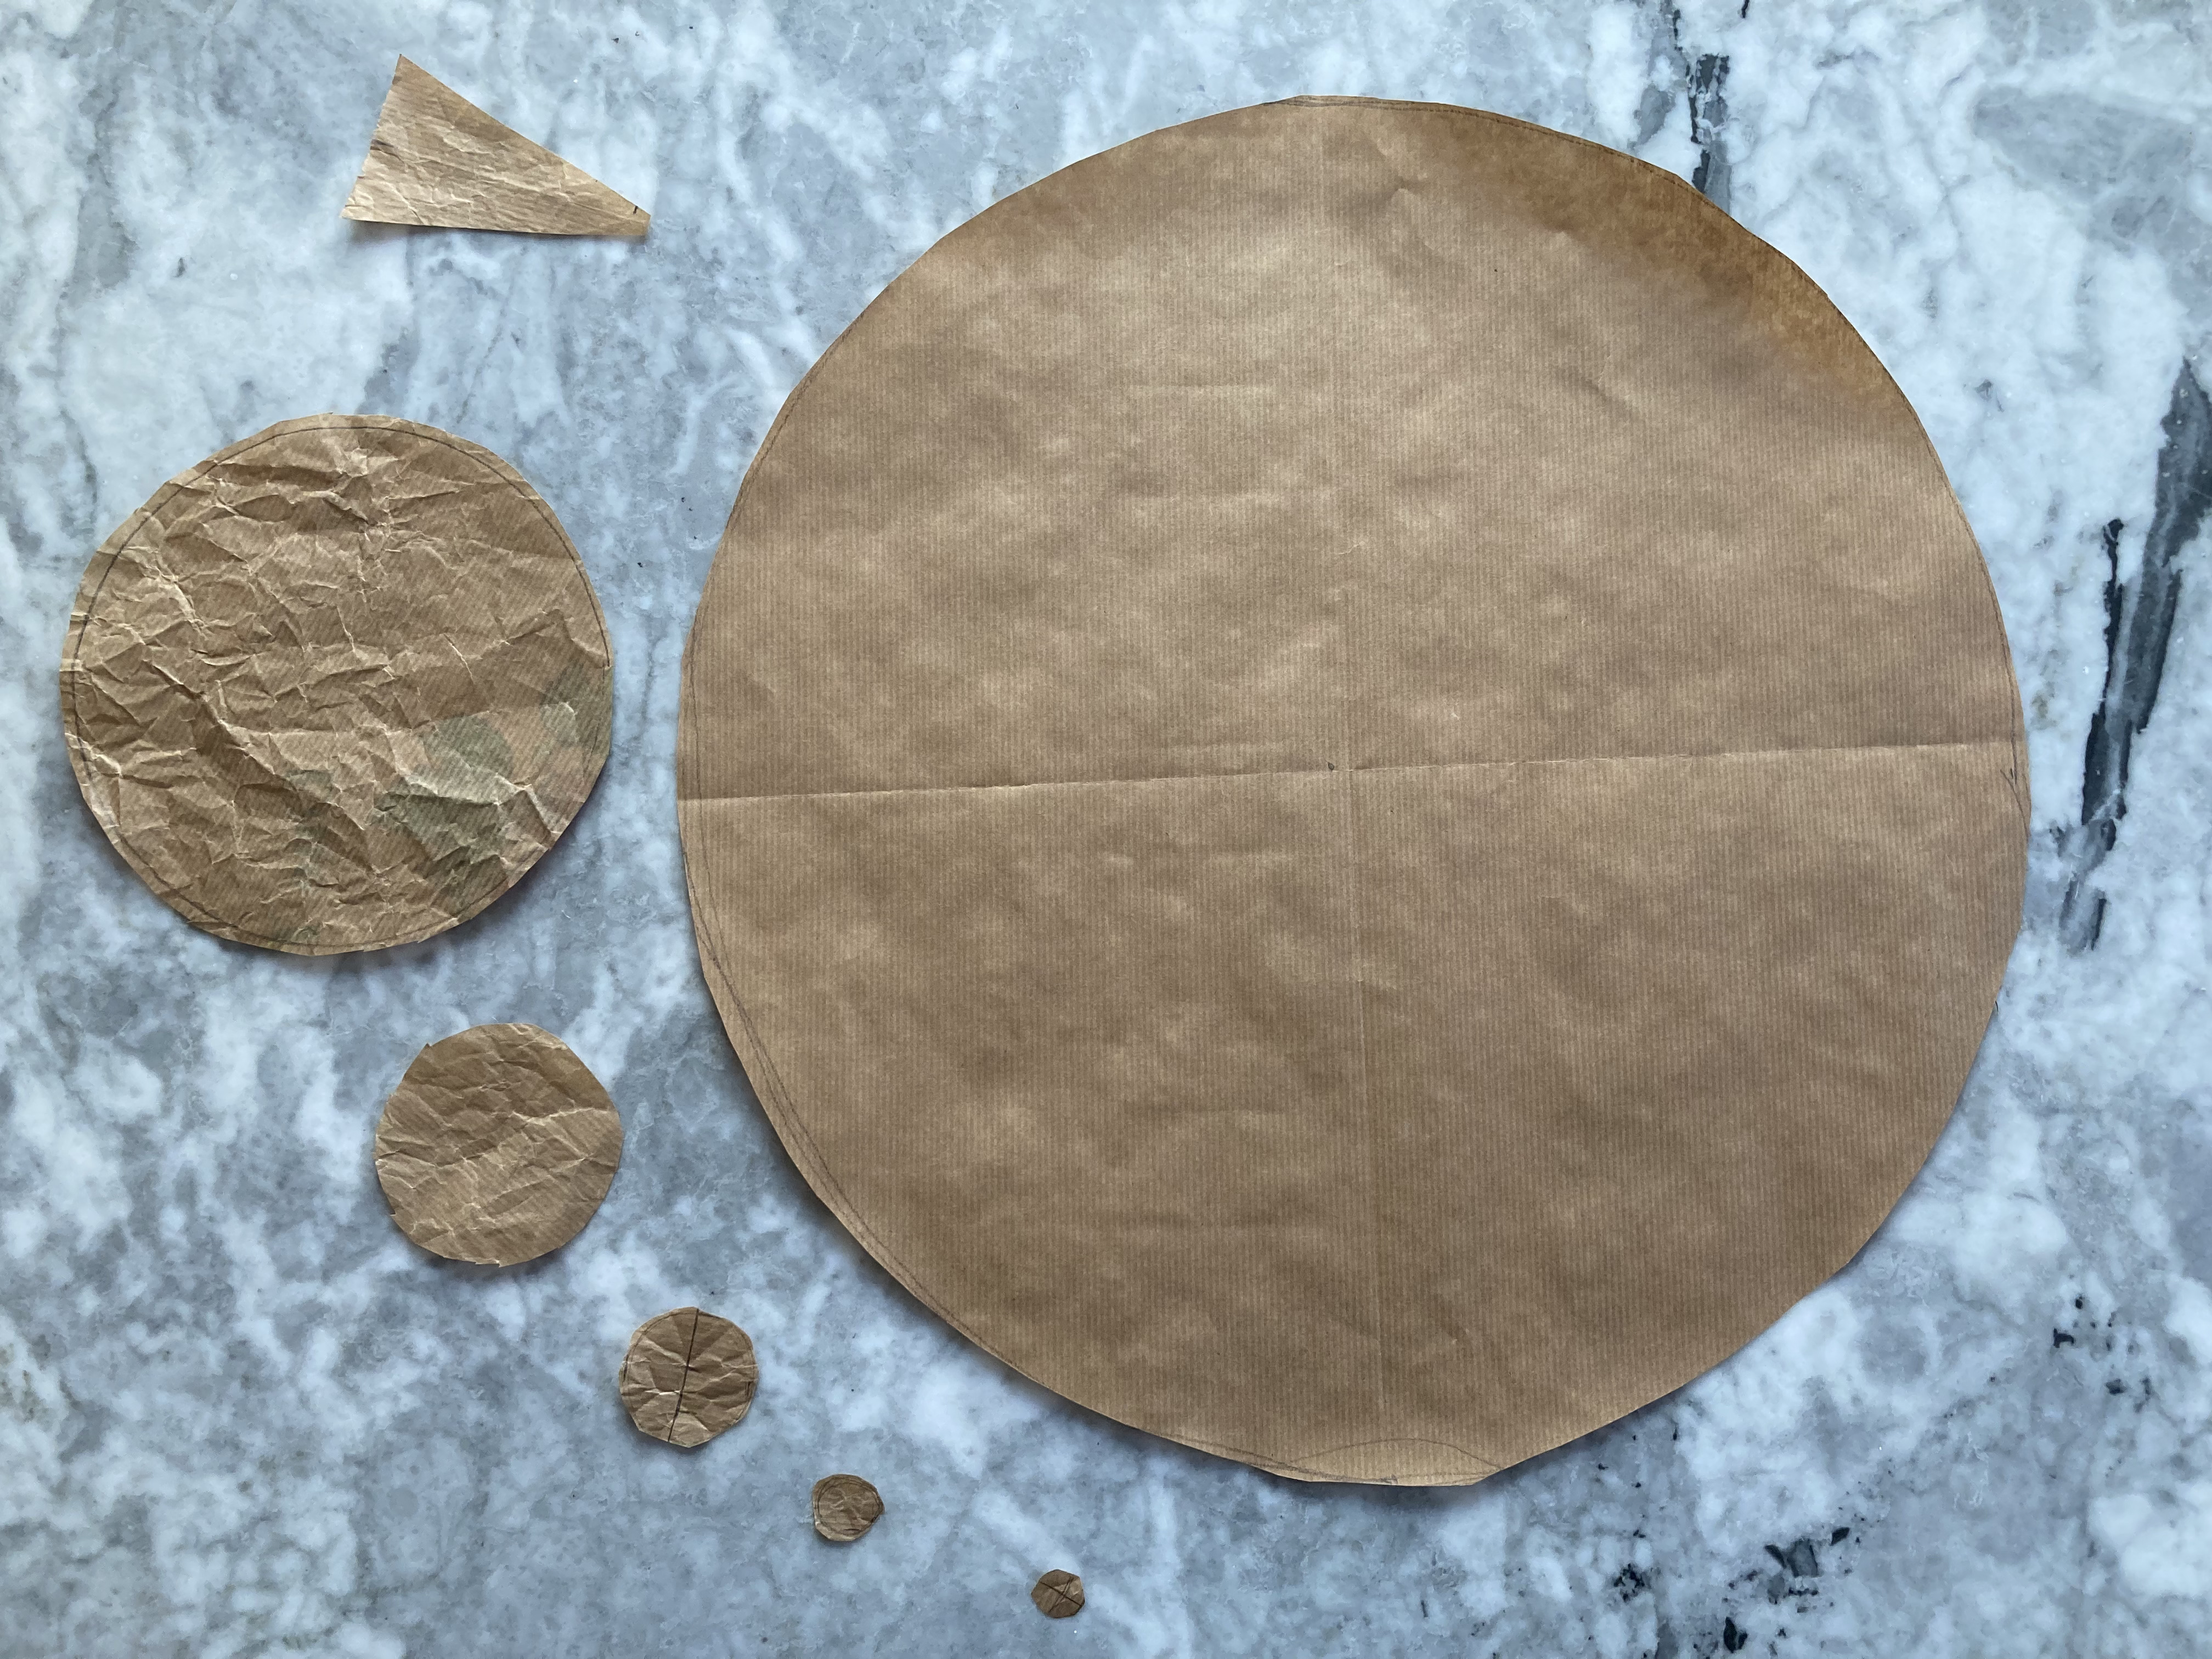
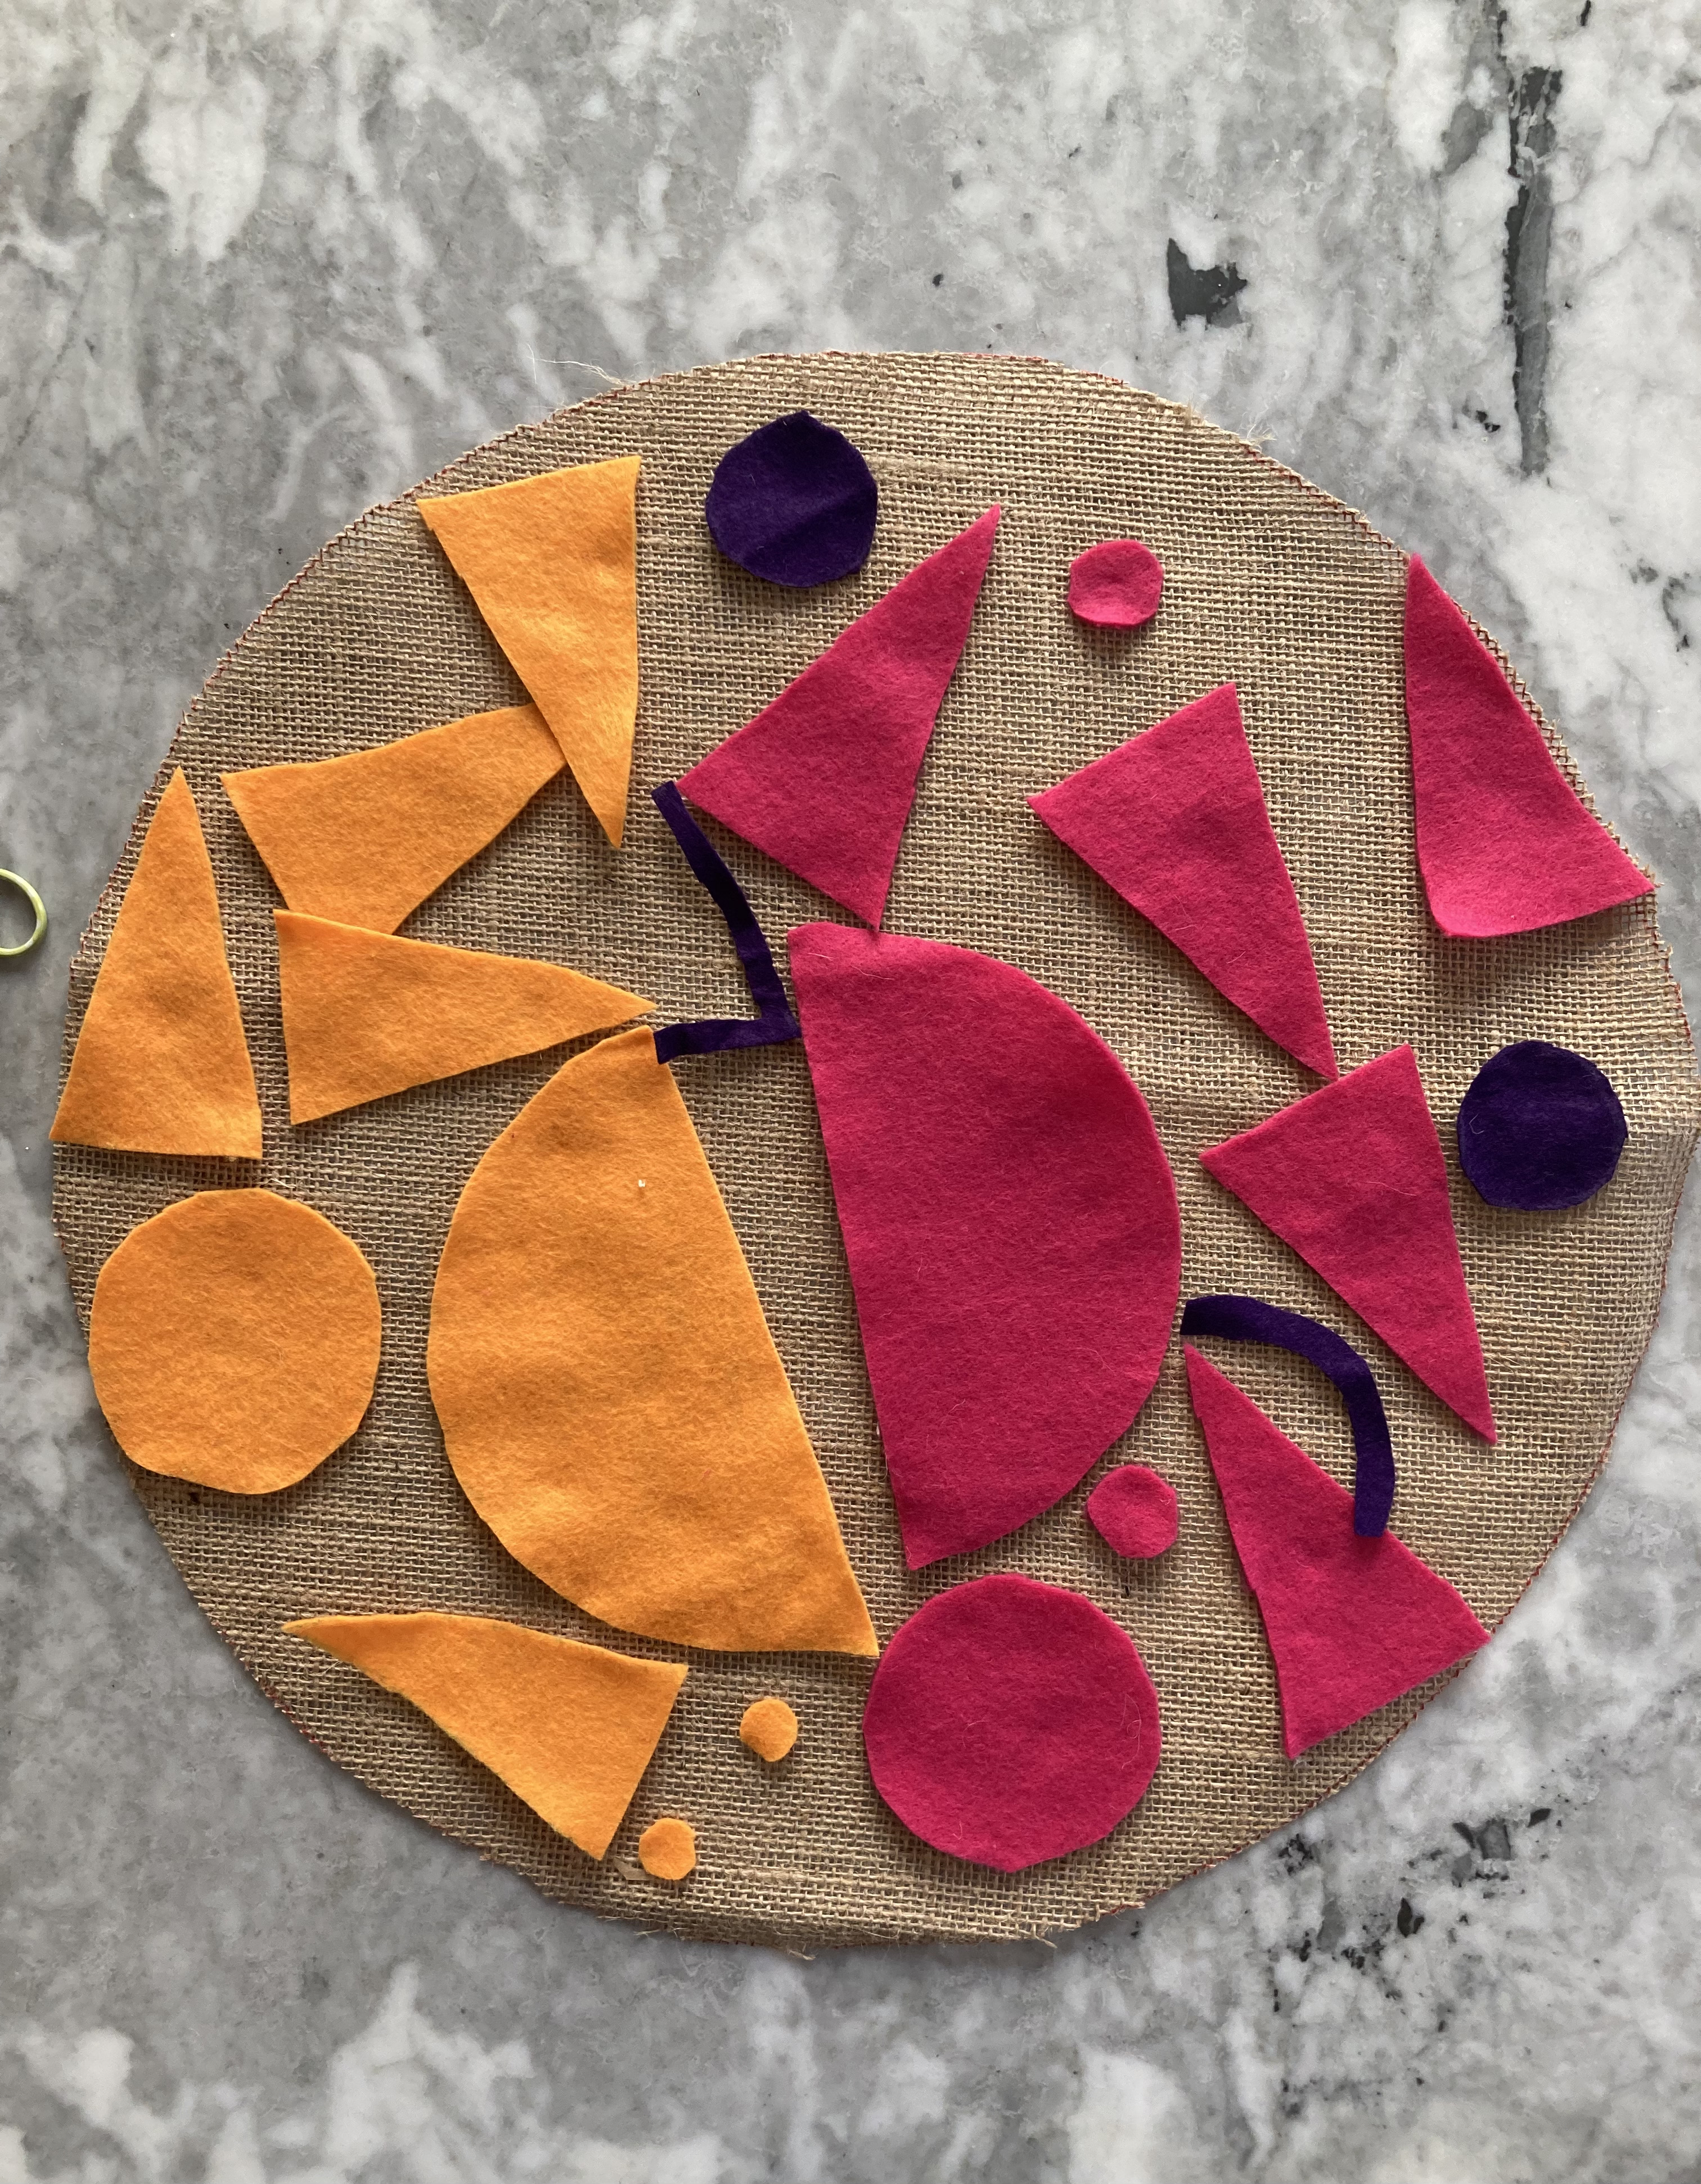
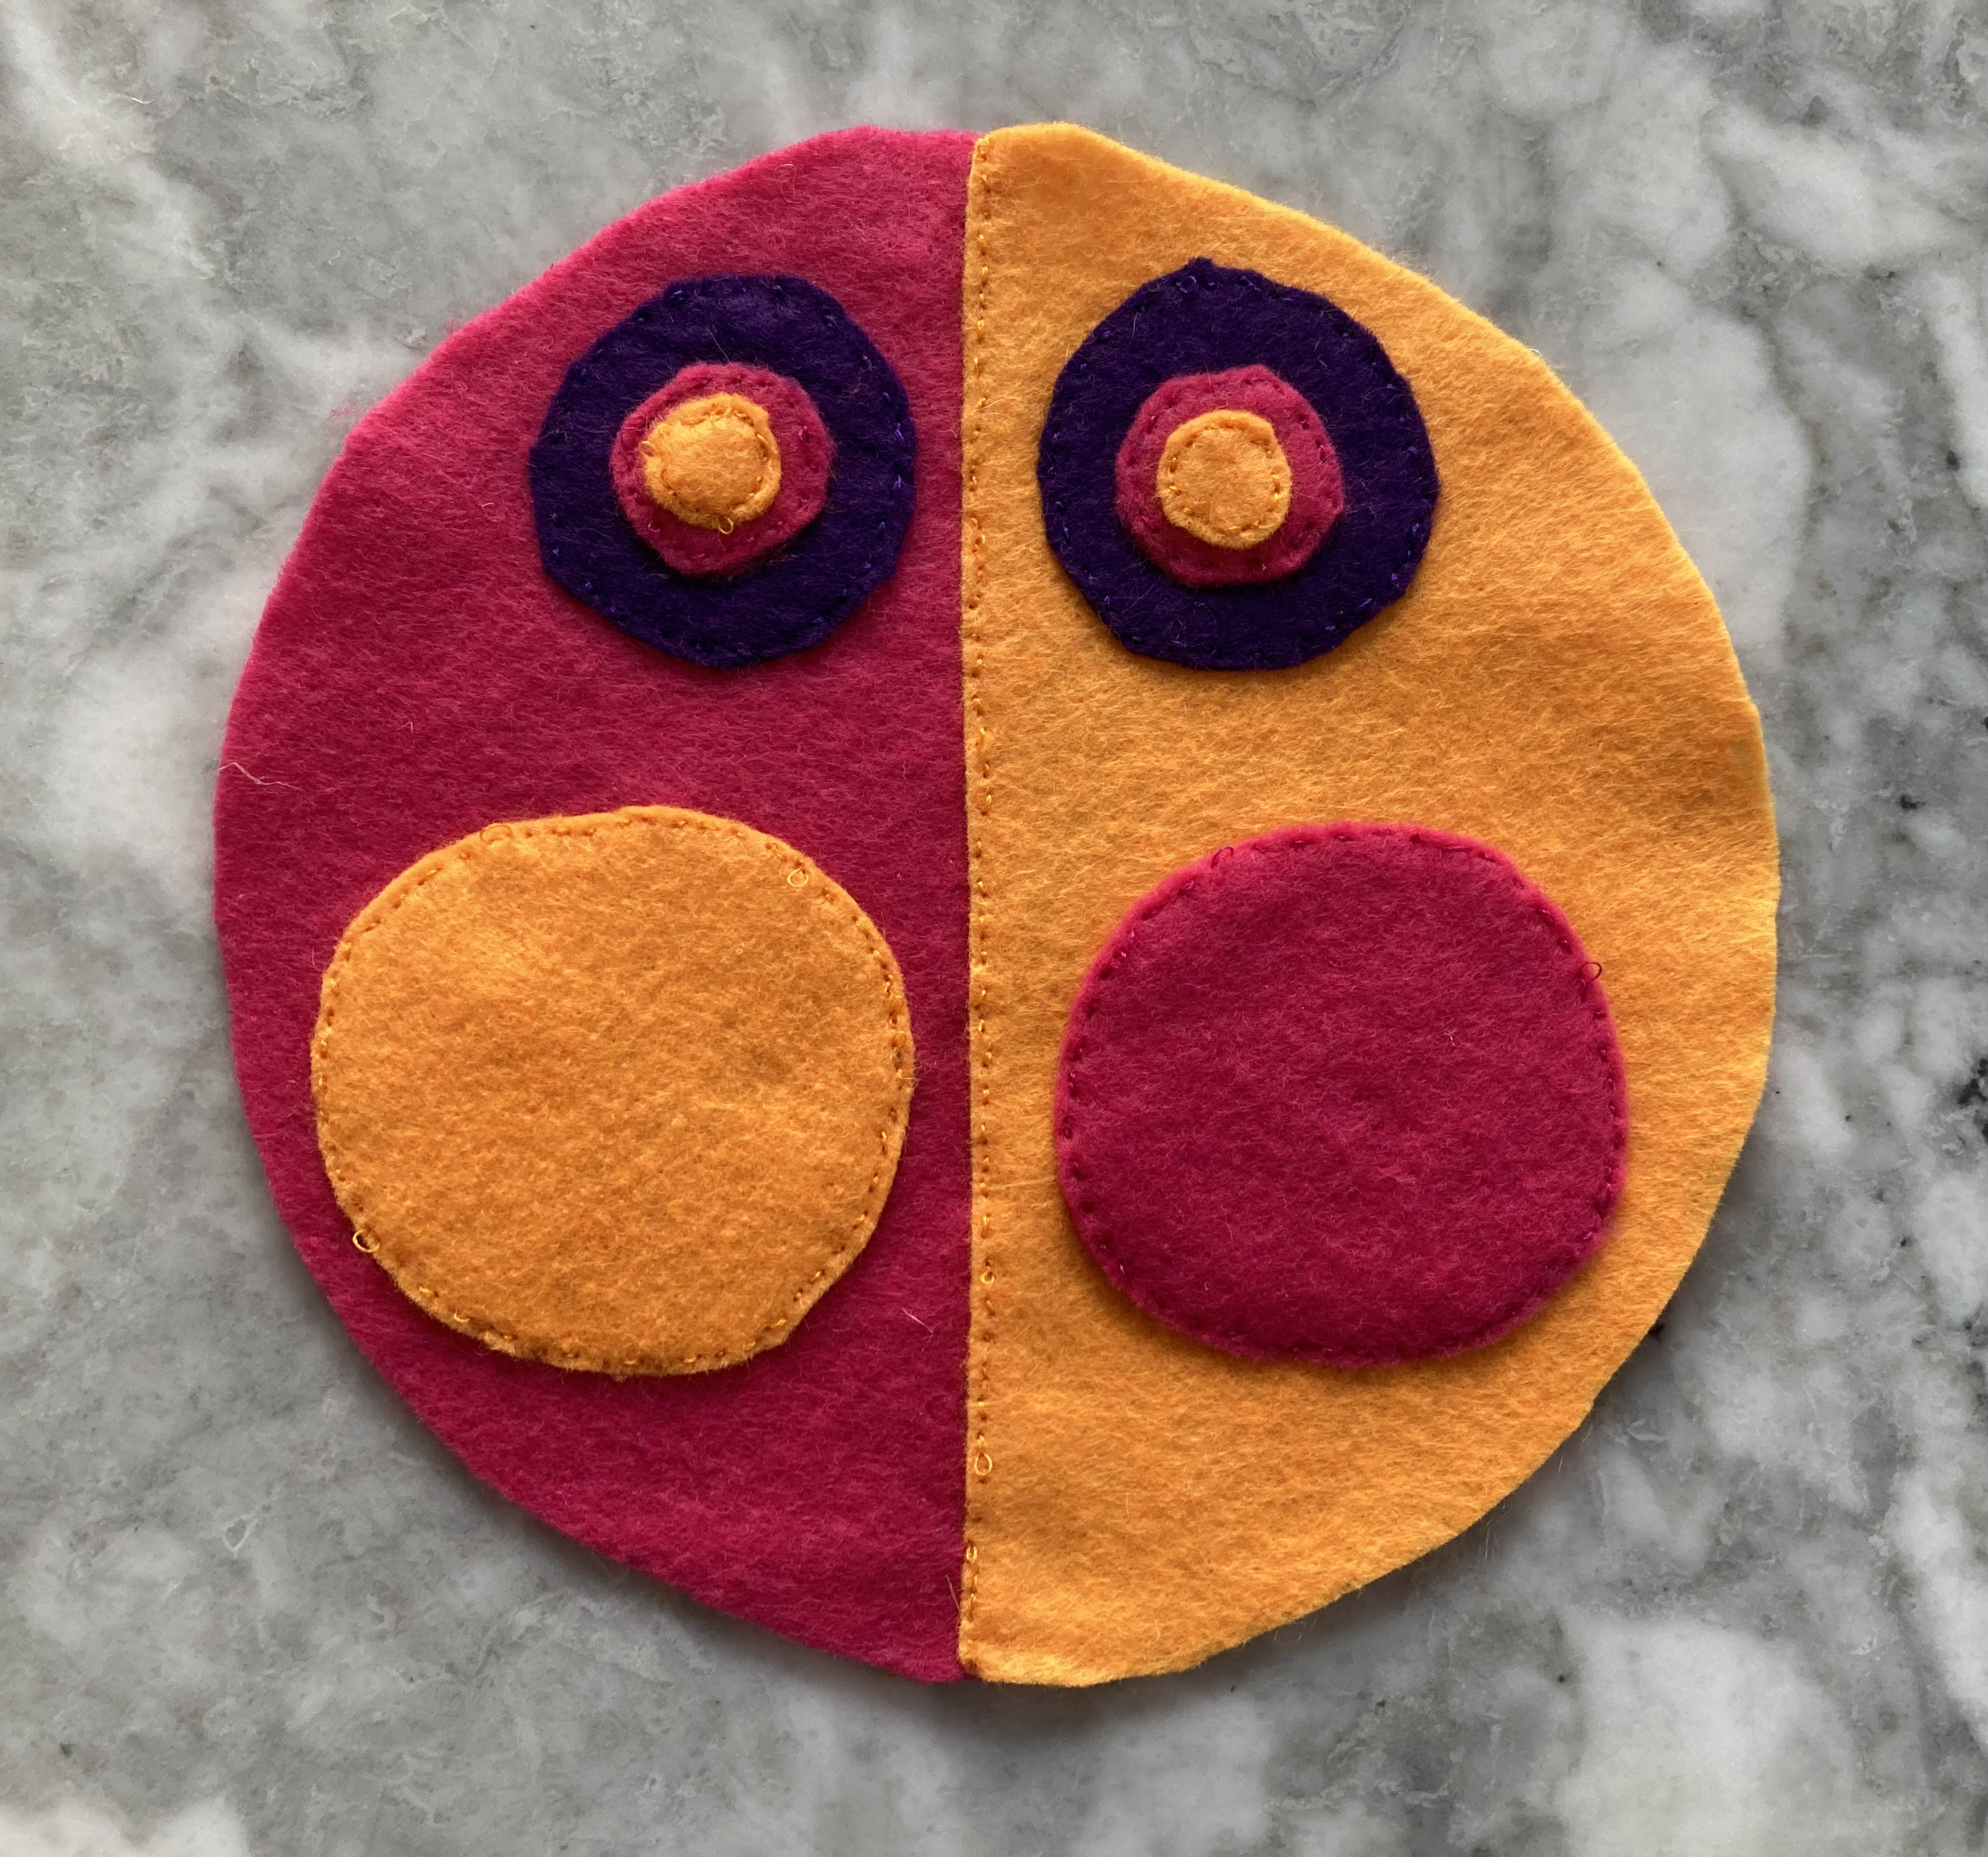
It’s made with felt appliqué on hessian fabric in orange and magenta with purple facial features. I really wish the magazine had a colour photograph. There was no need to send away for a transfer even at the time, as the dimensions of the cut-out circles and wedges are clearly described in the instructions and there’s a little schematic in the back pages to help. You simply cut paper patterns for circles in different diameters (7 cut in half, then 3, 1 1/4, 3/4 and 1/2 inches), plus a long triangle wedge pattern (3 1/2 inches long by2 1/2 inches wide at the base). The measurements of mouth and nose are described carefully as well, and there you have it. Here are my paper patterns, arranged to look like a spaceship entering a very well-organised solar system, and the cut-out felts, arranged to look like a 1980s new-wave pizza.
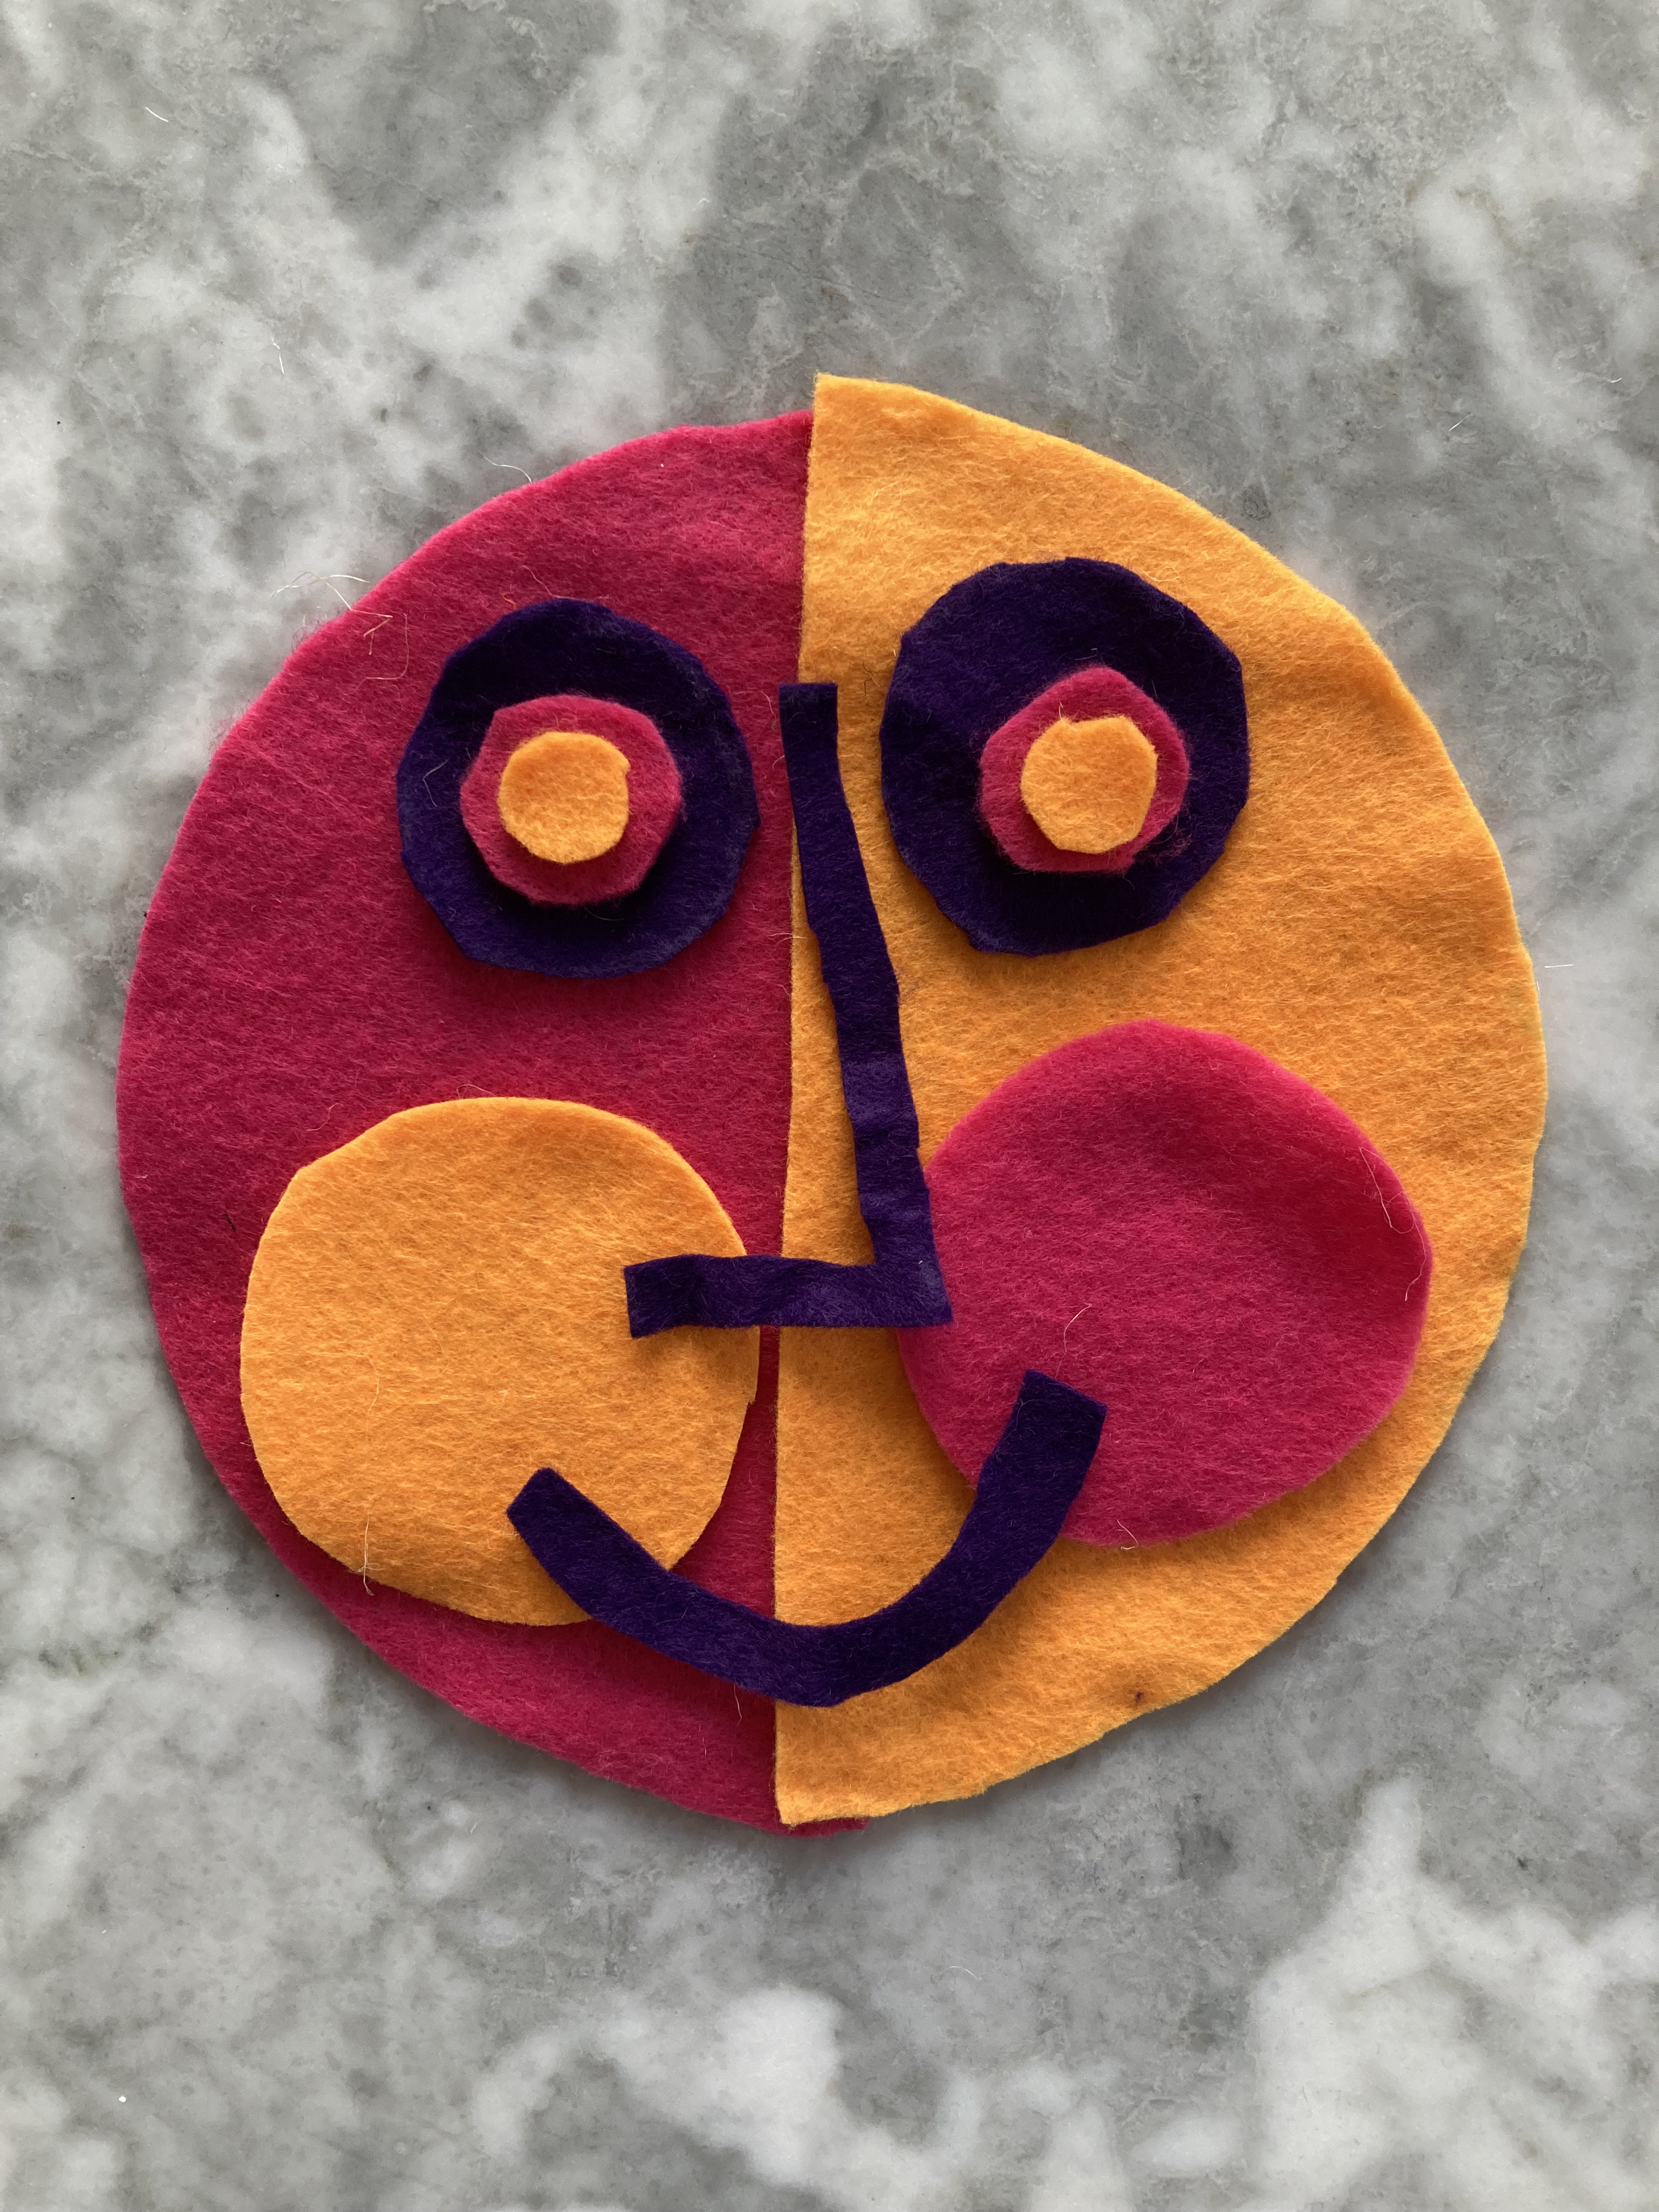
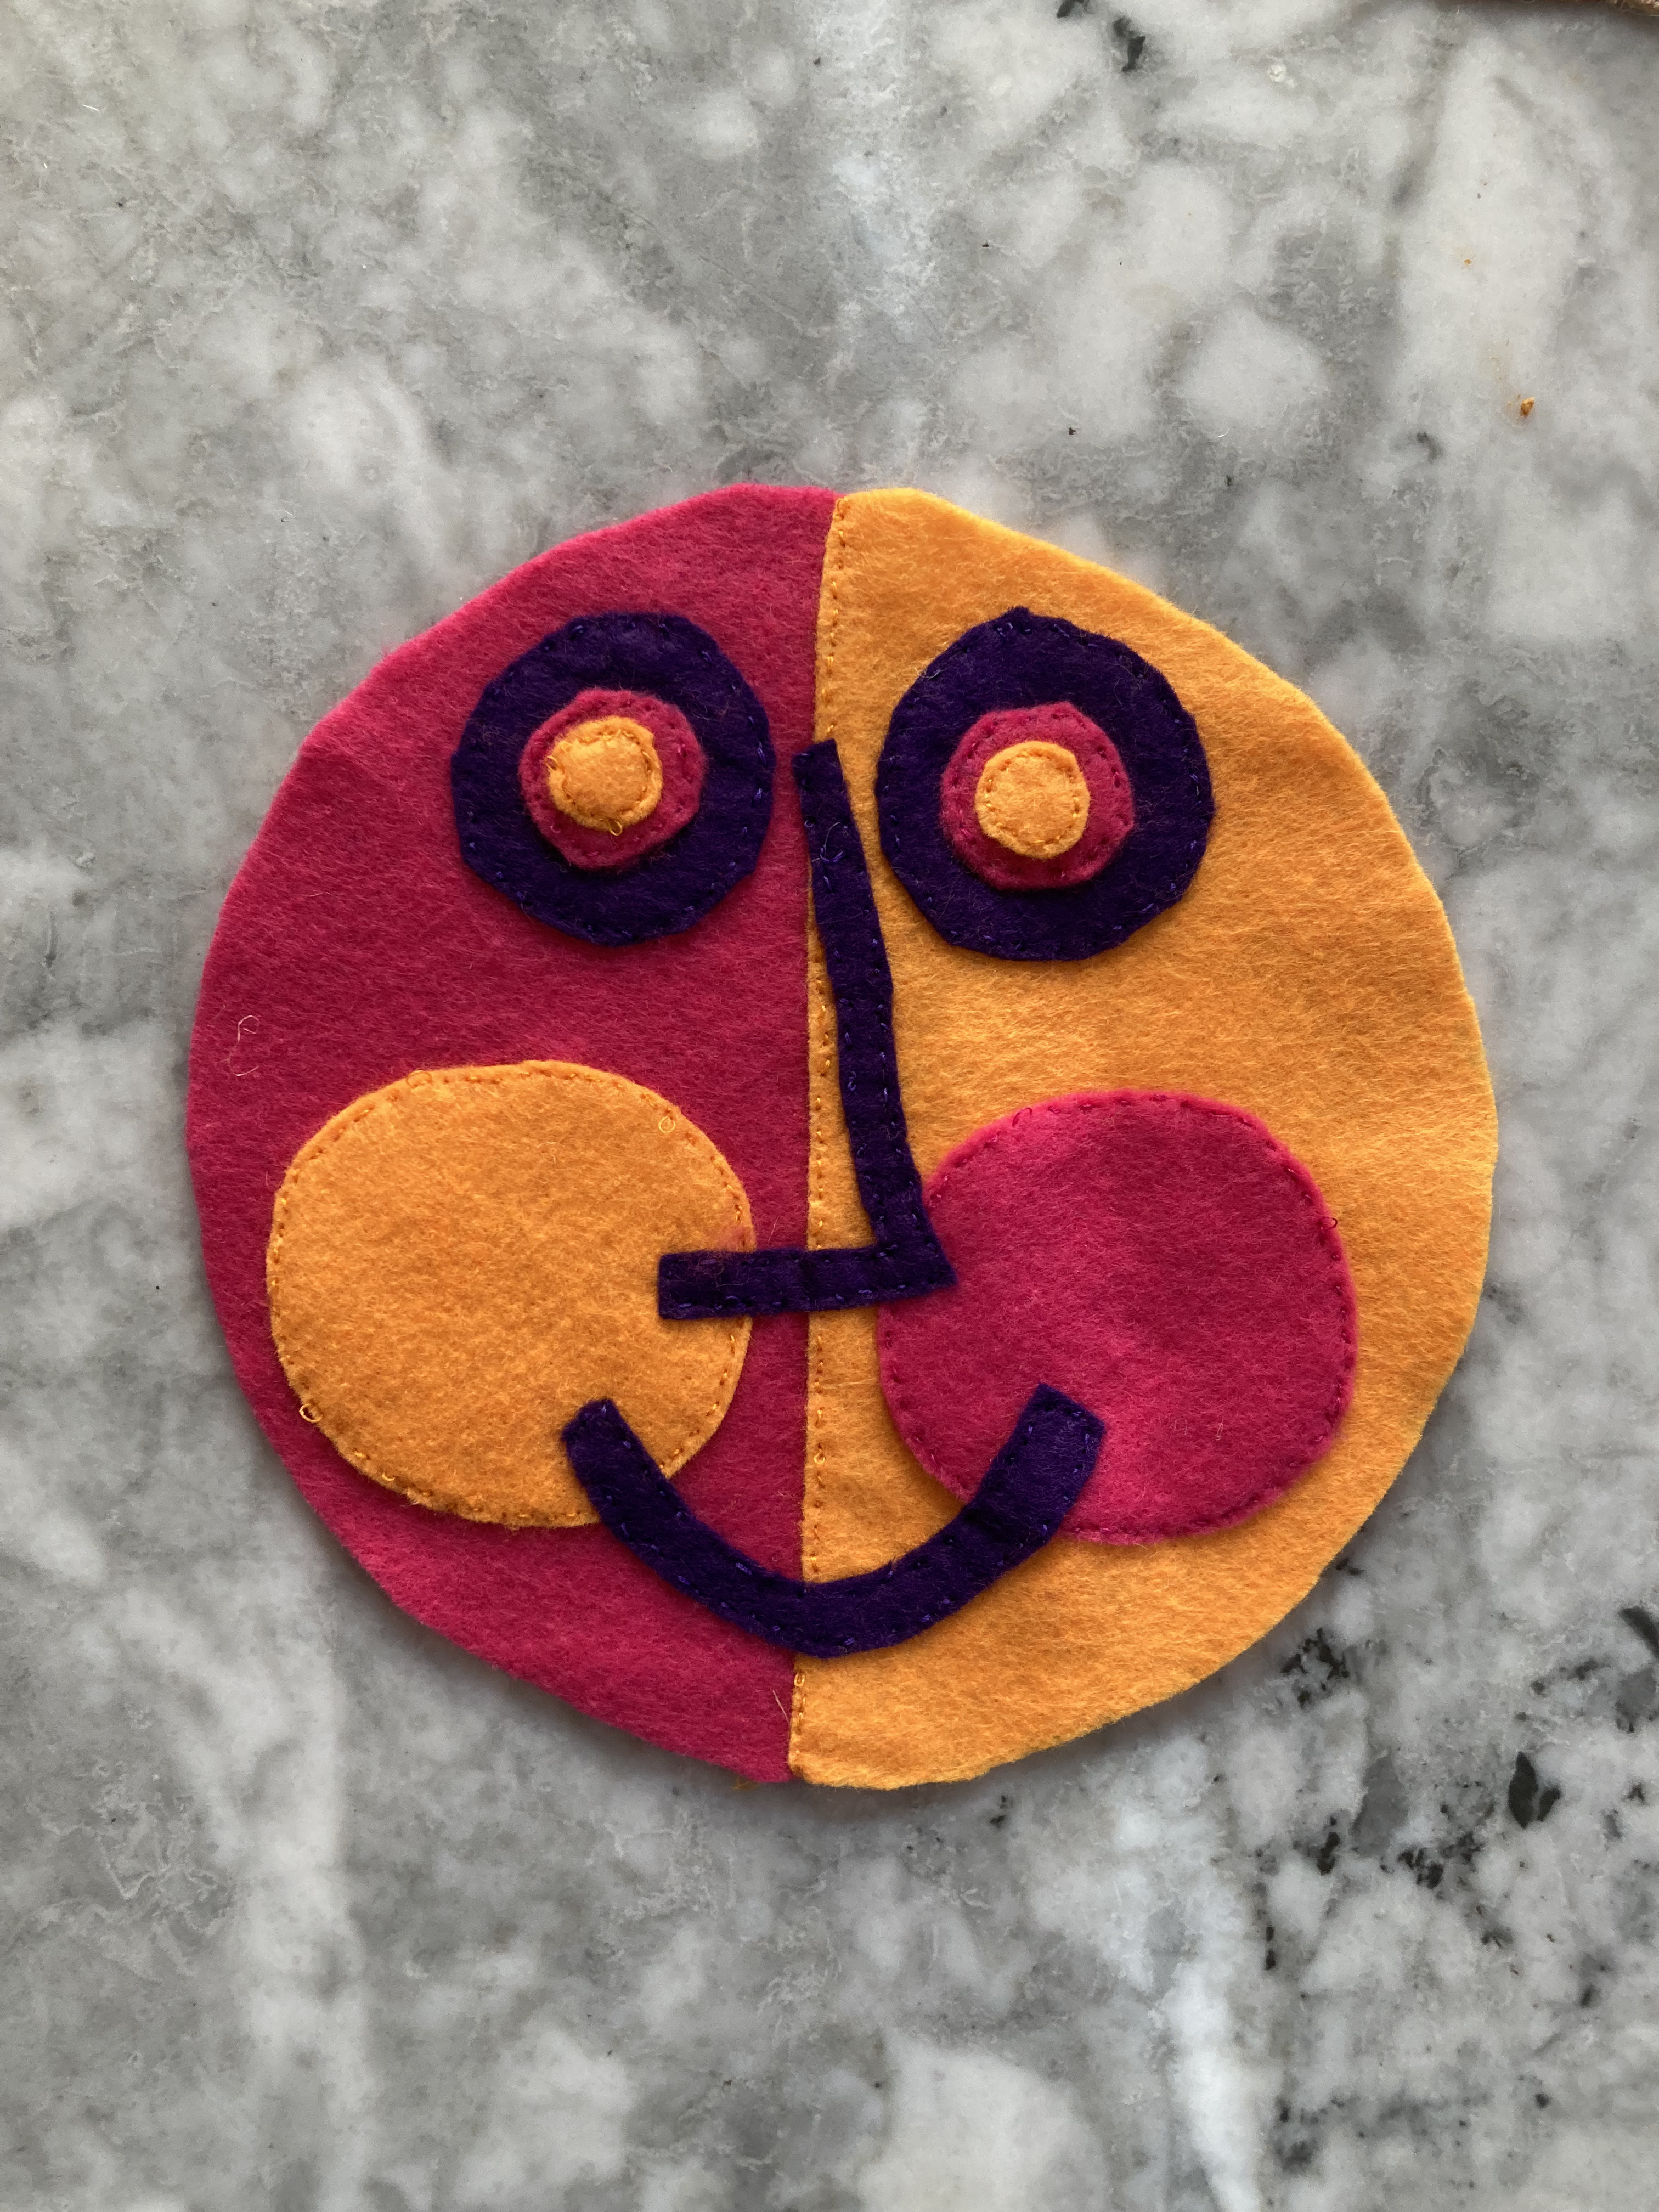
The appliqué is supposed to be done on the machine. I weighed the time factor of stitching by hand versus the bother factor of making bobbins in 3 colours that I would not otherwise use and switching them out constantly, and decided to stitch the felts on by hand with a small back-stitch. It was actually quite relaxing and probably didn’t take a whole lot longer than if I had dome it on the machine.
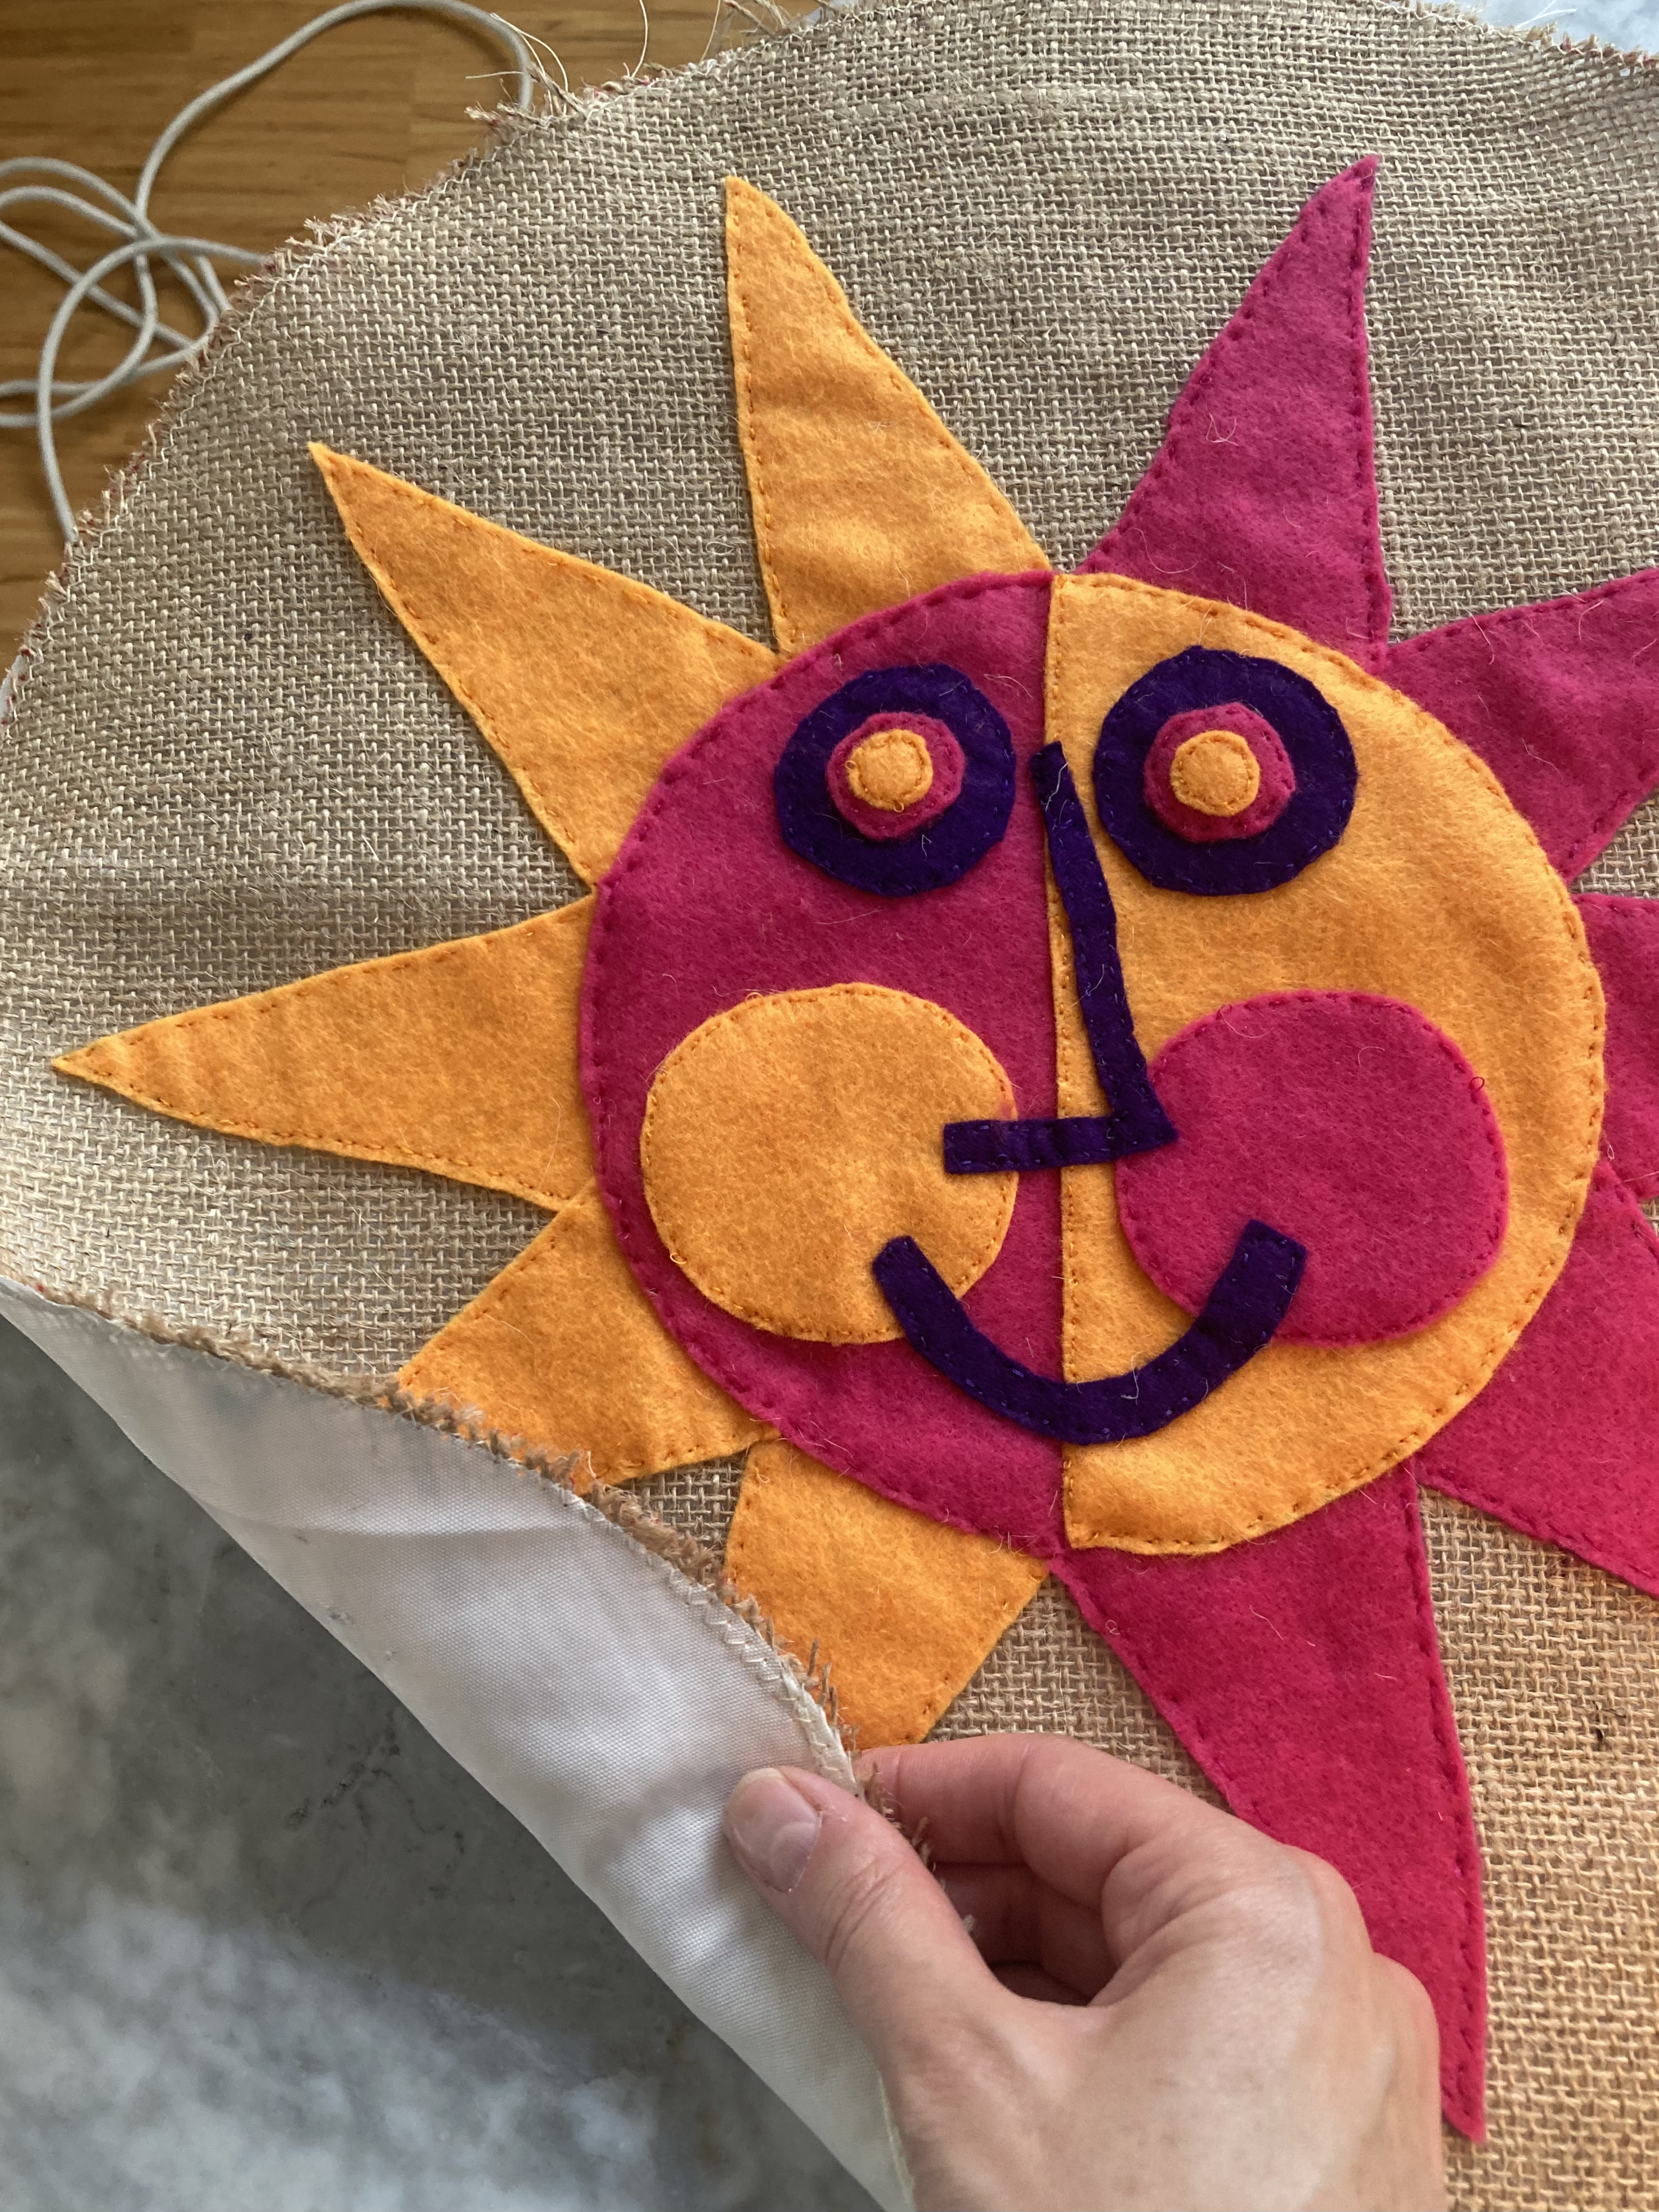
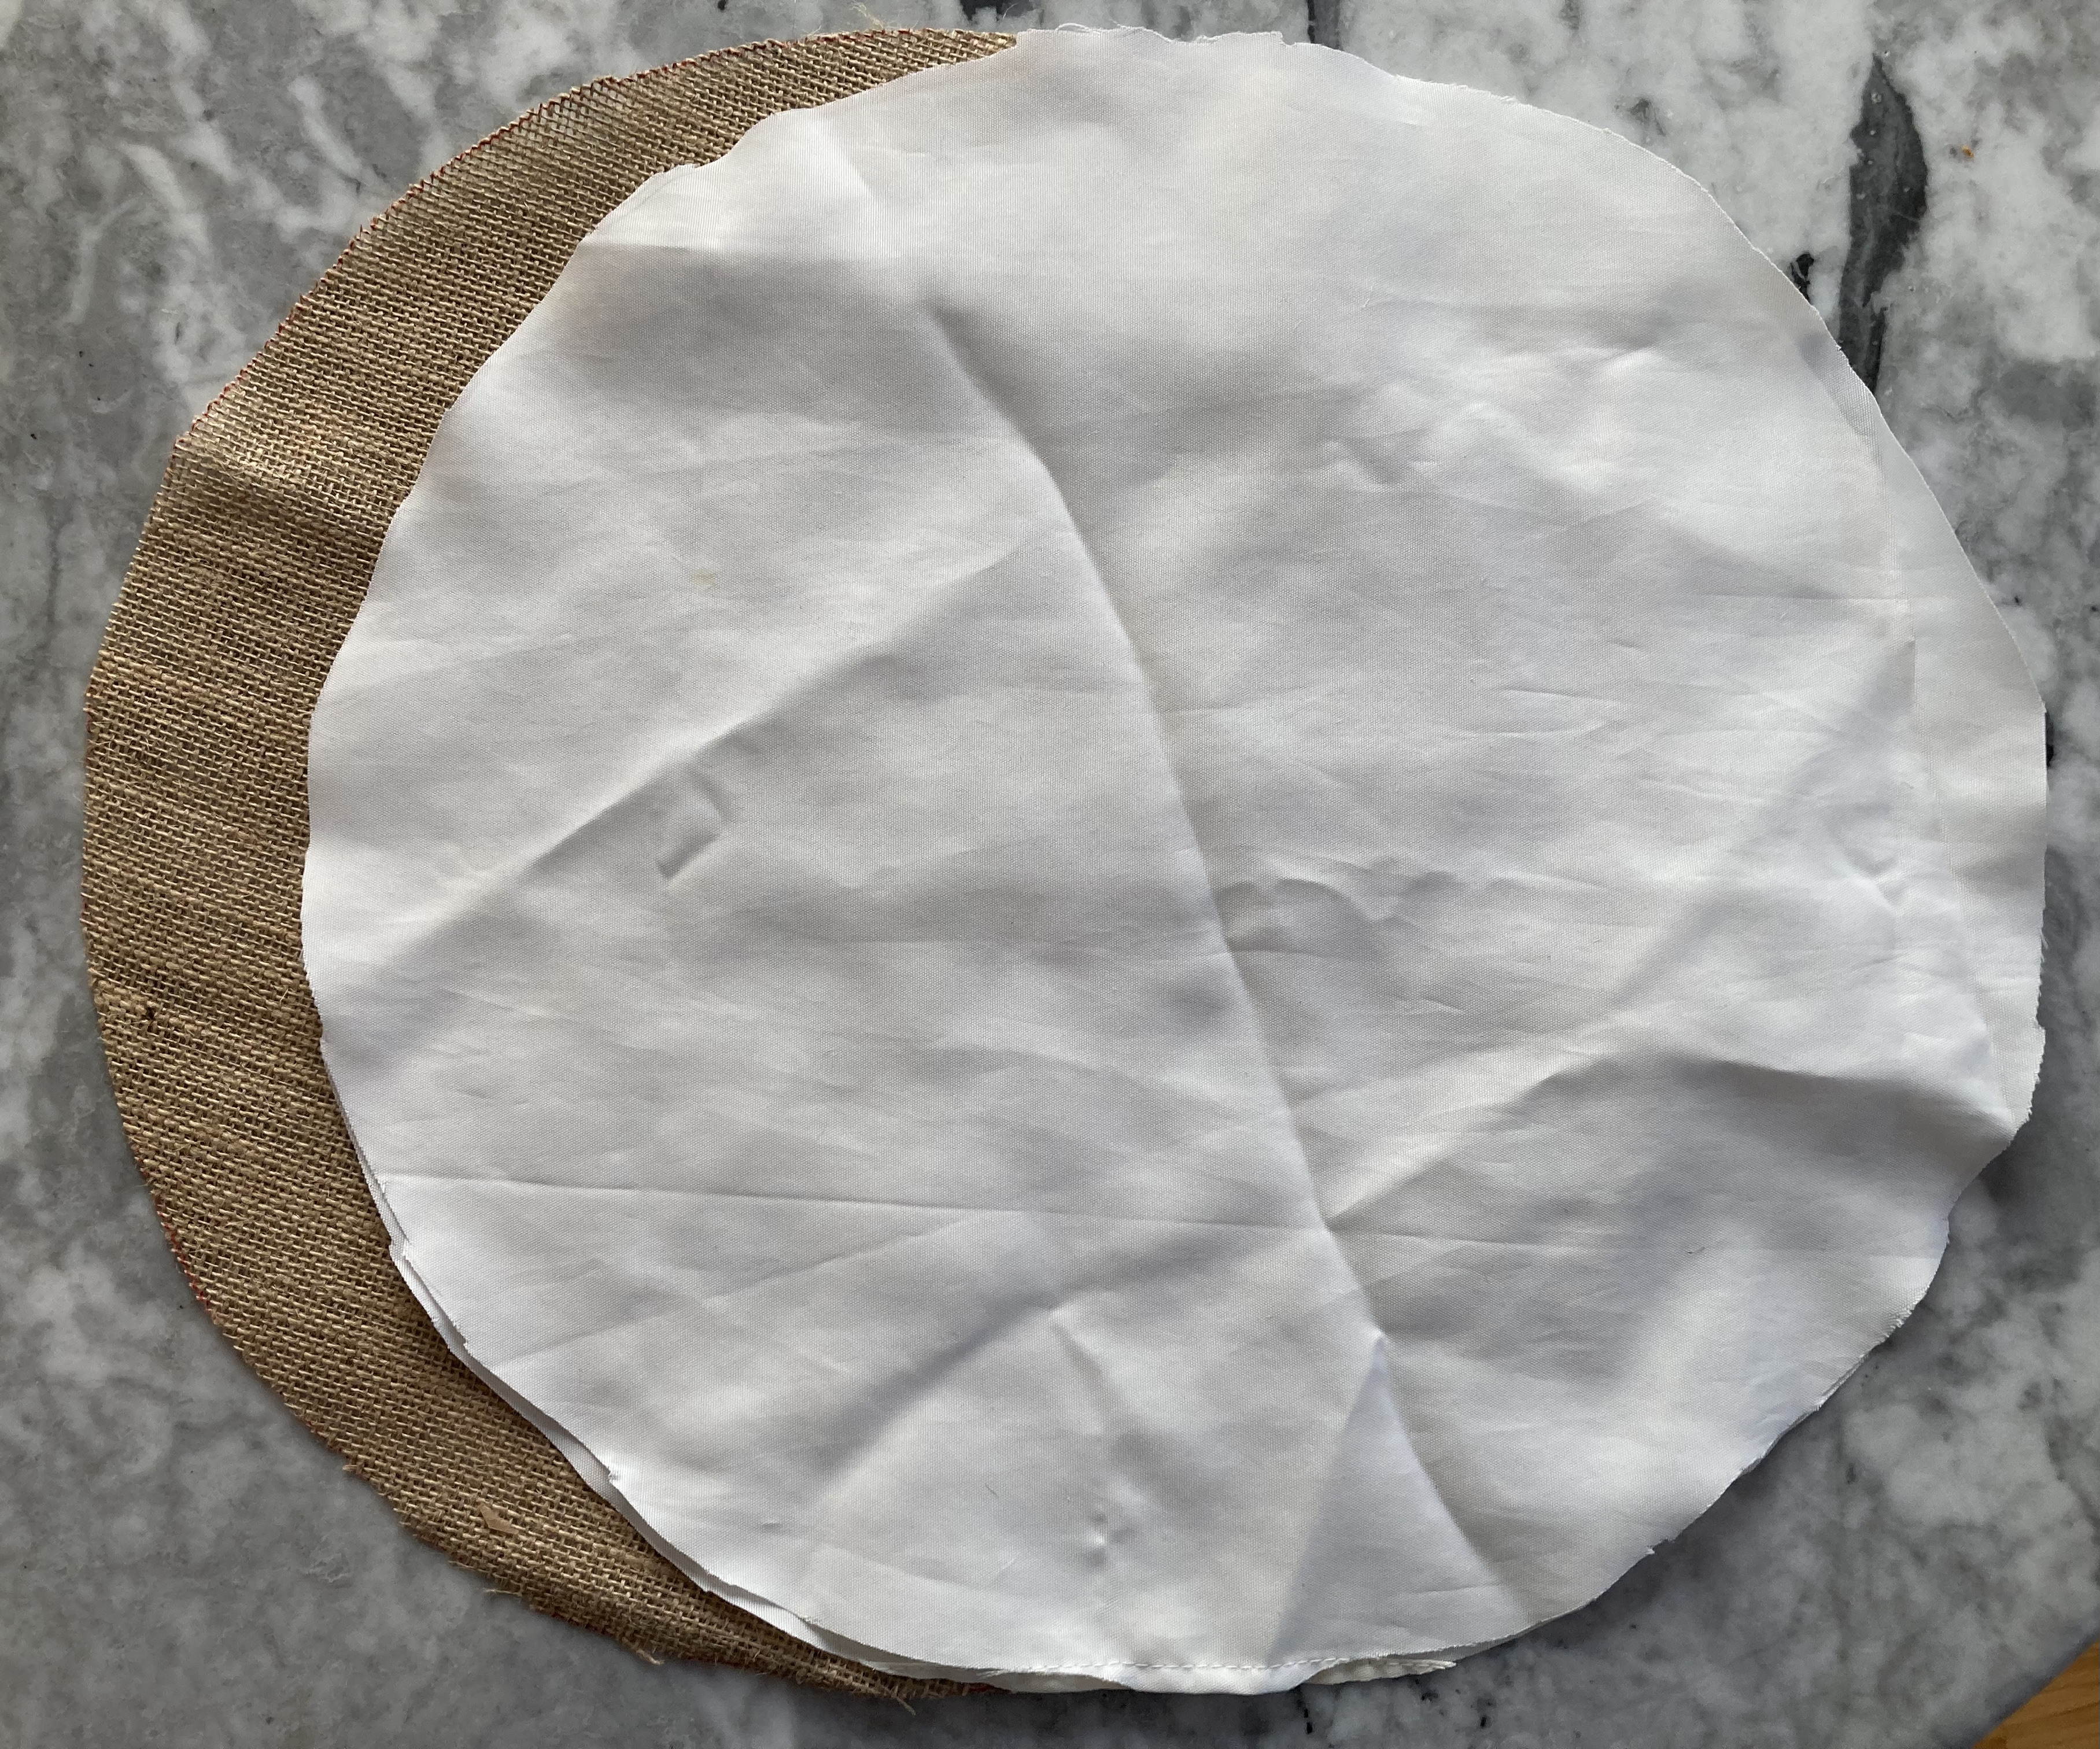
The hessian background is 17 inches in diameter. You were supposed to use a contrasting linen for the back piece, but I had plenty of hessian and no suitable backing linen, so I made both sides in hessian. Always the up-cycler, I also finally had a use for the old (well-cleaned) shower curtain in the craft drawer. I flat-lined the hessian with it, making the background fabric stronger and less see-through and, more importantly, protecting the inside of the cushion from getting damp in my rainy climate. Stitchcraft actually occasionally recommends lining “outdoor” projects with plastic in some other issues, and I had been looking forward to trying it out.
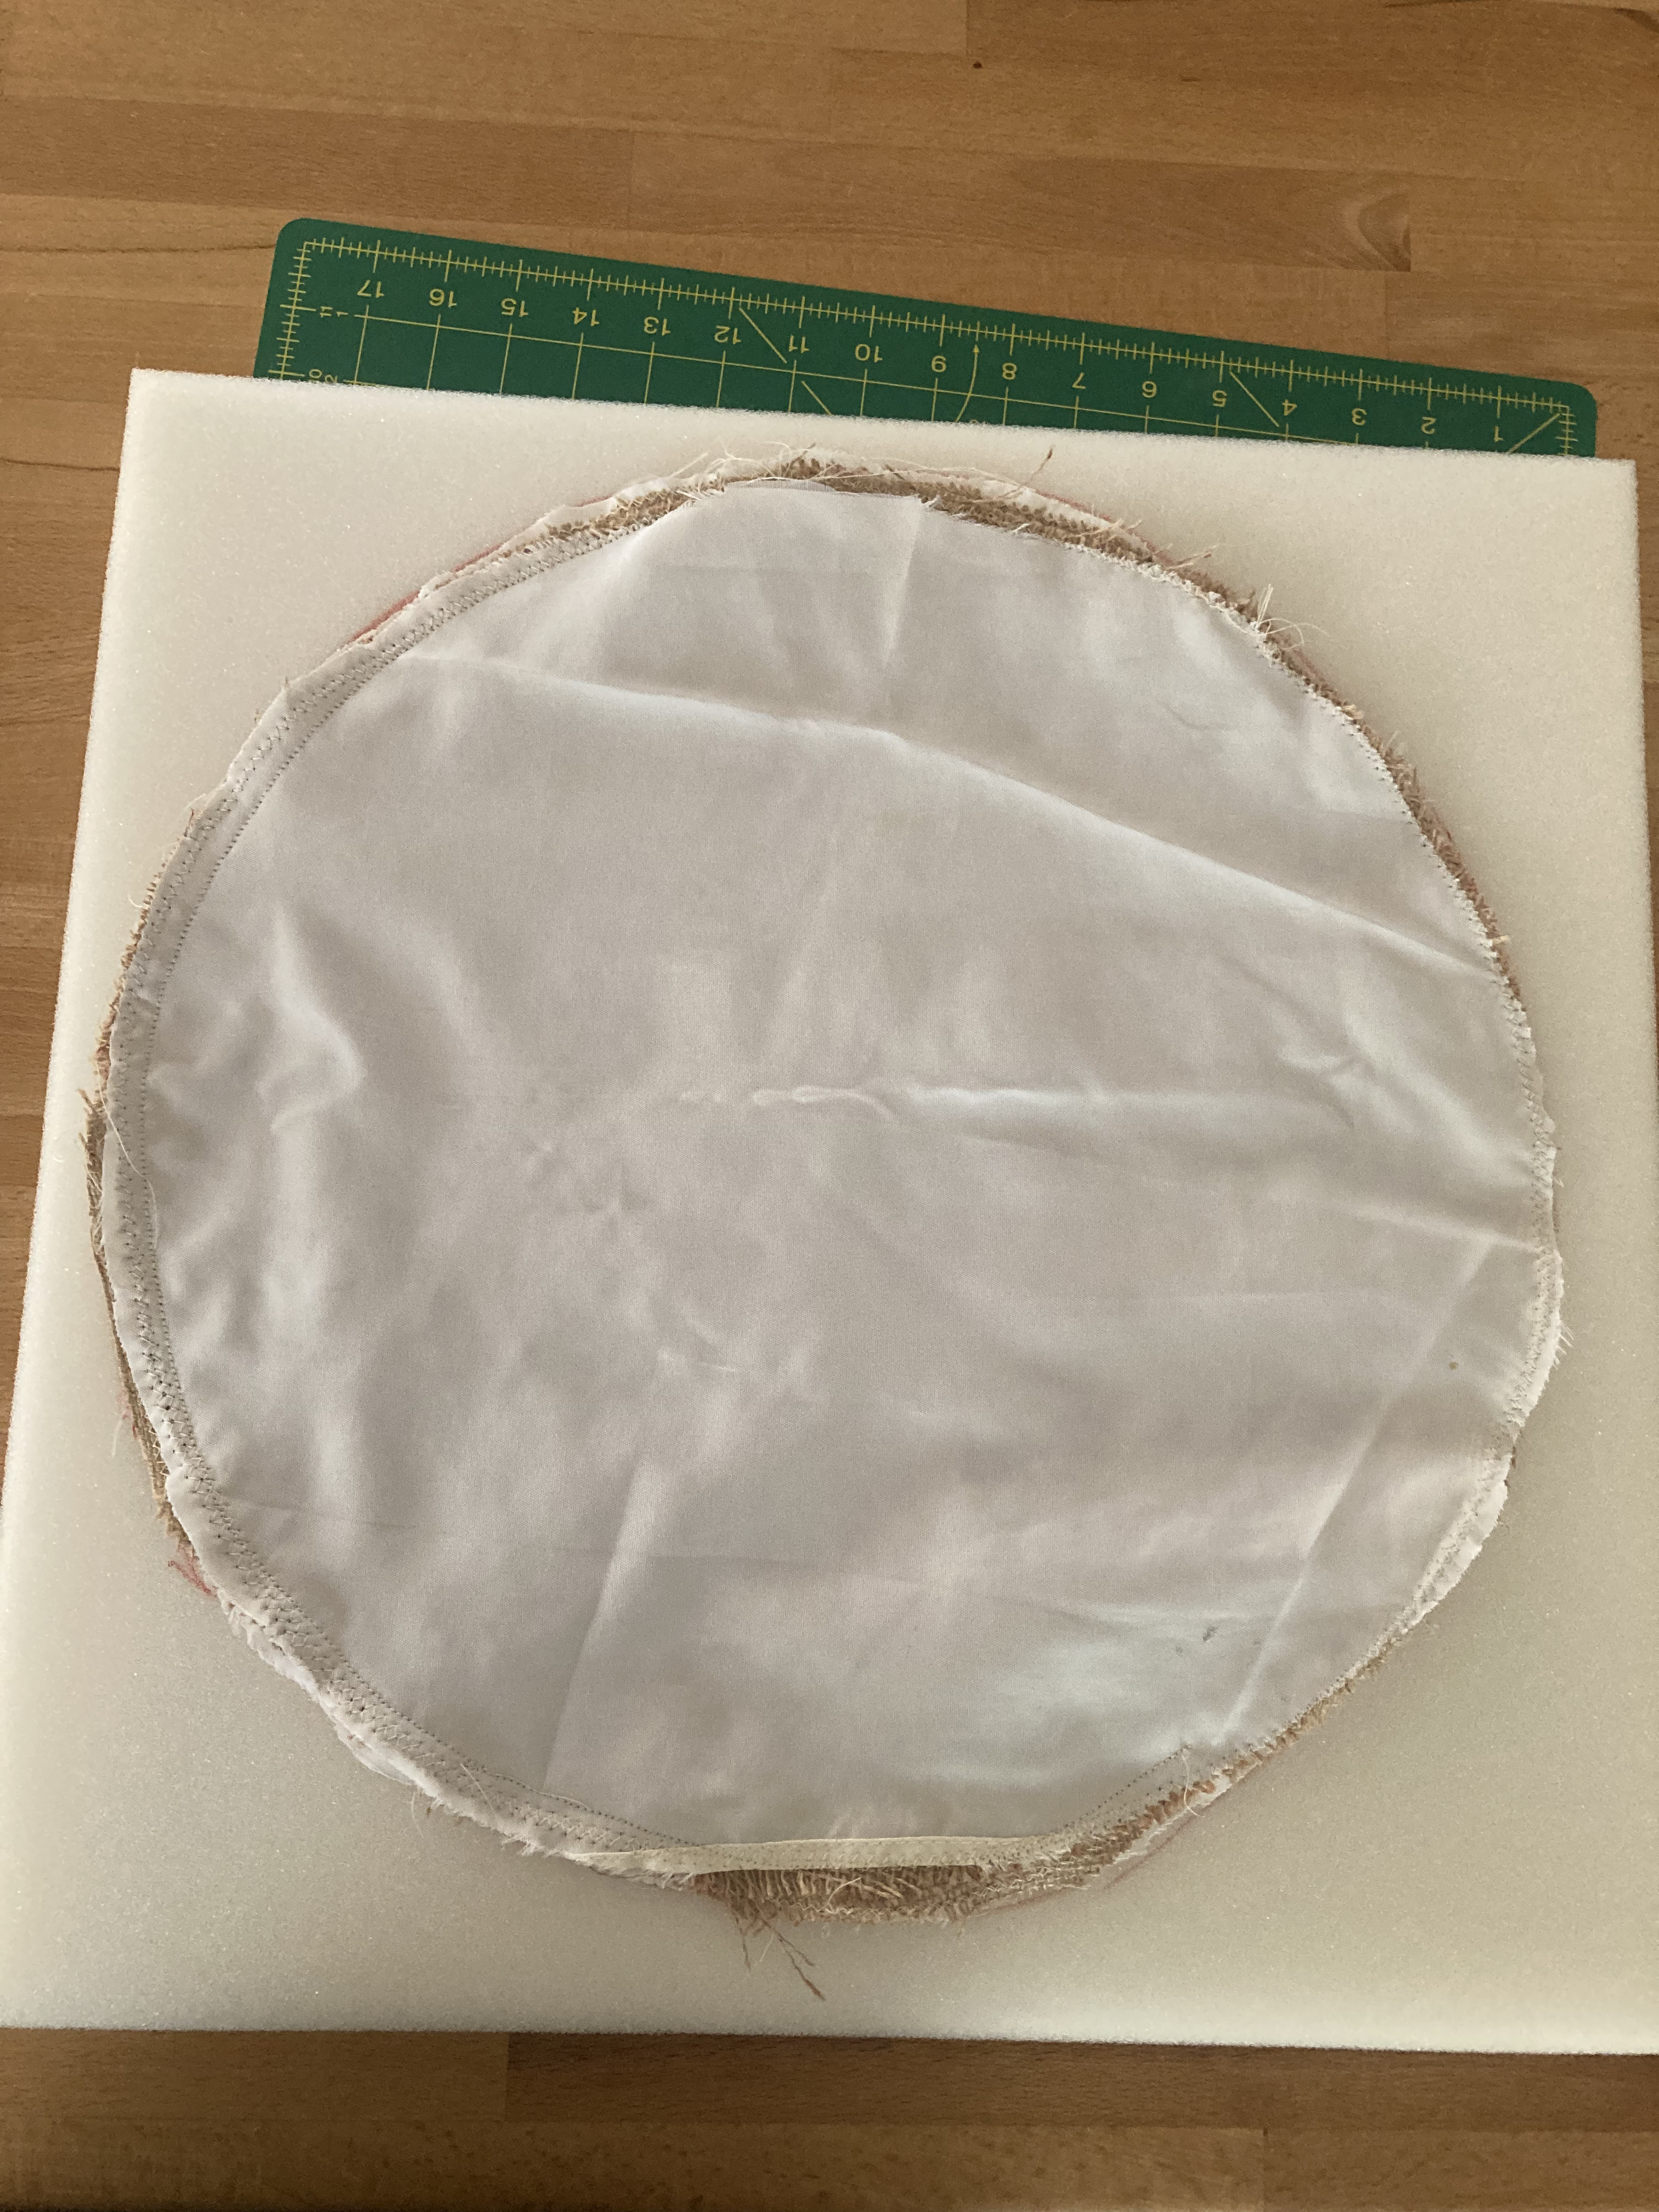
The inner pad is a piece of foam rubber that I ordered in a block and cut into a circle of the proper size with a carpet knife. It was not as easy to cut as I had imagined! I had to saw away at it quite a bit and the finished edge looked rather chewed, but it worked. As far as sewing it together… now, if I were really smart, of course I would have made the back circle in two pieces with an overlap in the middle, so the cushion would be removable. (It didn’t say to do that in the instructions, but it would have been smart!) Alas, I did not think of that option in time, so I kept the opening as small as possible and sewed it up by hand after putting the foam cushion in.
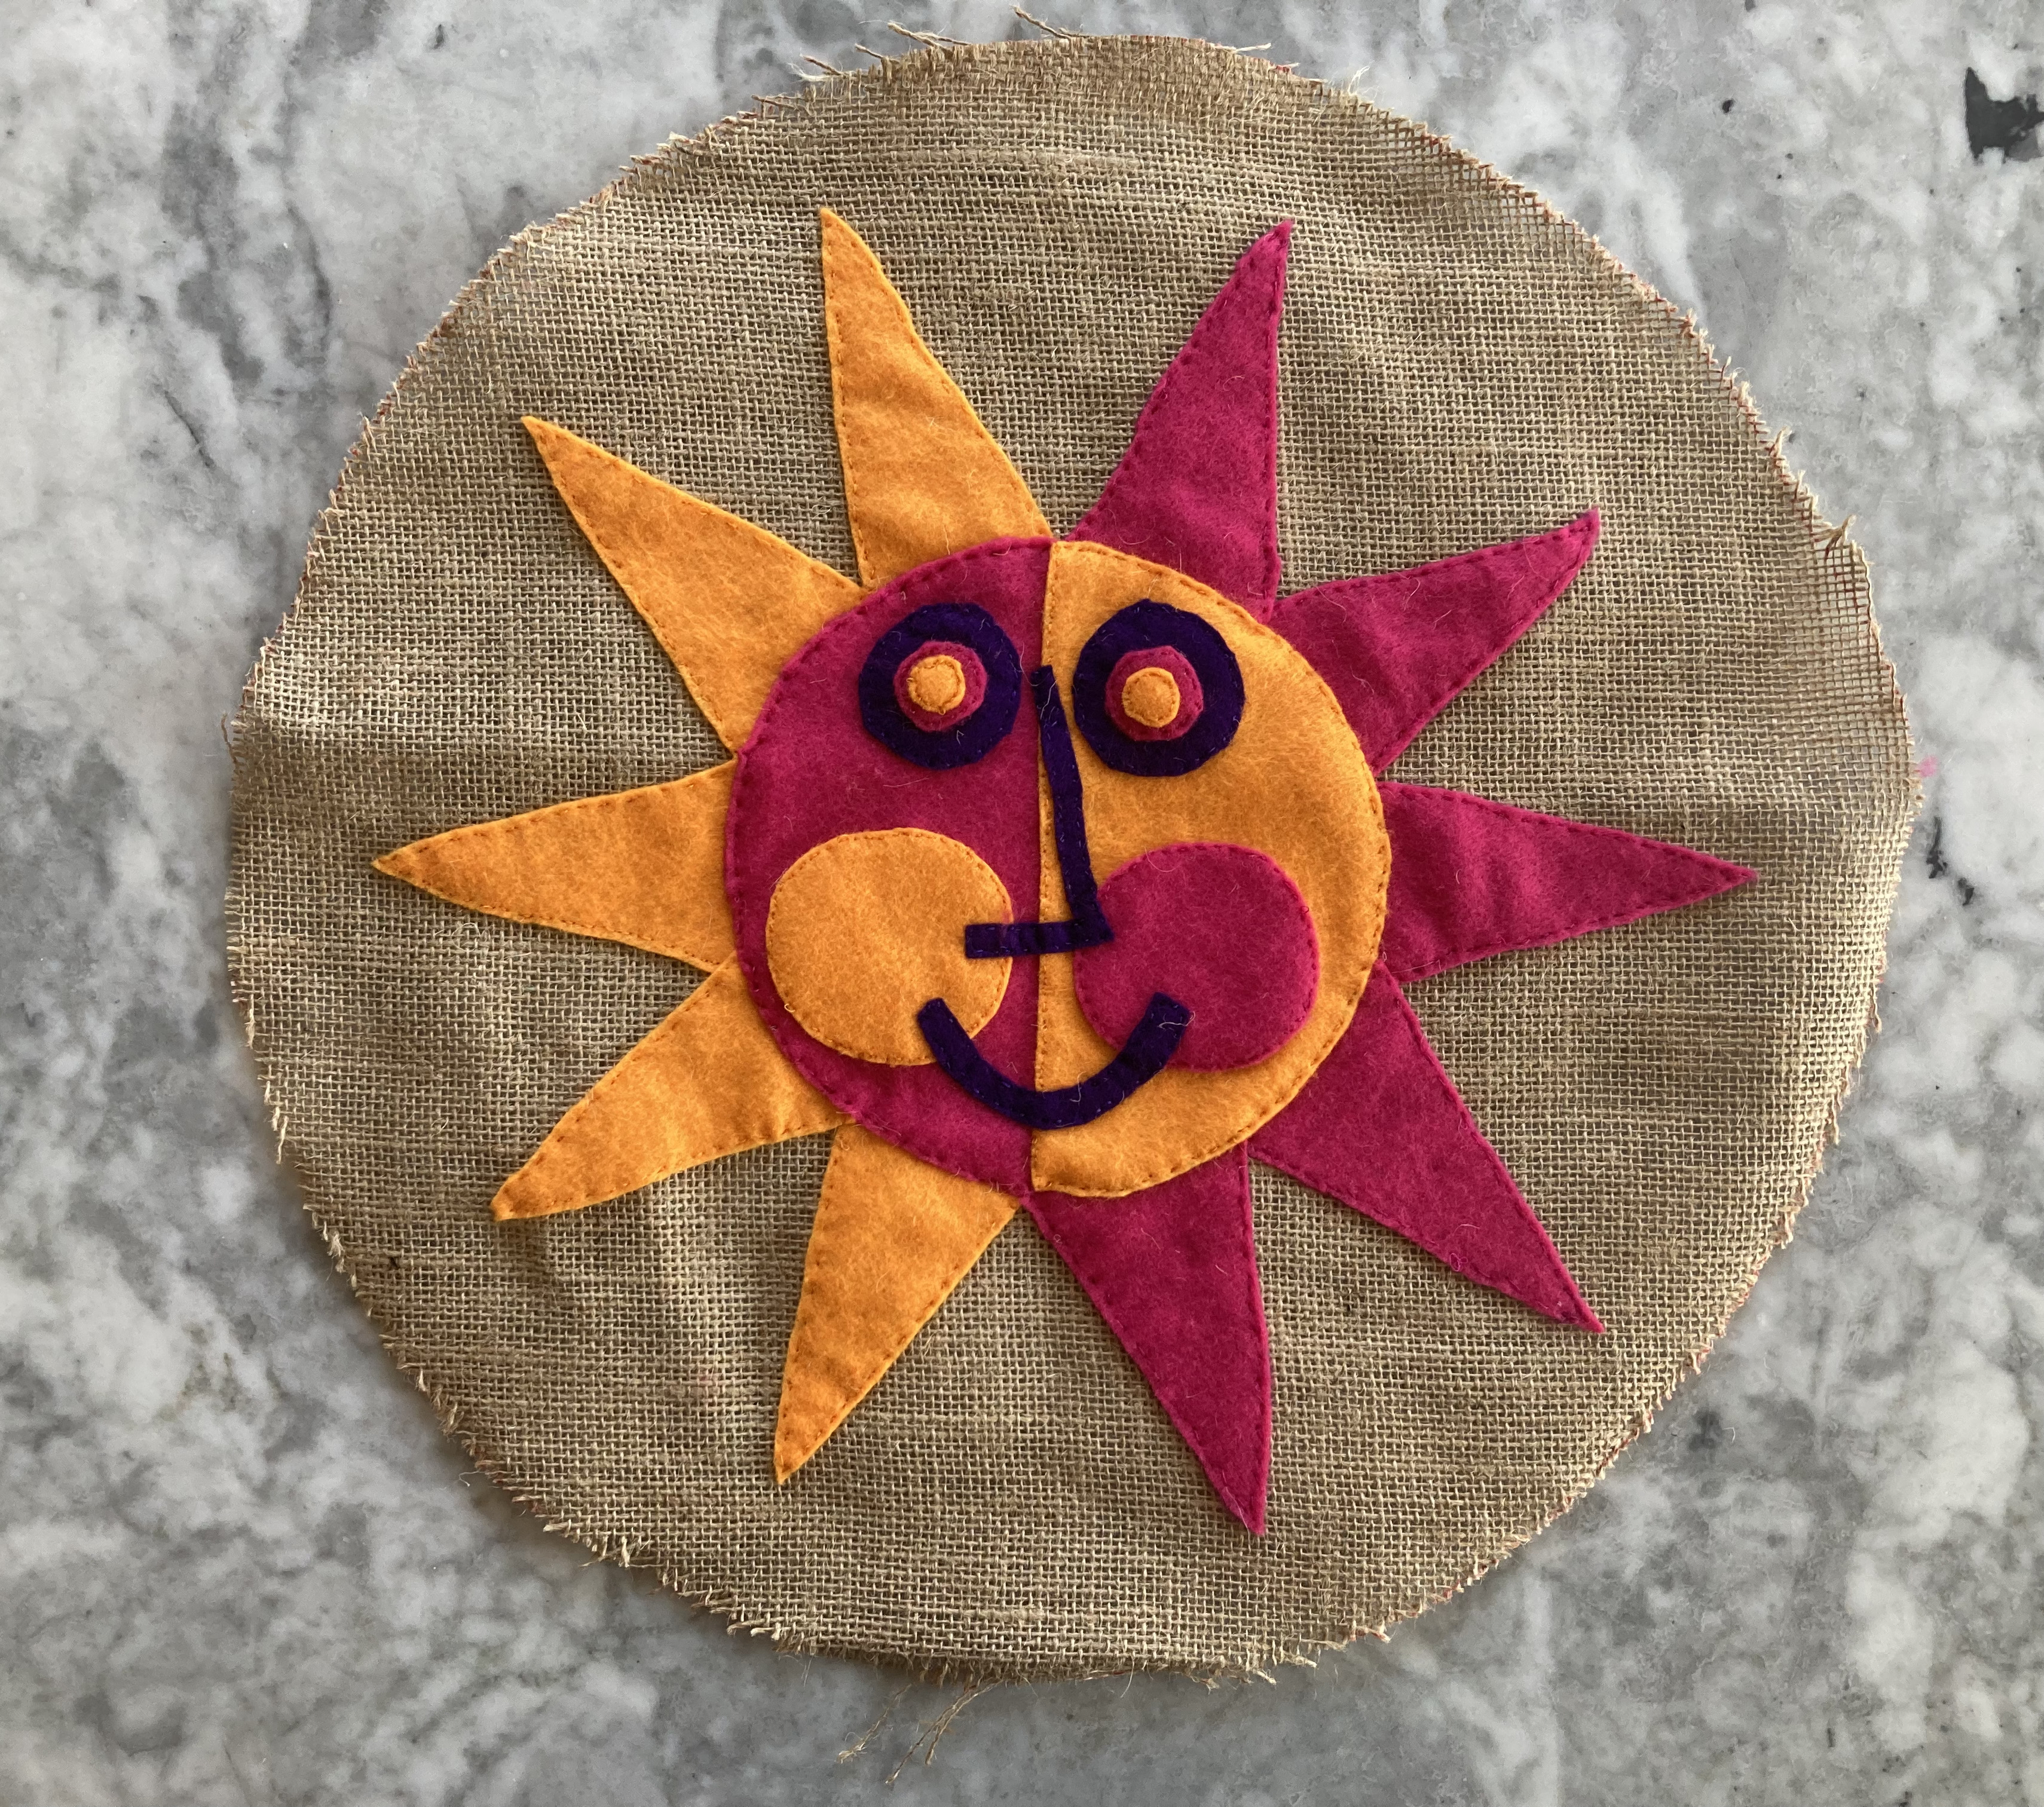
And it was done! WAIT, NO! After it was all finished, I took another look at the big photo in the magazine and saw that there was supposed to be a lot more decorative stitching on the “cheeks” and “rays”. Oh well! The cushion was finished and sewn up, so there it was. Note to self: if I make it again, I’ll stitch the appliqué on the machine with the decorative bits and organise the cushion back better. Still 100% happy with it, though.
I don’t have a garden, or even a balcony, so this will be a present for a friend.
P.P.S. It was so cloudy and overcast the day after I finished the cushion that I had to wait another day to photograph it — there wasn’t enough light to get a good picture. As I write this blog, we’re having a thunderstorm. So much for sunny summer! At least the cushion gives me all the light and warmth I need.
Edit 15. August 2024: Here’s a photo of the cushion in its new home!
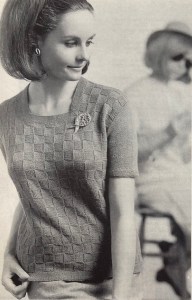
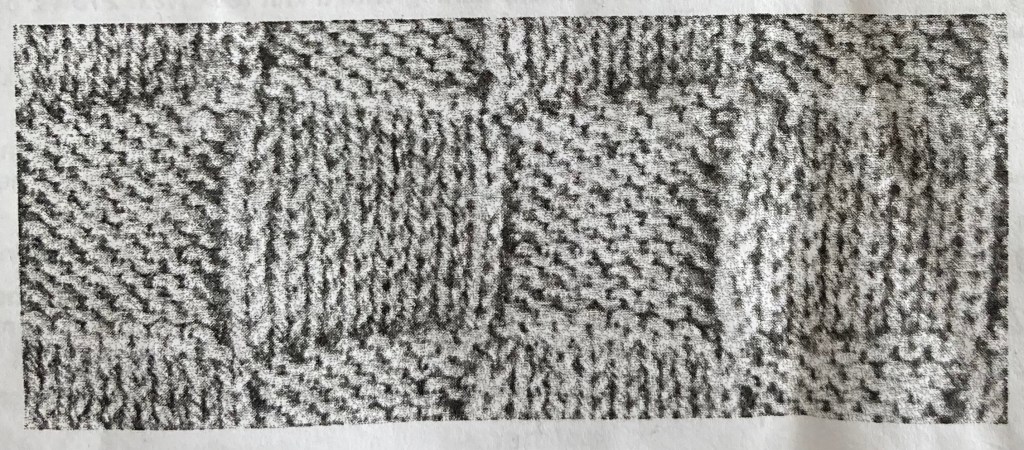
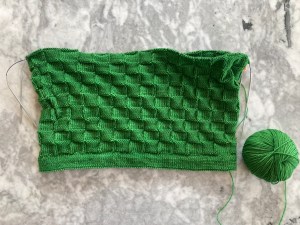
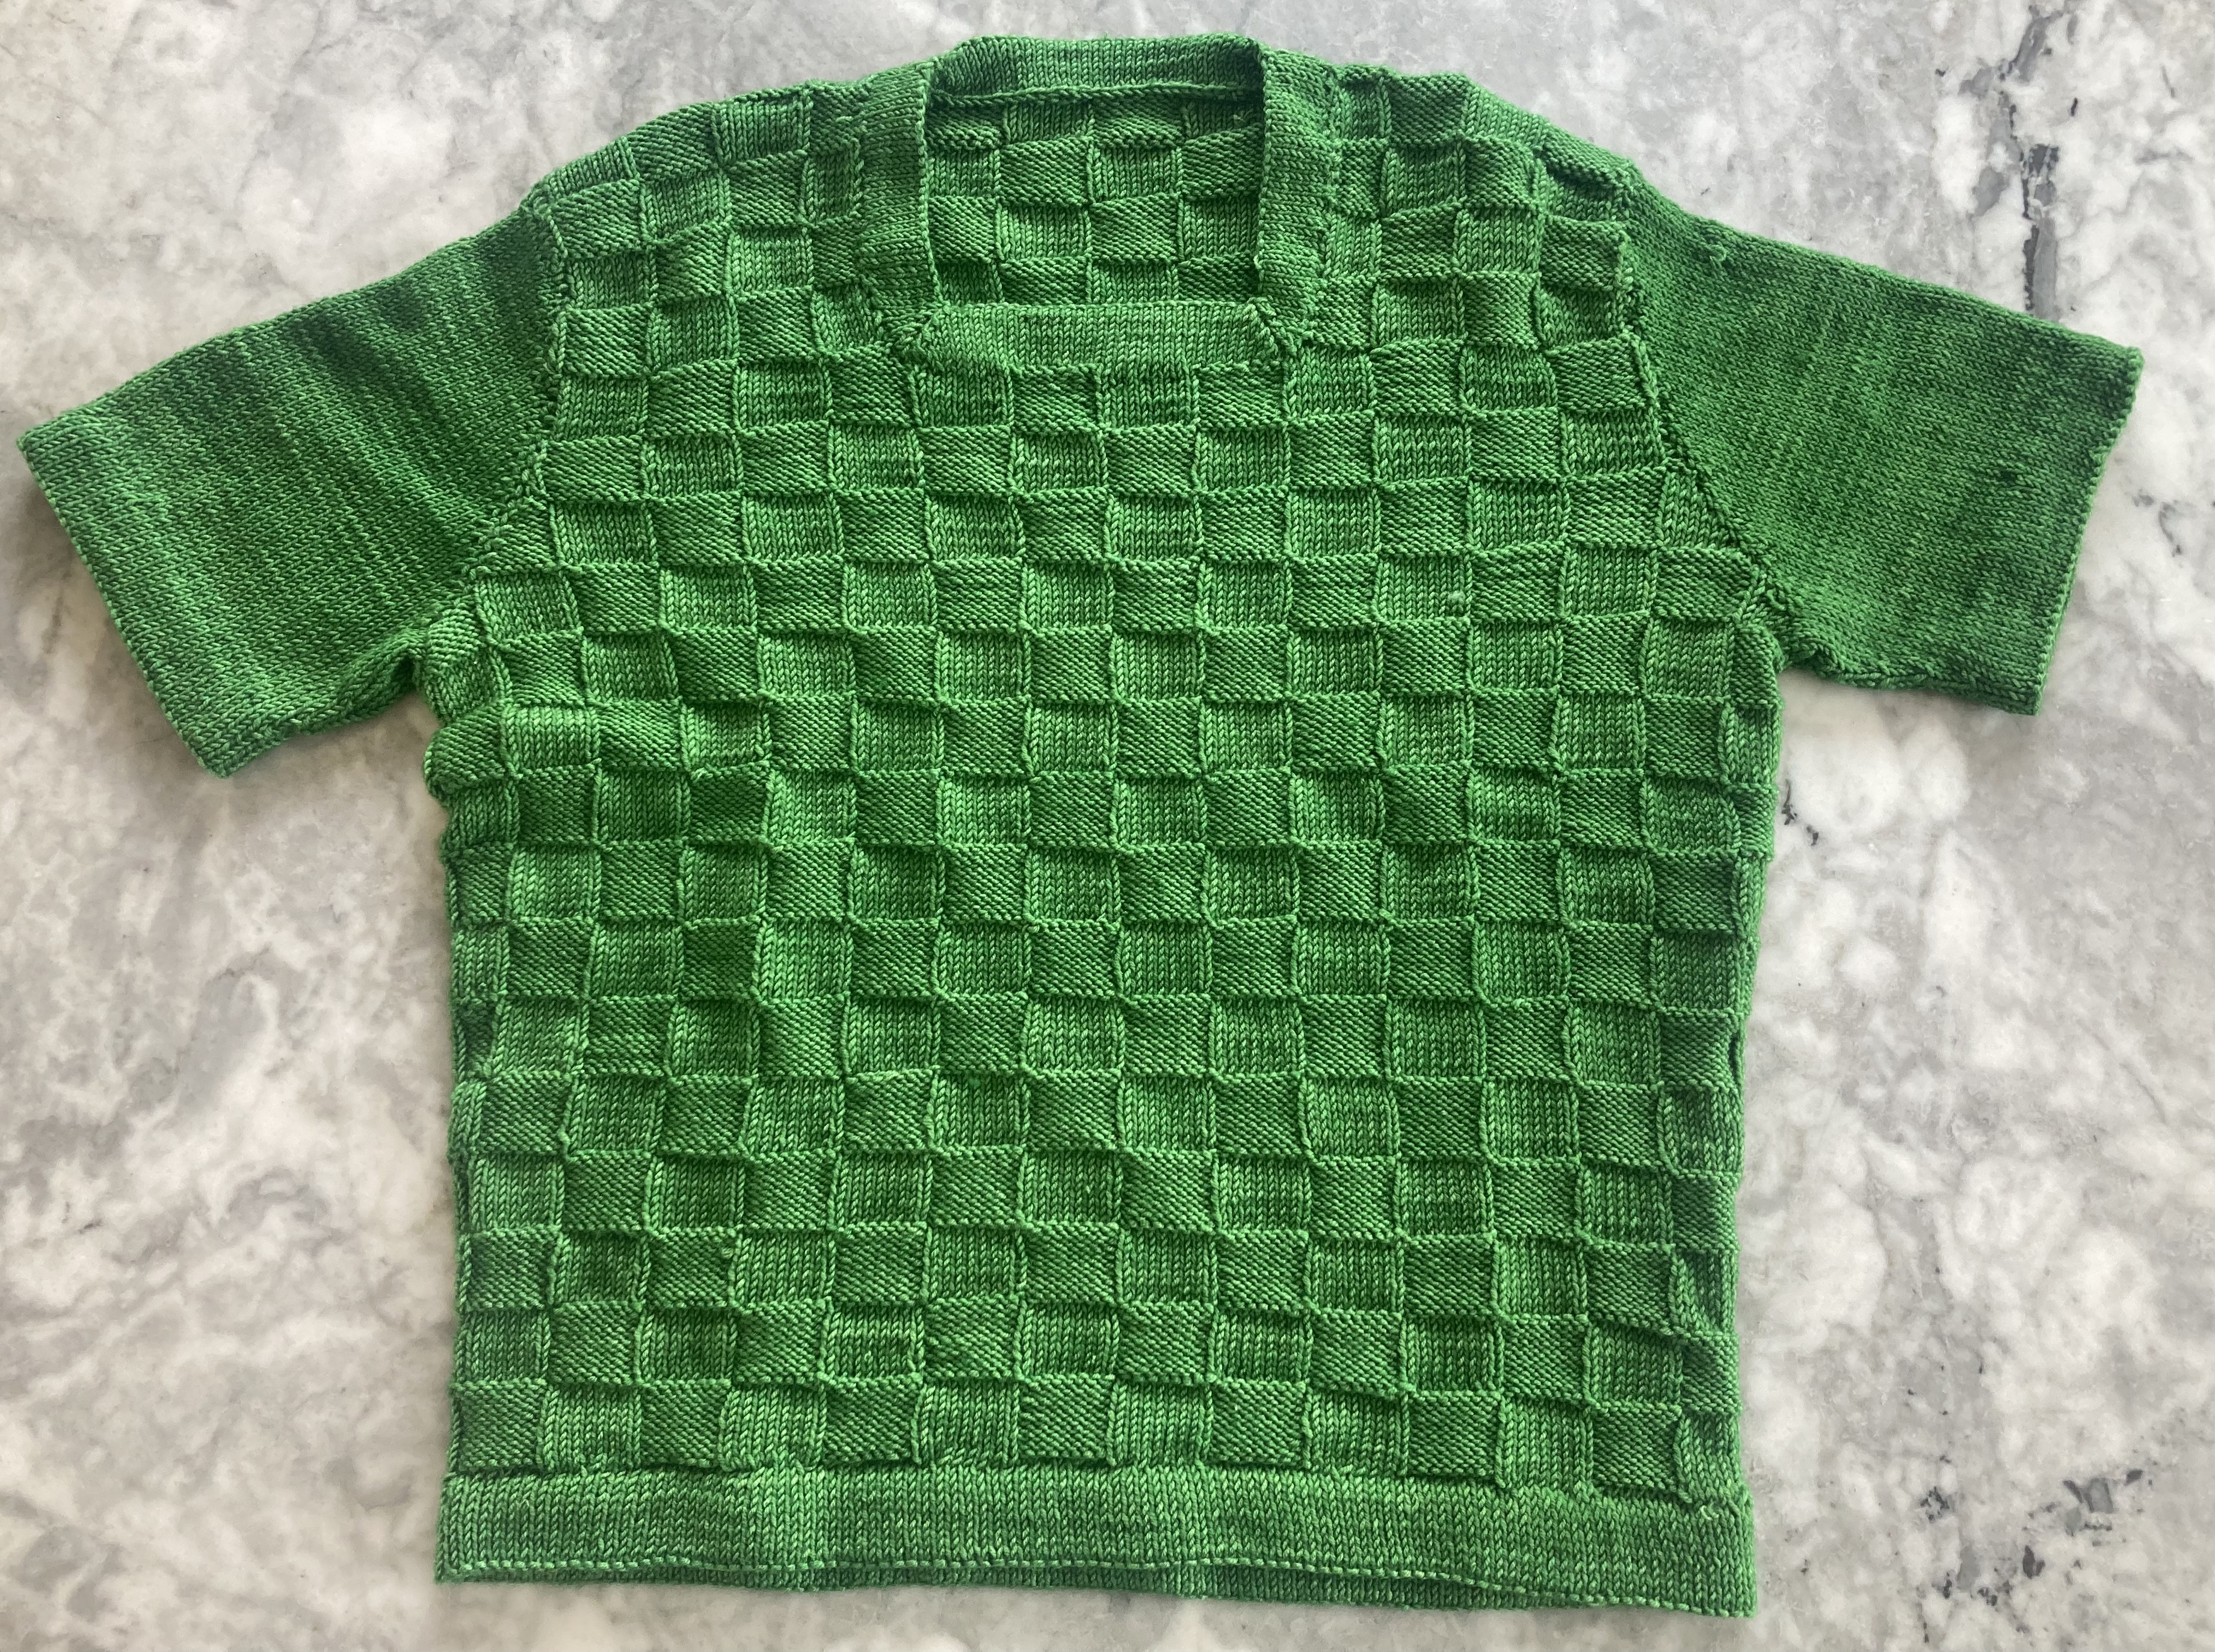
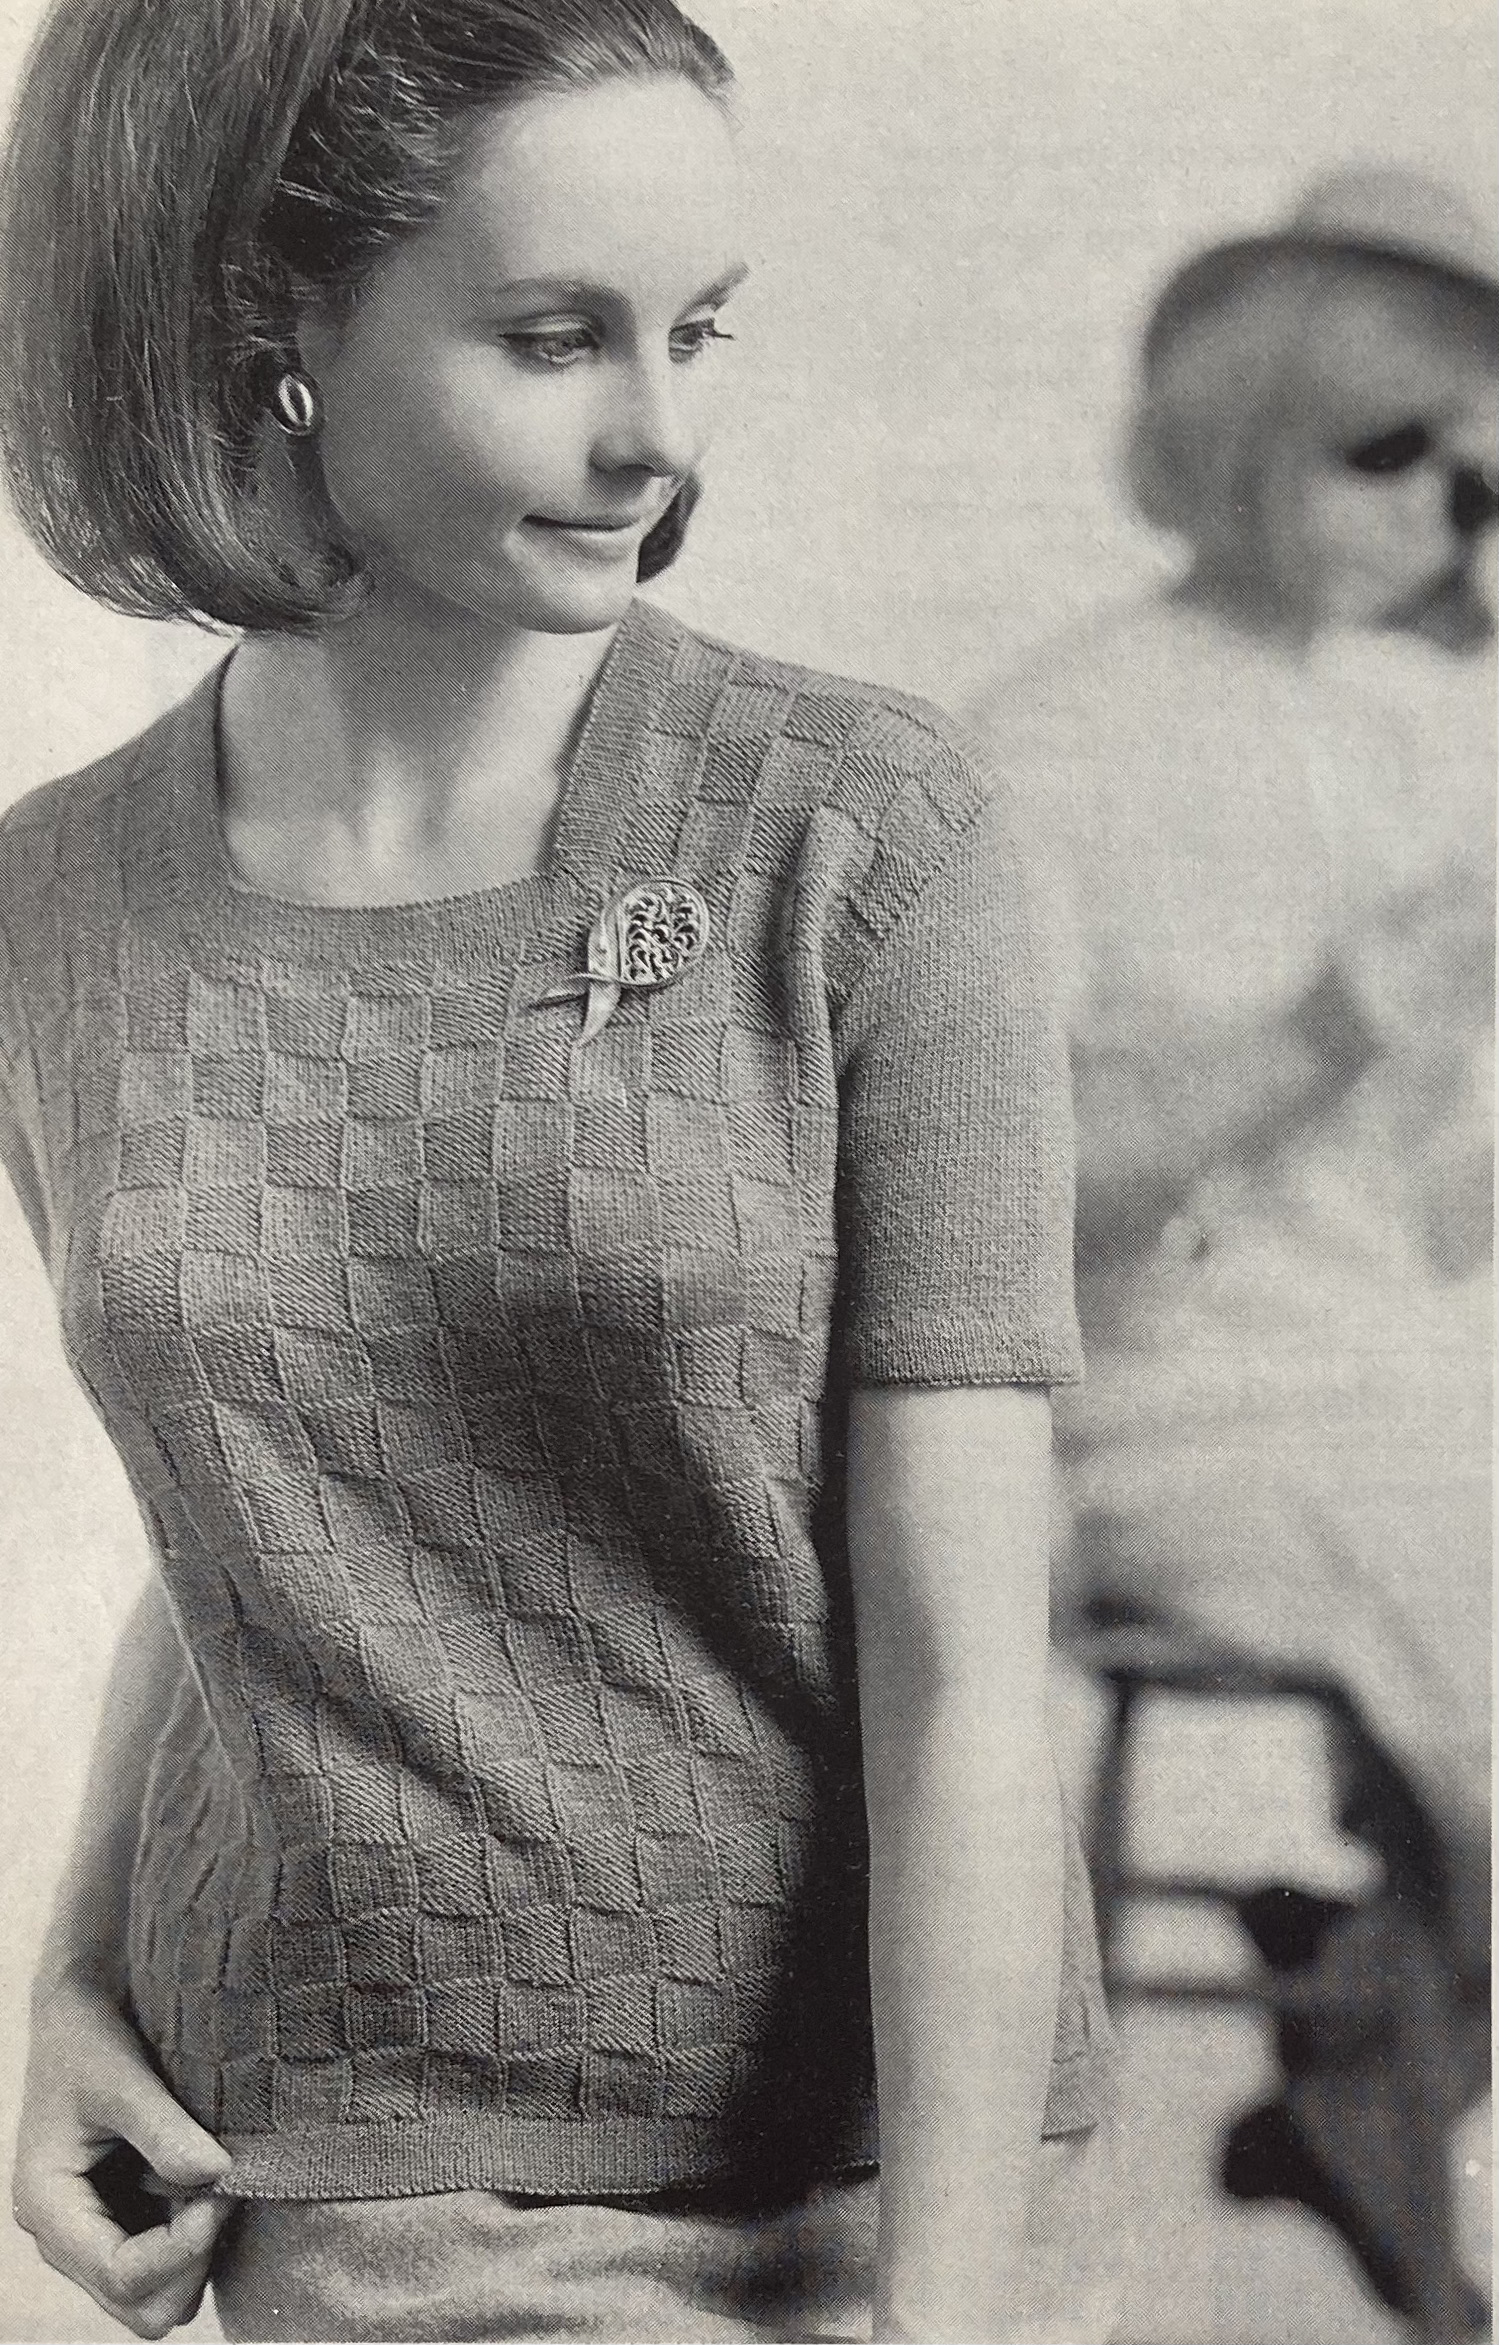
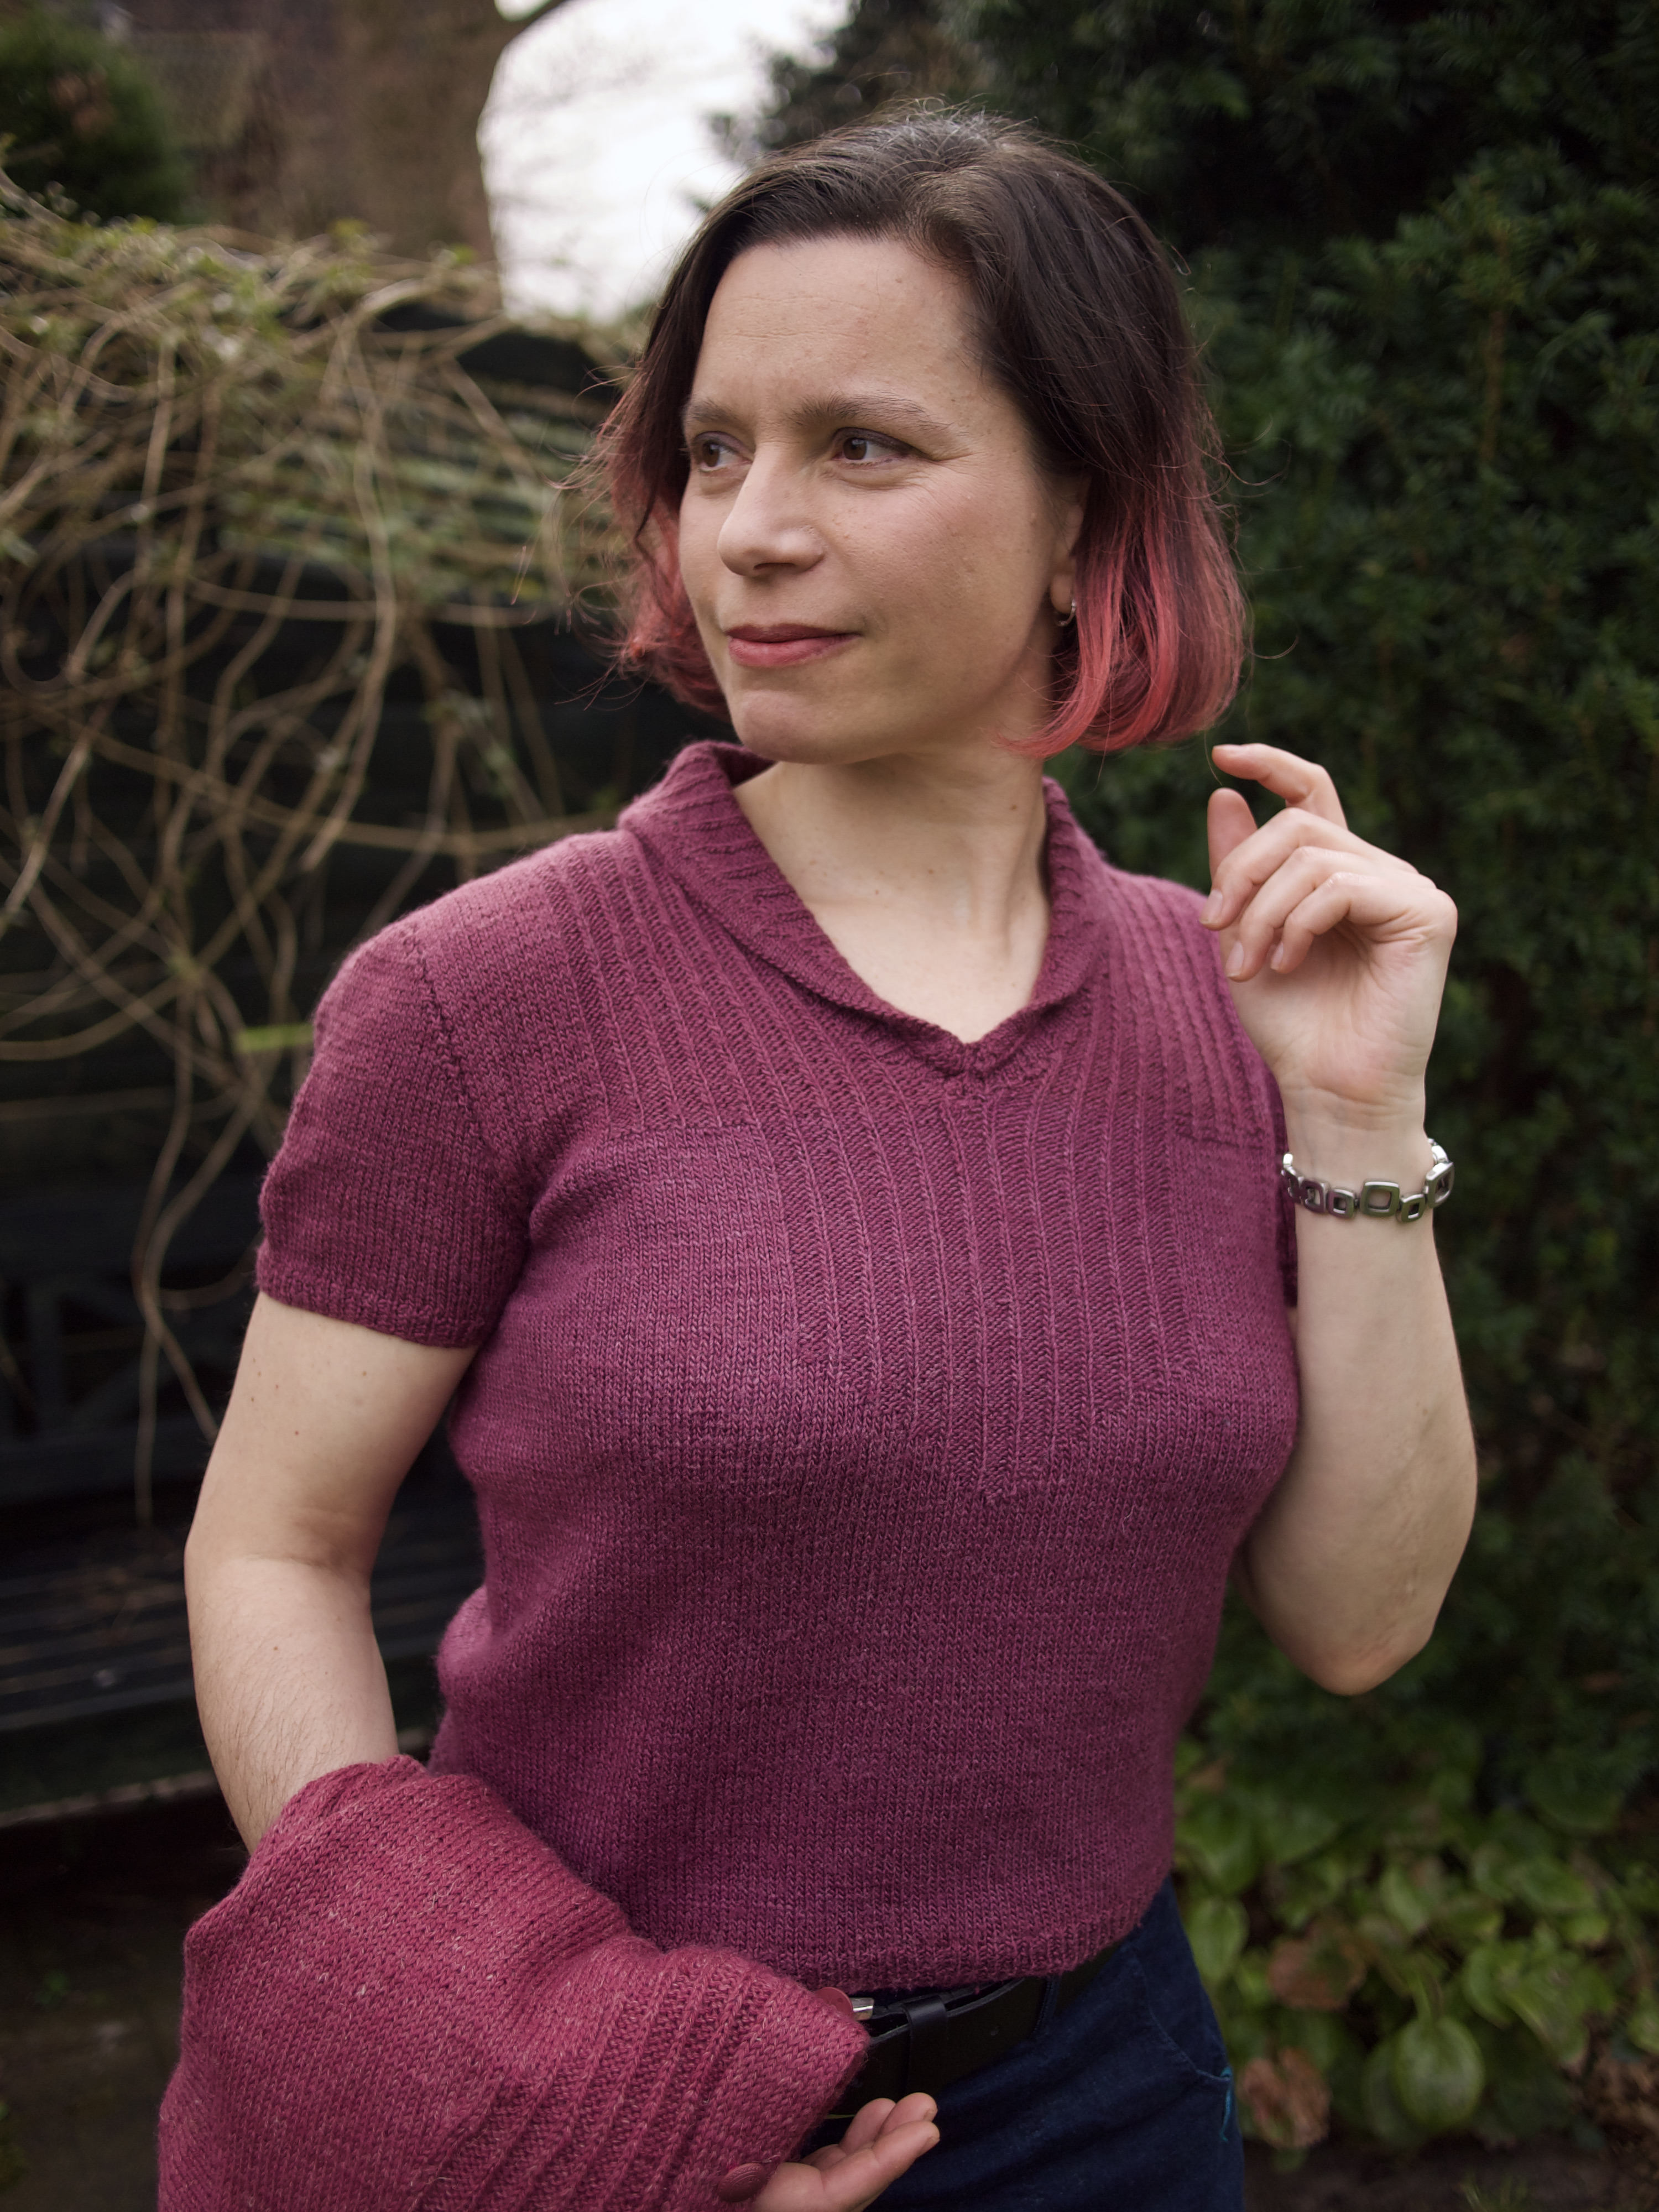
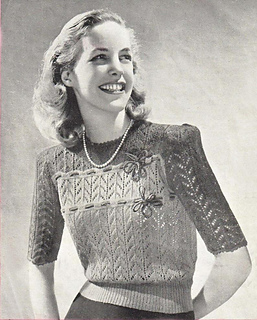
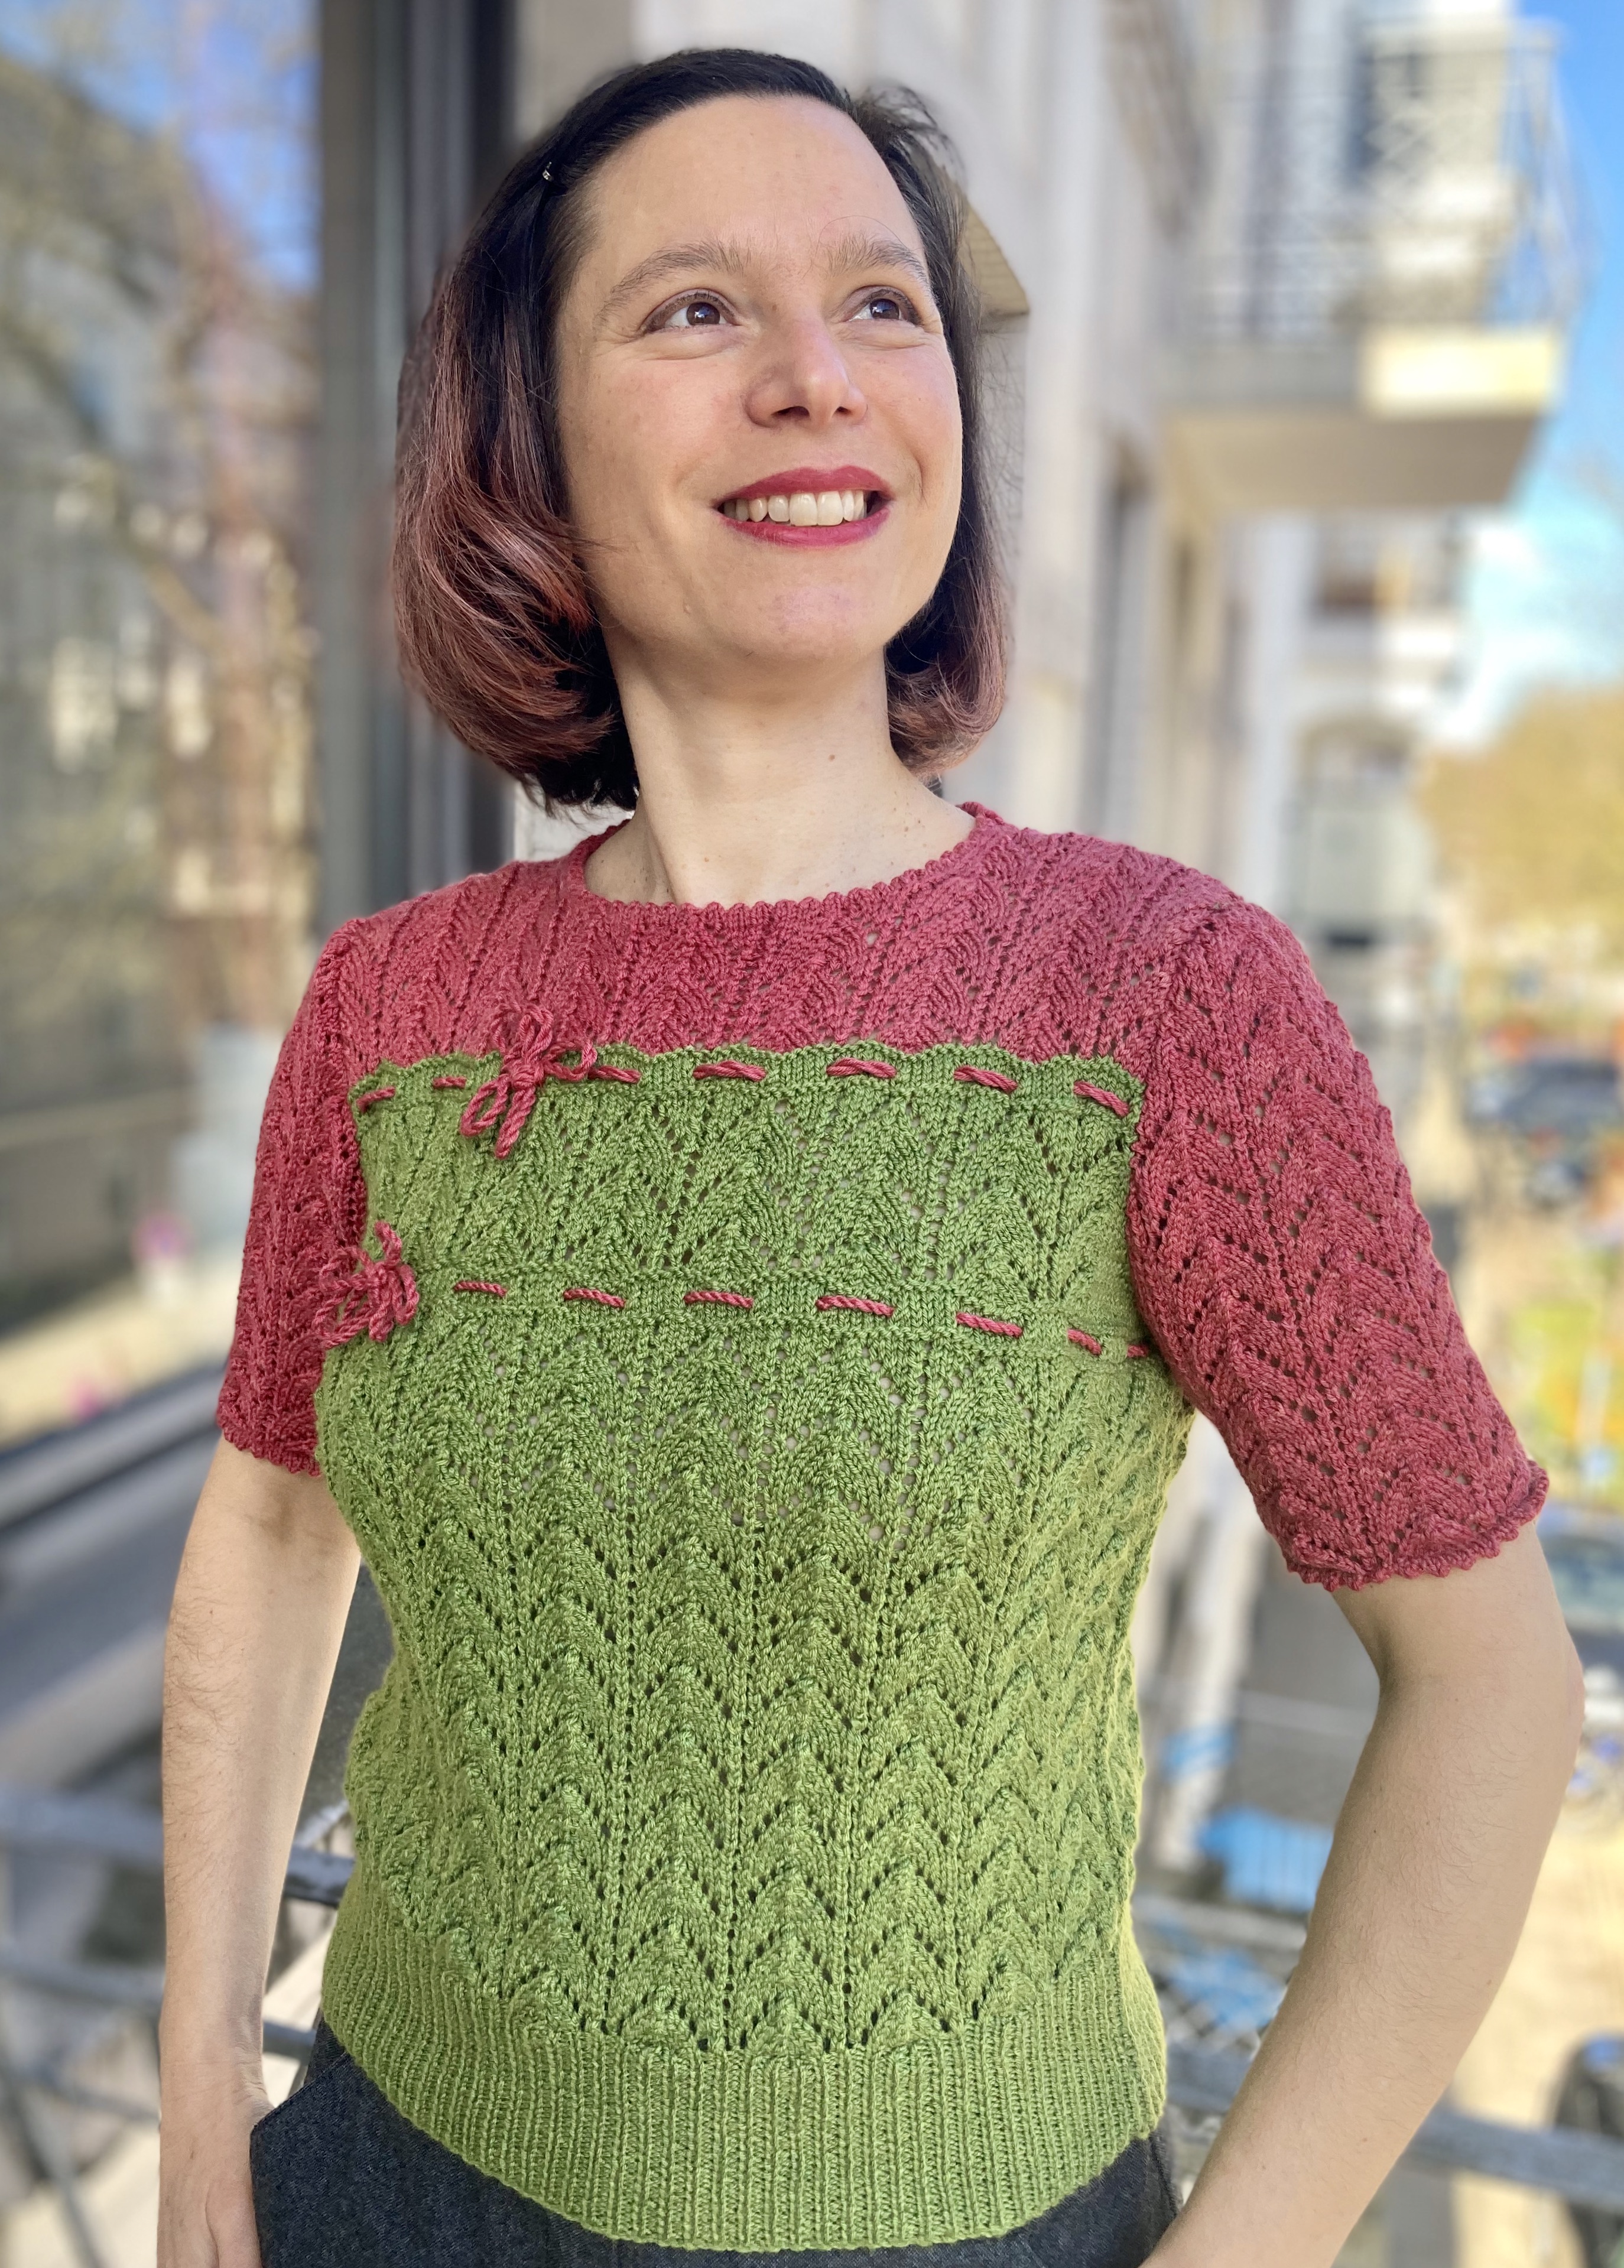
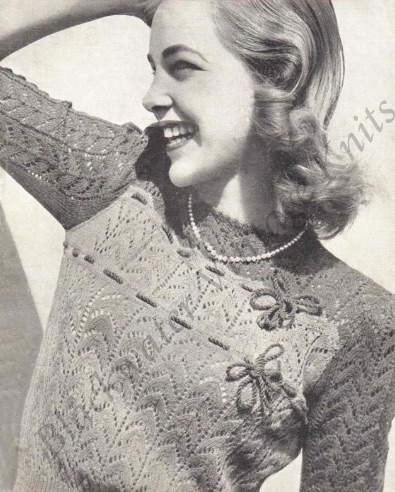
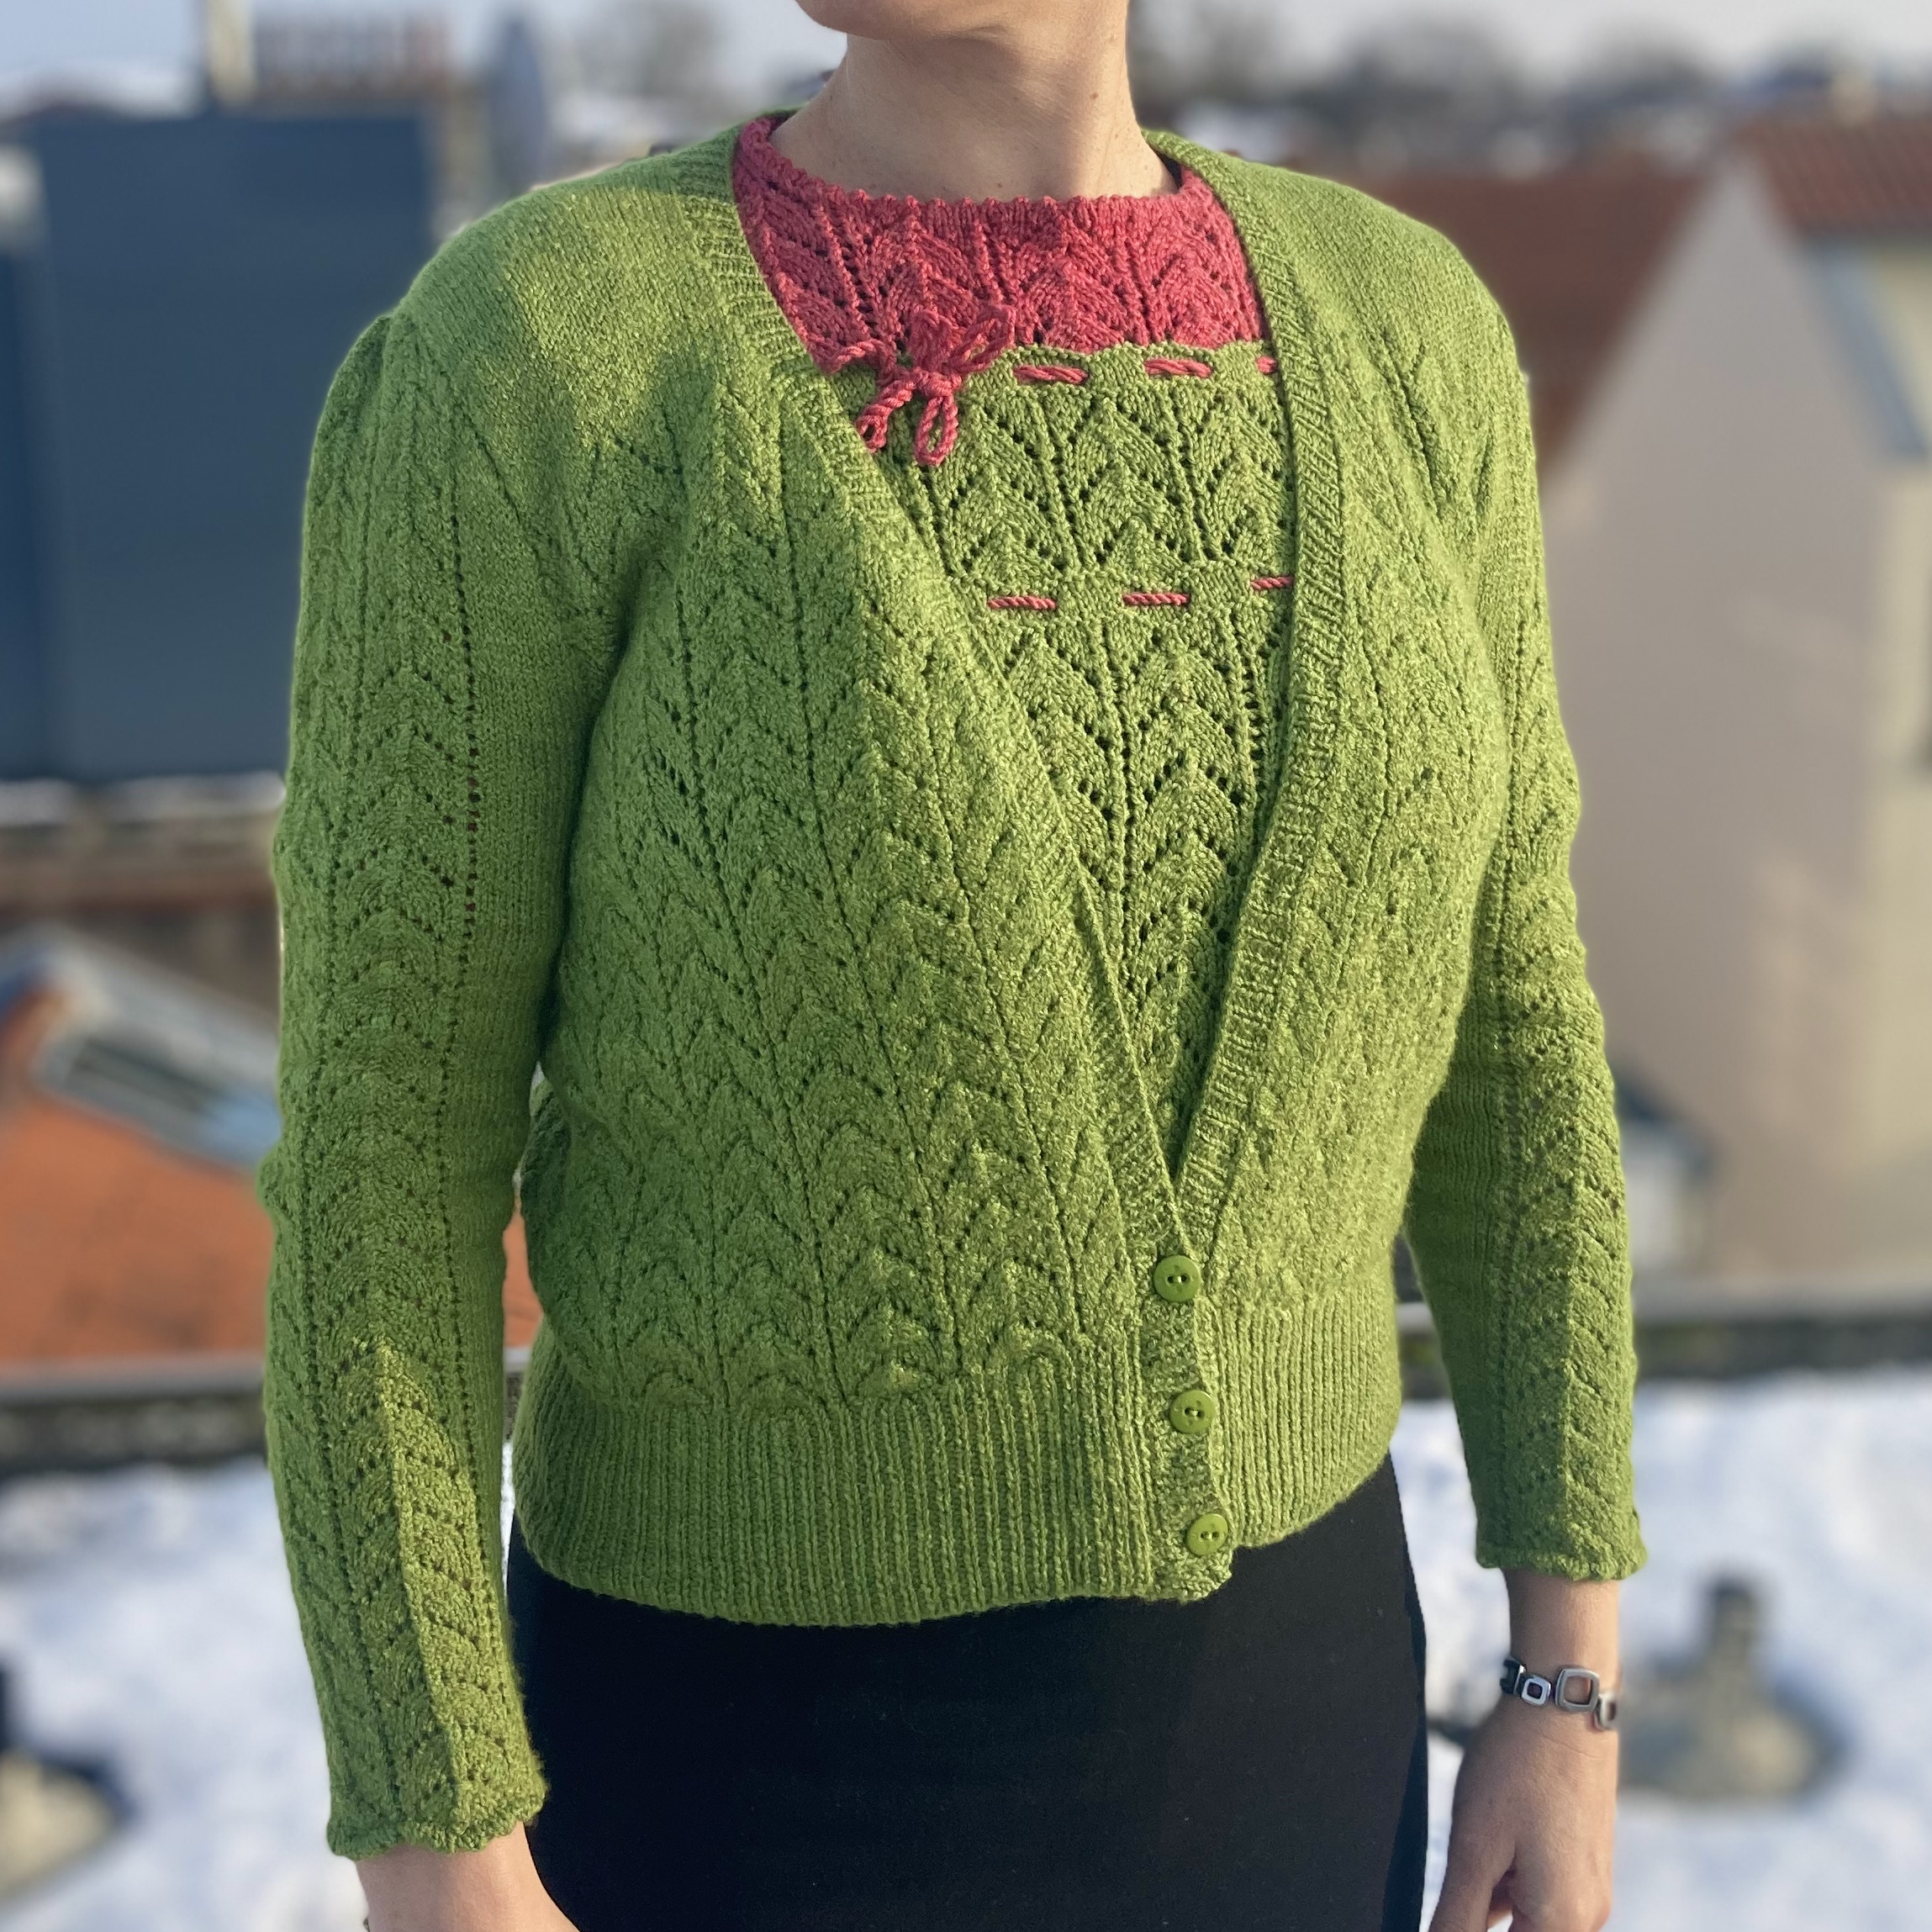
My June 2024 / June 1966 project was going to be the goofy garden cushion with the smiling purple and magenta felt appliqué sun, but I was traveling the first two weeks of June and it was easier to have a knitting project with me than an appliquéd cushion on hessian fabric. I loved the 3-ply blouse in this “Pattern texture from Paris” (note: I do not think the basket weave knitting pattern stitch was specifically invented in Paris, but whatever sells your magazine…) and a lovely colleague had given me a ball of Lana Grossa Cool Wool Vintage yarn in my favourite shade of green just the week before, so I was inspired to make it instead.
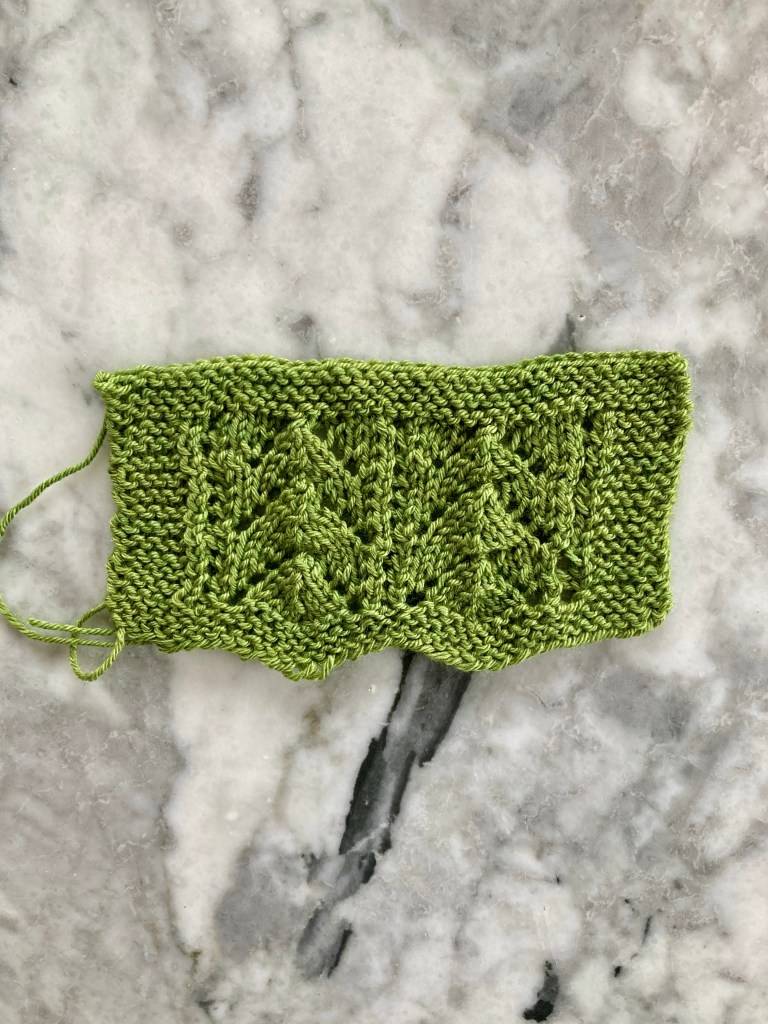
The pattern is written for Patons Nylox 3-ply, which existed in an earlier version with 80% wool and 20% nylon, and a later version with 60% wool and 40% nylon. This pattern would have to be written for the earlier version, as the later version was sold in 25-gram balls and UK wool weights didn’t change to metric until the early 1970s. It was 3-ply, so quite lightweight, and meant to be knitted up at a tension of 8 stitches to the inch in stocking-stitch. Cool Wool Vintage is more like regular 4-ply / fingering-weight wool, or even a little more on the “sportweight” side. The pattern also only offers one size — to fit 35-37 inch bust — which would fit me snugly at 8 sts / inch in stocking-stitch but surely be too large at the 6.7 sts/inch that I got in the pattern-stitch swatch, so I adjusted the stitch count and number of pattern repeats.
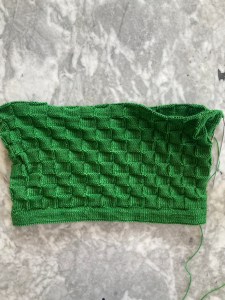
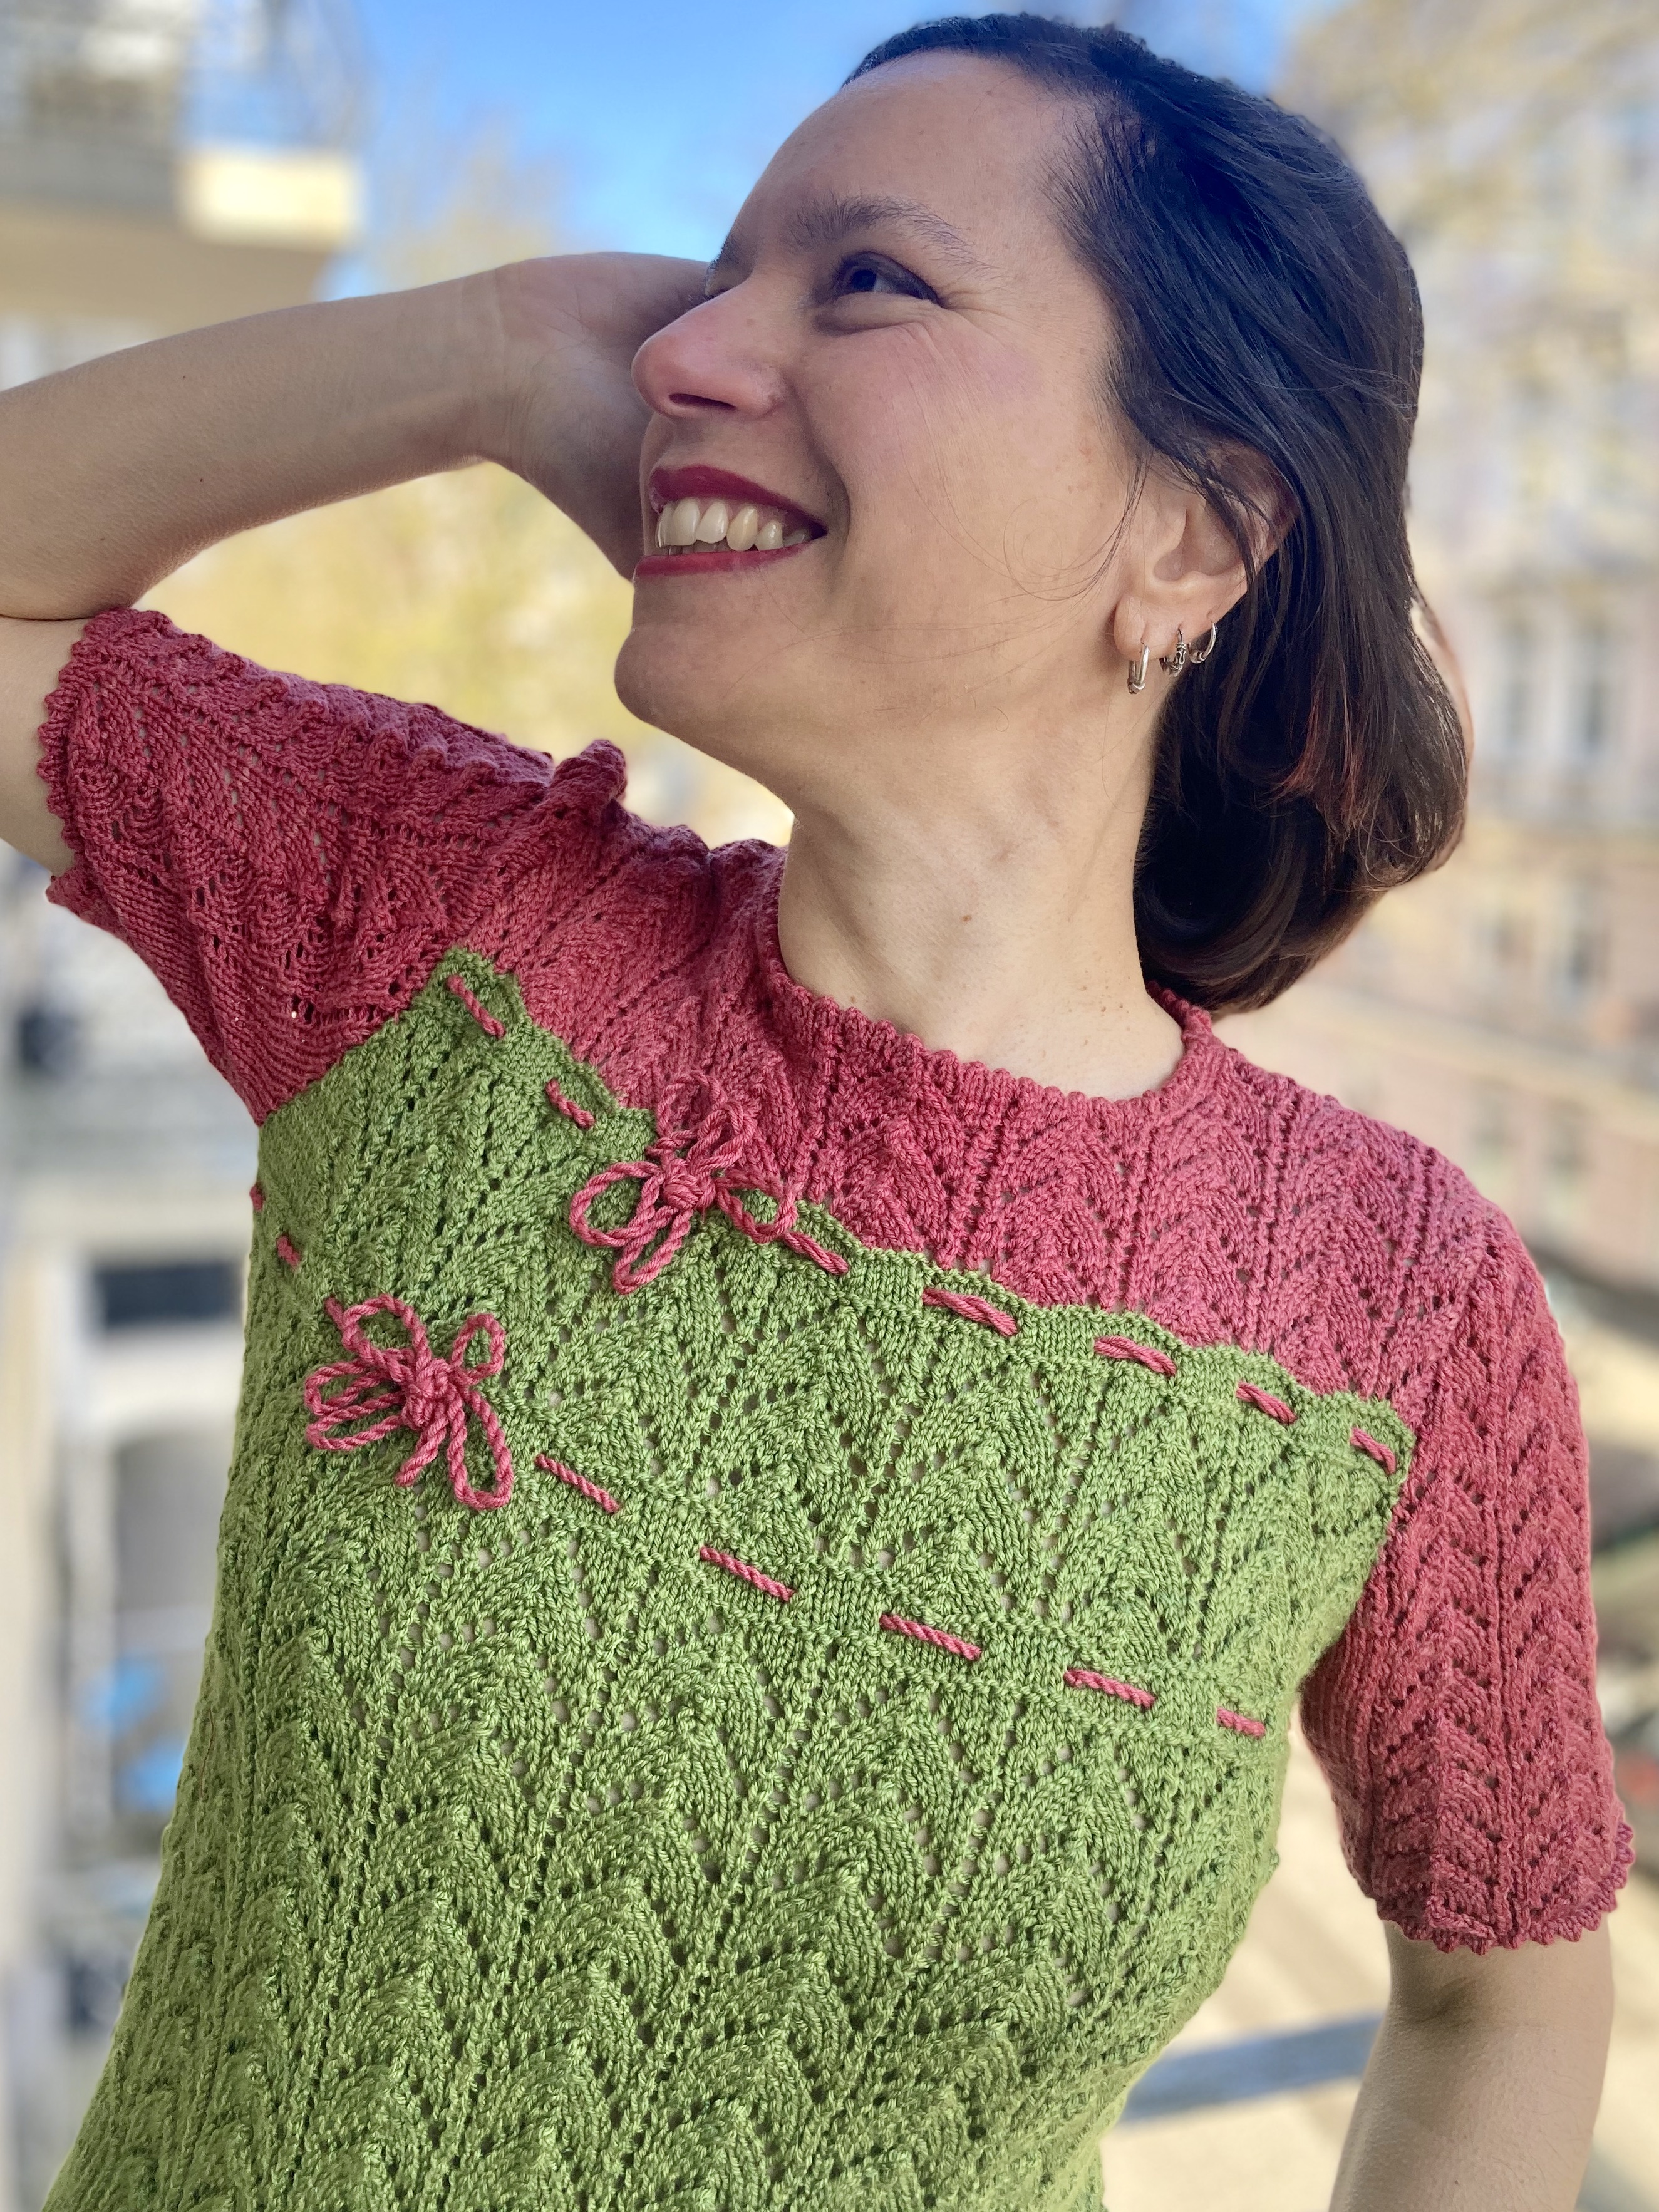
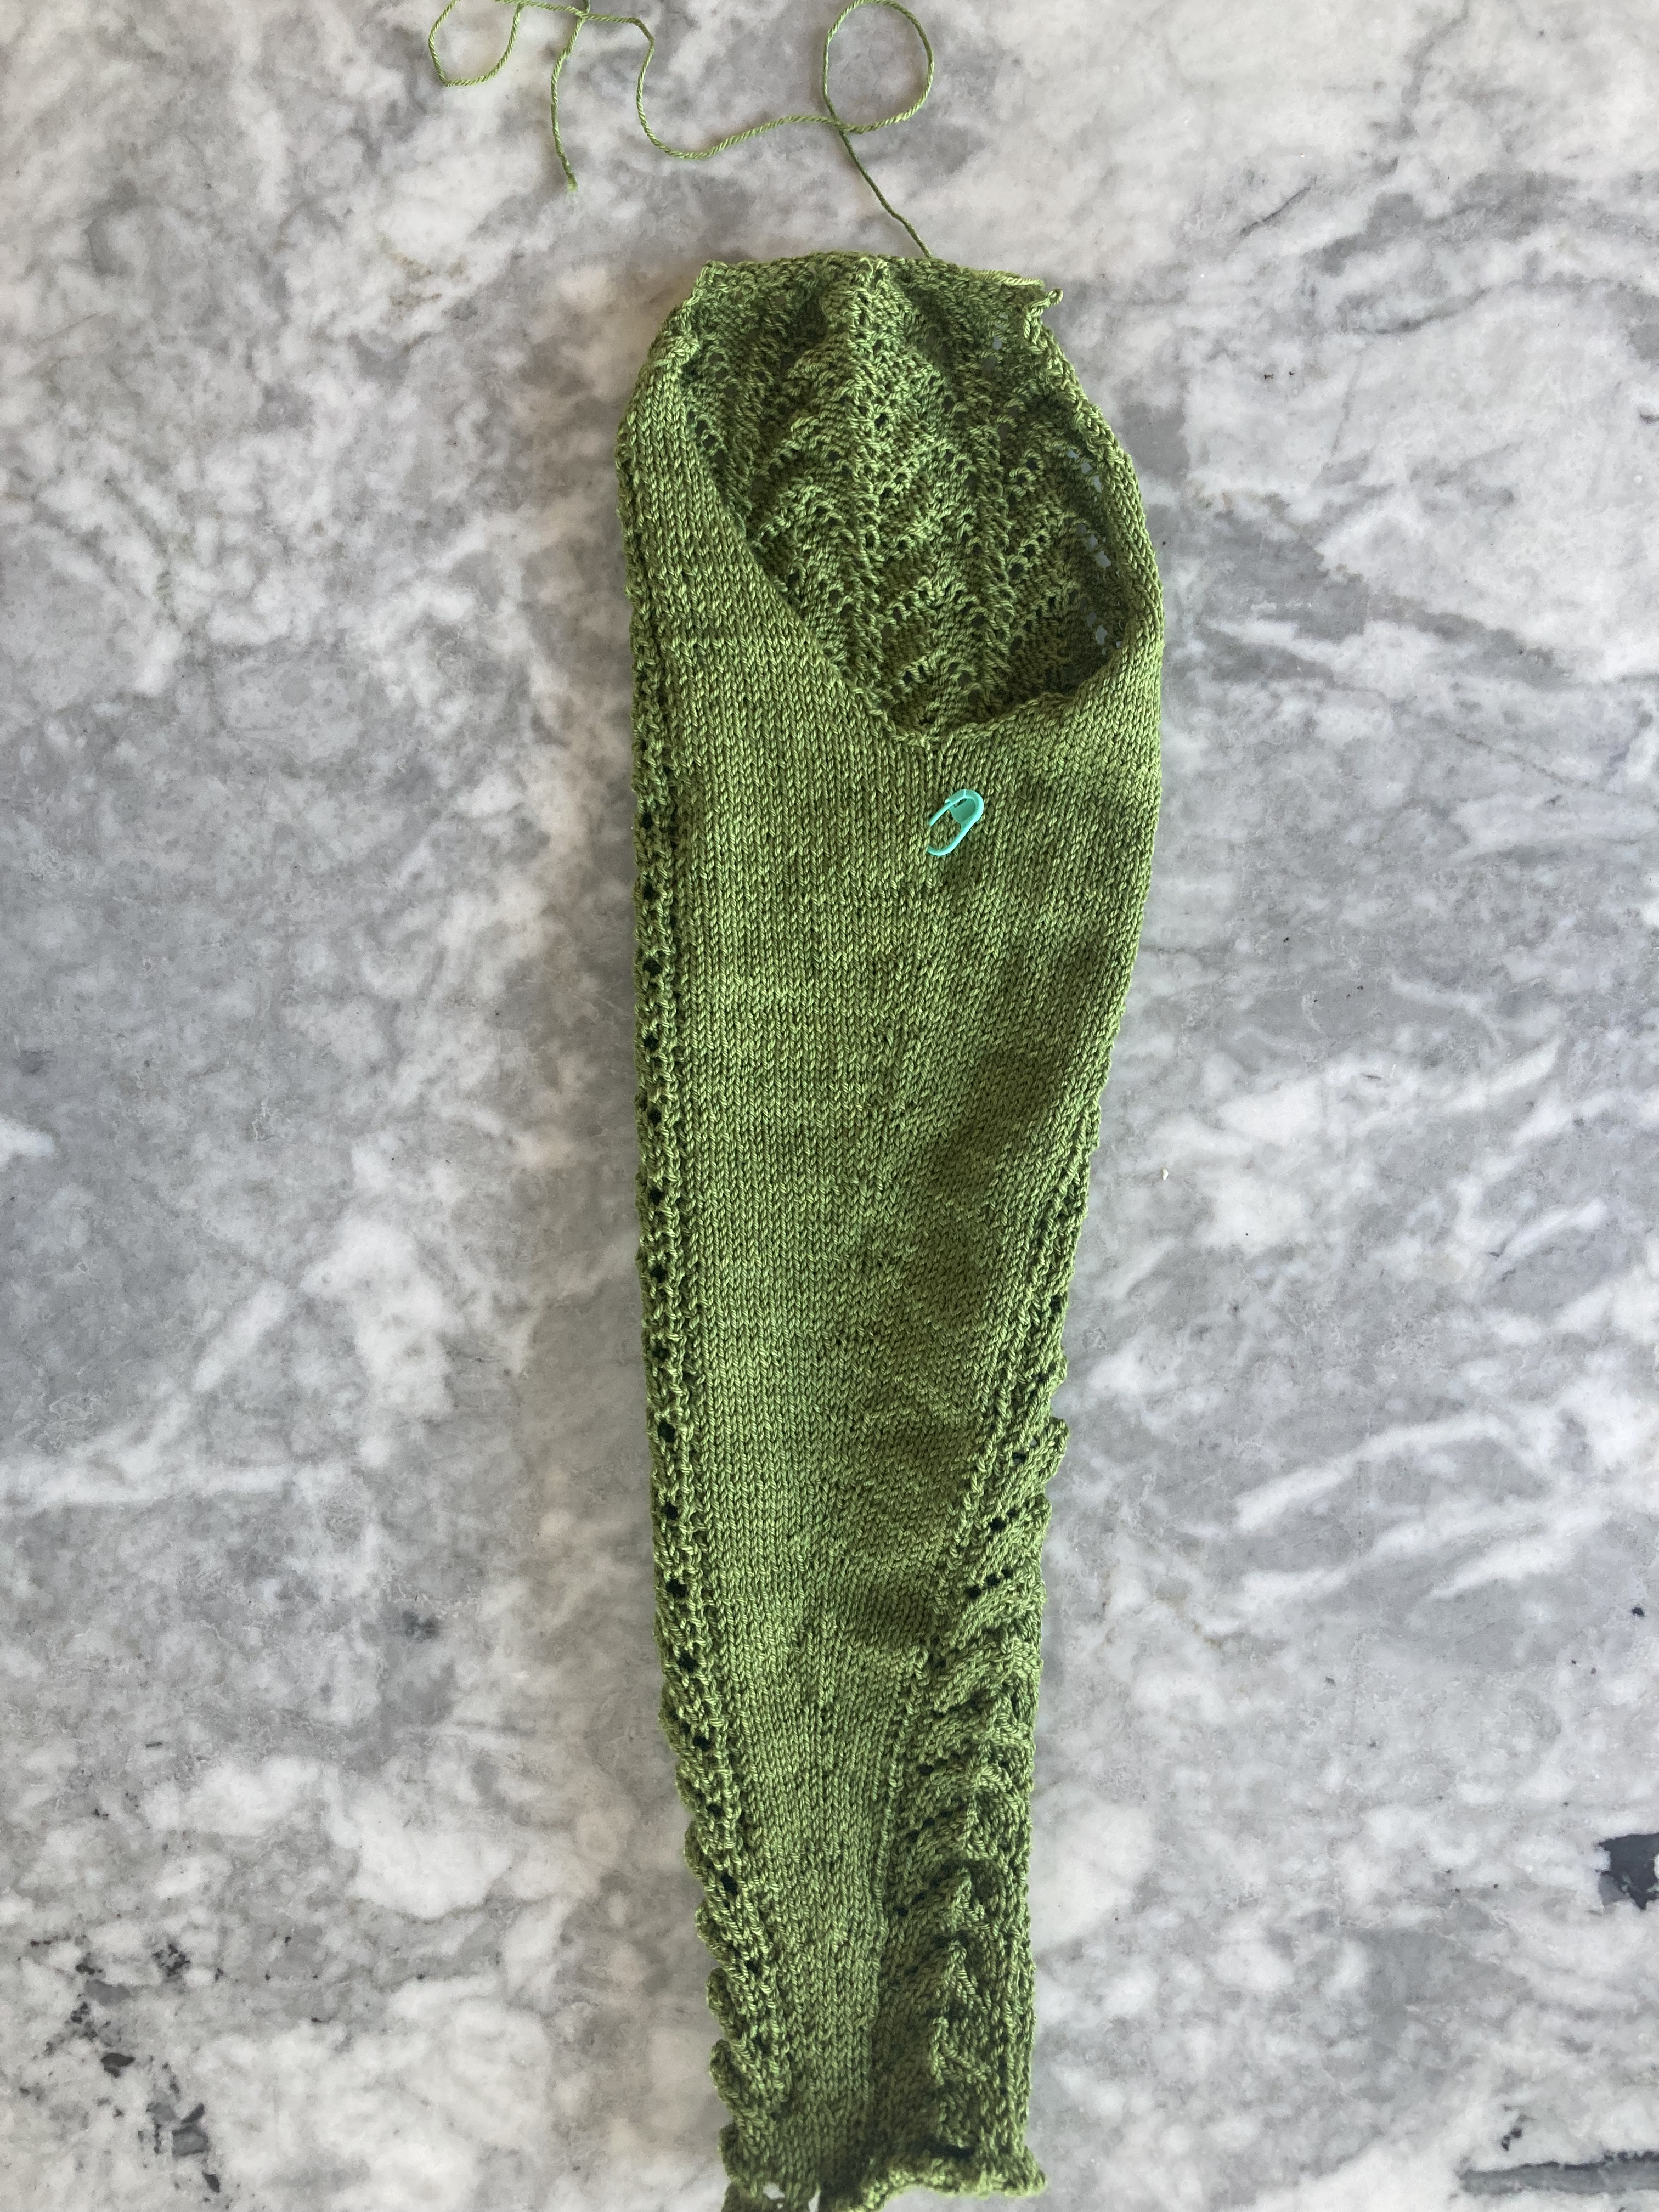
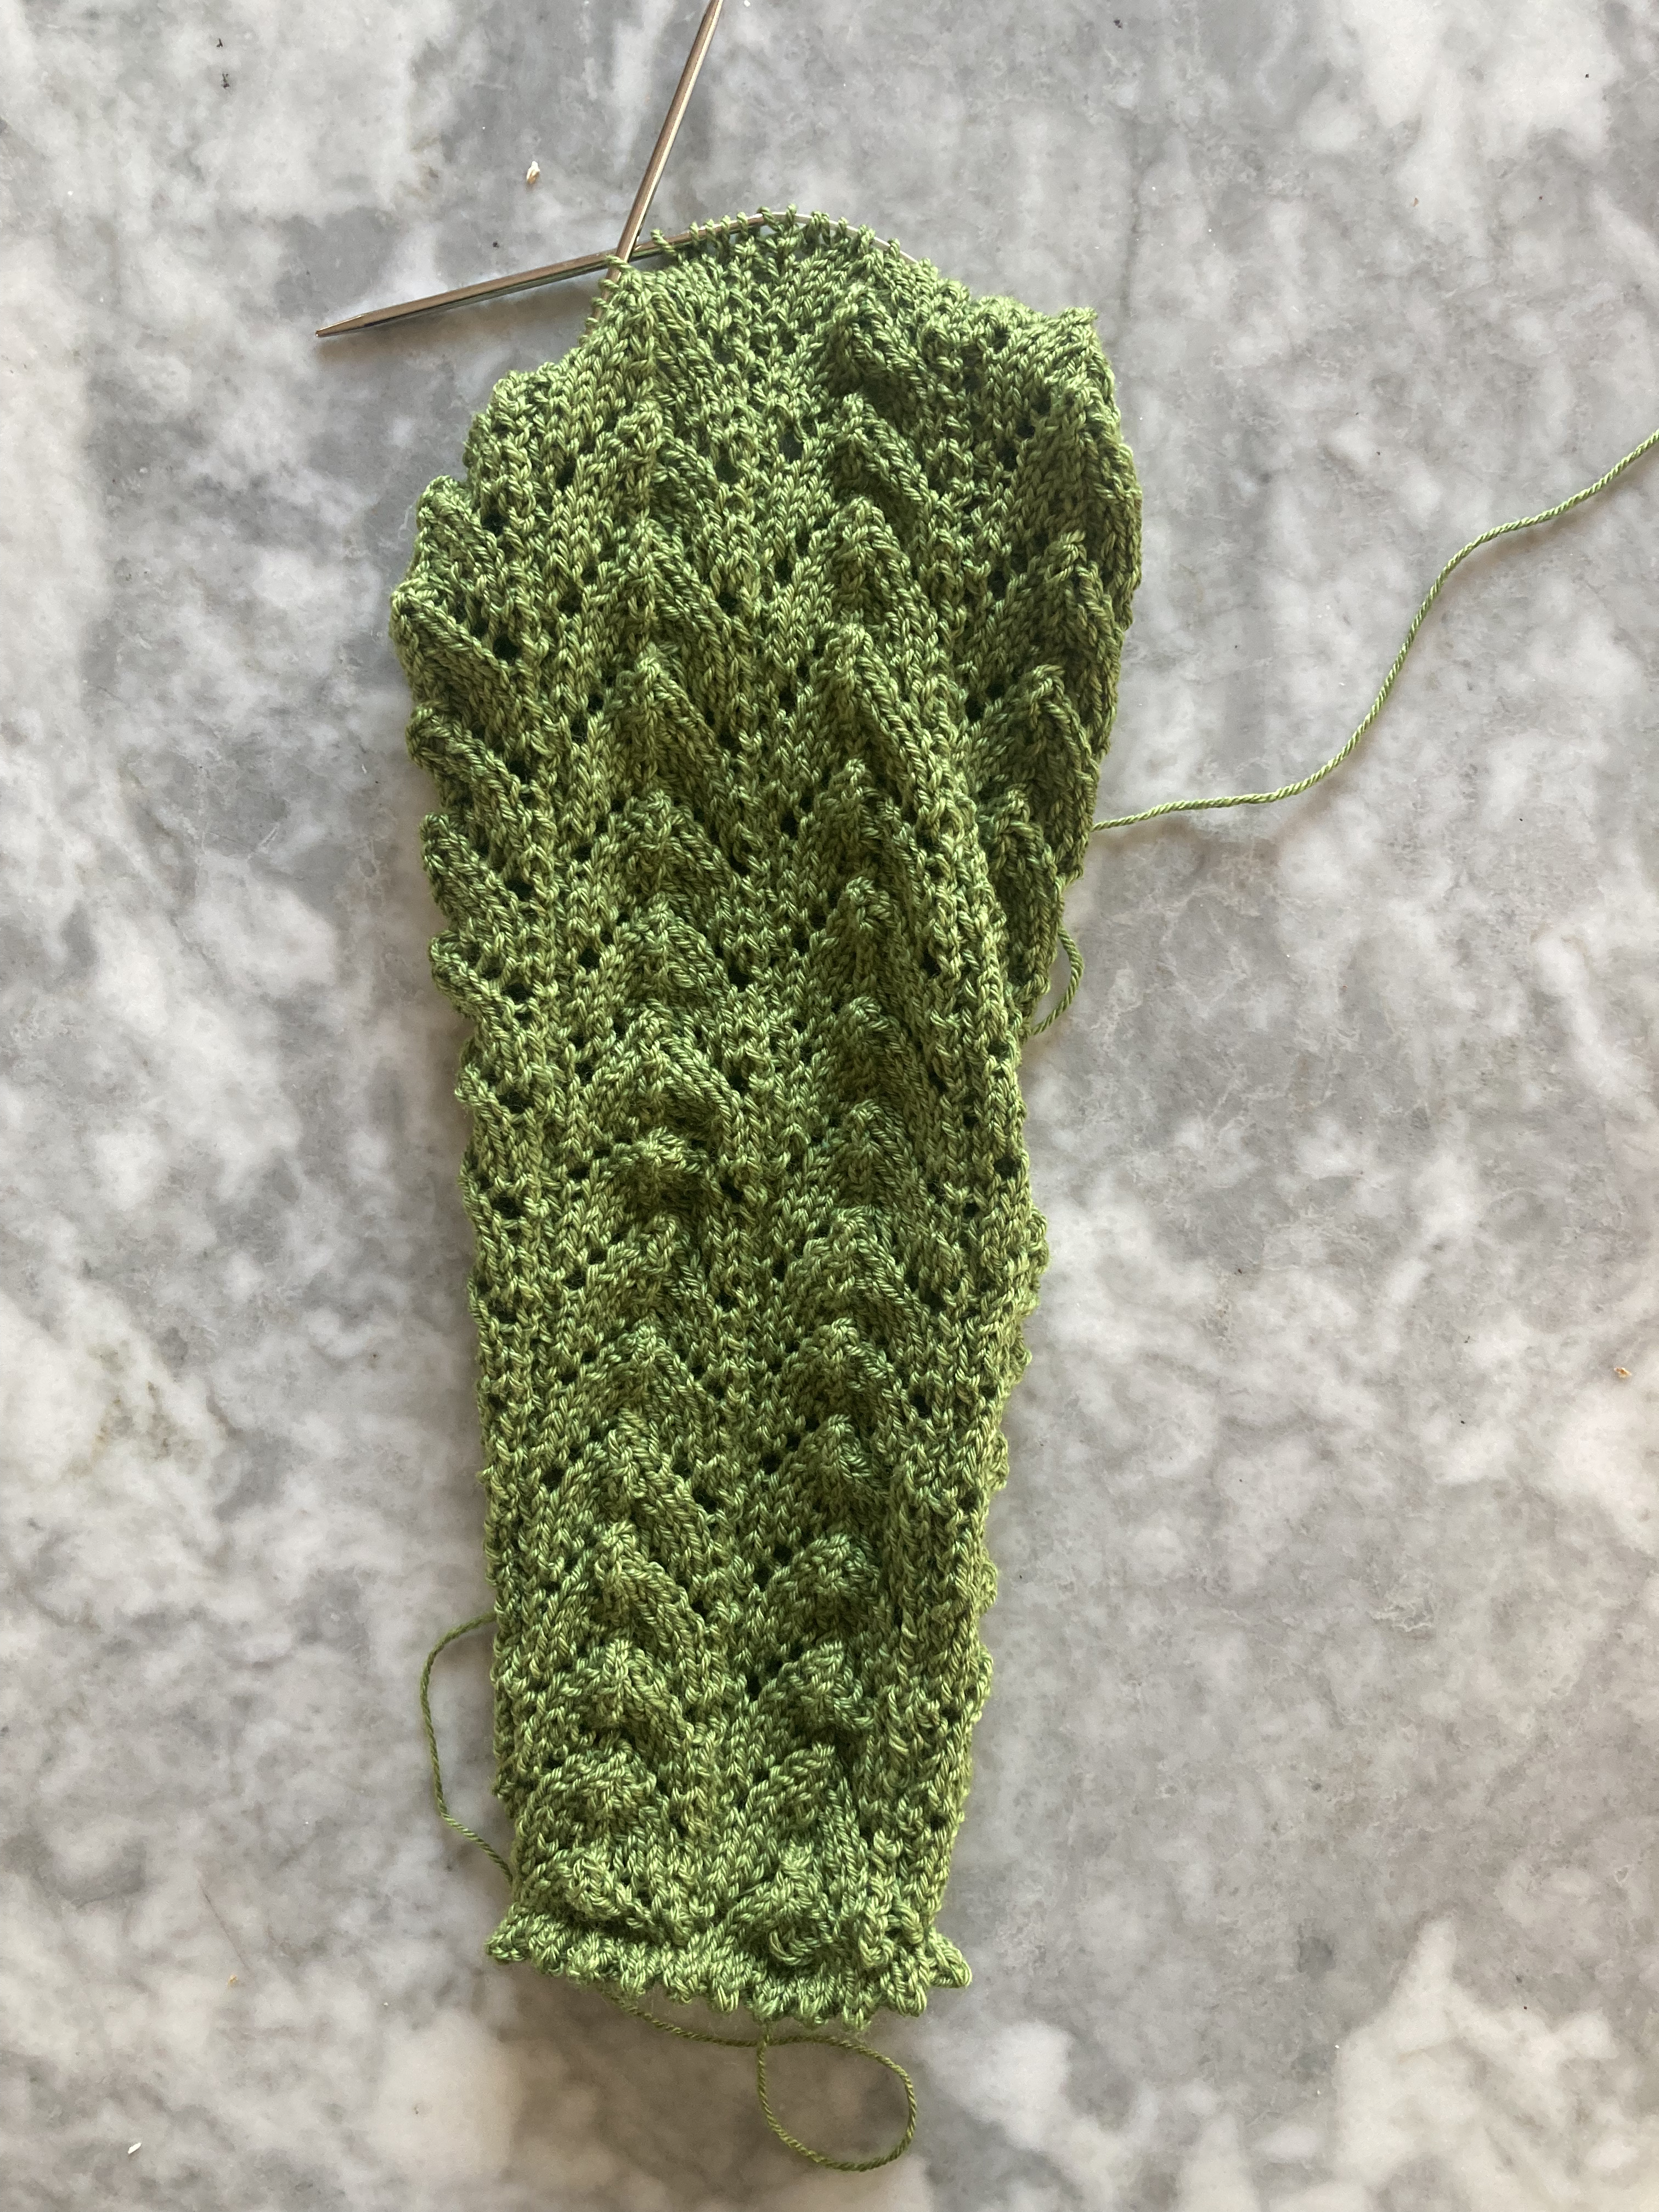
As usual for mid-1960s garments, there is no shaping from hem to bust, but unshaped garments always look like a sack on me. I started with a reasonable amount of positive ease at the hem (literal hem: the blouse features stocking-stitch hems at the bottom edge, sleeve edge and even at the neck edge) and increased up to a more or less zero-ease bust. It won’t have that authentic shape, but I will like it a lot better. The yarn was quite springy and holds its shape well, which is great, especially considering that a basket-weave pattern tends to stretch wider and shorter.
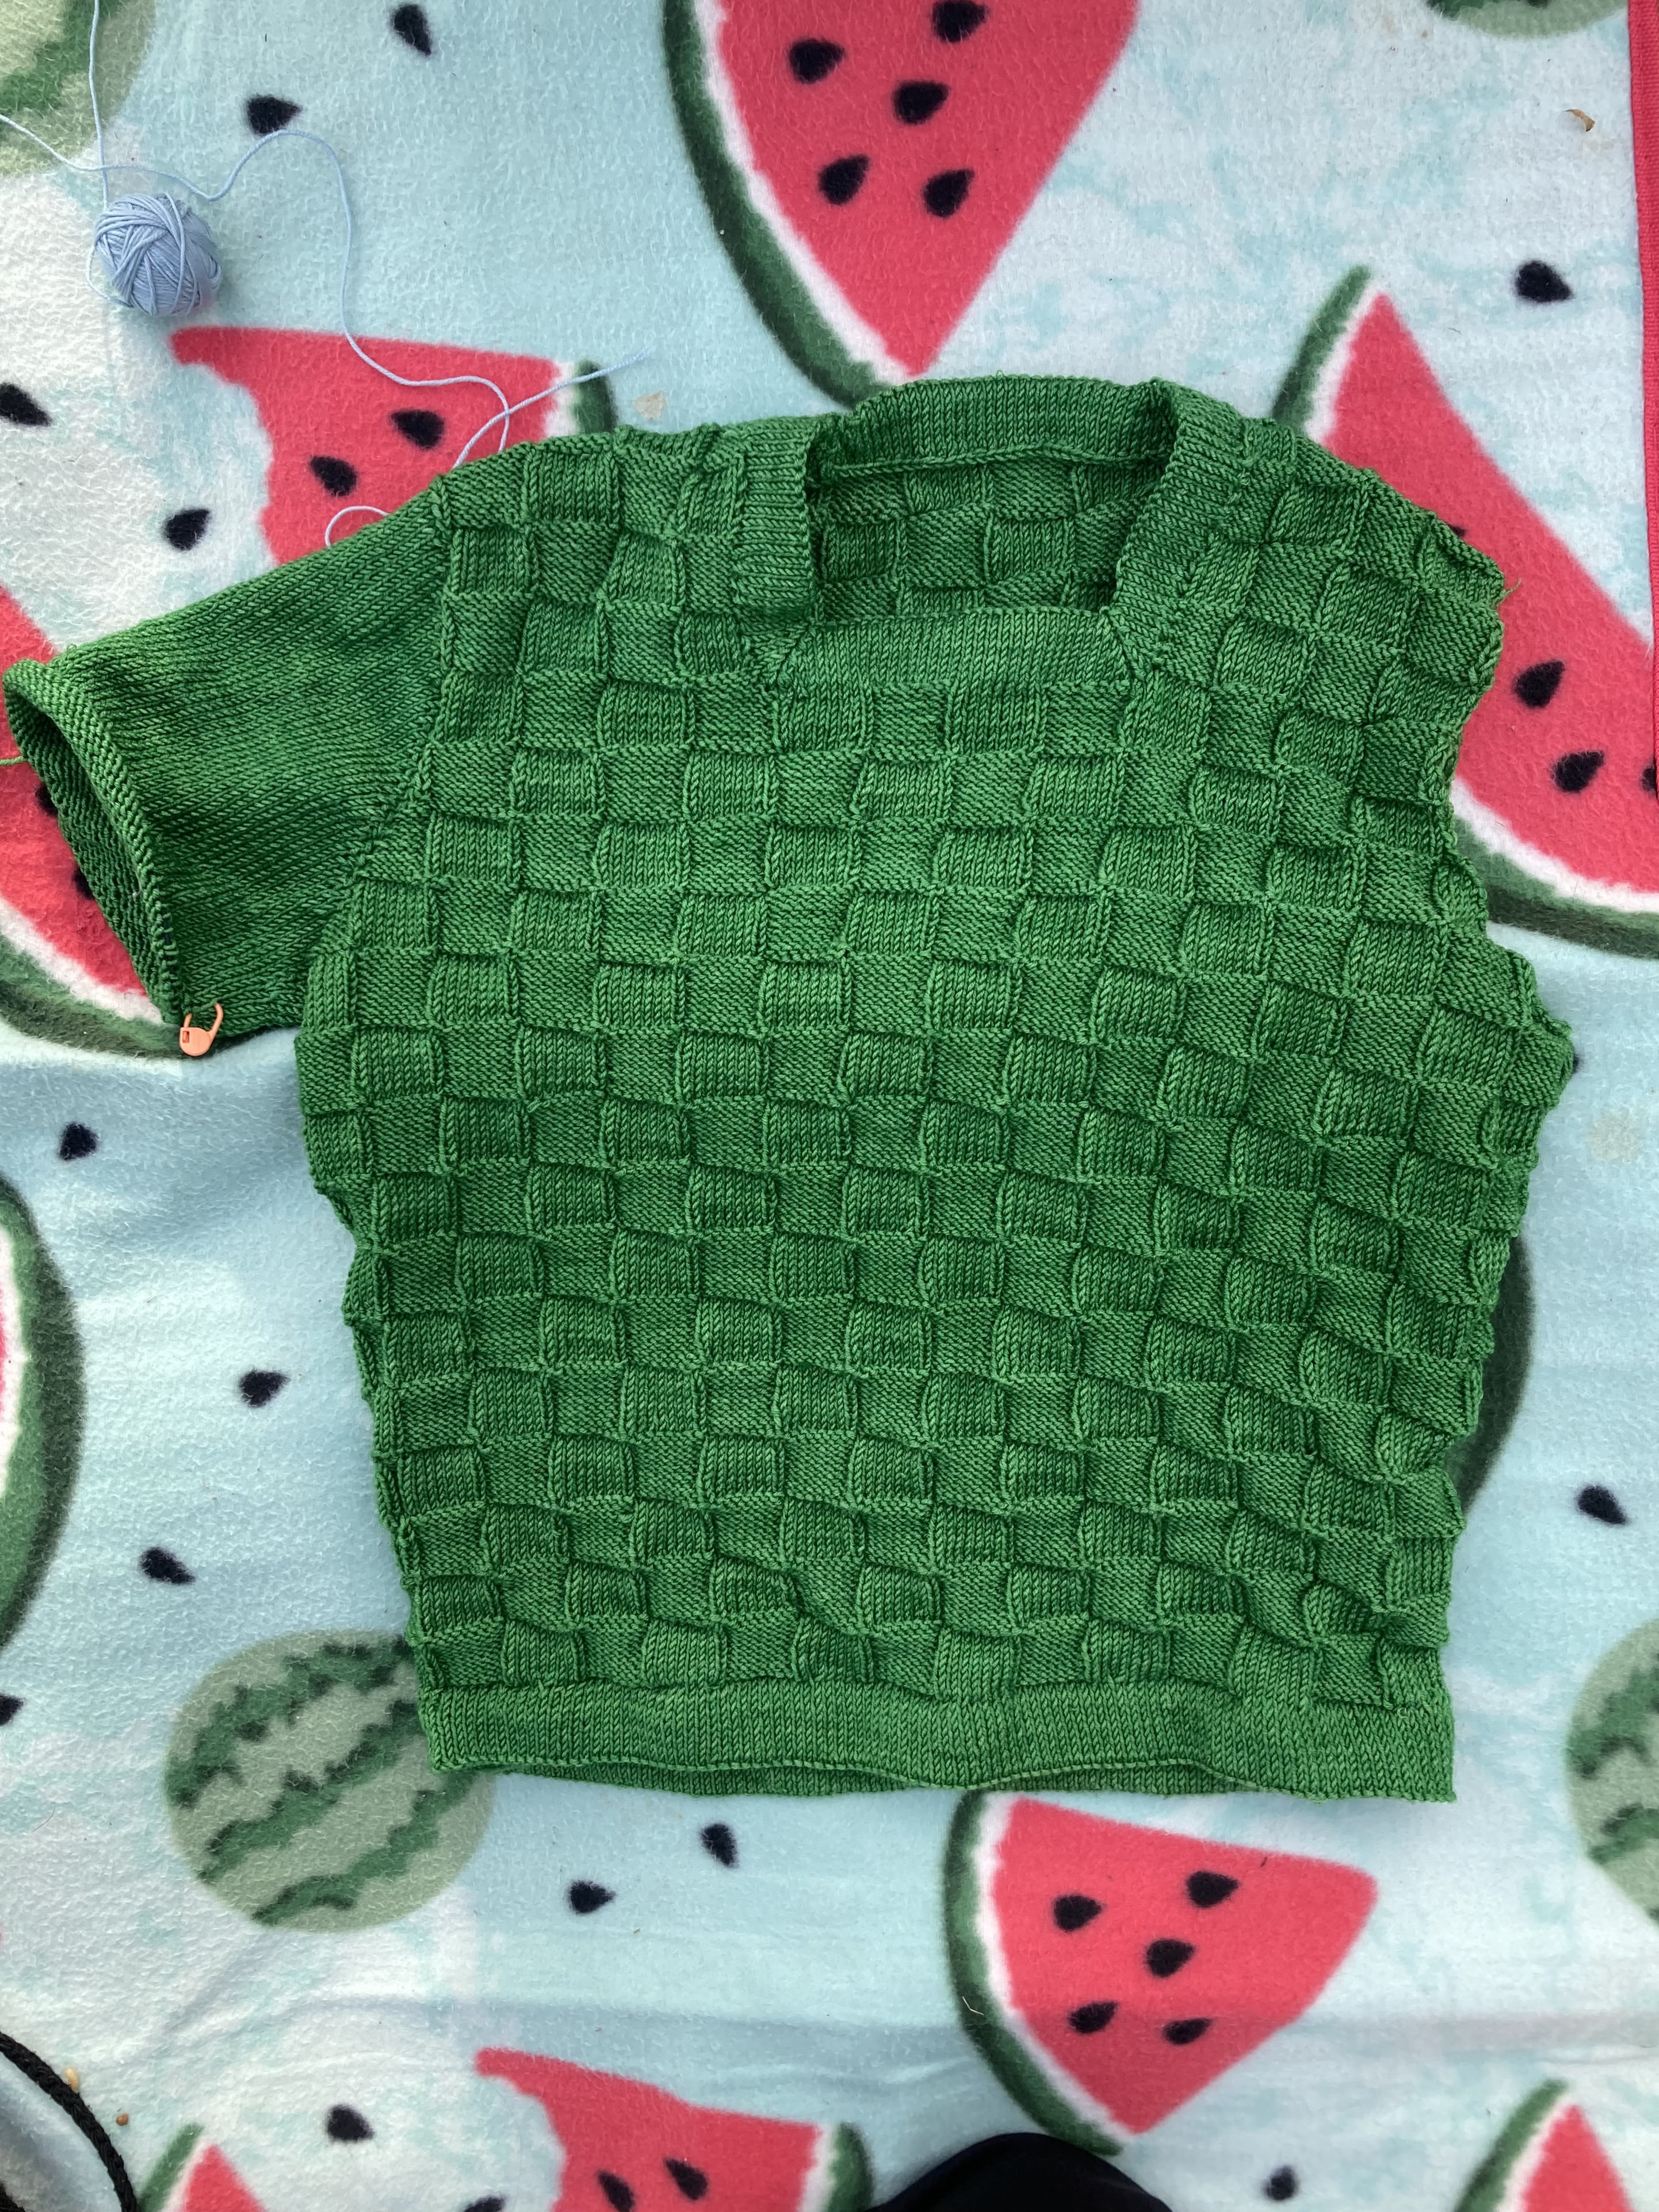
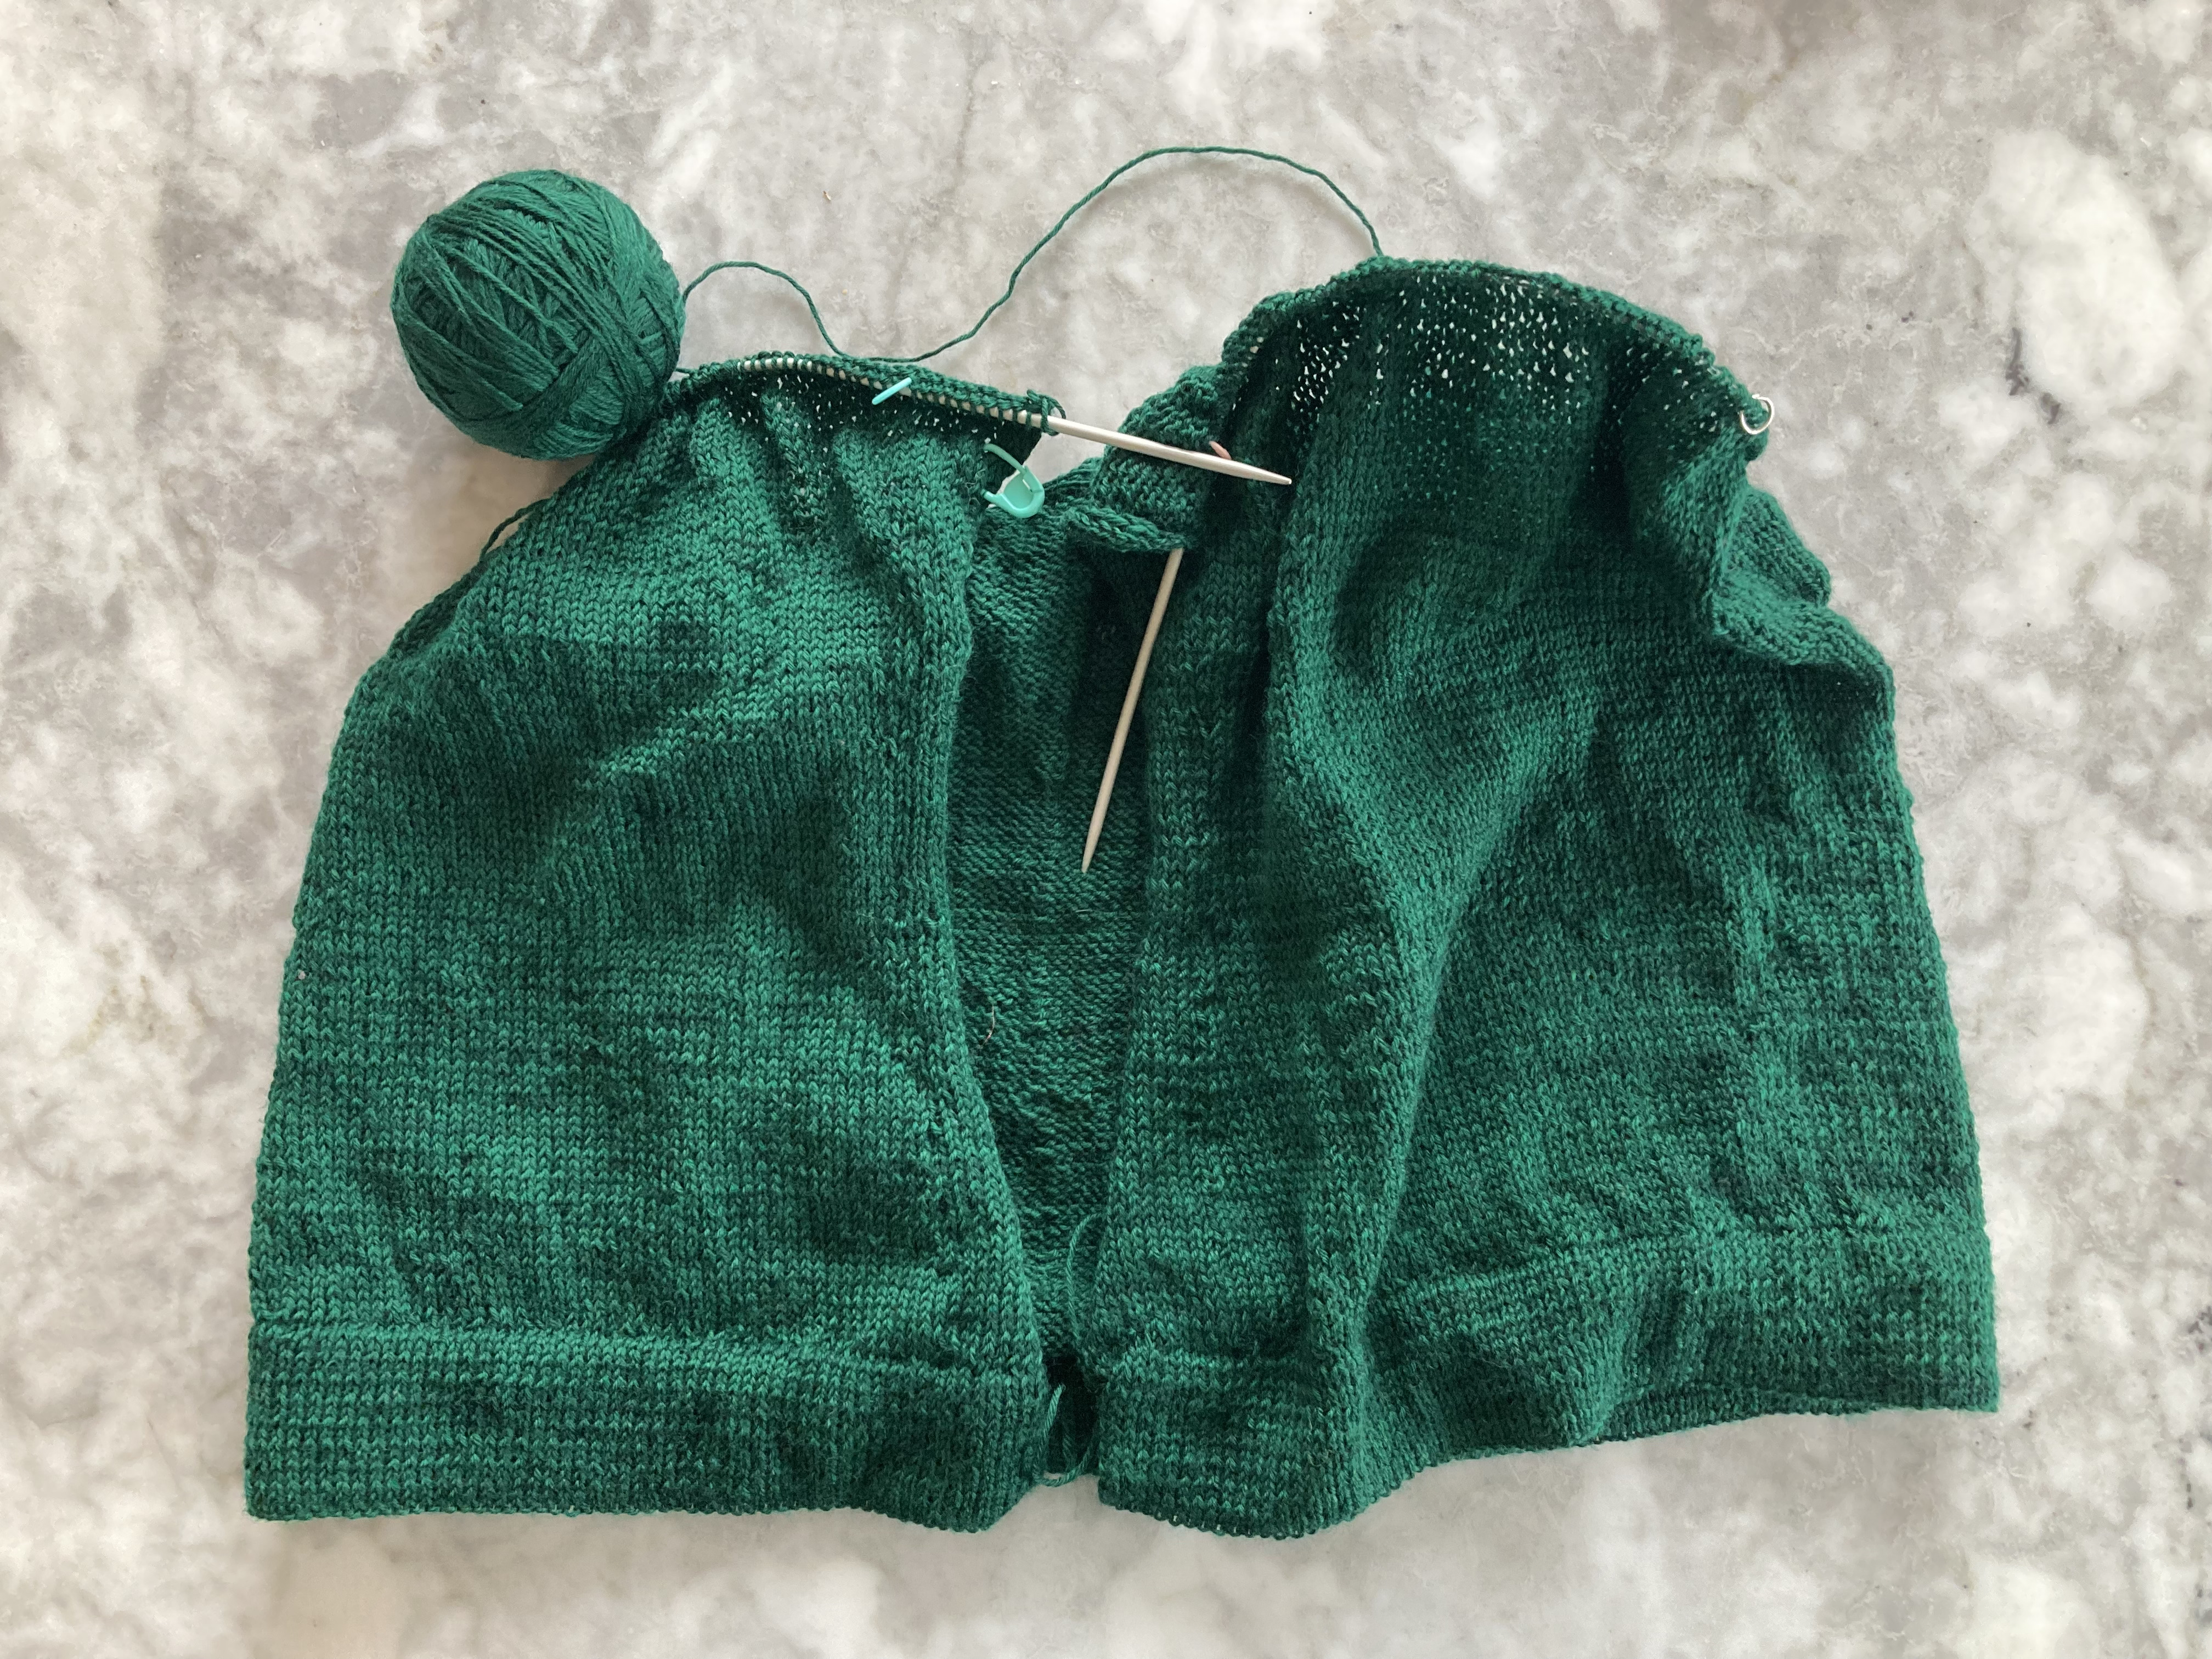
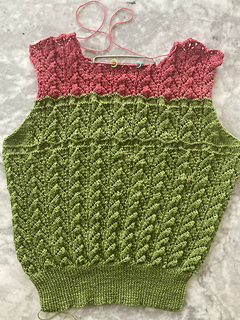
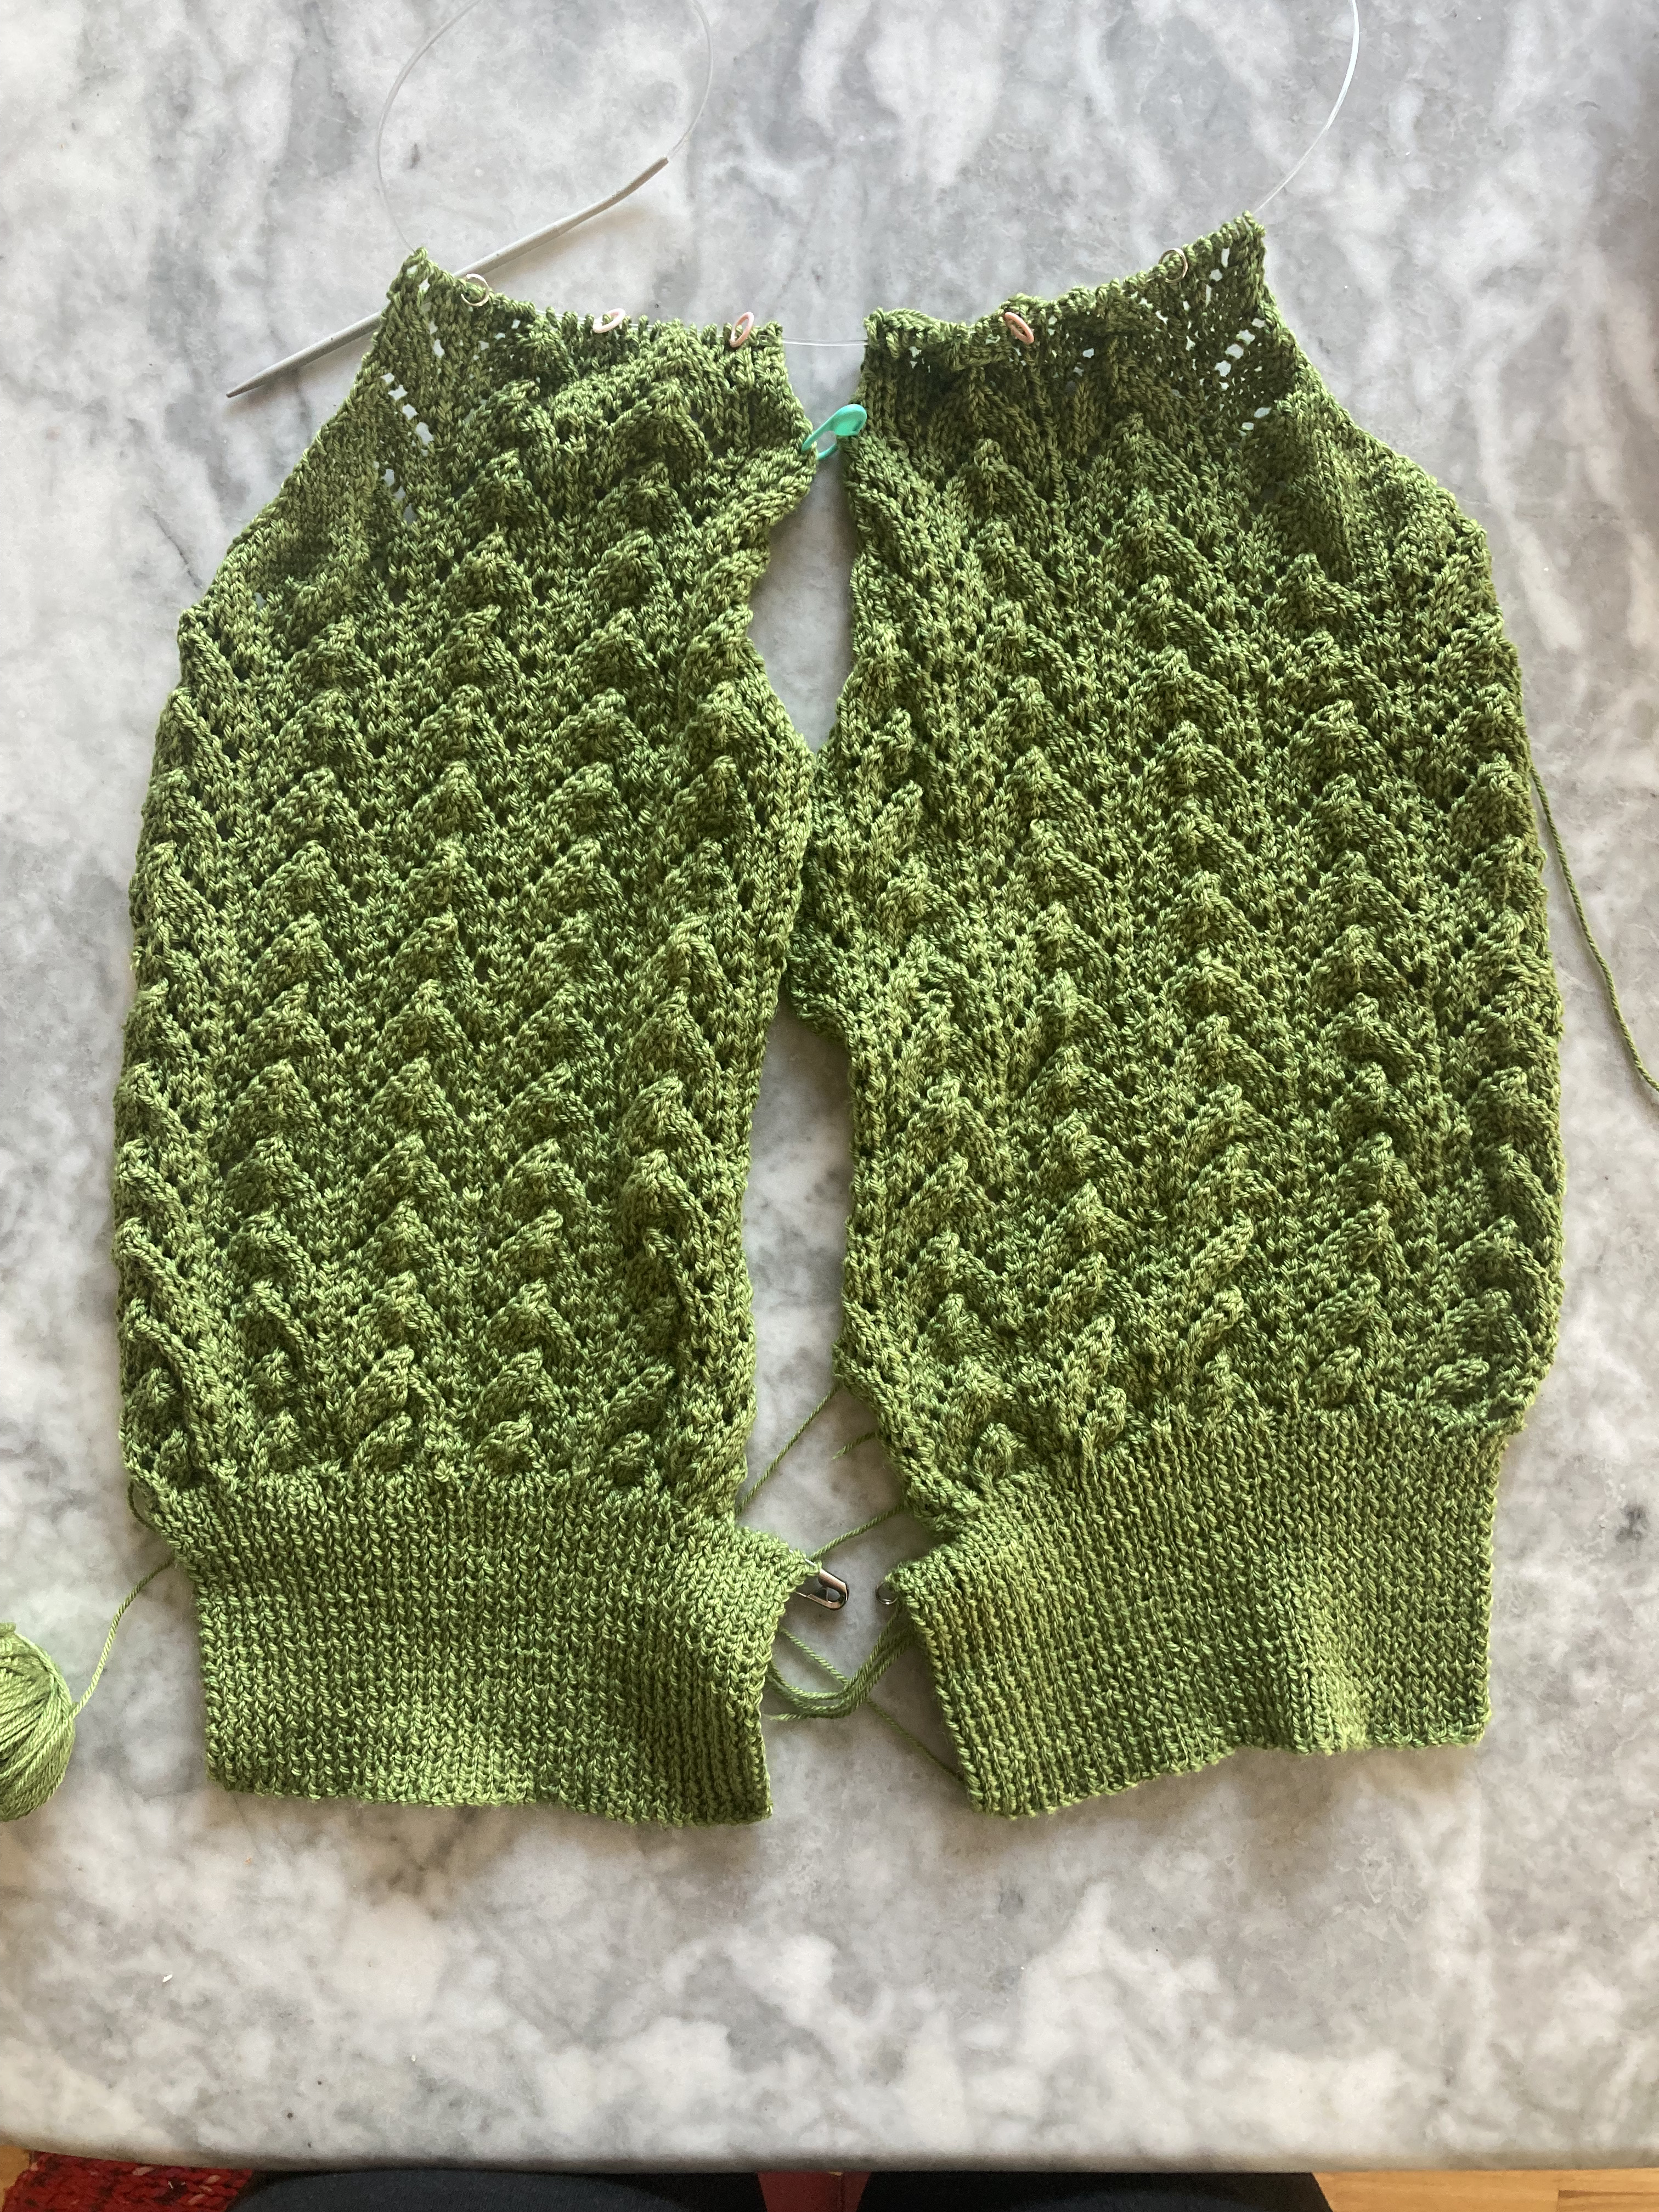
It went quite quickly. I made it in the round to the armhole openings. It was a bit snug when trying on, but I was sure it would stretch with blocking.
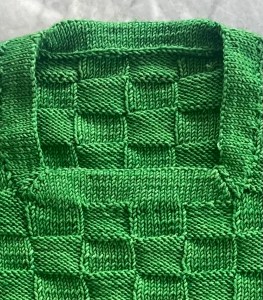
I made the back and front above the armholes, then sewed the shoulder seams and made the neck edging. The edging is a square hem just like the bottom edge and sleeves, but with mitred corners. In the pattern, you are supposed to make all four edges separately (picking up stitches from holders or knitting up on the neck sides, then decreasing and increasing at the corners) but of course I made them all together to avoid seaming. I put a purl ridge on the turning row as well. The neckline was weirdly small and not as low-cut as in the photo, even though I made it according to pattern / adjusted for gauge difference. It still fit over my head just fine.
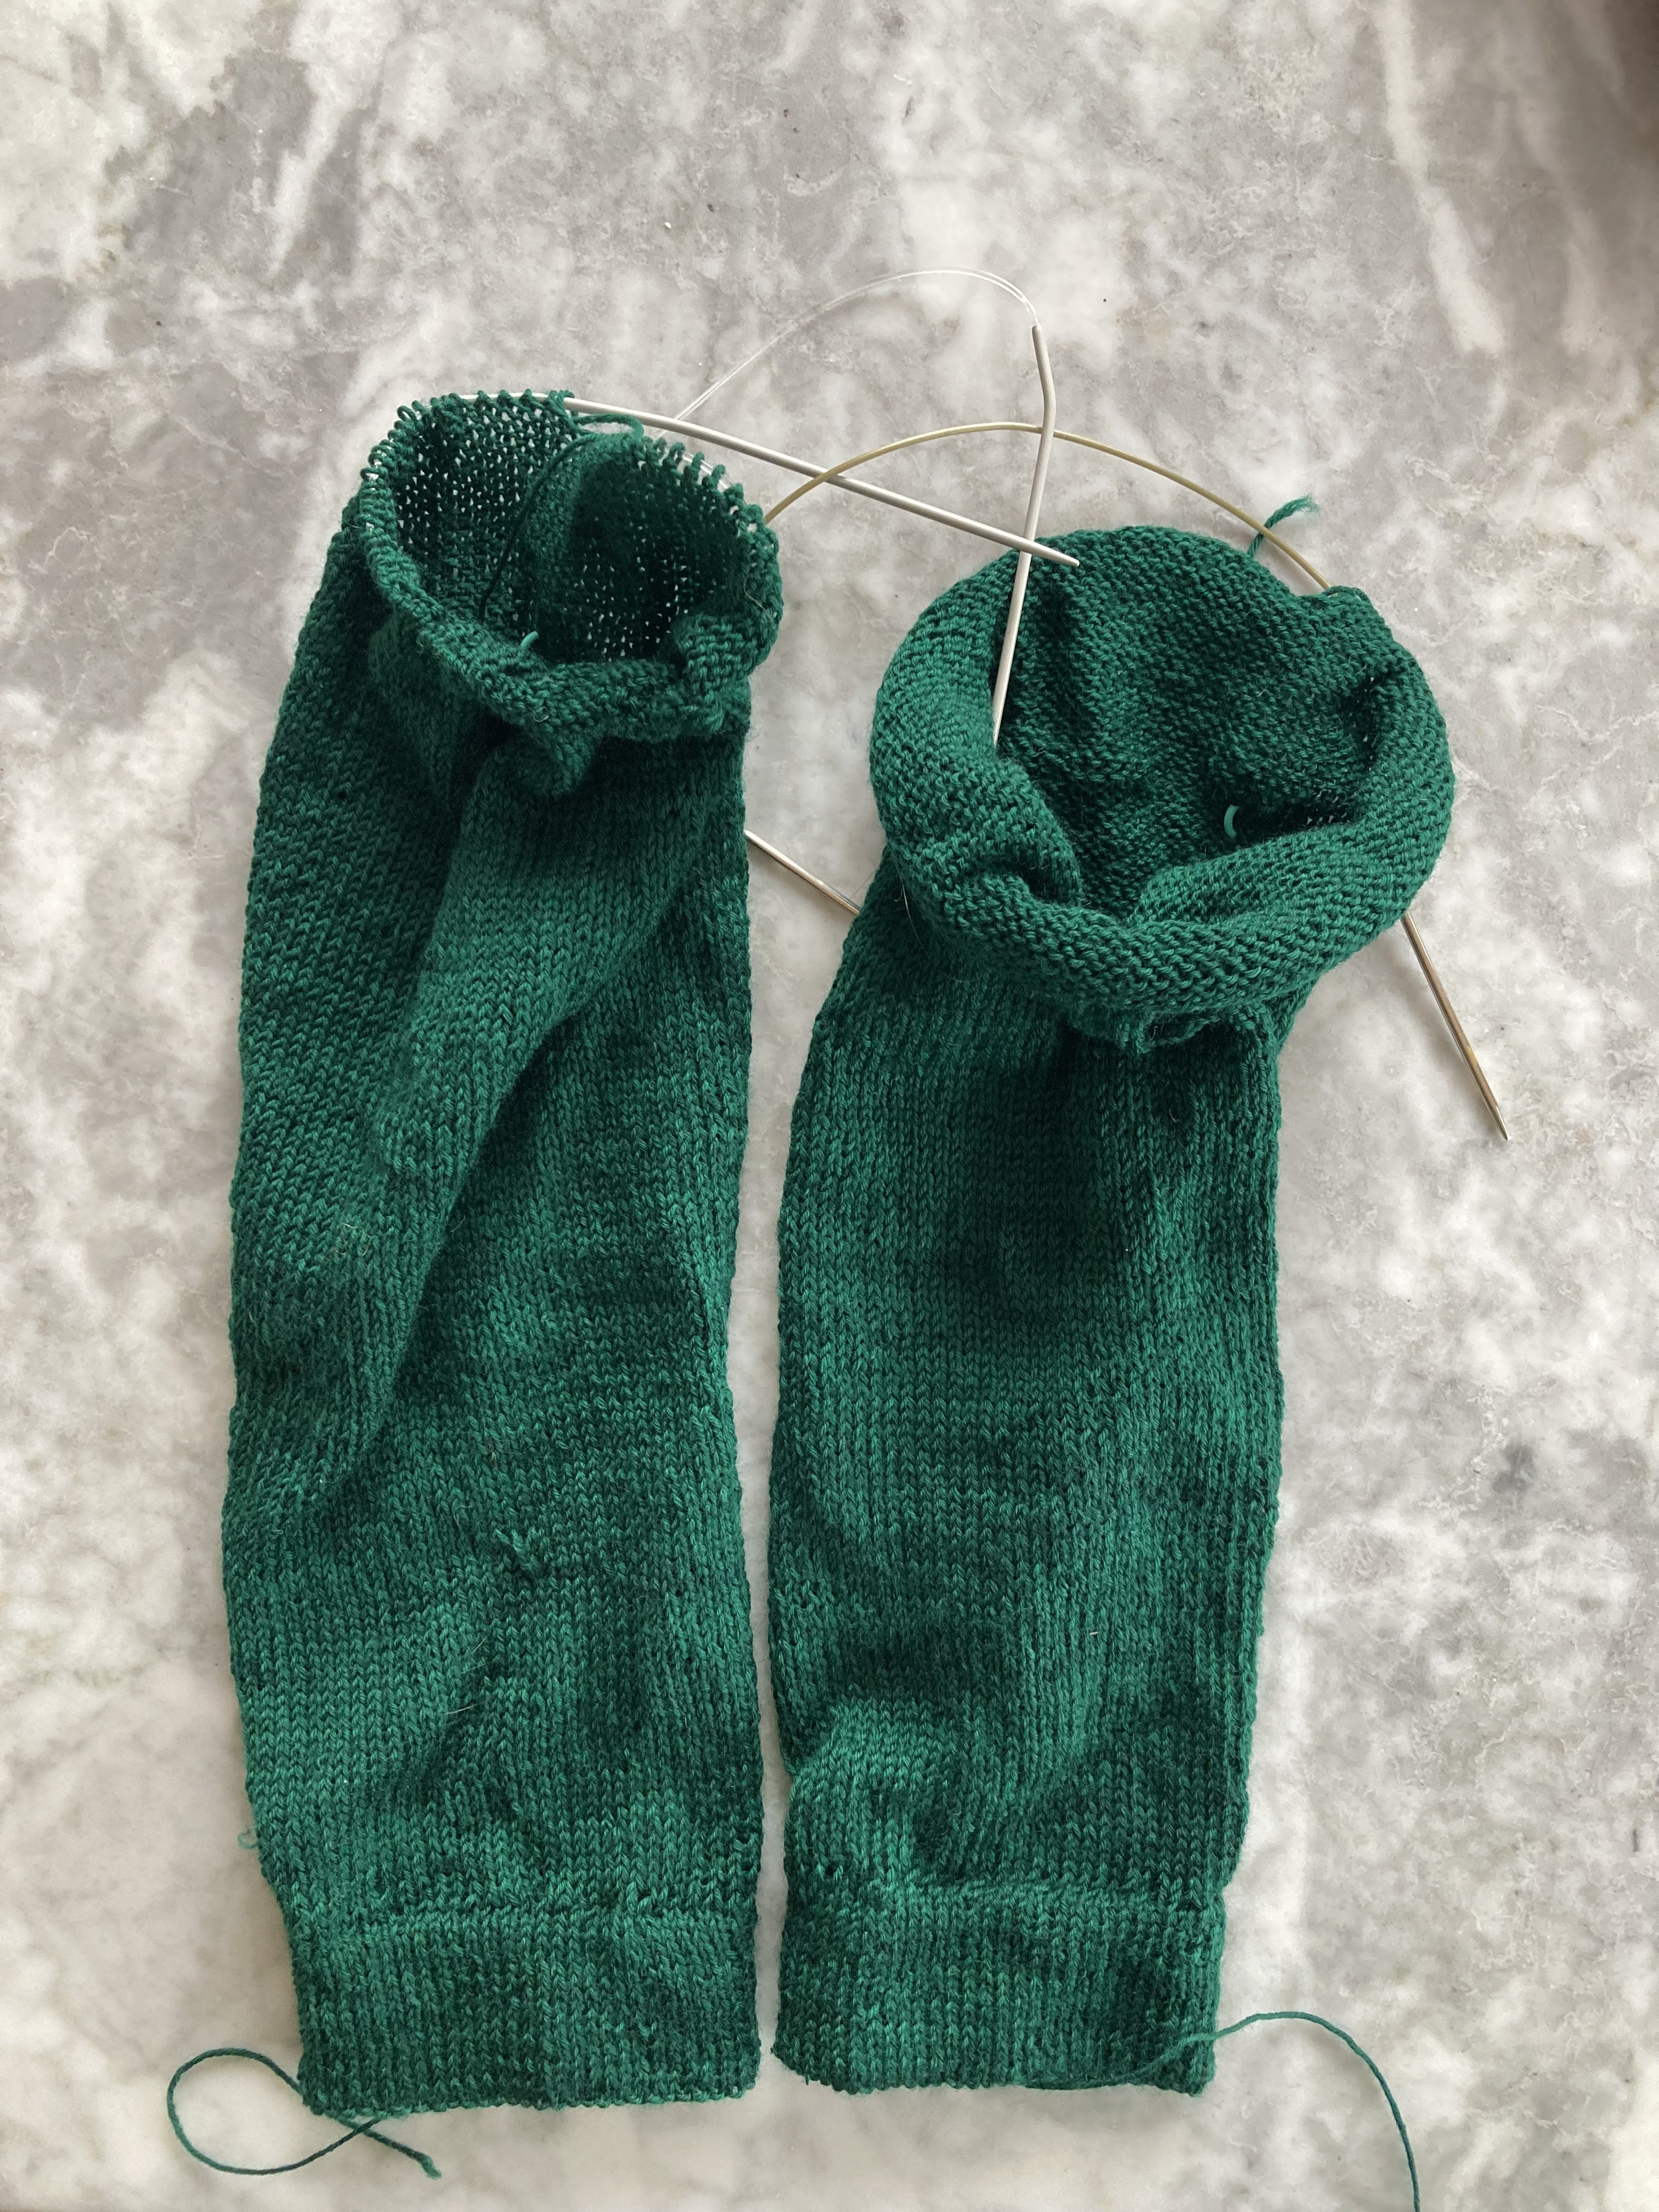
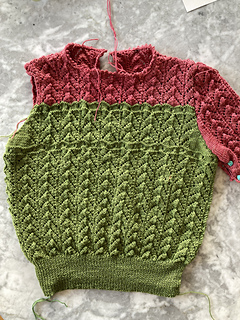
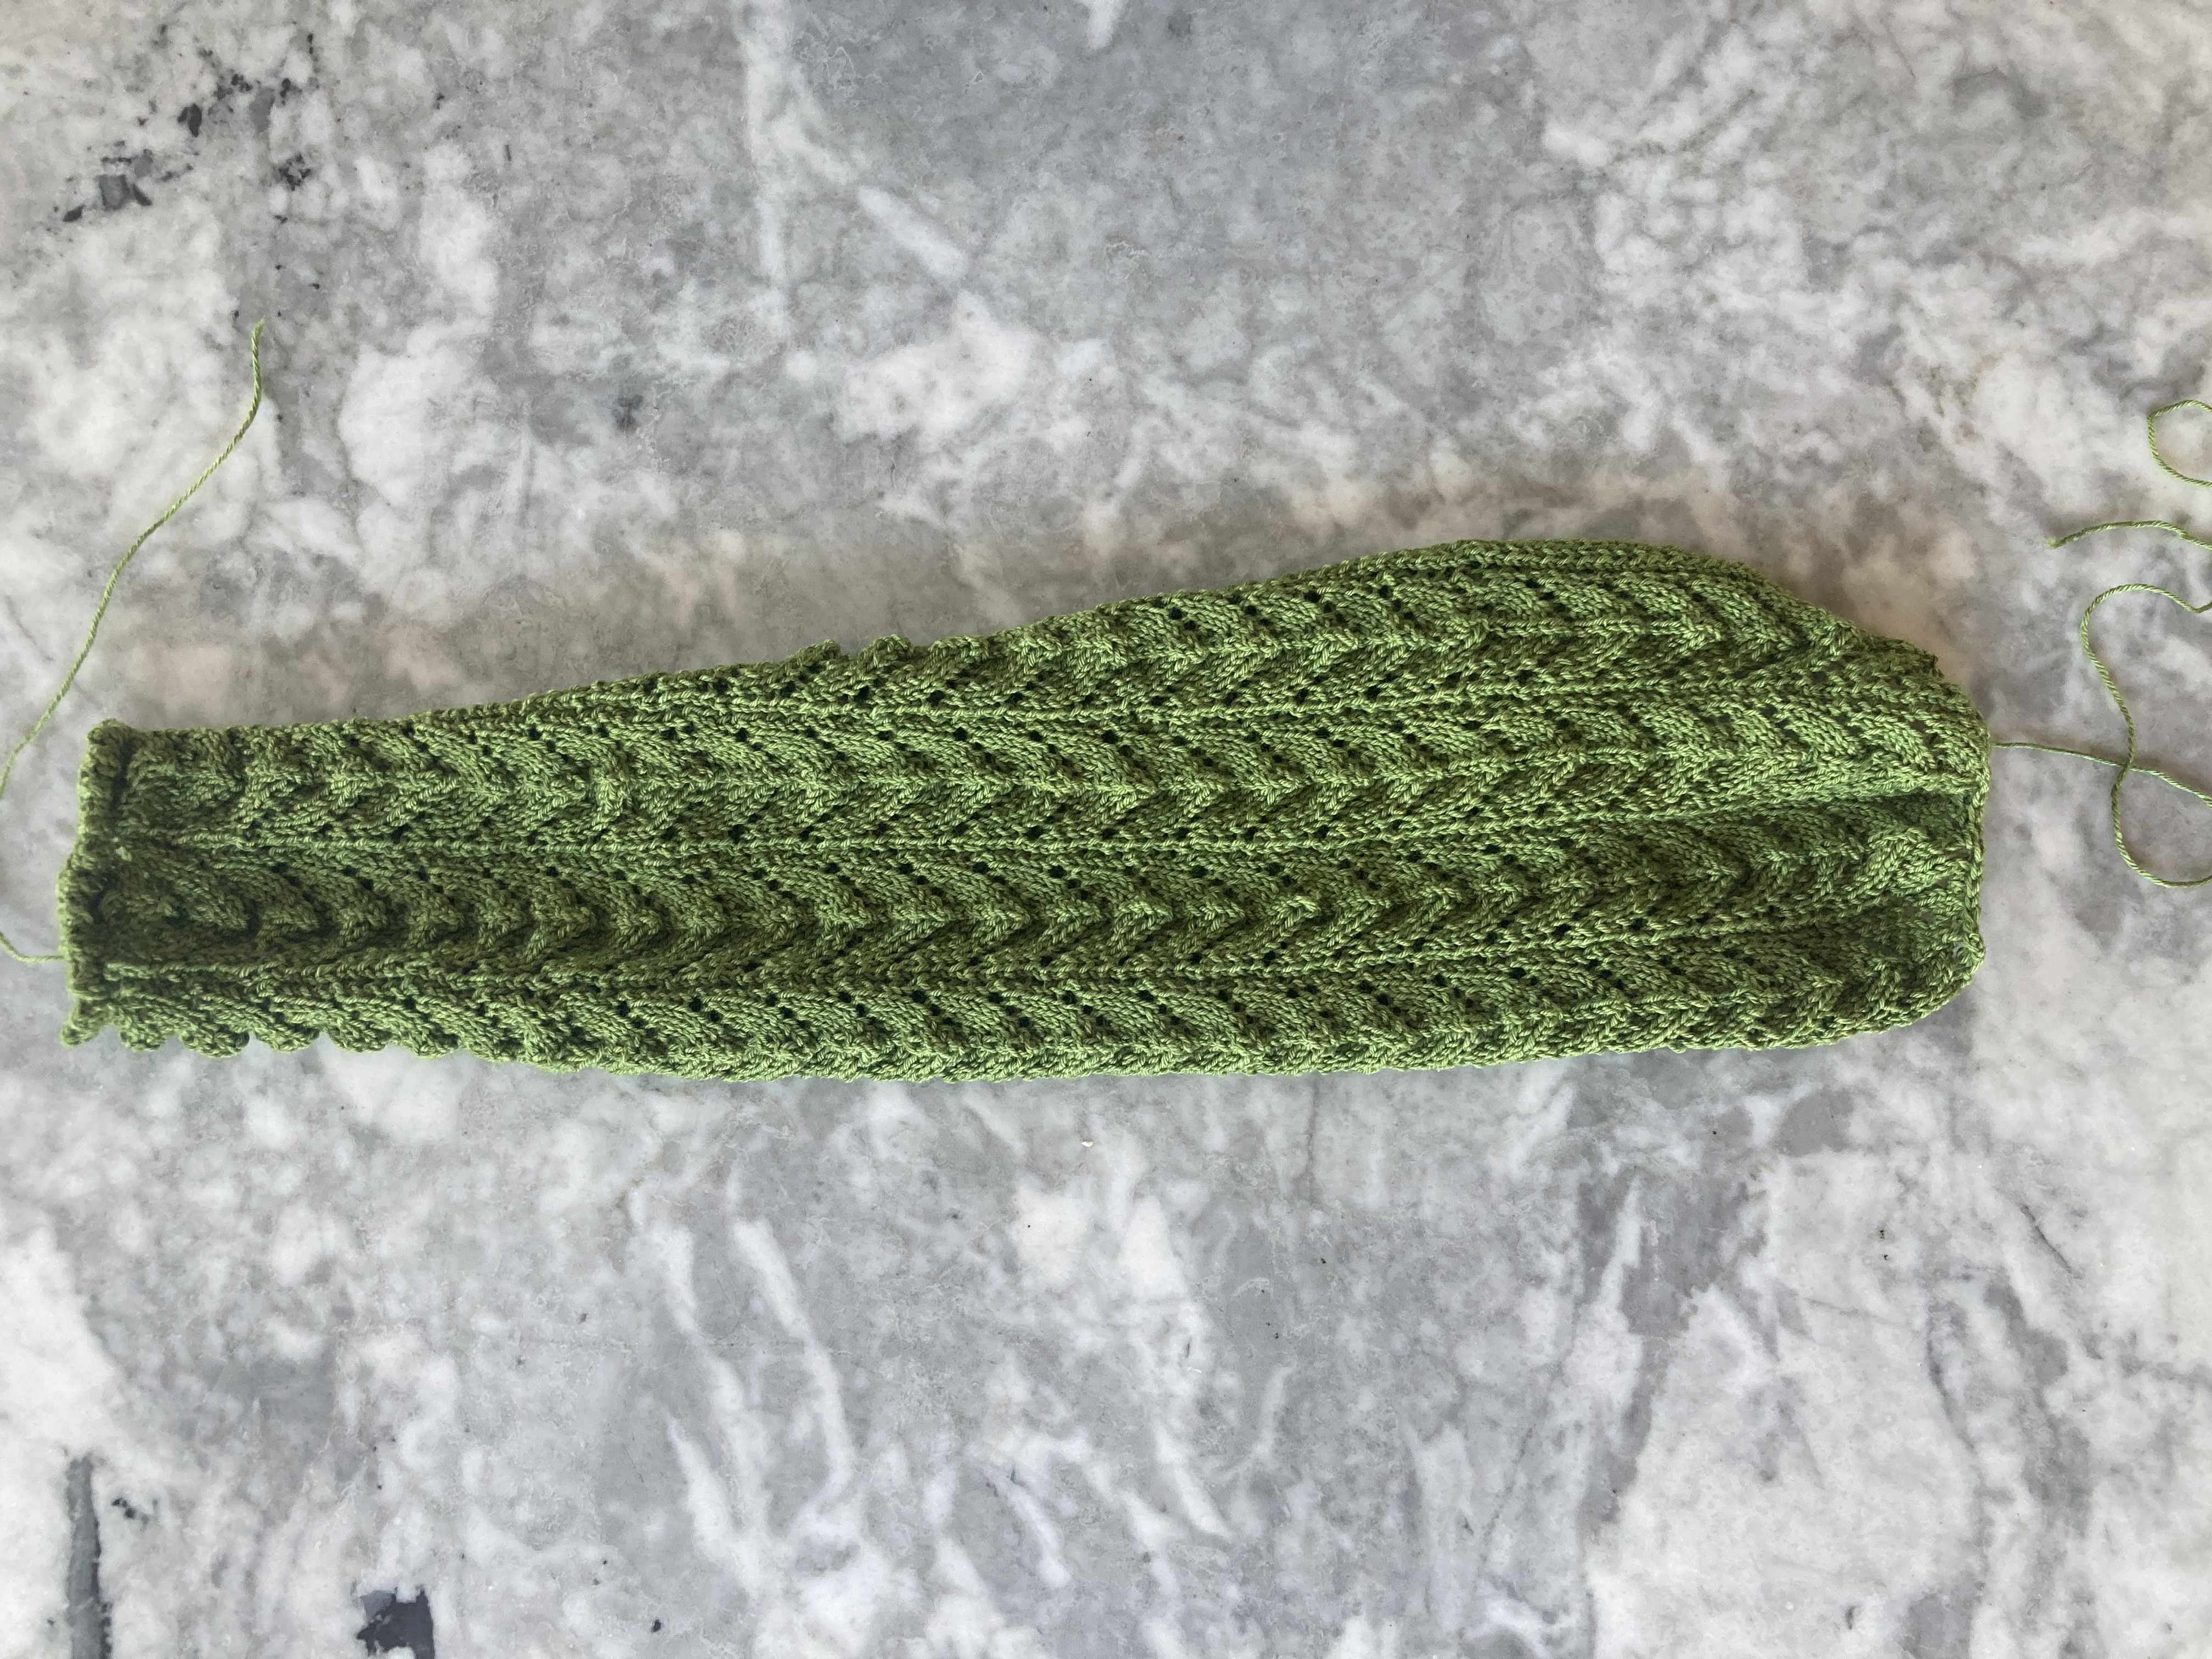
I didn’t know if I would have enough yarn or not — even with 300 grams — so I made the sleeves from the top down, picking up stitches around the armhole and working the pattern so to speak in reverse order. Even adjusting for gauge, the first sleeve was wide and a bit wing-like (the hem doesn’t pull the fabric in nearly as much as ribbing, of course). I recalculated and made the second sleeve narrower, which was better, so frogged the first sleeve and made it again. I did end up having to buy one more ball of yarn, too — I thought about making very short cap sleeves, but it was worth the extra ball of yarn to get the right length.
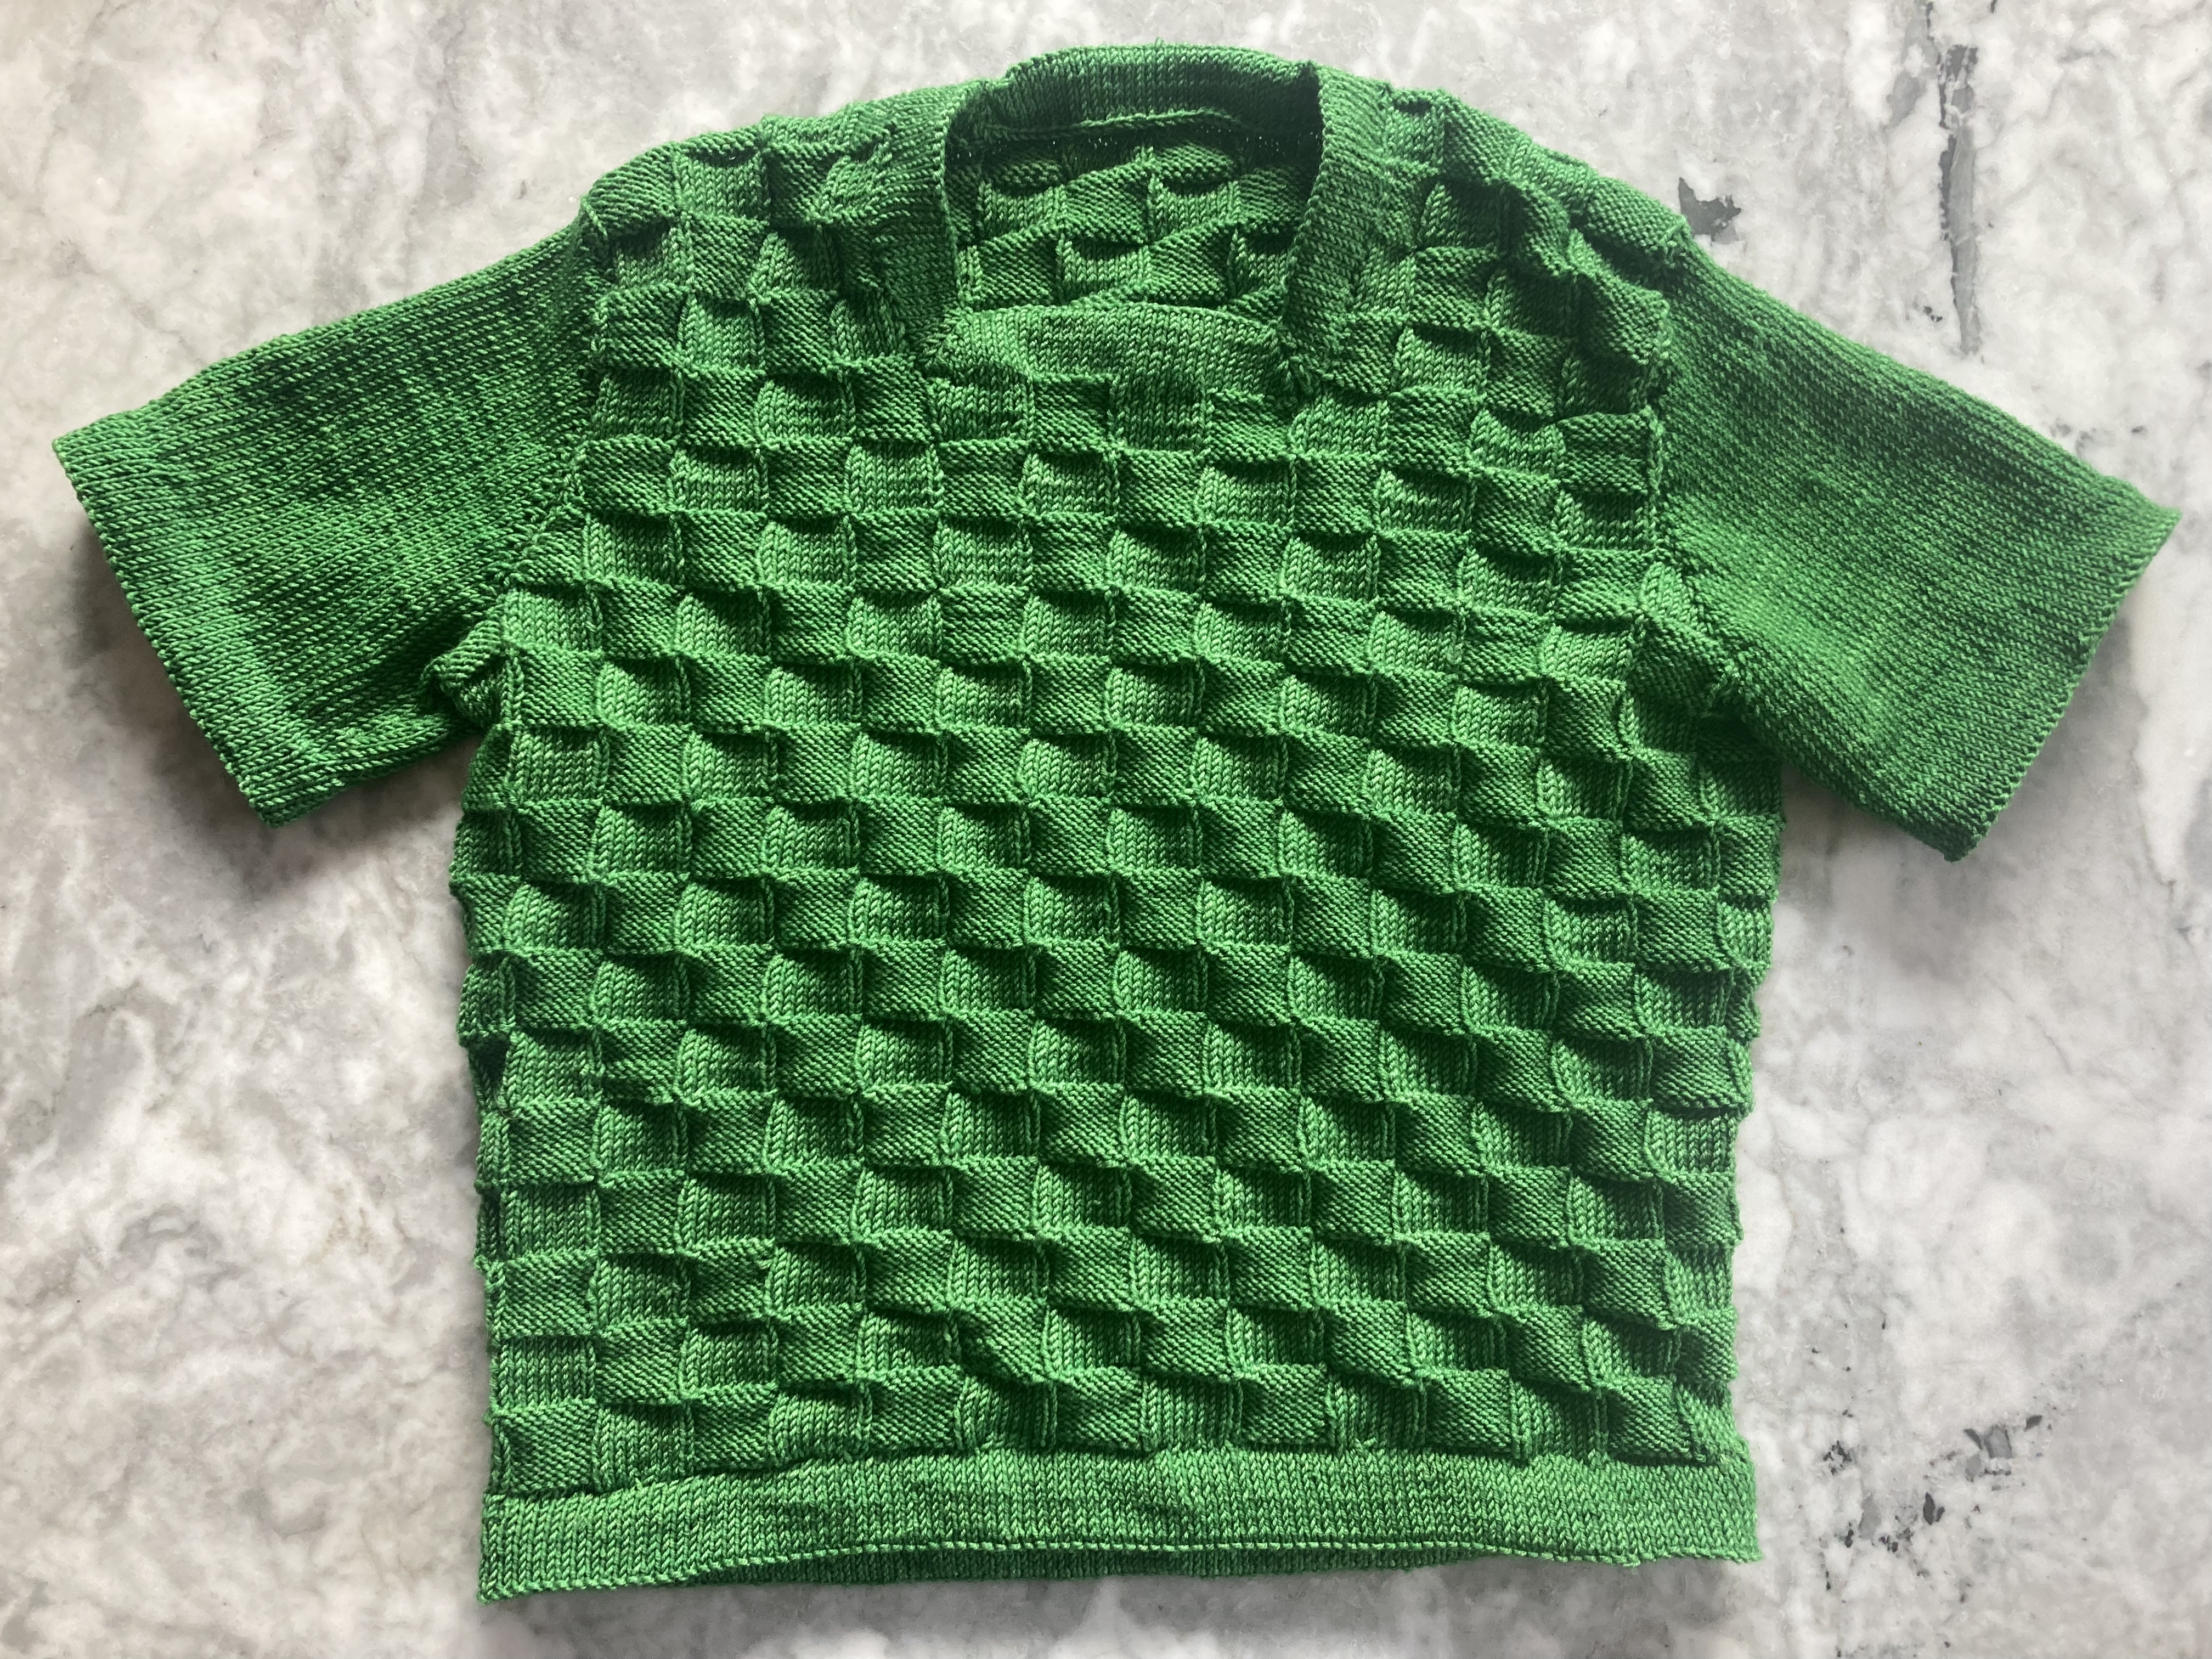
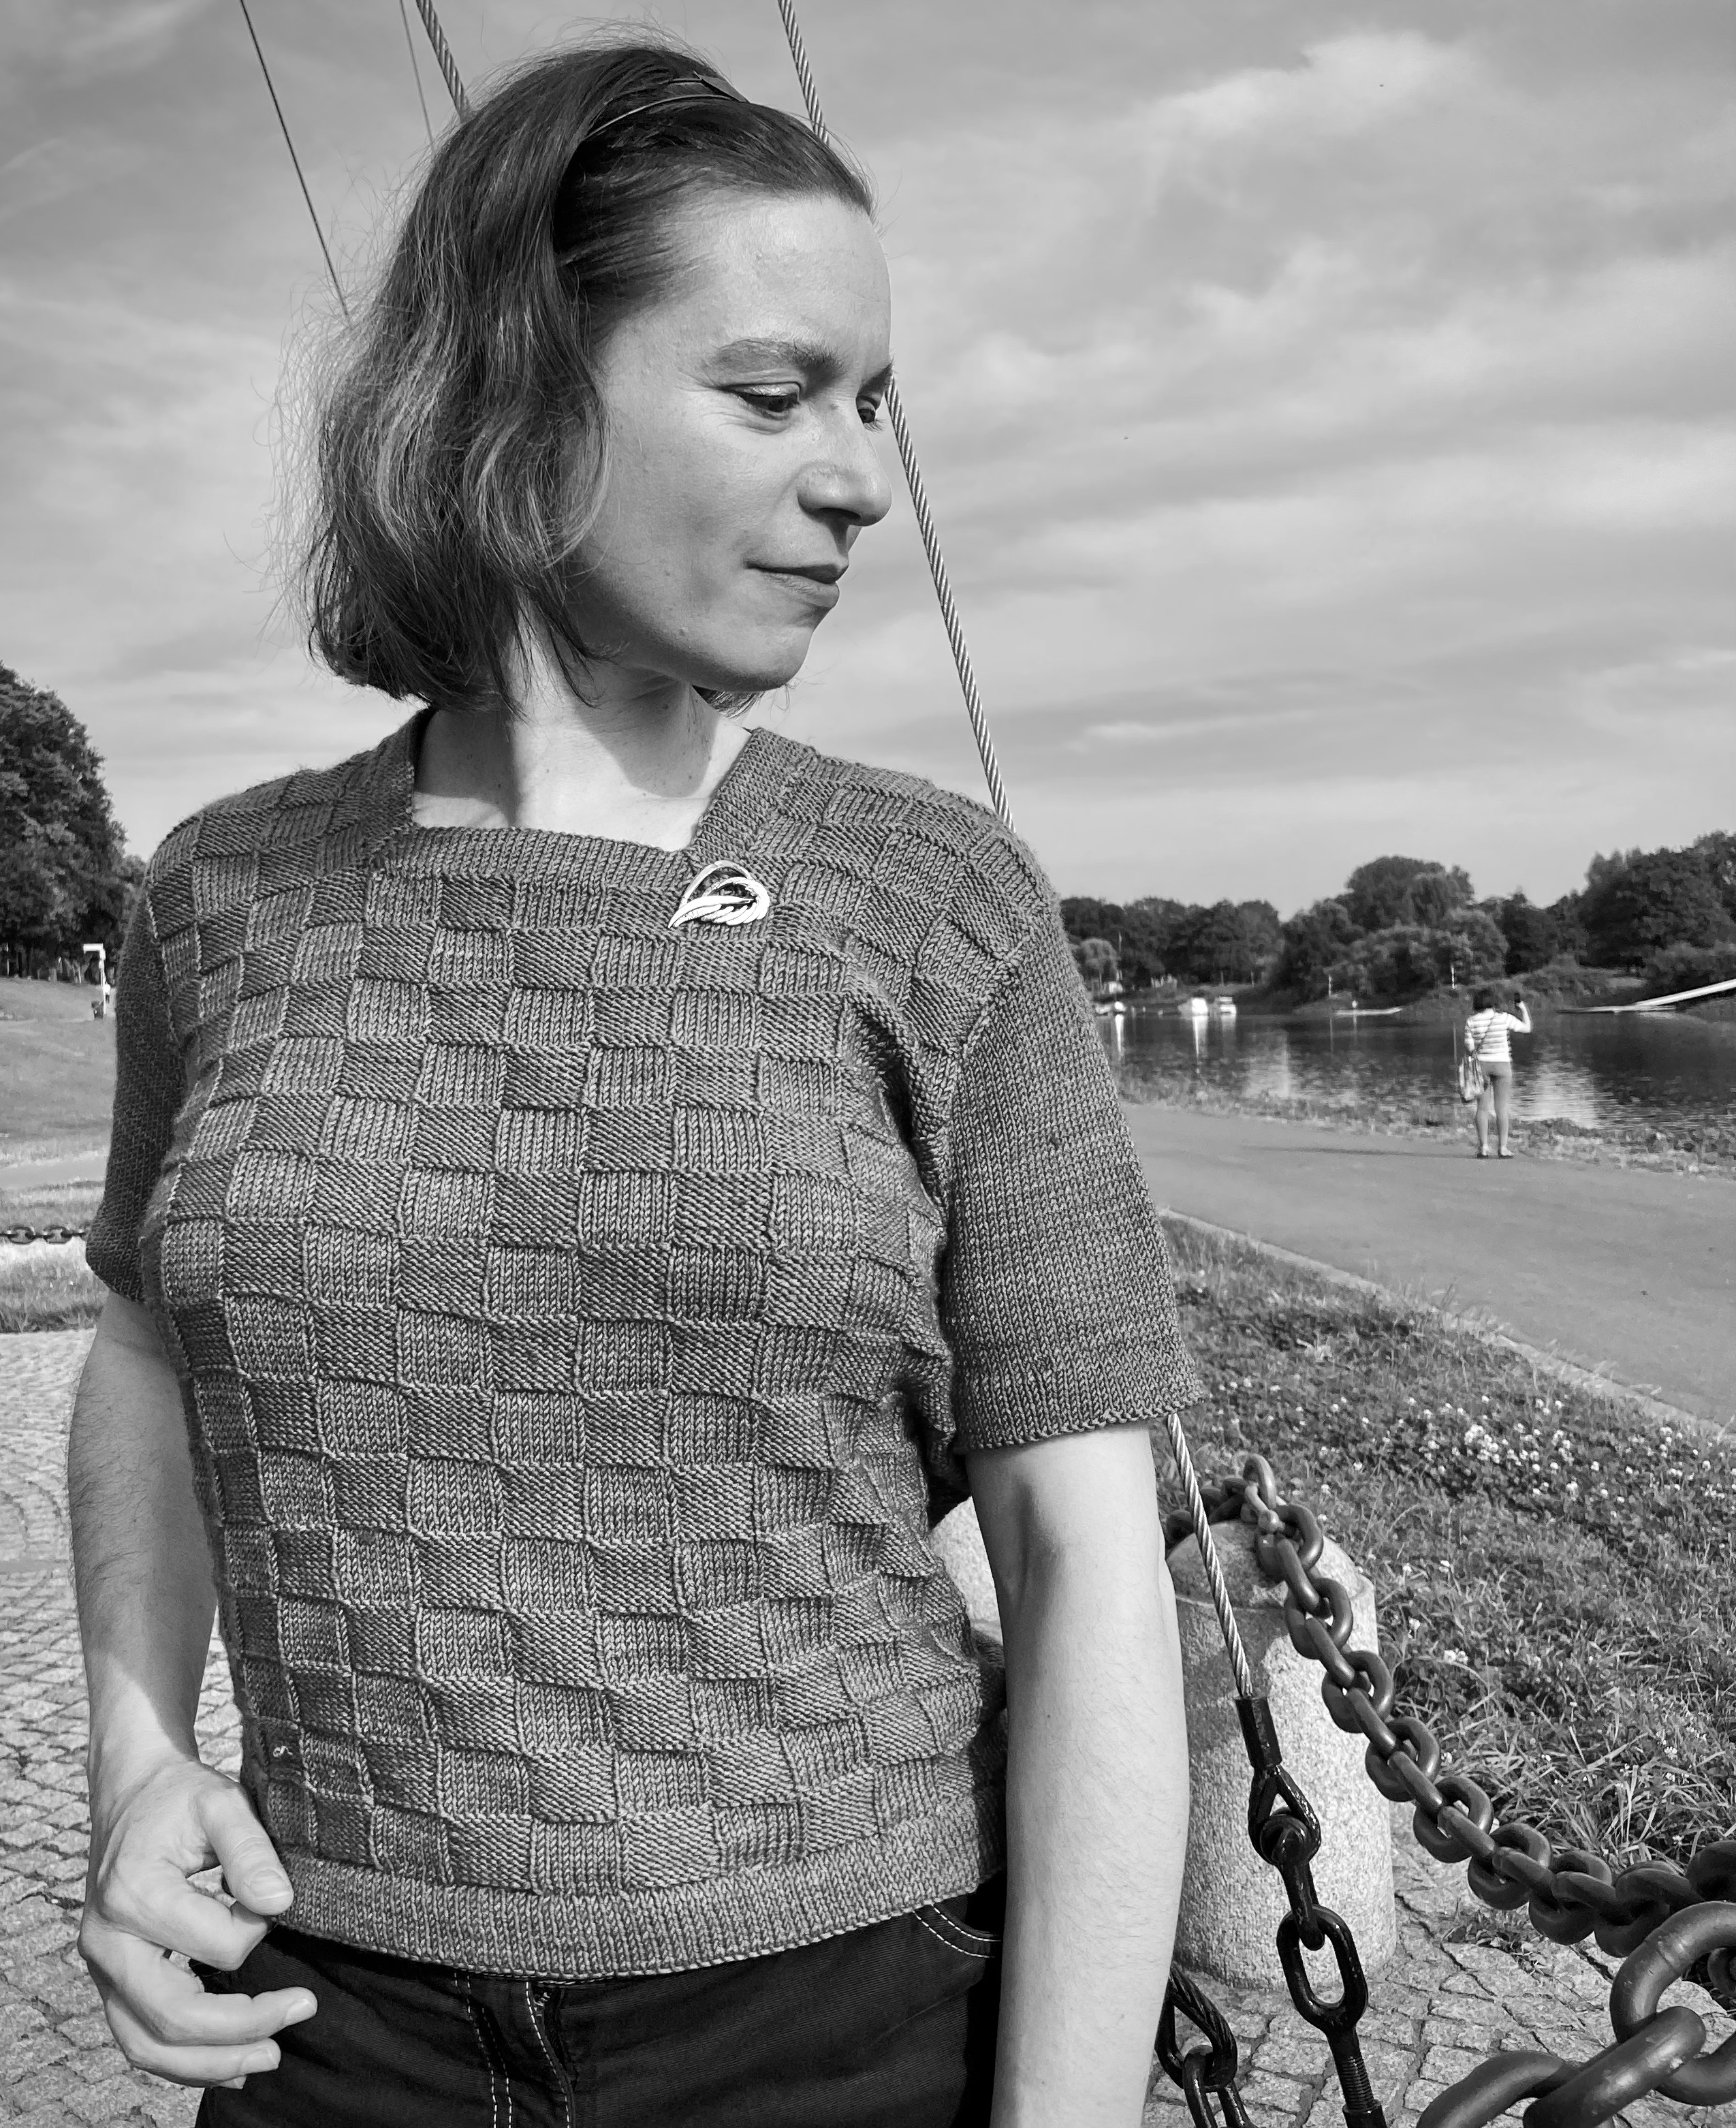
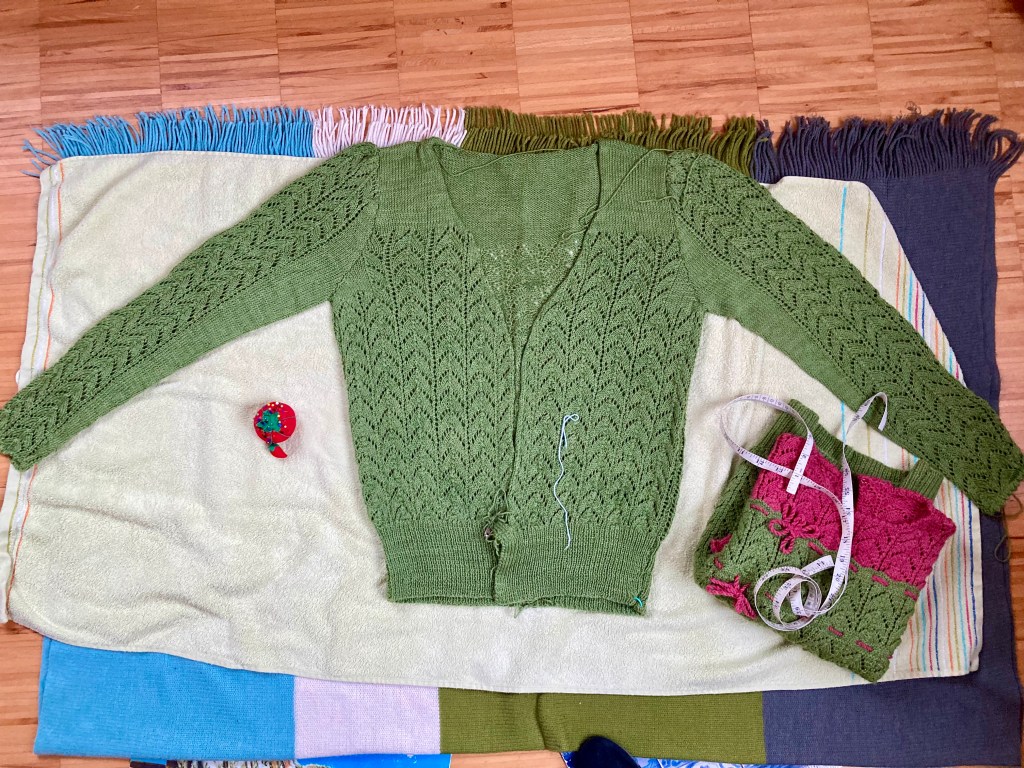
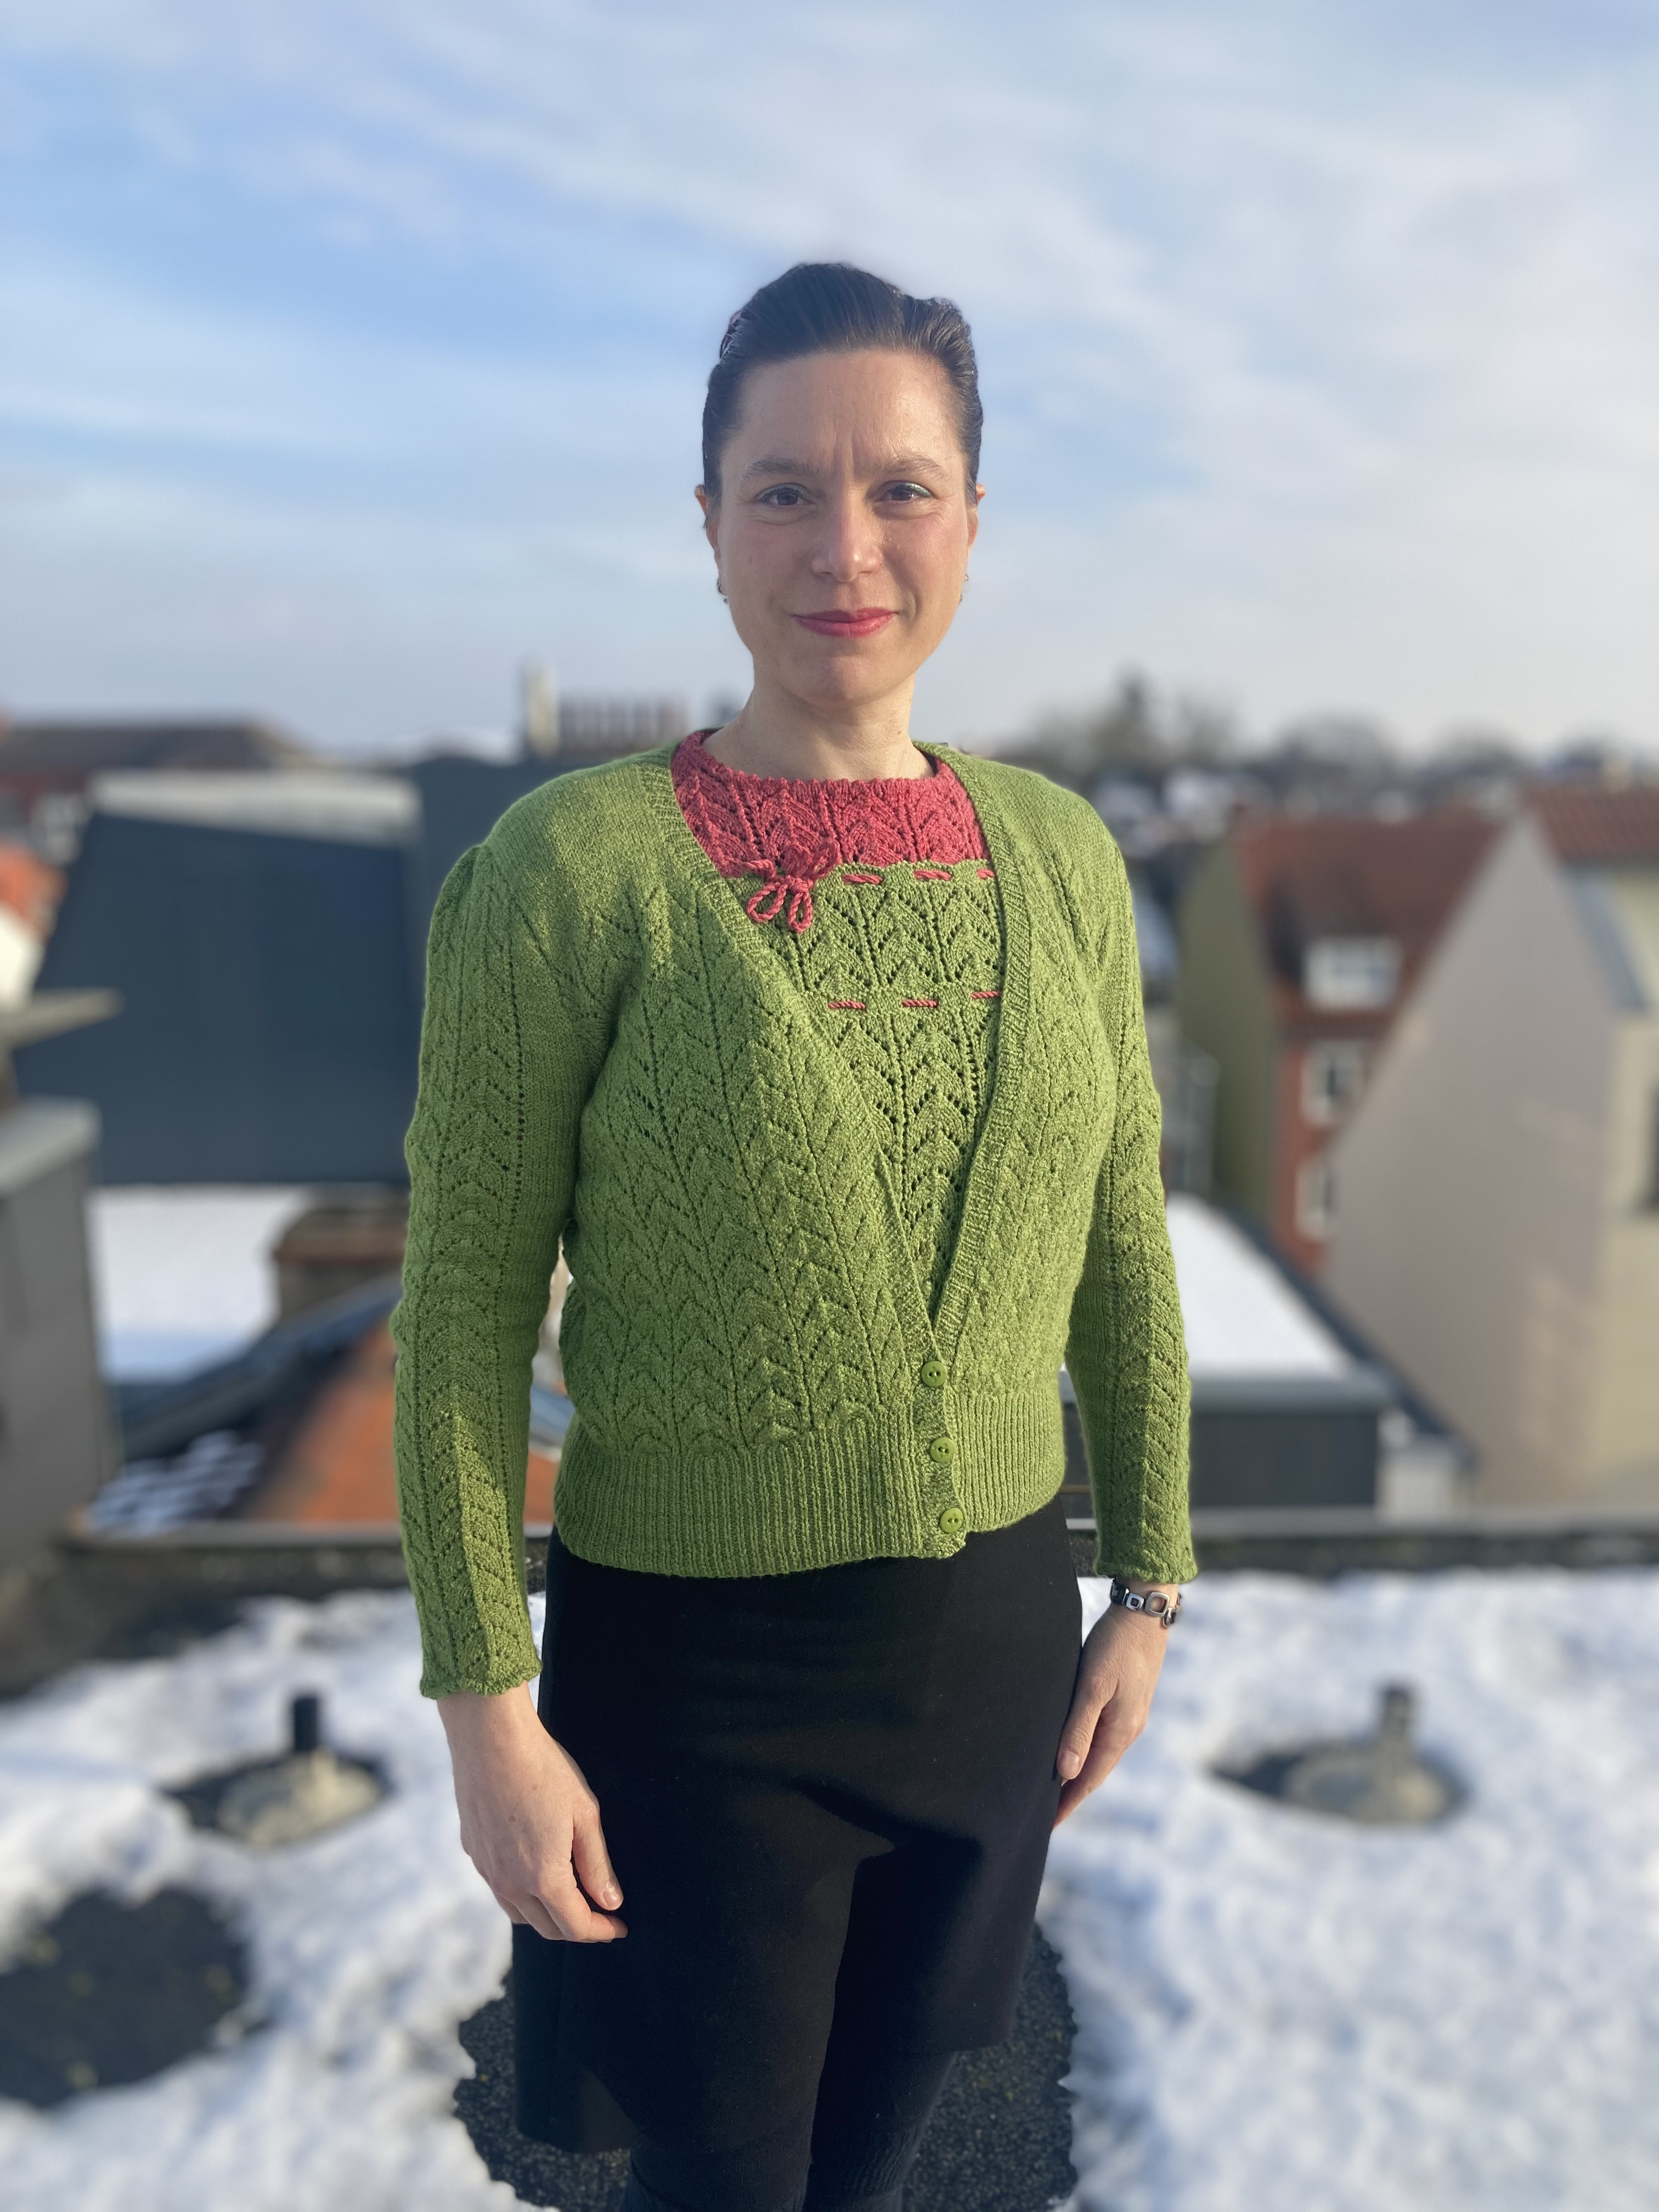
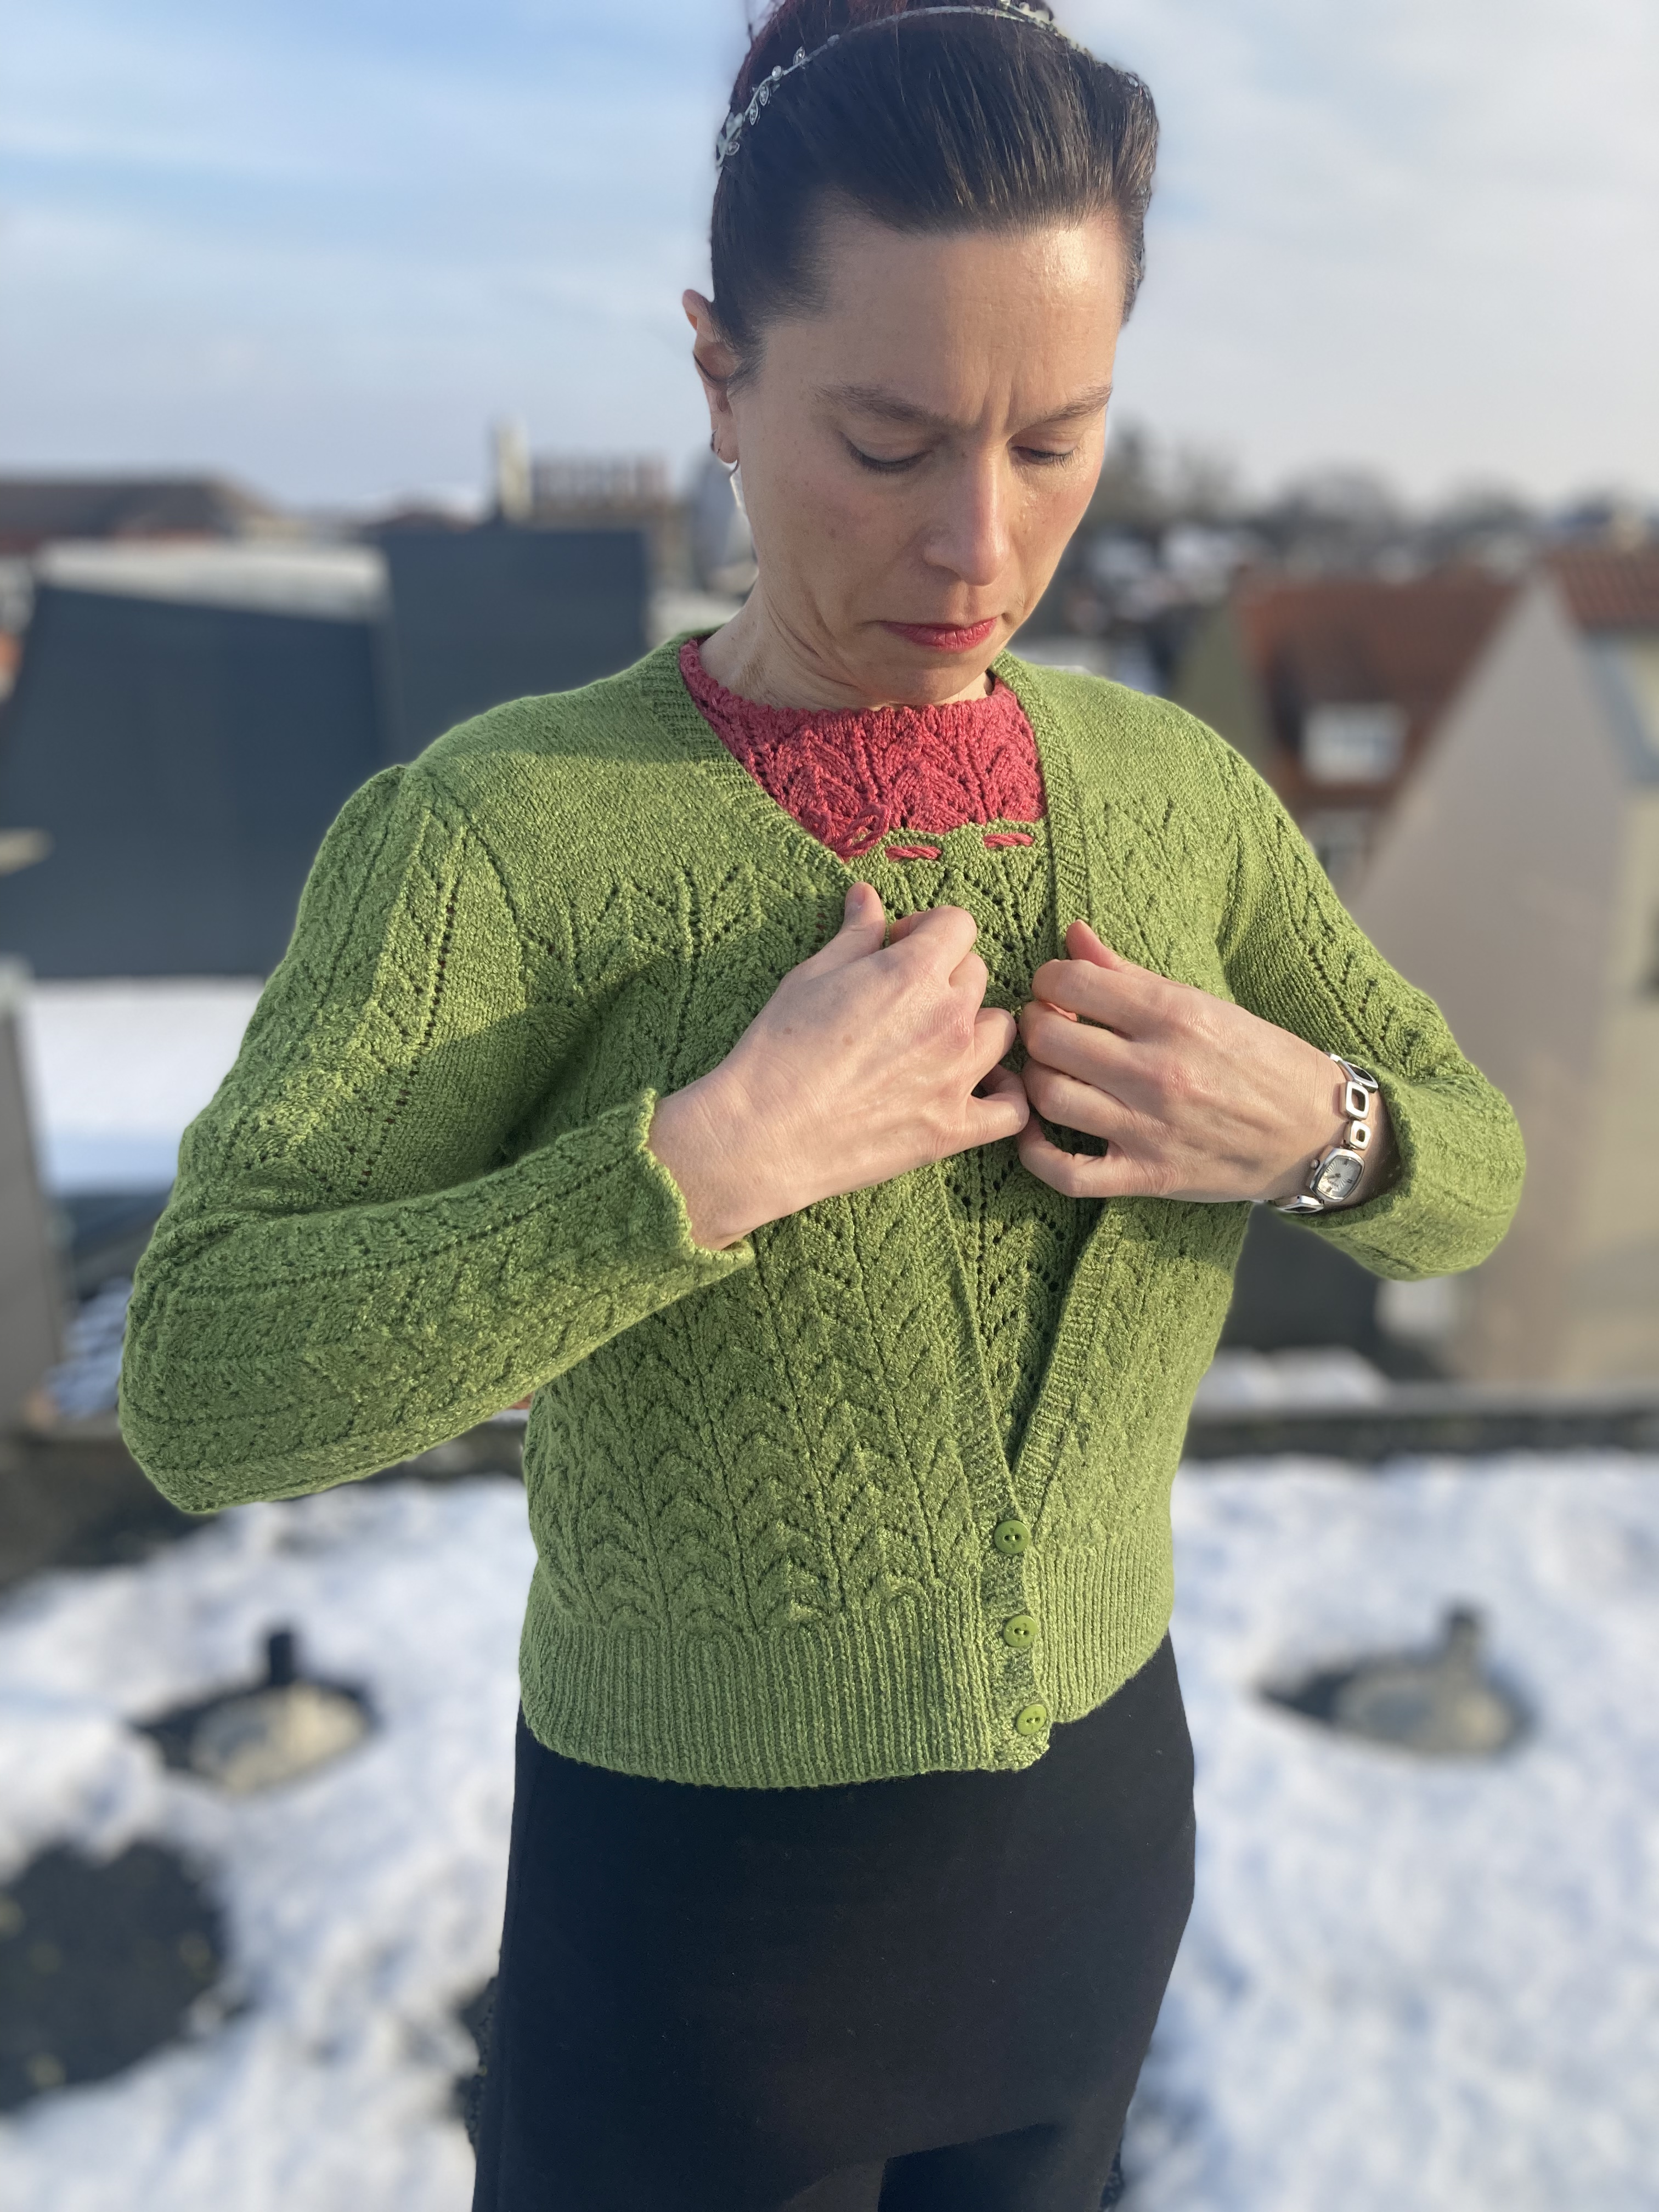
It was sweater-girl snug before blocking but as expected, it stretched out quite a lot in all directions. I put it in the dryer for a short spell when it was almost dry even tough technically the wool is not superwash. That was perfect and it turned out comfortably loose, but not sack-like. I even had a brooch that was similar to the one worn by the Sitchcraft model!
I love this top and am very happy with how it turned out.
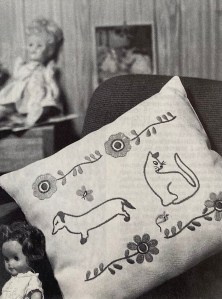
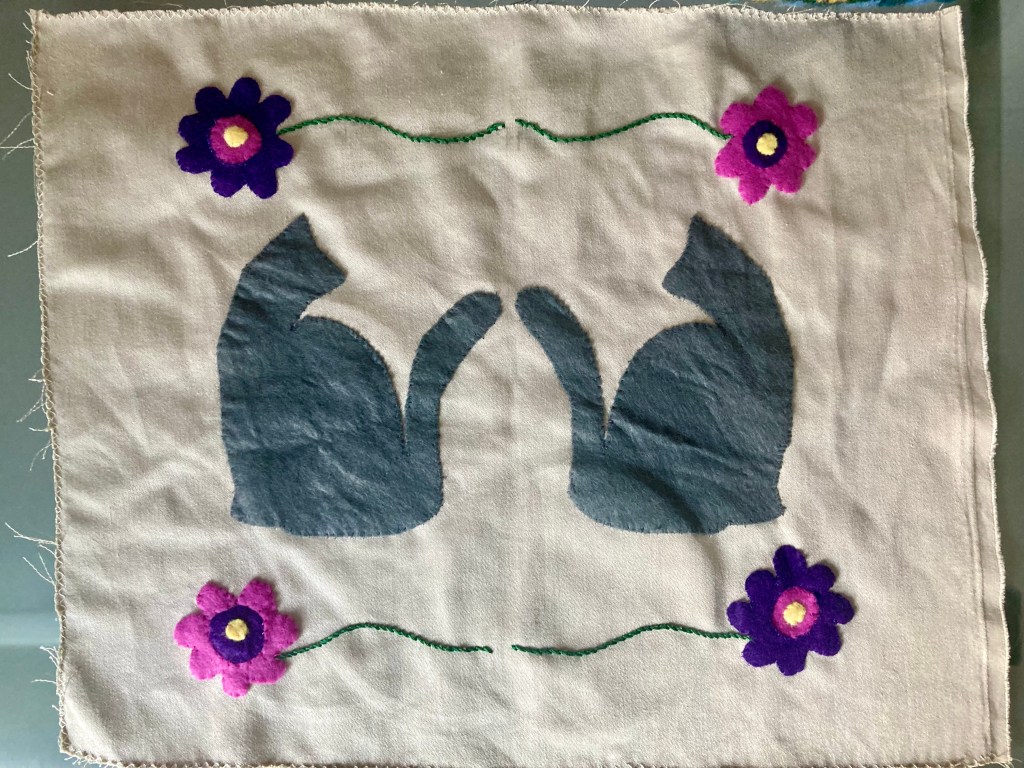
My May 1966/May 2024 project was based on an adaptable project “for the nursery” featuring cute little animals and flowers. The pattern as offered in the magazine could be used to make either a wall hanging in felt appliqué, or a cushion in wool embroidery. I chose to use elements of both designs and made a cushion in felt appliqué.
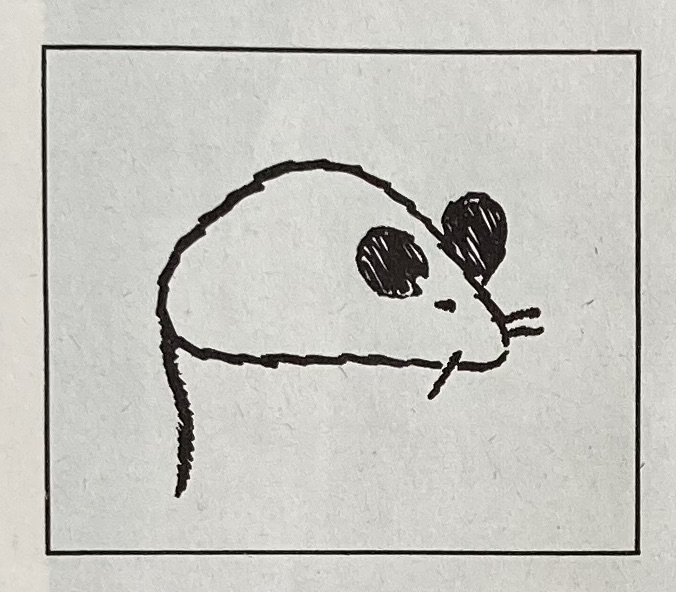
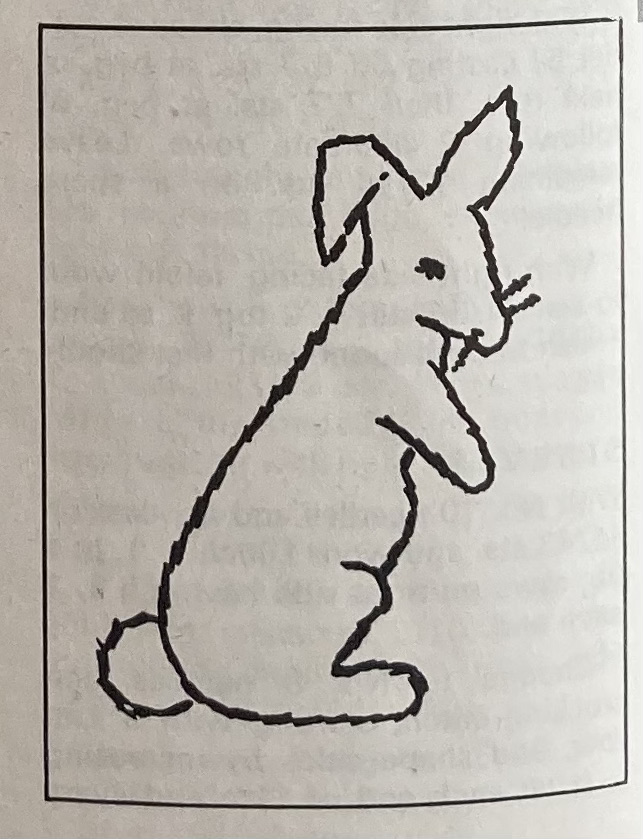
As always, the transfer was not included in the magazine — readers had to send 1/10d to Stitchcraft and received the transfer post free by mail. Obviously, that would not work now, as Stitchcraft is no longer published. Happily, the animal and flower shapes are quite easy to copy and individual illustrations of the dog, bunny and mouse are printed in the magazine.
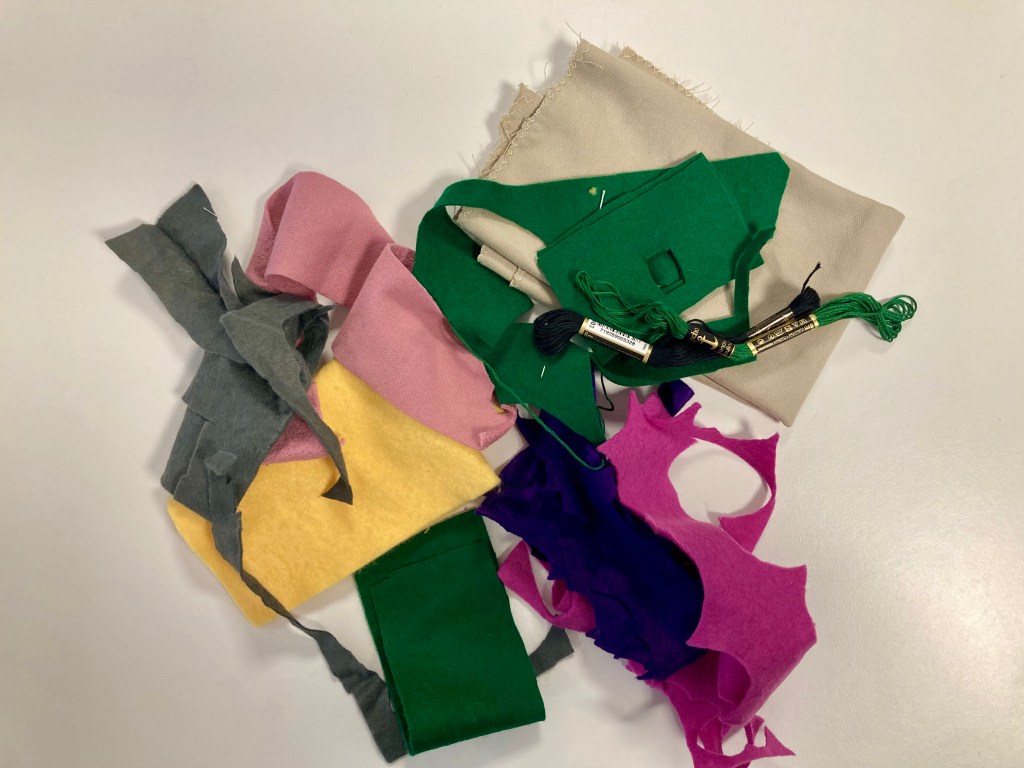
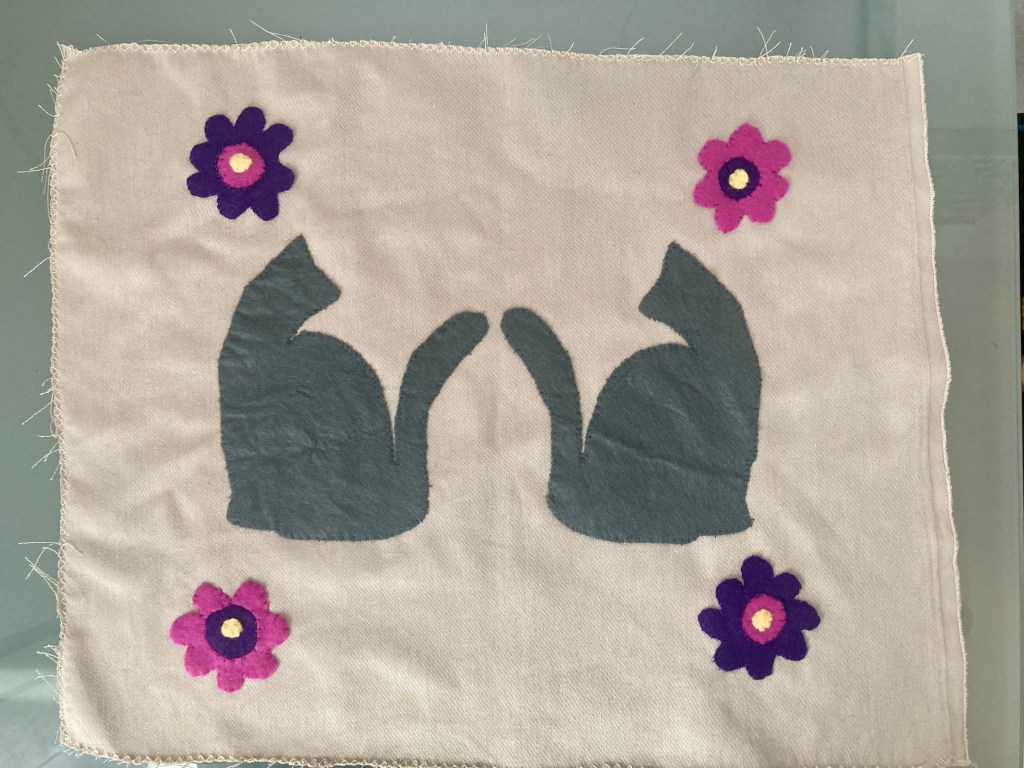
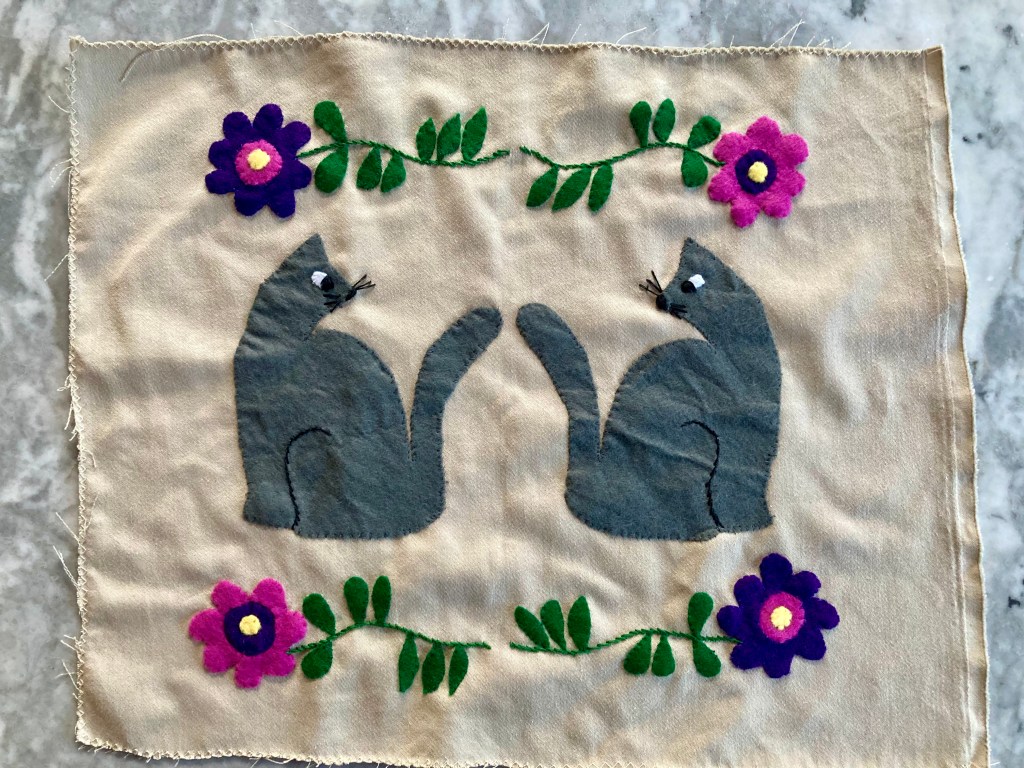
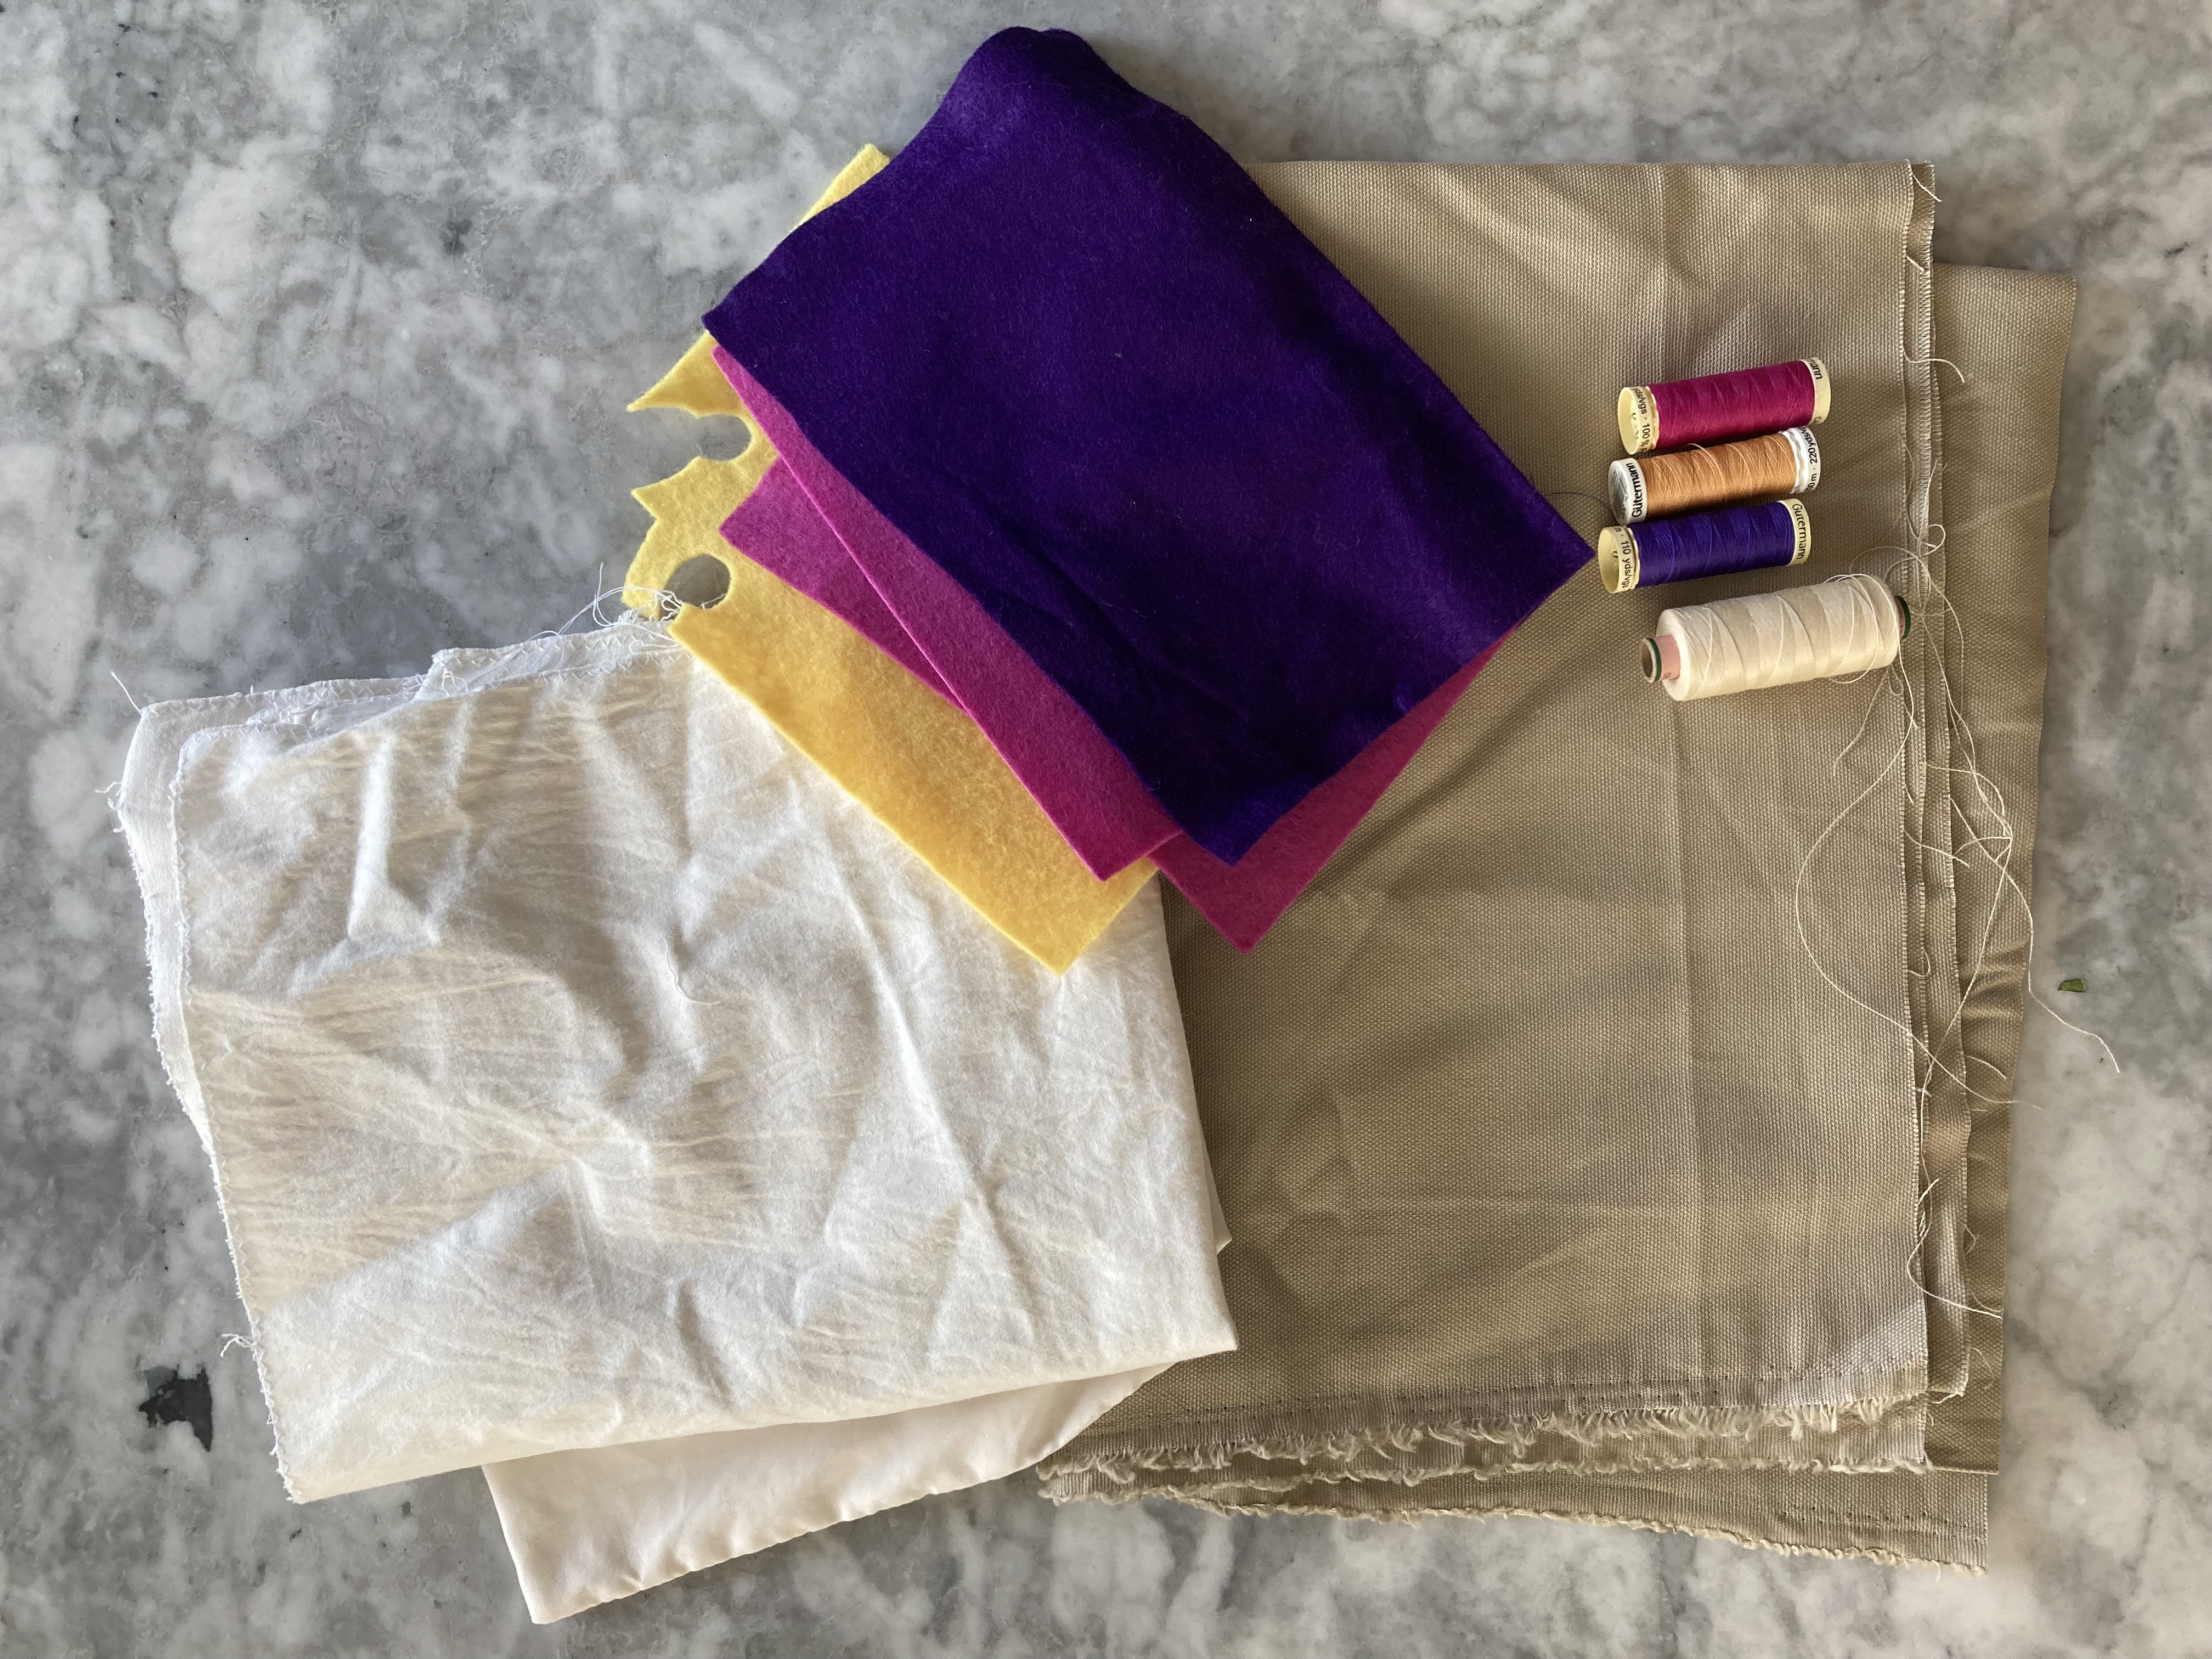
Both the appliquéd animals in the wall hanging and the embroidered outlines on the cushion are intended to be made with non-realistic colours (the rabbits are blue and magenta, the donkey gold, the cat jade green, the dachshund magenta, and the mouse bright pink). I chose more realistic colours based on what I had in my felt-scrap stash, and I like cats, so I made two grey cats looking at each other over their shoulders. I had enough purple, magenta and yellow felt left over from the last appliqué cushion I made to make the flowers. I made the cushion cover itself in a natural-coloured linen, as intended in the pattern, and the inner cushion in leftover white and beige fabric from other projects.
The appliqué work was quite easy and pleasant, even the tiny leaves of the flowers. The flower stems are embroidered in stem-stitch. I was nervous about making the cat’s eyes (white felt embroidered in black) as the expressions can be very tricky, but I think they turned out quite nicely. Since I was on the road for most of this project and didn’t always have access to my sewing machine, I put in the zipper by hand, which worked out fine.
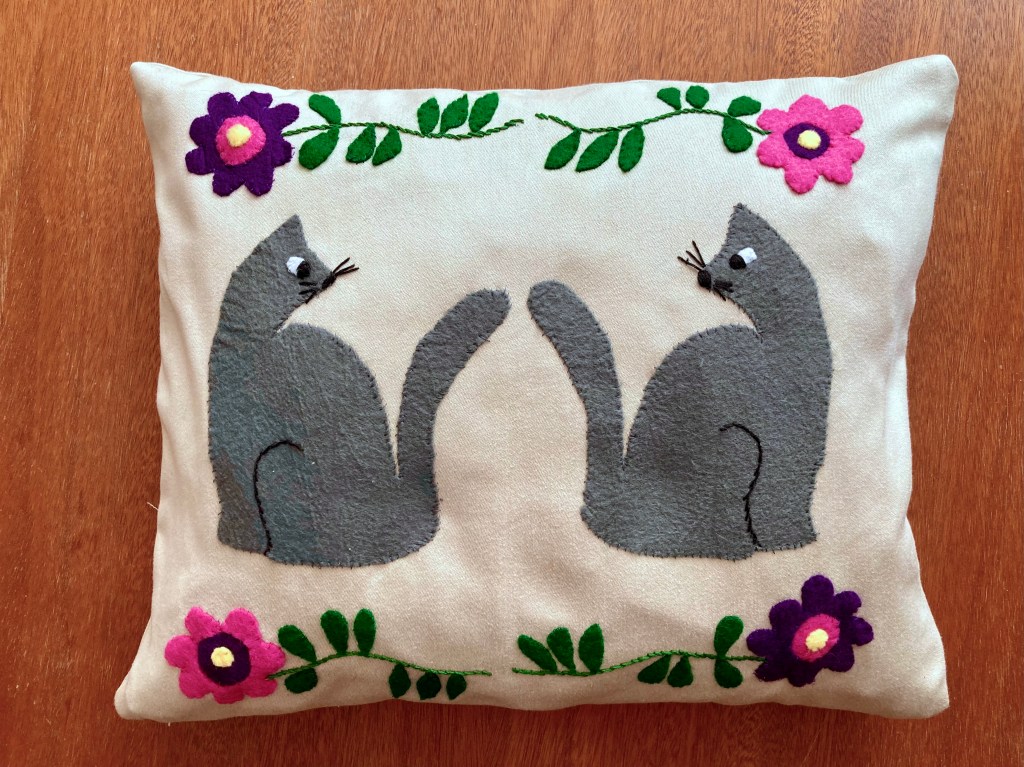
And there it was! I love making cushions and would make more of them if I knew what to do with them after they were done. I have more cushions than space already for myself, and this particular design, although extremely cute, is a bit childish even for my playful decorating style. Luckily, I have friends with small children, and this cushion will go to one of them, who is currently decorating her three-year-old’s room. I hope he likes it! I am certainly quite happy with my happy cat cushion and I think he will be too.
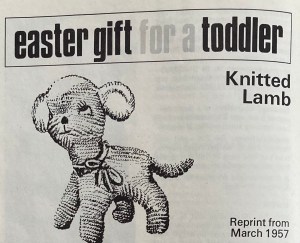
My Stitchcraft project from the April 1966 issue was actually a reprint from the March 1957 issue: a knitted lamb as an “Easter gift for a toddler.” Knit a little lamb for your knitting friend who is about to have a baby, they said. It will be fun and cute and use up leftover bits of wool, they said…
My first clue should have been the fact that there is no accompanying photo of the finished lamb in the 1966 issue. Either the original issue didn’t have a photograph (I don’t have the 1957 issue in my collection) or they just didn’t reprint it along with the pattern, since the latter version only has a drawn illustration. Why would the editors not want to show a lovely photograph of the lovely finished knitted lamb? Why indeed?
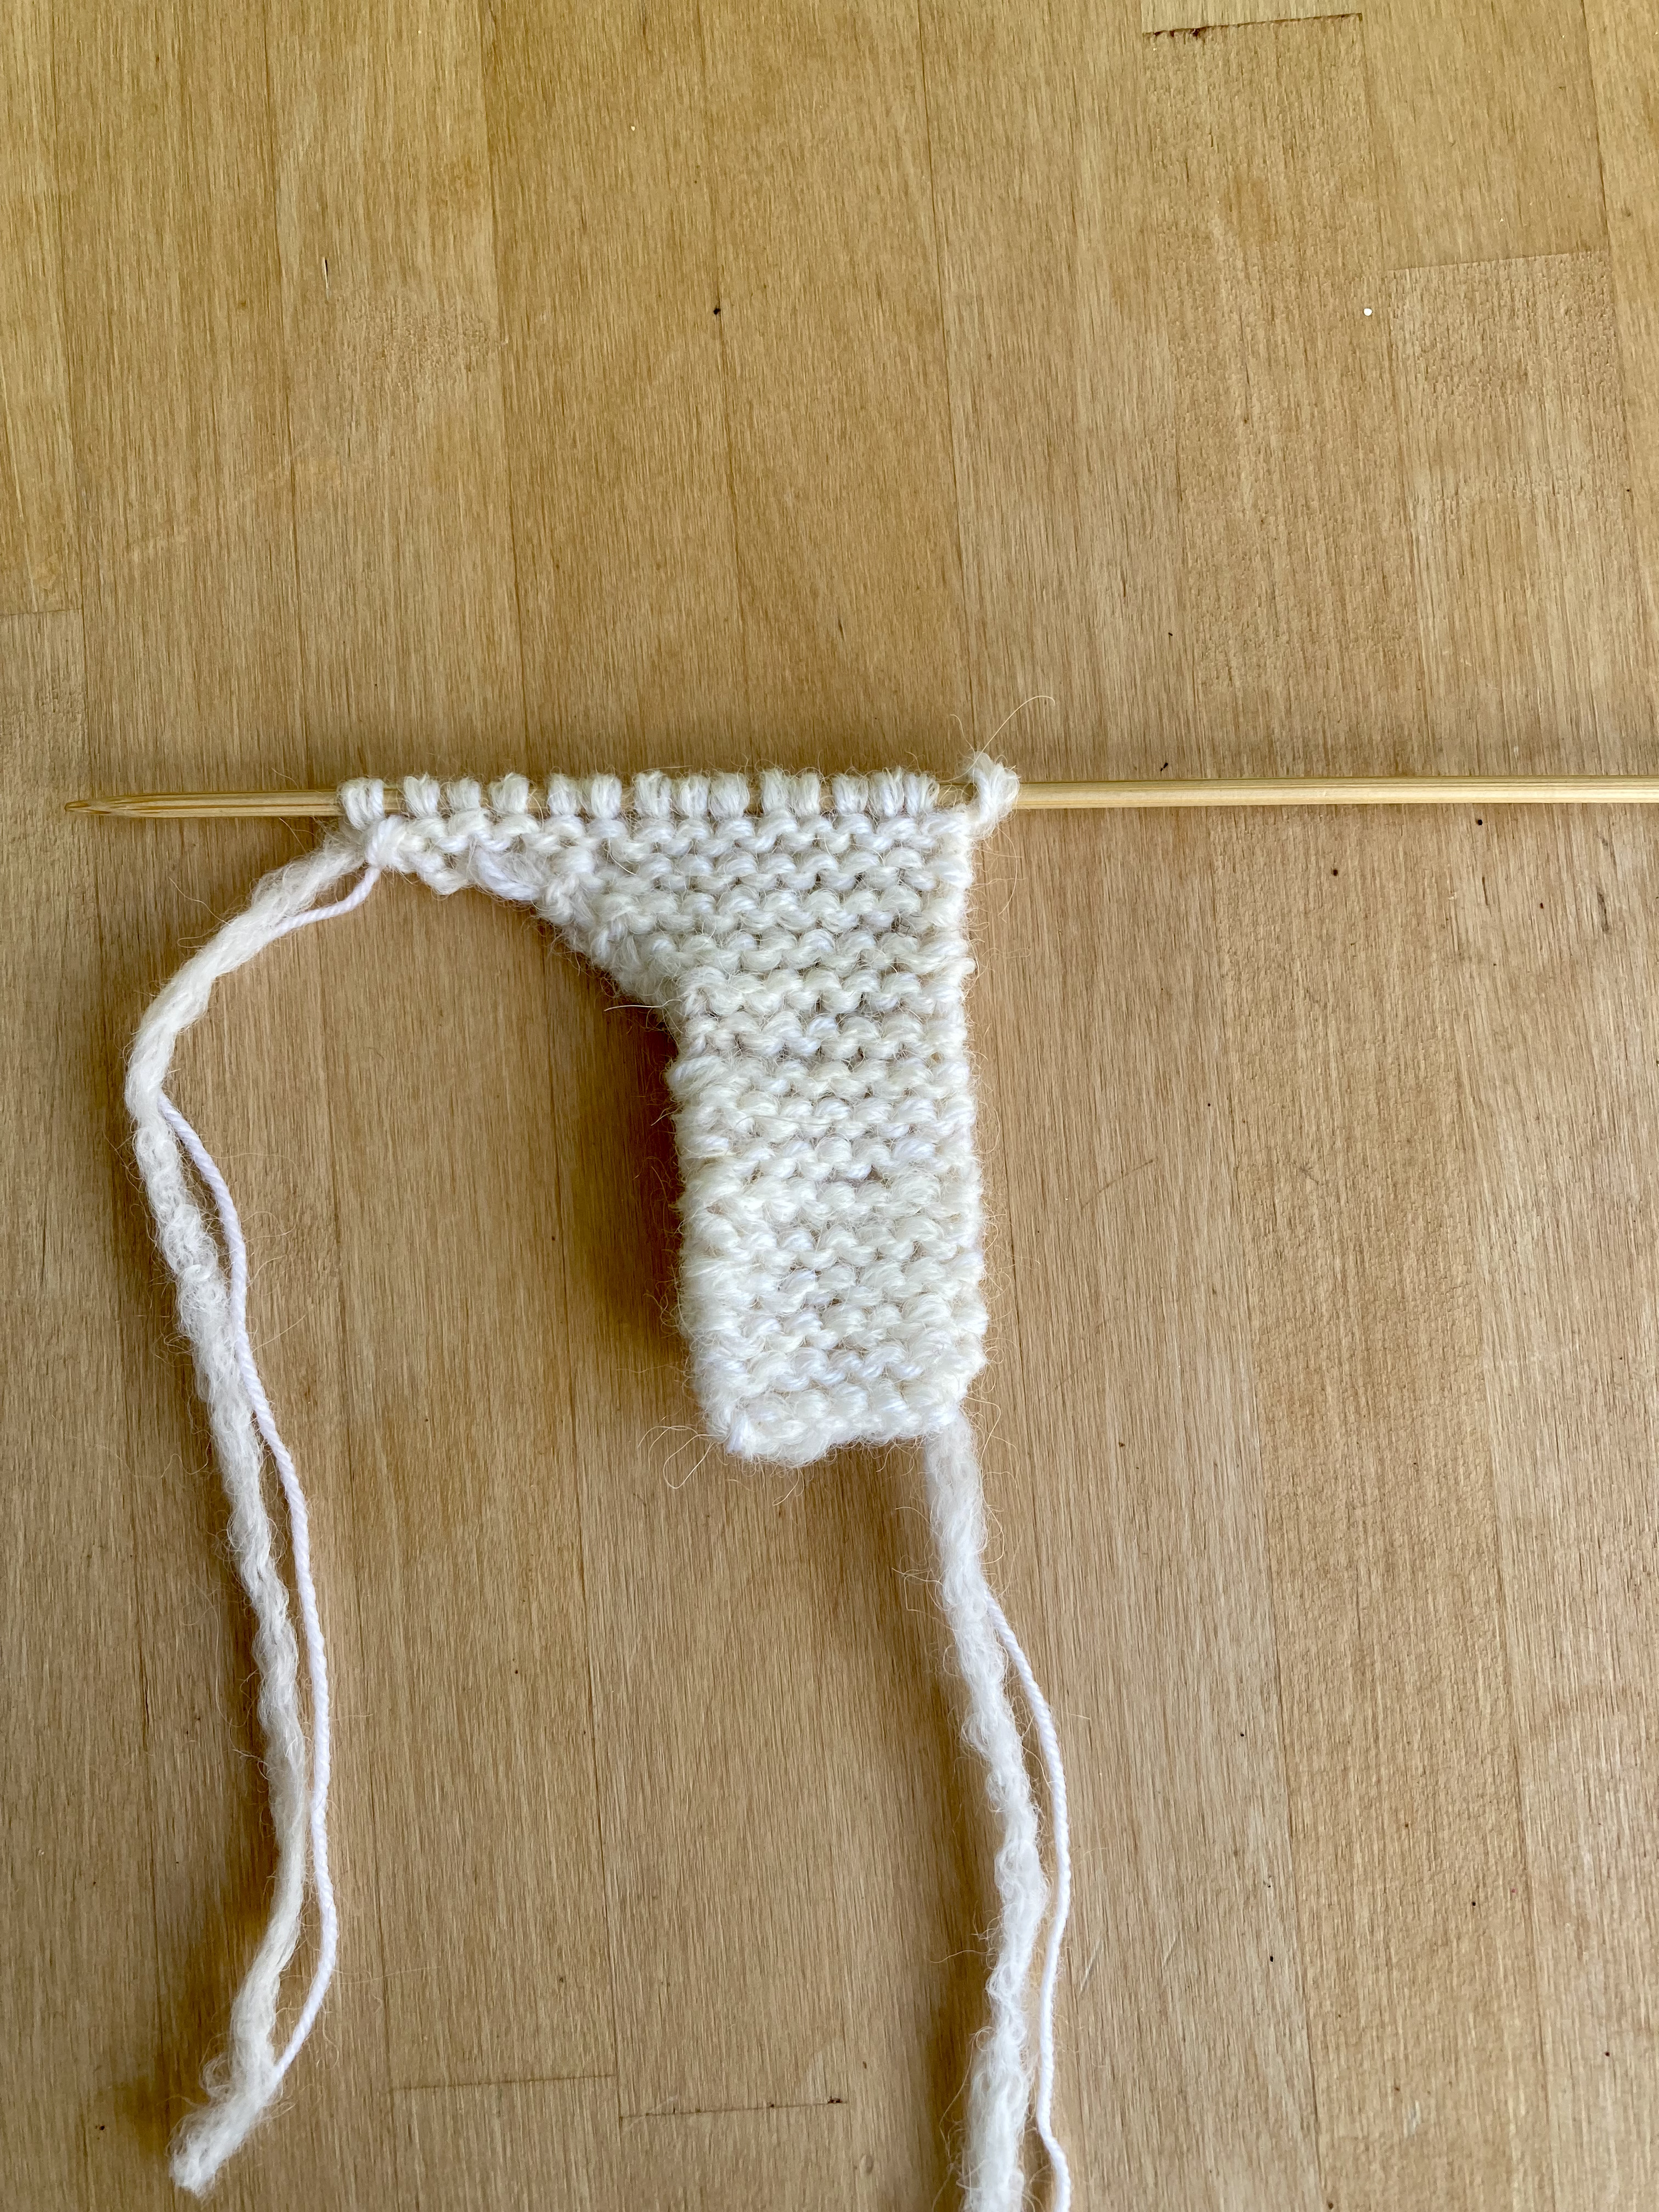
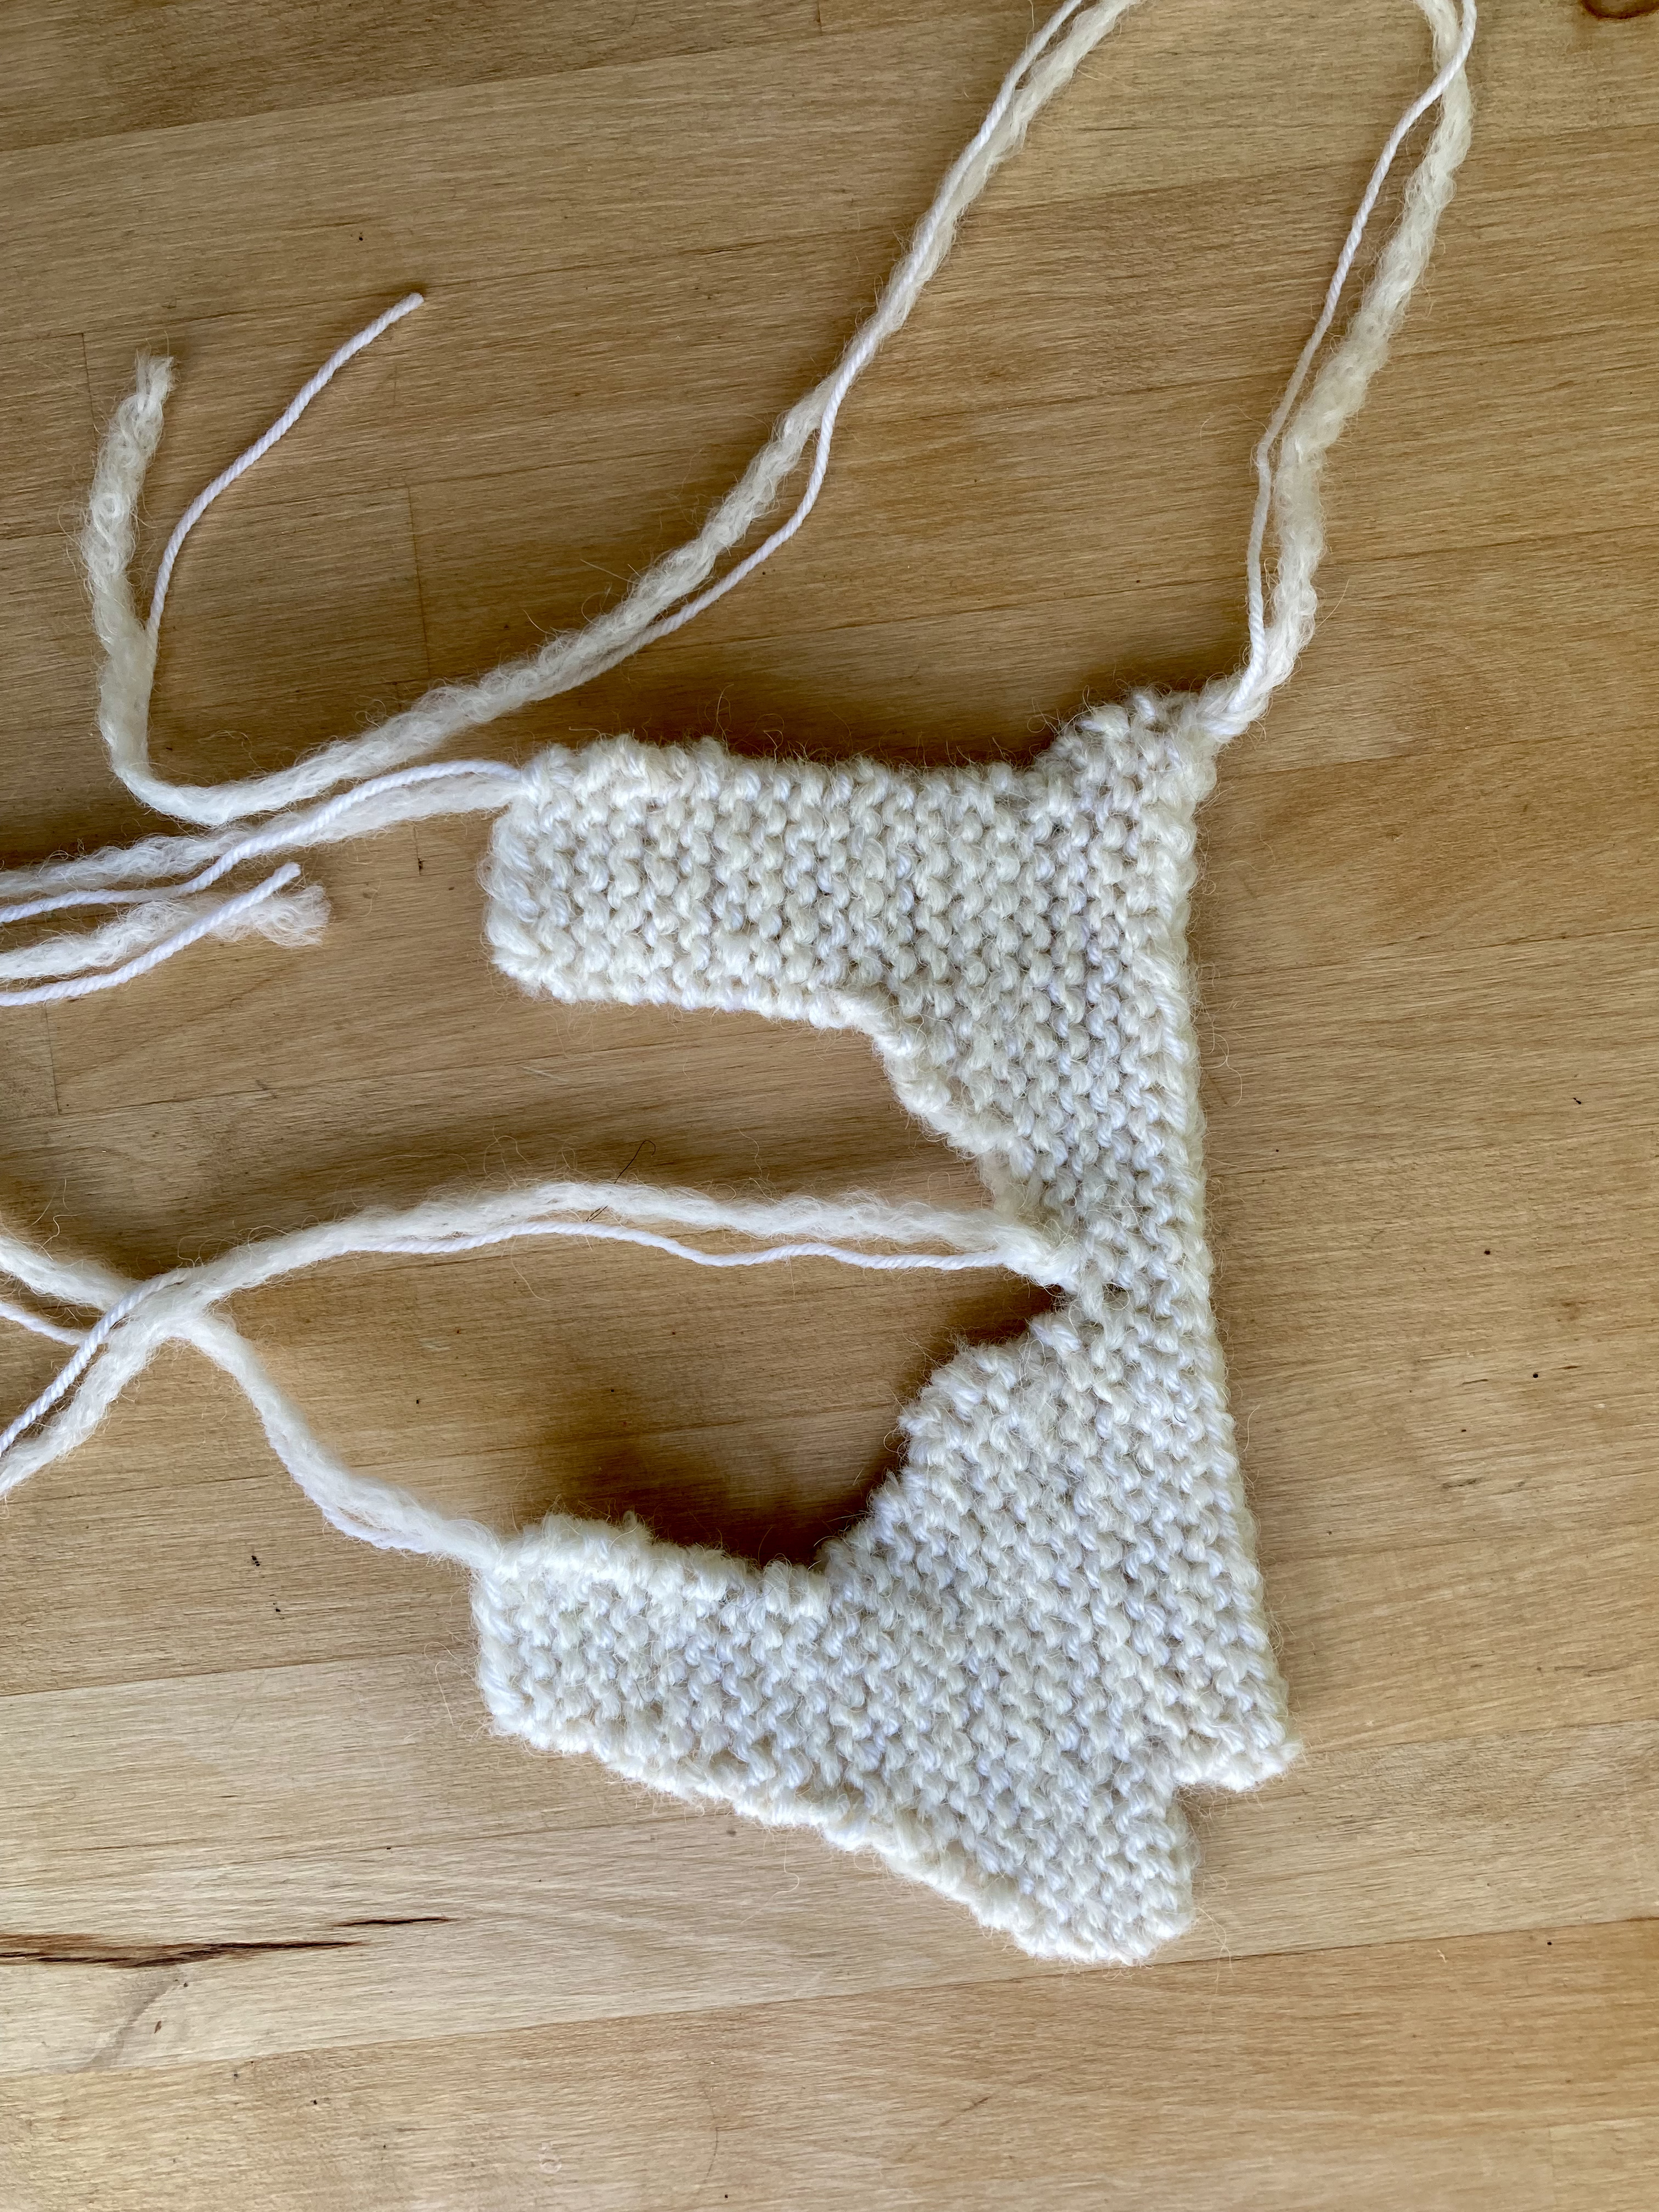
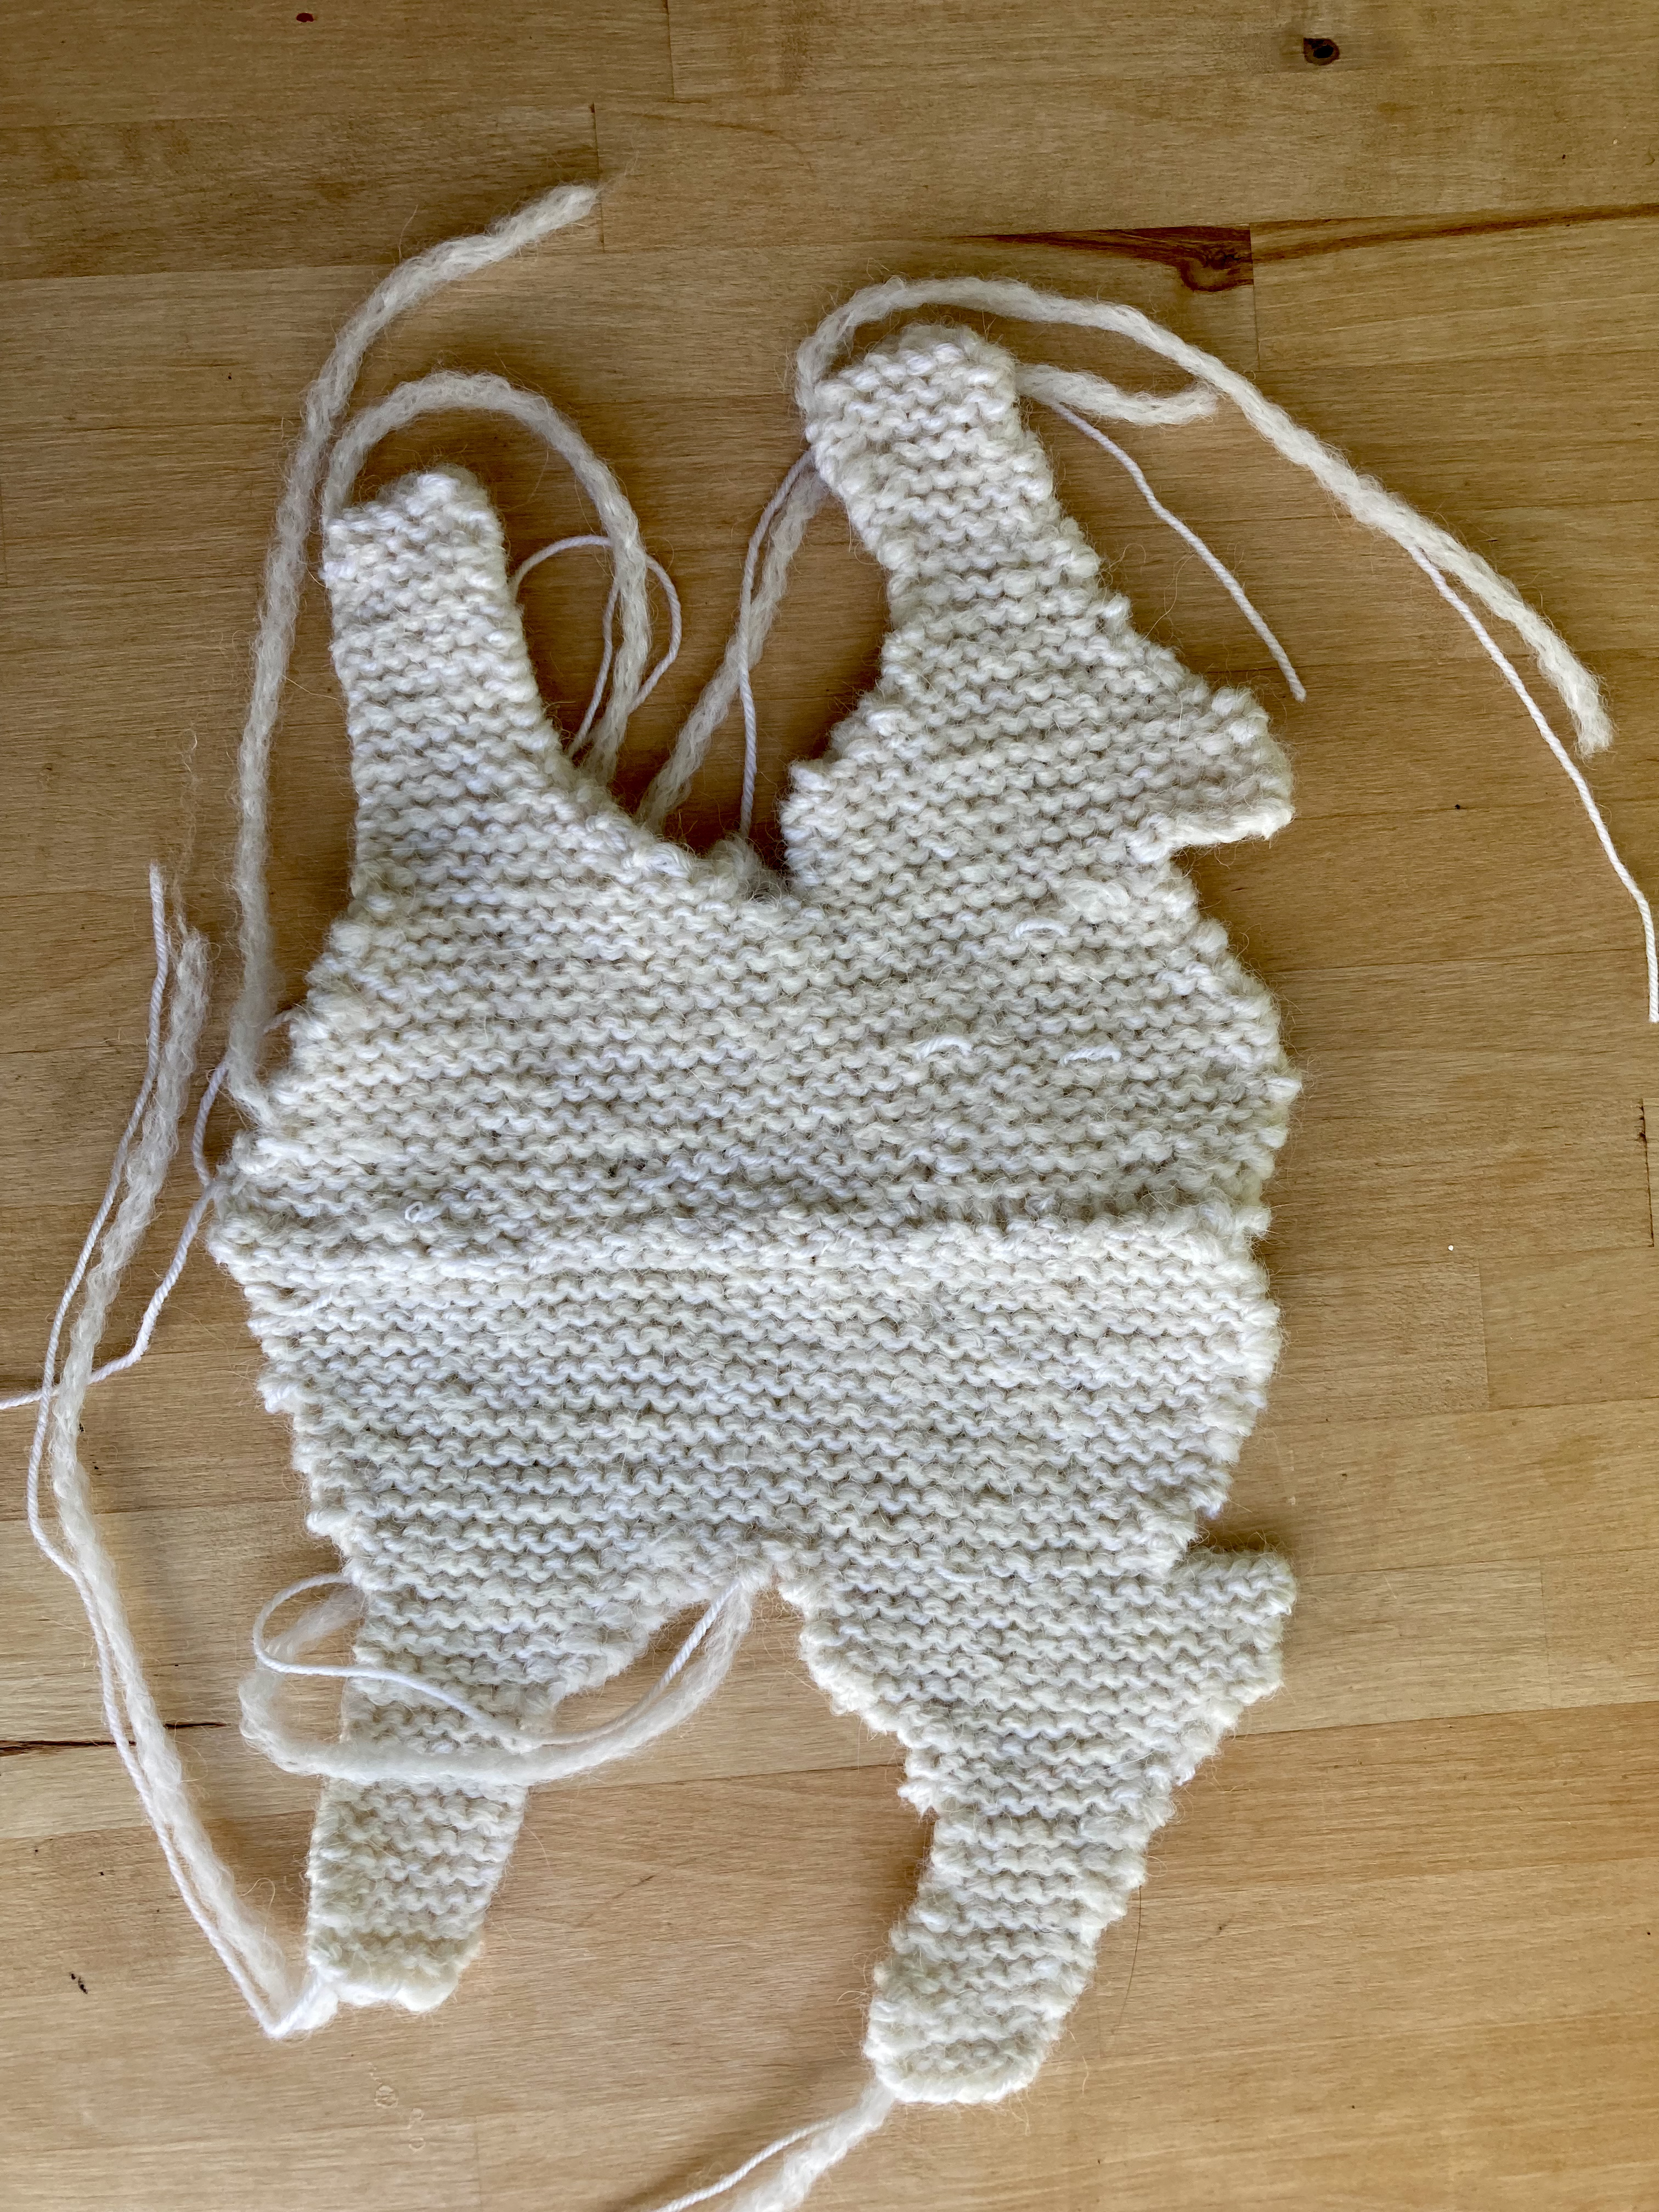
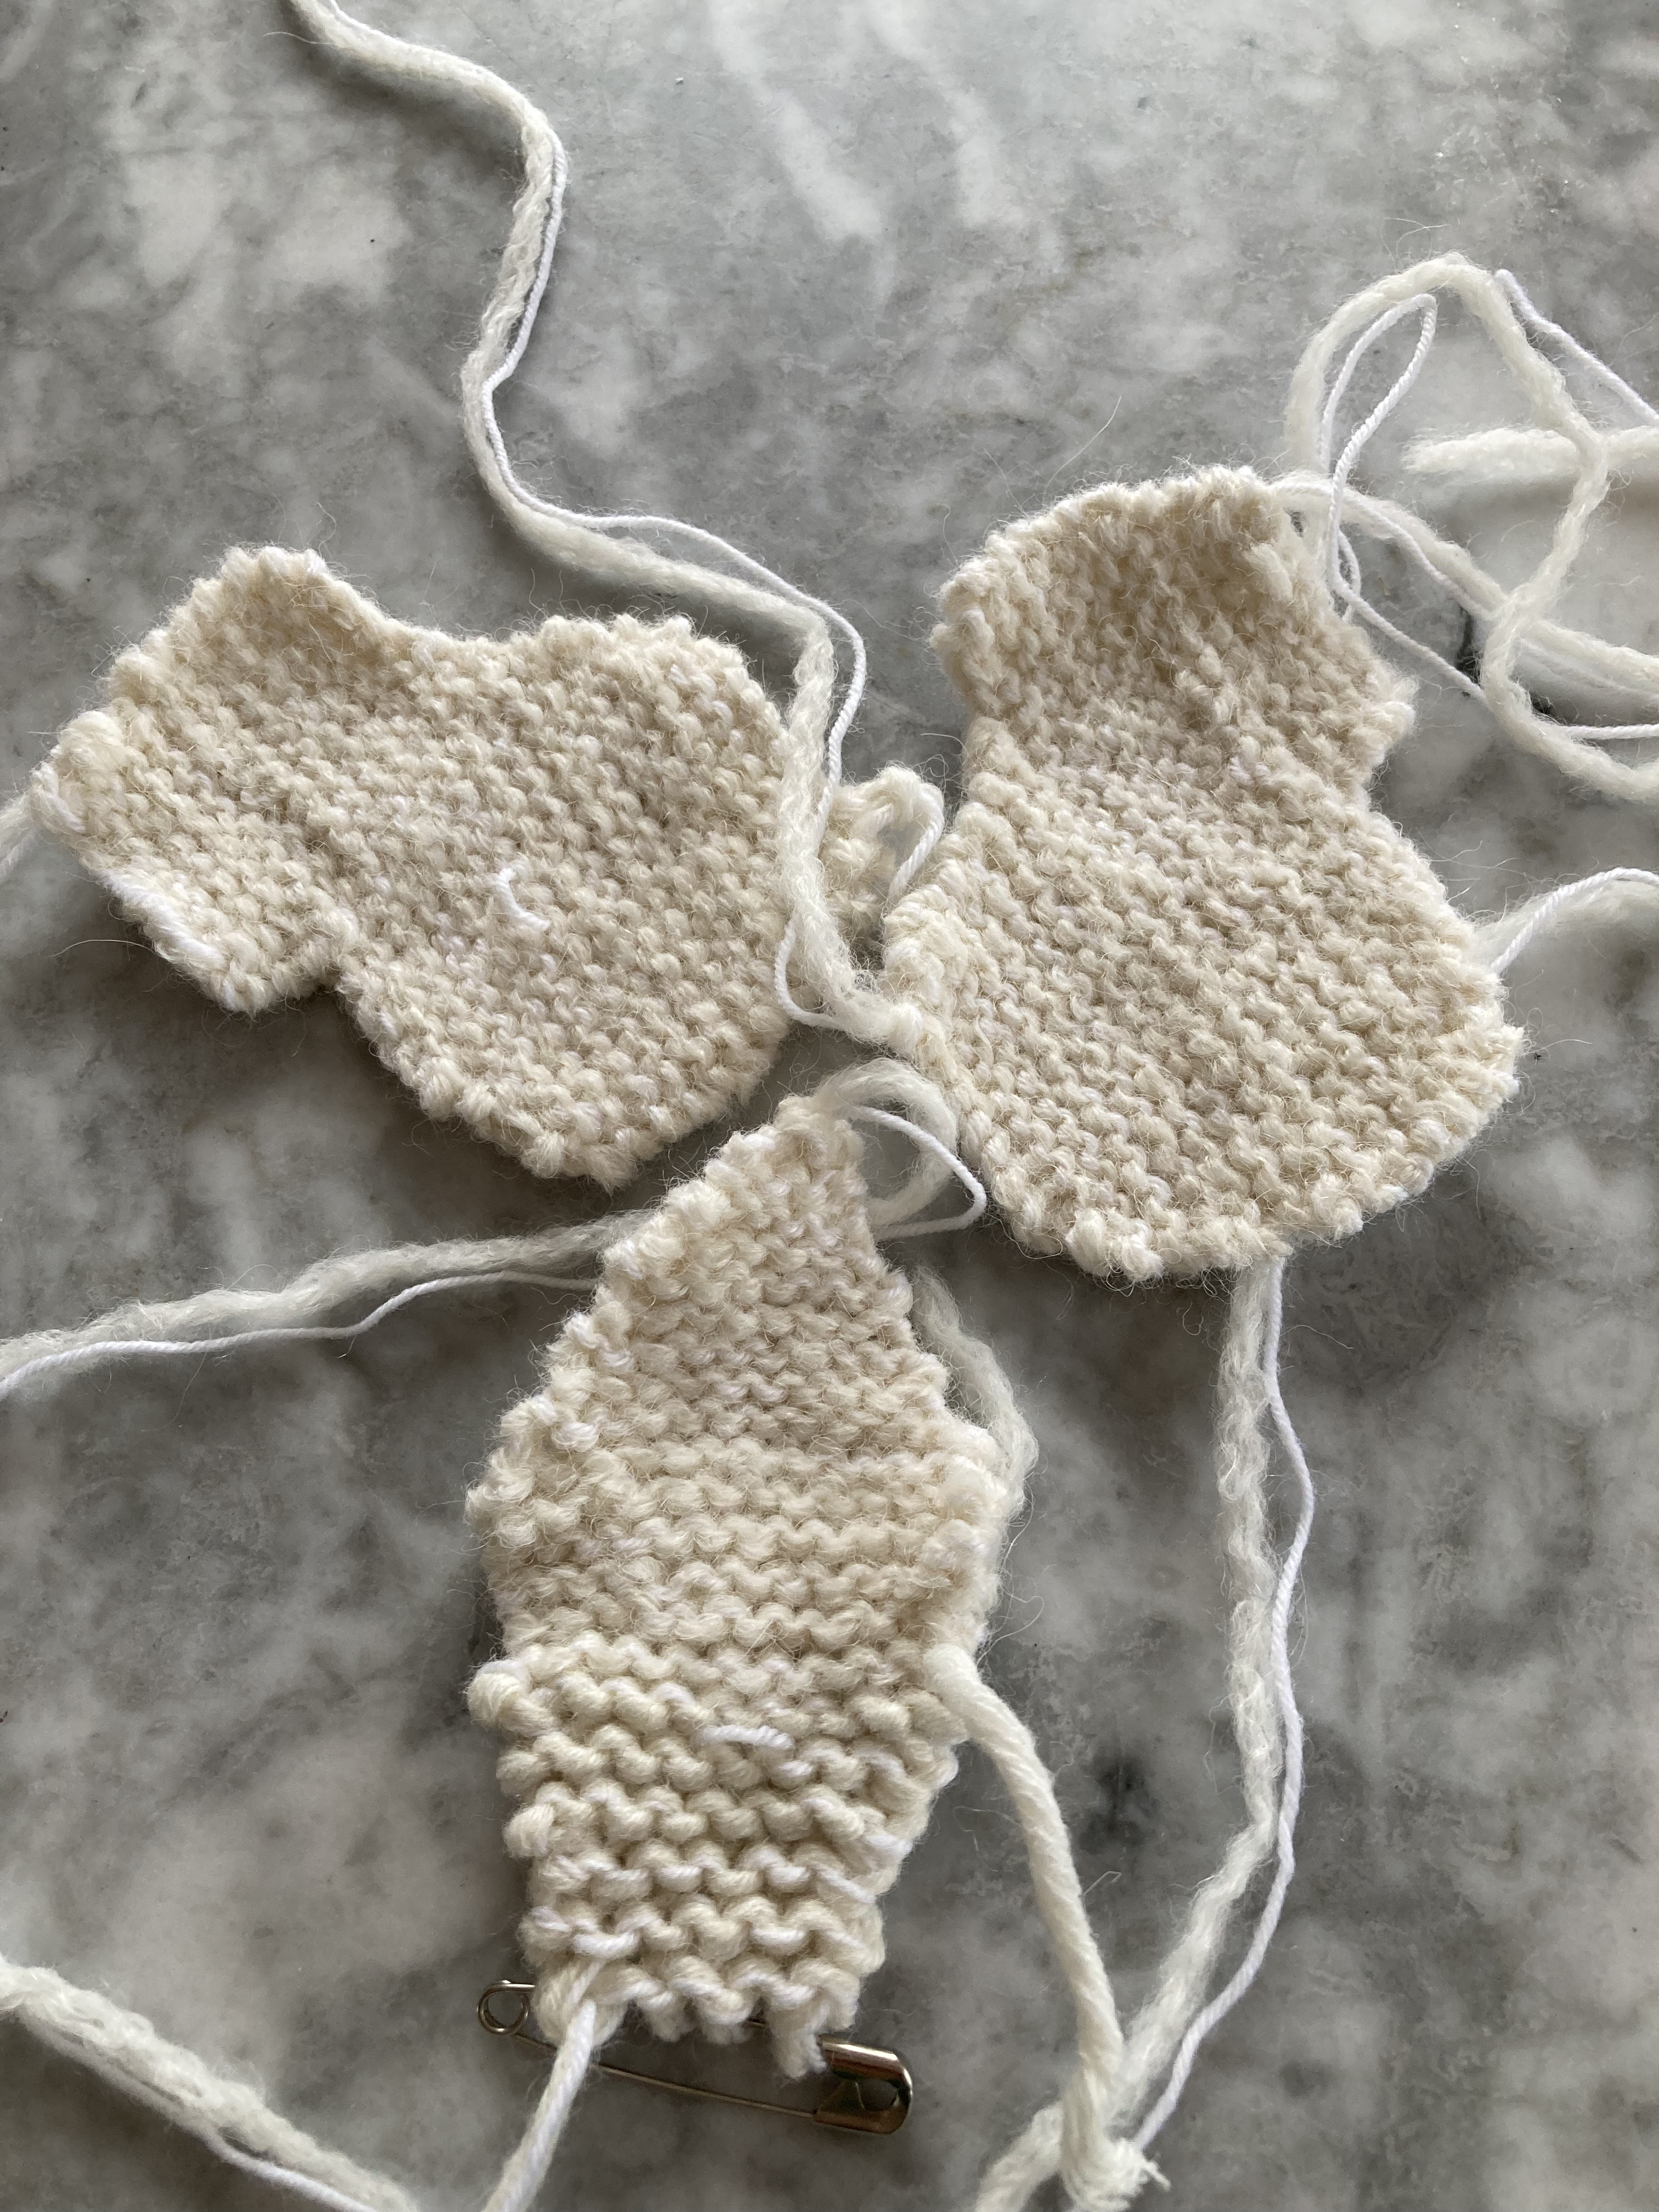
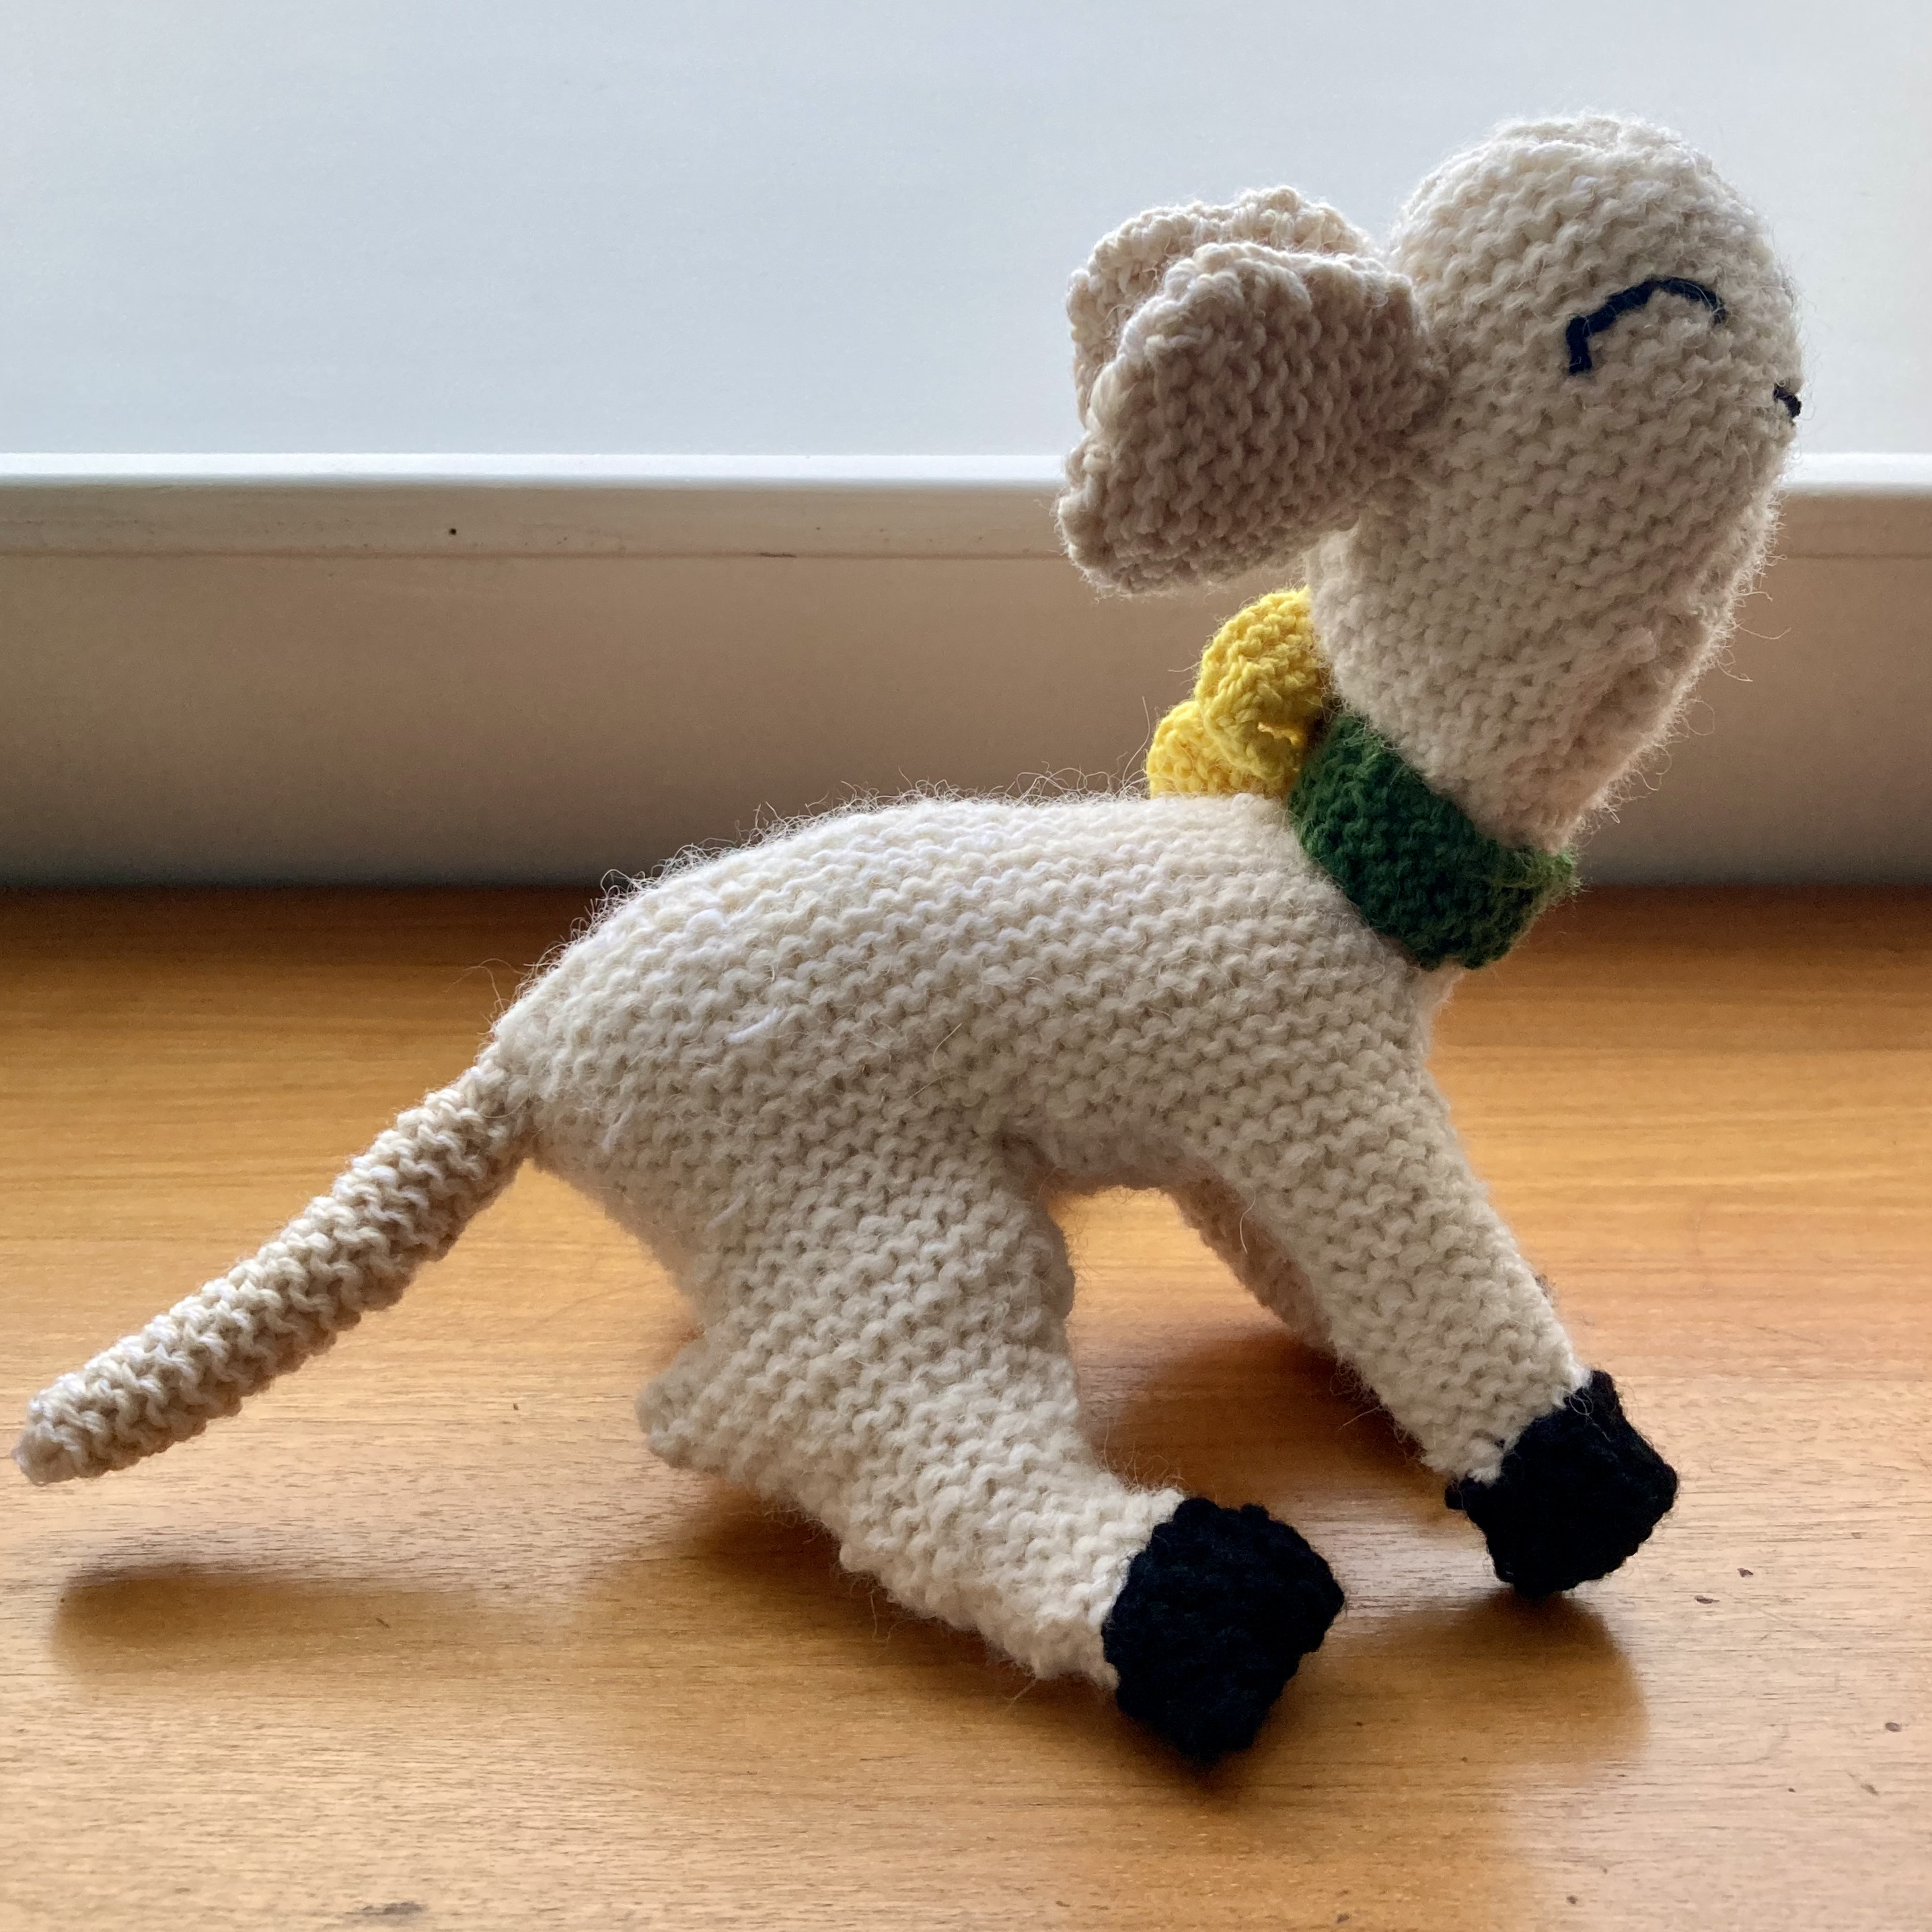
I admit the next step was “my fault”. Since the pattern called for 4-ply yarn held single, and I mostly had fluffy DK-or-thicker alpaca left over from the tot’s coat in February, I chose to adjust the stitch counts for a stitch-per-inch gauge and try to make the lamb turn out the same size as in the pattern. I did the math correctly, but I suspect something may have been off in the row gauge . The pattern starts with the legs and the main body (top part) in multiple pieces (1/2 each of back and front leg) and involves a complicated series of increases and decreases for the shaping. The “corner” on the back legs seemed odd to me, but I know I followed the pattern. Surely it will all come out right when sewn together, I told myself. After all, I successfully grafted the top back “spine” instead of sewing it! Obviously I was good at this! And it did pretty much look like a sheep’s pelt when laid out flat.
The next piece in sequence is the under-body, which is almost the same as the top, just shorter/narrower. I sewed it to the main body as instructed and stuffed it well, as instructed. The back legs were longer than the front ones, and what was with those weird “hocks” now? Shouldn’t they be sort of… attached to the rear end of the animal instead of just hanging off into space?
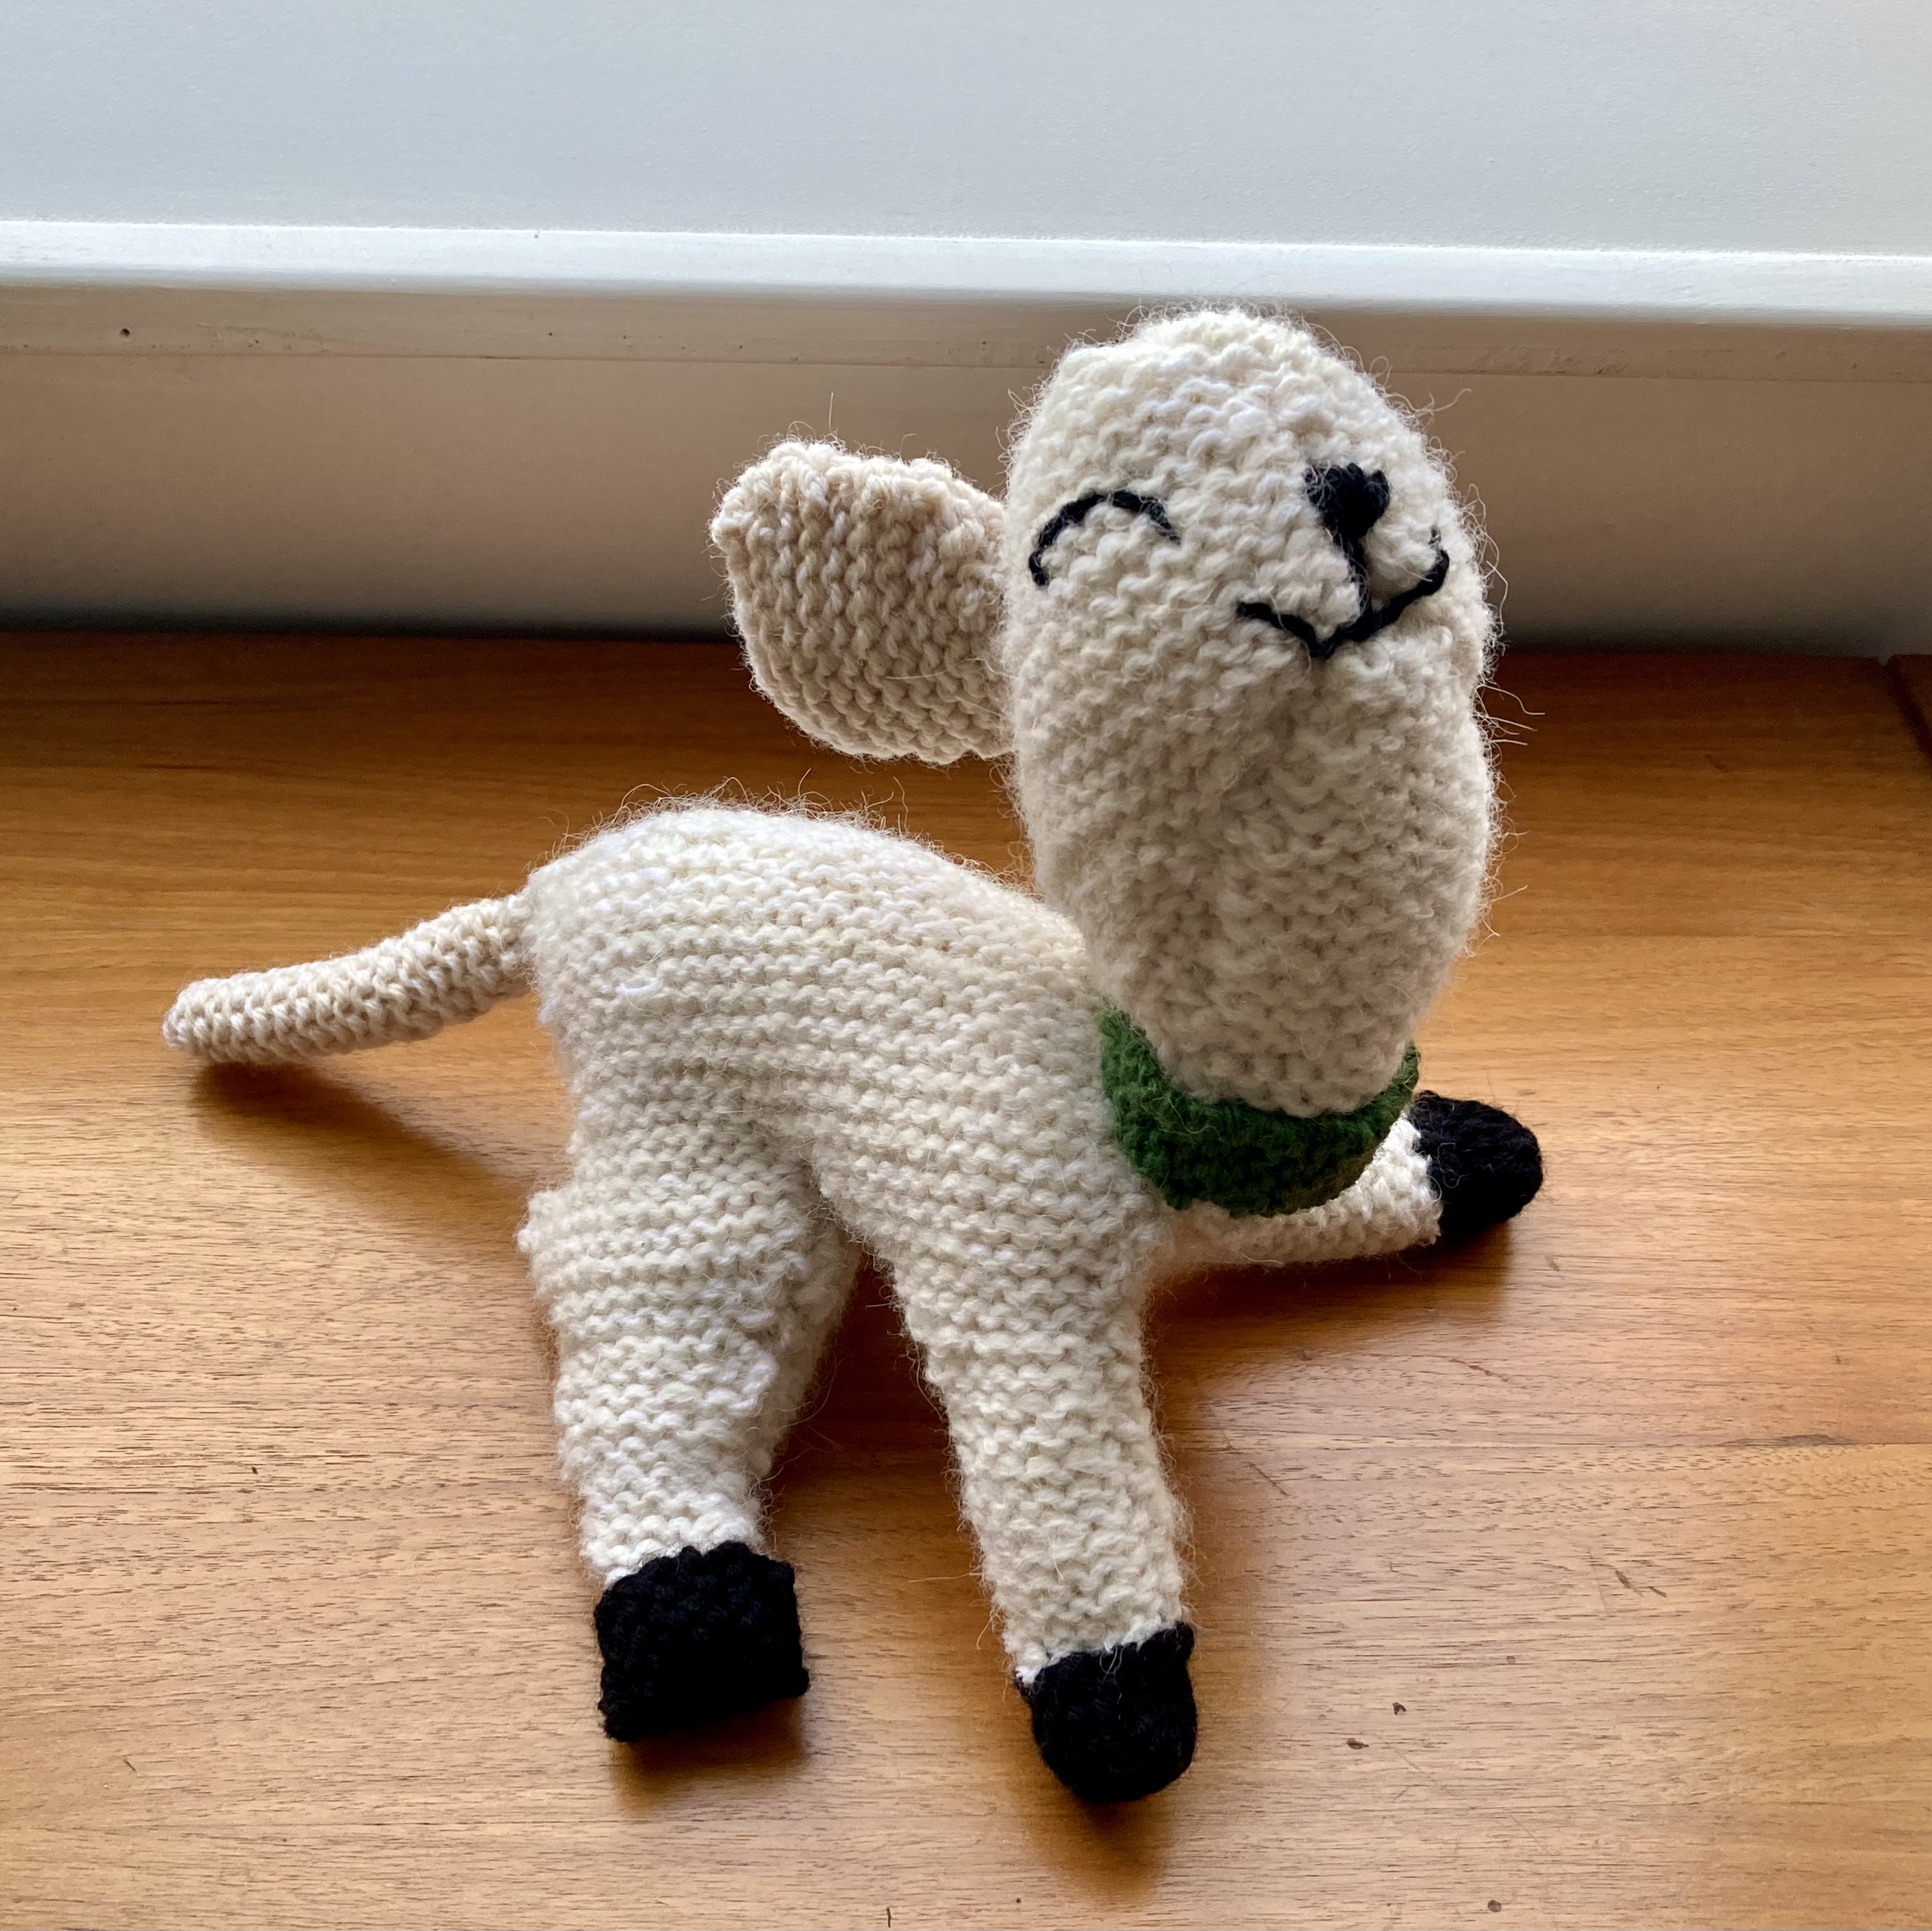
No matter, I made hooves. I guess the hooves were fine. Then the head, which was made in three parts: two sides and the “head gusset” for the “chin” and neck. I sewed them together as instructed, and it looked like Frankenstein’s lamb. The head was … not as round as in the illustration, and the neck strangely proportioned. Had I done the math wrong? Was it supposed to fit onto the opening of main and under-body? It didn’t really, but I persevered.
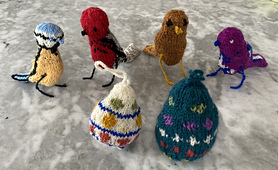
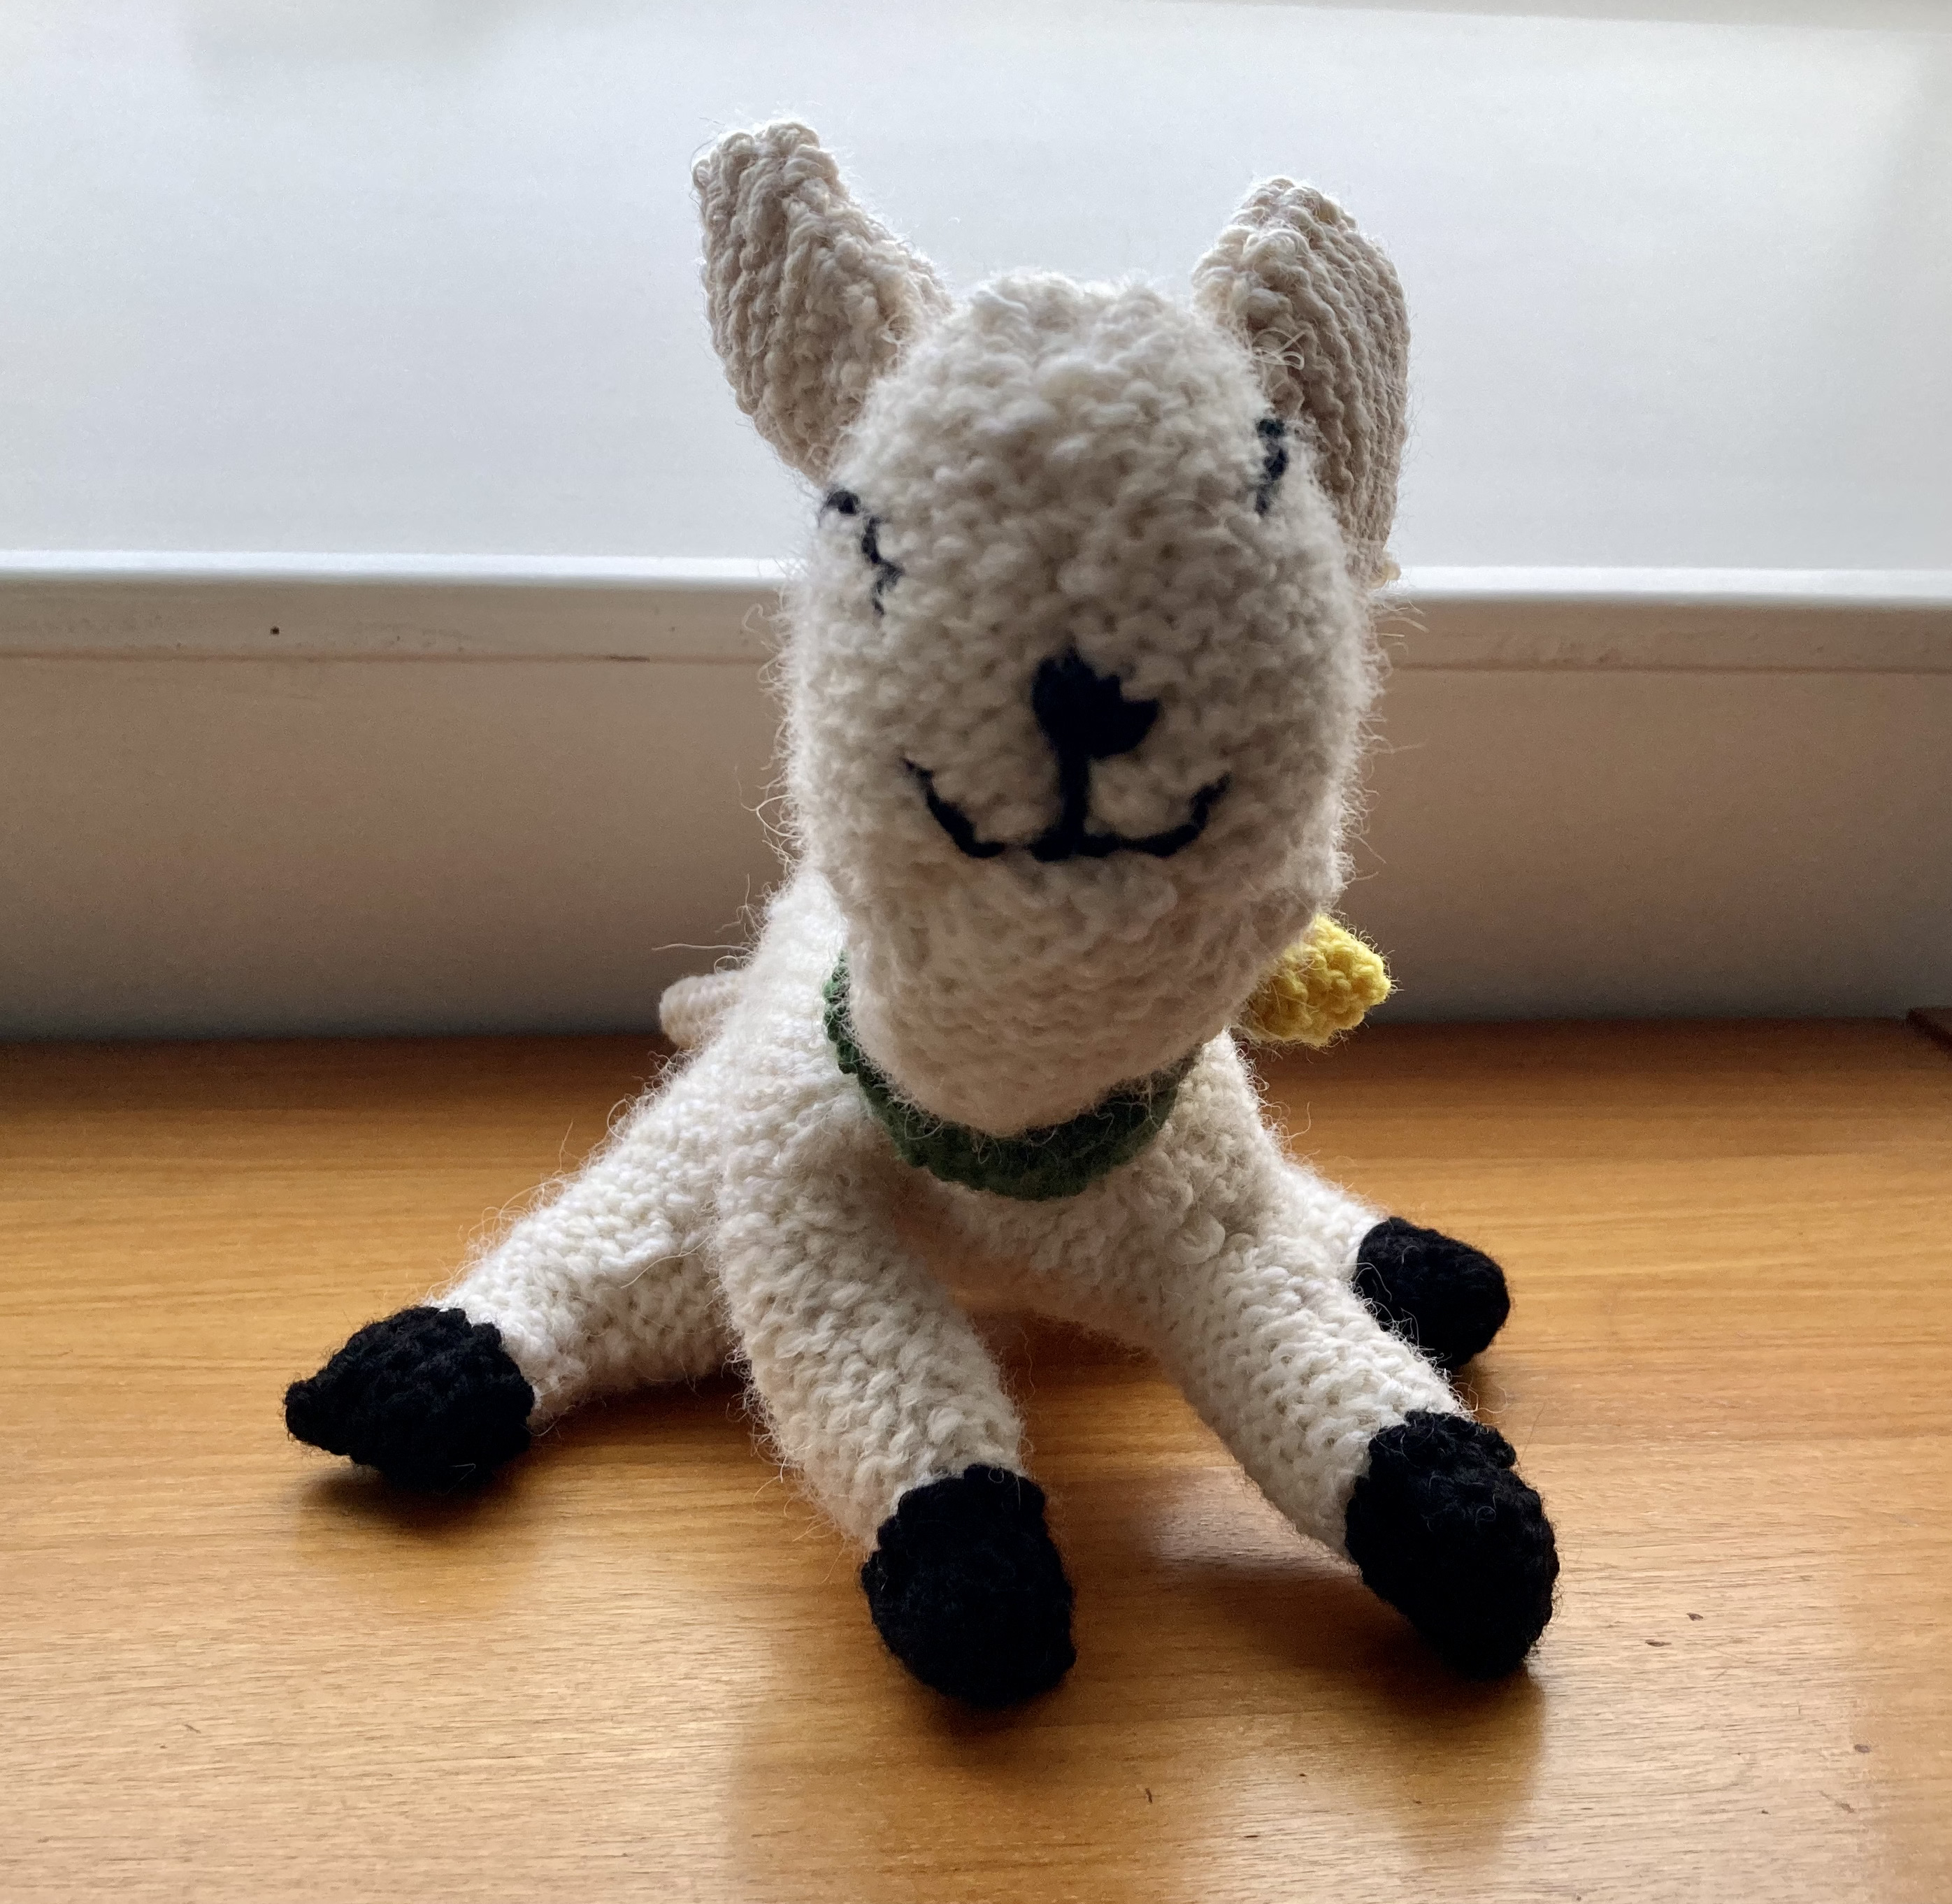
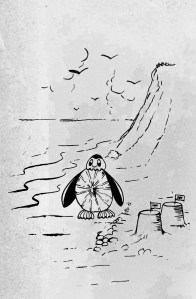
Eyes. The lamb needed to have eyes, as well as a symbolic nose and mouth. This was the part I had been dreading. Ever since I tried to knit some decorative stuffed birds that ended up looking sad, psychotic and/or dead (see photo), I have been afraid to embroider eyes on a toy. The eyes in the illustration look like the lamb is rolling its eyes in high annoyance (at all the knitters who fail at embroidering faces, no doubt.) Not wanting to even attempt that, I had the brilliant idea to make “closed” eyes. Just a little upside-down “u” and a smiling mouth! Hurrah, it worked! Little Lamb is so happy not to have been eaten for Easter supper!
Side note, marijuana was legalised in Germany on Easter Monday, one day after I finished this lamb. Perhaps the lamb was celebrating early. In any case, it’s really, really happy.
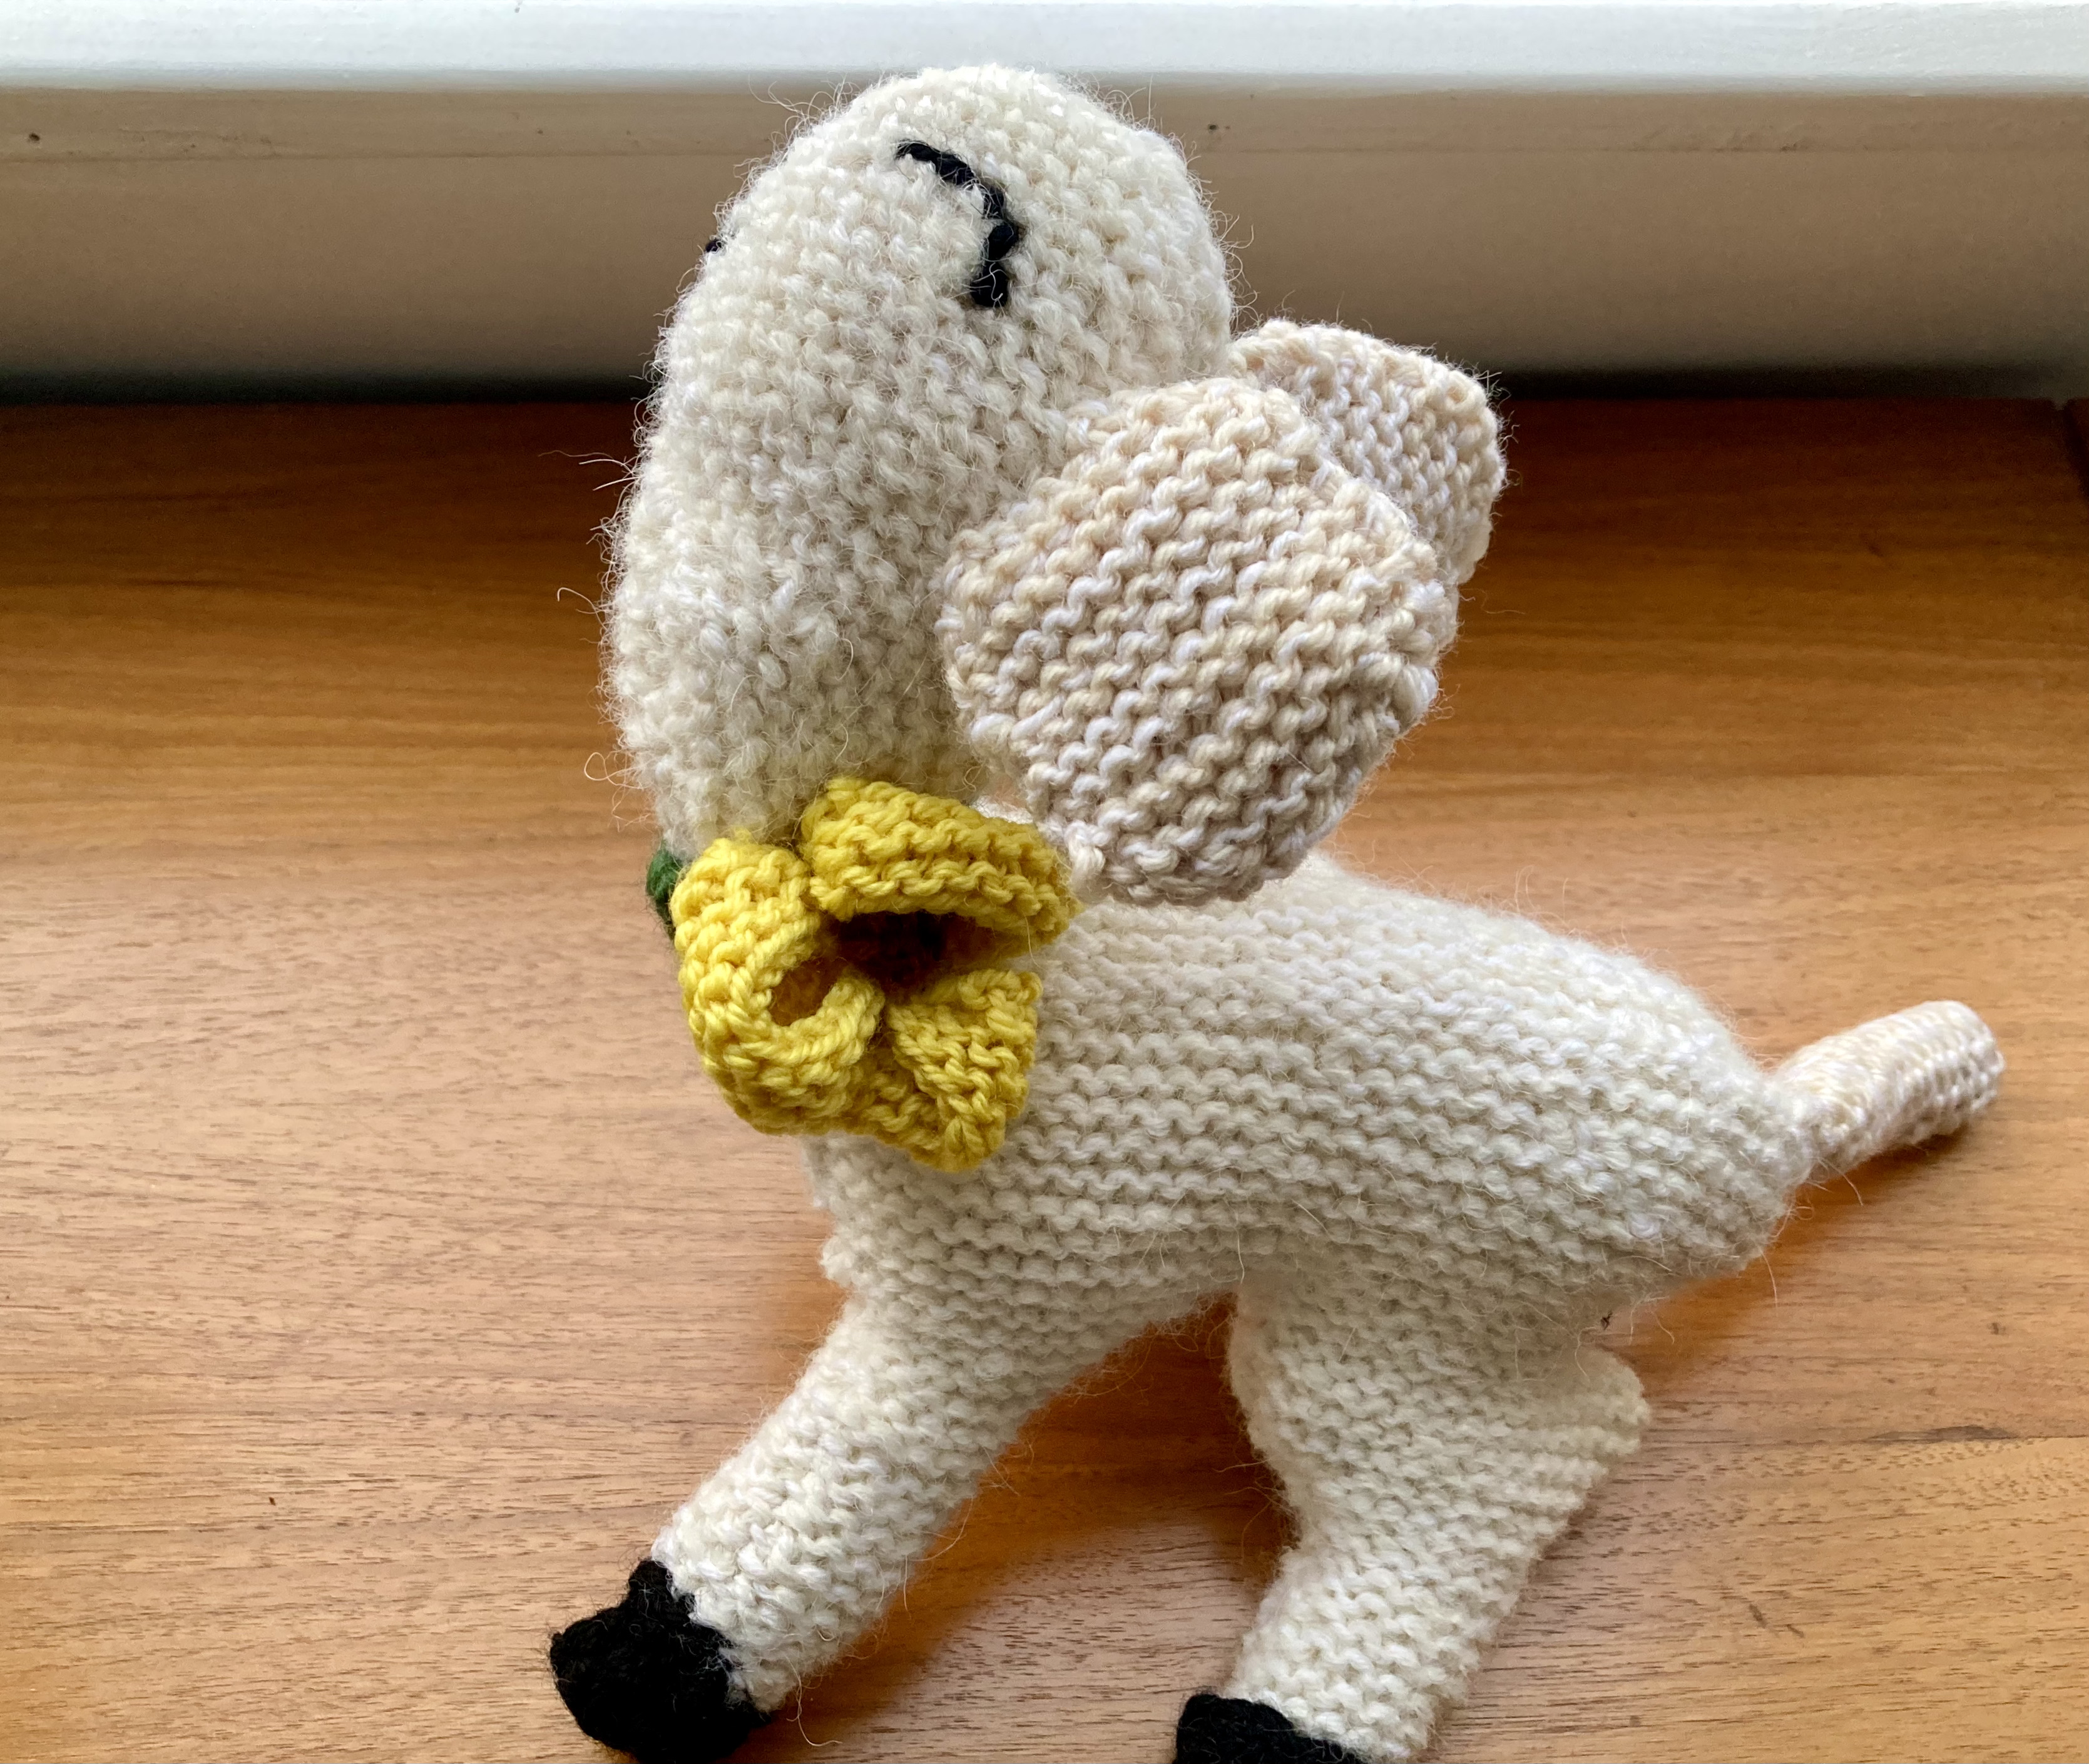
At this point I was torn between giving up entirely or just seeing it through. Oh, and I had also run out of the alpaca yarn, so when I decided to just roll with it and finish the project, I switched to some mystery something that was also sort of off-white for the ears and tail. The ears looked nothing like the ears in the illustration, but I was getting used to that by now.
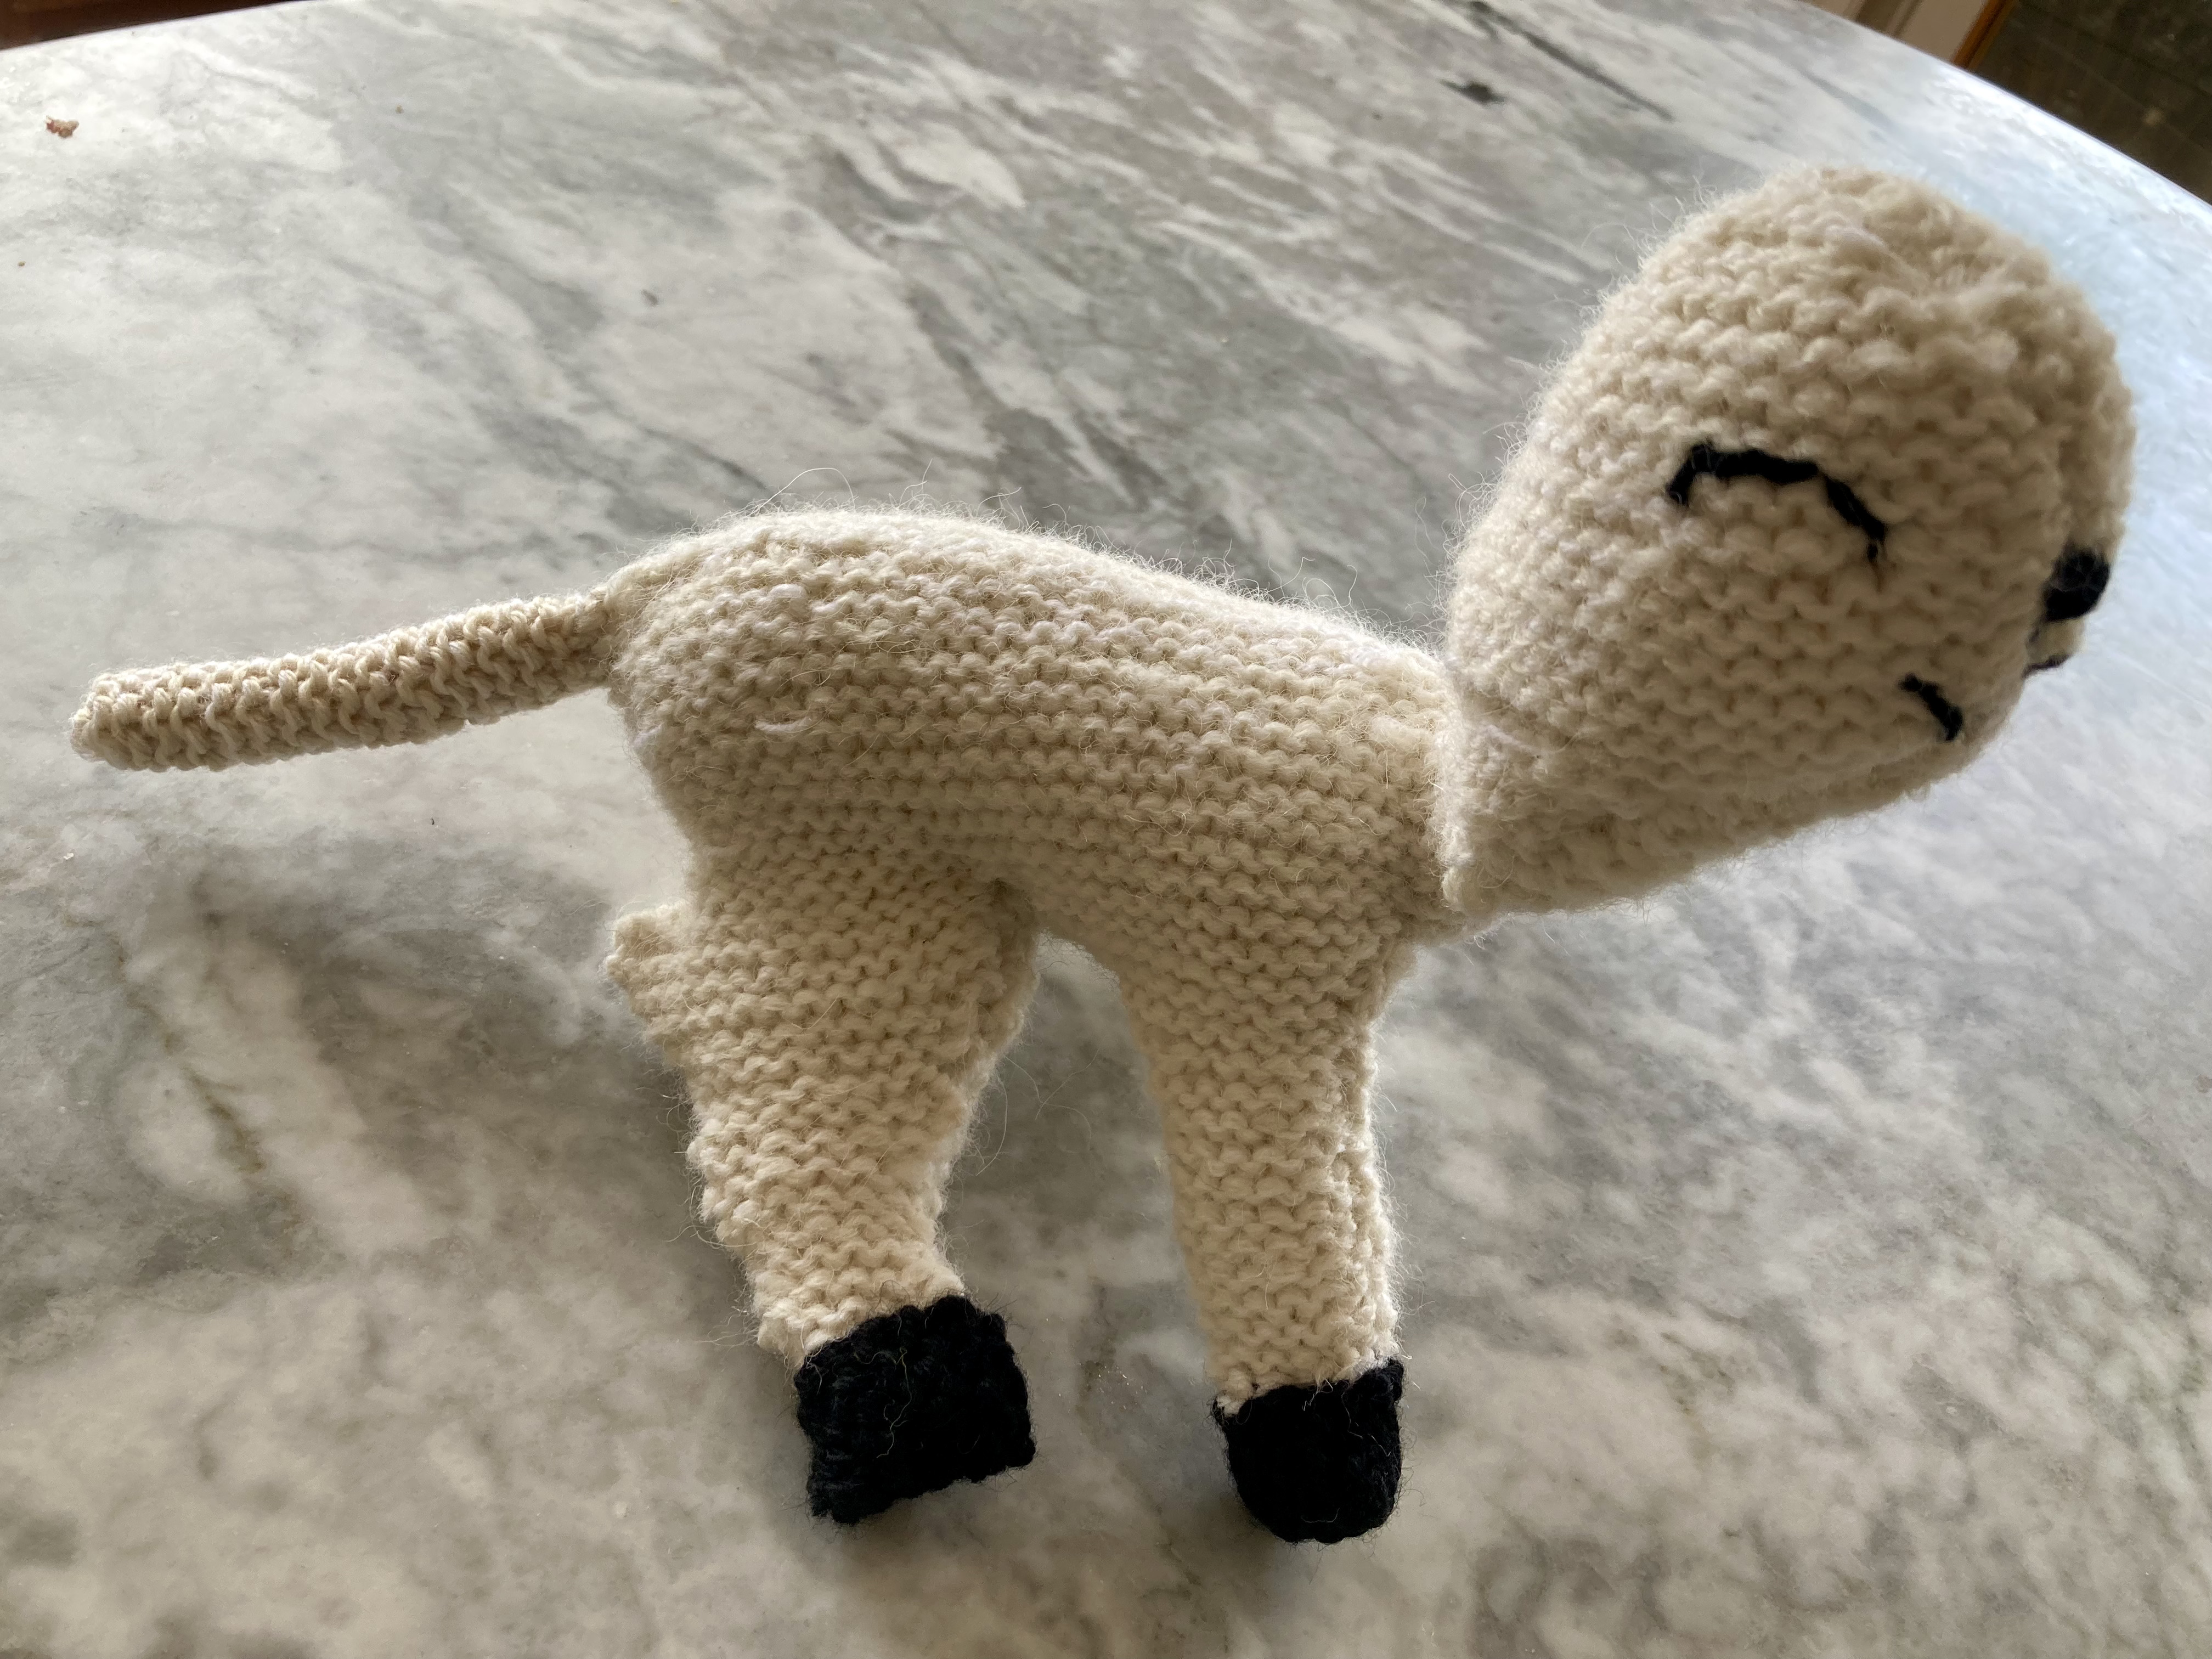
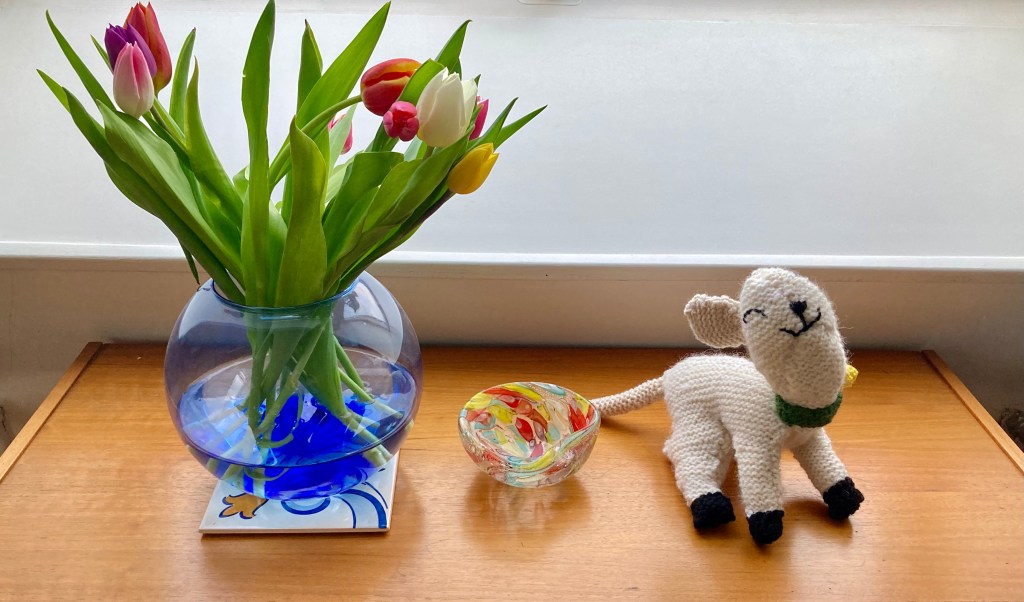
I sewed all the bits together and strangely, the head stayed up by itself. And the lamb could almost stand on its own, depending on what position you bent it into and how widely the legs were splayed out. (I do feel like that’s kind of accurate as to how real lambs look when they learn to walk, says the person who has never lived anywhere near the countryside or raised sheep.) The lamb’s “necklace” as given in the pattern was a complicated bit of braiding, knotting and embroidery, to which I said “nope” and made a little green collar with an easy yellow flower instead. (Thank you, Frankie Brown, for writing and publishing a great pattern for the flower. I donated to the Children’s Liver Disease Foundation and can promise you that I am not going to try to sell this lamb!) Luckily, the collar conveniently hid the awkward seams at the neck. Otherwise I would have had to go full Frankenstein and put in some screw-bolts.
And there it was! Behold the finished lamb, in all his / her / its glory. It is so wonky. The more you look at it, the more weirdness you see. But also, the more you look at it, the happier you feel. I love this lamb so much and challenge all of you to look at it and not feel happy with me. I almost want to keep it for myself instead of giving it to the baby… Maybe it can stay with me just a little while longer?
May all your imperfect projects bring you such joy.
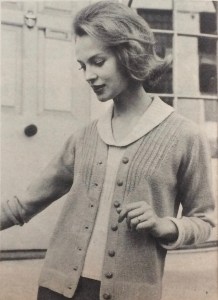
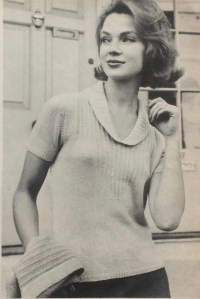
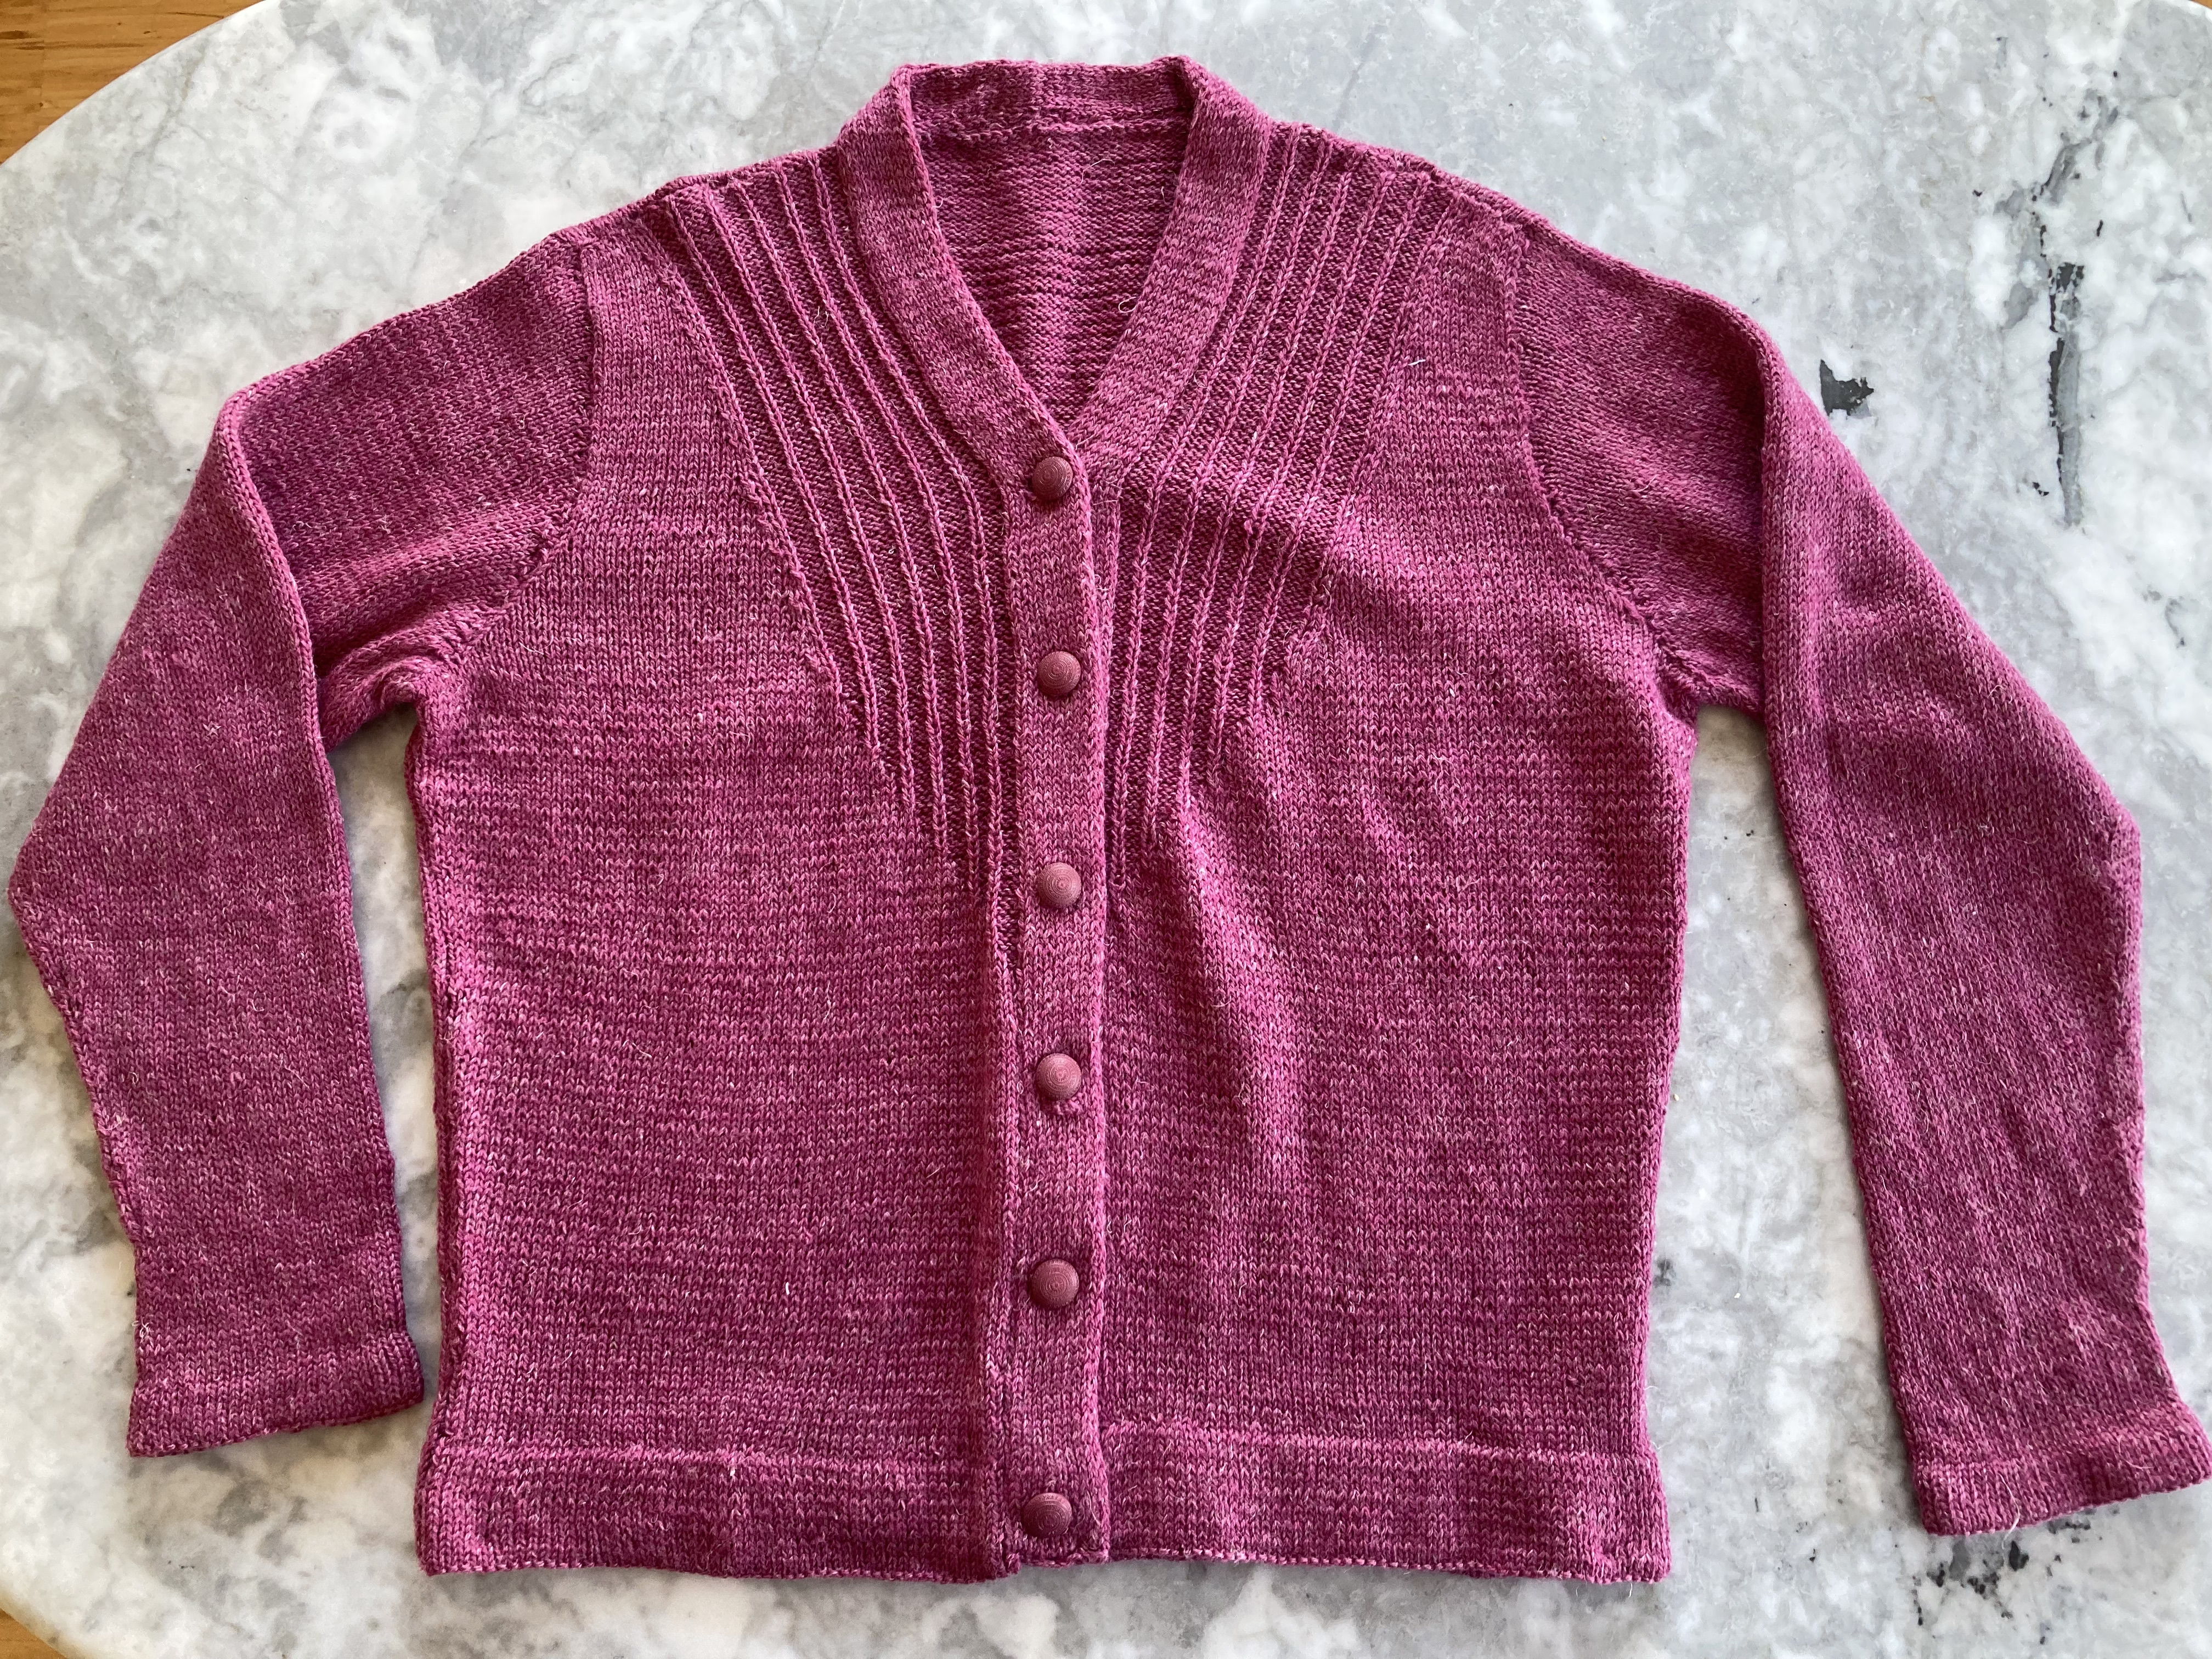
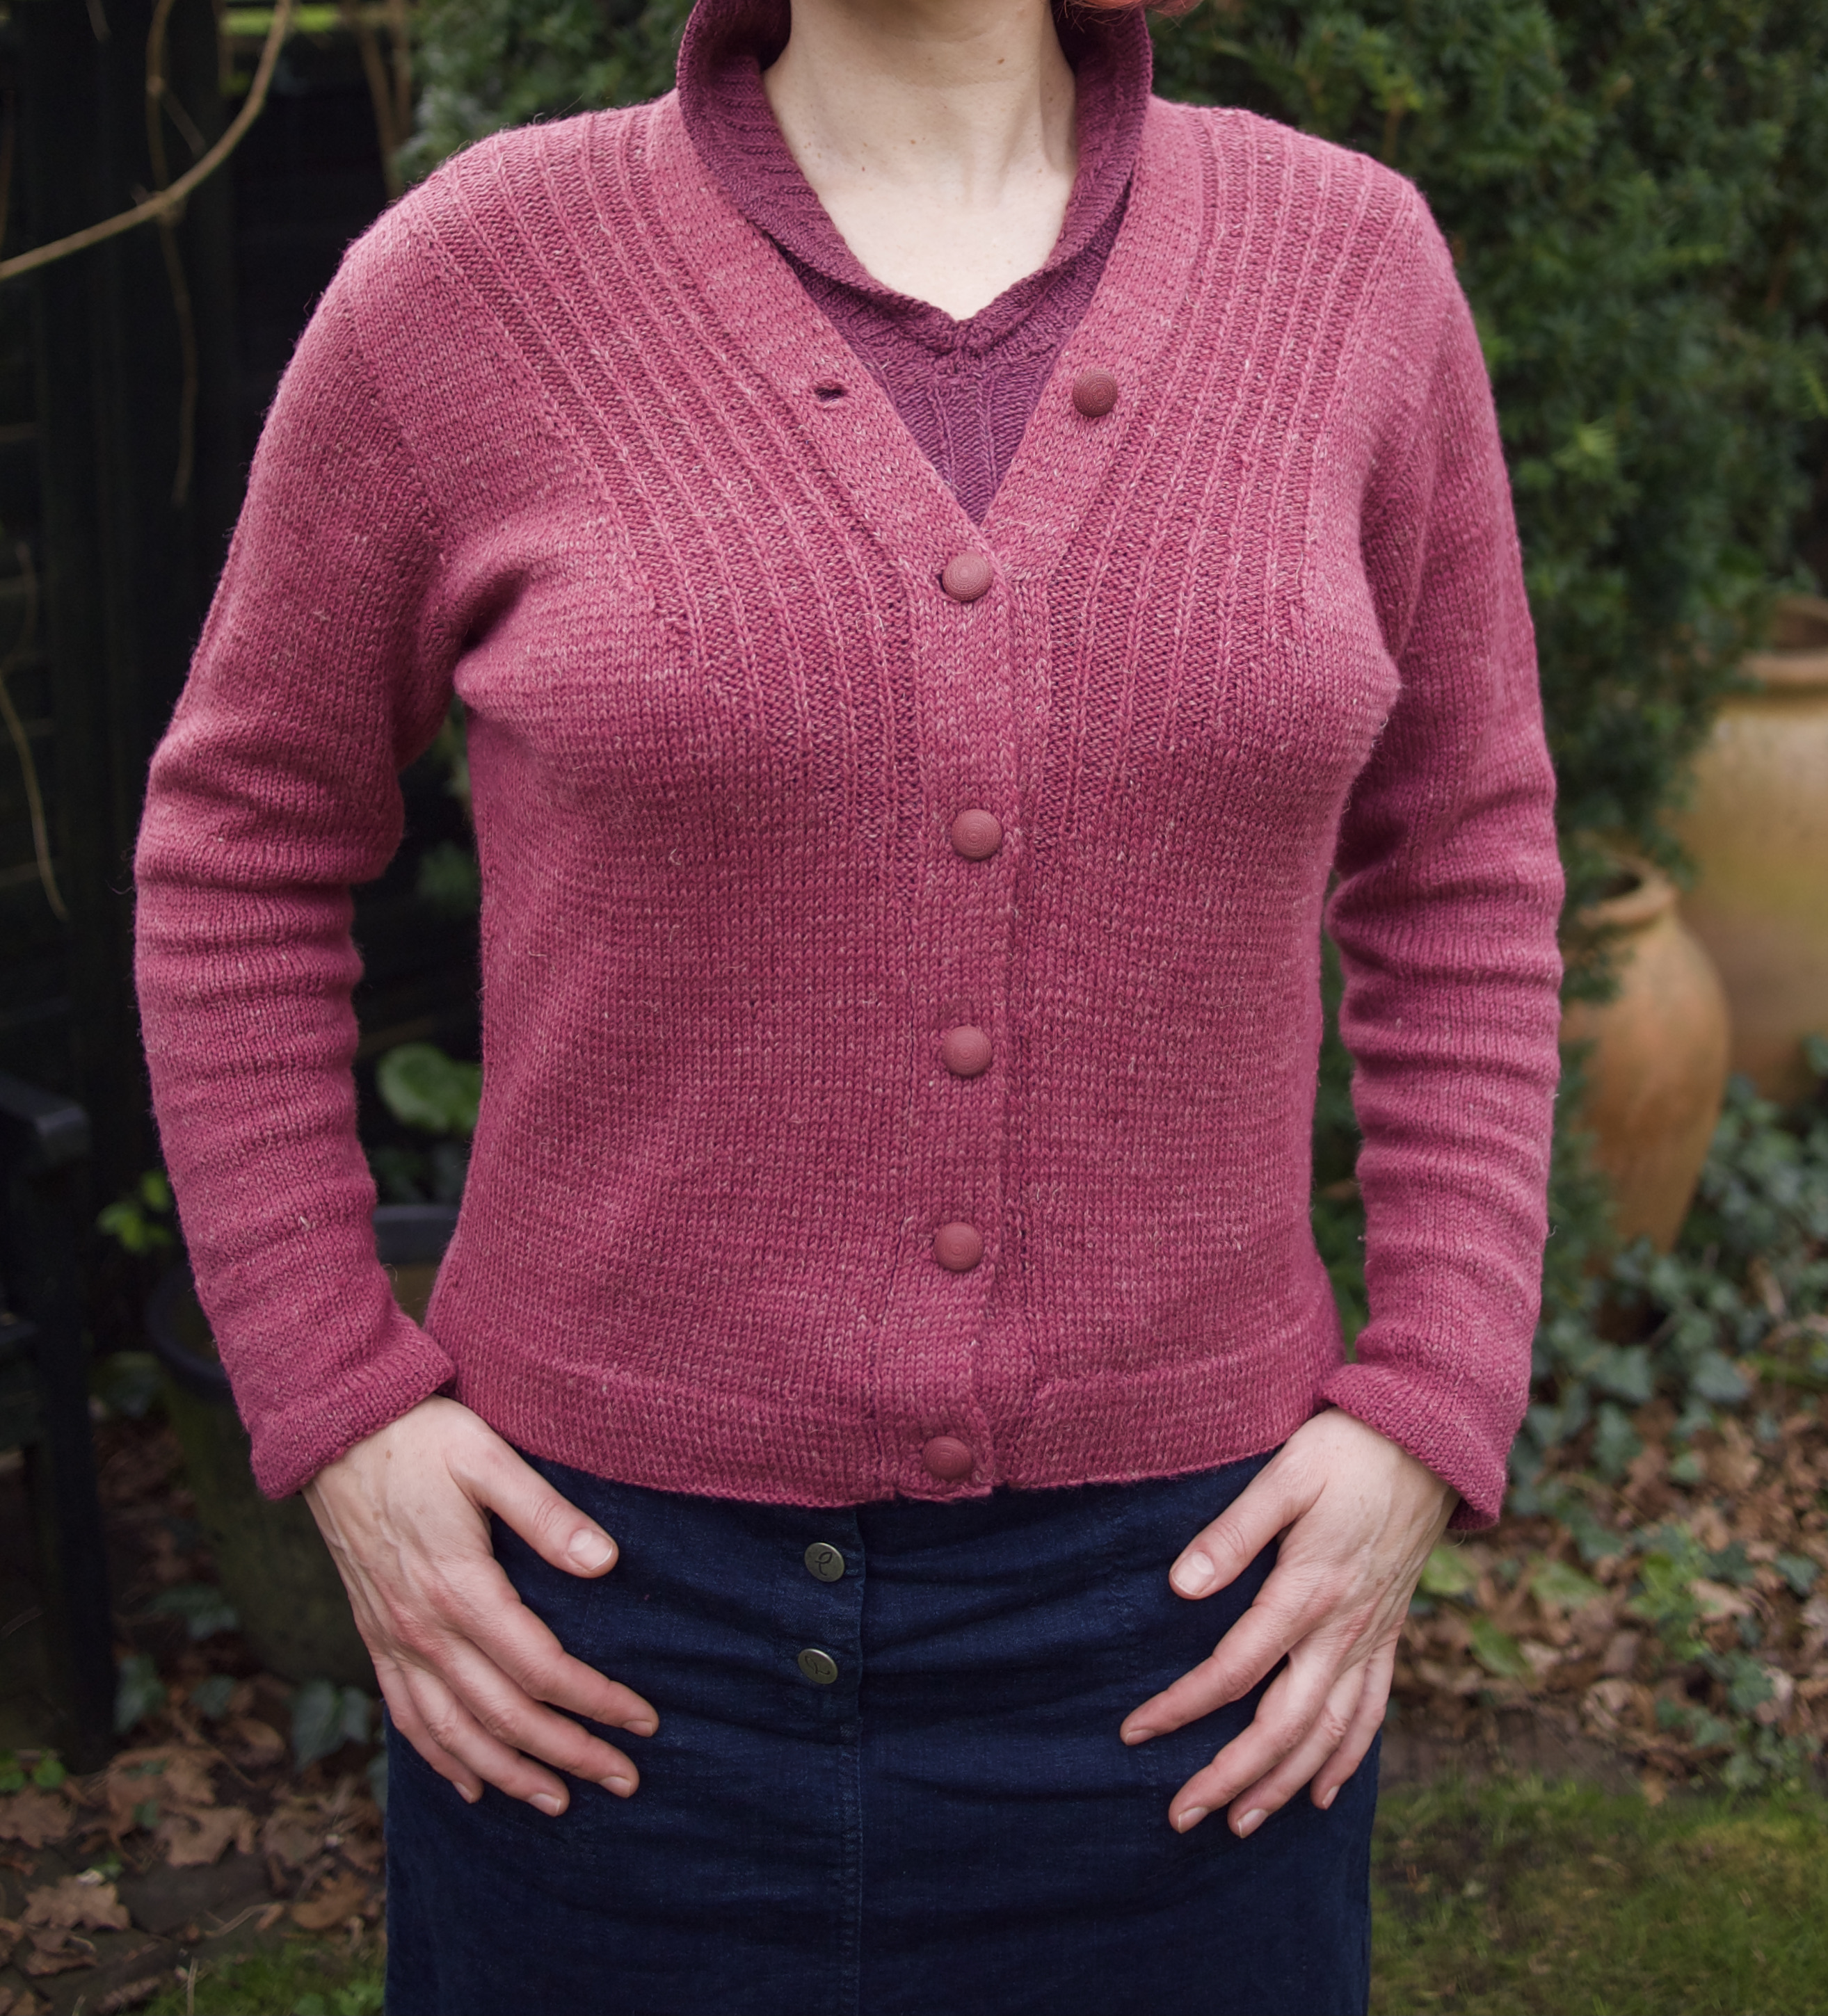
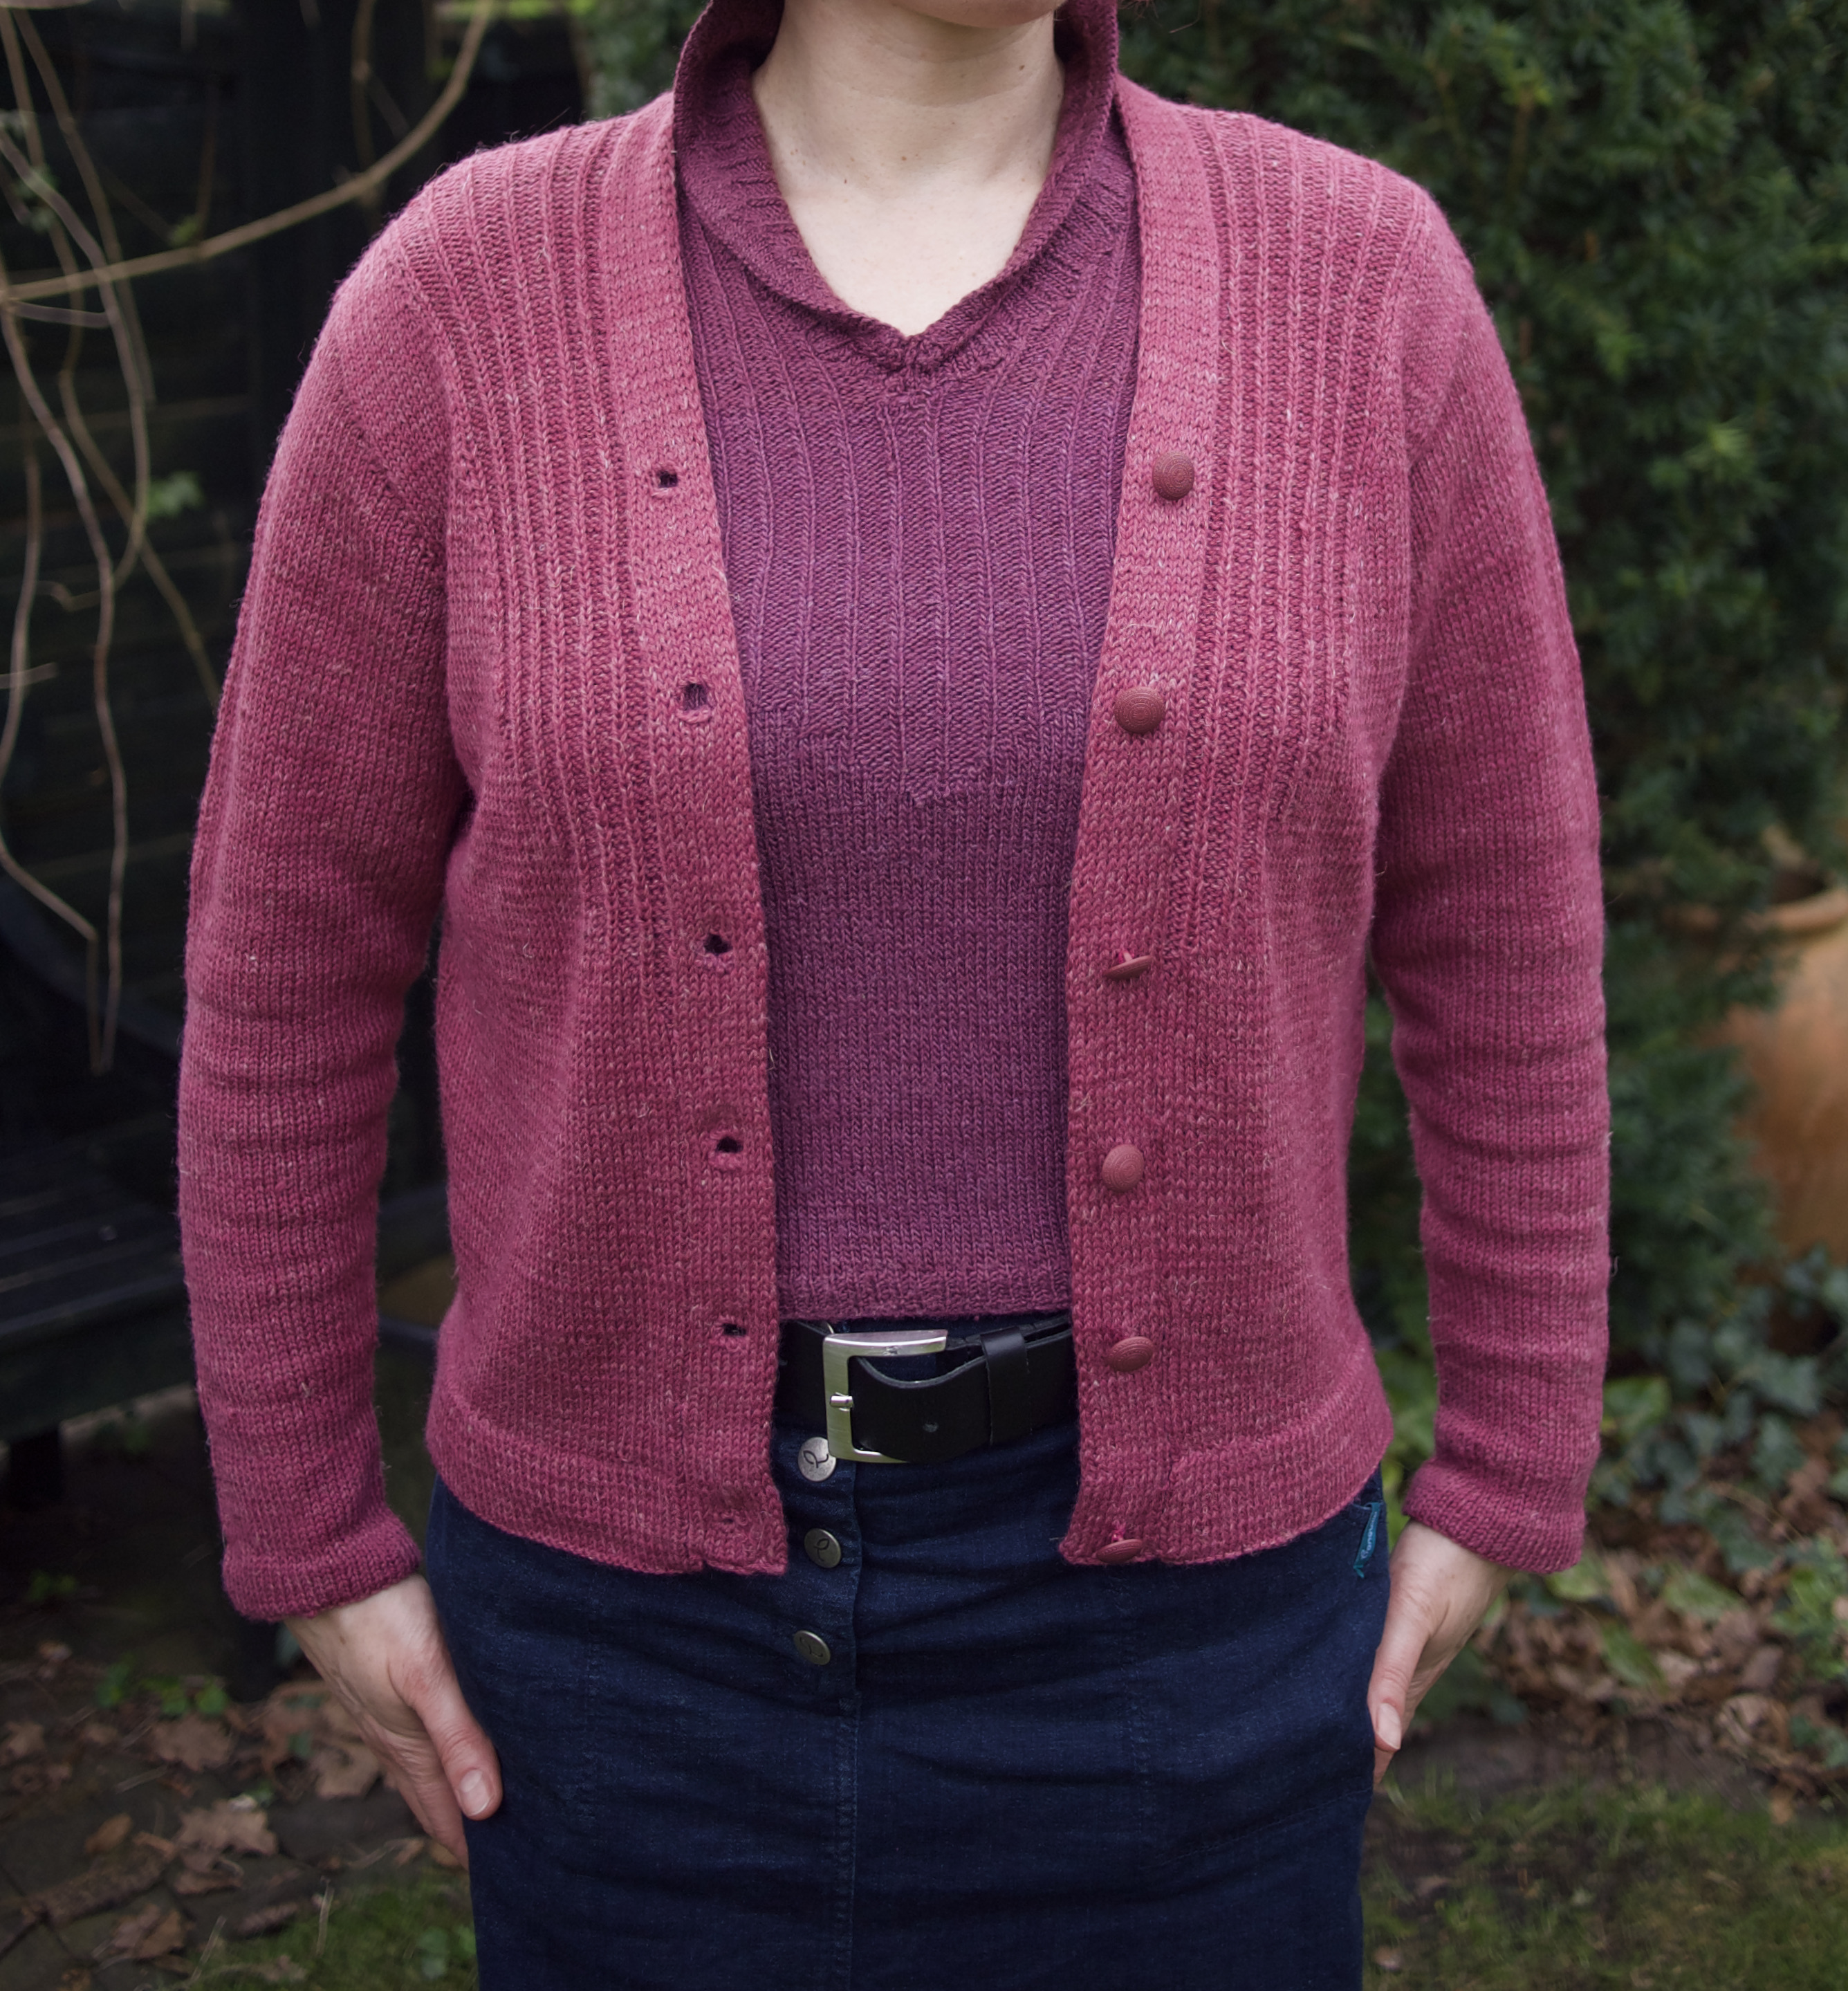
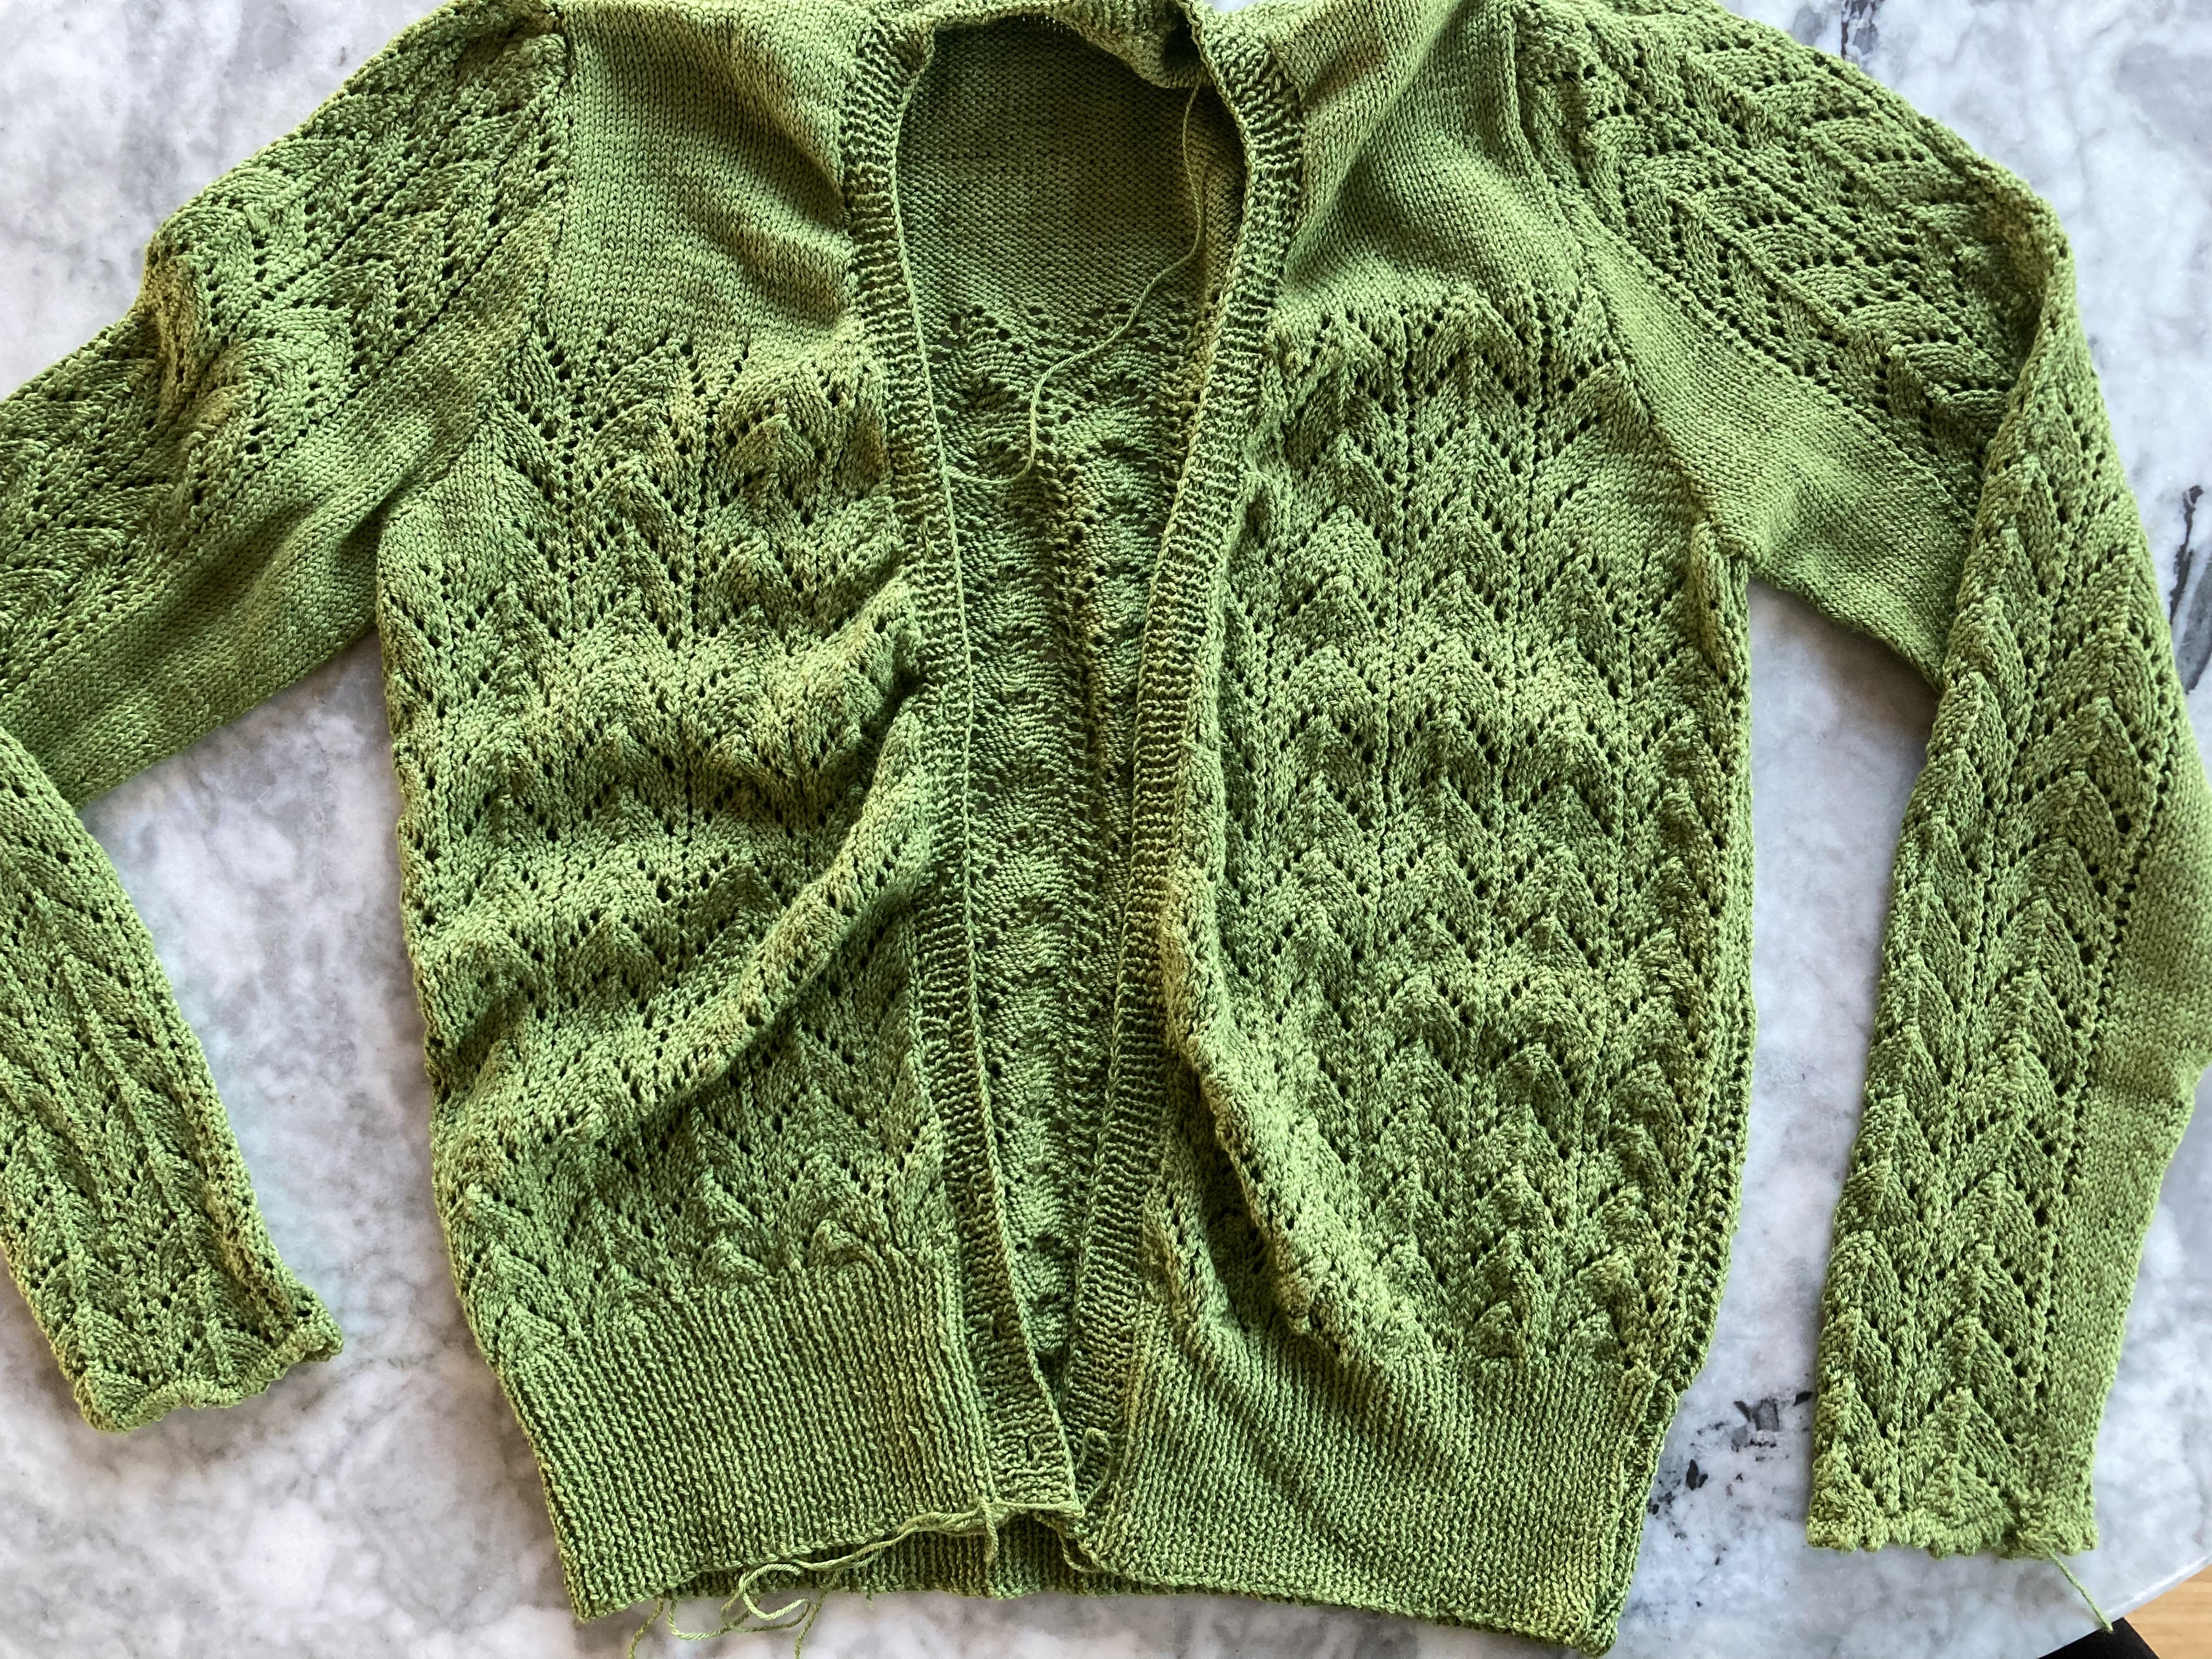
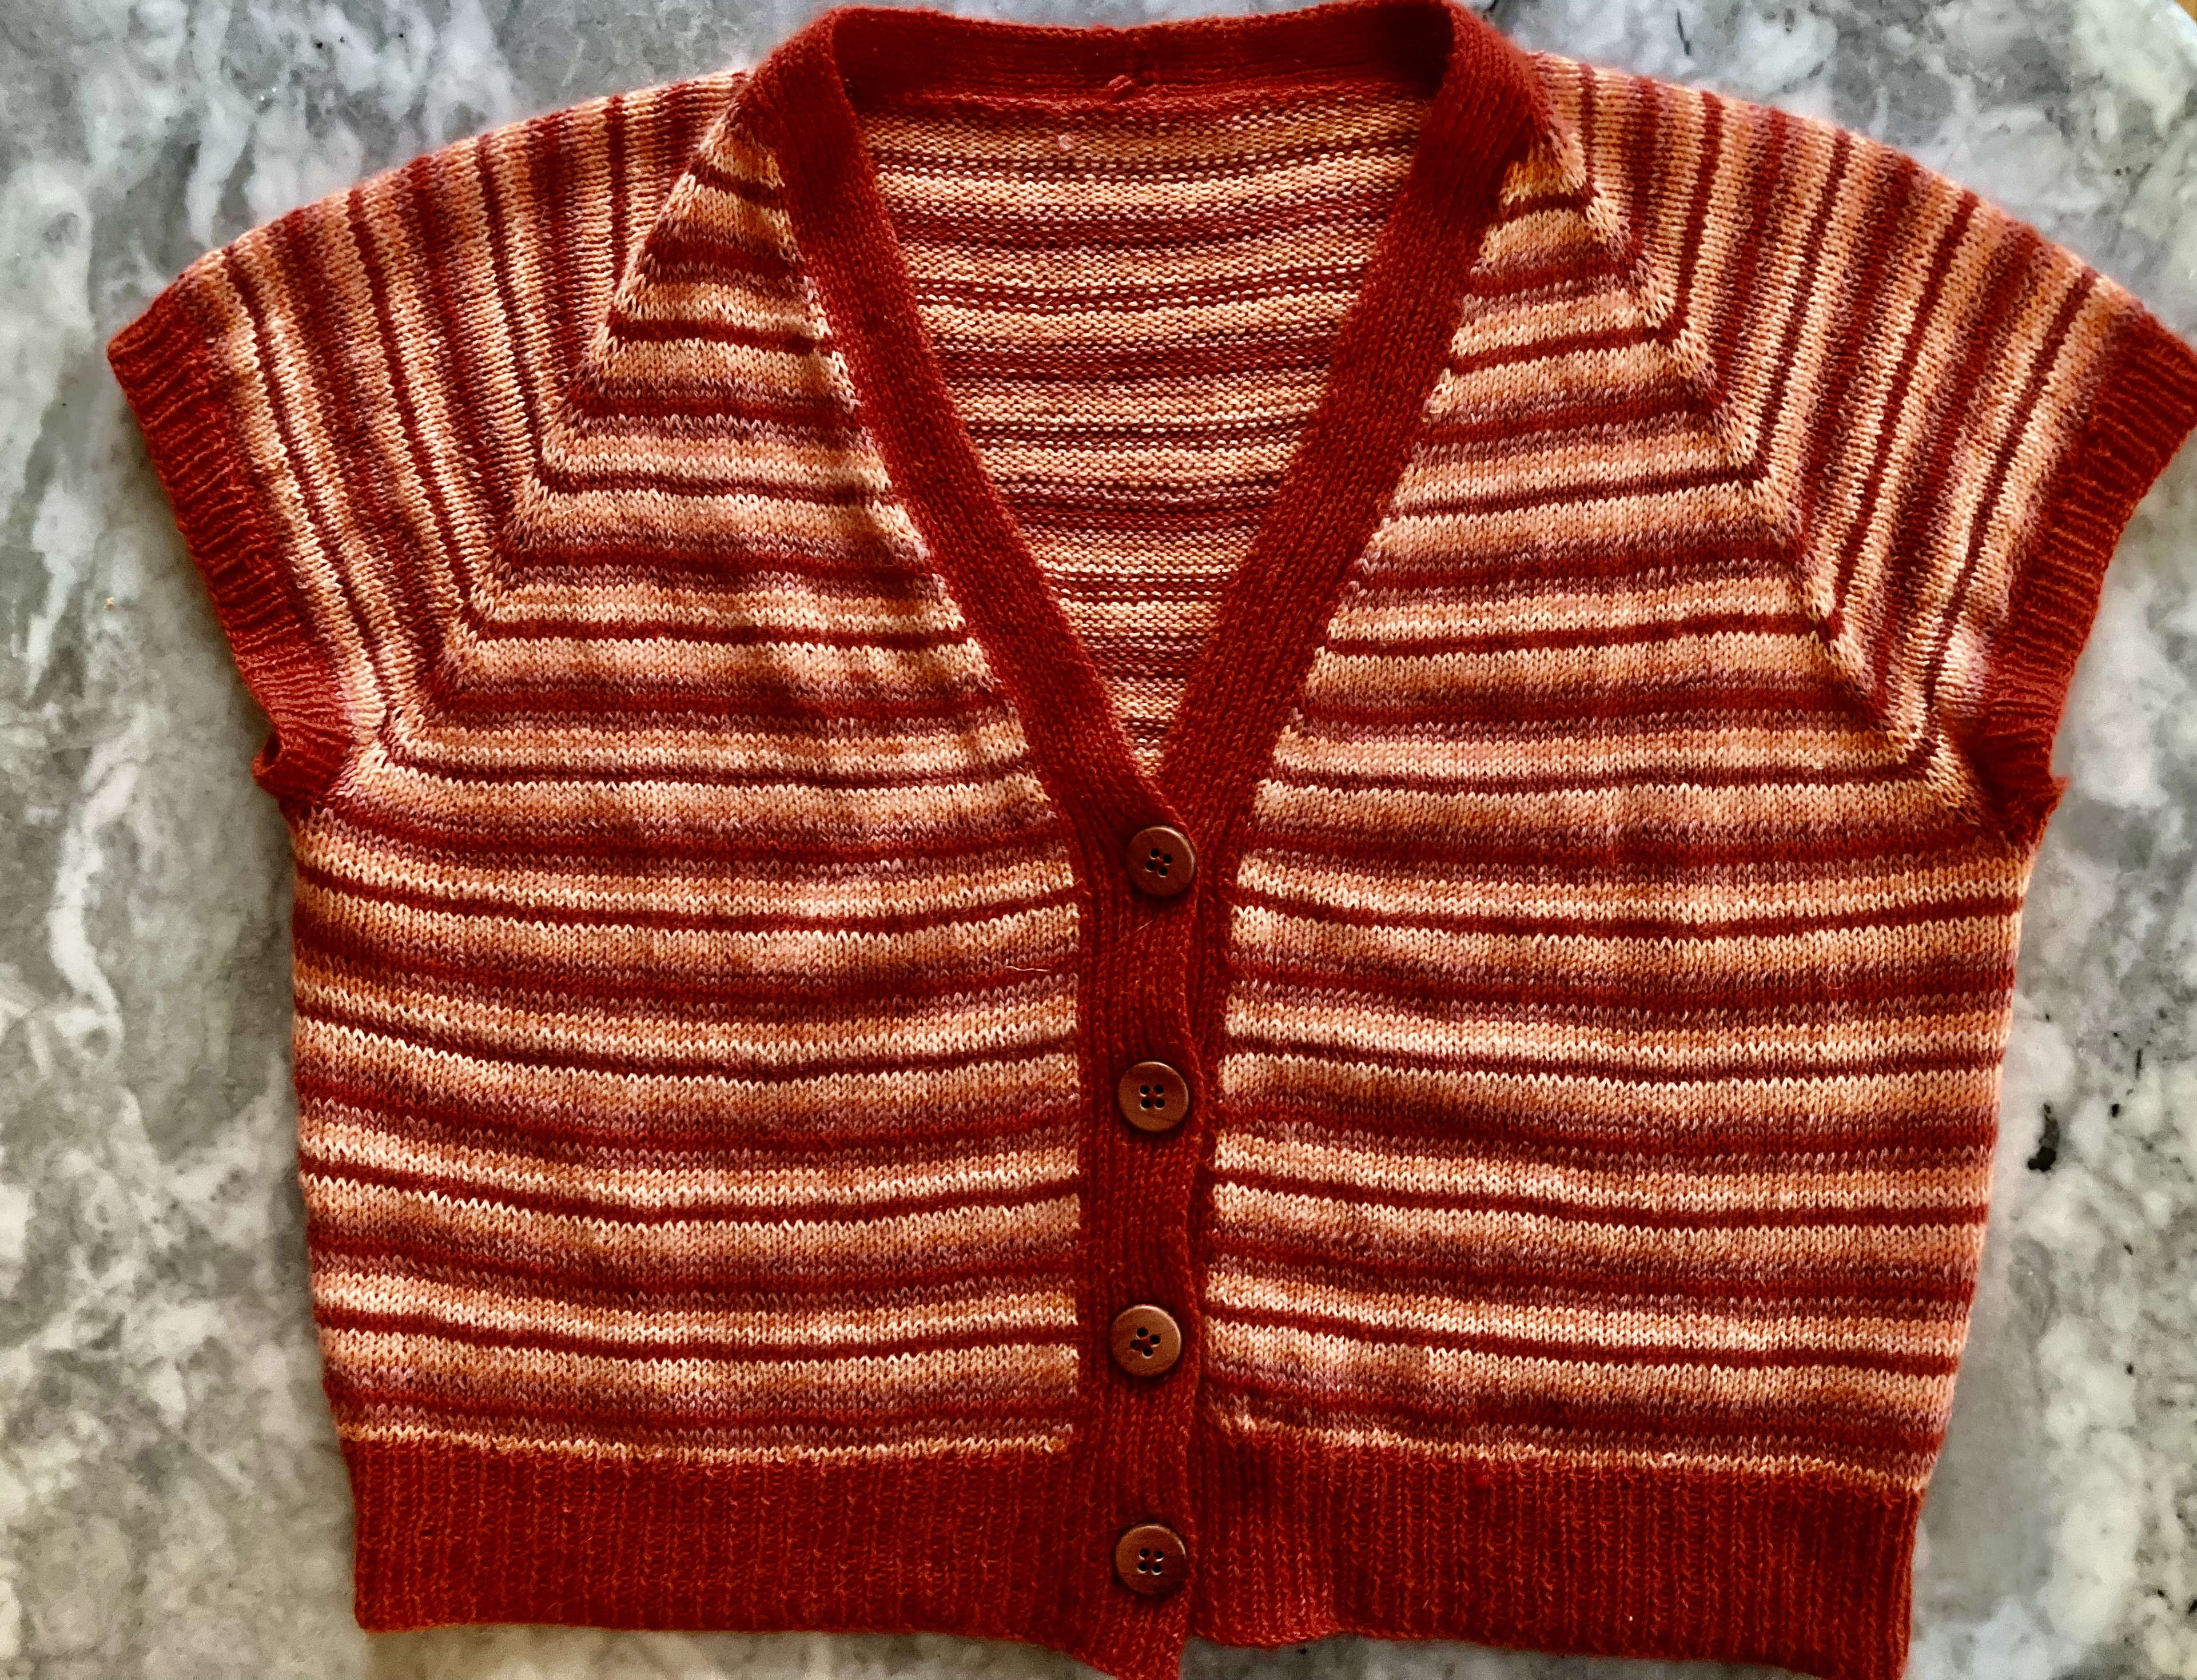
The March 1966 issue of Stitchcraft didn’t have any projects that particularly called to me, and I am still in destash/finish up old projects mode. So this month, I finally finished the cardigan to the “Softly Fitting” twinset from January 1962.
The original twinset is made in two different colours of the same wool: Patons Cameo Crepe “French Green” for the cardigan and “Pearl Frost” for the jumper. I had already made the jumper in Concept by Katia Silky Lace in a more blue-ish shade of purple, and had 300 grams of wonderful Lana Grossa Slow Wool Lino in stash in a slightly more reddish shade of purple. The two purples harmonised quite well, and although the yarns are different compositions, they are both the same weight and have a similar drape and softness.
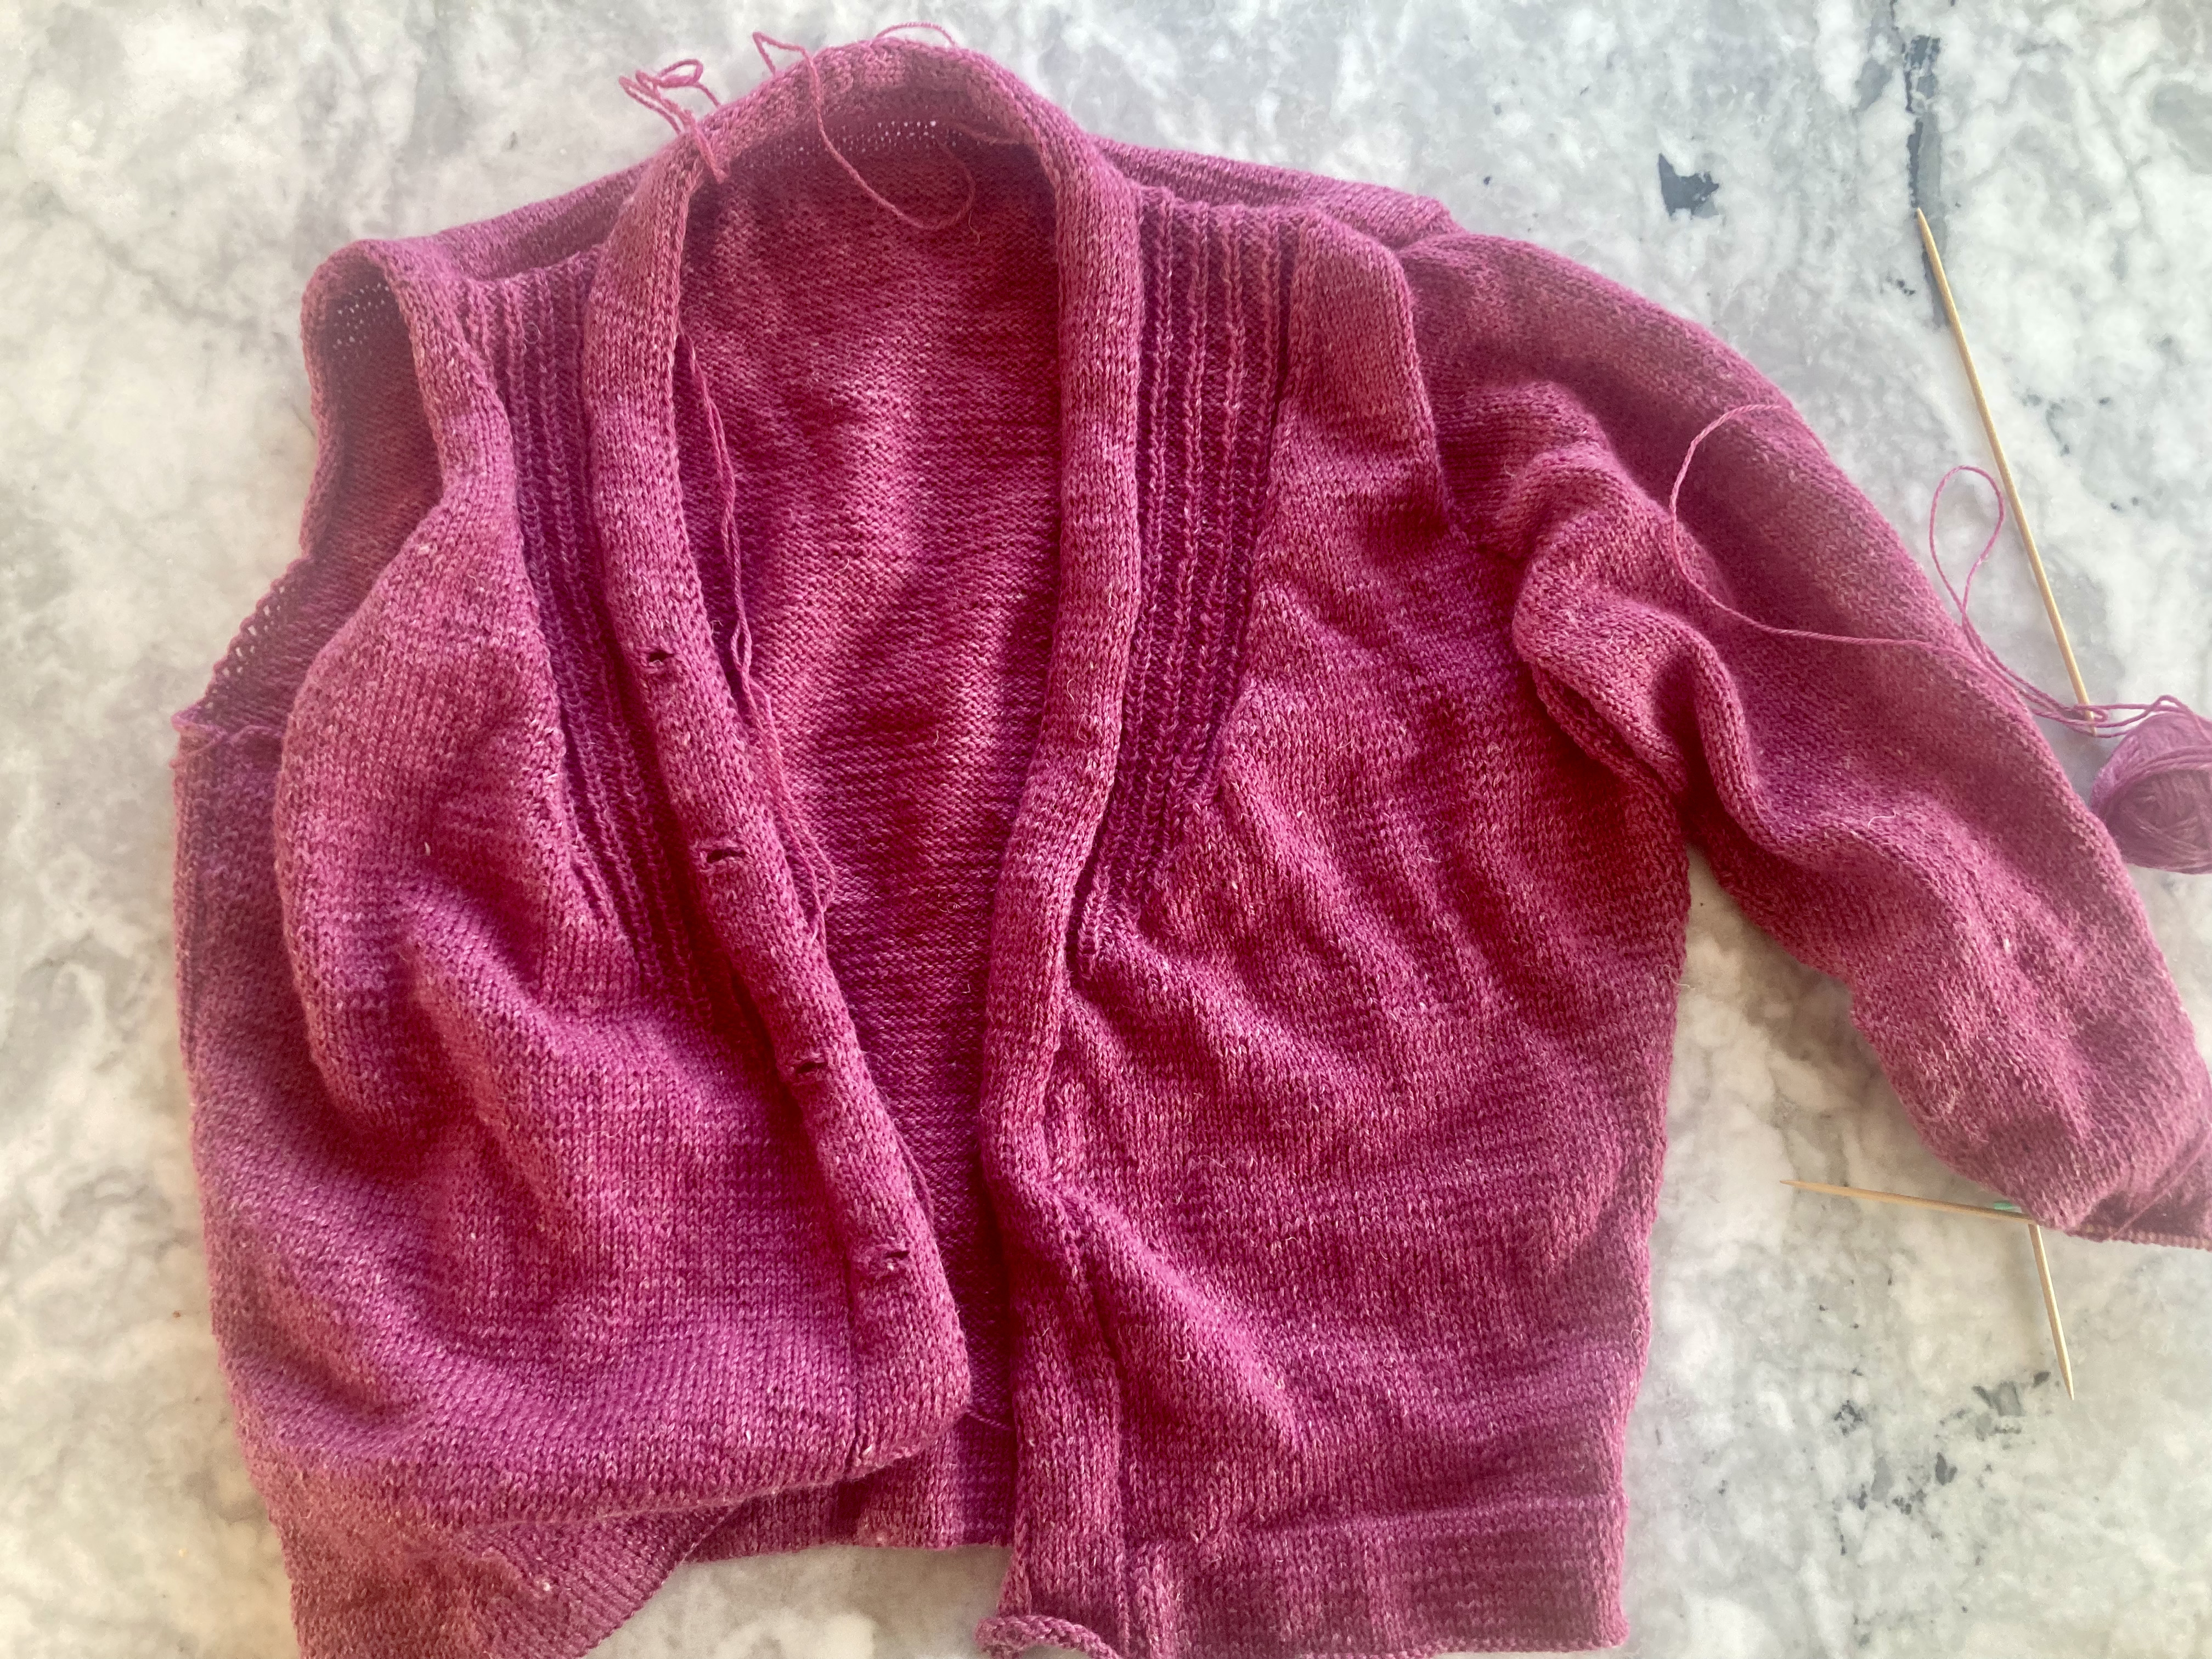
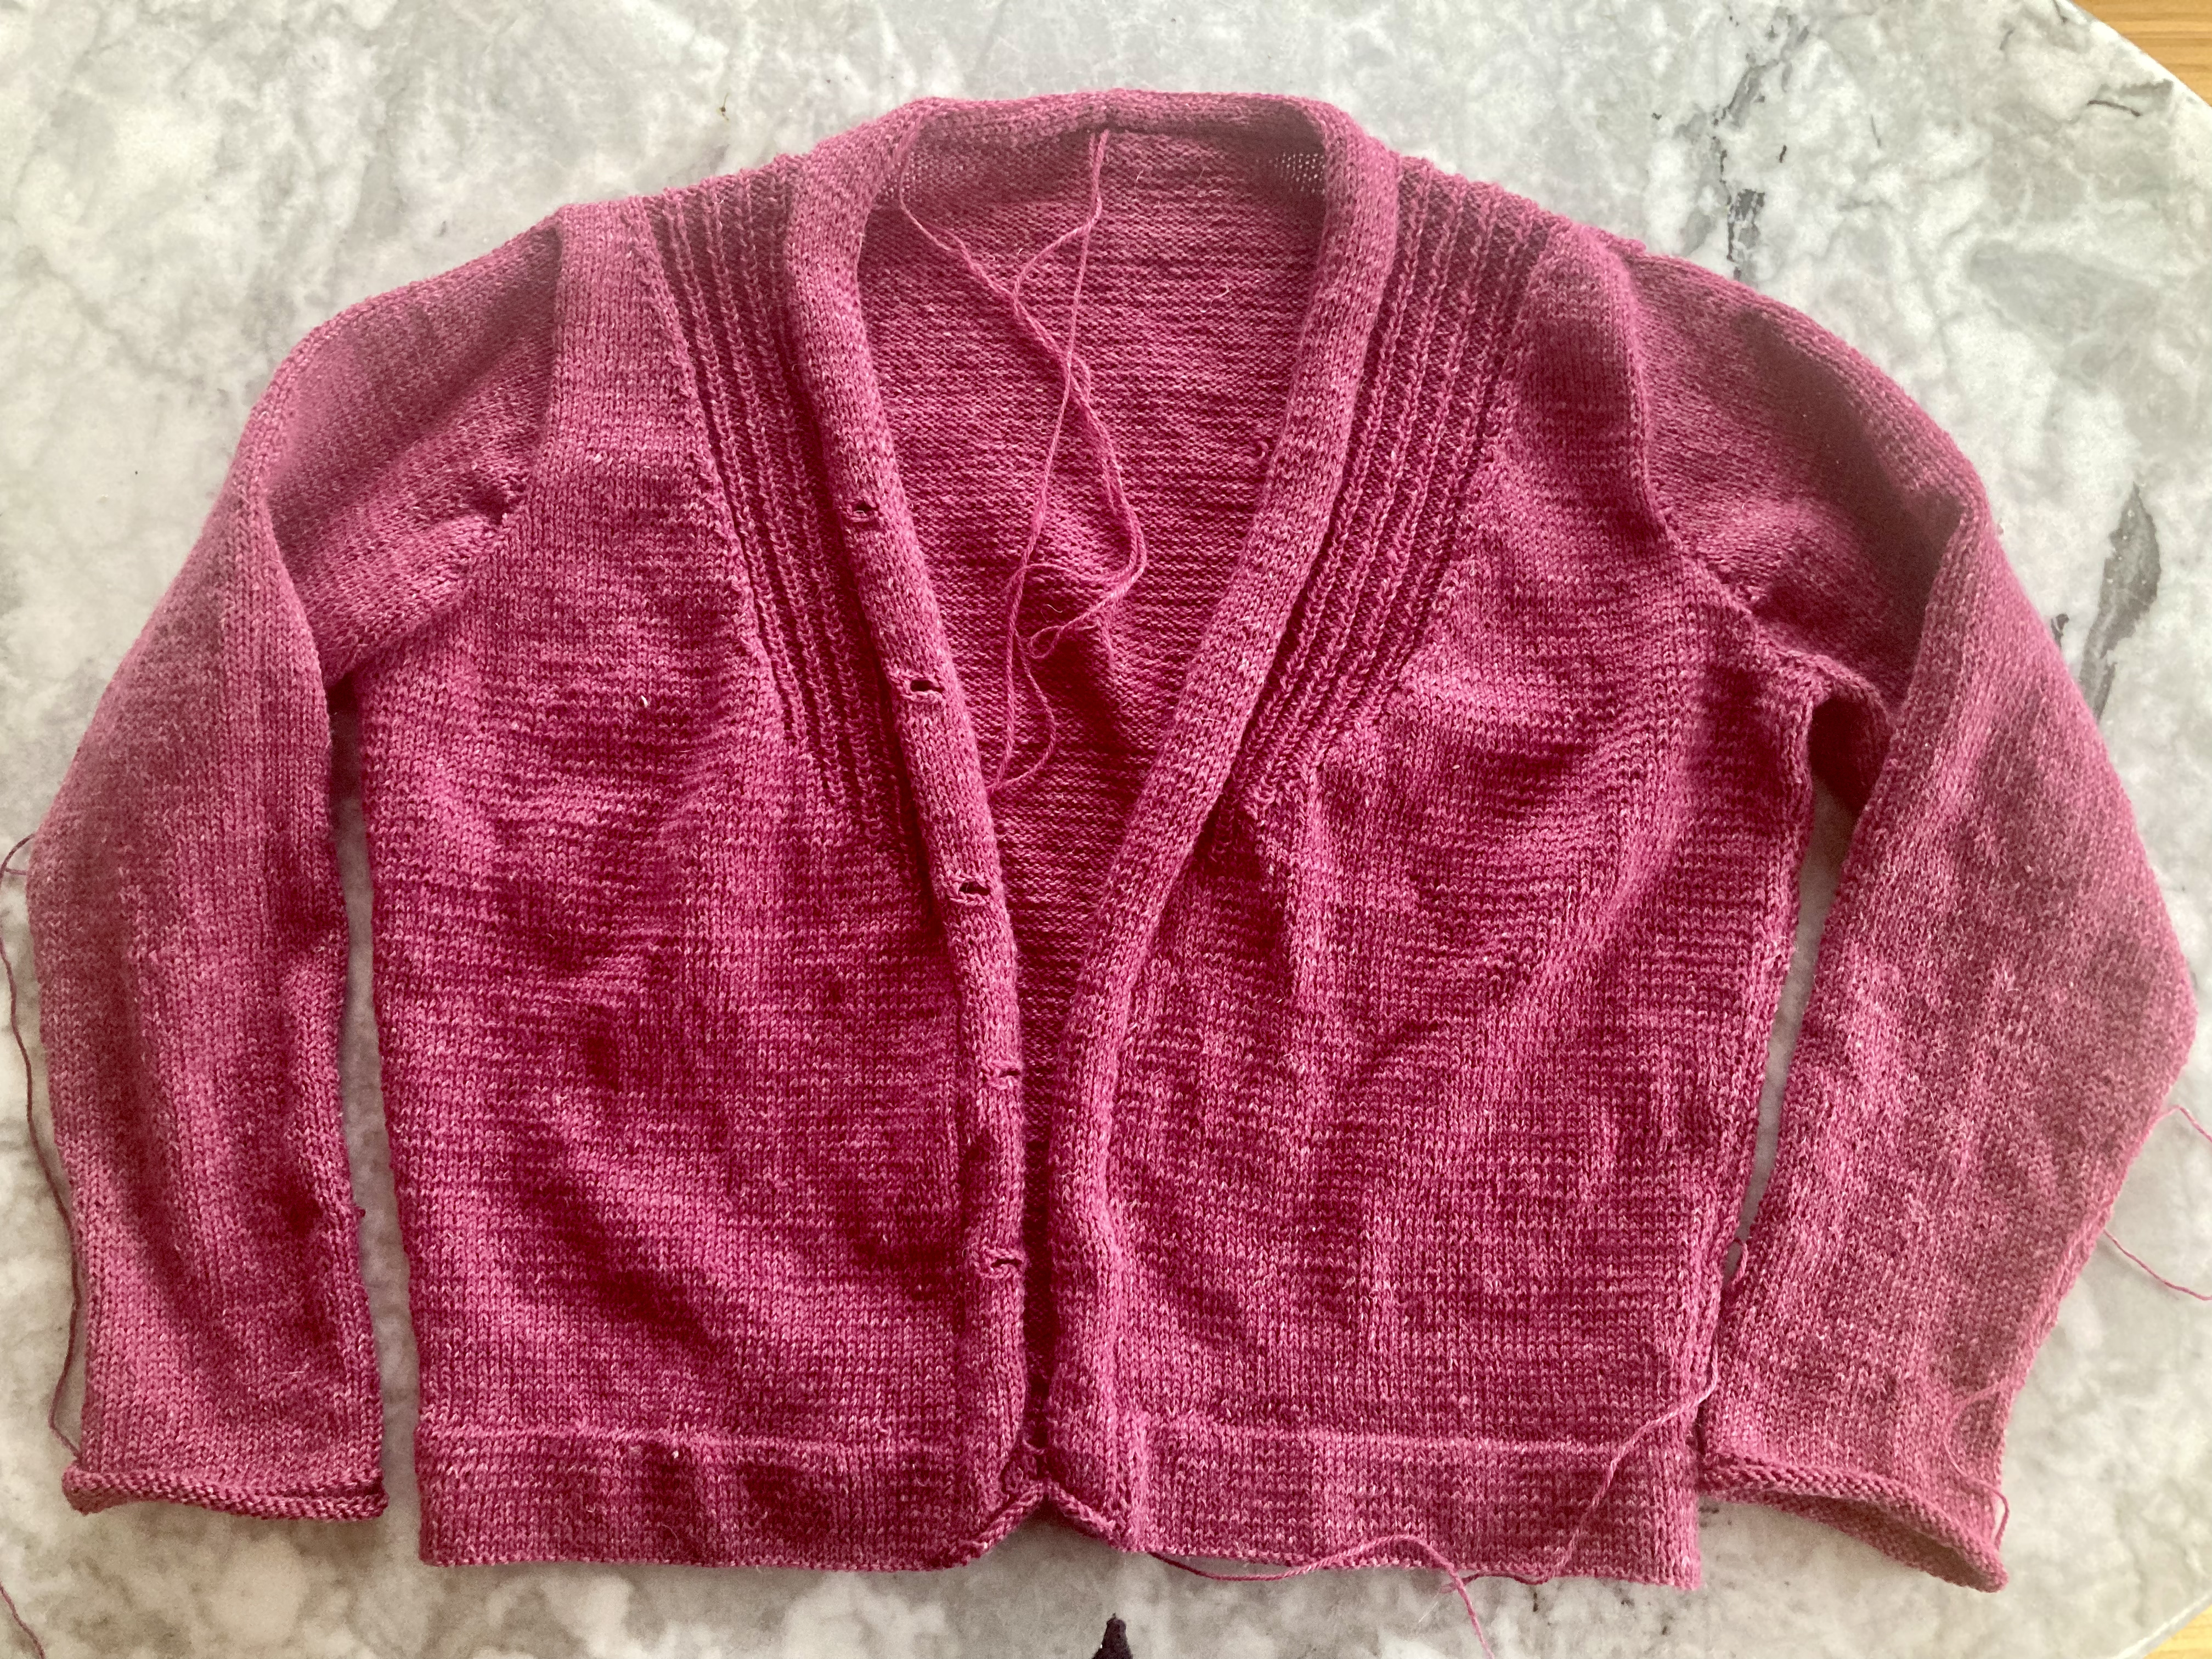
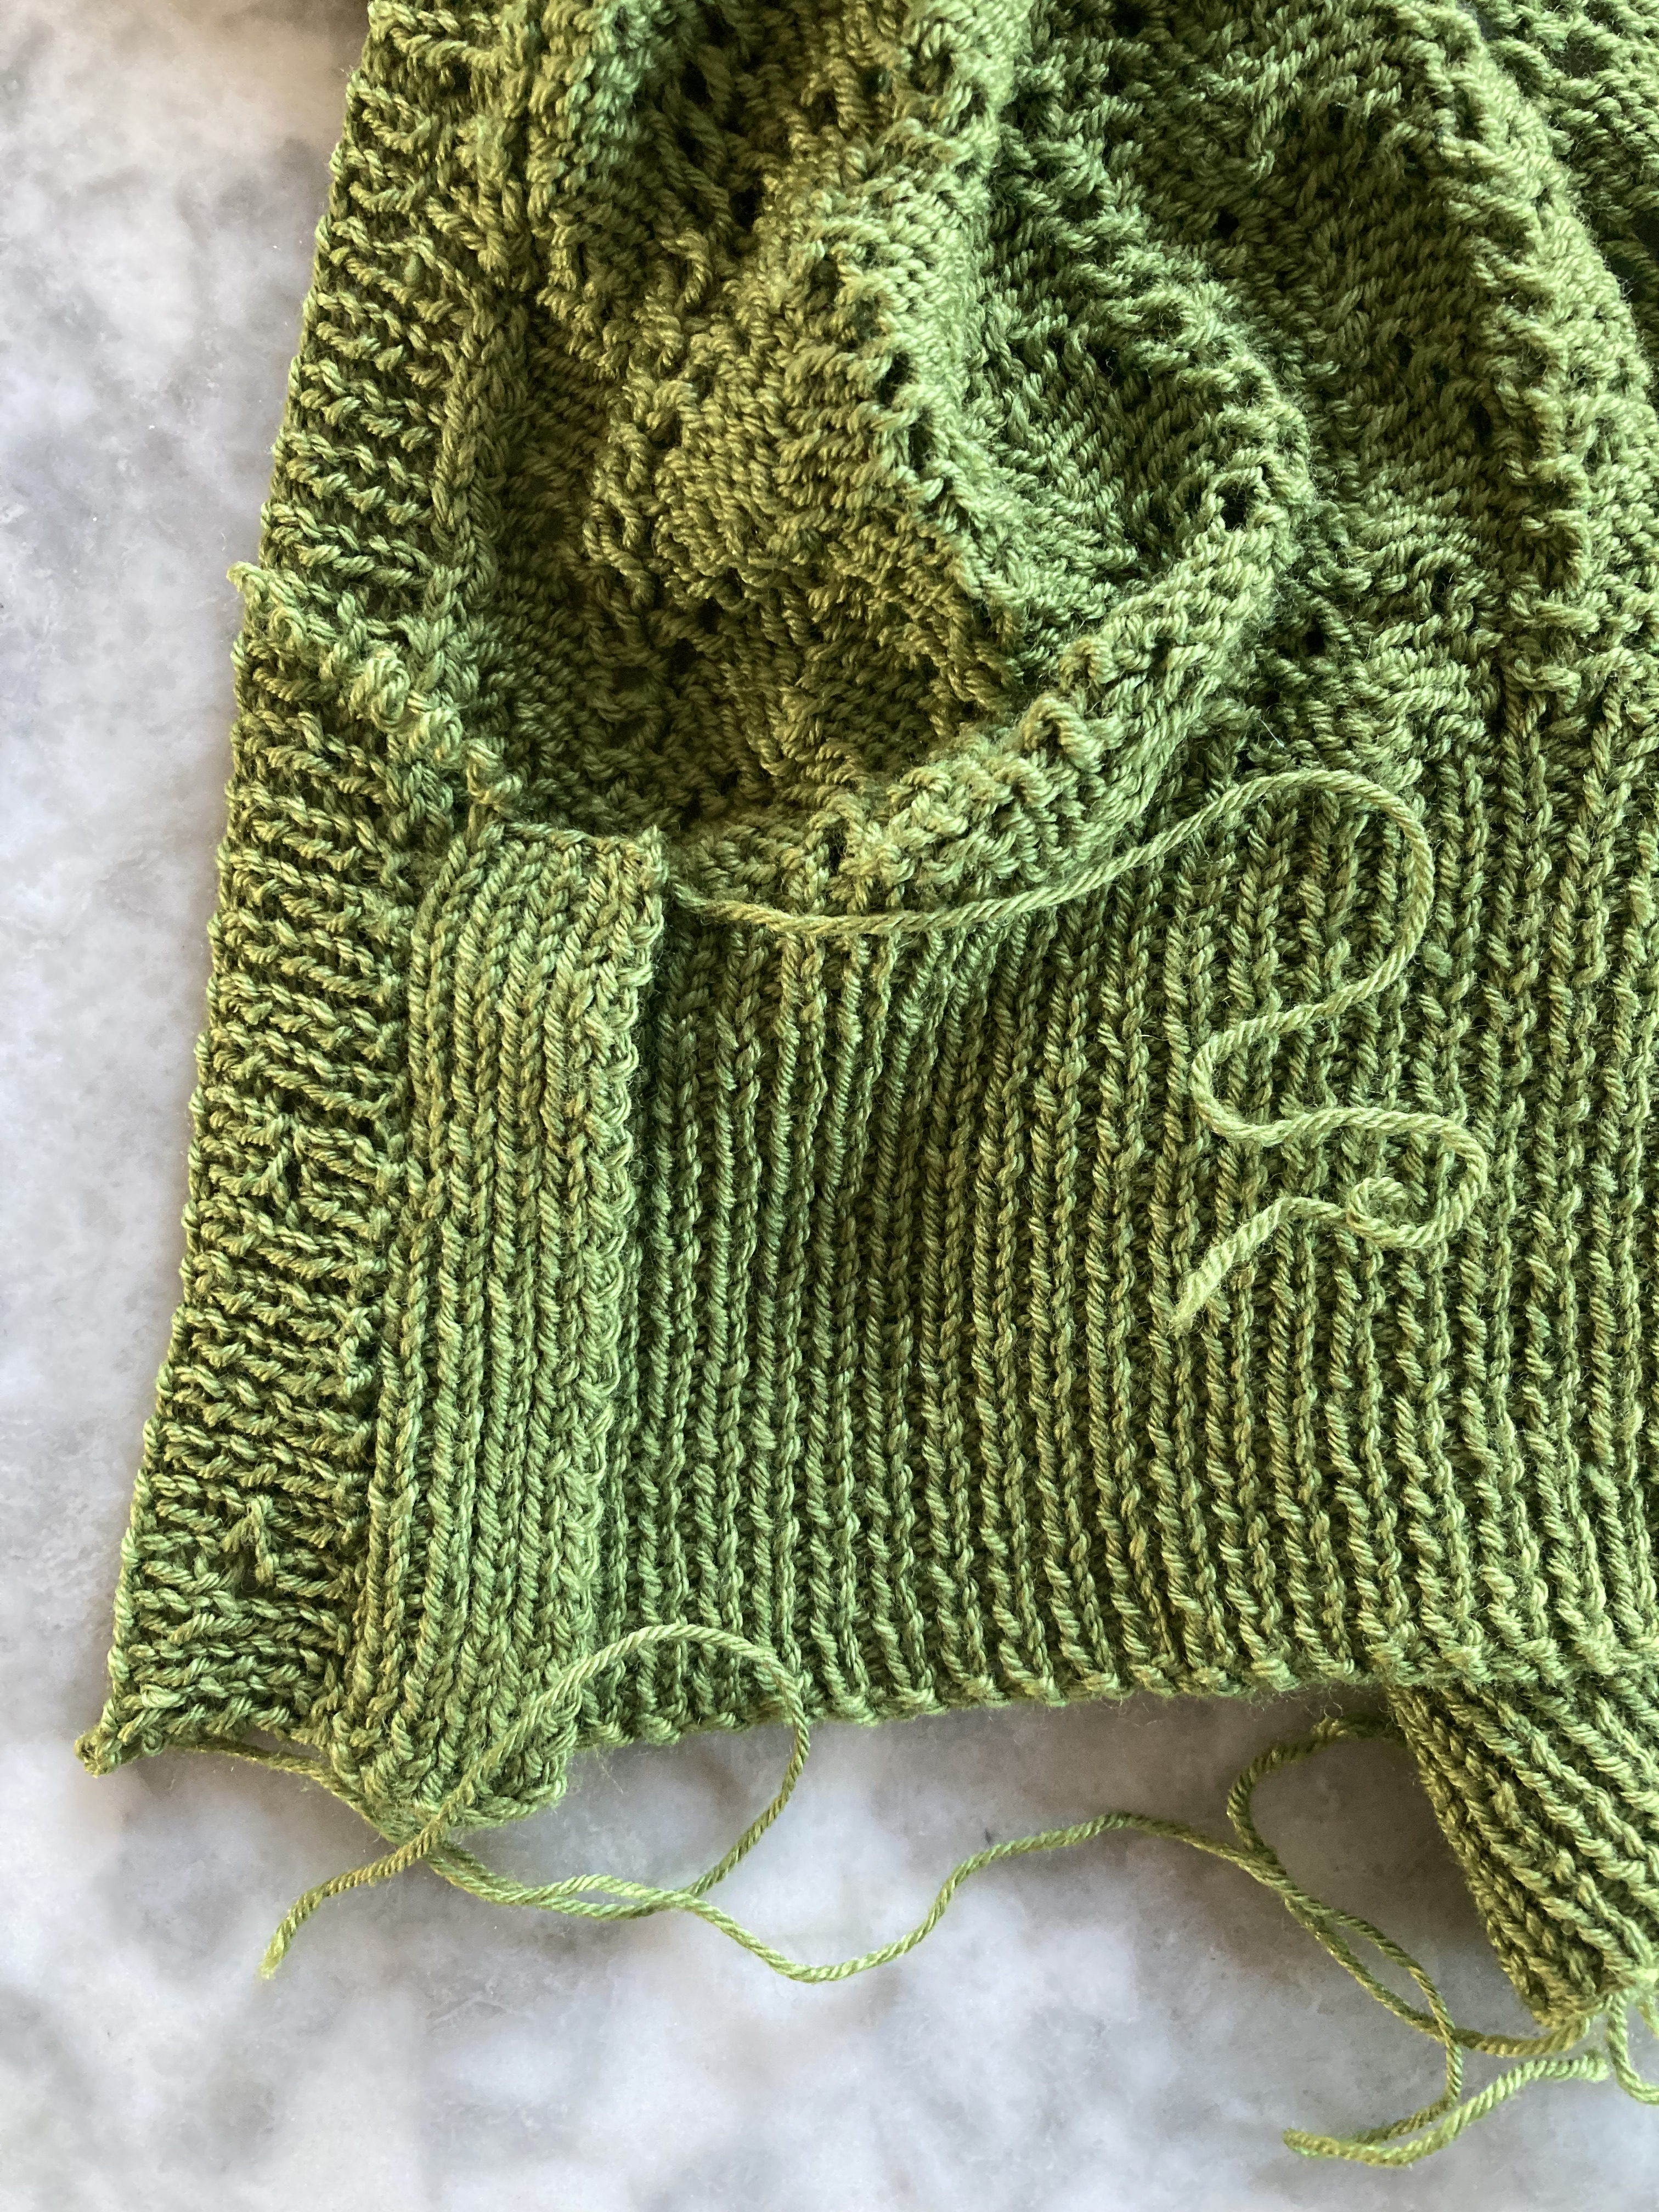
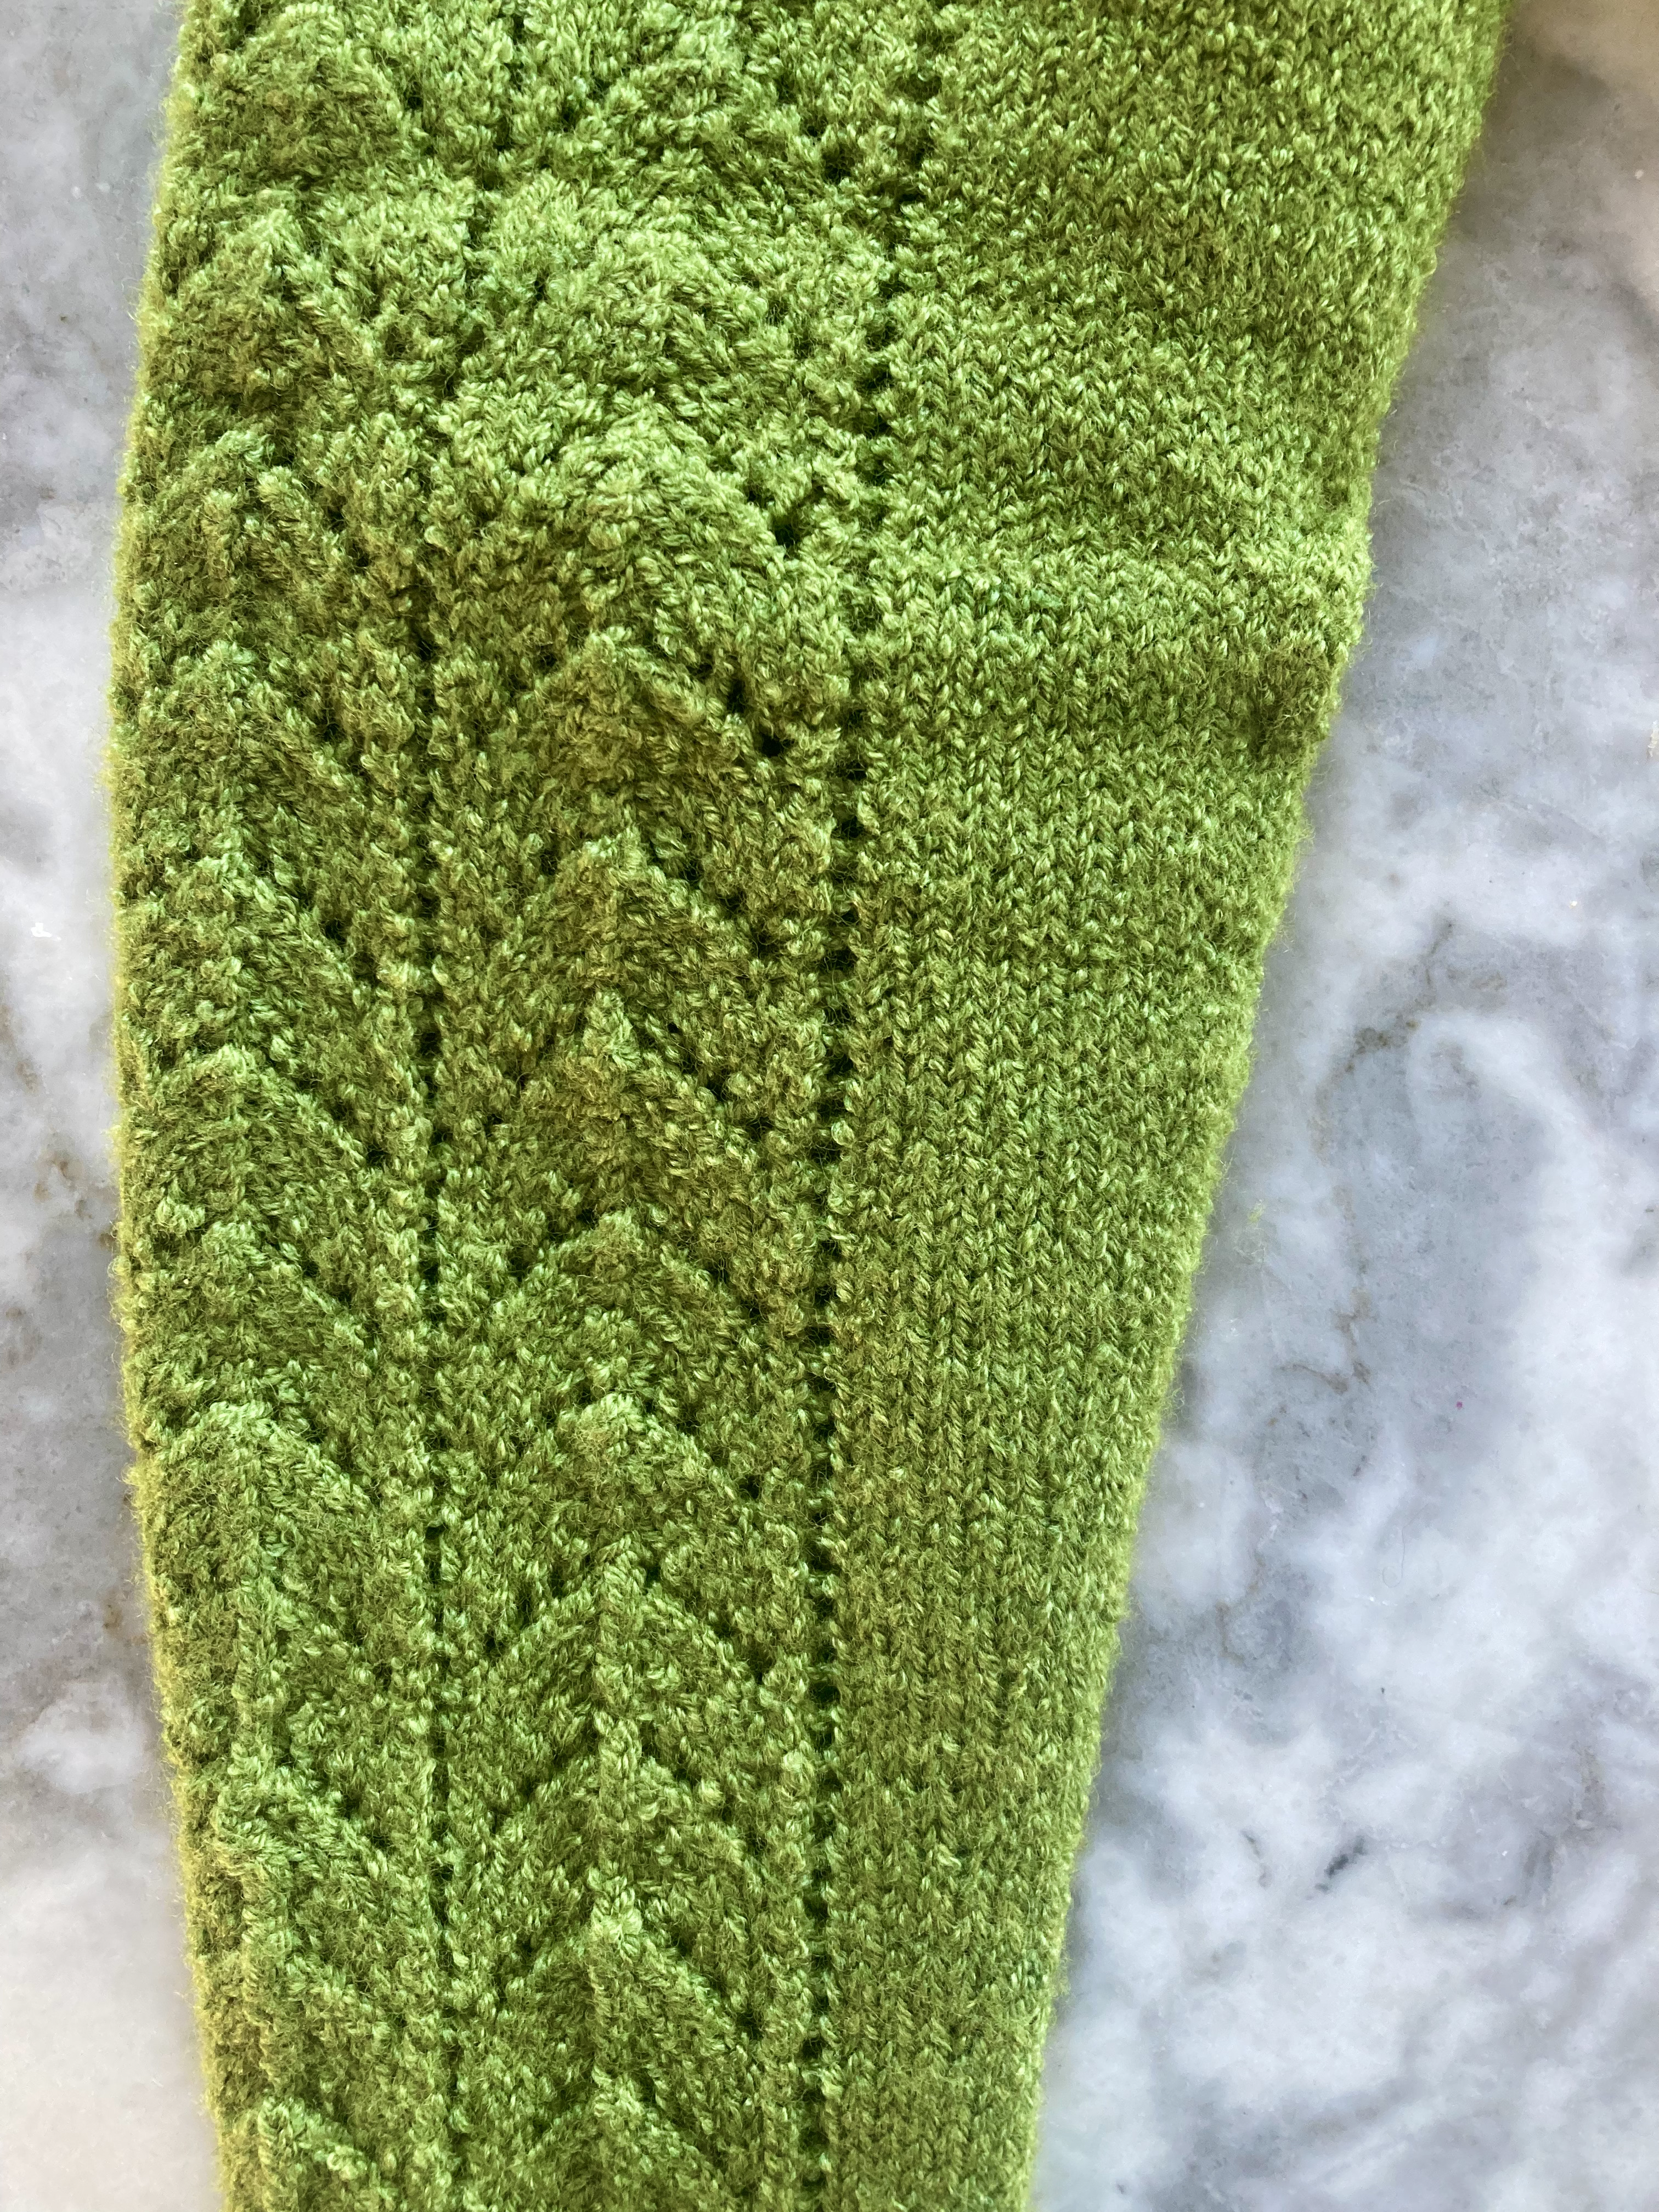
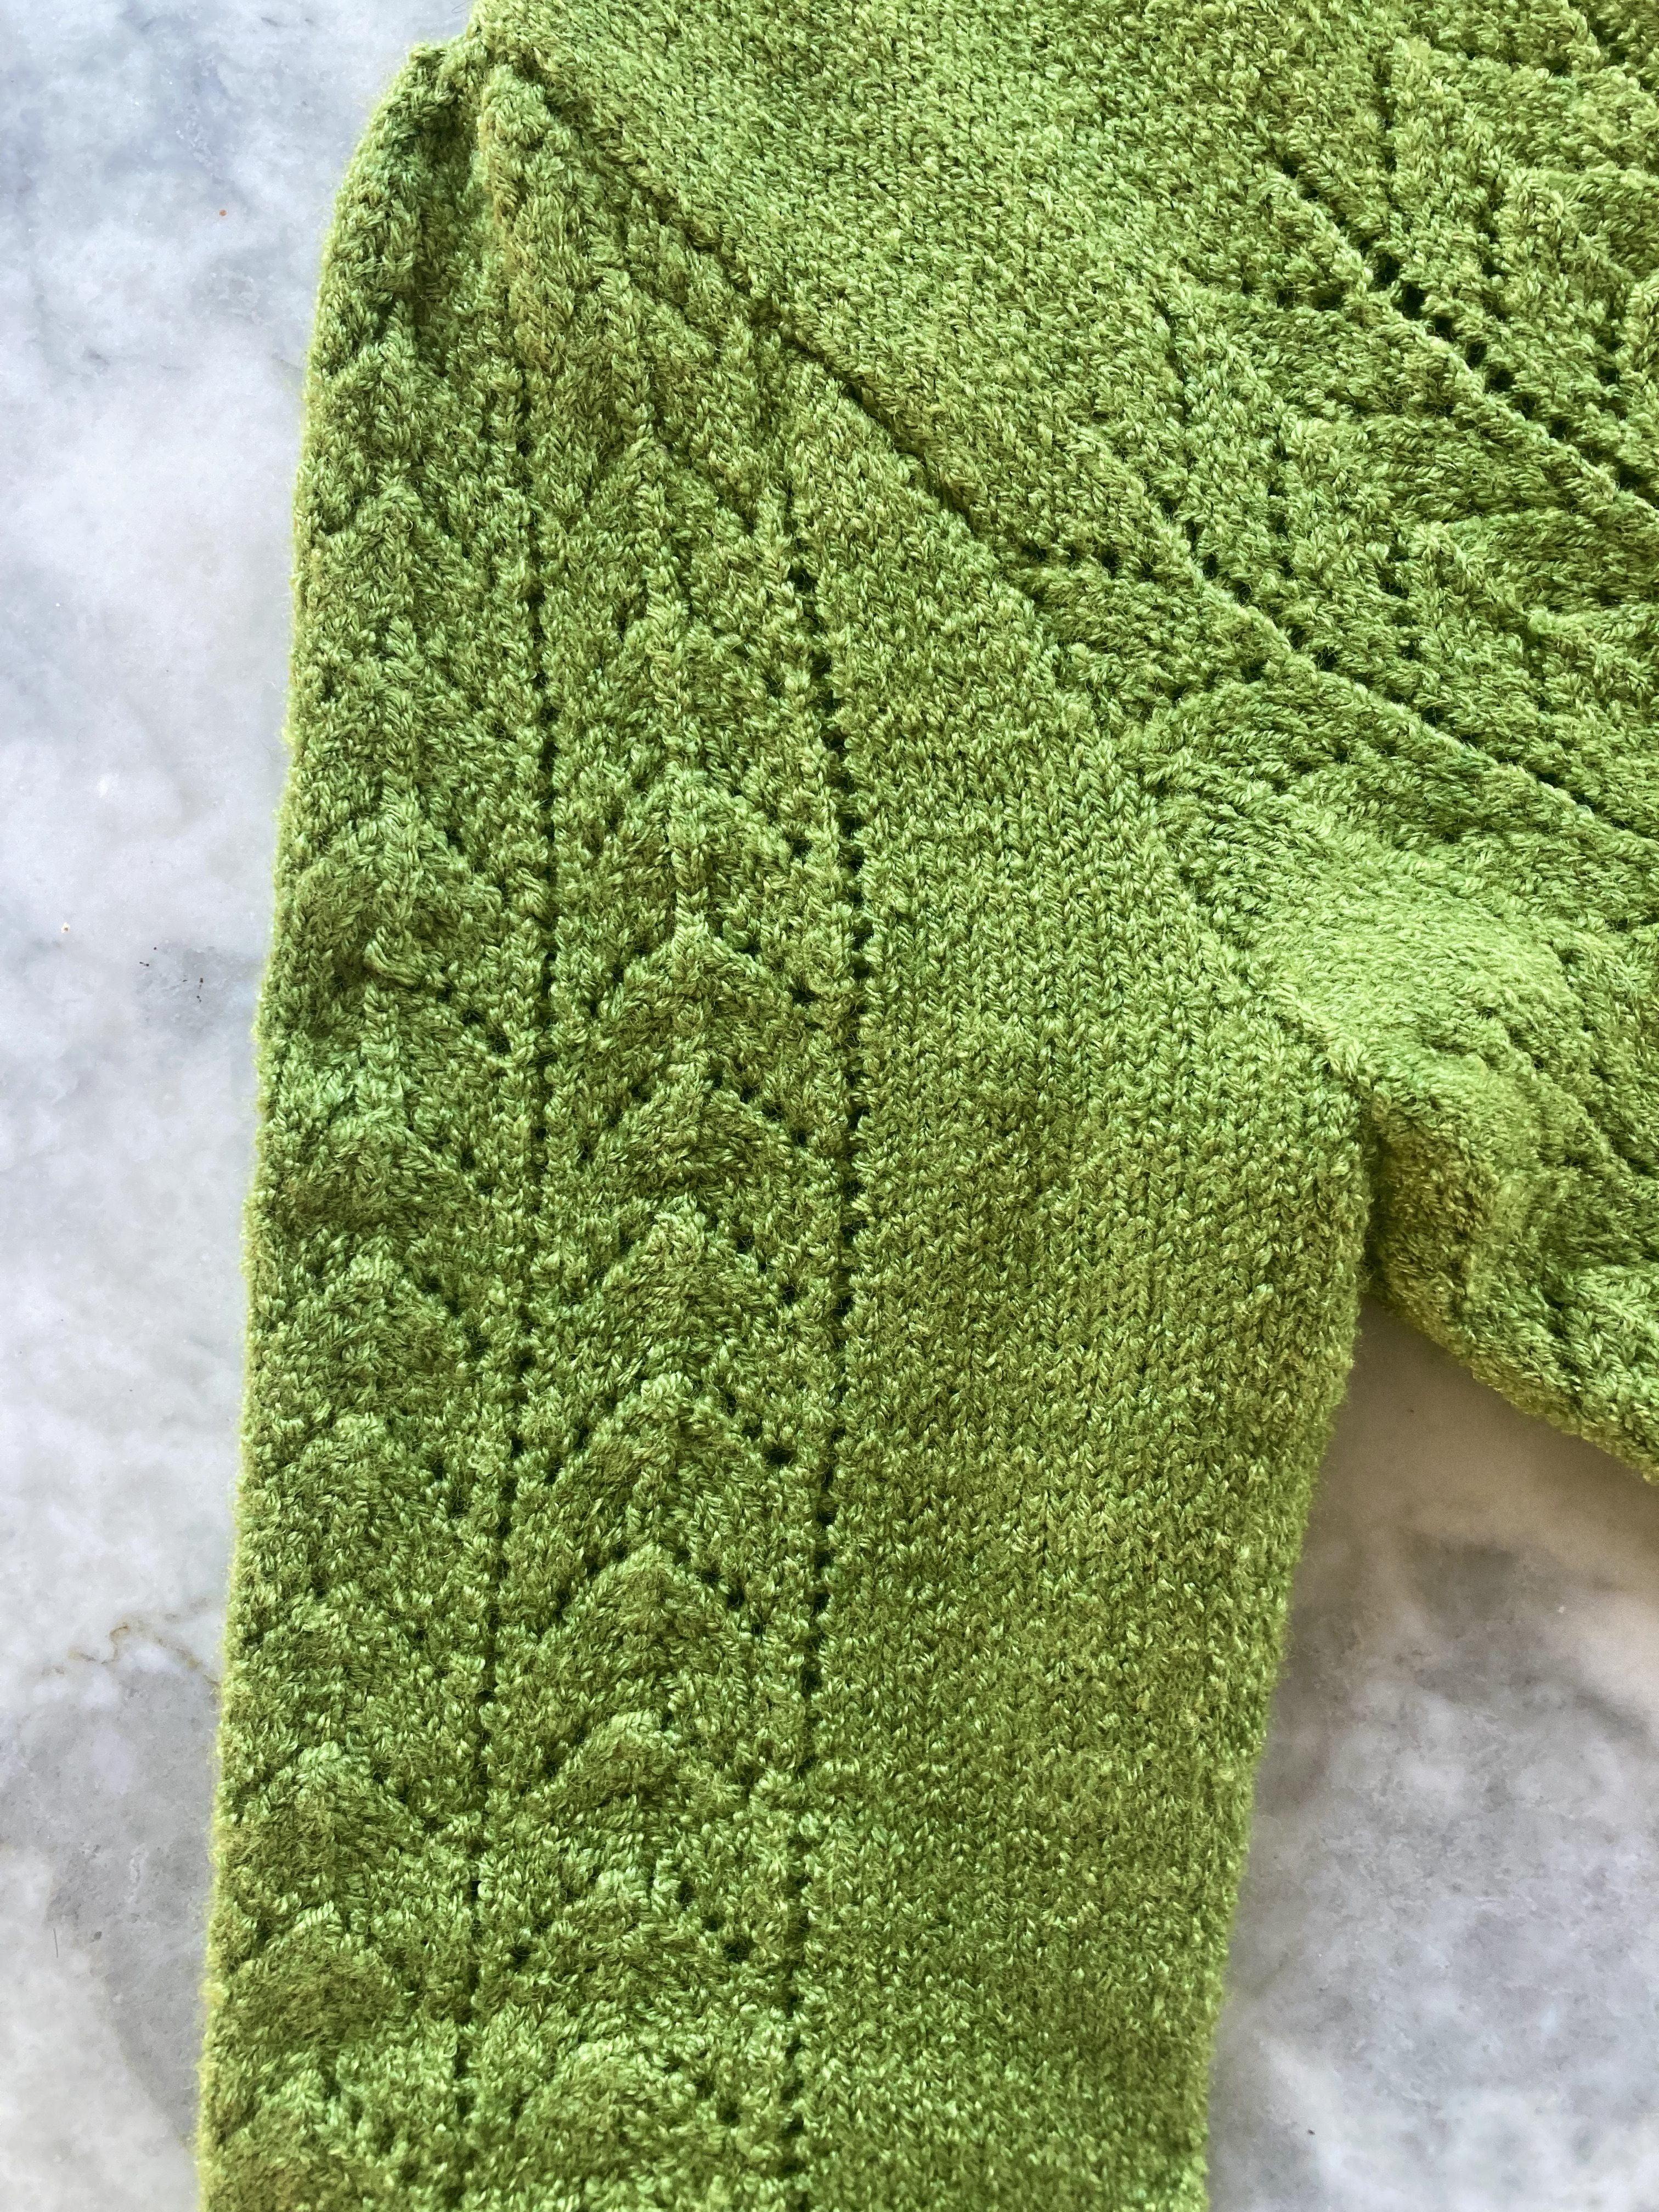
Like many designs from the mid-1960s, the cardigan has stocking-stitch hems at the bottom edge and sleeve edge, as well as double front bands. Both hems and bands are made easier by working one purl row on the right side (hems) or one slip stitch every other row at the same stitch (bands) to make a fold line. I made the body hem by knitting one stitch from the live stitches together with one stitch from the cast-on edge all across the piece — nerve-wracking, but saves sewing it later.
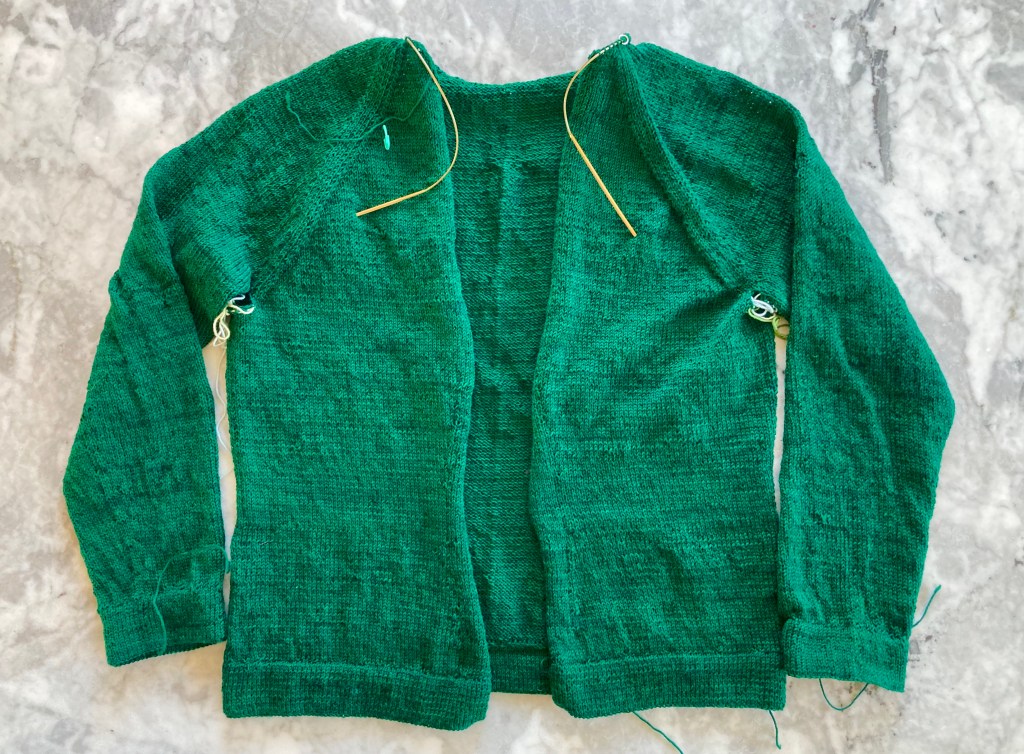
The cardigan itself is very easy — stocking-stitch with a little bit of rib detail on the yoke, and set-in sleeves — but the challenge for me was making sure that I had enough yarn. Slow Wool Lino has unfortunately been discontinued, and I bought the wool at a buy-up-whatever-we-have-left type of sale, so the chance of finding any more in the right colour was minimal. 300 grams should be enough, I thought, even for a cardigan with double front bands and a stocking-stitch hem. But to be sure, I knit the front bands together with the fronts and back in one piece and finished the bands around the back neck before starting on the sleeves. Then I knit the sleeves top-down, picking up around the armhole and dividing the remaining wool exactly in half. That way, if I ran out of wool, the sleeves would just be “bracelet length”, which wouldn’t bother me.
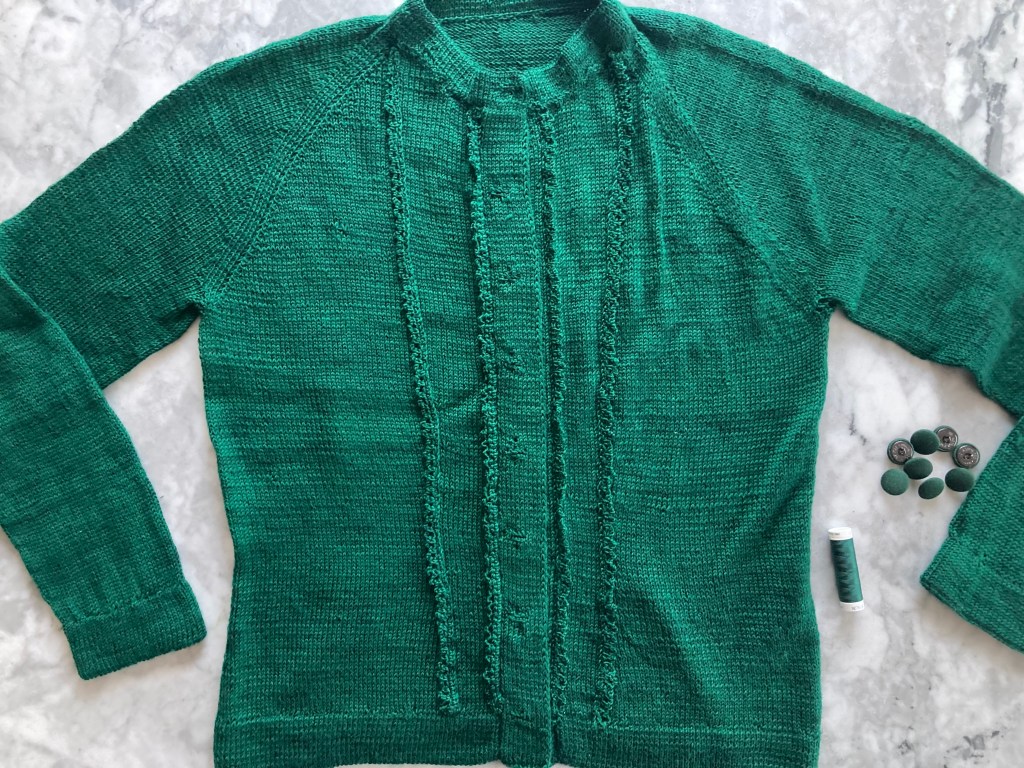
What can I say… it was perfect! I hd to use a little bit of the leftover Katia from the jumper to finish the underside of the hem on one sleeve (invisible) and sew down the sleeve hems and front bands (also invisible). Thus the yarn was de-stashed perfectly. The sleeves were in fact bracelet length after knitting, then stretched to normal long length after blocking. (I didn’t even have to pin them, they grew by themselves.) To top it all off, I went down to my local yarn store / mercerie and immediately found buttons that perfectly matched in size, colour and style.
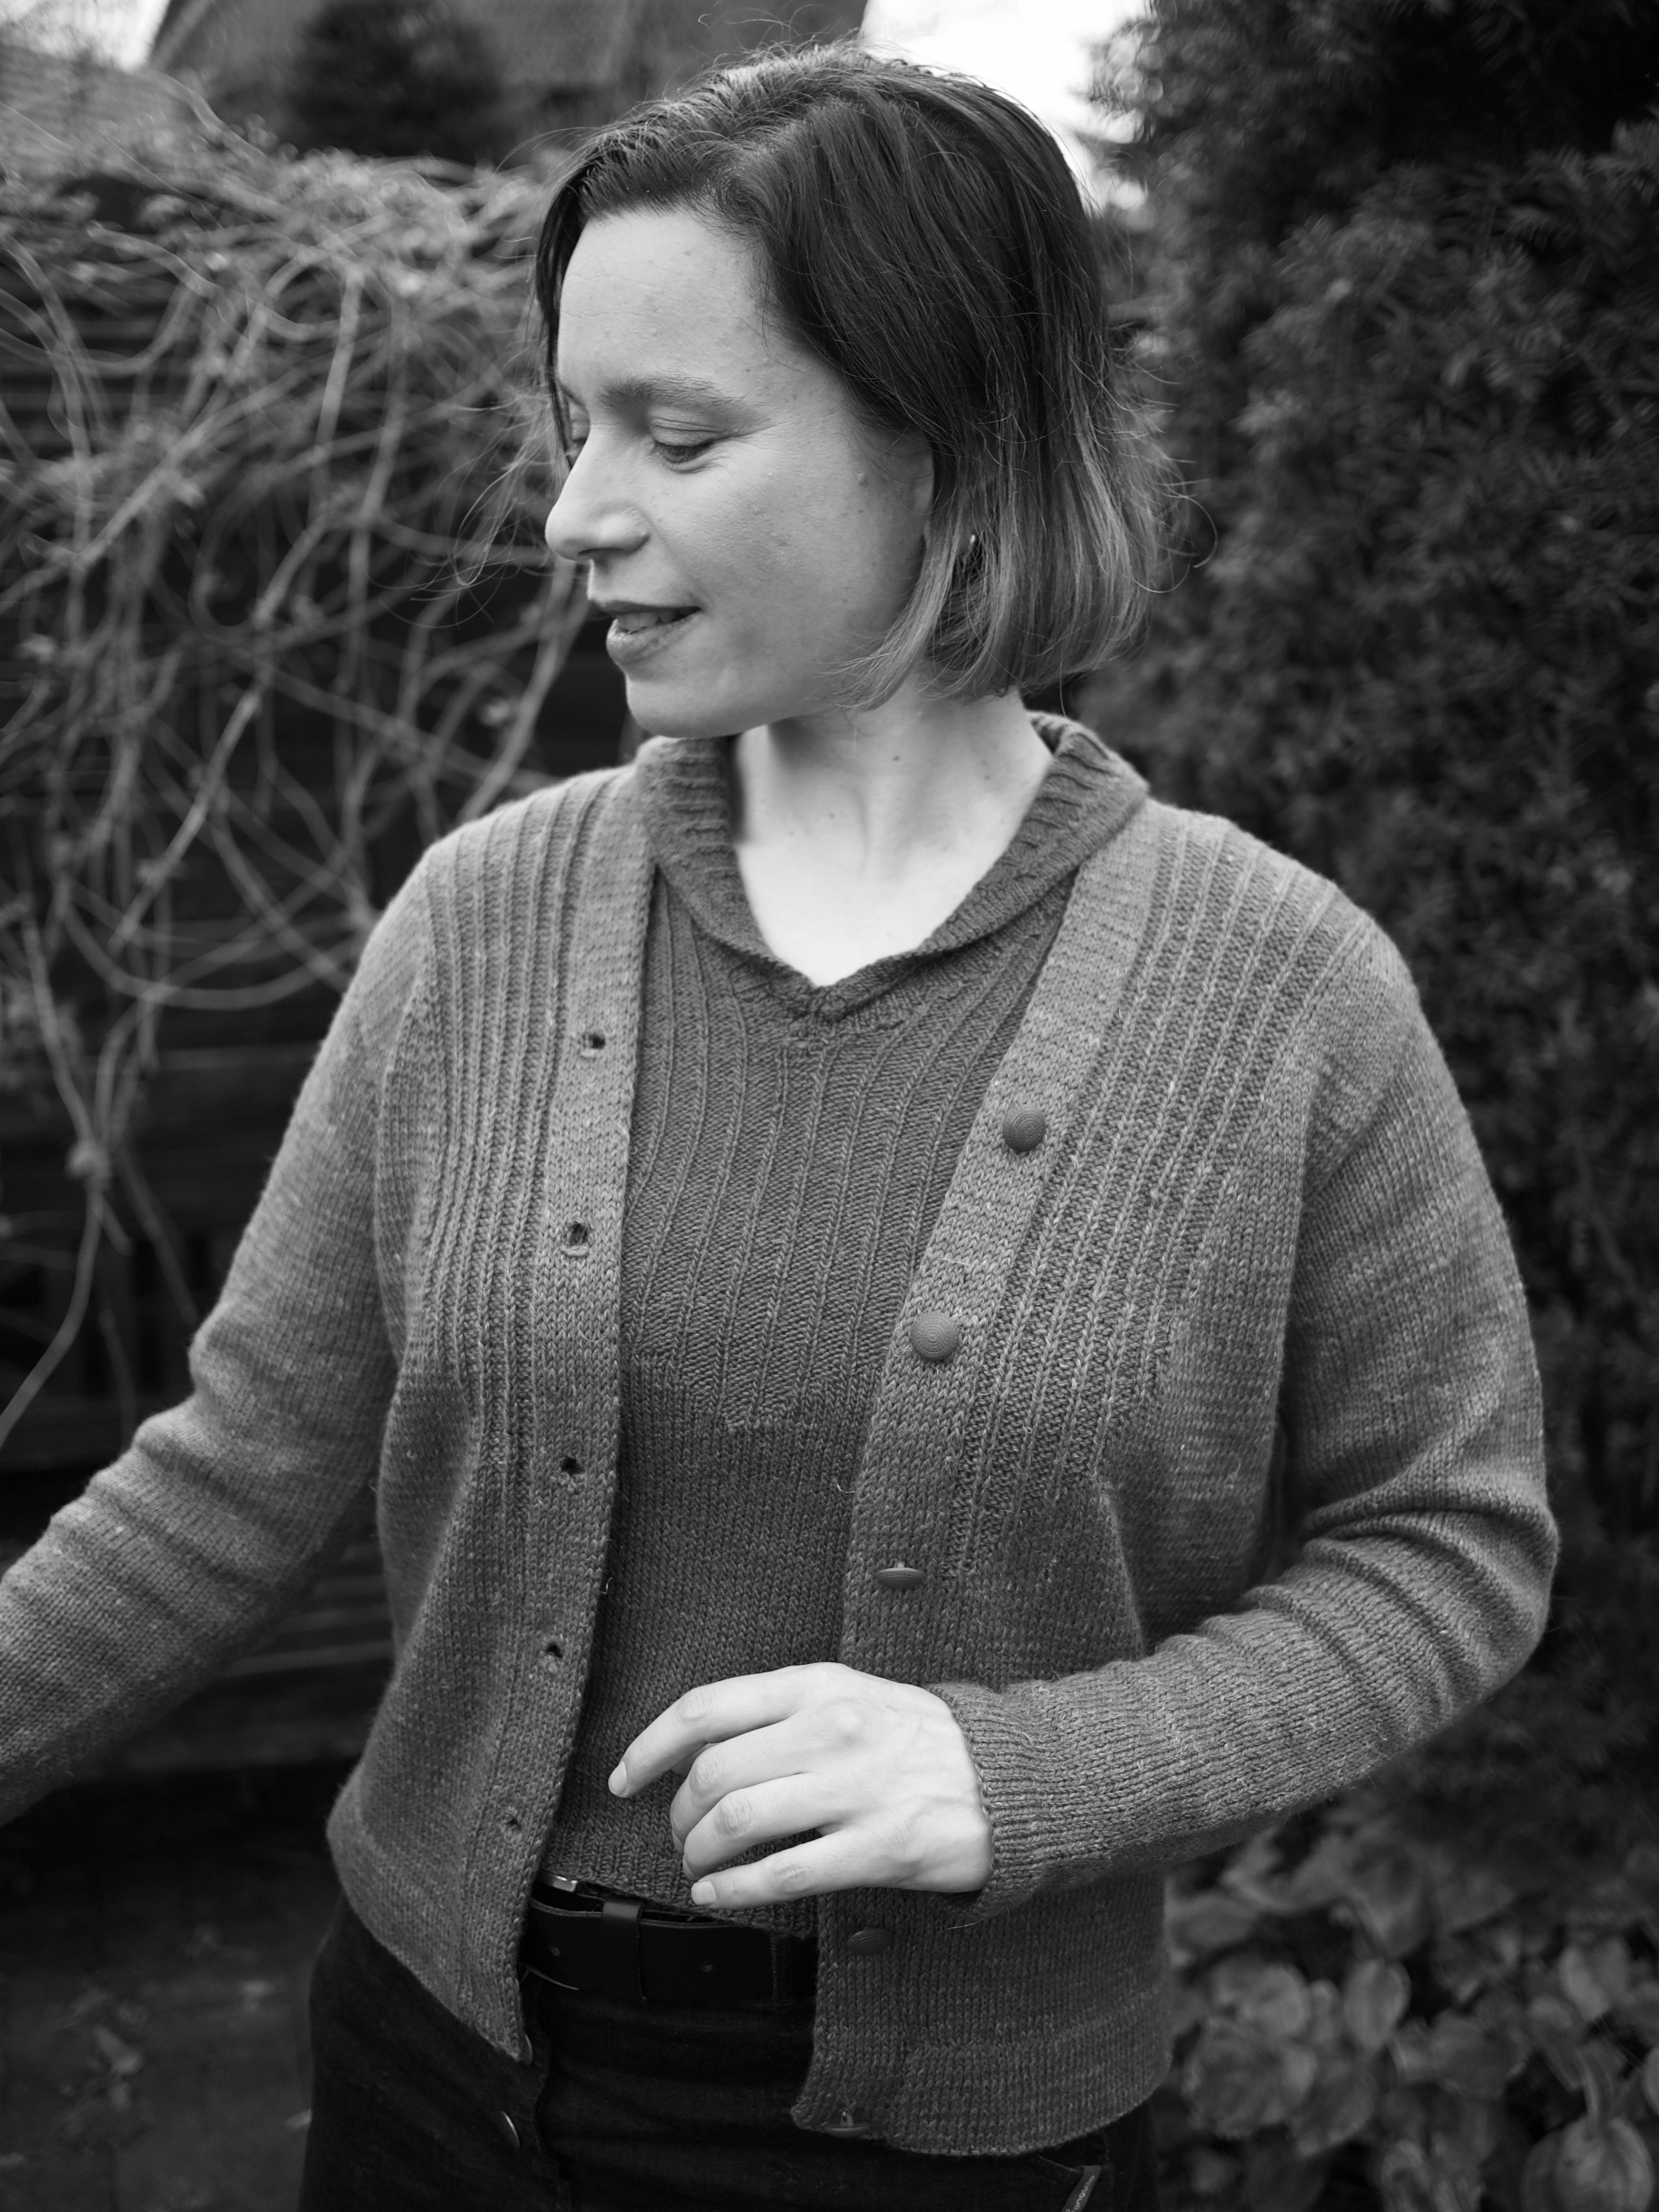
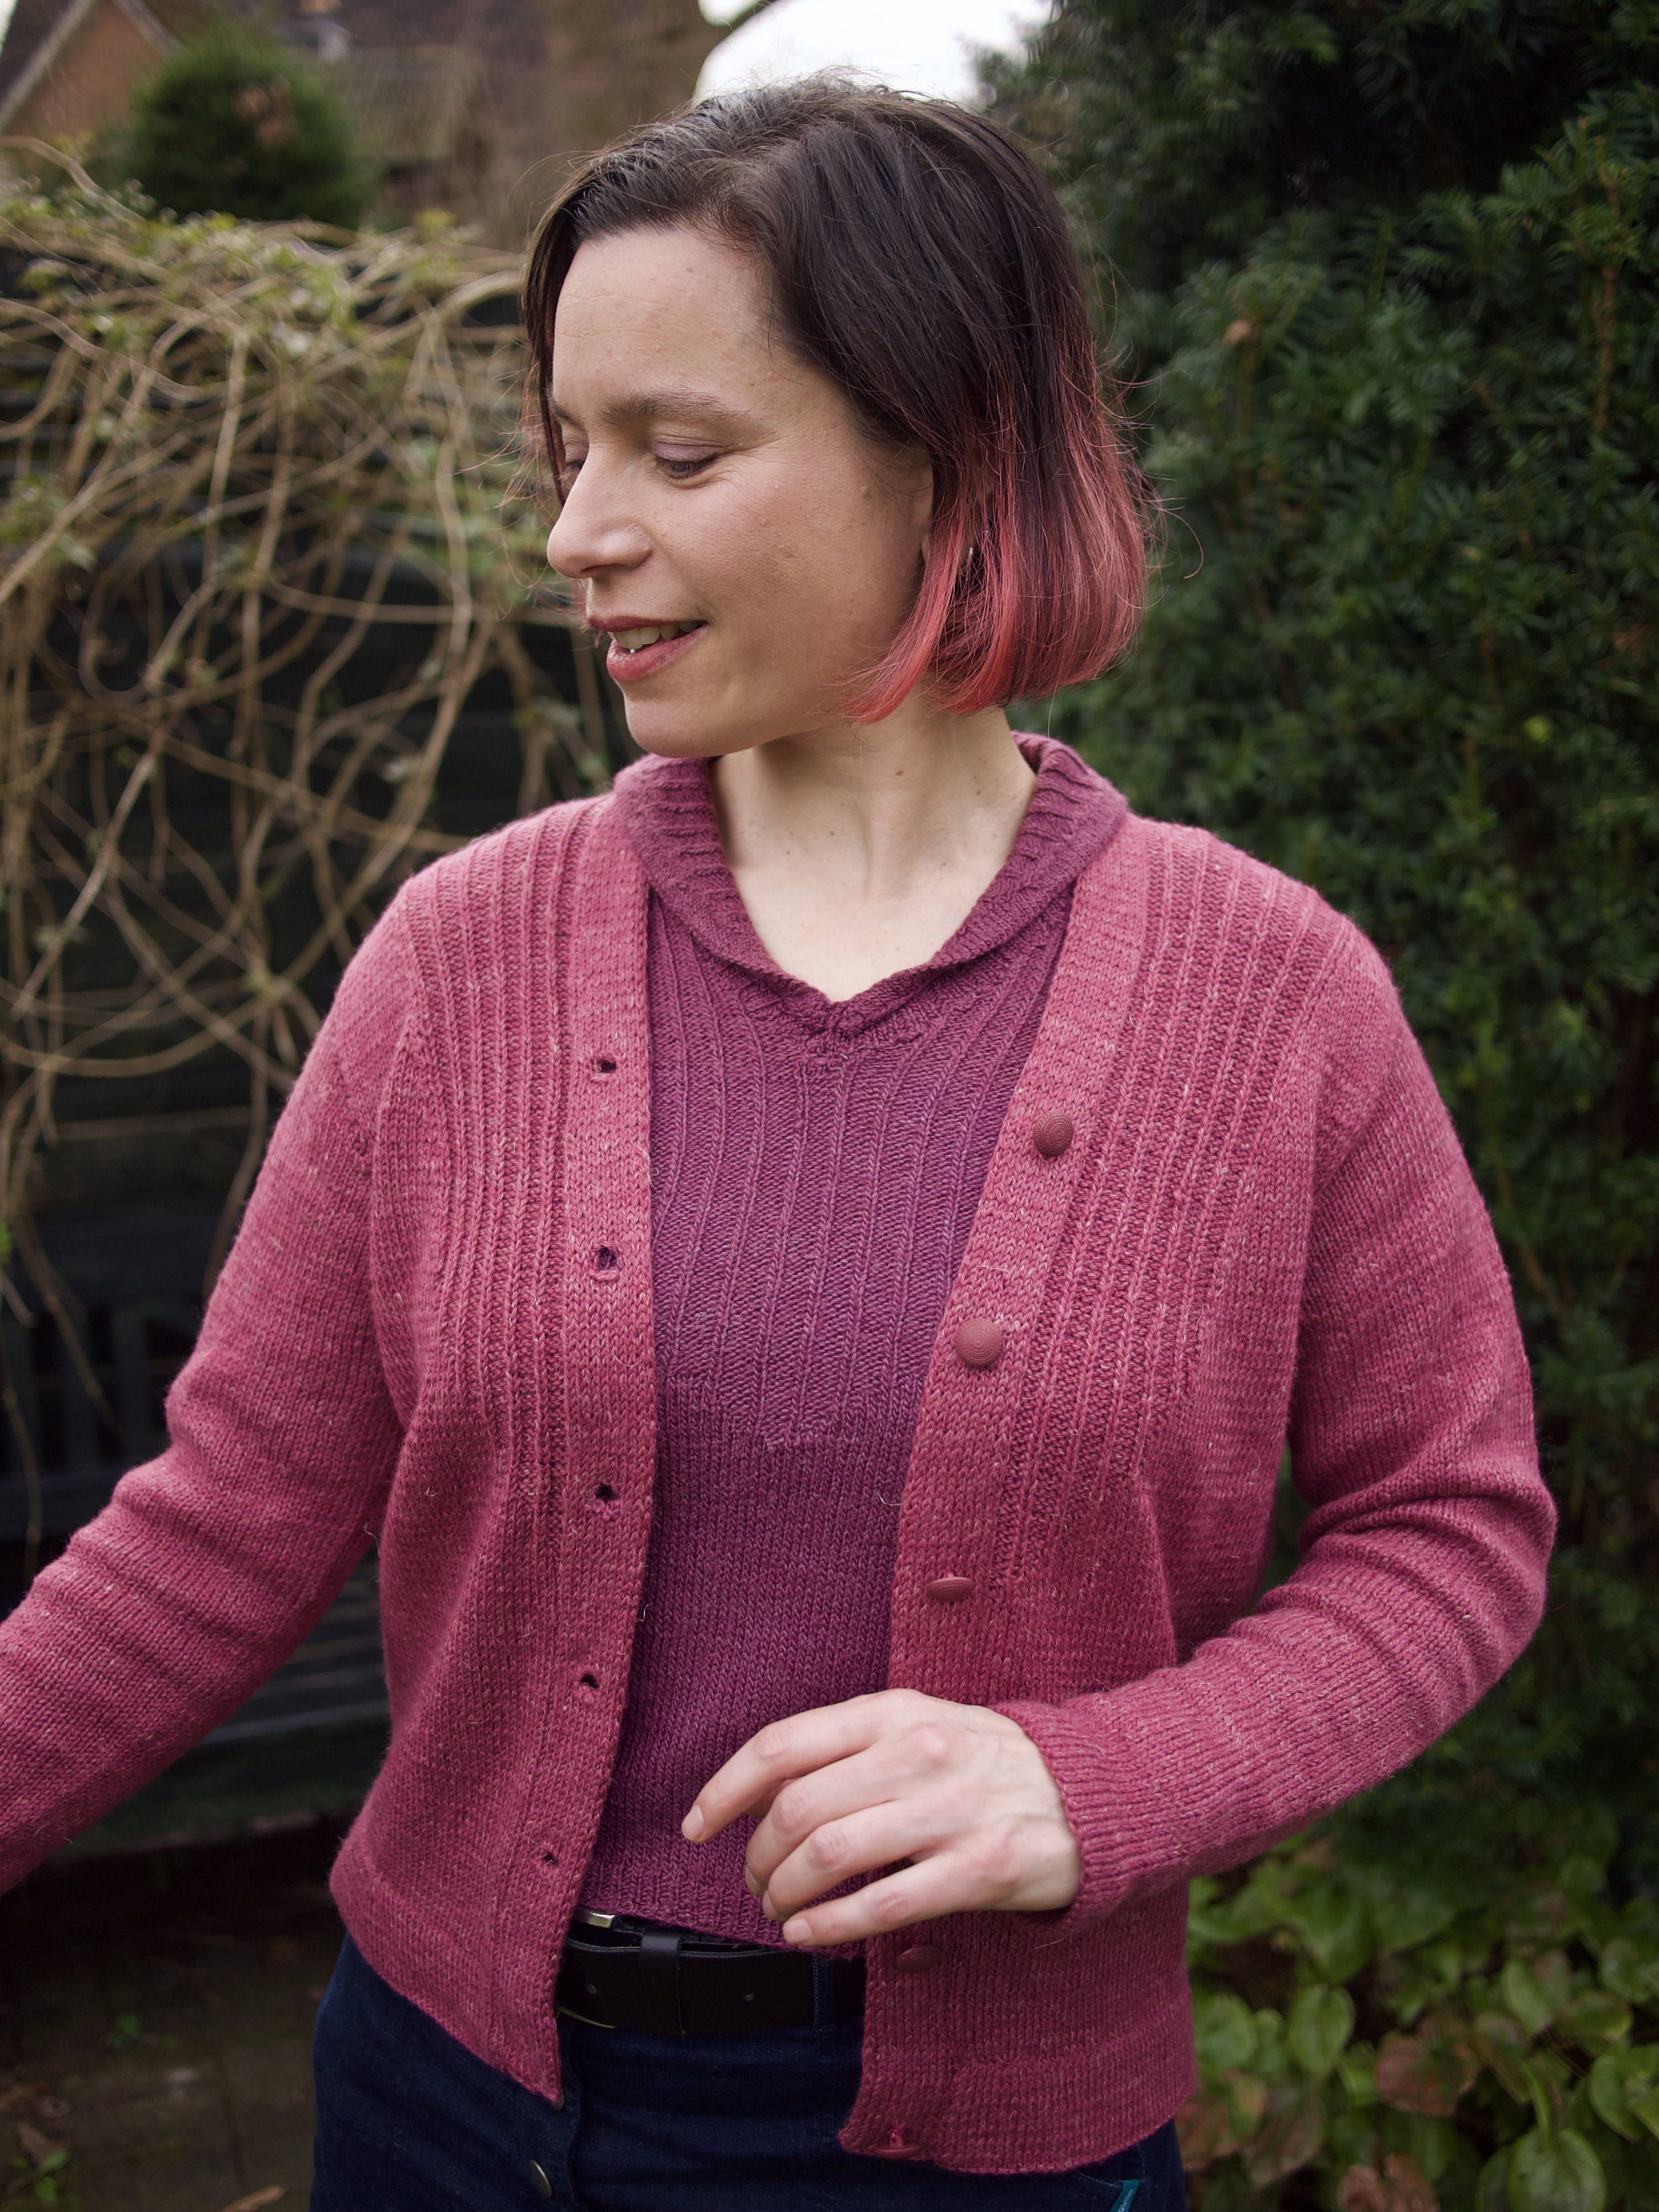
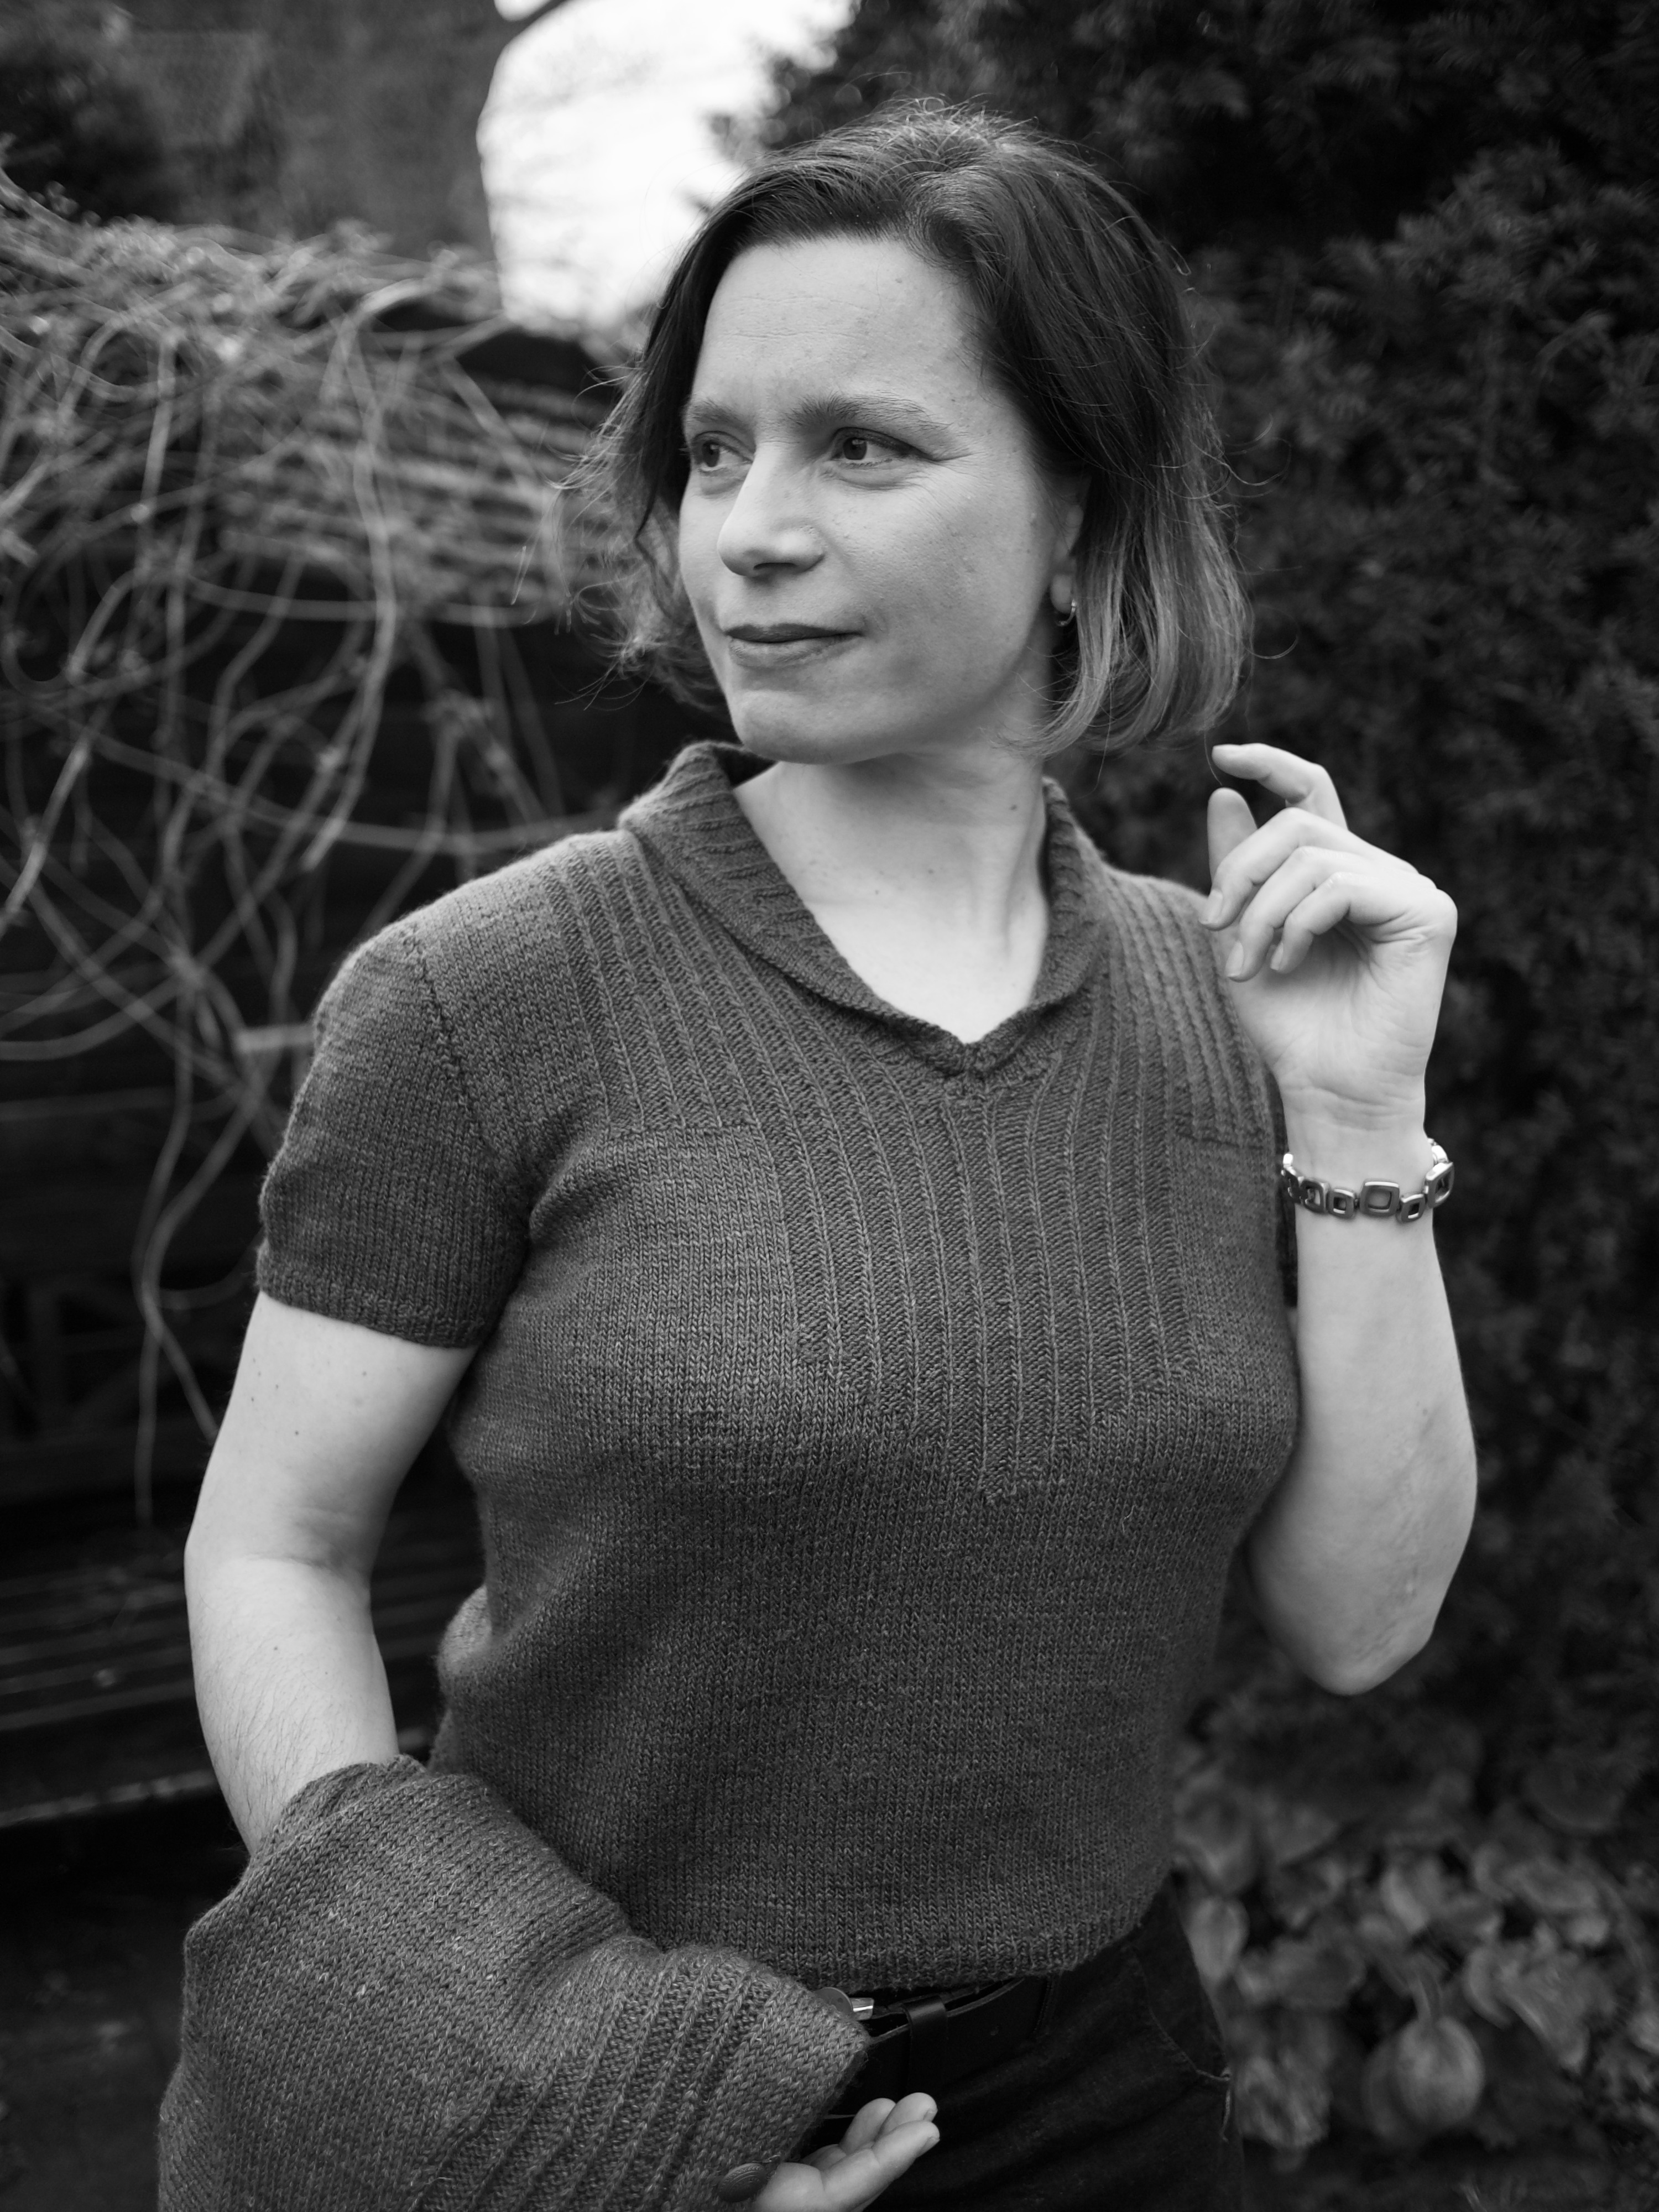
As always, we had fun re-creating the original poses from the magazine.
In the “normally posed” photos, neither I nor the photographer noticed that the collar of the jumper was sticking up. Normally, it overlaps the non-collared cardigan elegantly, as in the other photos. We’ll try to take some more pictures in the next few days if it ever stops raining.
Really happy with this twin set and I’m sure it will get a lot of use this spring. The combination of lightweight wool-silk and lightweight merino-linen makes both pieces very adaptable to changing temperatures, warming and cooling as needed. The pattern was easy and I would recommend it to anyone.
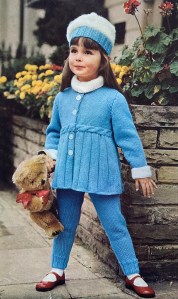
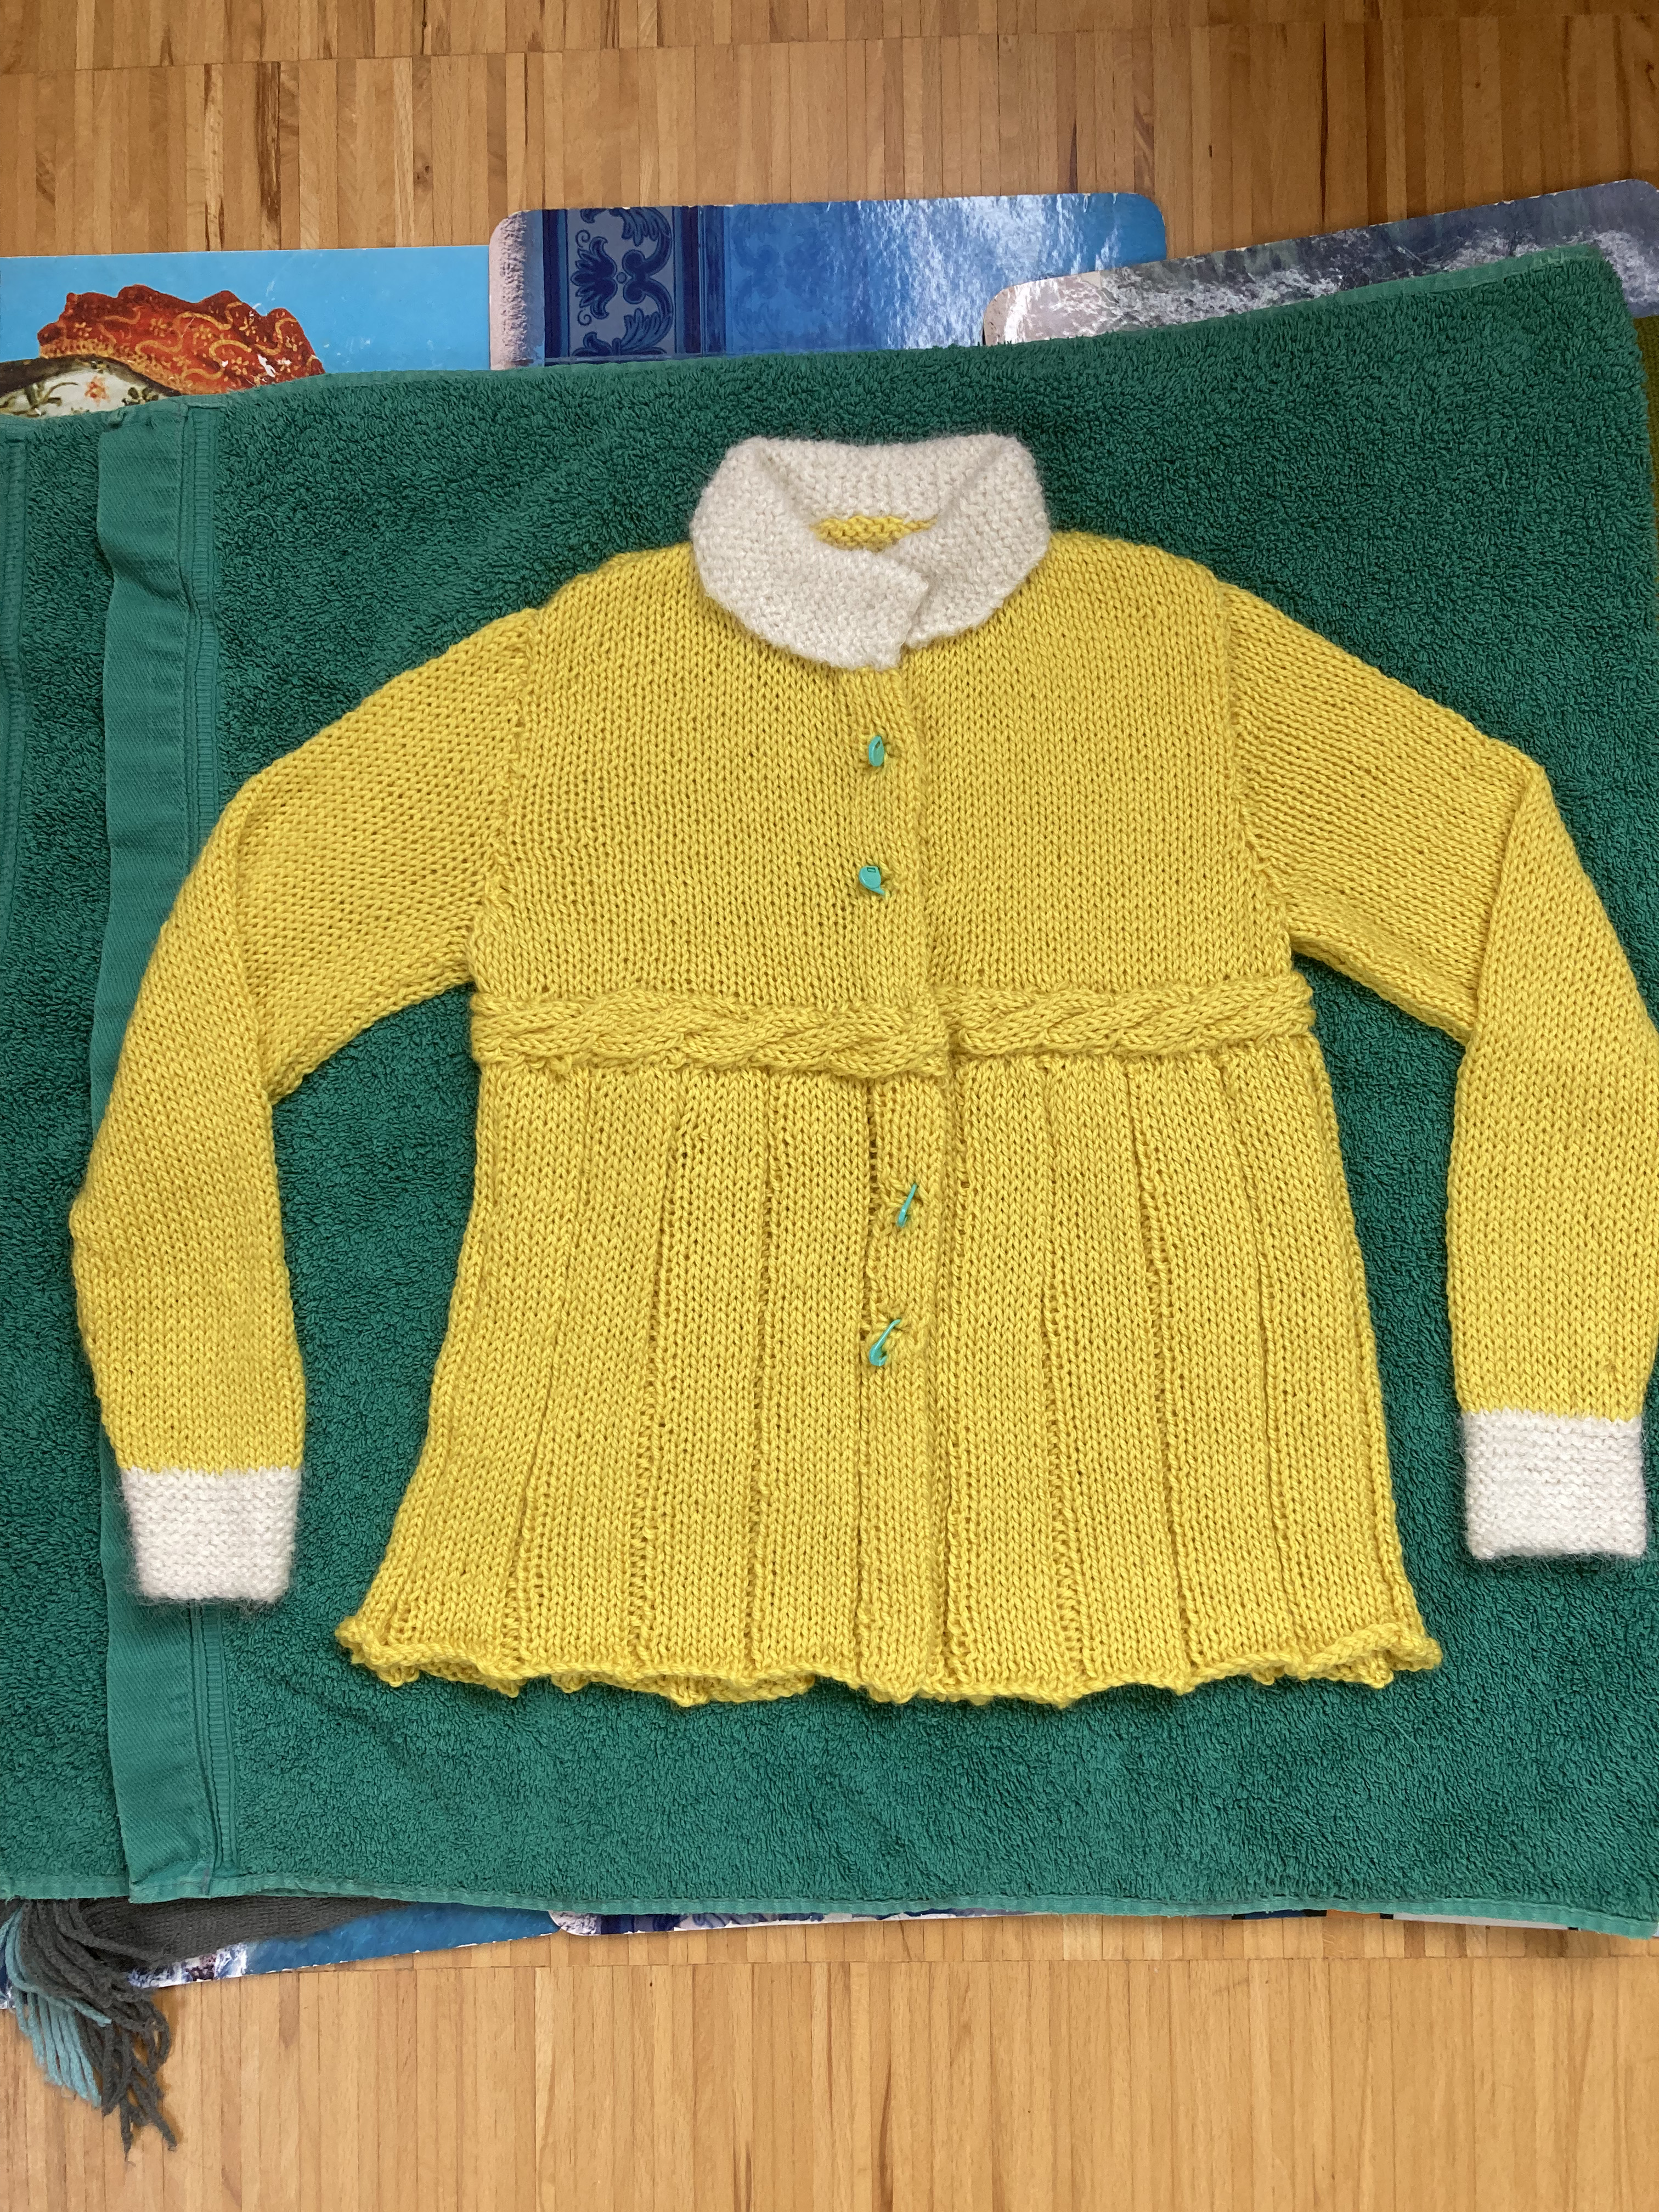
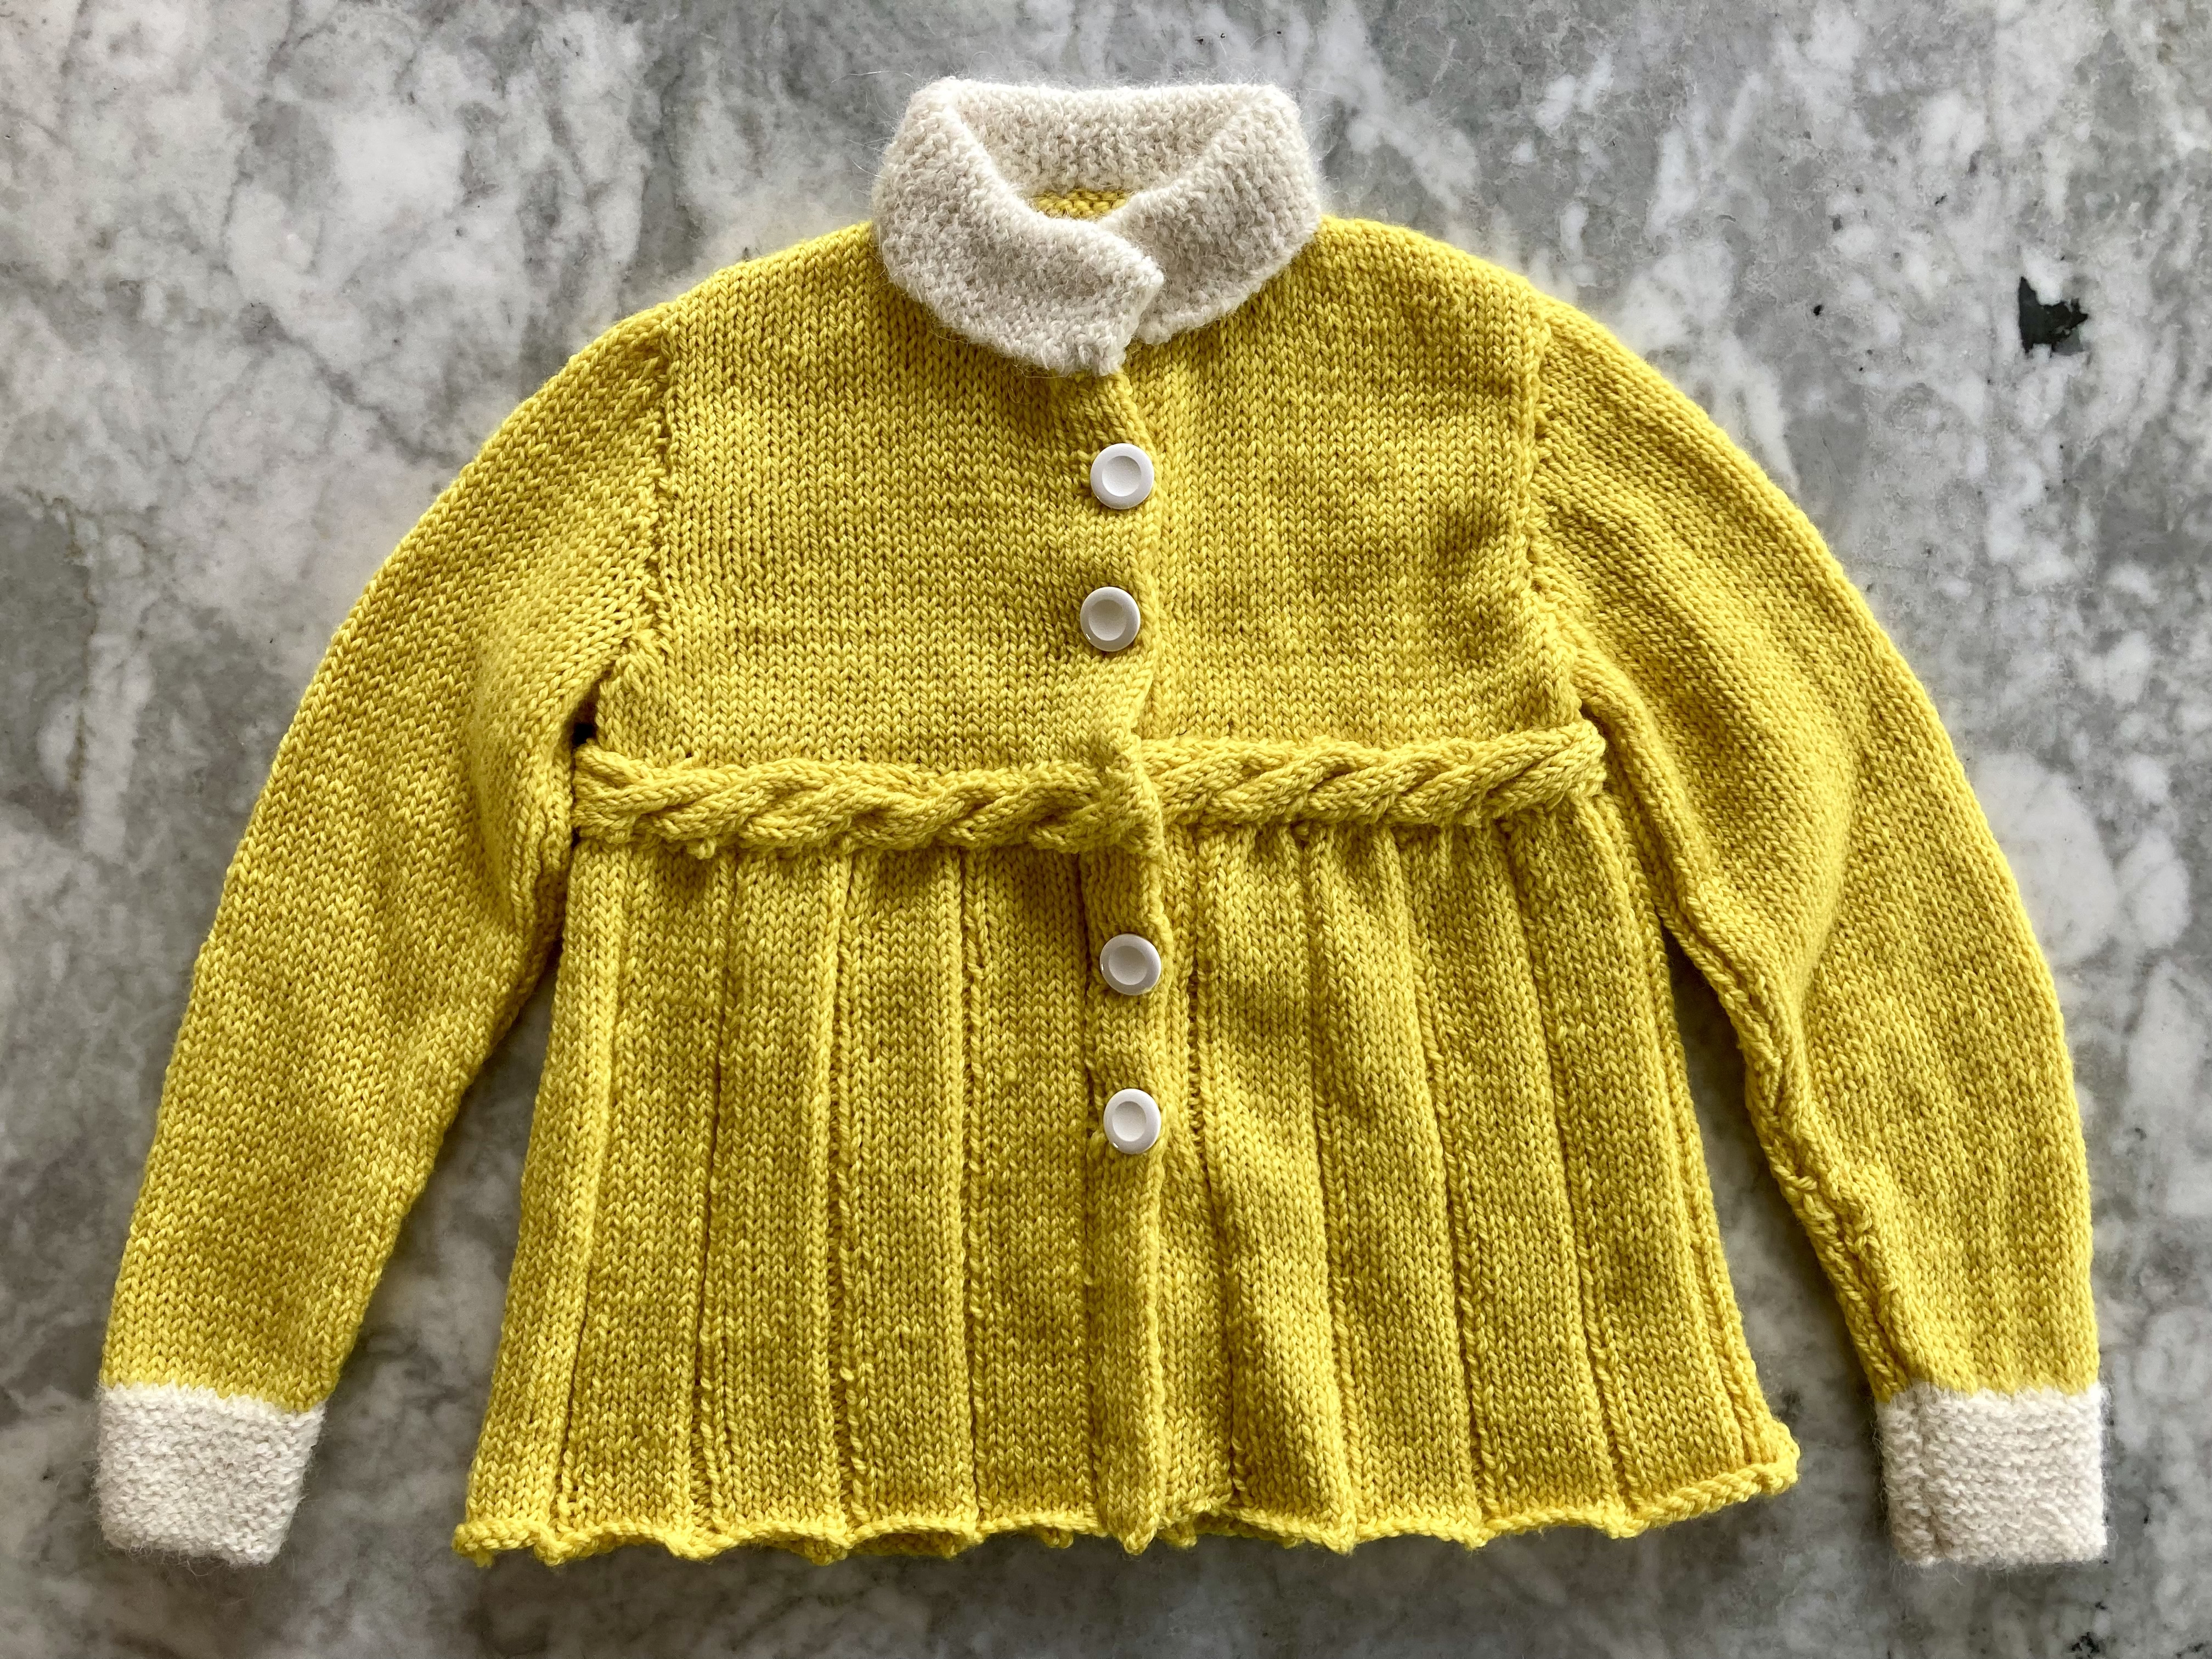
My February project (So glad 2024 is a leap year! It gave me one more day to get this blog post in on time) was this wonderful “Flair for Tots” set for a little girl. I made the coat-jacket and hat, but not the leggings.
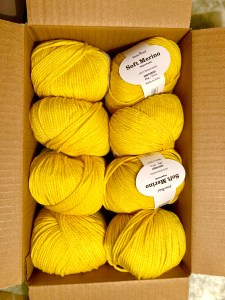
The set certainly has plenty of flair, and “Flair” is also the name of the slightly heavier-than-DK wool-synthetic mix yarn that it is written for. I decided to use Soft Merino by Wolle Rödel, which is 100% wool, quite soft, and give me the correct tension of 19 stitches in 4 inches on 5 mm needles. The intended recipient (the daughter of a nice colleague, for whom I had already made both this “Practical coat” and this “Sunday Best Dress“) requested yellow and it looks like she was perfectly on trend — as soon as I bought the wool and started knitting, I started noticing how many people I saw in the course of a day were wearing a similar bright canary yellow.
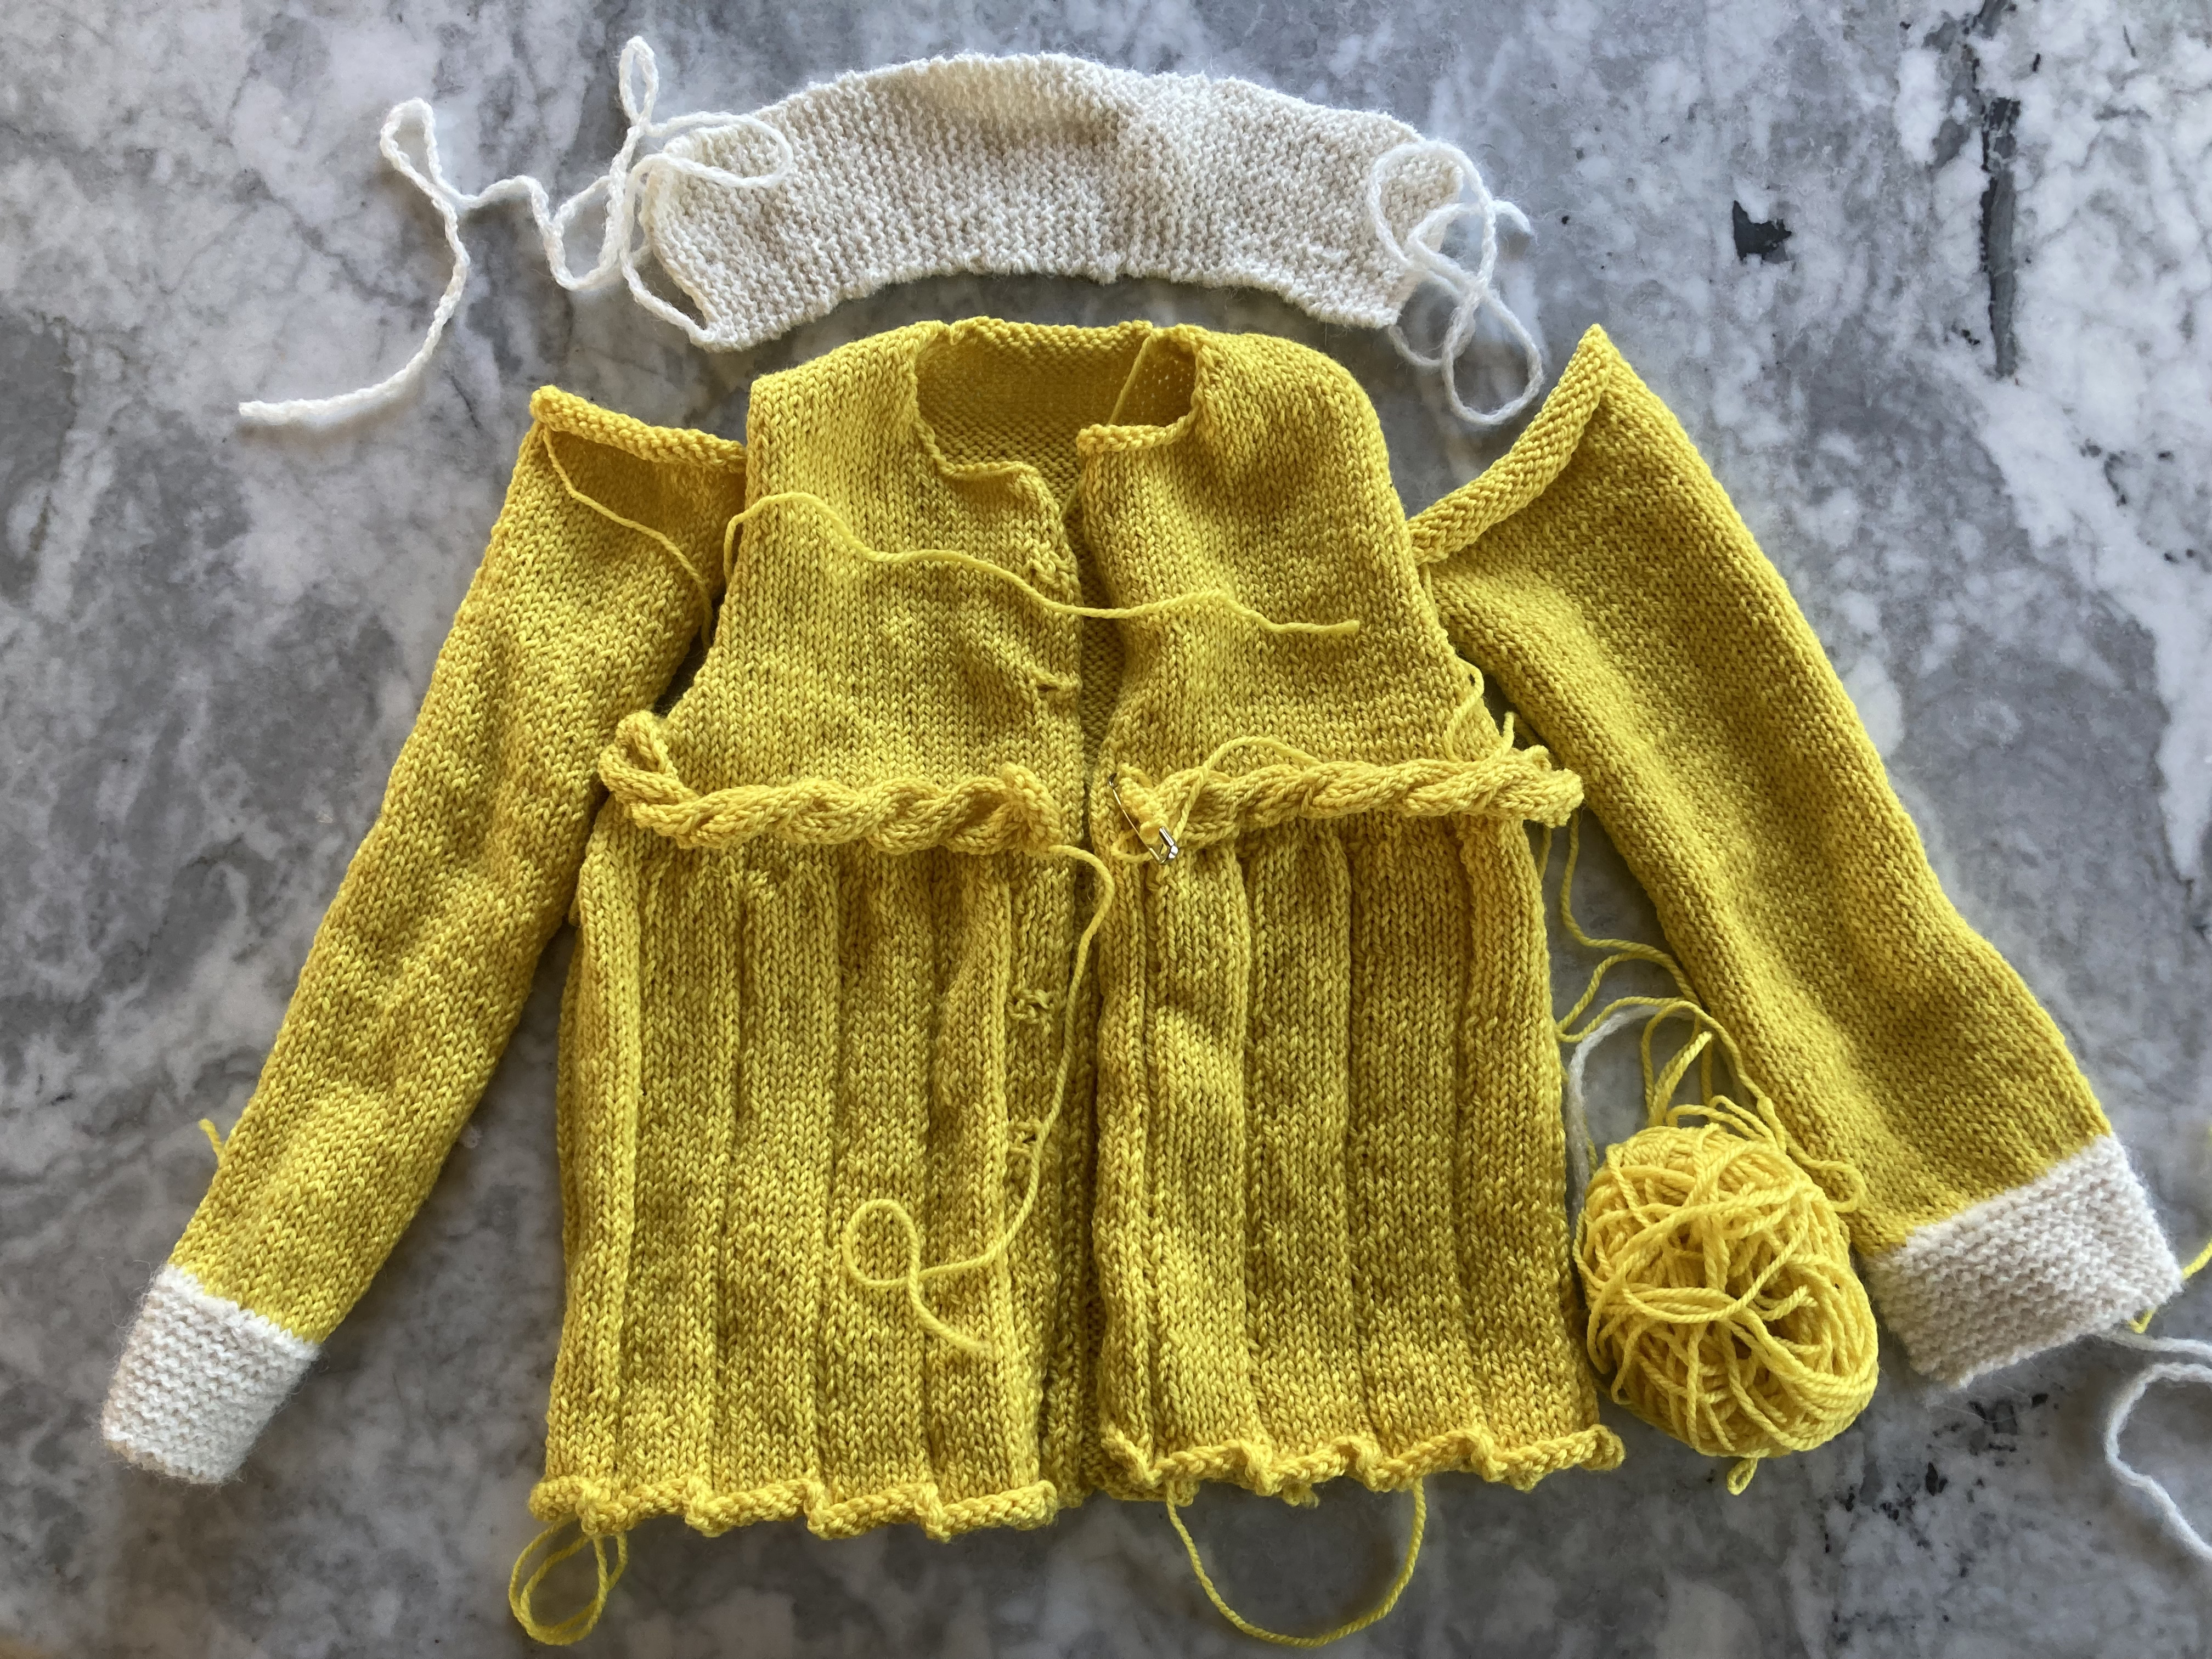
The jacket pattern starts at the hem with a k7, p1 flattened rib. I made the back and fronts in one piece to avoid seams. The pattern switches to stocking-stitch a couple of inches before the armhole openings to make room for the belt (a simple strip of 6-stitch cable knit separately and sewn on later). The front bands are knitted along with the fronts and are exactly the width of one flattened rib, doubled over with a slip stitch fold line and double buttonholes.
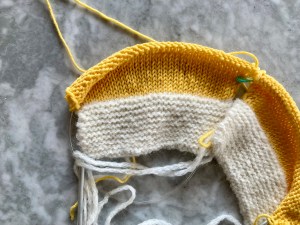
In the pattern, the white wool trim at the collar (made separately and sewn on later) and cuffs is the same “Flair” wool used to make the rest of the set, but fluffed up by brushing with a teazle (aka teasel, teasle) brush. It’s a brush with metal tines for back-combing wool the same way you might tease your hair with a rat-tail comb, and with the same effect: it breaks and felts some of the fibres, creating a fluffy-blanket effect. Occasionally, there’s a pattern in an older Stitchcraft for brushed wool items (usually a baby blanket), and, there, readers are advised to send their finished knitting to a special service to get it brushed “for a very reasonable price.” By 1966, I guess anyone could buy a teazle brush and do their own brushing on the knitted trims.
All well and good, but these days one can also just buy fluffy yarn, and I saved myself some time and trouble by doing that. The white contrast yarn is Luxury Alpaca by Rico Design, a 63% alpaca, 37% polyamide mix that confusingly has both the terms “Superfine” and “Aran” in its name and knits up, like the Soft Merino, a bit bigger than DK on 4.5 or 5 mm needles.
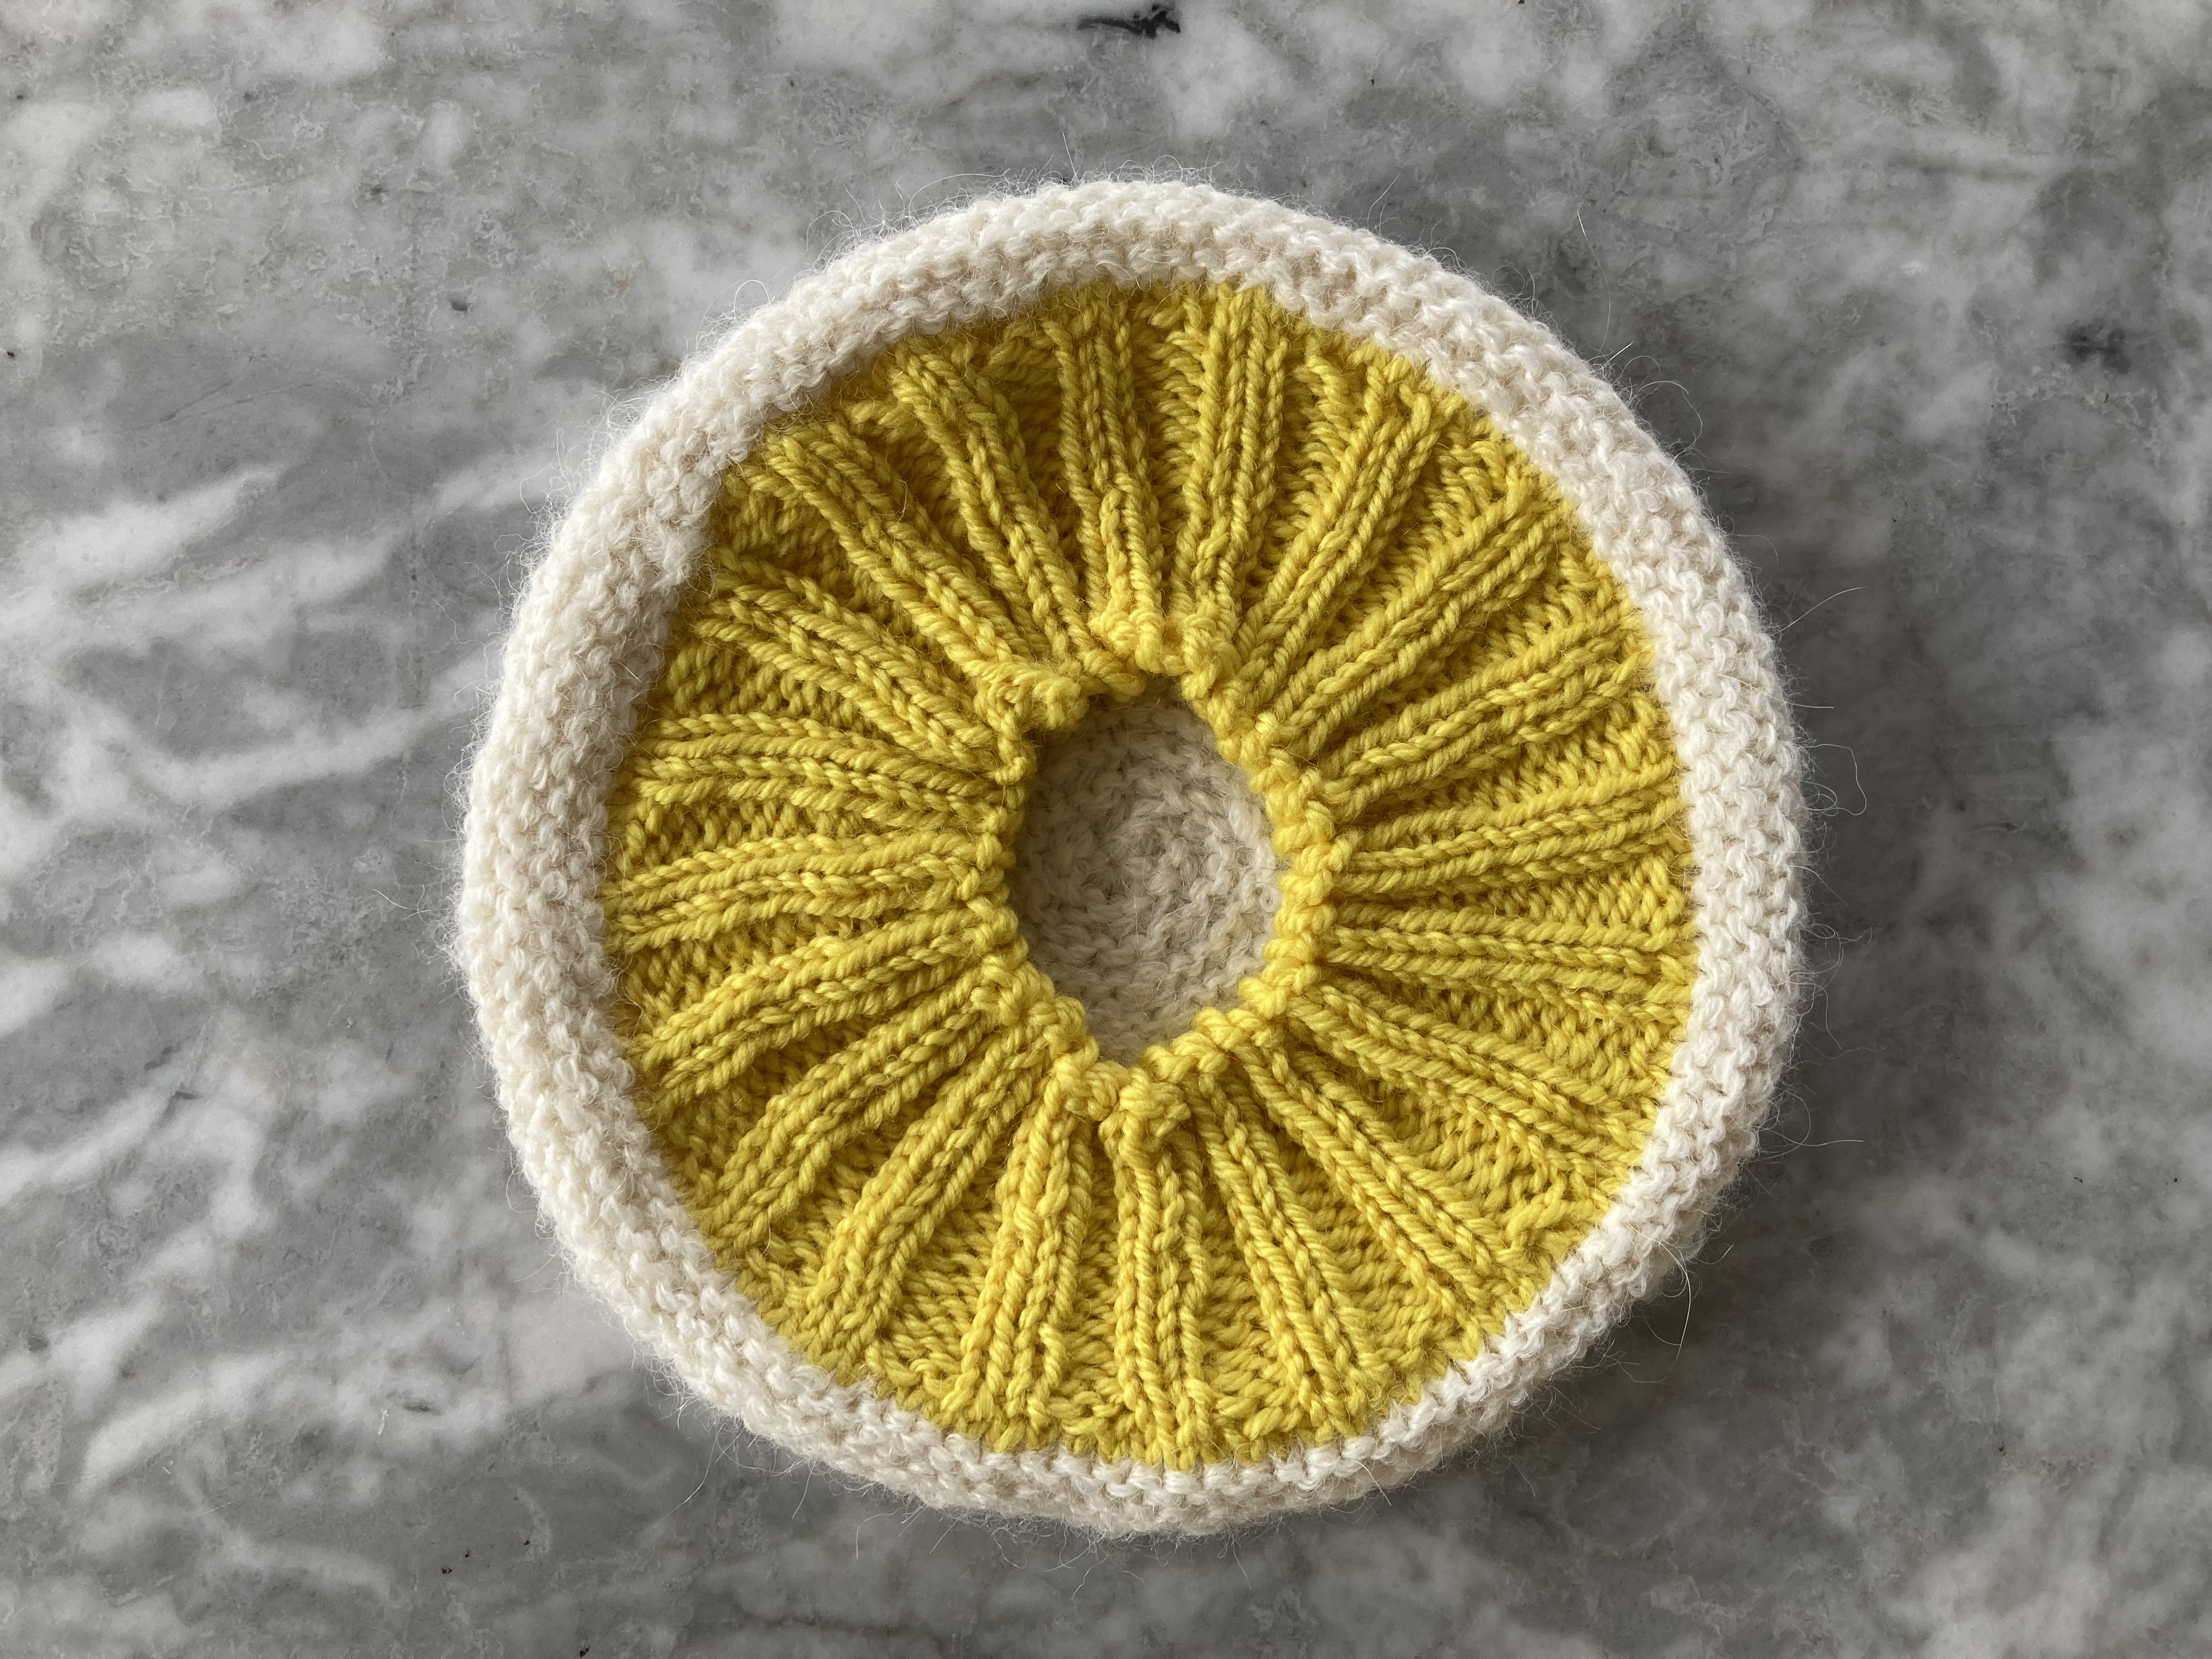
The belt and collar are knitted separately and sewn on. The collar has a nice sort of crescent shape made with short rows. It is supposed to have double buttonholes to button up very high on the neck, but although I made the collar perfectly according to pattern and it fit fine on the jacket neck edge, the double buttonholes didn’t line up anywhere near each other. No worries — I don’t think any child would enjoy having something tightly buttoned around their neck, the collar stands up on its own anyway, and I didn’t even have to sew the buttonholes together, since the wool is so fluffy. Similarly, I saw no need to add a snap fastener to the neckline above the last button, as called for in the pattern, but I did add a snap fastener at the waist as indicated.
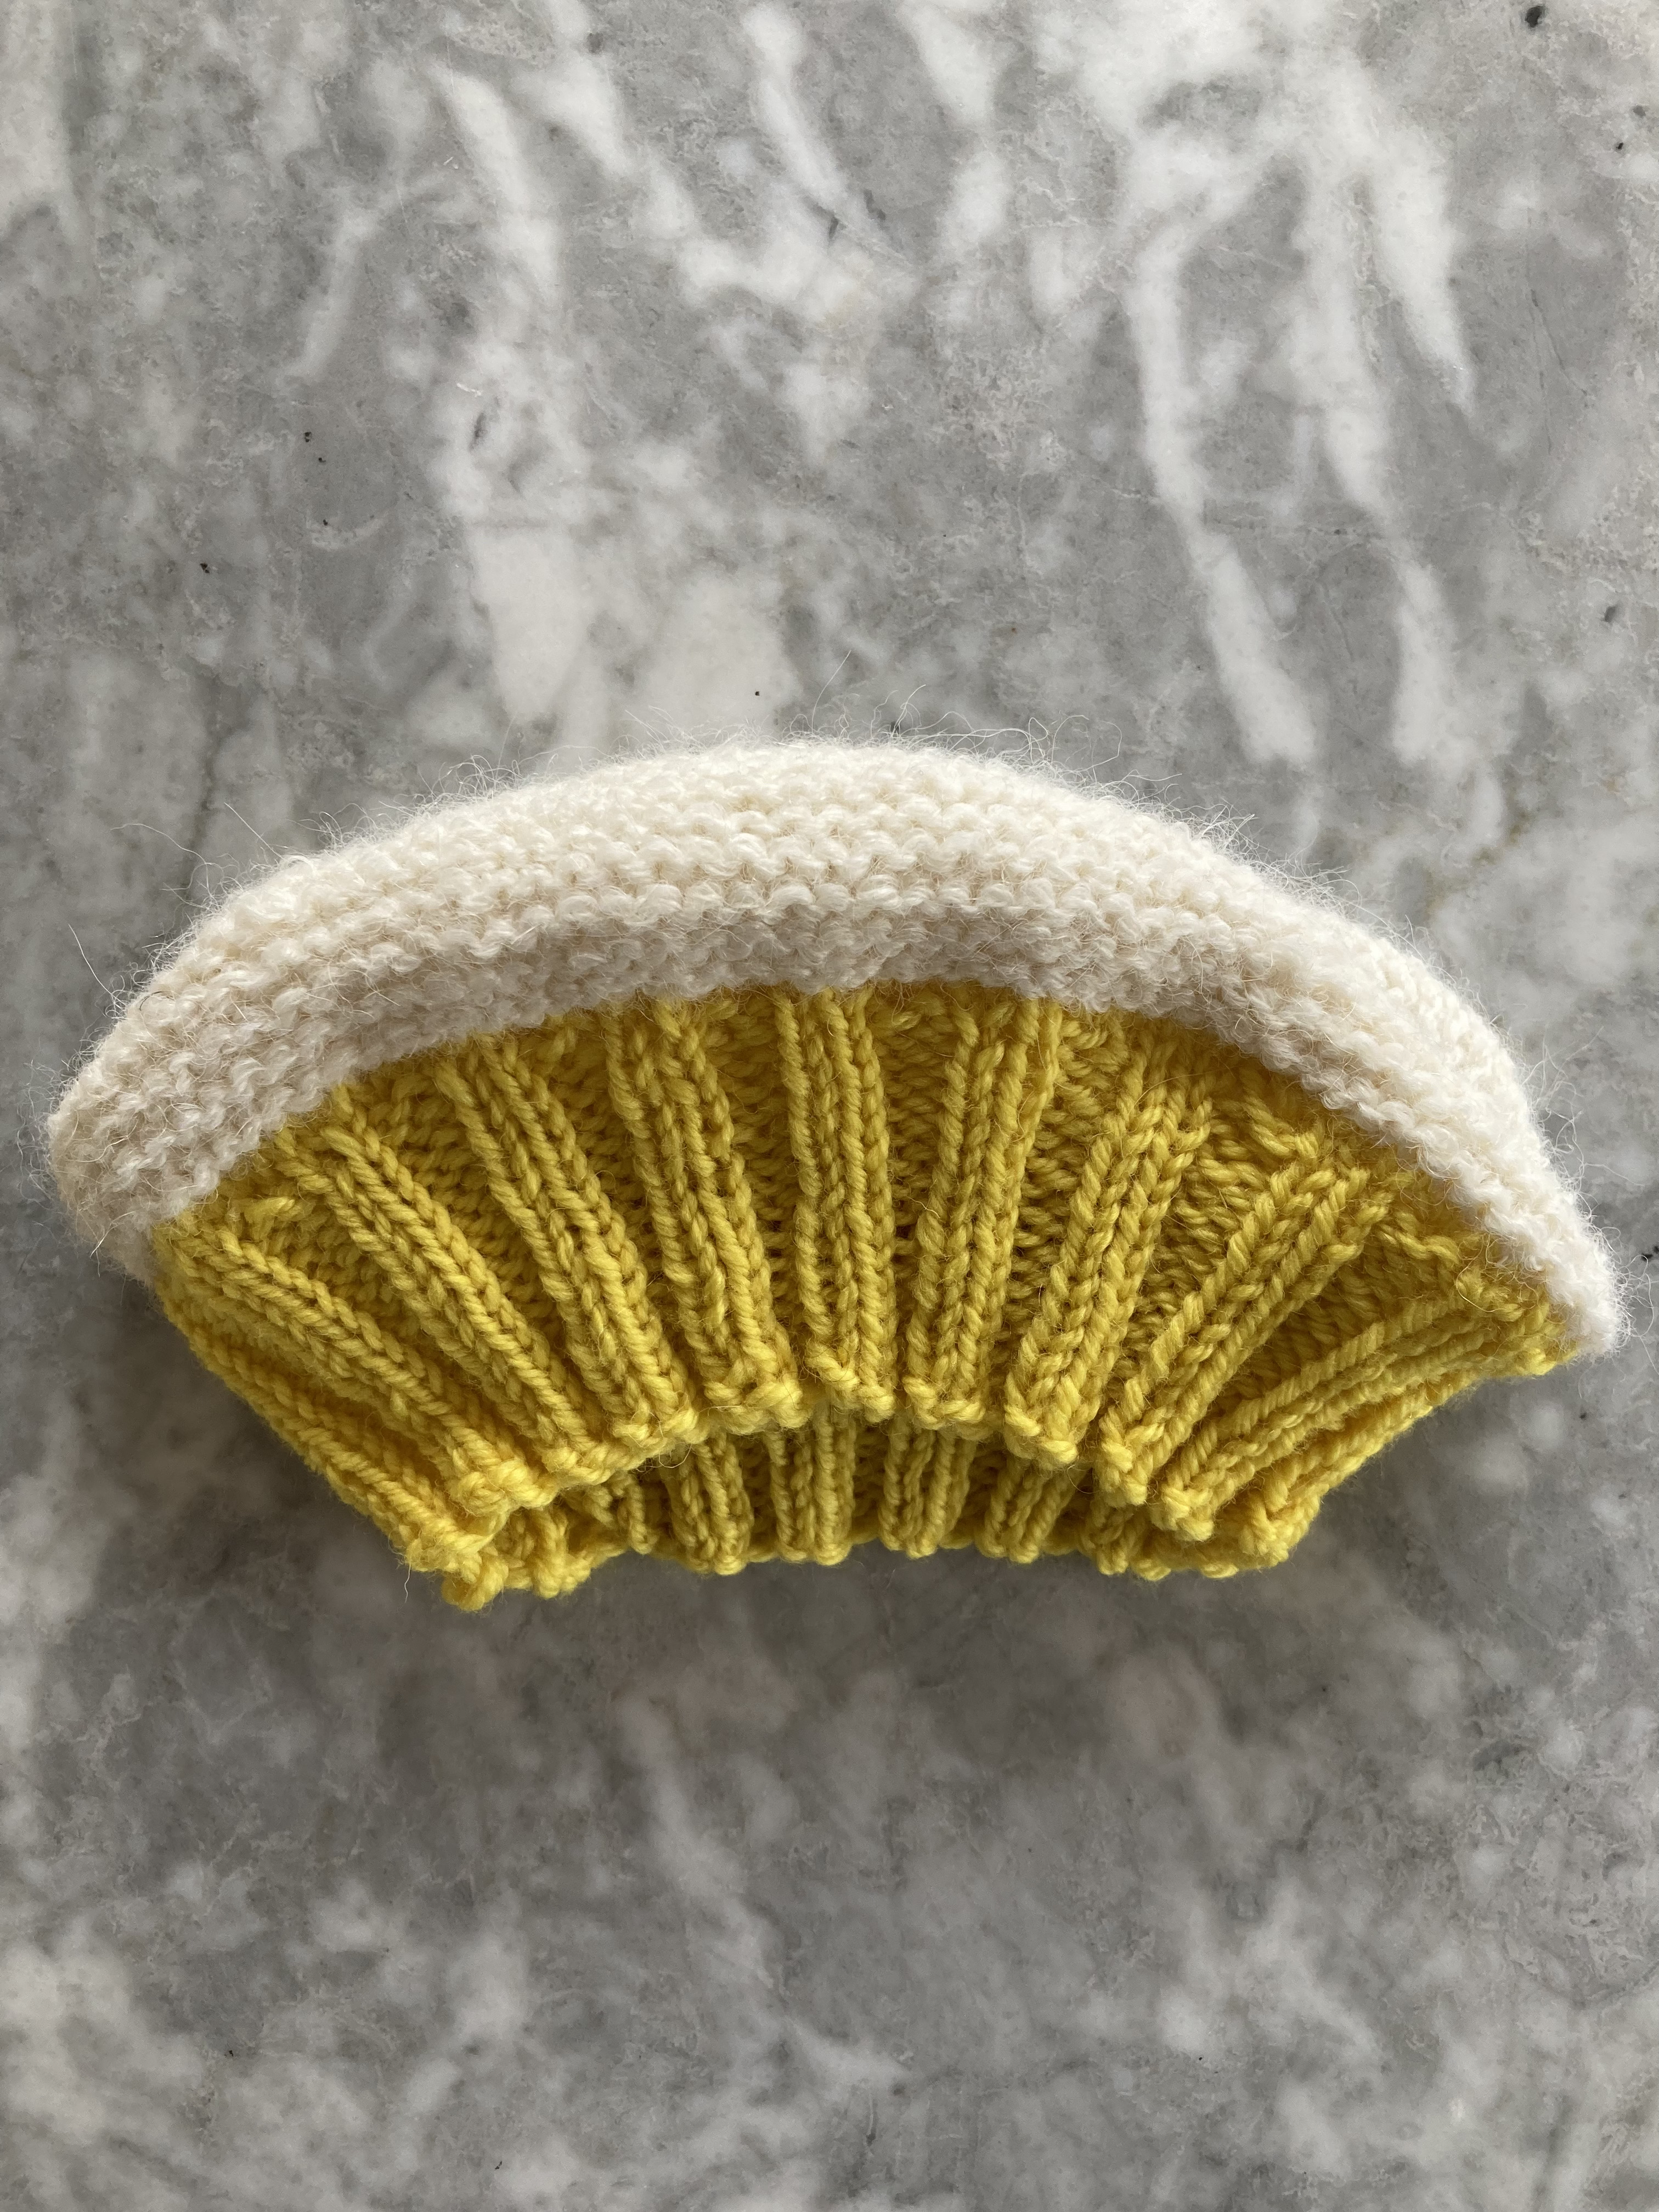
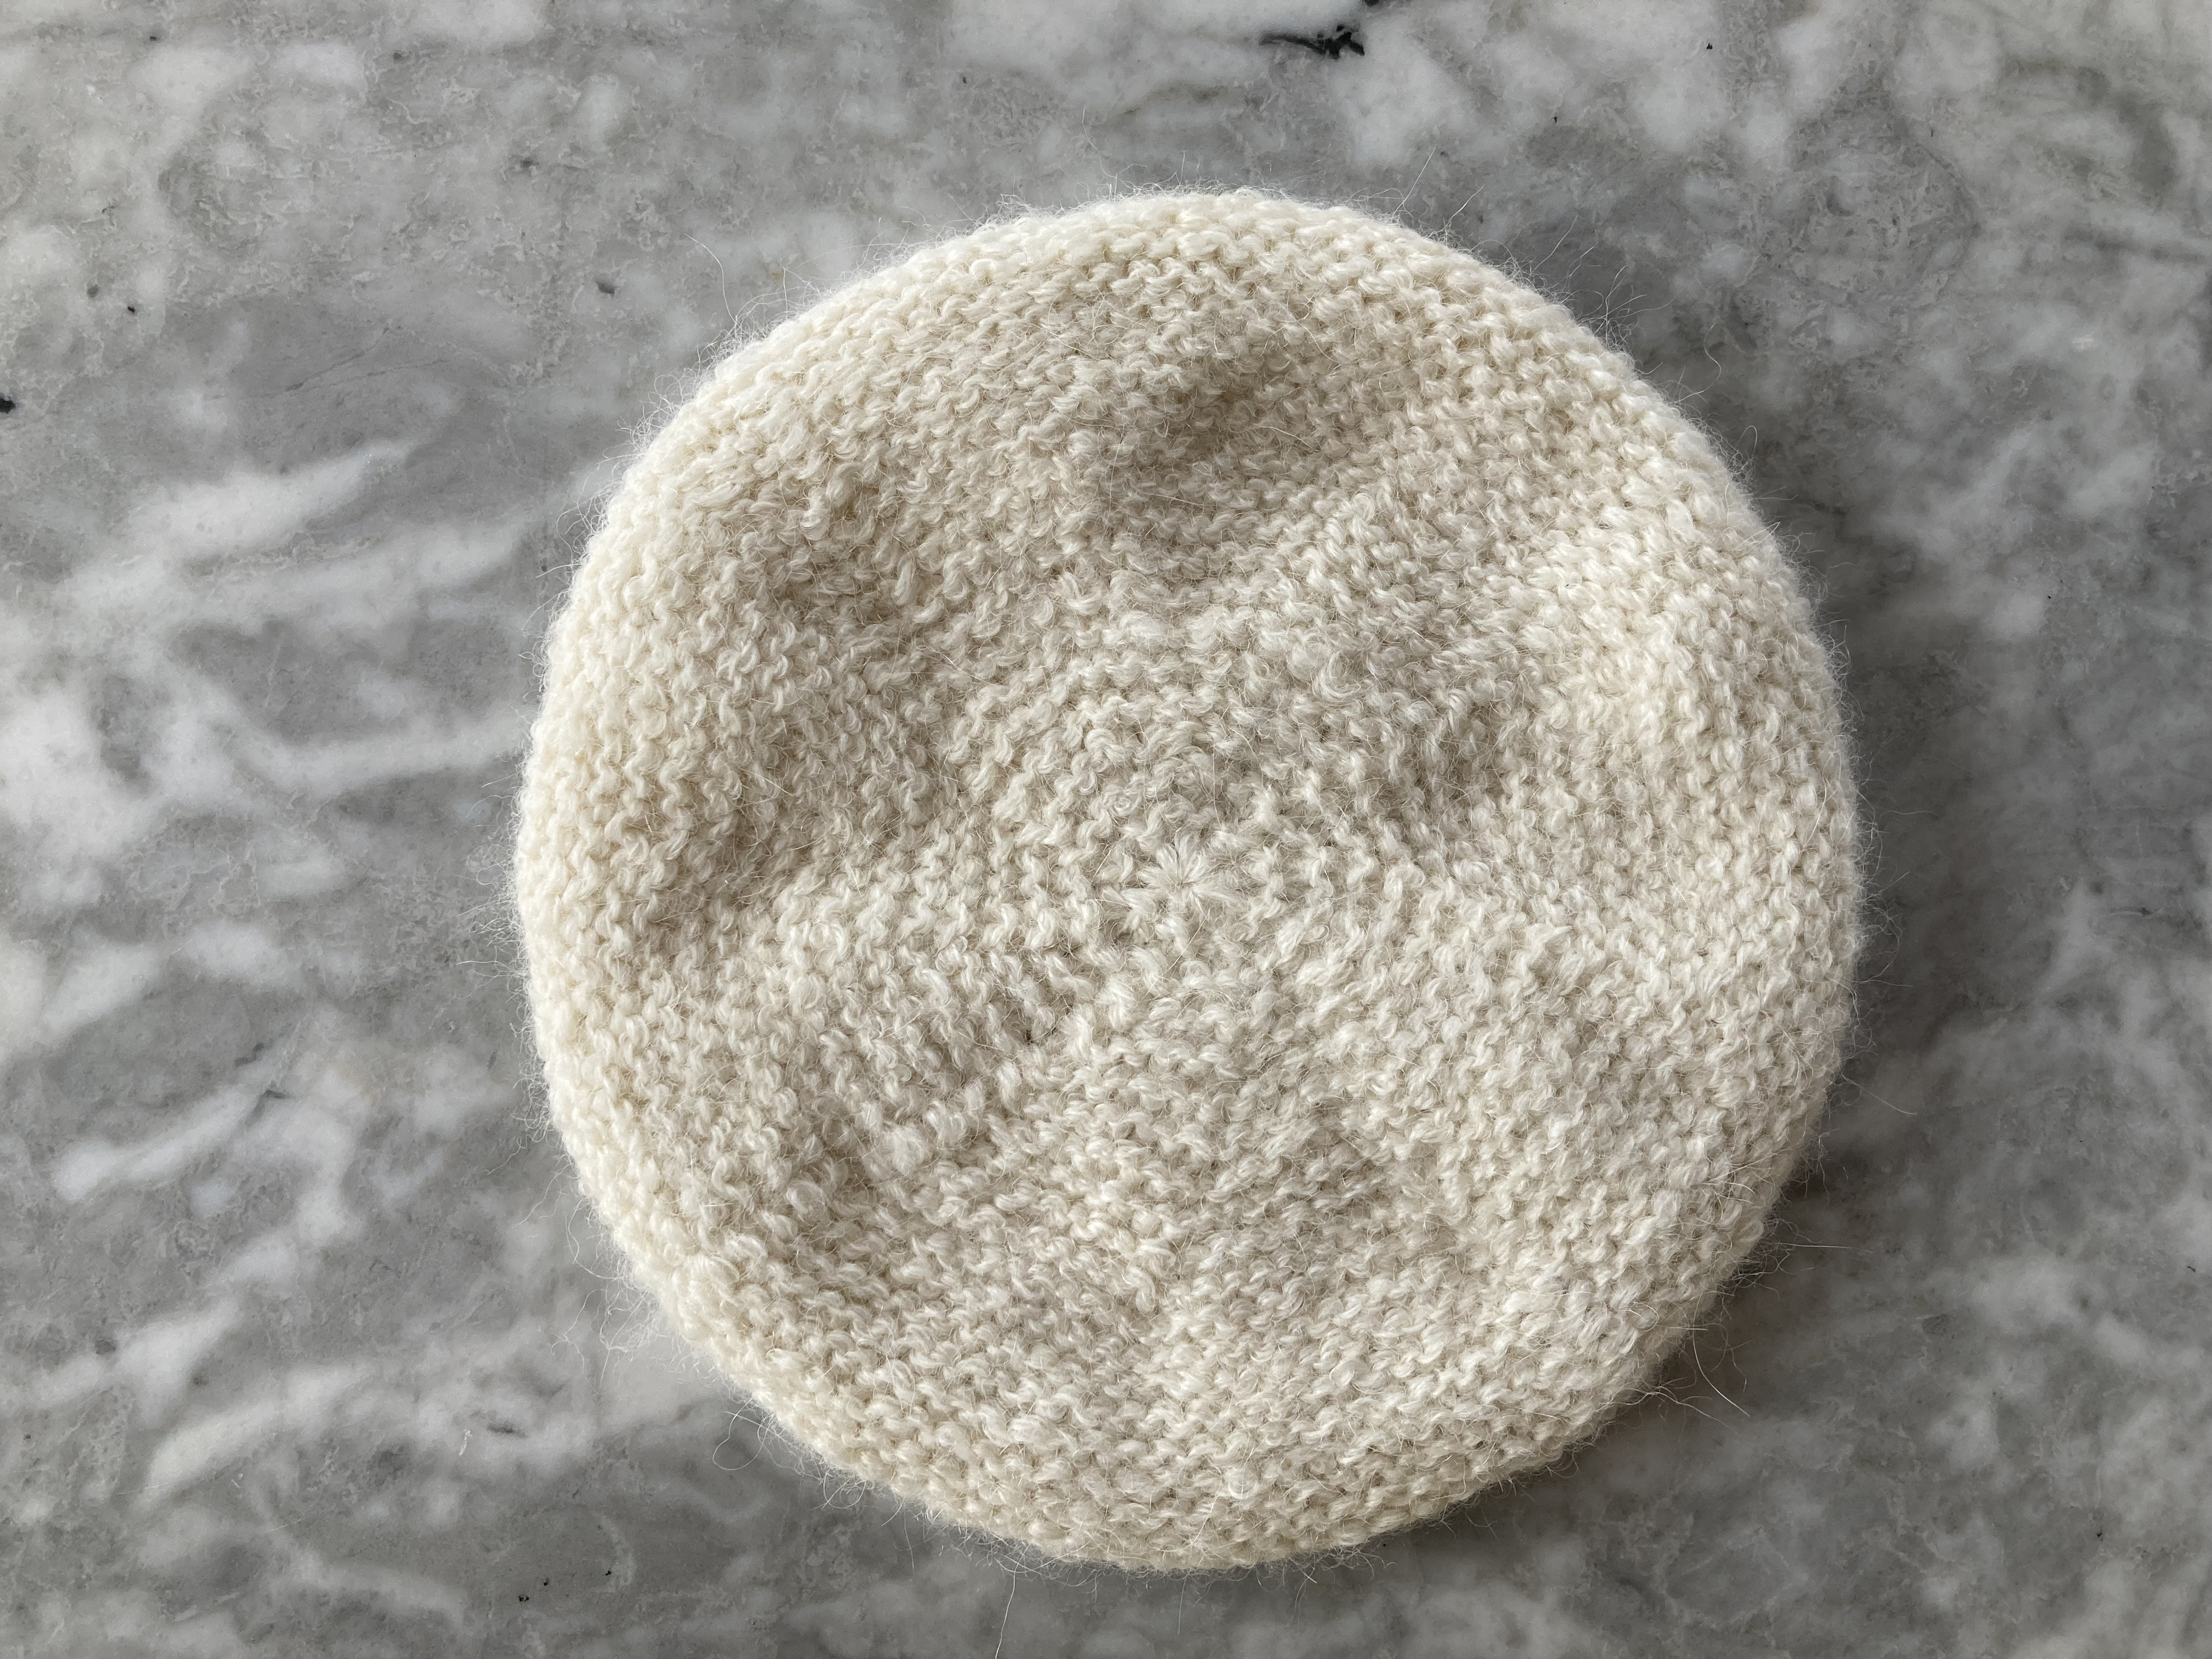
The hat is a simple modified beret, intended to be knit flat, but I made it in the round. The crown has a nice, easy decrease pattern: from 108 stitches, you k10, k2tog for 1 row (round), then 1 row straight, then k9, k2 tog, one row straight, then k8, k2tog and so on.
That’s it! I had a fun time knitting this set and was very glad to know someone to knit it for. I hope she likes it!
My 2024 New Year’s knitting resolutions are to 1) destash as much as possible and 2) finish all the “endless” WIPs. (Or to quote the famous German New Year’s Eve short film Dinner for One, “Same procedure as every year.”) In that spirit, my January blog project was made entirely from stash.
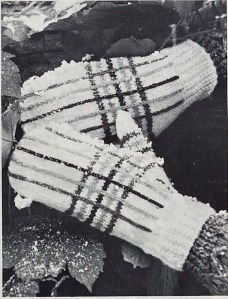
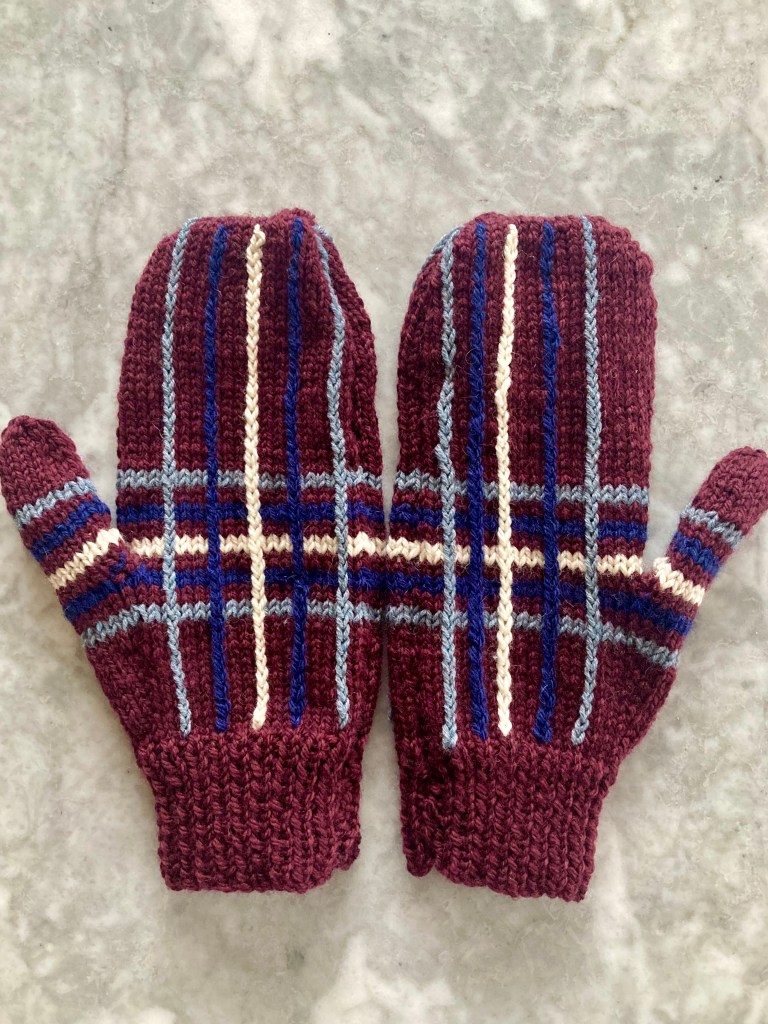
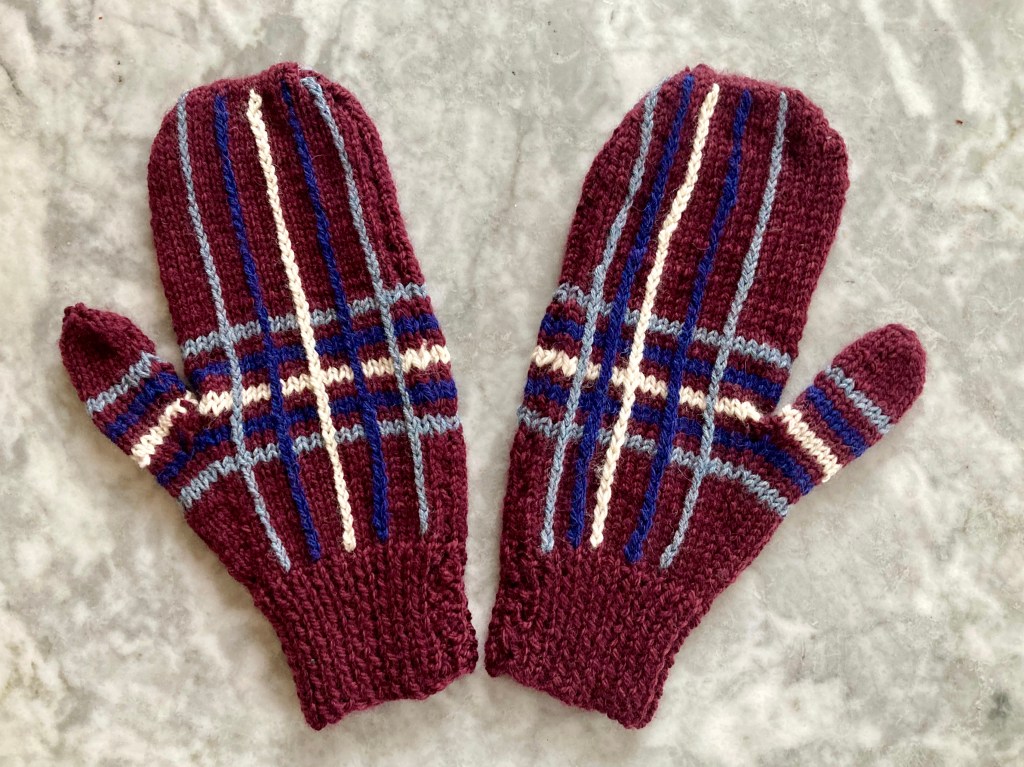
The mittens (Stitchcraft calls them “mitts”) are knitted in DK wool on two needles, i.e. worked flat and then sewn together. Aside from the fact that many mitten patterns were written this way at the time, it has a very practical reason in this case: the vertical stripes are embroidered on after the knitting is finished, which would obviously be significantly more difficult to do if the mittens were made in the round.
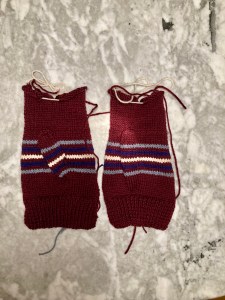
The original pattern uses the very 1966 colour scheme of “Loam Brown”, “Bright Olive” and “Tangerine” on a white background. I used leftover maroon wool from my 1920s men’s “sport coat” as the main colour, with stripes of white and medium blue (also left over from the same project) and light blue (left over from I don’t know what other project) with the intention of giving the gloves to the recipient of the 1920s cardigan as a late Christmas present.
The knitting was quite easy — all stocking-stitch. The horizontal stripes are knitted in the normal way and the thumb is made flat out of a gusset on the mitten. When the gusset is wide enough, you work the thumb to the end (back and forth), then pick up a few stitches at the base of the thumb and continue the hand part of the mitten flat as well.
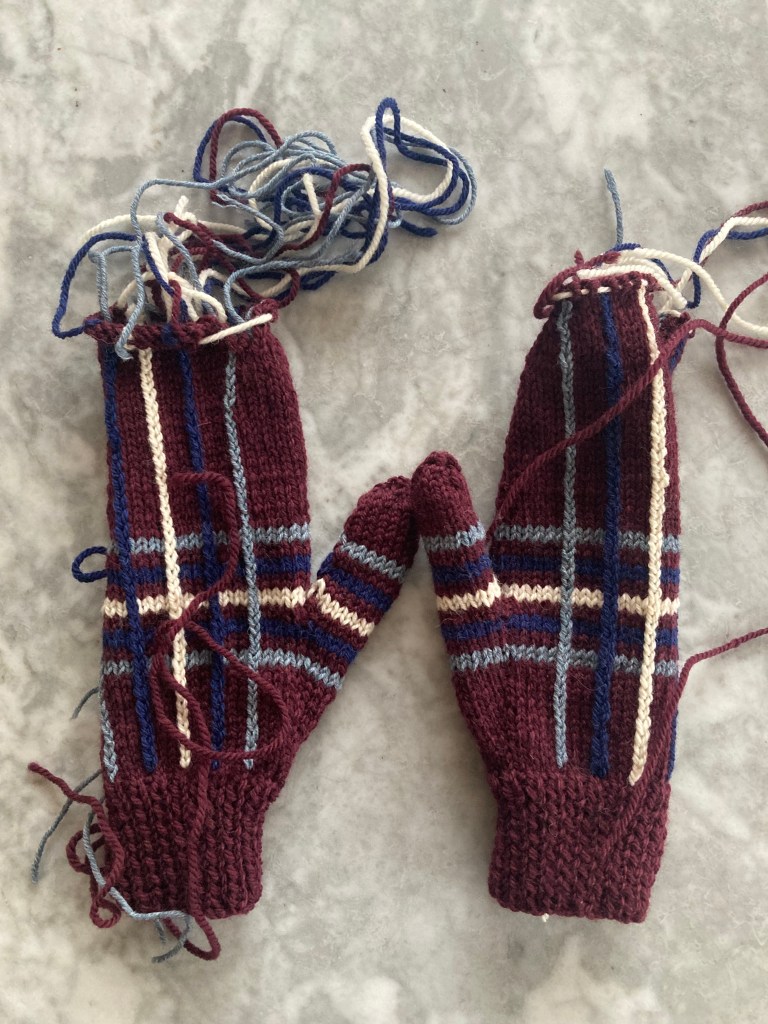
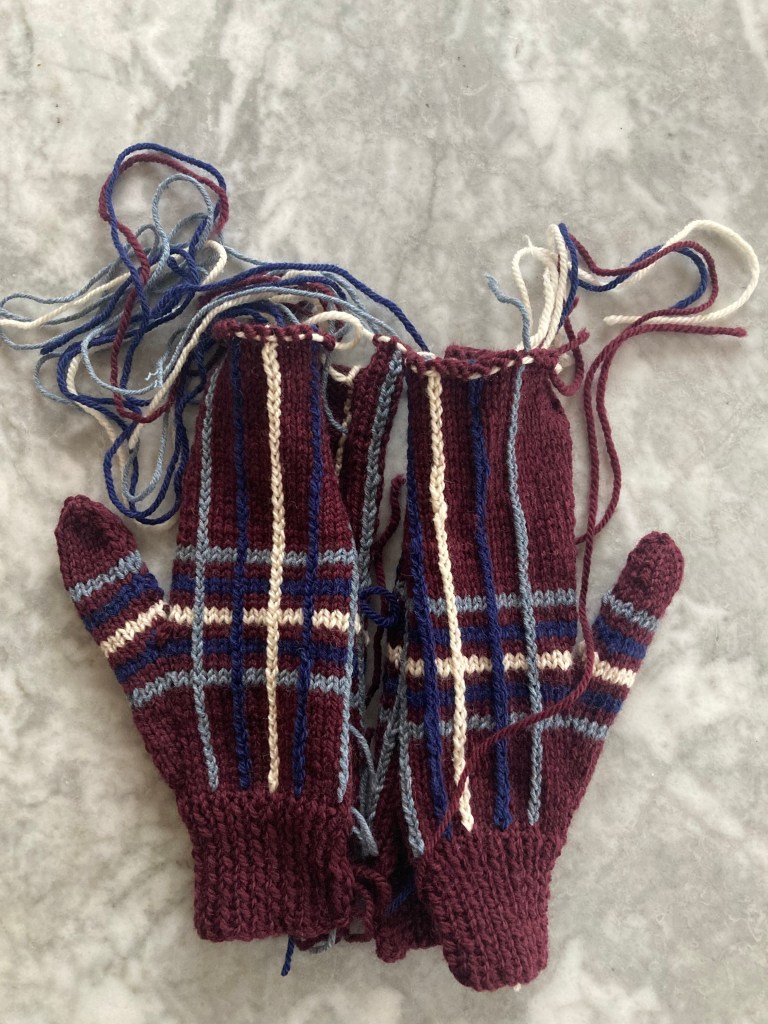
The vertical stripes are embroidered in chain-stitch, which can be anchored very easily in the little horizontal strands between the knit stitches. That also makes it easier to keep the lines straight. The embroidery is on both the palm and the back of the hand. After embroidering, you weave in a whole lot of ends and sew up the side, top and thumb seams and voilà. I used a three-needle bind off on the tops or the mittens, since I thought it would be easier and more elegant than binding off and sewing a seam, but I don’t think it really made a difference in the end. I blocked them, but they hardly looked different before and after — all I did in the blocking was to widen the thumb a little bit, since it was fairly narrow in comparison to the hand width, and make sure the lines were nice and straight.
And that was it! Both I and the recipient are very happy with the finished mittens. They were quick and easy and used up some stash. Now I have some time in January to work on those endless WIPs. Stay tuned and maybe one will appear here soon.
It was hard to choose a project from the December 1965 issue. There were lots of nice things in it — the red pullover on the cover, the men’s classic cable V-neck, the two-piece wool dress, the fun knee-high socks, the swingy ribbed skirt — but I was not feeling any of it. I have so many large, unfinished projects and so much wool in stash (of which none would be suitable and/or enough for any of the nice garments in the issue.) Also, I have way too many finished knitted projects! My closet is past full. I need to start knitting exclusively for other people.
Though, as it turned out, I had also already made one of the projects from this issue, back before I started the blog. At the time, I had lots and lots of leftover Rauma 3-ply (which is double-knitting weight, not what you normally would expect “3-ply” to be) and Jamieson’s Double Knitting in stash from a tam and mitts combo that I had designed for Knit Now. And here in the December 1965 issue of Stitchcraft was this wonderful “Workbag for a friend” that was perfect for using up leftovers. The check pattern is easier than it looks — the colours are just staggered every four rows. I adapted the stitch counts to make it work with DK wool instead of the 4-ply called for in the pattern.
The bag is made in two pieces for front and back, with two separate gussets made in 1×1 ribbing, for the sides. This makes a nice, big bag. I bought non-vintage handles which were unfortunately not real wood, but accurate reproductions of the type in the magazine photo. They have a slot at the bottom through which you insert the ribbed top of the bag, fold it over to the inside and sew in place. Very easy. Although it’s not called for in the pattern, I lined the bag with non-stretchy, woven cotton material to keep it from stretching. It’s a great bag and I use it for large projects. (I apologise for having only a finished photo and no in-progress pictures. At the time, i didn’t know I was going to start writing a blog, and only took pictured of finished objects, if at all.)
Still, I felt like I was “cheating” by not making at least something new from this issue. How about a “Pretty idea for a Buffet Party” i.e. a trolly cloth and napkins embroidered with Christmas trees? Too much work… but how about one little embroidered Christmas tree on green felt, made from stash and sewn into a little bag to use for a tiny present? Okay! I had plenty of green felt scraps from various other projects and plenty of white, brown and gold embroidery cotton.
The tree is cleverly “drawn” in one single swooping line and worked in easy chain stitch. The pot is brown long-and-short stitch and the stars, straight stitch with French knots. Since nothing writes or transfers onto dark green felt, I traced the pattern directly from the magazine page onto sewing-pattern paper, embroidered over the paper and dissolved the paper under running water.
Too lazy to set up the sewing machine, I sewed it into a little bag (approx. 4 x 4.5 inches or 10.5 x 12 cm) by hand (very badly, very crookedly. Sorry, it is the end of the year, and I am tired) and fastened it with a snap. The yellow cotton I used for lining seemed familiar… Oh right, it was left over from lining the workbag, six years ago! I guess that brought everything full circle.
On that full-circle note, I hope you all have a very happy New Year. See you in 1966!
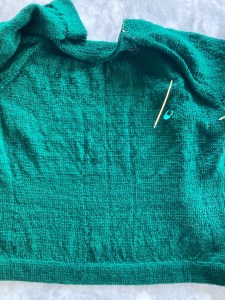
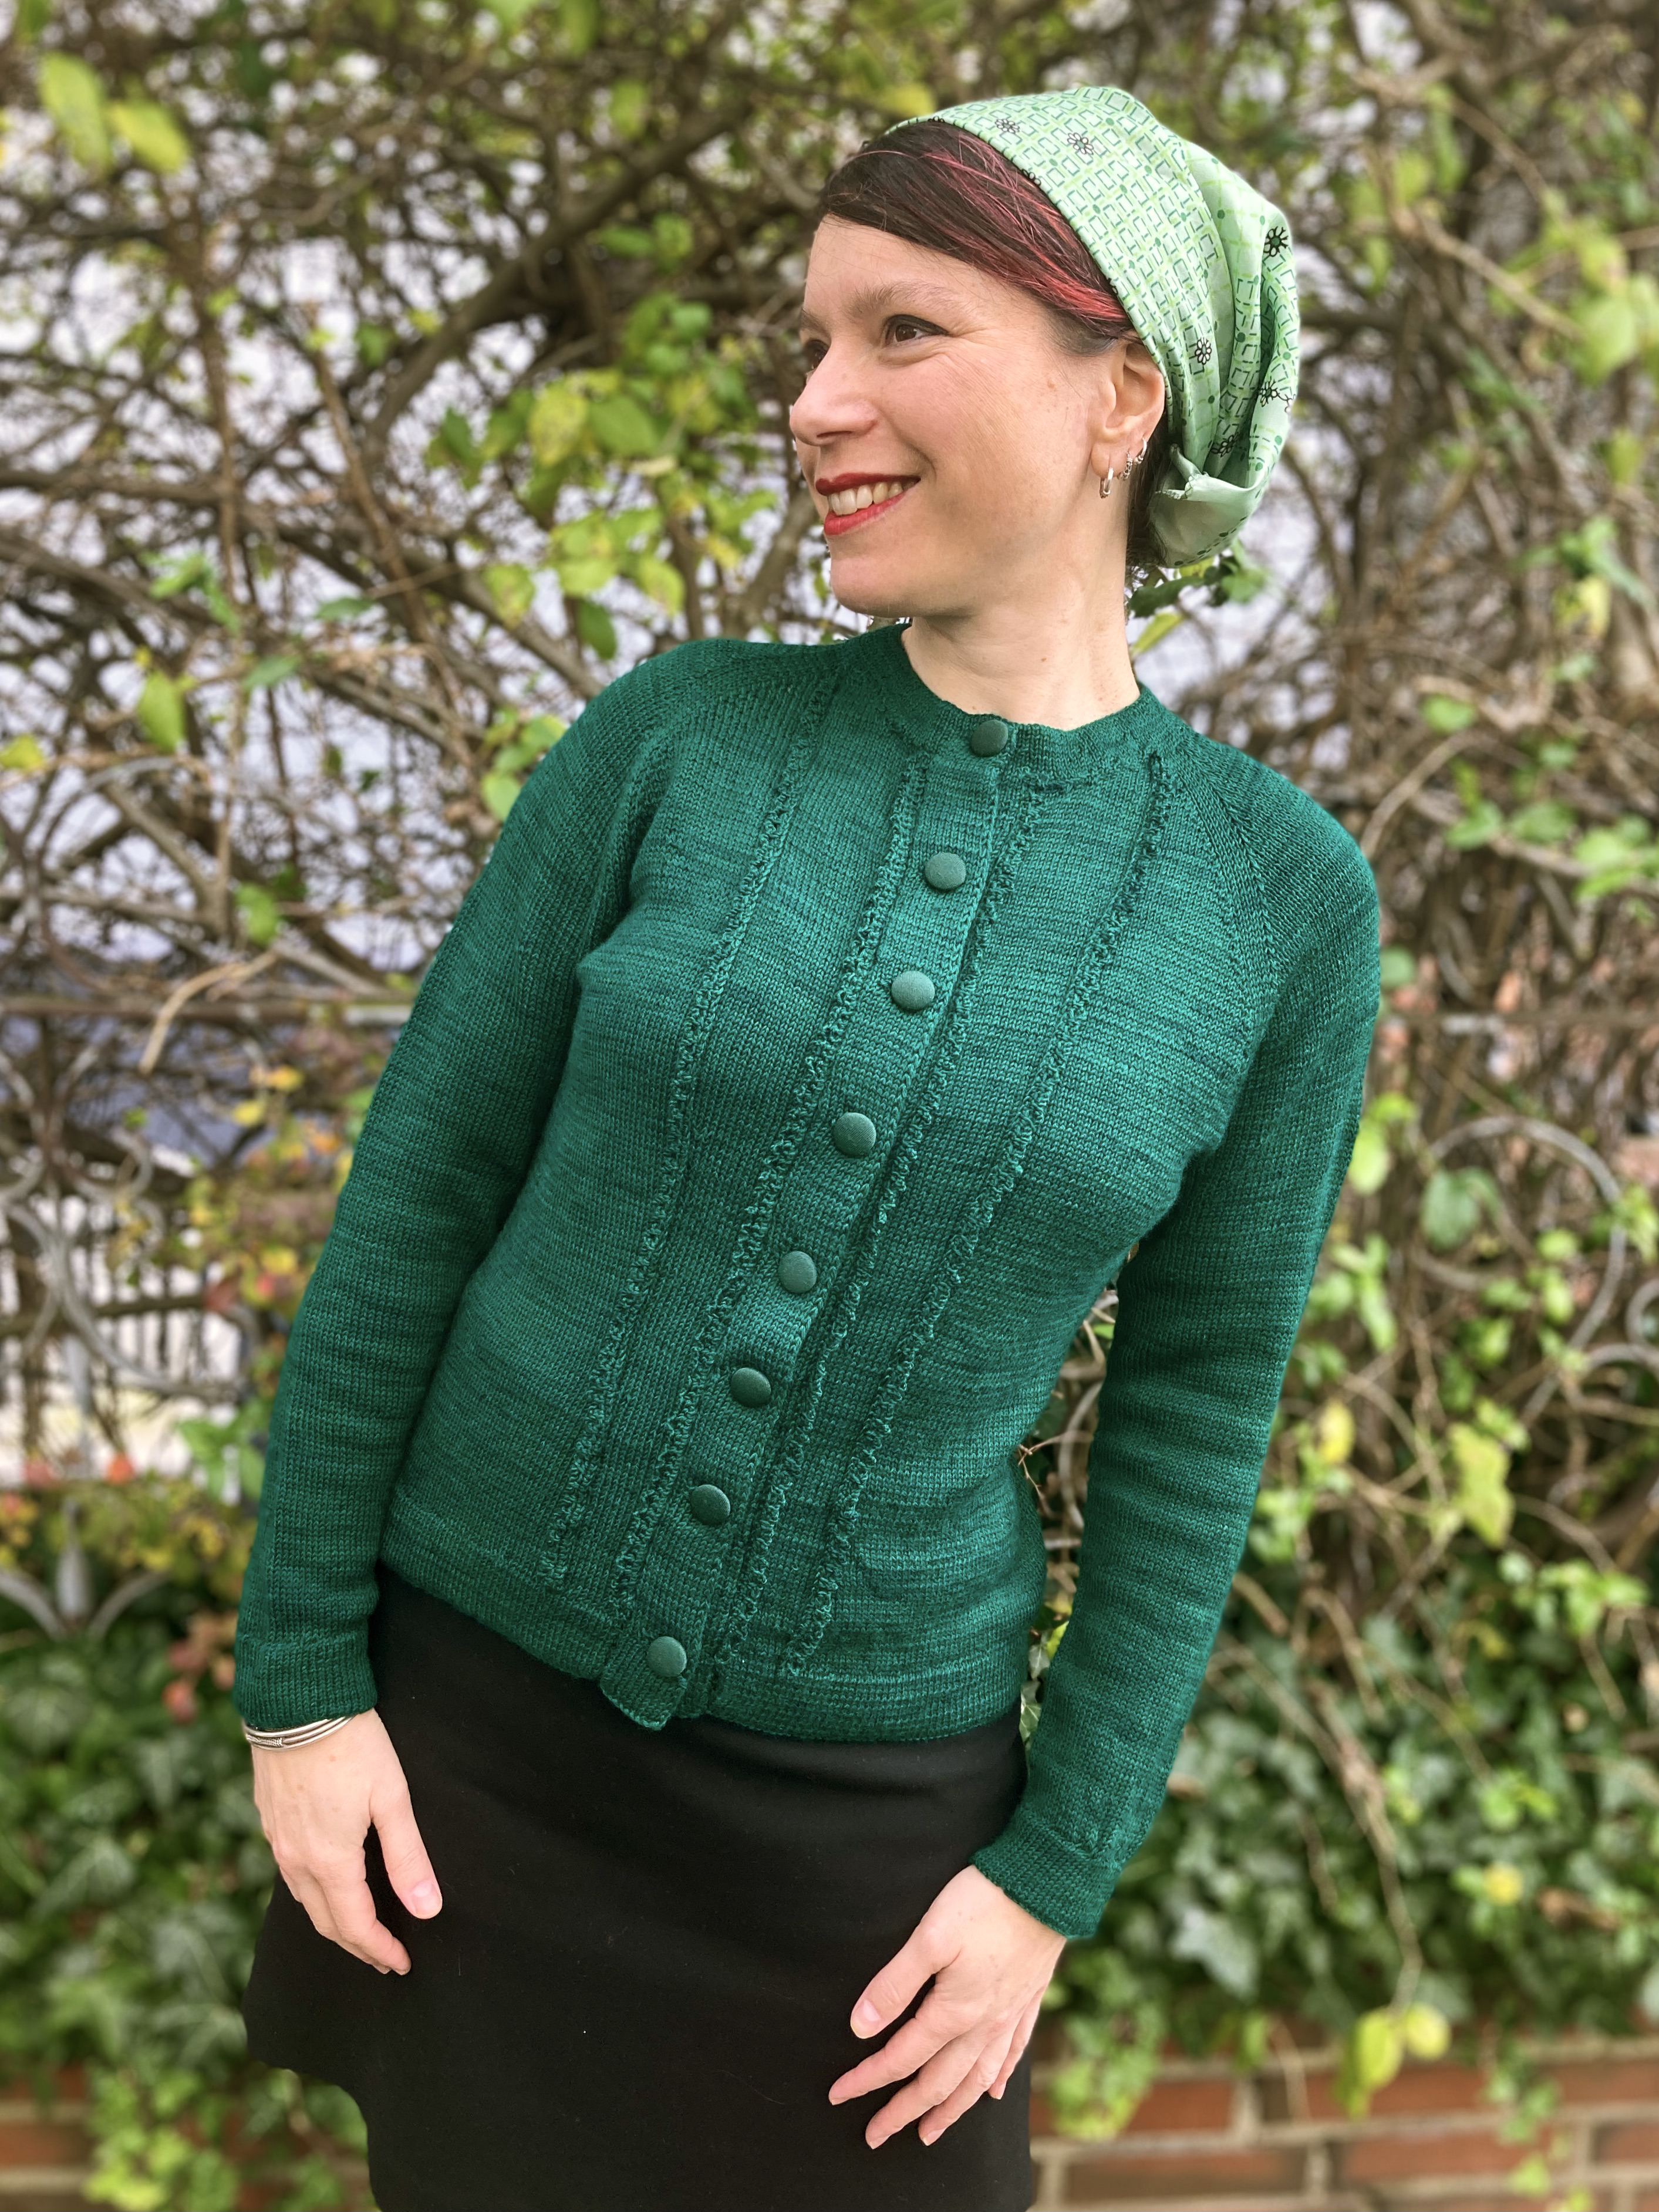
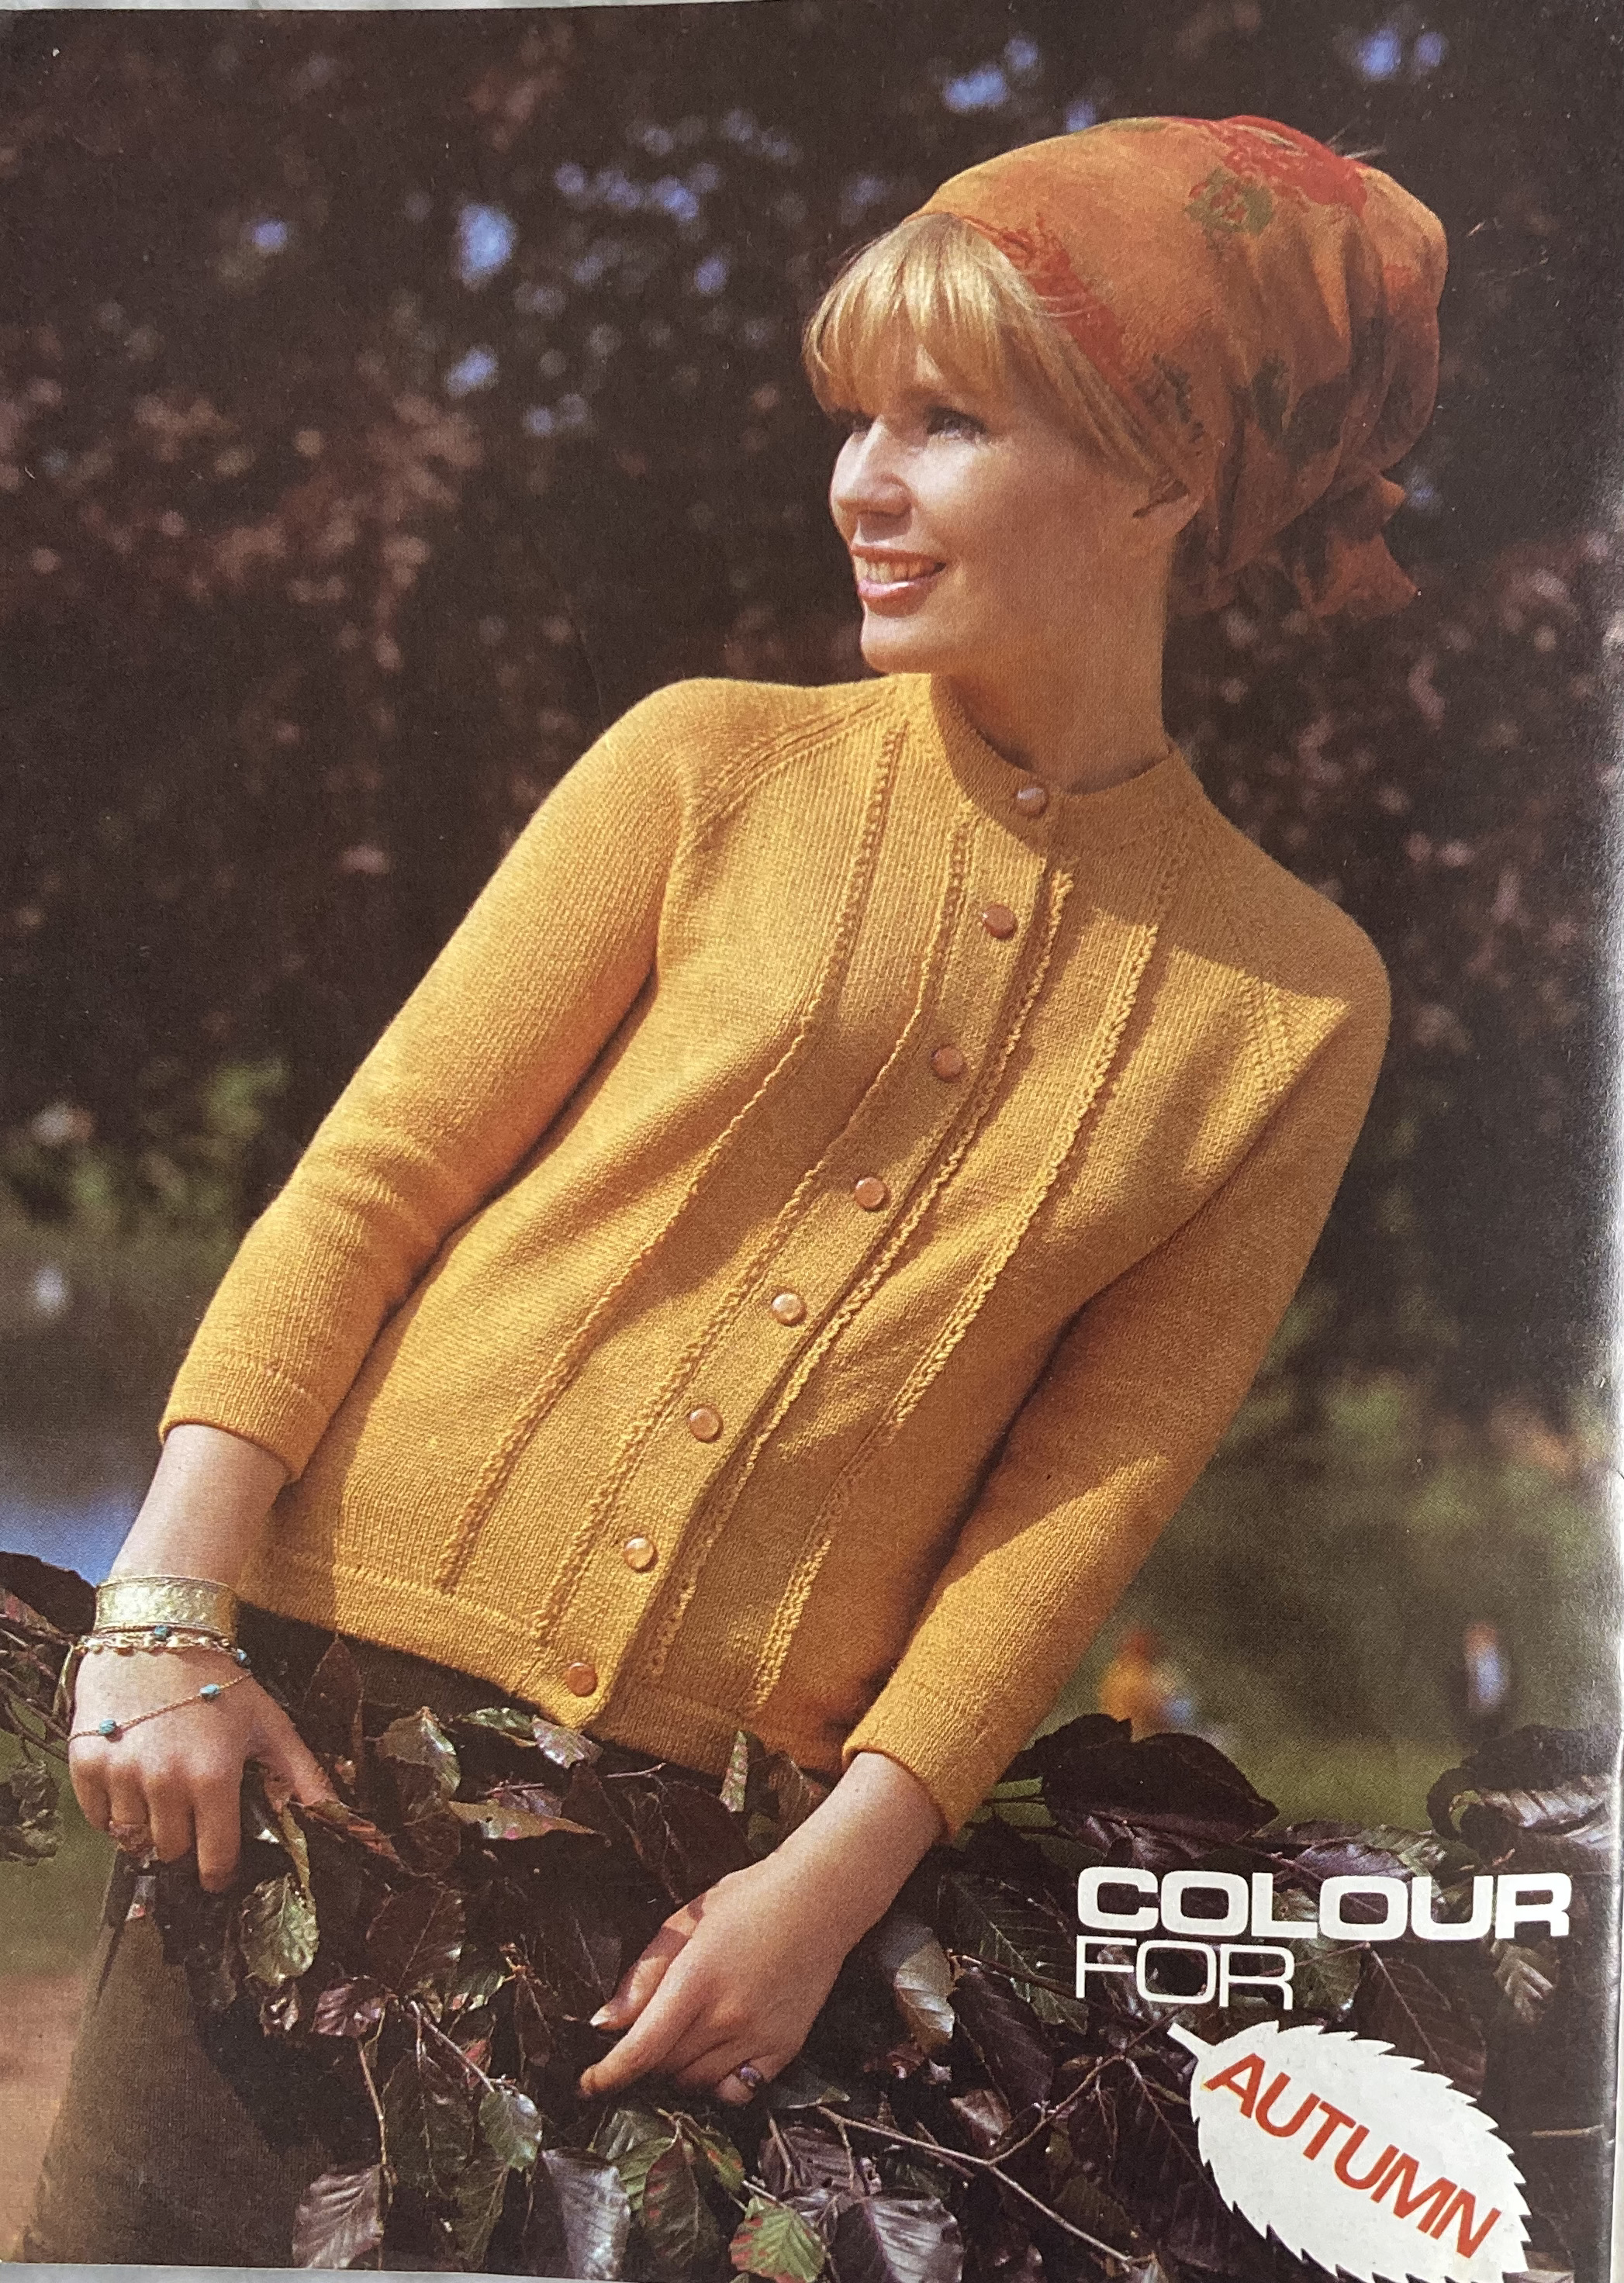
This month’s project was the simple, yet elegant “Cardigan with Picot Trims” from the October 1965 issue. It is made in stocking-stitch with 3/4 length raglan sleeves and hems at the lower edge, front bands, cuffs and neck. The fronts are then trimmed with simple crochet picot edging and the back is left plain.
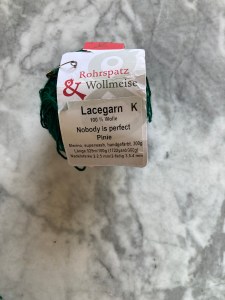
It was the perfect project for the Rohrspatz & Wollmeise “Lacegarn” wool (100% merino wool, superwash, hand-dyed) that I had bought at the Sulinger Wollfest this past summer. The pattern calls for Patons Beehive 4-ply, so a little thicker than my laceweight, but that meant that for once, I could use the intended needle size and get the intended tension (7 sts and 9 rows/inch on No. 10 (3.2g mm) needles — I used 3 mm and it worked perfectly.) The yarn is glorious, with its deep, glowing green colour, which is deepened by the slight marling that results from the hand-dying process. This hank (300 g) was even discounted due to possible knots, breakages or dying errors, but there were none of any of those that I could find.
I had resolved to never again make a garment with a stocking-stitch hem in lightweight wool, since in my experience it stretches out horizontally and the whole garment shrinks vertically, turning even a slim long-line into a boxy tent. In an attempt to counteract it, and to avoid the ballooning back and general dumpiness of 1960s unshaped style, I added some waist shaping, decreasing every 6 rows to just below my natural waist, knitting 2 inches plain and then increasing up to the required number of stitches. I decided to make the decreases not at the sides, where one would expect, but 12 stitches in from each front edge (where the picot trim is sewn on later) as well as 12 stitches in from each back side edge and 12 stitches in from the middle back symmetrically. Yes, this meant I decreased twice as many stitches on the back as on the fronts. And it worked! The back fits well without being too tight or ballooning out over the waist and the front has an elegant curve. Plus, the picot trims will cover up the decrease/increase line on the fronts.
In that vein, I increased up to the correct amount of stitches for the second size on the fronts, but kept the back at a stitch count between the first and second sizes, to allow the front to be wider than the back even before allowing for the extra inch or so of the front bands. The sleeves (which I actually knit first) were a bit tight, so I went ahead and increased up to the third size. I also made them longer. The 14 inches specified in the pattern for 3/4 length is closer to elbow length on me, and didn’t look quite right. I increased to 16 inches, which gives a nice “bracelet” length.
I made the raglan decreases as intended — sleeves decreasing every 4th row at first, then every other row, and always every other row for the fronts and back. Of course, the counts didn’t match exactly, since the stitch counts were from different sizes. Also, I wanted the neckline to sit a little lower and I was concerned that the yoke might be too long — I didn’t check row tension, but it seems to be not 9 rows/inch. I ended up making the initial neckline decrease about an inch below where it would have been in the pattern, ending where it fit the best and just making some extra decreases on the last row to pull the back neck in a bit for the neckband.
The front bands are made separately and sewn on. I guess I could have knitted them with the fronts and back, which I made in one piece anyway, but I didn’t think of it in time. And anyway, making them separately meant I could make them on smaller needles. For once, I got the spacing of the buttonholes right! Stitchcraft always tells you to make the button band first, sew it on as you go, then mark the places for the buttons with büpins and make the buttonholes on the other band to correspond. It does not always work as well as you think it should.
After the button bands and the neck band were finished, and the underarm seams grafted (terribly. So terribly. I can not seem to master the Kitchener stitch no matter how it is taught), it was time for the picot trims. I thought it might be possible, and easier, to crochet them directly onto the fabric instead of making them separately and sewing them on, as the pattern indicates. I tried it on a swatch, crocheting into the horizontal bar between stitches and working into 2 of every 3 rows. That gave a good length, but also made the trim stand up straight instead of lying flat to the side as it should have. So I crocheted the trims separately and sewed them on, handily covering up the line of decreases and increases from the waist shaping in the process.
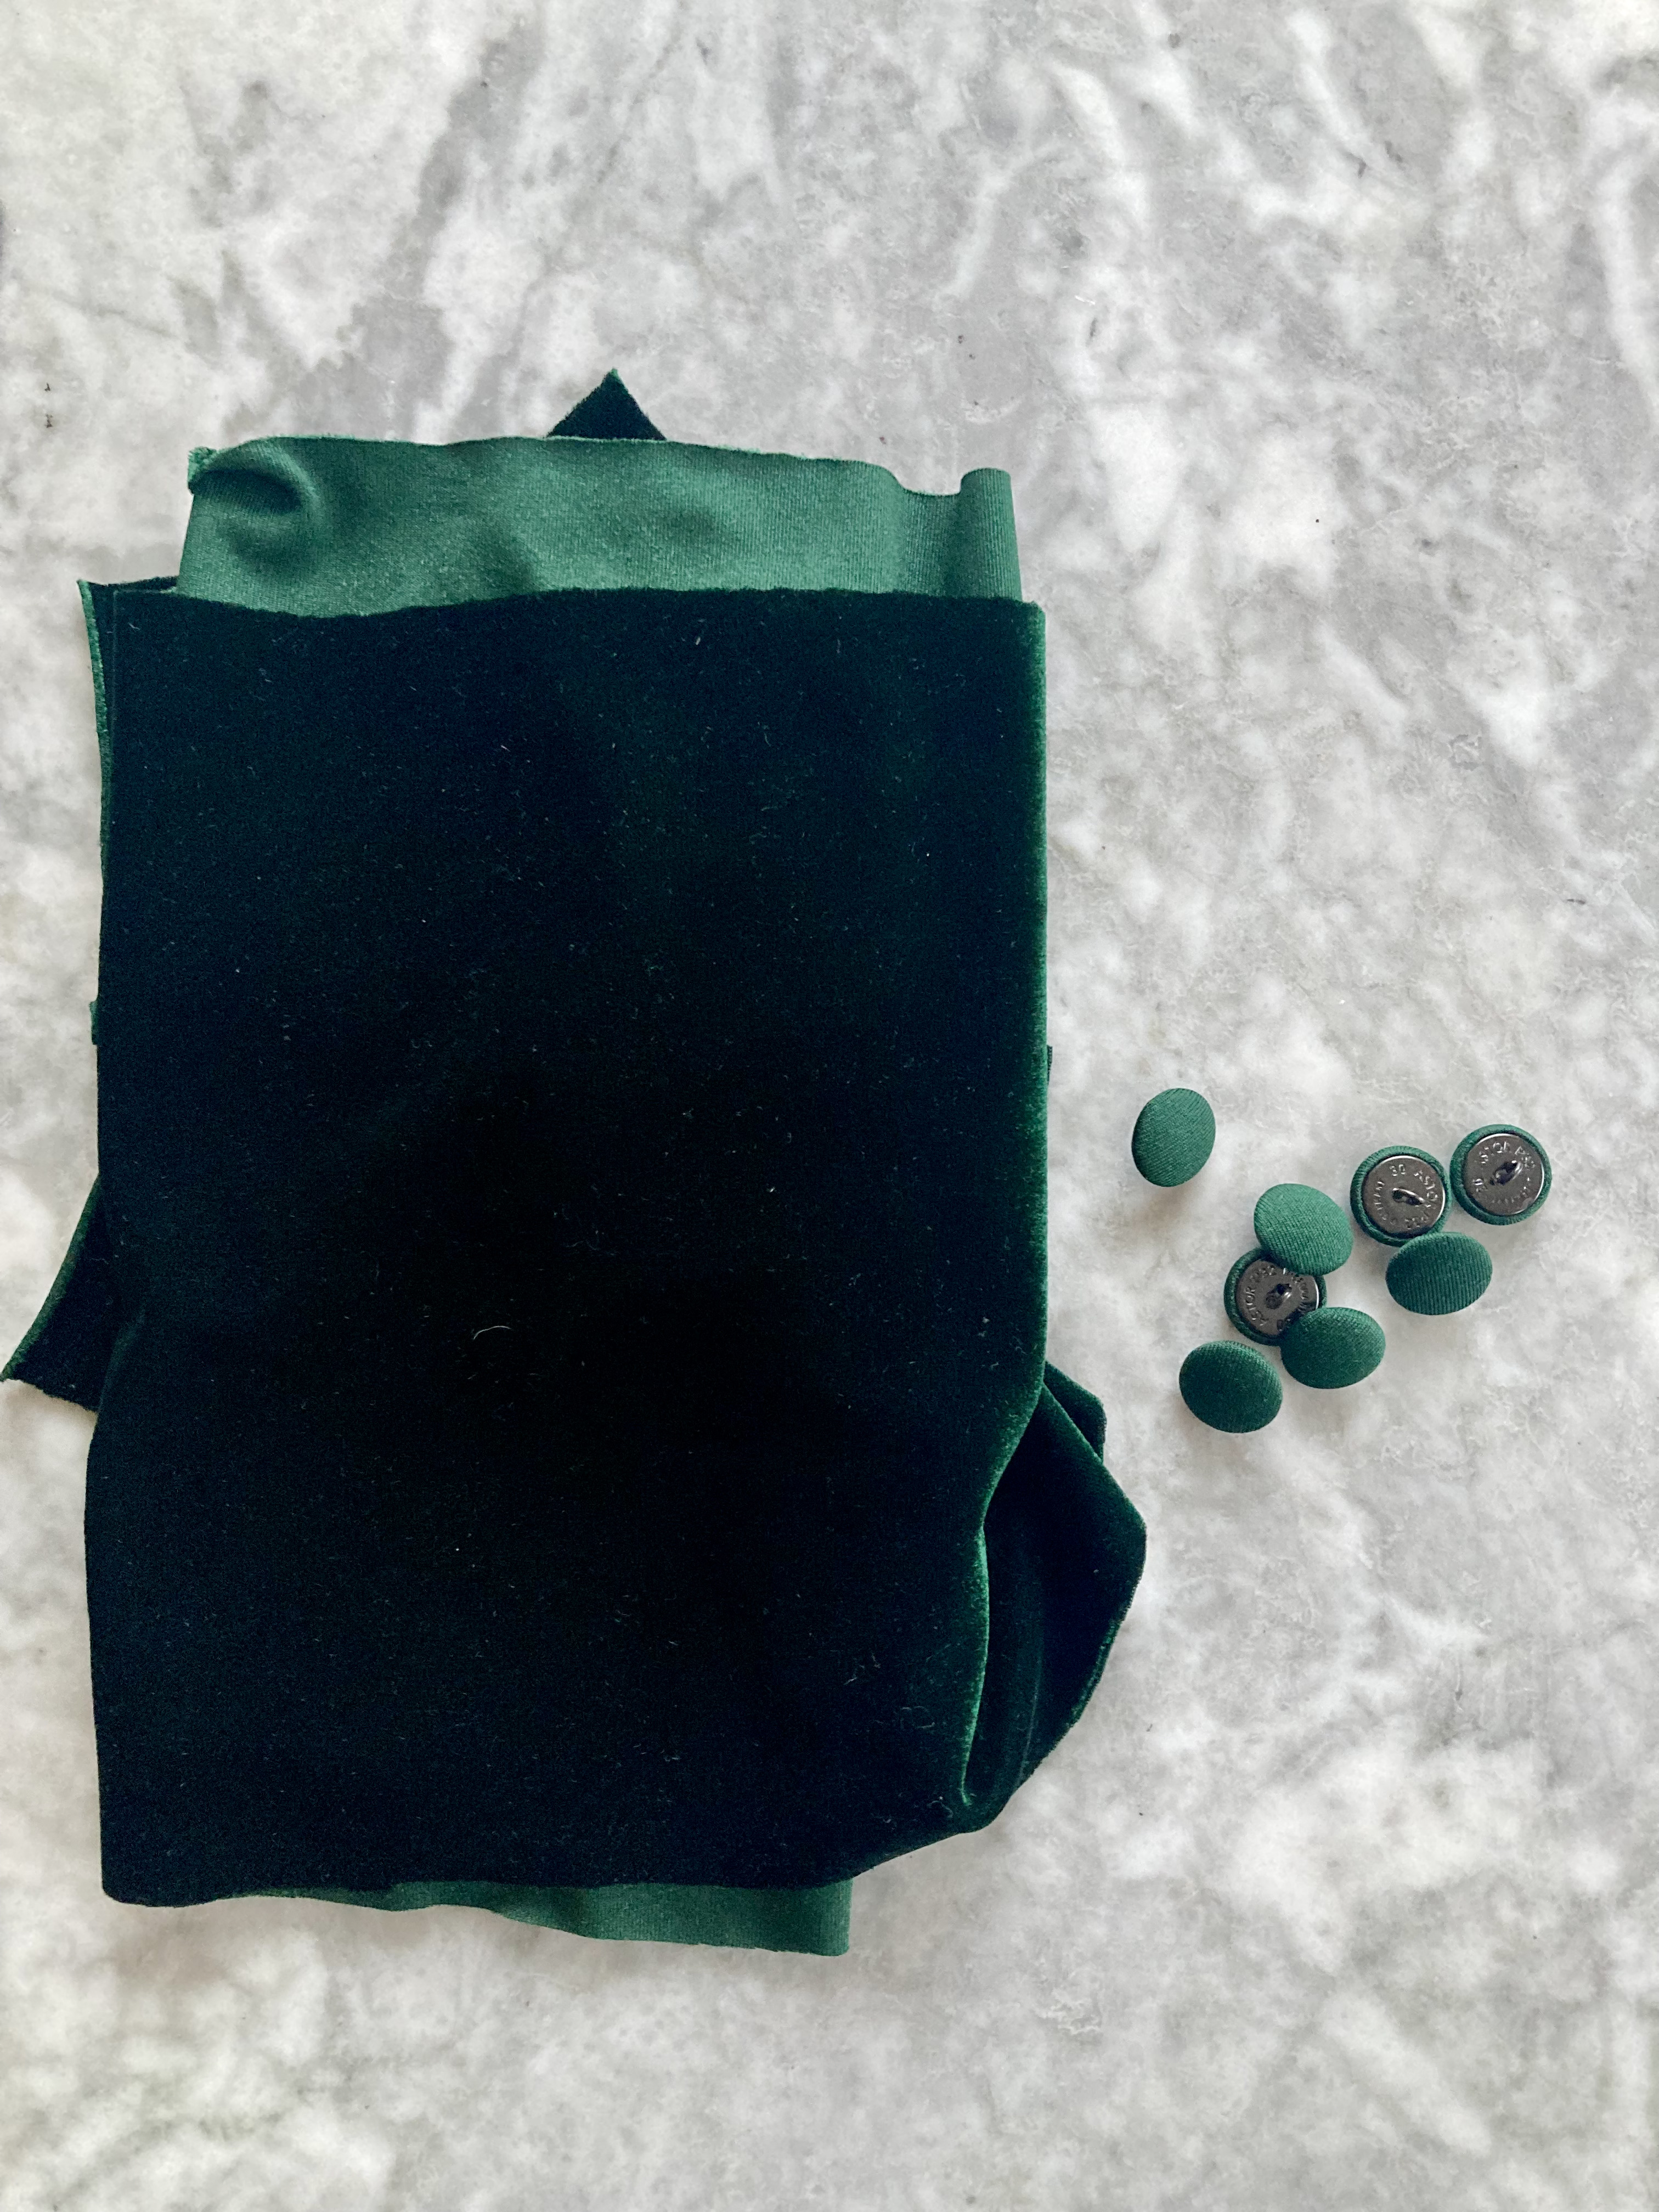
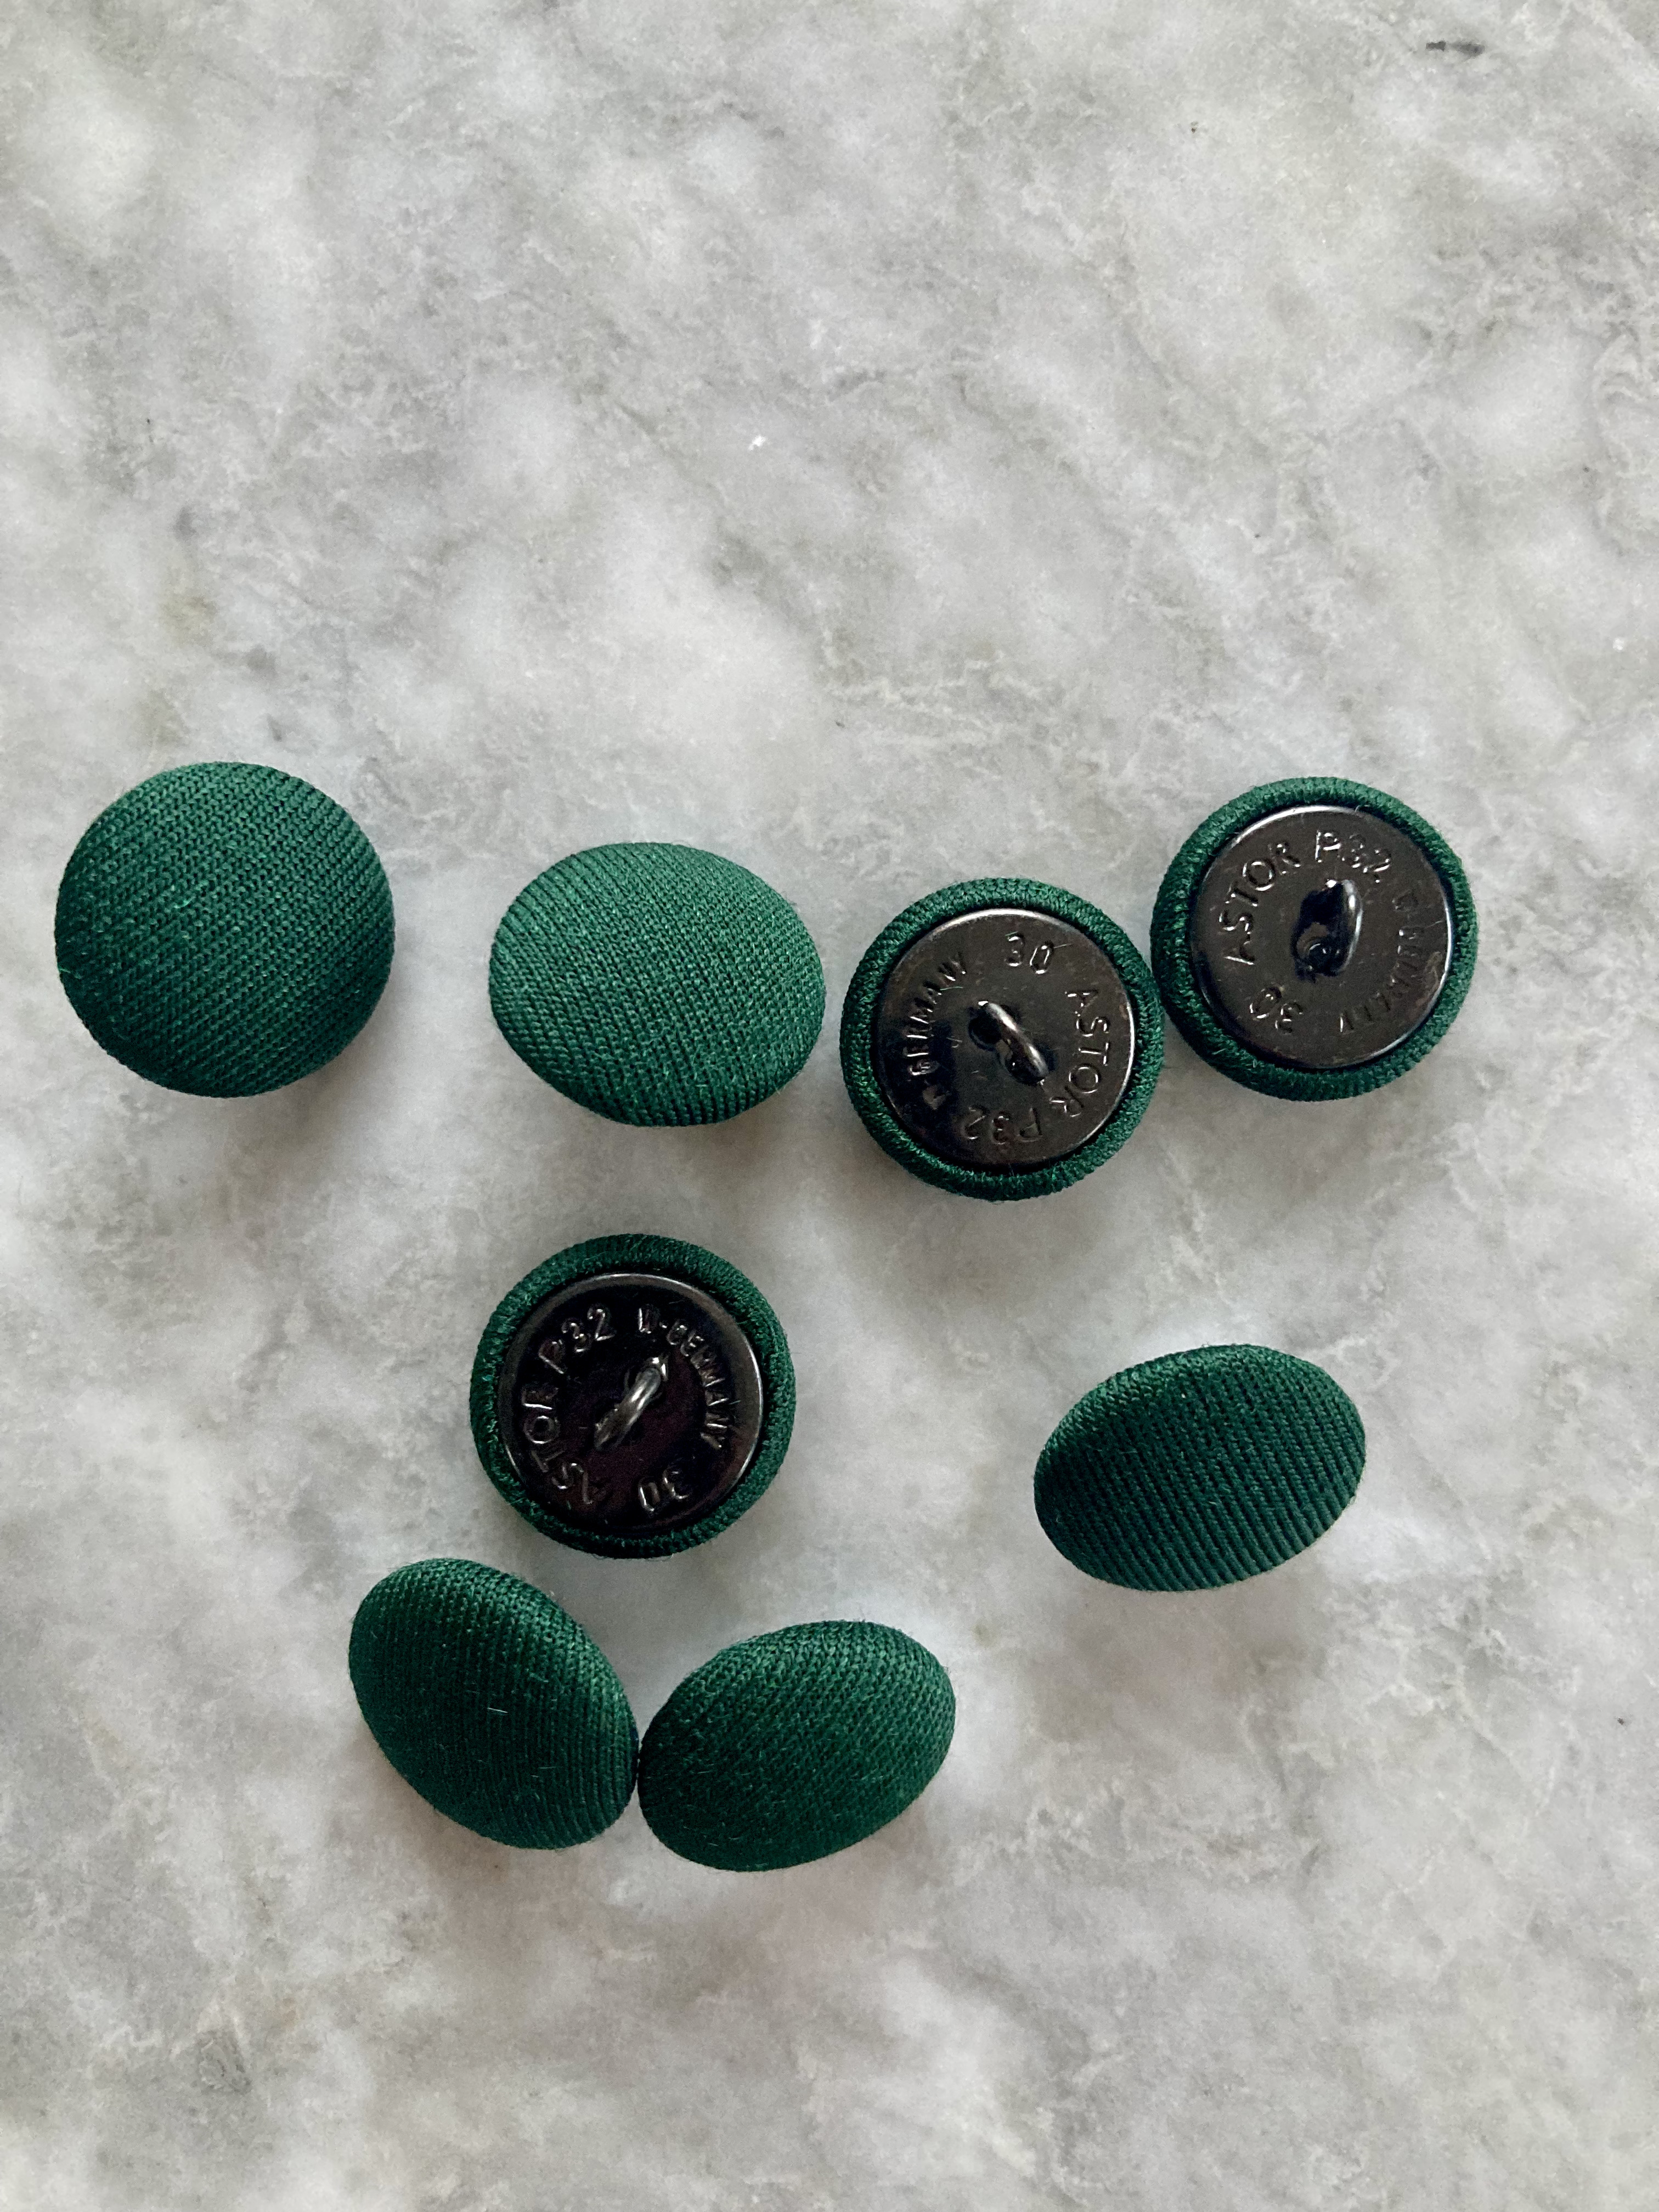
That left the buttons! Which were, strangely, the most difficult part. I wanted round, flat buttons with a back hook (not holes), as in the photo. So very 60s and in my opinion, they really make the outfit. But neither the colour of the wool (a deep, slightly blue pine green, none of the photos here really do it justice) nor the style of button seem to be in fashion. I looked at different stores, online button shops, vintage buttons on ebay… Nothing close. Luckily, my local wool/sewing shop can cover buttons with fabric if you have the right fabric. What do you know, this colour is not in fashion for fabric either! I finally found some gorgeous green stretch velvet and used the wrong side (not the velvet side) for the fabric buttons. Perfect.
In fact, everything about this project was perfect. The fit is perfect and the waist shaping worked perfectly. The sleeves blocked out to exactly long-sleeve length. The wool is wonderful, the colour is wonderful, and the finished blouse looks exactly like the photo except for the colour choice. I even managed to twist my back into almost as hard an S-curve as the model in the photo… (Rotating the finished photo helped too.)
This month‘s project was another modern adaptation of a 1960s homeware object. In this case, the original design was for a knitted „comfortable cushion” in a use-up-your-scraps striped slip-stitch pattern. I had plenty of scraps to use up and a request to make a little wrist cushion for someone who works a lot on the computer and had been padding their wrists with a folded scarf. The yarns I used were some more of the lovely Slow Wool Lino from Lana Grossa with bits of leftover sock wool for the contrast colours.
The original cushion measures 15×12 inches using a cast-on of 83 stitches of DK wool. I wanted a 14×4 inch cushion in fingering weight and calculated that out at 79 stitches in width. The stripes are made in slip 1, knit 3 pattern in alternating colours.
Everything worked out out fine on the first cushion piece. The width was perfect and three rows of stripes with 6 plain rows at beginning and end were a good height. The pattern was so very, very 1960s! Especially in the brown and brown and grayish brown and blue colour scheme (by request from the intended recipient.)
It was, in fact, a bit too authentically 1960s for the recipient, who requested a different pattern to use on the other side of the cushion. How about Space Invaders monsters? (i.e. hipster 80s retro instead of grandpa‘s 60s retro.) Space Invaders it was! I adjusted the number of blank rows on the Space Invaders piece, since the slip-stitch pattern pulls the knitting together even more than stranded work.
Then I made two more smaller squares in the same design, to make a pad for when the recipient might want to hold their wrists farther apart. All of the pieces curl a lot, as you would expect from stranded and/or slip-stitch patterns worked flat, but when I uncurled them, they seemed to be just the right size.
I wash-blocked the pieces, which flattened out both patterns admirably, and realised that I had made the Space Invaders piece too narrow. Not wanting to knit it again, I made two little strips to sew onto the sides — not elegant, but it fit.
I sewed up three sides and tacked 2 layers of quilt wadding to each of the insides, then turned around and sewed up the fourth side.
It’s… OK, I guess? The slip-stitch side definitely looks like a brown-on-brown 1960s home-made pillow, so you could call it authentic. But it’s not really one of my more interesting or beautiful projects. It should be useful, at least.
Since there wasn’t anything I really wanted to make from the August 1965 issue, this month’s project is taking us back to 1946. It’s technically not a Stitchcraft pattern (though Stitchcraft magazine was around then), but it is a pattern from Stitchcraft‘s patron wool company, Patons, so close enough for this blog, and conveniently fit into a lace-themed KAL on the All Things Vintage Ravelry forum. The pattern is for a short-sleeved jumper and I’m working to make it into a twin set.
I bought the pattern from the wonderful BlackwaterVintageNtz shop on Etsy and the wool (Yundi & Grete Felice Fingering Puro) from last year’s wool festival in Sulingen (Germany). The wool is a mix of 75% merino and 25% silk, which gives it a lovely softness and shine. I bought 500 grams of green and 200 grams of pink with no set plans for what to do with it, and as often happens, it lay around for a while before it found the right project.
The pattern is from 1946 and, as with many patterns from that decade, information about sizing, ease, tension etc. are minimal. It’s written in one size, for 32 inch bust, with (calculating from the tension given in the pattern) 2 inches of positive ease in the bust — odd for a 1940s pattern, actually, which usually have a quite a bit of negative ease, as do lace patterns, since they stretch so easily. The vintage knitting expert and owner of the BlackwaterVintageNtz Etsy shop Gunwaru on Ravelry had conveniently knitted the jumper herself and wrote in the notes that — made to gauge as specified — her version easily fit a 38 inch-bust dress form. I wasn’t sure if my wool would stretch as much and wanted to reproduce the easy looseness of the pattern photo, so I made a swatch on 3.5 mm needles (pattern calls for 3.75) and added one pattern repeat to each of back and front. This should have given me a 37 inch finished bust, which is a bit of negative ease, but shouldn’t look too tight. I made it one pattern repeat longer as well, as I do for all pre-1960s patterns (I am taller than an “average”-sized woman of the 1940s or 50s and long-waisted).
Well, that all goes to show that swatching and calculating work most of the time. Though my lace swatch hardly stretched in blocking, the finished jumper was generous after knitting and then blocked huge — I could have just made the normal size. Or even smaller! My swatch had no relation to the knitting on the finished garment. Even the sleeves, which were fine before blocking, stretched in both length and width. I had made them shorter since I don’t like just-above-elbow length… if I had made them according to pattern, they would have practically been long.
I couldn’t block it down small enough and in the end, I put it in the dryer to shrink (delicate cycle and not hot, I am not a complete monster.) Strangely, it worked and didn’t ruin the fabric! It is now a reasonable size and fits me. I don’t recommend drying non-superwash merino and silk in a clothes dryer as it is generally really risky (don’t try this at home! I am not responsible for damages!), but in this case, it worked. The yarn did lose a little bit of its sheen and silkiness, but I am willing to sacrifice that if I can get a wearable garment.
As always, we had fun re-creating the pattern photos.
On to the cardigan. There is no pattern for it, so I adapted ideas from the jumper. Sizing was a dilemma, since the jumper was so huge before the dryer manoeuvre, but of course you can’t make the cardigan smaller than the jumper. I decided to make it exactly the same size (plus front bands) and hoped for the best. As for the colour scheme, I wasn’t sure if I would have enough pink yarn left to make both sleeves and yoke, but also not sure if I would have enough green yarn to just make the whole thing in green. This led to a piecemeal approach, since (for example) it would look fine to have just the upper yoke in pink, but not one shoulder of one sleeve. I made at least the start of the front bands together with the fronts for this reason as well. I didn’t want to deal with too many increases in the lace pattern on the sleeves, so I made 4 pattern repeats on a base of stocking-stitch (similar to the way the increases and armhole decreases were made on the jumper.)
It went well in pieces, though I was nervous about the sizing and whether I would have to shrink the cardigan in the dryer as well, or if I could get it down to a size just slightly larger than the jumper. I made the back and fronts (with bands) and finished to the yoke where the colour change would come in the pattern, then finished one sleeve which was quite snug. I blocked the sleeve and it was a fine size after blocking, so made the other one to match.
Crossing fingers that it would all work out, I finished the front and back yokes in stocking-stitch in all green (leaving about 10-15 grams of green yarn over, so that was fine) and sewed it together. It was hard to tell whether it was a good size or not, since the lace pattern scrunches up a lot while knitting and I knew that blocking would stretch it out a lot. I didn’t want to complete the button bands on the scrunchy lace, so I blocked the almost-finished cardigan first.
Unfortunately, though the width was OK, and the sleeves were OK if a little narrow at the wrists, the length was unacceptably long. I had made it one pattern repeat longer than the jumper (ca. 3/4 inch) to allow for wearing it over the jumper. But whereas the finished jumper was about 20 inches long (i.e. a little short for me, but appropriate for 1940s style), the cardigan was now 25 inches. The yarn was that unpredictable.
What to do? It ballooned out terribly, of course. It also still didn’t have button bands. I had originally planned vertically-knit bands, started them along with the waist ribbing and left the band stitches on safety pins to continue knitting after the rest was finished. Now I changed tactics, cast off the truncated bands and folded them inward, and picked up stitches for horizontal bands. I calculated the number of stitches to pick up based on the length the cardigan should have been, with the idea that the bands would pull the length together and I could then re-block the cardigan and try to get it smaller.
That actually helped quite a lot — now it was a matter of the back part ballooning still, and of course nothing lying flat in the front. I probably picked up too few stitches along the back neck and upper part of the “V” neck. But I tried blocking it again… Still too long, and not behaving. Well, a short run in the dryer worked for the jumper and didn’t hurt it, right?
Alas, a short run in the dryer (here too, gentle cycle, cool air) was not a good idea this time. After only 10-15 minutes, the cardigan had shrunk massively and already begun to felt. I tried to save it by re-wetting and wearing (while wet, ugh), then pinning it out flat. That got it to a barely acceptable length, but the damage had been done. The sleeves were too tight and too narrow and the fabric had lost its beauty and “bounce”.
I finished it up with buttons and tried to make the best of it, but it’s not good. The cardigan is actually smaller than the jumper and doesn’t stretch any more. The shoulders and upper sleeves are particularly problematic where the jumper fabric bunches up under the cardigan and brings the shoulders out of line. Combined with the puffy 1940s sleeve tops and the too-short sleeves, it makes me look hugely bulky in the upper body. I feel like a gorilla wearing it.
I’m very sad and disappointed, in myself of course for risking the dryer a second time which was obviously a bad decision, but also with this yarn, which I so loved in the skein, but which turned out to be impossible to work with. Swatches, a jumper and a cardigan all knitted from the same pattern on the same needles turned out so wildly different both from each other and before and after blocking. How is anyone supposed to make a wearable garment without being able to calculate how big the finished fabric will be?
Not sure what to do with the cardigan. Maybe I will give it to someone smaller than me who is less picky about fabric perfection. I’ll keep the jumper, of course.
That’s all for this project… May it be a lesson to me!
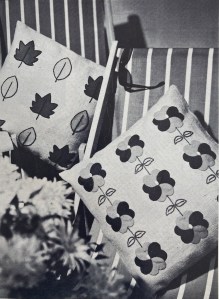
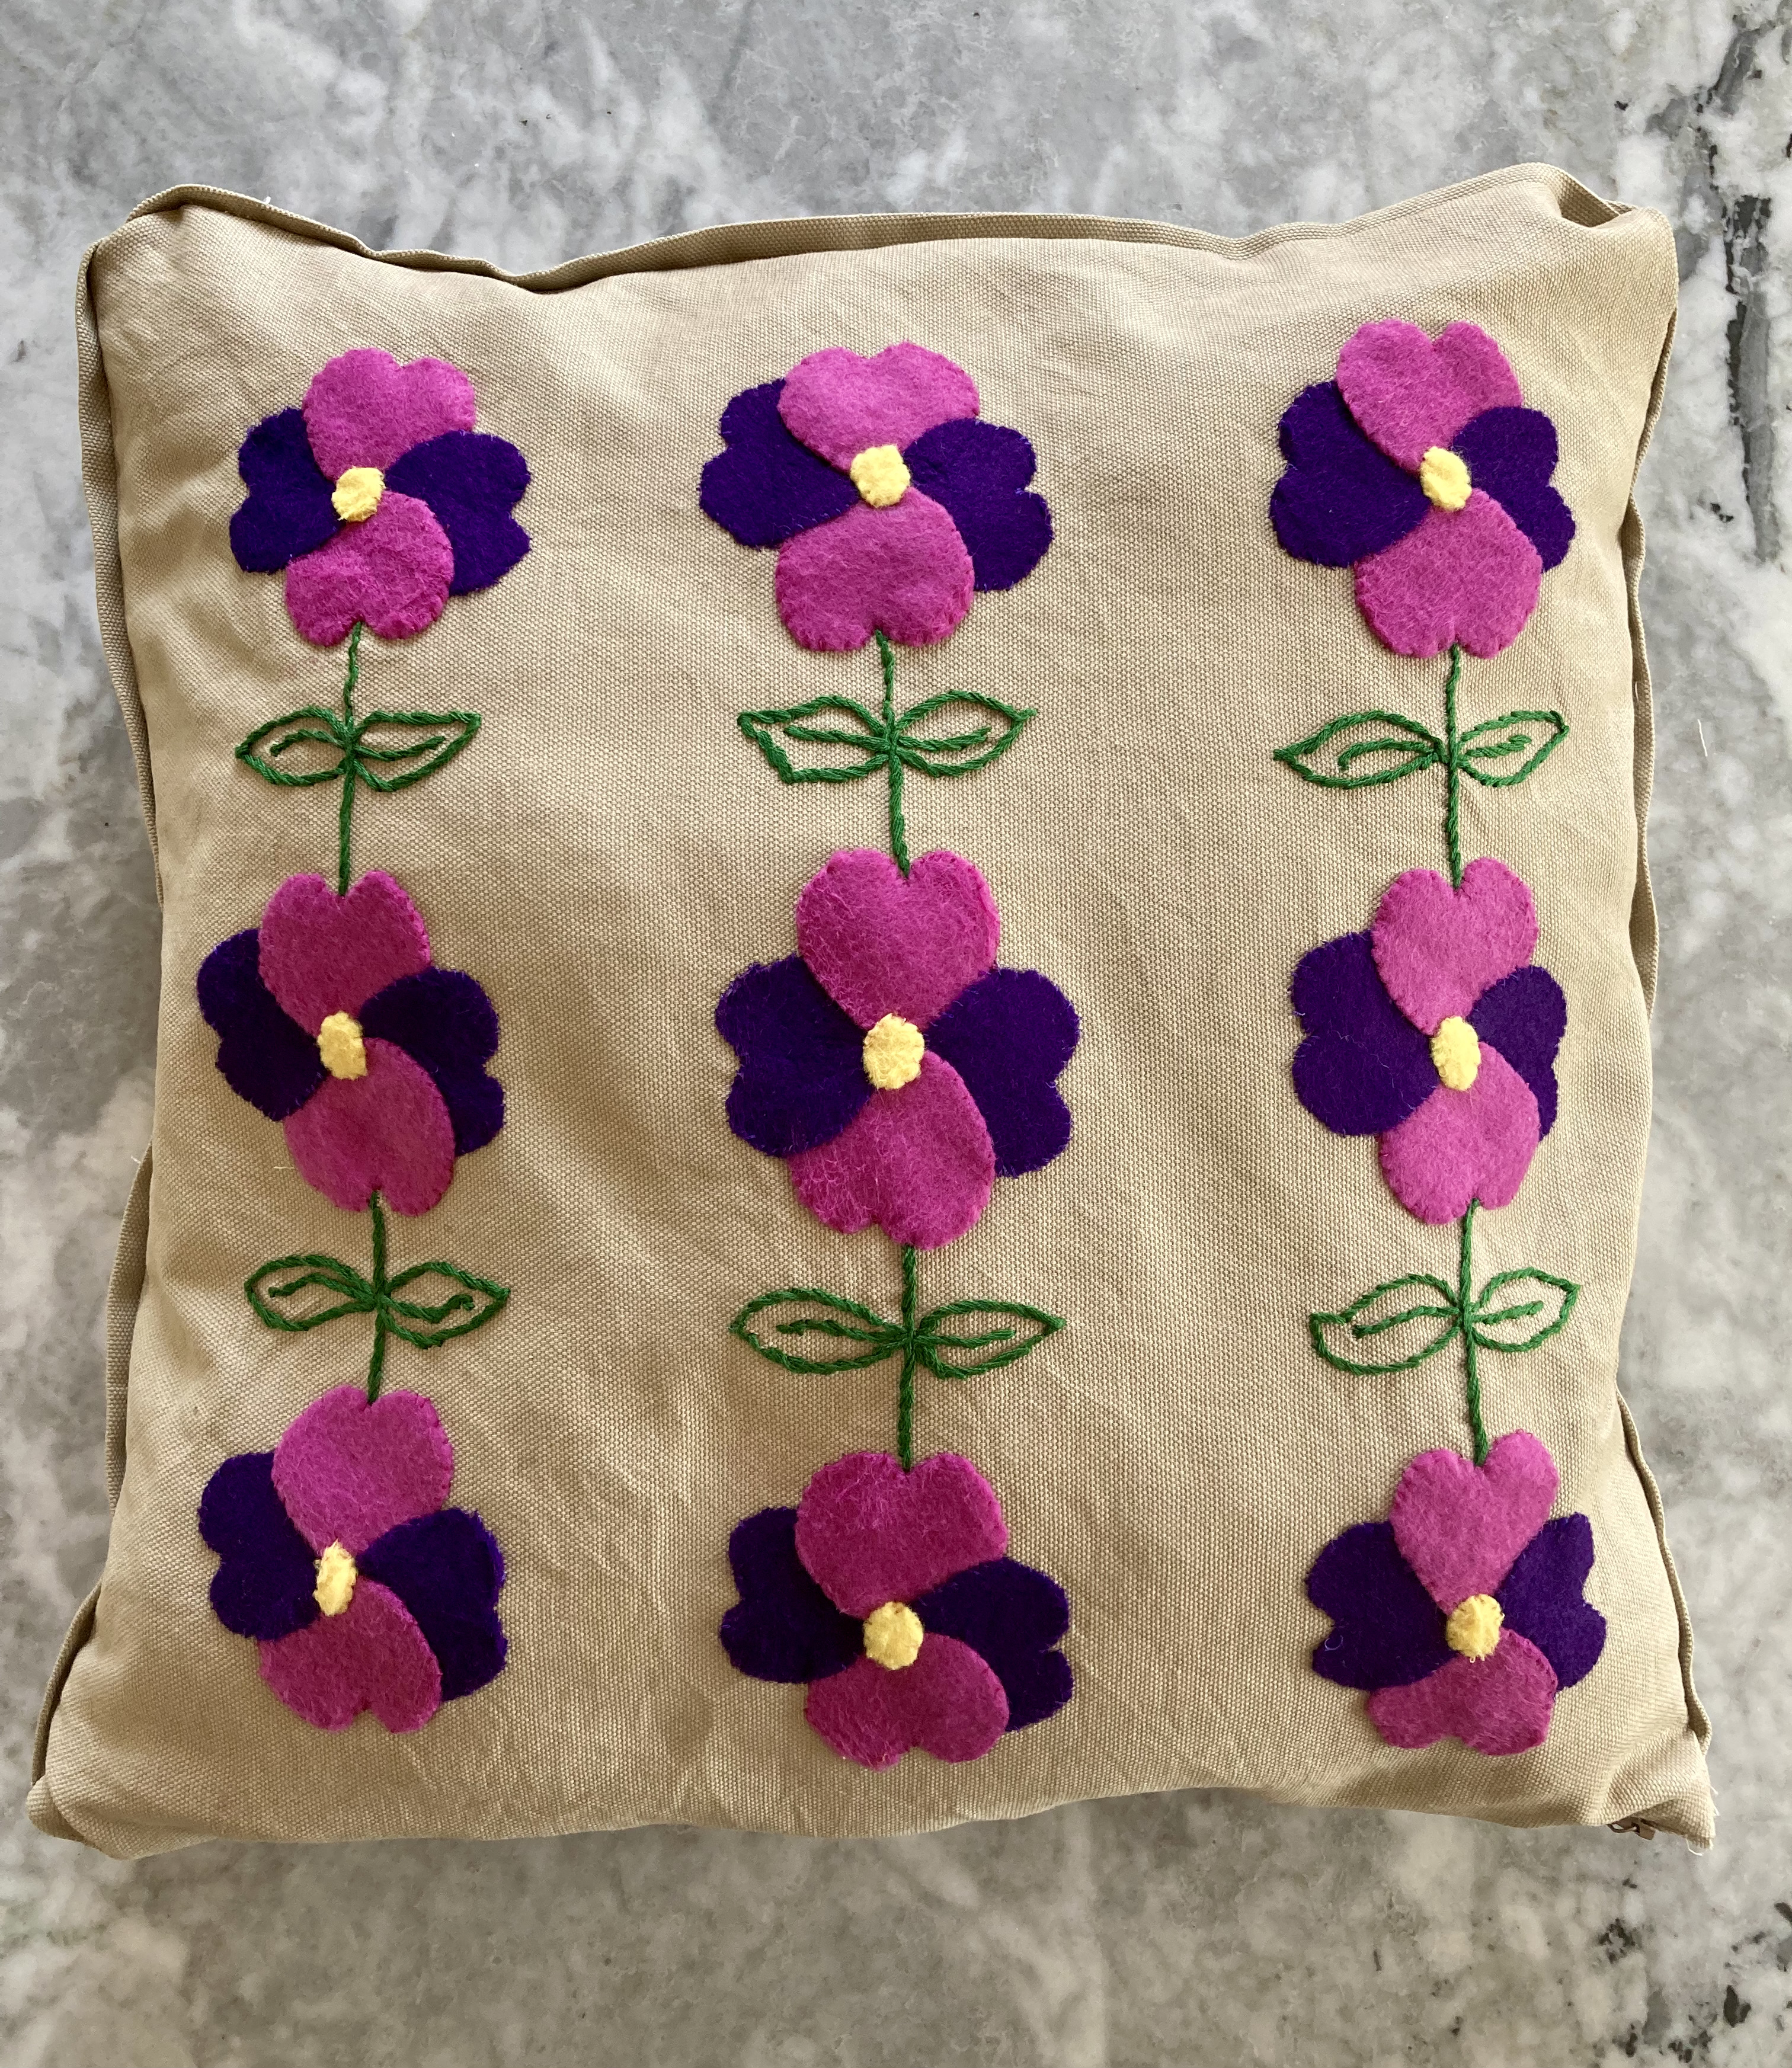
This month’s project was an appliquéd and embroidered cushion. Or, as the description in the magazine put it:
Attractive appliqué cushions in hardwearing hessian add a gay touch for garden lounging — ideal for deckchair comfort or to use on the lawn. Children will love them too, and they are tough enough to stand up to the rough-and-tumble of garden play.
Two cushion designs are given, one with autumn leaves and one with pink and purple pansies. I chose the pansies, which were bright and fun and very 1960s. As luck would have it, I had exactly the right amount of pink and purple felt in stash, and almost enough green embroidery thread for the stems and leaves, so I didn’t have to buy many materials and could use the project to de-stash. I did have to buy the backing fabric, and decided on a tough decorating/upholstery cotton instead of real Hessian fabric (aka burlap, jute, gunny-sack), since I don’t think this cushion will be subjected to any “rough-and-tumble of garden play” on my friend’s balcony.
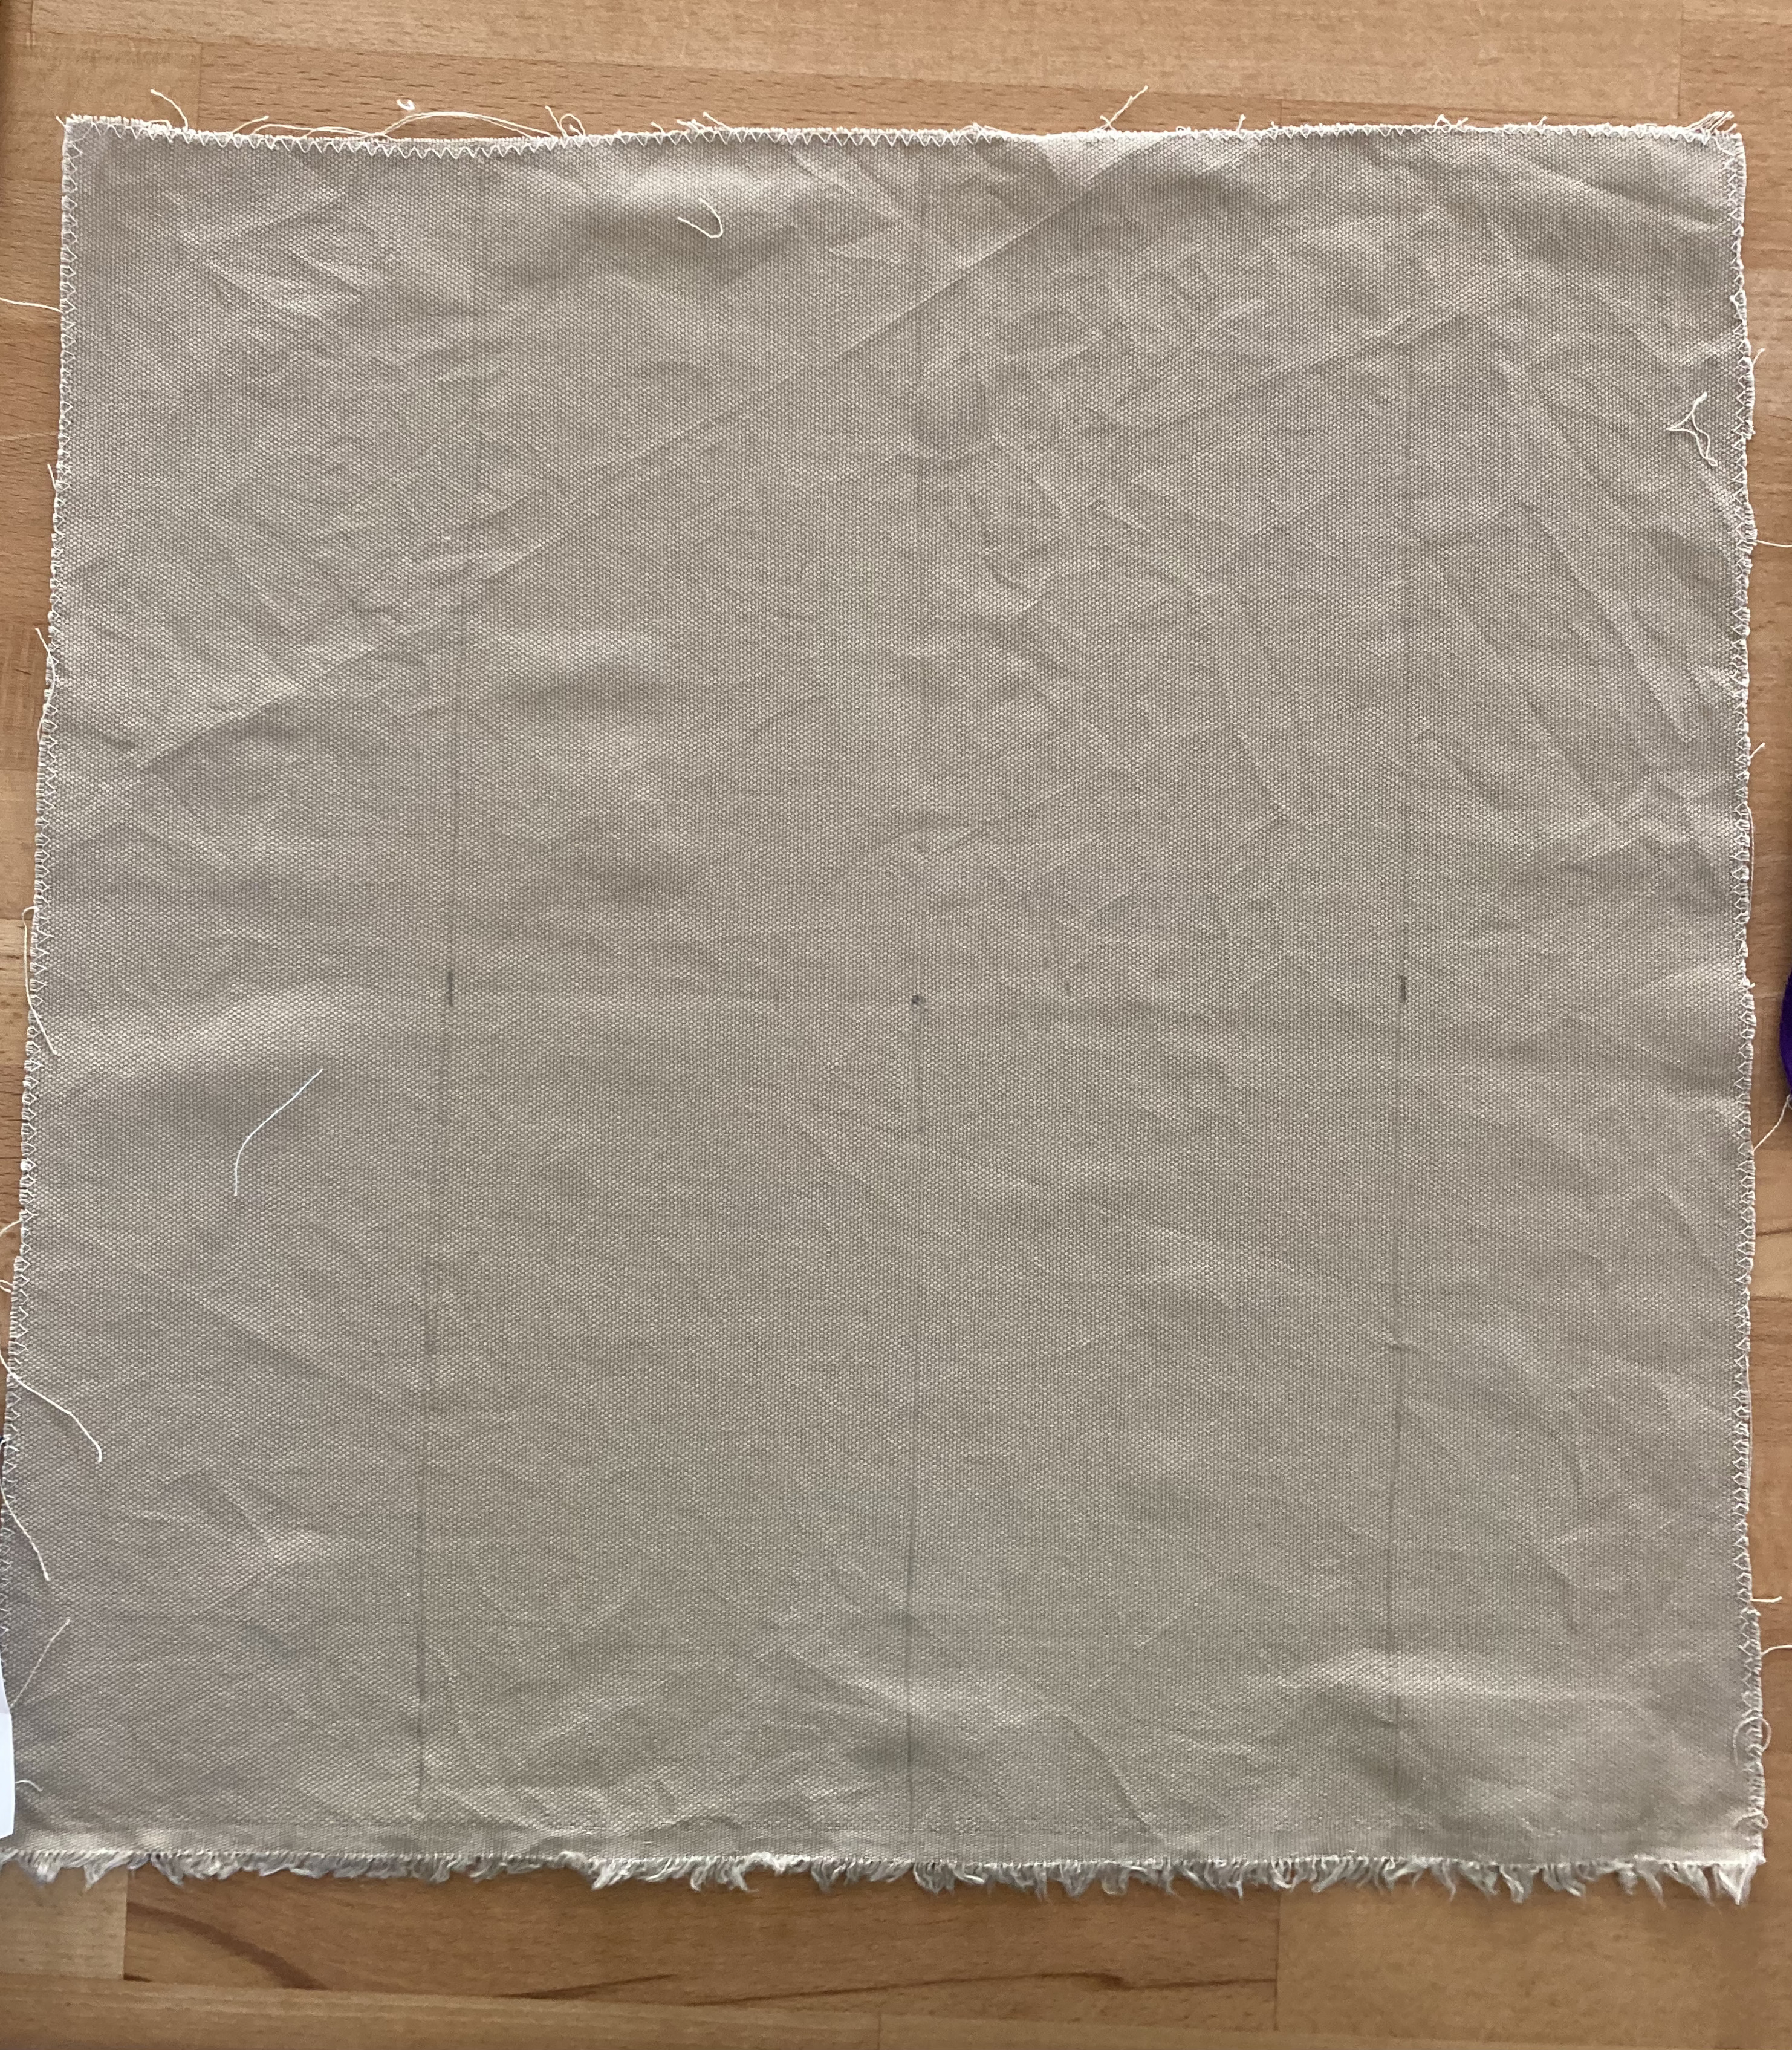
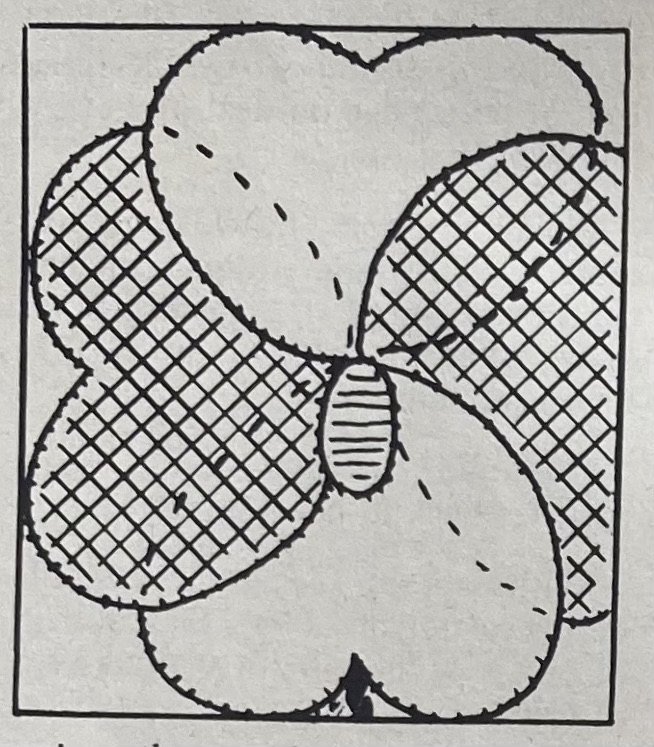
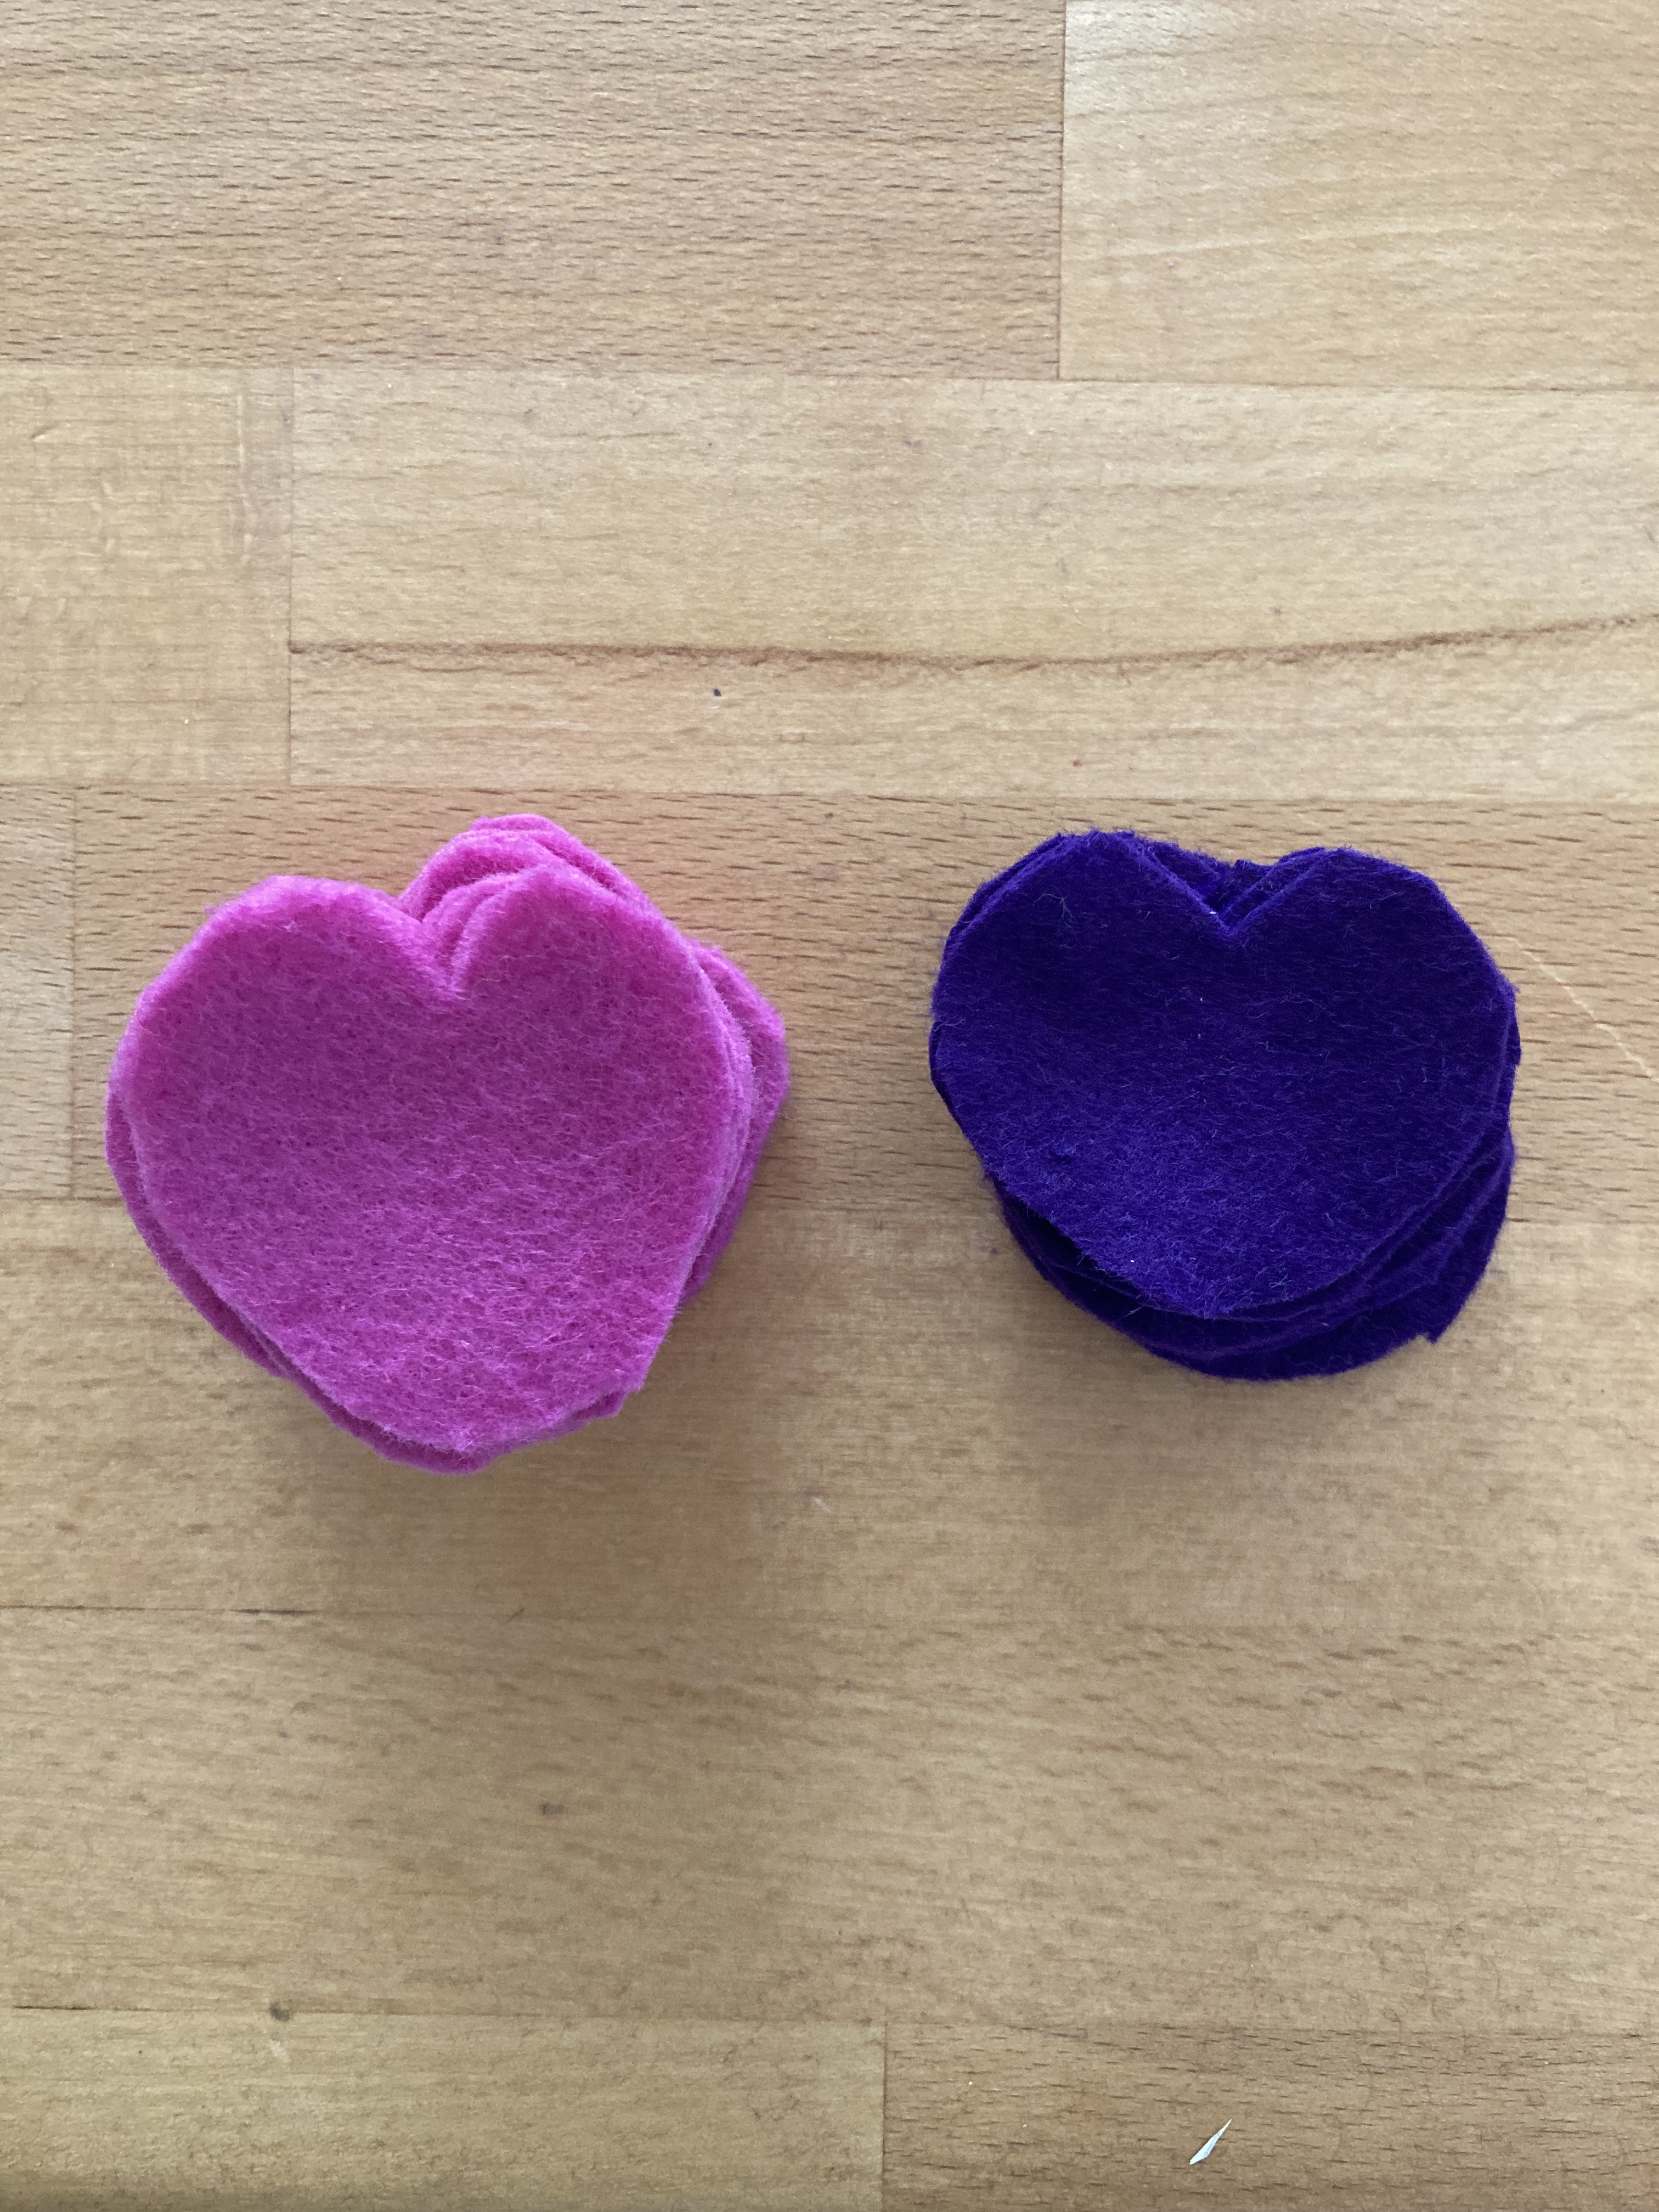
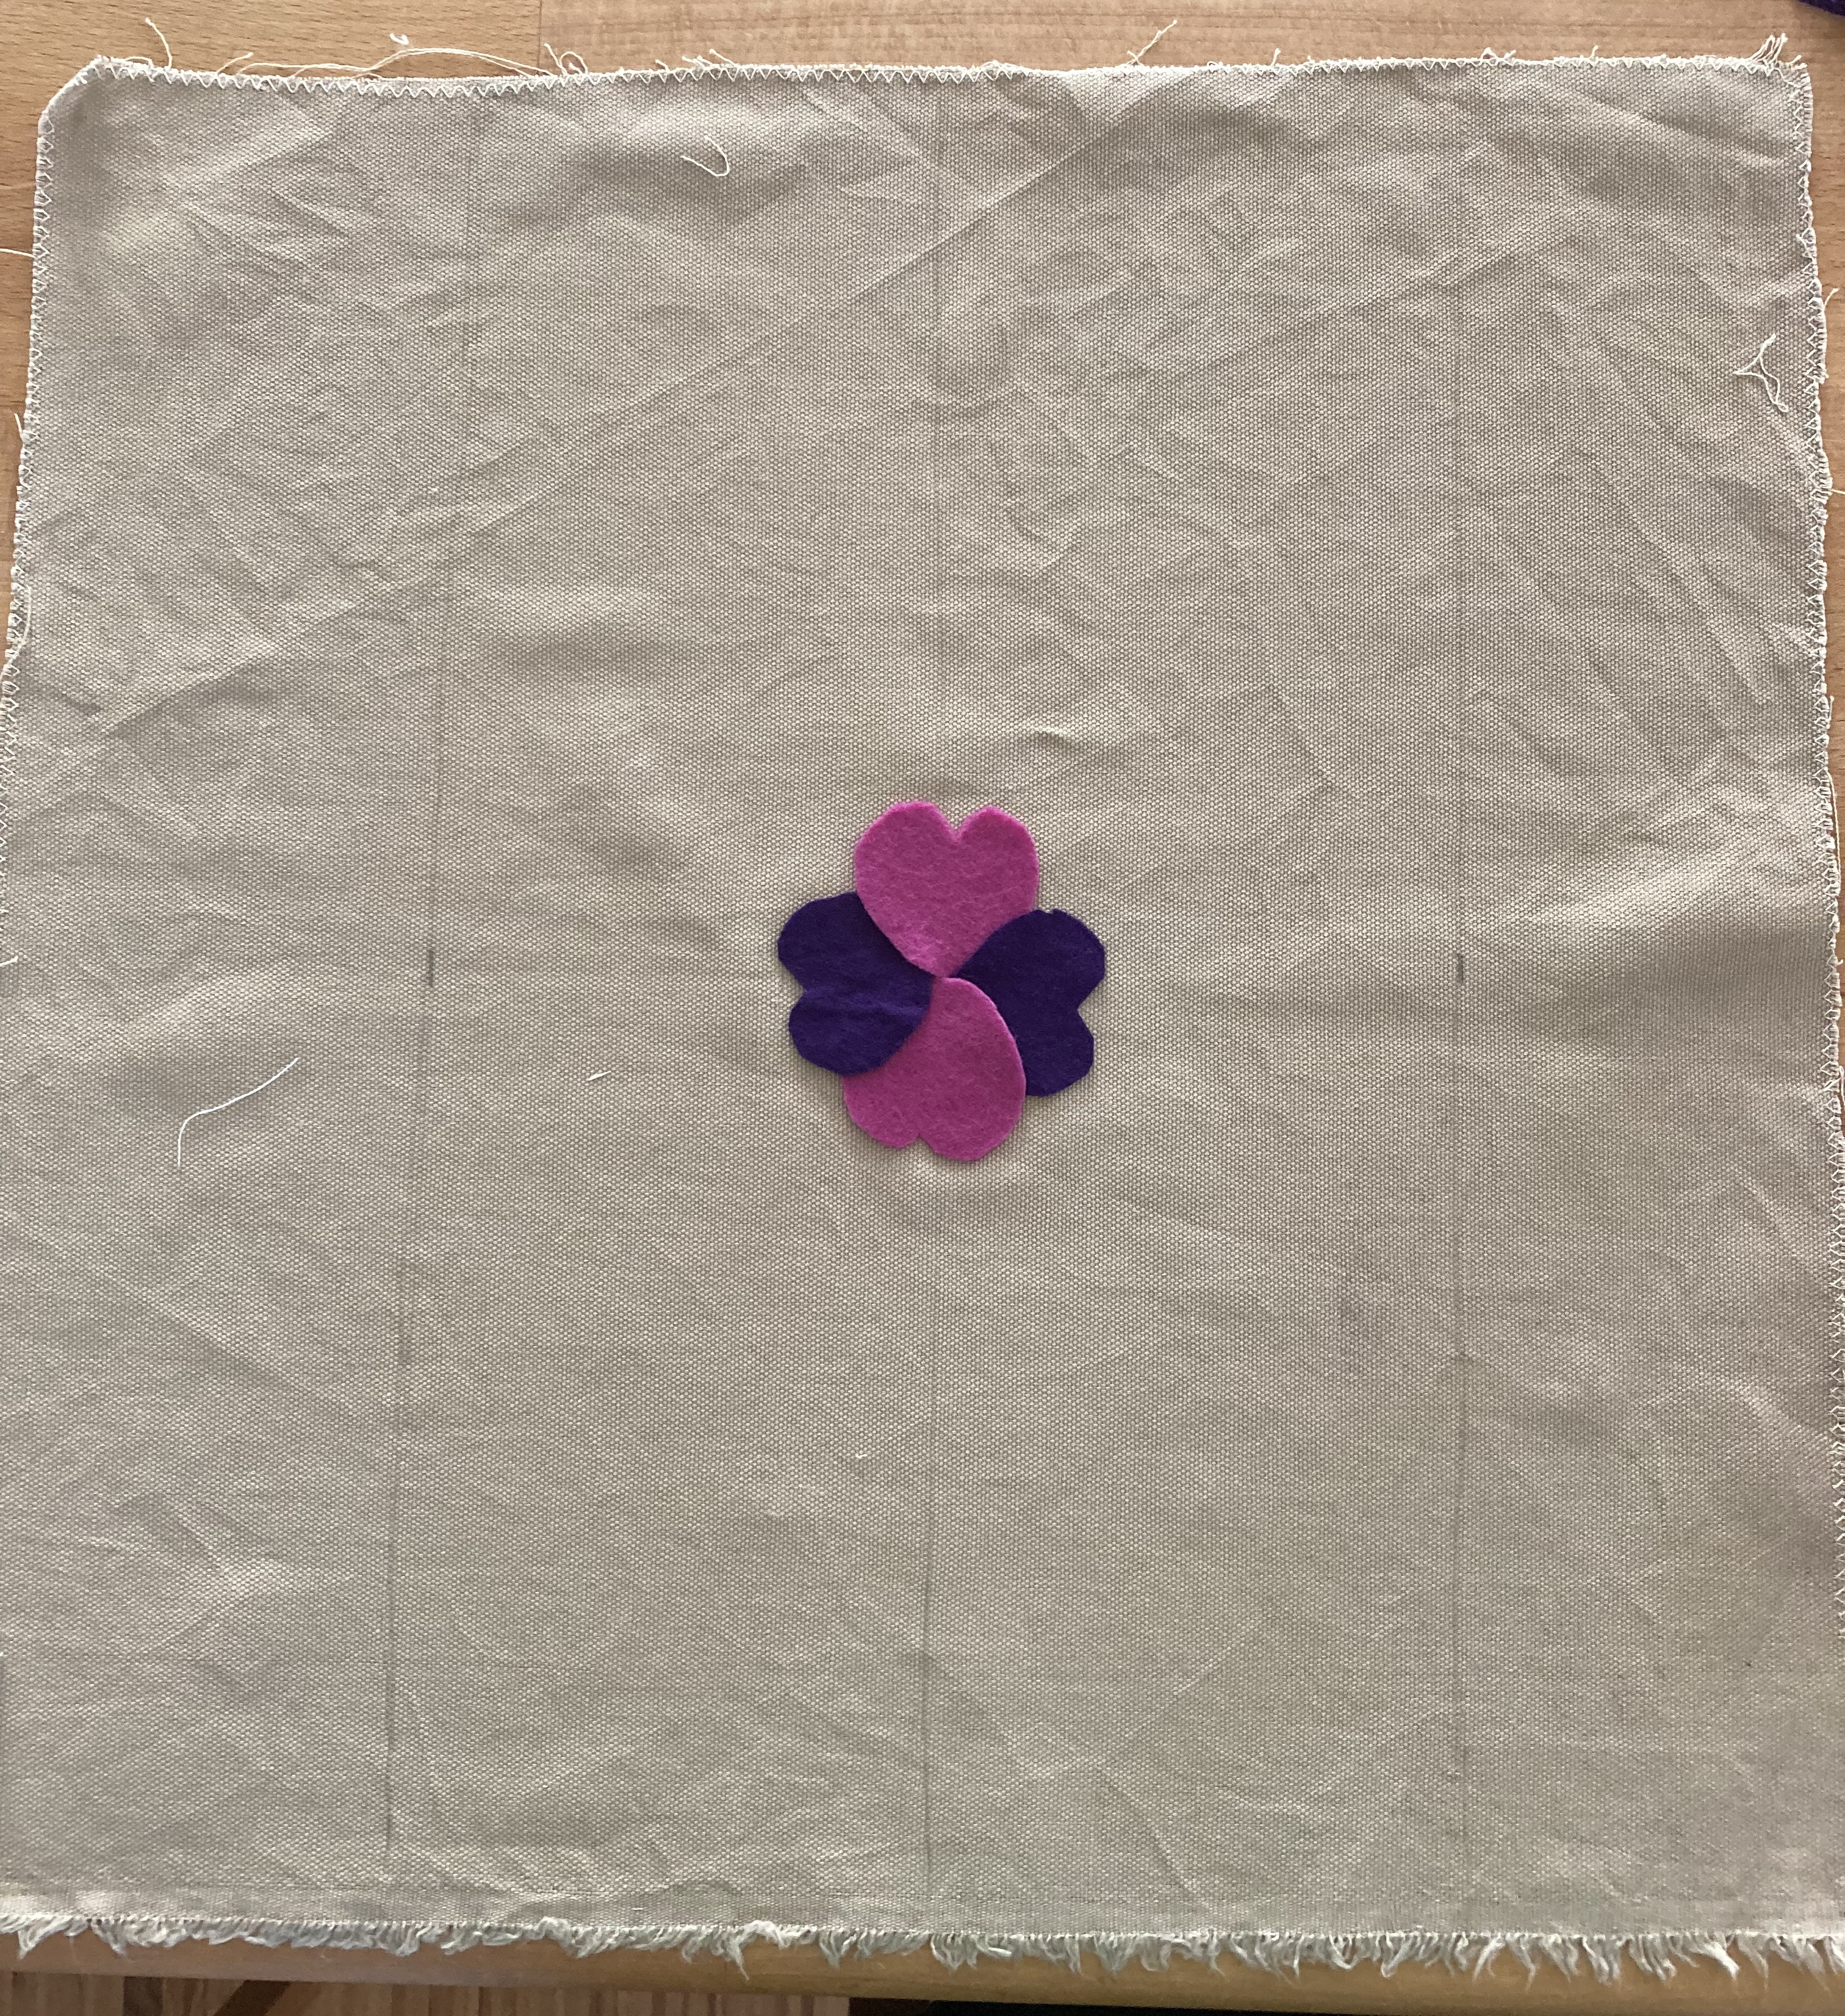
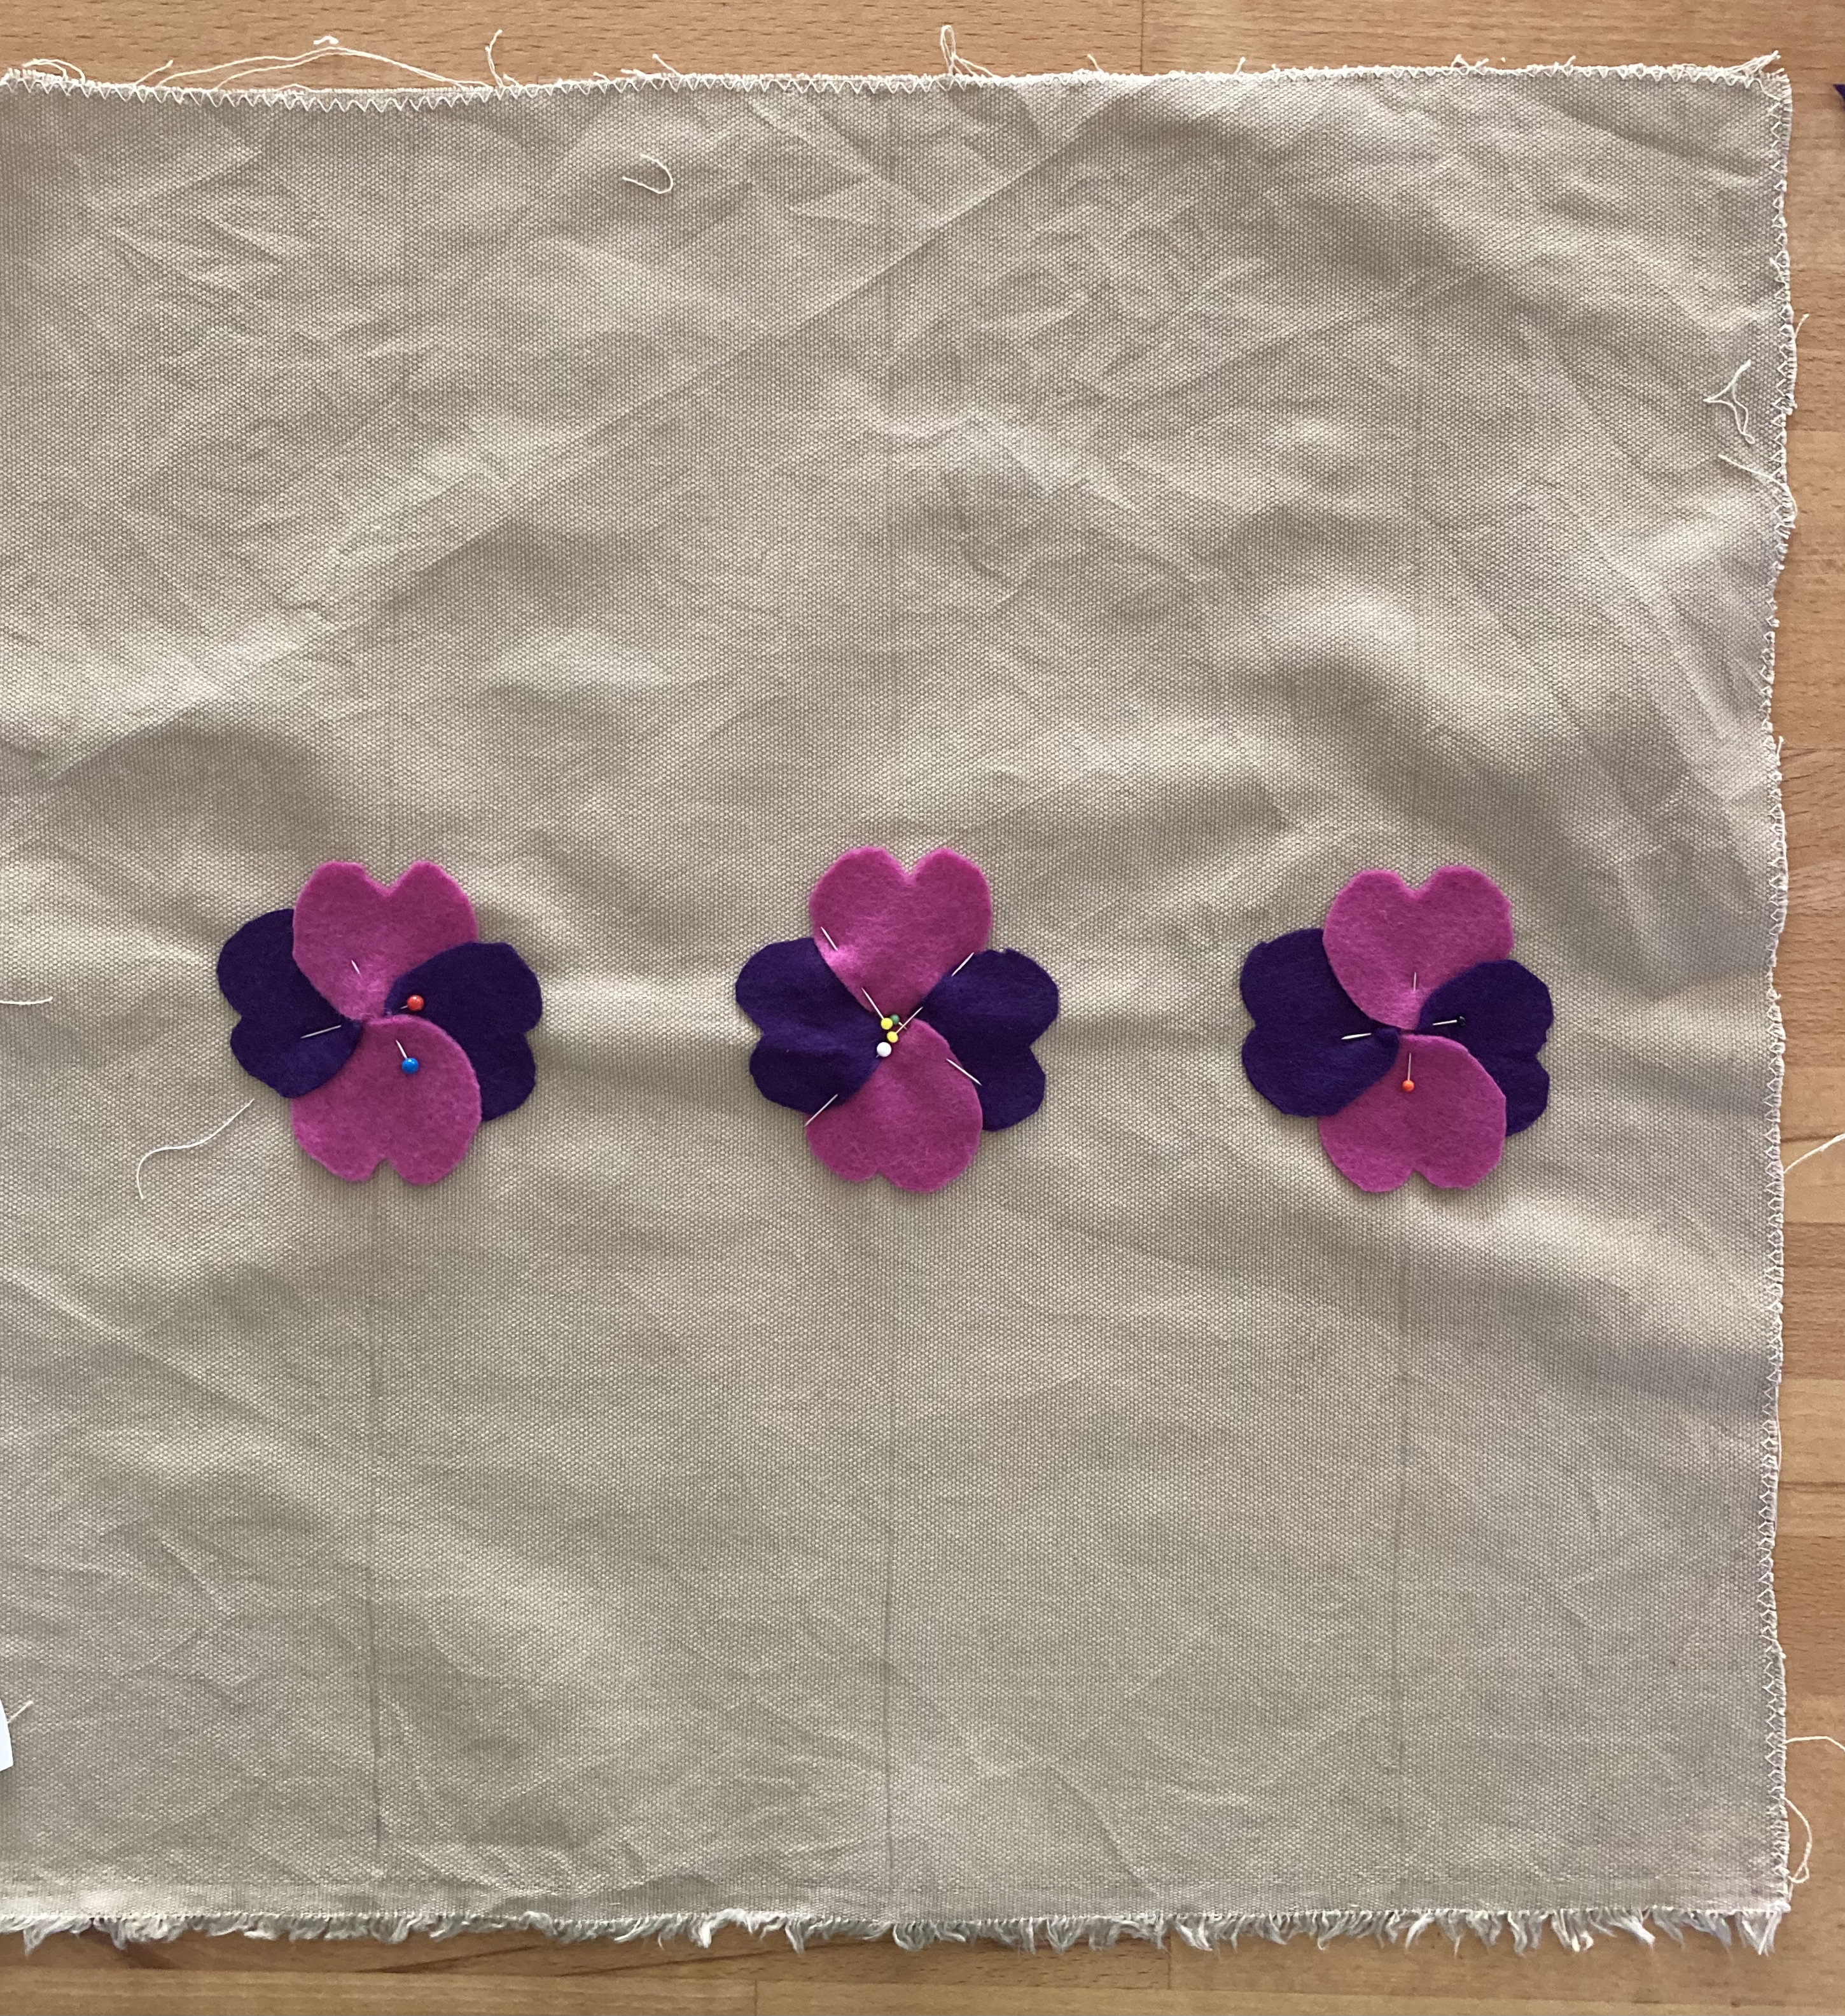
Since I didn’t have a transfer, I made a little paper pattern for the felt petals, estimating the size based on the amount of felt and the size of the background fabric. One modern “standard size” piece of decorating felt made exactly 18 petals and I think it came very close to whatever size the original transfer pattern was. I overlapped the leaves in a sort of pinwheel layer (following the helpful illustration), using a little bit of stick glue to help keep them in place, and then secured them with pins. For placement, I simply folded the background fabric in quarters and used the fold lines for the two middle axes, then measured evenly from there for the corner flowers.
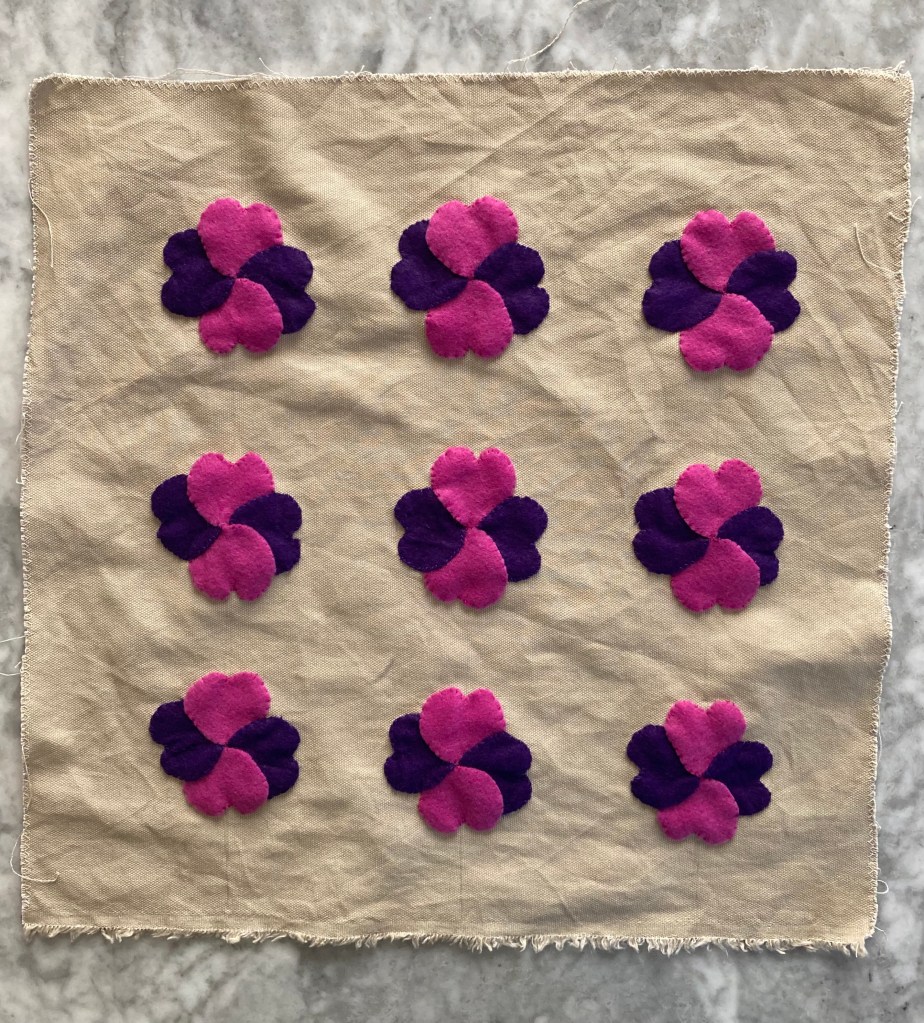
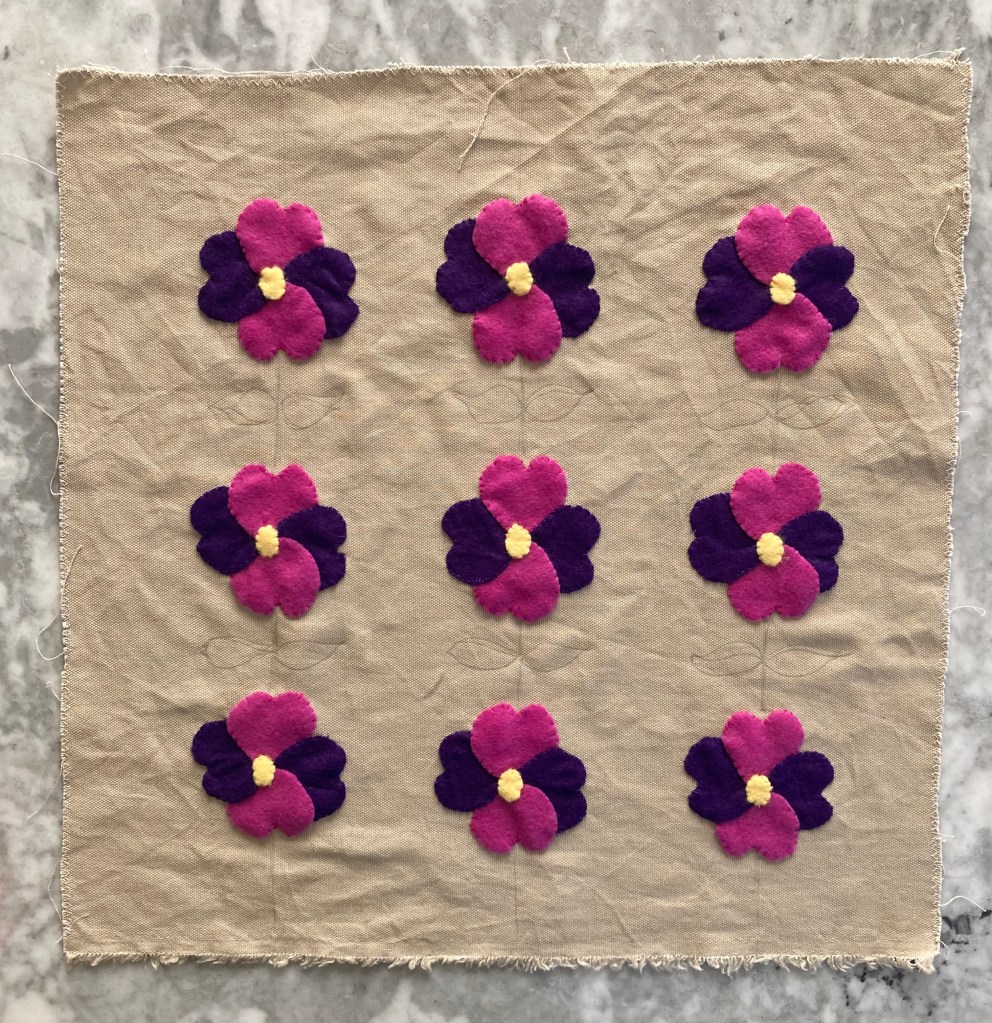
I sewed the flowers down with matching thread and added the yellow centres. The diagram shows them a bit above or below the actual centre of the petals, but I like symmetry, so I made the yellow pieces more round and put them right on the centre. (The layers of felt weren’t too heavy.)
All that was left to do after that was the leaf and stem embroidery, which was done in easy stem-stitch in green thread. The pattern didn’t say how many strands of thread to use, but seeing as it was a bold design, I used all six threads together and ran out of thread. (Up until this point, I had done all of the work in one day, but alas, I had to pause because it was Saturday late afternoon and the shops wouldn’t open again until Monday.)
Monday came, I bought more thread and finished the surface of the cushion. Sewing it up was easy enough. I had enough muslin in stash to make up one half of the inner cushion pad (pro tip: the inner cushion should always be a little bit larger than the outer cover, to prevent sagging) and enough of the beige cotton to make the other half. I did not, as suggested in the pattern, line the pad with plastic to make it waterproof “for use on the grass”. After making the pad, I had exactly enough beige fabric left to make strips for “piping”, so added that as well (not part of the original design). It was not “real” piping, which is made on a bias strip, and thus came out a bit uneven. Oh well. At least the zipper was no problem this time.
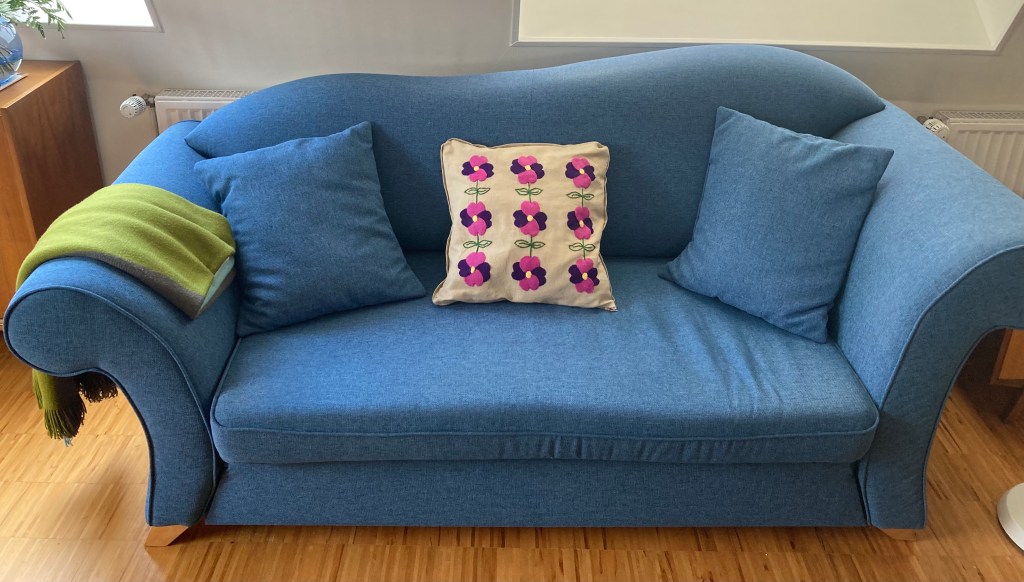
And that was that! I stuffed the inner cushion with fluff, sewed it up, zipped it into the cover and voilà. I have no garden, no balcony and too many cushions already, so this will be a gift for a friend.
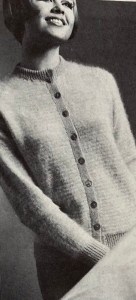
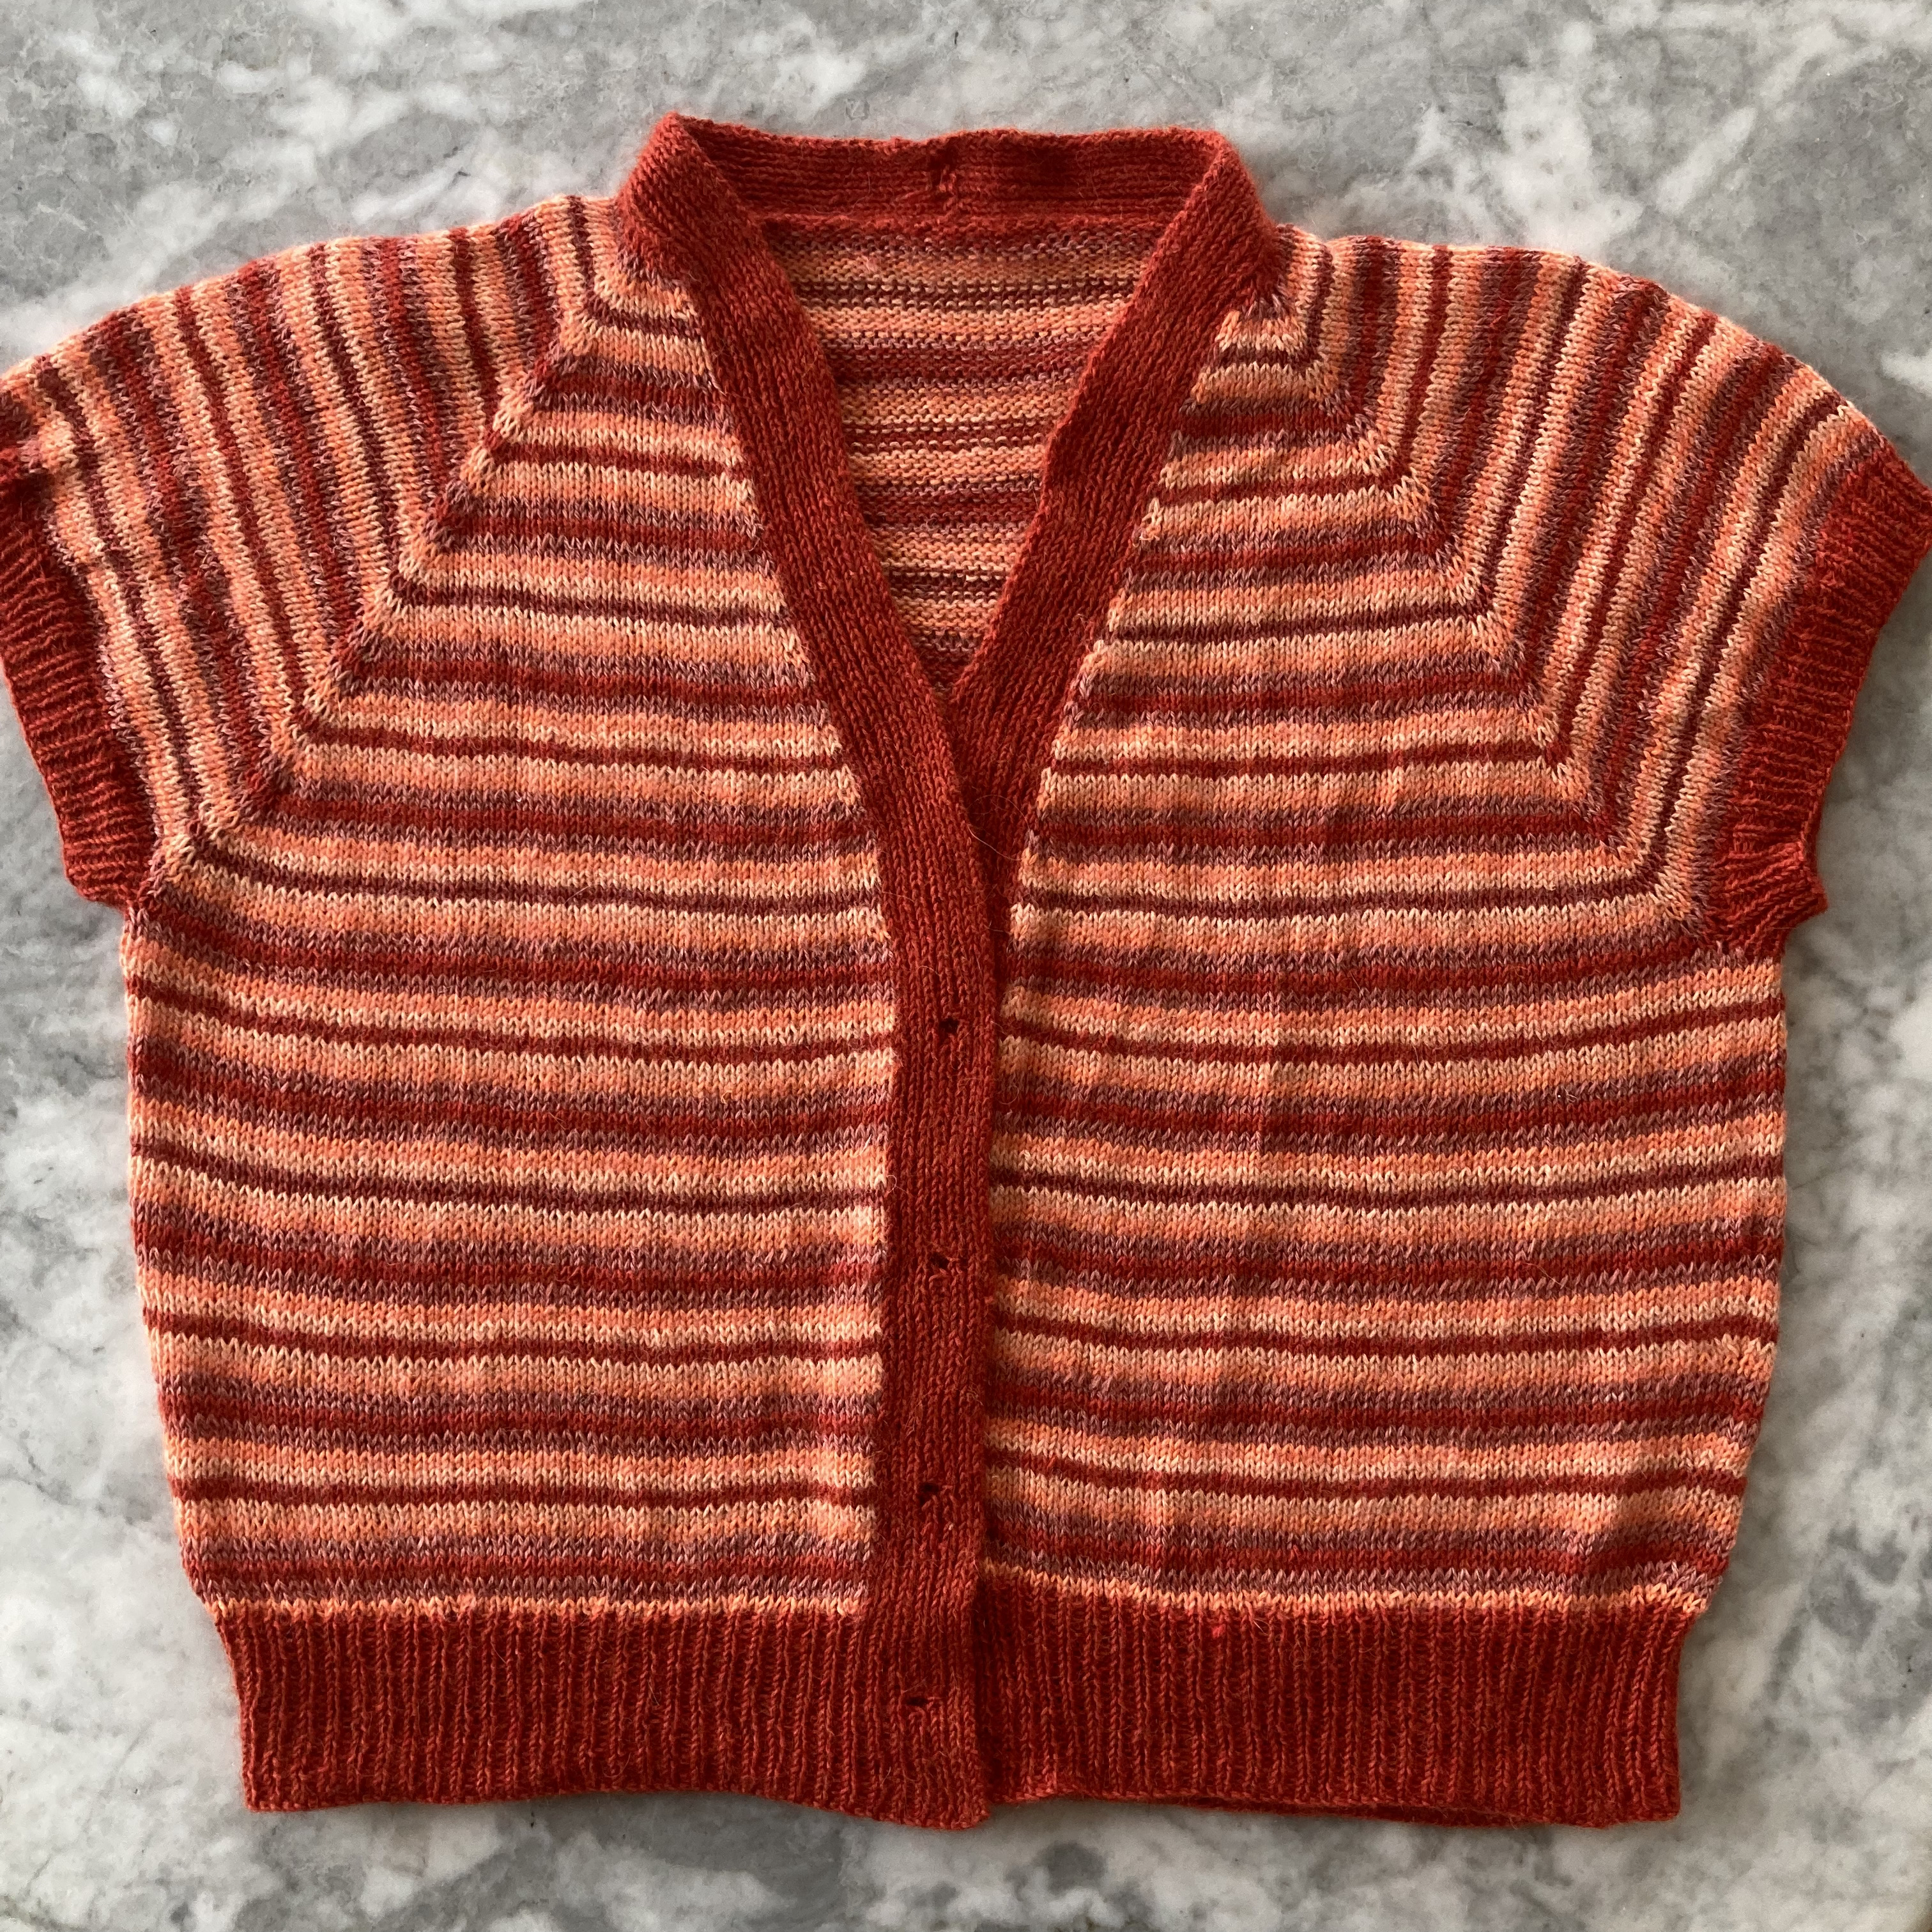
My project from Stitchcraft’s June 1965 issue was inspired by this design for a striped orange cardigan made with “Fuzzy-Wuzzy” (3-ply angora/wool blend) yarn.
I say “inspired by” because I saw the project as a way to use up the different shades of orange wool I used in my “Shaded Blouse” project from last month, as well as the leftover pink from my “Clarel” and even a little bit of leftover orange from this lovely 1961 sleeveless top I made a few years ago. I figured I could just make narrow stripes until the first colour ran out and then see how to best finish the cardigan.
In order to do that effectively, I changed the construction from the standard bottom-up-in-flat-pieces in the pattern to a V-neck made in one piece from the top down, vertical ribbing included. That meant starting with the ribbing for the back neck, then picking up stitches across the long edge and the two short edges to make the curve, then keeping the ribbing in the dark orange colour from then on, using the same needles and two balls of wool for the two sides. It was a little tricky at first, but it was worth it to not have to play “yarn chicken” with the amount of orange needed for the ribbing at the end.
The “Fuzzy-Wuzzy” wool in the pattern is 3-ply and supposed to be knitted at 8 stitches to the inch. My wools were modern fingering/4-ply and I got a nice, even 7 stitches to the inch on 3 mm needles, so I adjusted the stitch counts, increasing up to the smallest size instead of my normal second. I remembered that this wool tended to shrink in blocking, so I wasn’t worried when it seemed generously sized — but maybe I should have been! The cardigan turned out wider than it needed to be, and if I had been able to use less yarn, I could have made the cardigan longer.
I ran out of the light peach yarn first and hardly had any dark orange left at that point, so had to buy another ball of the dark orange to finish off the ribbing (so much for the idea of using up scraps…). I expected to not want to wear or keep the finished garment, since the “cropped and boxy” look is not a great one on me. (It is, however, currently in fashion, so I figured I could sell the cardigan.) Strangely, though, I love it! It looks playful and fun and does not me look nearly as squared-off-and-put-in-a-box as I thought it would. The wool-silk-linen blend yarns and cap sleeves make it a perfect-temperature top for slightly cooler summer days.
I still have a bit of most of the yarns left over. Hat? “Shaded” mitts? Little cowl or scarf? I don’t know. I’ll edit this post if I make something matching!
For this month’s project, I couldn’t decide whether to make the pretty 3-colour “Shaded Blouse” (knowing that I have plenty of knitted tops, and that I would have to buy yarn for it when I am trying hard to reduce my stash) or adapt the tablecloth/dressing-table set embroidery pattern for another vegetable bag (quick, easy, useful, environmentally friendly and reduces the stash of embroidery thread and yet-unembroidered bags). Spoiler: I made both, so the stash balance will remain even. The top will take a little while, so here’s the veggie bag in the meantime.
The pattern is a design of yellow primroses and purple violets, but not in the same “bouquet” — there’s an option for a tablecloth with the primrose sprays in the corners and the smaller, individual violets scattered across the middle surface, or a “cheval set” for your dressing table with one large mat (2 primrose sprays and 2 violets) and two small mats (one violet each.) I chose to just make the primrose spray.
The bag is one of several that I bought at an antique sale a few years ago for a euro each. They are literally old moneybags, formerly used to transport money to and from the German national bank (hence the “Deutsche Bundesbank” and date printed on it; this bag was apparently from January 1997.) After 2002, the German Bundesbank replaced the old bags with newer and better ones (better in the sense that they presumably fulfilled new security regulations for the Euro) and you can now buy the disused old bags at antique markets, via ebay, etc. How they got from the bank to there, I do not know, but would love to find out. (If you are an expert in the sale and trade of disused moneybags, please share your wisdom in the comments — I genuinely would like to know.)
Anyway, apart from the fascinating can of worms that is their origin story, the bags are the absolute best for buying vegetables at the grocery store, farmers’ market etc, being made of a very thick linen (?) fabric and just the right size for small amounts of things like mushrooms, green beans, shallots, etc. Because they are both tough and easily washable (of course I washed them thoroughly before starting to use them for food items — money is literally filthy) they are particularly good for sandy or earthy vegetables like the aforementioned mushrooms, new potatoes, or the kind of carrots that I like to eat, which are grown in peat and therefore quite “dirty” (but taste better than regular carrots).
The actual embroidery pattern was not difficult. Of course, I had no transfer, since I would have had to order it in the mail in 1965. But it was no problem to sketch out the flower spray from the photo. I used transfer paper to transfer the design onto the fabric. The ink was quite faint, so I went over it with a ball-point pen (washable), which worked well enough. There were instructions in the magazine and even a helpful close-up of the stitches, which were all extremely easy: satin stitch for the petals, blanket stitch for the leaf outlines and stem stitch for everything else. I ran out of light yellow after embroidering half of the flowers, and the new skein I bought was one colour-shade different. You can tell if you look closely, but I don’t think it’s a flaw — it gives the flowers a little more depth.
This is the third “Bundesbank” bag that I’ve embroidered, as well as another bag of regular cotton fabric. I used the other bags to buy stuff at the local organic supermarket last week and the cashier stopped in the middle of my checkout to say, “I’m sorry, I just need to take a second to admire this beautiful work.” That was sweet! If I ever get enough of these made, I’ll probably start selling them.
Hello, everyone! Just a little in-between post to let you know some news:
First of all, this blog now has its own domain name: http://www.thestitchcraftsixties.com. You can still access it under the old address (www.thestitchcraftsixties.wordpress.com), but the new name is quicker to type. : )
Also, I have finally finished this Little Girl’s Holiday Dress project from last year, and it was worth the wait! It came out beautifully and I’m very happy with it, so check out the link if you want to see how it turned out.
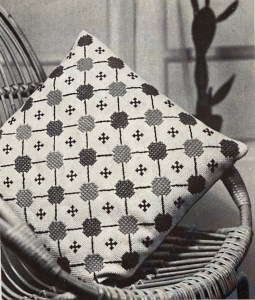
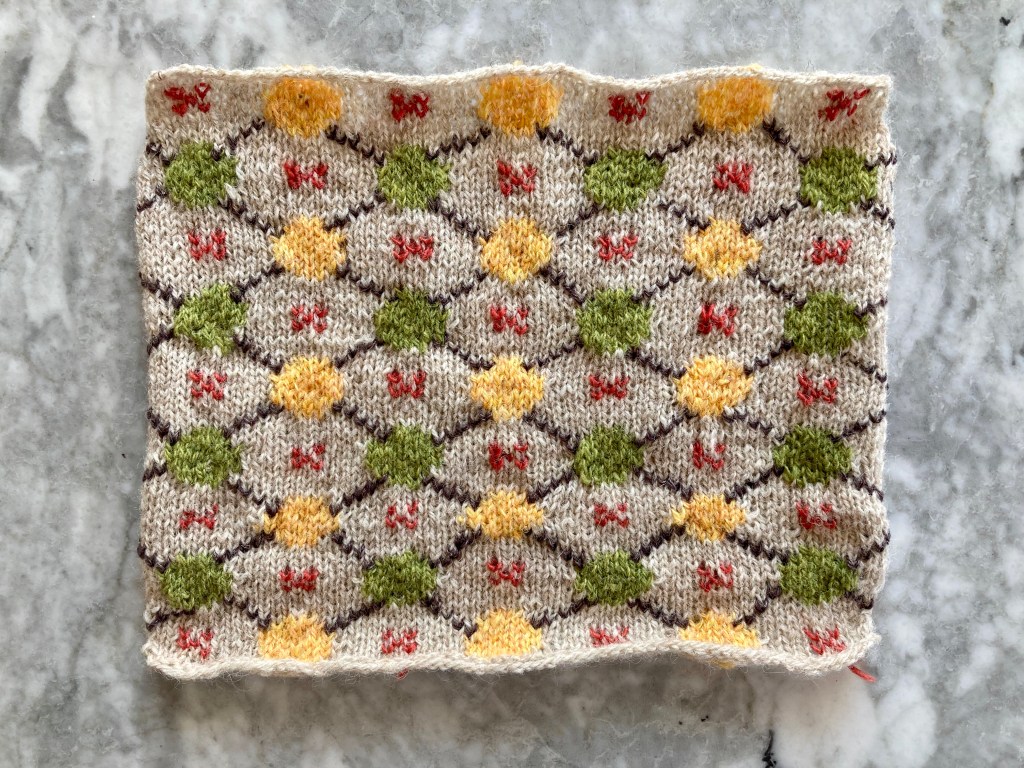
For this month’s project, I wanted to try something different and convert a cross-stitch pattern into knitting. The April 1965 issue of Stitchcraft had two designs for counted-stitch cushions embroidered with tapestry wool on coarse “Portree” cloth. Portree seems to be a grouped-thread fabric similar to Aida, but doesn’t seem to be manufactured under this name anymore. (If you know anything about it, please tell me!)
Anyway, I don’t like counted cross-stitch and I have enough cushions, but I was interested to see how one could convert the cross-stitch pattern into knitted form and what type of object or garment it would be suitable for. Theoretically, any counted-stitch chart can be used as a knitting chart. In practice, many cross-stitch patterns are not suitable for stranded or intarsia knitting due to the number of colours in a row or the placement of motifs. I thought this design would work as an intarsia design because the motifs are small and self-contained. The diagonal lines could be added in later either with embroidery on the finished knitting, or with duplicate stitch.
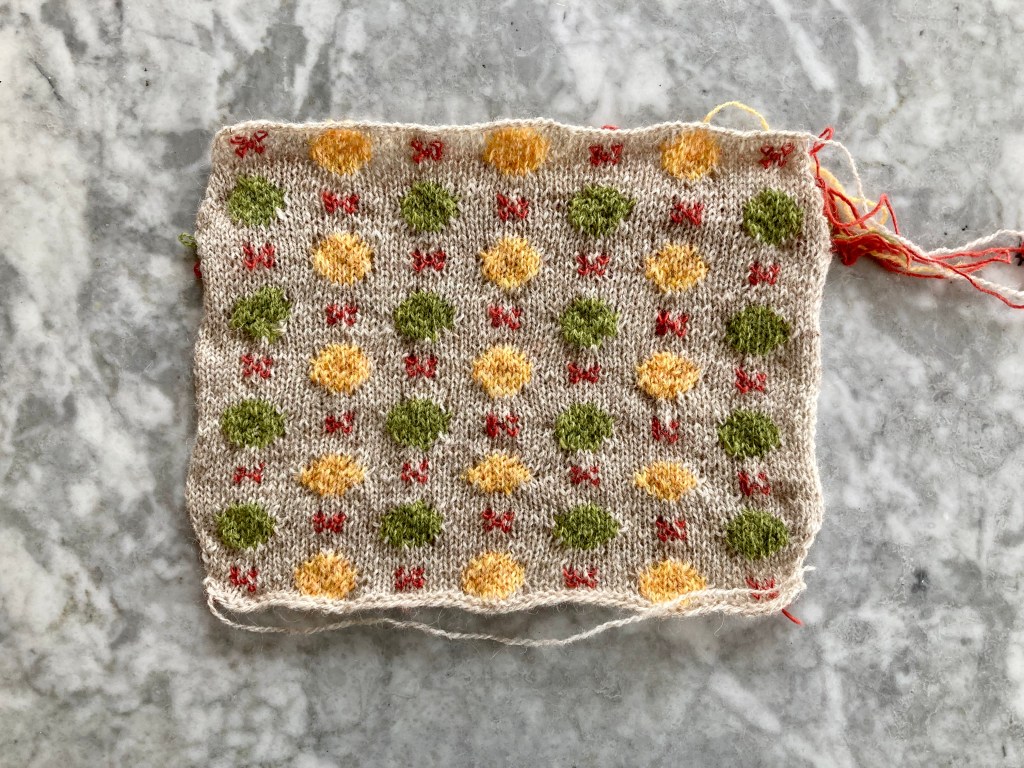
The original pattern uses Lime, Orange and Brown wools on natural colour cloth (how very 1960s.) I had lots of scraps of Shetland wool and used green (lime, I guess) and yellow (lemon?) for the spots on a slightly pink natural background. For the little motifs between the spots (brown in the original design), I chose some pink silk-wool blend of which I also had a small amount left over. The spots are 3, 5, 7, 7, 7, 5, 3 stitches wide and I stranded the wool on the seven-stitch rows and twisted the background and spot colours together at the changes on the edges of the spots. I made a modified square with slightly rounded edges, thinking if I didn’t know what to do with it, I could always mount it in a circular embroidery hoop-frame and hang it on the wall. Nine rows of spots made a piece about 10 inches wide and 9 inches long. Here it is after blocking, but before adding the duplicate stitch lines:
So far, so good. Of course, there were a million ends to weave in.
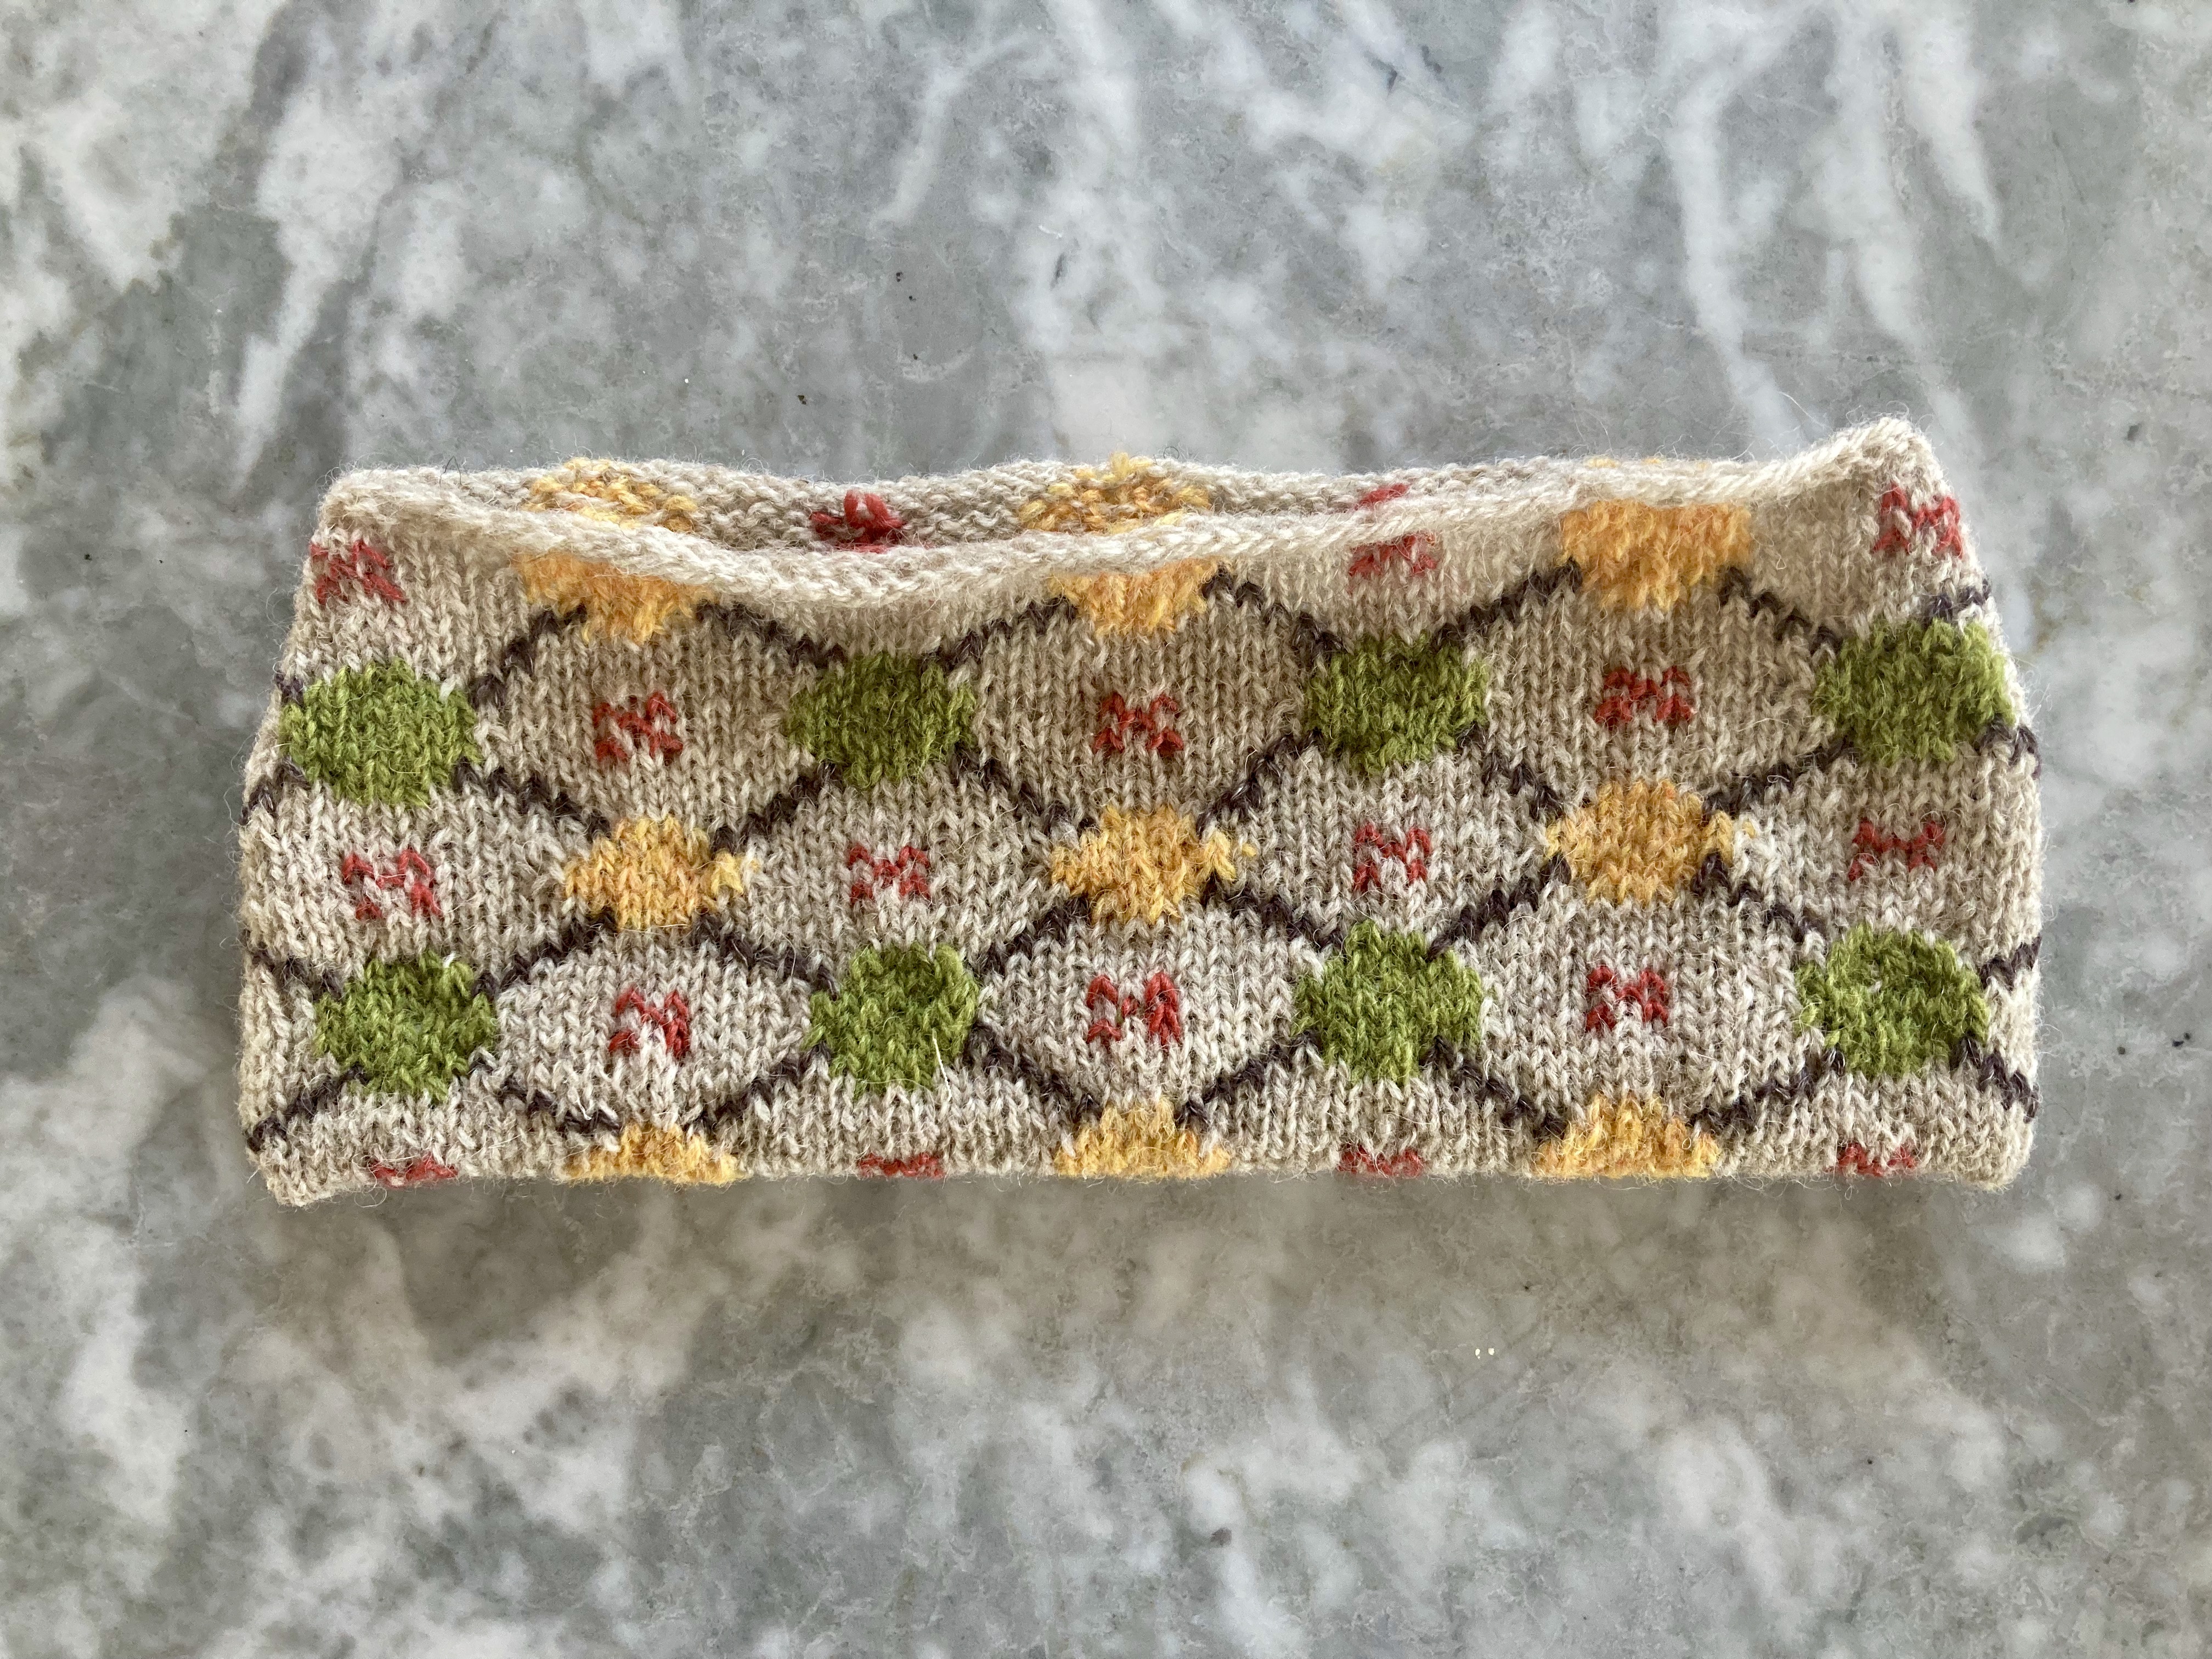
The duplicate stitch lines were surprisingly difficult. They are supposed to go from one 5-stitch-wide row to another, but I couldn’t always make it work out with the diagonals and the number of stitches and rows. Mathematically, it should not be a problem. In practice, I guess I didn’t always find the correct stitch to duplicate.
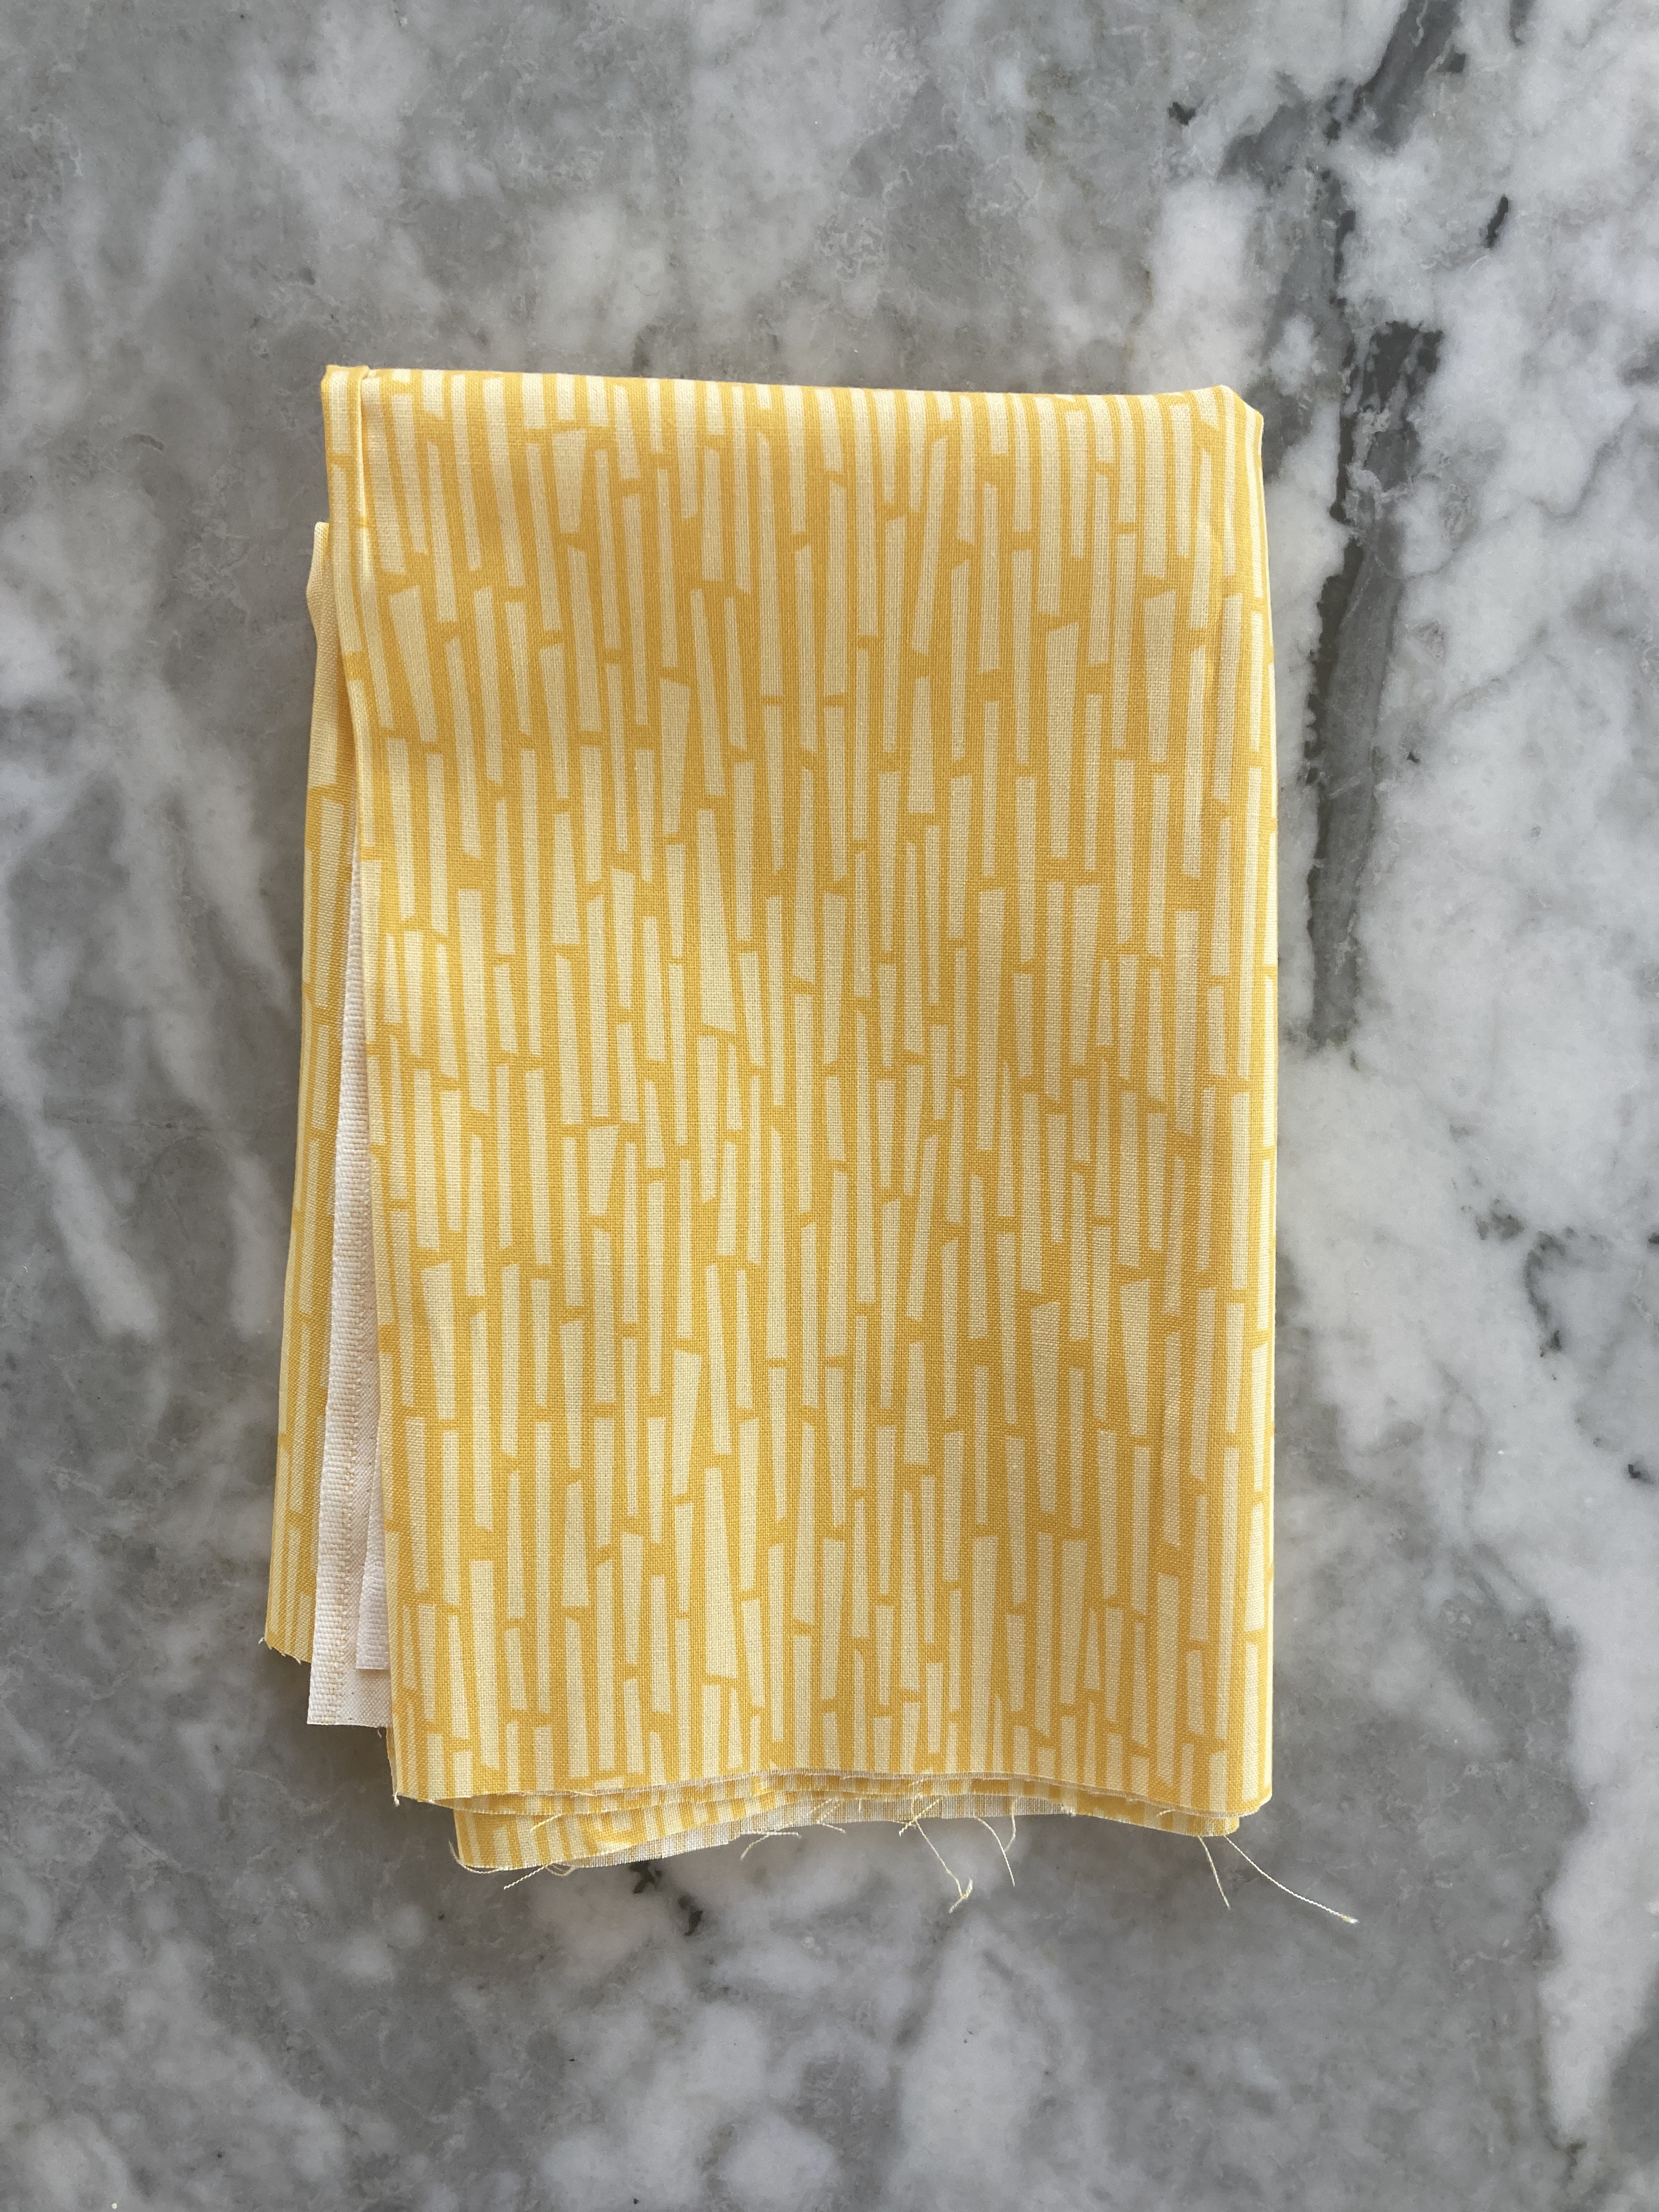
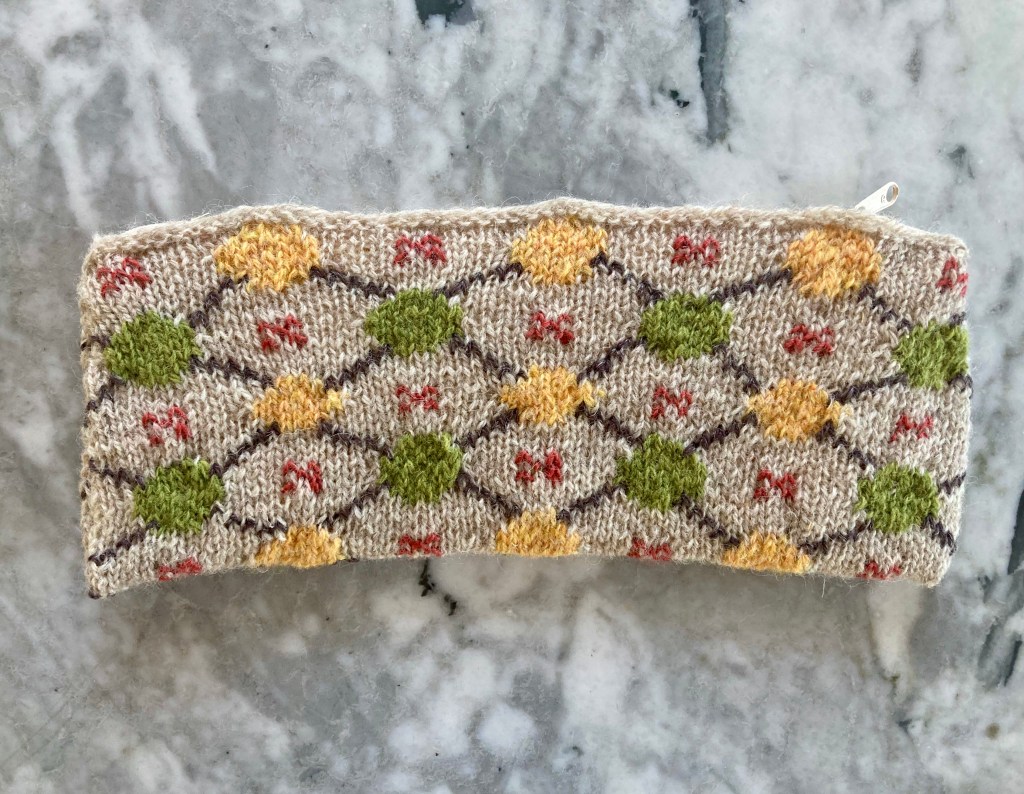
At this point, I had realised that I could fold it in half to make a little rectangular case for pencils or double-pointed needles. Not that I need that, particularly, but if it turned out well enough, I could give it away or sell it or something. I bought a small piece of yellow cotton for the lining and a zipper, sewed it up and there it was.
Sewing in the zipper was a disaster, as it usually is, and for some reason, the finished bag is a bit… warped? It was perfectly flat, as was the lining, before putting in the zipper. I think the knitted fabric pulled a little more on one side than the other. But other than that, it’s fine.
I could imagine a design like this for a rectangular sort of garment, like a slipover/vest/whatever you call it thing with no sleeves — sort of like an argyle design. The only truly annoying part is weaving in the thousand ends. This was a good learning experience and I definitely feel more confident about converting cross-stitch designs after doing it.