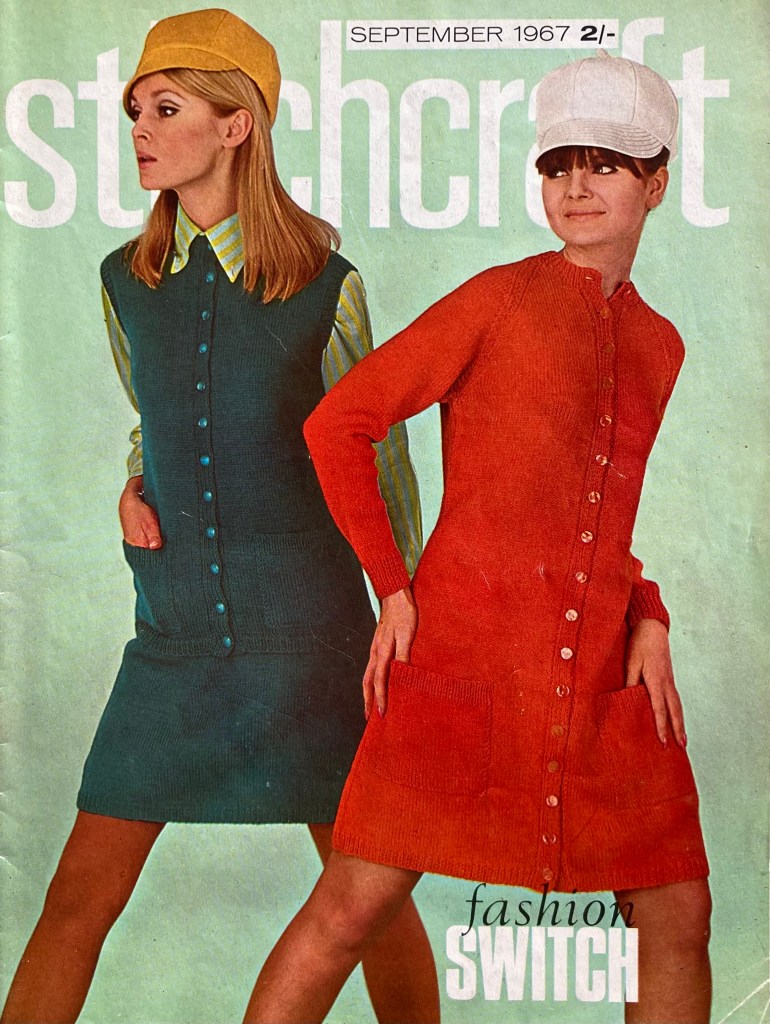
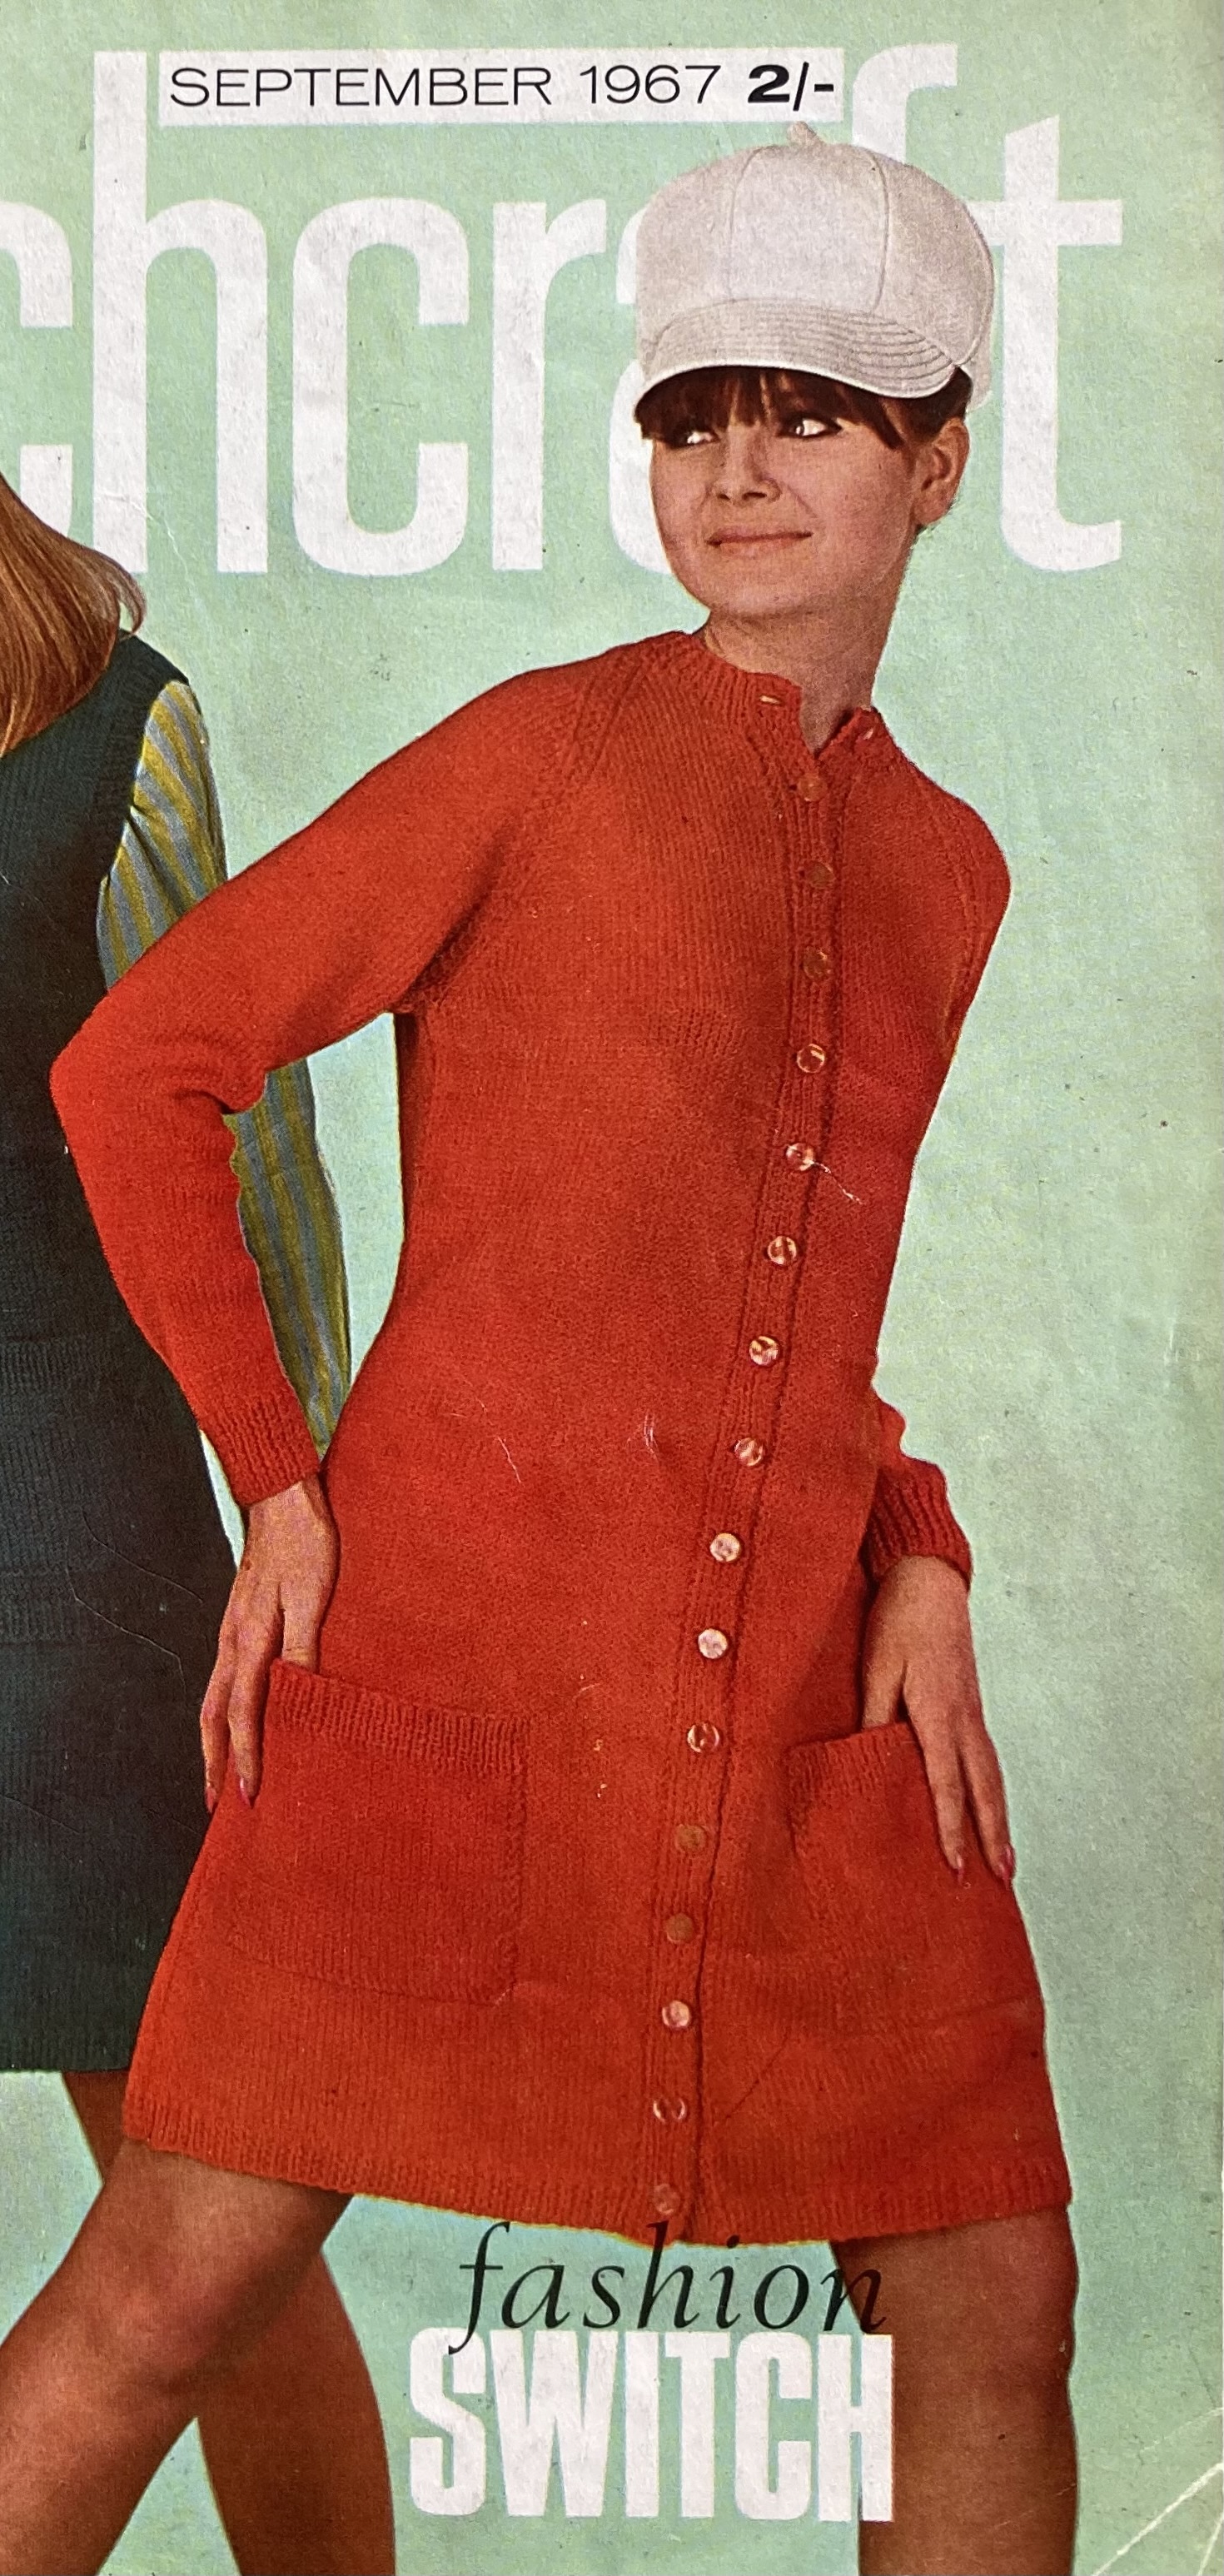
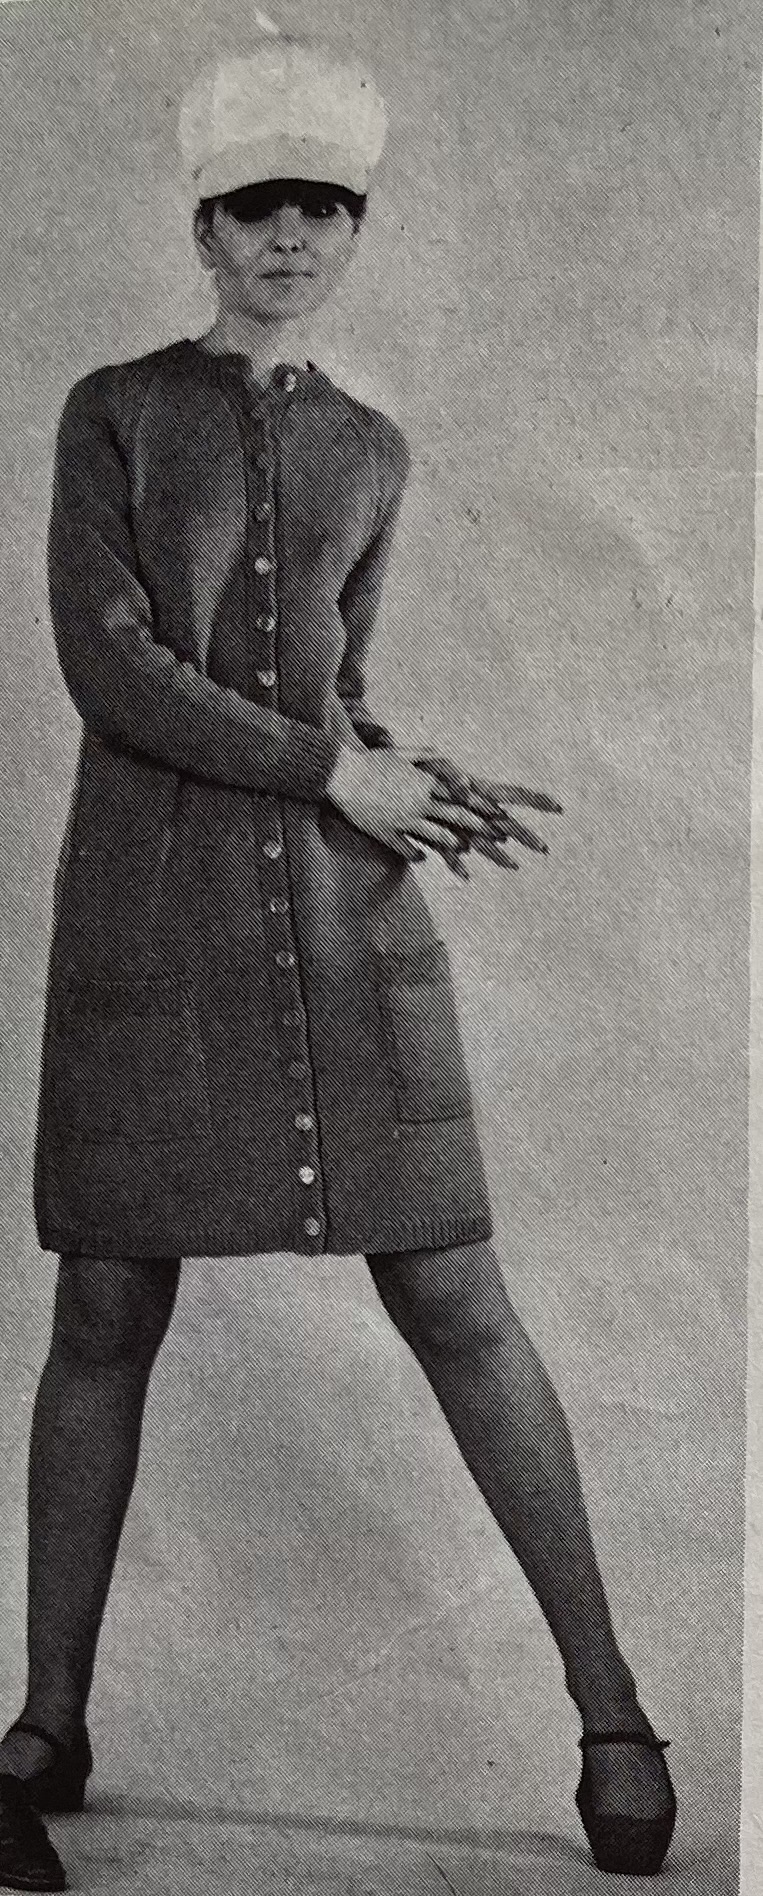
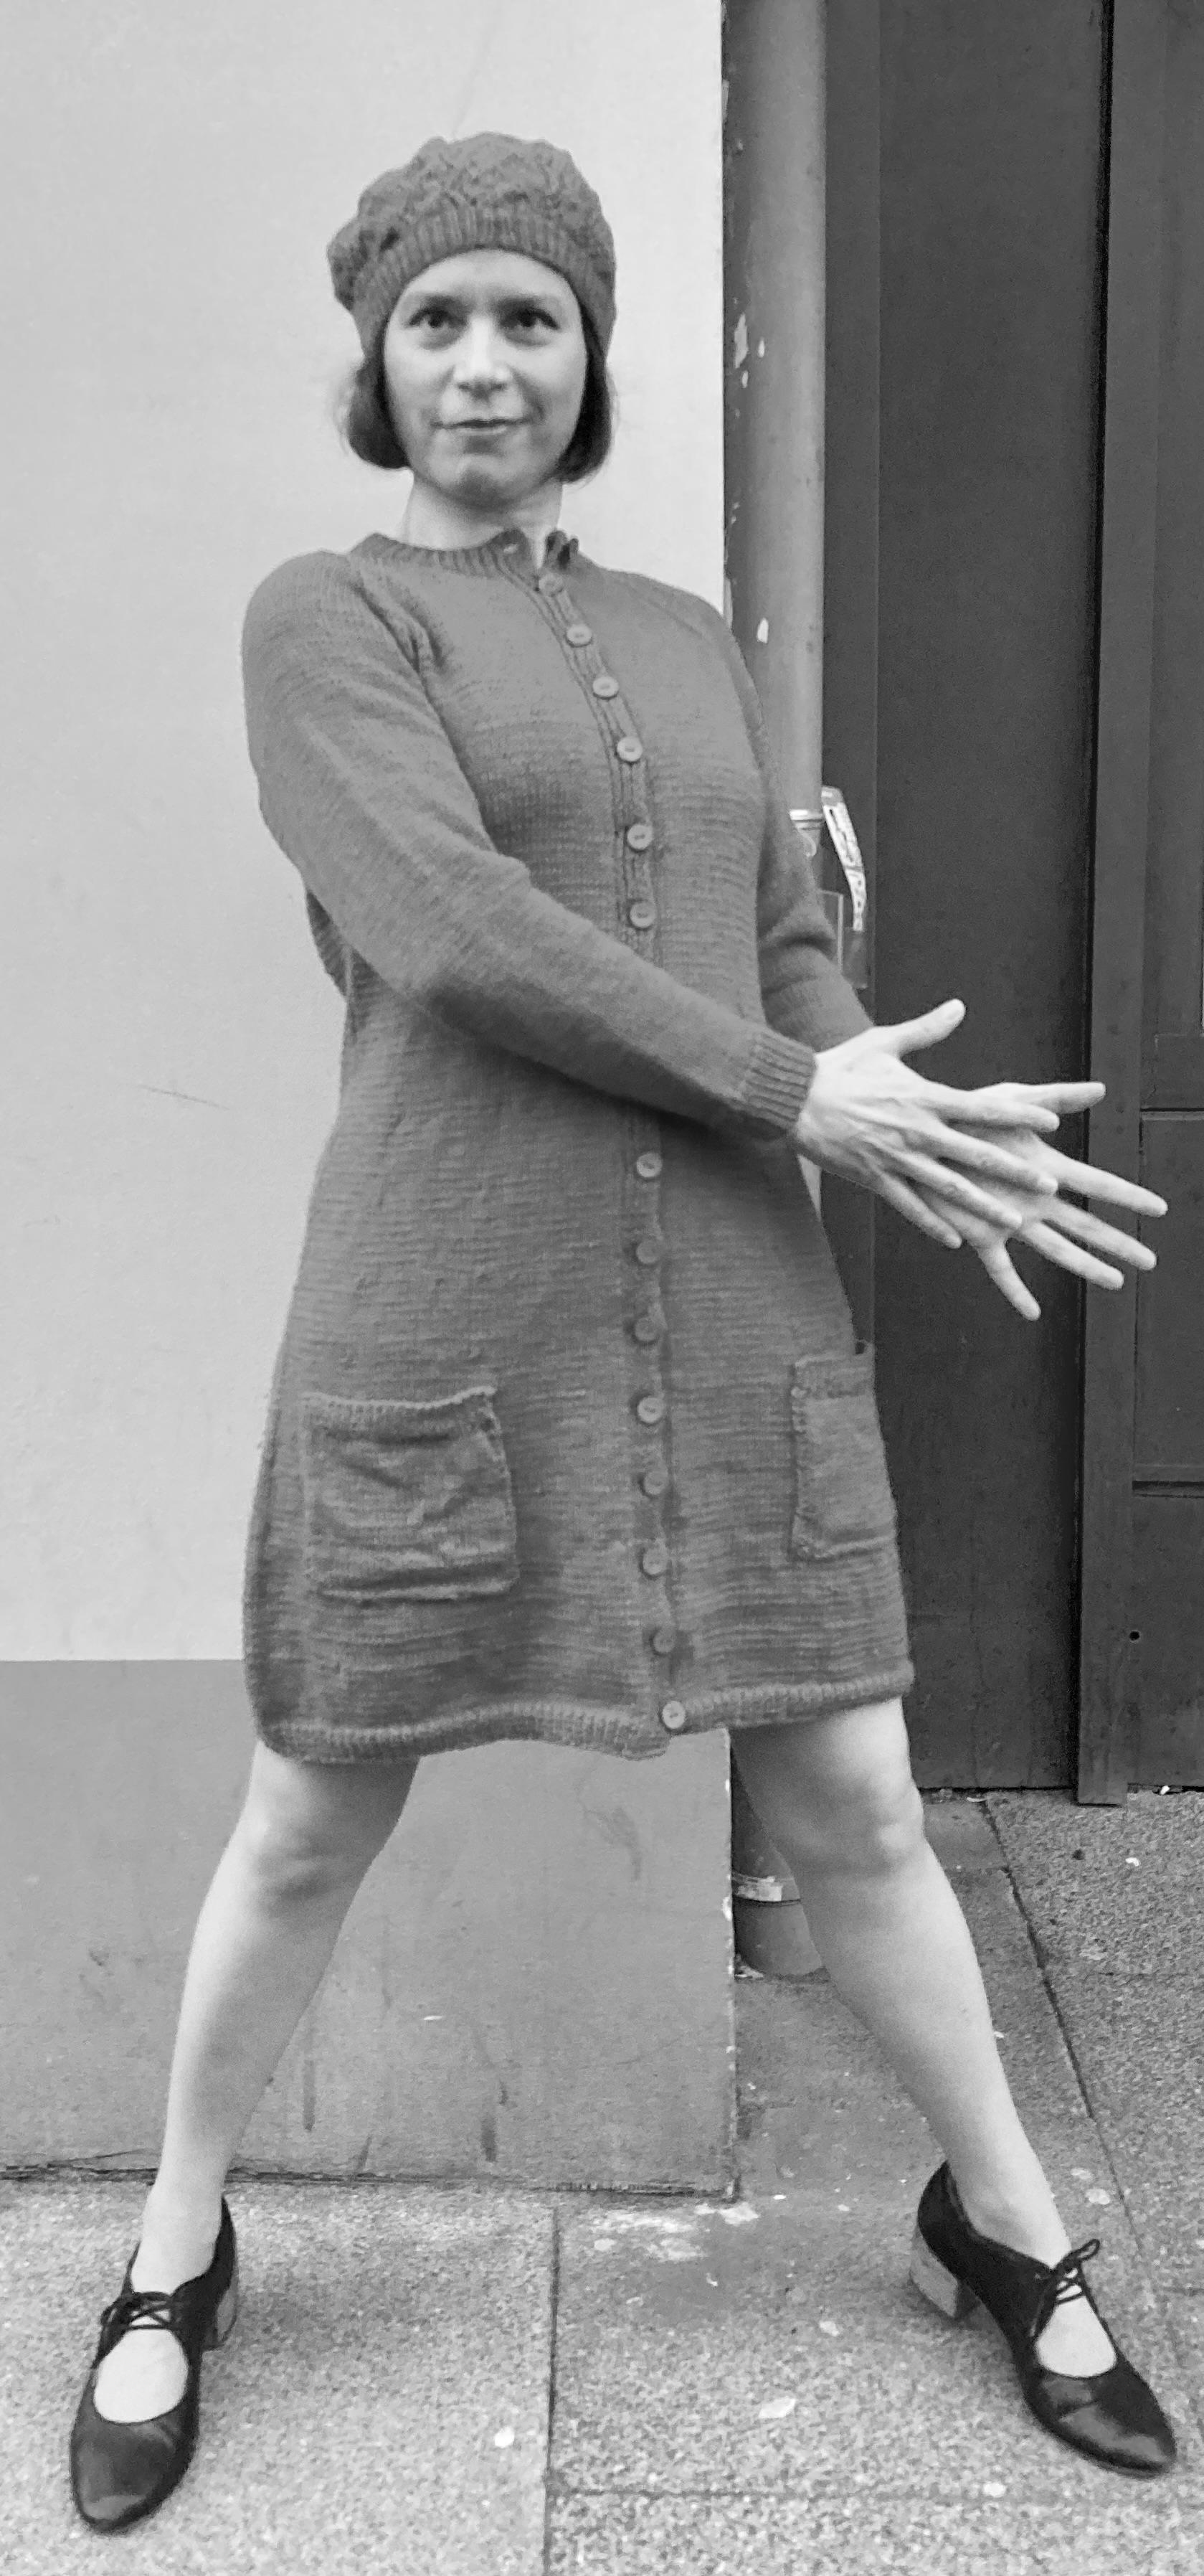
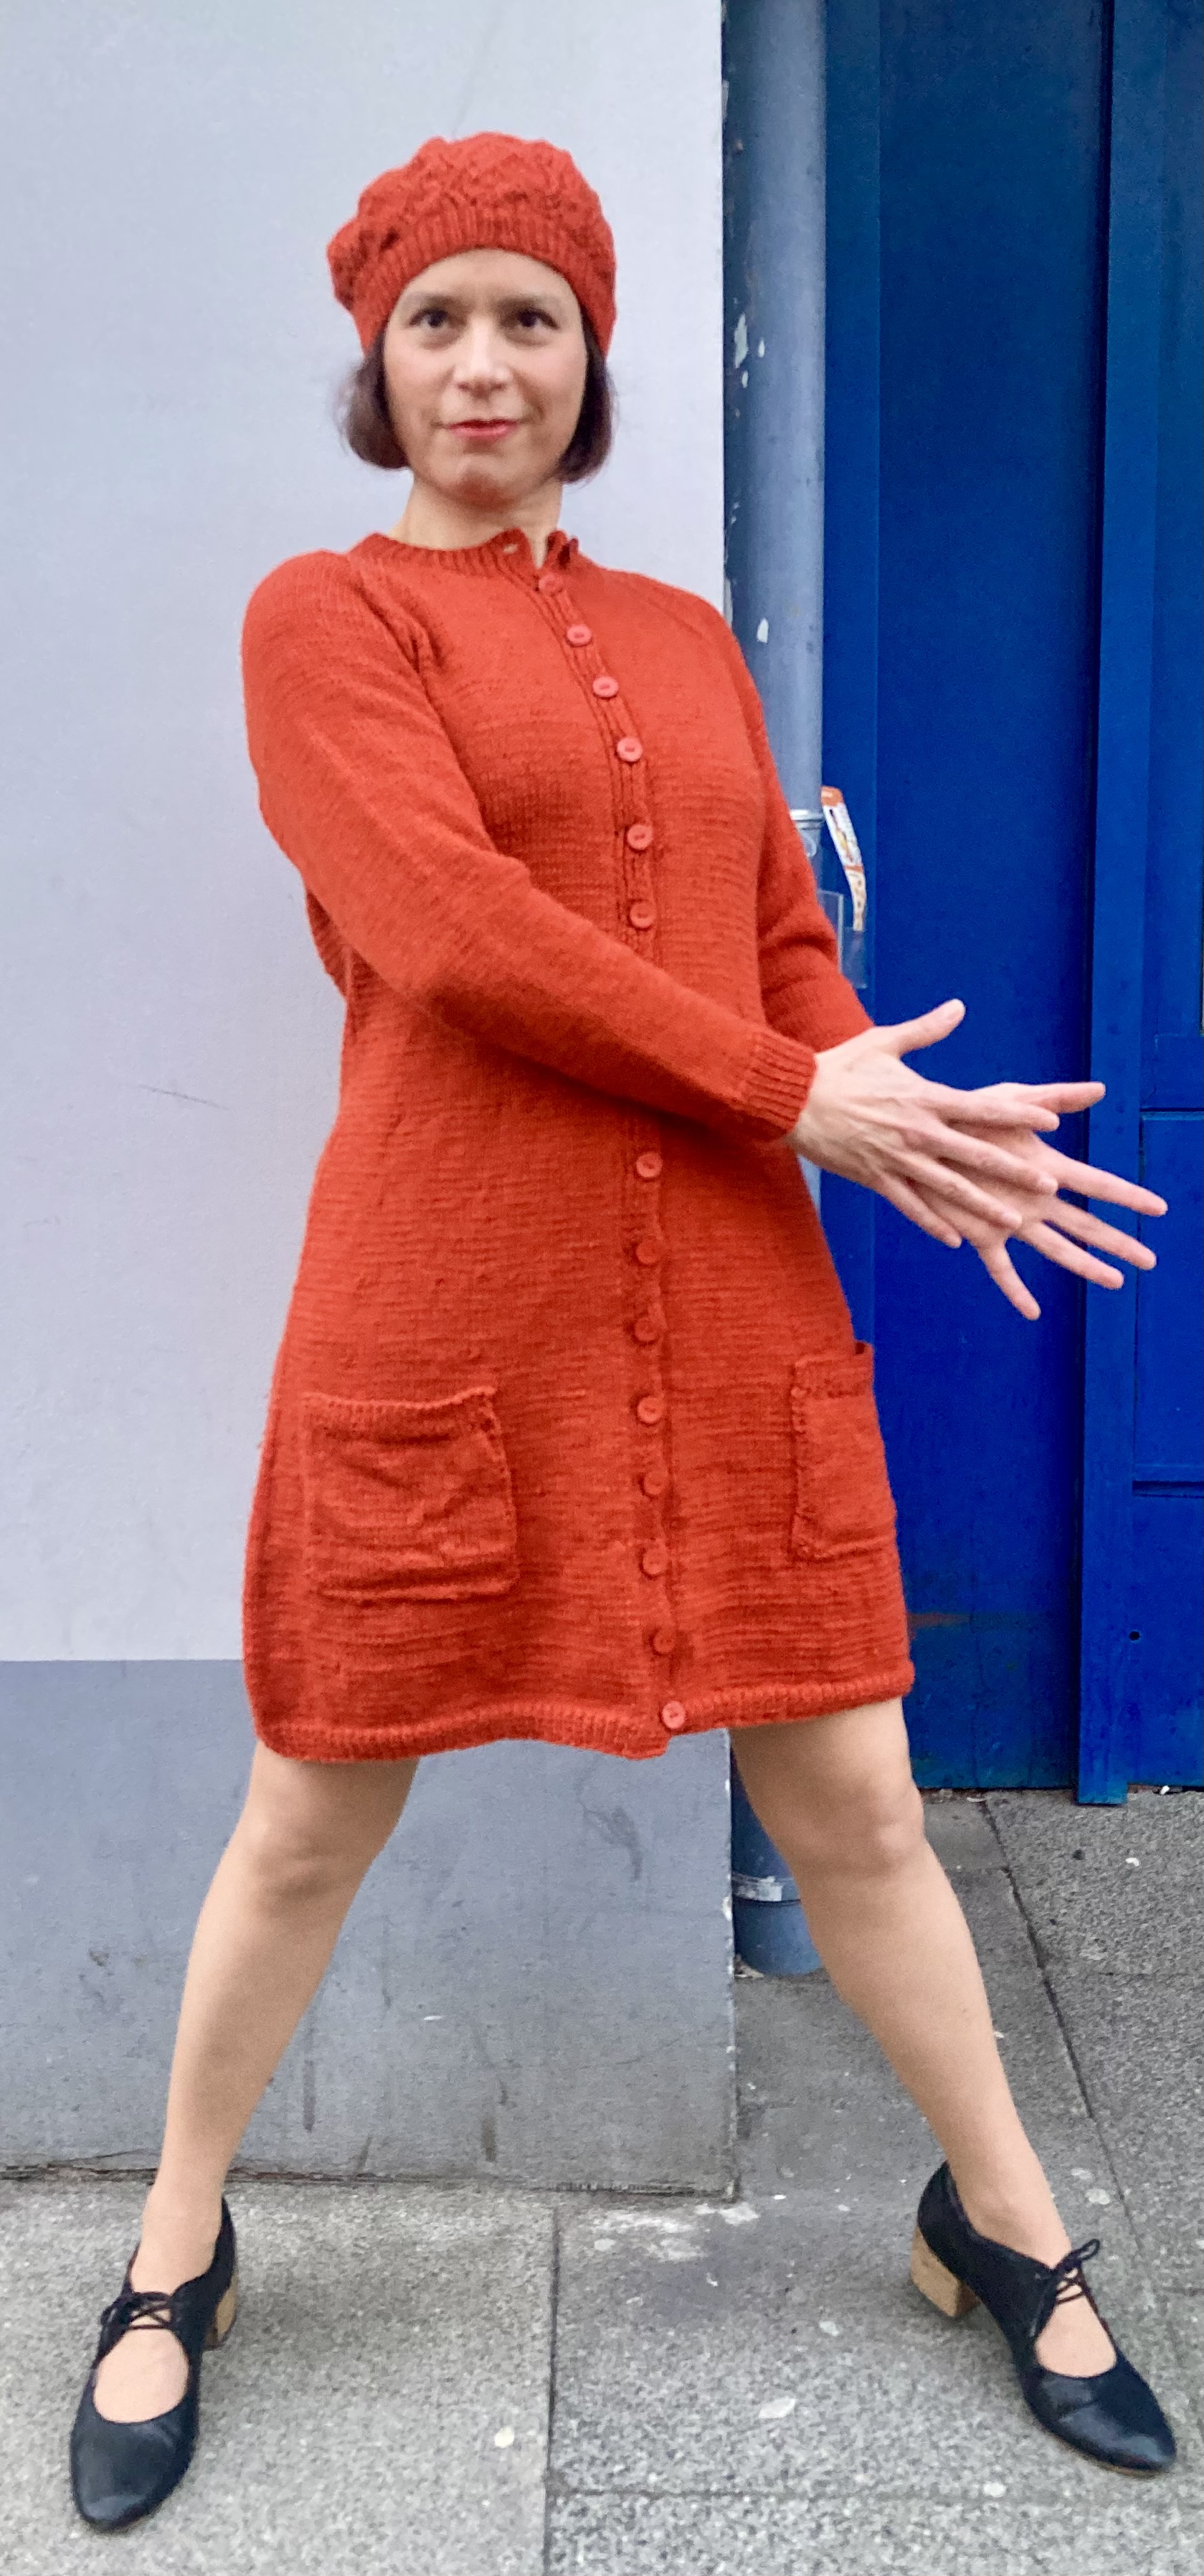
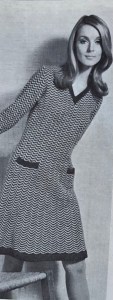
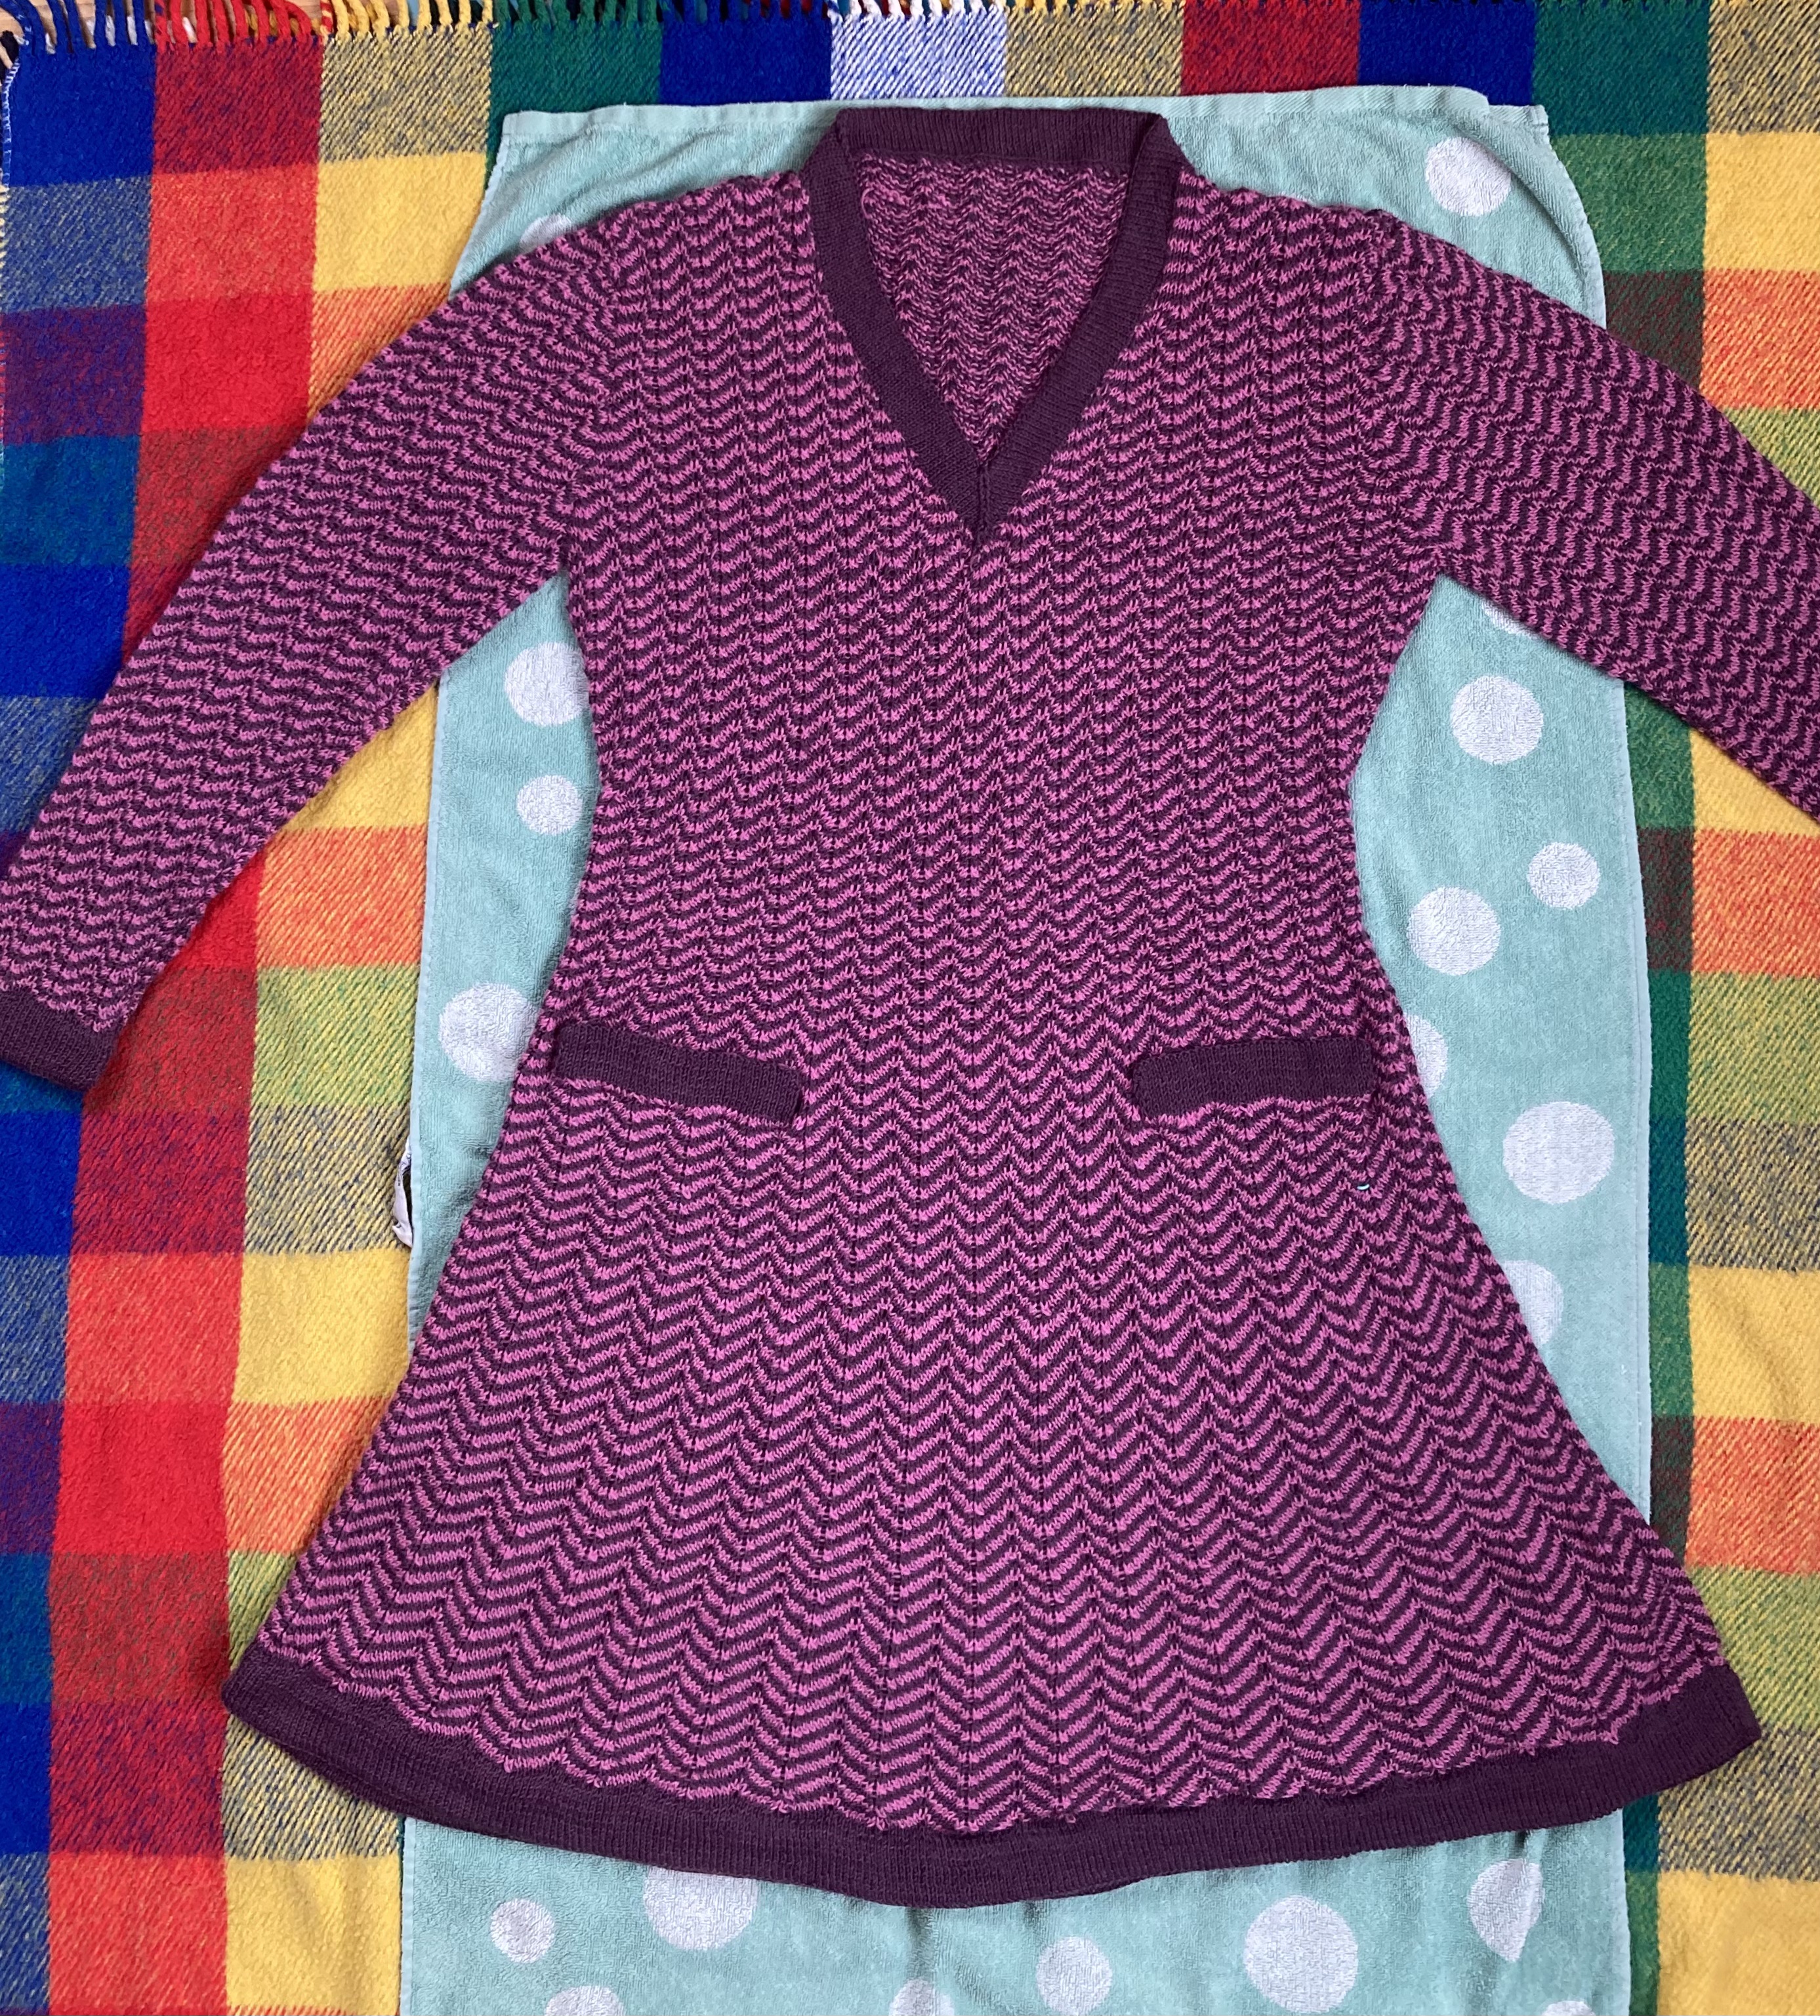
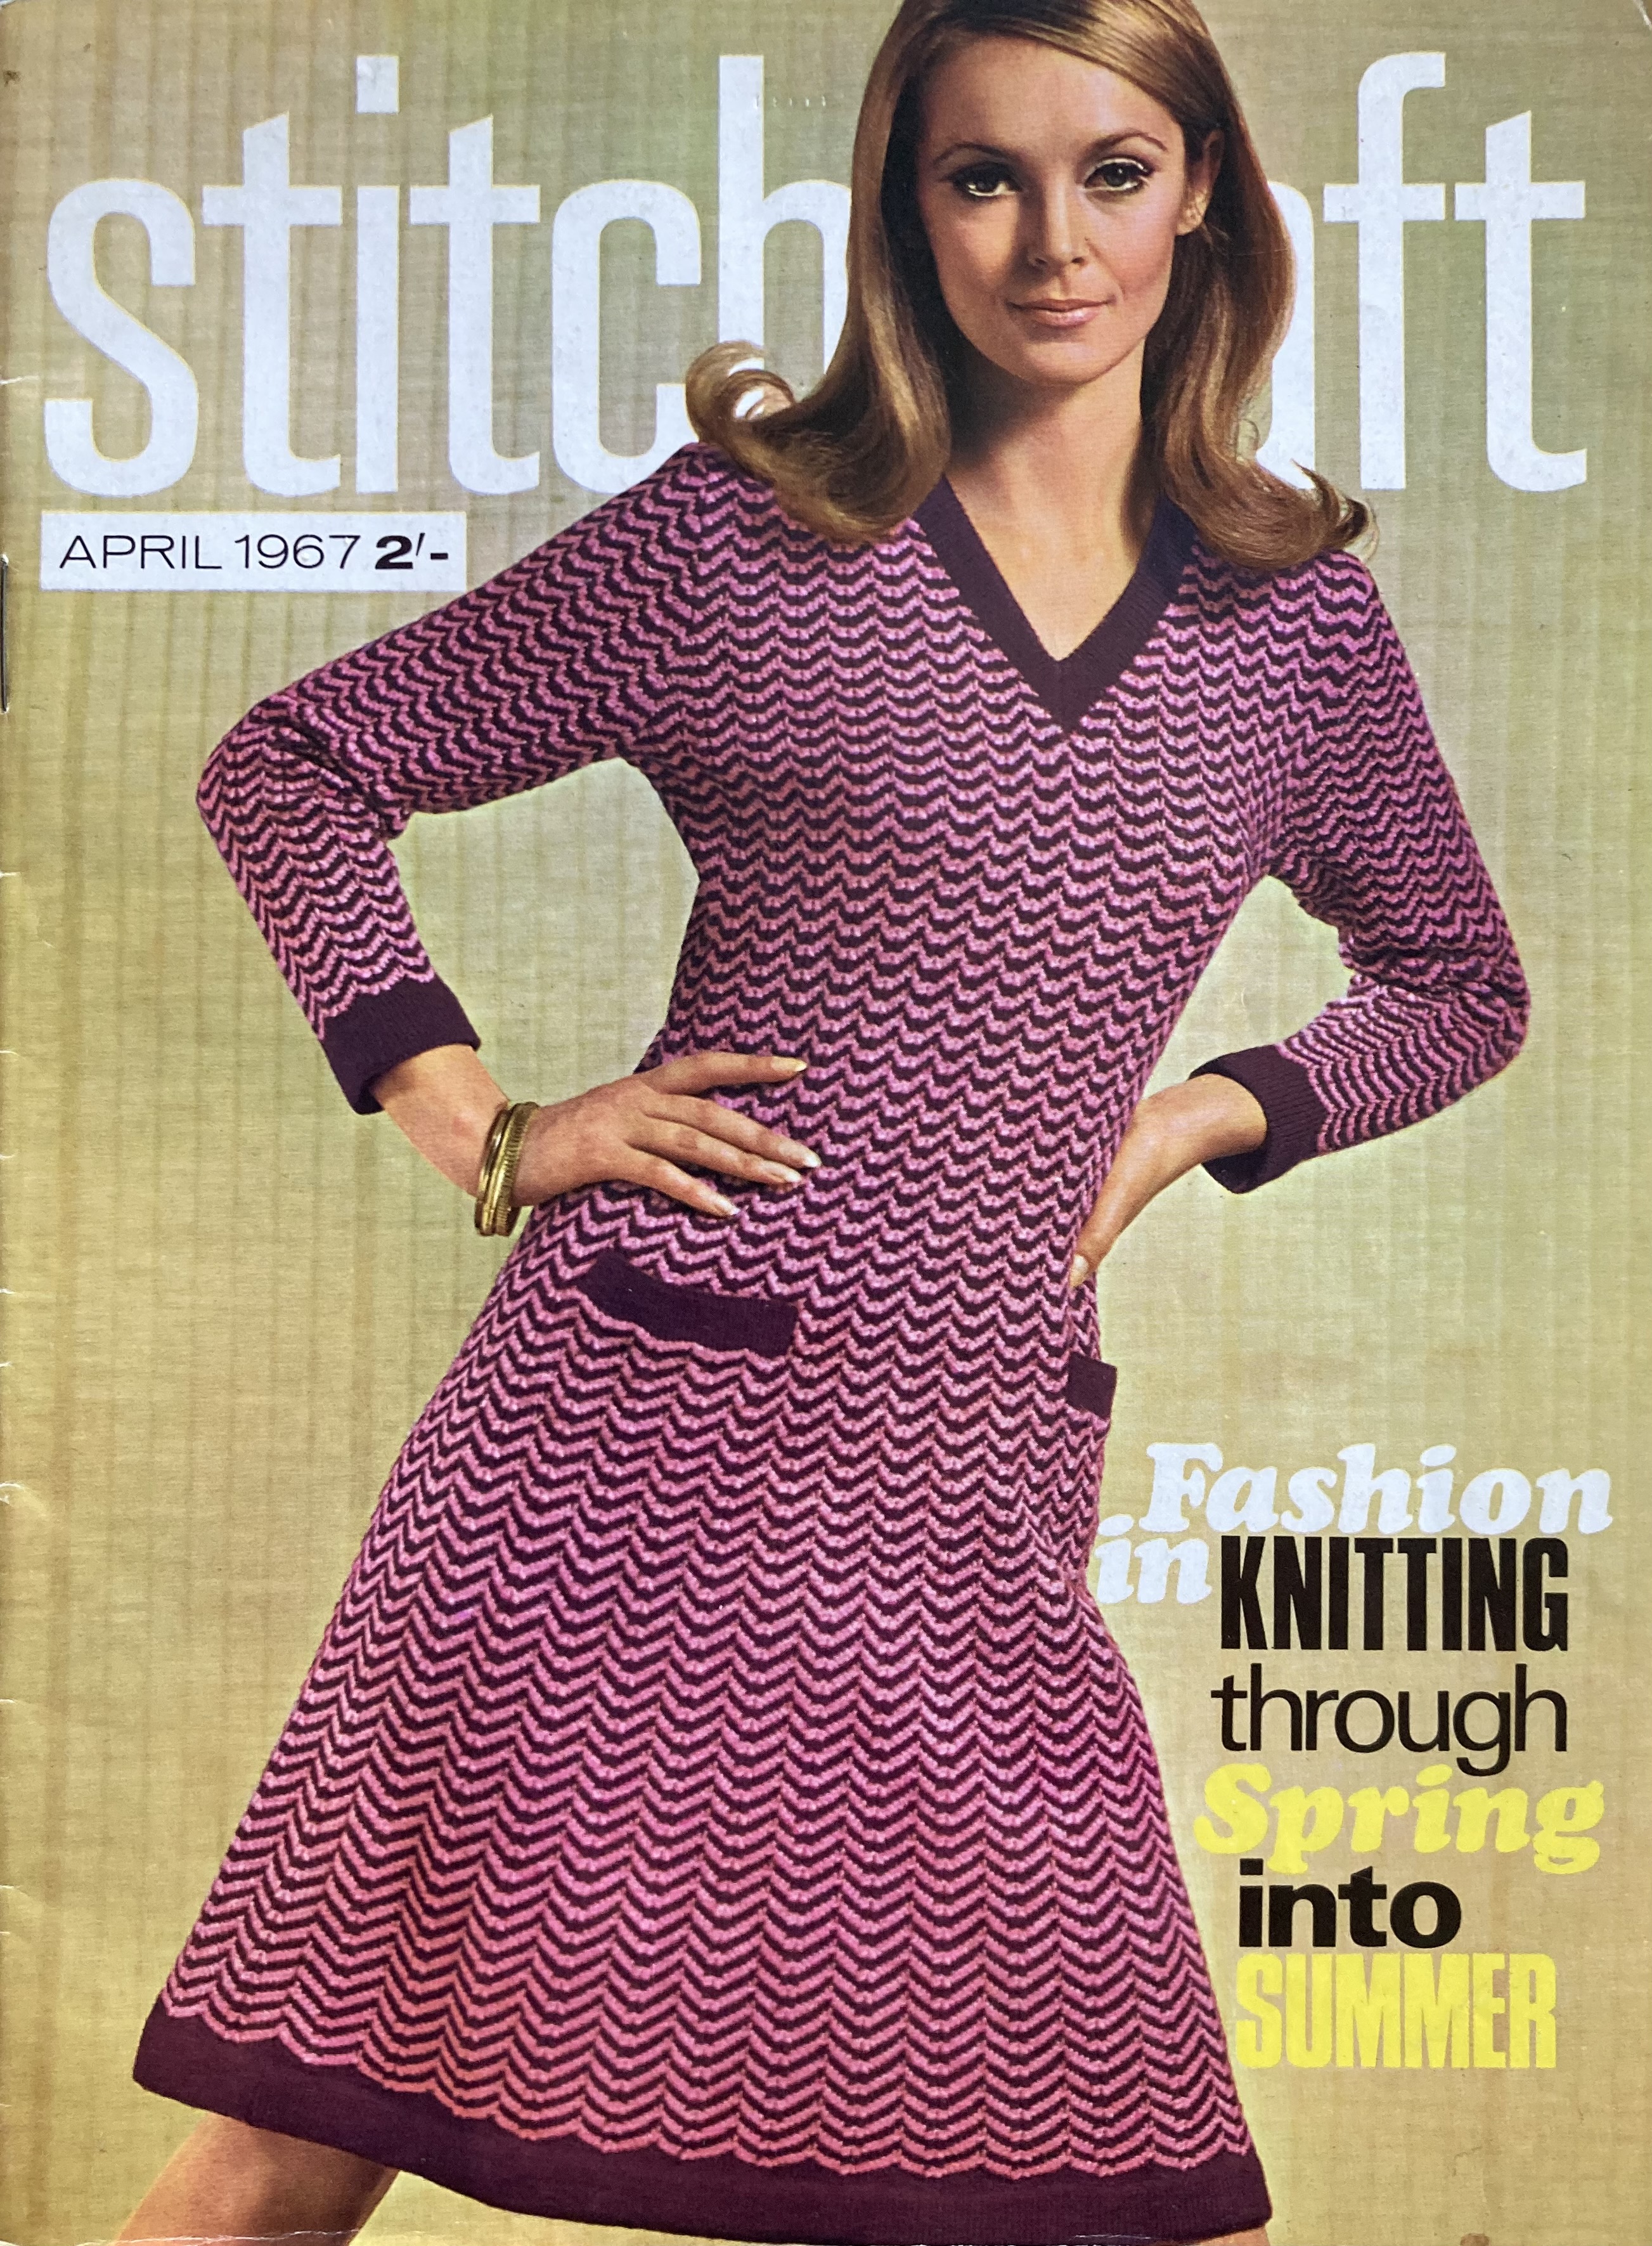
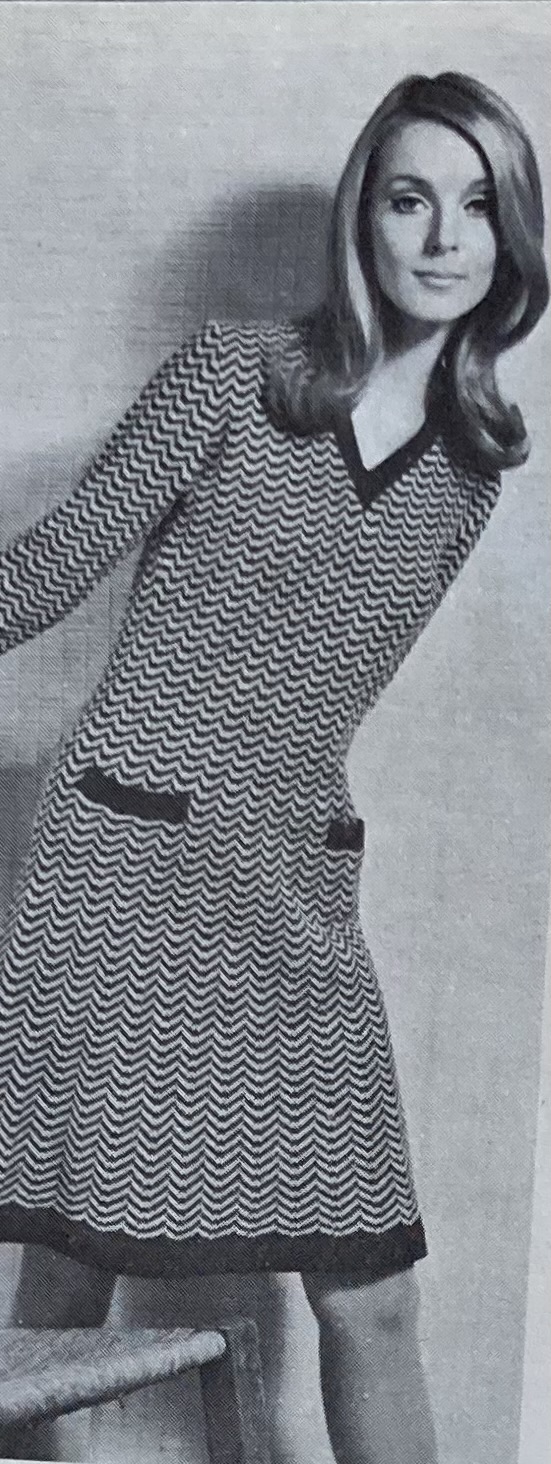
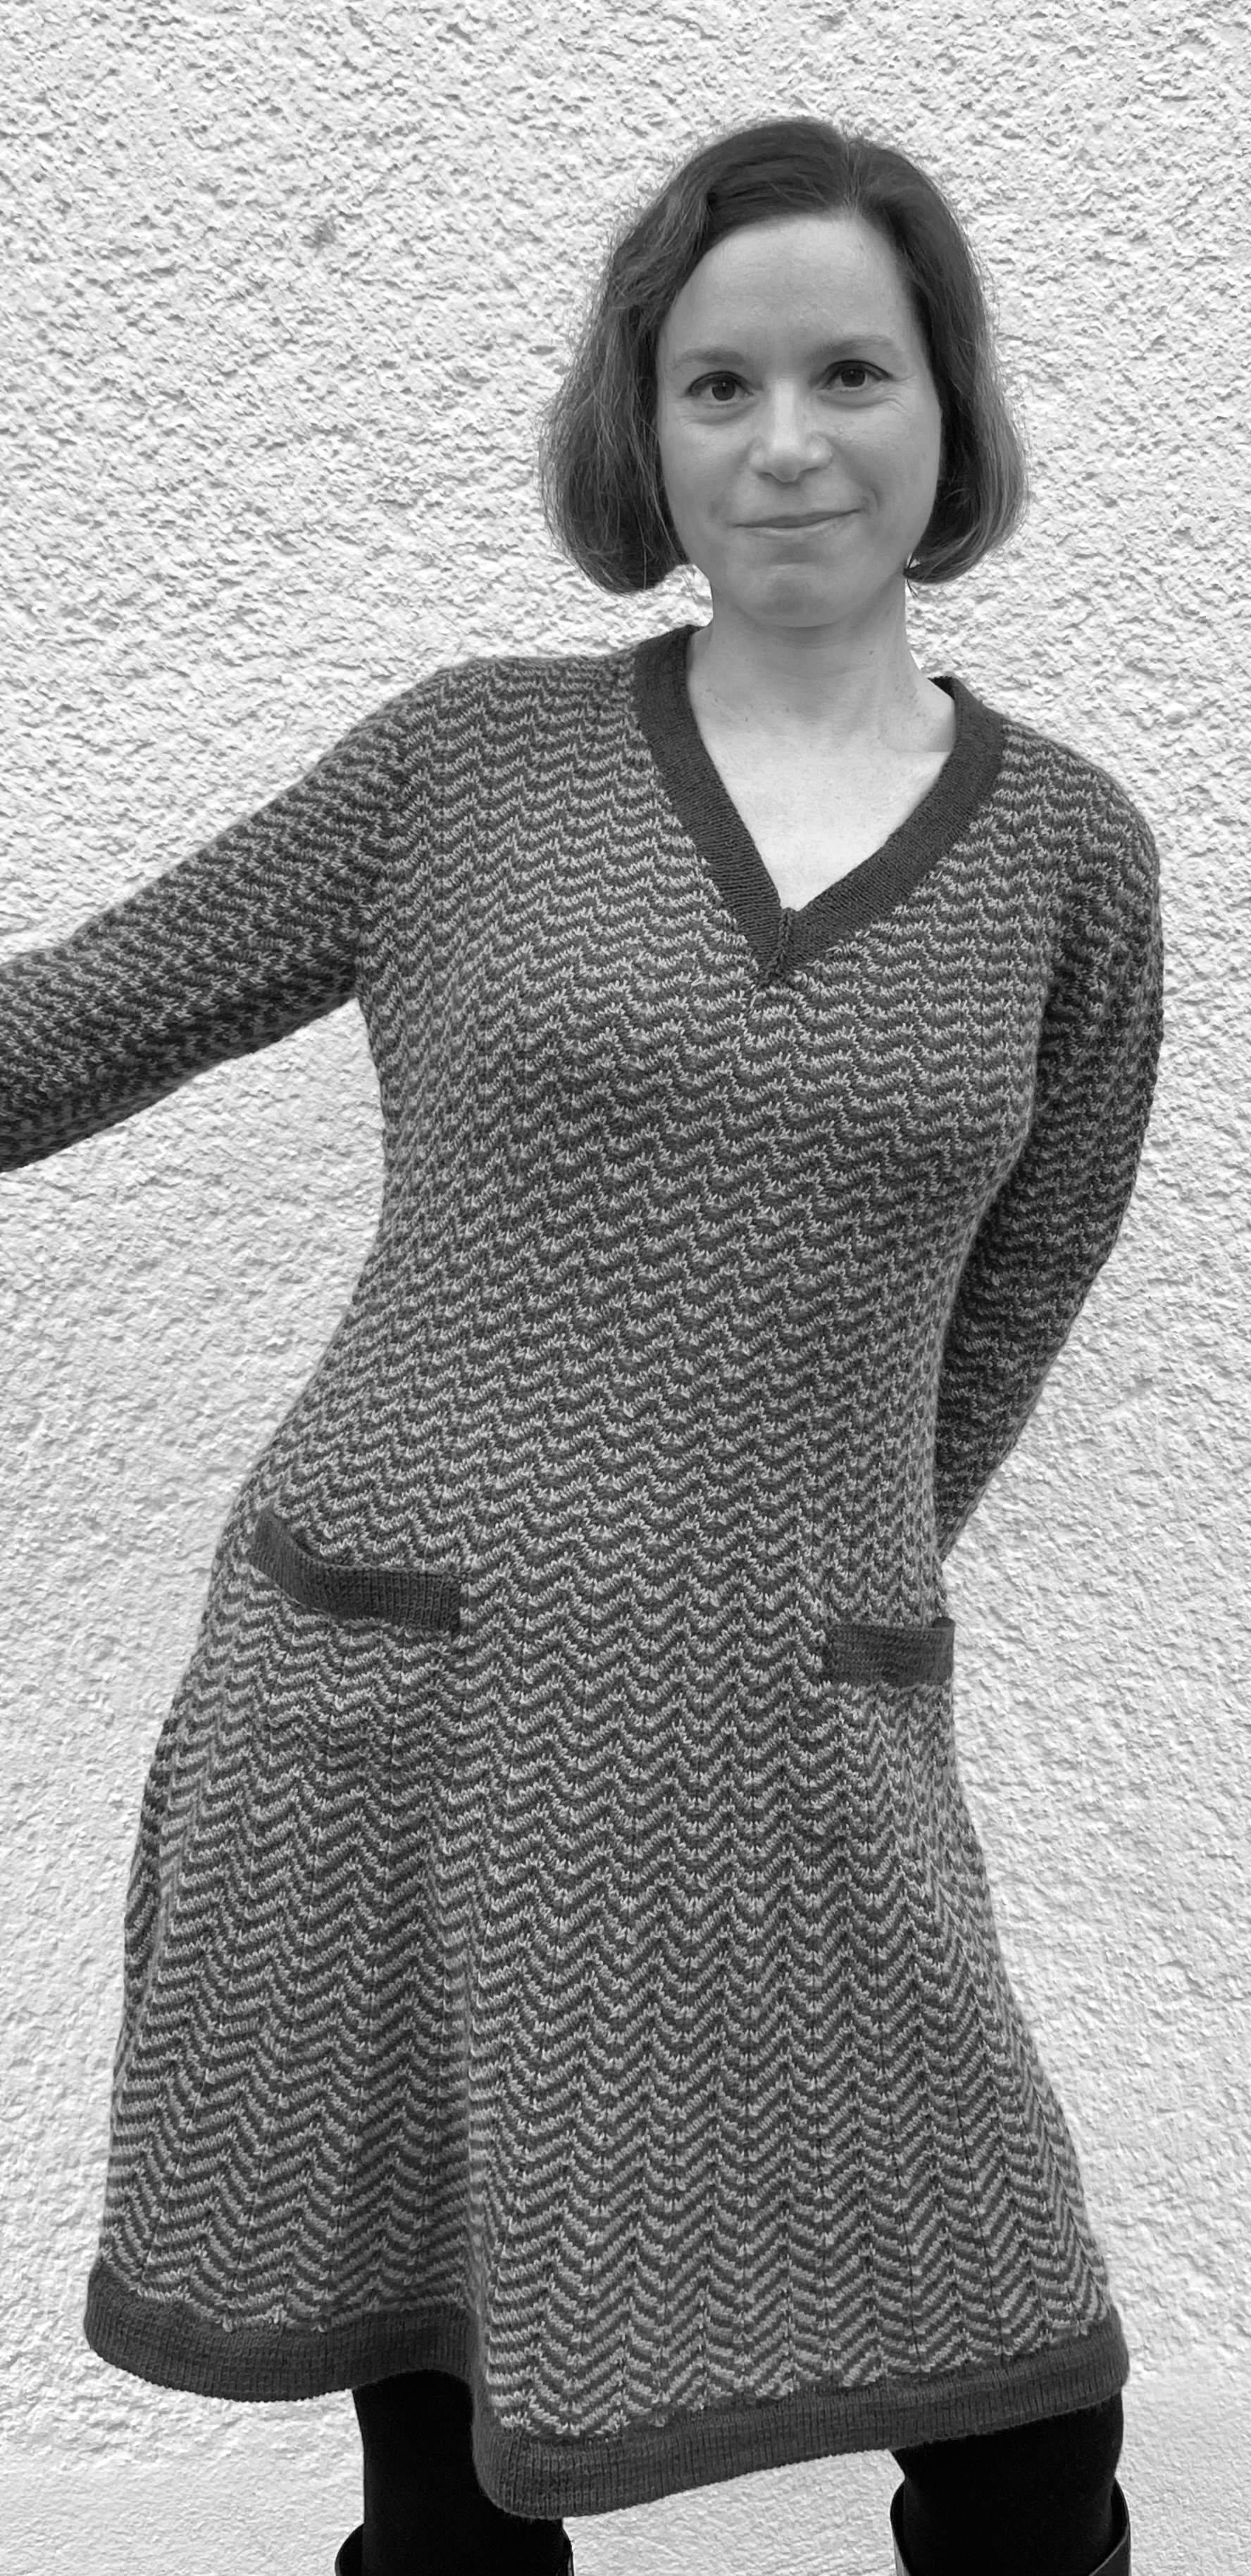
I have finally finished the magnificent cardigan dress from September 1967!
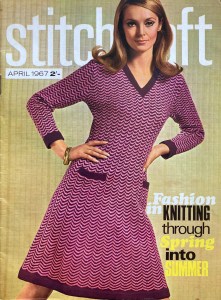
Captioned “Fashion Switch” along with the waistcoat-and-miniskirt set in the cover photo, the dress was written to be knit in Patons Double Knitting in the colour “Burnt Orange” 5020. I had already had great results (“Front Panel Classic Sweater” from 1964 and the inspired-by-Stitchcraft fingerless gloves from December 1966) with G-B Jil wool in the perfect shade of orange, so the choice of yarn was easy.
I am a bit sceptical when it comes to A-line dresses, since the often look too sack-like on me — I need dresses to be shaped or belted or nipped in at the waist in some way. The pattern has four sizes, to fit 33-34 up to 39-40 inch bust. I got perfect tension with 3.5 mm needles on the other projects with this wool, so I made the third size, for 37-38 inch bust and figured I could always adjust by continuing the A-line skirt decreases and/or adding extra stitches before the underarm shaping.
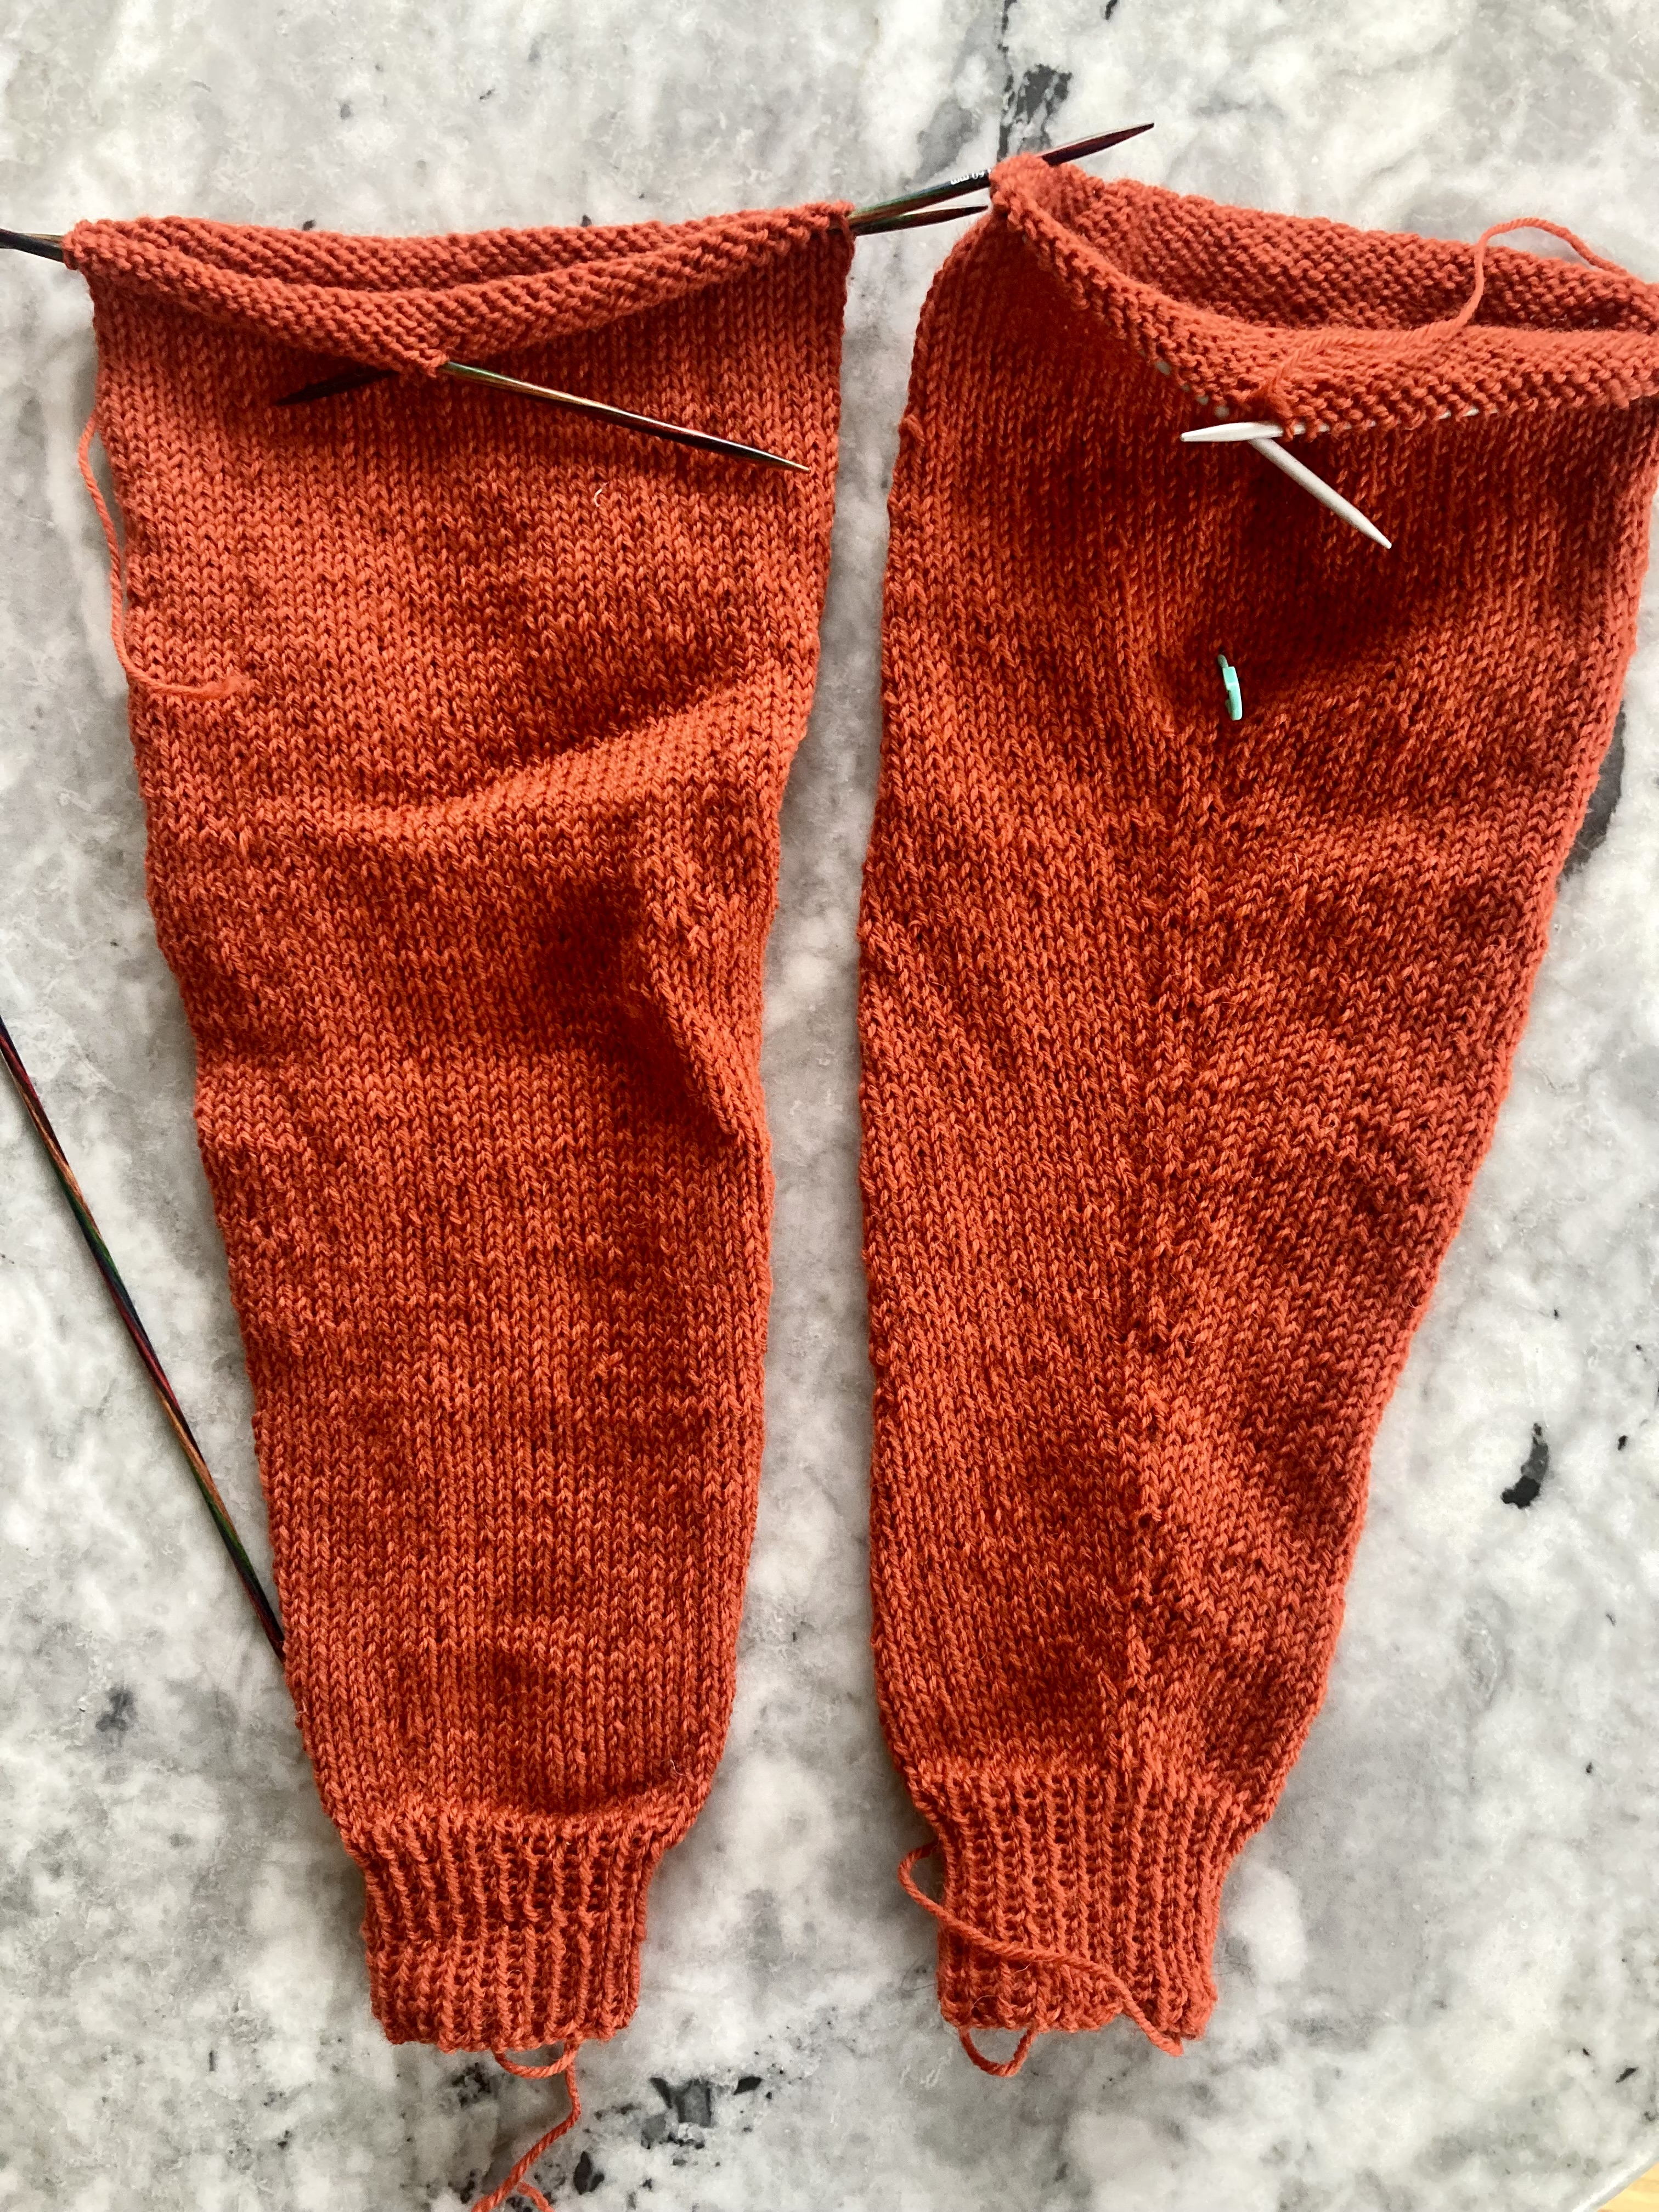
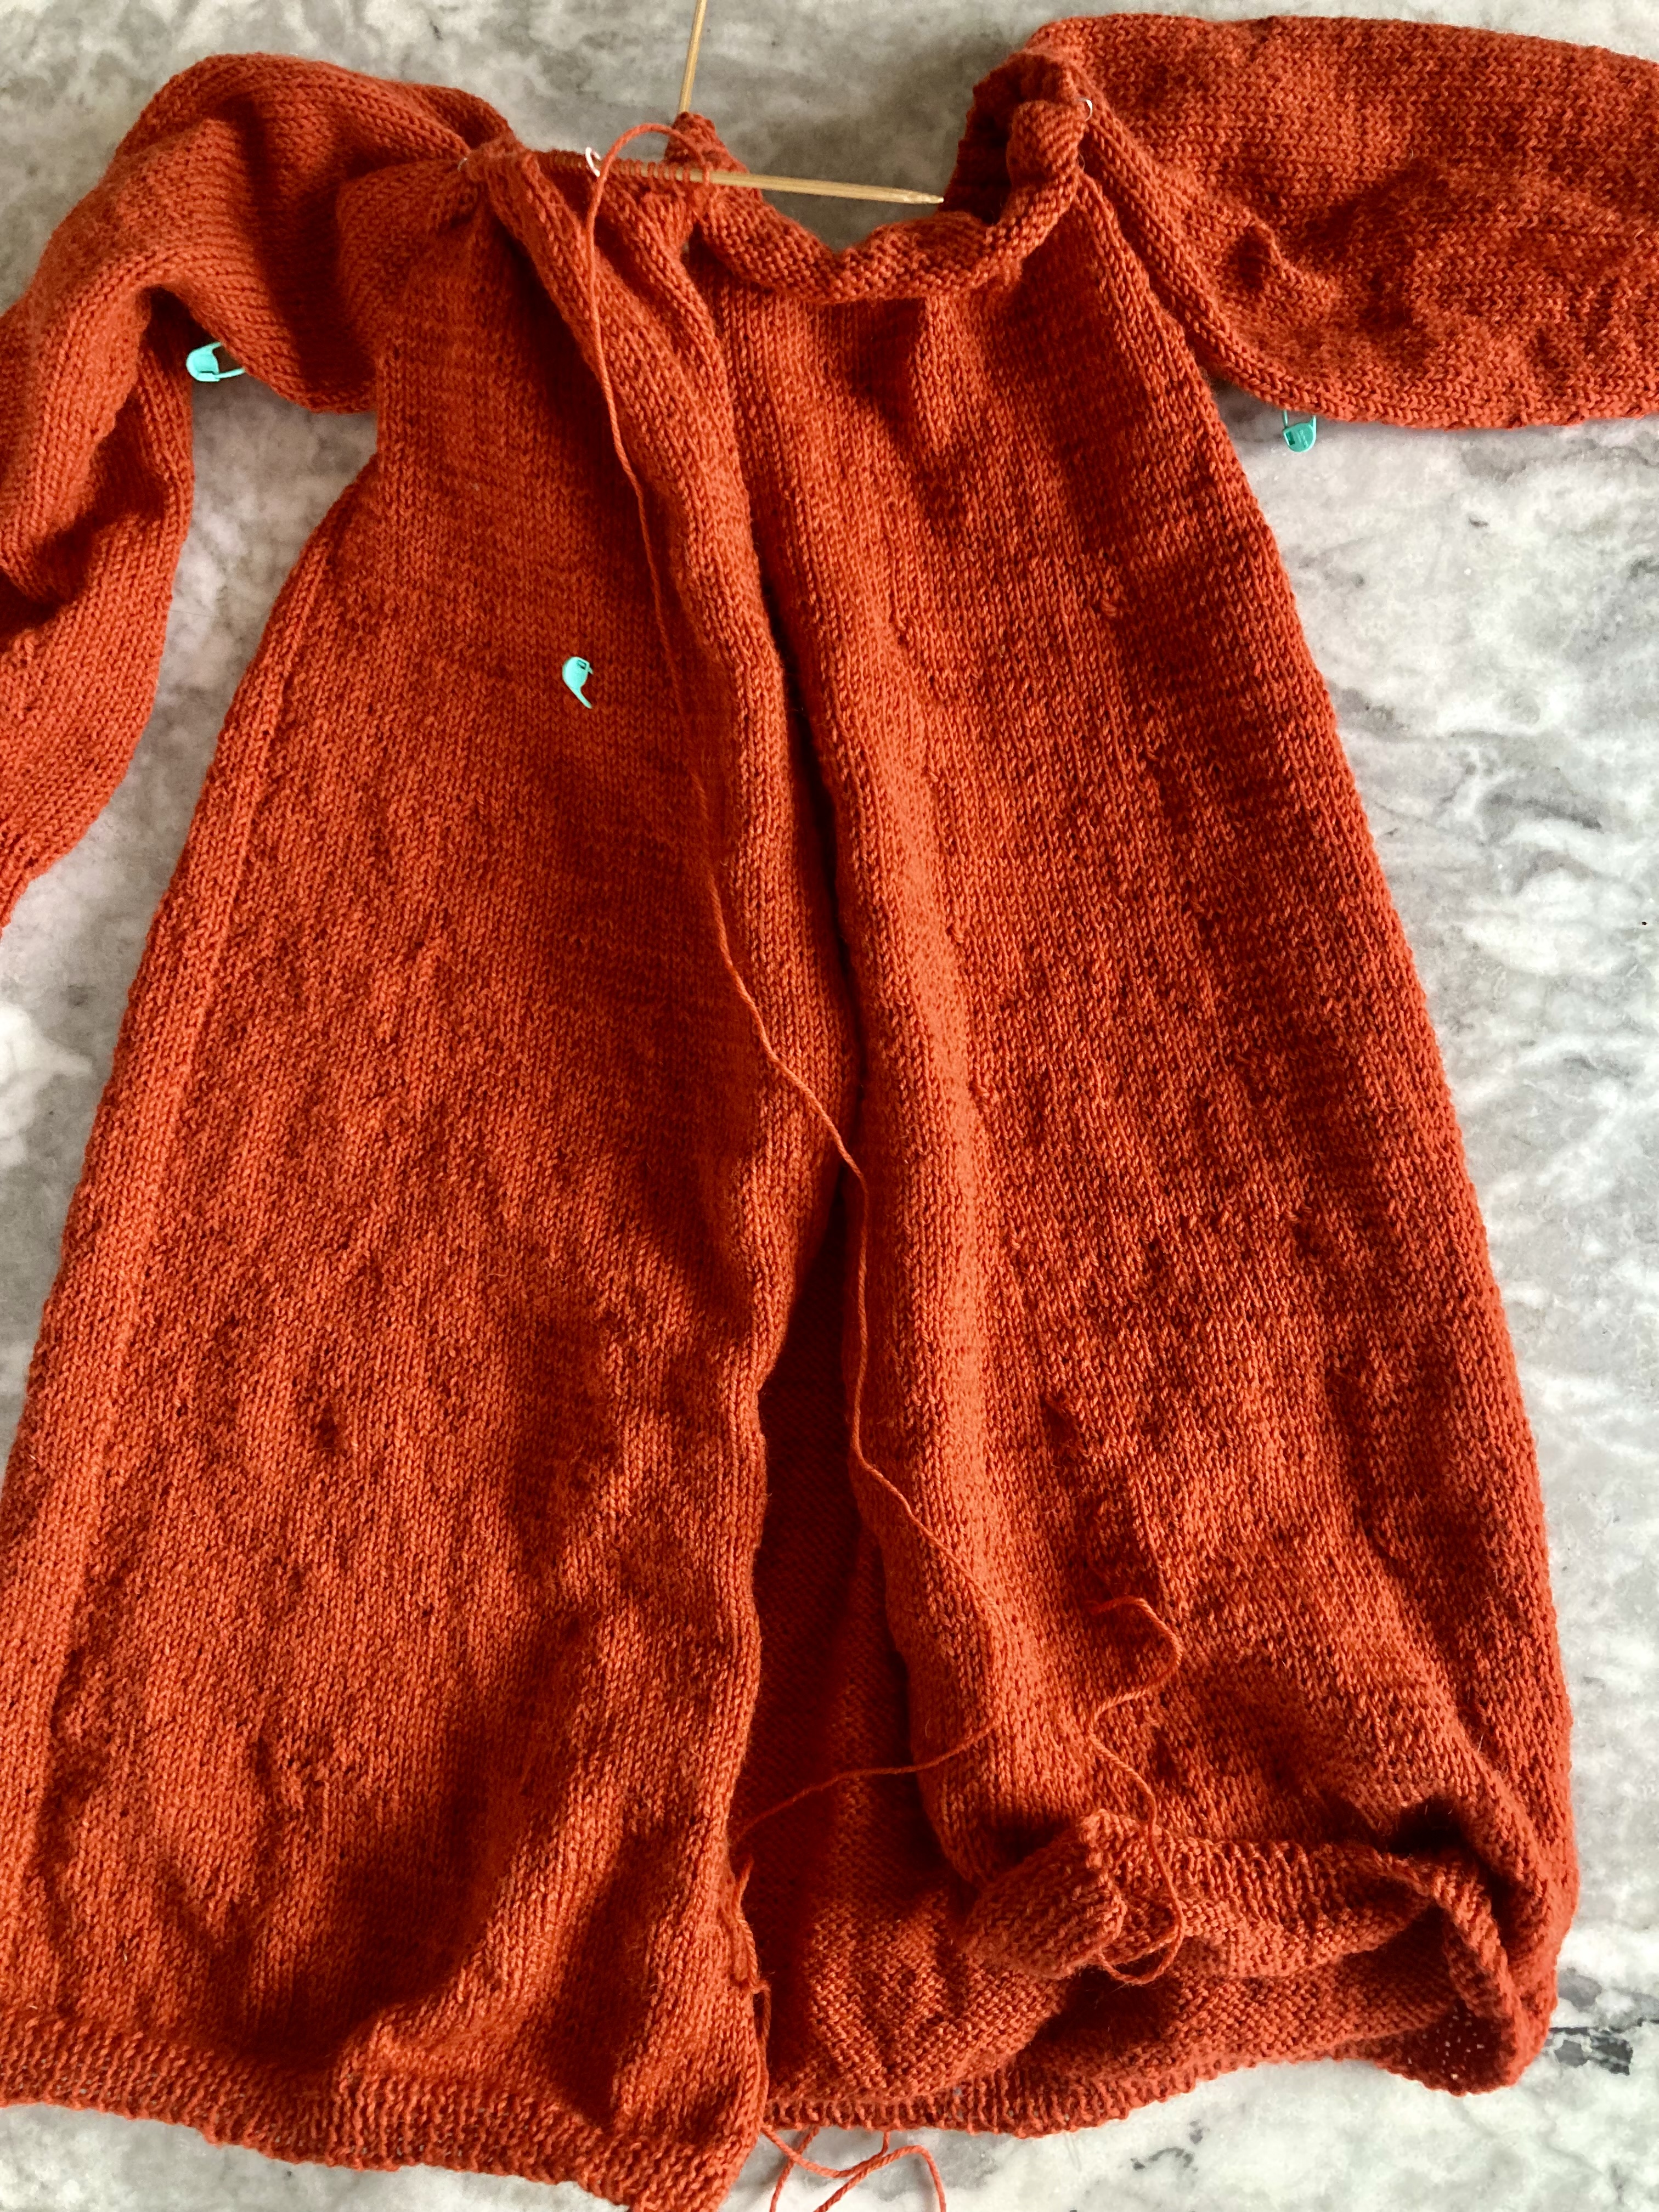
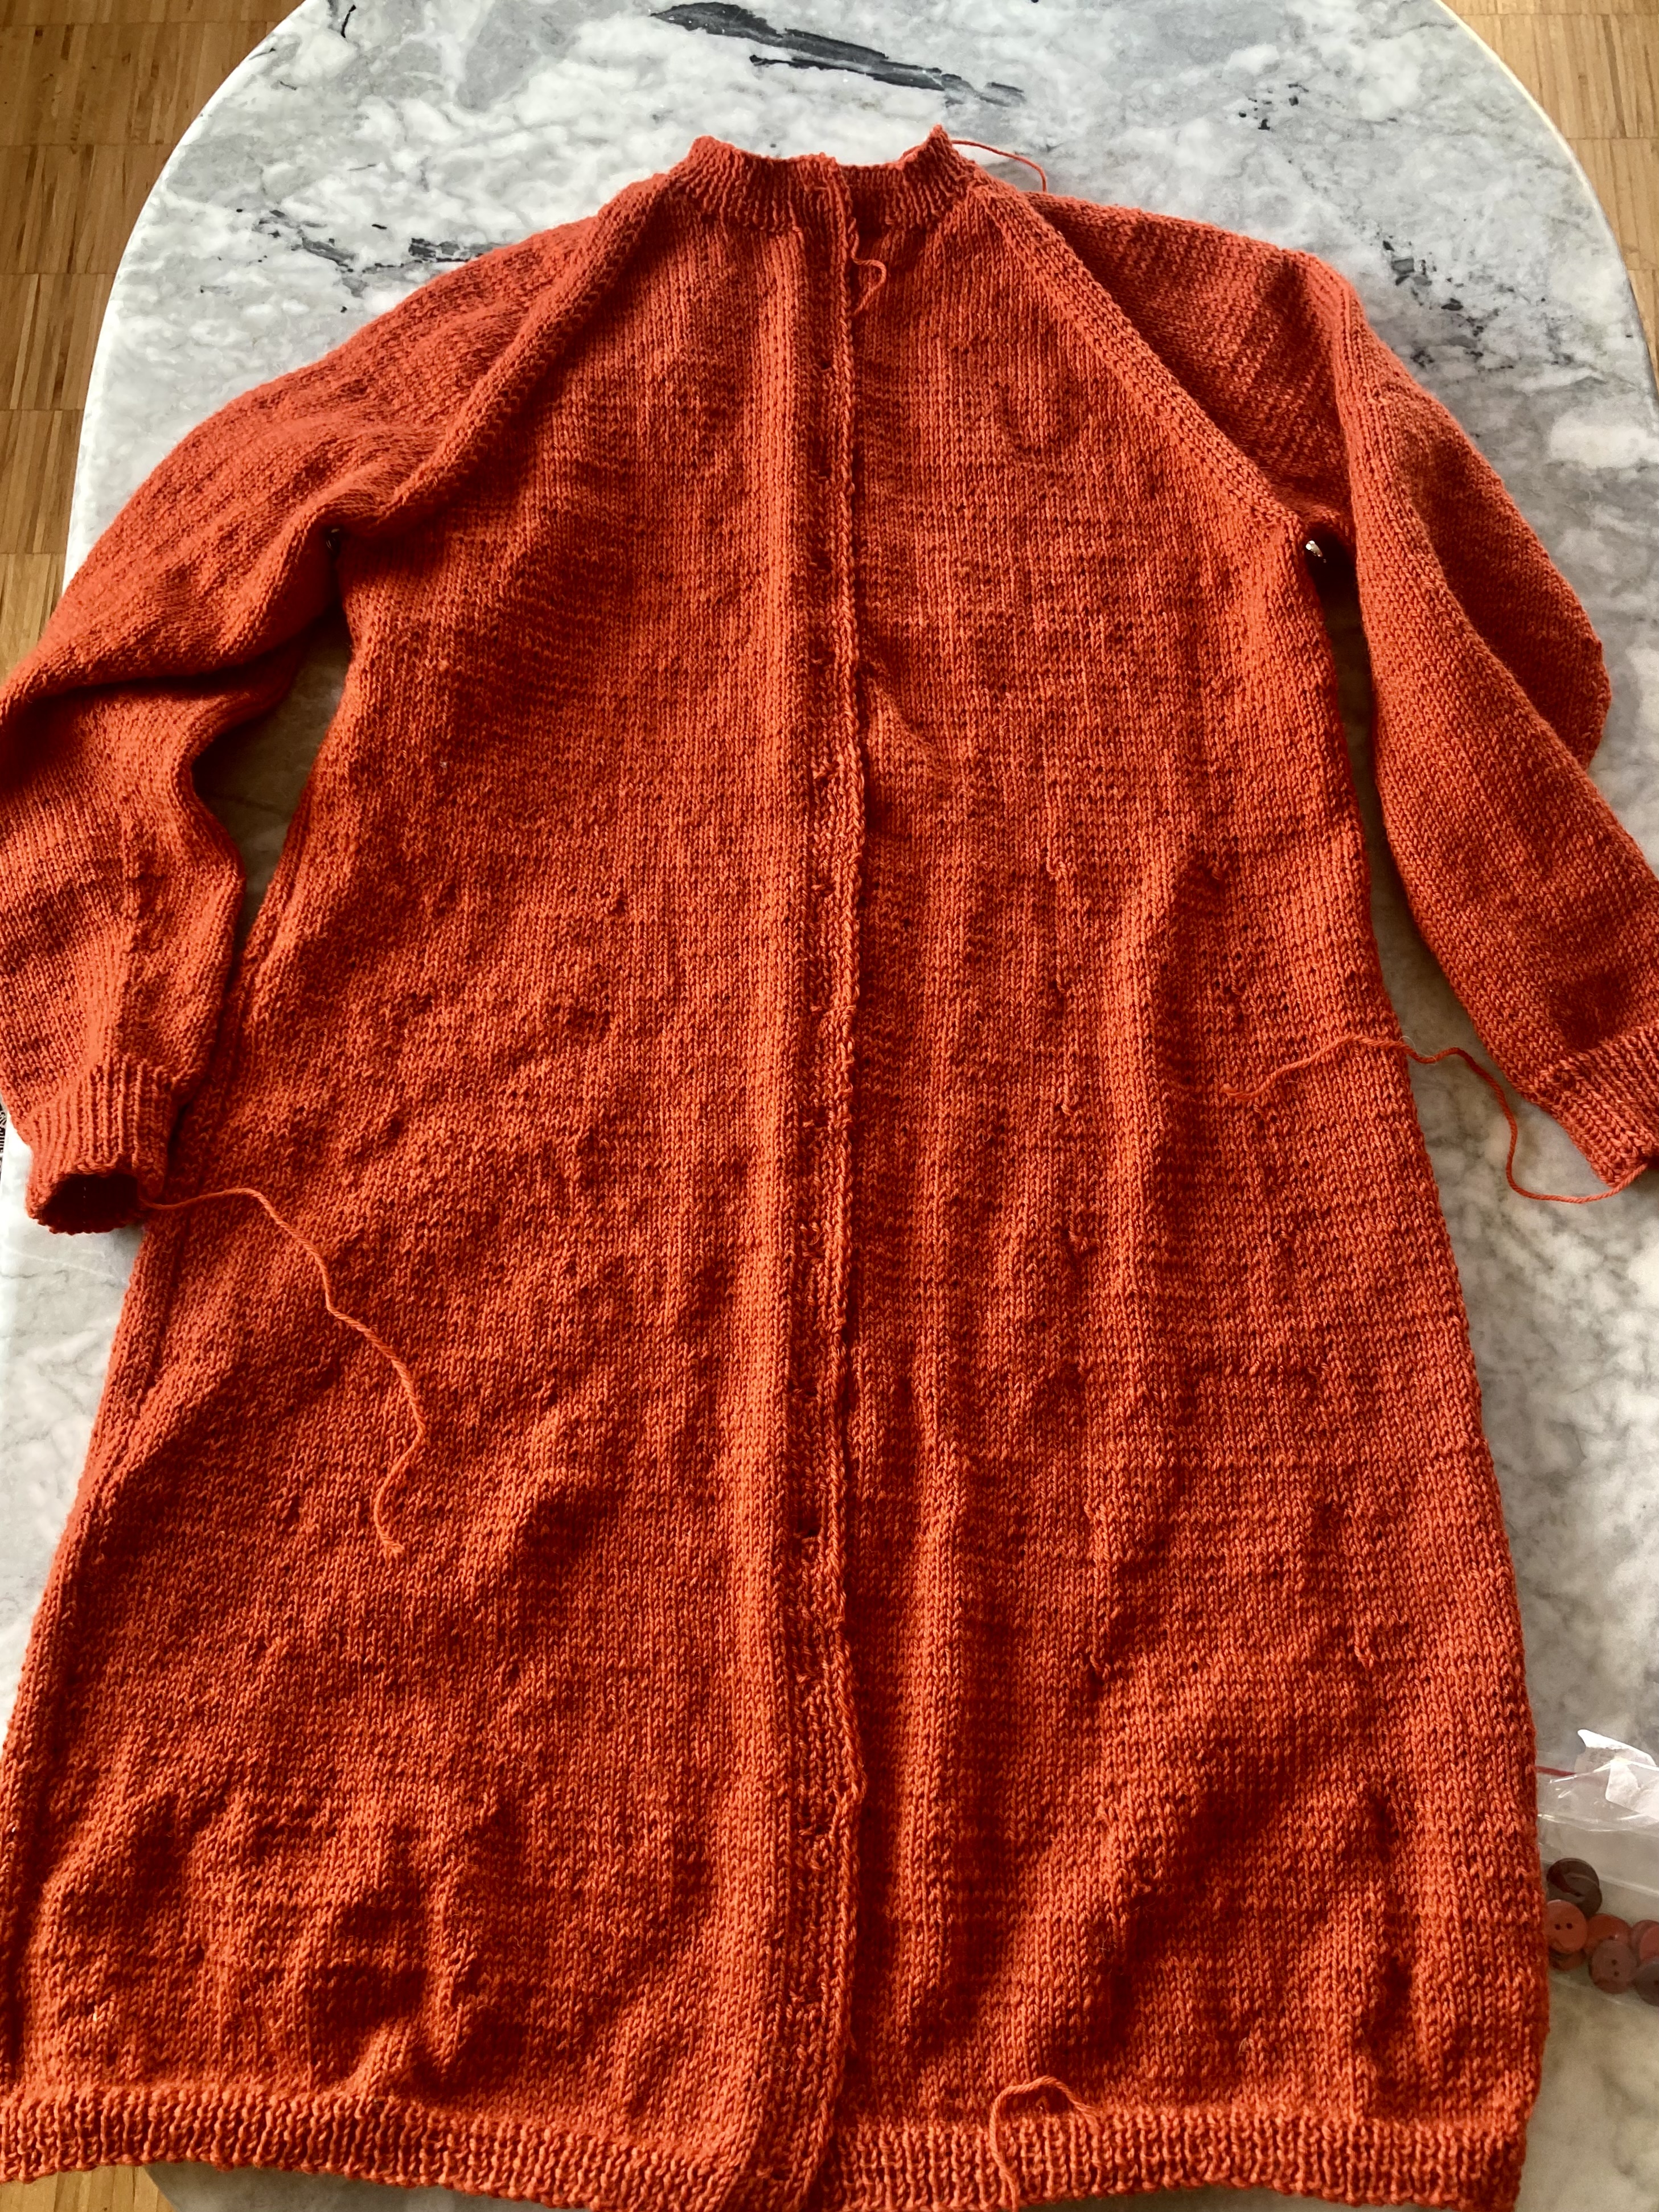
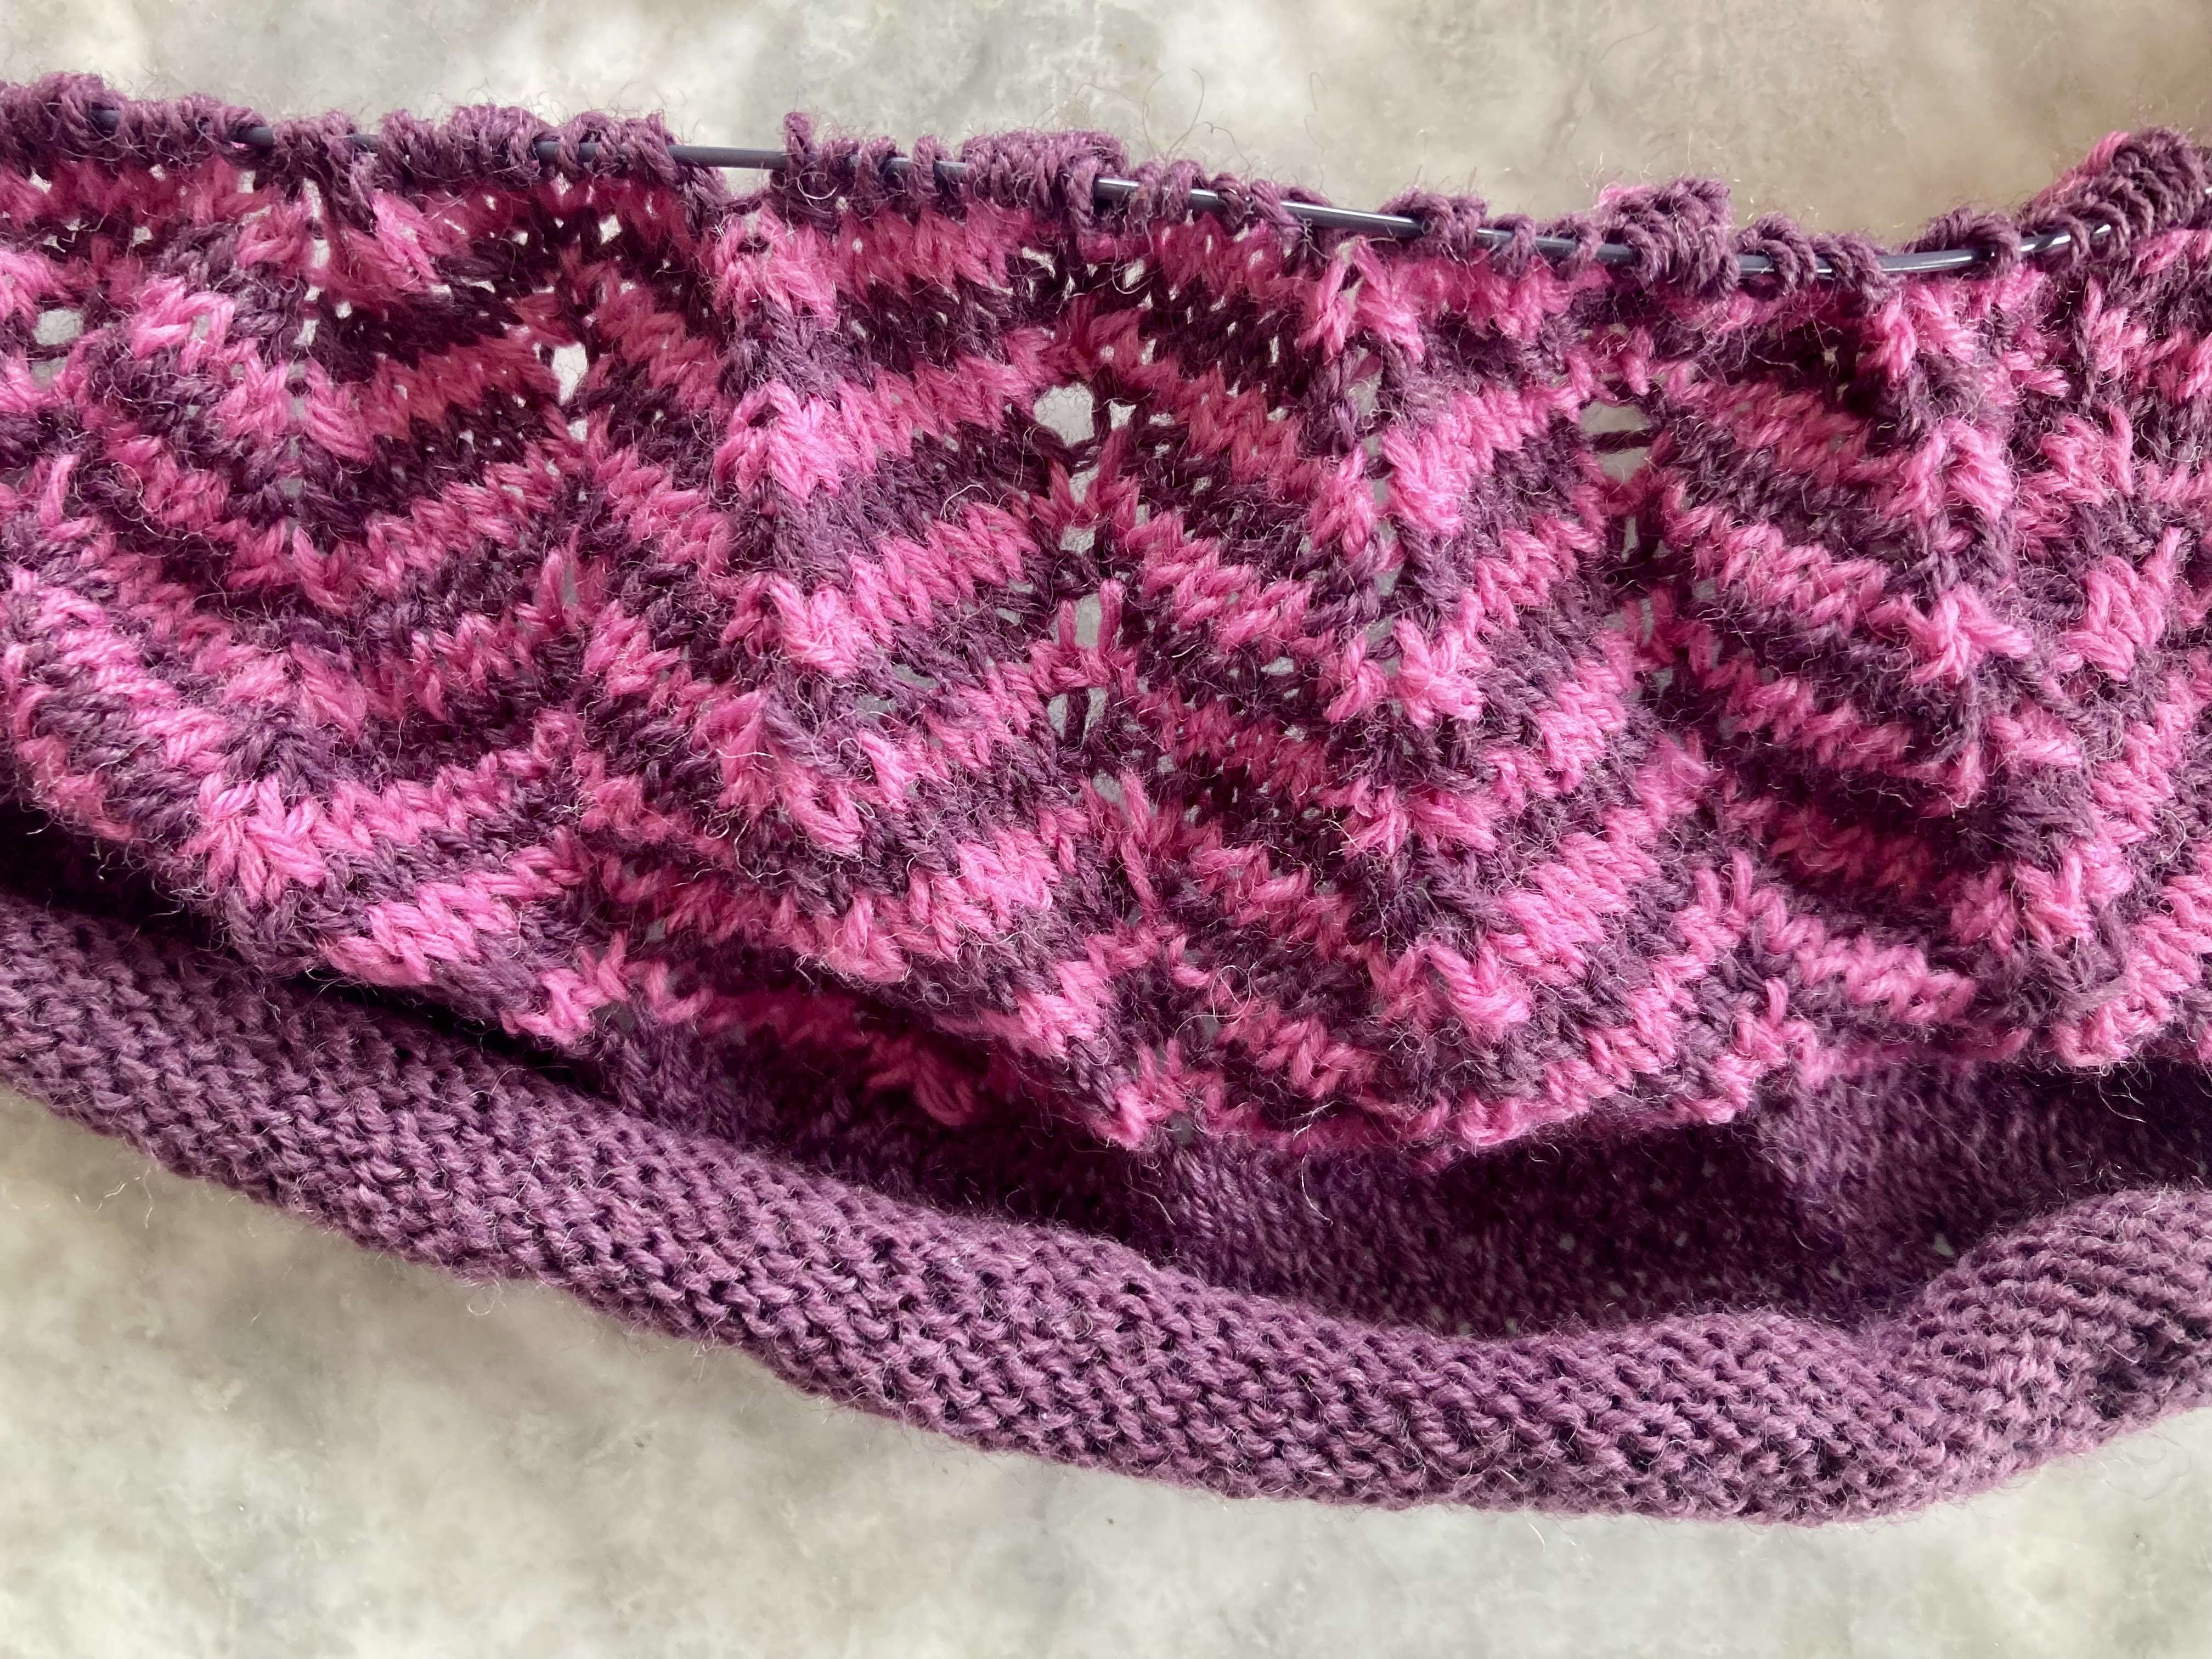
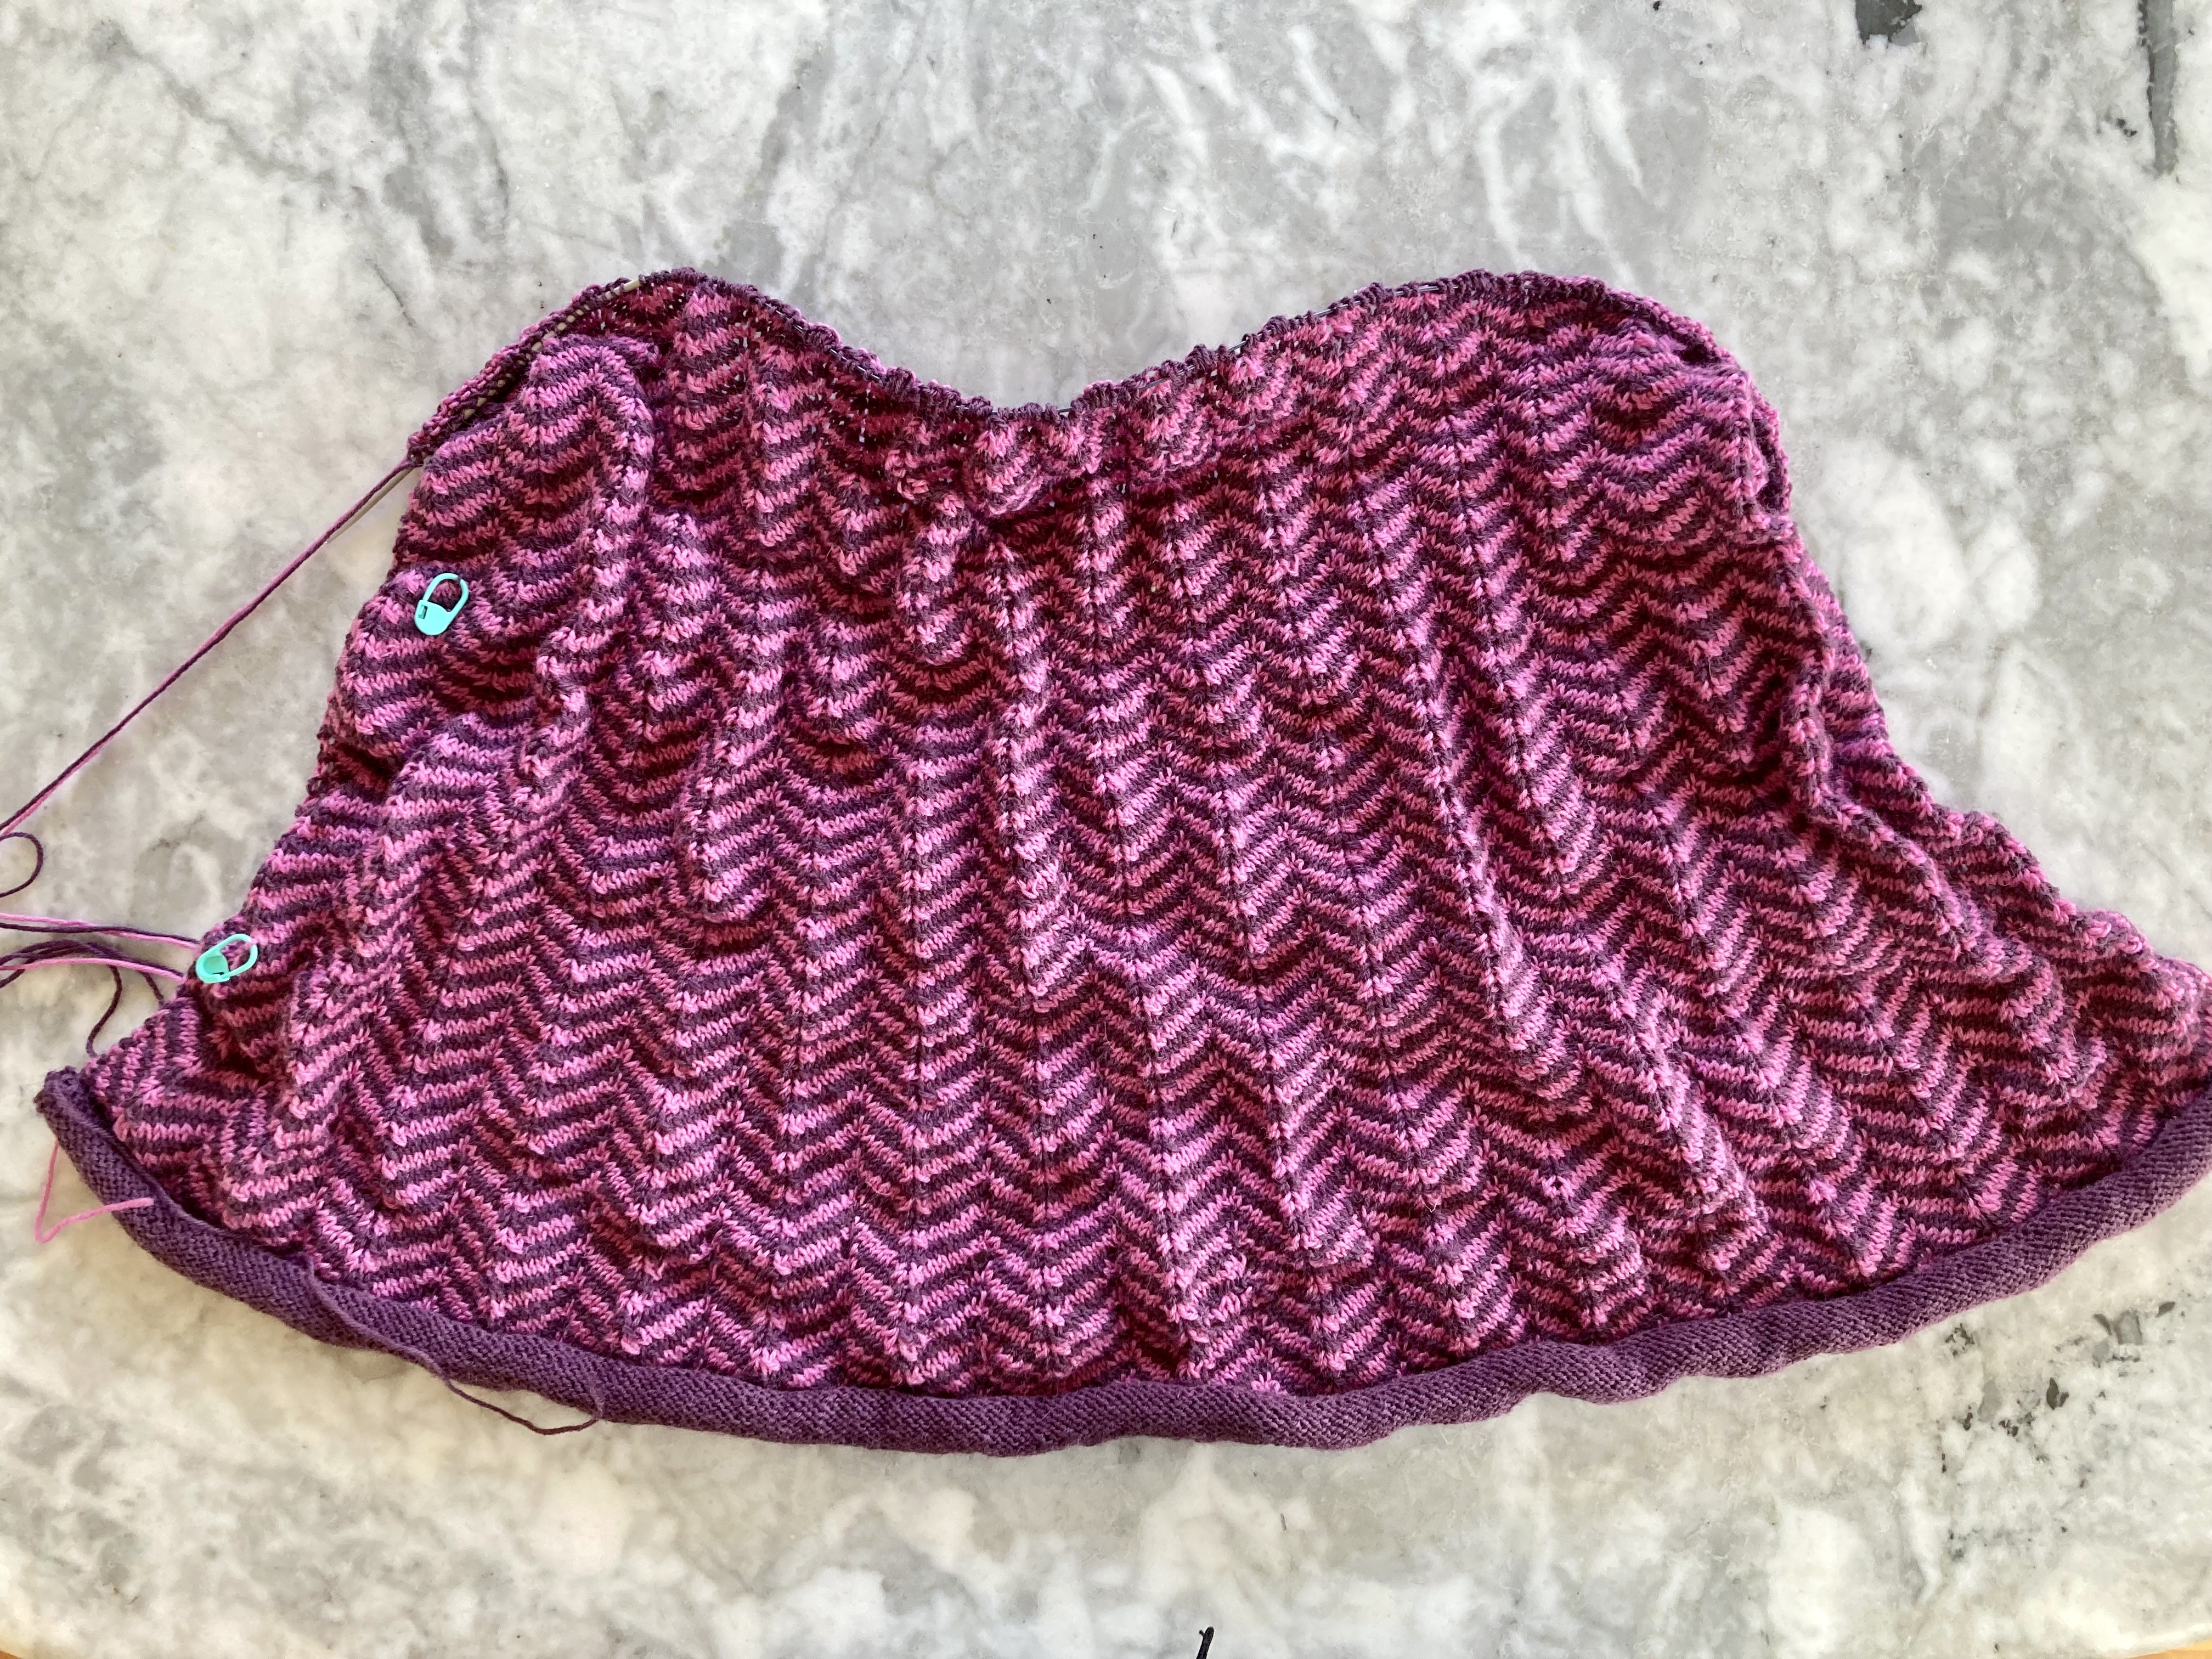
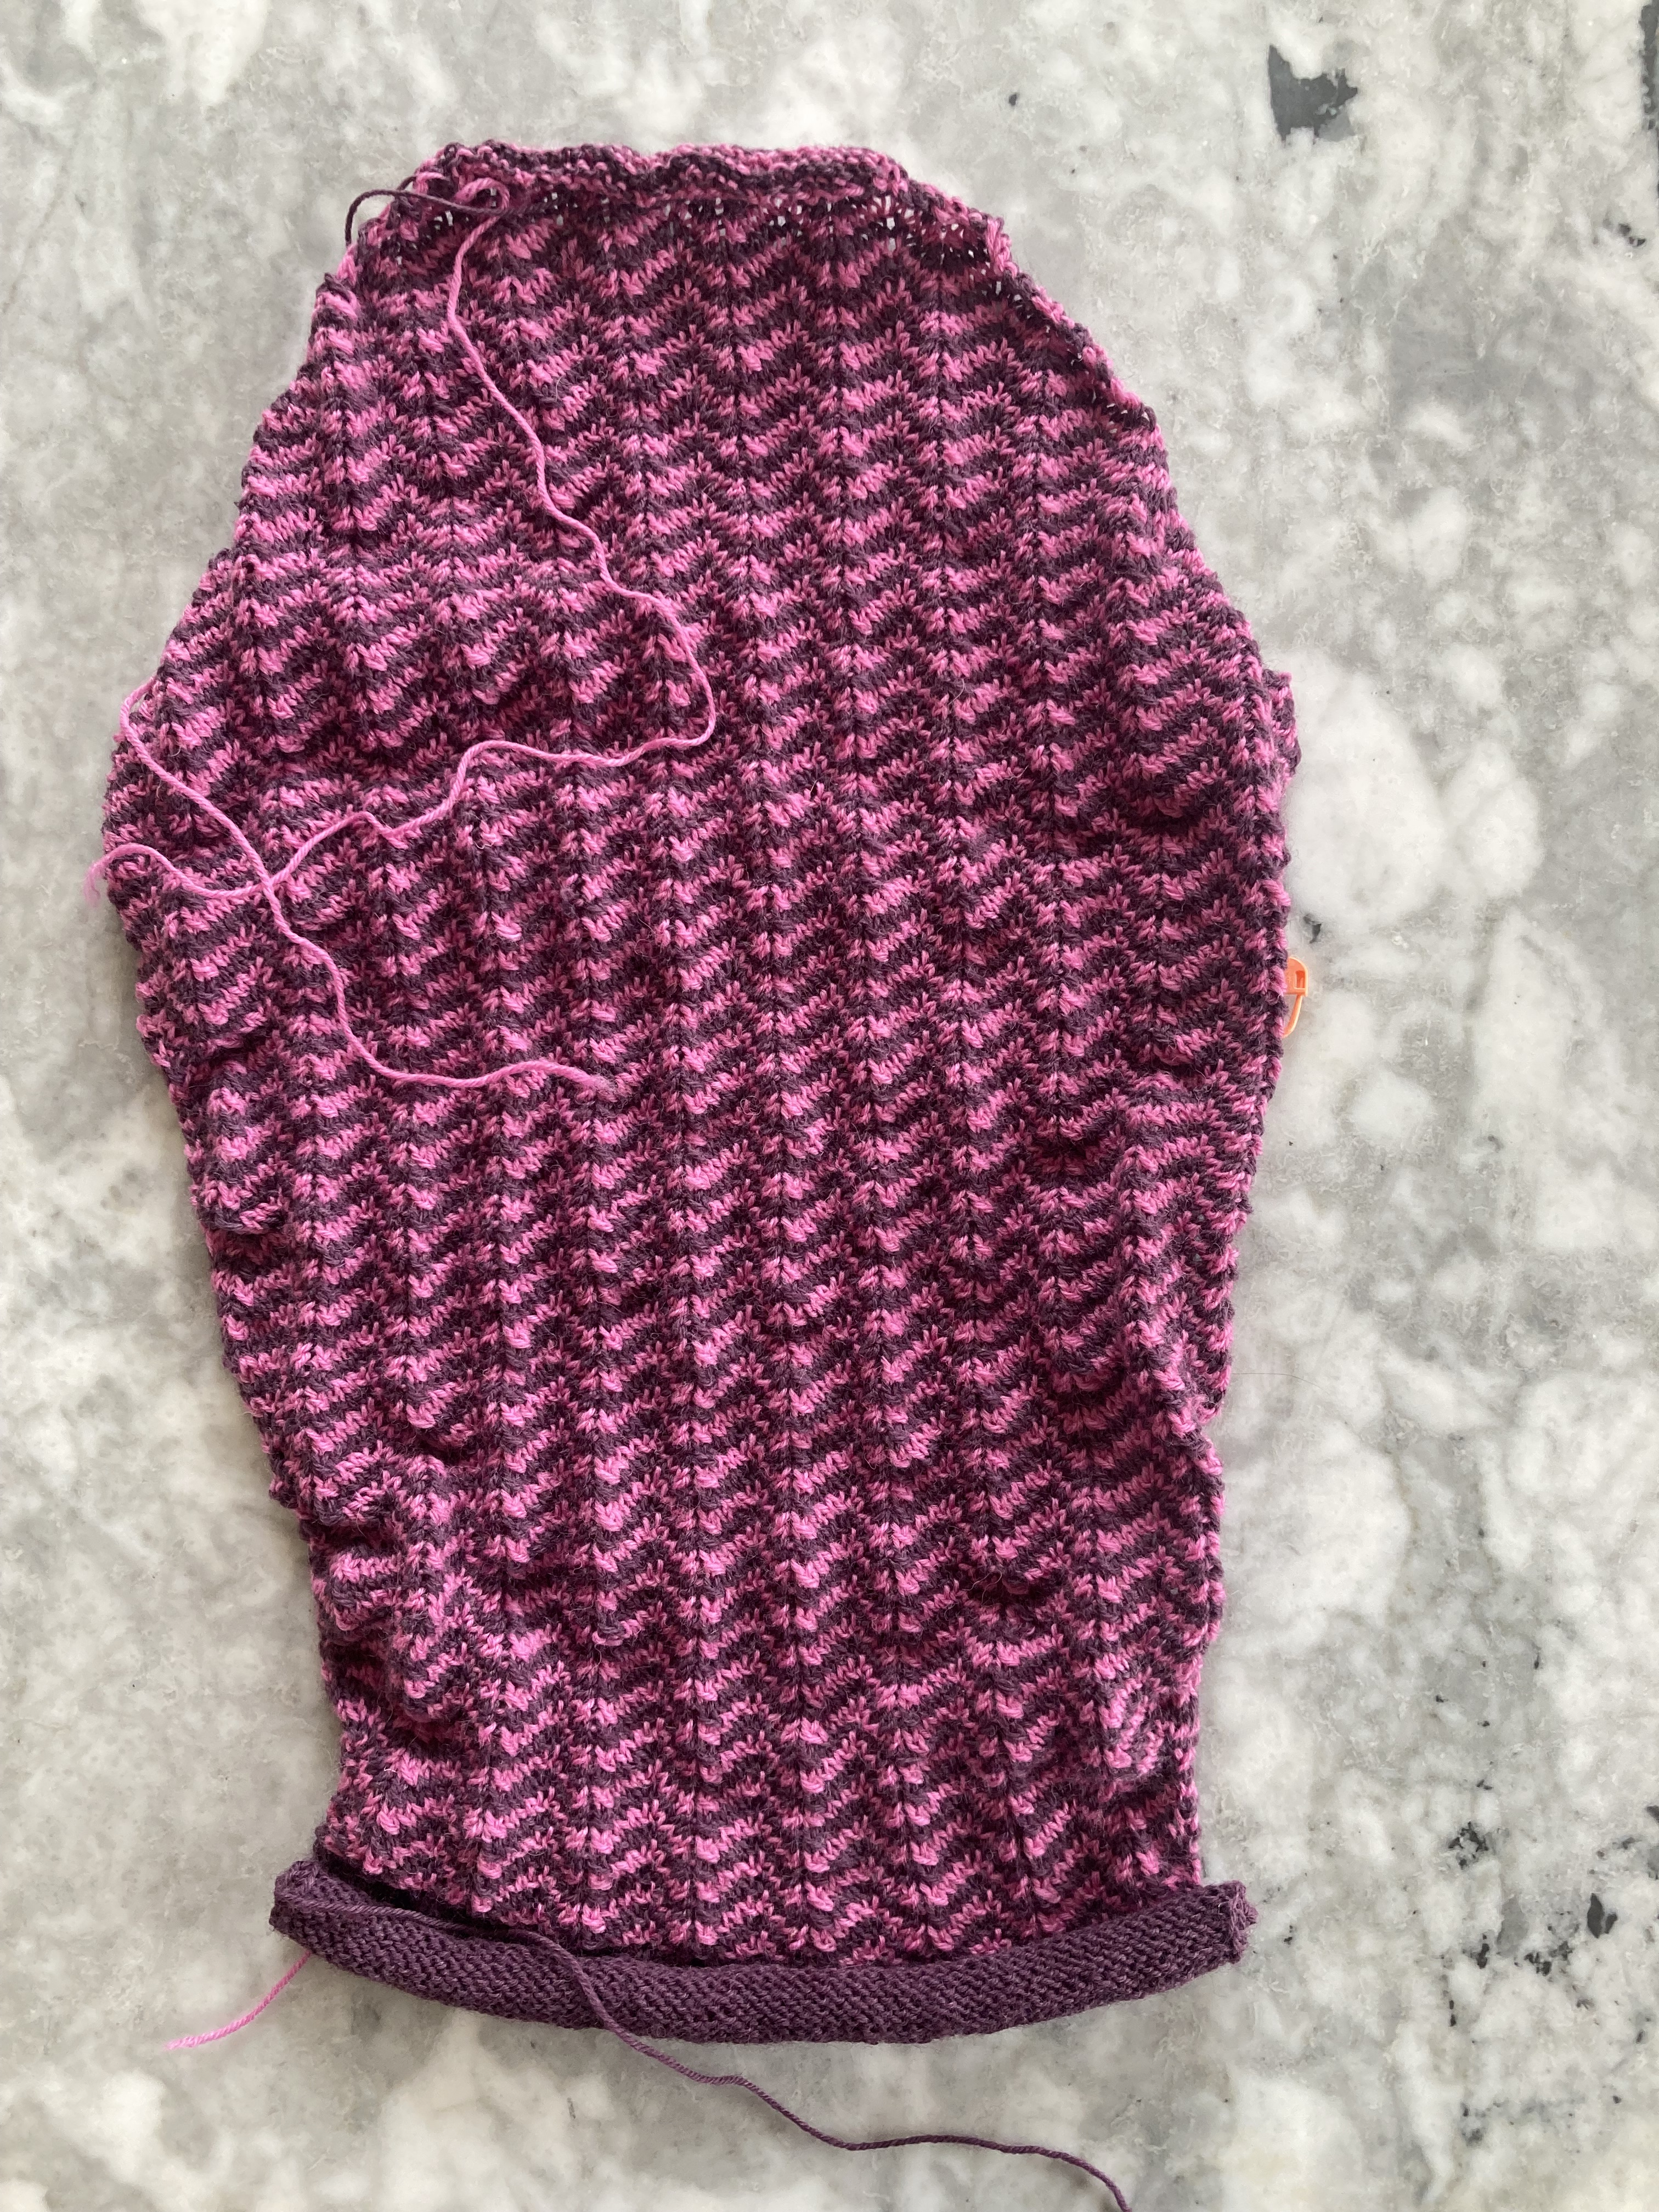
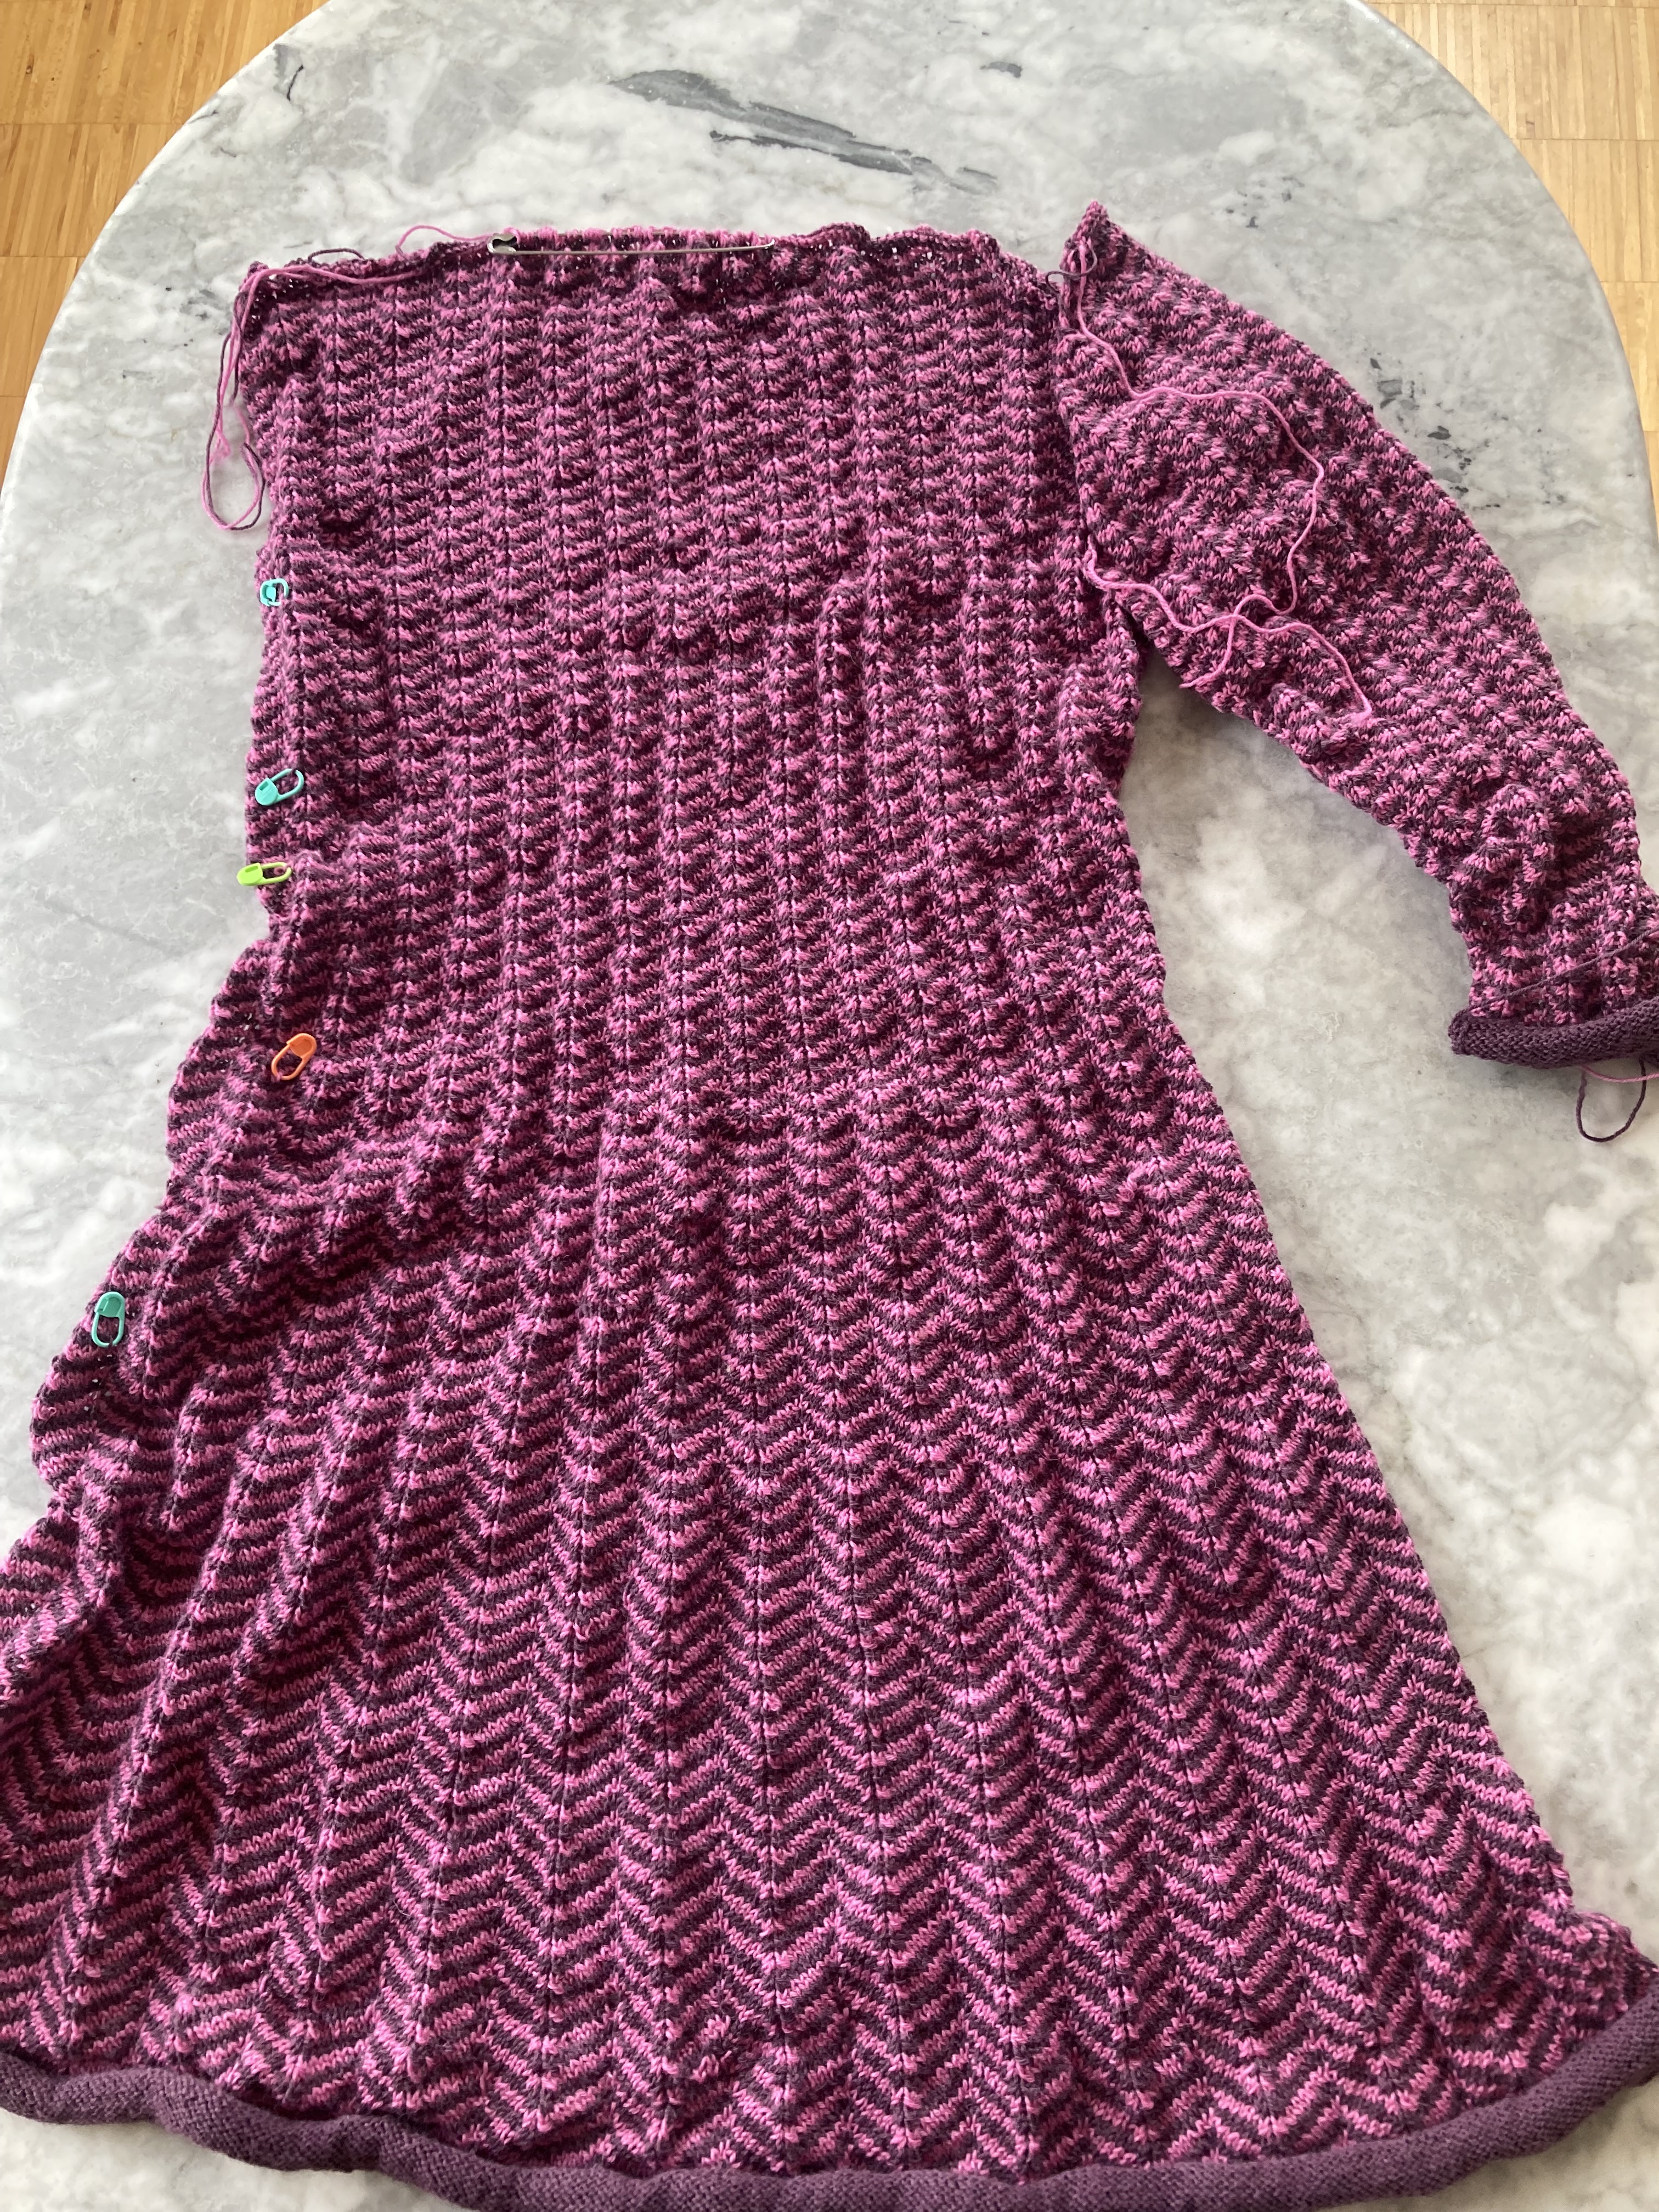
I made the sleeves first to check for size and tension. That had the extra advantage of not having to make the sleeves after finishing the entire body of the dress and procrastinating. I made them in the round and other than the wrists being a little tight, they were fine. I also made the body in one piece with fake side “seams” (1 extra p stitch) including the button bands. Of course, the bands should have been knit a little shorter than the garment and on a smaller-size needle. I was happy to ignore that rule this time, because if there was one thing I did not want to do, it was to knit and sew on extra vertical-rib button bands on a 34 inch long dress. Also, the skirt decreases were placed every 16 rows, which was conveniently about 2 inches apart — the exact spacing of the buttonholes. For once in my knitting career, all the buttonholes were evenly spaced!
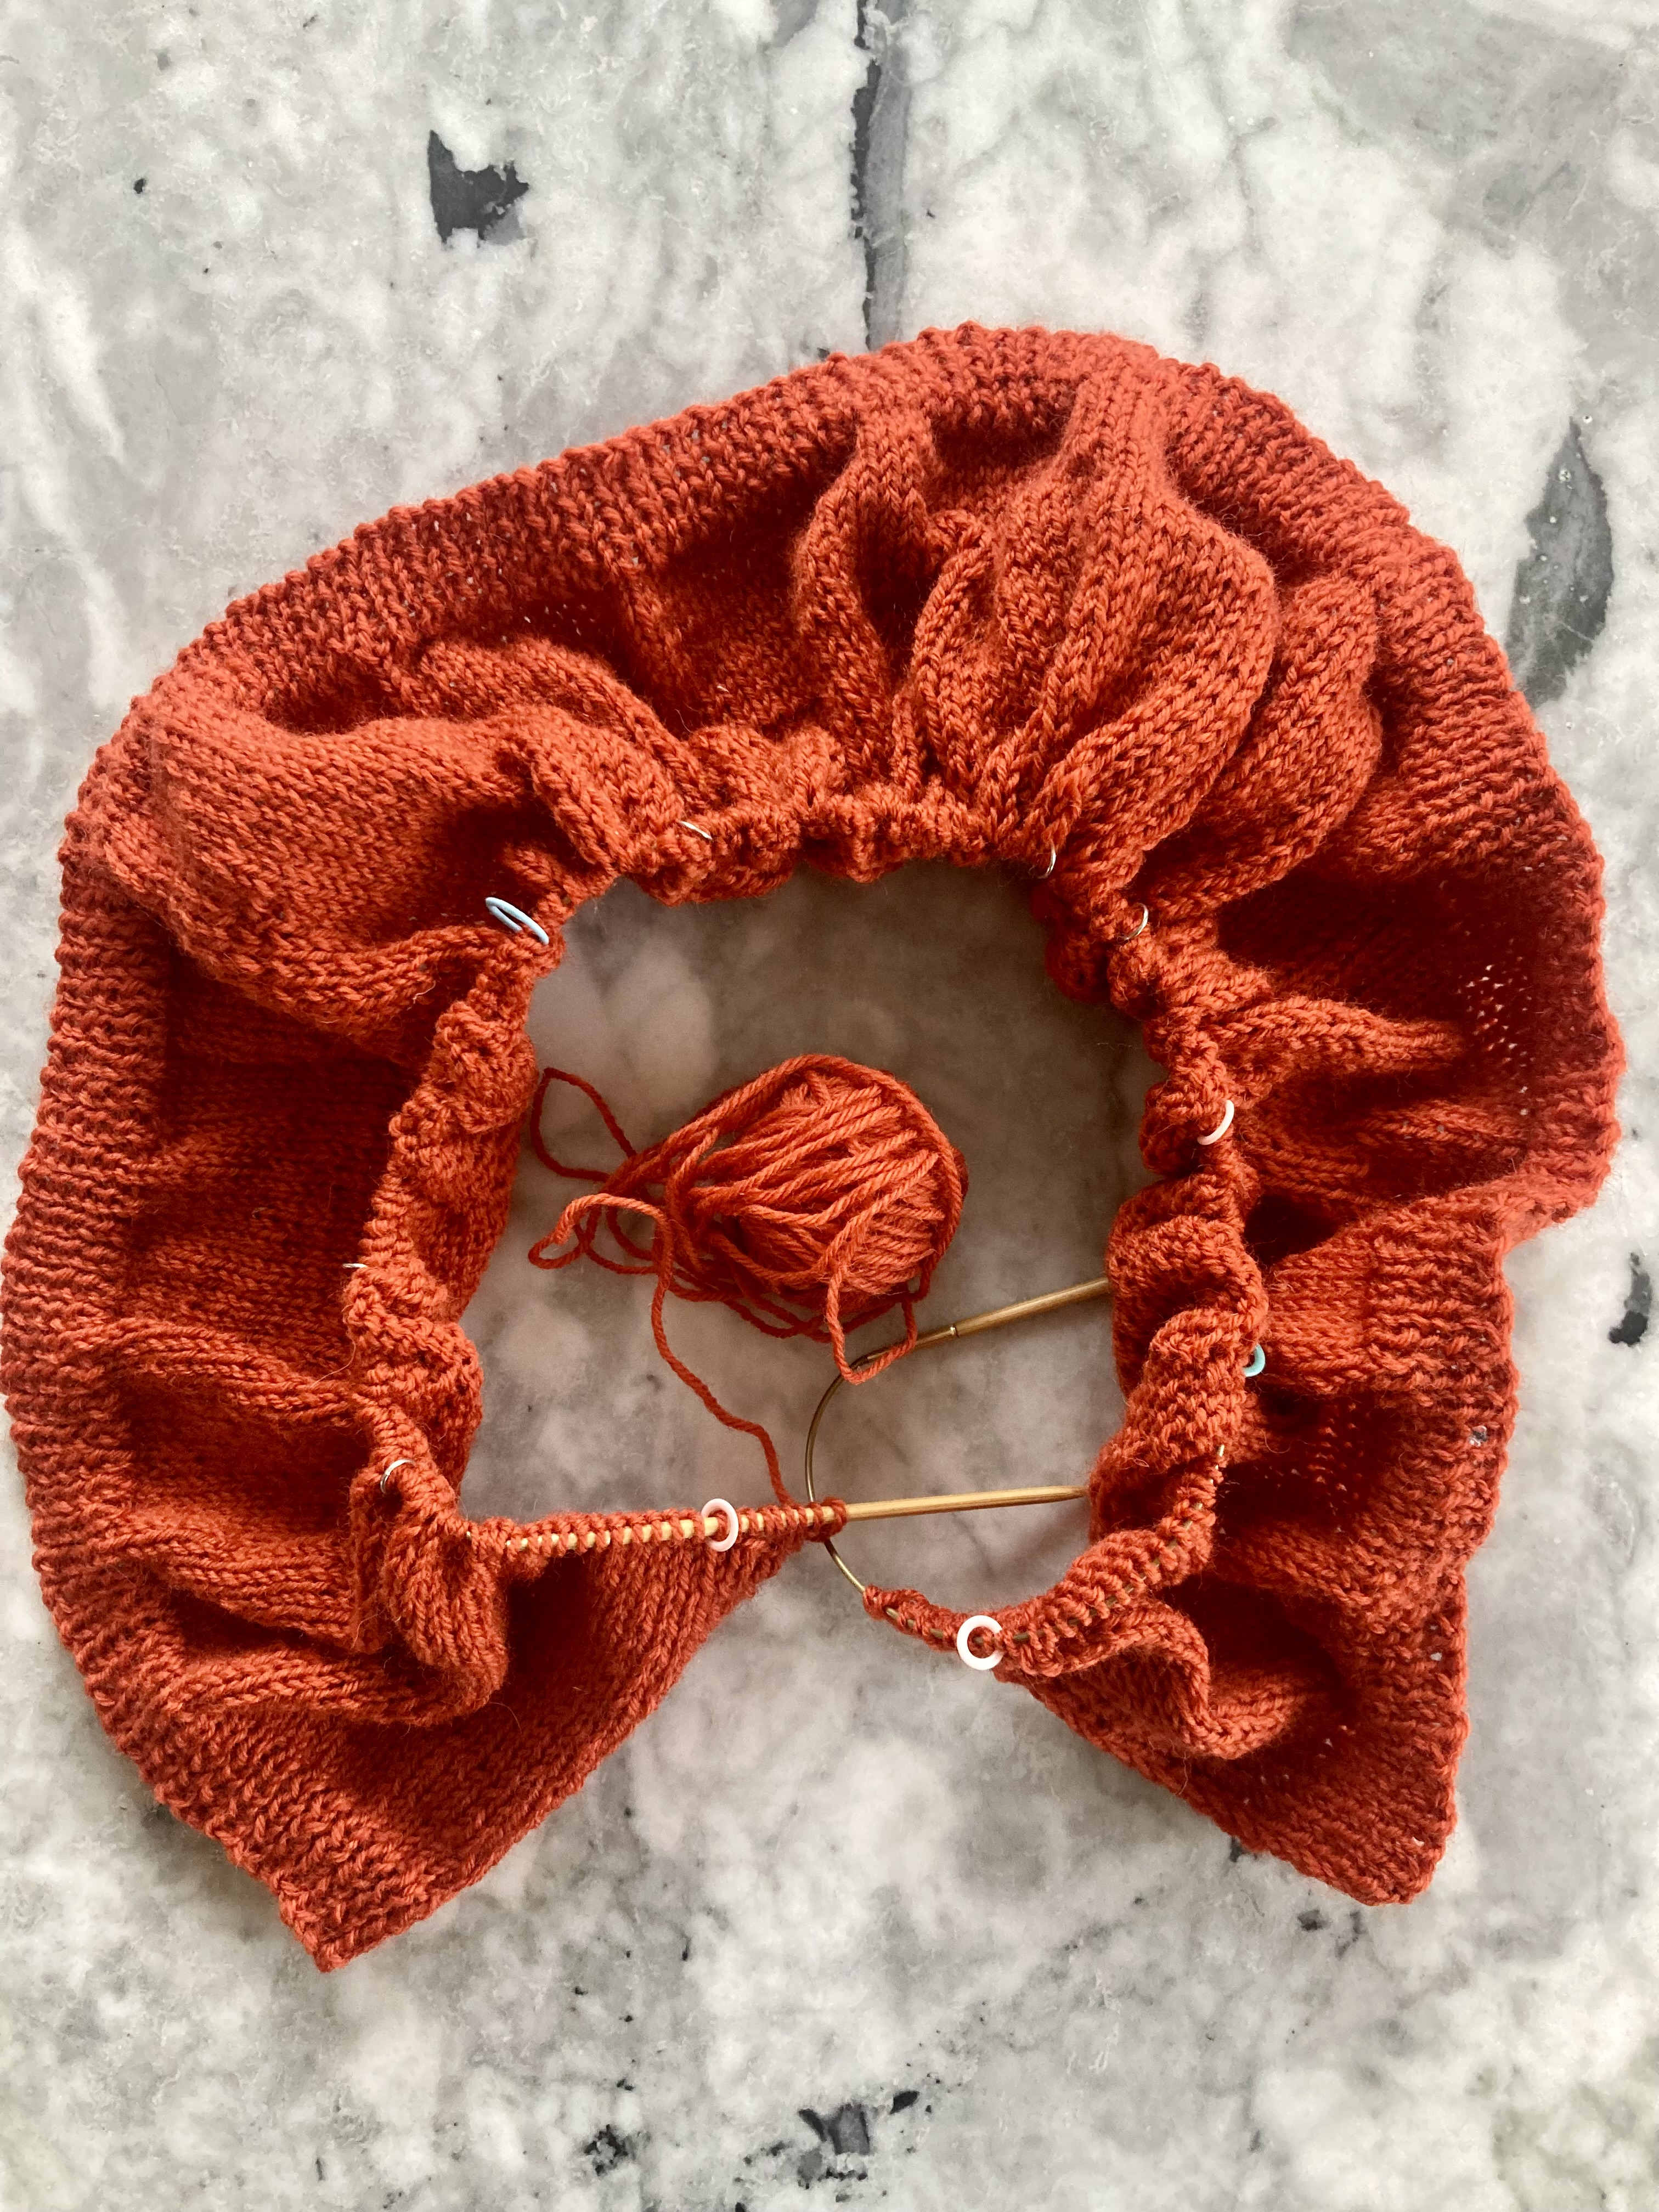
It started off very slowly, because the skirt is wide at the hem, and I was worried that I might not have enough yarn, since the first 100 or 150 grams got knitted away very quickly. It slowed down with the decreases, though (8 stitches decreased every 16 rows in “princess seam” style, 2 rows of decreases the the right and left of the center line on both front and back.) For a slightly more nipped-in waist, I continued the decreases 1 more time and then, after a couple of inches straight, increased on the side “seams” until the stitch count was back up to the 3rd size.
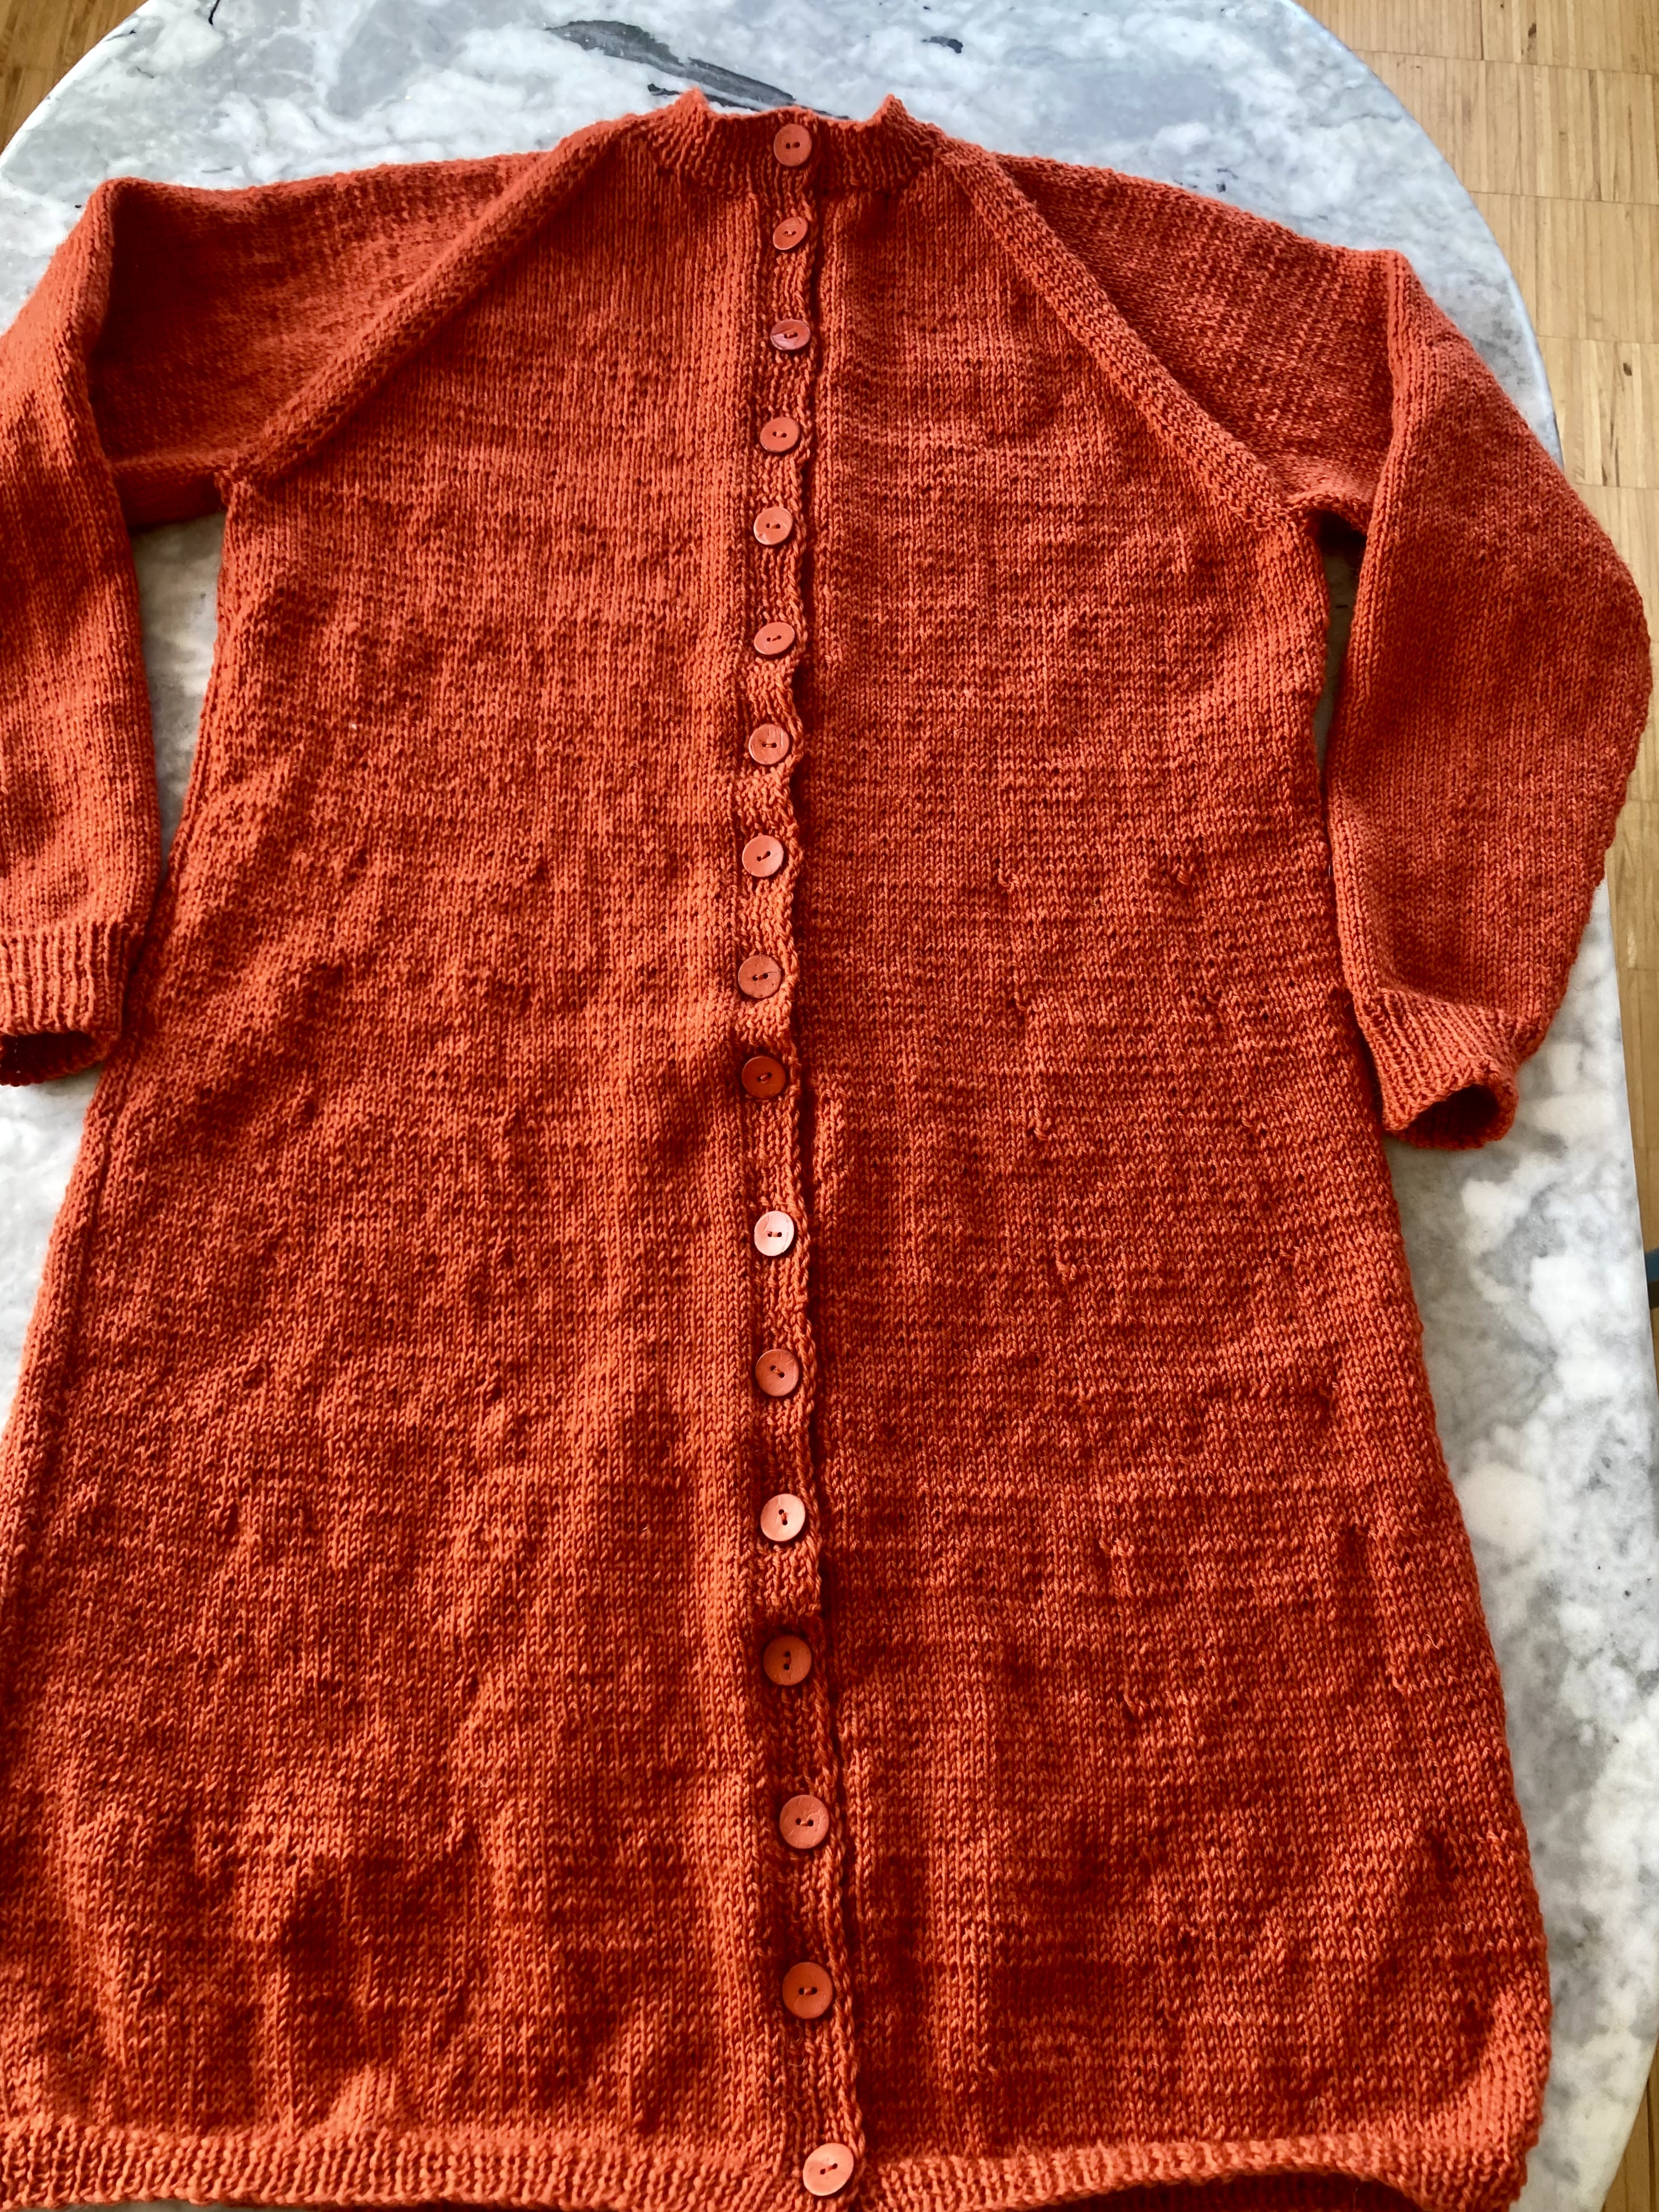
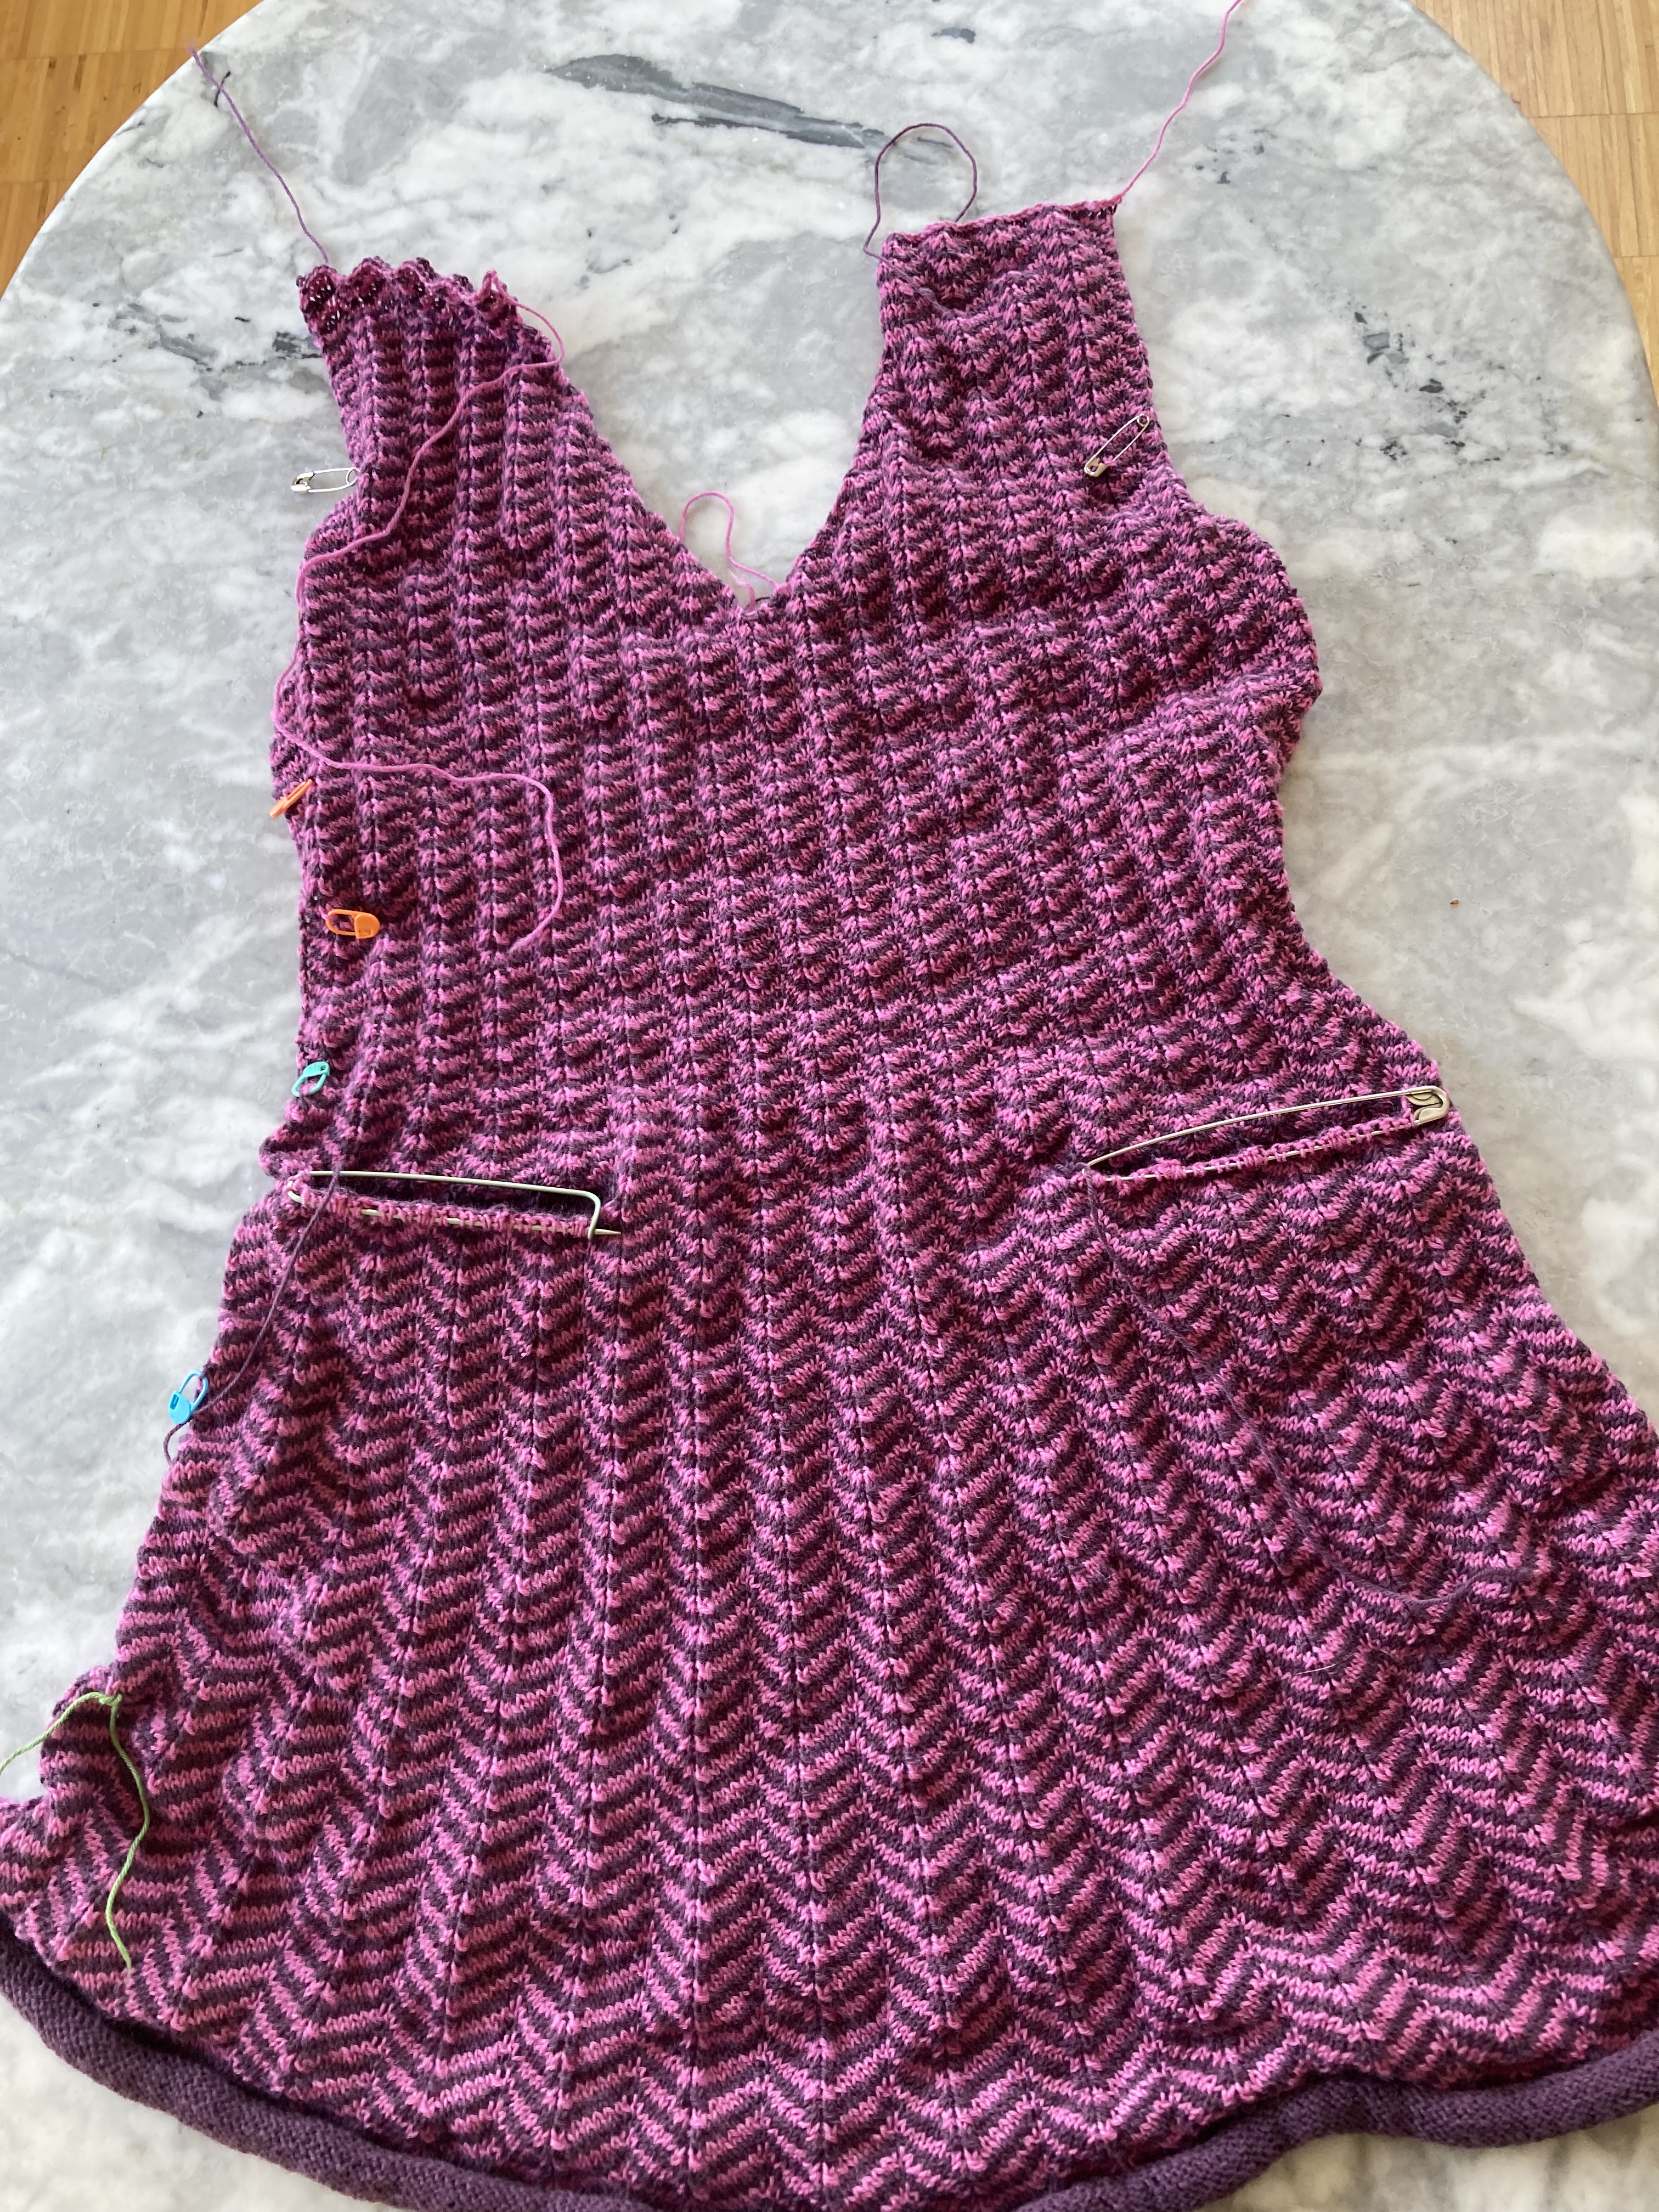
It was hard to try on while knitting, since the front edges curled a lot before blocking and buttoning. I found some incredible and very 1960s looking buttons, but there were not enough of them at the shop and they couldn’t be re-ordered. Bummer! The cover model seems to have those plain, clear plastic buttons that one otherwise uses to close a duvet clover. I found similar plain buttons in a surprsingly good matching burnt orange shade, and there were exactly 18 of them in stock (17 for the dress and one extra.)
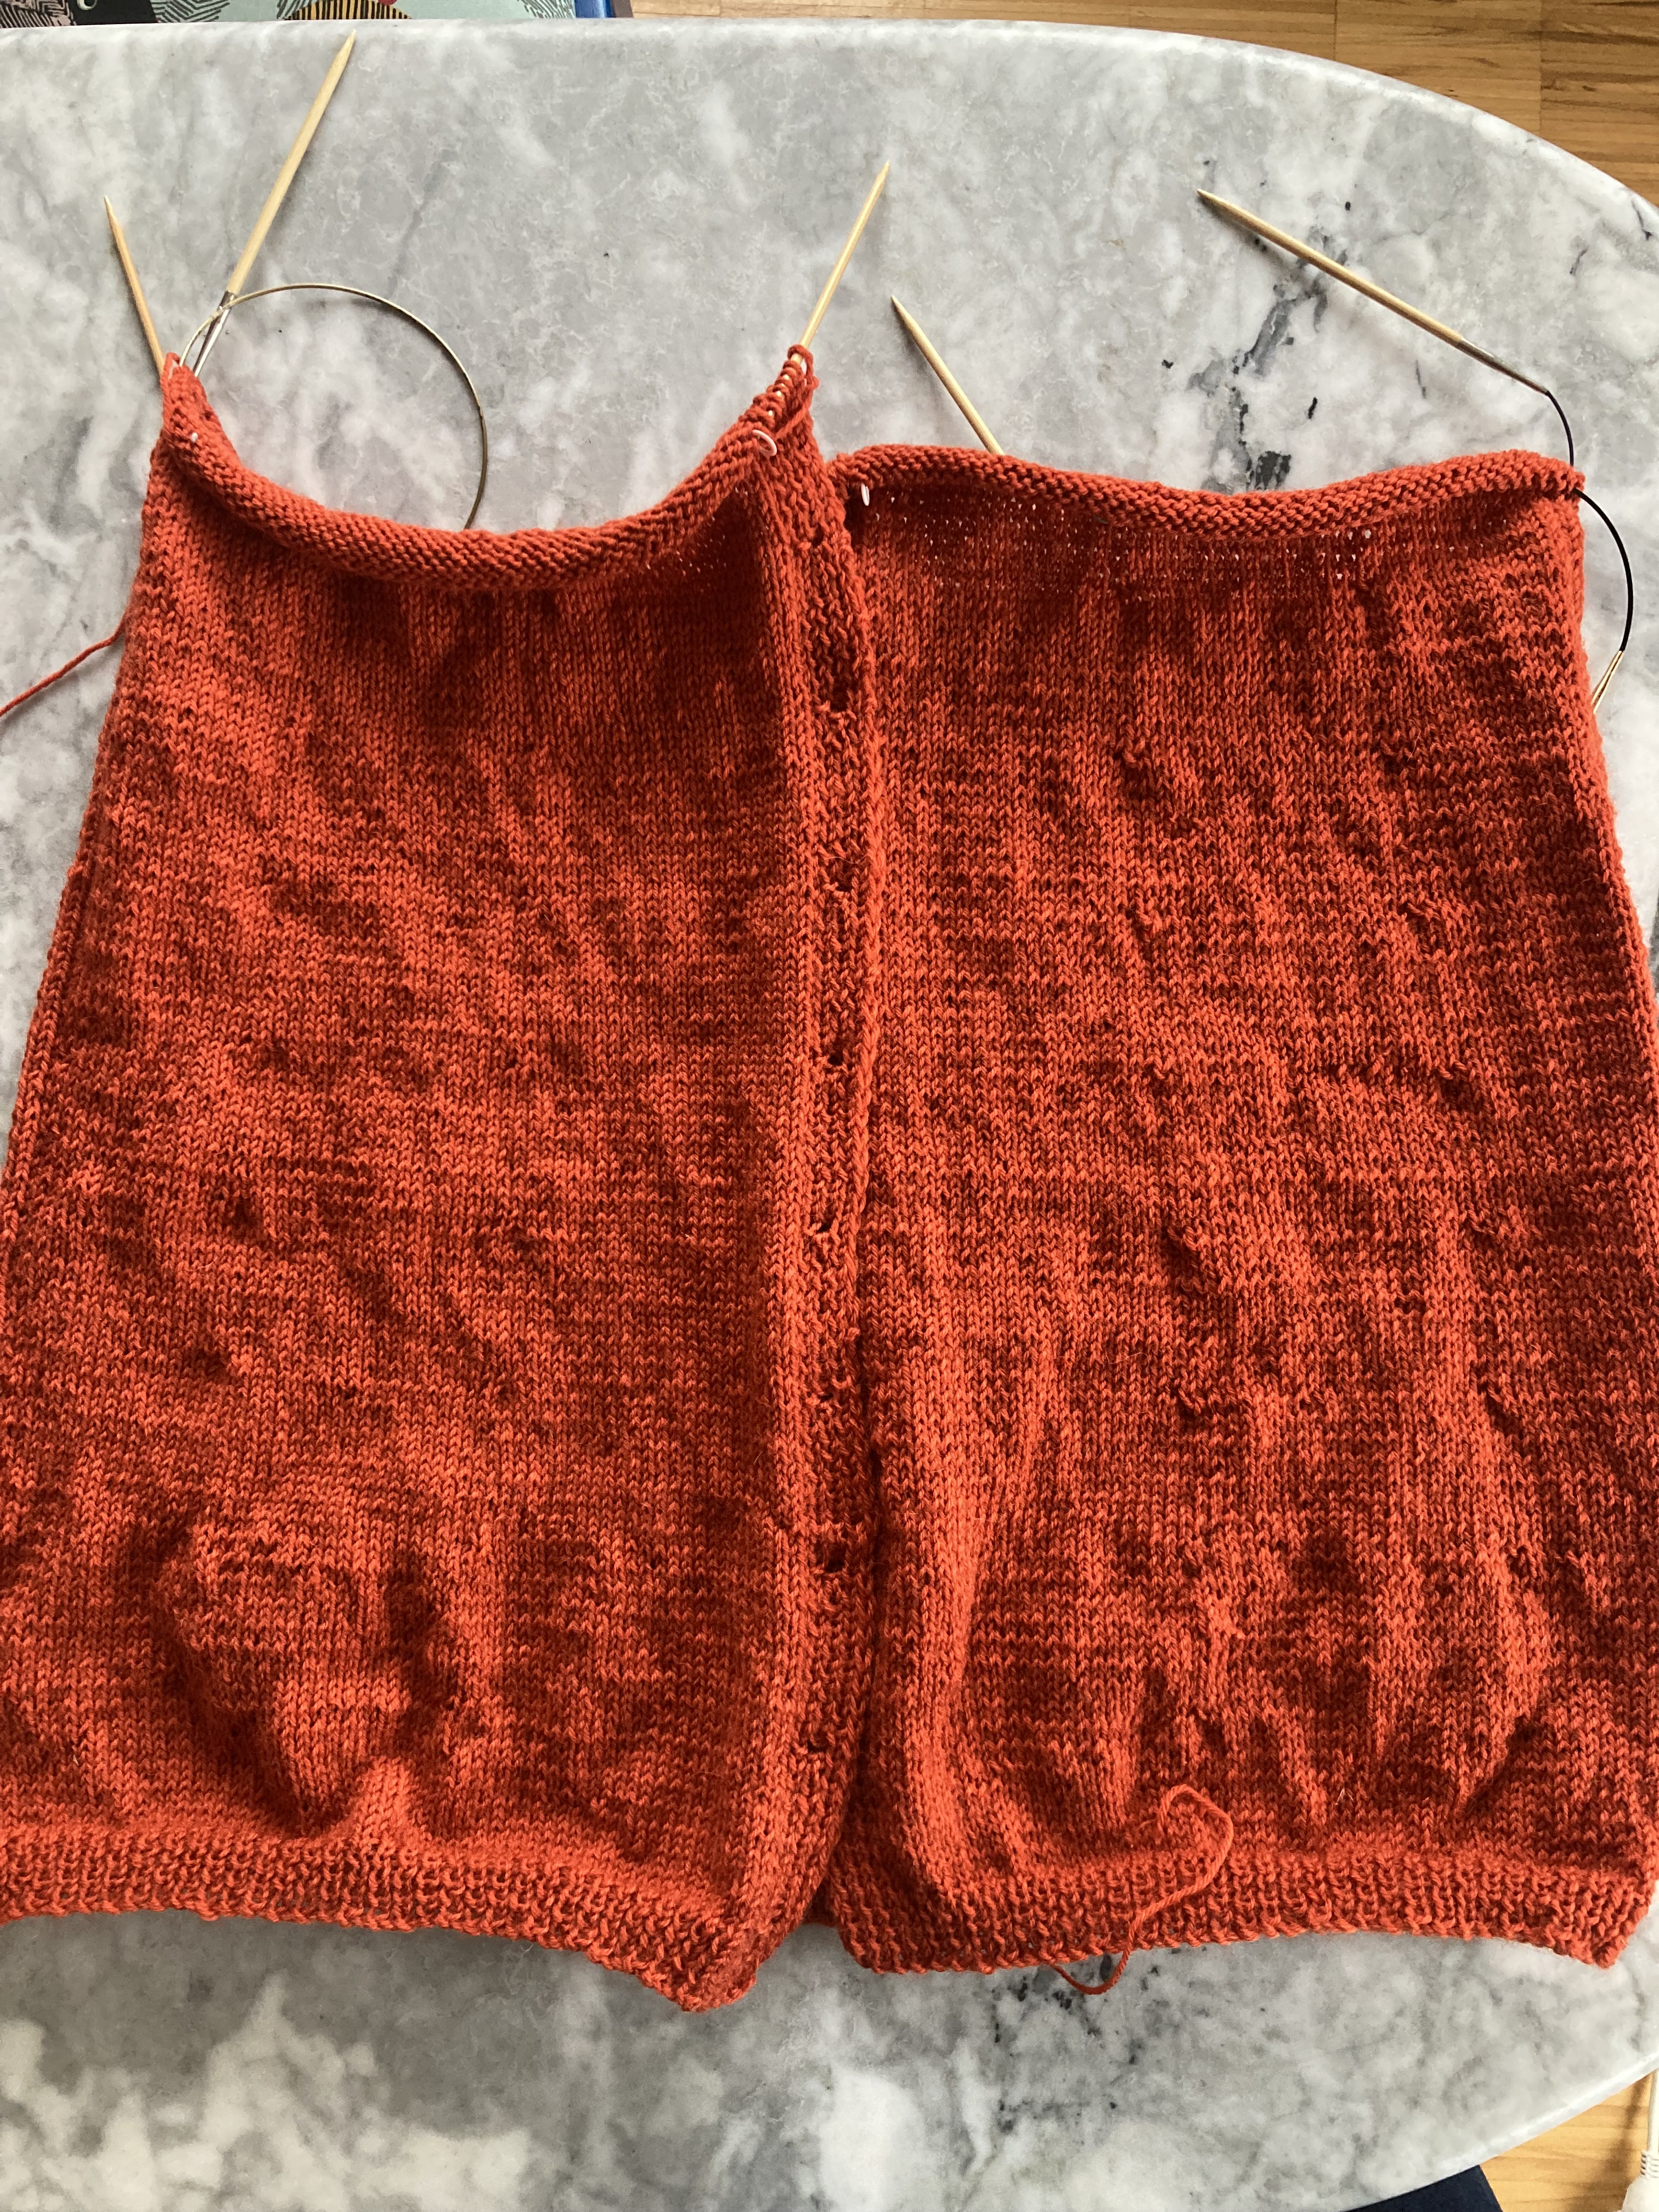
The G-B Jil wool washes really well in the machine and can be dried in the dryer. It’s superwash, so I knew it would stretch bit when washed and could either be dried flat to keep it slightly larger, or dried in the machine to shrink it down a bit. I knit and blocked the pockets separately and sewed them on after everything was dry and flat, to get a good placement. The pattern said to place them 4.5 inches up from the bottom hem, which seemed too low to me… and also seems lower than in the pattern photo. If it annoys me, I can always remove them and sew them on a little higher — the advantage of patch pockets.
The dress fit quite well after being dried flat. The only problem was that the neckline was a bit too high and the last button pressed against the front of my throat annoyingly. Looking back at the magazine photo, I see the Stitchcraft model had the same problem! I adopted the same solution: leave the top button unbuttoned.
We had a great photo session at our Monday knit night and even got a perfect 60s-esque colour-block background.
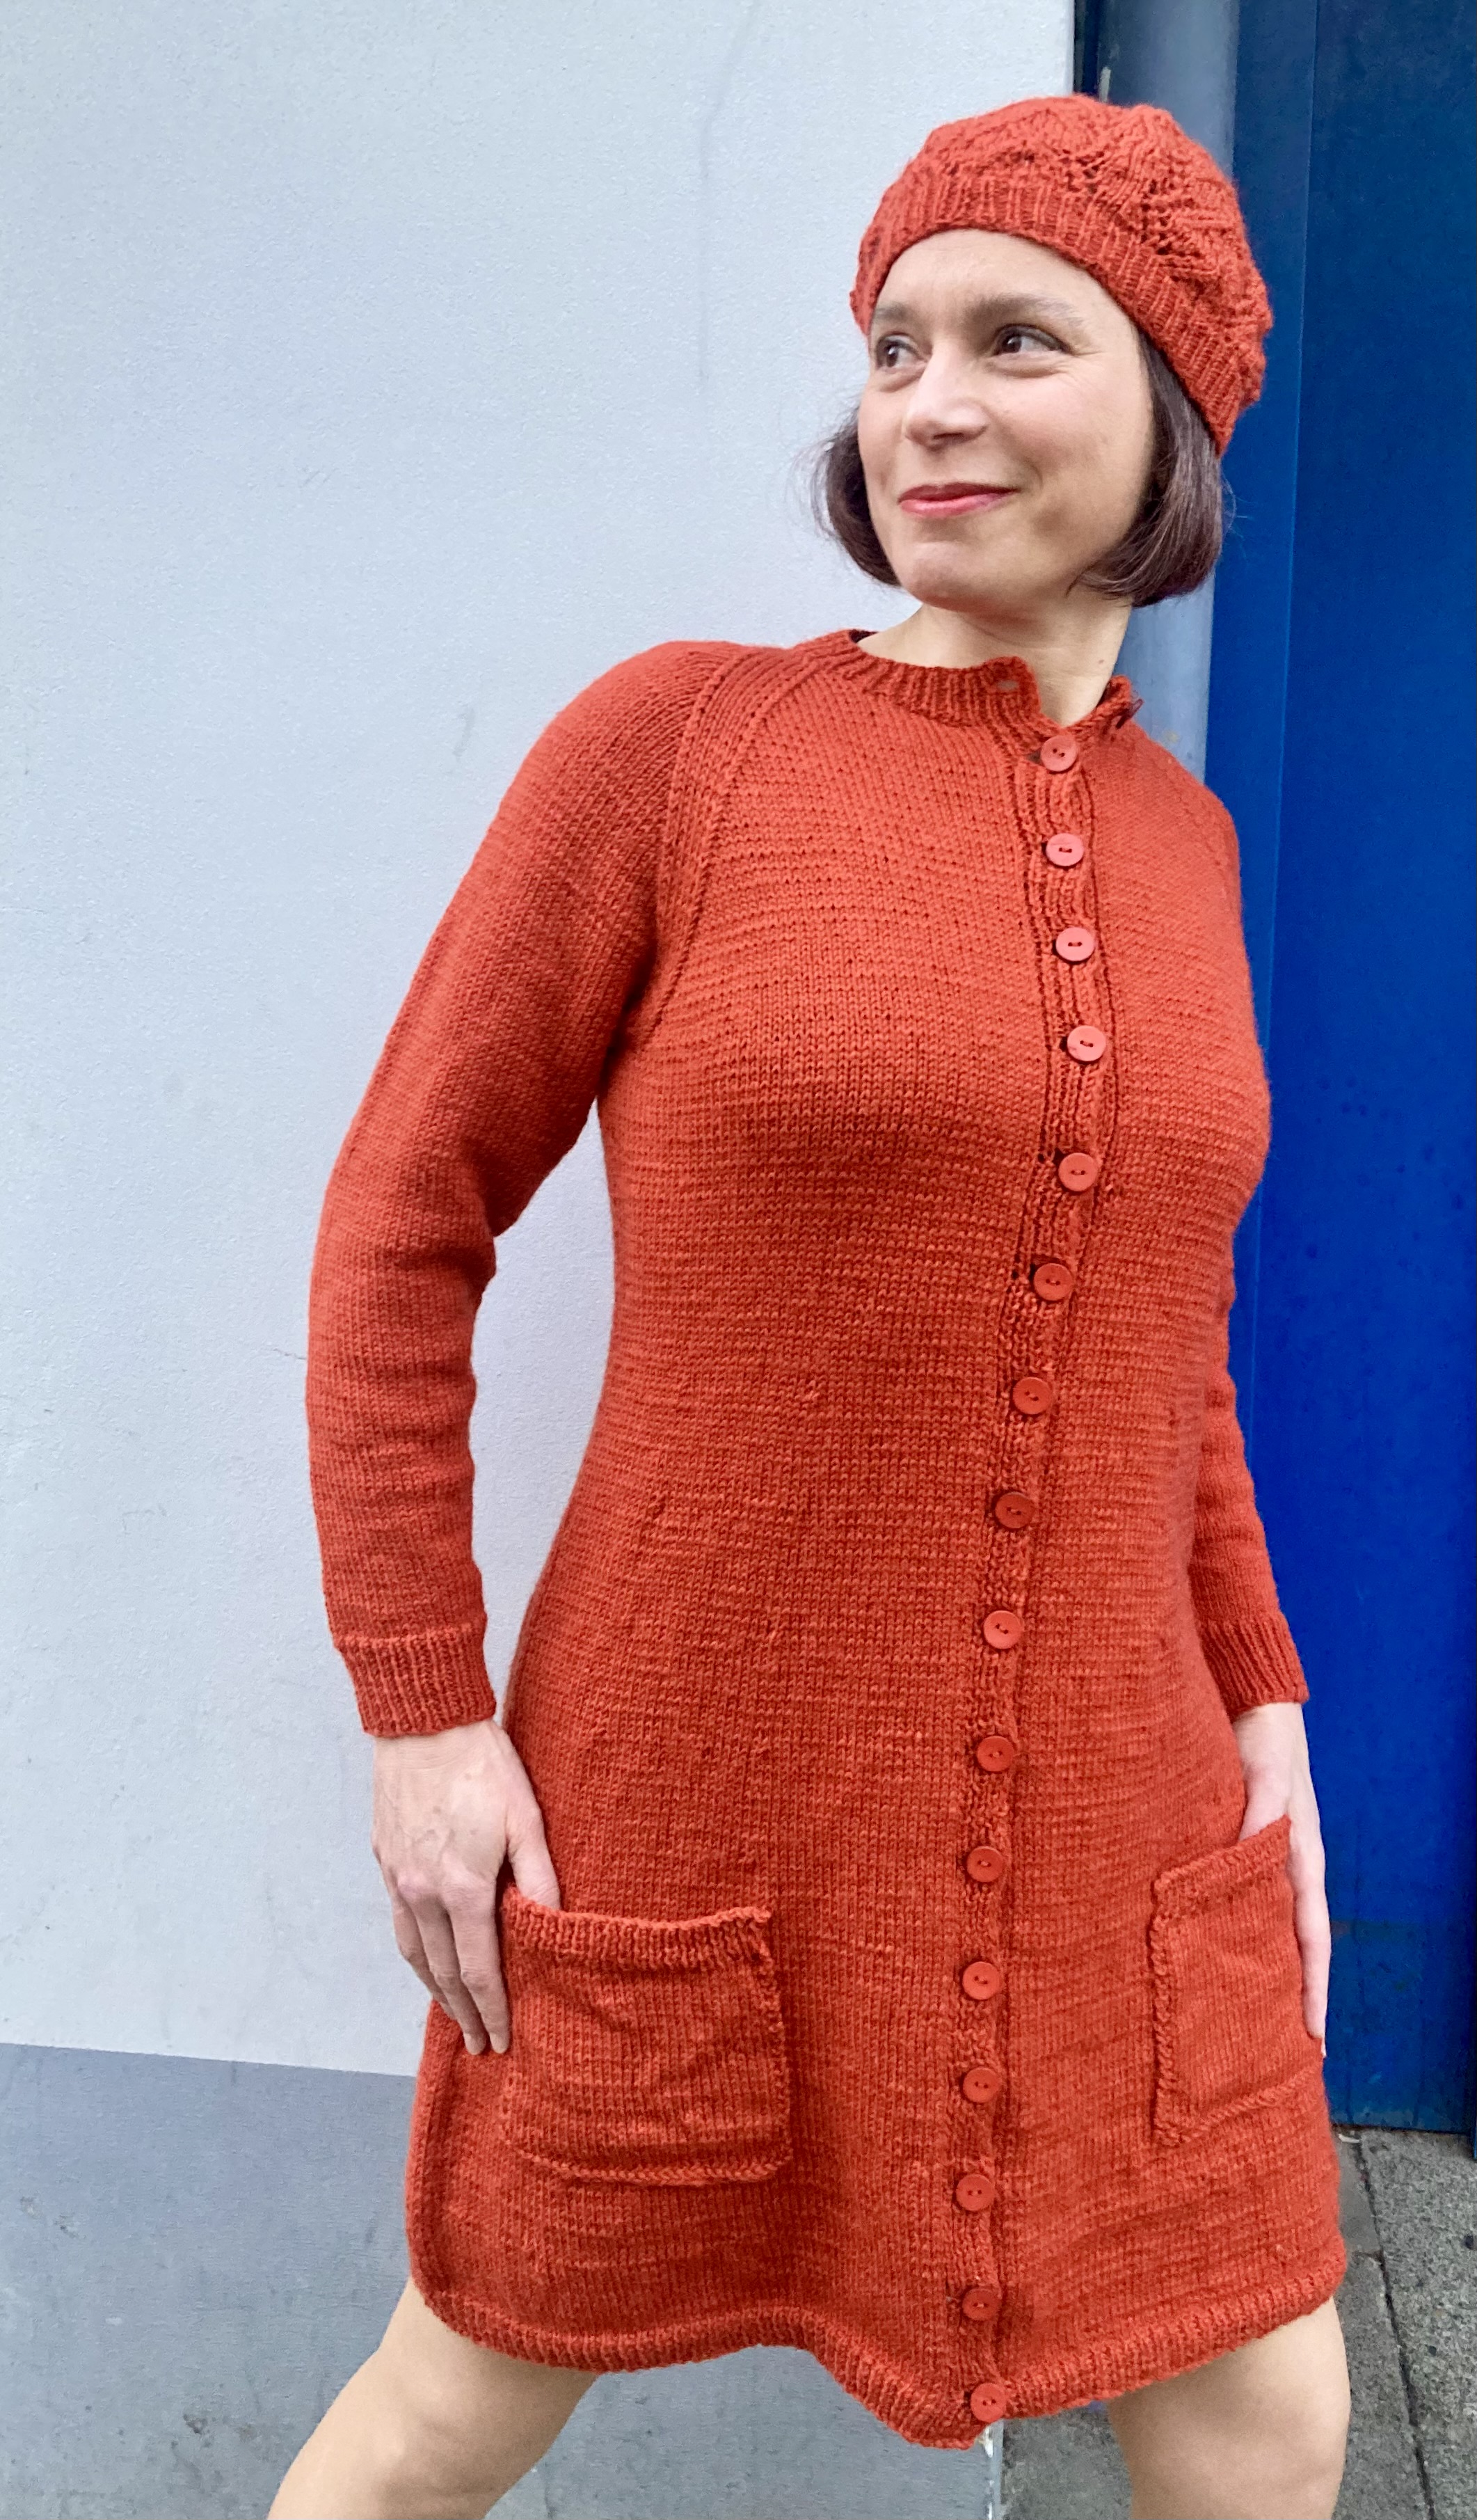
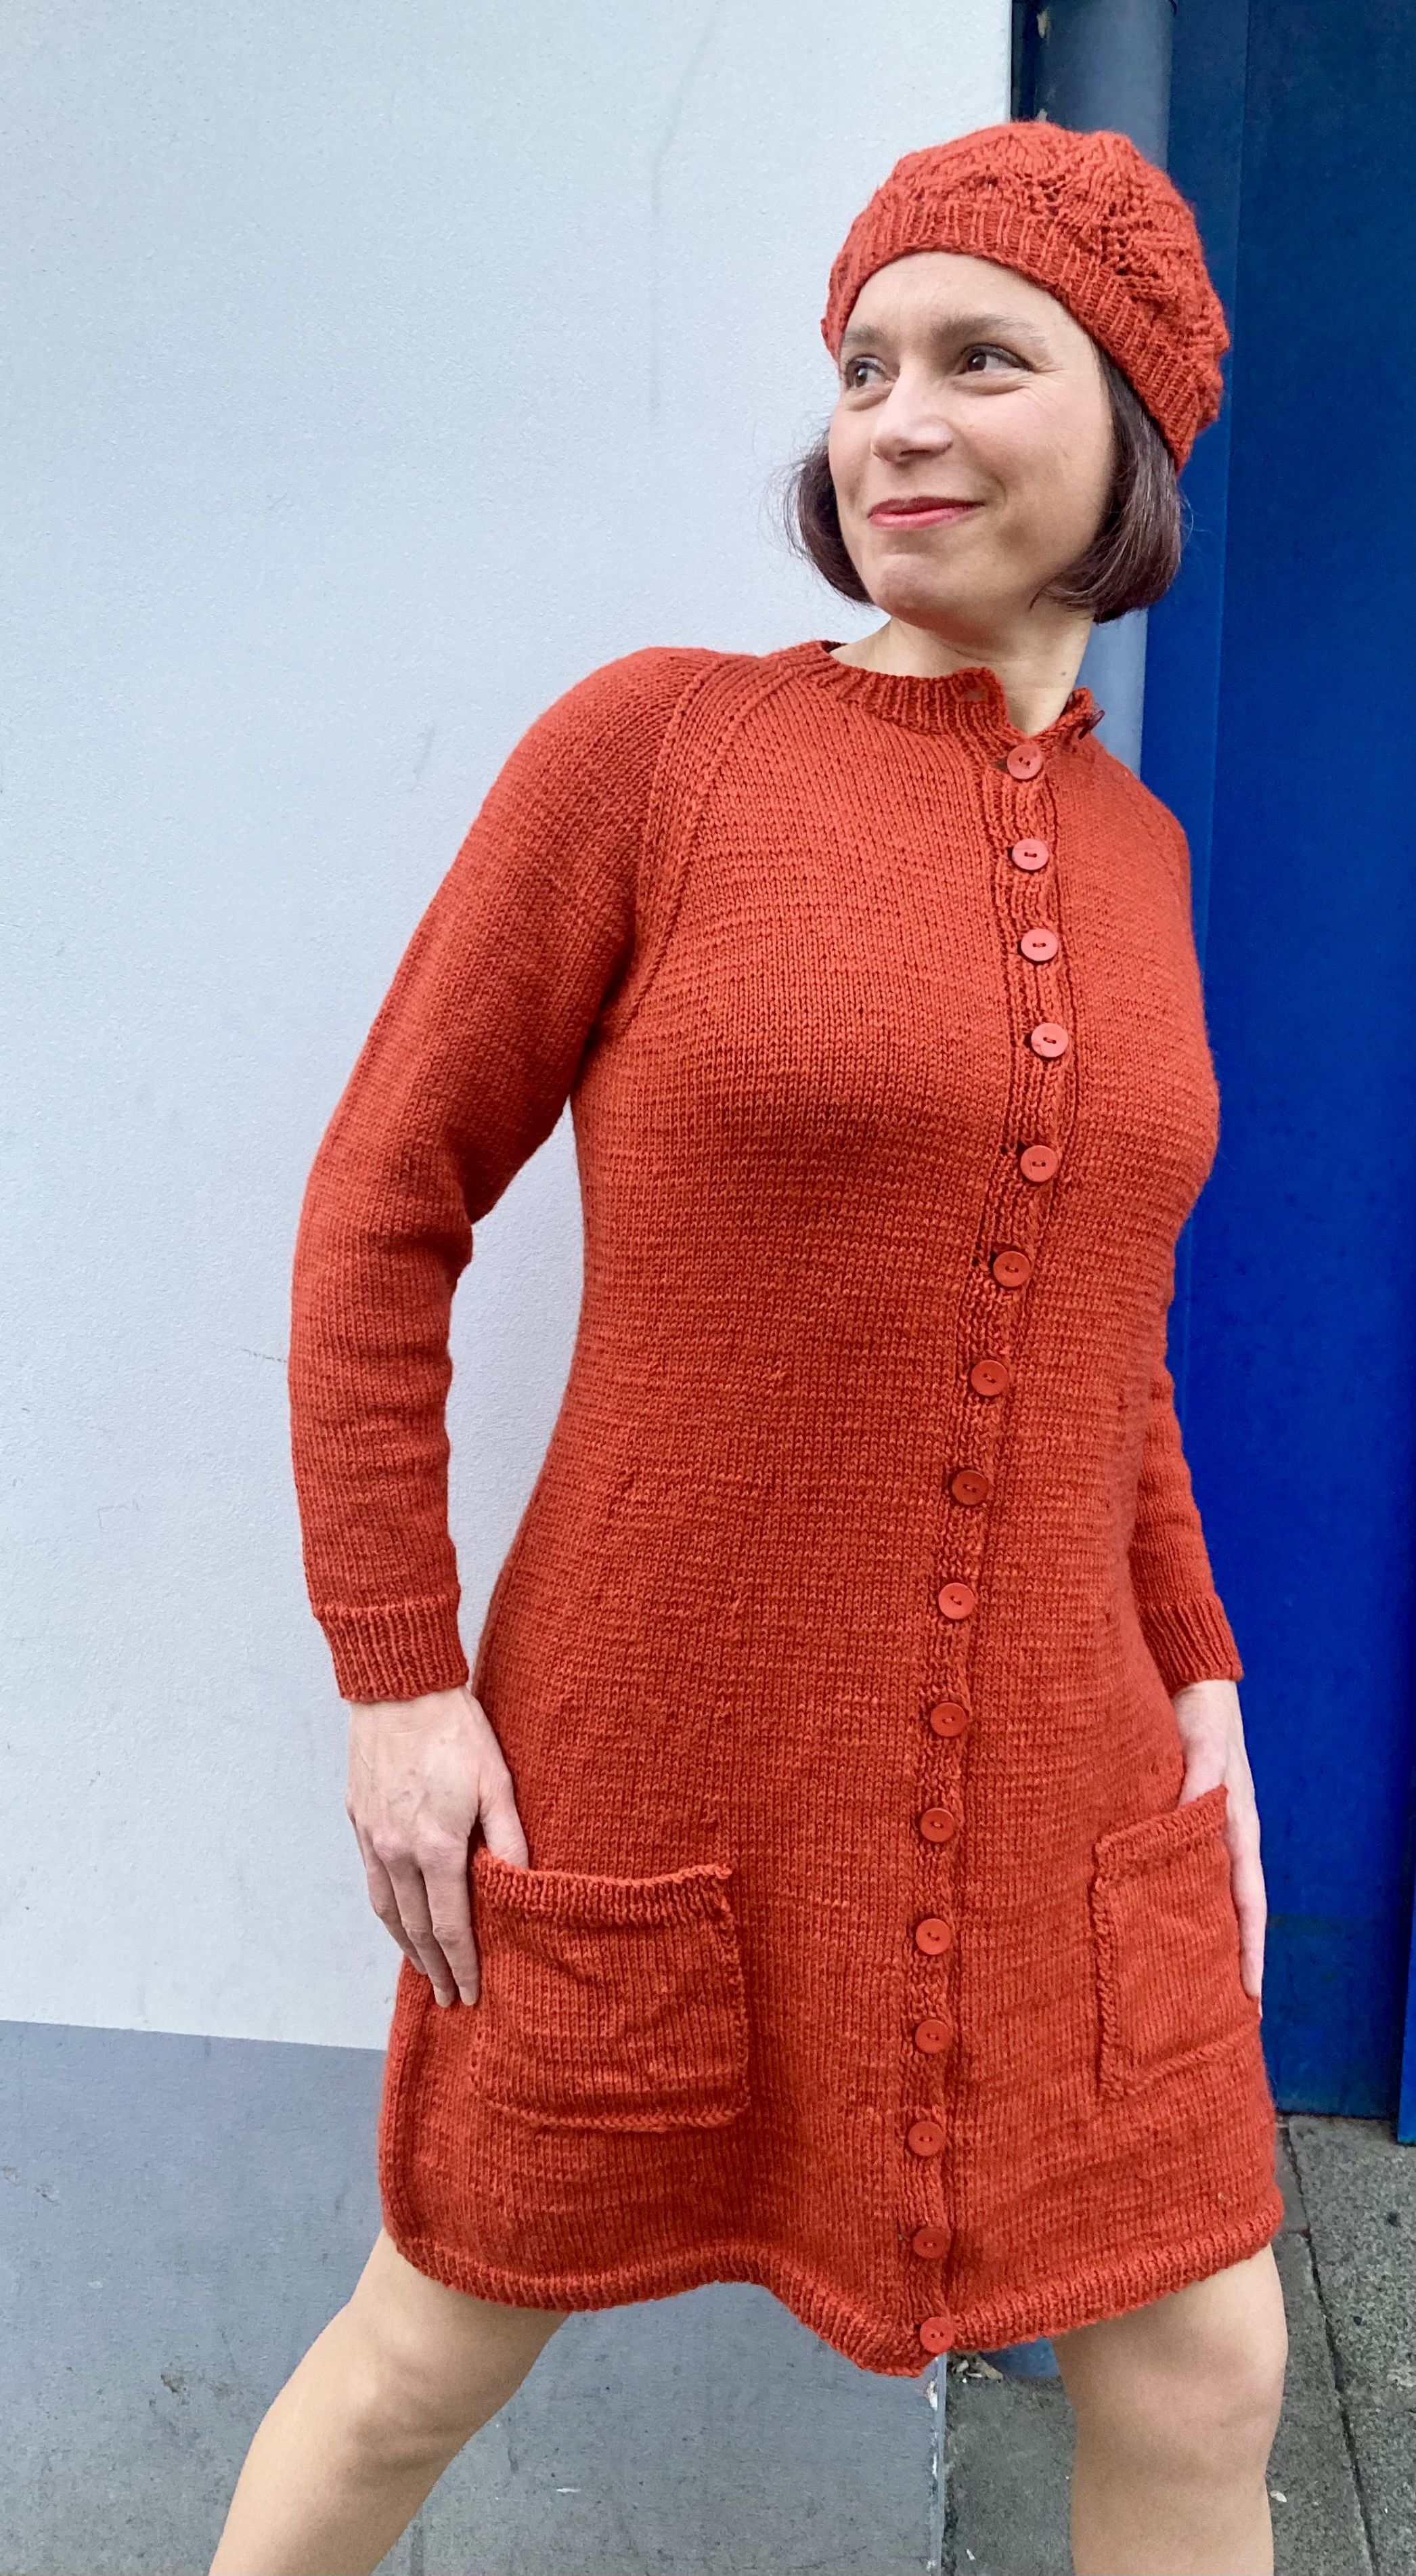
I love this dress and am very happy that I took the time to make it!


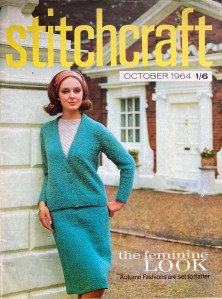


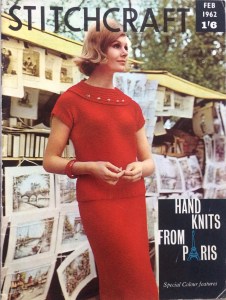 Put on your best traveling suit, pack your Aeros and have your Kodak Instamatic in hand, because it’s February 1962 and Stitchcraft is going to Paris! This month’s issue features Paris-inspired designs (whatever that means) and extra pages in colour to show off the latest knitwear against a backdrop of Parisian tourist classics.


 June 1961 was the issue with too many great projects in it and not enough time to make them all. My “official” project was
 I decided to make it in cotton instead of Nylox (Patons wool-nylon mix from the 1960s) or a modern equivalent. It is always, always a problem to find non-mercerised cotton that is fine enough to give 7 stitches to the inch. Thick, mercerised dishcloth cotton is always available, mercerised crochet cotton is always available, but what passes as 4-ply or fingering weight non-mercerised cotton is just too thick. I decided on Natura “Just Cotton” which is non-mercerised, soft, pretty and supposedly free of harmful substances (Oeko-Tex certification). The label says it gets 27 stitches in 4 inches but that is illusory. The yarn is 8-ply! I don’t know why they don’t use 4 strands, thus making it a true 4-ply fine cotton for soft, light garments. I got 6 1/2 stitches to the inch with some effort, but the resulting fabric is a bit stiffer than I would have liked.


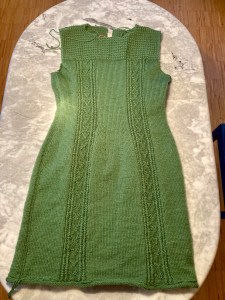
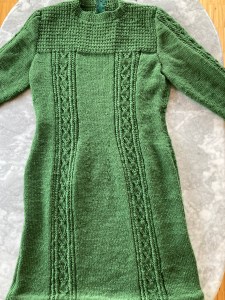
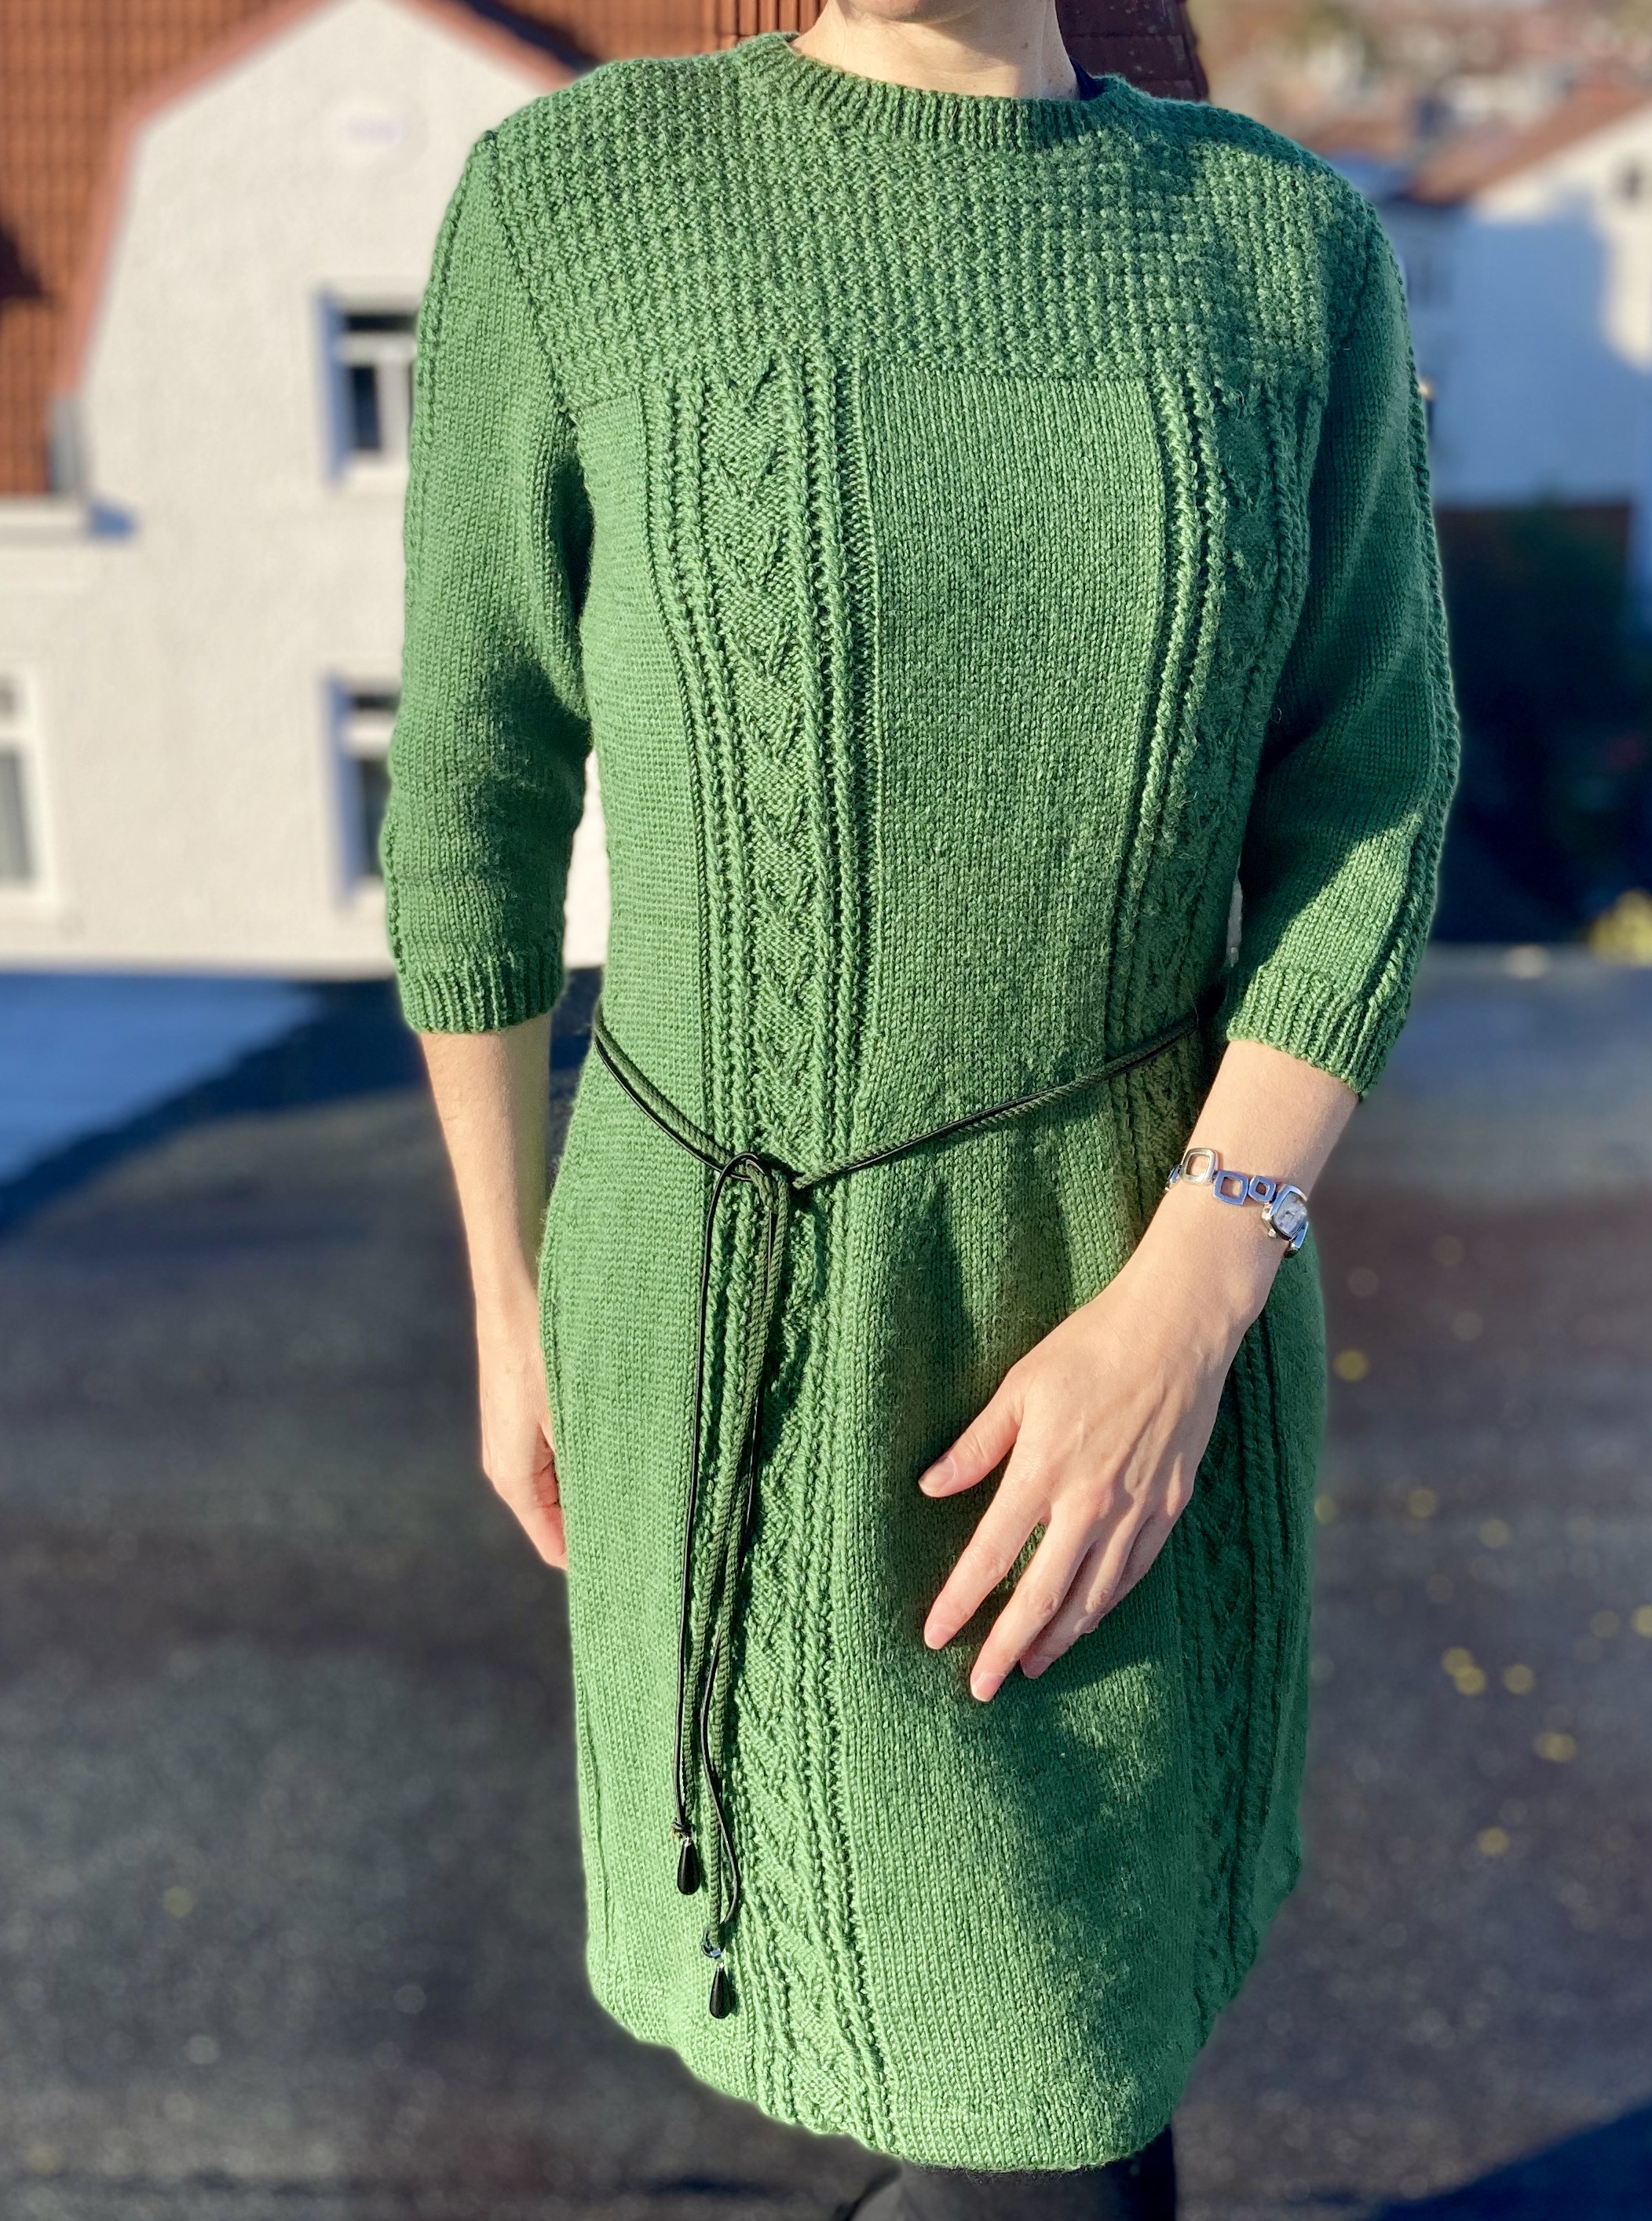
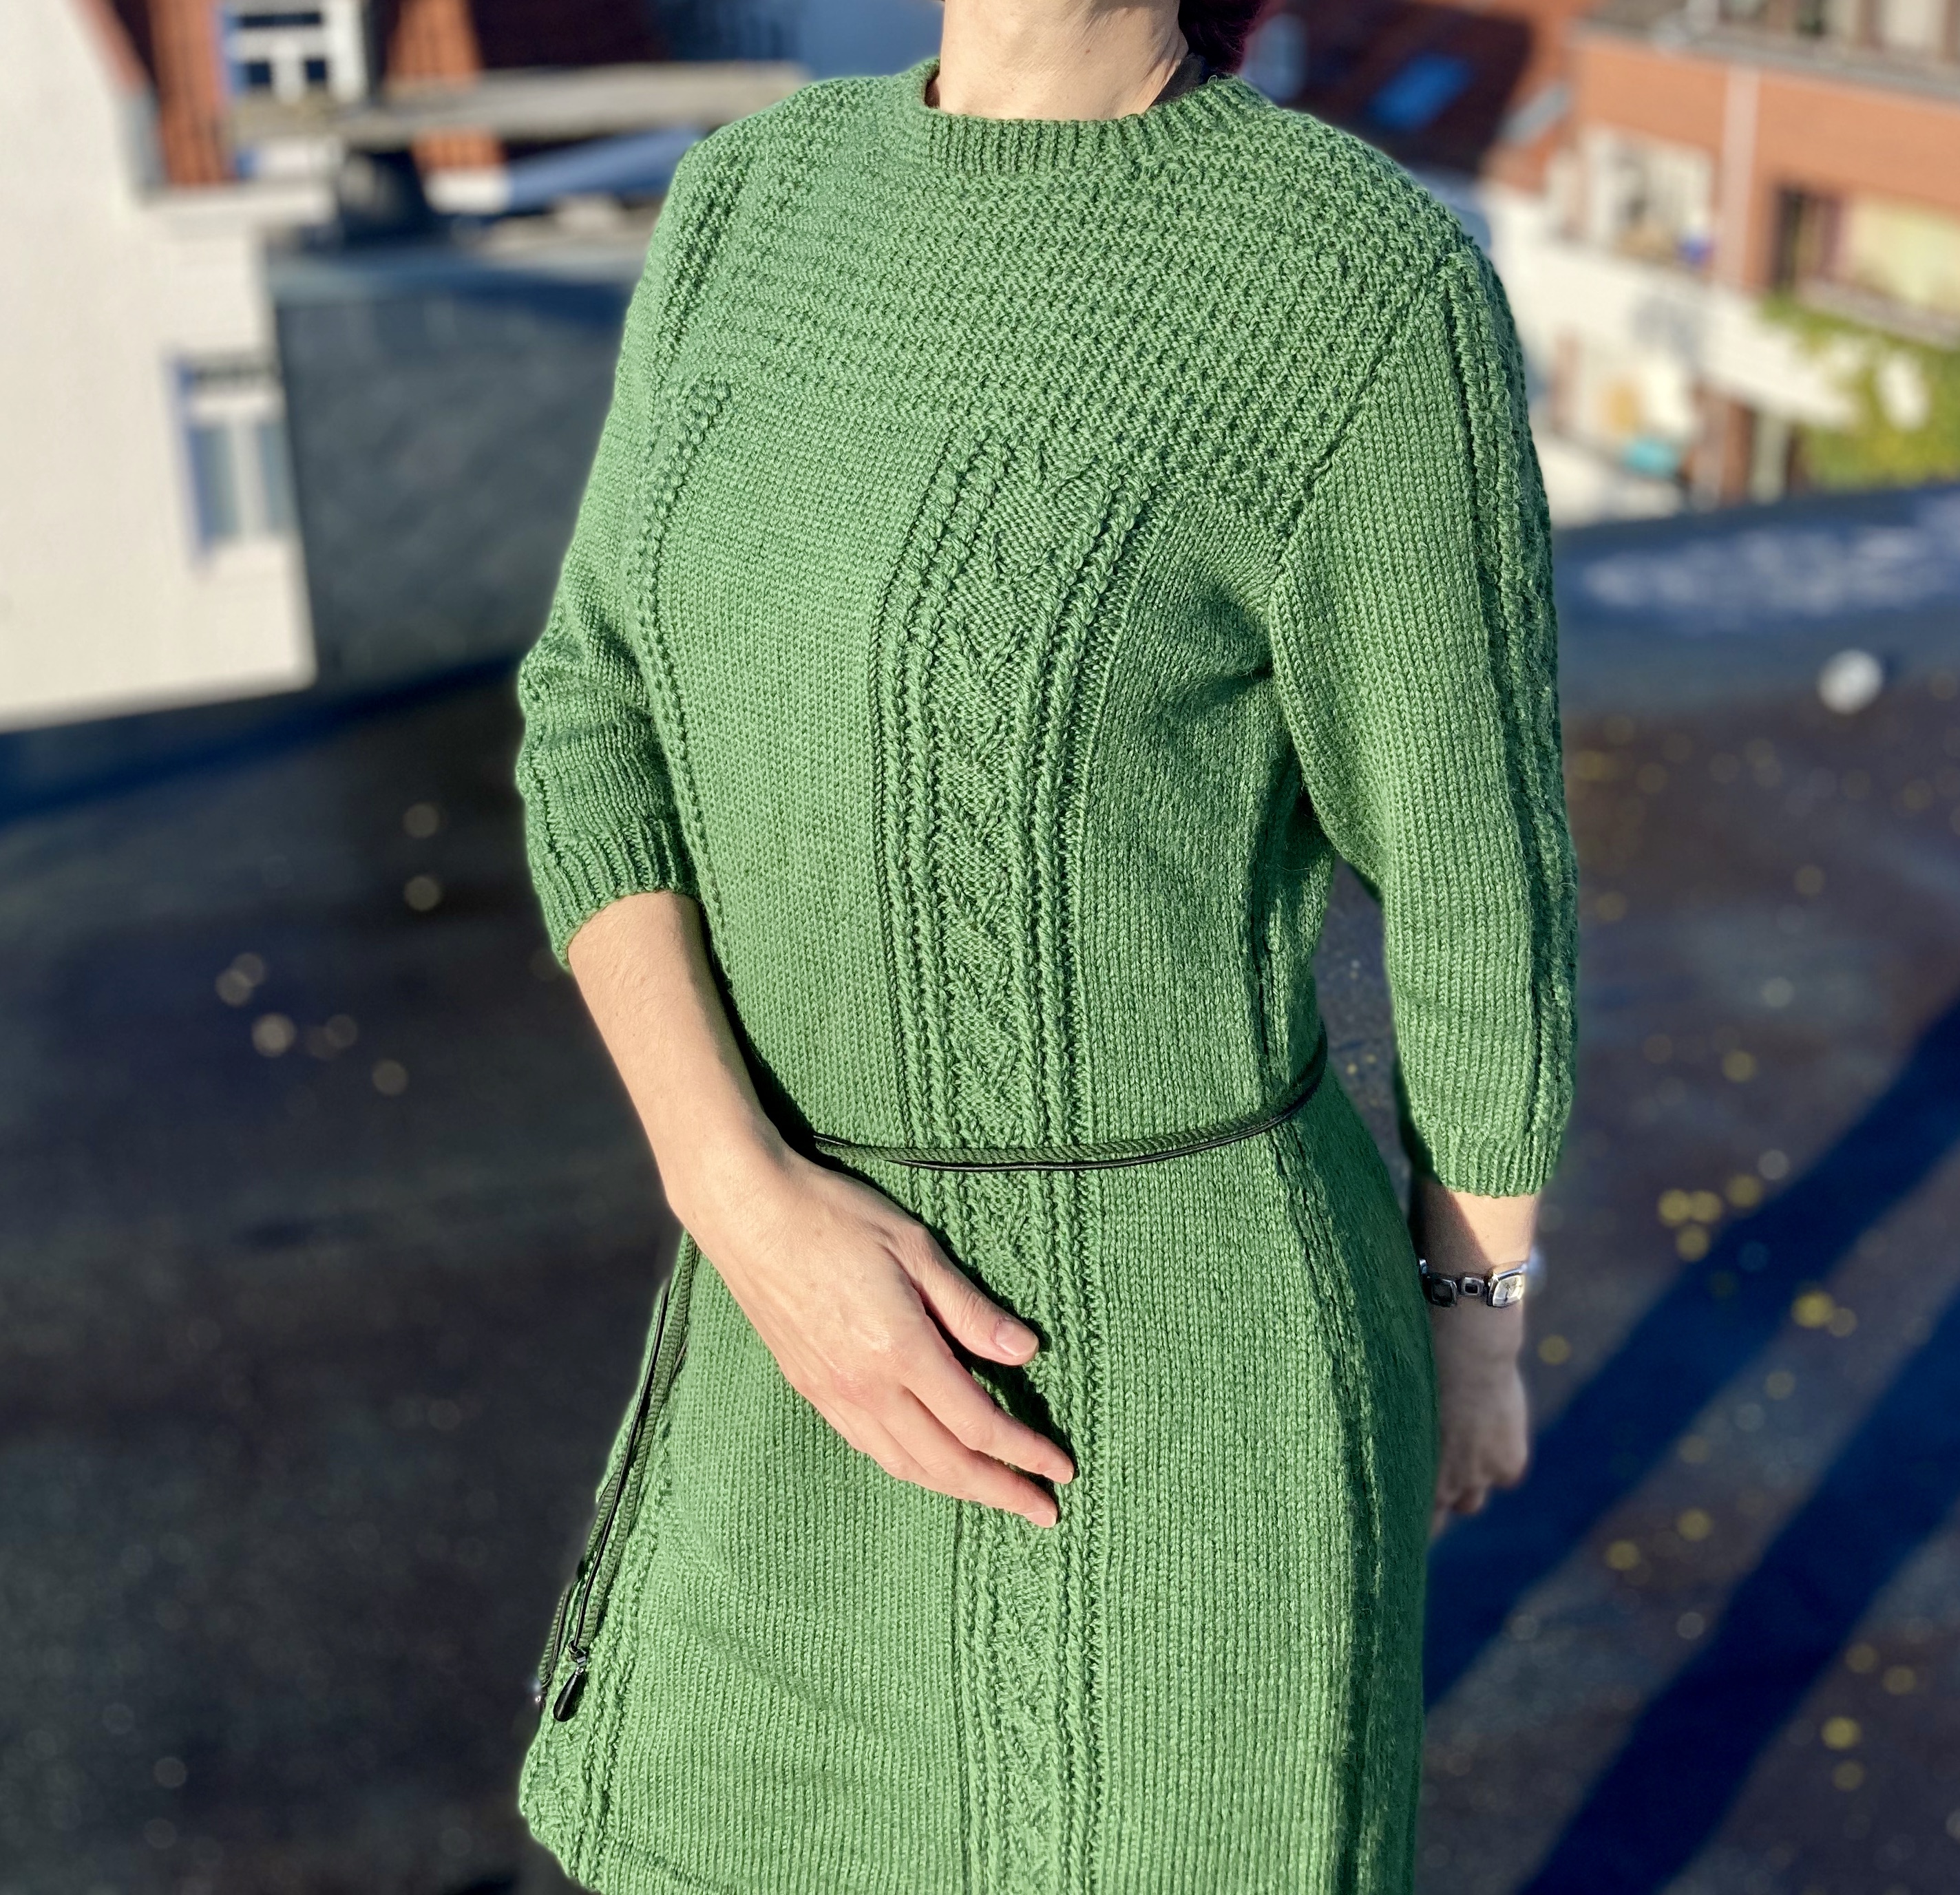
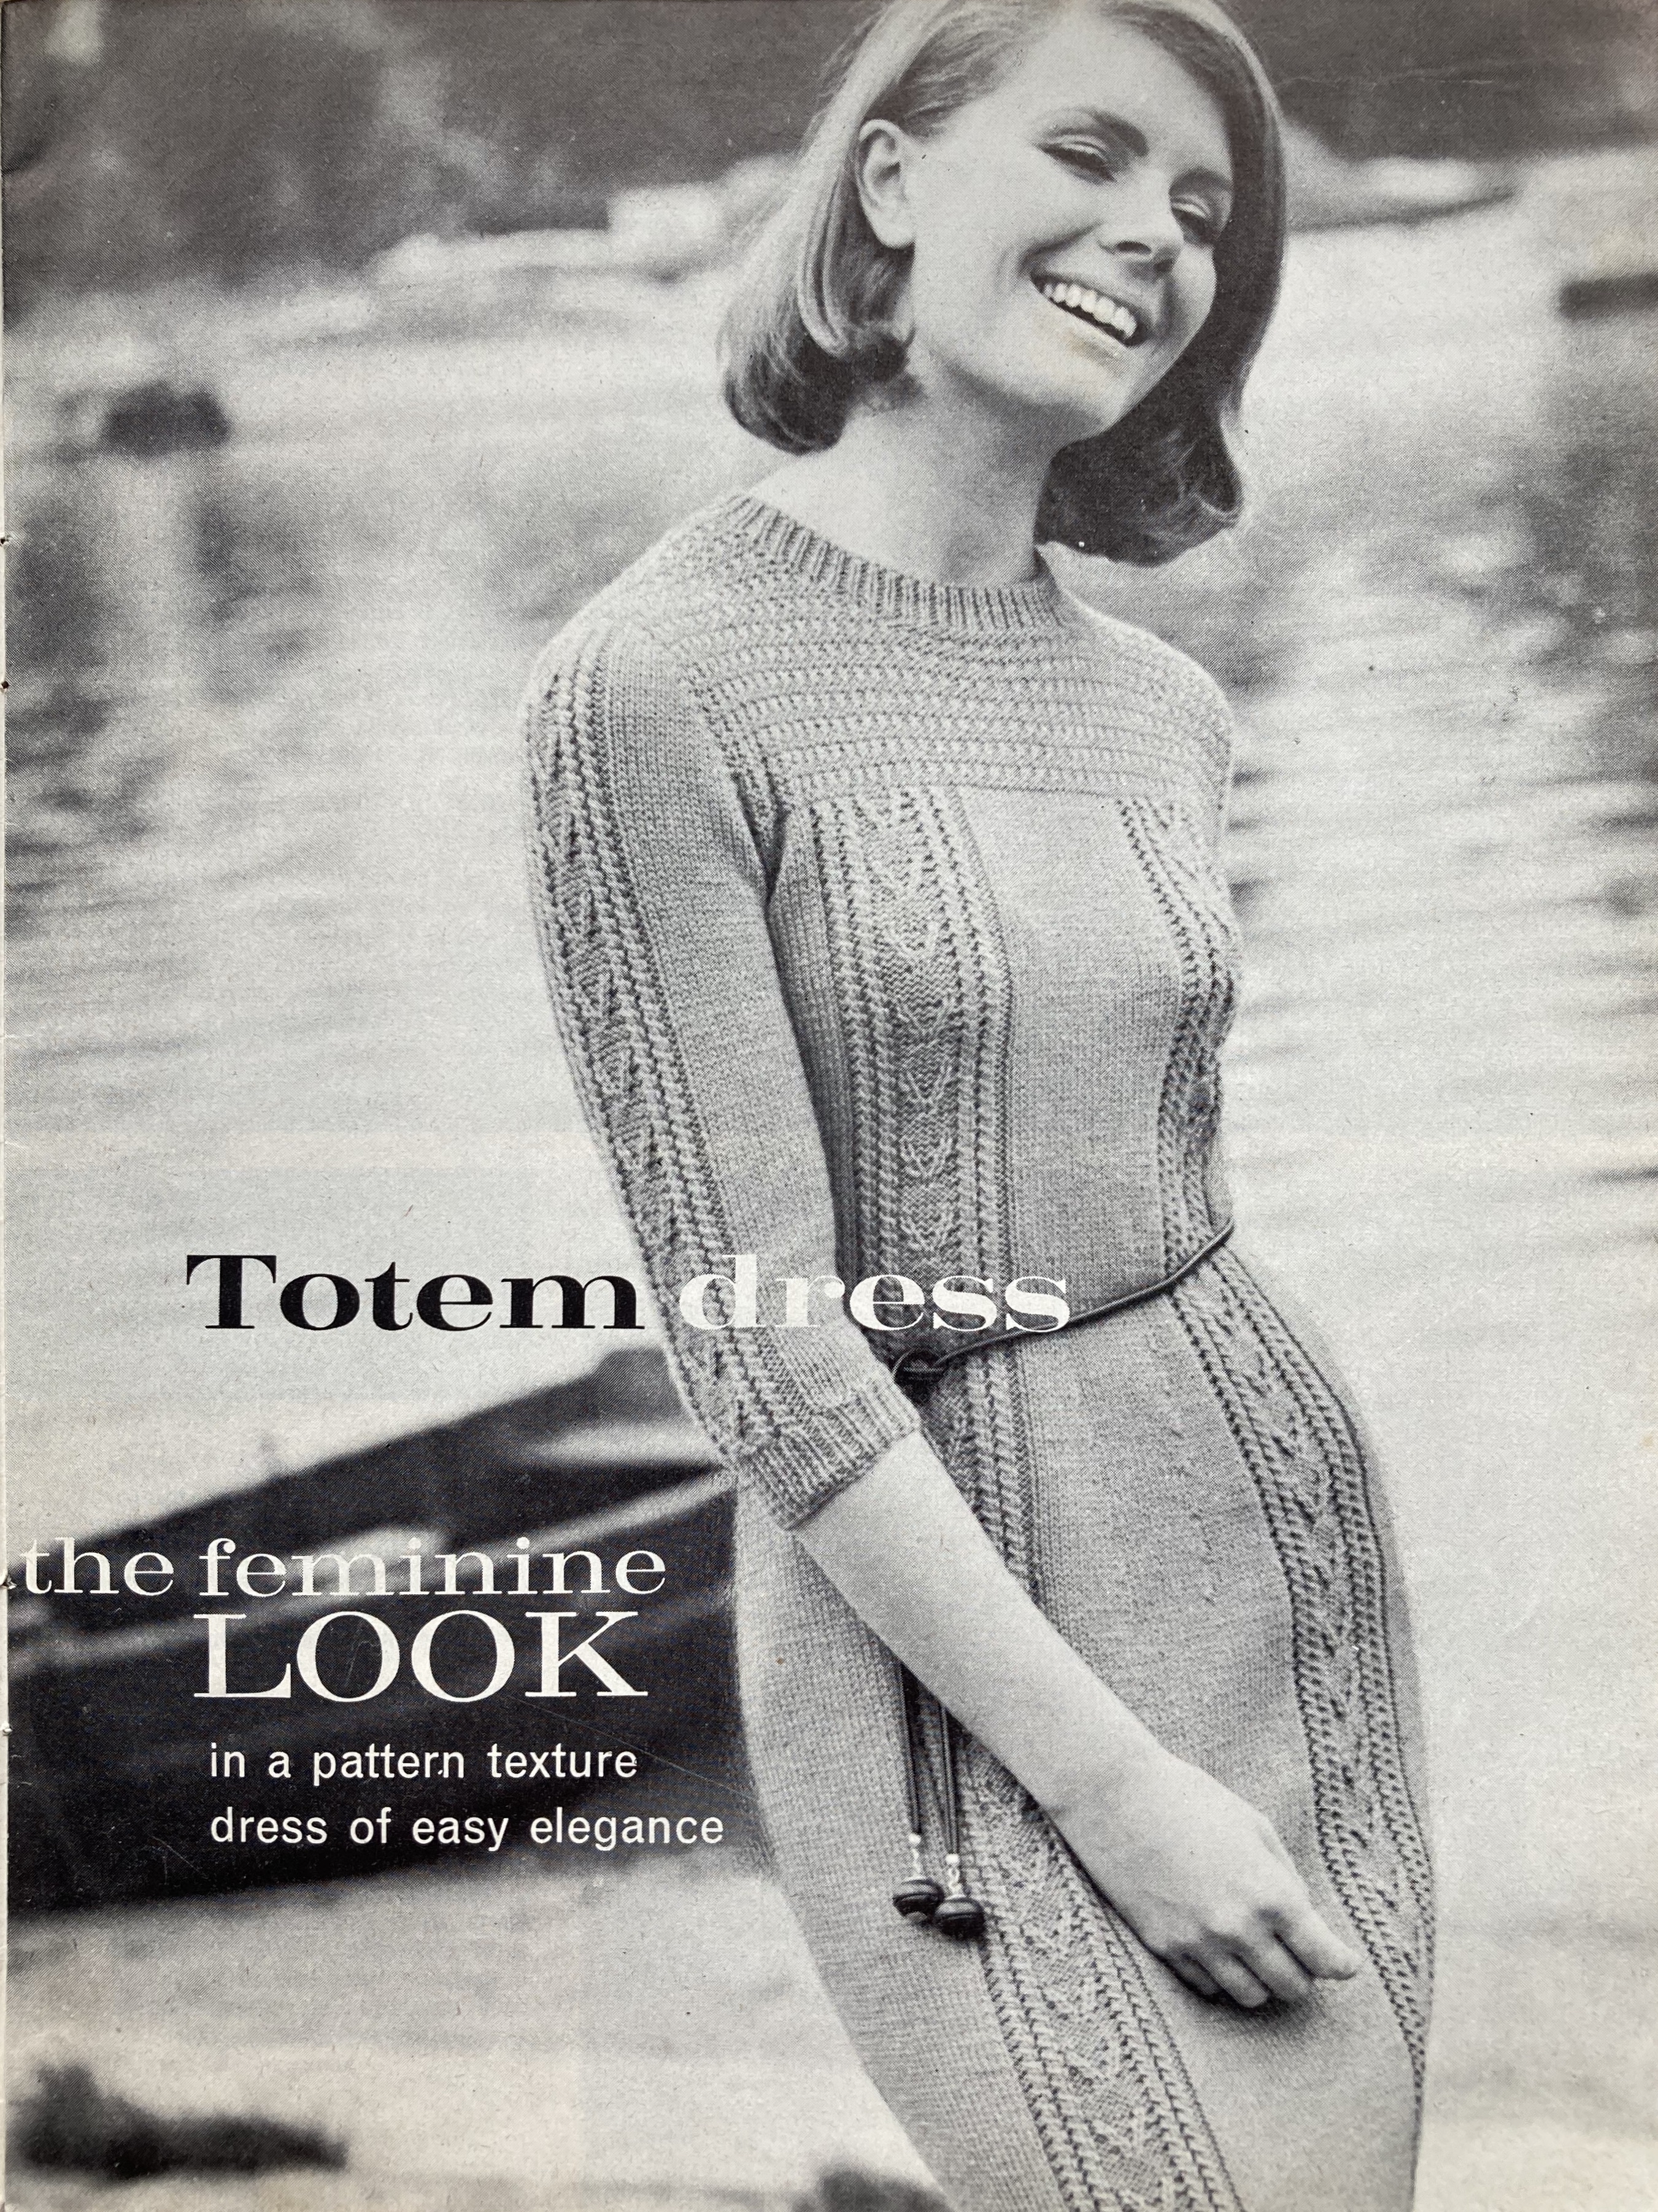
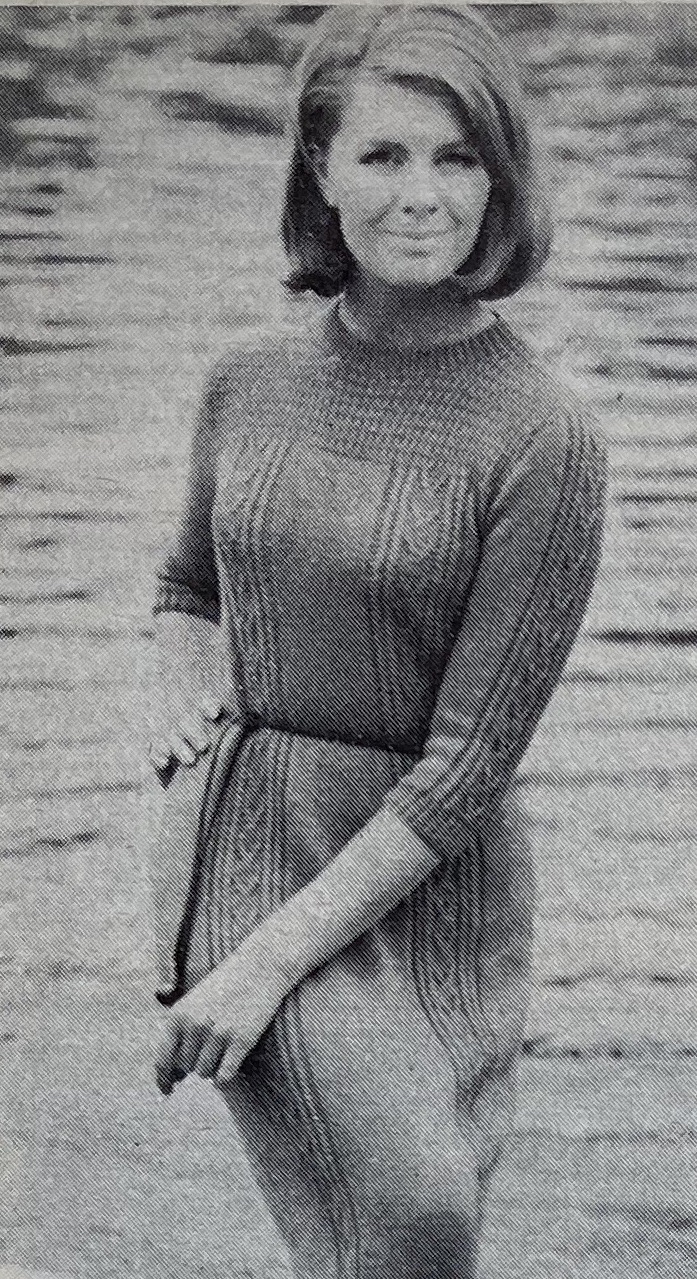
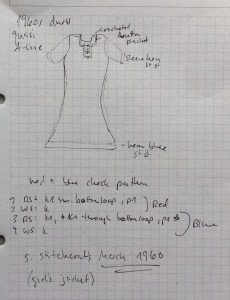 This month’s project was a little bit different than usual. Instead of making something from the April 1961 issue, which didn’t have any projects that really spoke to me, I decided to finally make something I’ve been dreaming of ever since I made
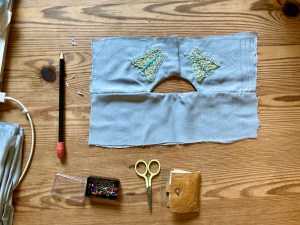
 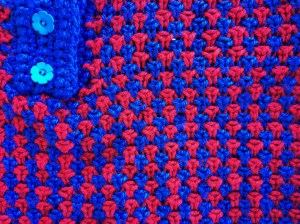 I chose a typical basic construction with front, back and sleeves all made flat and separately from the bottom up and sewn together, and made a stockinette-stitch hem with the blue yarn. The dress shape is a modified A-line: flared at the hem and narrowed to the top waist, then increased slightly at the bust. I used another knit dress as a pattern, but had to deviate from it as the stitch pattern made the fabric behave differently. The sleeves are short, simple and set-in. The front piece is essentially the same as the back, but divided in half after the armhole cast-offs and rounded a bit at the neck. The button band is plain crochet.
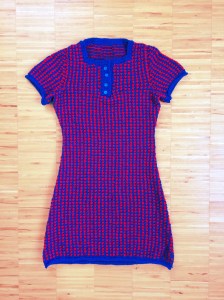 After it was all done, I realised that I liked the roll of the blue stockinette stitch hems, so I decided to just leave them as is. That means the bottom hem is a little bit narrow in the blue part where it should flare out. I may or may not fix that in time, depending on my laziness levels.

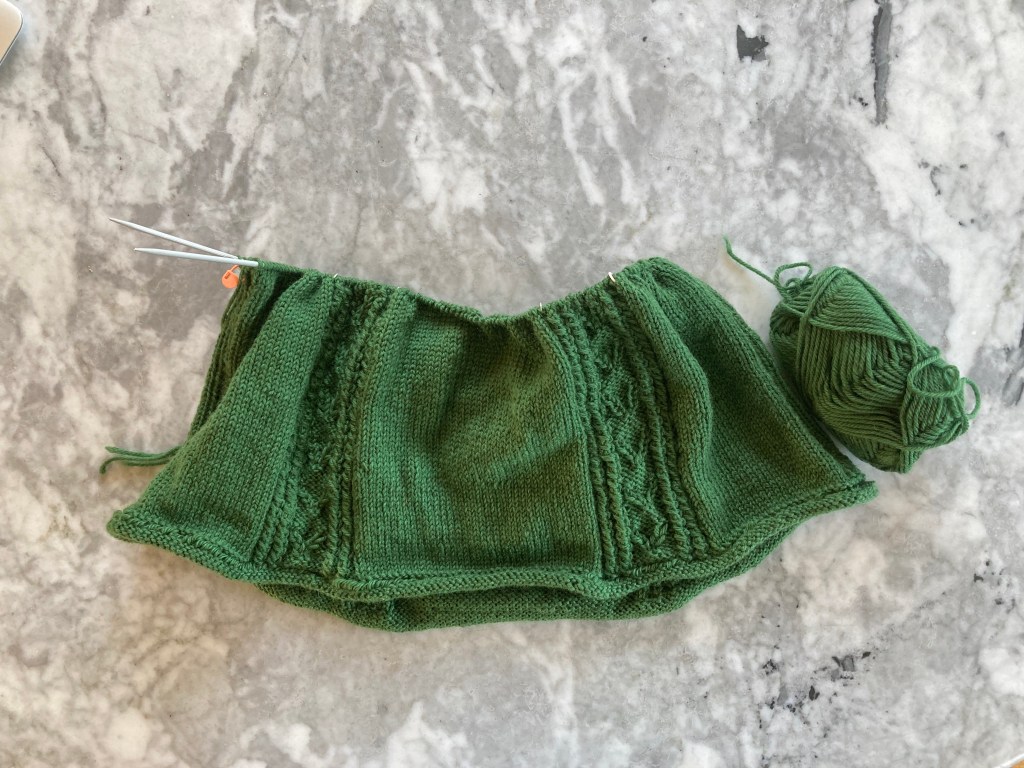
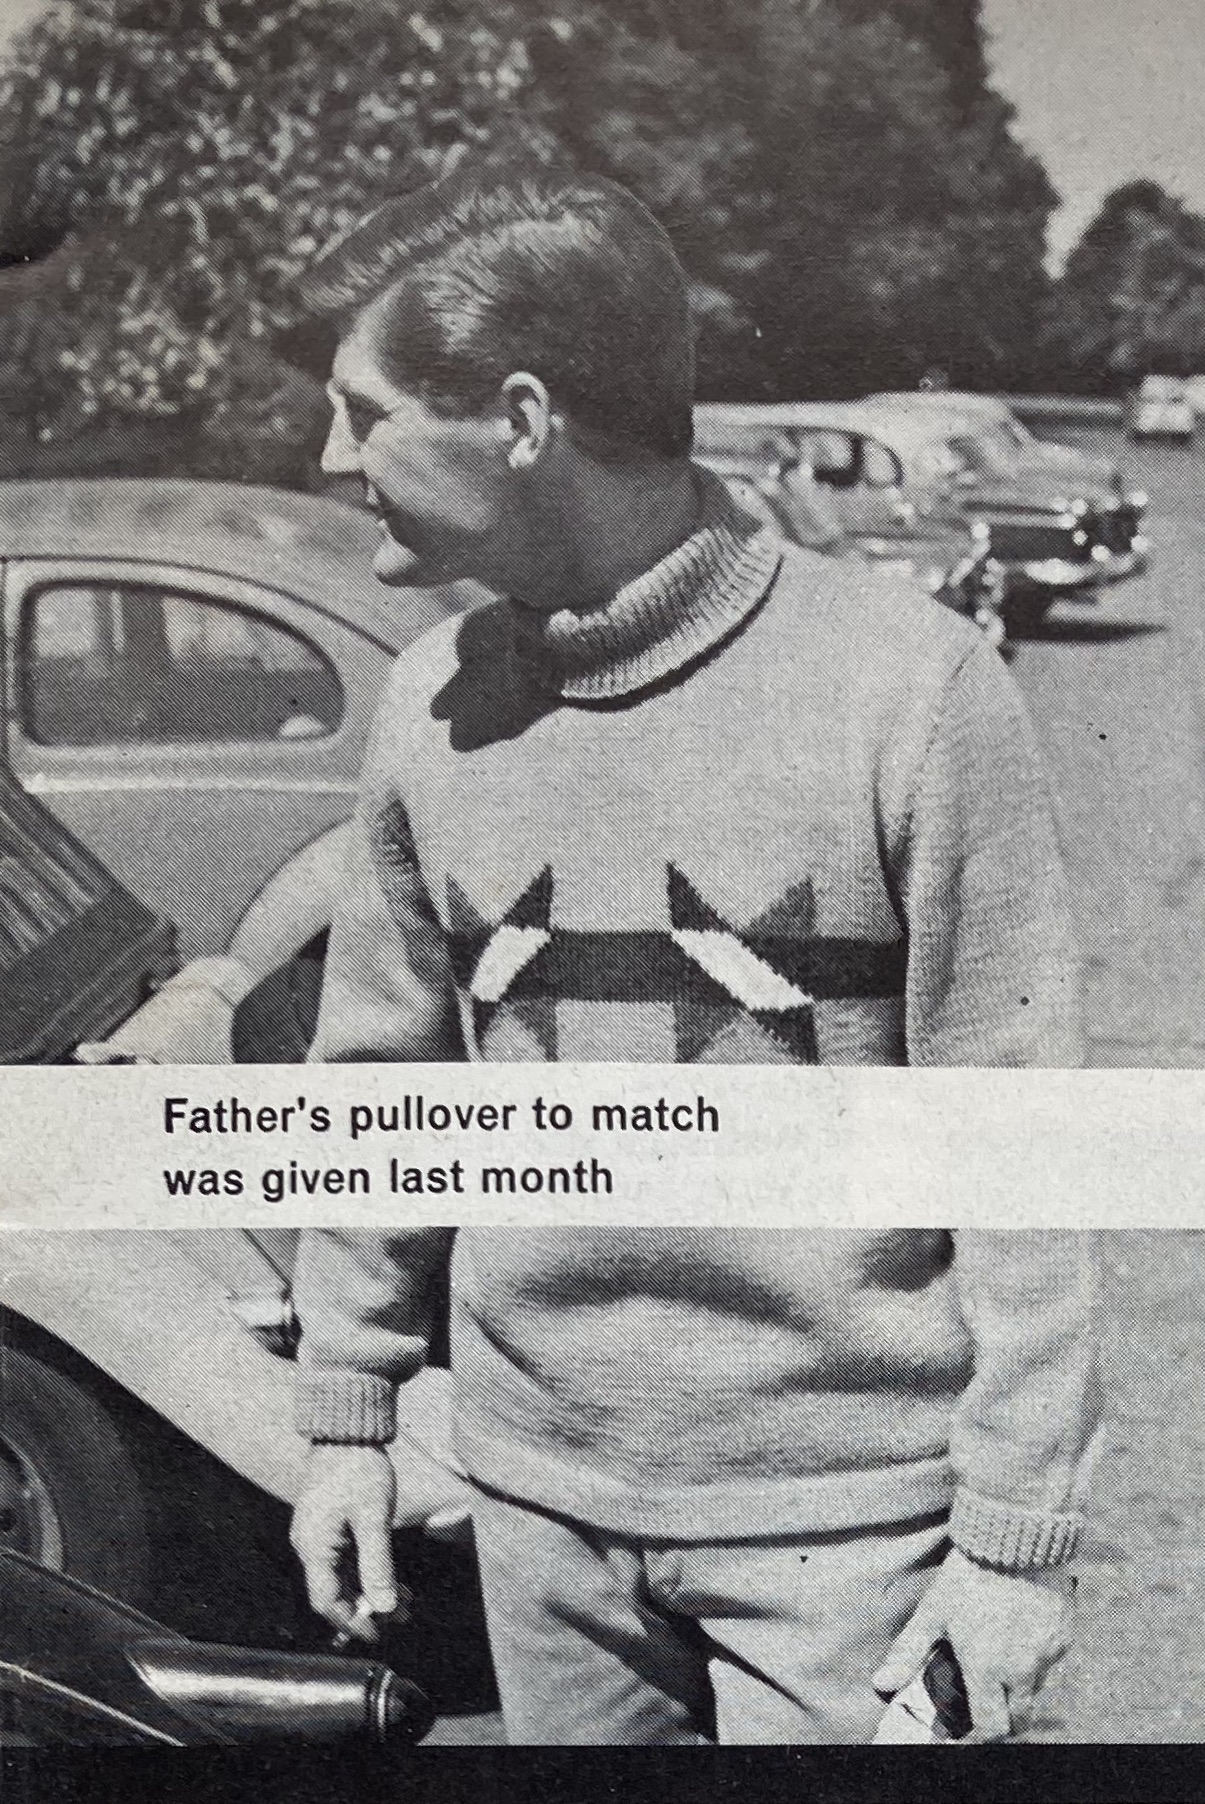
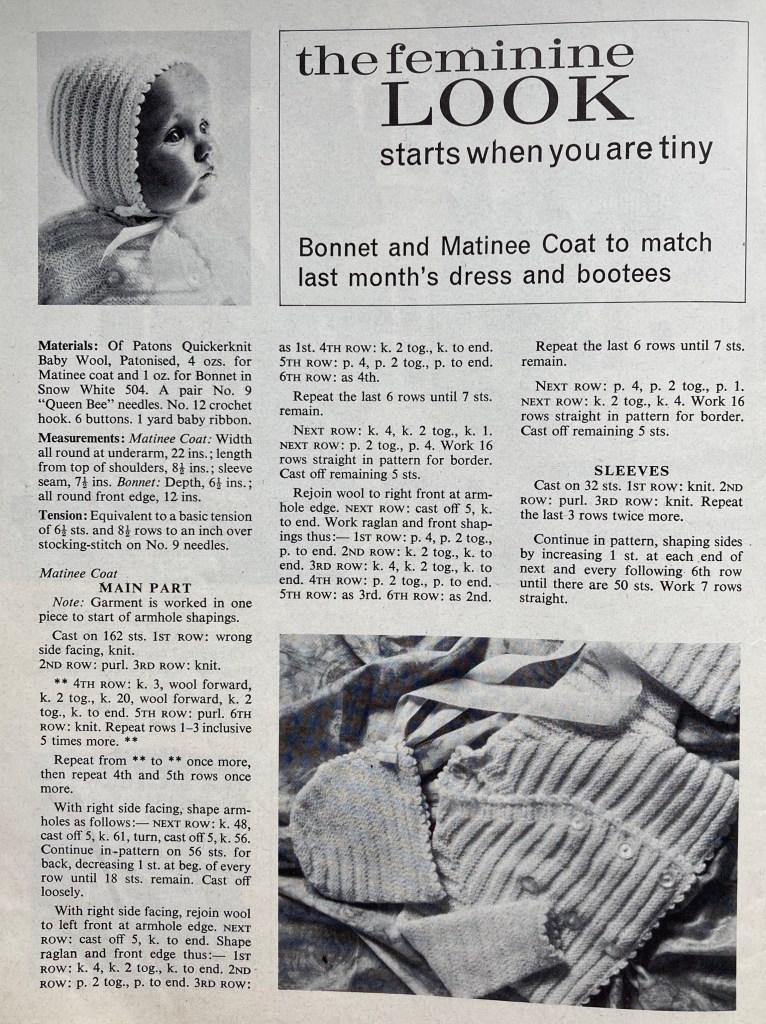
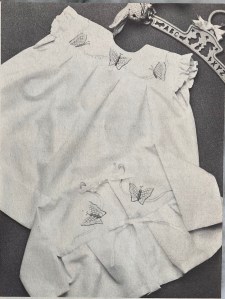
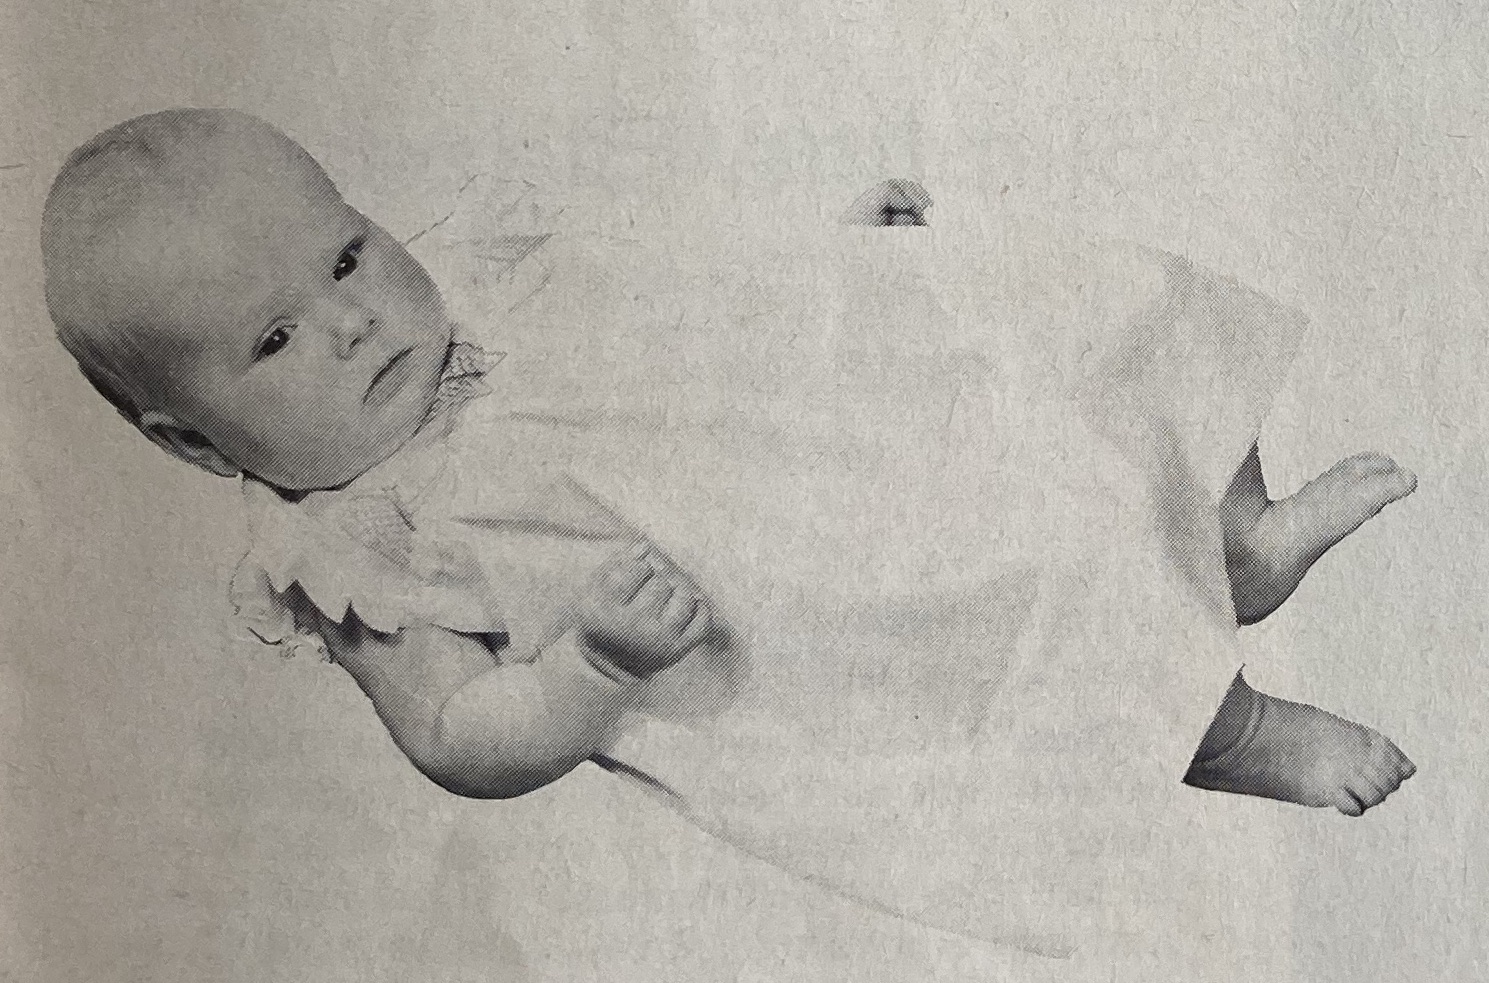
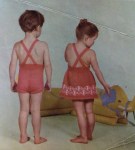
 My December project was a warm winter dress for a baby, part of the “Baby’s Special Outfit” of dress, bootees and mittens that continued the baby set started in the November 1960 issue.
 I used a lovely 100% wool that was hand-dyed by a fellow knitter in my local knitting group. She uses natural dyes from plants in her garden, or the bits of food items that are normally not eaten: walnut shells, onion skins, and so on. This green-melange wool was dyed with red onion skins! She did explain to me how that worked, but please don’t ask me, because I forgot the answer already. Anyway, it’s very nice. I was worried that it might be too scratchy for sensitive baby skin, but wash-blocking it and rinsing with hair conditioner softened it up quite a bit.

