 After January’s time- and labor-intensive pullover for me, I wanted to make something quick and easy in February. And there’s always a friend, colleague, or relative having a baby, so I made this simple ” Tiny Cardigan” from the cardigan and slipper set.
The wool was Lang Nova, a wonderfully fluffy and very light wool-camelhair-nylon mix. There are 180 metres in 25 grams! It is essentially made of air, but softer and warmer. I suspect it is not very hard-wearing and probably pills and breaks easily, but babies grow so fast that it will hopefully be outgrown by the time it falls apart. My swatch grew exponentially with blocking, so I converted the pattern to a larger gauge. Then the finished garment didn’t grow much at all with blocking, so it ended up more like newborn size. I hope the parents send out a birth announcement as soon as the baby arrives…
 The cardigan has a basic bottom-up raglan construction with the twisted ribbing featured in January’s Snowflake Sweater. I made it in one piece from the bottom up to avoid seams, and was so busy trying to read the front, back, and sleeve directions simultaneously while working the yoke that I forgot to make the little twisted-rib sleeve insertions that would have made this otherwise very basic jacket a little bit more interesting. Whoops! But by the time I realised my mistake, it was already almost done, and I have a feeling this wool really does not like to be frogged. I pepped up the plain marble-grey colour of the jacket with some red flower buttons.


And there it is! I had to buy a second skein of wool to finish the cardigan and now have some left over, so I might as well make the slippers, seeing as the baby hasn’t arrived yet.
ETA: I went ahead and made the slippers, adding a flat spiral of red i-cord instead of a pom-pom.

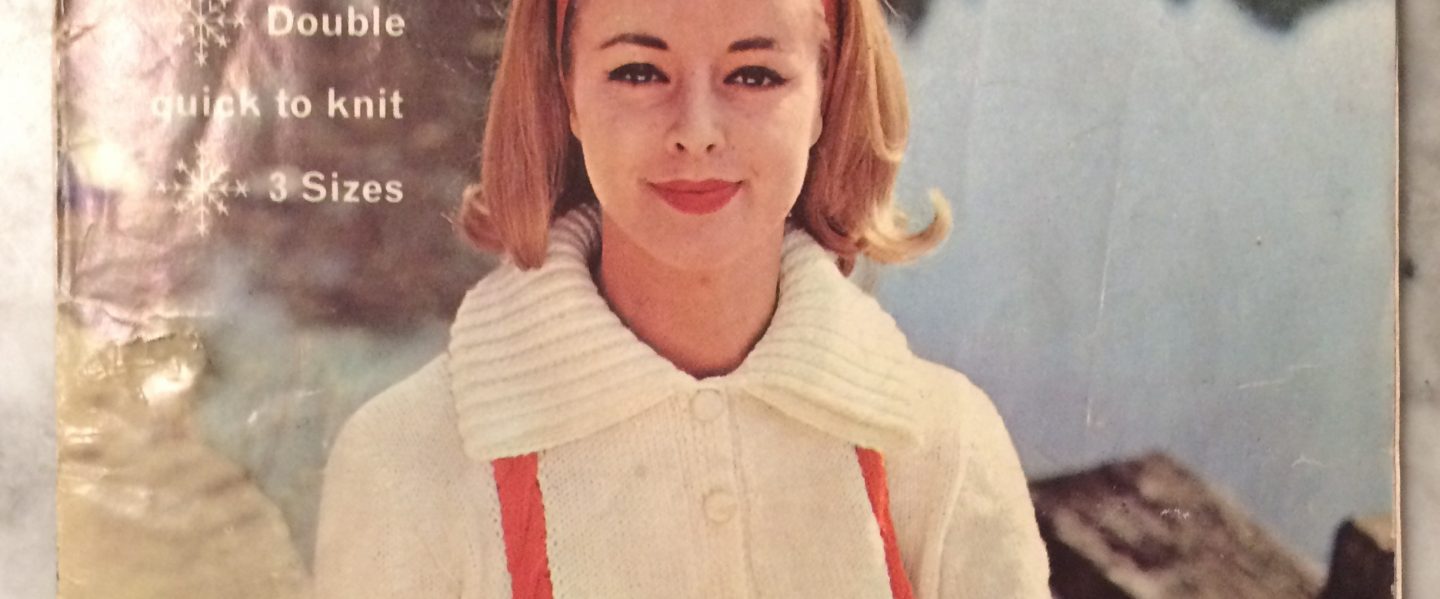
 I loved this twinset at first sight. I loved the short raglan sleeves on the pullover, the cable-and-mesh panel on the front and the very original mock-turtleneck-meets-peter-pan collar. It’s one of the reasons I started this whole long-term Stitchcraft blog project, so I’m thrilled to have it come to life.
 The cables have an interesting twist — literally. You put four stitches on the cable needle, knit the other four and then give the cable needle an extra 360 degree clockwise twist before knitting the stitches off of it. This gives them a cool extra definition. I forgot to do it once and it was almost unnoticeable — almost — but I didn’t want to rip back that far, so when everything was done I looped a little tiny thread around one of the cable stitches and just pulled it over more to the side and tacked it down by tying the thread ends in a knot on the wrong side. Look at the close-up picture above — can you tell which cable it was? I can’t on the finished garment. Good to know.


 The cardigan is somewhat more plain, as it doesn’t have the cables, but it makes such a lovely set with the pullover — not to mention it’s an excellent “everyday” cardigan to go with lots of other outfits. The sleeves came out a bit long — I was obviously over-compensating for my long arms and the fact that I always have to lengthen the arms a bit — but it looks just as good with the cuffs turned back, and I can turn them down for extra warmth under a coat and gloves. I hadn’t expected the raglan sleeves to have so much armhole depth. I thought about adding facing ribbon to the button bands, but it turned out to not be necessary, as the cardigan fits fine whether buttoned or unbuttoned. In short, I am thrilled with my new twin-set and it will surely get a lot of use this winter.


 My first project for May was a “matinee coat” for a 6-month old baby. The baby I knit it for hadn’t been born yet, but I always like to make a six-month size for a newborn. Of course it will be too big at first, but eventually the coat will fit.
 I actually did just that, because the written pattern was very difficult to follow on the first few rows after the underarm divide. The raglan increases at the top are done with eyelets and make-1 increases on a each side of a bit of moss stitch, and after the underarm divide, the same type of increase is done on the fronts and back to make a flared skirt. That all makes perfect sense, but the way the pattern was written made it difficult to find the placement of the increases if making the fronts and back all in one. So I just went ahead and followed the pattern exactly. Except for the sleeves, which are supposed to be long, but I ran out of yarn.
 If you are looking at the first picture and wondering what went wrong, let me assure you that it was NOT a tangled mess! As long as the sleeve stitches were on holders, there was no way to make the thing sit down flat for a photo. Kind of the same problem with the baby, if you think about it… Here’s a picture during blocking (at left) and here’s a picture of the finished garment. I am very happy with it!
 First project for March: this charming jacket from the jacket-and-skirt set titled “Spring Magic in Judy’s trim Outfit”. What a great title! And what a great photo in the booklet. I’m glad today’s girls don’t generally get their hair tortured into curls like litte Judy’s in the picture, but she certainly looks happy enough holding hands with her gigantic teddy bear.

