Blast from the Past: Hooded Pram-Coat

Photo of baby in knitted jacket, Stitchcraft, October 1965.

EDIT December 19th, 2023: Finished!

It’s been another month of much knitting and comparatively little to show for it. There was a wonderful bed-jacket in a cute, spongy slip-stitch pattern in the November 1965 issue that I very much wanted to make. I thought I had the perfect yarn (DROPS Lima) and chose green and black for the colours — very much my taste — and started on a swatch to better understand the stitch pattern. I made it correctly, but it didn’t look good. I tried with different wool and different colours. Still didn’t like it. The way the two colours played with each other didn’t harmonise and didn’t give the effect I wanted. I couldn’t make it work with the wools I had and didn’t want to make it in baby blue and white (I don’t wear white). On top of it all, I had a pile of endless WIPs at home and two pregnant colleagues, one whose baby was probably being born just in time for this blog post at the end of November, and another due in January. So I decided to put the bed jacket plans on ice and make some baby things instead.

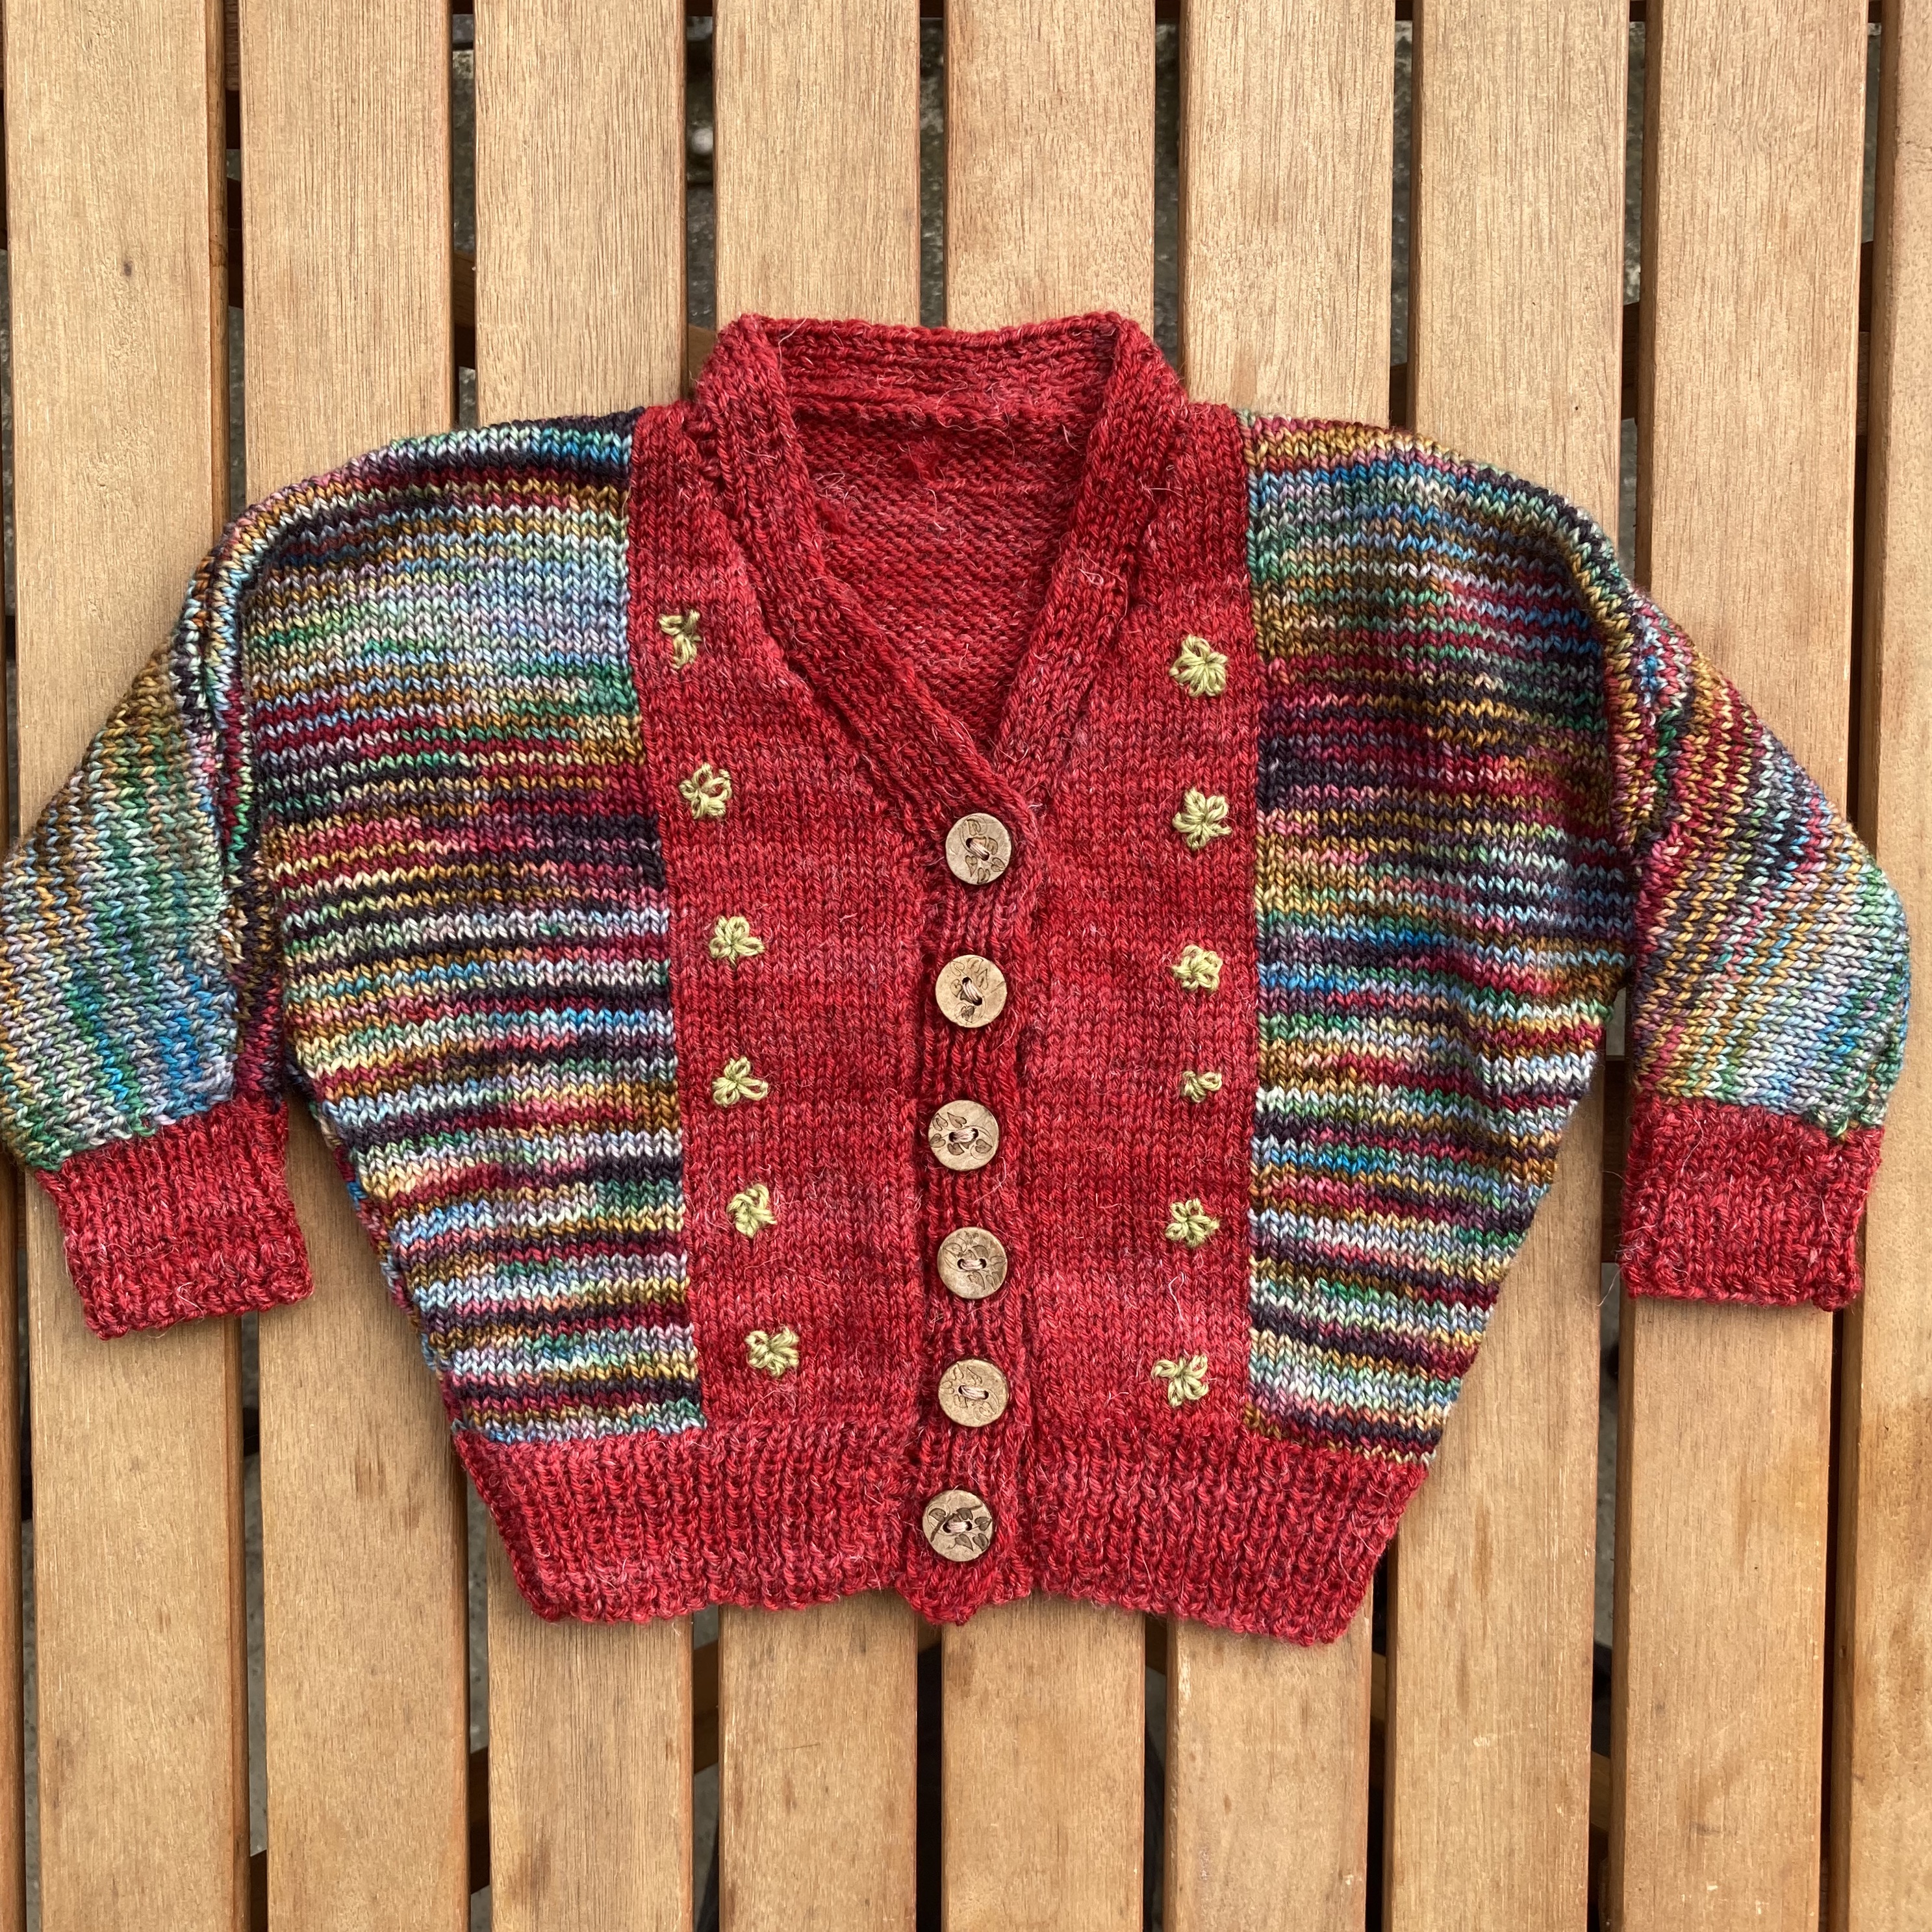
For the November colleague, I made a simple baby blanket in thick cotton yarn of the “dishcloth” variety. The pattern wasn’t vintage — just the traditional crochet “American square” motif with white edge and different colour centres — but the yarn actually was! A couple of years ago, another colleague (not the pregnant one) had to clear out her mother-in-law’s flat after the elderly lady moved to a nursing home, and gave me a huge bag of yarns that had been left behind. In that sense, the blanket does have a vintage connection, though this type of craft cotton honestly hasn’t changed much in fifty years. Here’s the finished product:

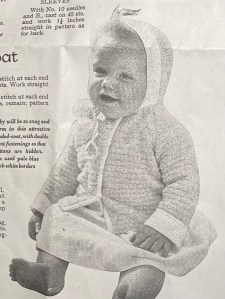
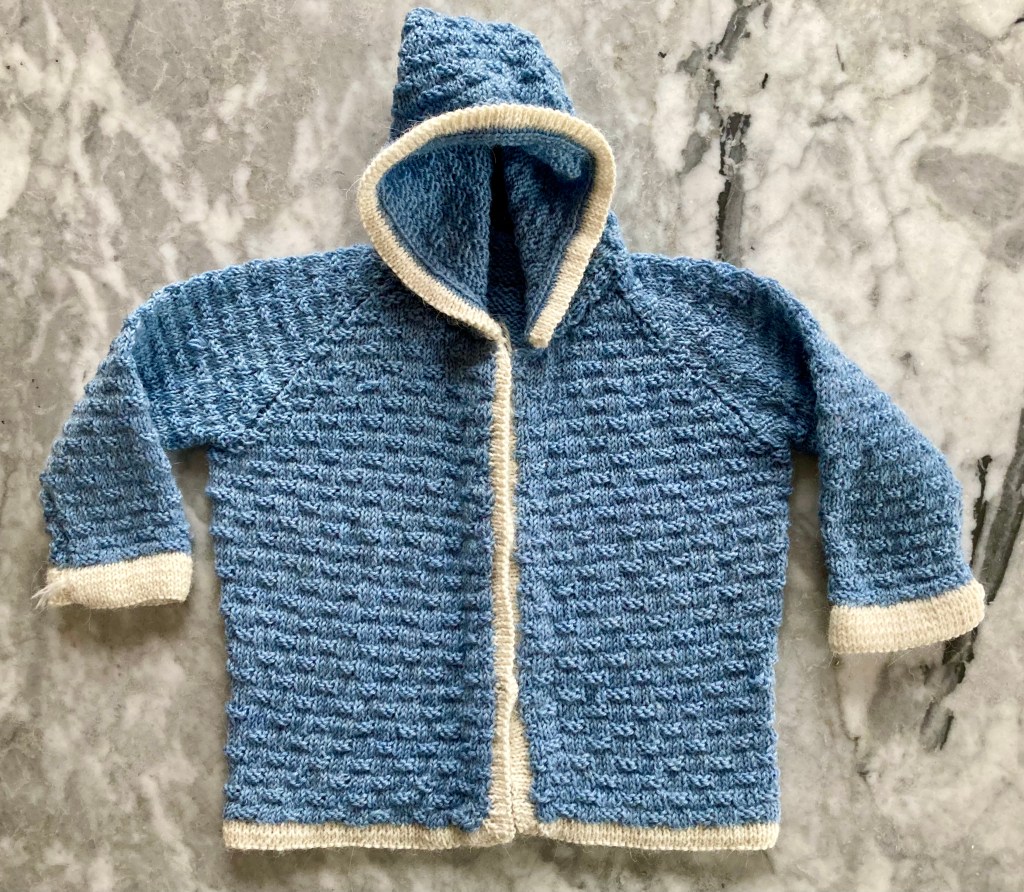
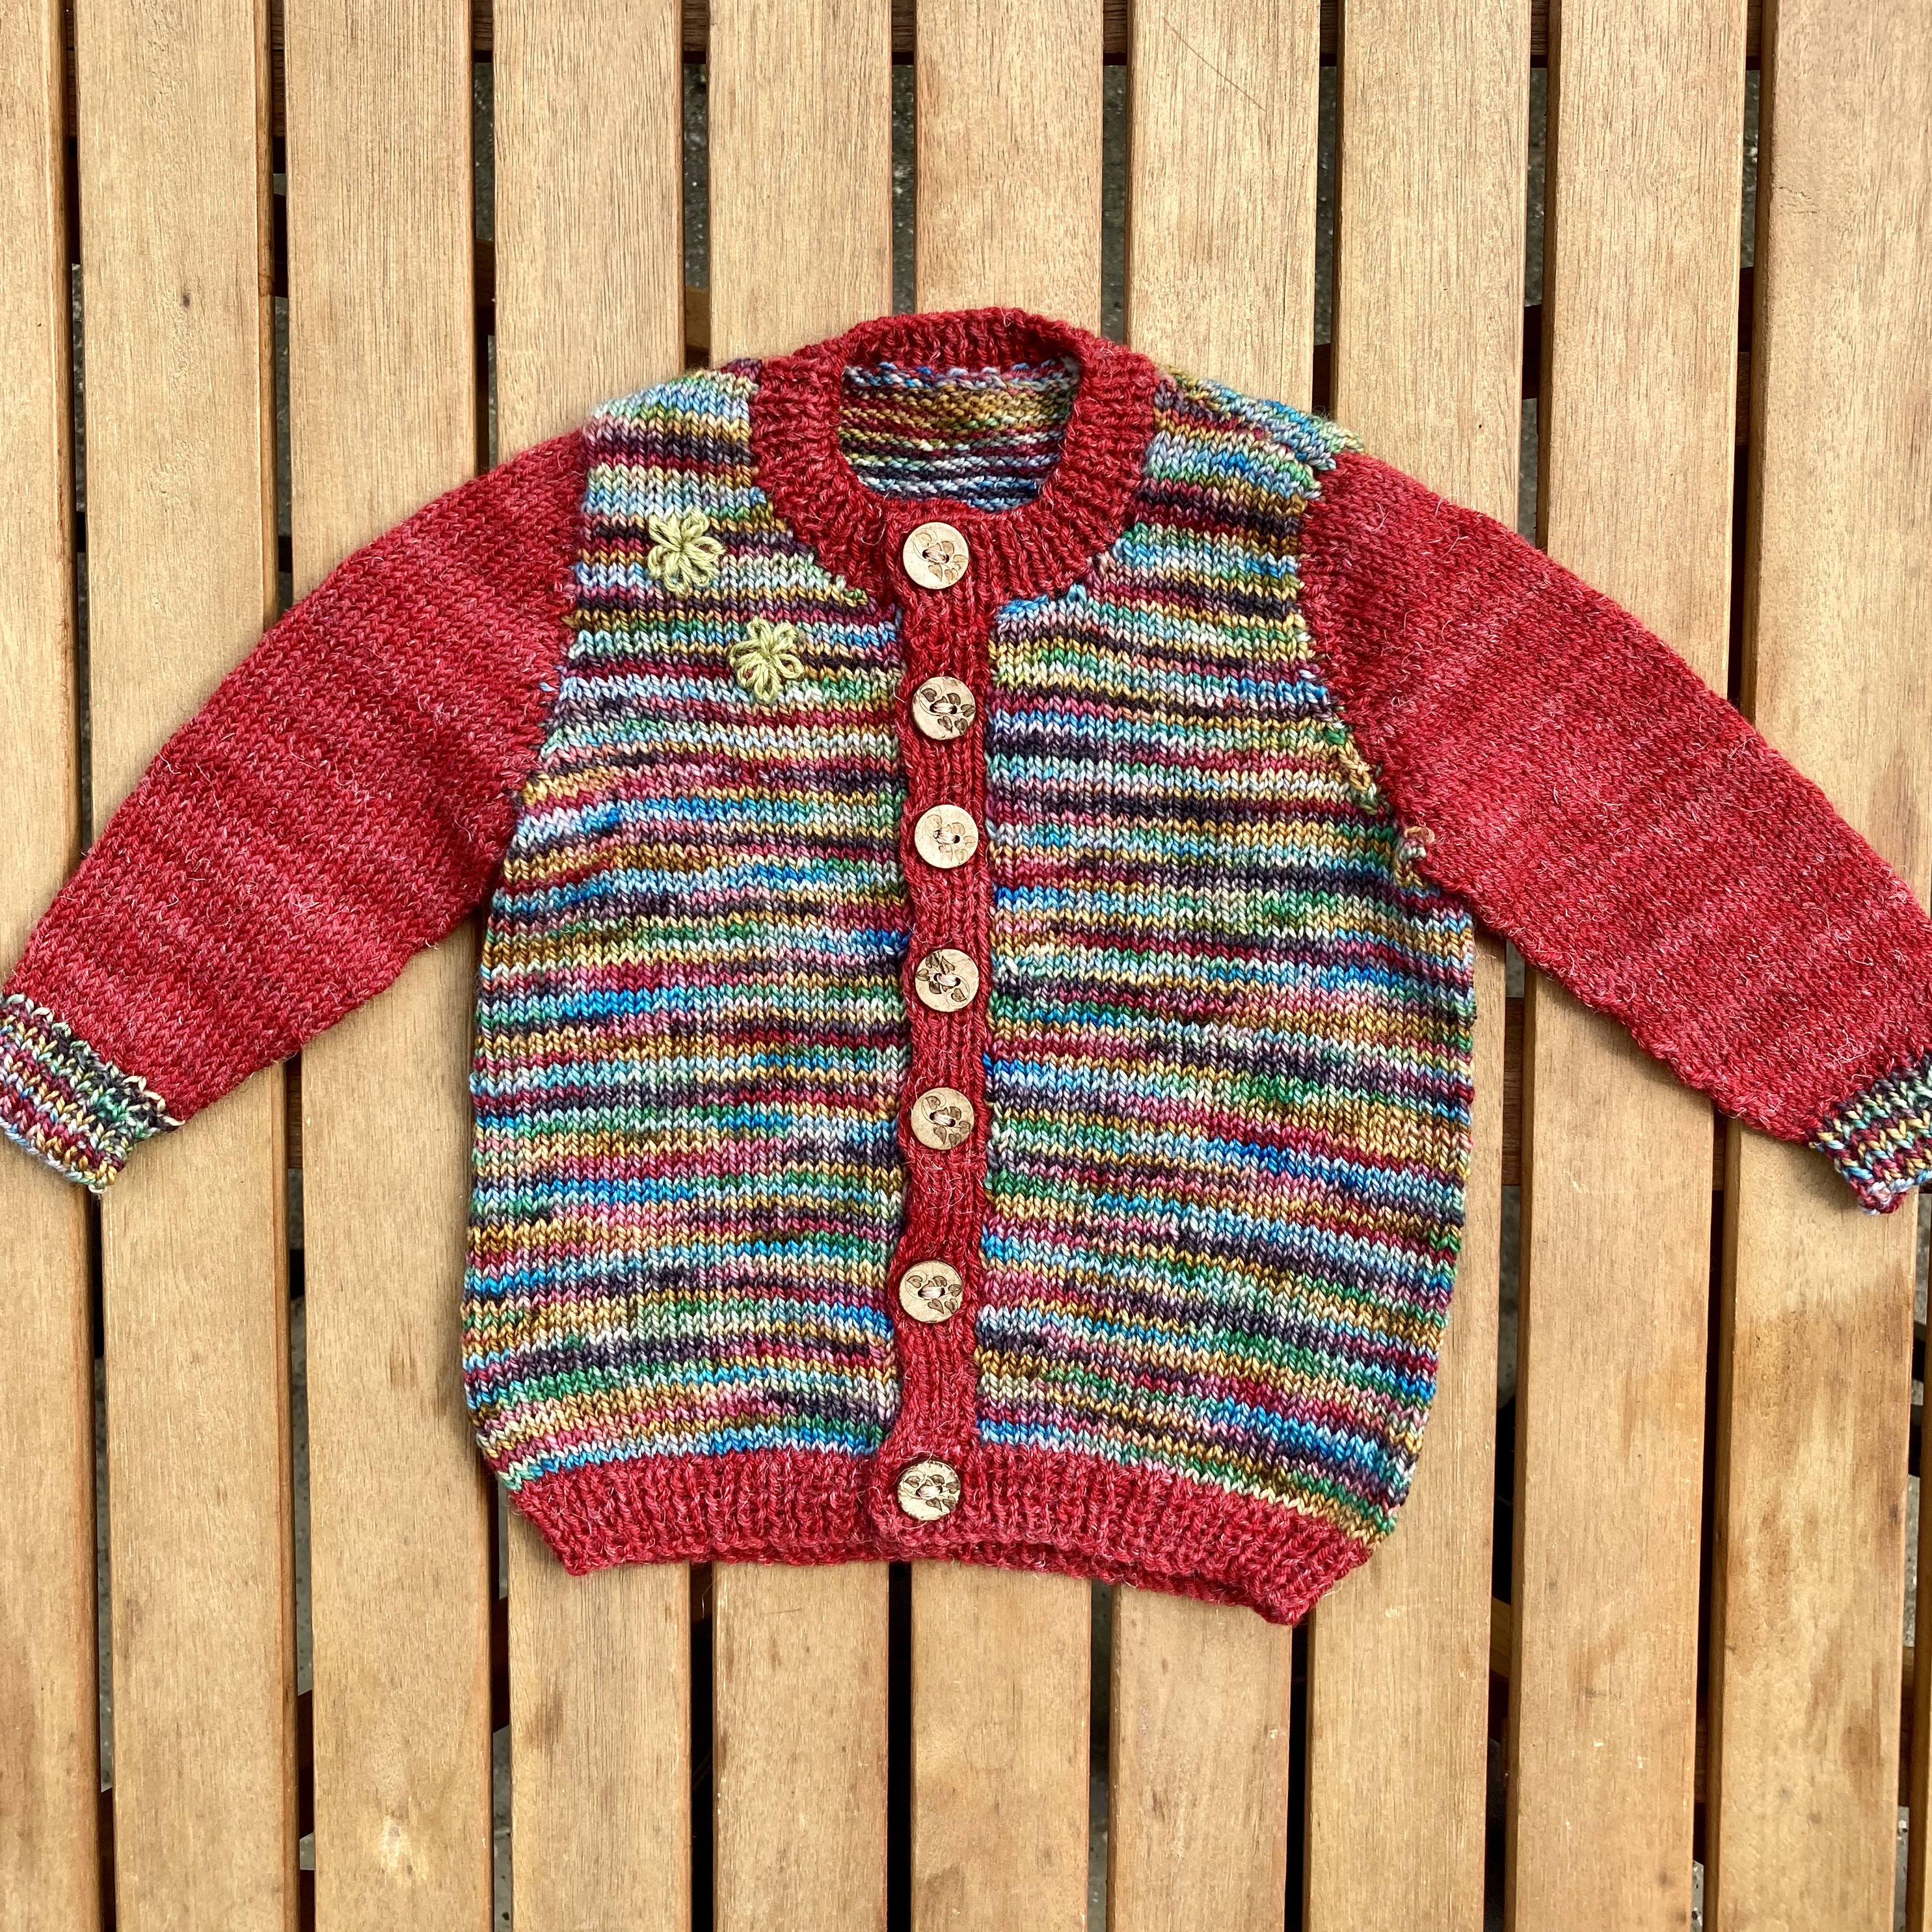
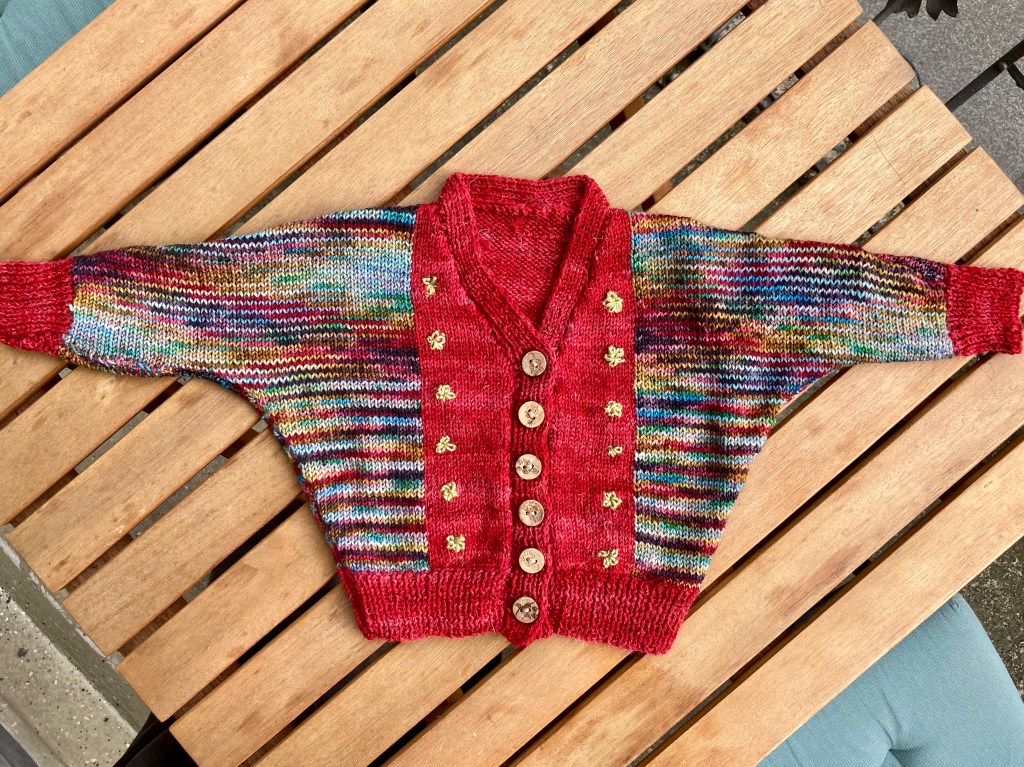
For the January baby, I looked through a few earlier Stitchcrafts from the 1950s, which often had the best baby patterns, and found an intriguing hooded “pram-coat” jacket from the October 1956 issue. I say “intriguing” because it had some unusual design aspects, like the front hem facings that fold under to make a hidden button band, the wide-edge hood and the turned-back-and-crocheted-on sleeve cuffs. I still had some light blue and white-ish Lana Grossa Meilenweit from the March 1964 Slipover for a Smart Tot — probably not enough for the whole jacket with hood, but I thought I might make the sleeves in dark blue (left over from the same project).

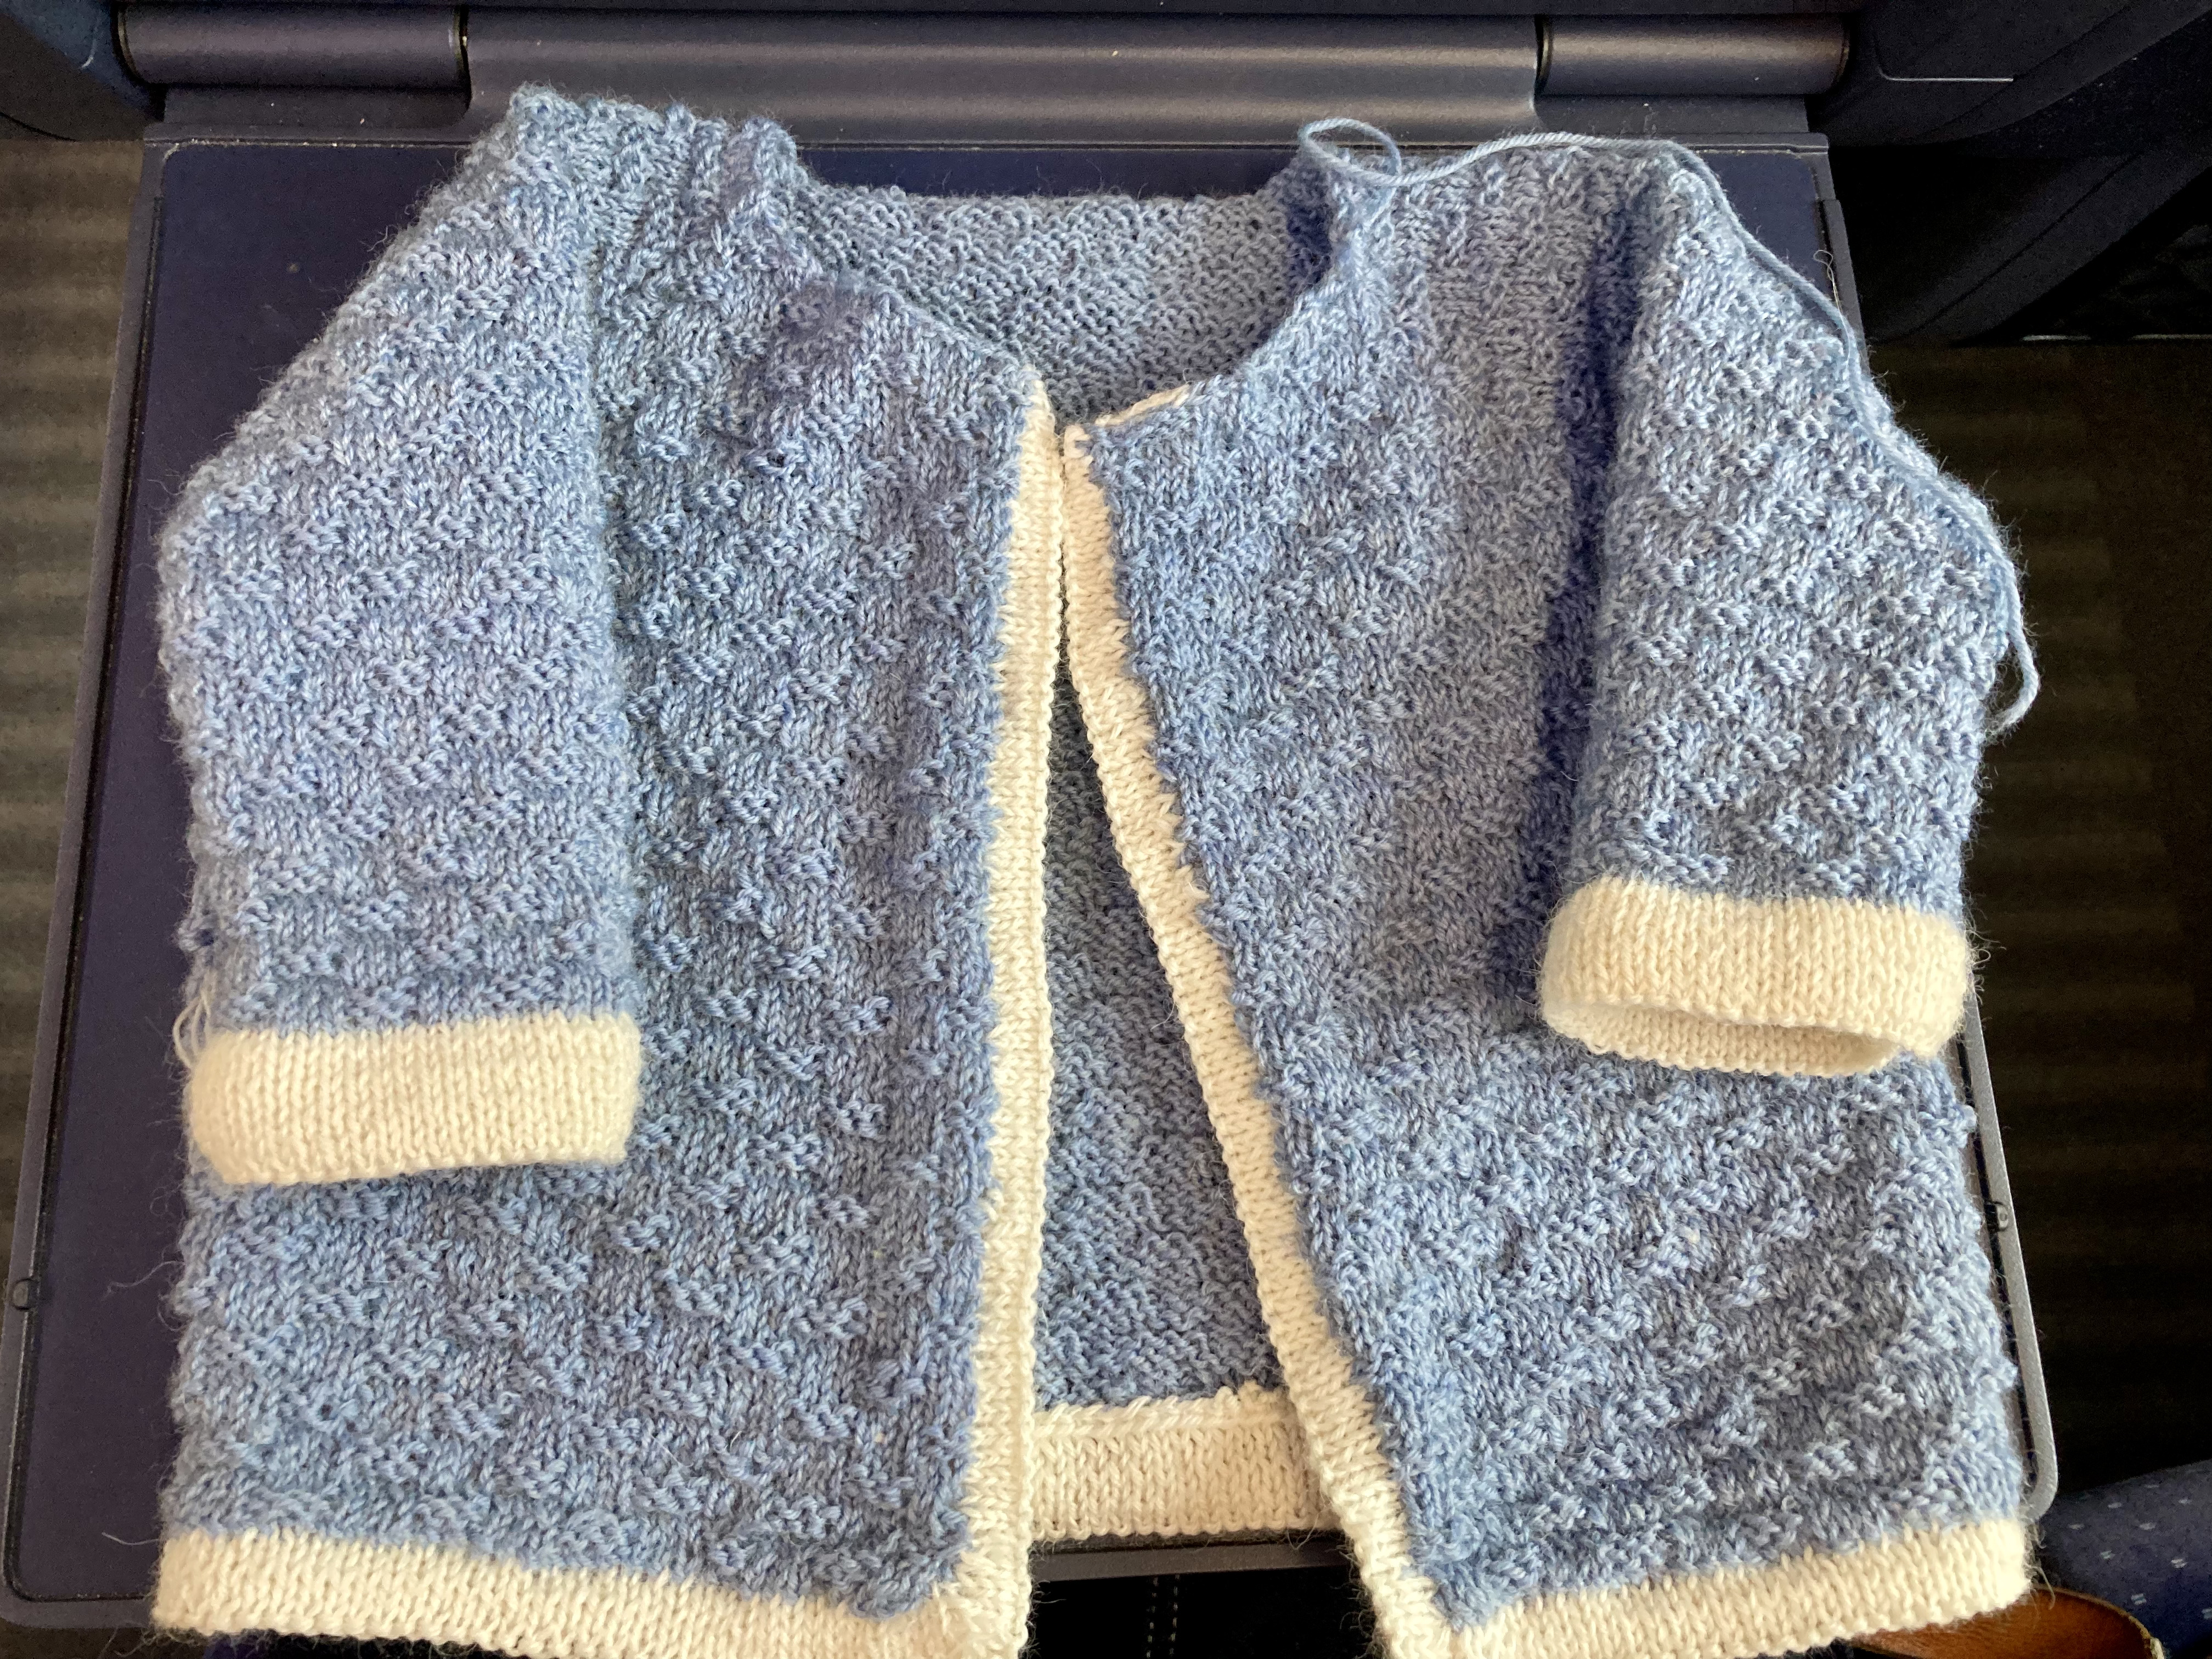
The stitch pattern is a nice basket-weave over 3+3 stitches, with 2 rows of stocking-stitch interspersed to even it out a bit. There isn’t supposed to be a hem at the bottom, but it curled so badly, even in the basket-weave pattern, that I picked up stitches from the cast-on and made one with a purl row for turning. Similarly, the sleeve cuffs were supposed to be knit separately, sewn on later, turned back and then crocheted over, but why so much effort? I made a hem the same way. Continuing in the spirit of saving time and energy, I made the fronts and back in one piece up to the armholes, the sleeves flat and two at a time on one needle, and the raglan yoke in one piece back and forth. There wasn’t enough light blue to even make the whole fronts and back, so I bought more to the whole thing in light blue, as in the pattern.

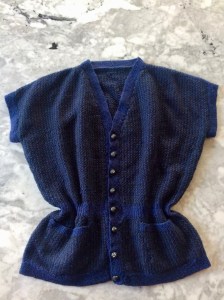
Of course it occurred to me, when halfway finished, that I could have made the bed-jacket pattern after all, just adjusted the size and yarn to fit a baby... and then it would have had the same colour scheme as the original, too. Too late! What can I say. My brain had been occupied with too many “real-life” things.

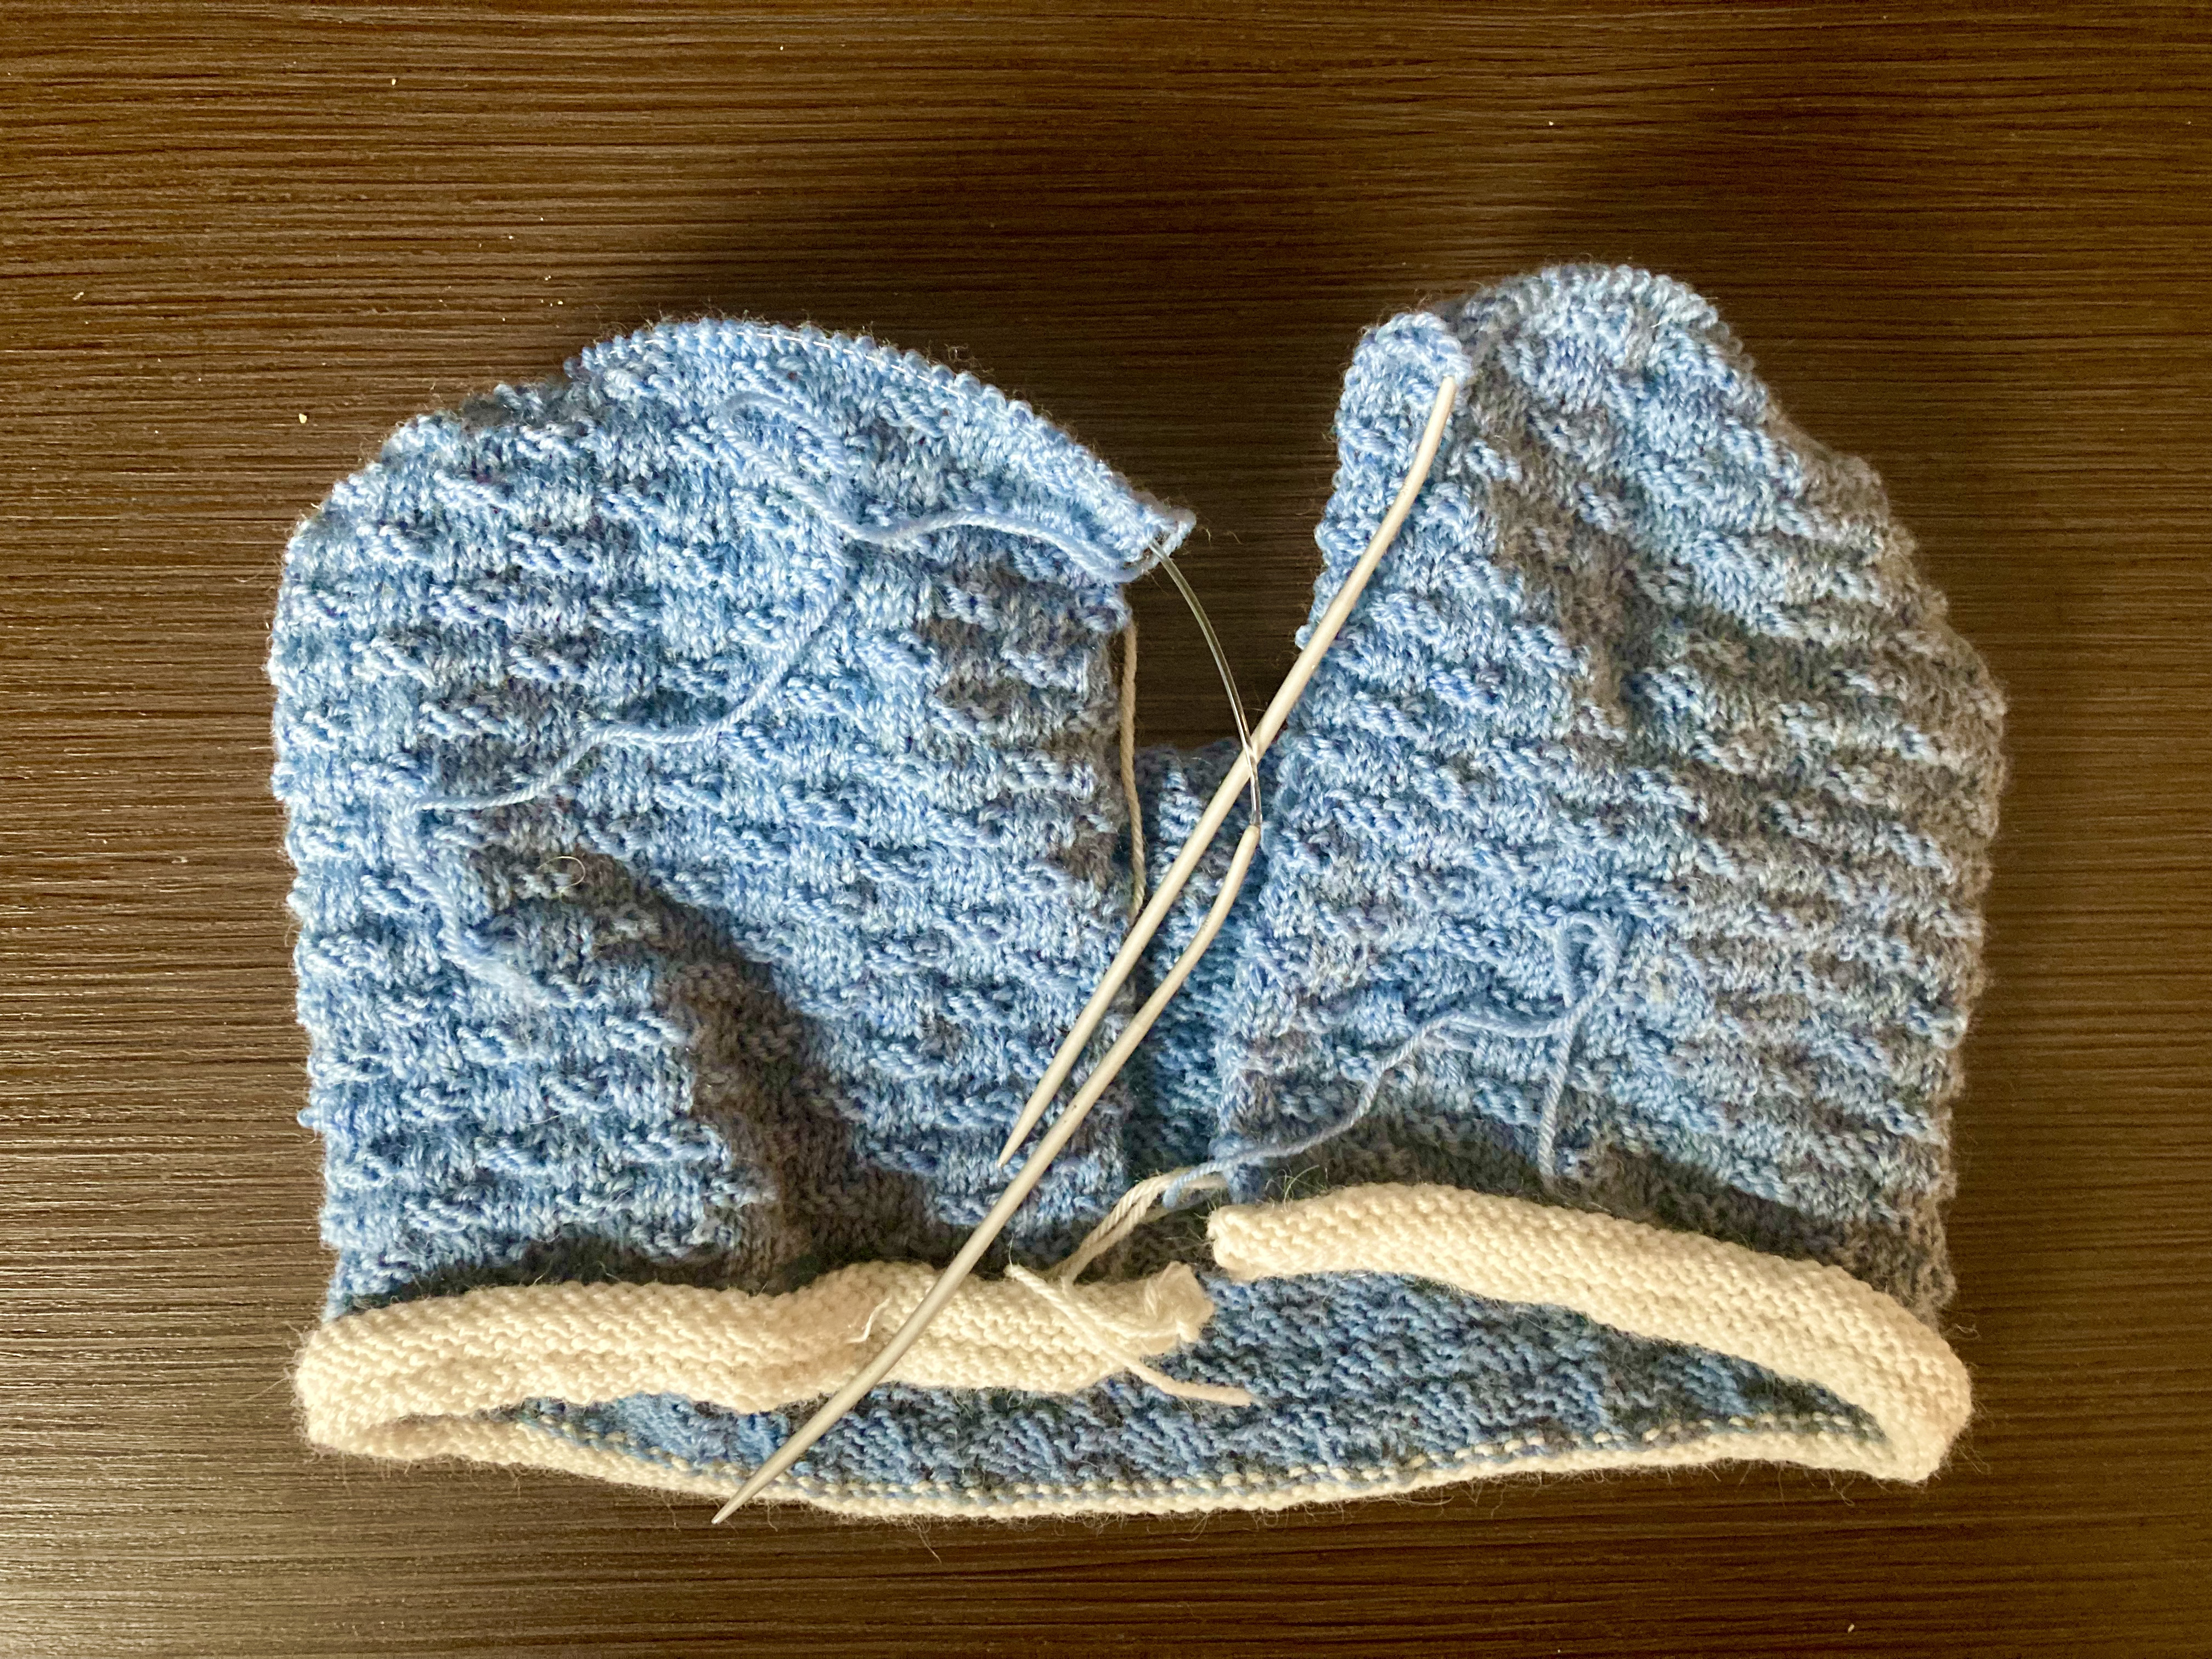
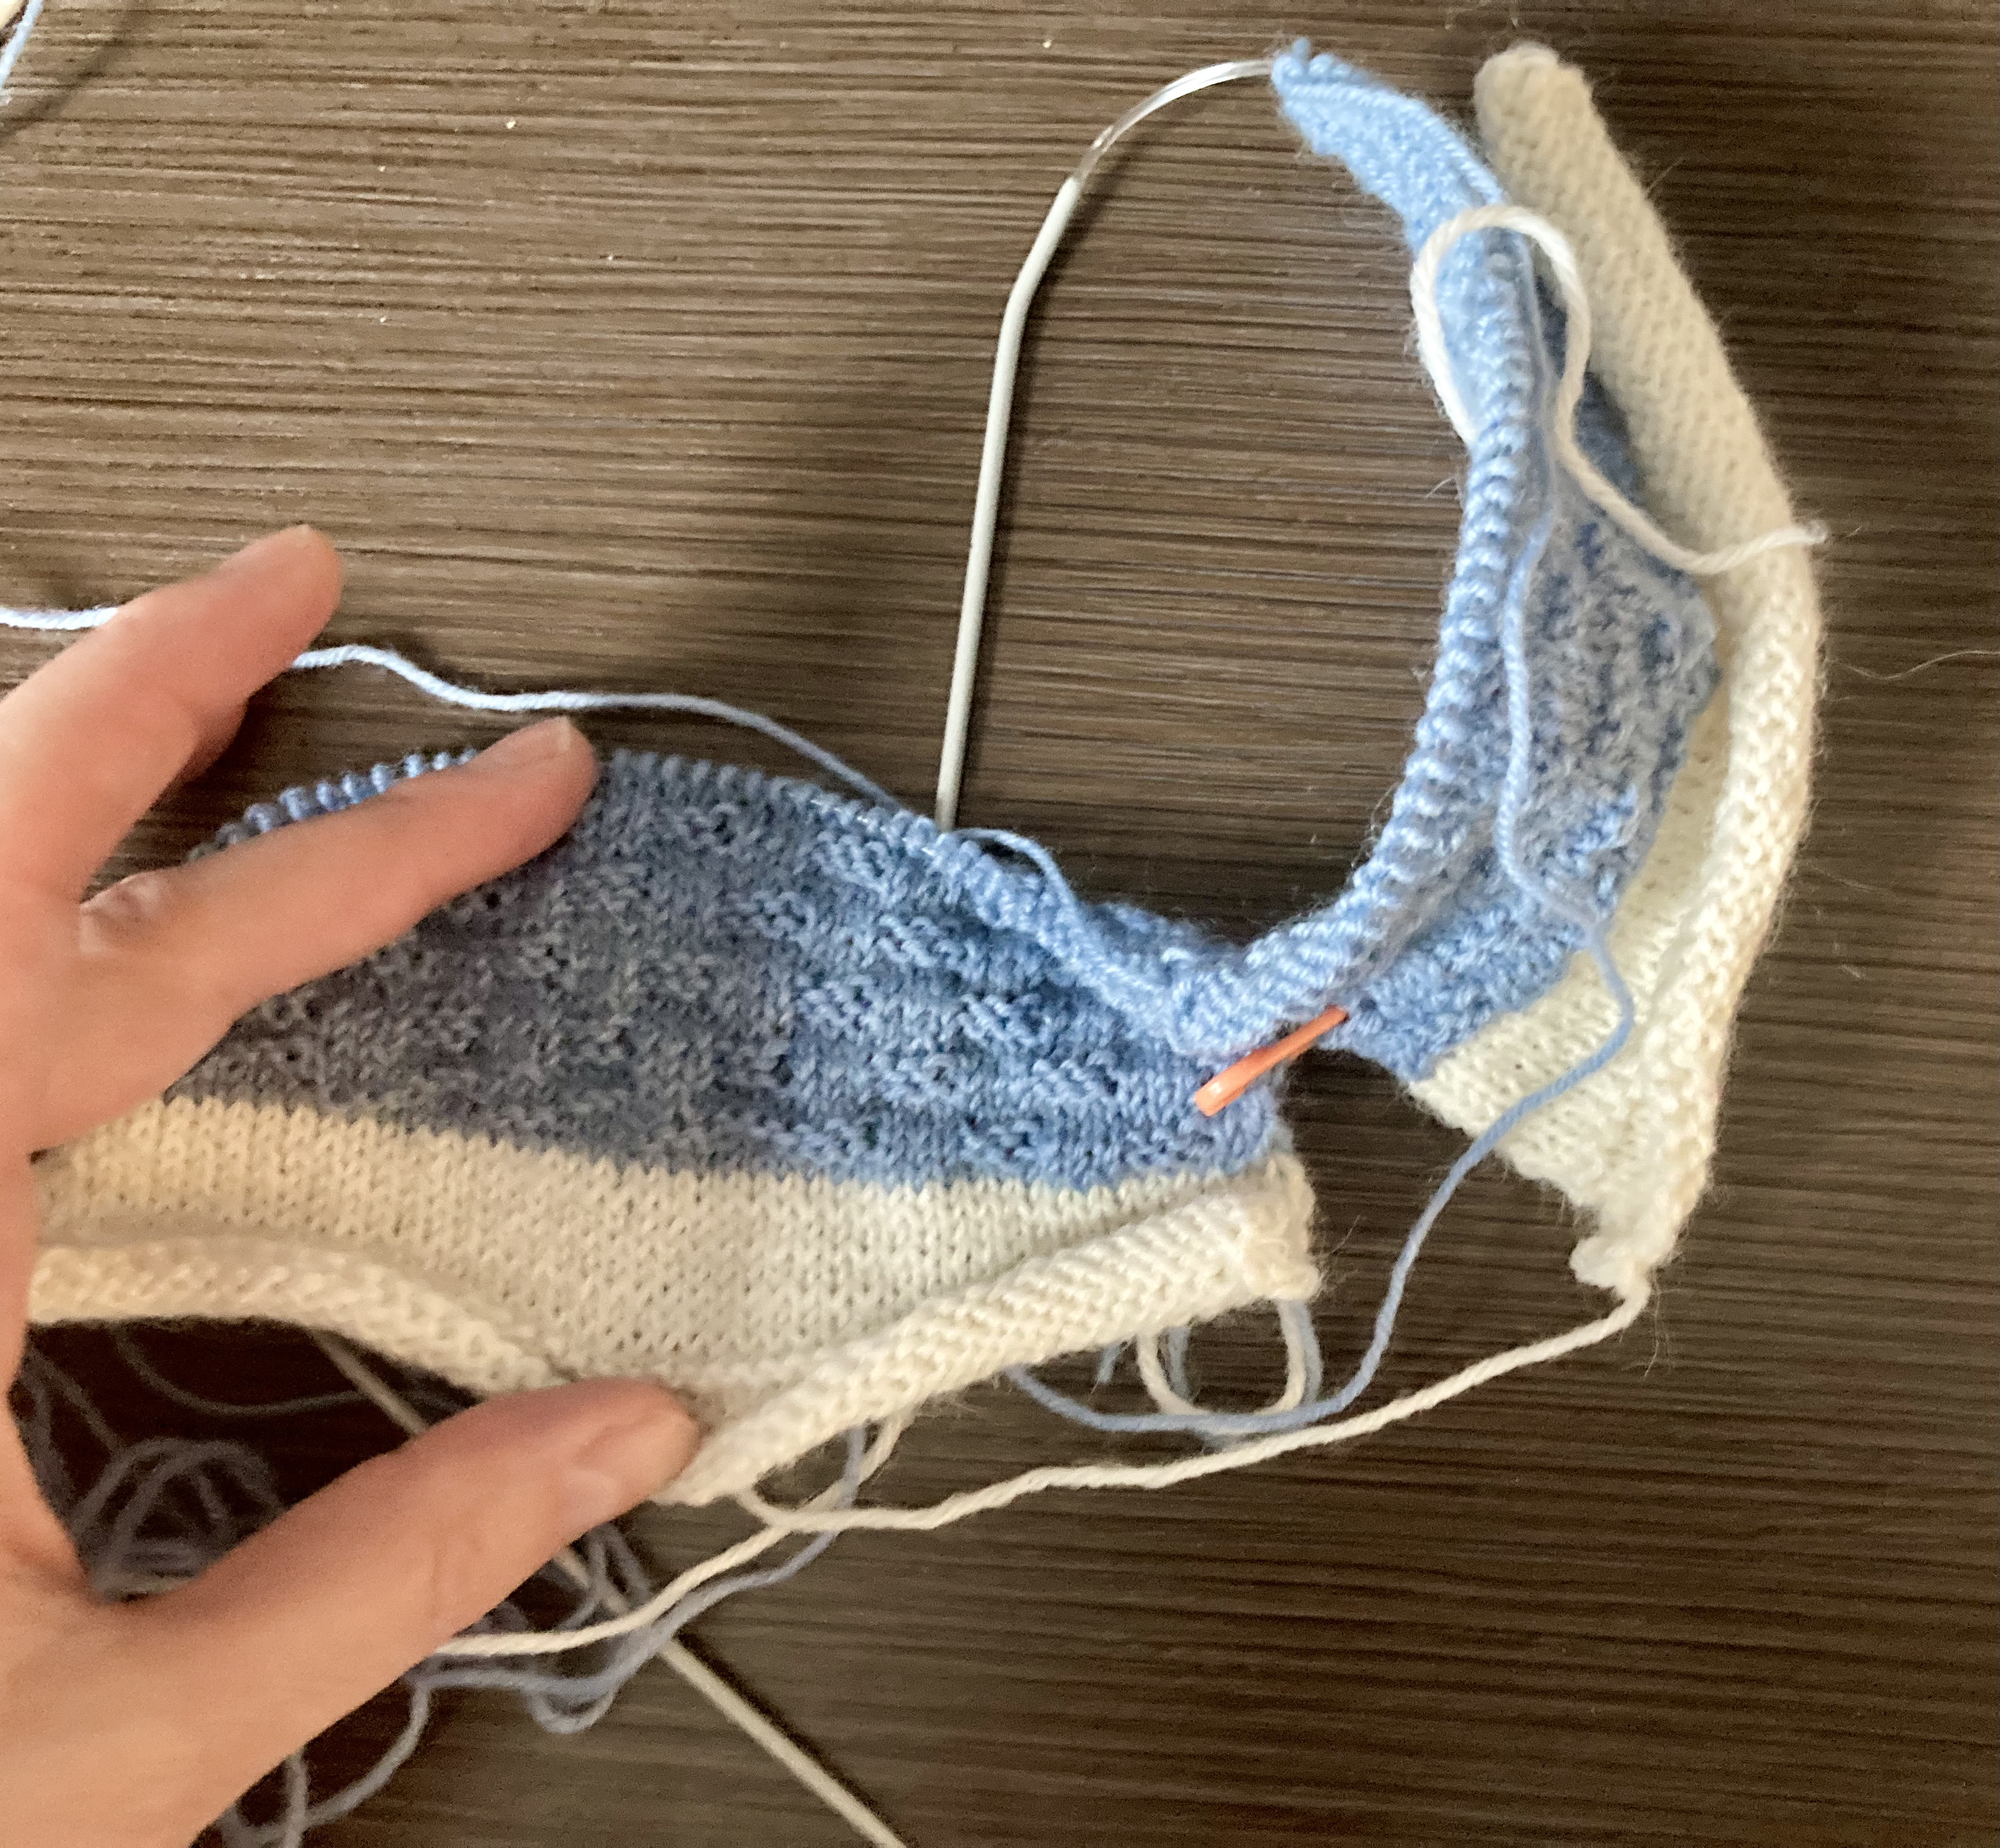
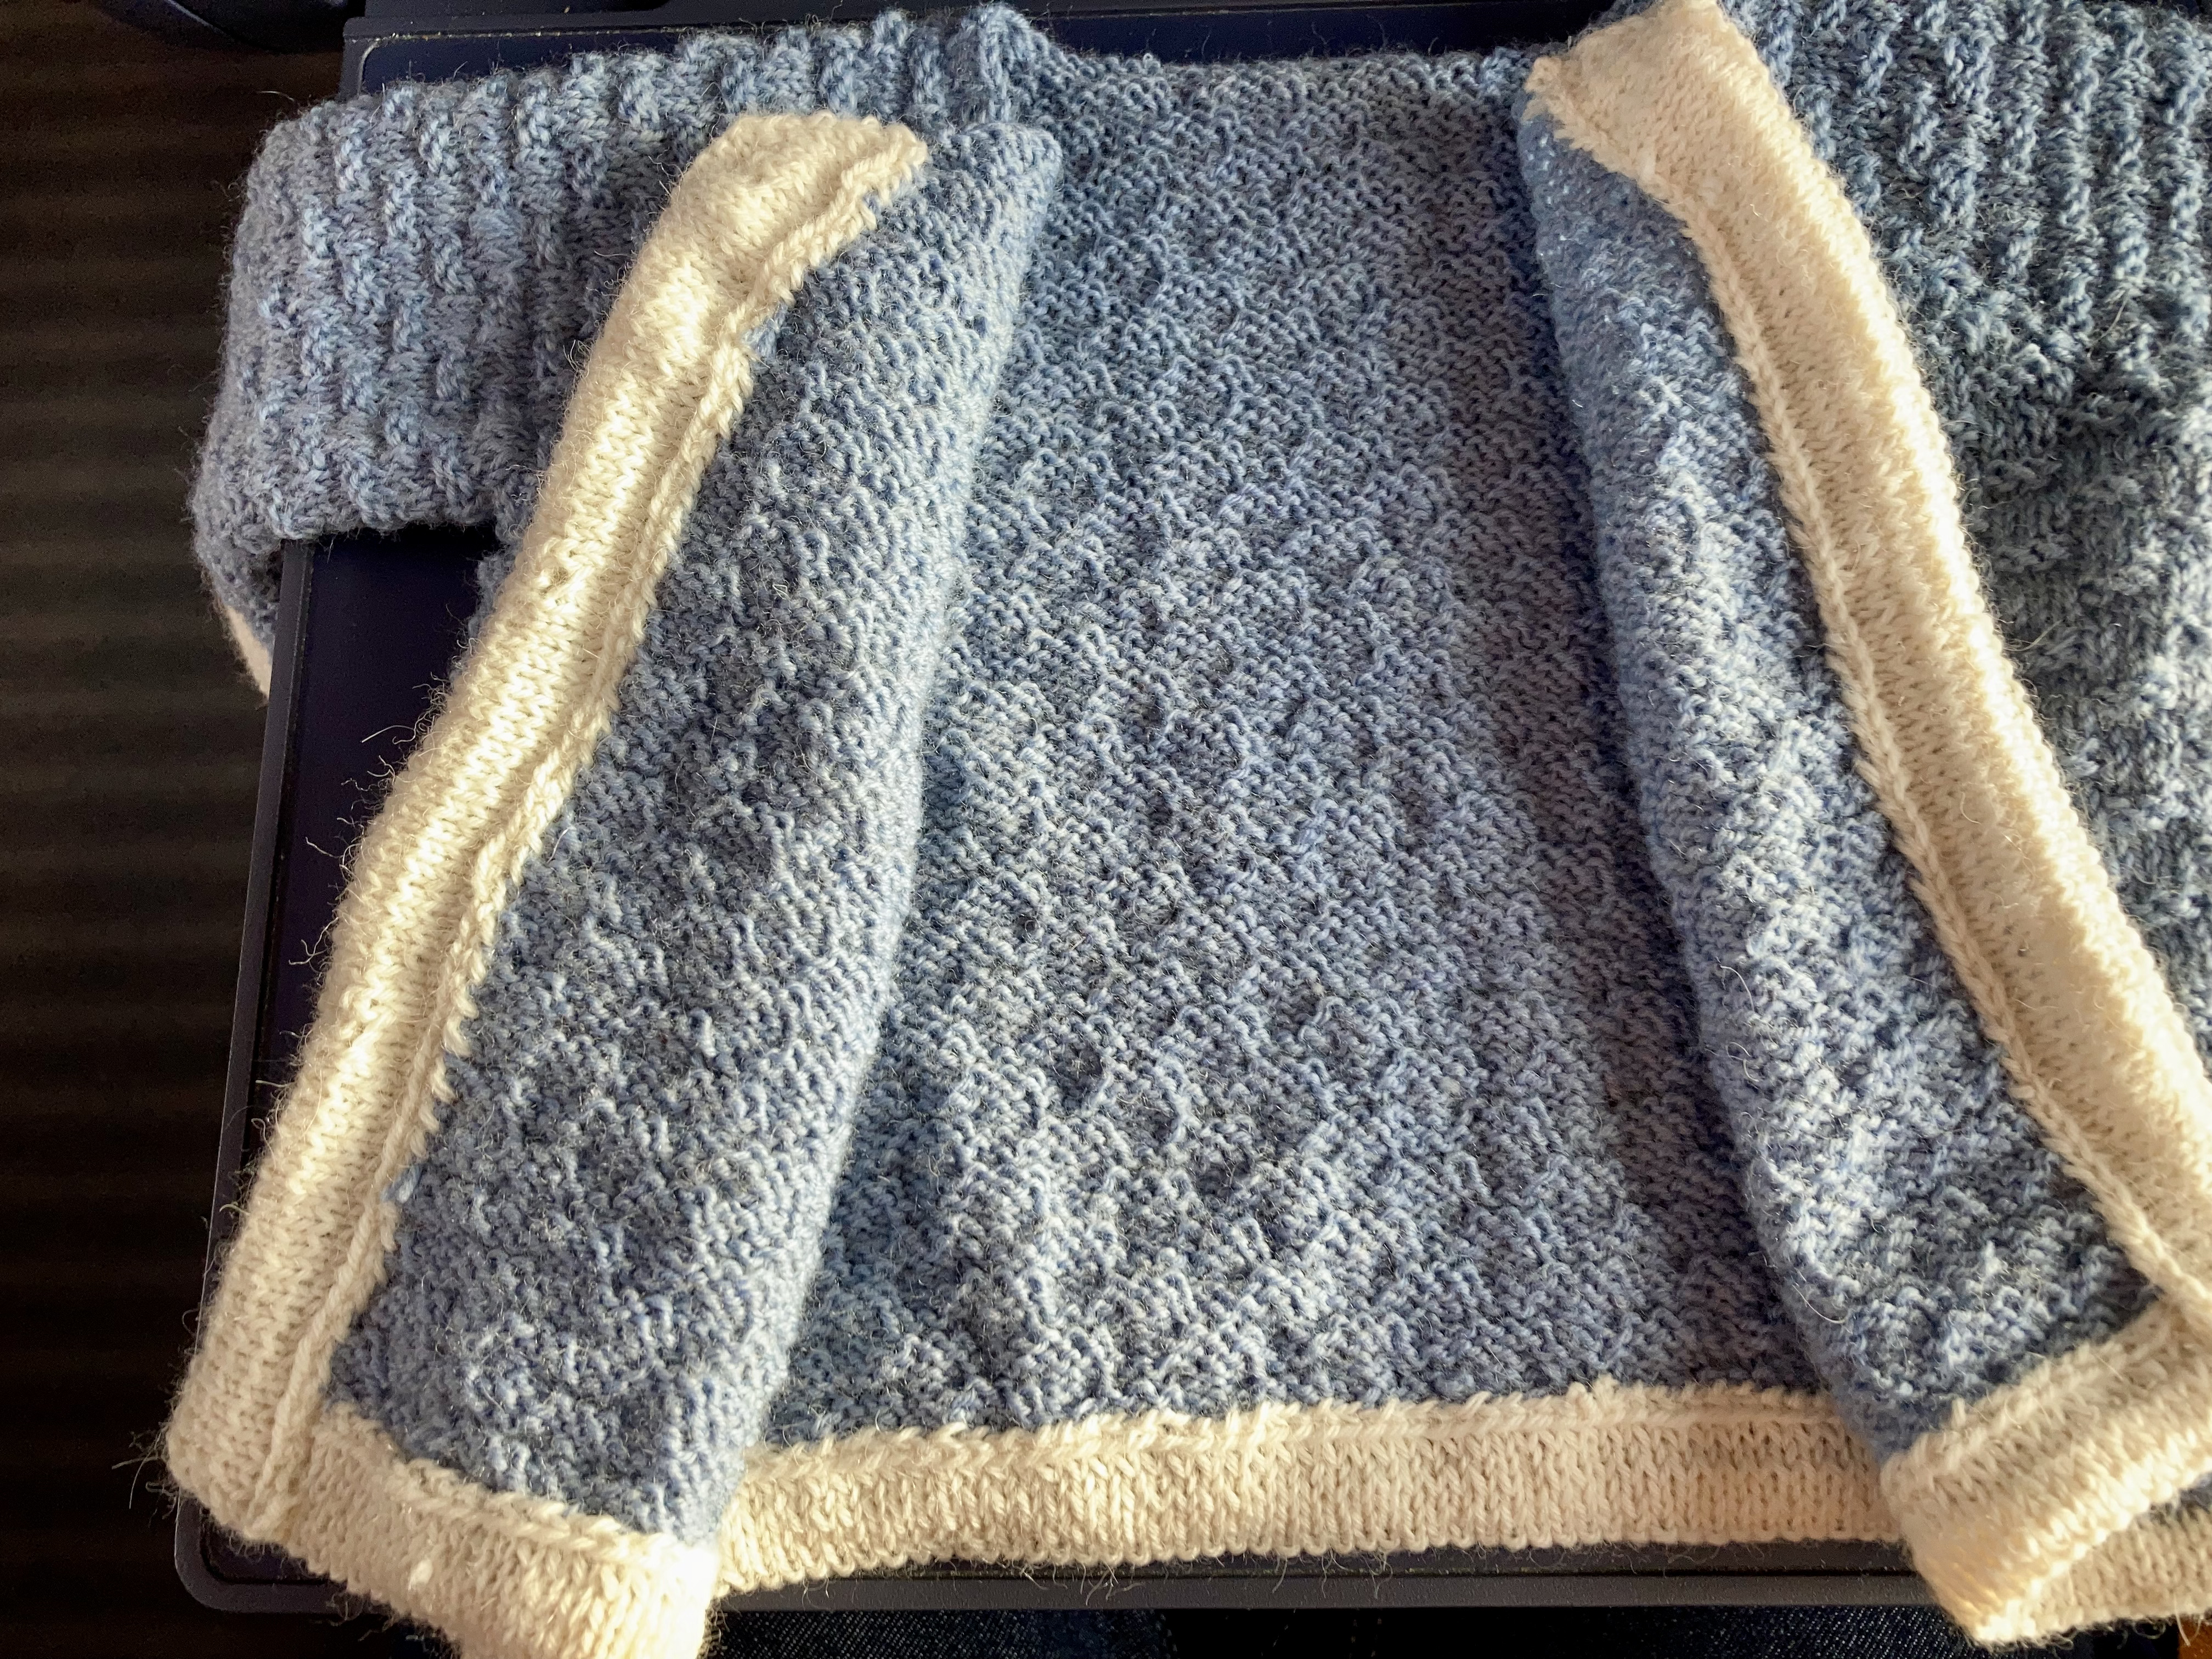
Part of those real-life things included a lot of work-related travel on trains, which has the advantage of giving me lots of time to knit — and the disadvantage of not being able to take good in-progress photos. Here are some of the jacket after completing the body and knitting the front bands, with a lovely background of train floor. The front bands are picked up and knitted horizontally in the usual way and folded under, so double thickness, and the buttonholes are only on the inside part of the fold, so that they are hidden when the jacket is buttoned. There are increases at the neck edge to make a sort of top facing in the front “corners” where the hood join ends.

The hood is made in a separate piece from the brim to the neck, with short rows to round out the top part. Here again, the instructions said to make the hood in blue first and pick up for the facing later. I could have just cast on with white and made the facing first to avoid having to pick up along the cast-on edge later, but I was happy not to, since I had limited white wool — I ran out and had to switch to blue for the under-facing part (after the fold). That wasn’t a problem and the white wool remnant has now been successfully de-stashed.

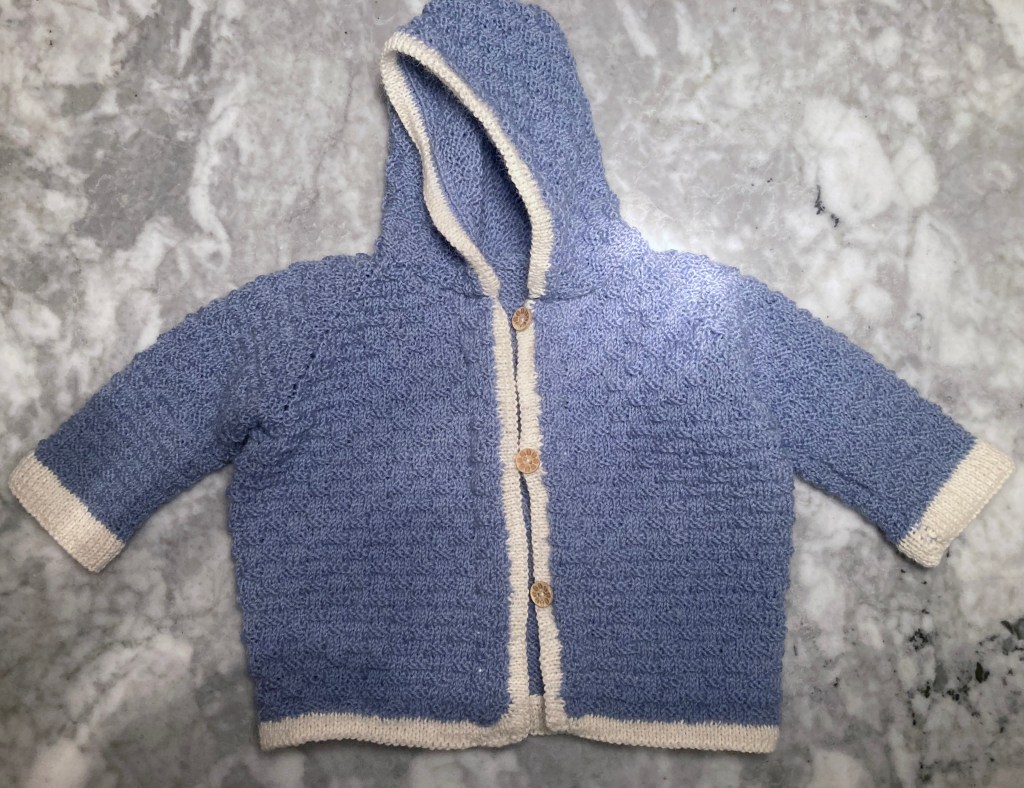
I added lightweight wooden buttons. The covered-button design didn’t really convince me, in the end, since I imagine it will be unnecessarily difficult to button up if the baby is squirming around, and the doubled facings are a little bulky even in 4-ply, fingering-weight wool. That said, the facings will put up with a good amount of wear and tear. The finished jacket is really cute and should fit a larger baby in the first few months as an “outdoor” pram jacket, or maybe a six-month old as a cover-up on cooler summer days.

I hope the my colleagues will be happy with this baby jacket! The mother is herself an expert knitter and seamstress, so the bar was set high. But I’m quite satisfied and I think they (and the baby, of course) will be too.

Blast from the Past: October 1956

This month’s blog project was a bit different than planned. The August 1964 issue didn’t have any projects that particularly called to me. There was a nice baby set of “vest and pilch”, but I didn’t know anyone who was having a baby soon… or did I? In fact, I did know that a friend of mine was expecting twins, but we hadn’t seen each other for a while and unfortunately that fact slipped my mind until the babies were almost due! At which point I could have made two vest-and-pilch sets, but I wanted to get the project done quickly and also destash some yarn that was more suitable for a top/middle layer than to be worn right next to delicate baby skin.

I decided to make two similar, but non-identical cardigans and opted to make one without a pattern and one from this pattern for a dolman-sleeve cardigan from Stitchcraft‘s October 1956 issue. The use of two block colours made it a good choice for the two yarns I wanted to use, and the embroidery was a cute touch.

The pattern calls for Patons Beehive 3-ply Baby Wool at a tension of 8 stitches to the inch for a cardigan that is 19 inches around the underarms. My wools were Becoming Art Cielo fingering in the colour combination “Carousel” (multi) and Schöppel Admiral Hanf in red — admittedly not a very vintage colour combination or standard baby-pastel, but I like knitting bright colours for babies, and the mother’s favourite colour to wear is red, so I loved it.

Both wools were gifts — the Admiral Hanf from my knitting group’s holiday “secret Santa” and the Cielo Carousel a prize from the last KAL at the All Things Vintage forum on Ravelry. “Hanf” is German for hemp, which makes up 10% of the red yarn and gives it strength and durability. It’s not scratchy, but also not super-soft. The Cielo fingering is delightfully springy and squishy. I got 6.5 stitches to the inch with each of them on 3 mm needles, but saw no need to change the pattern, as a larger cardigan would be more practical for autumn/winter wear, when the babies will be bigger and wear more clothing underneath.

The cardigan is knit from the bottom up in three pieces — back and two fronts, with the sleeves cast on horizontally. The colour-block effect is made by using separate balls of wool and twisting them together at the colour change, intarsia-style. I made both the fronts together with separate balls of yarn on one needle to insure symmetry. The cuff ribbing is picked up and knit in rib after the main pieces are done and the front button bands are knitted separately and vertically in rib and sewn on. (I’m not a fan of this type of button band and would just as soon have knitted the bands together with the fronts, even if technically they’re supposed to be made on a smaller needle.)

The little flowers on the fronts are embroidered on in loop stitch after everything else is finished. It was surprisingly difficult to get all the “petals” to be the same size and distributed evenly around the centre. Perhaps I should have made them larger. I’m always happy to practice embroidery on knitting, since I think it looks really cool, but it continues to be a challenge. The wool is a bit of leftover Onion Nettle Sock yarn.

One 100 gram skein of the multi-colour wool and one 50 g ball of the red were enough to make this cardigan, another “fraternal” cardigan (plain crew-neck with set-in sleeves) made without pattern using the multi-colour yarn for the body and the red for the sleeves and ribbing, and almost two hats with multi-colour ribbing and a red body. The crown of one hat was finished in the green Onion sock, which I also used to embroider two larger flowers near one shoulder of the no-pattern cardigan.

I loved the dolman pattern and will surely use it again for another baby. I love the similar, but not identical cardigans for (fraternal) twins. I love matching hats and cardigans. I love the bright colours! And I think these sets will be very useful for the twins and make the parents happy.

Blast from the Past: April 1952

IMG_2746I hang out a lot in the “All Things Vintage” forum on Ravelry and try to participate in the make-alongs when I can. Usually, there are two of them per year, and last year’s July-December KAL/CAL (that’s “knit along”/ “crochet along” for anyone not familiar with the abbreviations) had the theme “Fabulous Fifties.” The 1950s were indeed a fabulous time for fashion and I have a small selection of 1950s knitting magazines, including some very nice issues of Stitchcraft, so the most difficult part was choosing a pattern! I went with this “Elegant jerkin for summer wear” from April 1952.

William_Segar_Sir_Walter_Raleigh_1598
Portrait of Sir Walter Raleigh (wearing a jerkin) by William Segar, 1598. National Gallery of Ireland. Public domain.

First of all, I hear most of you asking: What is a jerkin? I’m glad you asked. Originally, it was a short, close-fitting, buttoned or otherwise fastened jacket with short or no sleeves, worn in the Renaissance over a doublet. It was often nipped in at the waist. Modern versions of the jerkin were revived for military use in the 20th century, and Stitchcraft as well as other mid-century patterns often use the word for a women’s waistcoat with cap sleeves to wear over  a blouse, or a knitted blouse-like garment such as this one, which plays off of the historical jerkin shape.

The four-row stitch pattern was quite easy (knit 1, slip 1 on the right-side rows, knit 1, purl 1 on the wrong-side rows in one colour, then slip 1, purl one on the RS and purl 1, knit 1 on the WS in the other colour) but because of the colour change with the slip stitches, it was amazingly difficult to “read” the work and get back on track. At the same time, if just one stitch was wrong, it was immediately visible in the pattern. Of course, I had to pick blue and black, two colours that didn’t offer much contrast and which, I found, only look different in natural light. As a result, I could only work on this project during daylight hours… in the winter, which is pretty dark.

IMG_2747
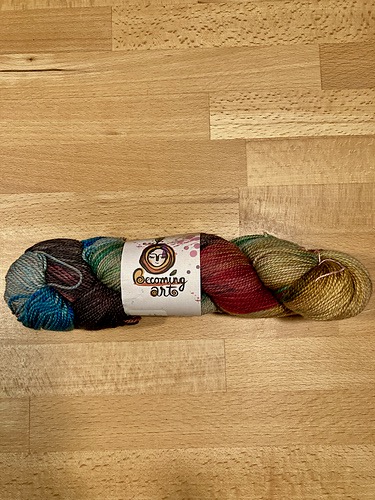
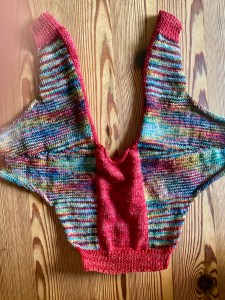
Adding to the frustration: as always, no matter how small the needles or how thin the wool, I could not knit tightly enough to get the minuscule gauge, which itself was only given as a “life-size” photograph in the pattern. Of course, I am also larger than the 34-35 inch bust given in the pattern, but how much larger the garment, calibrated for how much larger the gauge? Right, lots of calculations, estimations, measurements upon measurements, and just plain guesswork. Plus the thing pulled together either more or less, horizontally or vertically, as it got larger — my gauge swatch (a pocket lining) was utterly useless. I had to start three times.

IMG_3080
Before sewing

When I finally got it done (too late for the KAL deadline but whatever), it fit perfectly! I was so proud of myself! Then I wash-blocked it and the wool stretched about six inches in width and at least two or three in length above the waist. In desperation, I reached out to the good people of Ravelry, who told me that the yarn I used (Lang Merino 200 Bébé) was superwash and I should put it in the clothes dryer to shrink it back into shape. I did that and it actually did shrink it down, but it still ballooned a bit in the torso, so I sewed side seams into it. At the moment they are just sewn down with yarn, but the next time I get the sewing machine out, I will probably sew them down properly and (aaaaaggggh!!) cut the excess fabric away to reduce bulk

Also, I sewed that moss-stitch bottom band on twice and it still pulls in a little bit. Oh right, and the tour through the dryer dinged up the buttons, even though I turned the garment inside out.

All in all, this jerkin was a jerk. It was jerkin me around! It looks OK though, I guess, and better under a blazer. You will have to take my word for it when I tell you that I look less dumpy in it in real life than in the photo. It was an interesting project in terms of construction and stitch pattern and I’m sure I will wear it, but sadly, in the end I don’t think it was worth all the frustration.


IMG_3091

Stay tuned for the update on the really, truly, almost finished January 1962 project and the embroidered chicken squirrel (yes) that will be my February 1962 experiment catastrophe vegetable bag.