Autumn is here, and the September 1965 issue of Stitchcraft is, as promised by its editress, a “bumper” issue with more colour photos (to offset the price increase to 2s. per single issue) and a new yarn from Stitchcraft’s patron wool company, Patons.
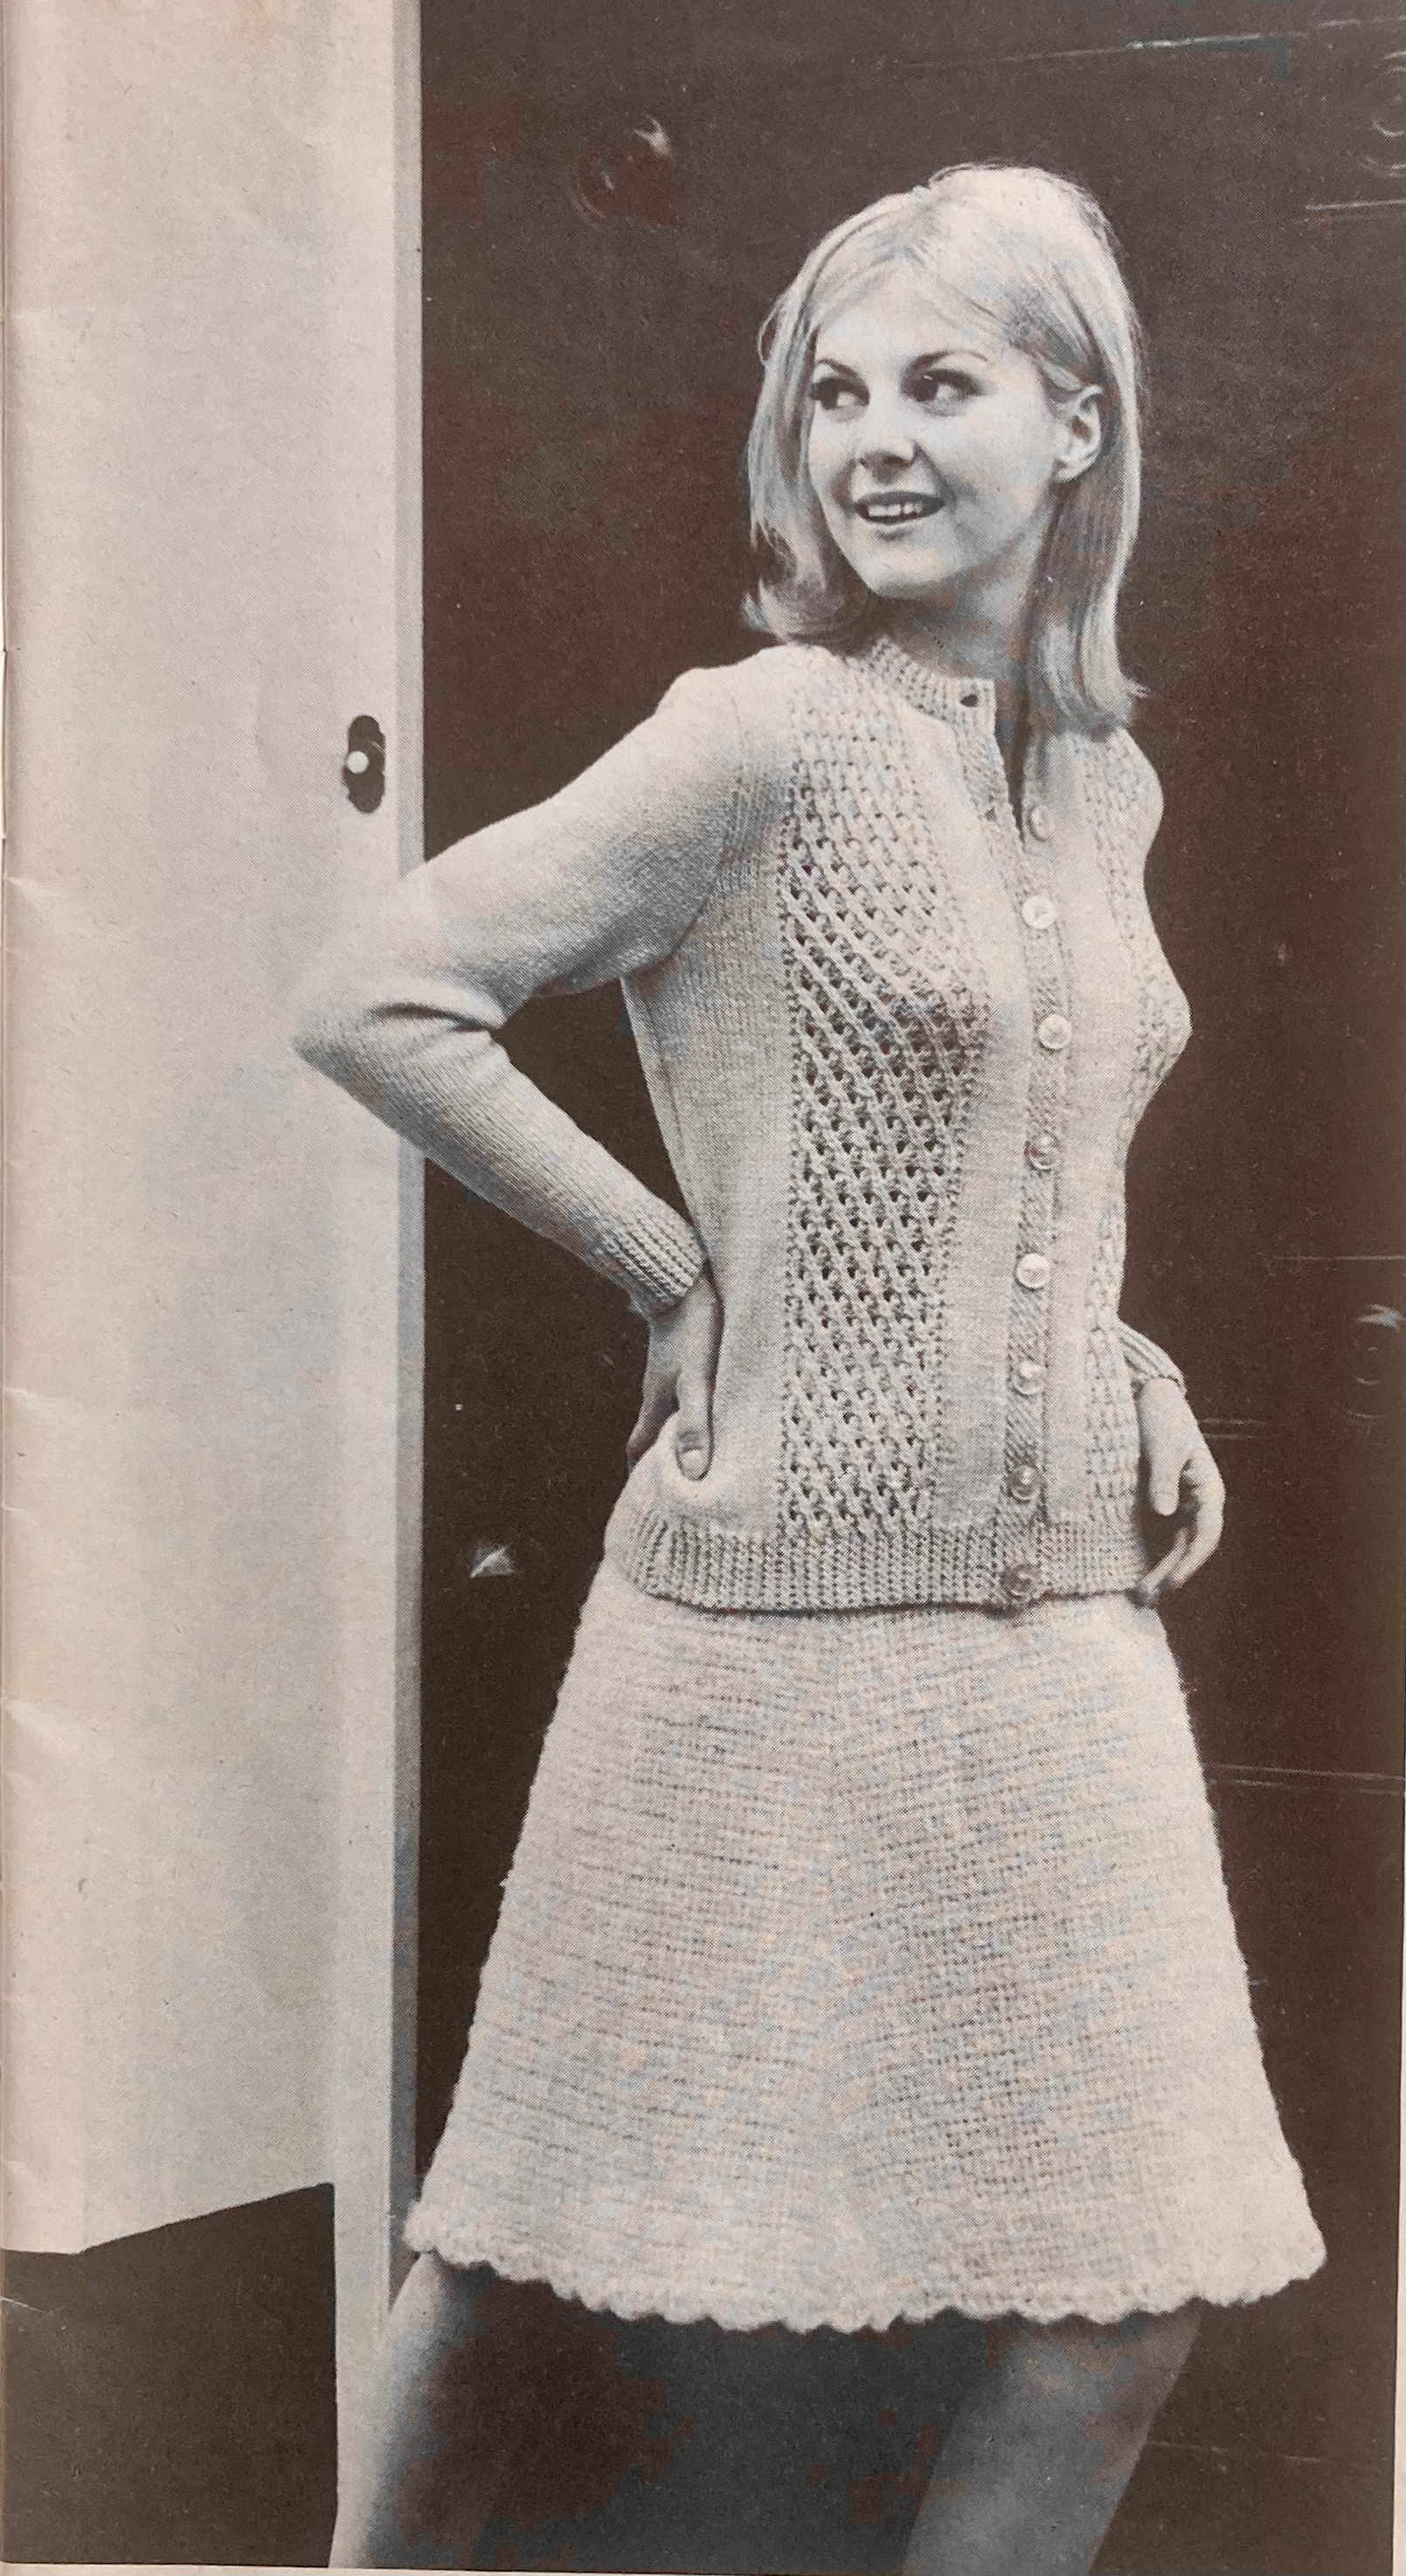
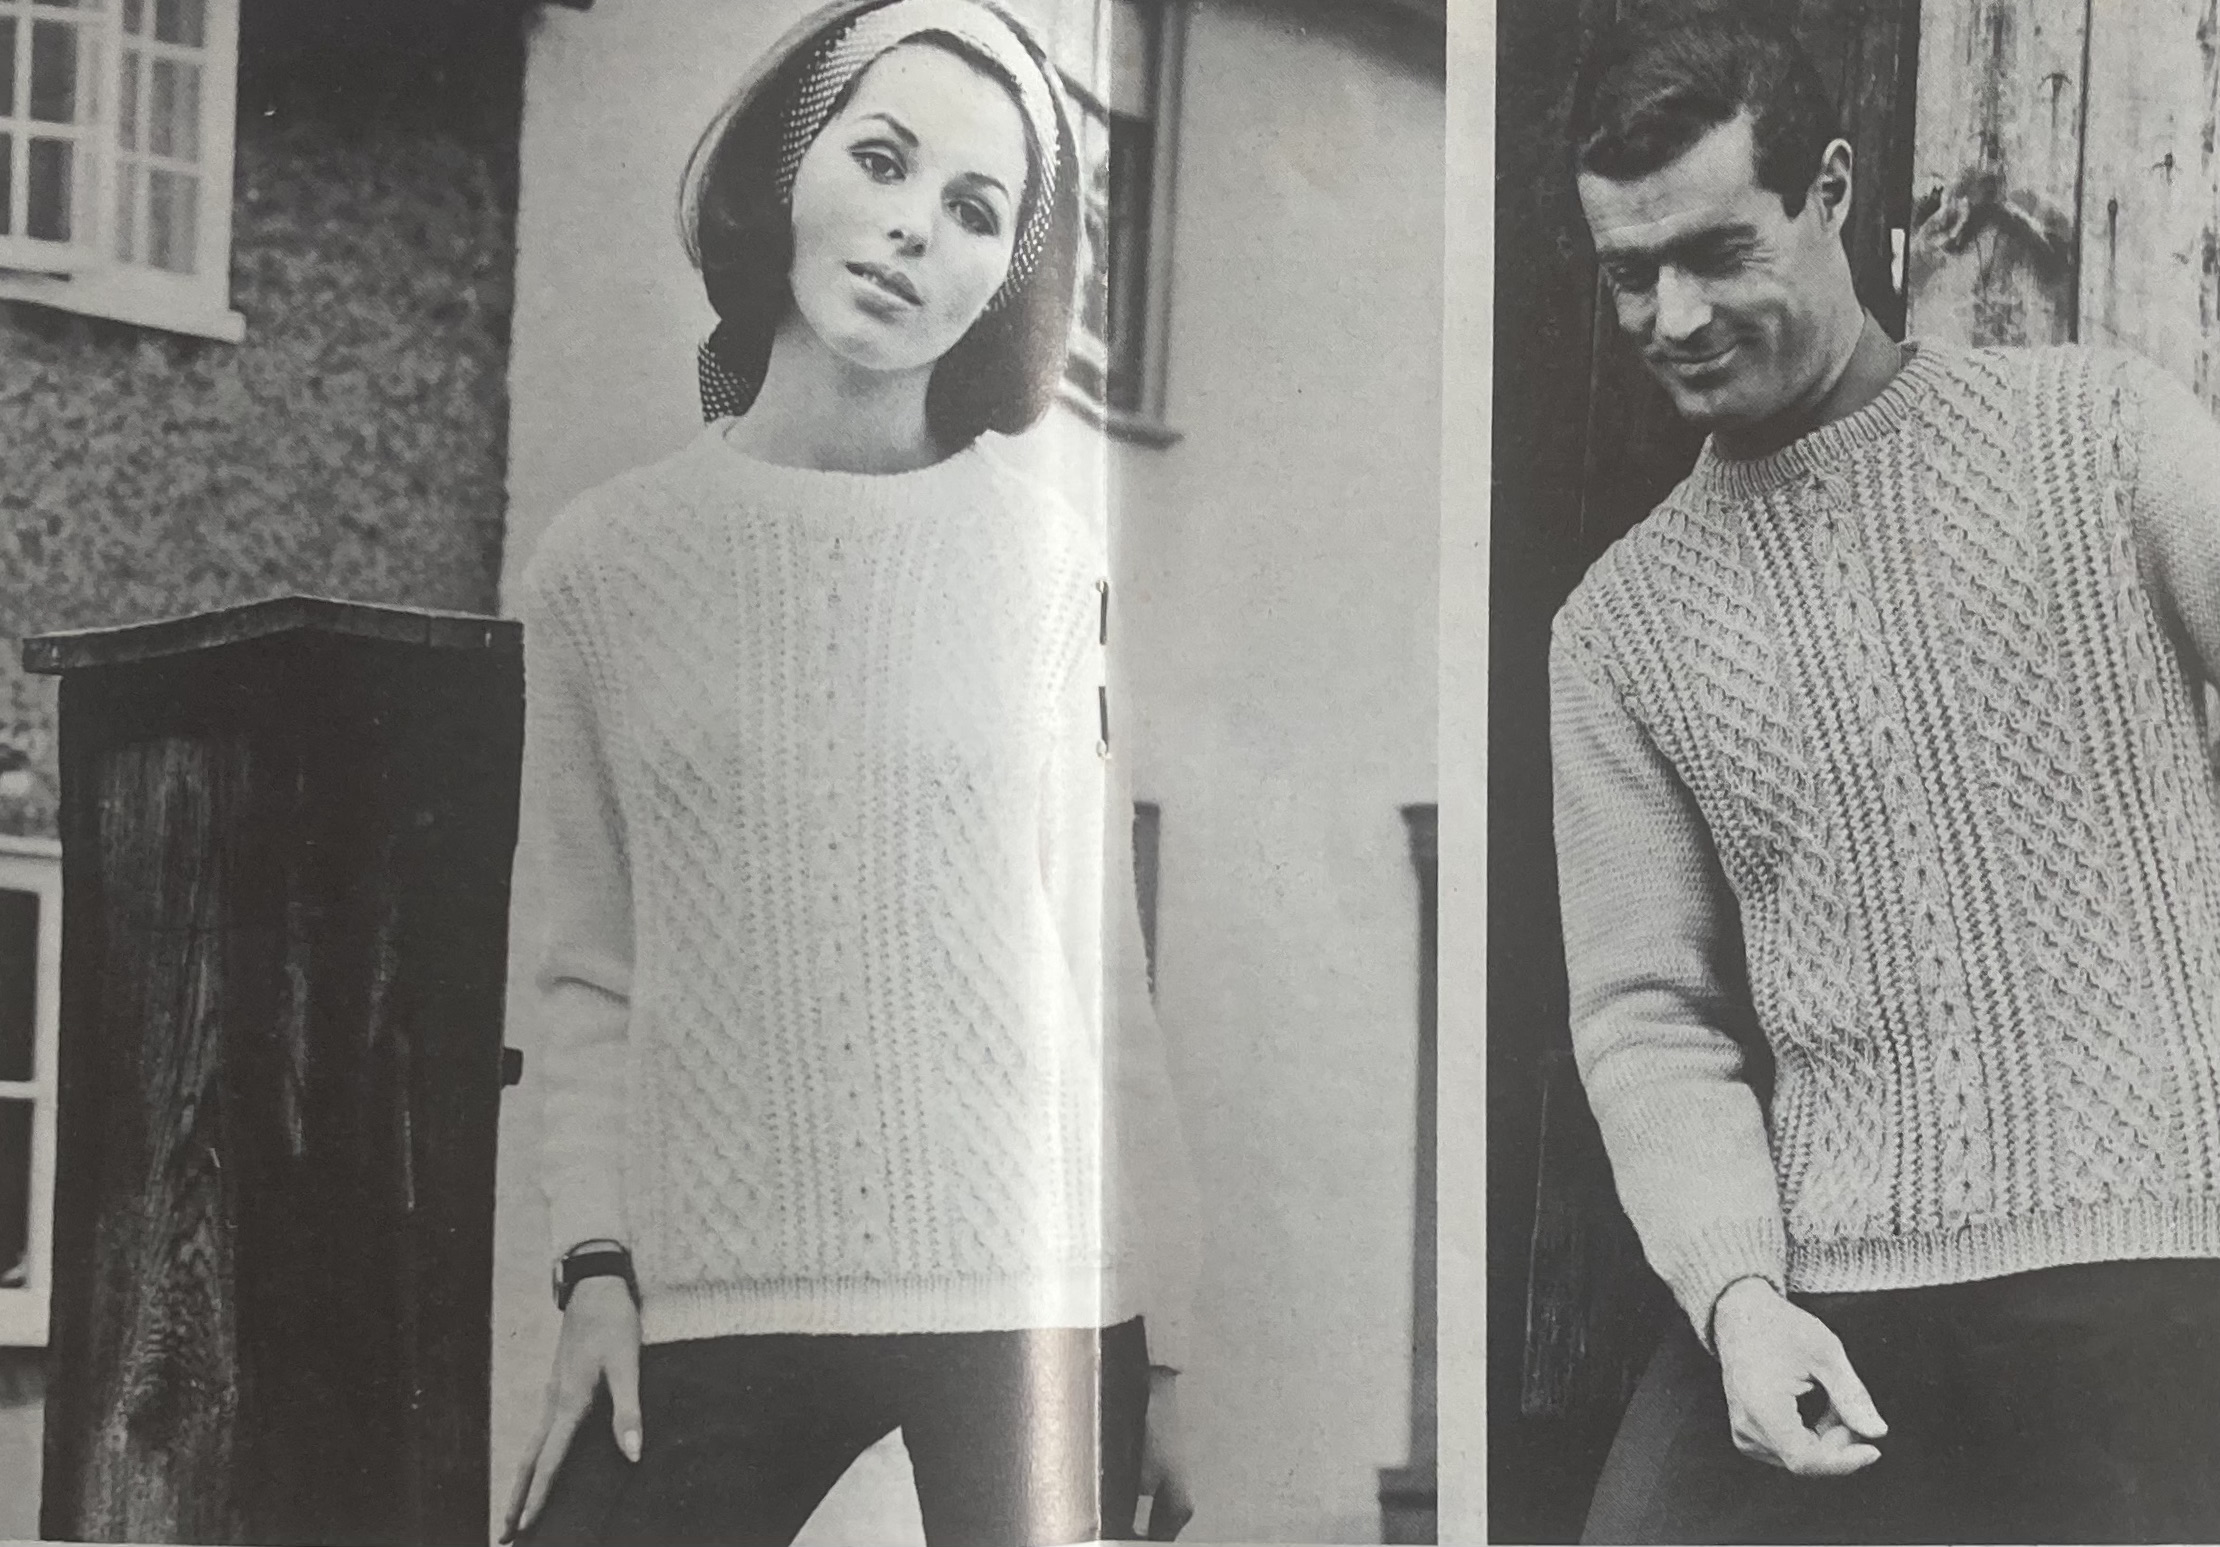
Called “Fiona”, it was DK-weight and made of 50% Shetland wool and 50% “Orlon” (one of the very first acrylic yarns). Shetland wool is beautifully warm and lightweight due to its being very lofty and “hairy”, and “Fiona” was marketed as combining these positive aspects with the easy-care, less scratchy and non-tangling qualities of synthetic yarn — a sort of “Shetland lite”, if you will. Real Shetland wool is excellent for traditional “Fair Isle” stranded colourwork patterns, since the hairs lock into each other in the stranding, but the “Fiona” designs in this issue employ smoother, textured stitch patterns. The cover cardigan-jacket has a bobbly lace pattern and the his-and-hers pullovers use a broken cable rib.
The other two designs for adults are made in standard 100% wools: a “young-looking sweater” with really, really unfortunately placed bobbles (directly along the bustline) in Patons Double Knitting or Crepe, and an Aran-patterned jacket in bulkier “Capstan”. An older brother might get this “Husky polo style” pullover in Patons DK and a fun reversed stocking-stitch pattern with more (and better placed) bobbles.
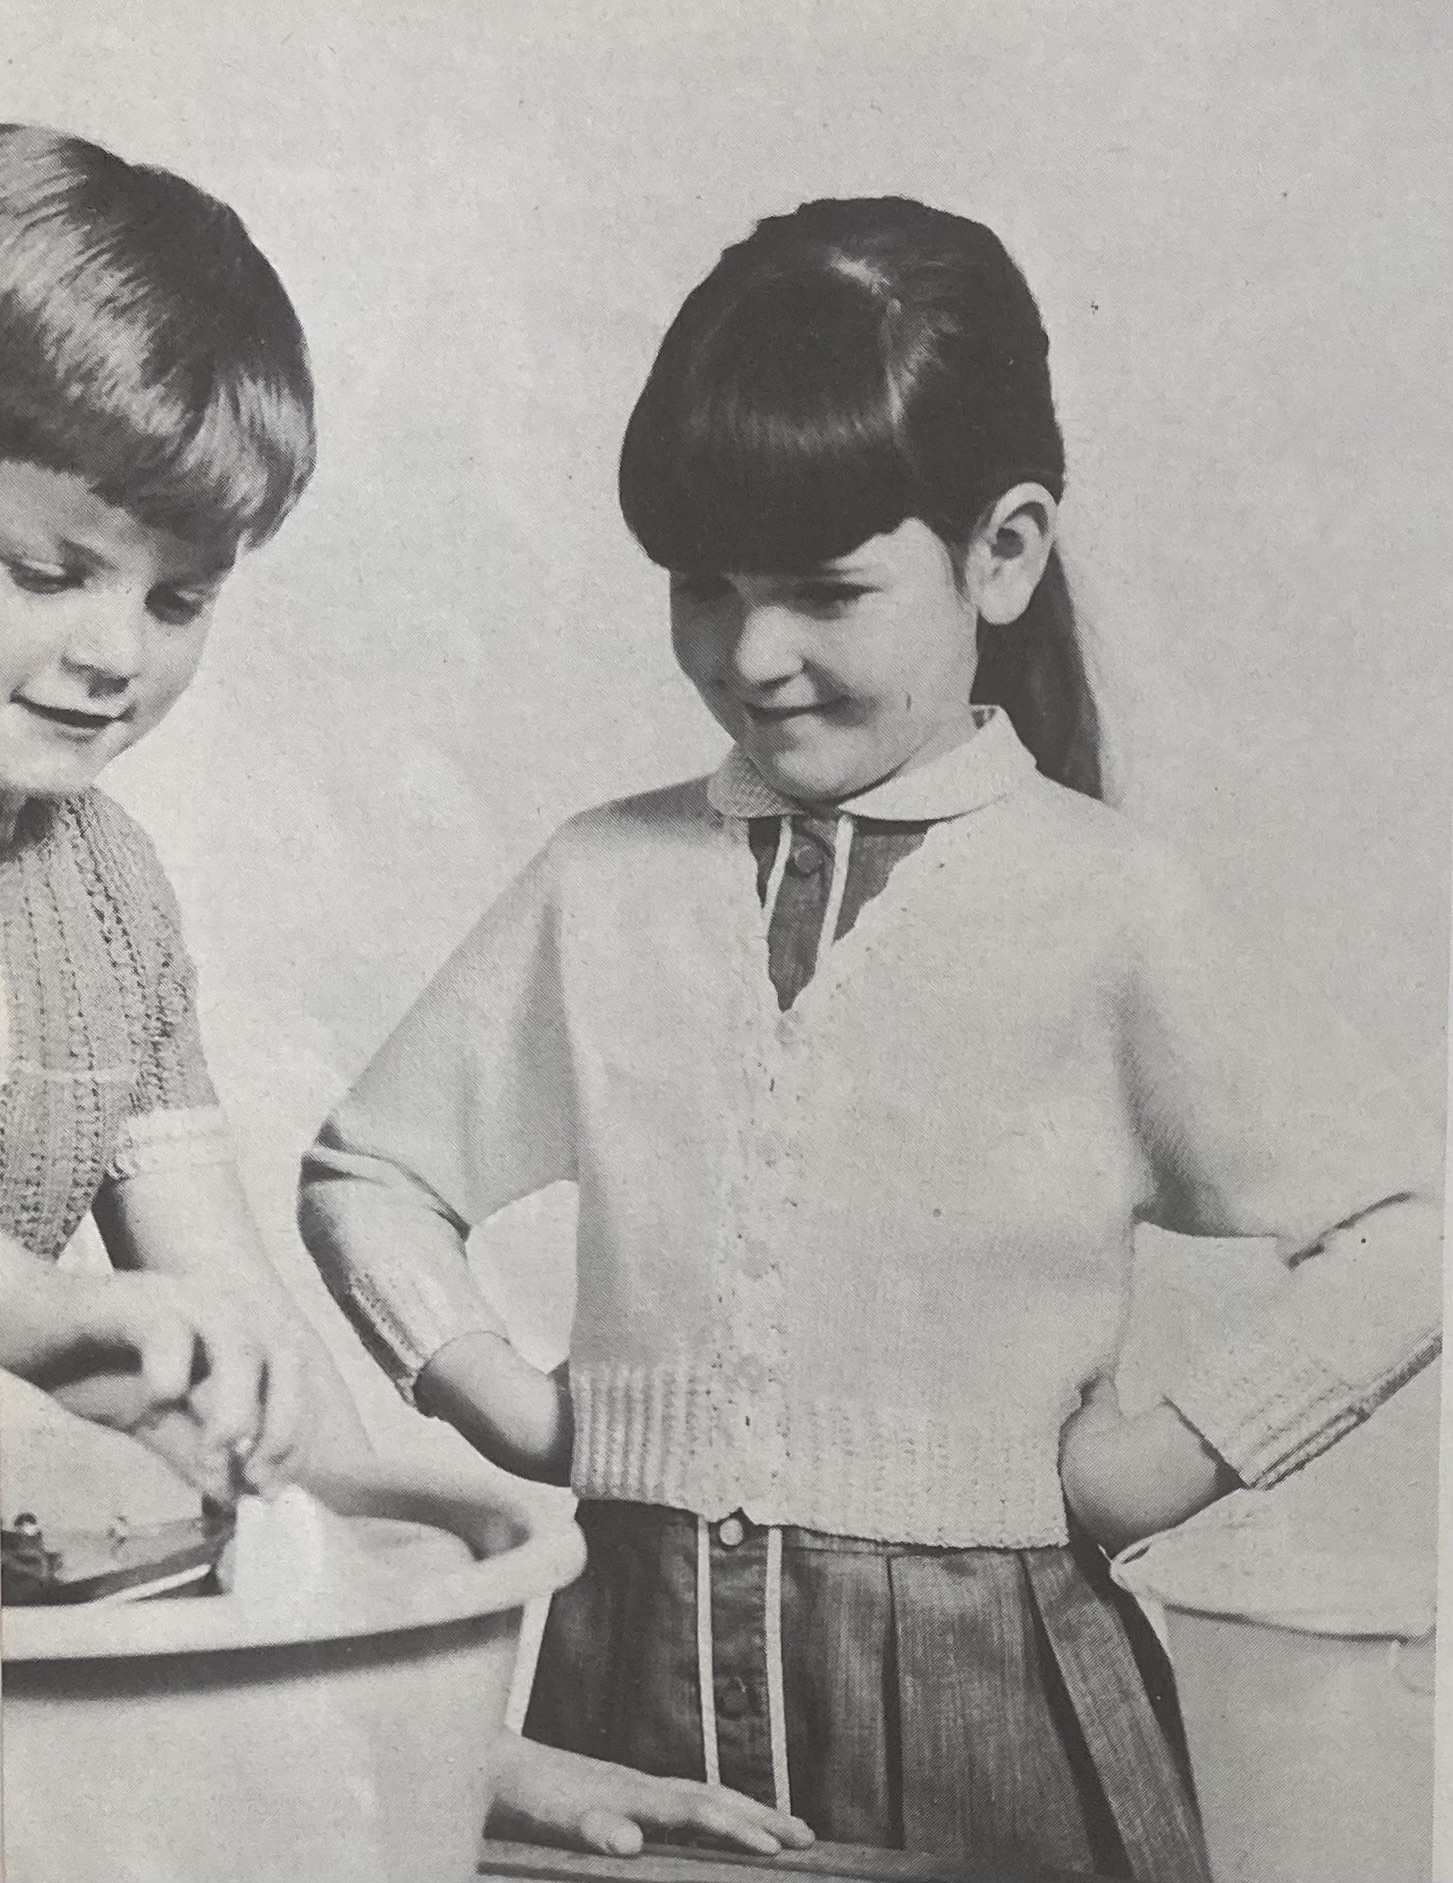
The trend for textured stitch patterns continues with garments for the younger set. The toddlers’ “walking-out set” of pullover, leggings and snug helmet-style cap (with more bobbles on the tie at the neck) is made in easy 2×2 ribbing in blue and white DK wool. Love the pre-Photoshop-era addition of a tree in the photo, to show you that he’s playing outside! His big brother gets a warm slipover in an easy zig-zag pattern, and tomboy sister, (with short hair and trousers) gets a set of cap and sweater in a fisherman’s rib pattern that is more complicated to do than it looks. You purl the RS rows and and on the WS rows, you *k1, purl into next st. but through loop of row below at the same time slipping st. above off left needle; rep from * to last st, k1. The vertical stripes are added later via Swiss darning aka duplicate stitch embroidery.
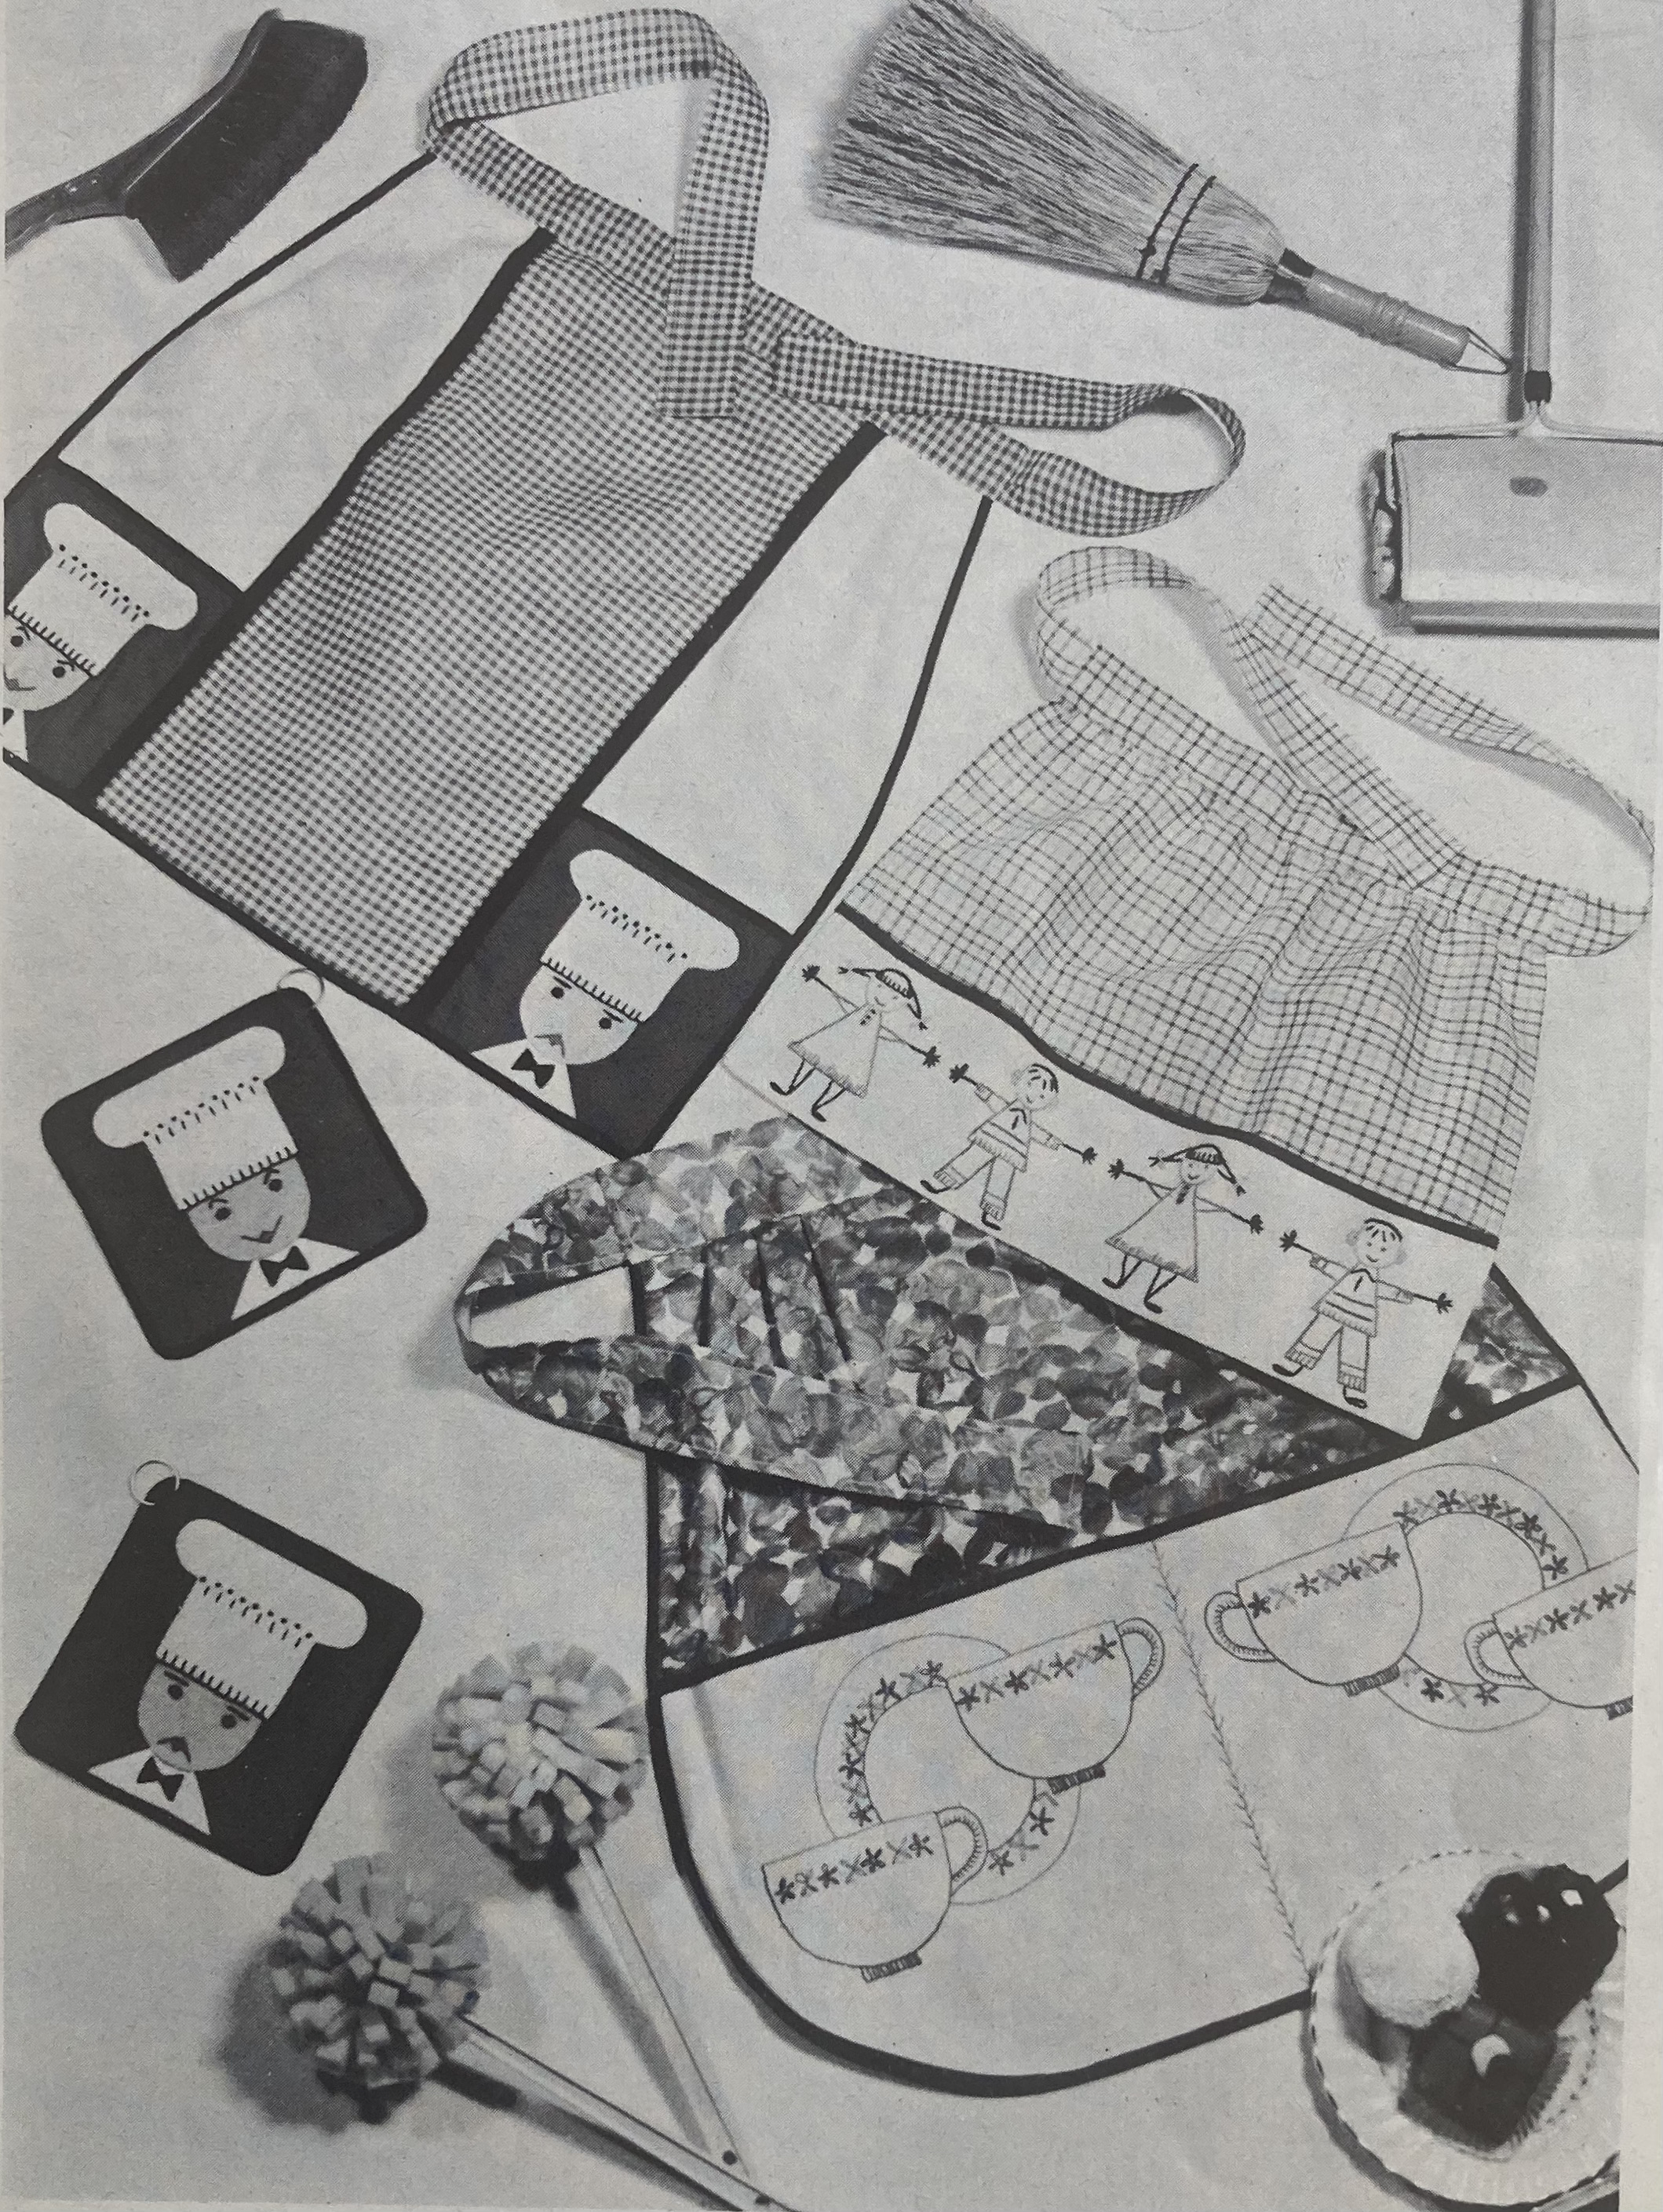
Above all, this is a bumper issue for homewares. There are multiple pages of easy projects for a “Sale of Work” stall at the church bazaar or what have you, including a “house” and “windmill”-themed apron, mat/cosy set and a “peg bag” for holding laundry pegs. Other quick novelties include a knitted scottie-dog toy and a cosy or cushion made out of odds and ends of wool.
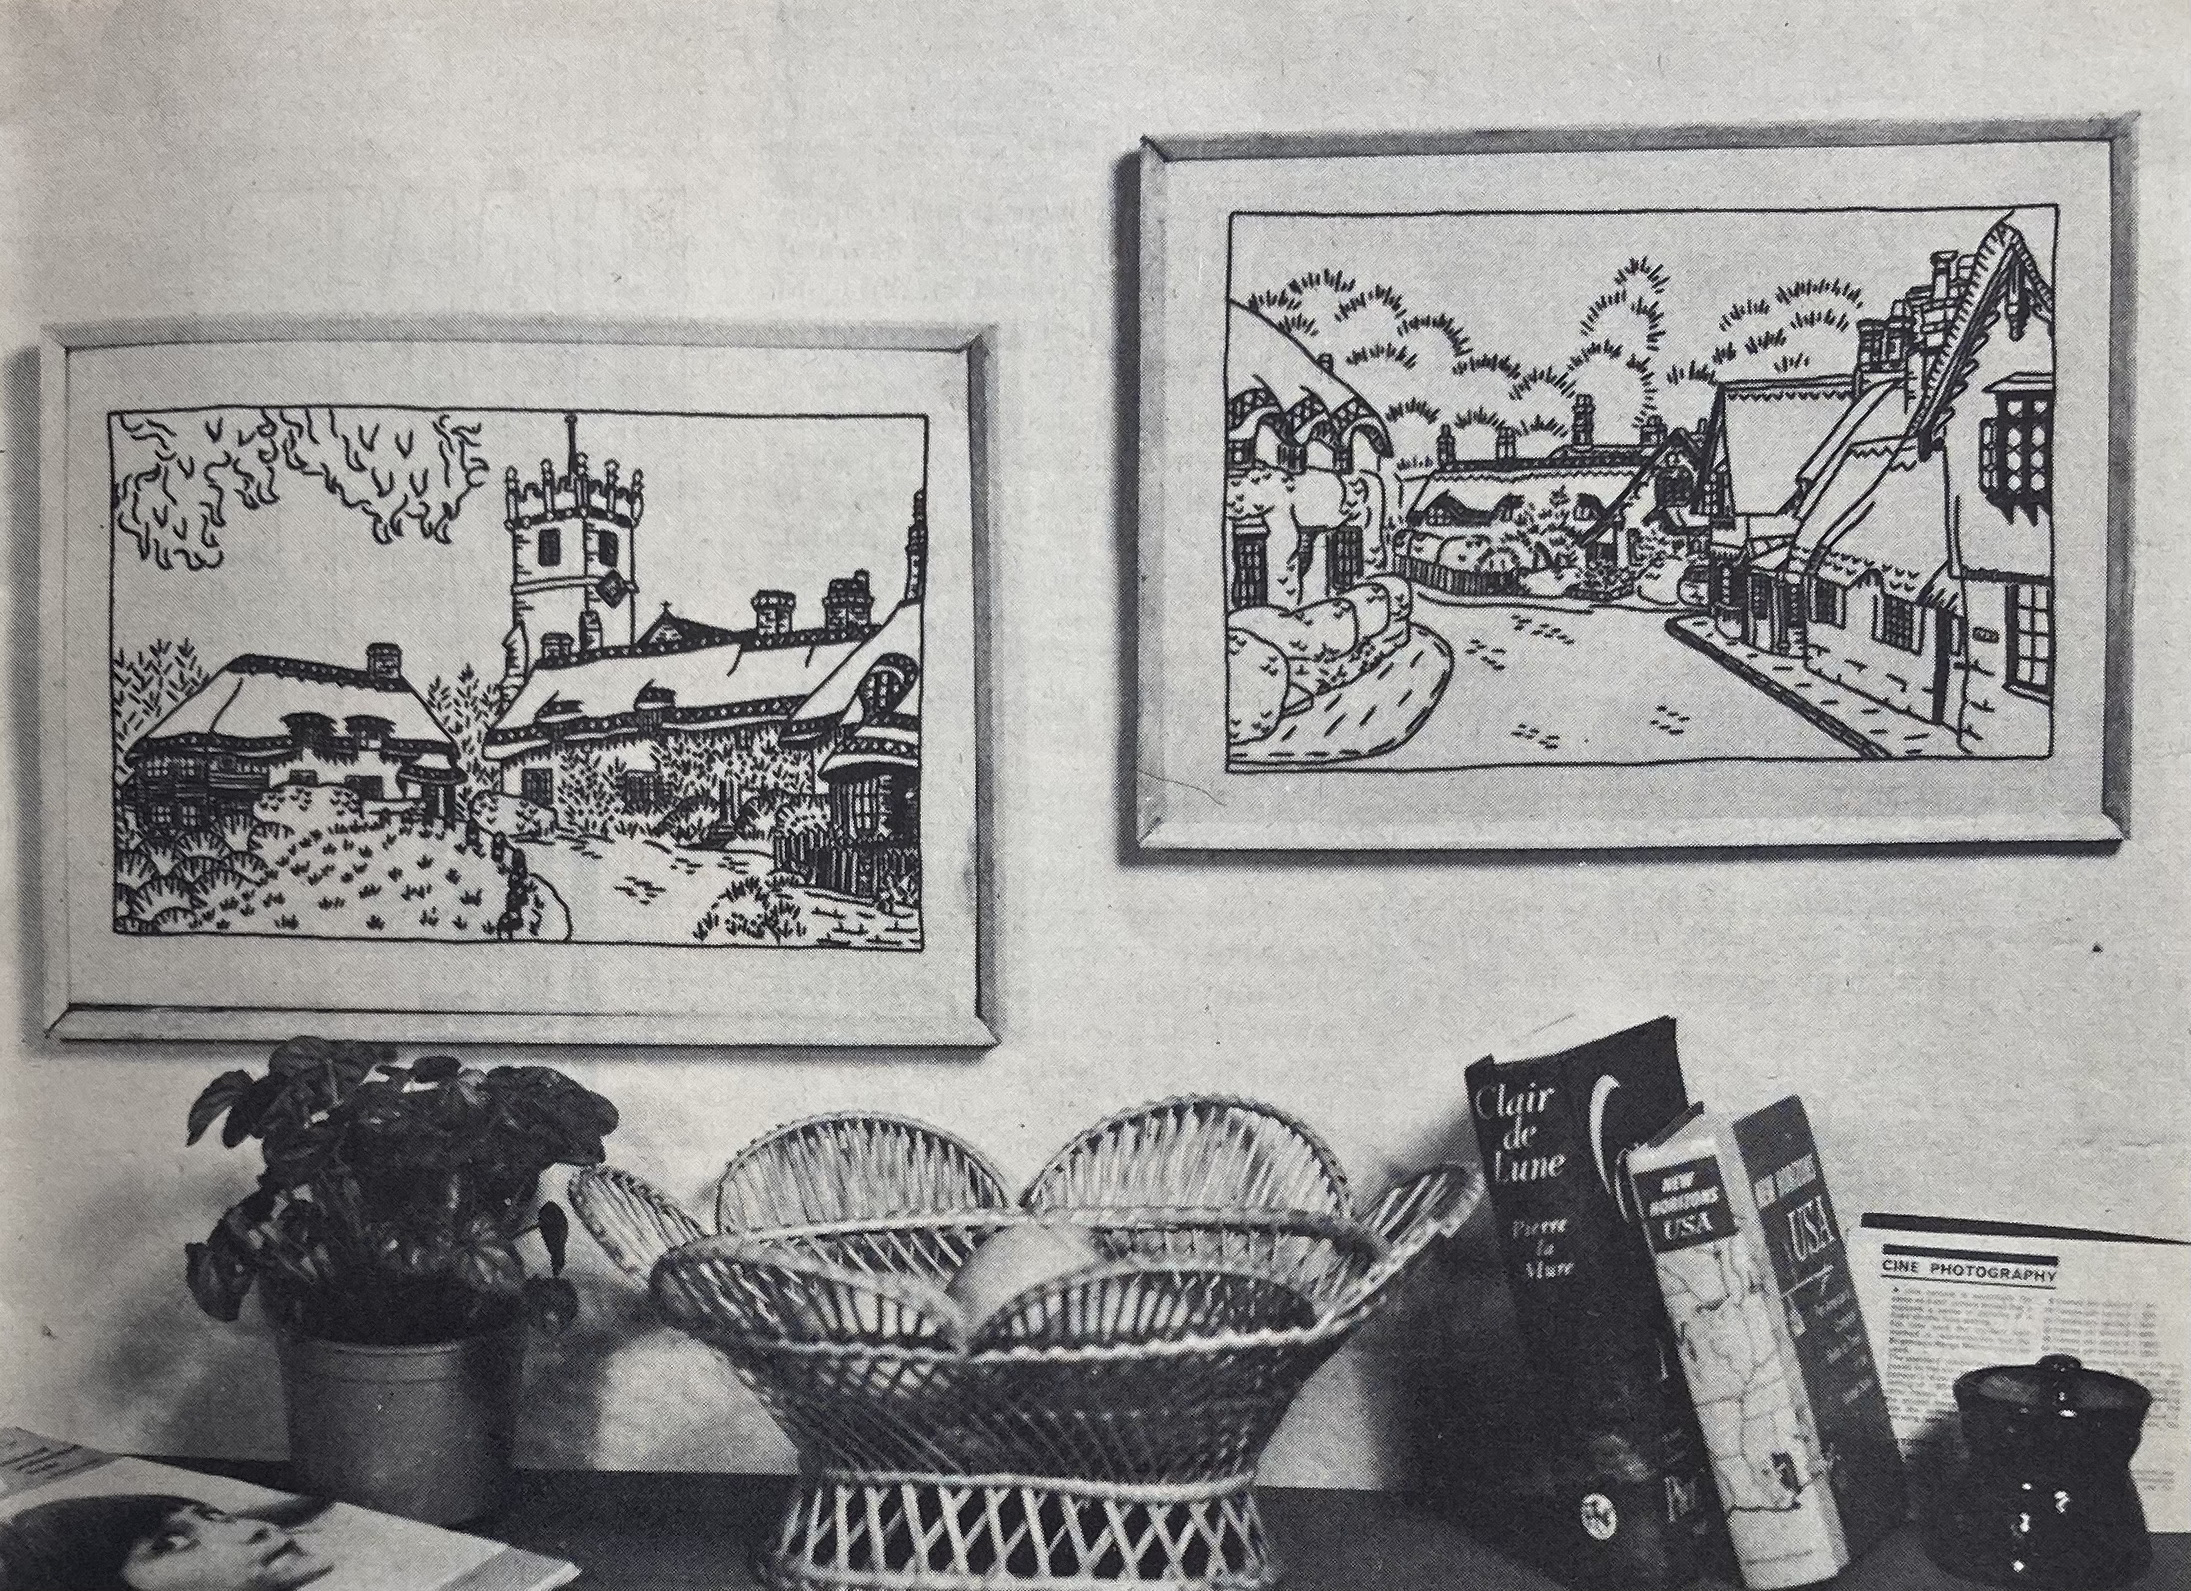
More ambitious needle-workers can decorate an entire room from top to bottom with designs from this issue, starting with a needle-etched picture of a steam engine — a throwback to the Victorian nostalgia of the late 1950s and early 1960s — or a tapestry picture of the seaside village of Clovelly to hang on the wall.
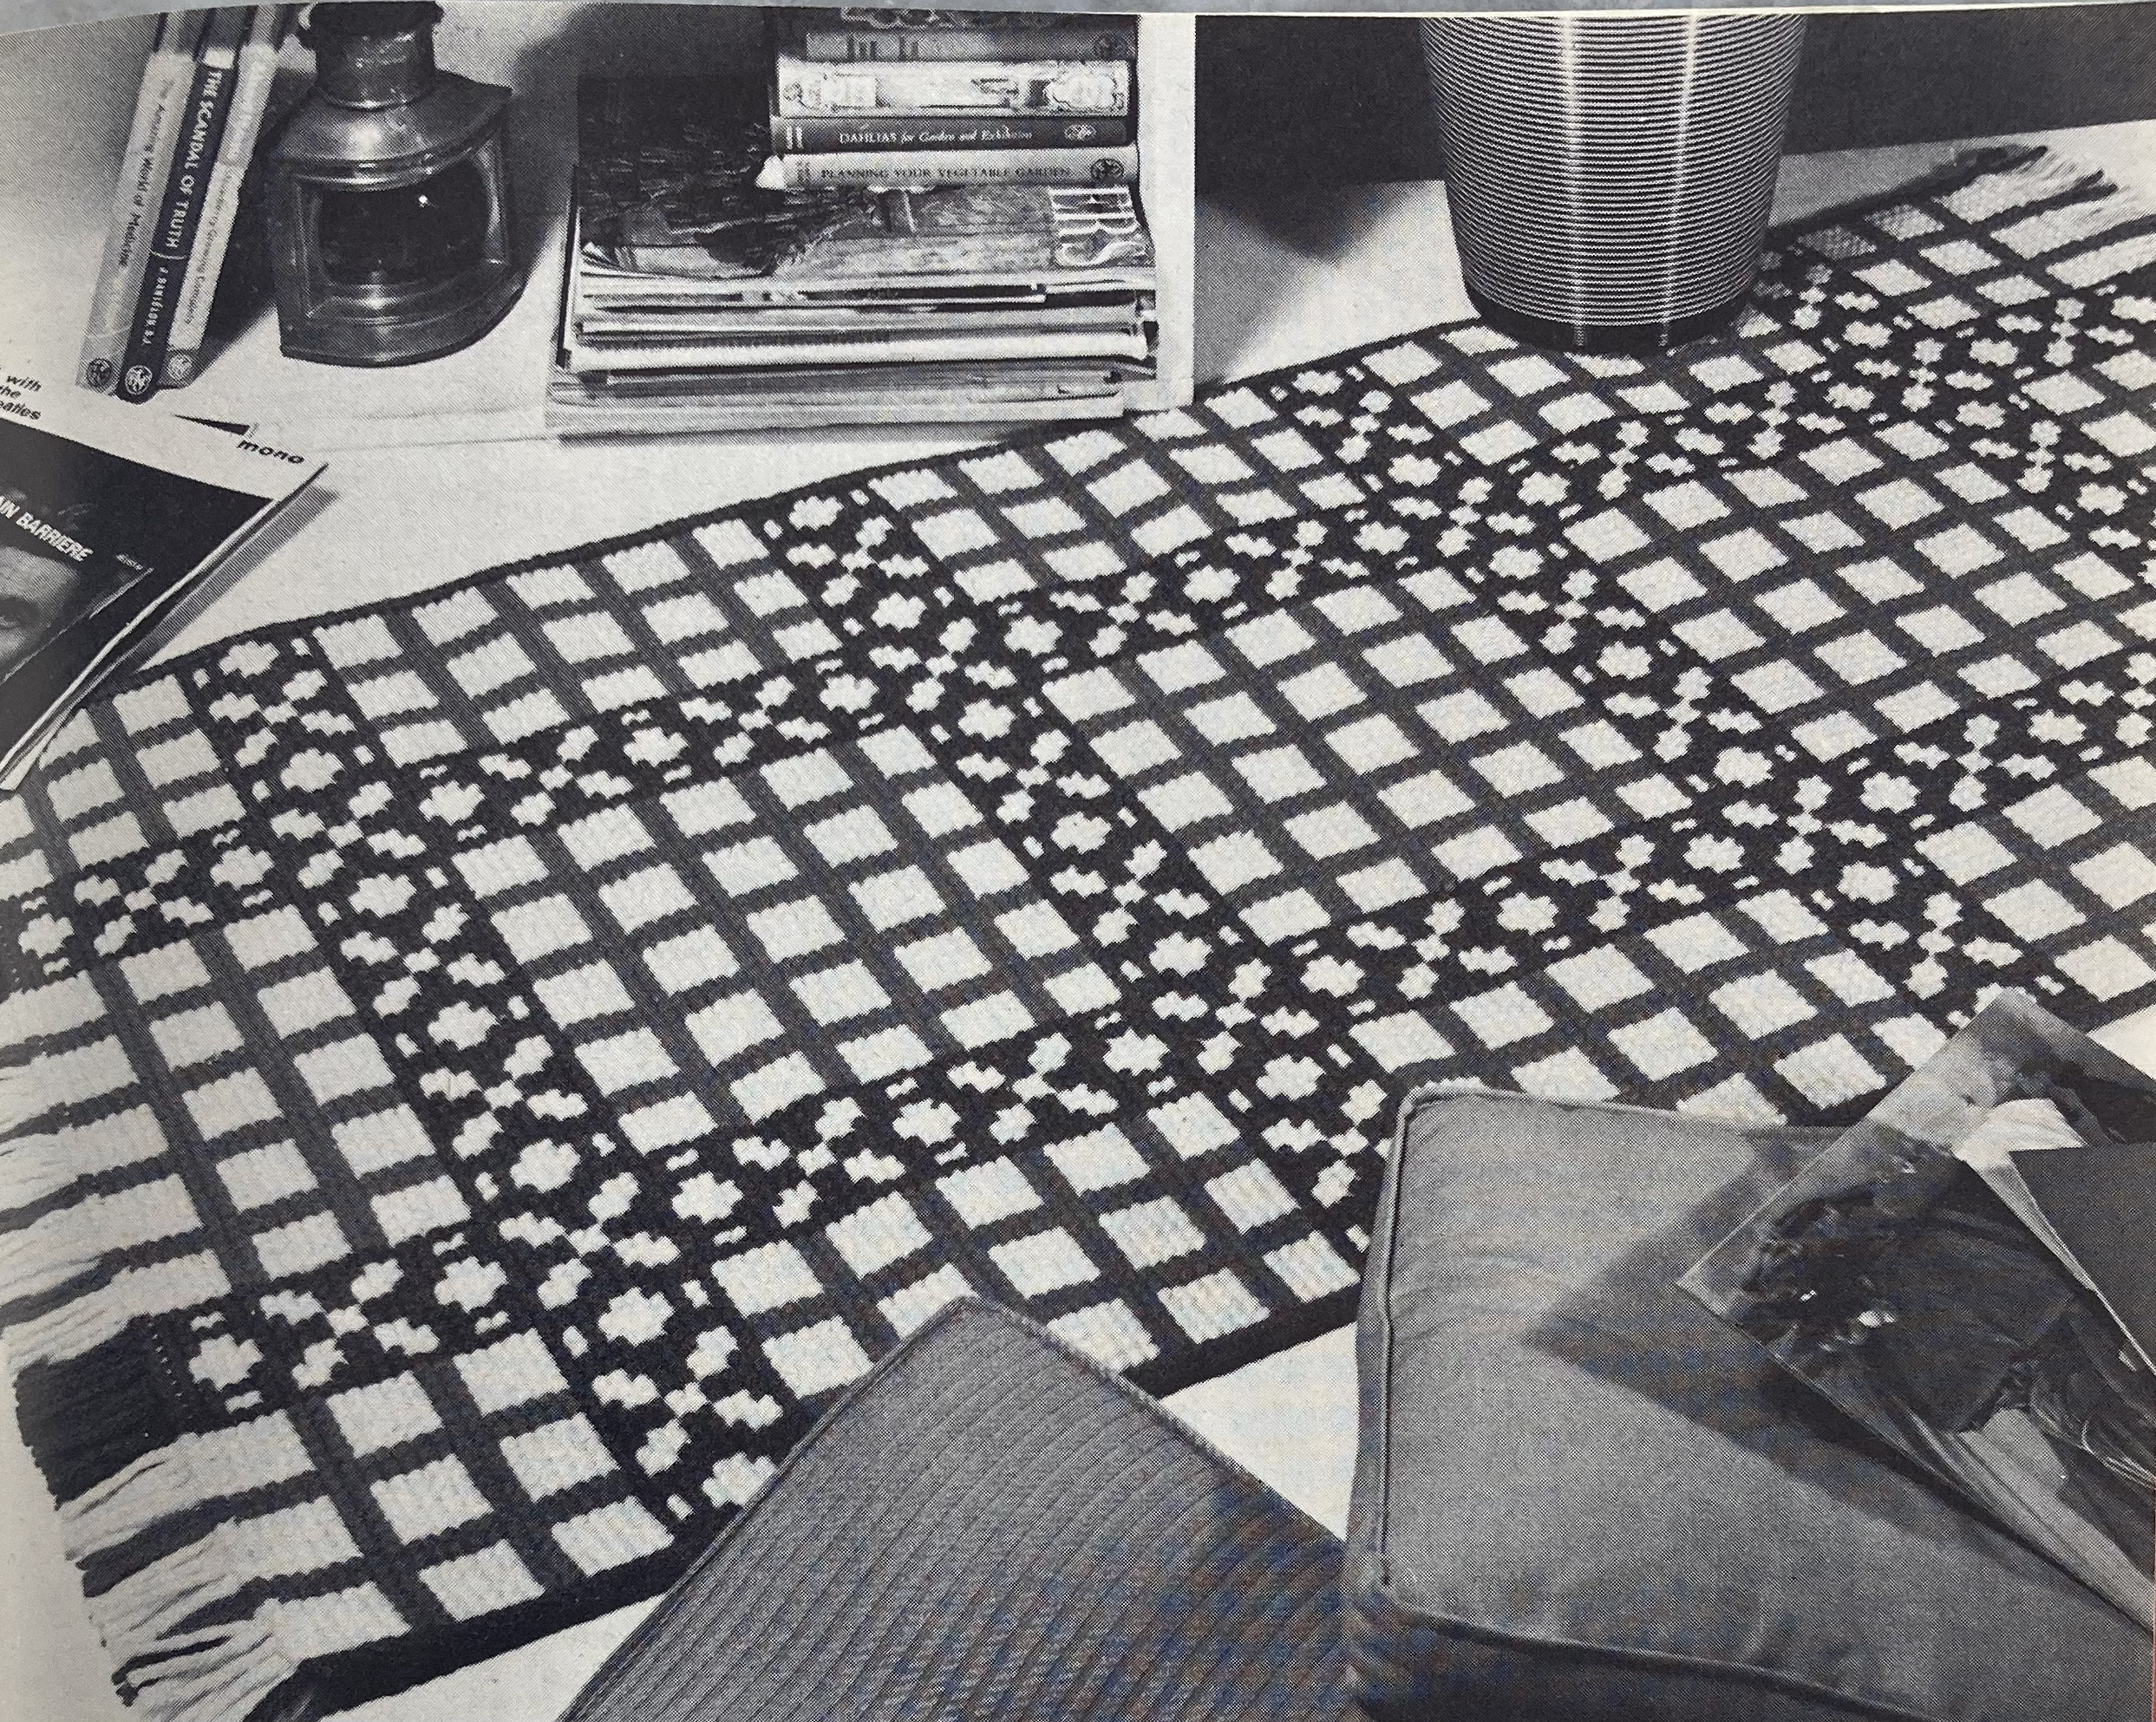
For the furniture, there’s a beautiful “peasant” (their word, not mine) design for a cushion and chairback, made in embroidery wool on linen, and for the floor, a hand-made “Tartan” rug. It uses a latch-hook and the “Turkey knot” to make a soft, three-dimensional pile. Finally, church-goers can make a tapestry “kneeler” cushion in a pattern inspired by Gothic stonework.
And there’s a new children’s comic serial in the Readers Pages! This is a really cute and creative story about Homer the plush rabbit (so called because he was home-made) and Sale Price, the store-bought plush rabbit, who go out into the big wide world to try and find a real rabbit to befriend. Will they find one? Stay tuned! Oh, and I bought this issue on Ebay, so received a special… bonus? picture of an embroidered Christmas tree with no transfer or pattern instructions (and not from Stitchcraft.). If anyone can identify it, I will be very impressed!
My project from this issue will be the knitted cushion, by special request from someone who works on the computer a lot and would like a soft underlay to rest their wrists on.
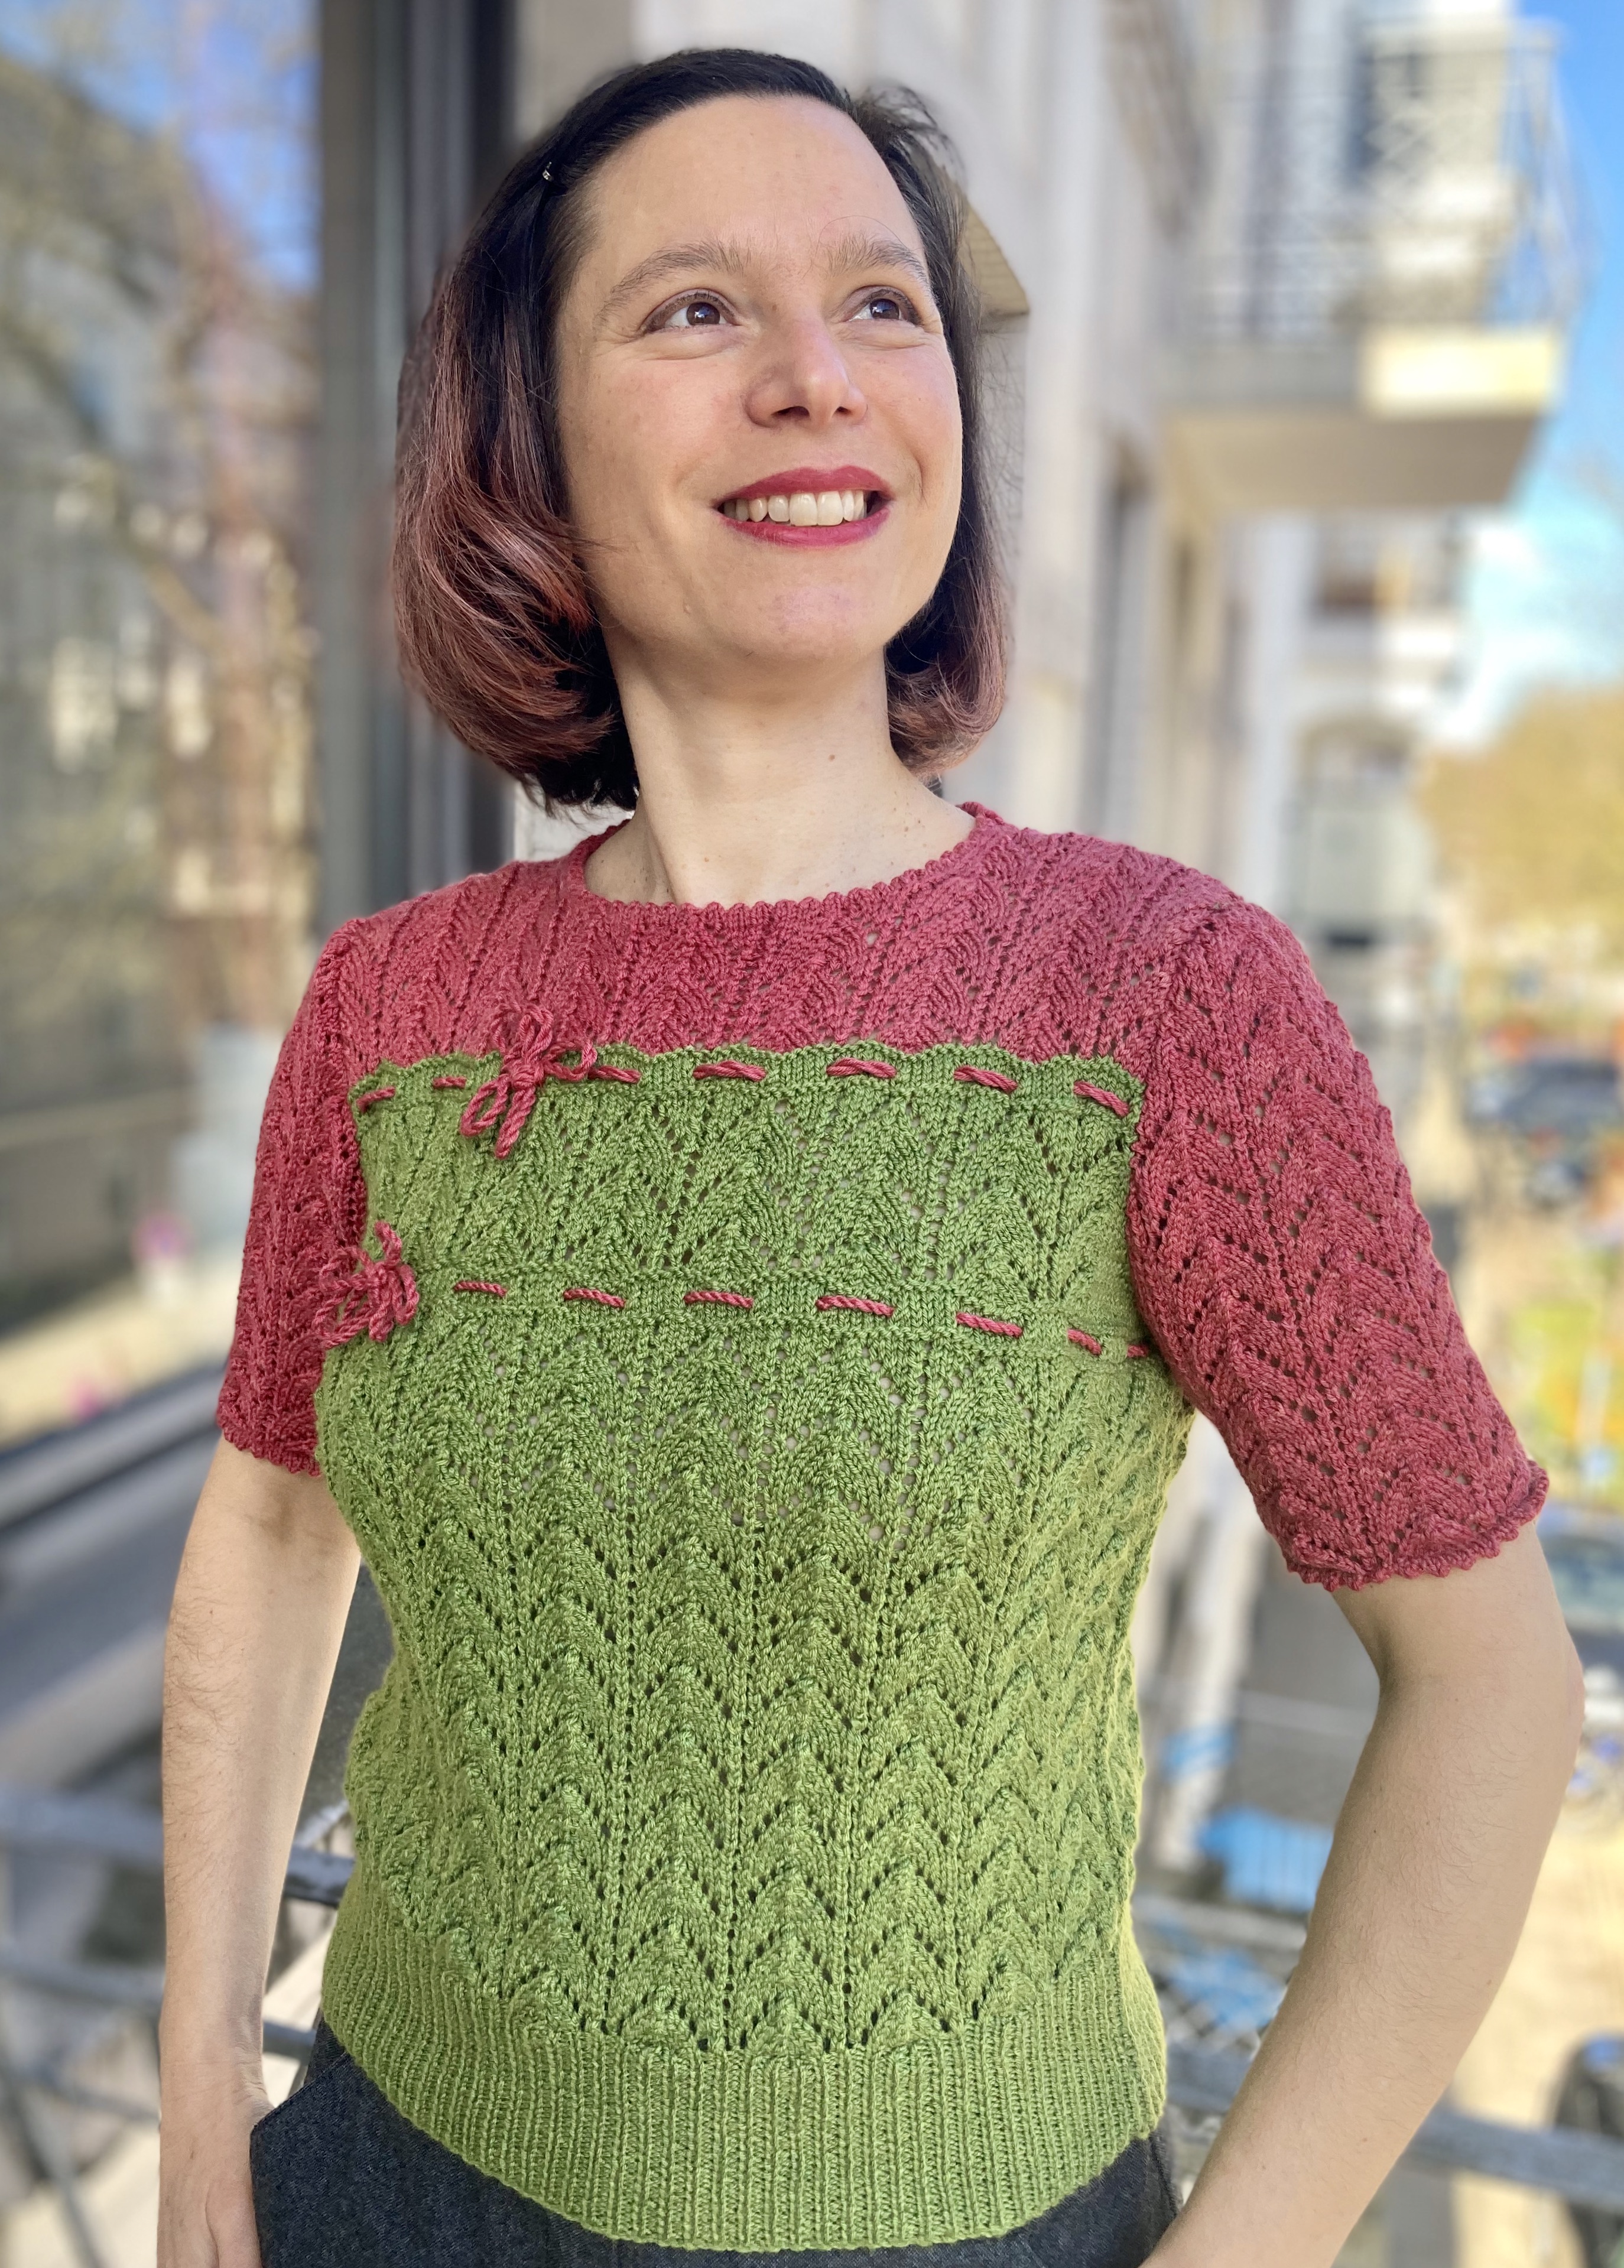
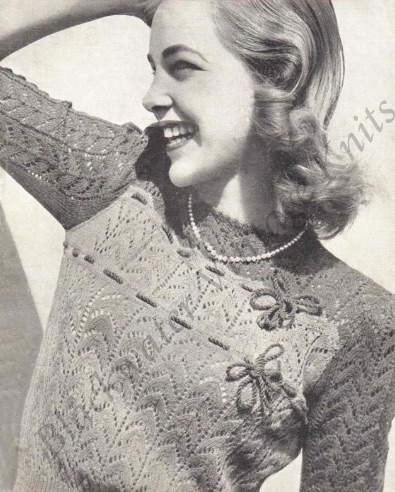
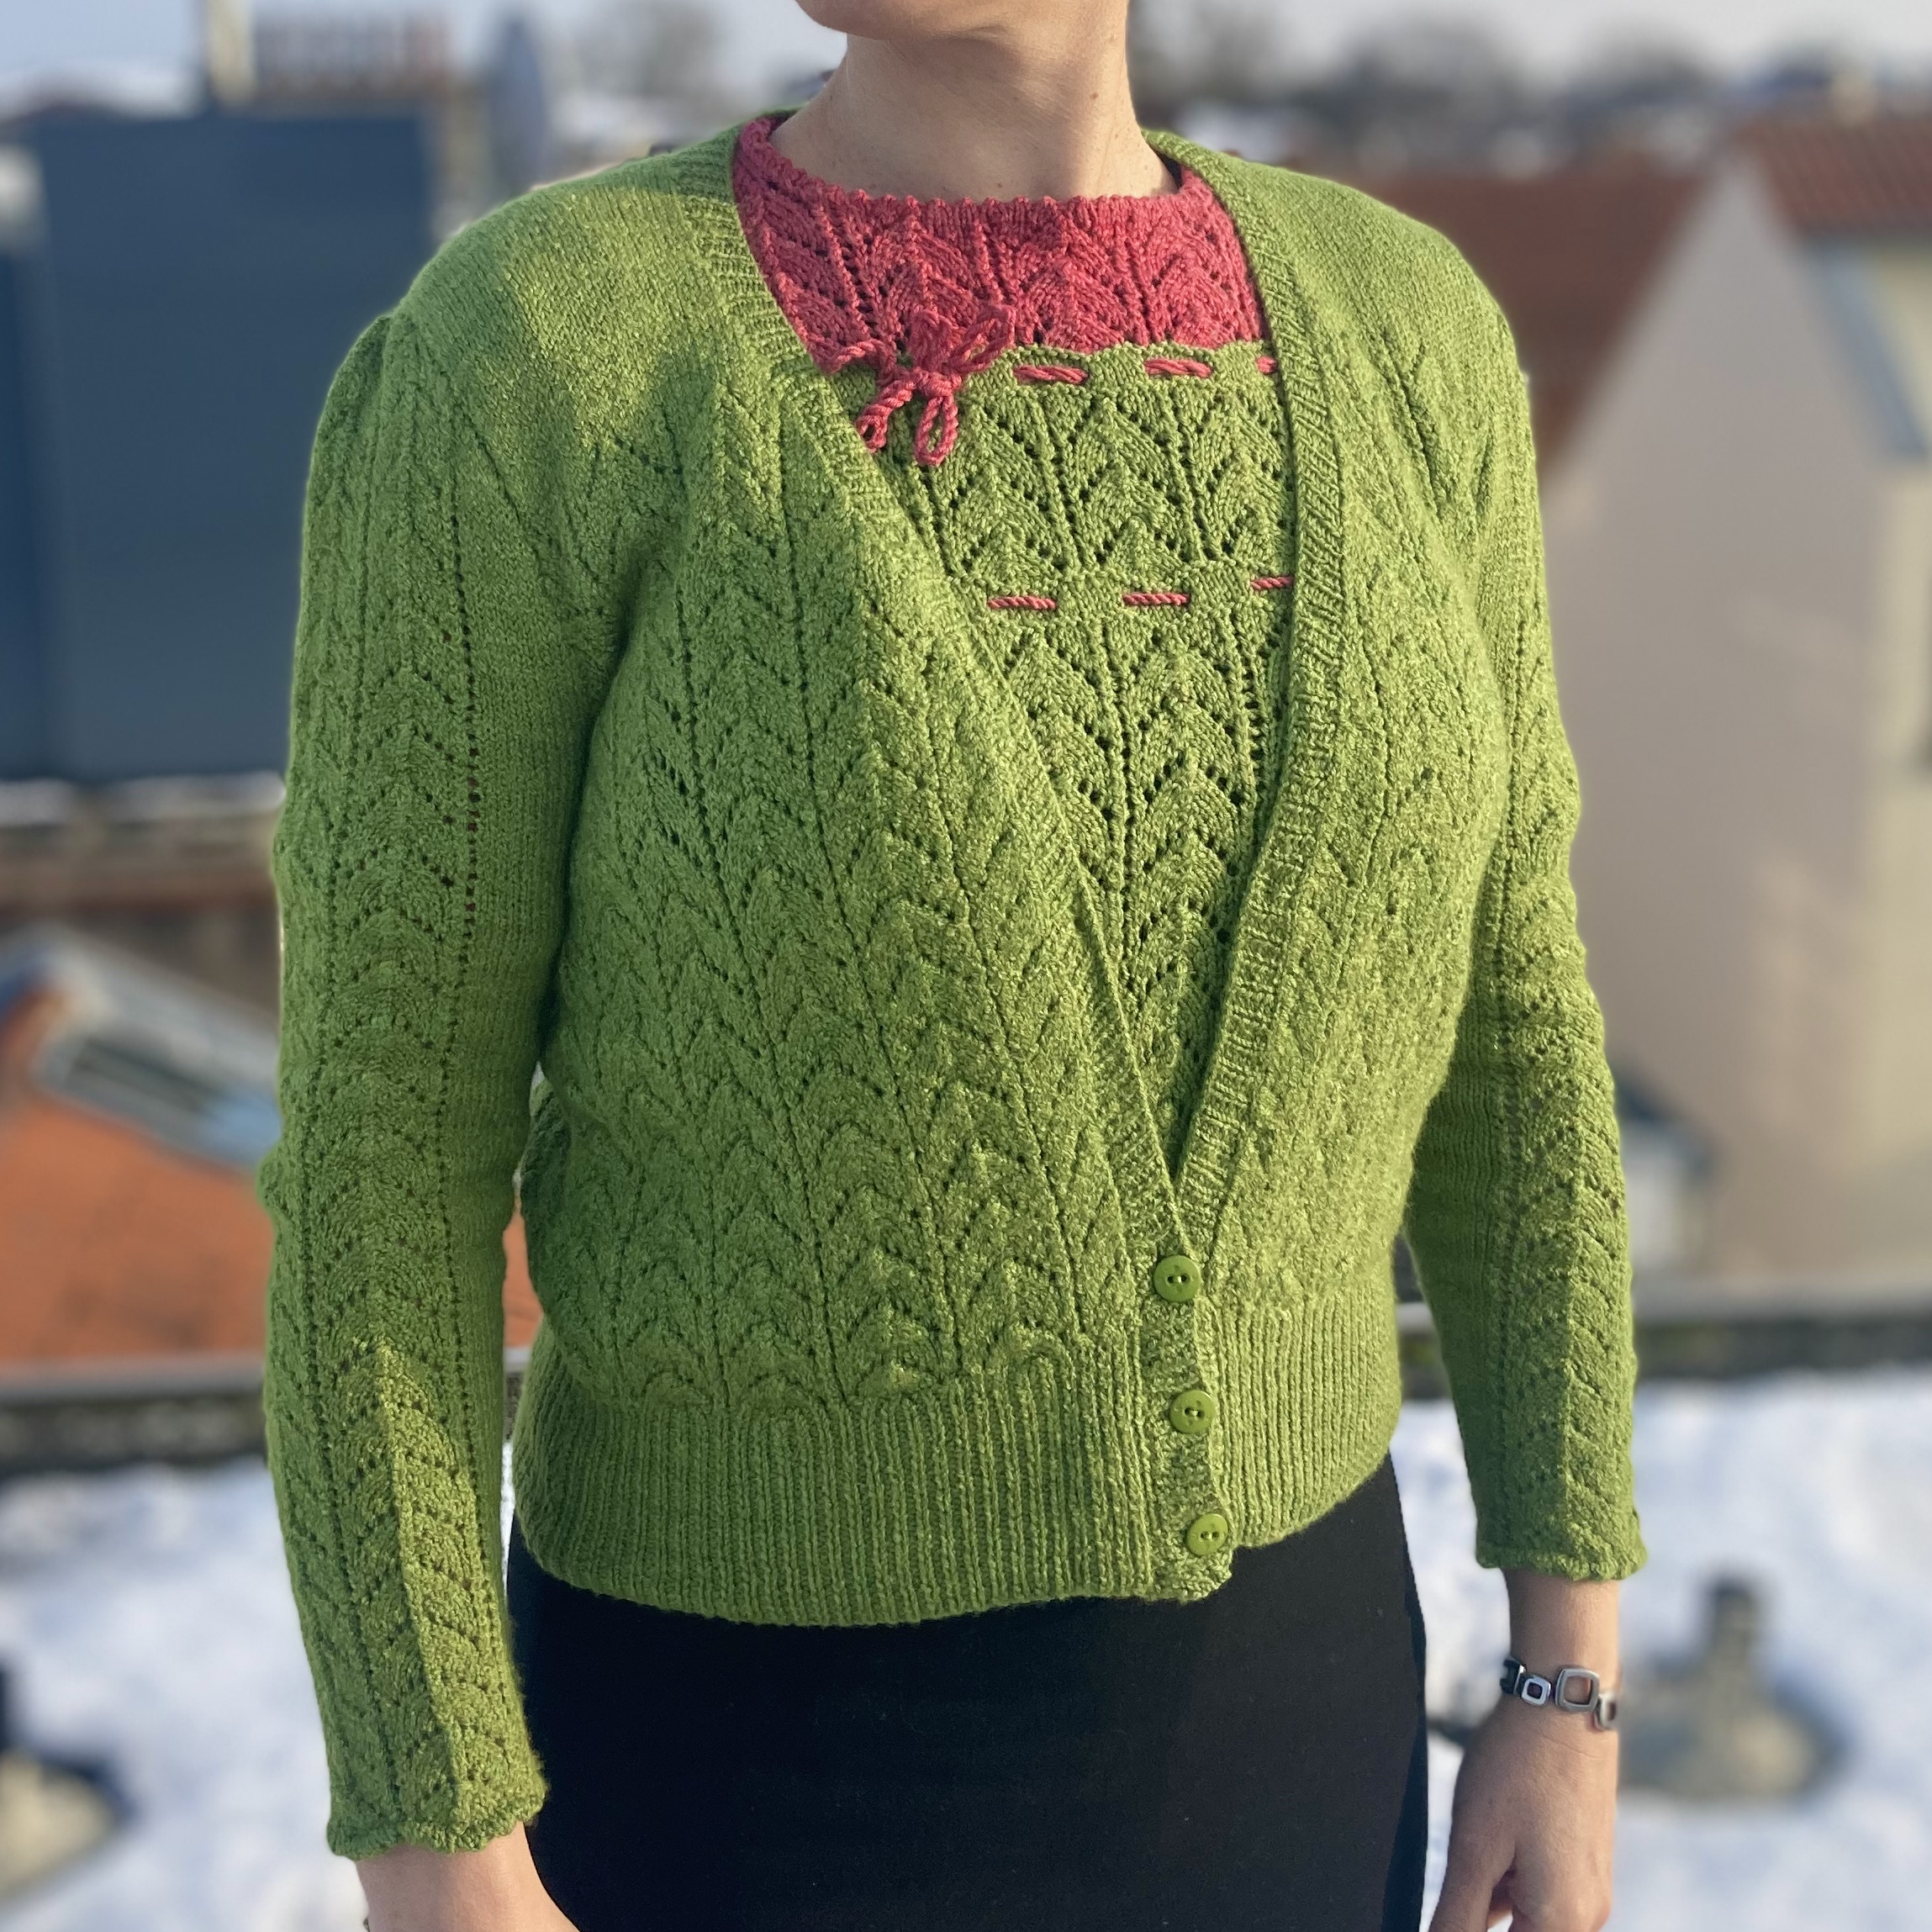
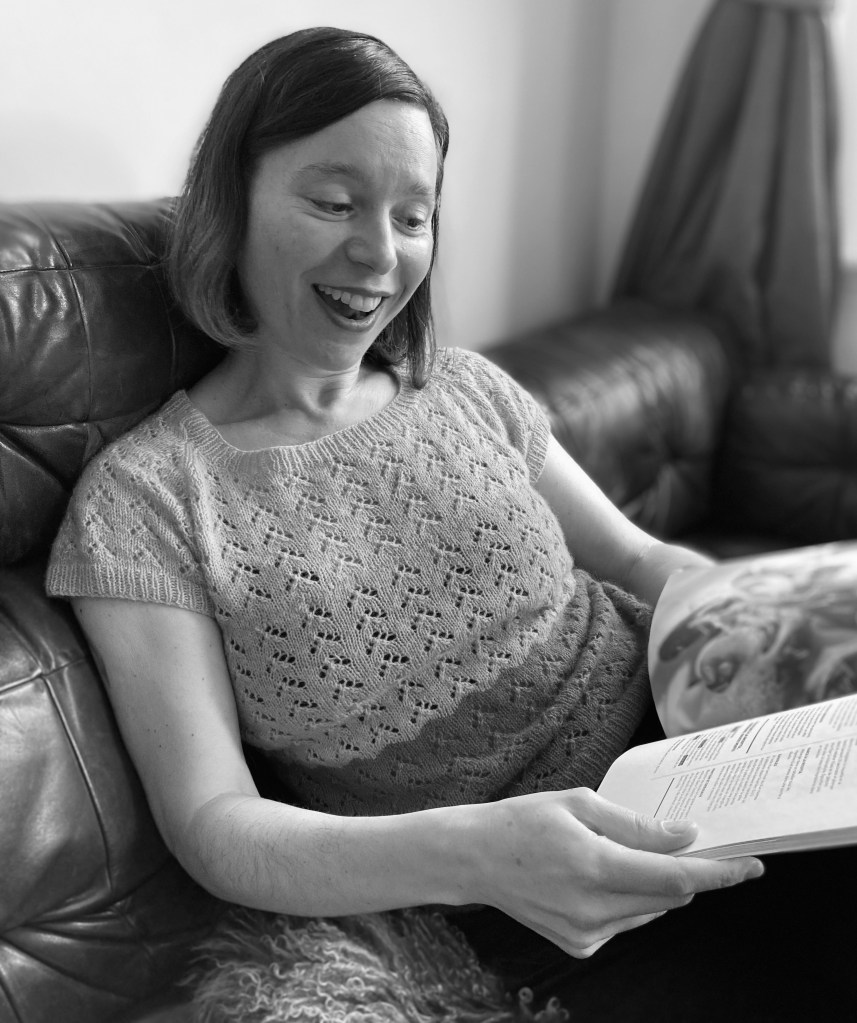
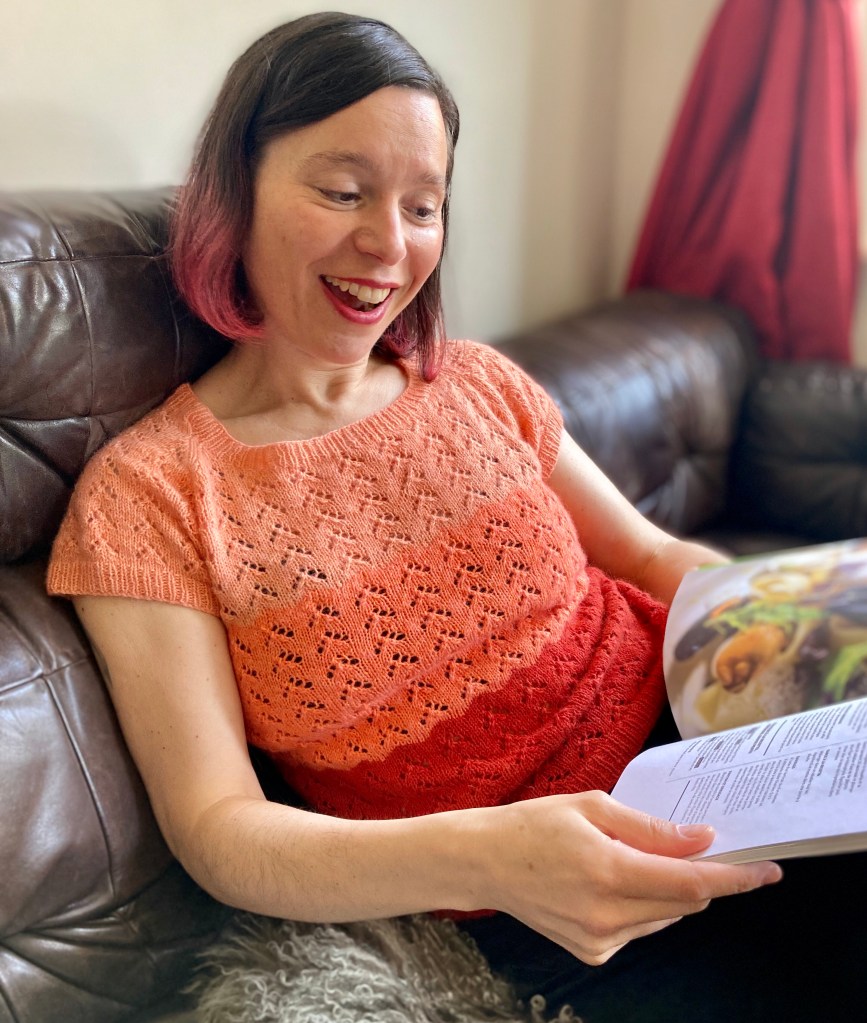
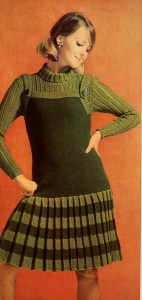
Since there wasn’t anything I really wanted to make from the August 1965 issue, this month’s project is taking us back to 1946. It’s technically not a Stitchcraft pattern (though Stitchcraft magazine was around then), but it is a pattern from Stitchcraft‘s patron wool company, Patons, so close enough for this blog, and conveniently fit into a lace-themed KAL on the All Things Vintage Ravelry forum. The pattern is for a short-sleeved jumper and I’m working to make it into a twin set.
I bought the pattern from the wonderful BlackwaterVintageNtz shop on Etsy and the wool (Yundi & Grete Felice Fingering Puro) from last year’s wool festival in Sulingen (Germany). The wool is a mix of 75% merino and 25% silk, which gives it a lovely softness and shine. I bought 500 grams of green and 200 grams of pink with no set plans for what to do with it, and as often happens, it lay around for a while before it found the right project.
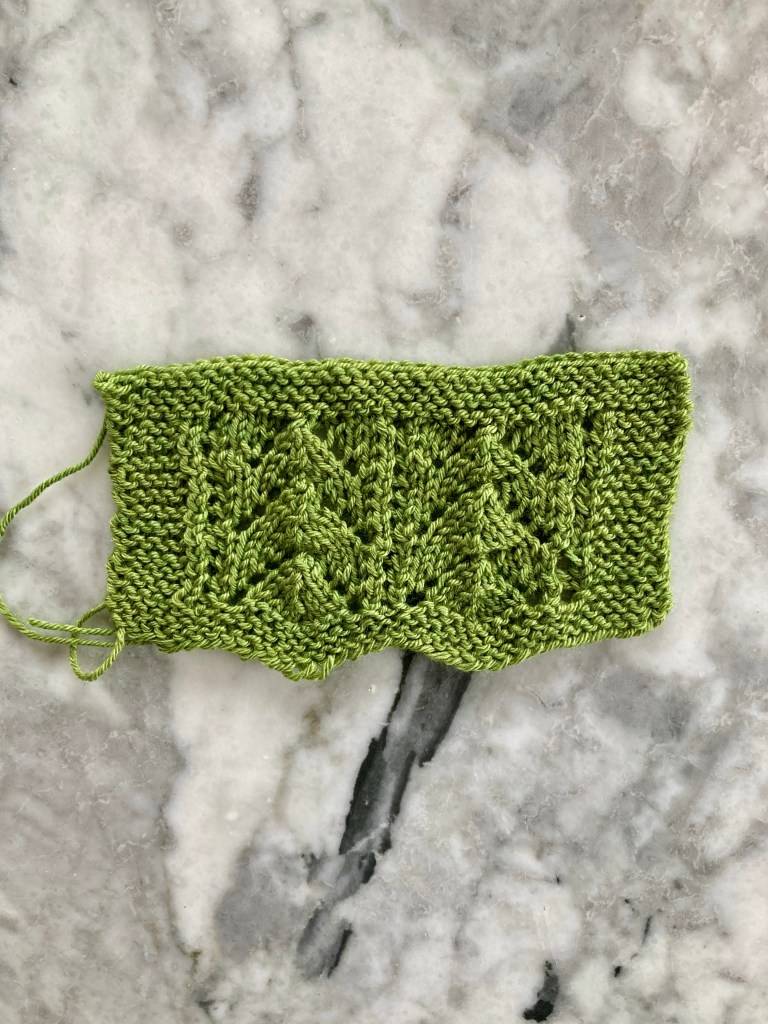
The pattern is from 1946 and, as with many patterns from that decade, information about sizing, ease, tension etc. are minimal. It’s written in one size, for 32 inch bust, with (calculating from the tension given in the pattern) 2 inches of positive ease in the bust — odd for a 1940s pattern, actually, which usually have a quite a bit of negative ease, as do lace patterns, since they stretch so easily. The vintage knitting expert and owner of the BlackwaterVintageNtz Etsy shop Gunwaru on Ravelry had conveniently knitted the jumper herself and wrote in the notes that — made to gauge as specified — her version easily fit a 38 inch-bust dress form. I wasn’t sure if my wool would stretch as much and wanted to reproduce the easy looseness of the pattern photo, so I made a swatch on 3.5 mm needles (pattern calls for 3.75) and added one pattern repeat to each of back and front. This should have given me a 37 inch finished bust, which is a bit of negative ease, but shouldn’t look too tight. I made it one pattern repeat longer as well, as I do for all pre-1960s patterns (I am taller than an “average”-sized woman of the 1940s or 50s and long-waisted).
Well, that all goes to show that swatching and calculating work most of the time. Though my lace swatch hardly stretched in blocking, the finished jumper was generous after knitting and then blocked huge — I could have just made the normal size. Or even smaller! My swatch had no relation to the knitting on the finished garment. Even the sleeves, which were fine before blocking, stretched in both length and width. I had made them shorter since I don’t like just-above-elbow length… if I had made them according to pattern, they would have practically been long.
I couldn’t block it down small enough and in the end, I put it in the dryer to shrink (delicate cycle and not hot, I am not a complete monster.) Strangely, it worked and didn’t ruin the fabric! It is now a reasonable size and fits me. I don’t recommend drying non-superwash merino and silk in a clothes dryer as it is generally really risky (don’t try this at home! I am not responsible for damages!), but in this case, it worked. The yarn did lose a little bit of its sheen and silkiness, but I am willing to sacrifice that if I can get a wearable garment.
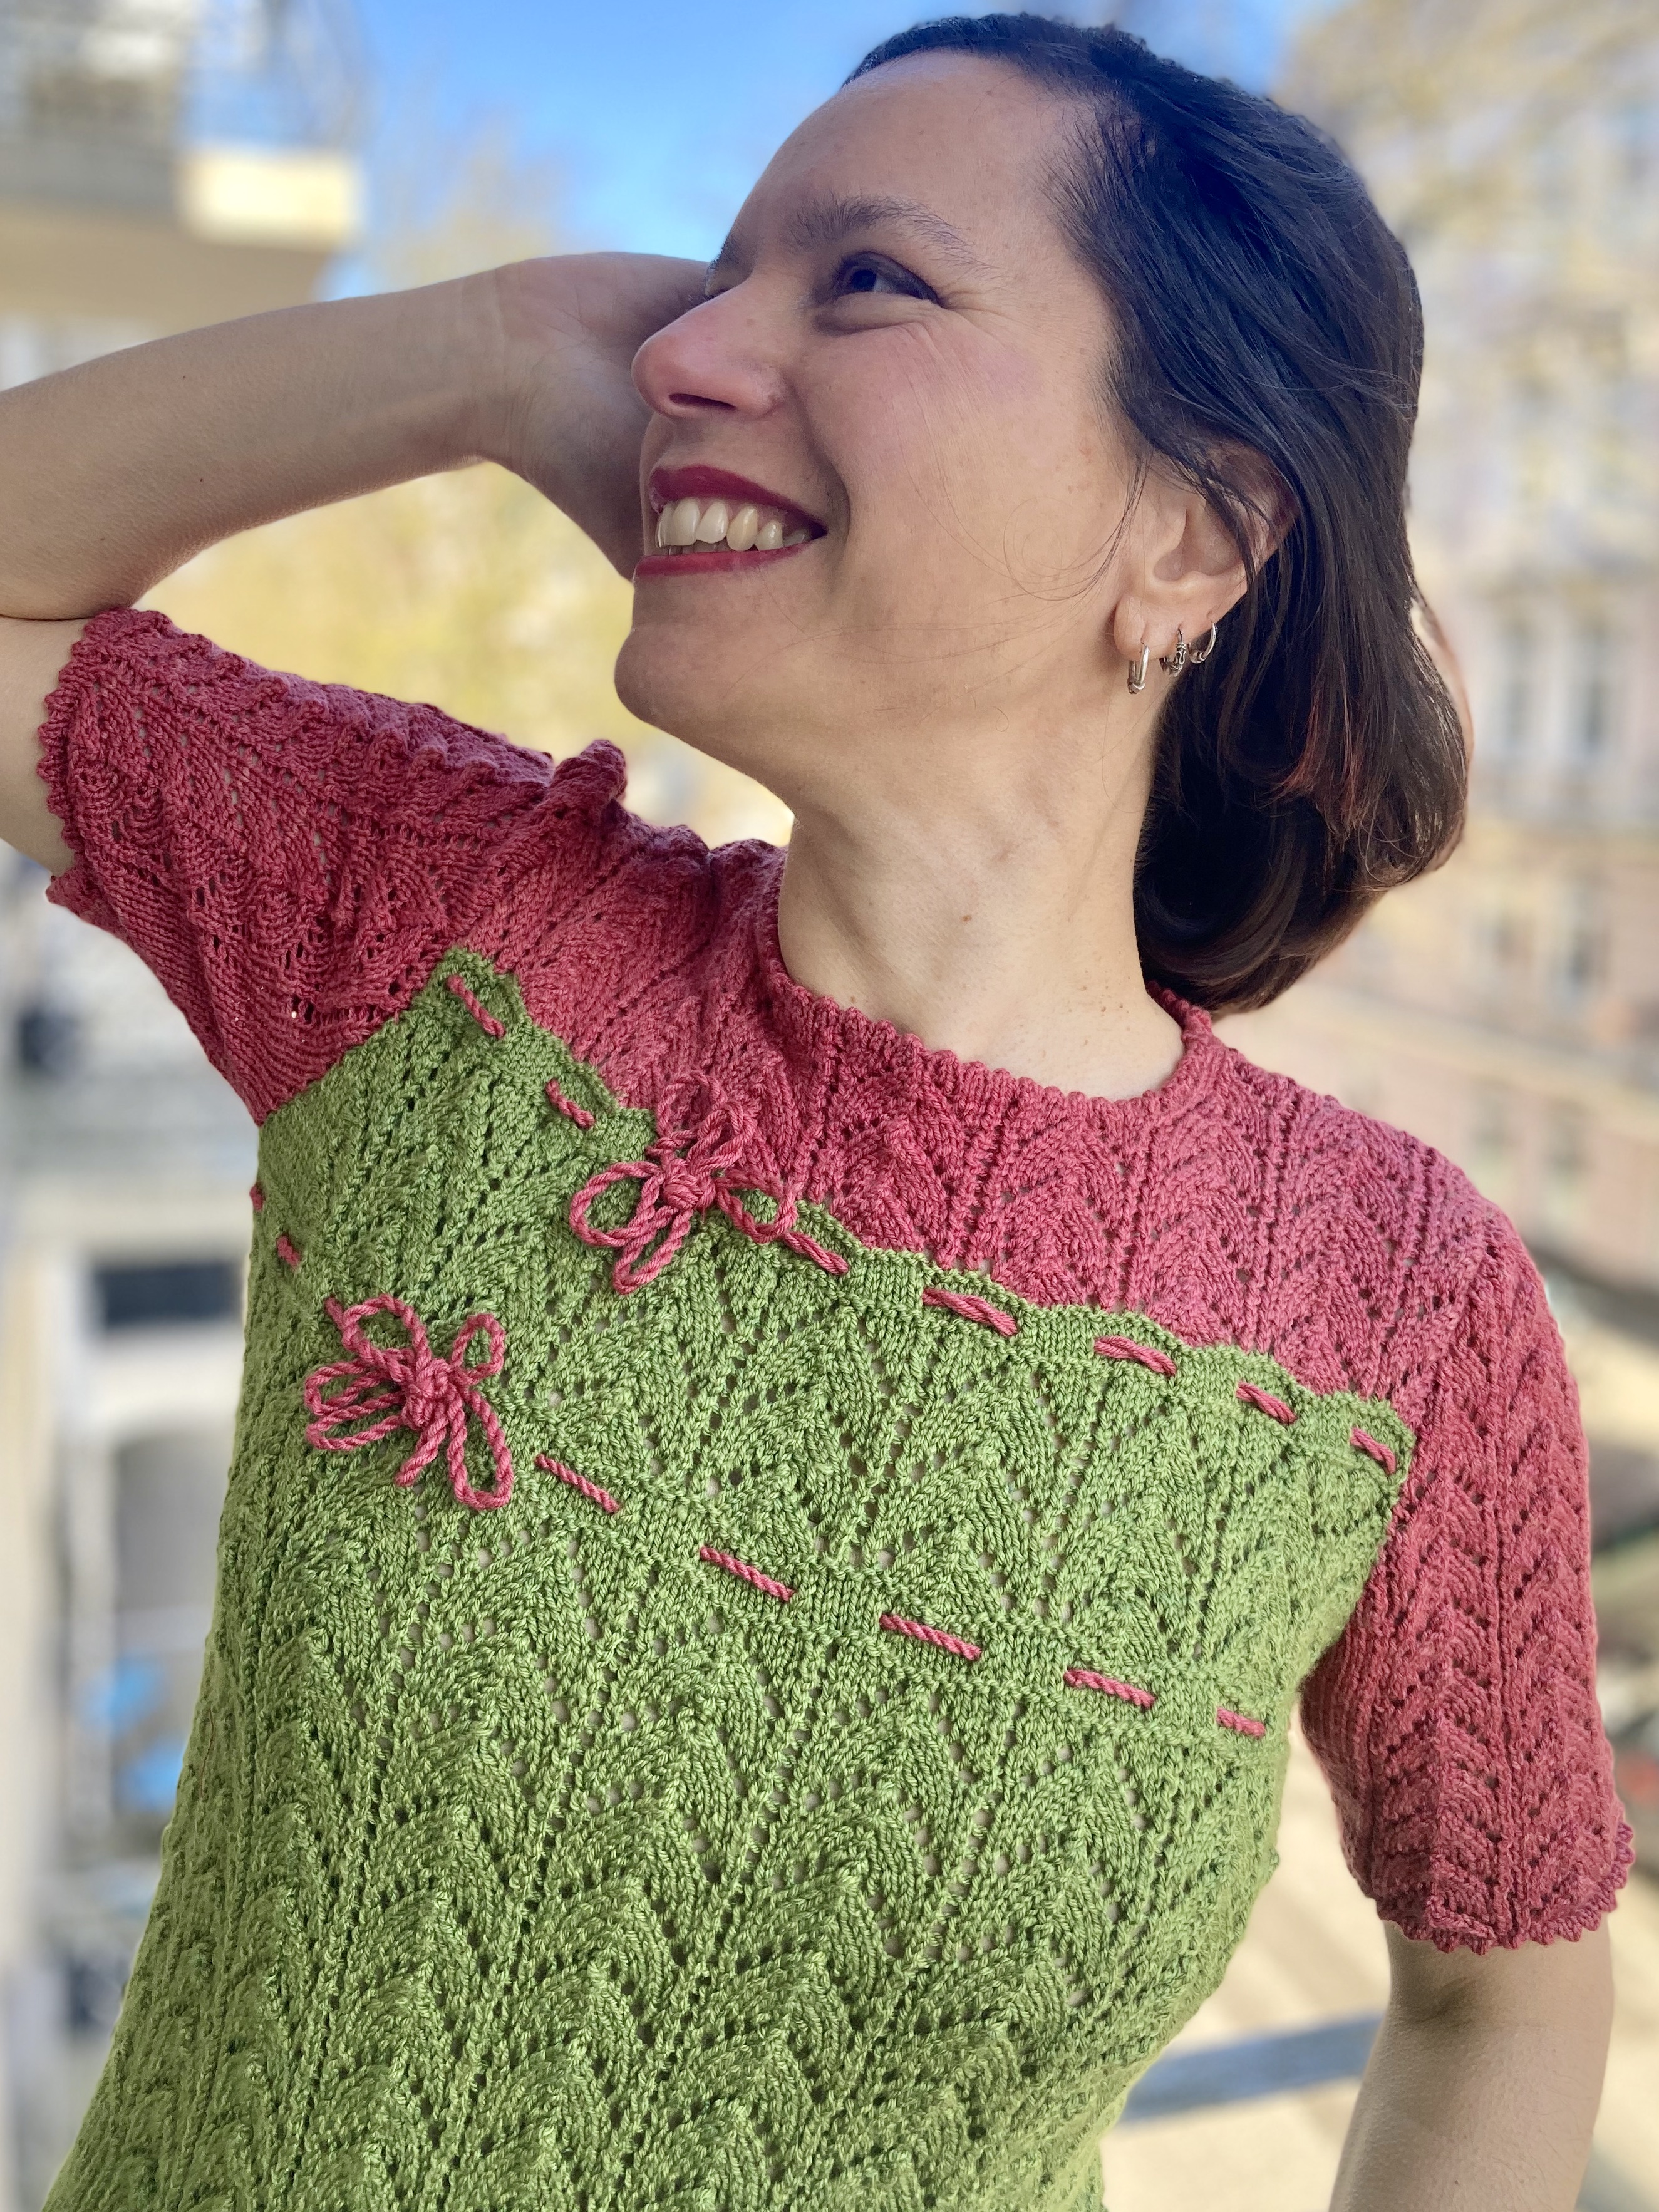
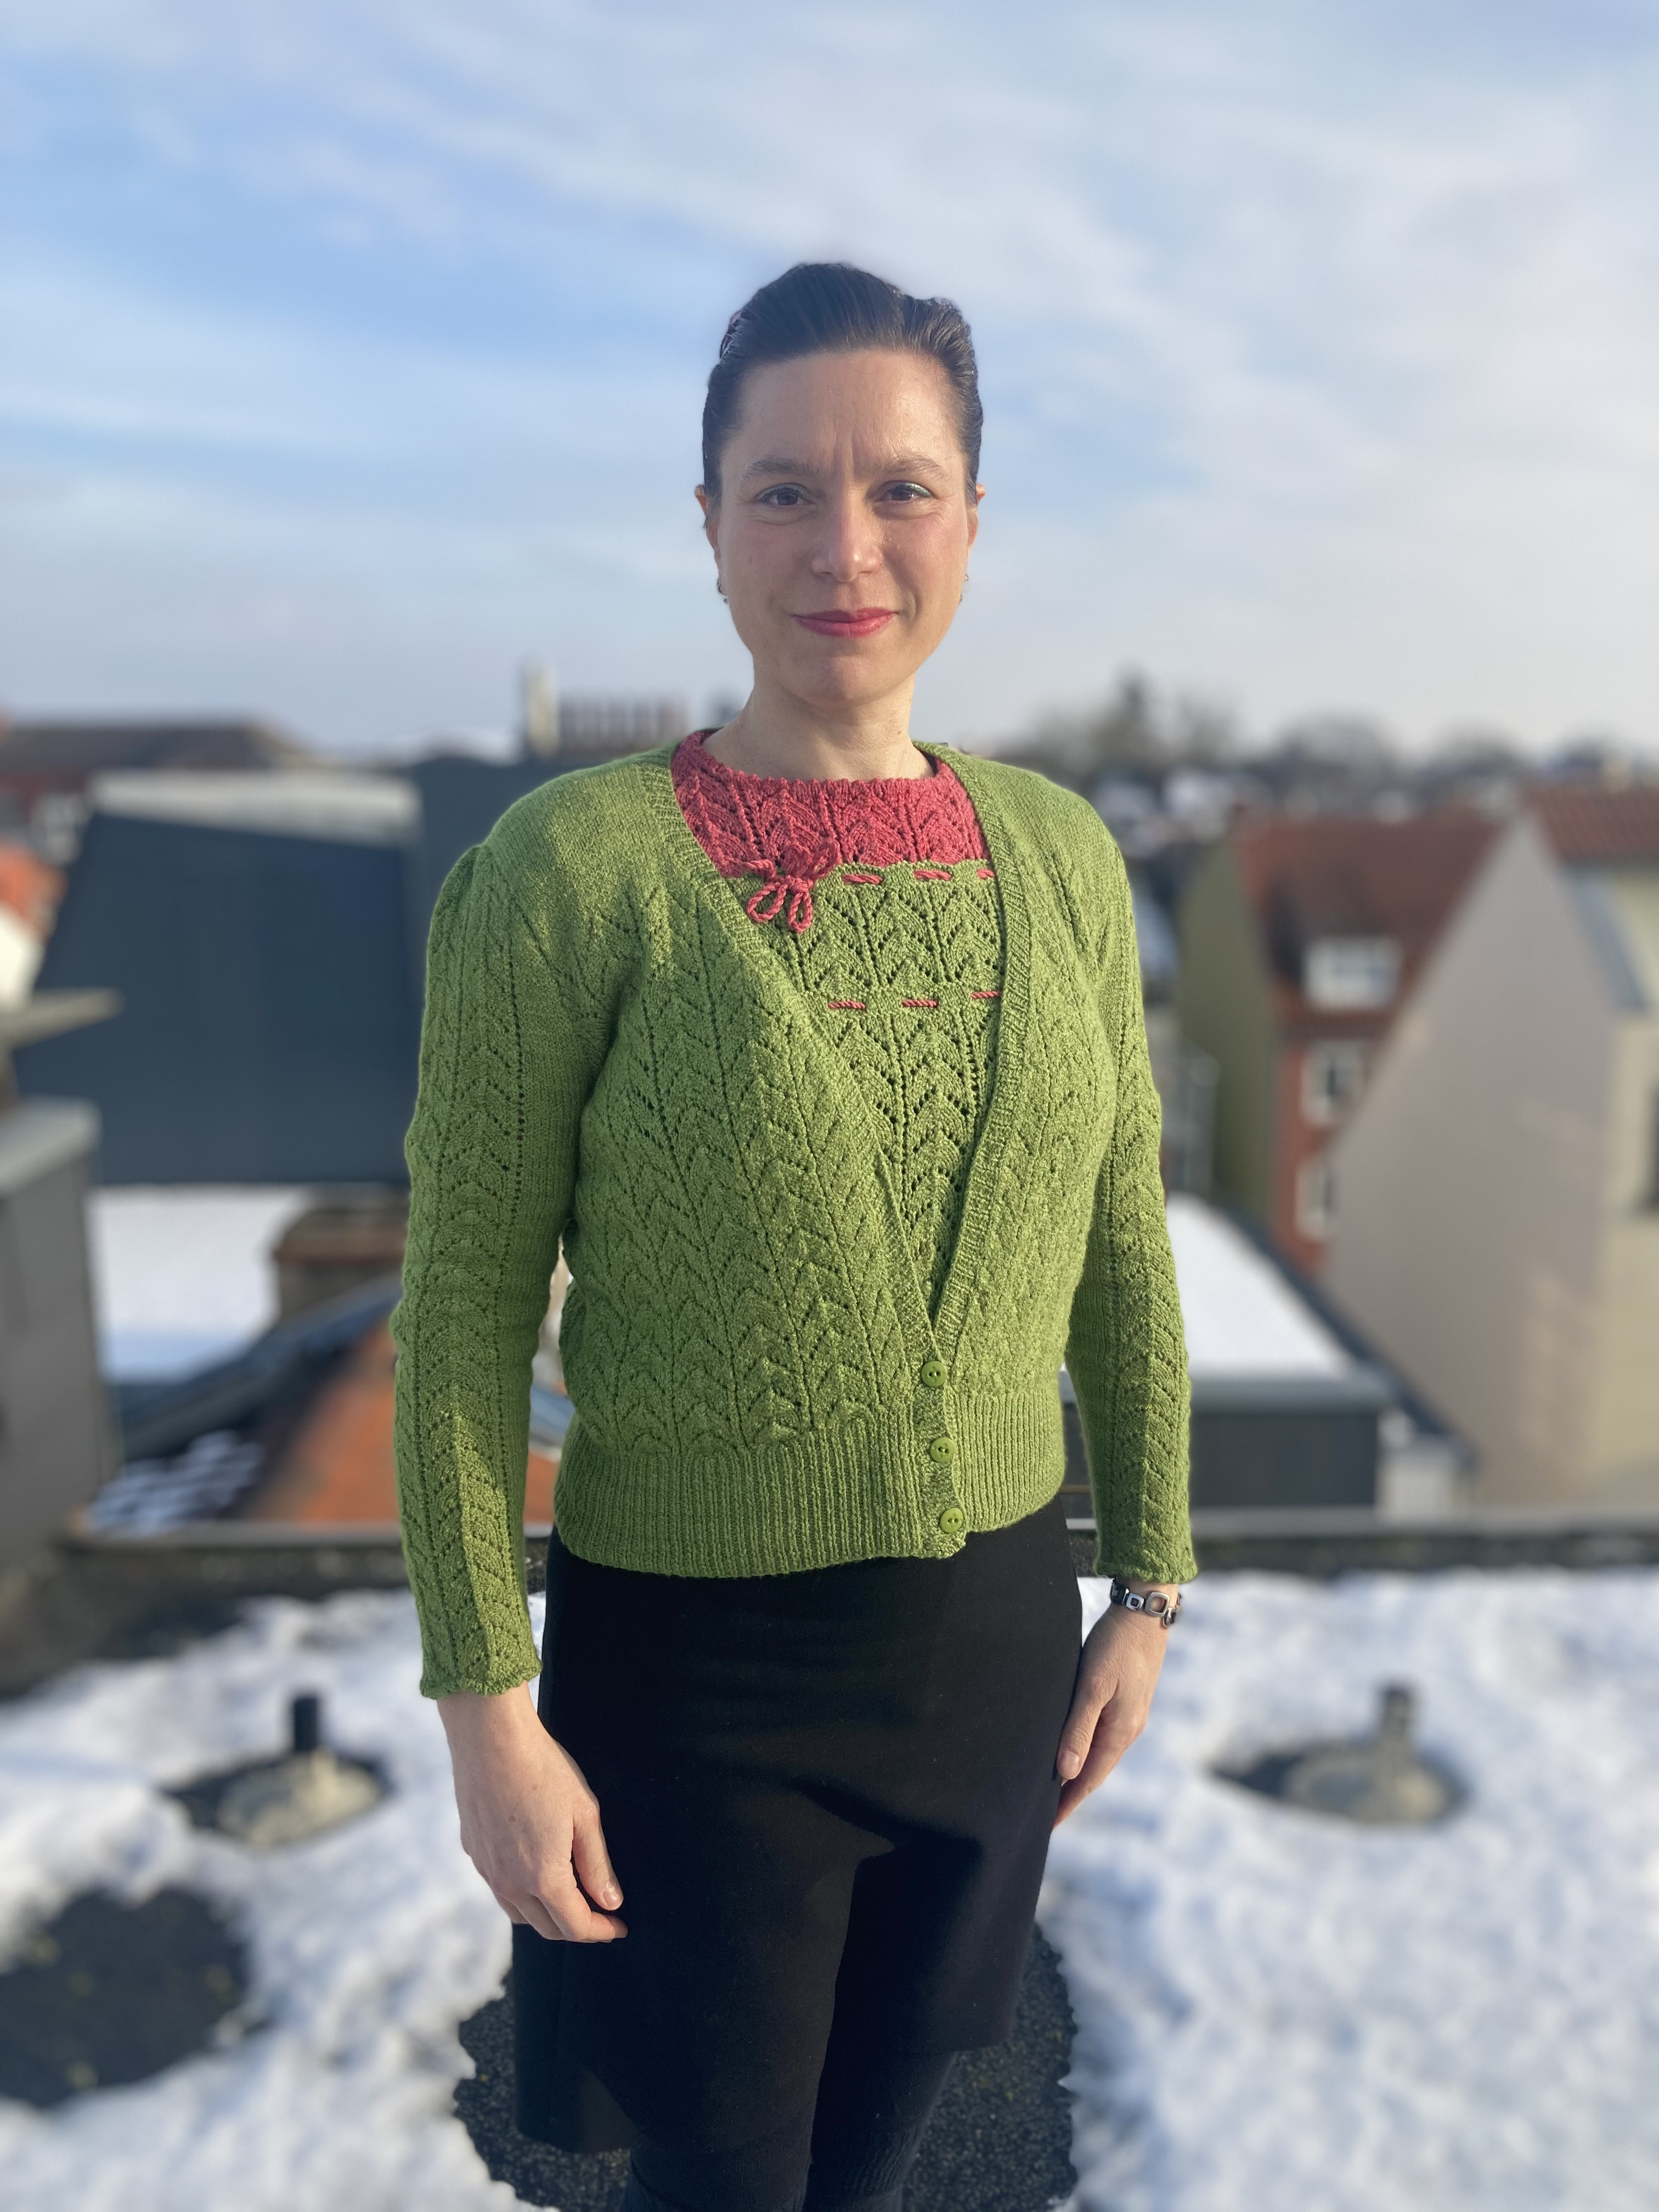
As always, we had fun re-creating the pattern photos.
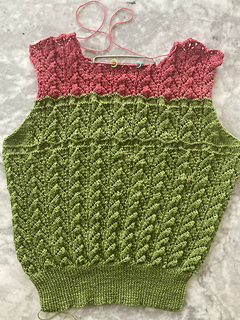
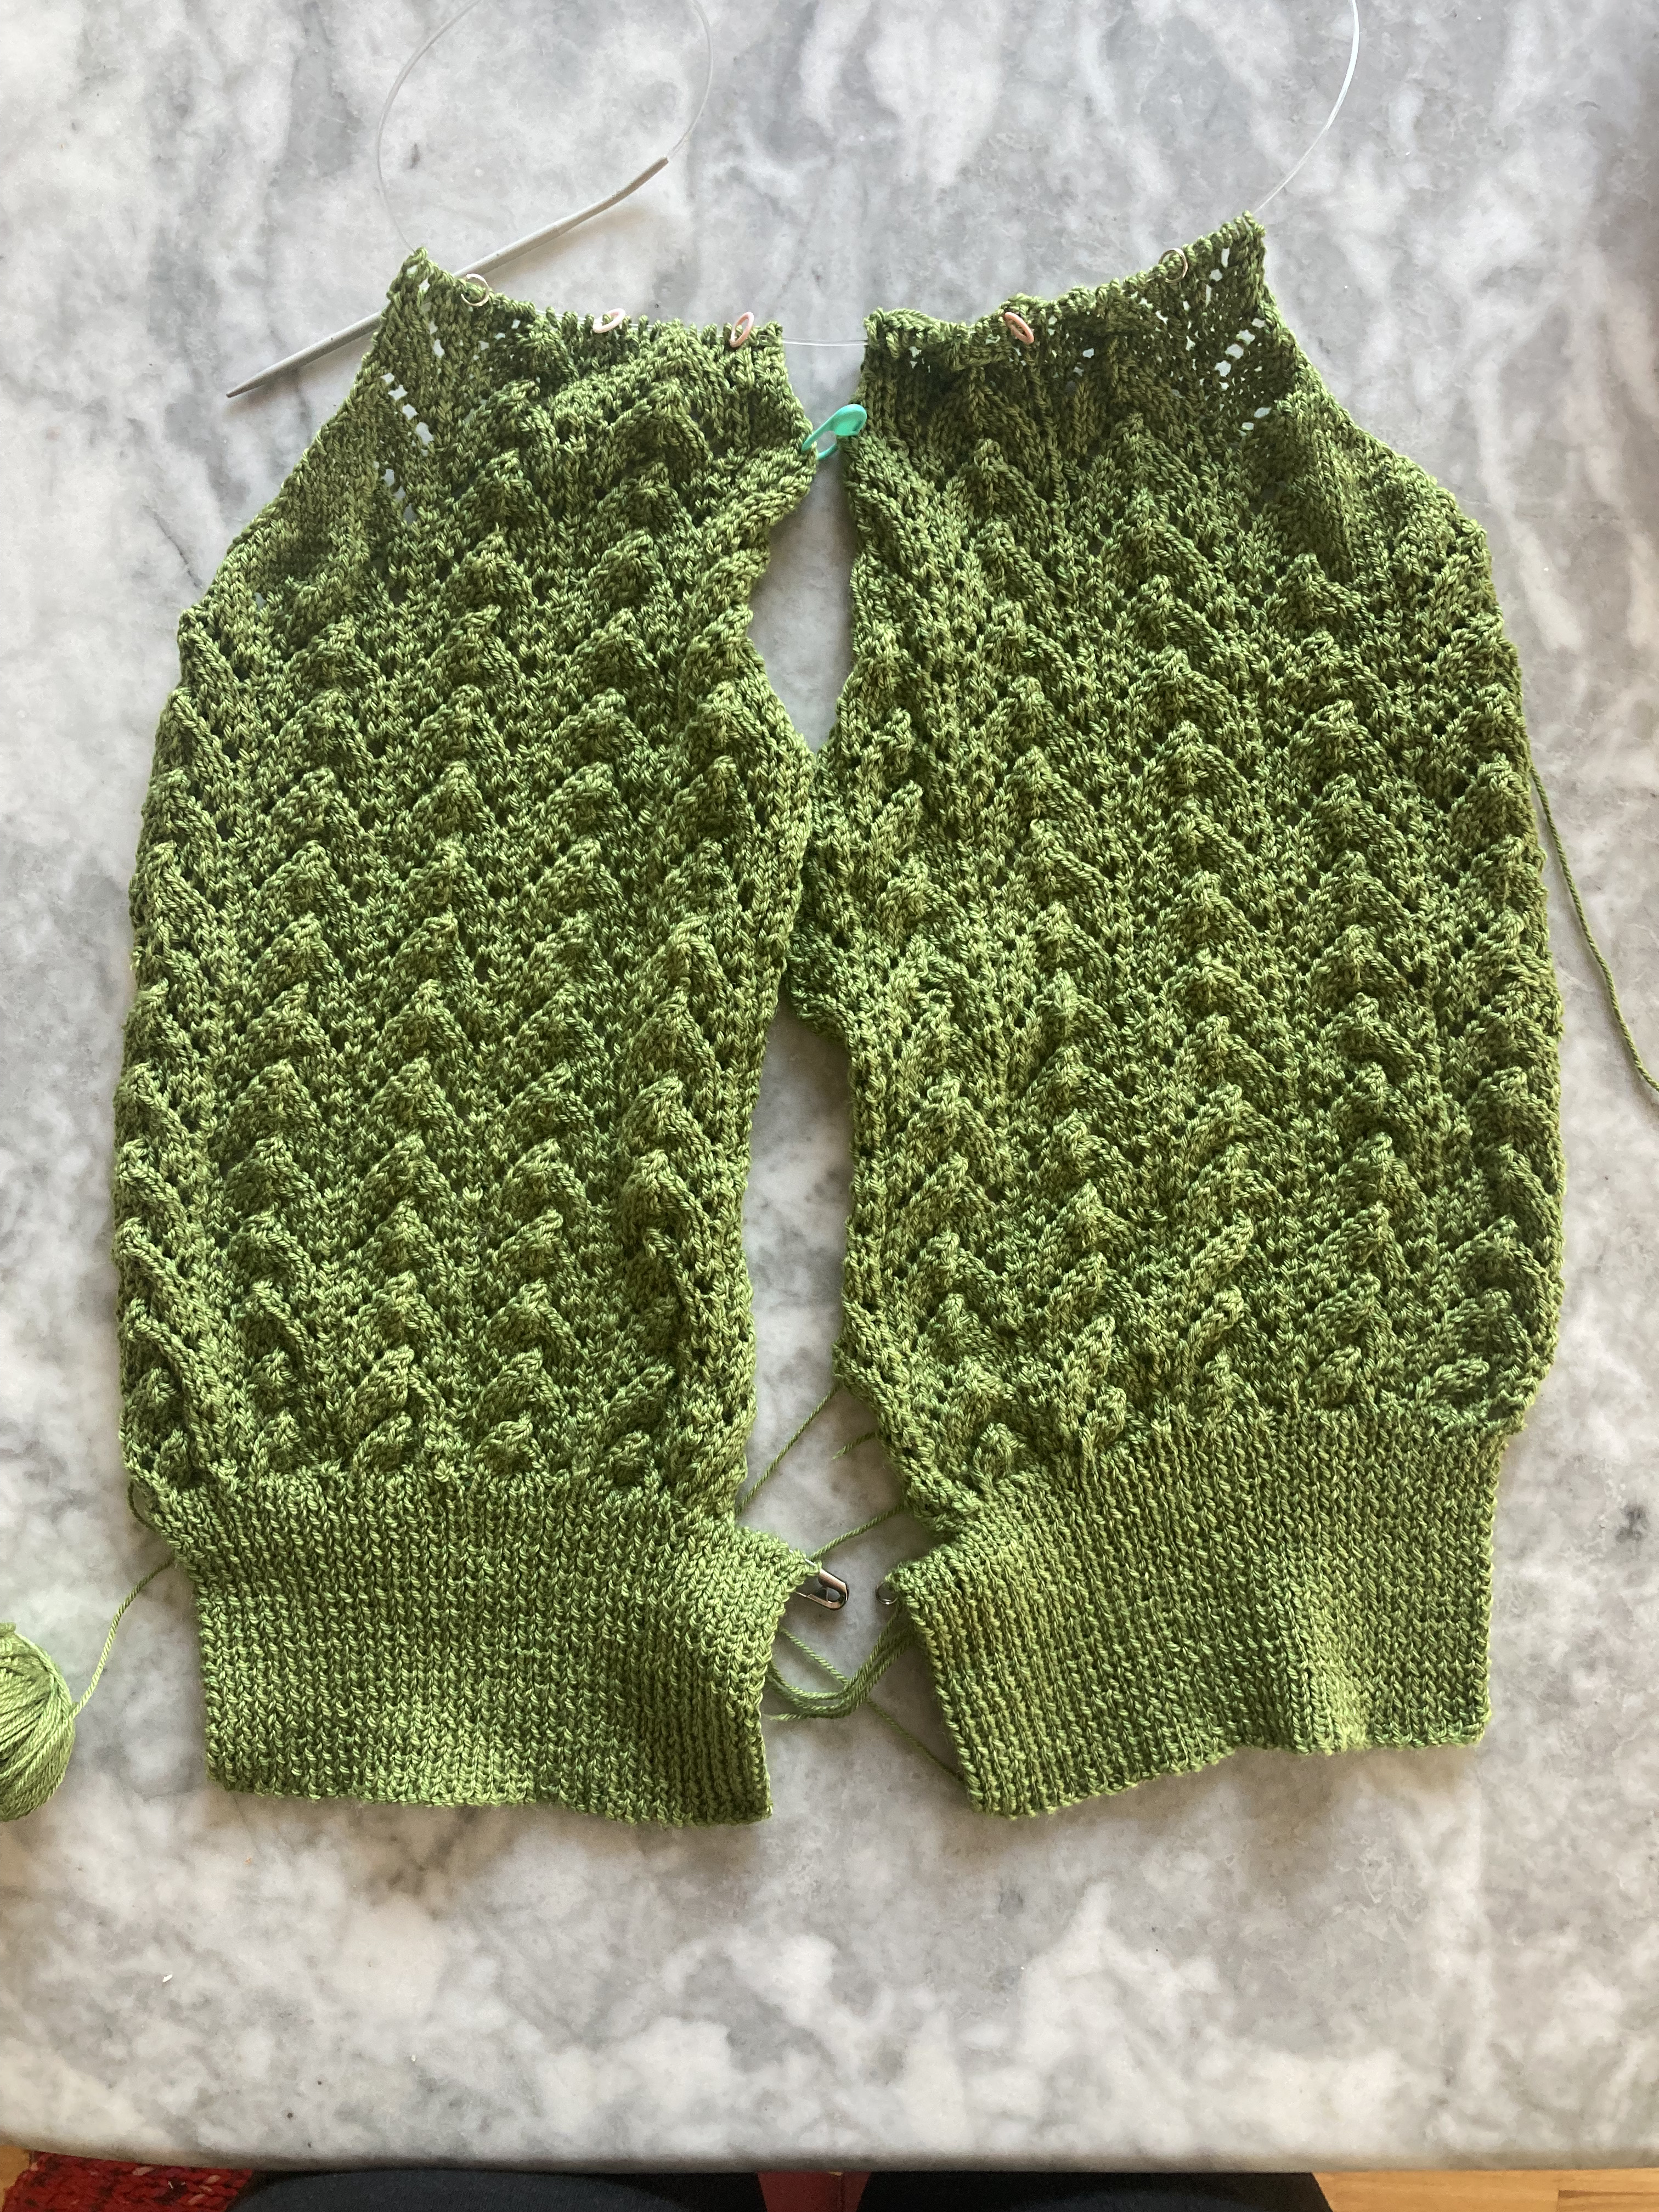
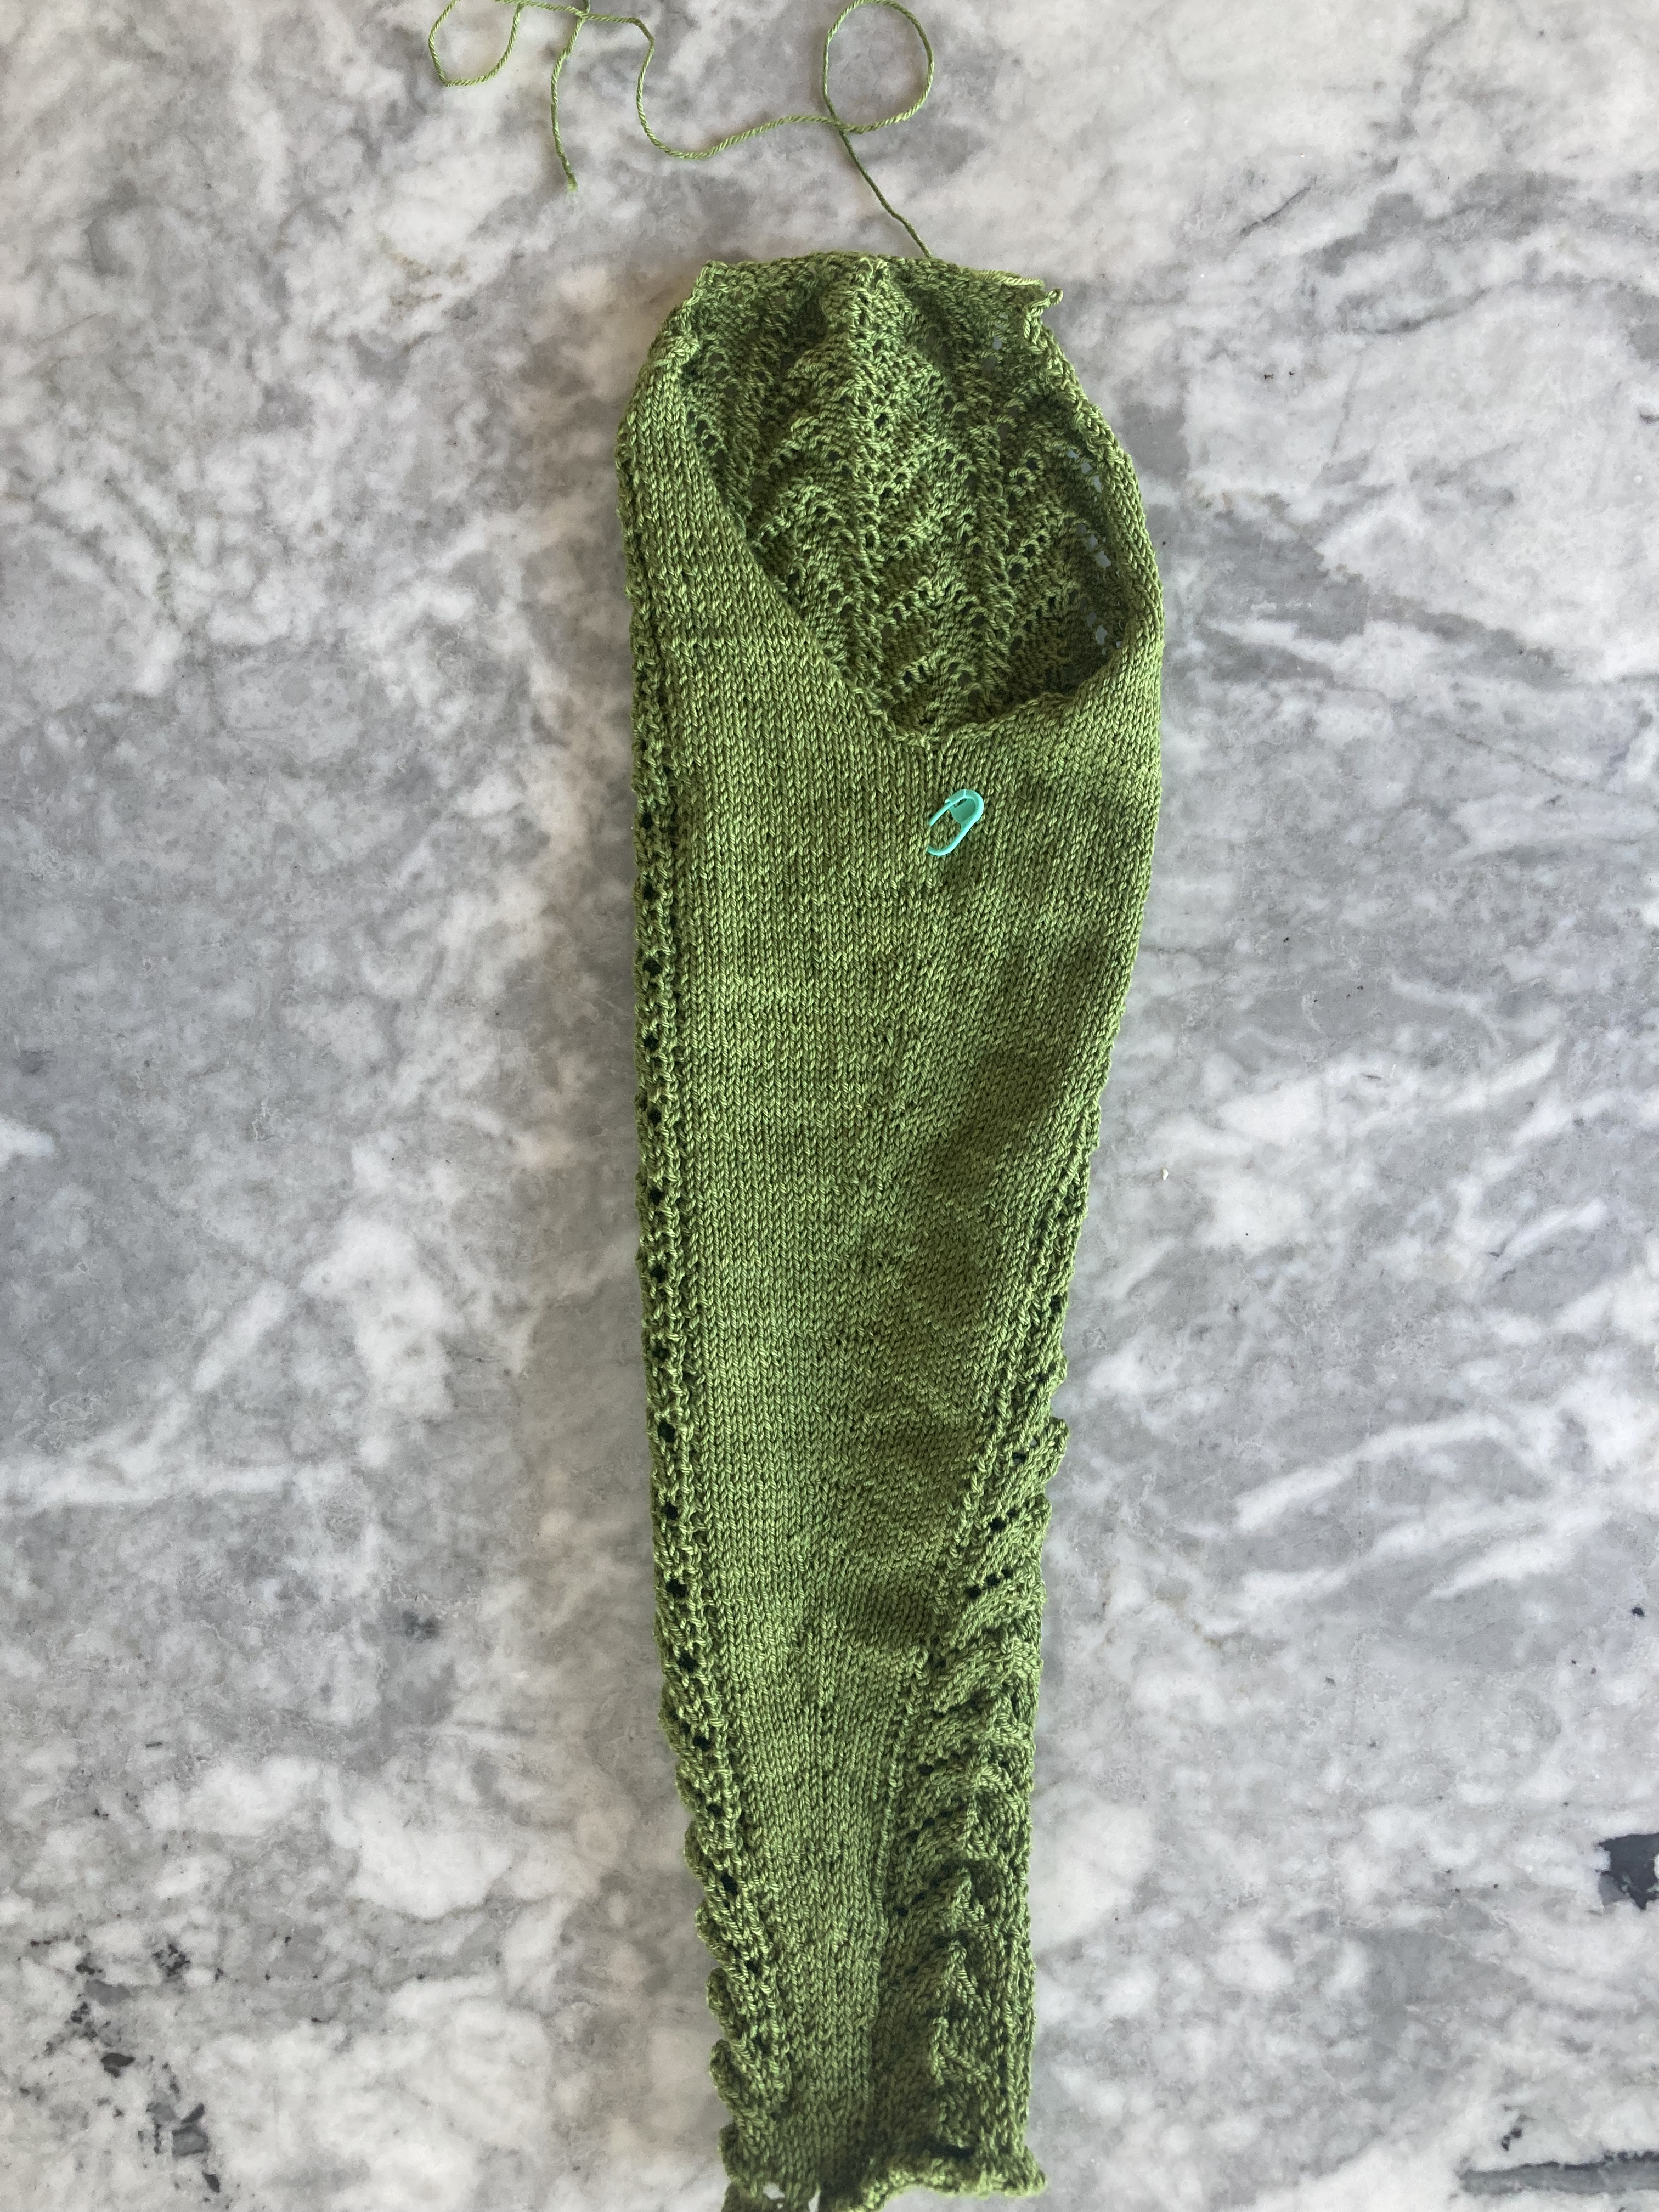
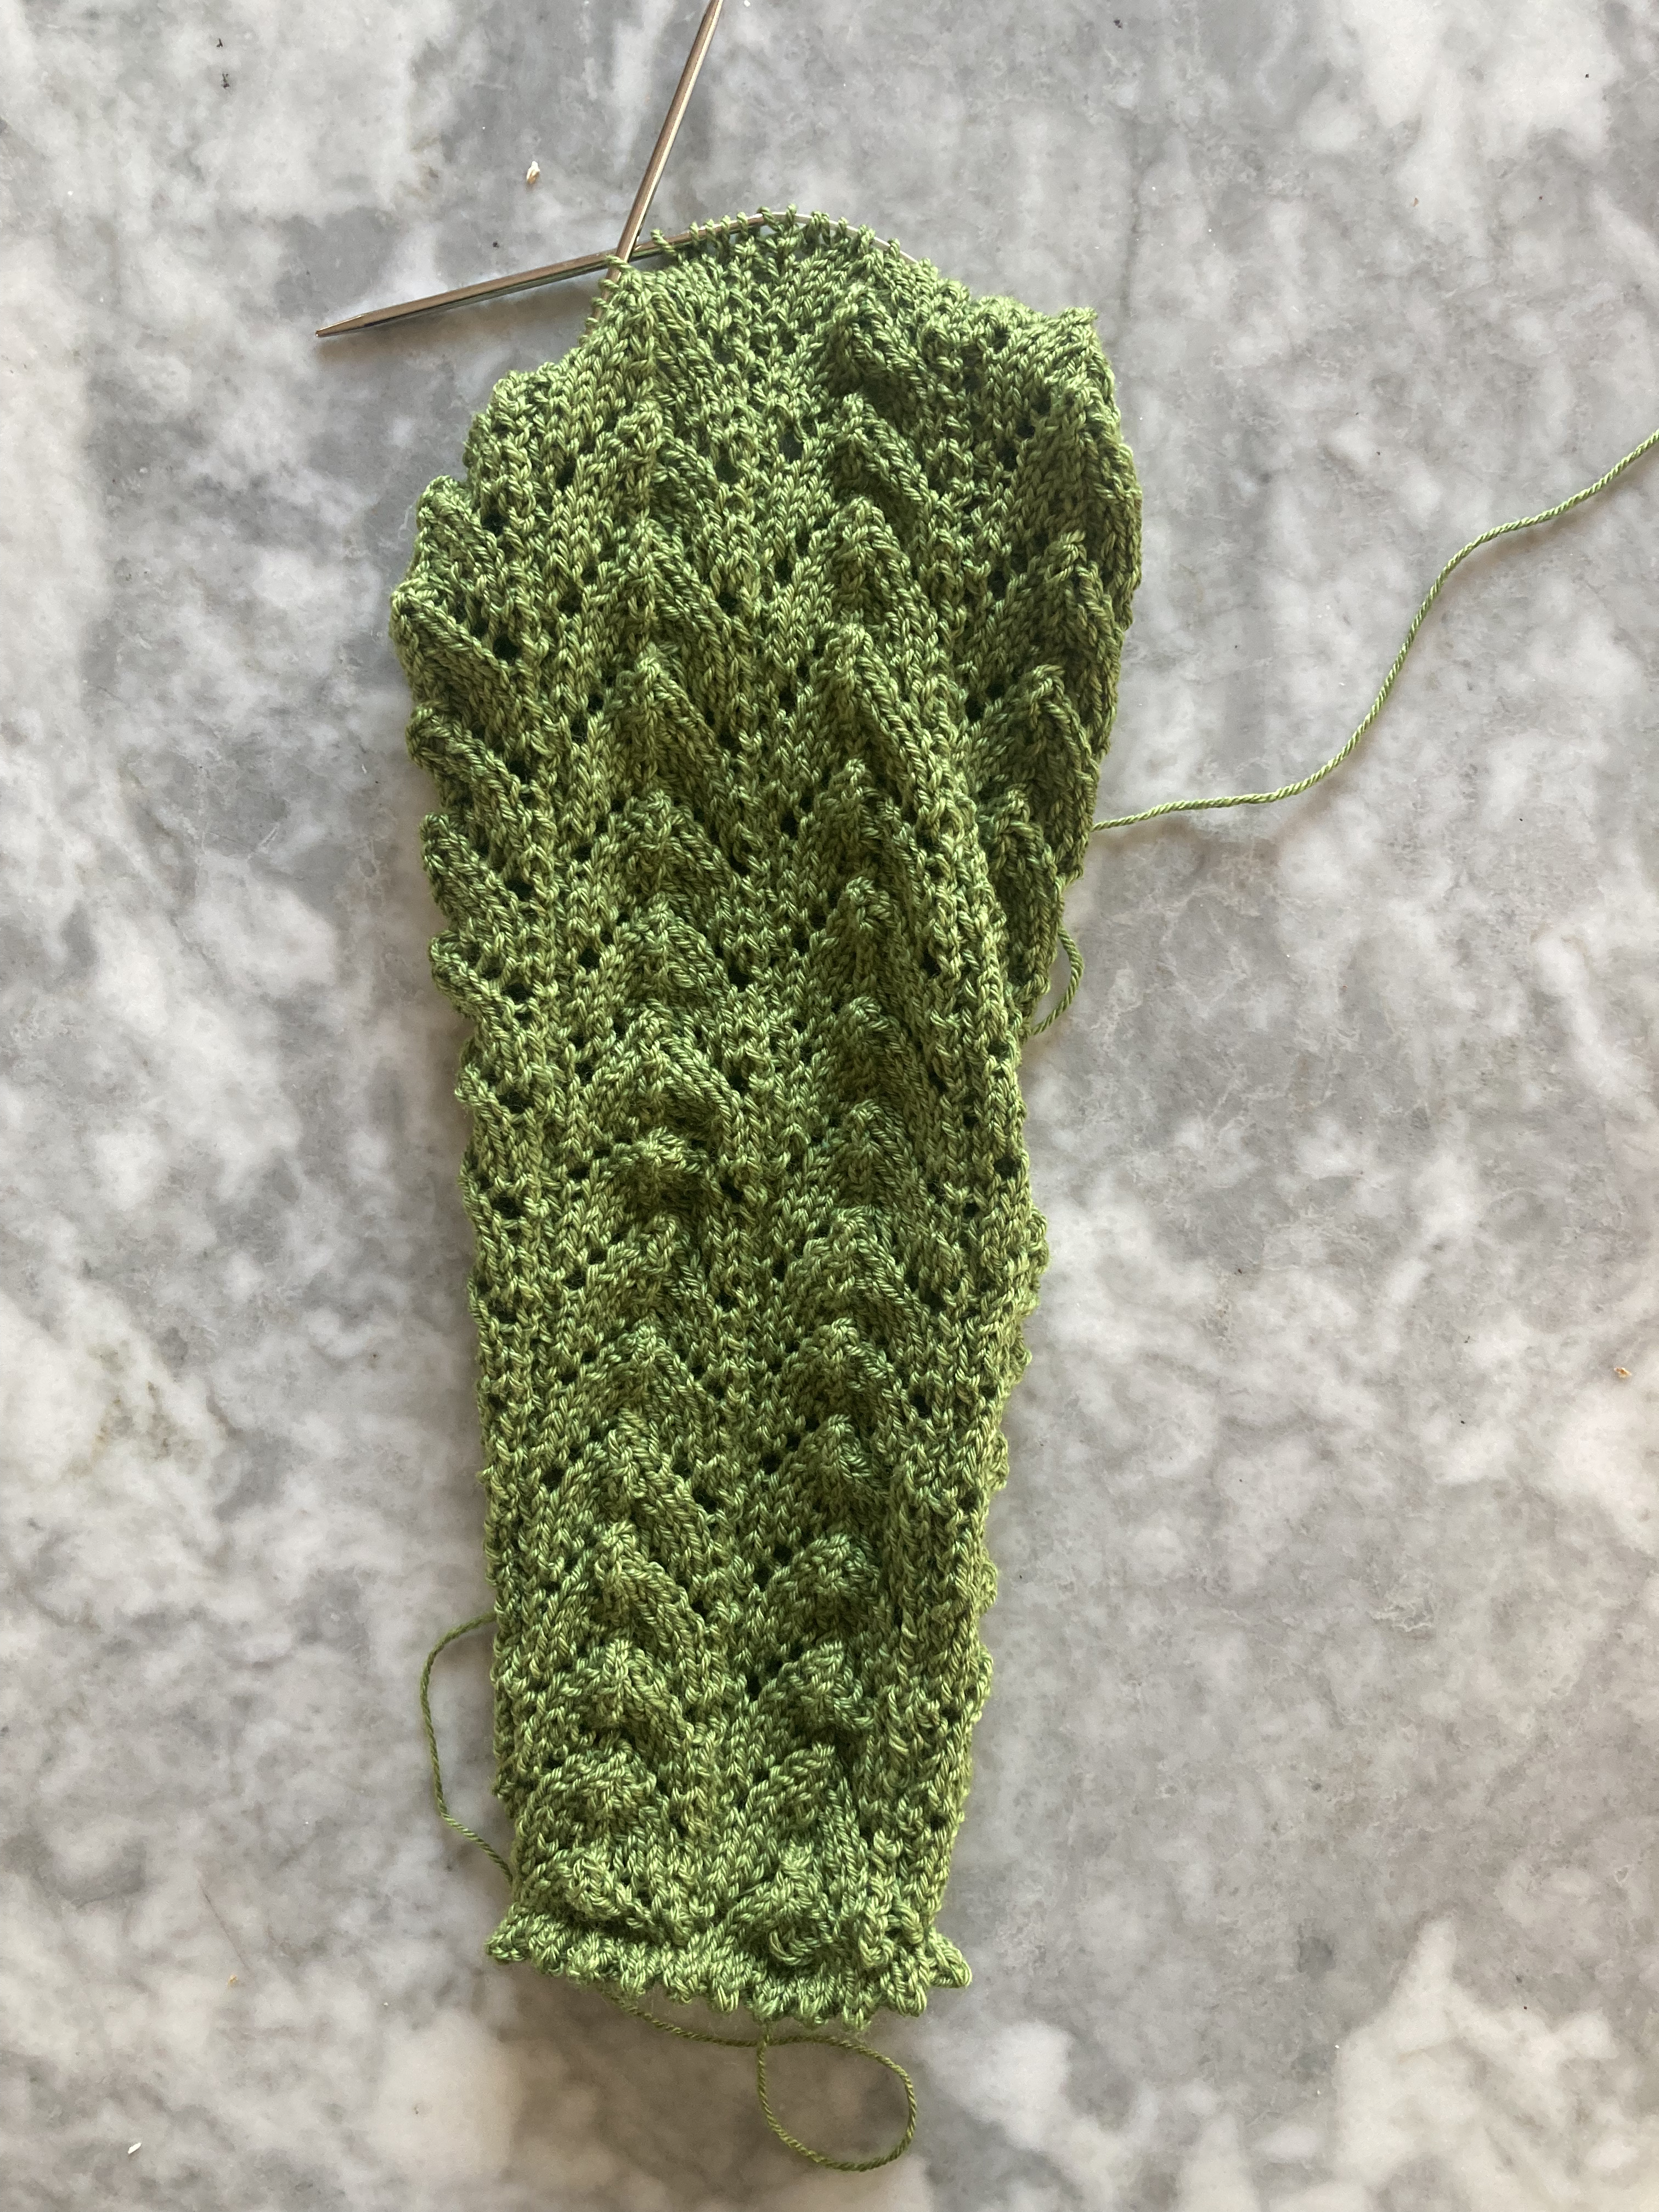
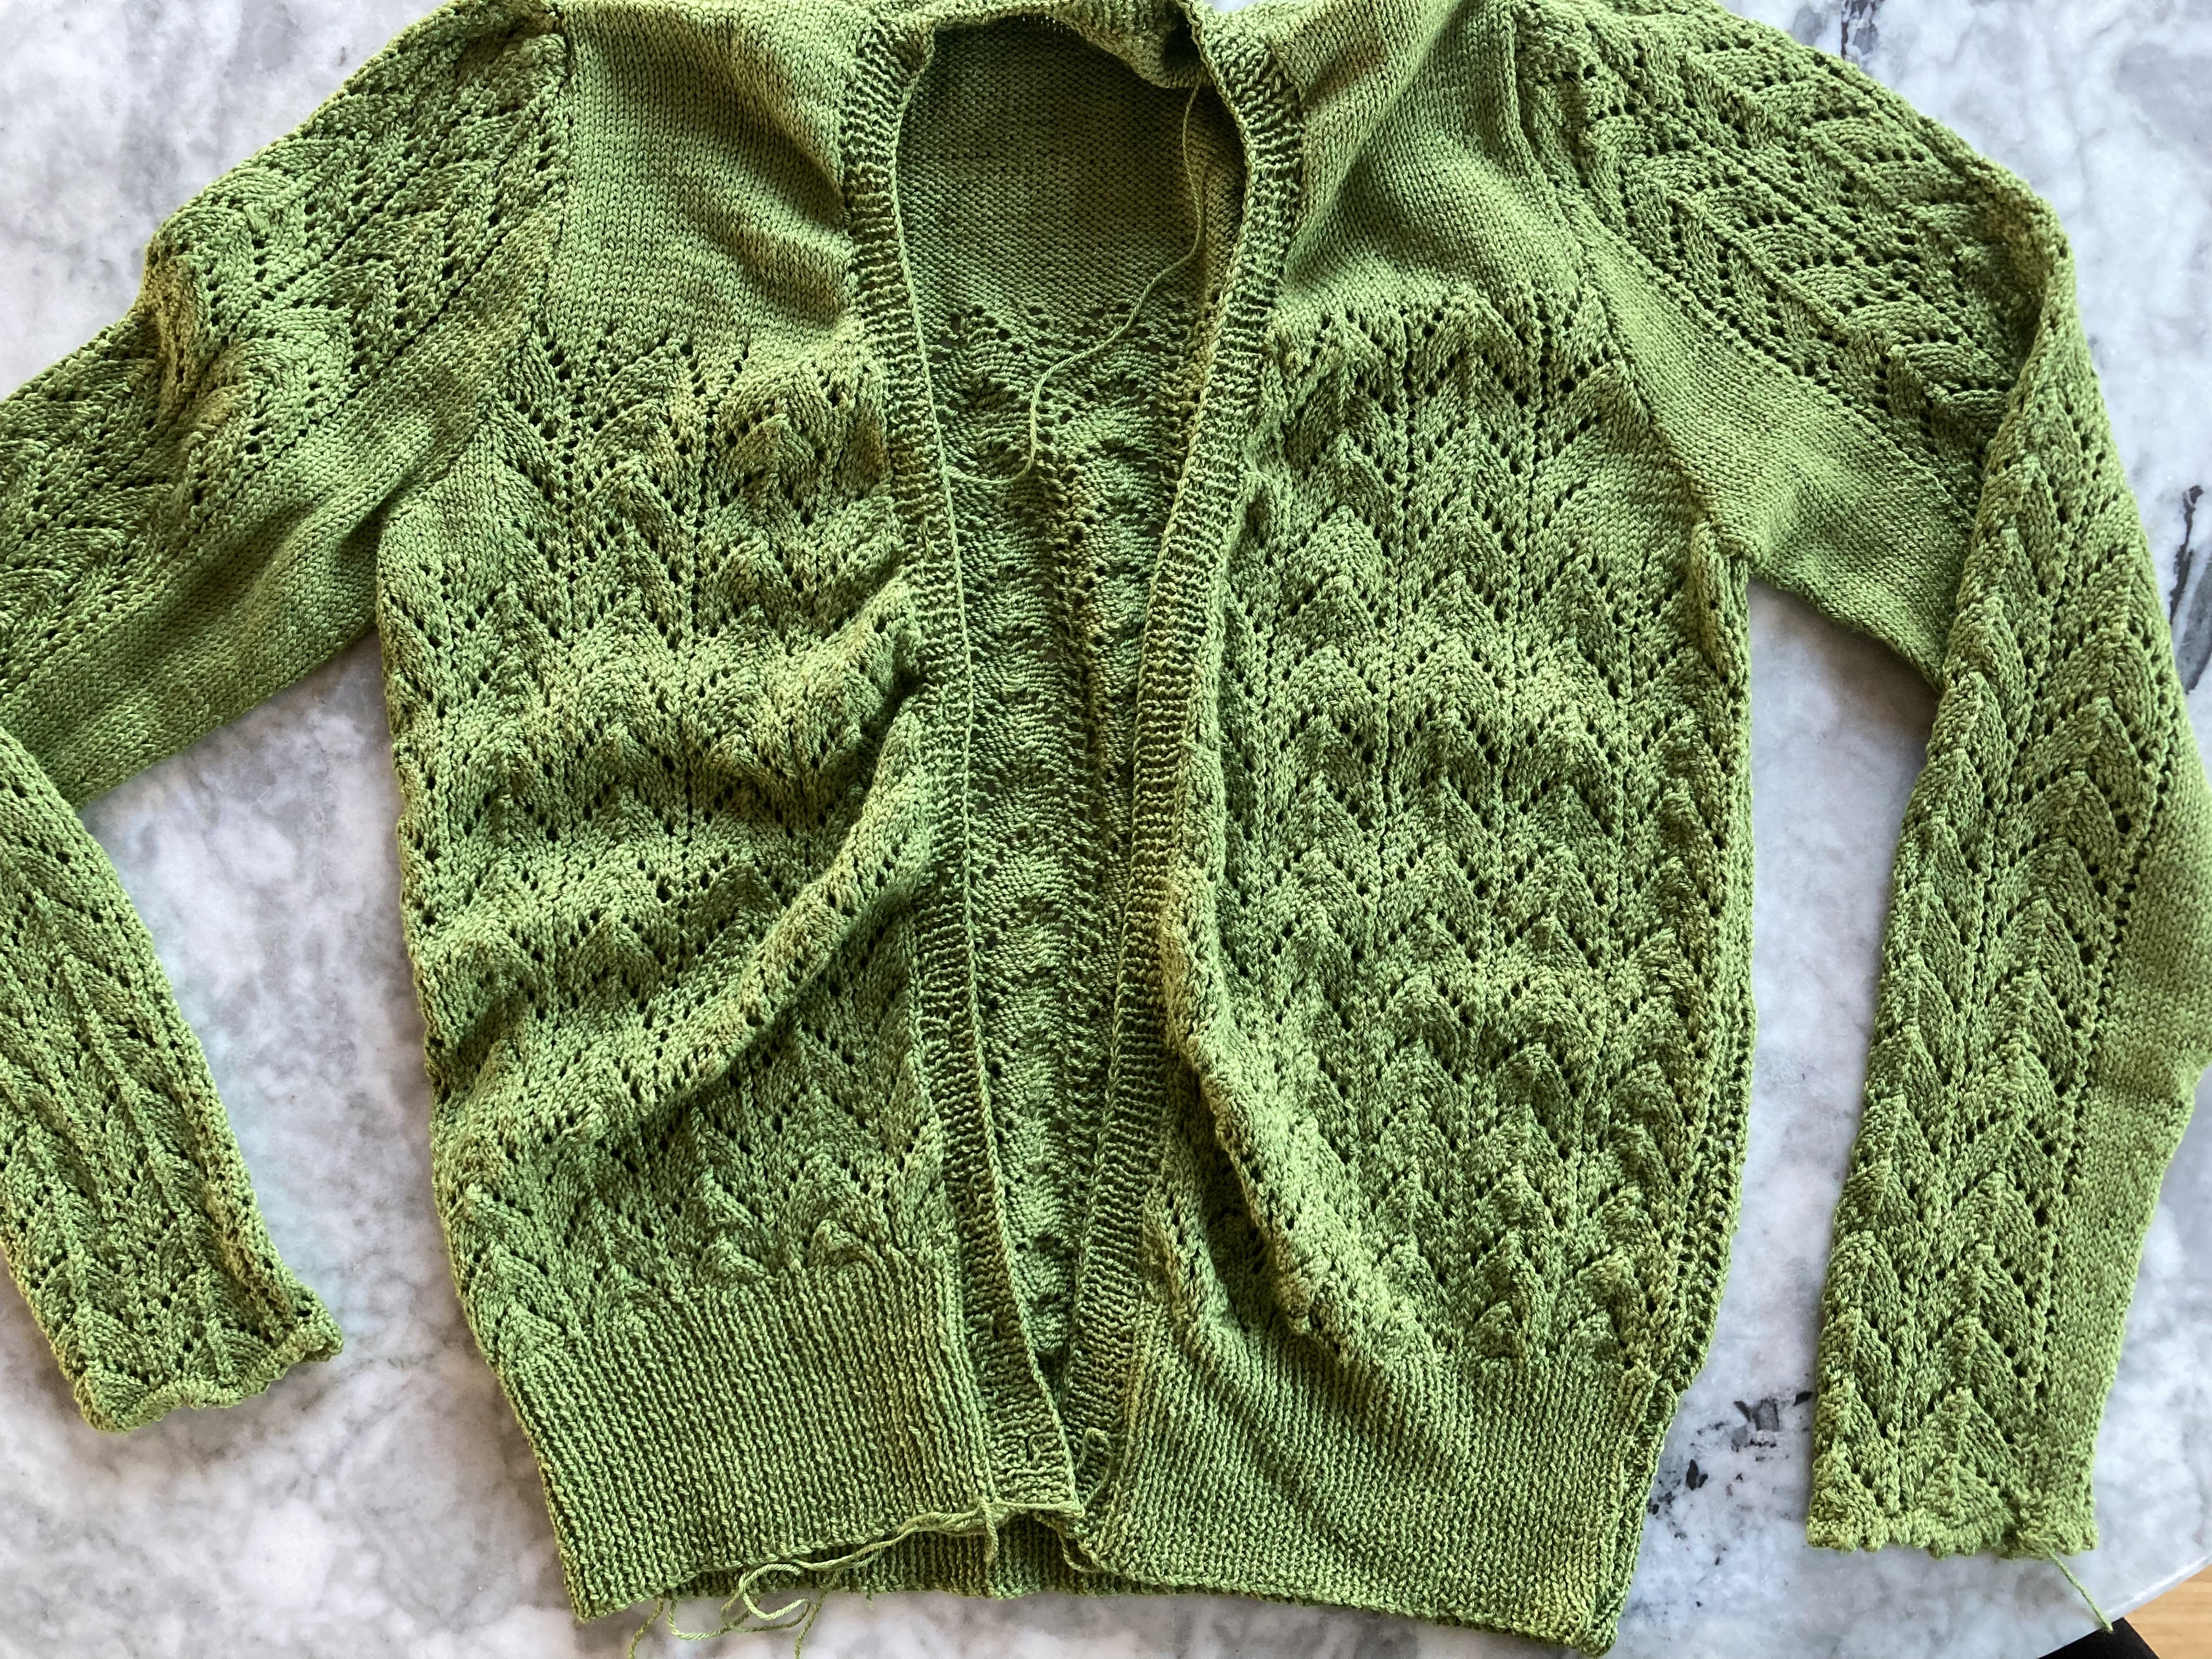
On to the cardigan. There is no pattern for it, so I adapted ideas from the jumper. Sizing was a dilemma, since the jumper was so huge before the dryer manoeuvre, but of course you can’t make the cardigan smaller than the jumper. I decided to make it exactly the same size (plus front bands) and hoped for the best. As for the colour scheme, I wasn’t sure if I would have enough pink yarn left to make both sleeves and yoke, but also not sure if I would have enough green yarn to just make the whole thing in green. This led to a piecemeal approach, since (for example) it would look fine to have just the upper yoke in pink, but not one shoulder of one sleeve. I made at least the start of the front bands together with the fronts for this reason as well. I didn’t want to deal with too many increases in the lace pattern on the sleeves, so I made 4 pattern repeats on a base of stocking-stitch (similar to the way the increases and armhole decreases were made on the jumper.)
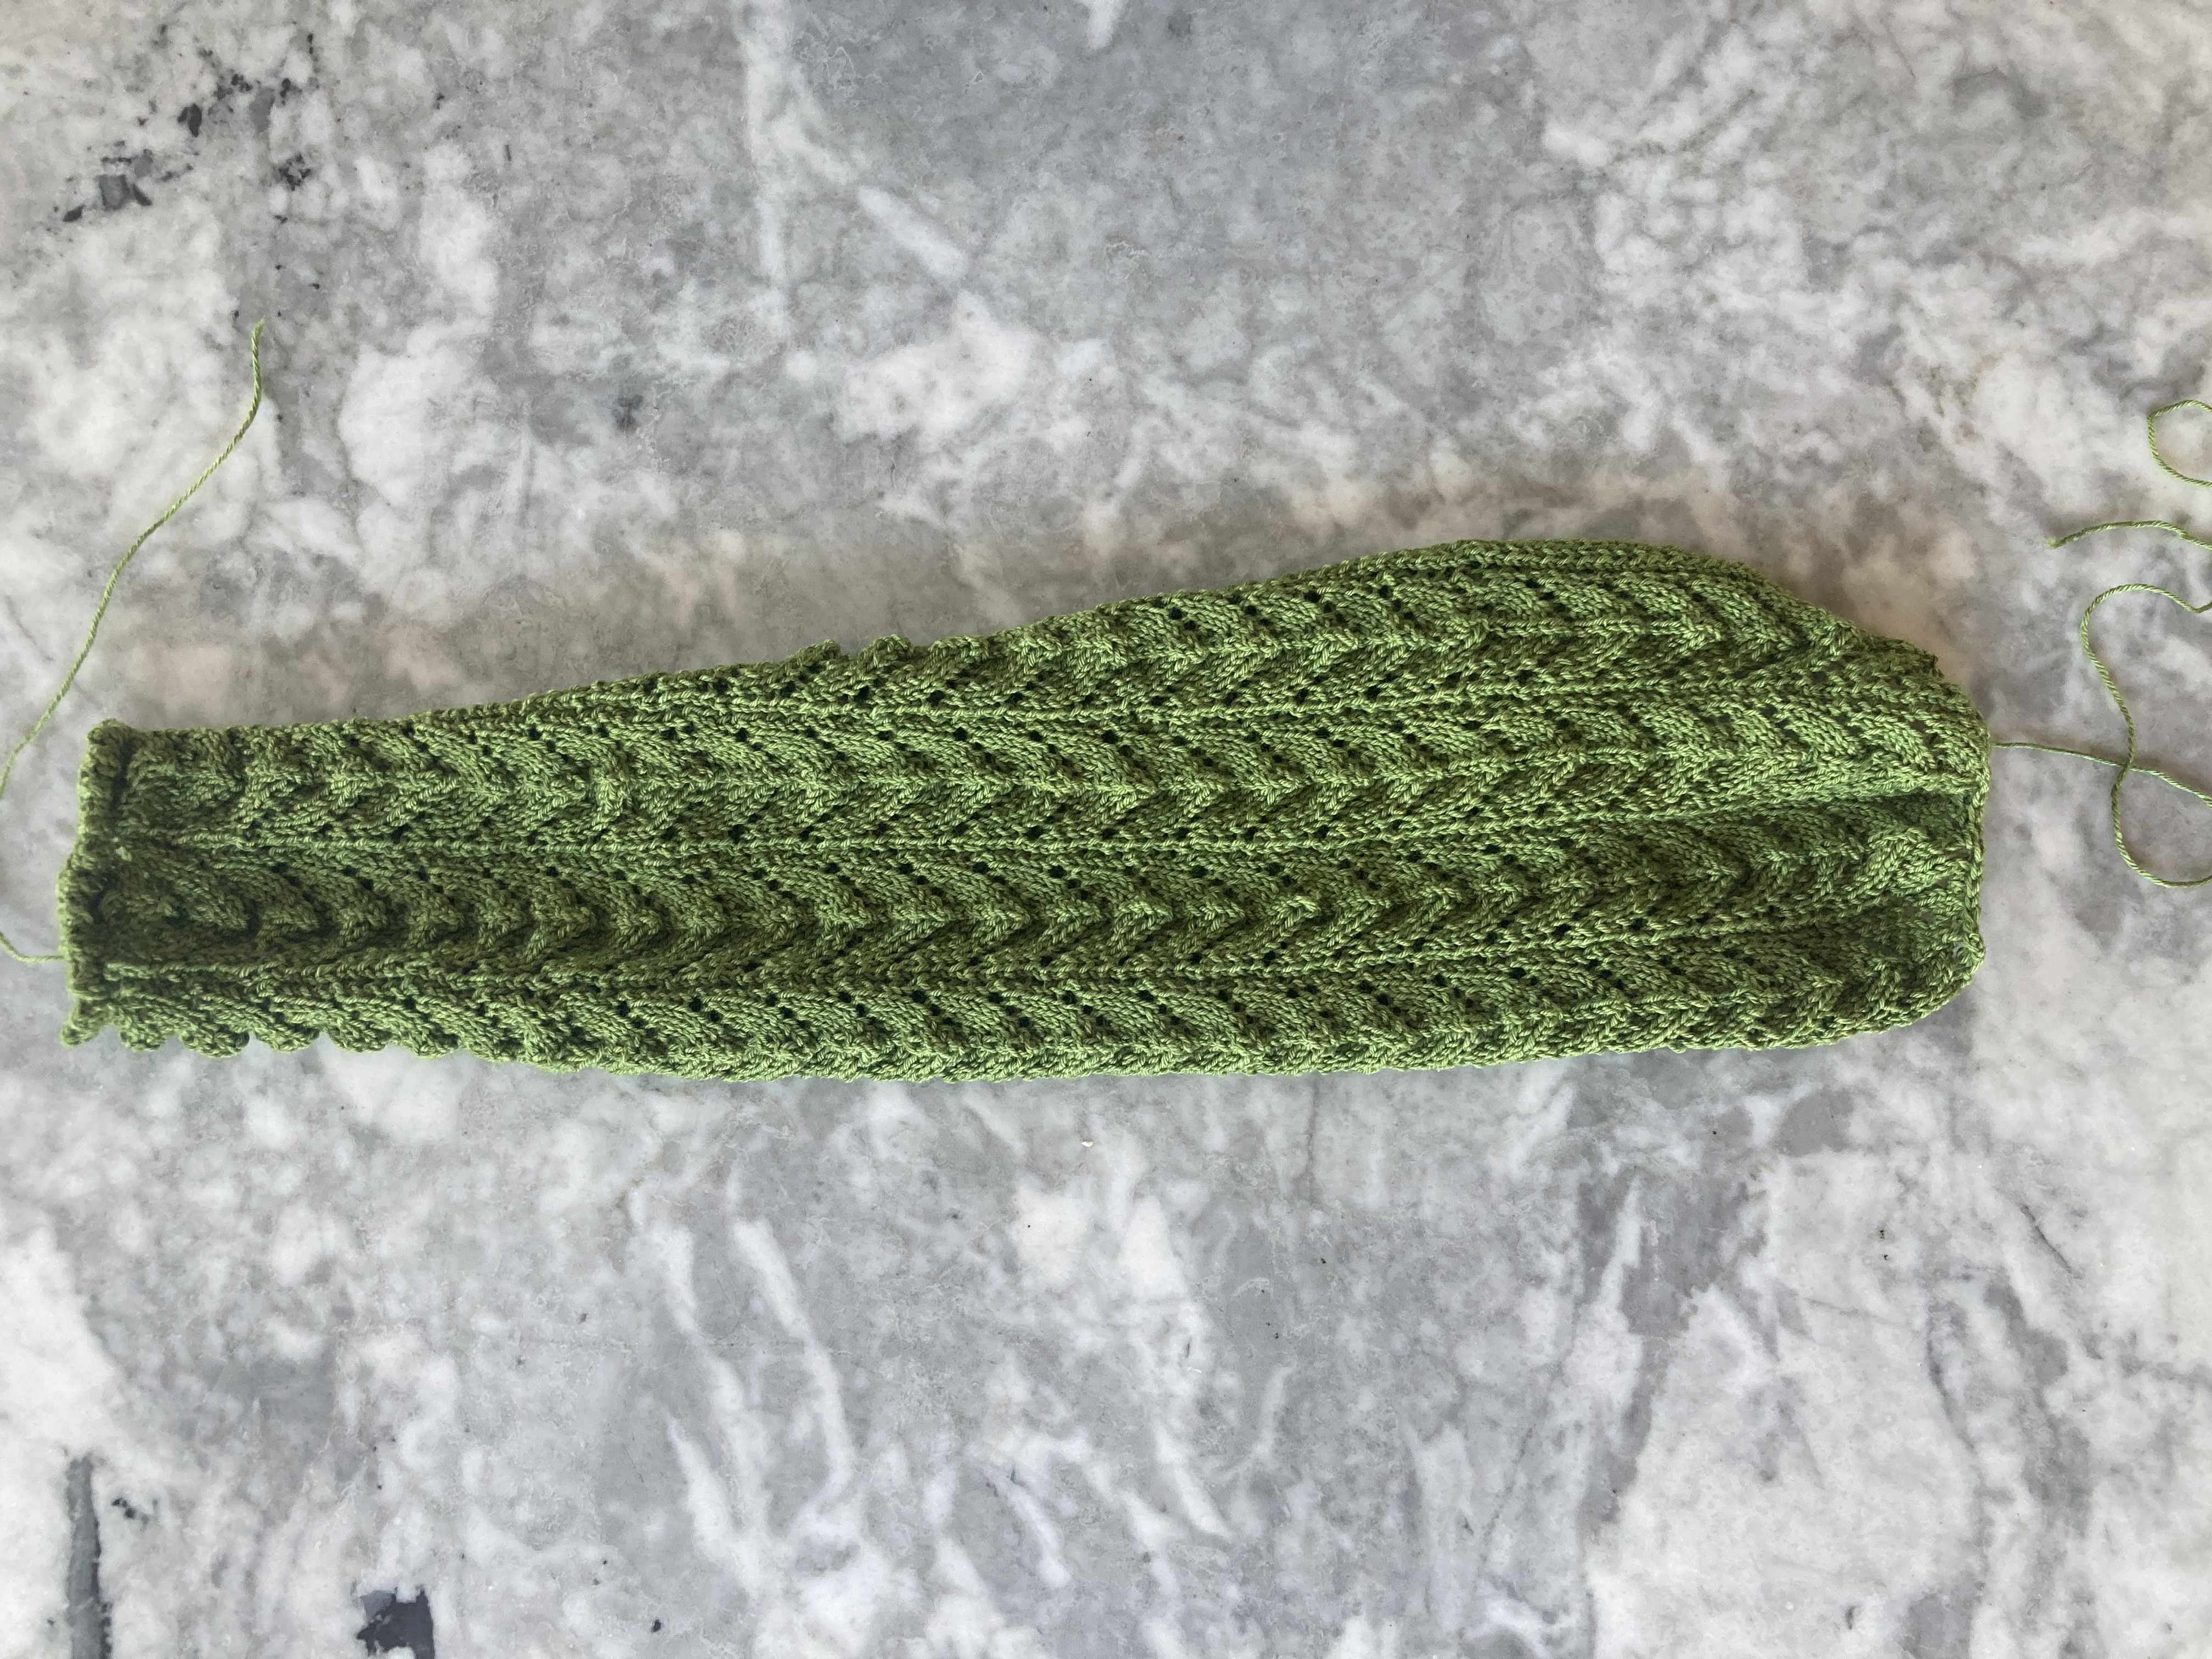
It went well in pieces, though I was nervous about the sizing and whether I would have to shrink the cardigan in the dryer as well, or if I could get it down to a size just slightly larger than the jumper. I made the back and fronts (with bands) and finished to the yoke where the colour change would come in the pattern, then finished one sleeve which was quite snug. I blocked the sleeve and it was a fine size after blocking, so made the other one to match.
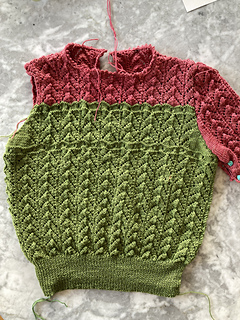
Crossing fingers that it would all work out, I finished the front and back yokes in stocking-stitch in all green (leaving about 10-15 grams of green yarn over, so that was fine) and sewed it together. It was hard to tell whether it was a good size or not, since the lace pattern scrunches up a lot while knitting and I knew that blocking would stretch it out a lot. I didn’t want to complete the button bands on the scrunchy lace, so I blocked the almost-finished cardigan first.
Unfortunately, though the width was OK, and the sleeves were OK if a little narrow at the wrists, the length was unacceptably long. I had made it one pattern repeat longer than the jumper (ca. 3/4 inch) to allow for wearing it over the jumper. But whereas the finished jumper was about 20 inches long (i.e. a little short for me, but appropriate for 1940s style), the cardigan was now 25 inches. The yarn was that unpredictable.
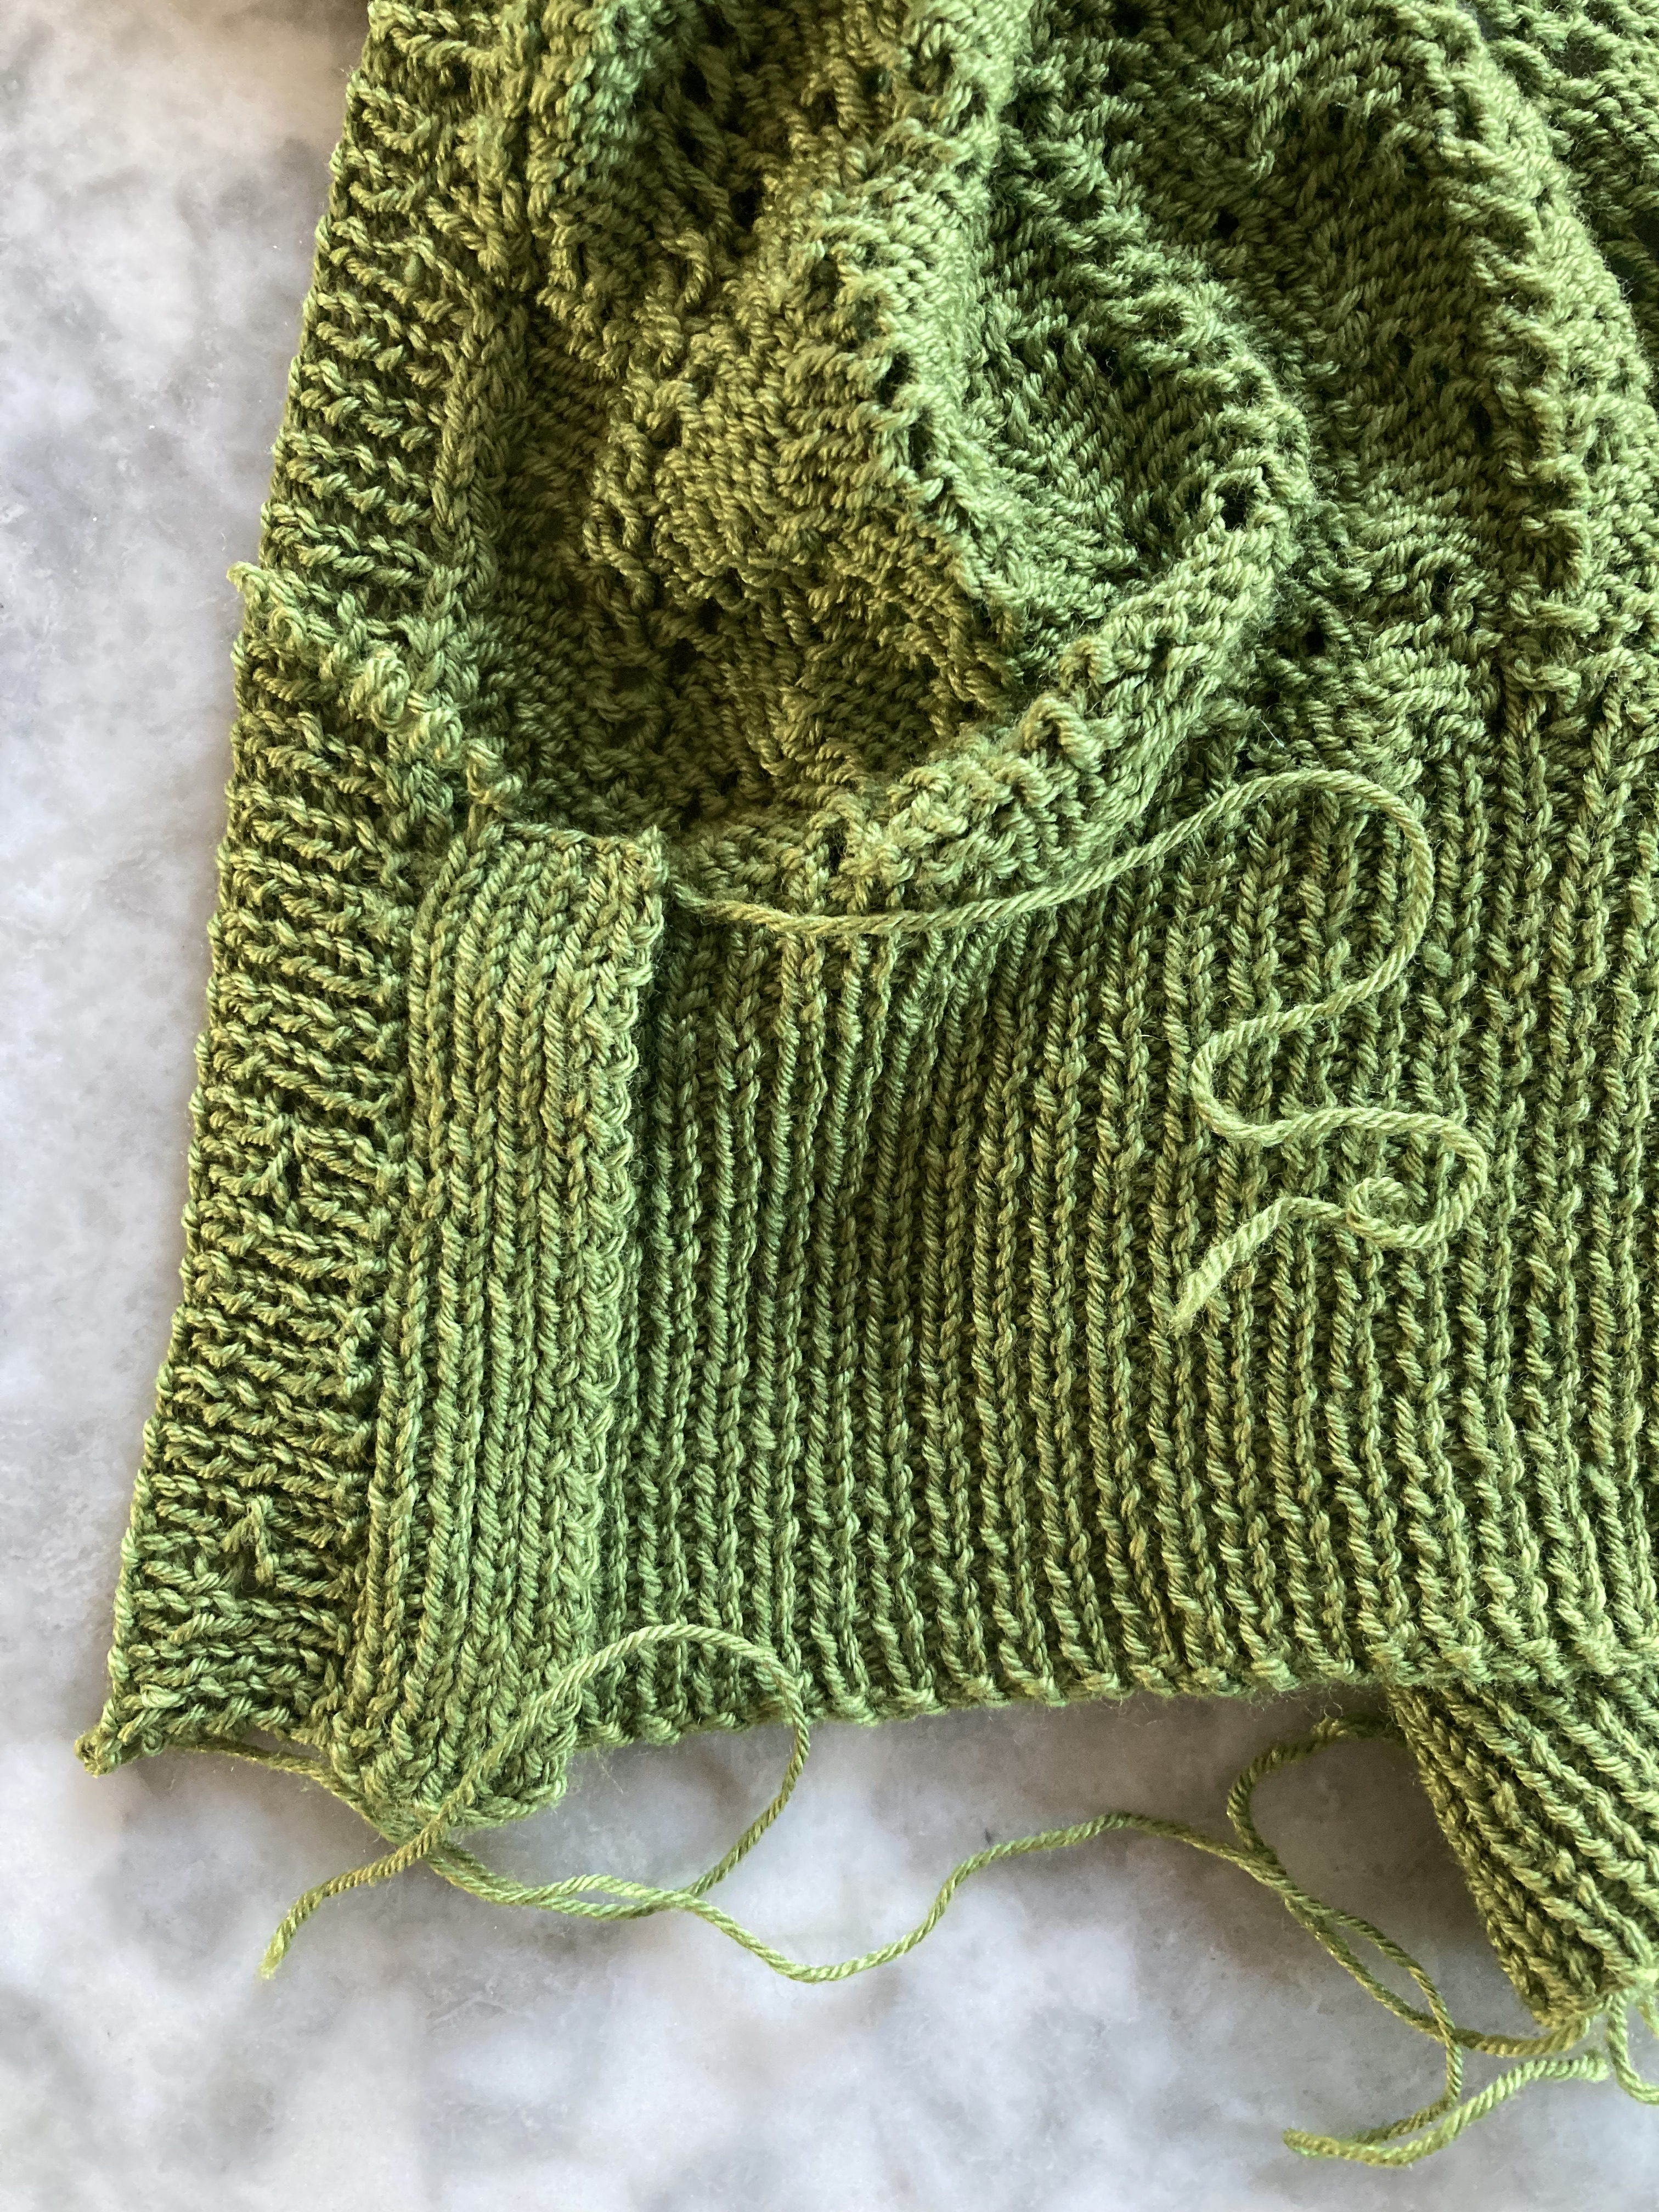
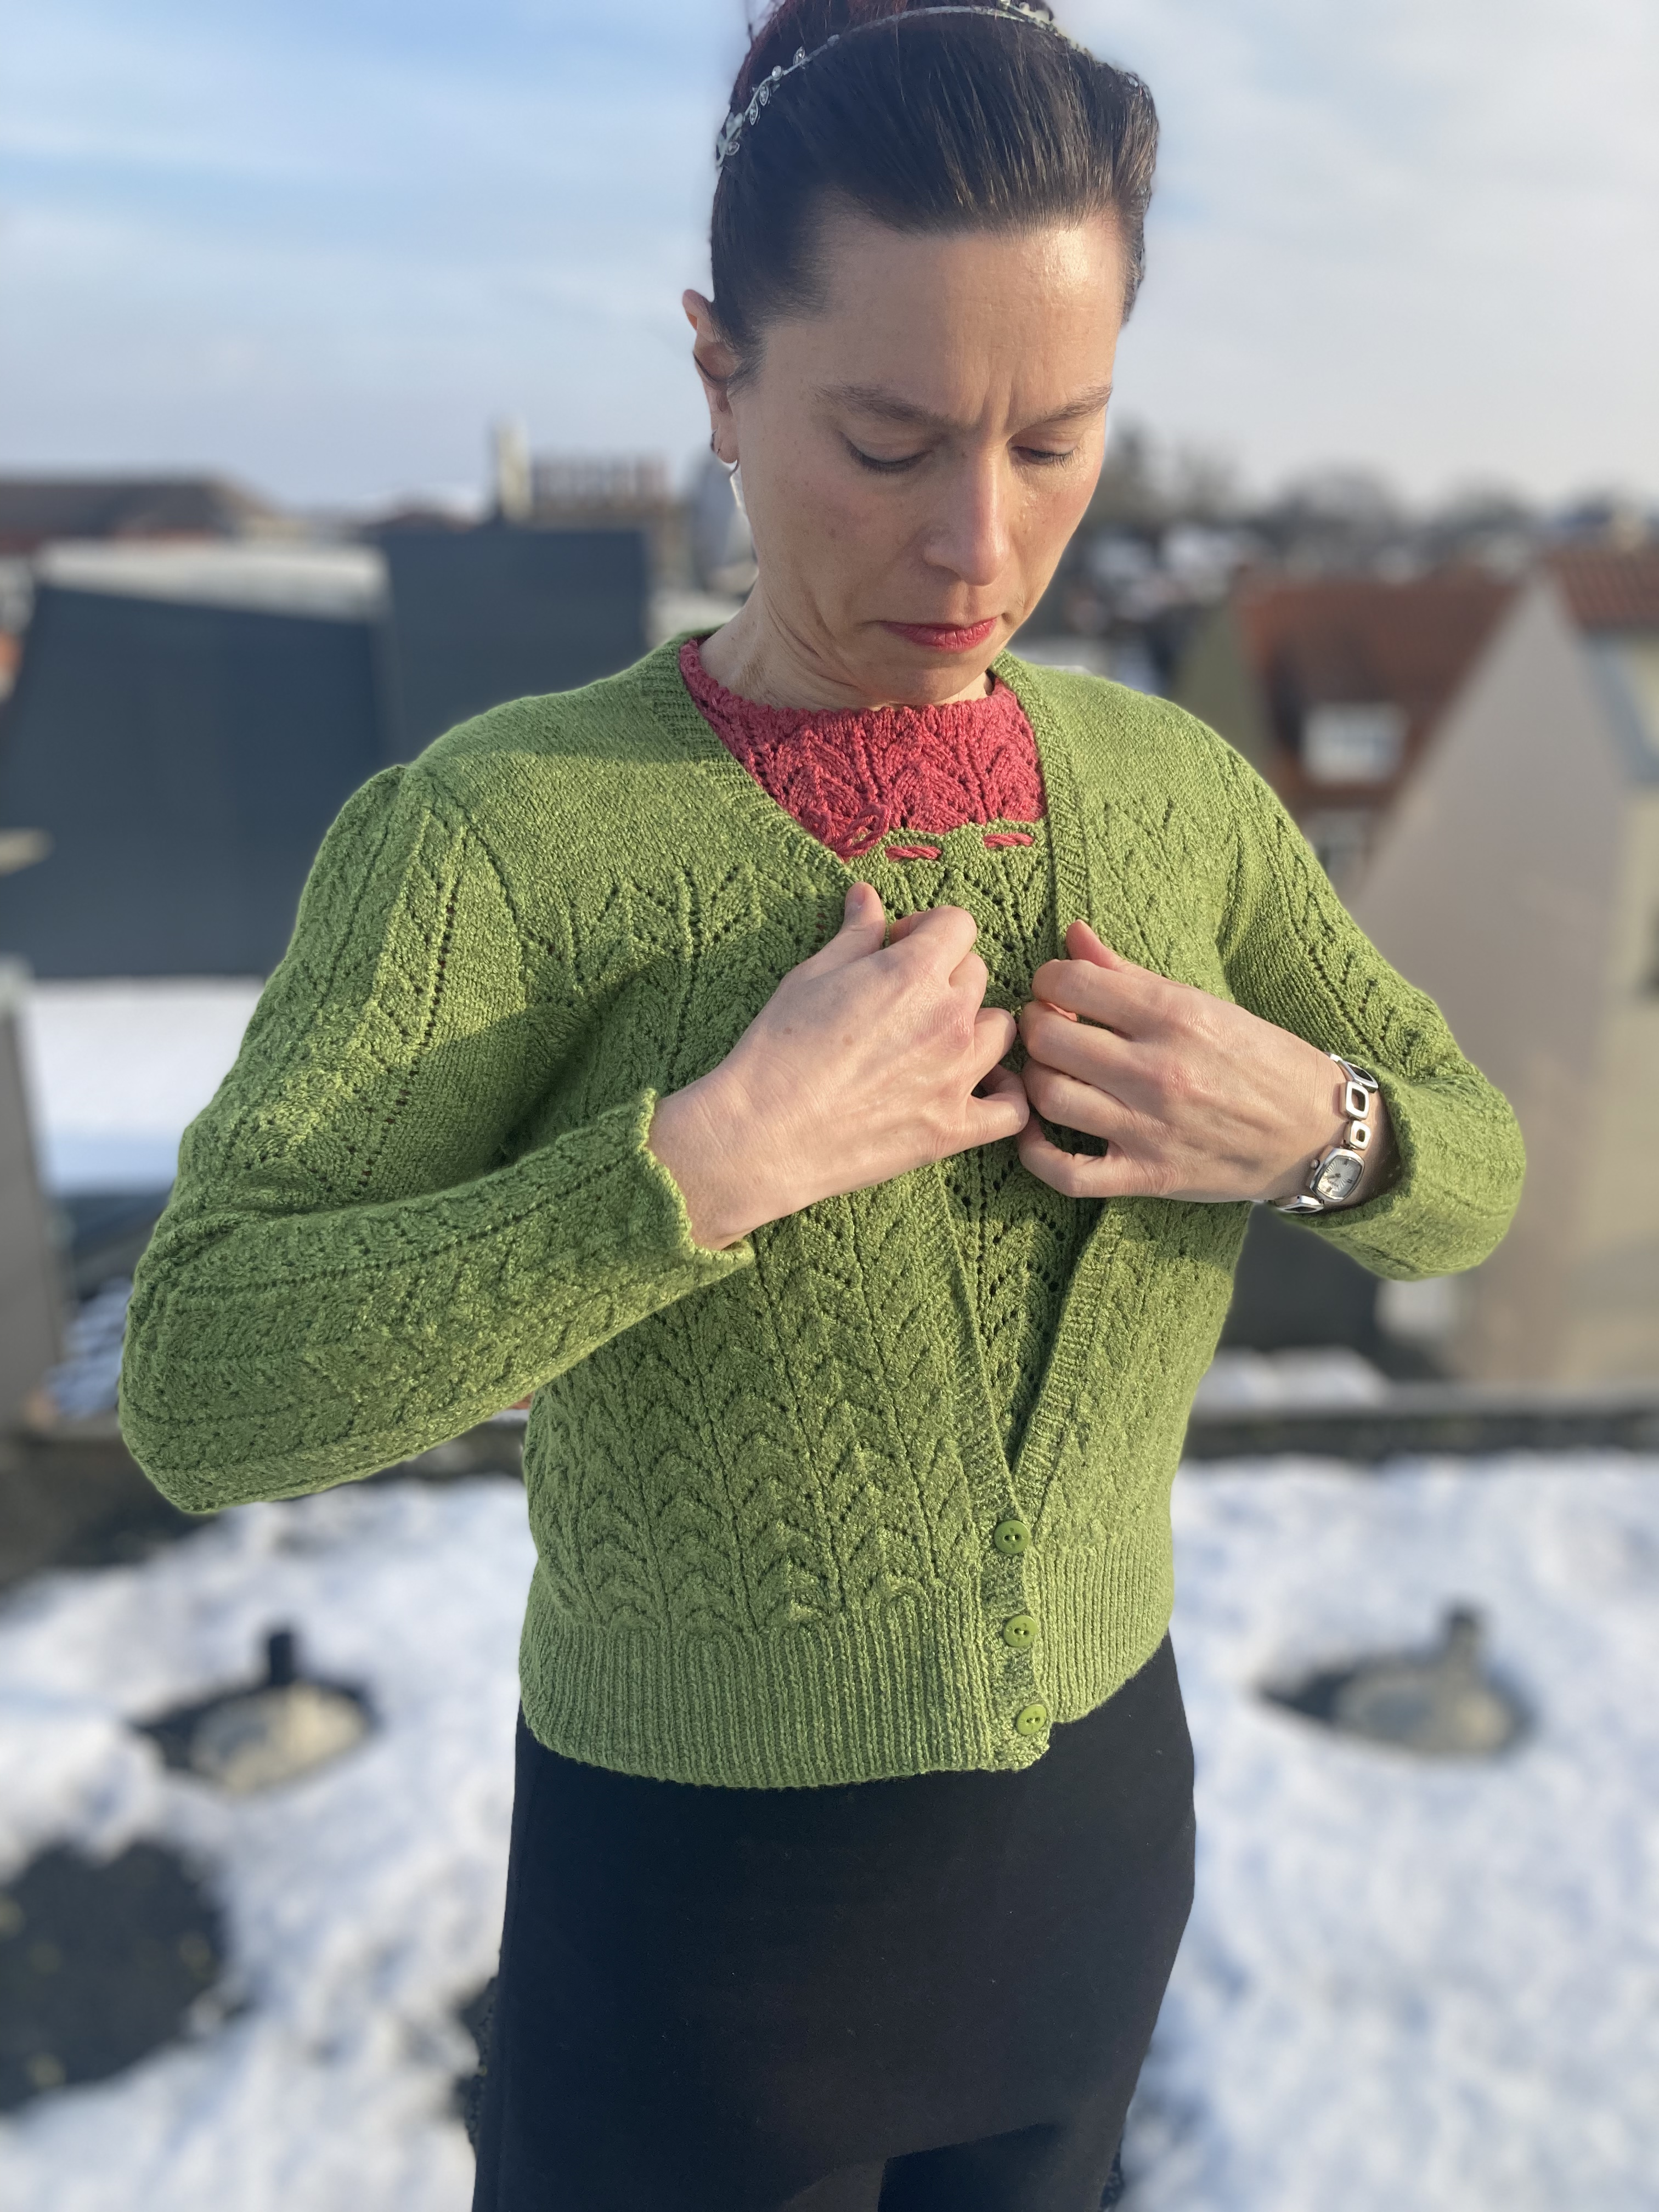
What to do? It ballooned out terribly, of course. It also still didn’t have button bands. I had originally planned vertically-knit bands, started them along with the waist ribbing and left the band stitches on safety pins to continue knitting after the rest was finished. Now I changed tactics, cast off the truncated bands and folded them inward, and picked up stitches for horizontal bands. I calculated the number of stitches to pick up based on the length the cardigan should have been, with the idea that the bands would pull the length together and I could then re-block the cardigan and try to get it smaller.
That actually helped quite a lot — now it was a matter of the back part ballooning still, and of course nothing lying flat in the front. I probably picked up too few stitches along the back neck and upper part of the “V” neck. But I tried blocking it again… Still too long, and not behaving. Well, a short run in the dryer worked for the jumper and didn’t hurt it, right?
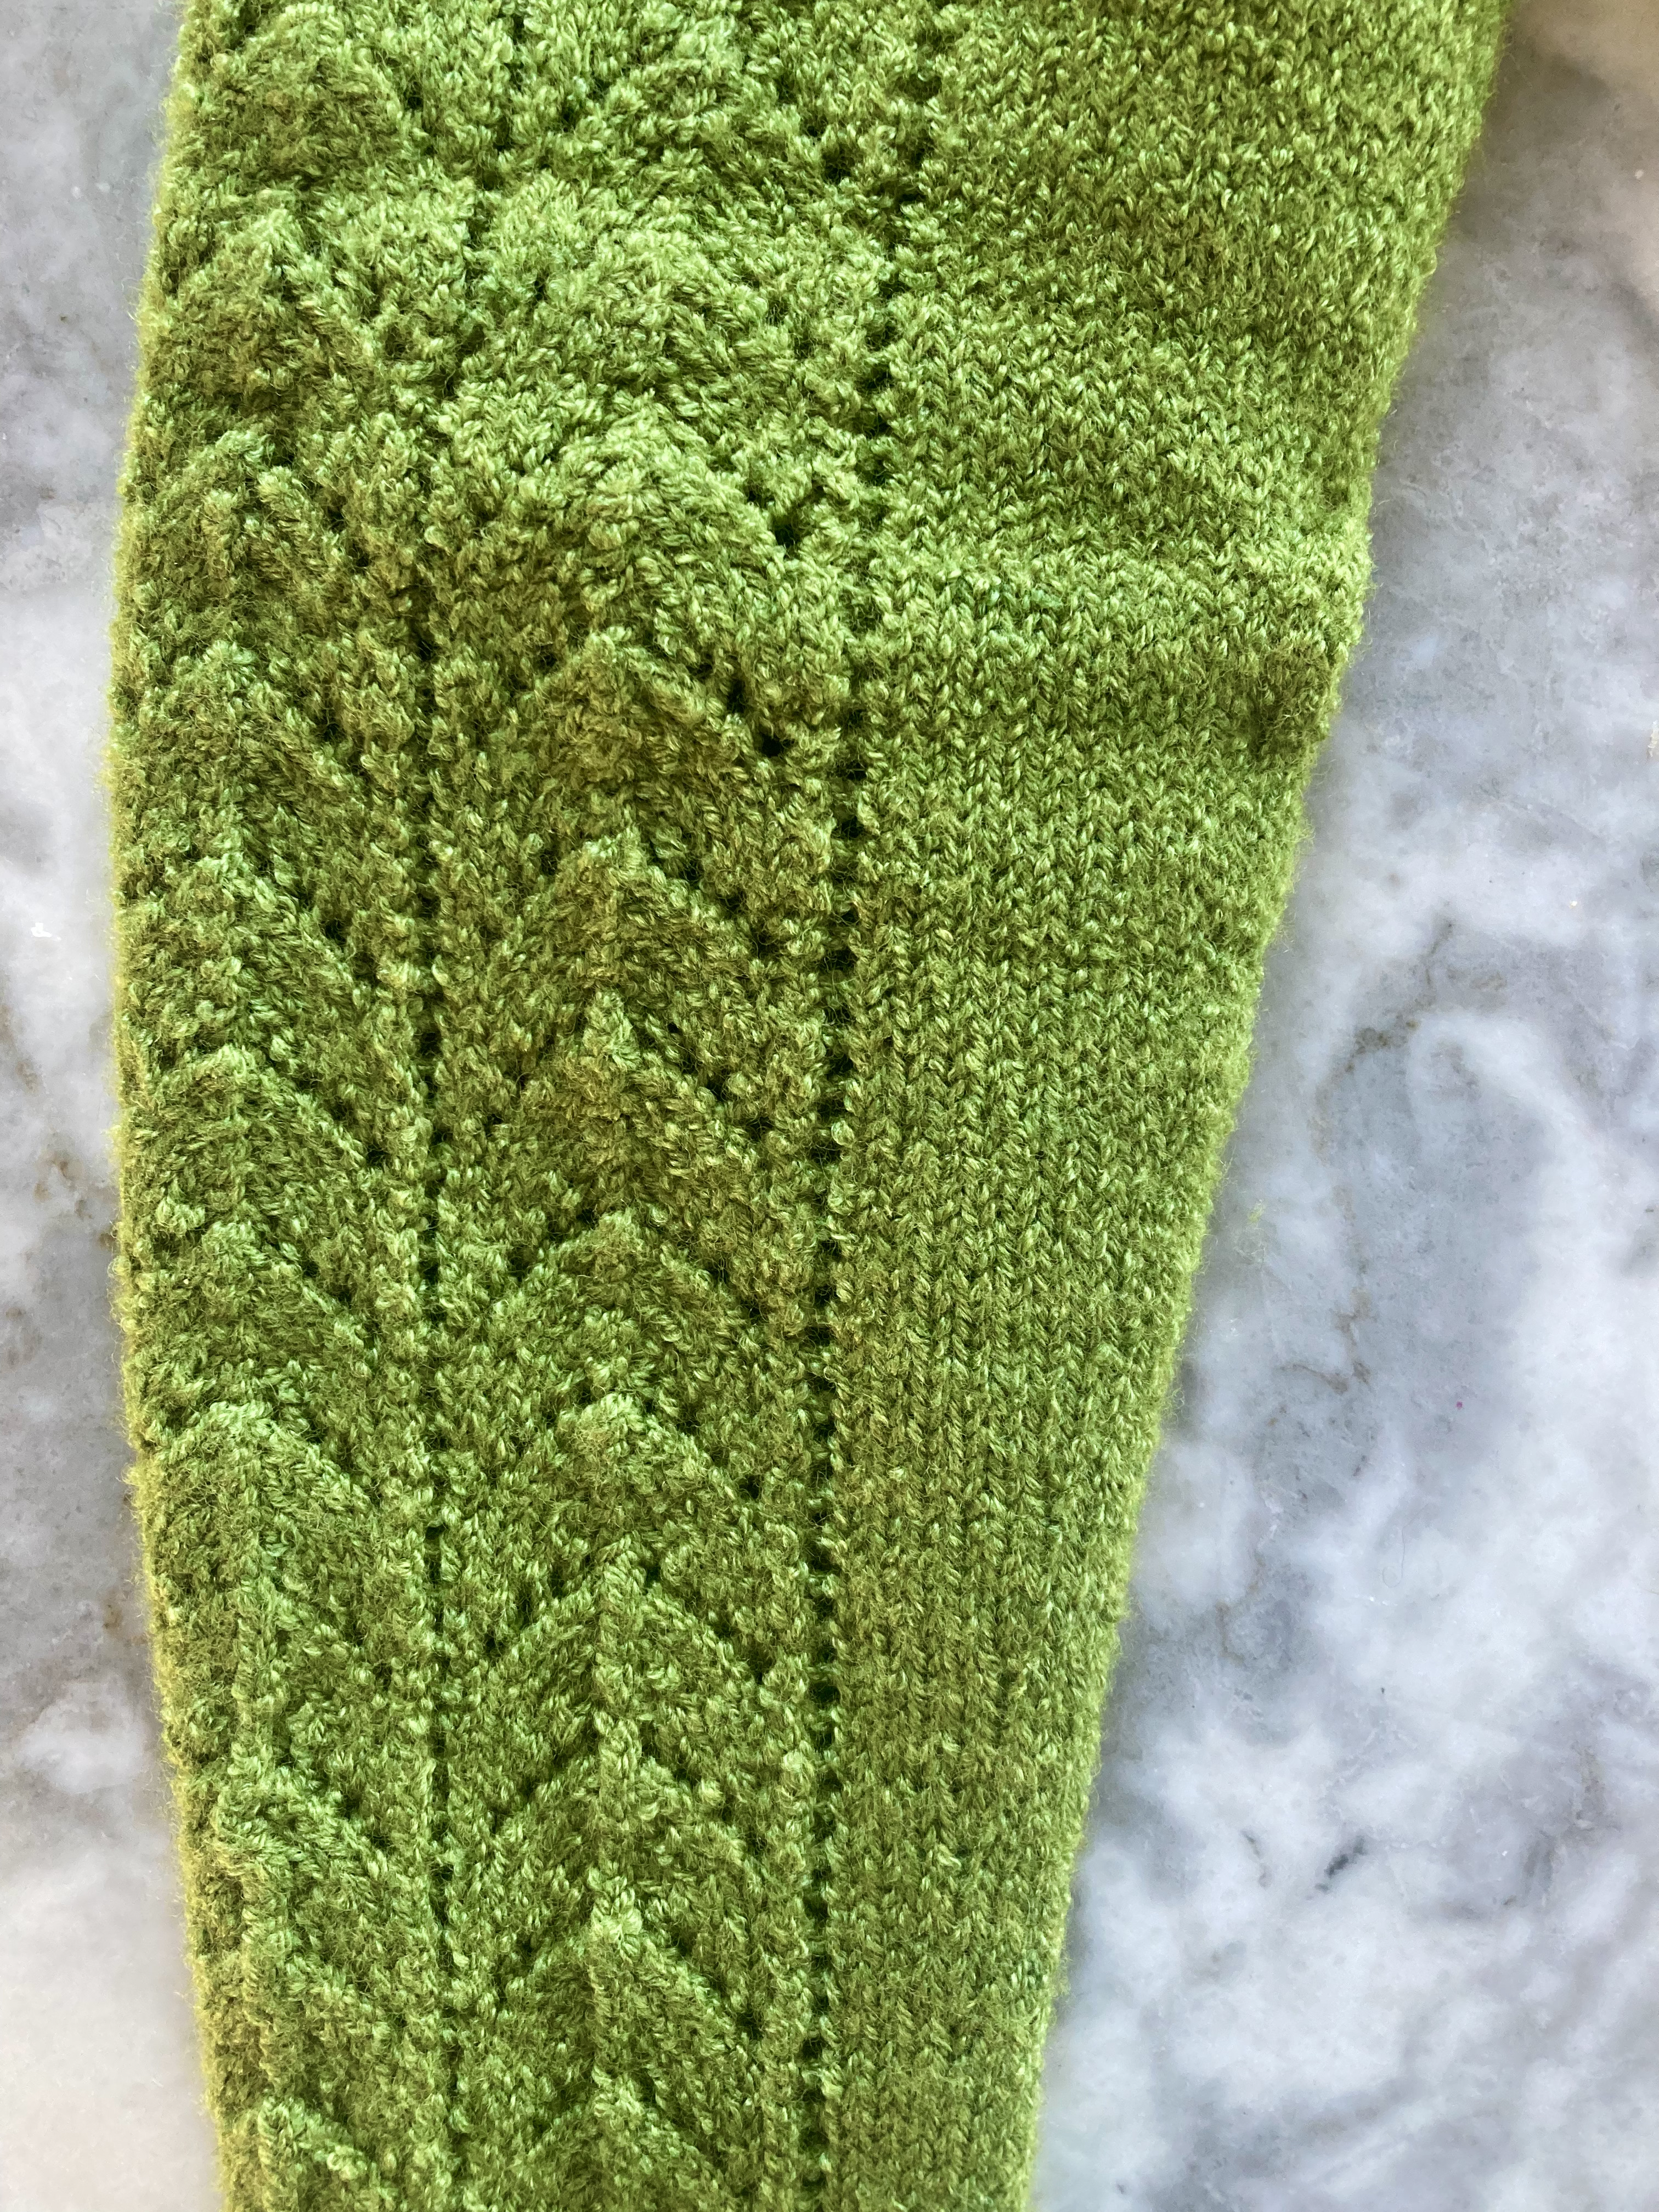
Alas, a short run in the dryer (here too, gentle cycle, cool air) was not a good idea this time. After only 10-15 minutes, the cardigan had shrunk massively and already begun to felt. I tried to save it by re-wetting and wearing (while wet, ugh), then pinning it out flat. That got it to a barely acceptable length, but the damage had been done. The sleeves were too tight and too narrow and the fabric had lost its beauty and “bounce”.
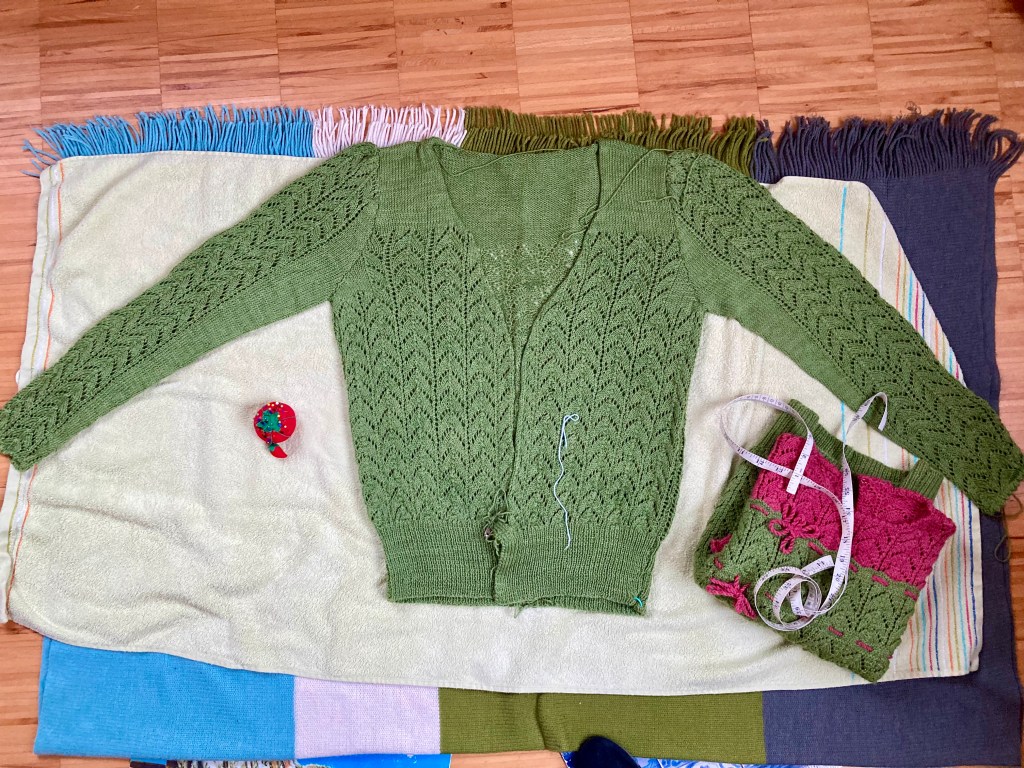
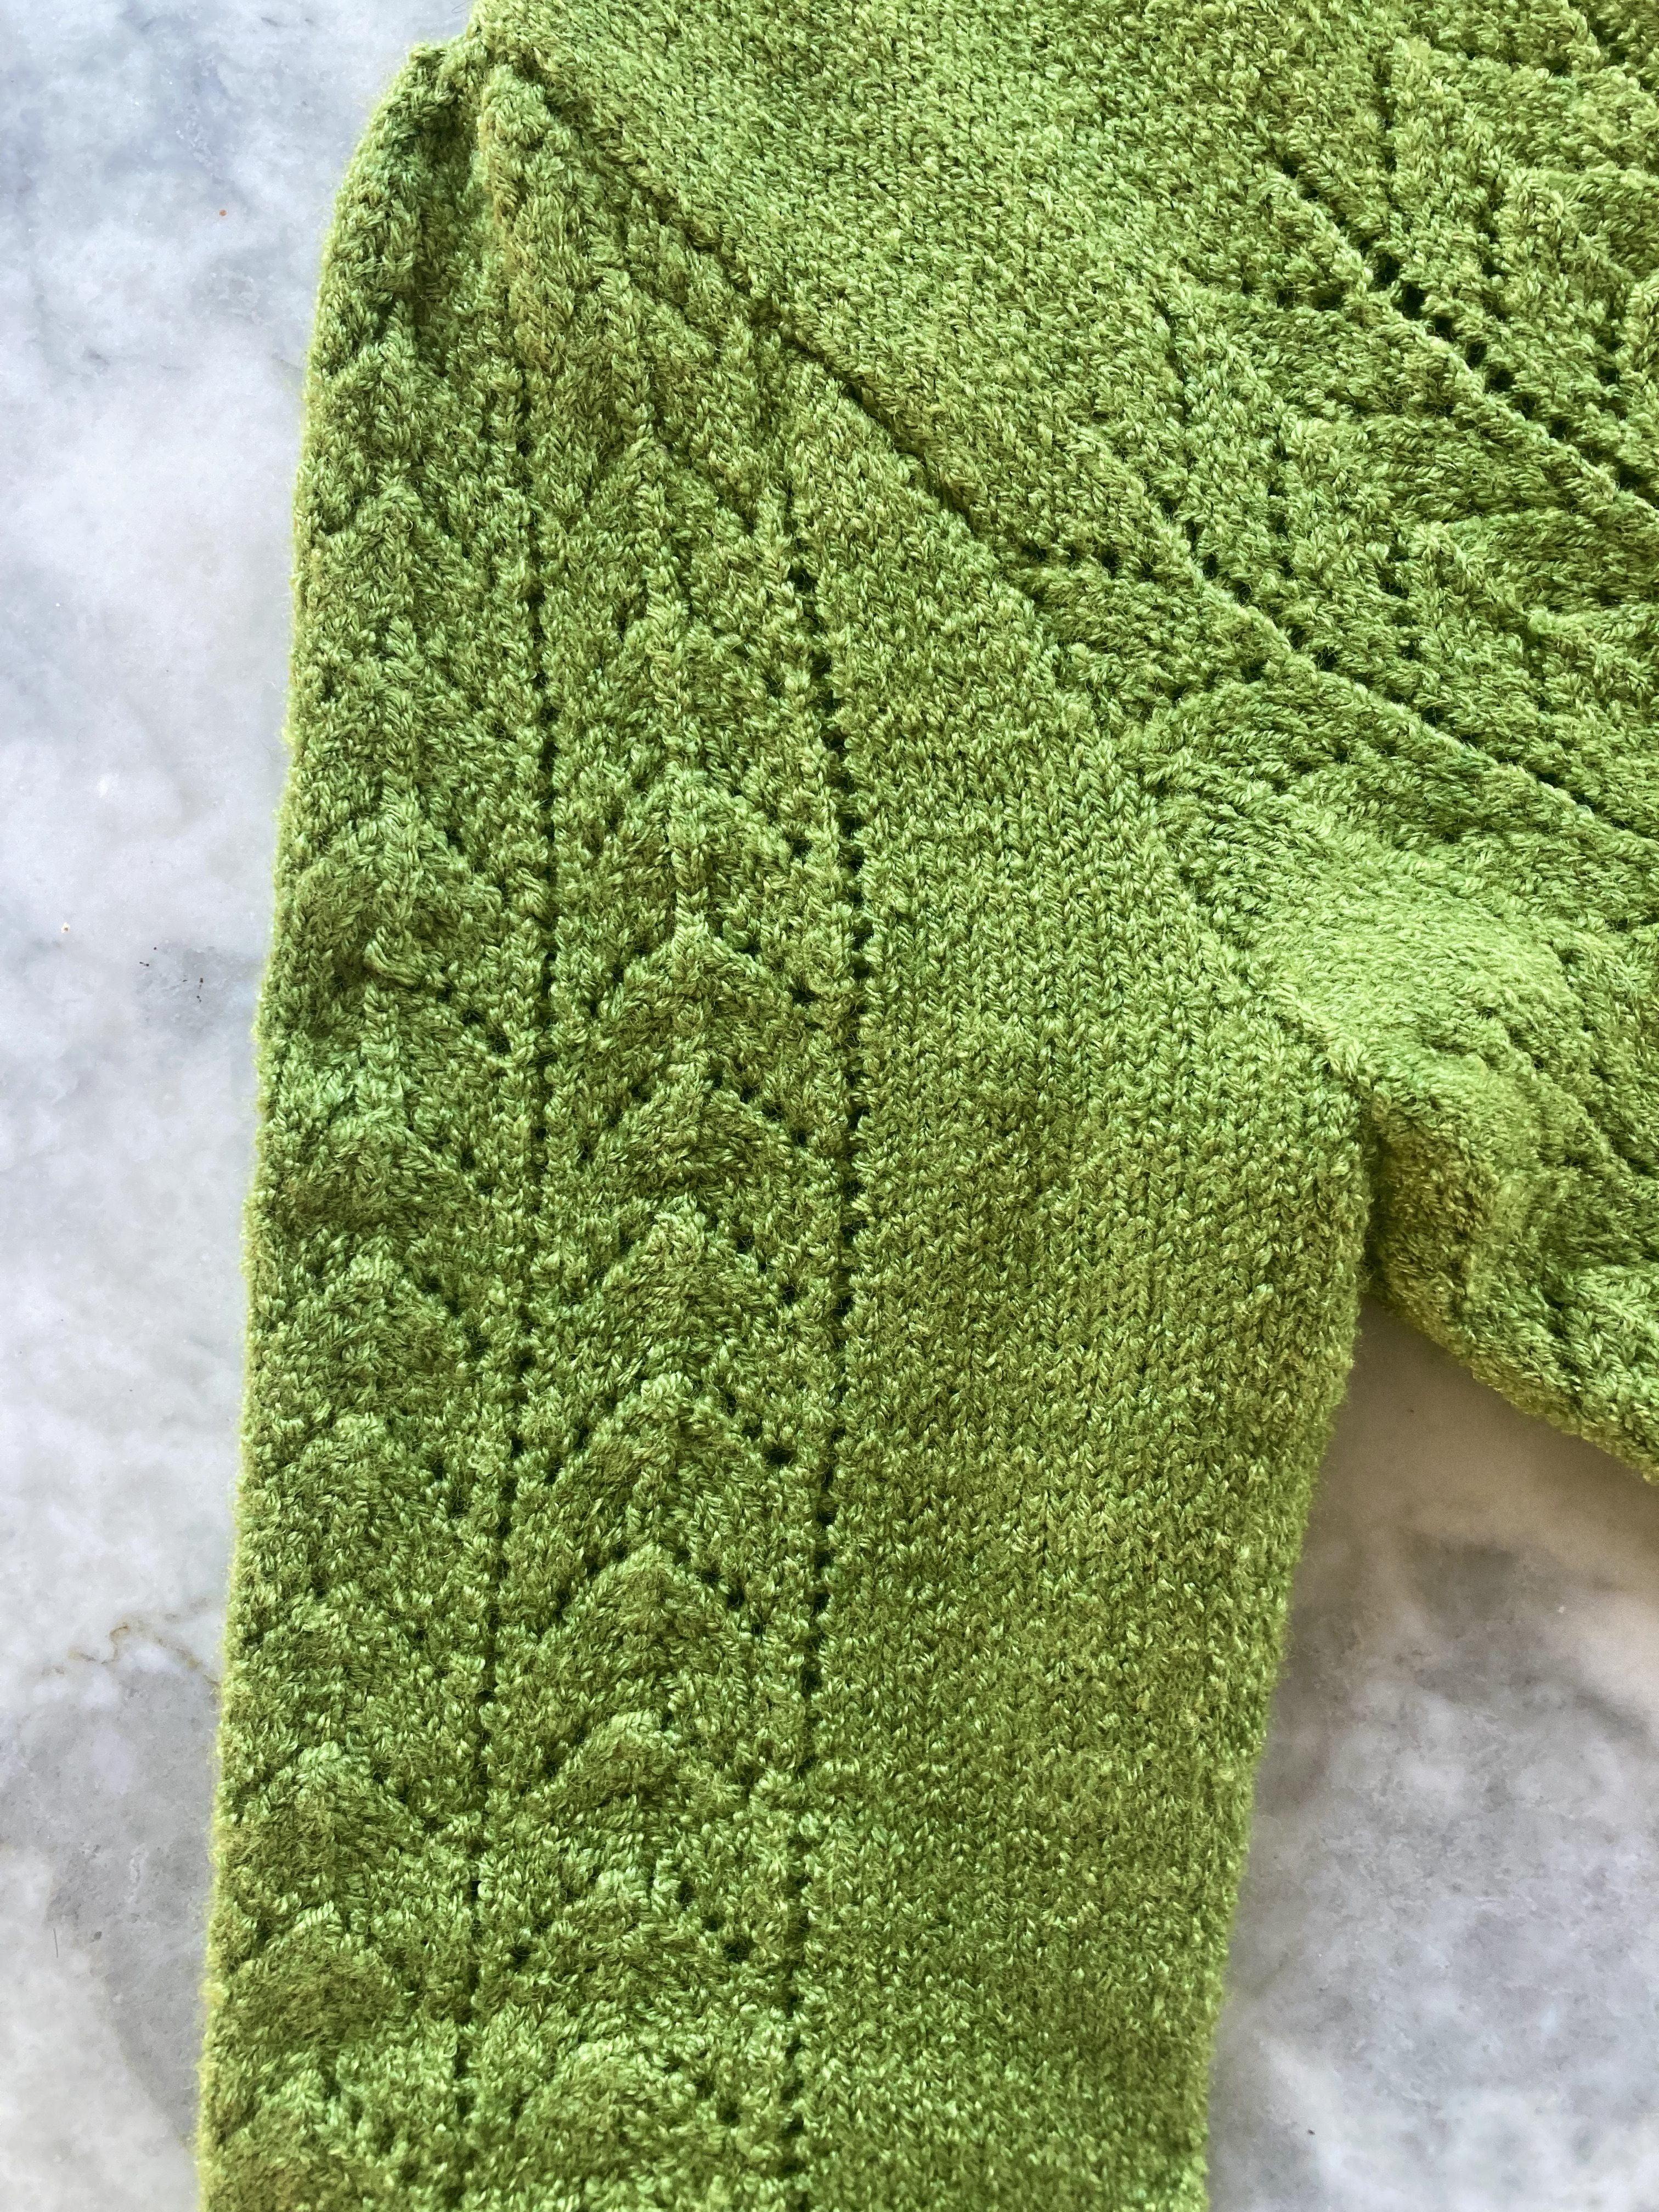
I finished it up with buttons and tried to make the best of it, but it’s not good. The cardigan is actually smaller than the jumper and doesn’t stretch any more. The shoulders and upper sleeves are particularly problematic where the jumper fabric bunches up under the cardigan and brings the shoulders out of line. Combined with the puffy 1940s sleeve tops and the too-short sleeves, it makes me look hugely bulky in the upper body. I feel like a gorilla wearing it.
I’m very sad and disappointed, in myself of course for risking the dryer a second time which was obviously a bad decision, but also with this yarn, which I so loved in the skein, but which turned out to be impossible to work with. Swatches, a jumper and a cardigan all knitted from the same pattern on the same needles turned out so wildly different both from each other and before and after blocking. How is anyone supposed to make a wearable garment without being able to calculate how big the finished fabric will be?
Not sure what to do with the cardigan. Maybe I will give it to someone smaller than me who is less picky about fabric perfection. I’ll keep the jumper, of course.
That’s all for this project… May it be a lesson to me!
It’s “late summer” over at Stitchcraft magazine, and this month’s designs are still summery-looking, but warmer, with an eye towards the coming autumn and cooler weather. Also, production costs were apparently increasing, so readers were informed that as of September 1965, the price for individual issues would be raised to 2s. 0d. The increase to the current subscription rate of £1 8 s 0d for one year or 14s for six months, post-free to any part of the world (!) was scheduled to be explained in the September issue, with existing subscriptions running out at the old price.
To make up for the price increase…
How much was that in today’s currency? I cannot vouch for the accuracy or lack thereof from either of these sources, but the currency converter website of the National Archives tells me that a year’s subscription at the old price would be the equivalent of £24.67 in 2017 (the latest year the website calculates to), so quite inexpensive for 12 issues. A six-month subscription would cost £12.33, so pretty much exactly half (if you round up a penny, since a six-month subscription certainly wouldn’t have cost less than half of the yearly price.) A single issue at the new price would cost £1.76. According to this inflation calculator (again, take all of this with a grain of salt as such converters are always approximate), in 2023 prices that would come out to £2.21 for a single issue at the new price and £31.01 for a year’s subscription at the old price — again, quite reasonable, if the converters are at all accurate. Stitchcraft was published by Condé Nast as an independent publication, but of course was a co-product of Patons / Patons and Baldwins / at this point the company had been merged with J&P. Coats / yarn company, so served as an advertisement for their wools. As was common for knitting magazines at the time as well as today.
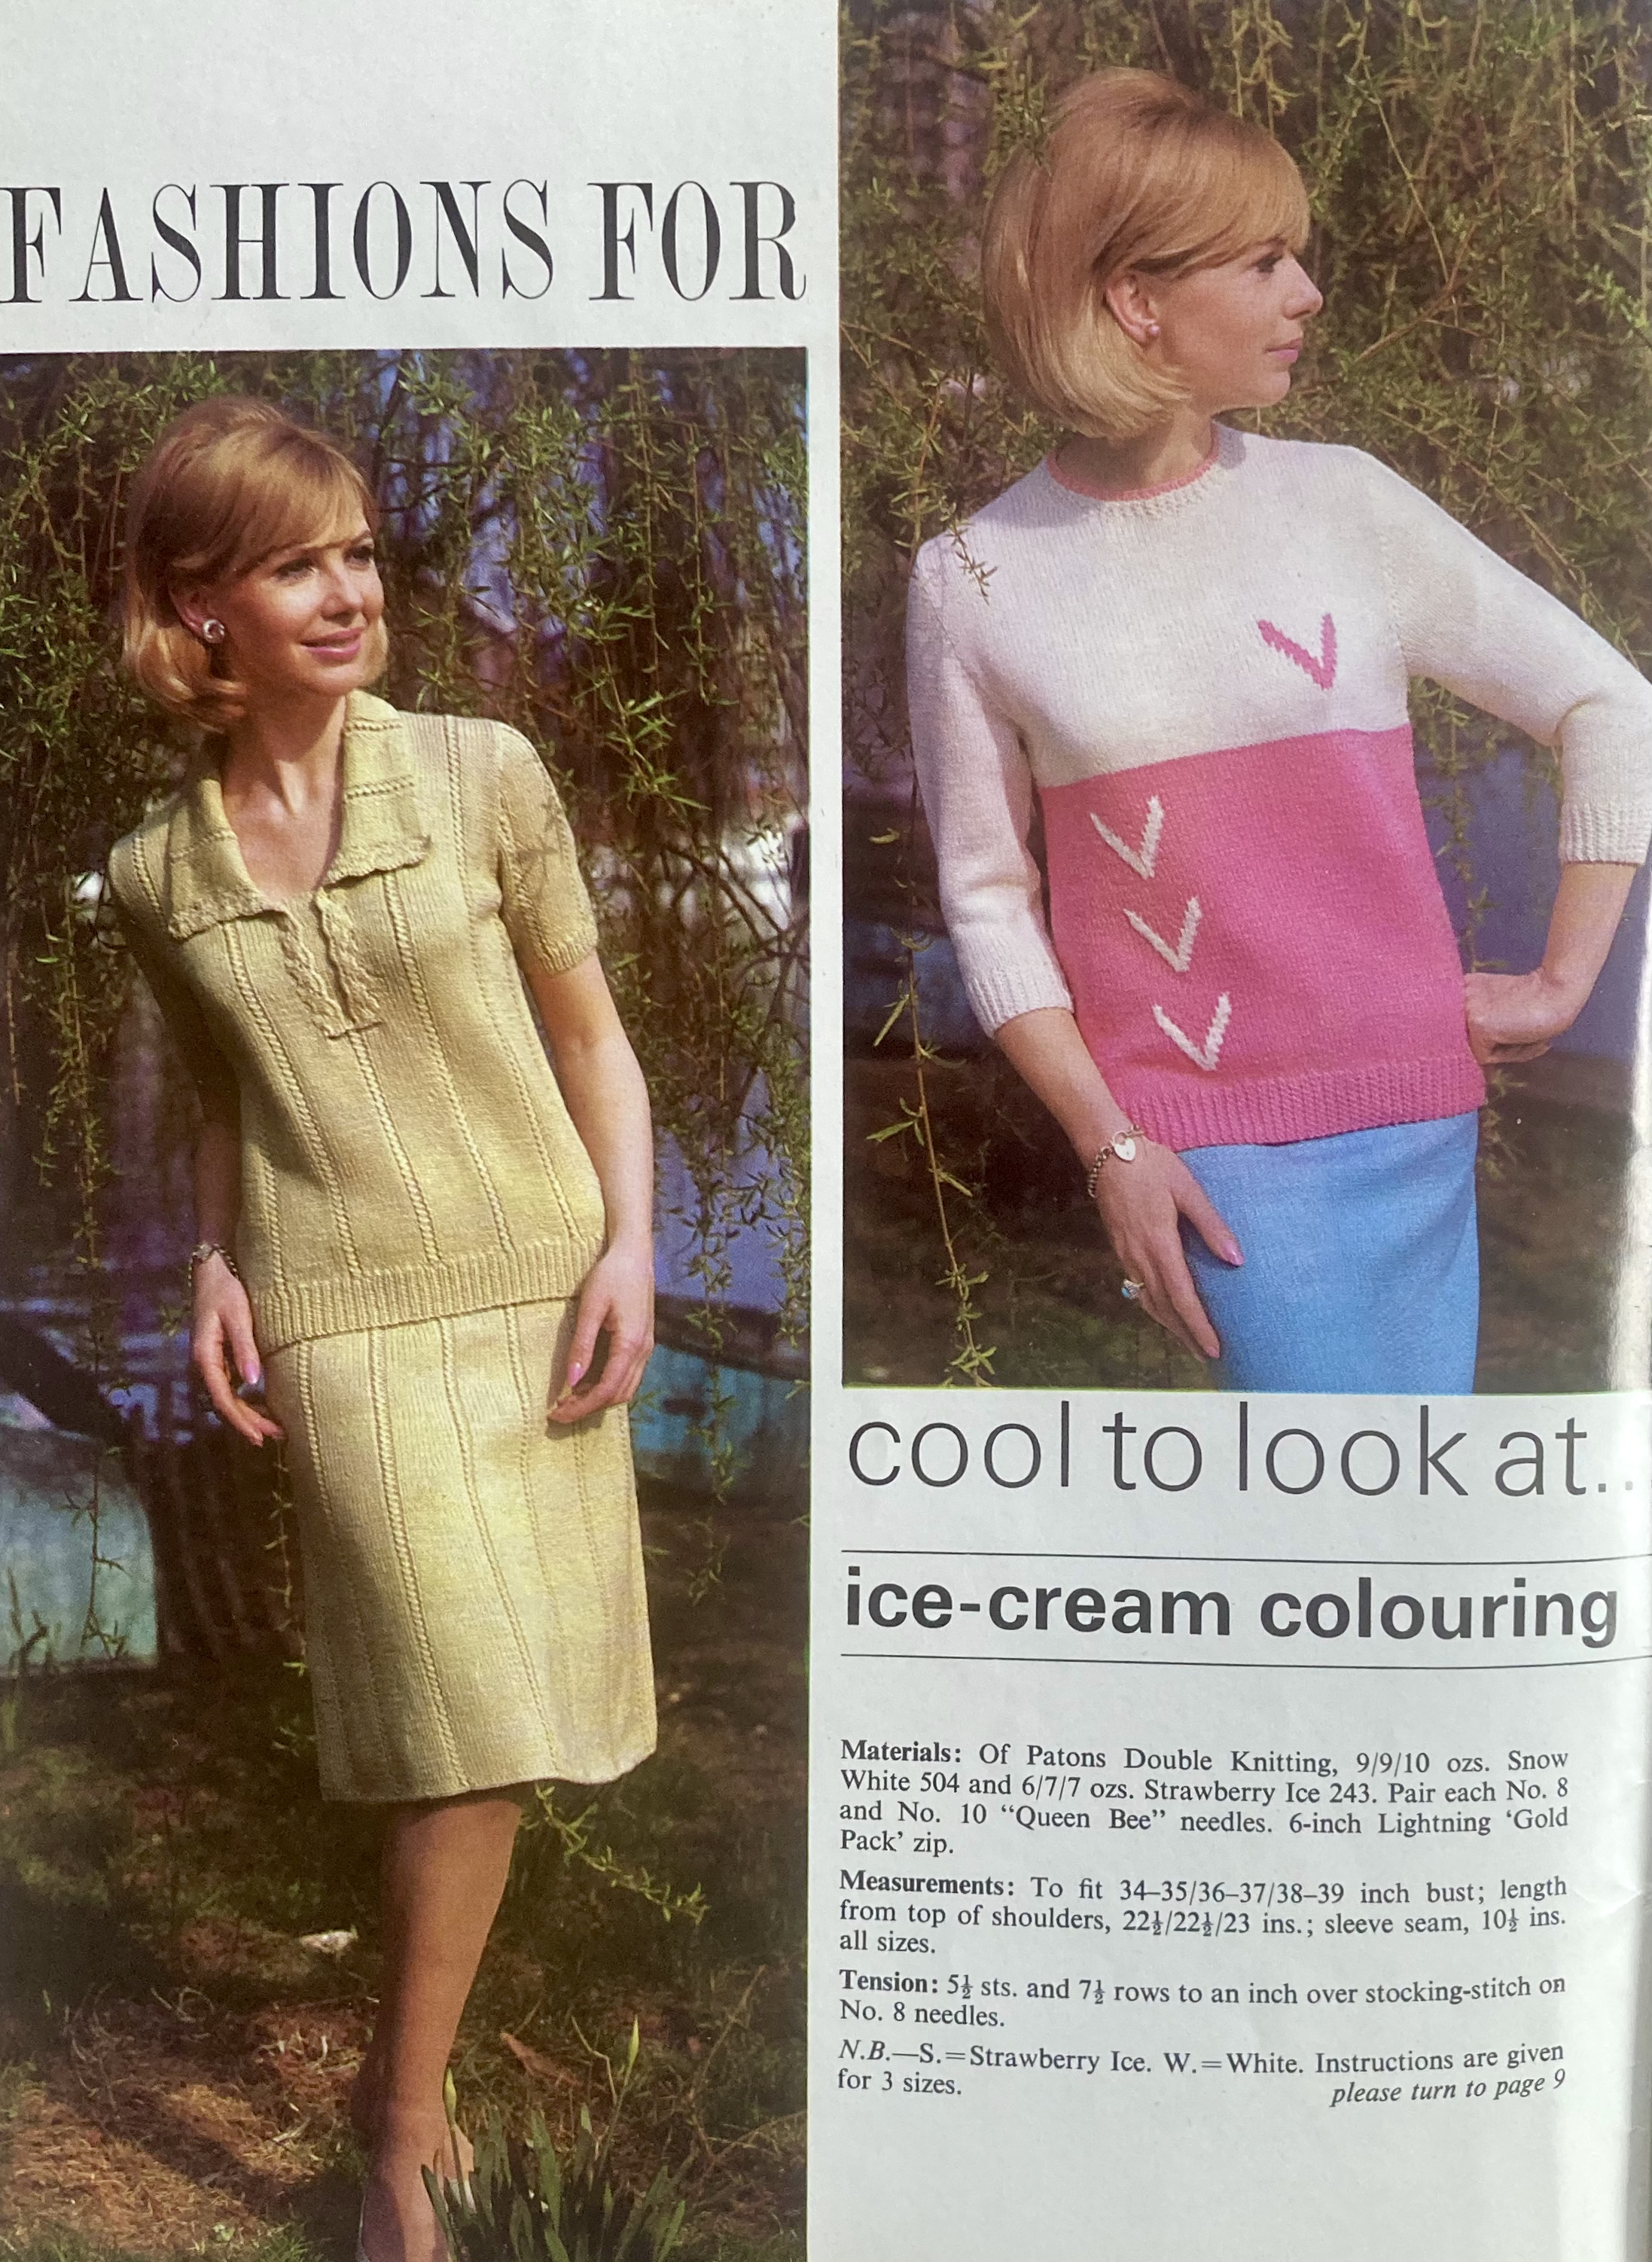
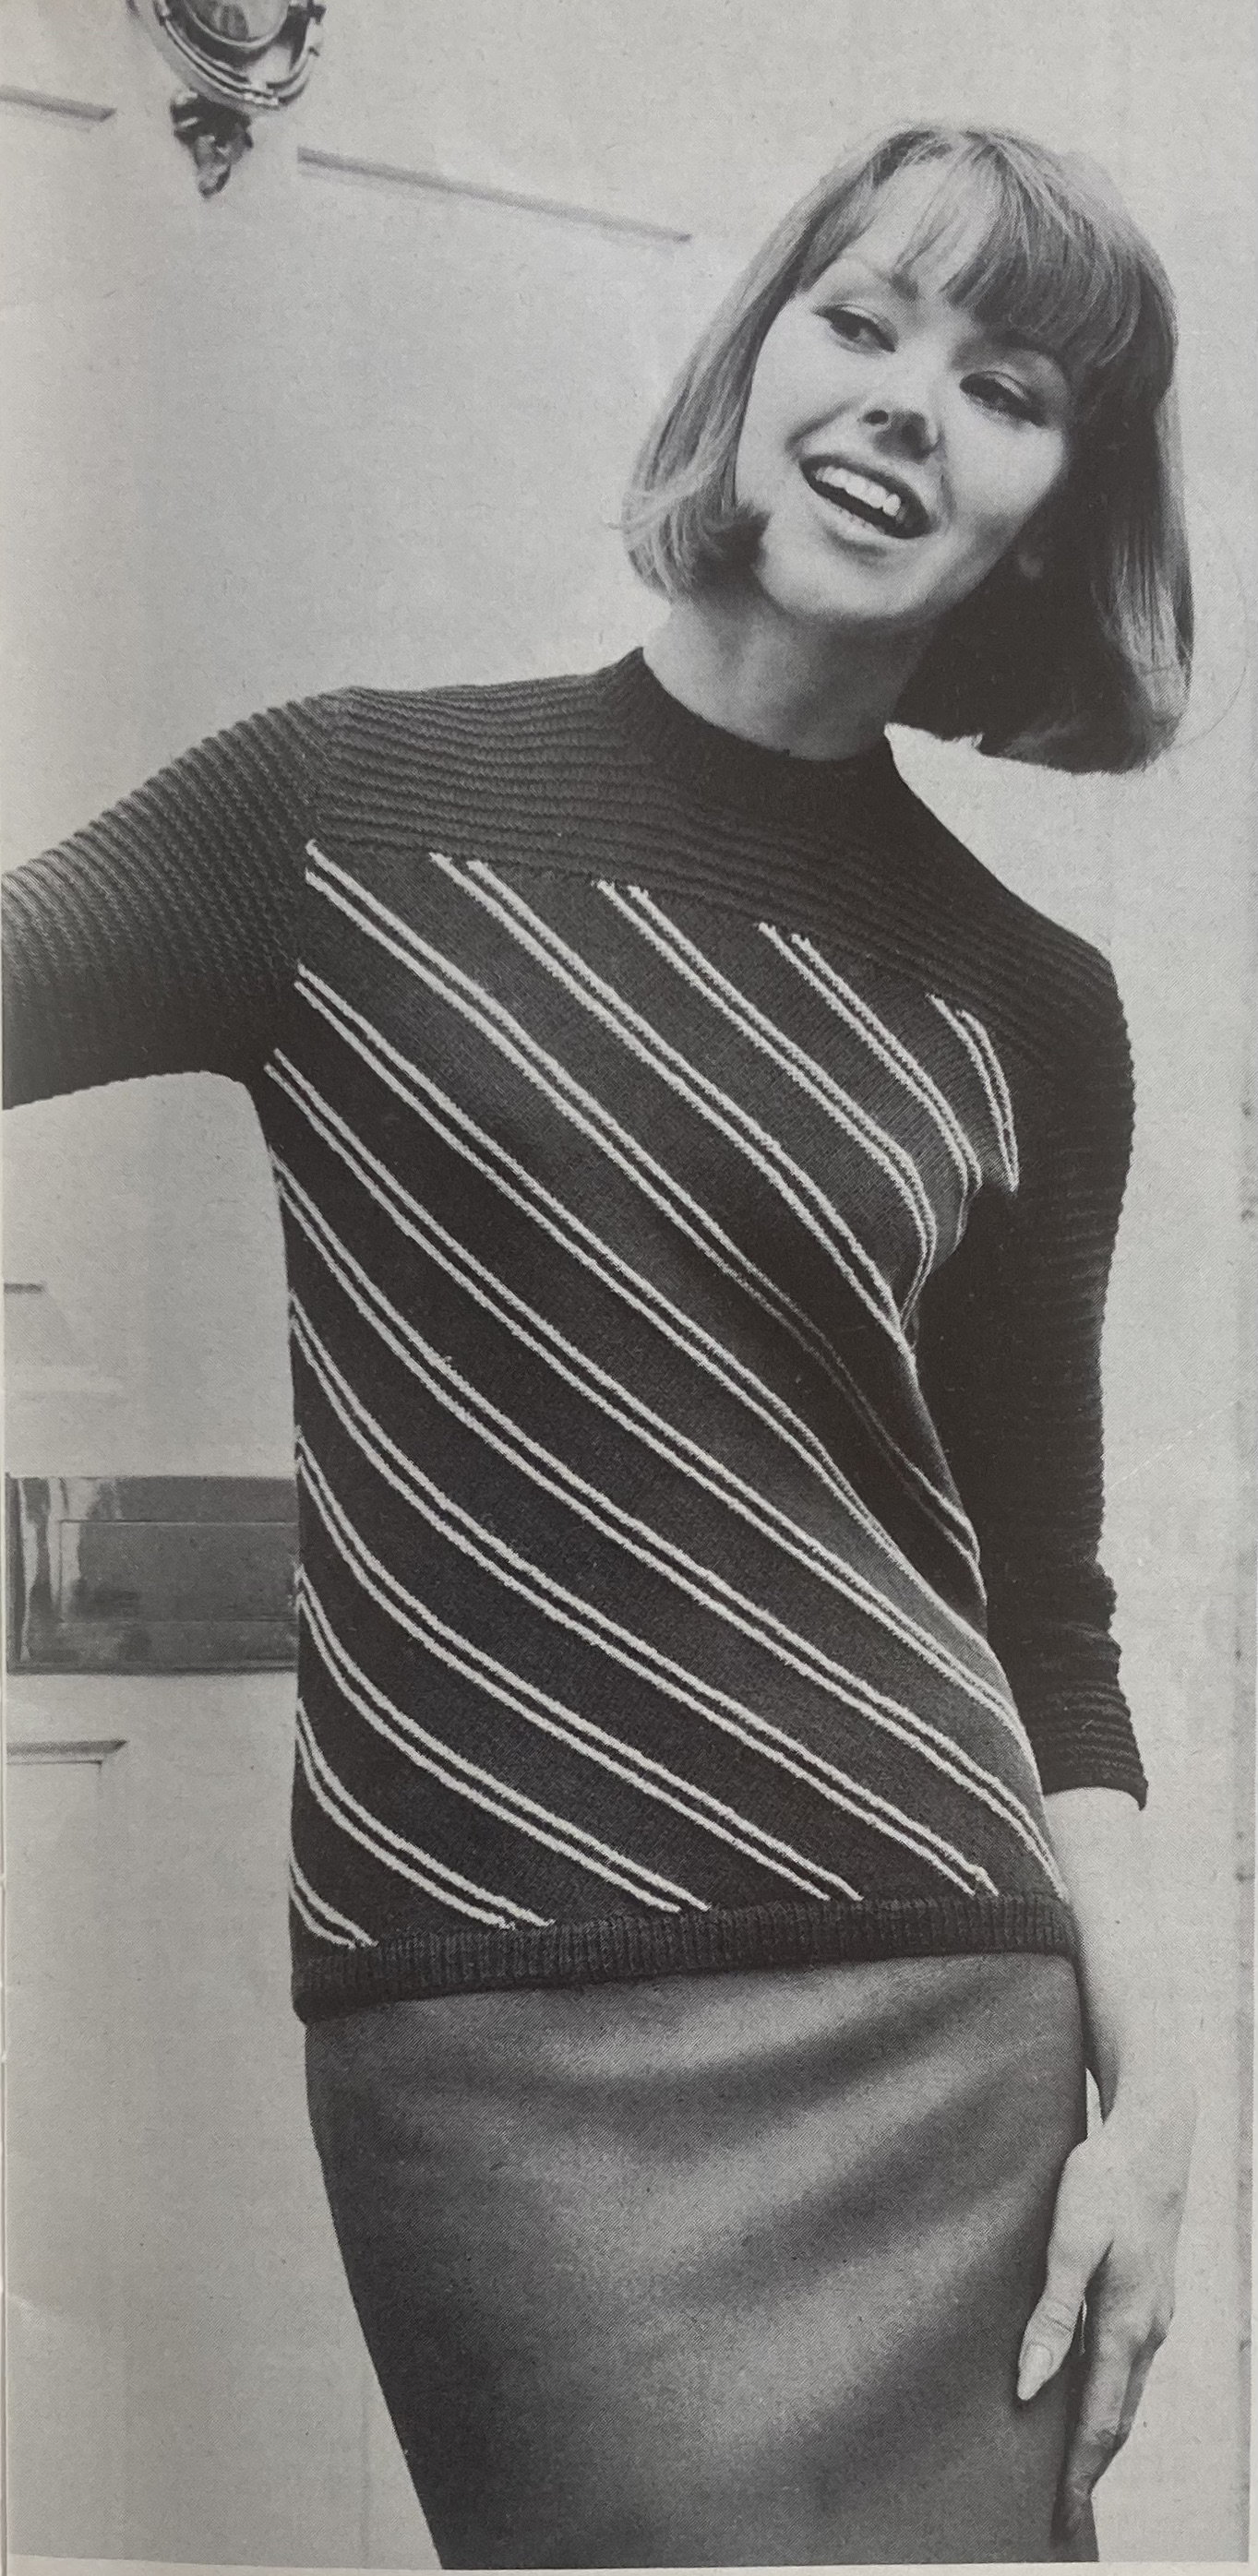
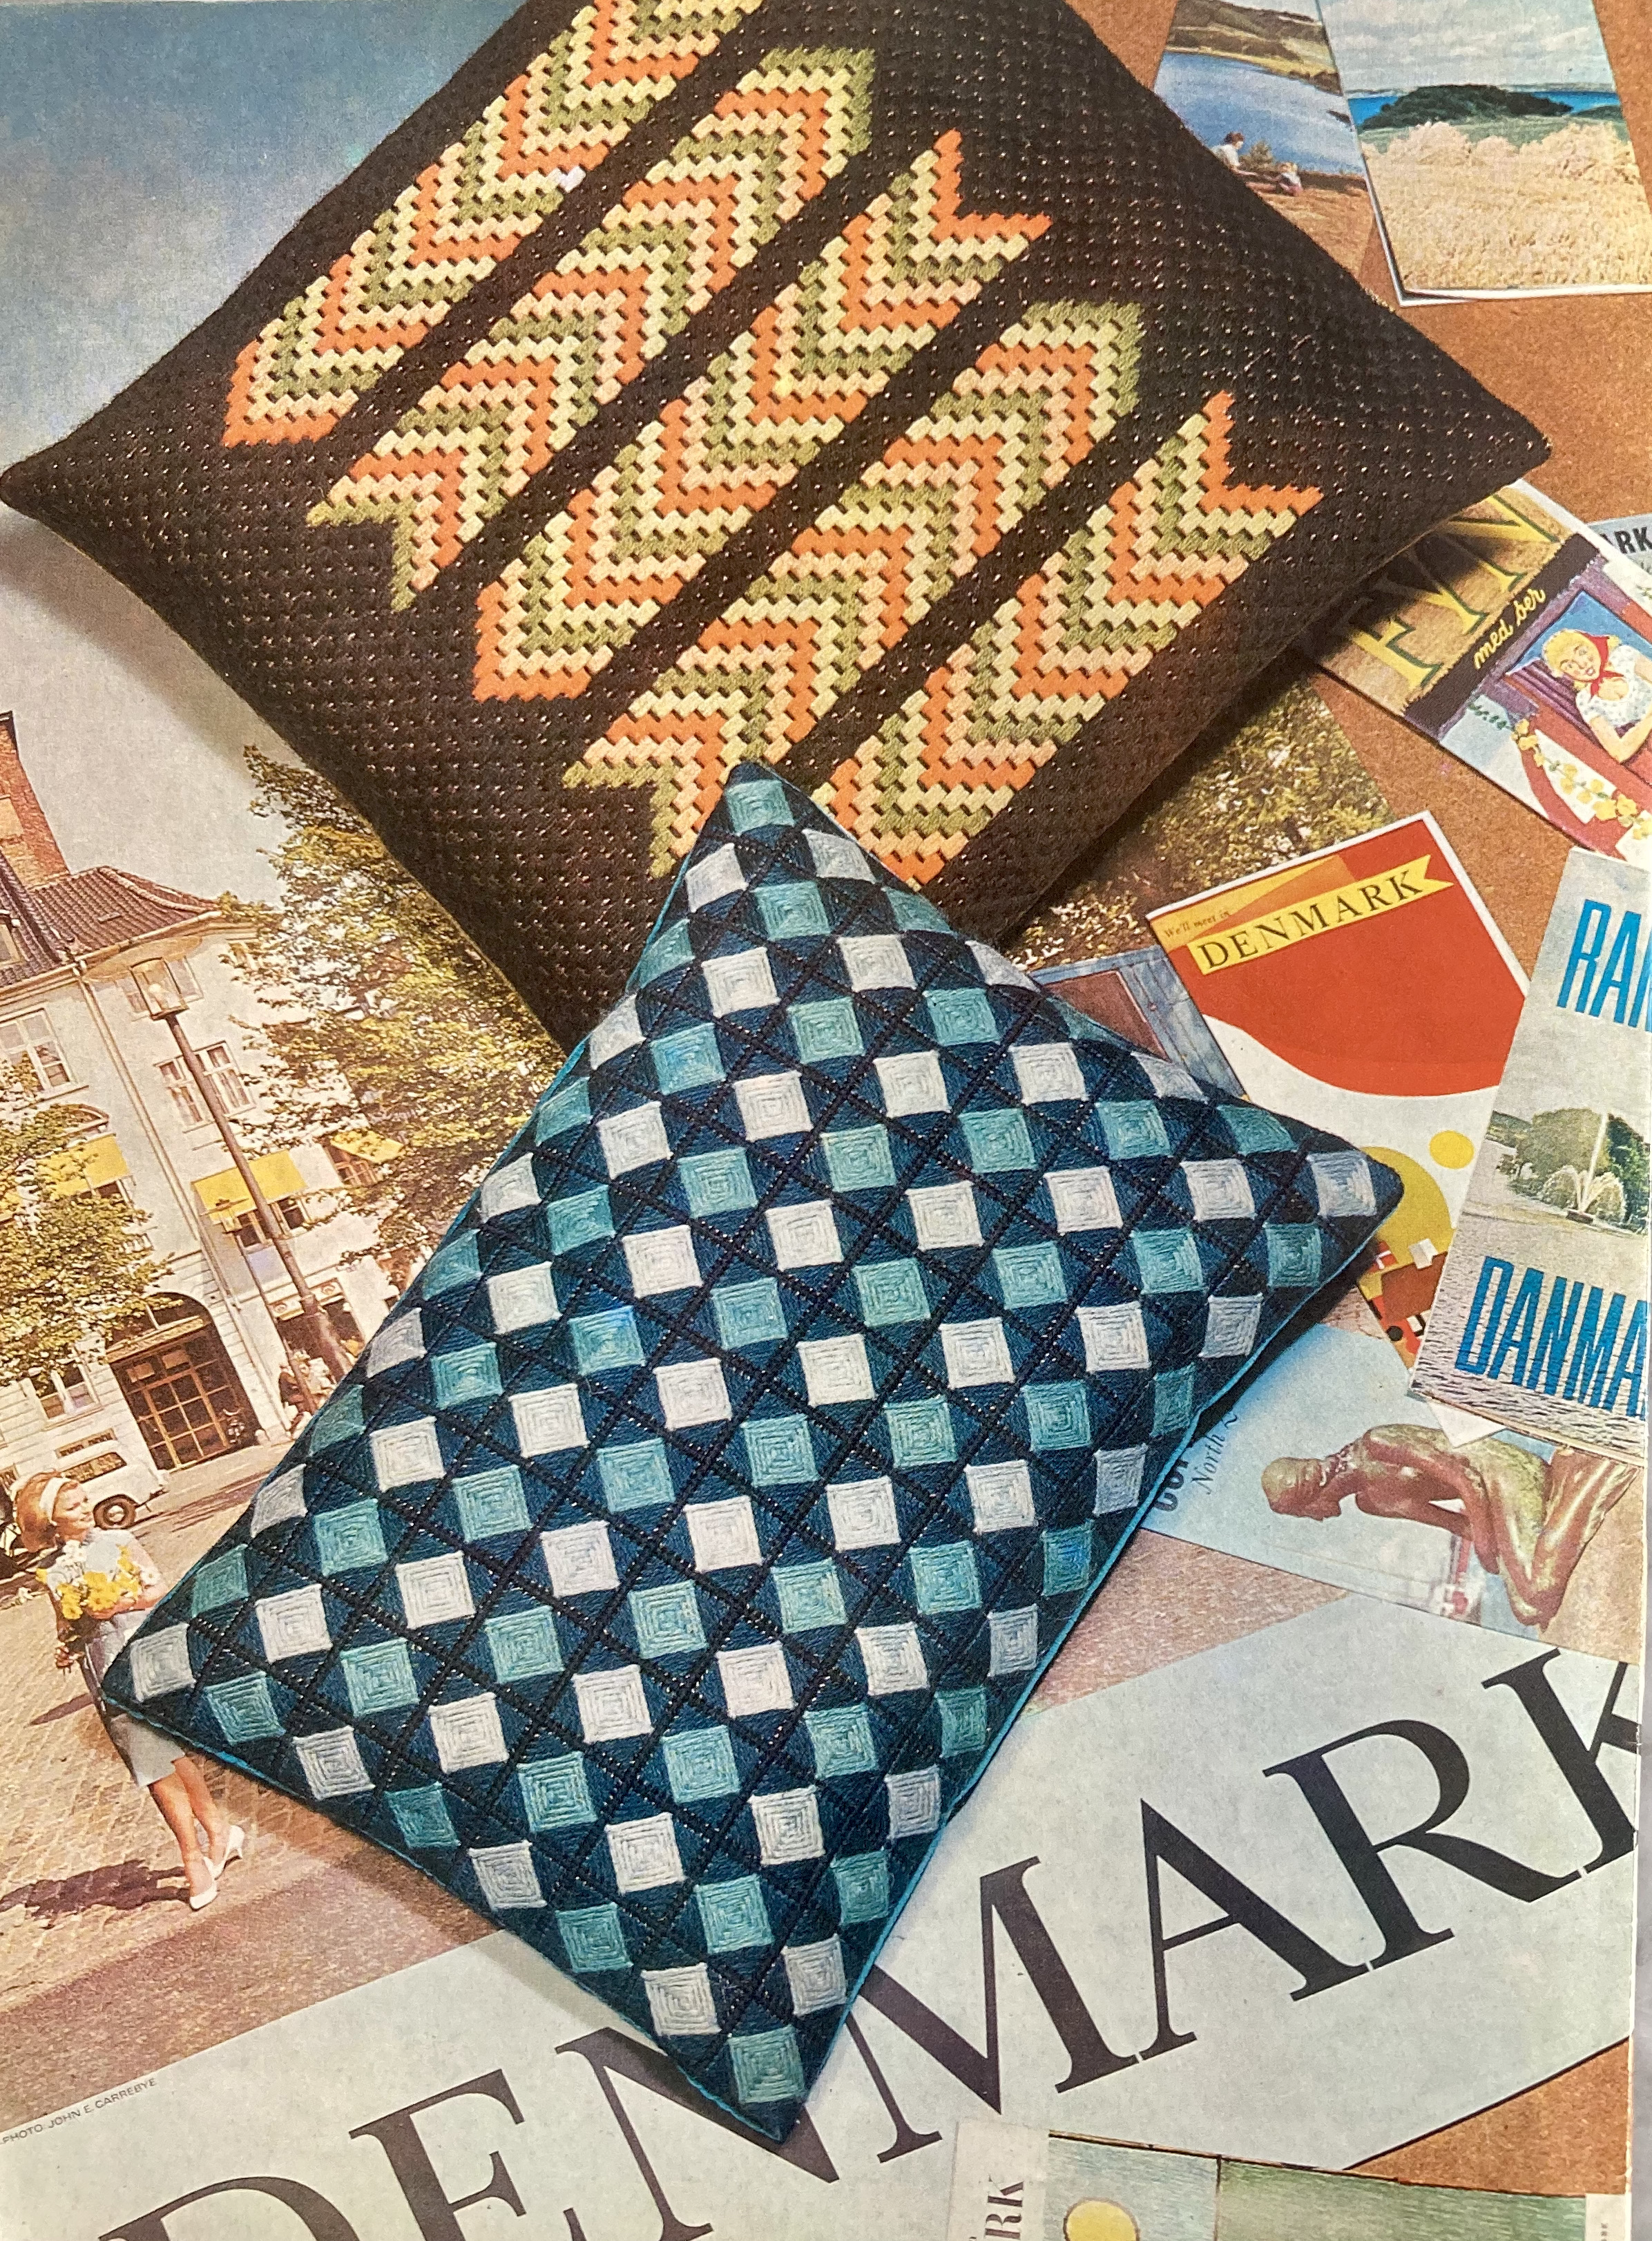
But I digress! The cover photo shows Aran sweaters in the partner-look for him and her, made in slightly-heavier-than-DK “Flair”, a wool-synthetic mix. Other fashions for women strike a balance between “cool to look at… warmer to wear” and include a two-piece DK dress with a short-sleeved top or a DK sweater in “ice-cream” colours of bubblegum pink and white. For the coming autumn days days, there’s a DK cardigan made warmer and heavier by the use of trellis-stitch panels on the front and back, or for a lighter touch, there’s a 4-ply jumper with diagonal stripes, knit diagonally — basically two rectangles for front and back, then picking up stitches for the vertically-knit yoke, and separate sleeves. The colour scheme is definitely still summery, with the striped jumper in navy blue and white and the trellis cardigan in light “Beau Blue”.
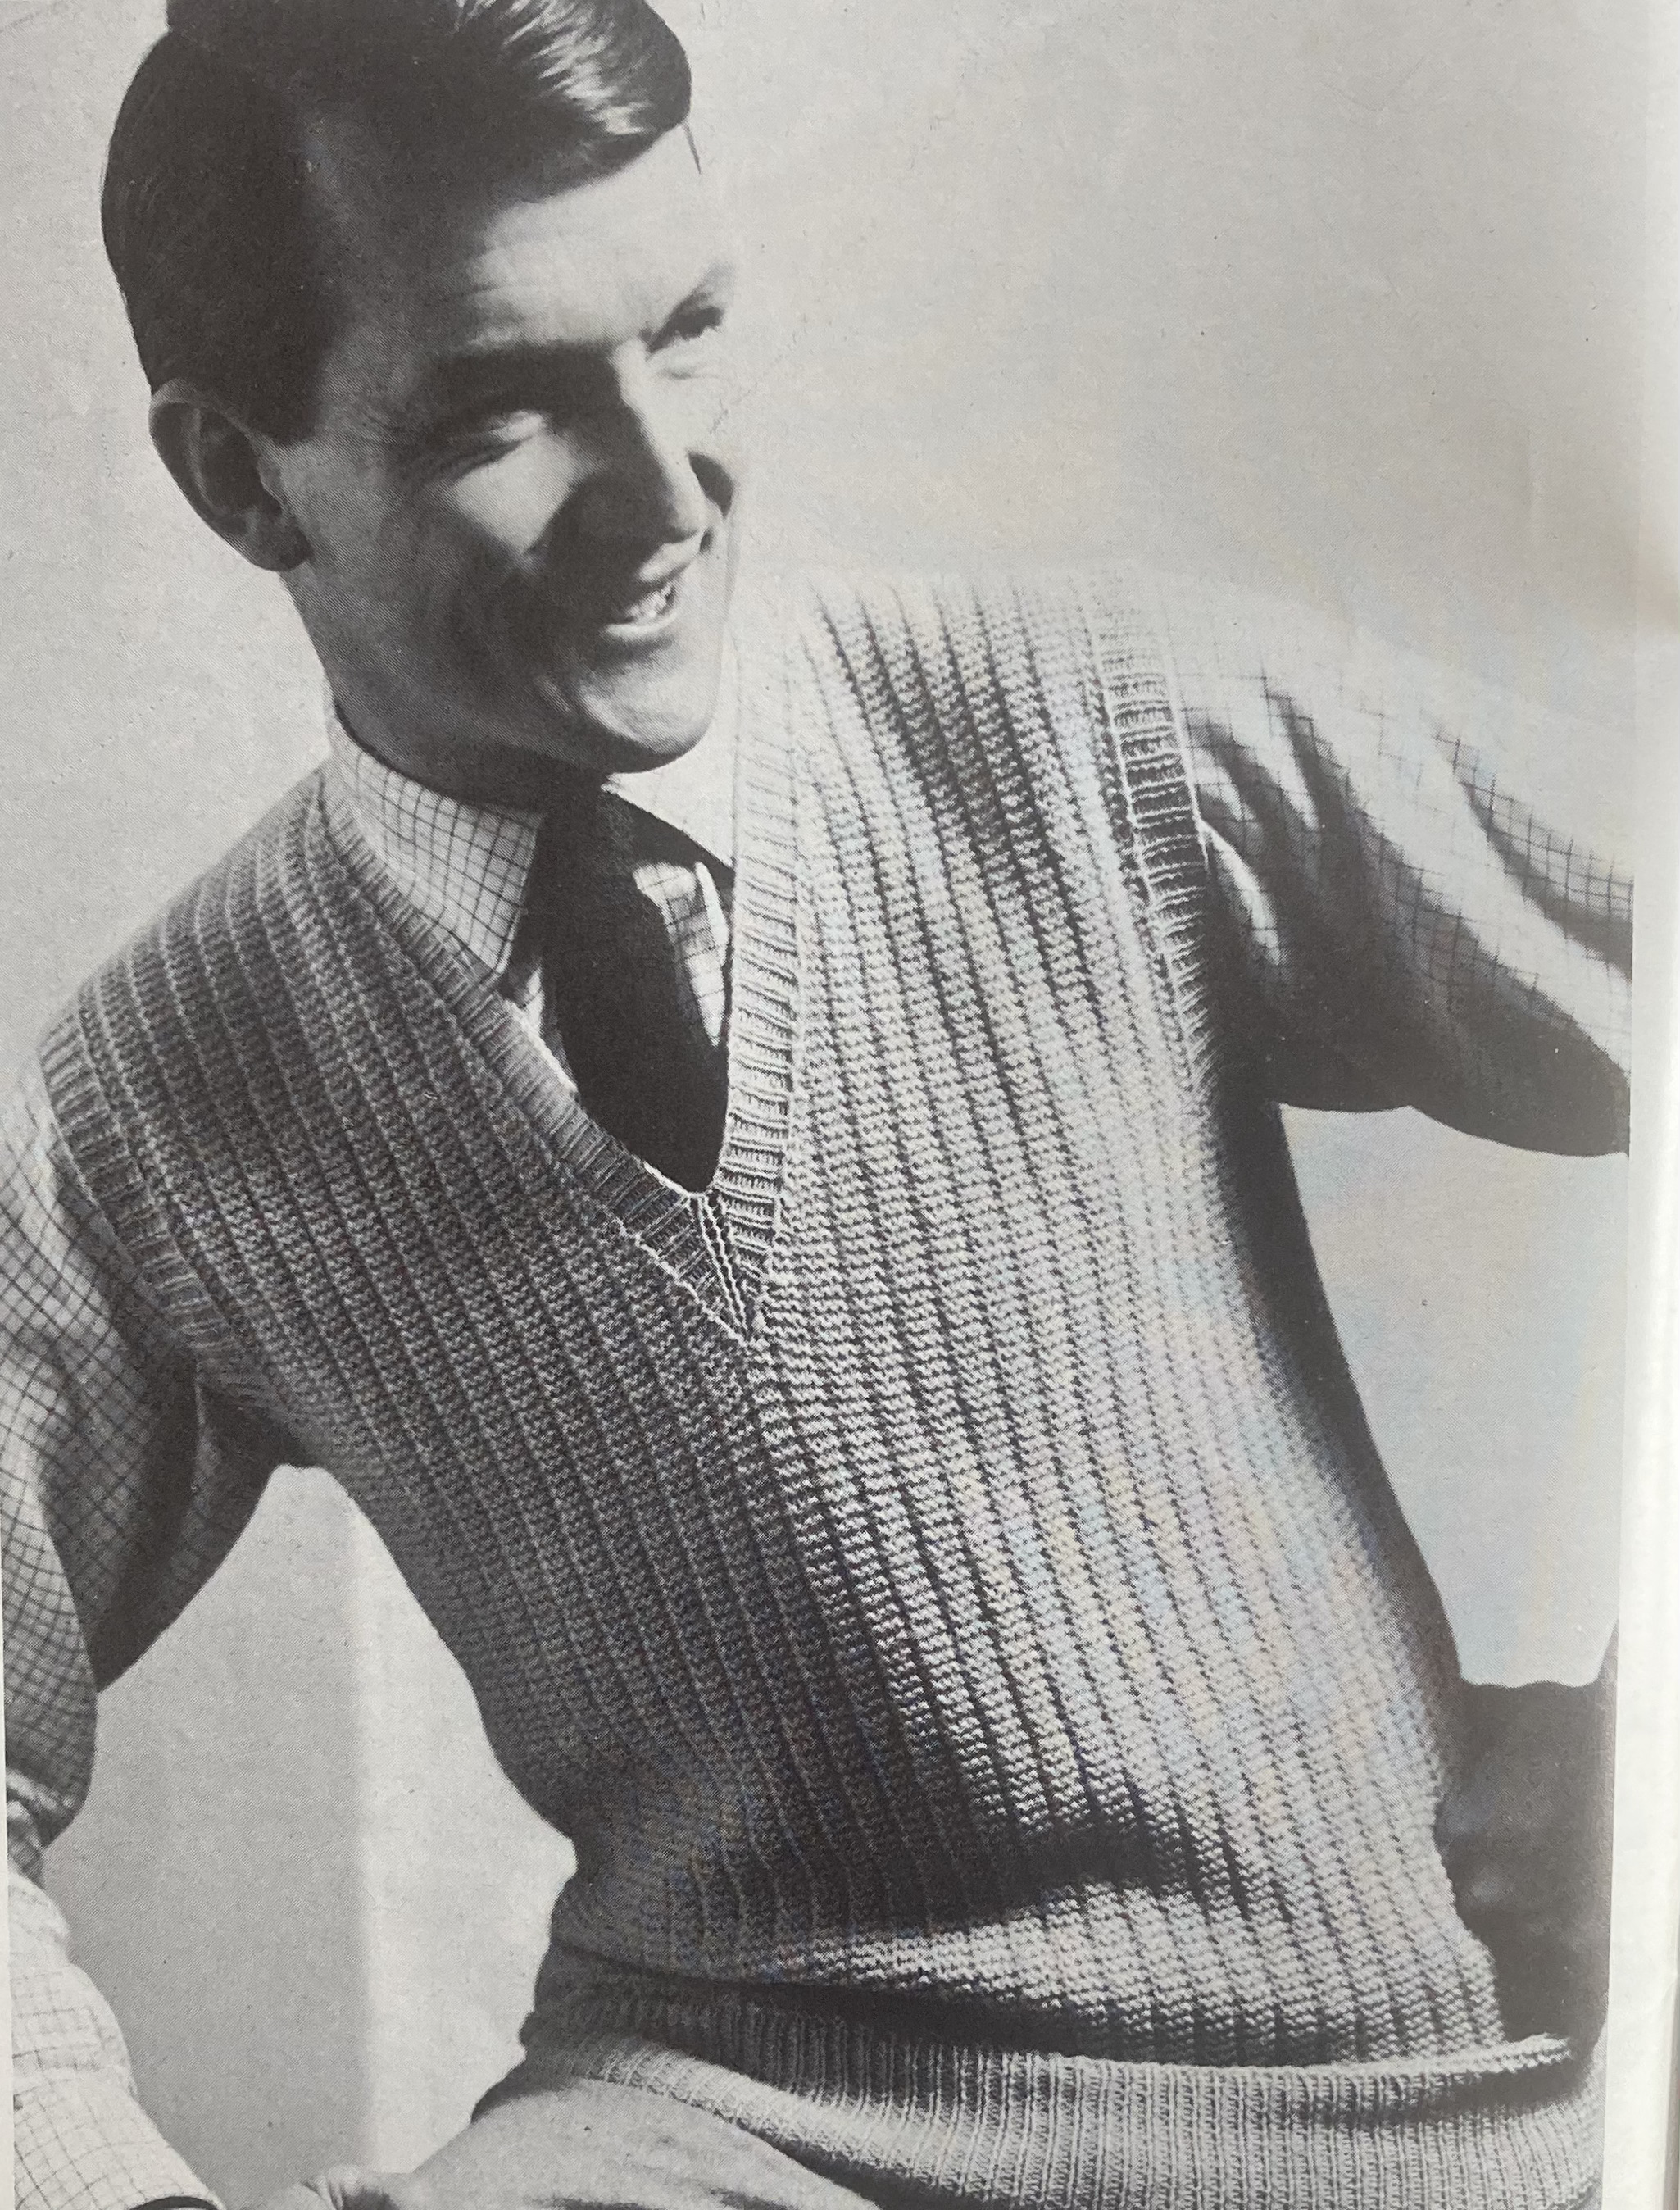
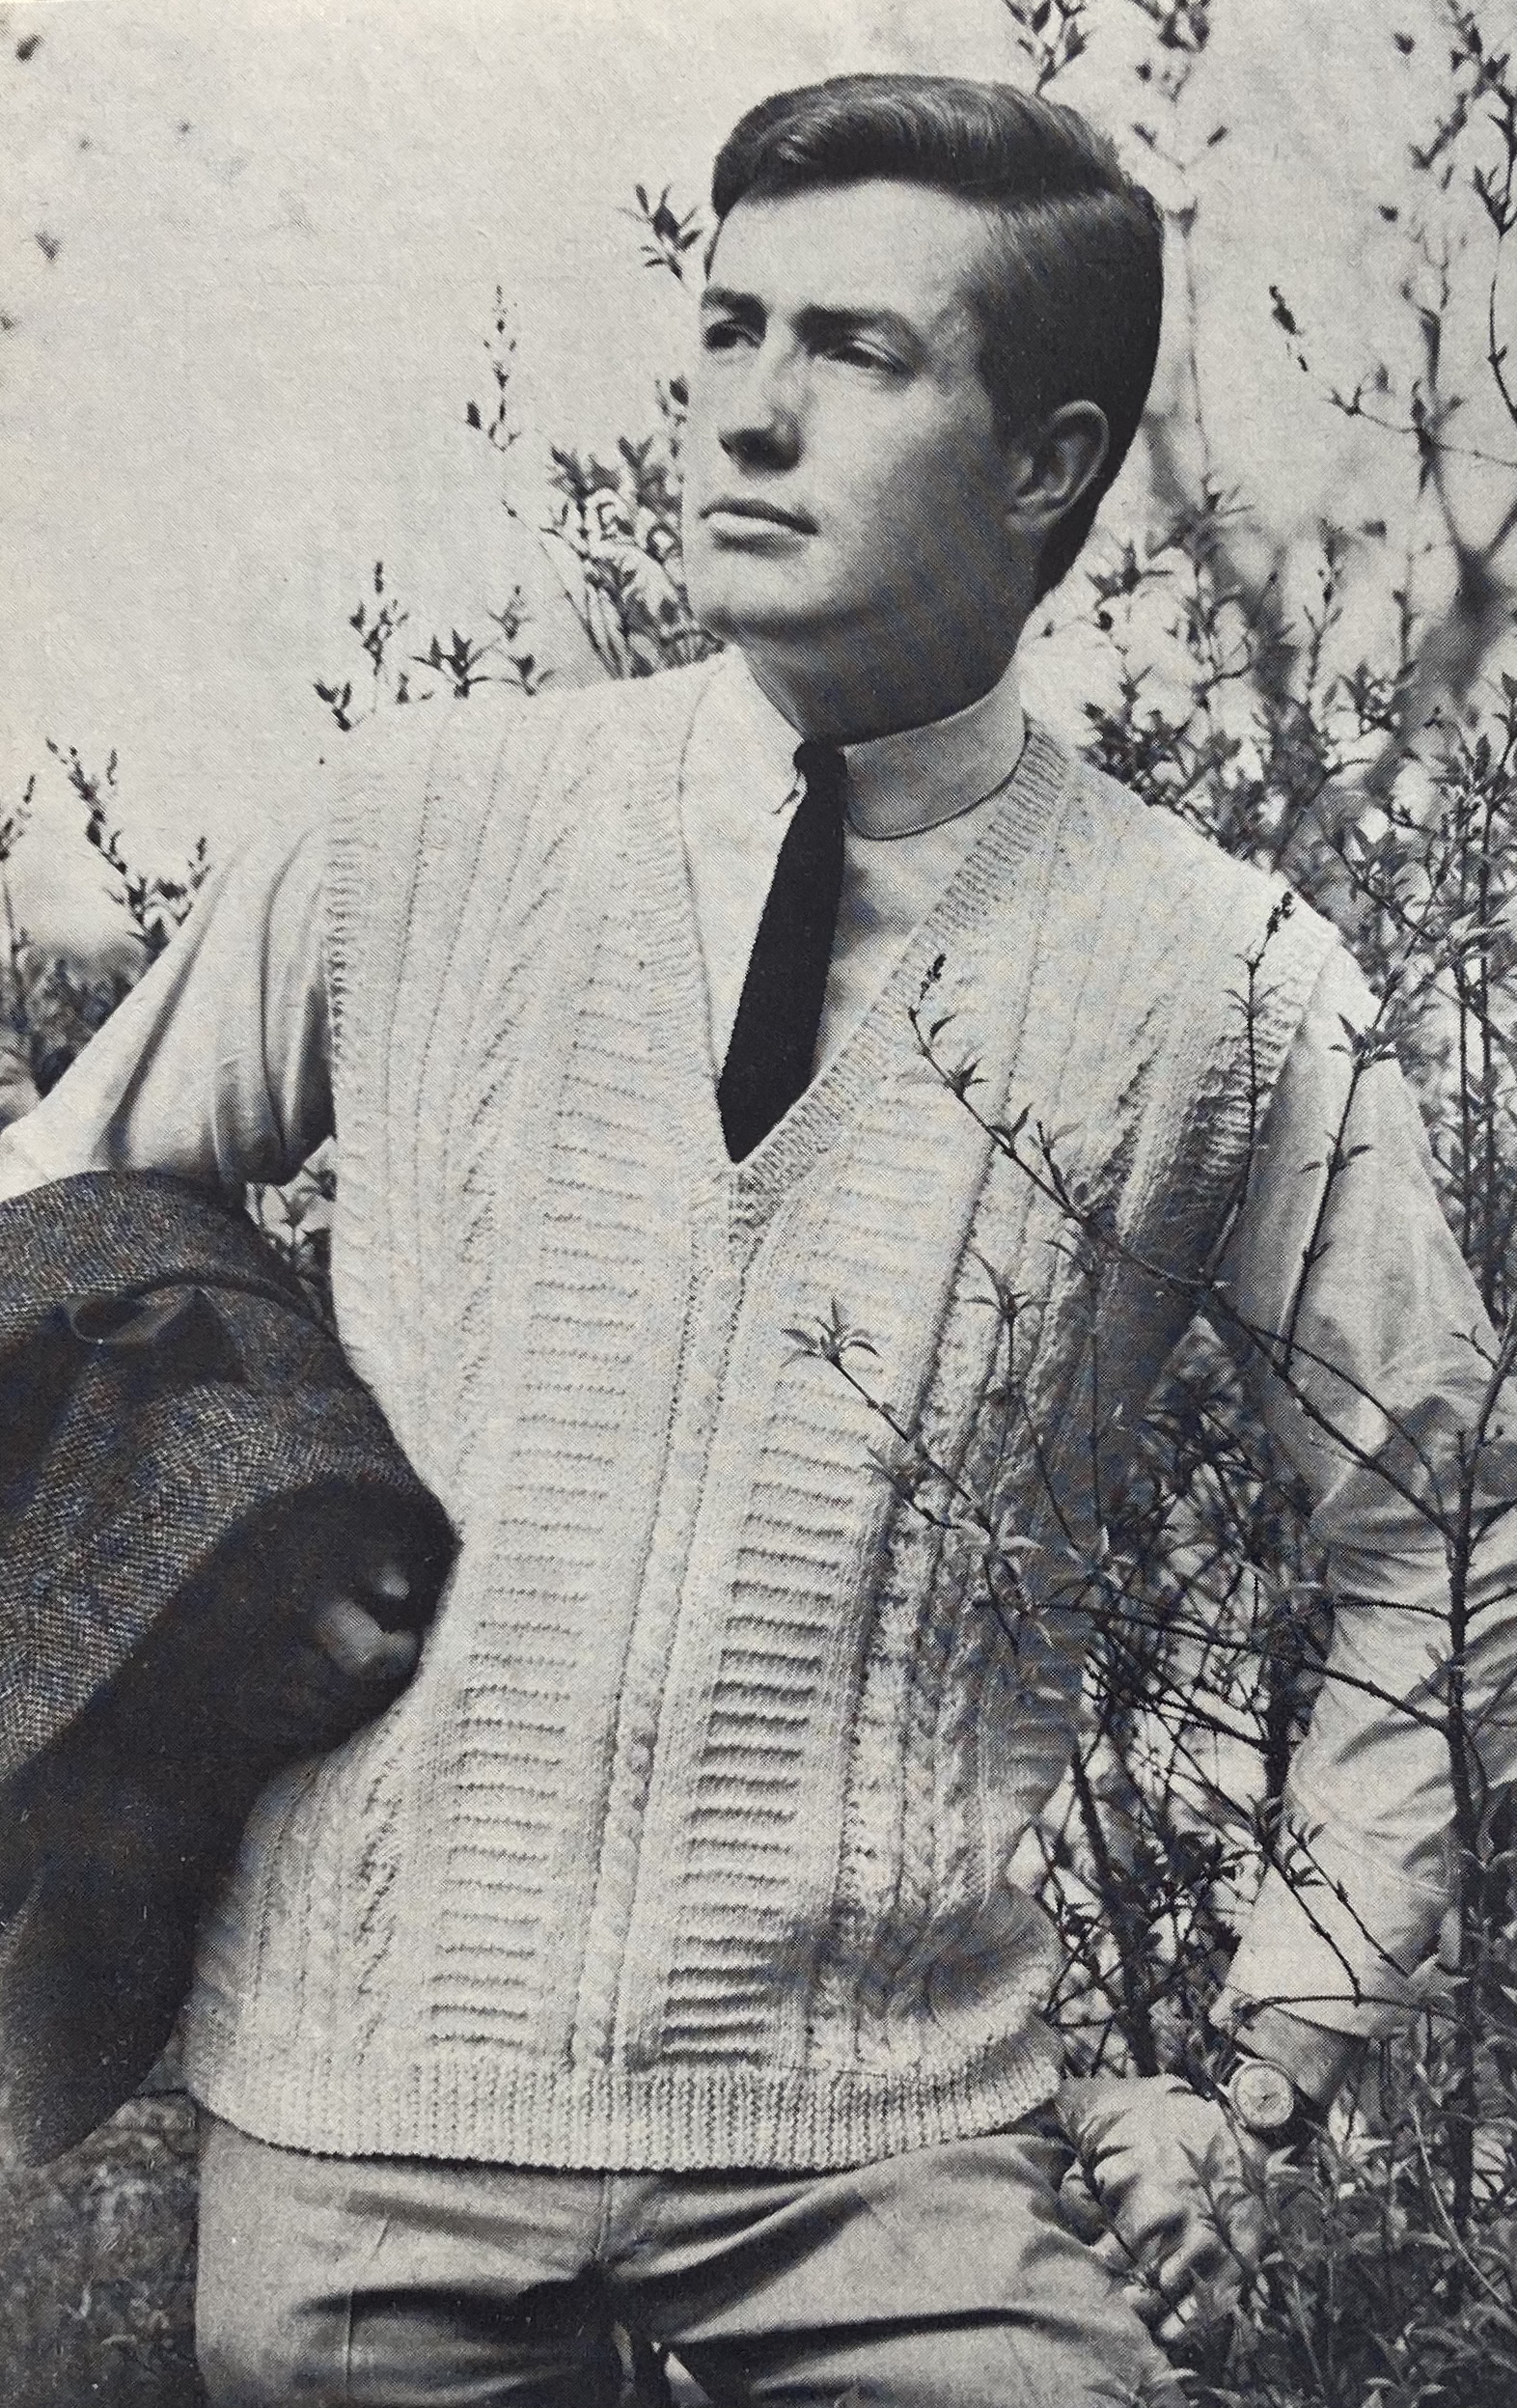
For men, in addition to the Aran-pattern sweater on the front cover, there’s a nice 4-ply slipover, made warmer by the use of a sort of broken garter stitch pattern: every 4th stitch is knit through the back on the RS rows and purled on the WS rows to create a pseudo-ribbing effect.
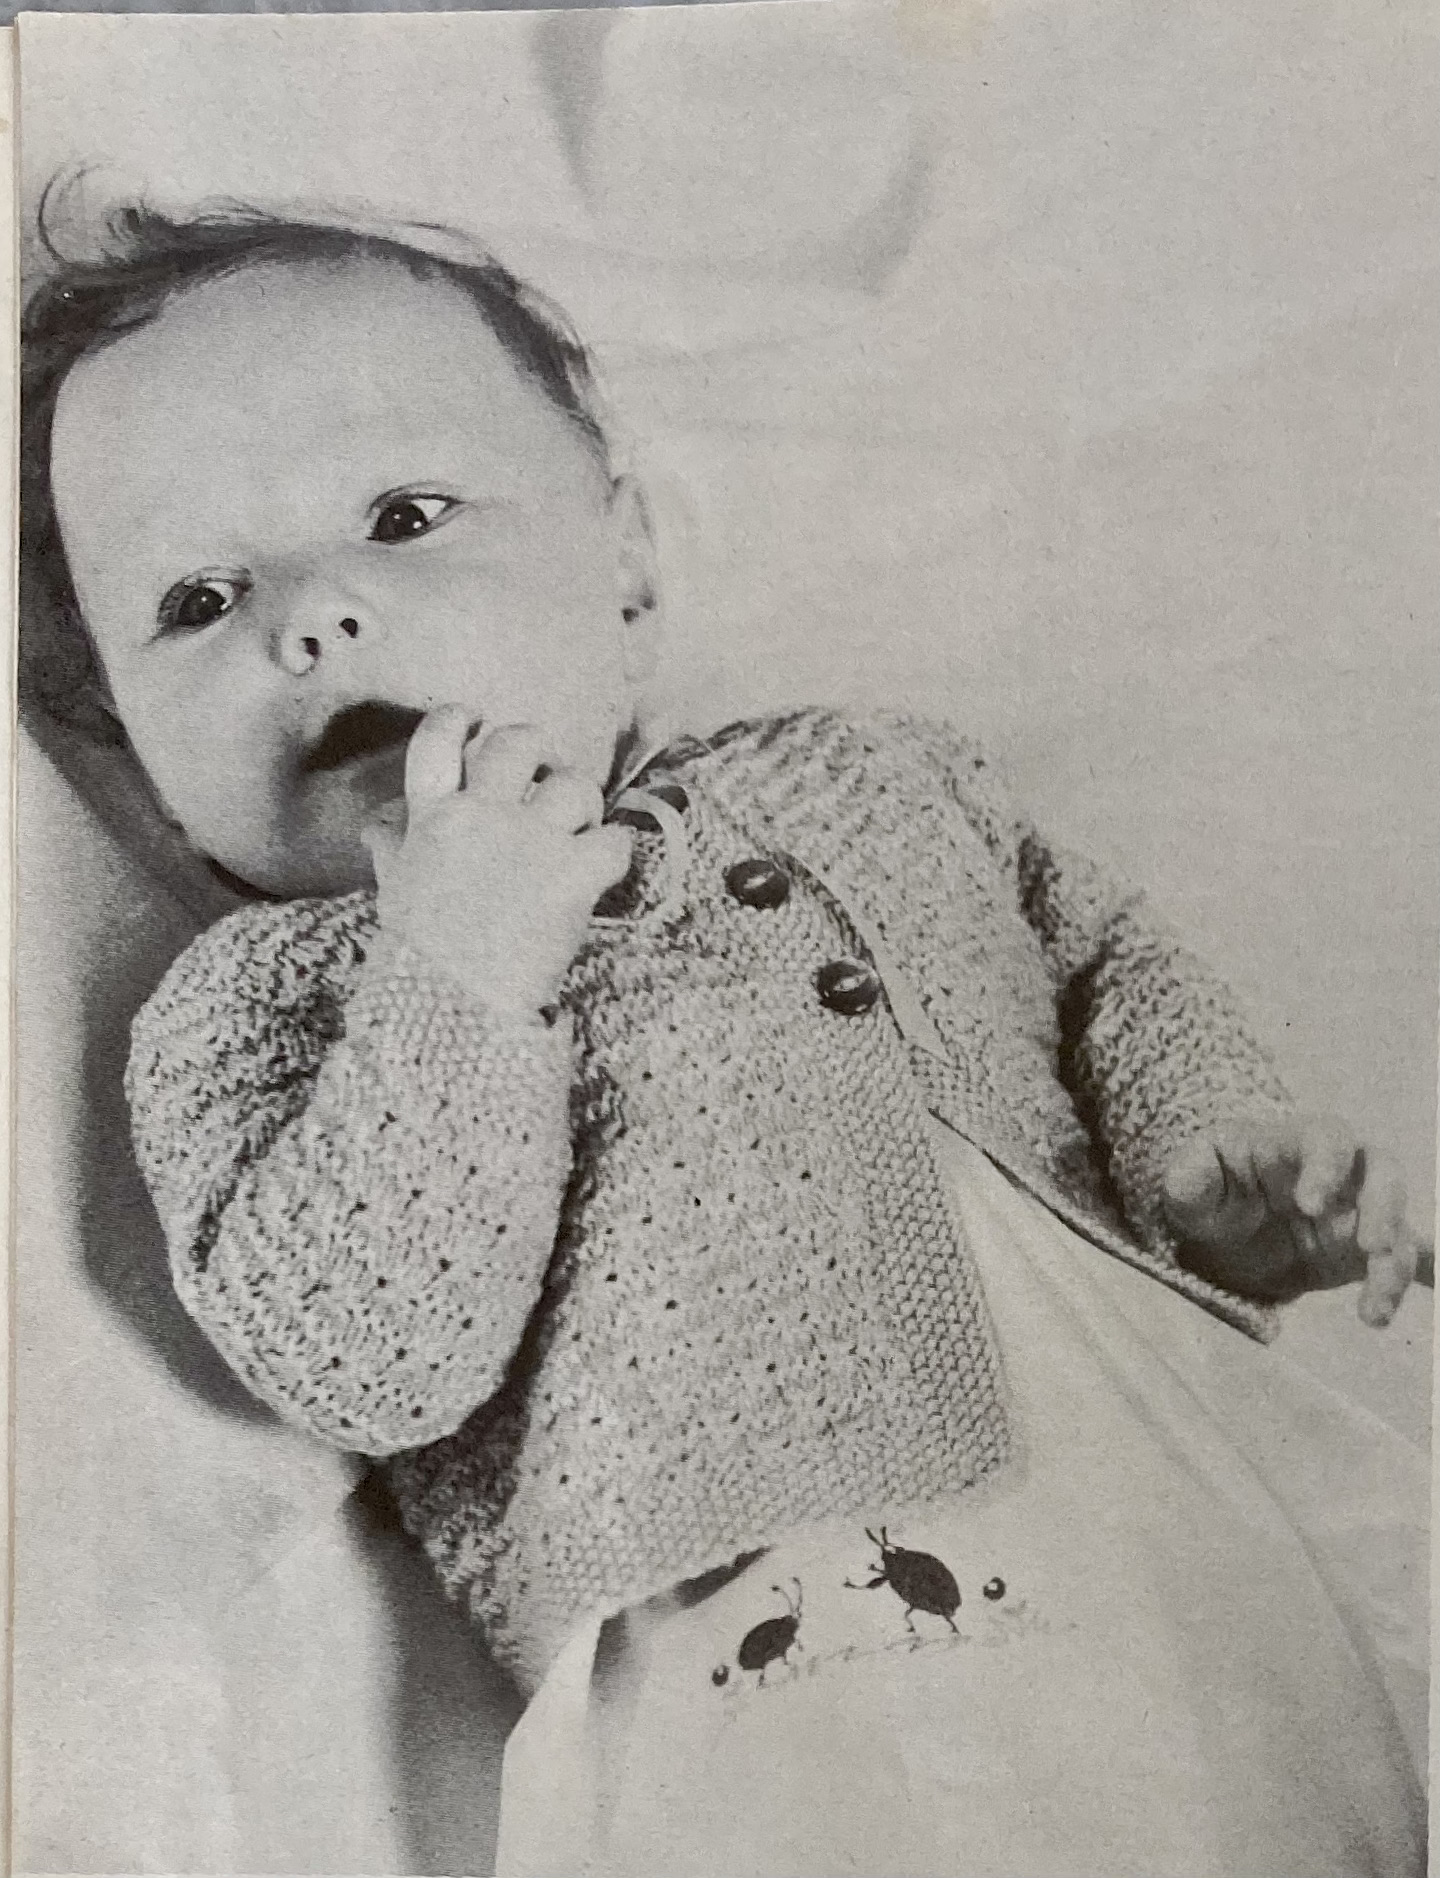
This month, we once again have children’s fashions for all ages. There’s a dolman cardigan for girls up to a 29 inch chest and a cute unisex “play shirt” up to 28 inch chest, all in sunny colours of gold, white, “Gay Turquoise” and “Sunglint”. Baby’s turquoise “extra jacket” is worked in one piece up to the armholes in a stitch pattern that looks a bit like the one for the man’s slipover, but is more complicated:
1st row: WS facing, knit.
2nd row: *k3, k3 tog and leave on needle, then k. 1st st again, then k tog the other 2 sts and slip off needle, k 3*, rpt to last 3 sts, k3 tog and leave on needle, k 1st st again, then k tog the other 2 sts and slip off needle
3rd row: purl
4th row: knit
5th row: knit
6th row: *k3 tog and leave on needle, then k. 1st st again, then k tog the other 2 sts and slip off needle, k 3*, rpt to last 3 sts, k3 tog and leave on needle, k 1st st again, then k tog the other 2 sts and slip off needle
7th row: purl
8th row: knit
I’ve never seen this stitch before — does anyone know it, or know if it has a name?
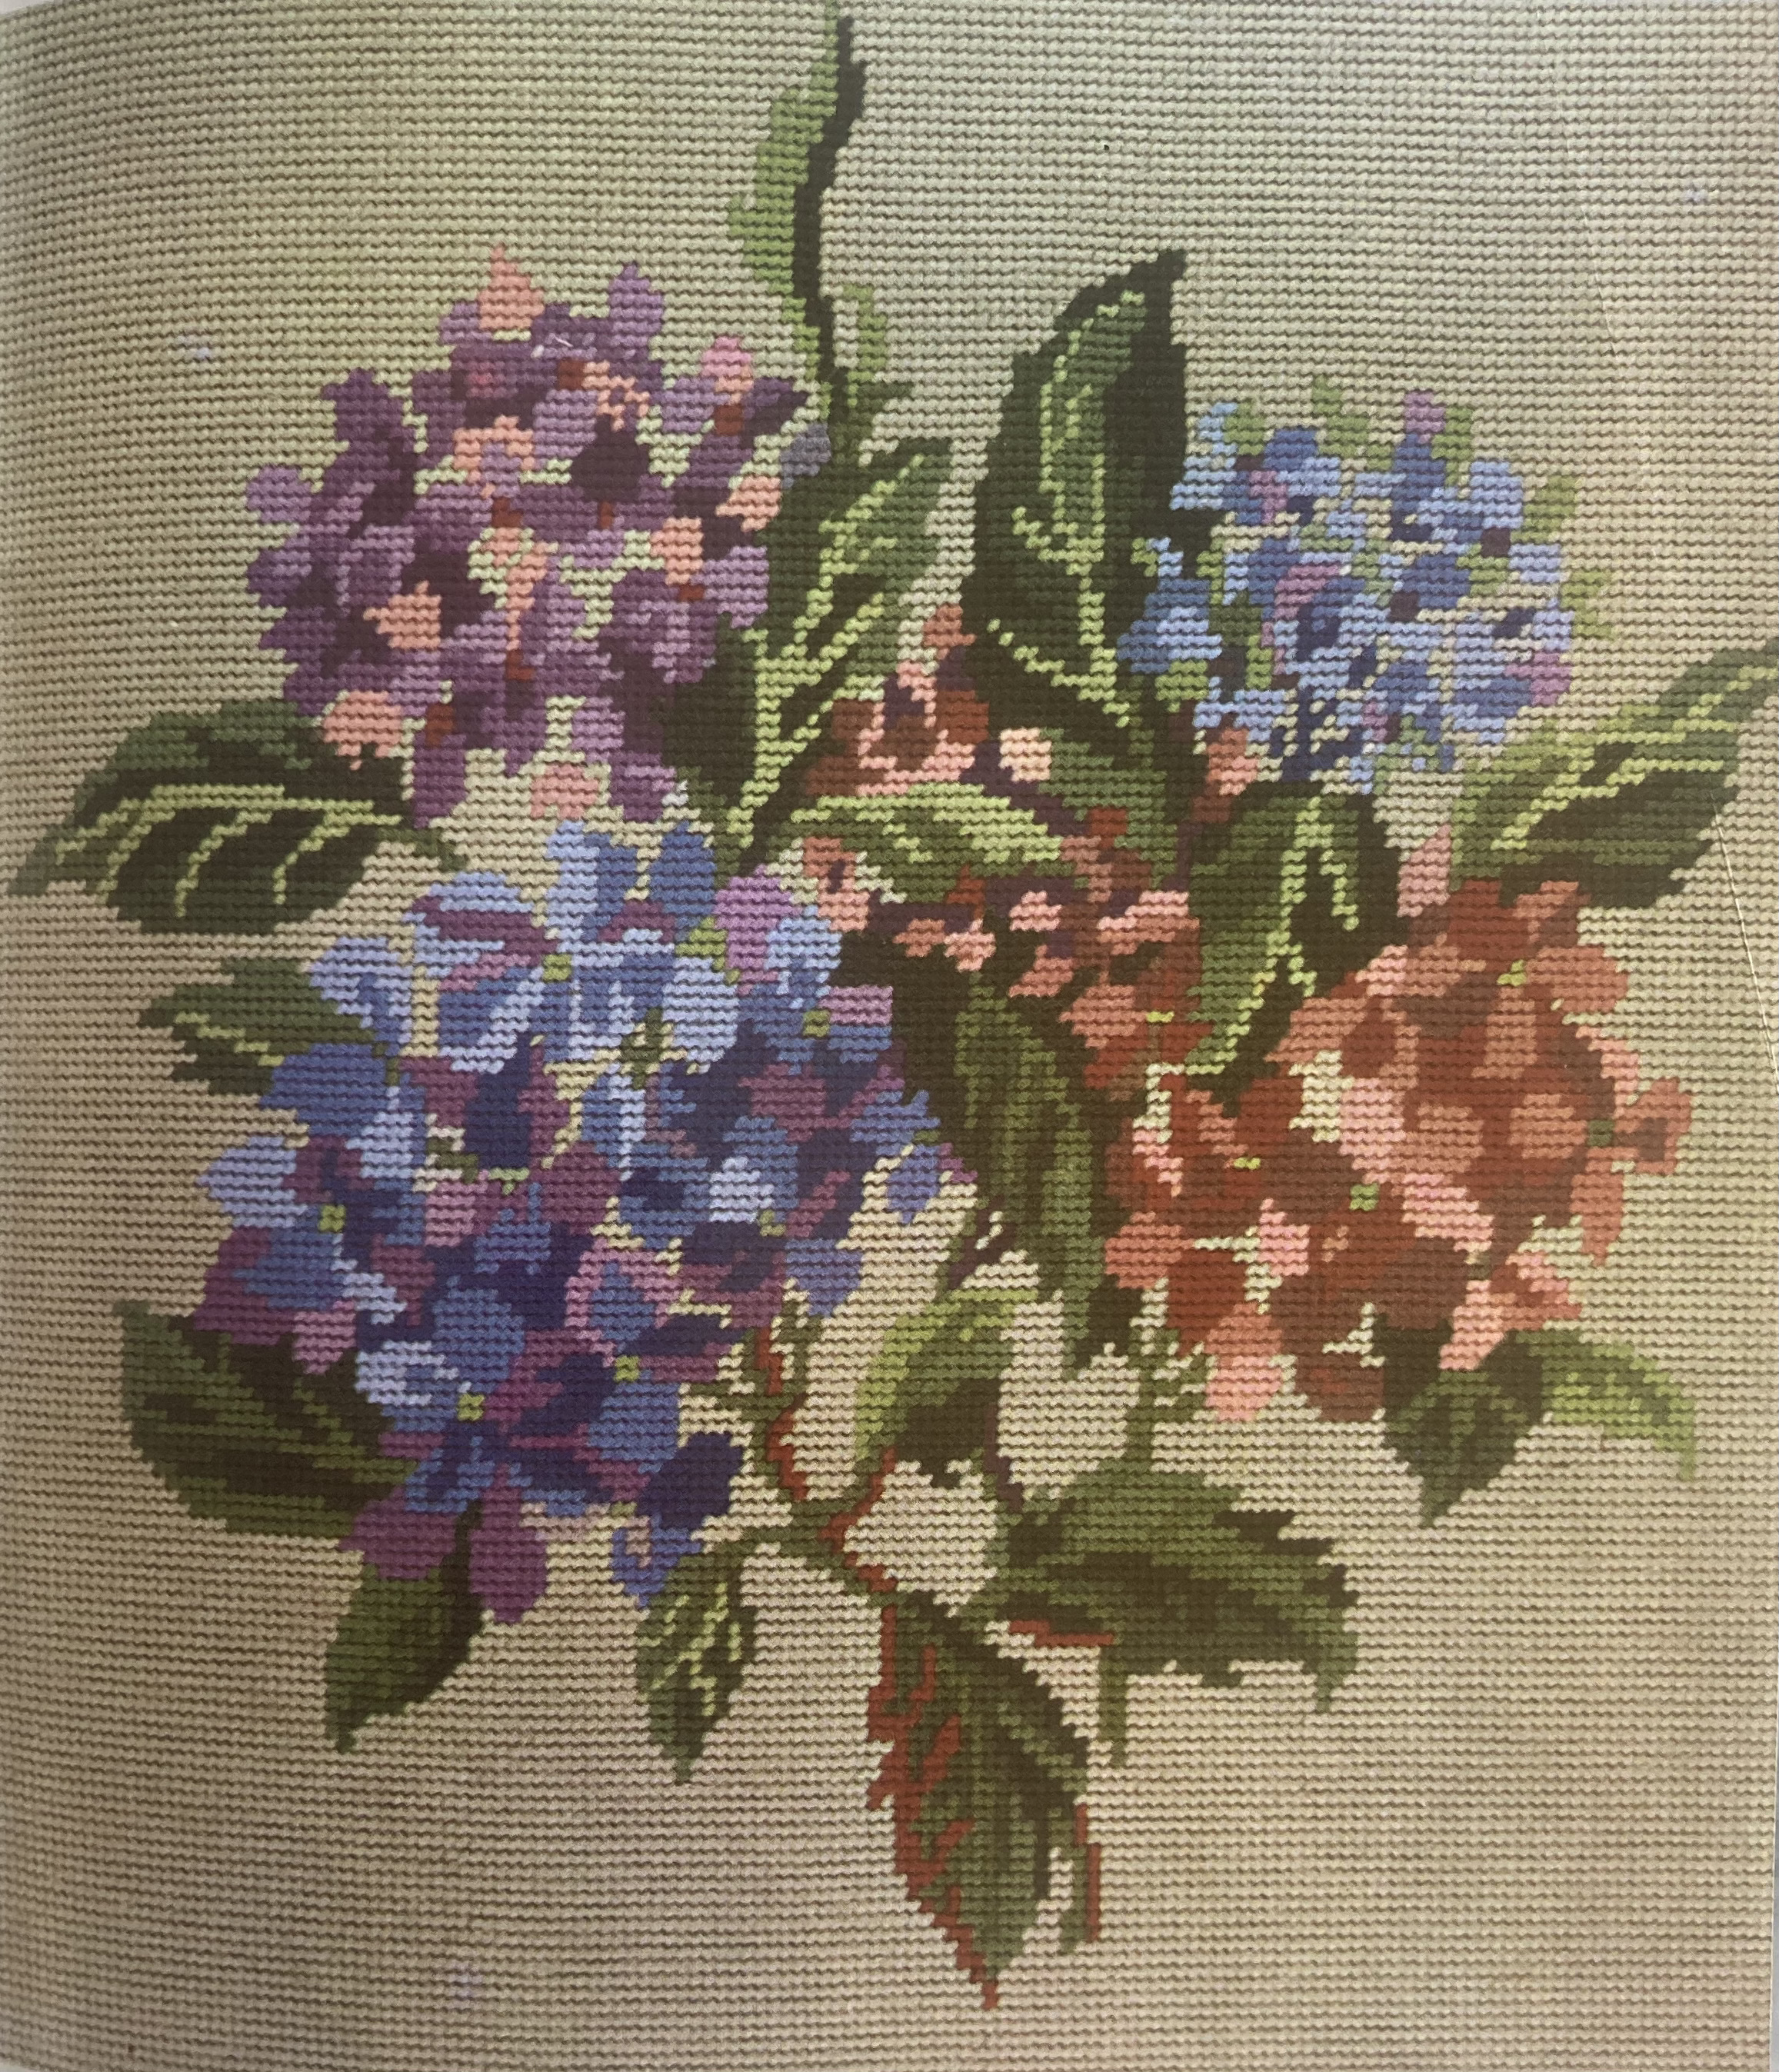
In the homewares department, we have the usual selection of versatile designs for different items and uses. The cross-stitch ivy border, for example, is suggested for “cushions, table mats and chair-backs, or as a border for curtains” , the wavy “design from Greece” is featured on a chair-back, cushion and rug, and the Swedish-inspired design “for bold counted embroidery” works on table mats as well as cushions. Even the tapestry hydrangeas can be used as a wall picture or fire-screen.
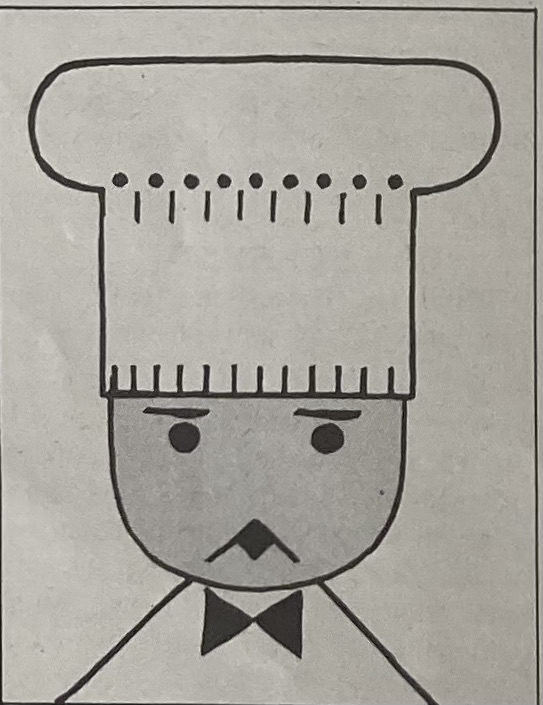
It wouldn’t be a proper issue of Stitchcraft without bizarre-bazaar ideas, though these are not nearly as weird as some of the items that we’ve seen in the past. The theme is clearly “kitchen” this time, with embroidered or appliquéd aprons and pot holders. Sometimes the chef looks happy with the food, and sometimes he definitely has l’air déçu!
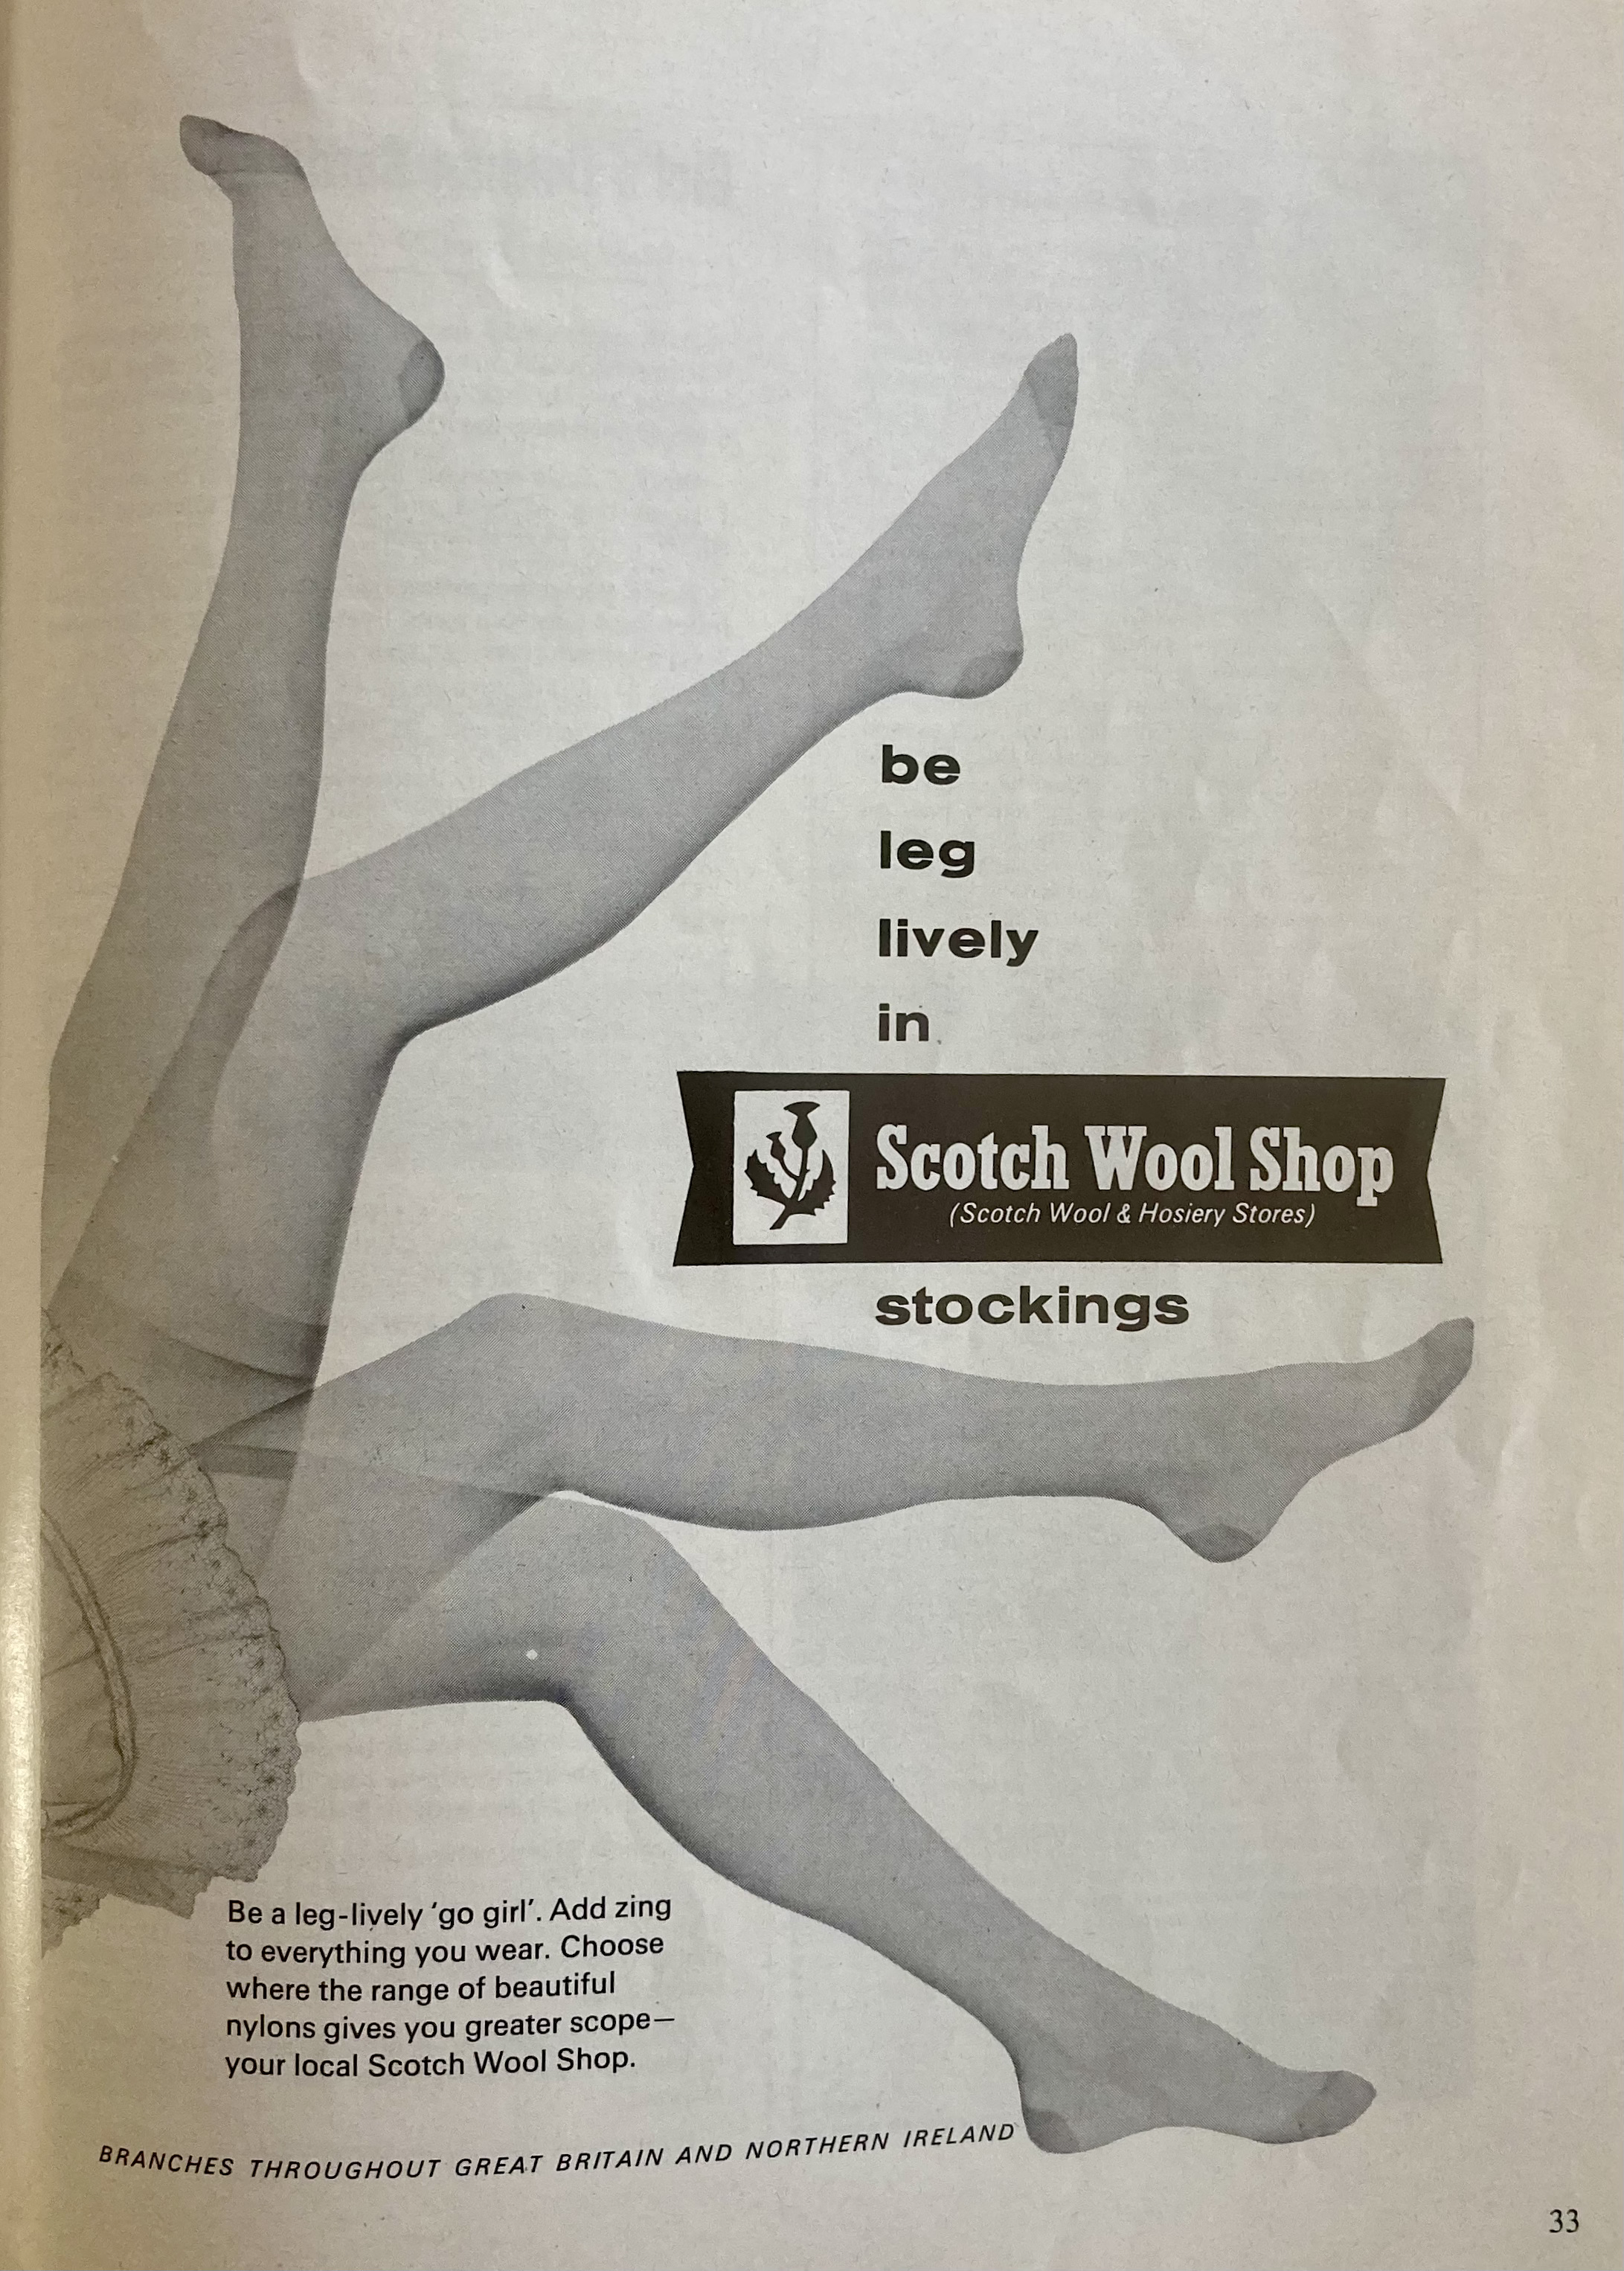
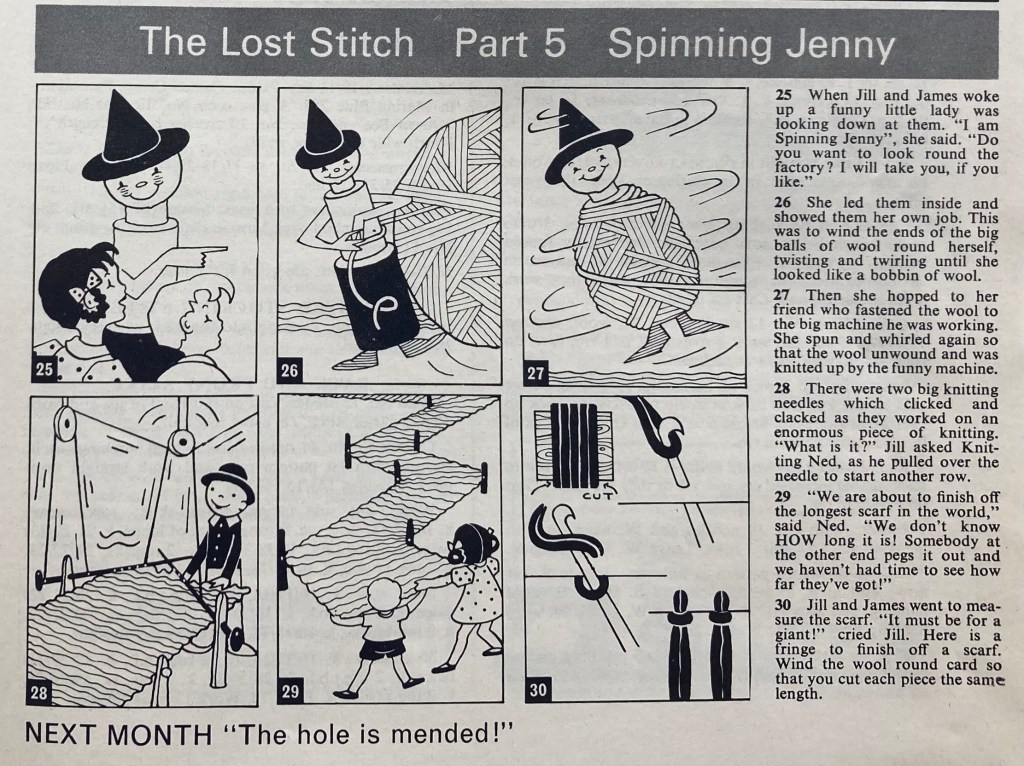
The back pages feature a “special request” tatted doily edging, a great “leg lively” ad for nylon stockings from the Scotch Wool Shop. In the final chapter of the current children’s serial comic, “The Lost Stitch”, Jill and her brother James fall back through the magic portal that appeared in a dropped stitch, to find themselves back at home with the stitch magically mended. May all your dropped stitches heal this way!
There isn’t a specific design that I like enough to make from this issue, so my August project will be another non-Stitchcraft “Blast From the Past.” Happy late summer and if it’s still too hot where you live, enjoy that ad for Lightning zips that promises to keep you cool as a cucumber in your summer cottons.
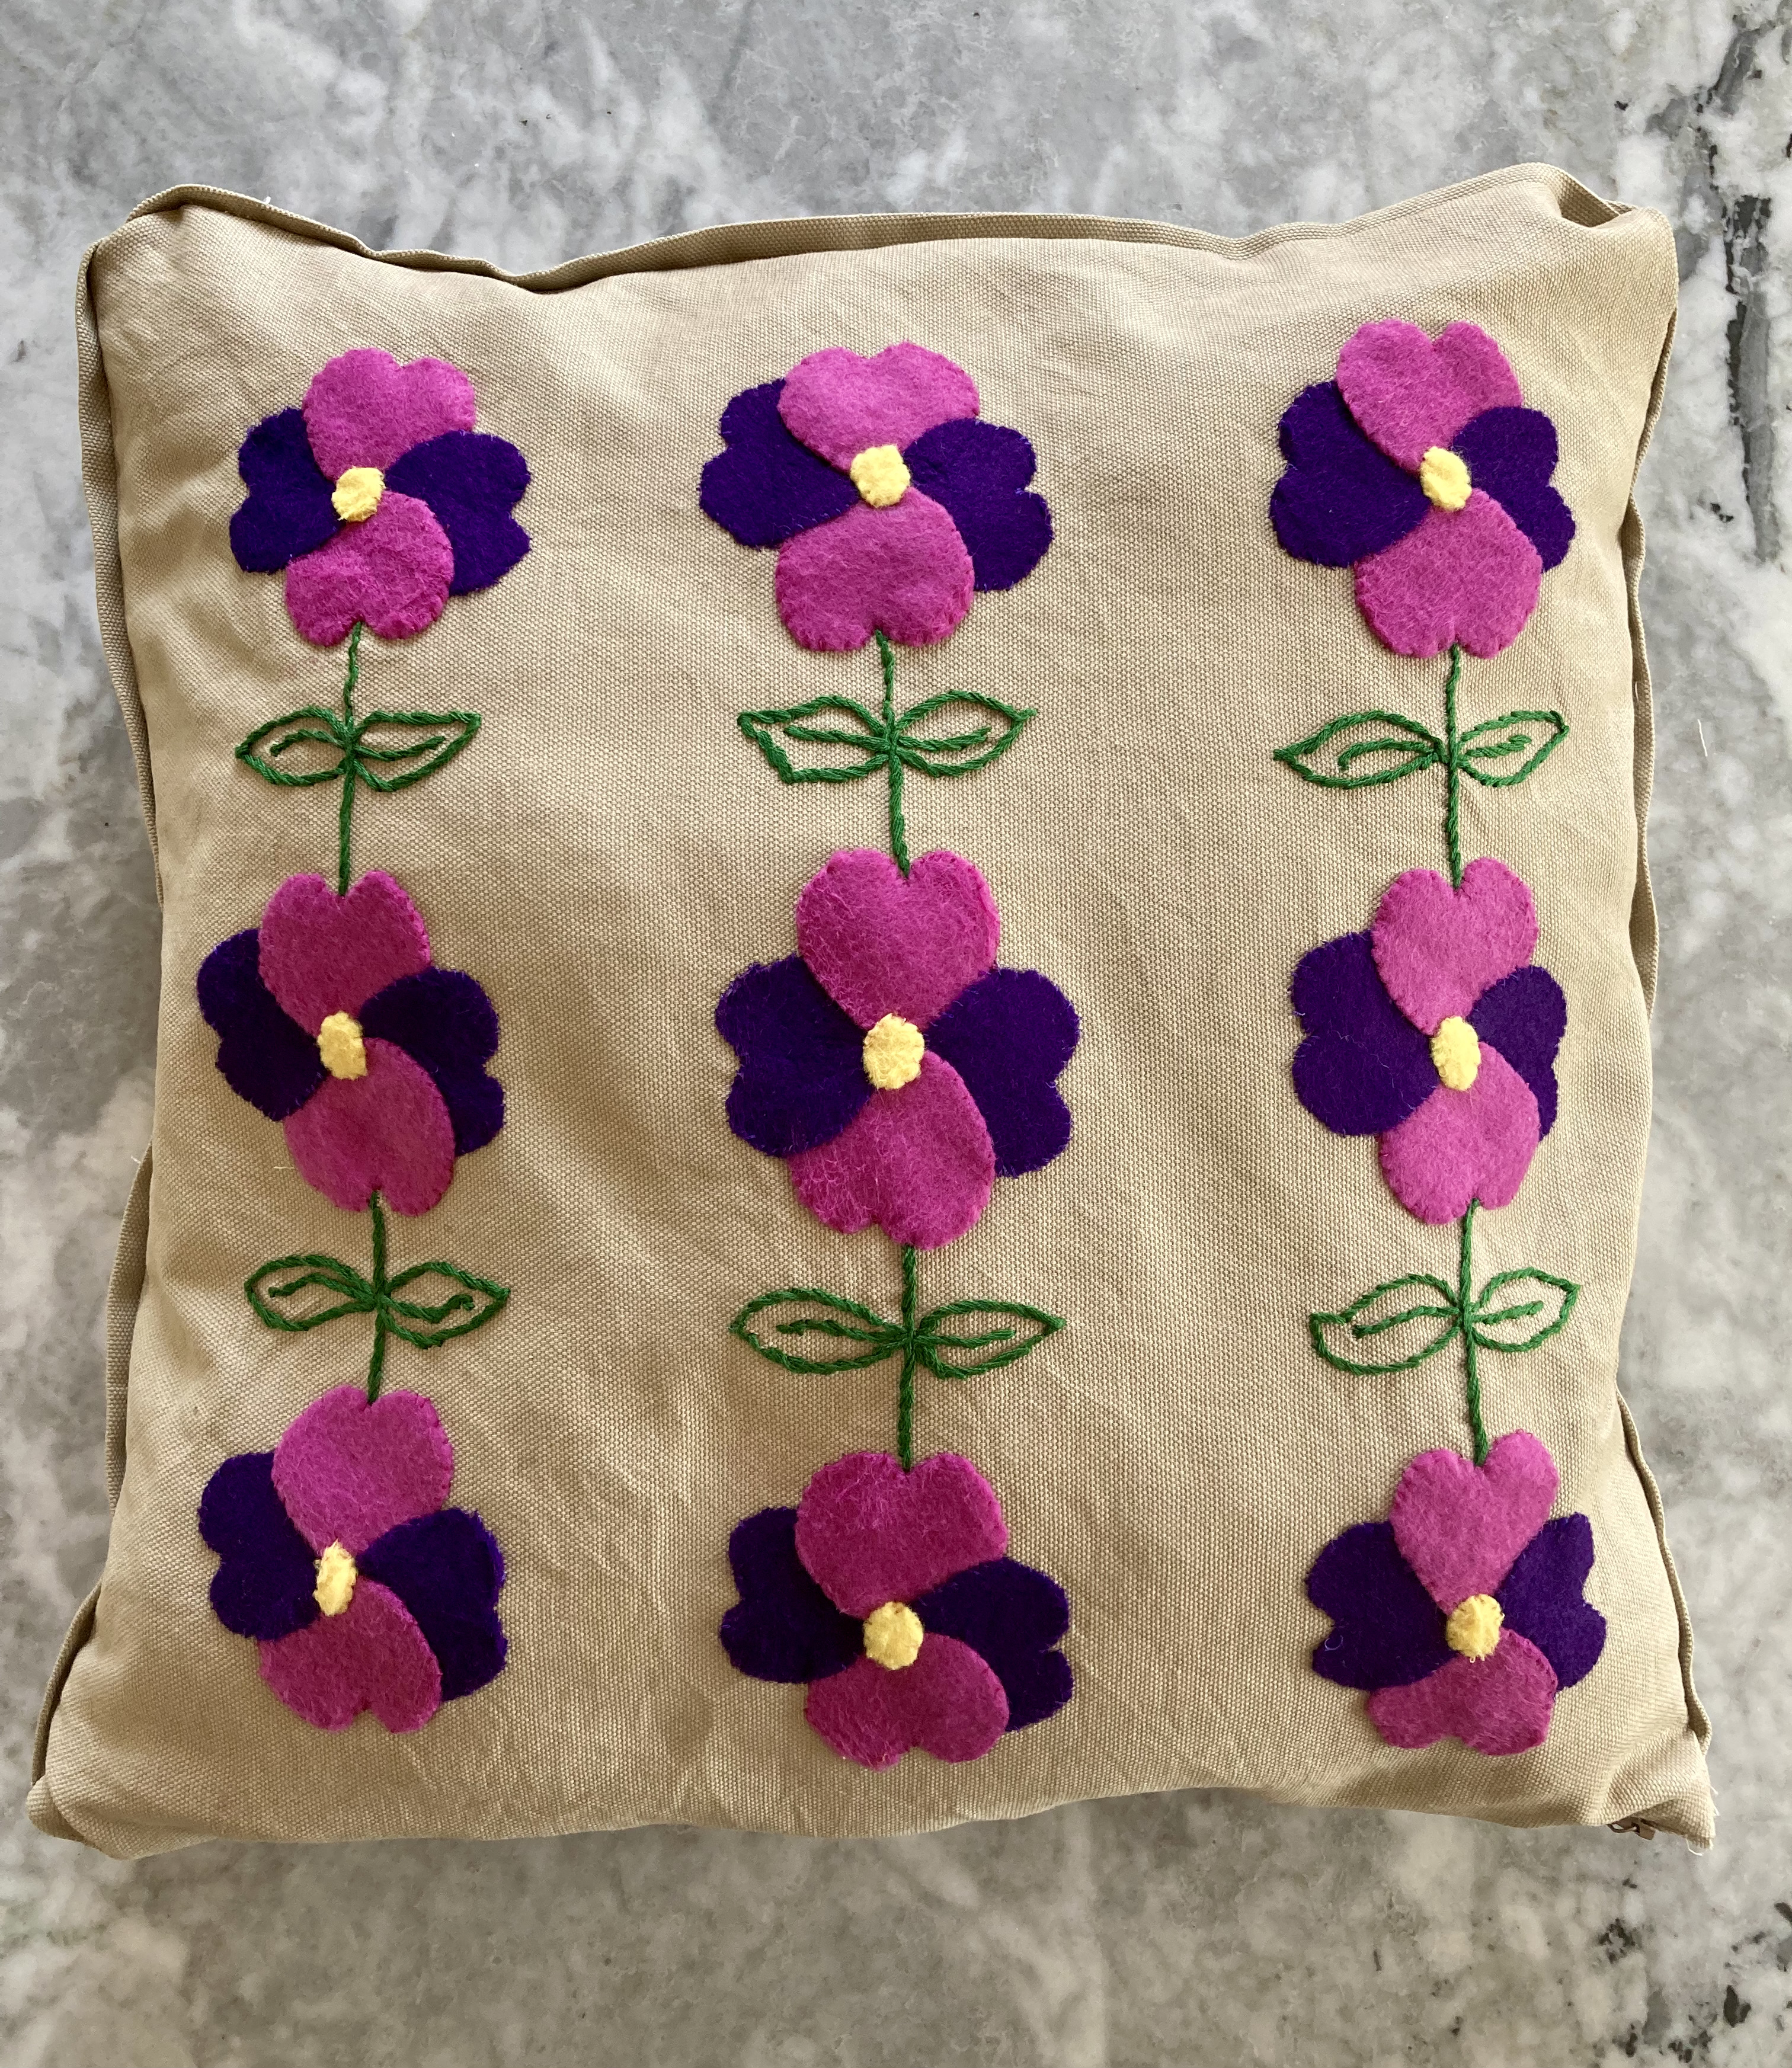
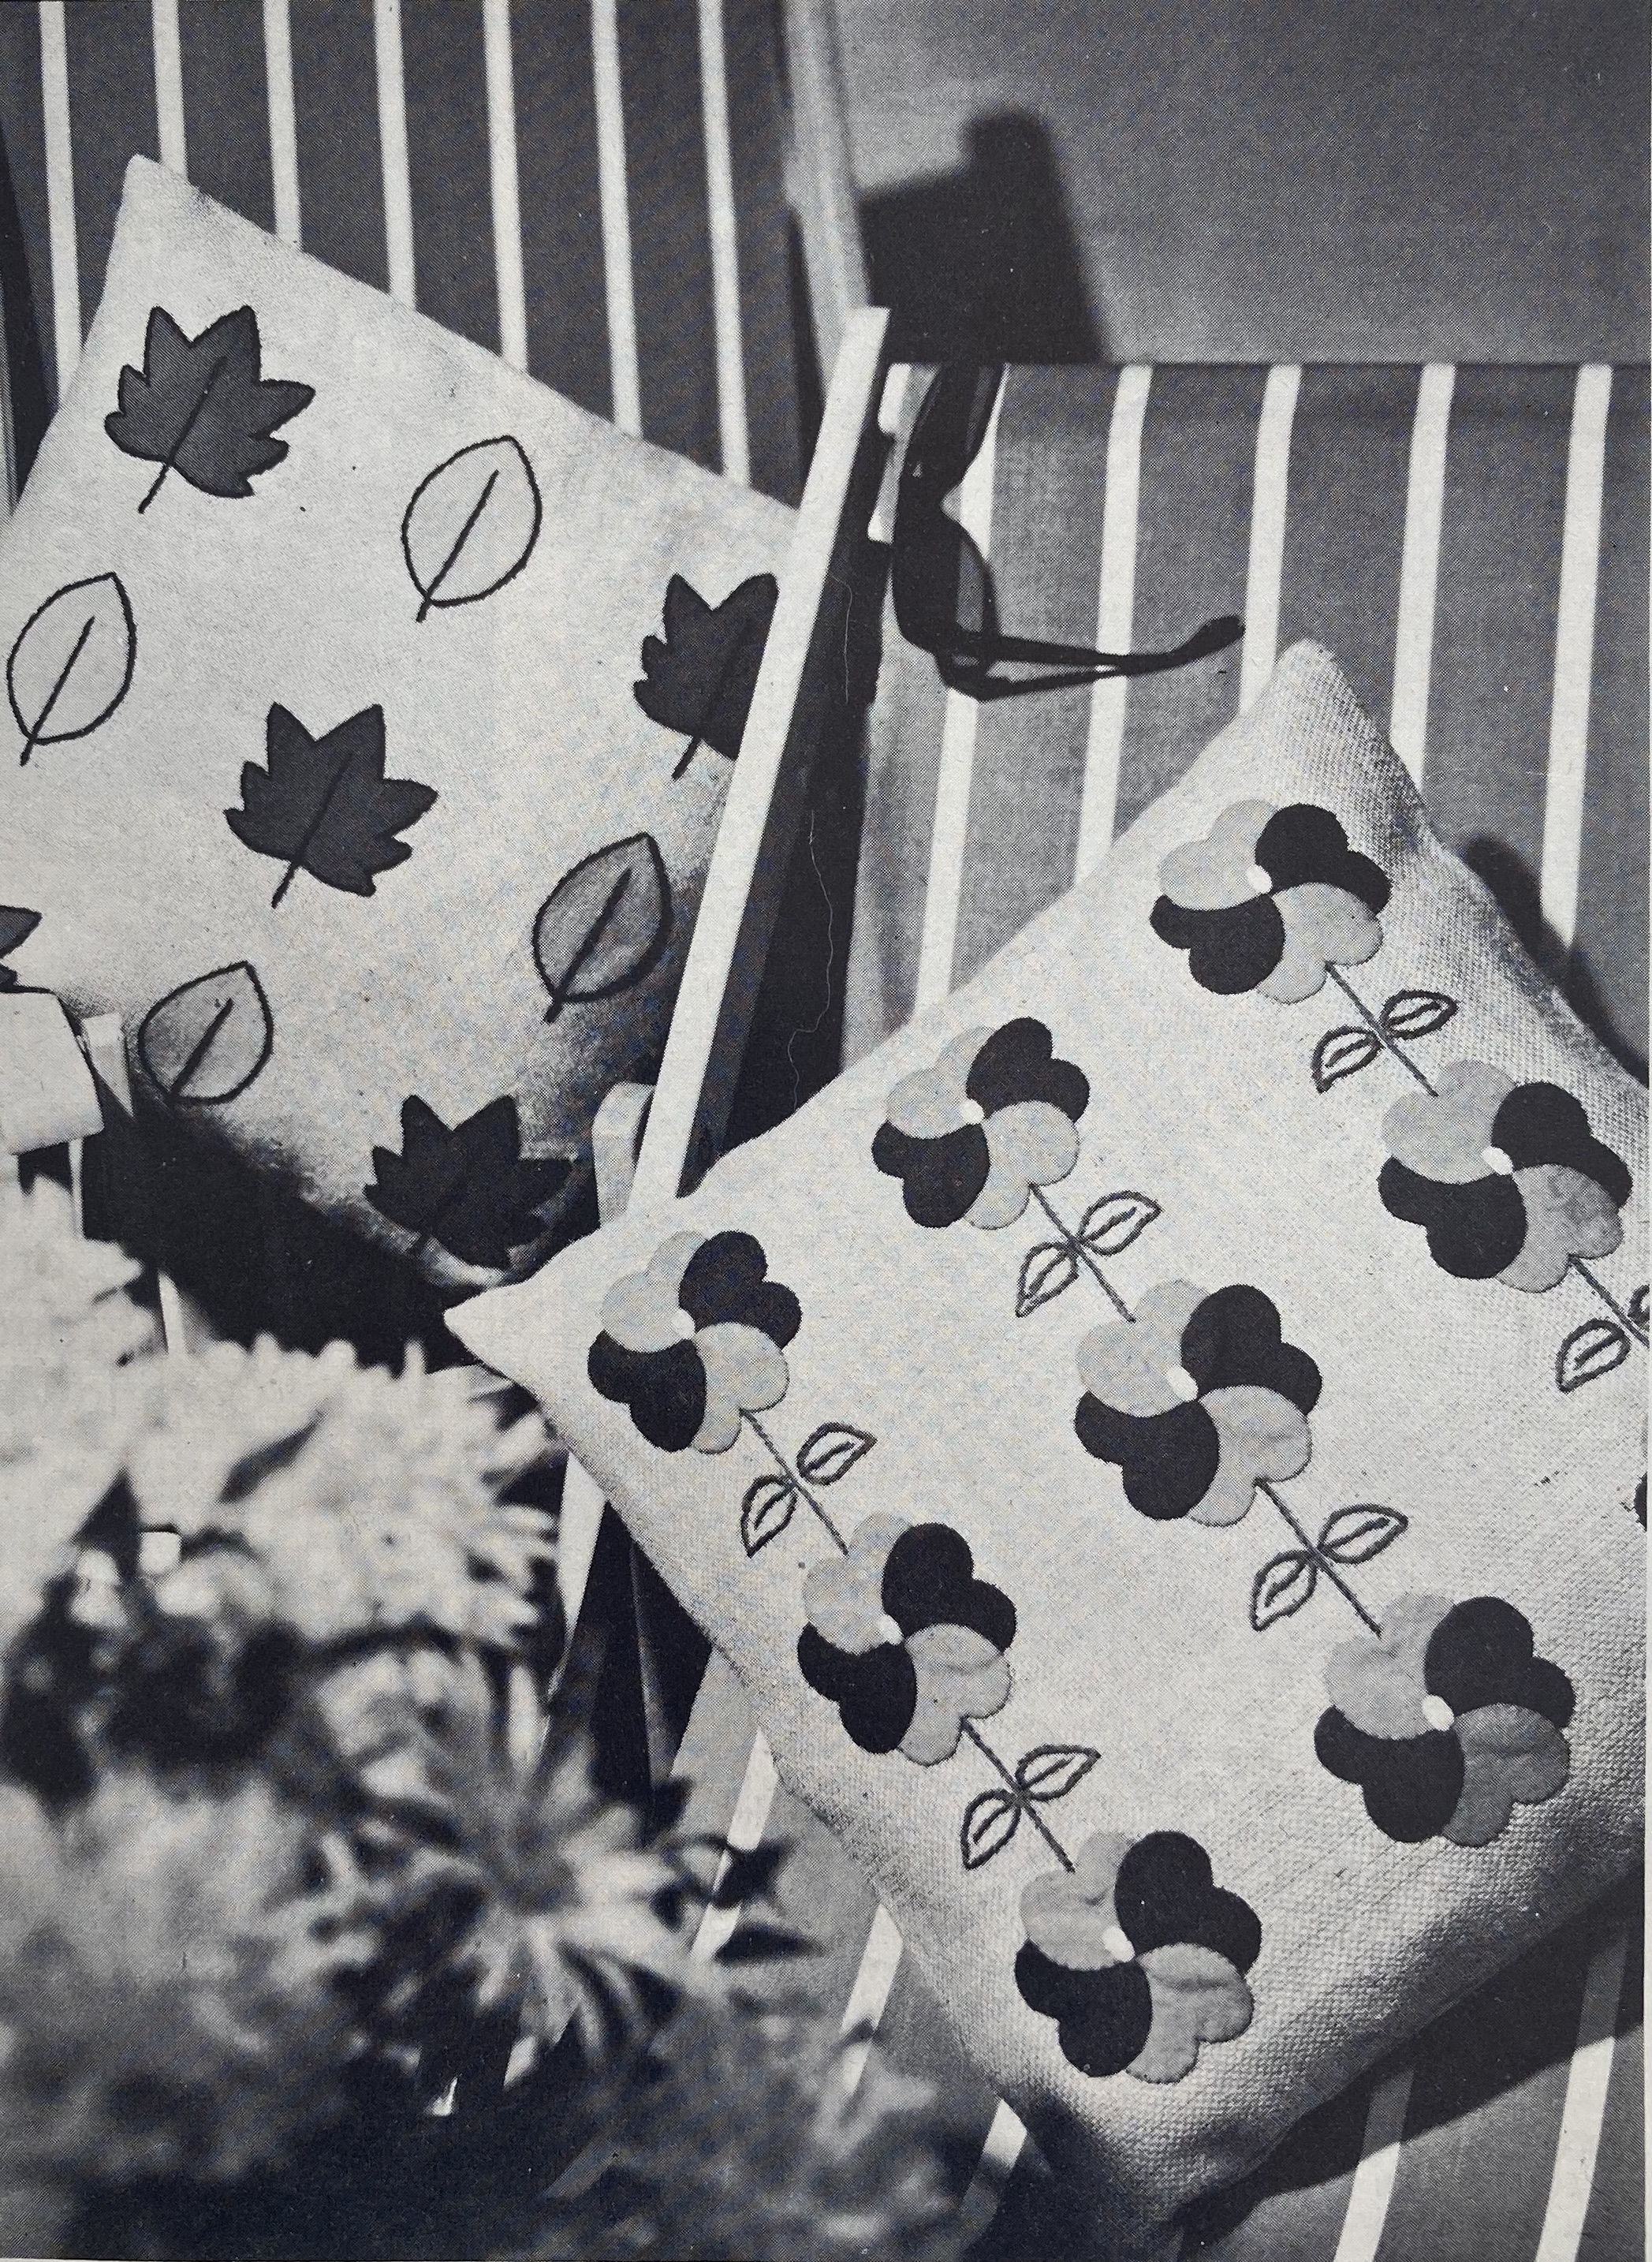
This month’s project was an appliquéd and embroidered cushion. Or, as the description in the magazine put it:
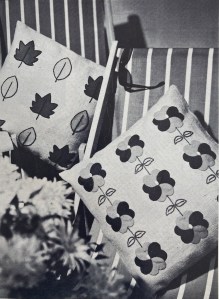
Attractive appliqué cushions in hardwearing hessian add a gay touch for garden lounging — ideal for deckchair comfort or to use on the lawn. Children will love them too, and they are tough enough to stand up to the rough-and-tumble of garden play.
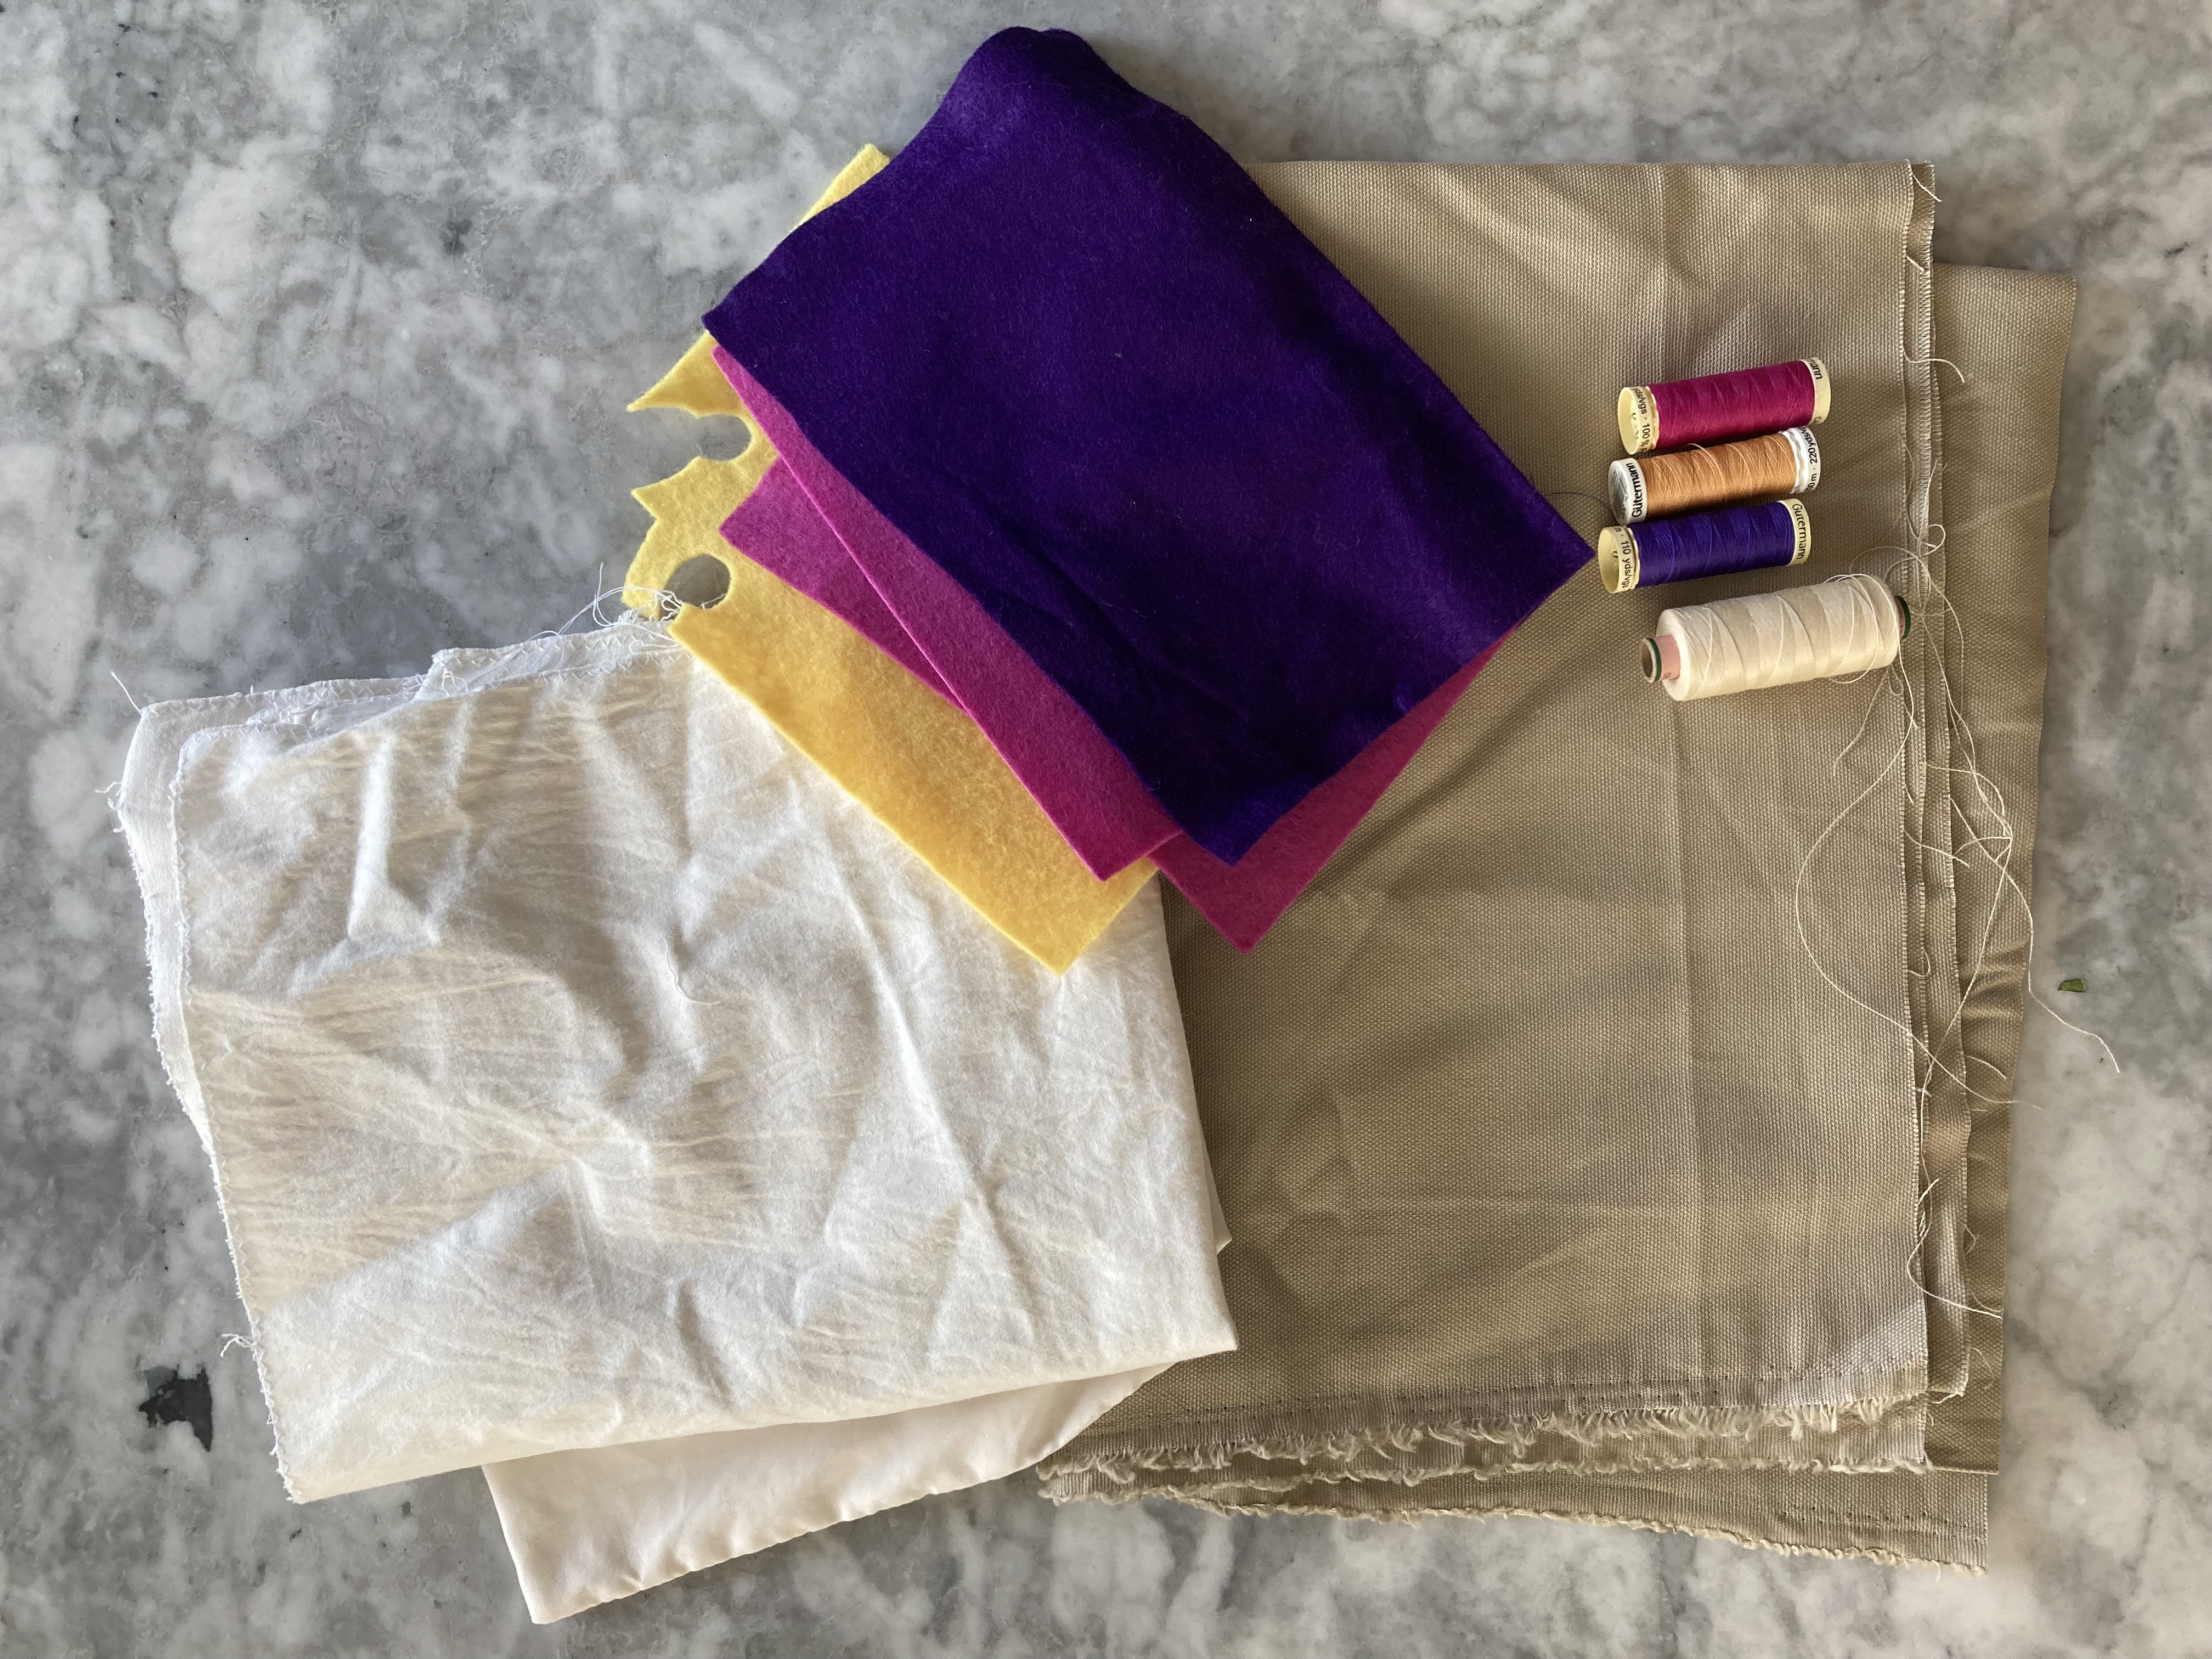
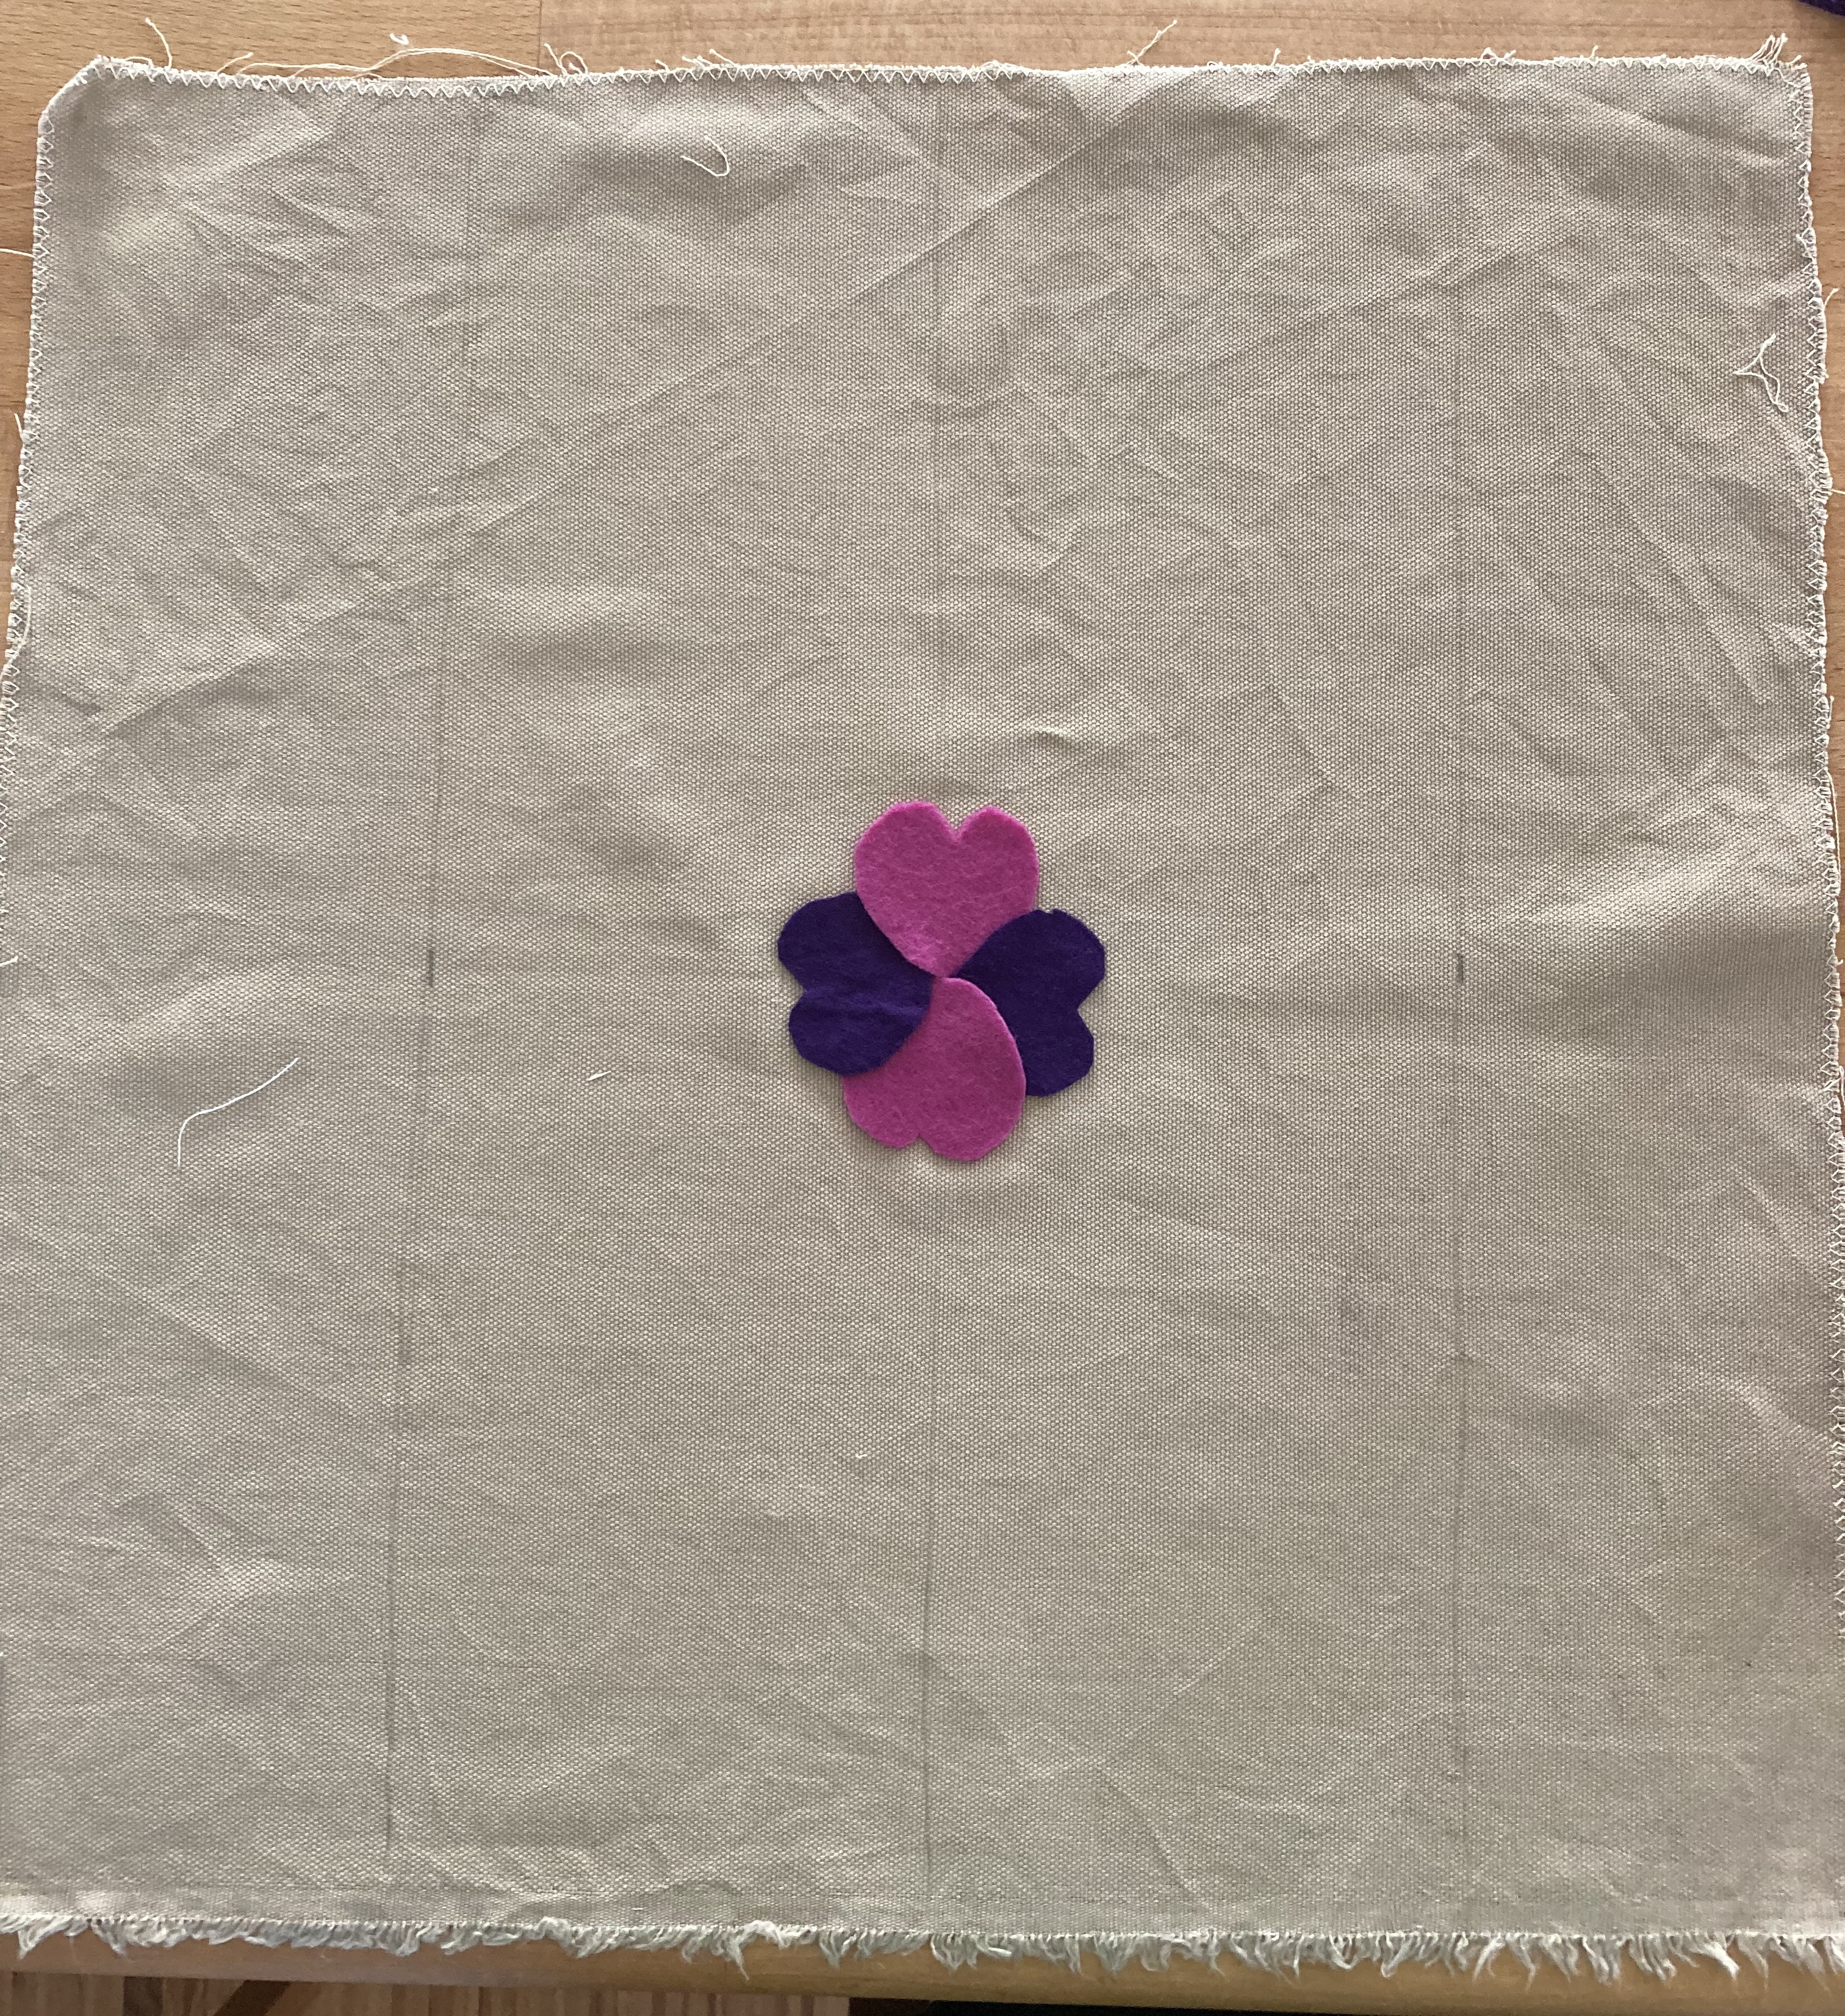
Two cushion designs are given, one with autumn leaves and one with pink and purple pansies. I chose the pansies, which were bright and fun and very 1960s. As luck would have it, I had exactly the right amount of pink and purple felt in stash, and almost enough green embroidery thread for the stems and leaves, so I didn’t have to buy many materials and could use the project to de-stash. I did have to buy the backing fabric, and decided on a tough decorating/upholstery cotton instead of real Hessian fabric (aka burlap, jute, gunny-sack), since I don’t think this cushion will be subjected to any “rough-and-tumble of garden play” on my friend’s balcony.
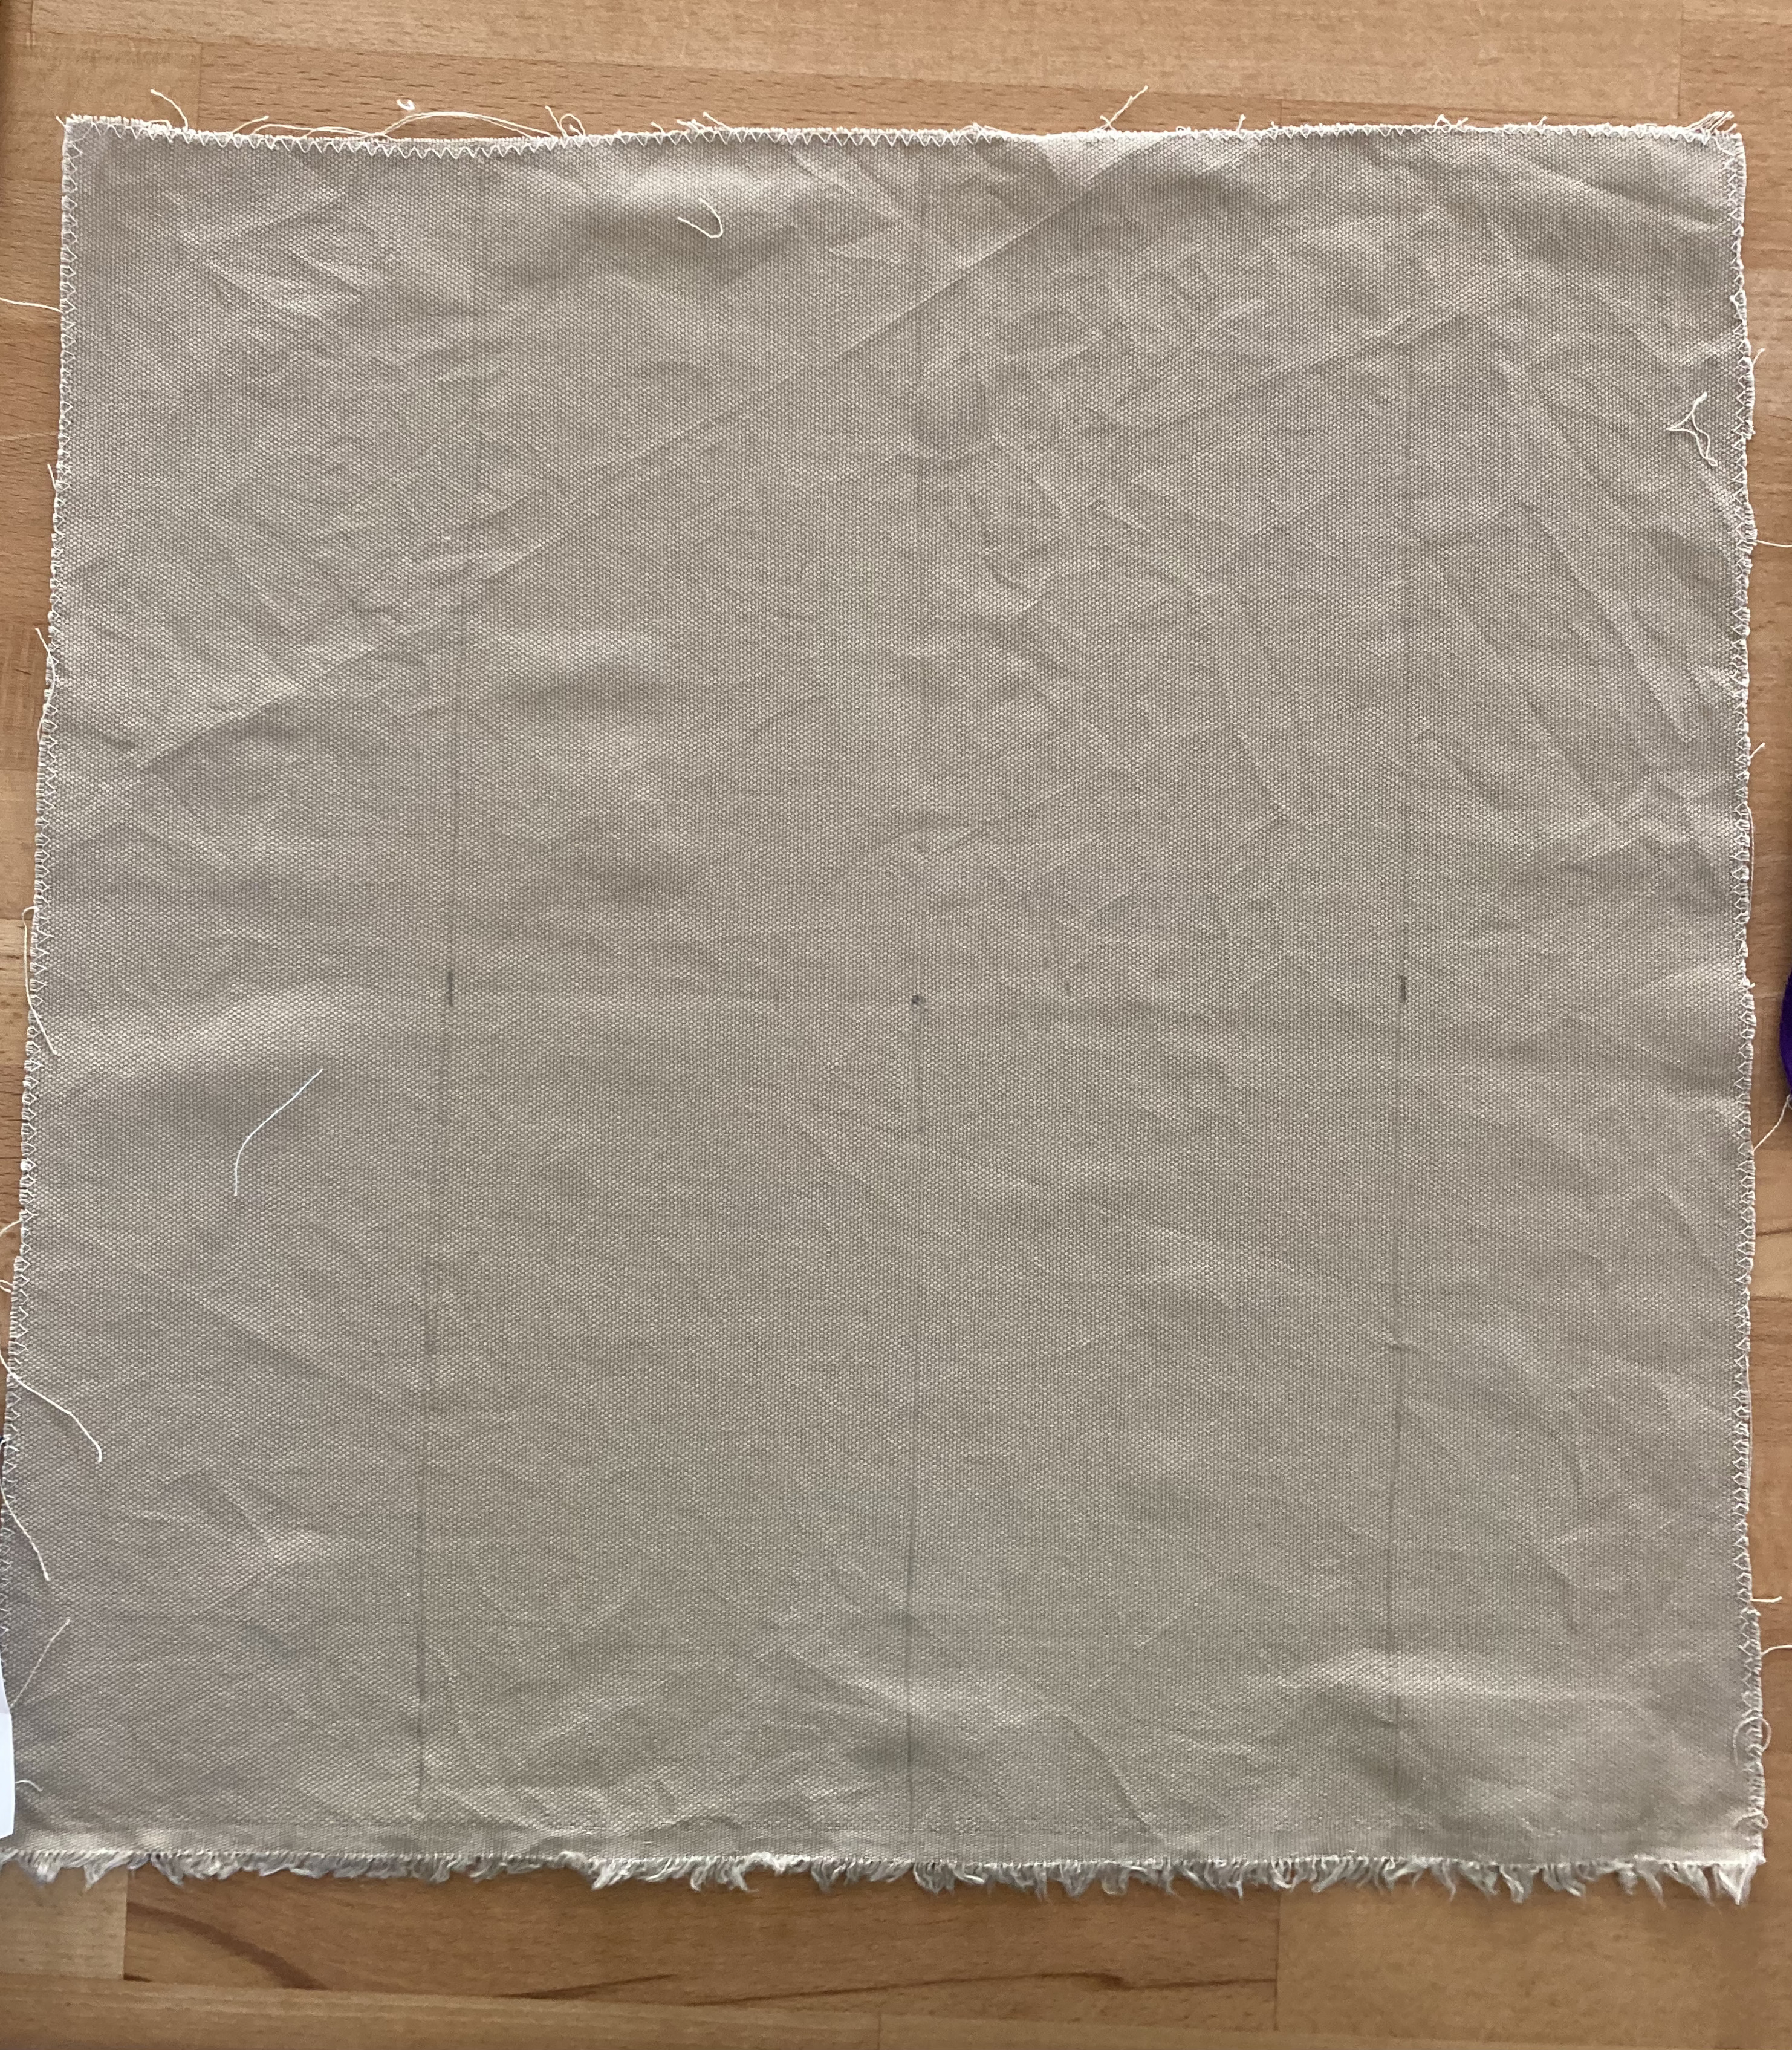
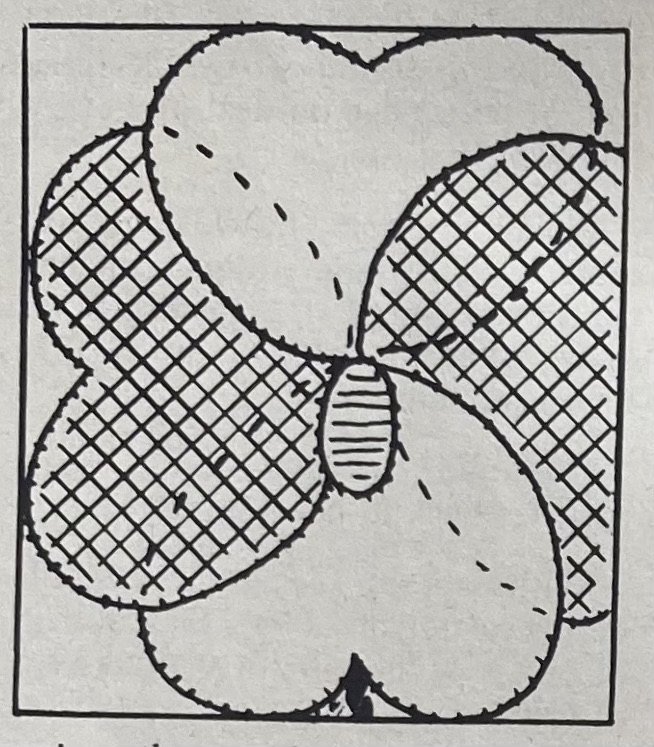
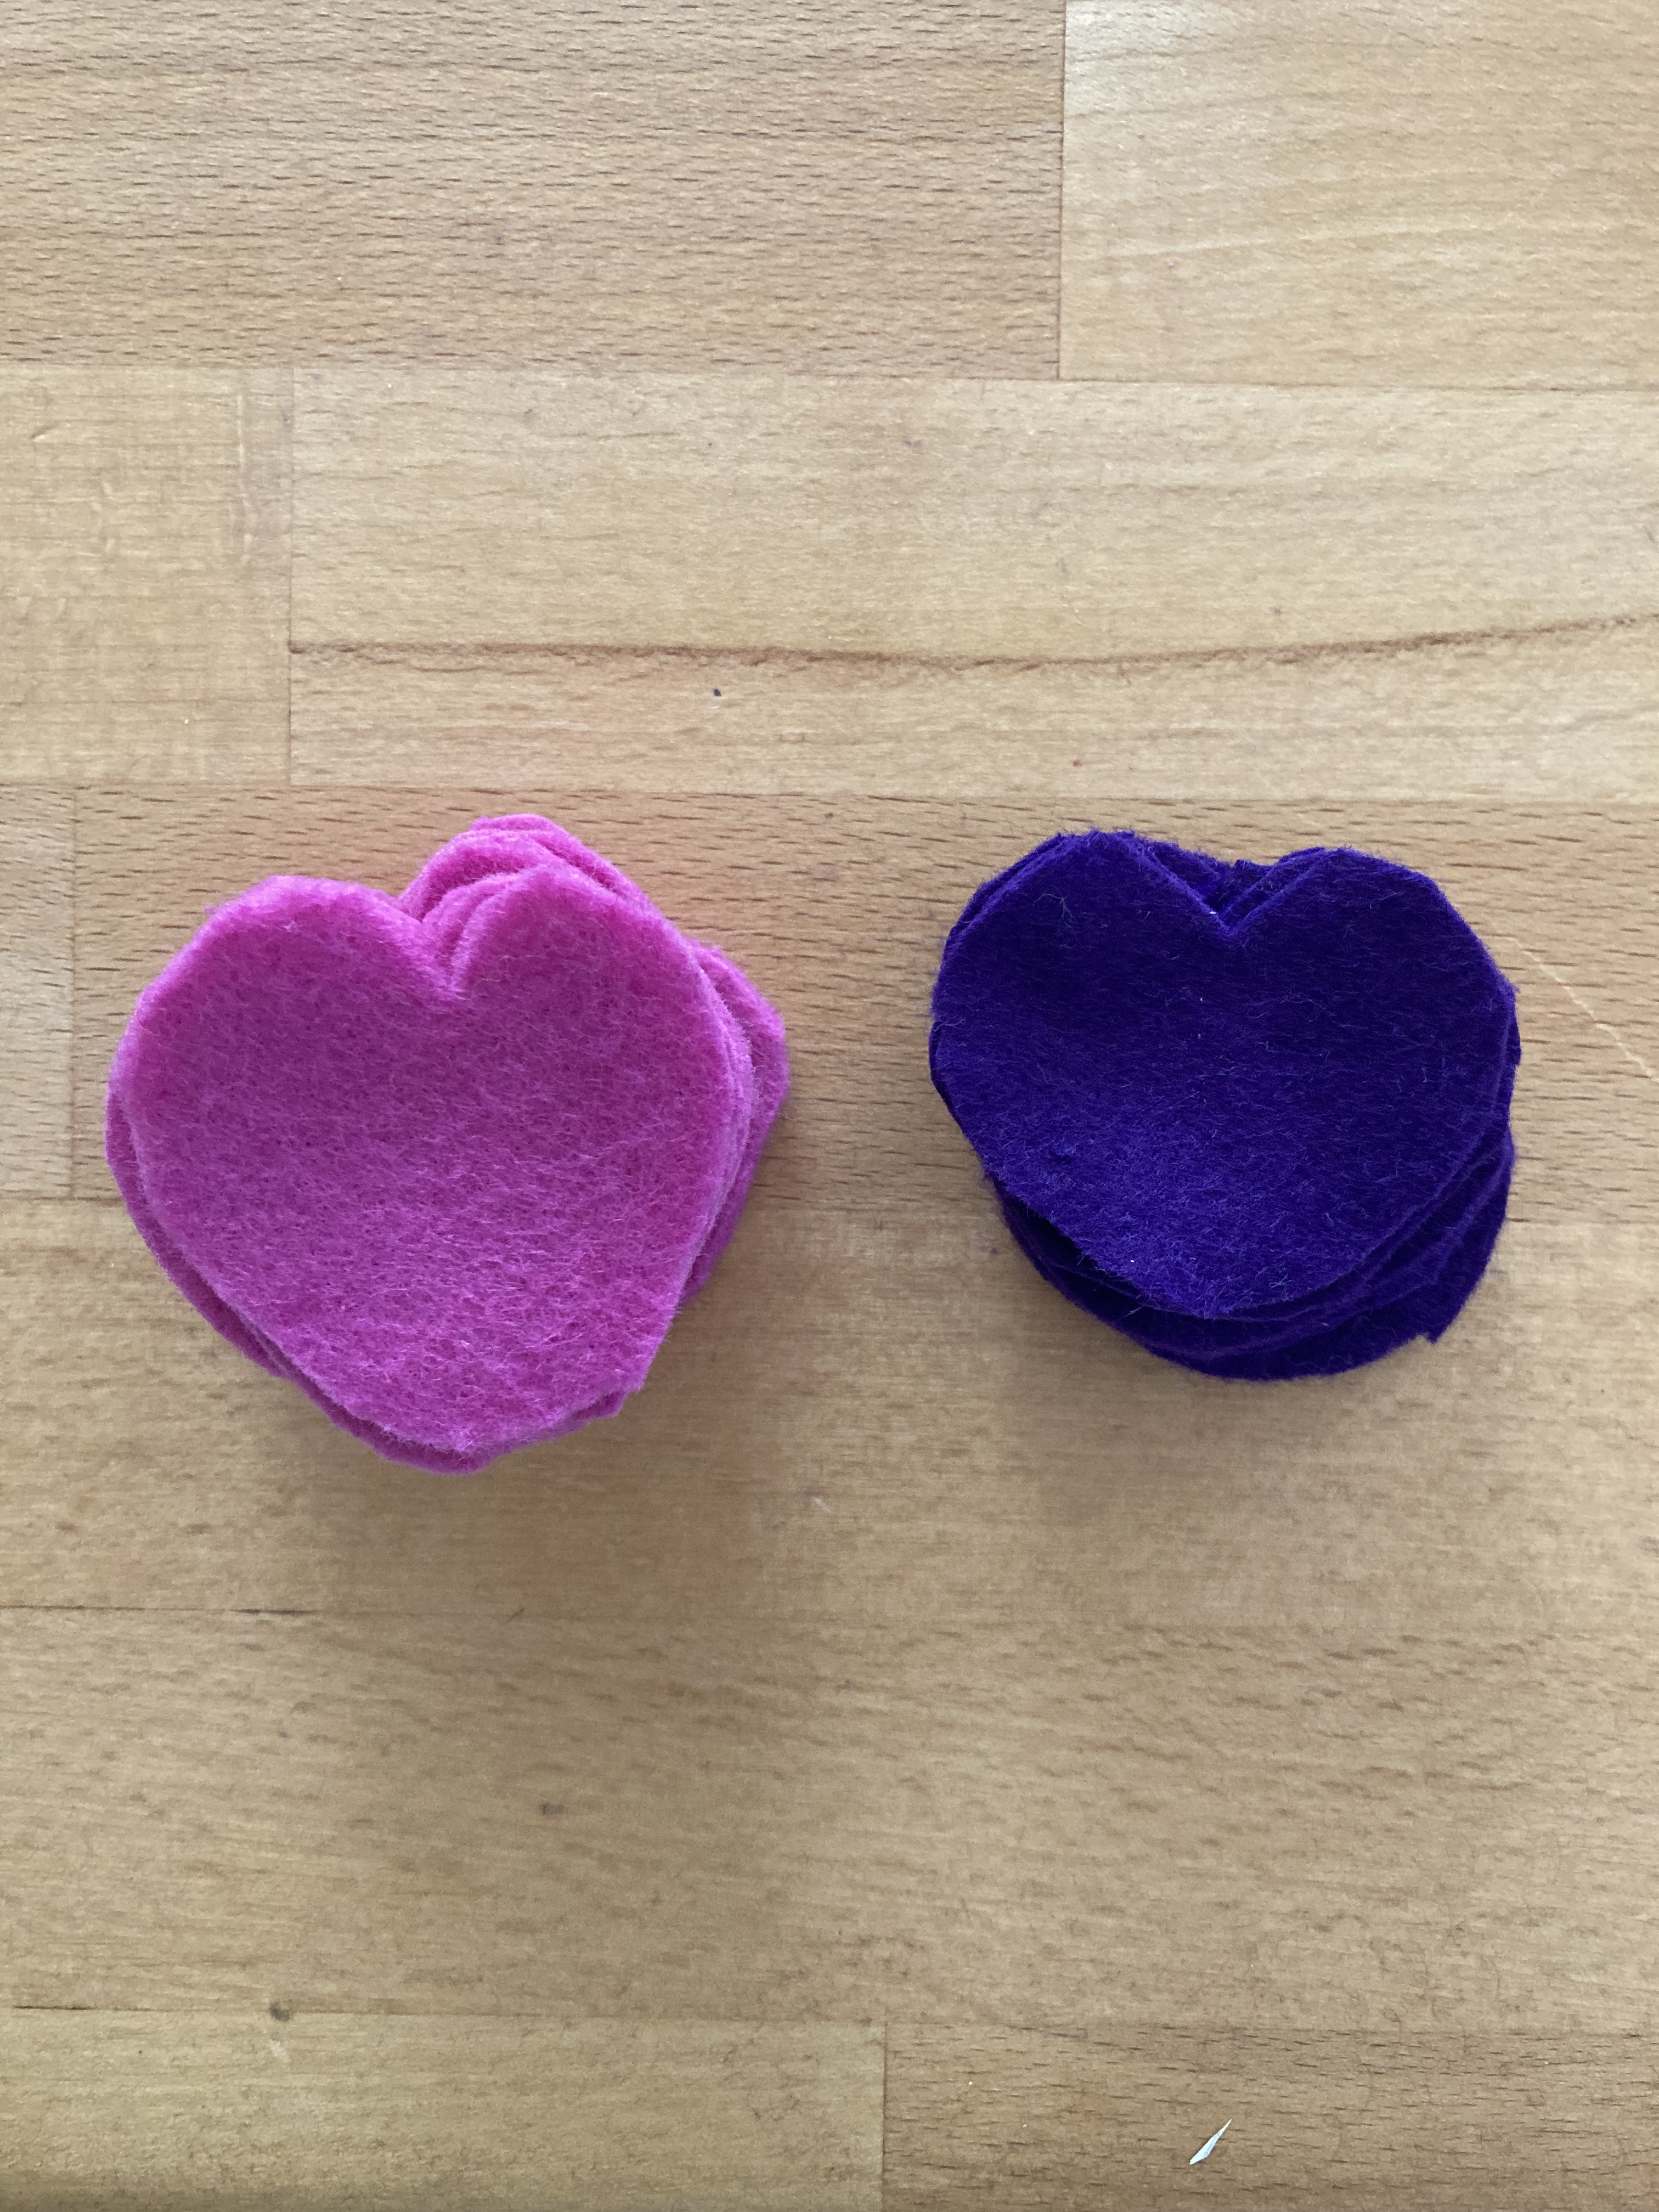
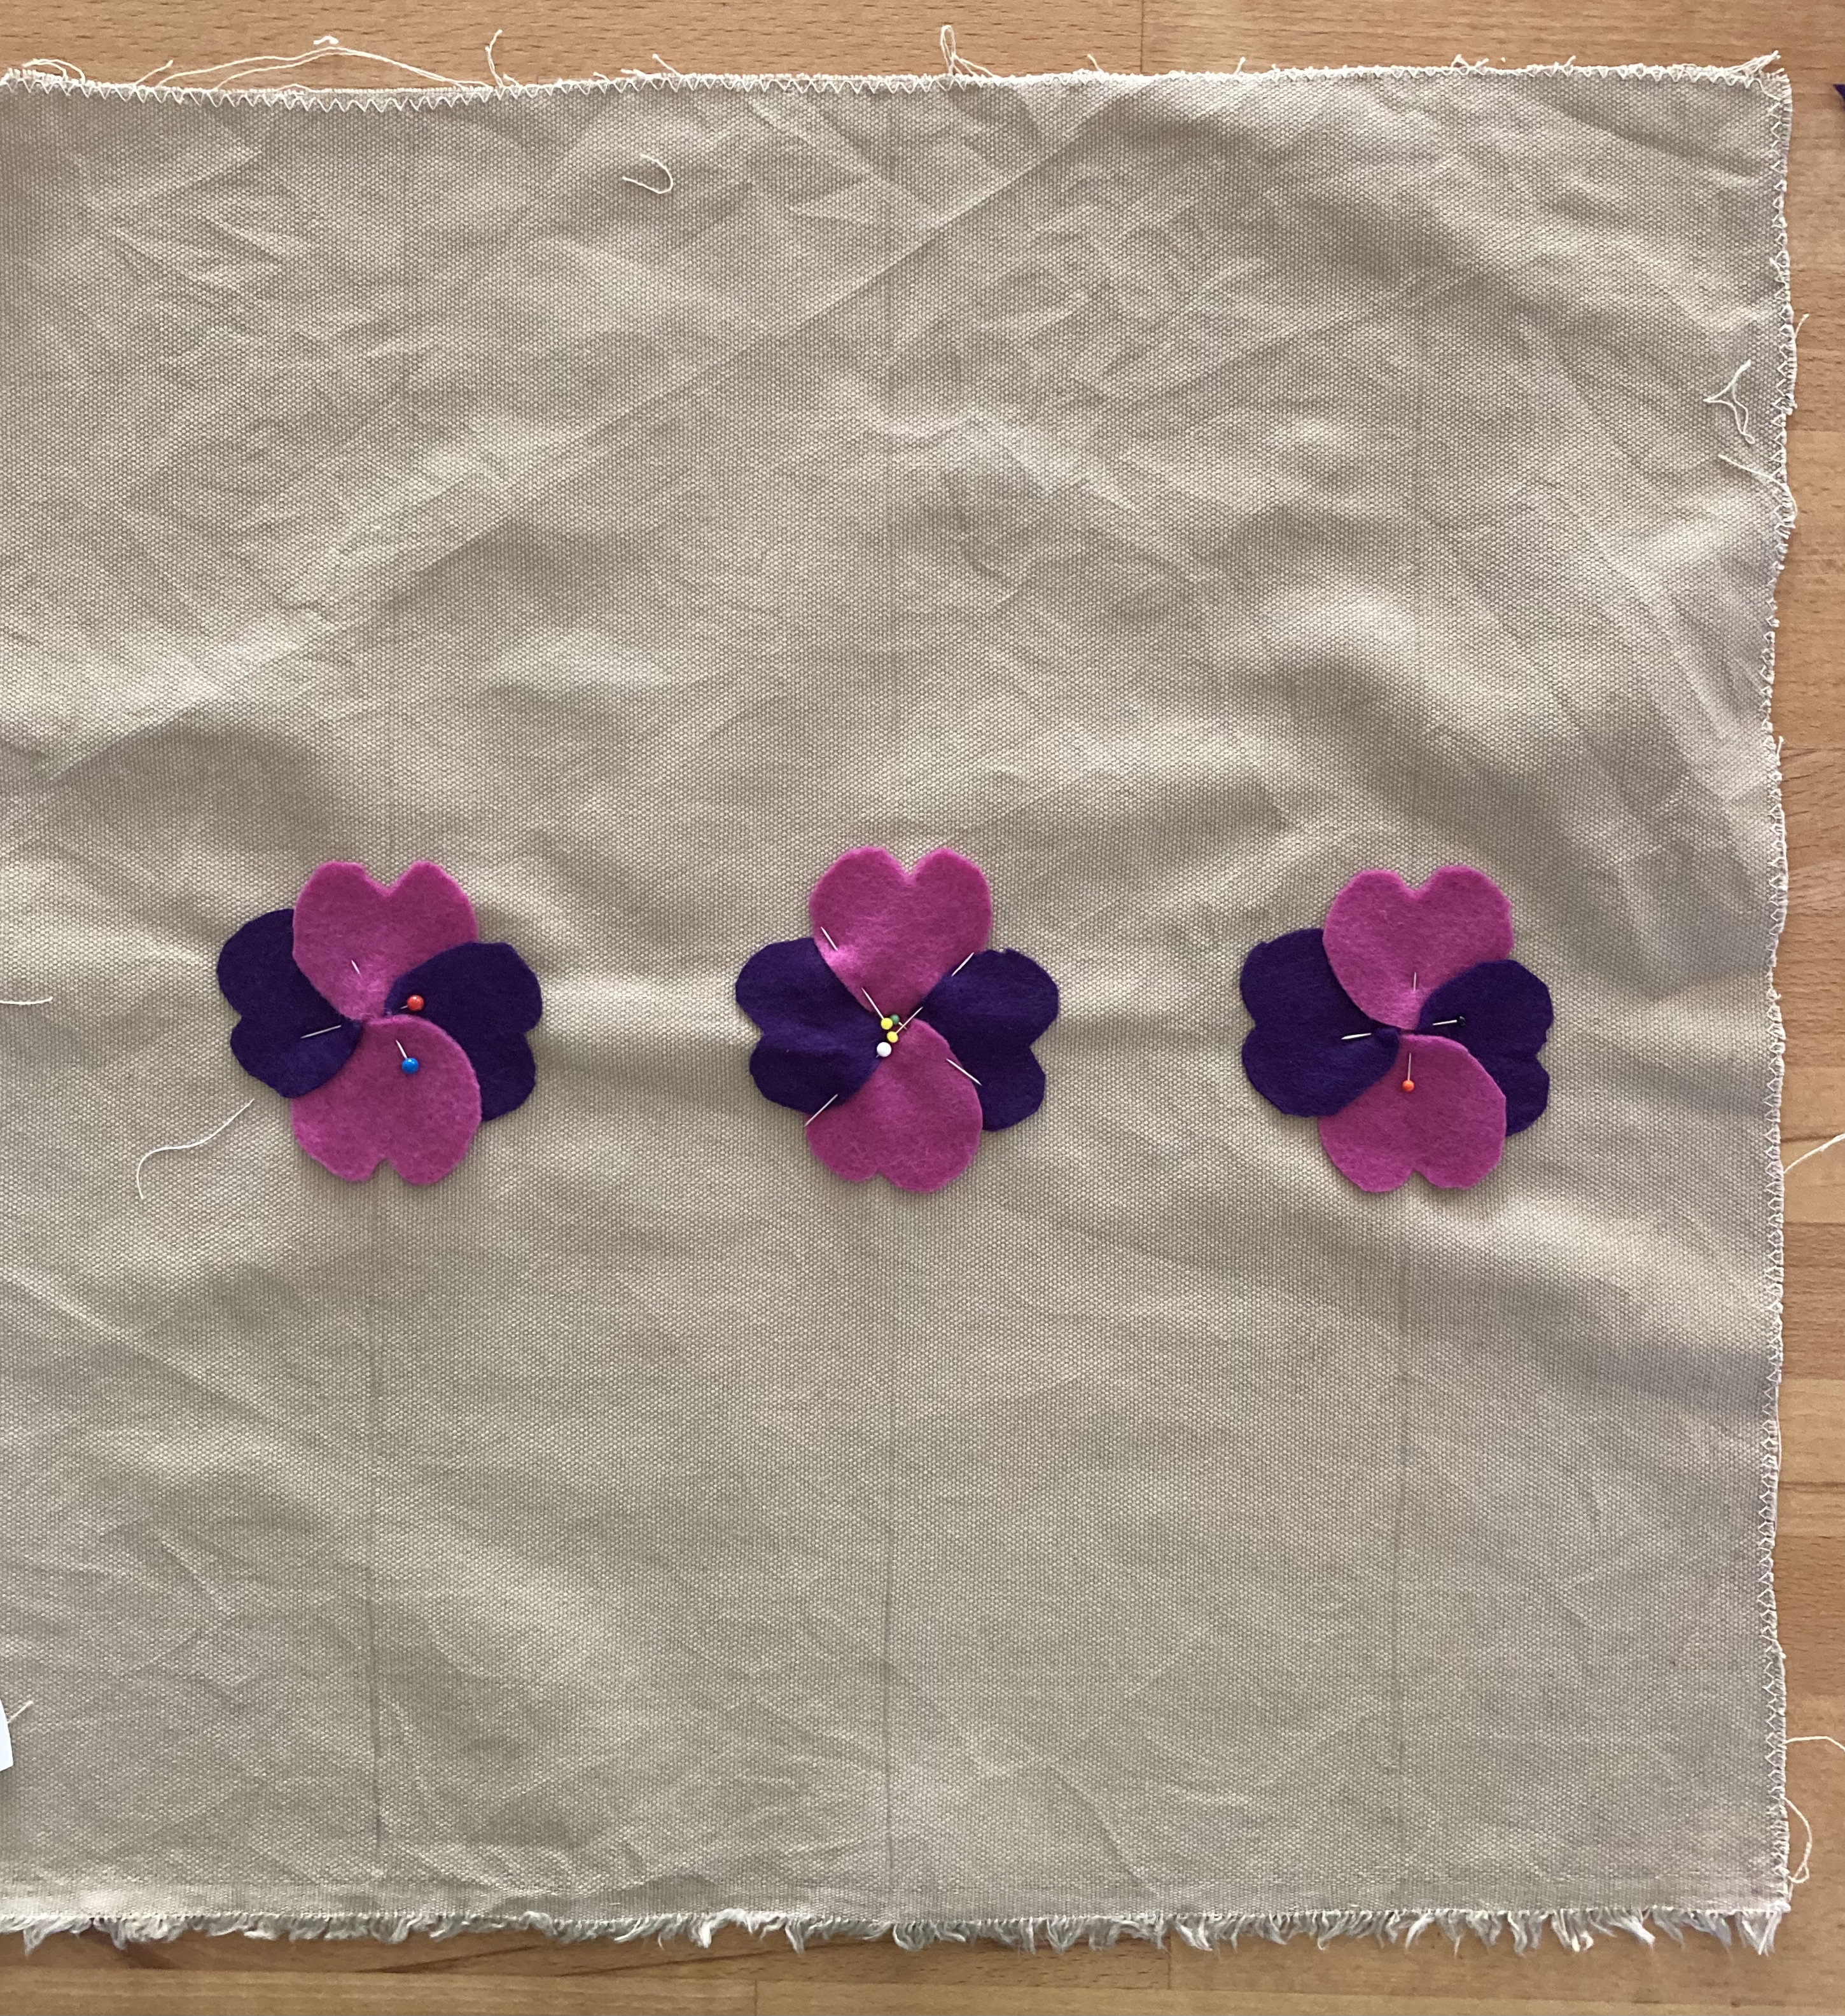
Since I didn’t have a transfer, I made a little paper pattern for the felt petals, estimating the size based on the amount of felt and the size of the background fabric. One modern “standard size” piece of decorating felt made exactly 18 petals and I think it came very close to whatever size the original transfer pattern was. I overlapped the leaves in a sort of pinwheel layer (following the helpful illustration), using a little bit of stick glue to help keep them in place, and then secured them with pins. For placement, I simply folded the background fabric in quarters and used the fold lines for the two middle axes, then measured evenly from there for the corner flowers.
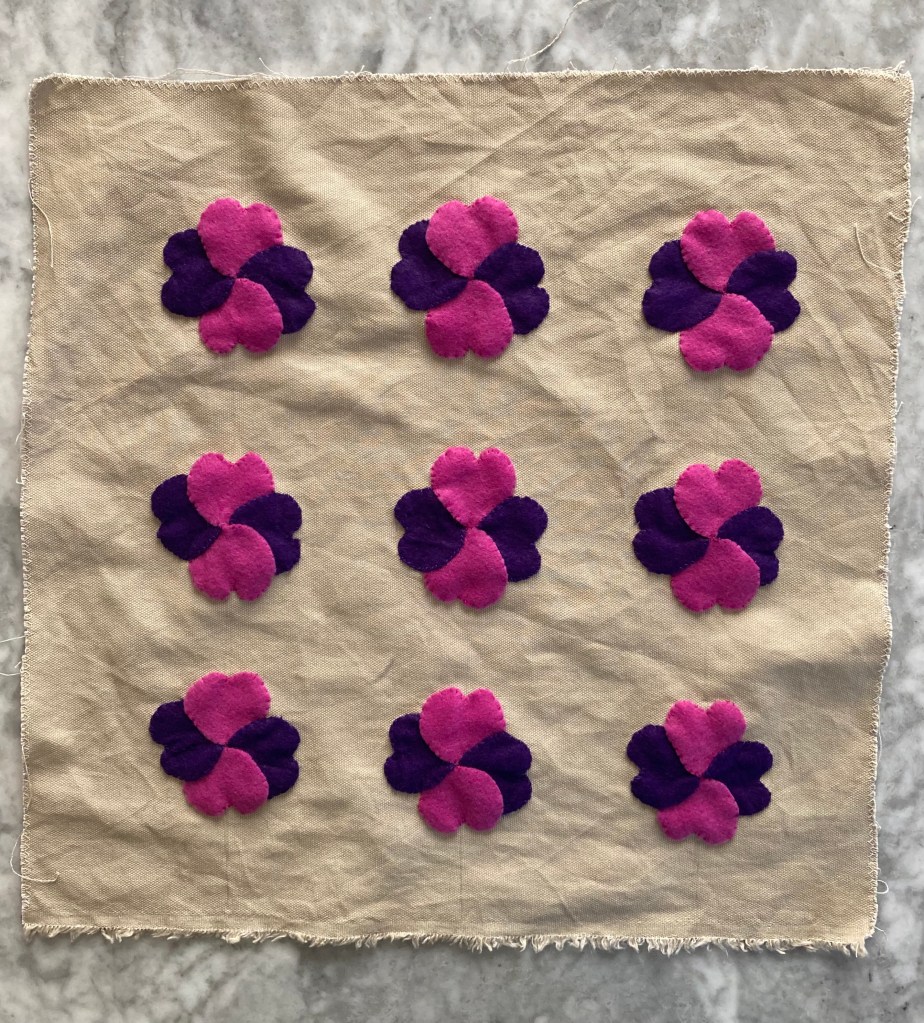
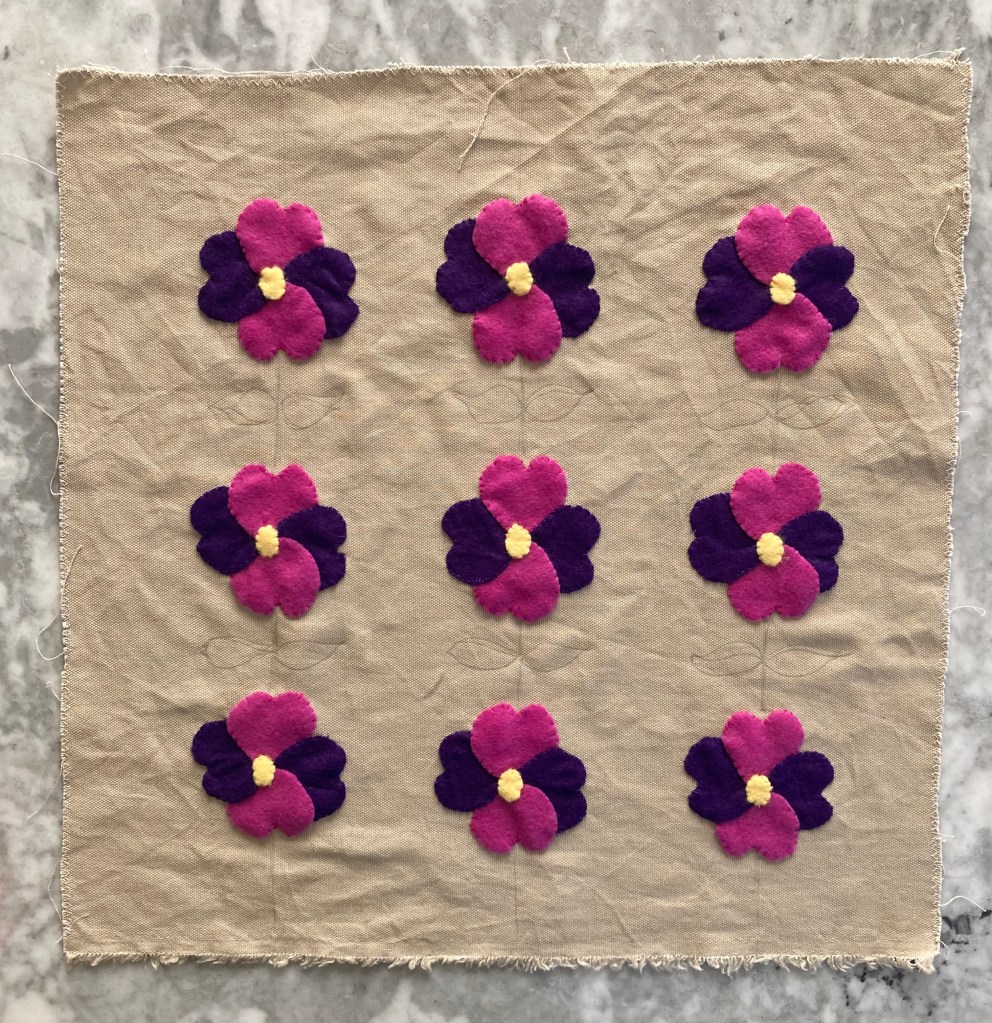
I sewed the flowers down with matching thread and added the yellow centres. The diagram shows them a bit above or below the actual centre of the petals, but I like symmetry, so I made the yellow pieces more round and put them right on the centre. (The layers of felt weren’t too heavy.)
All that was left to do after that was the leaf and stem embroidery, which was done in easy stem-stitch in green thread. The pattern didn’t say how many strands of thread to use, but seeing as it was a bold design, I used all six threads together and ran out of thread. (Up until this point, I had done all of the work in one day, but alas, I had to pause because it was Saturday late afternoon and the shops wouldn’t open again until Monday.)
Monday came, I bought more thread and finished the surface of the cushion. Sewing it up was easy enough. I had enough muslin in stash to make up one half of the inner cushion pad (pro tip: the inner cushion should always be a little bit larger than the outer cover, to prevent sagging) and enough of the beige cotton to make the other half. I did not, as suggested in the pattern, line the pad with plastic to make it waterproof “for use on the grass”. After making the pad, I had exactly enough beige fabric left to make strips for “piping”, so added that as well (not part of the original design). It was not “real” piping, which is made on a bias strip, and thus came out a bit uneven. Oh well. At least the zipper was no problem this time.
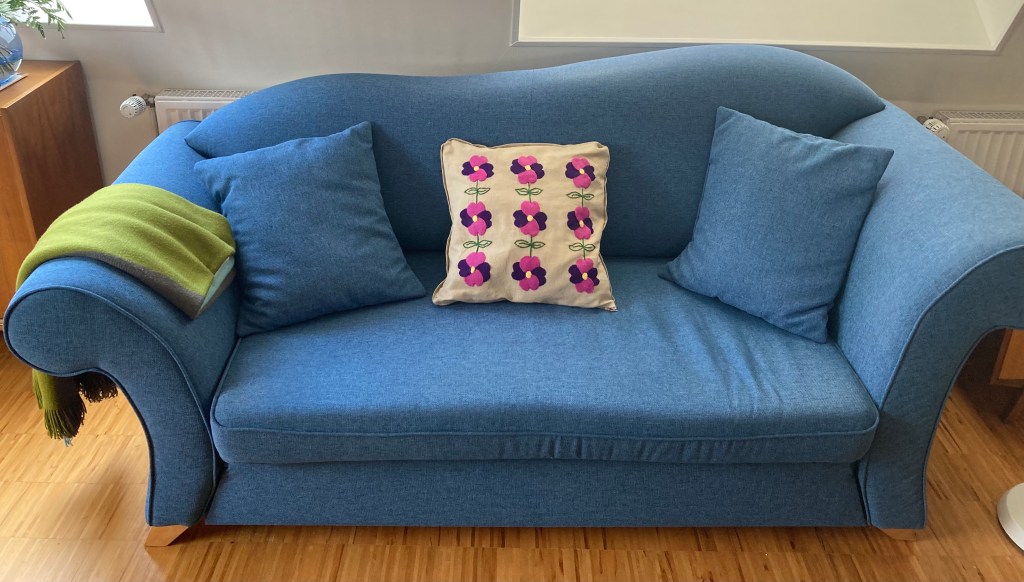
And that was that! I stuffed the inner cushion with fluff, sewed it up, zipped it into the cover and voilà. I have no garden, no balcony and too many cushions already, so this will be a gift for a friend.
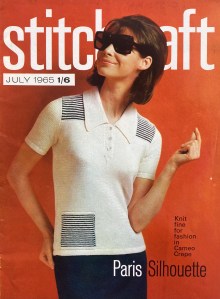
July is still “holiday” season over at Stitchcraft, but this summery issue is already looking towards cooler autumn temperatures and the return to post-holiday life. For women’s fashions, this means a “revival of the more feminine line” (as if there were ever a fashion for “the masculine line” in 1960s women’s fashions.) I guess they mean a slightly closer-fitting silhouette, or a little more shaping of upper-body garments between hem and bust. At the same time, “quick and easy yarns” or “easy-to-wear loose front styling” jackets are still in fashion, emphasising comfort and wearability.
Our cover model sports a white blouse made in 4-ply “Cameo Crepe” wool and twisted stocking-stitch for a little more texture. The navy blue accents on shoulder and pocket match the knitted skirt, which is just below-knee length. That may seem surprising if you associate mid-1960s fashions with miniskirts, but it took a while for the ideas of cutting-edge designers like Mary Quant or André Courrèges to trickle down to the general public, and hand-knitting magazines, even the more fashionable / aspirational ones, were oriented towards designs that “regular people” could wear in everyday life . The dresses and skirts in Vogue Knitting’s 1965 Spring/Summer issue, for example, all fall between just-barely-above and solidly-below knee-length — and Stitchcraft was a more conservative magazine than Vogue Knitting. We won’t be seeing miniskirts here for a while yet.
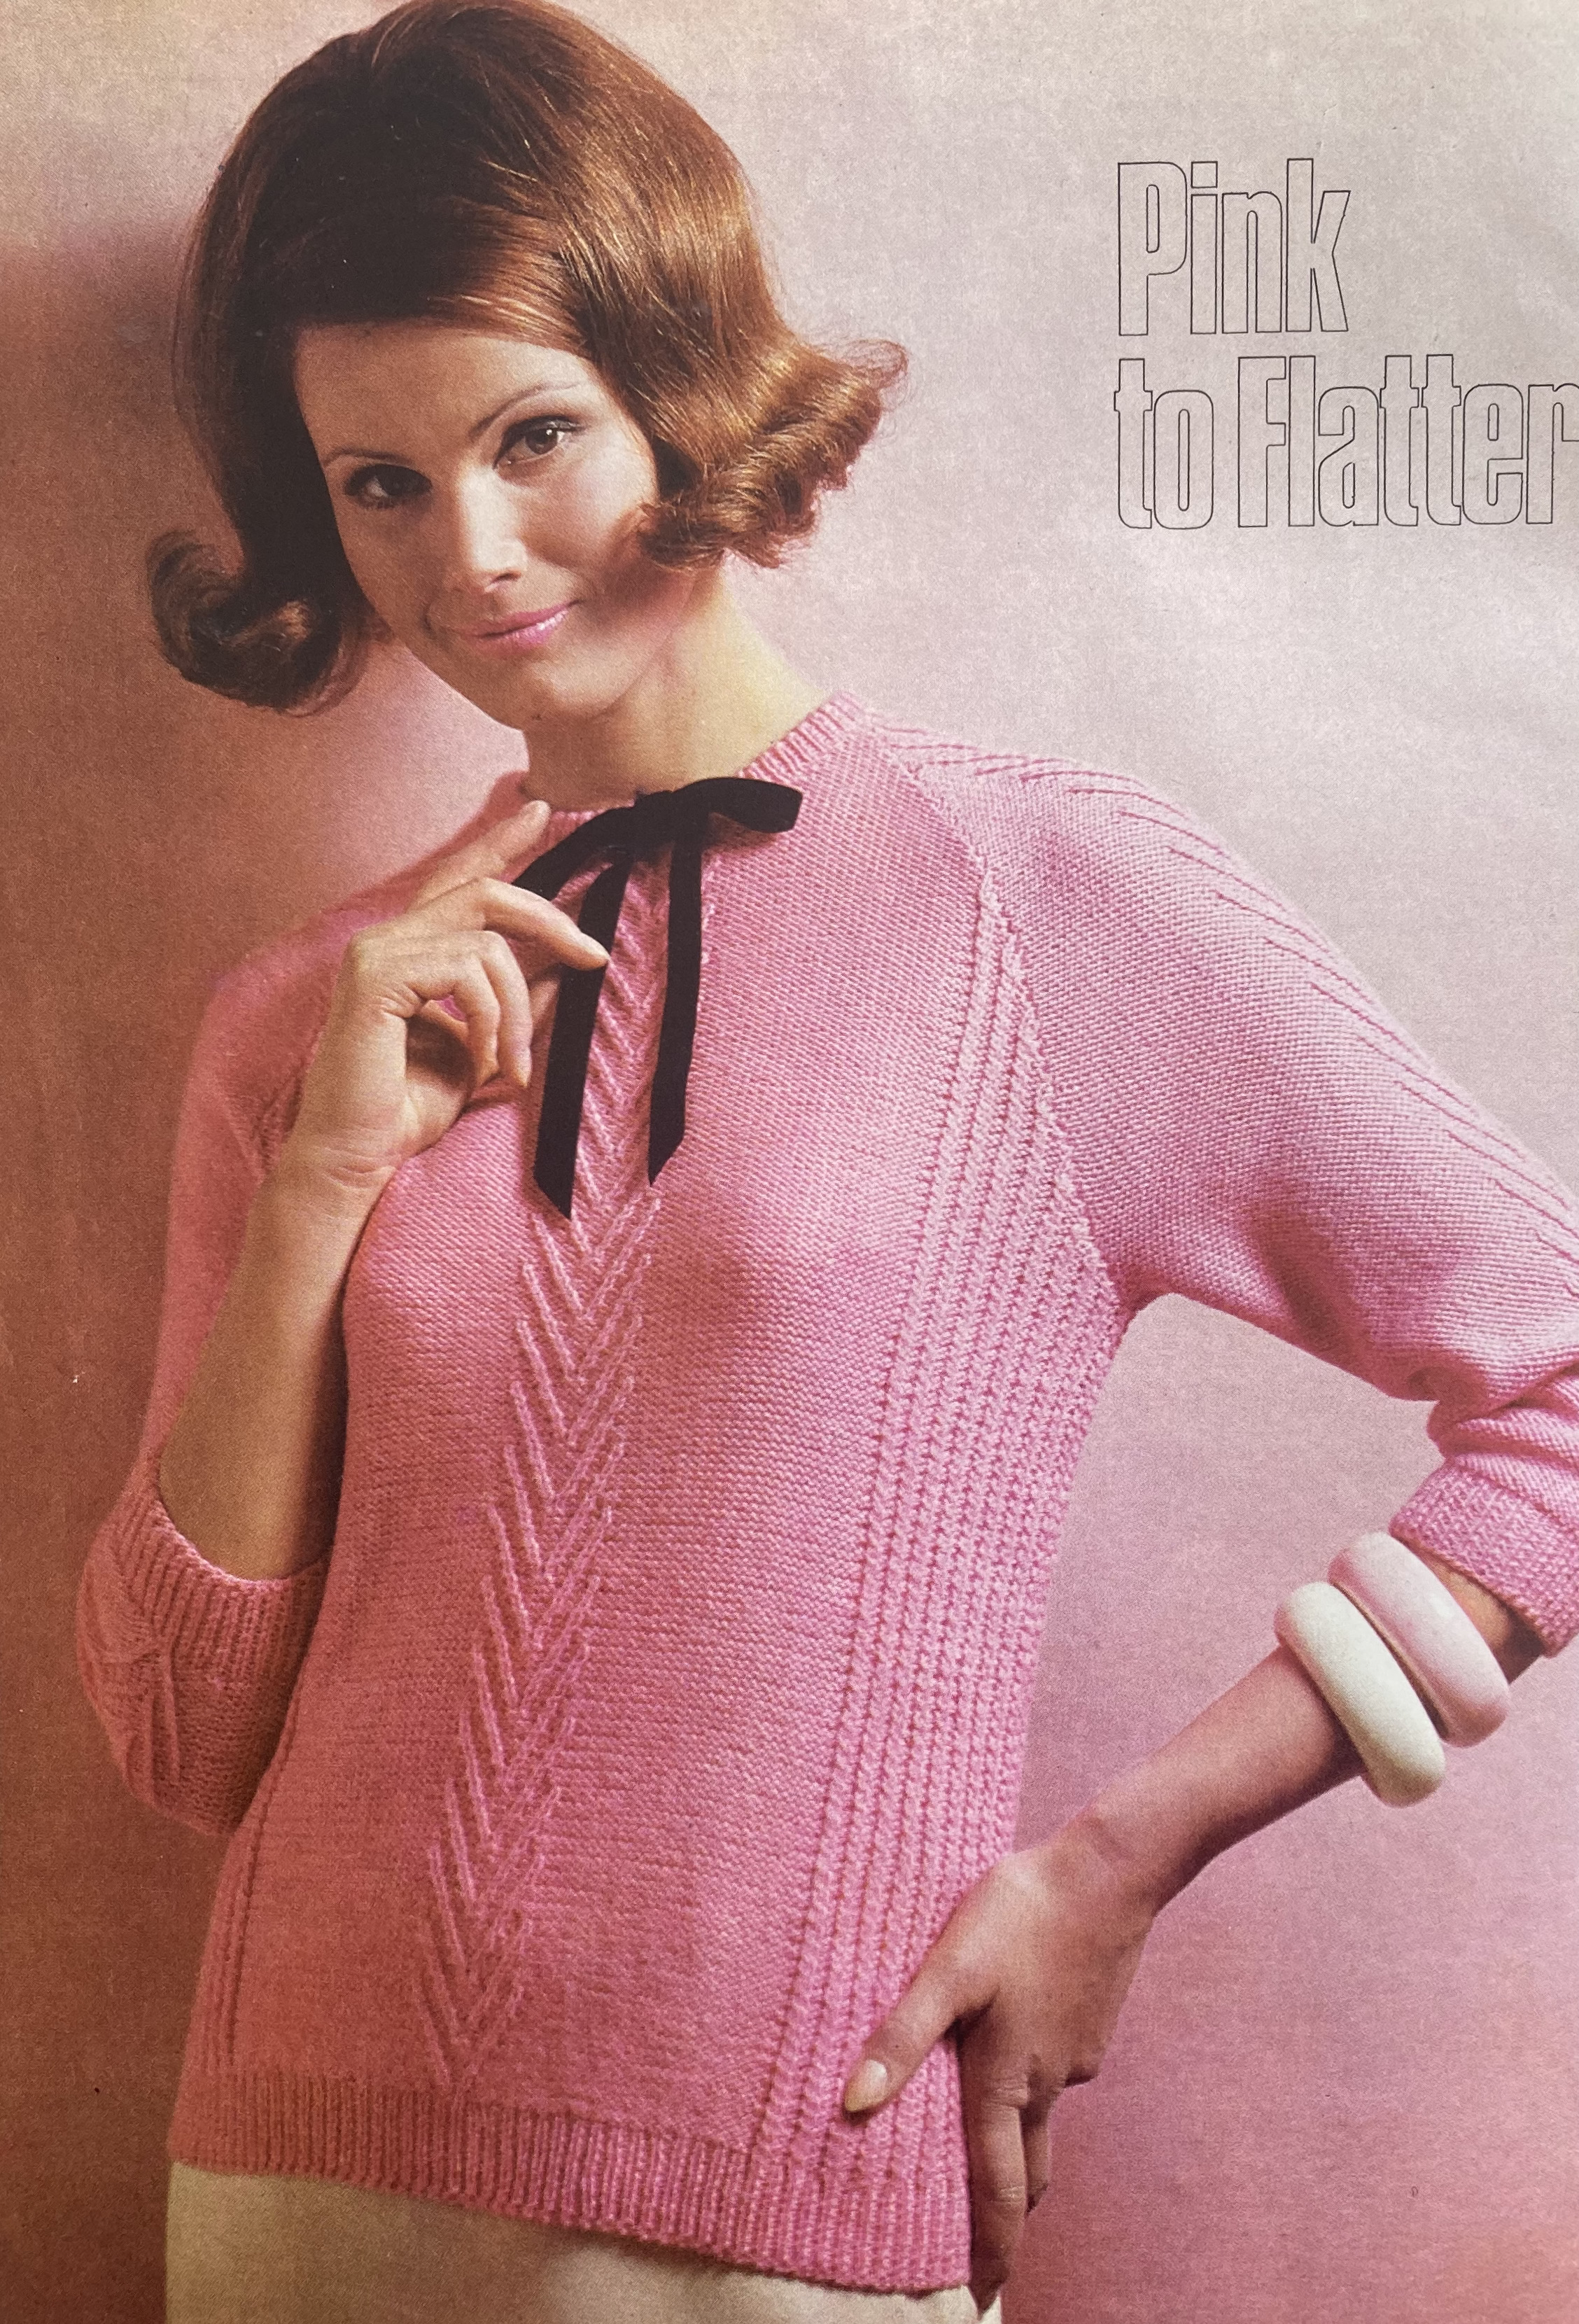
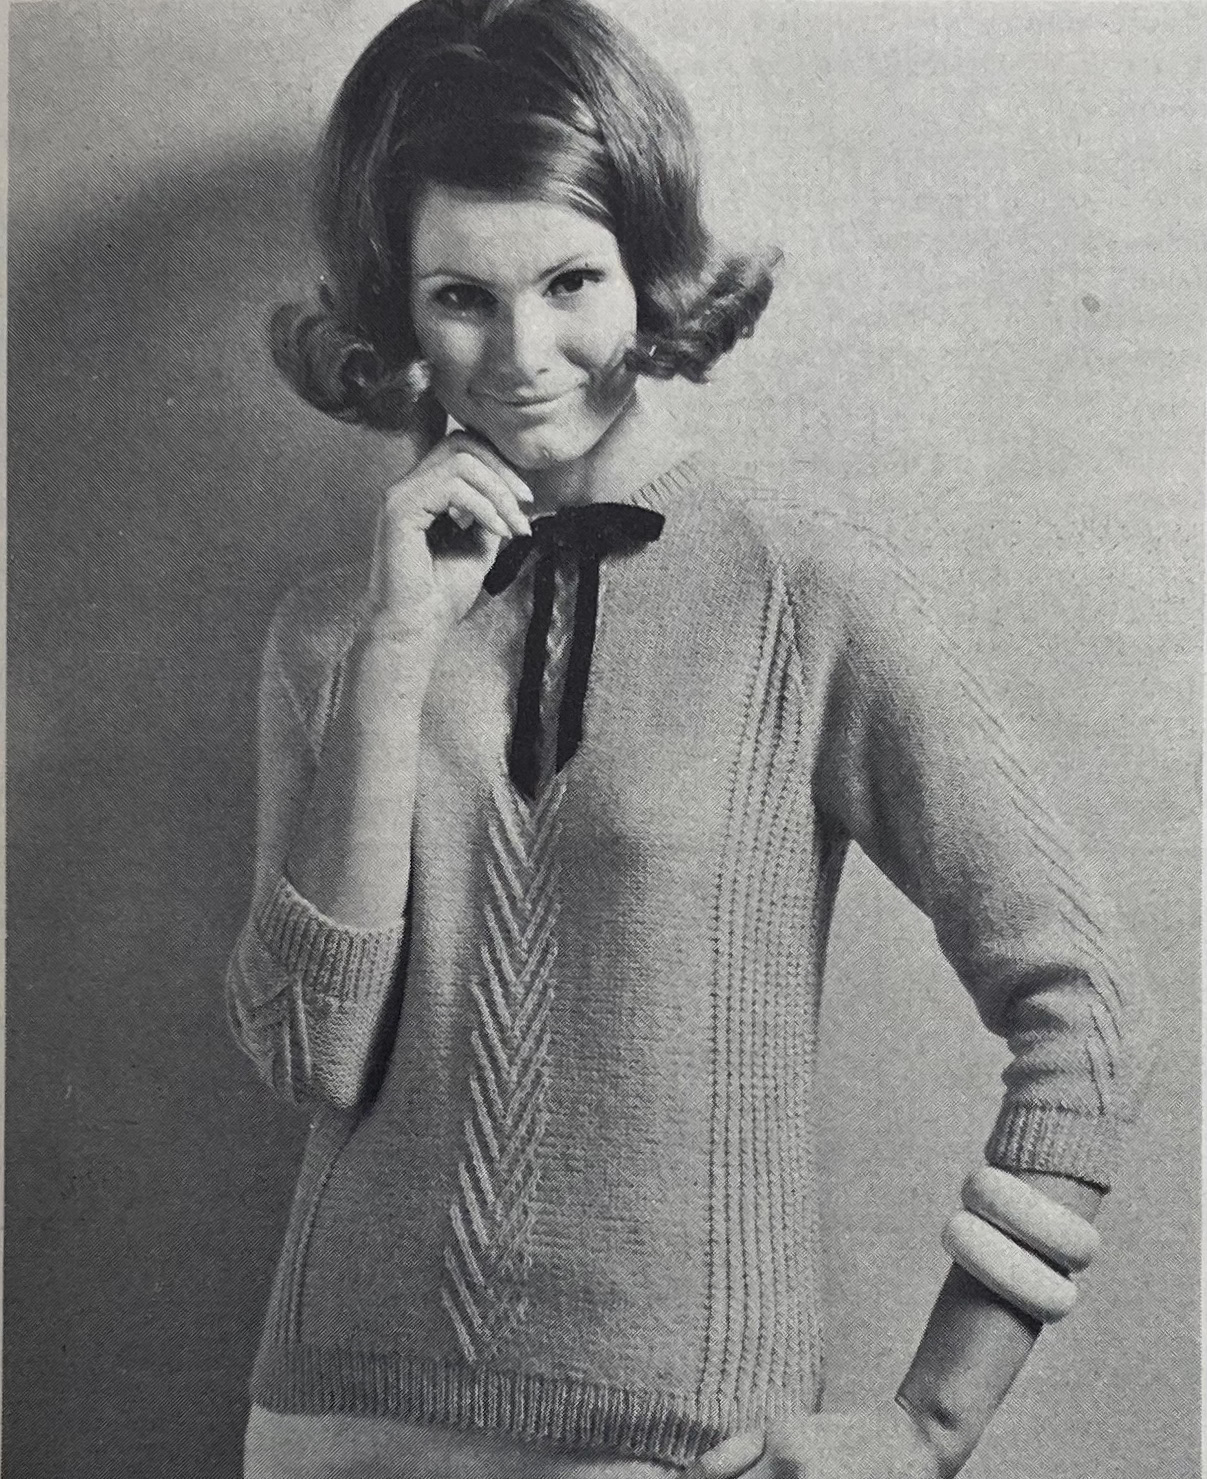
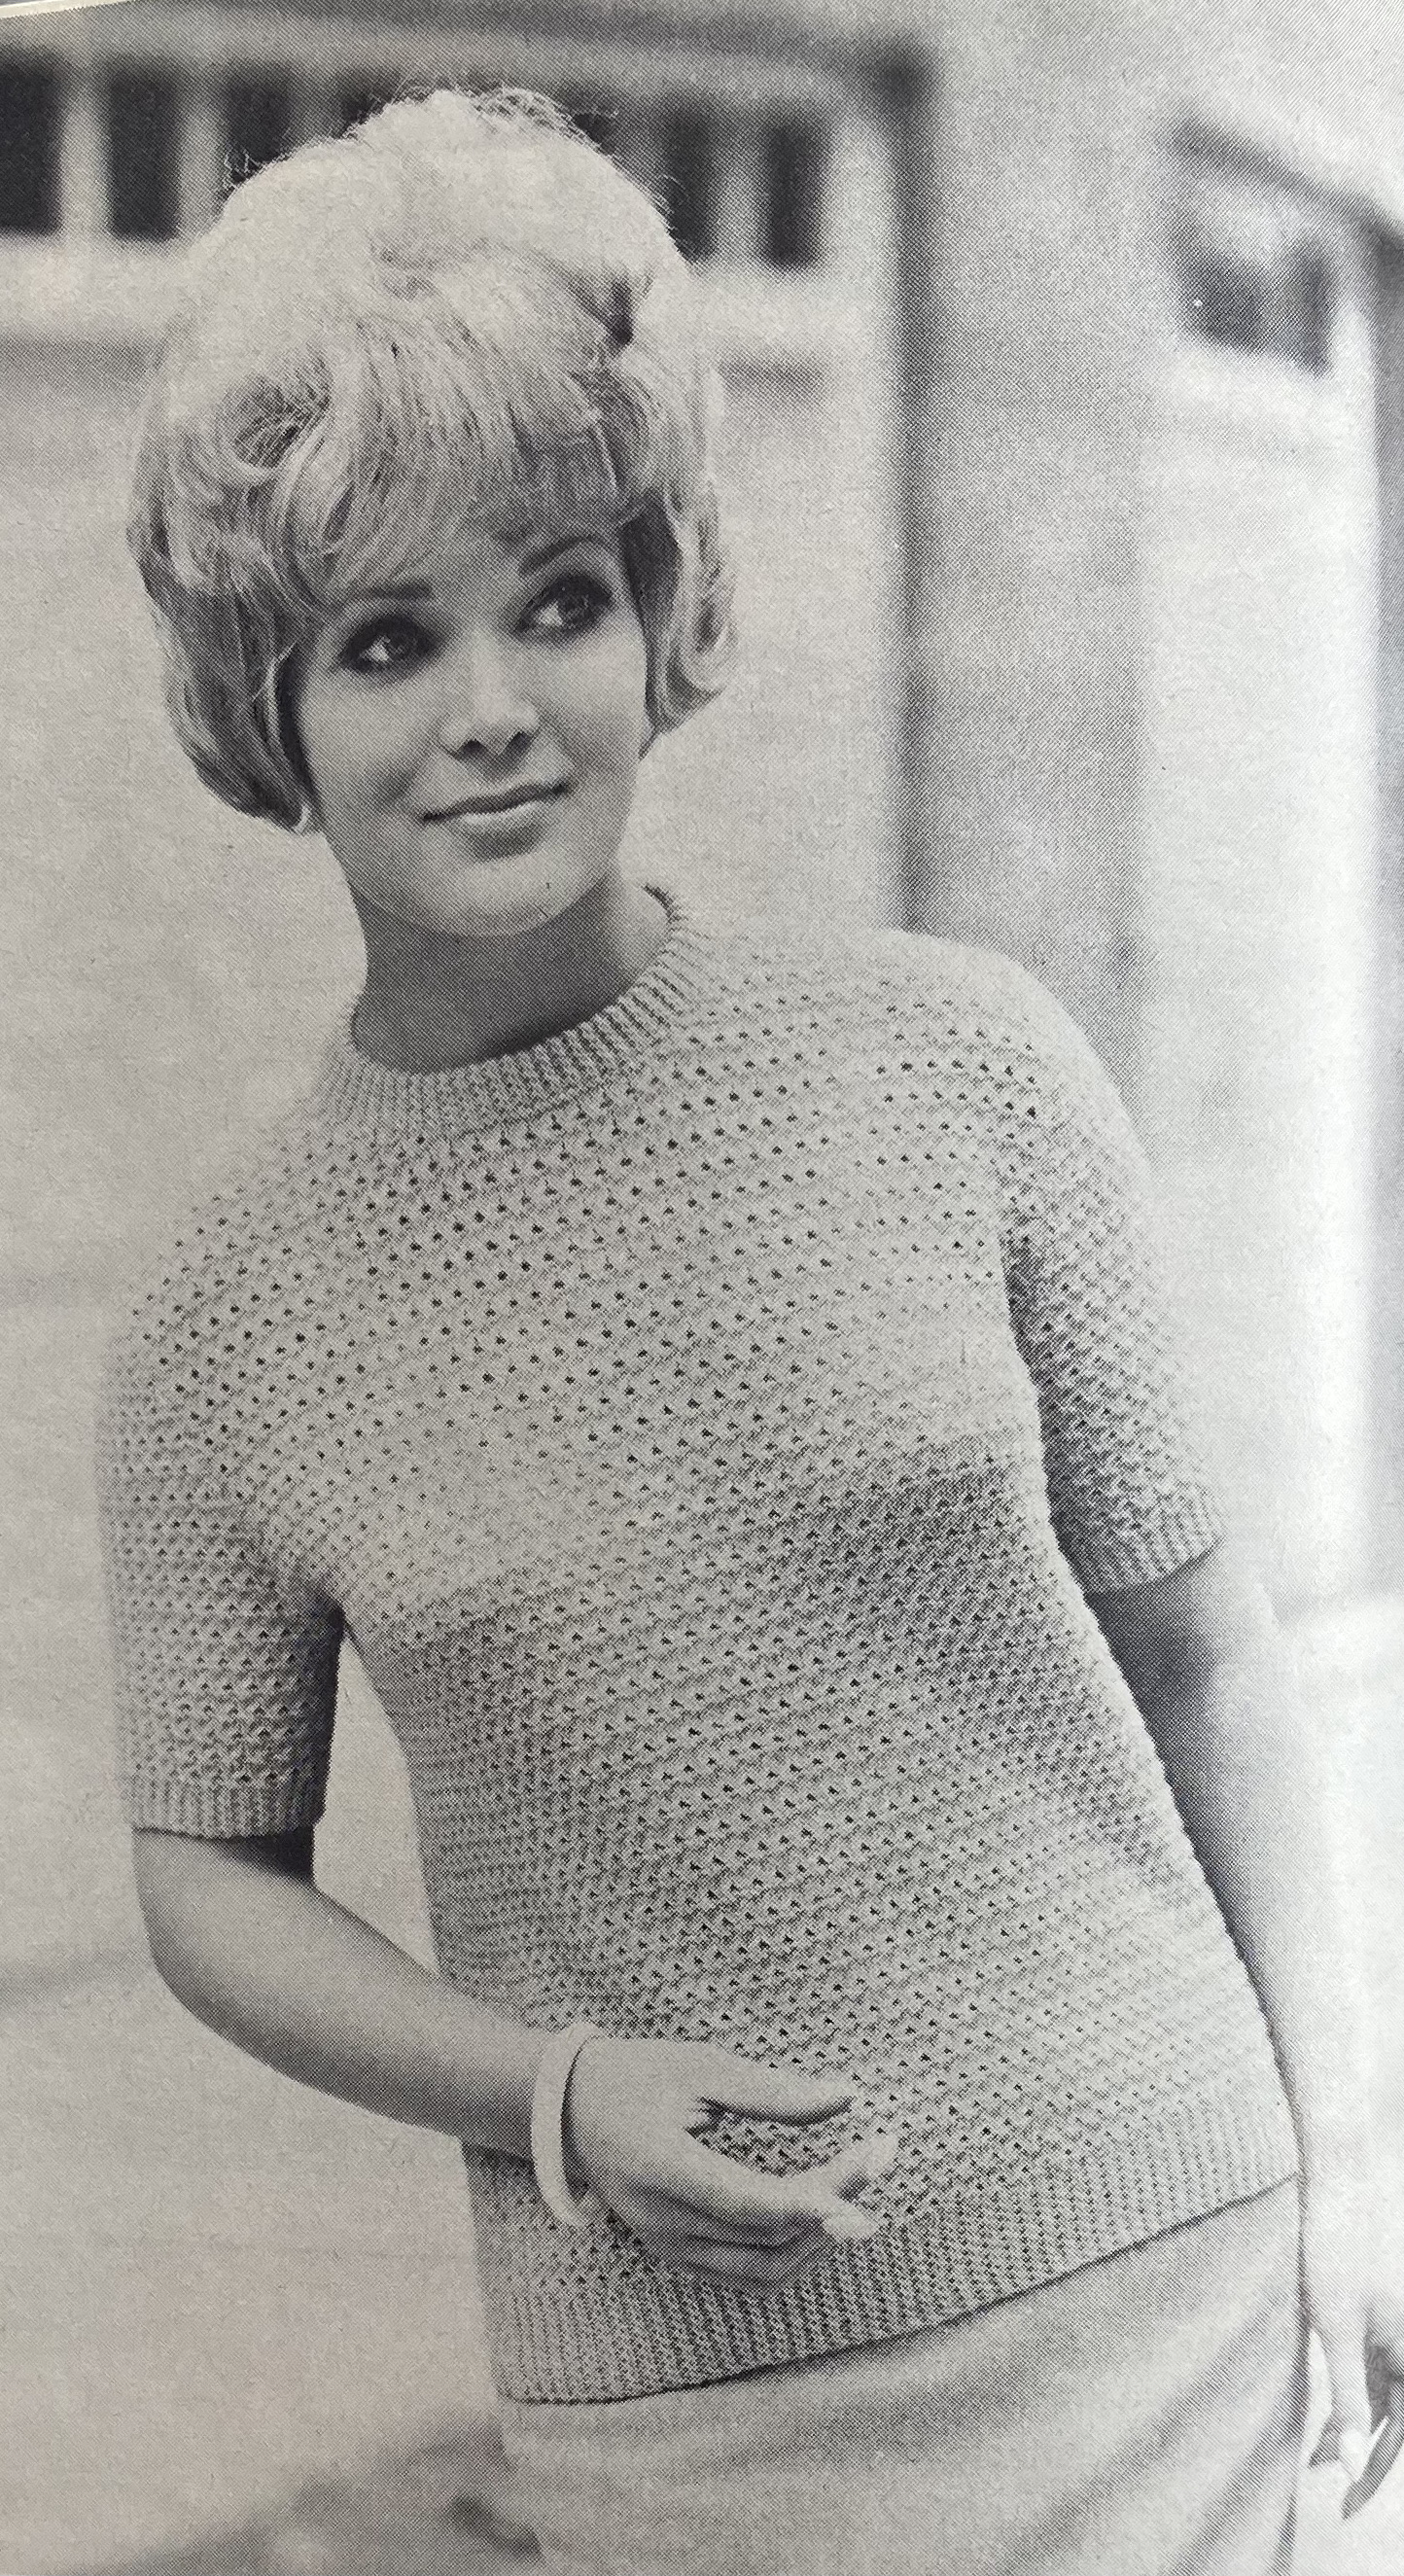
The upper-body fashions for women show, if not an extreme “revival of the feminine line”, a definite attention to cute colour and pattern details, particularly in the use of twisted stitches or ribbing variants. The pink raglan pullover on the inside front cover combines a sort of twisted rib on the sides with a “v” pattern, also made by twisting stitches, up the front and back midline and on the sleeves, and tops ot off with a black necktie bow. Nice touch to put it on a red-haired model! The combination of colour detail and ribbing variant (here: stranded panel and narrow slip-stitch rib) is also used on the warm blue-and-white cardigan. The “knitting that looks like crochet” trend continues in a short-sleeved blouse for larger sizes in 4-ply wool and a textured-lace pattern.
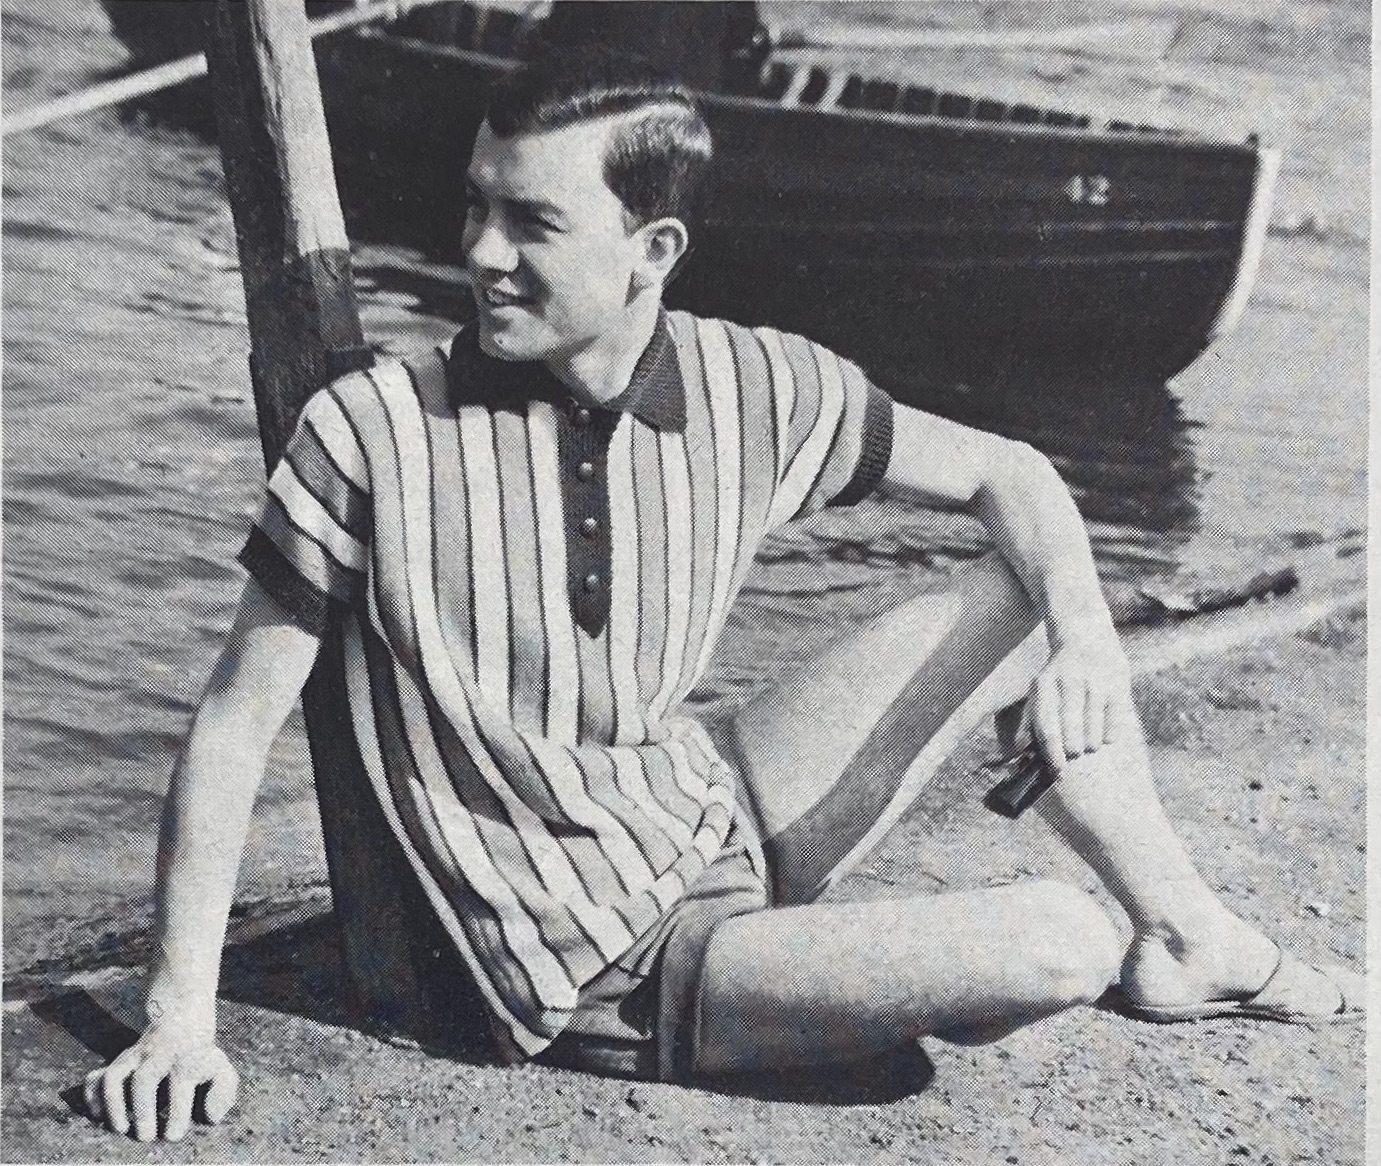
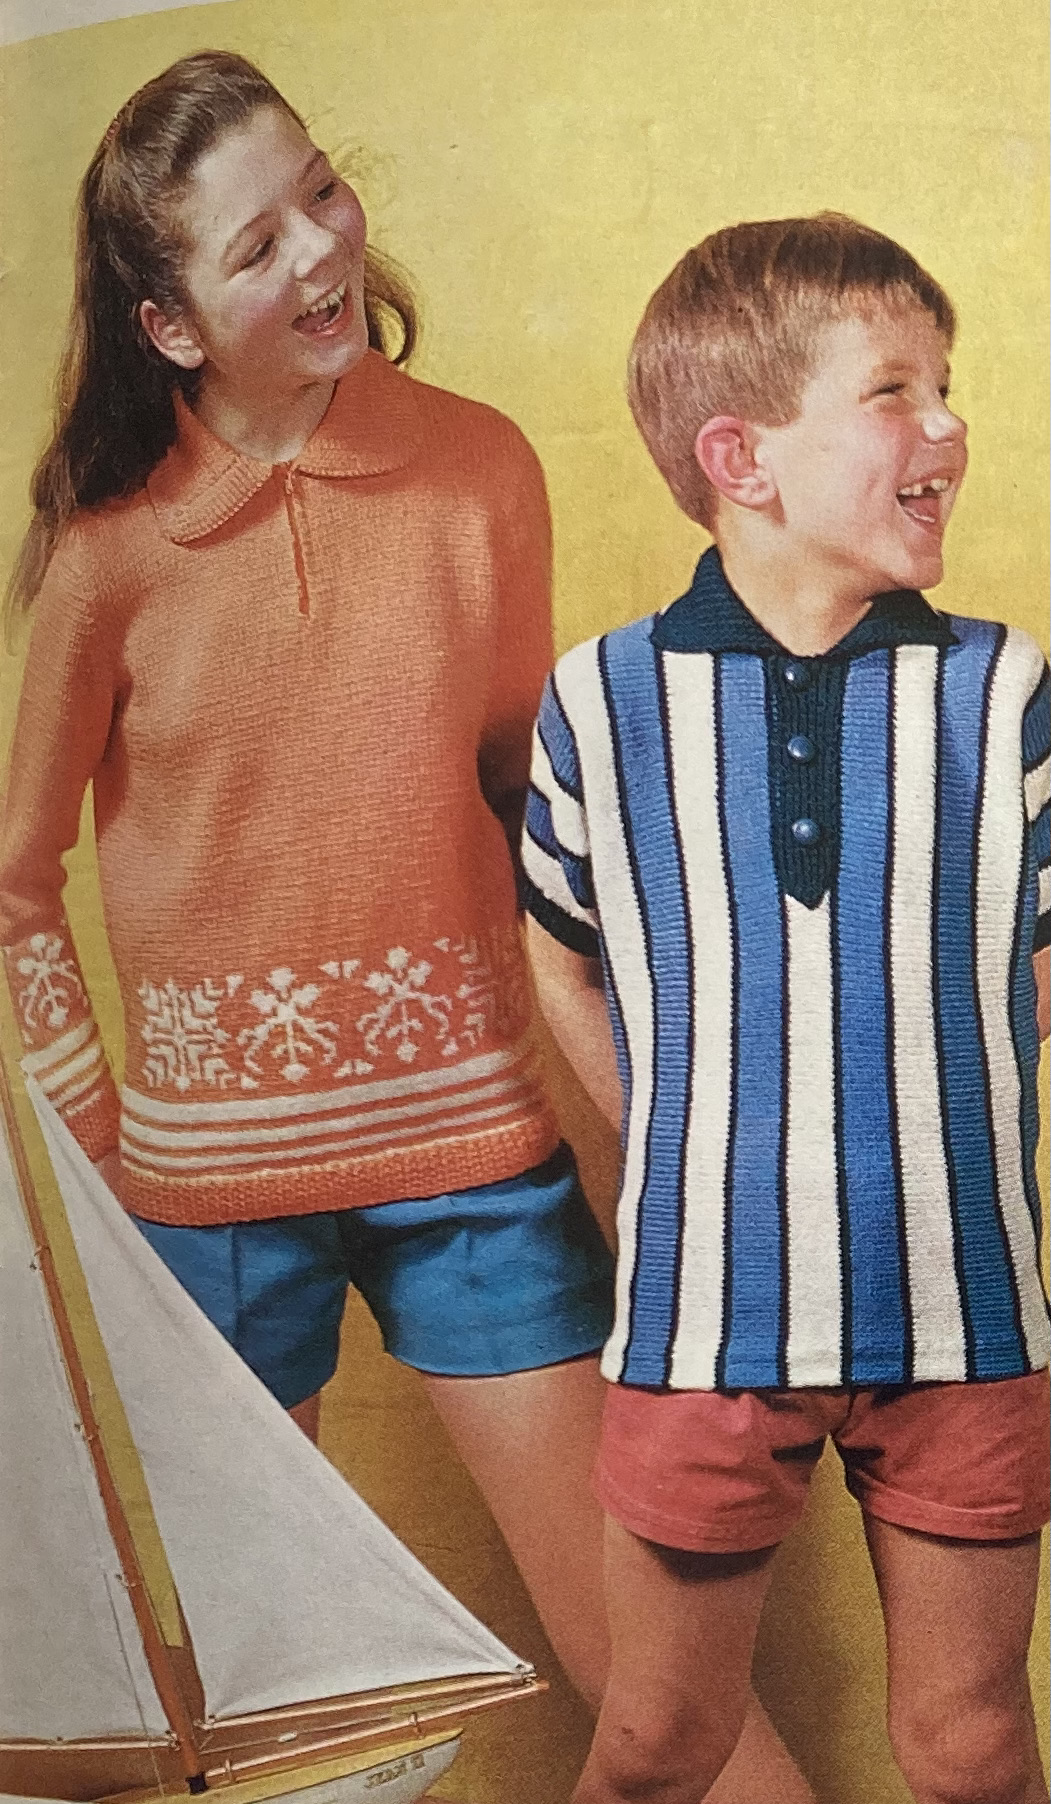
The men’s fashions use a predictably less dainty, but no less interesting use of colour and pattern: there’s a loose.fitting, sideways-knit and vertically-striped dolman-sleeve shirt for beach wear in “father and son” sizes for adults and children (though the “adult” model in the photo looks hardly older than a teenager himself) and a slipover in an Aran-style pattern of cables, ridges and zig-zags.
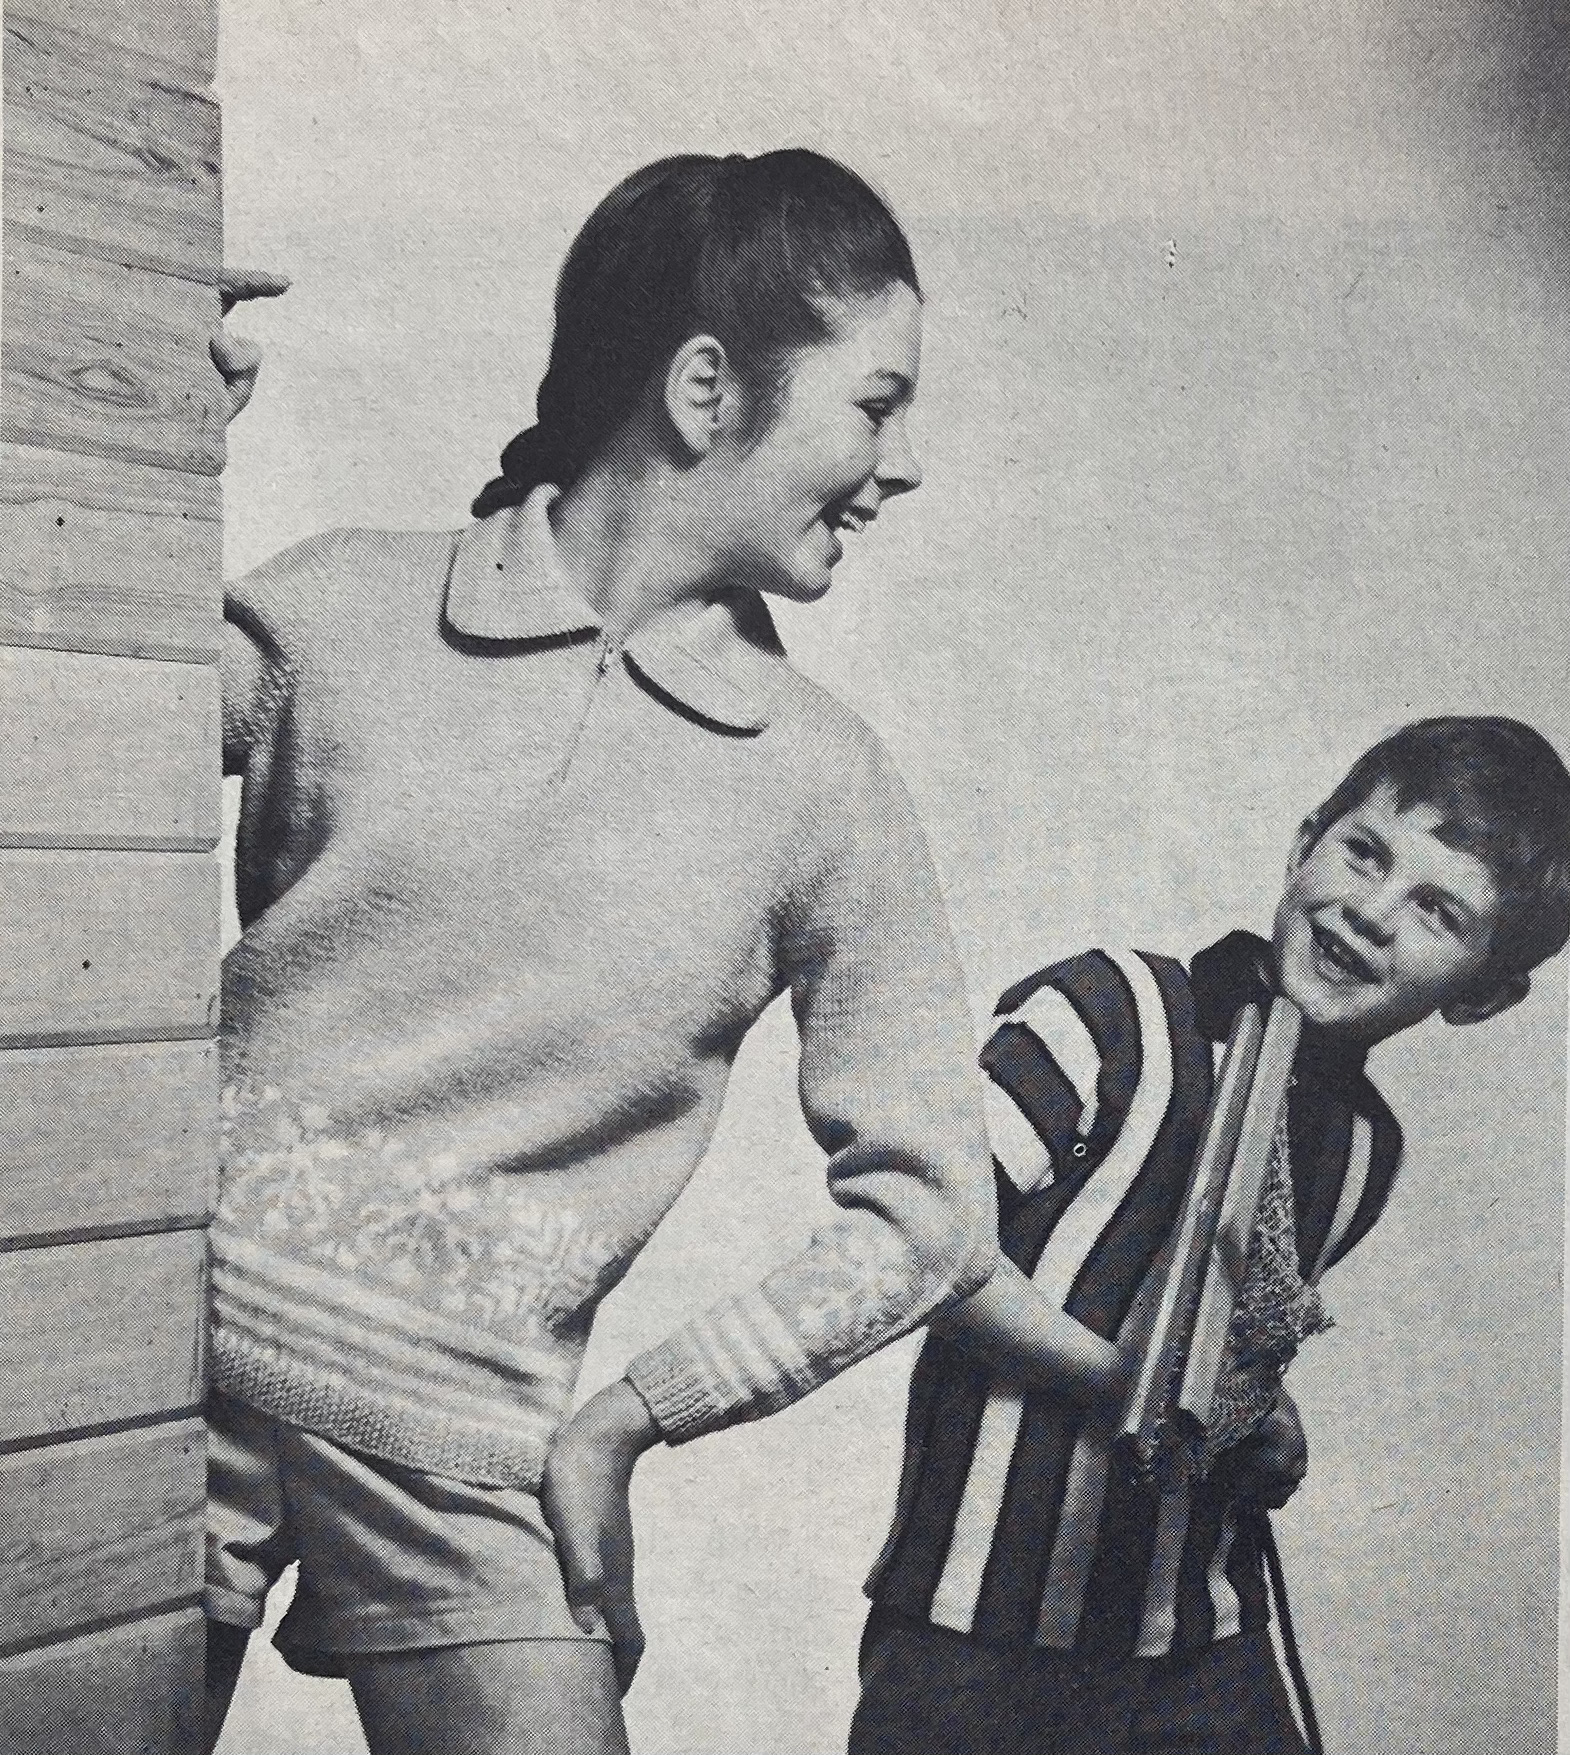
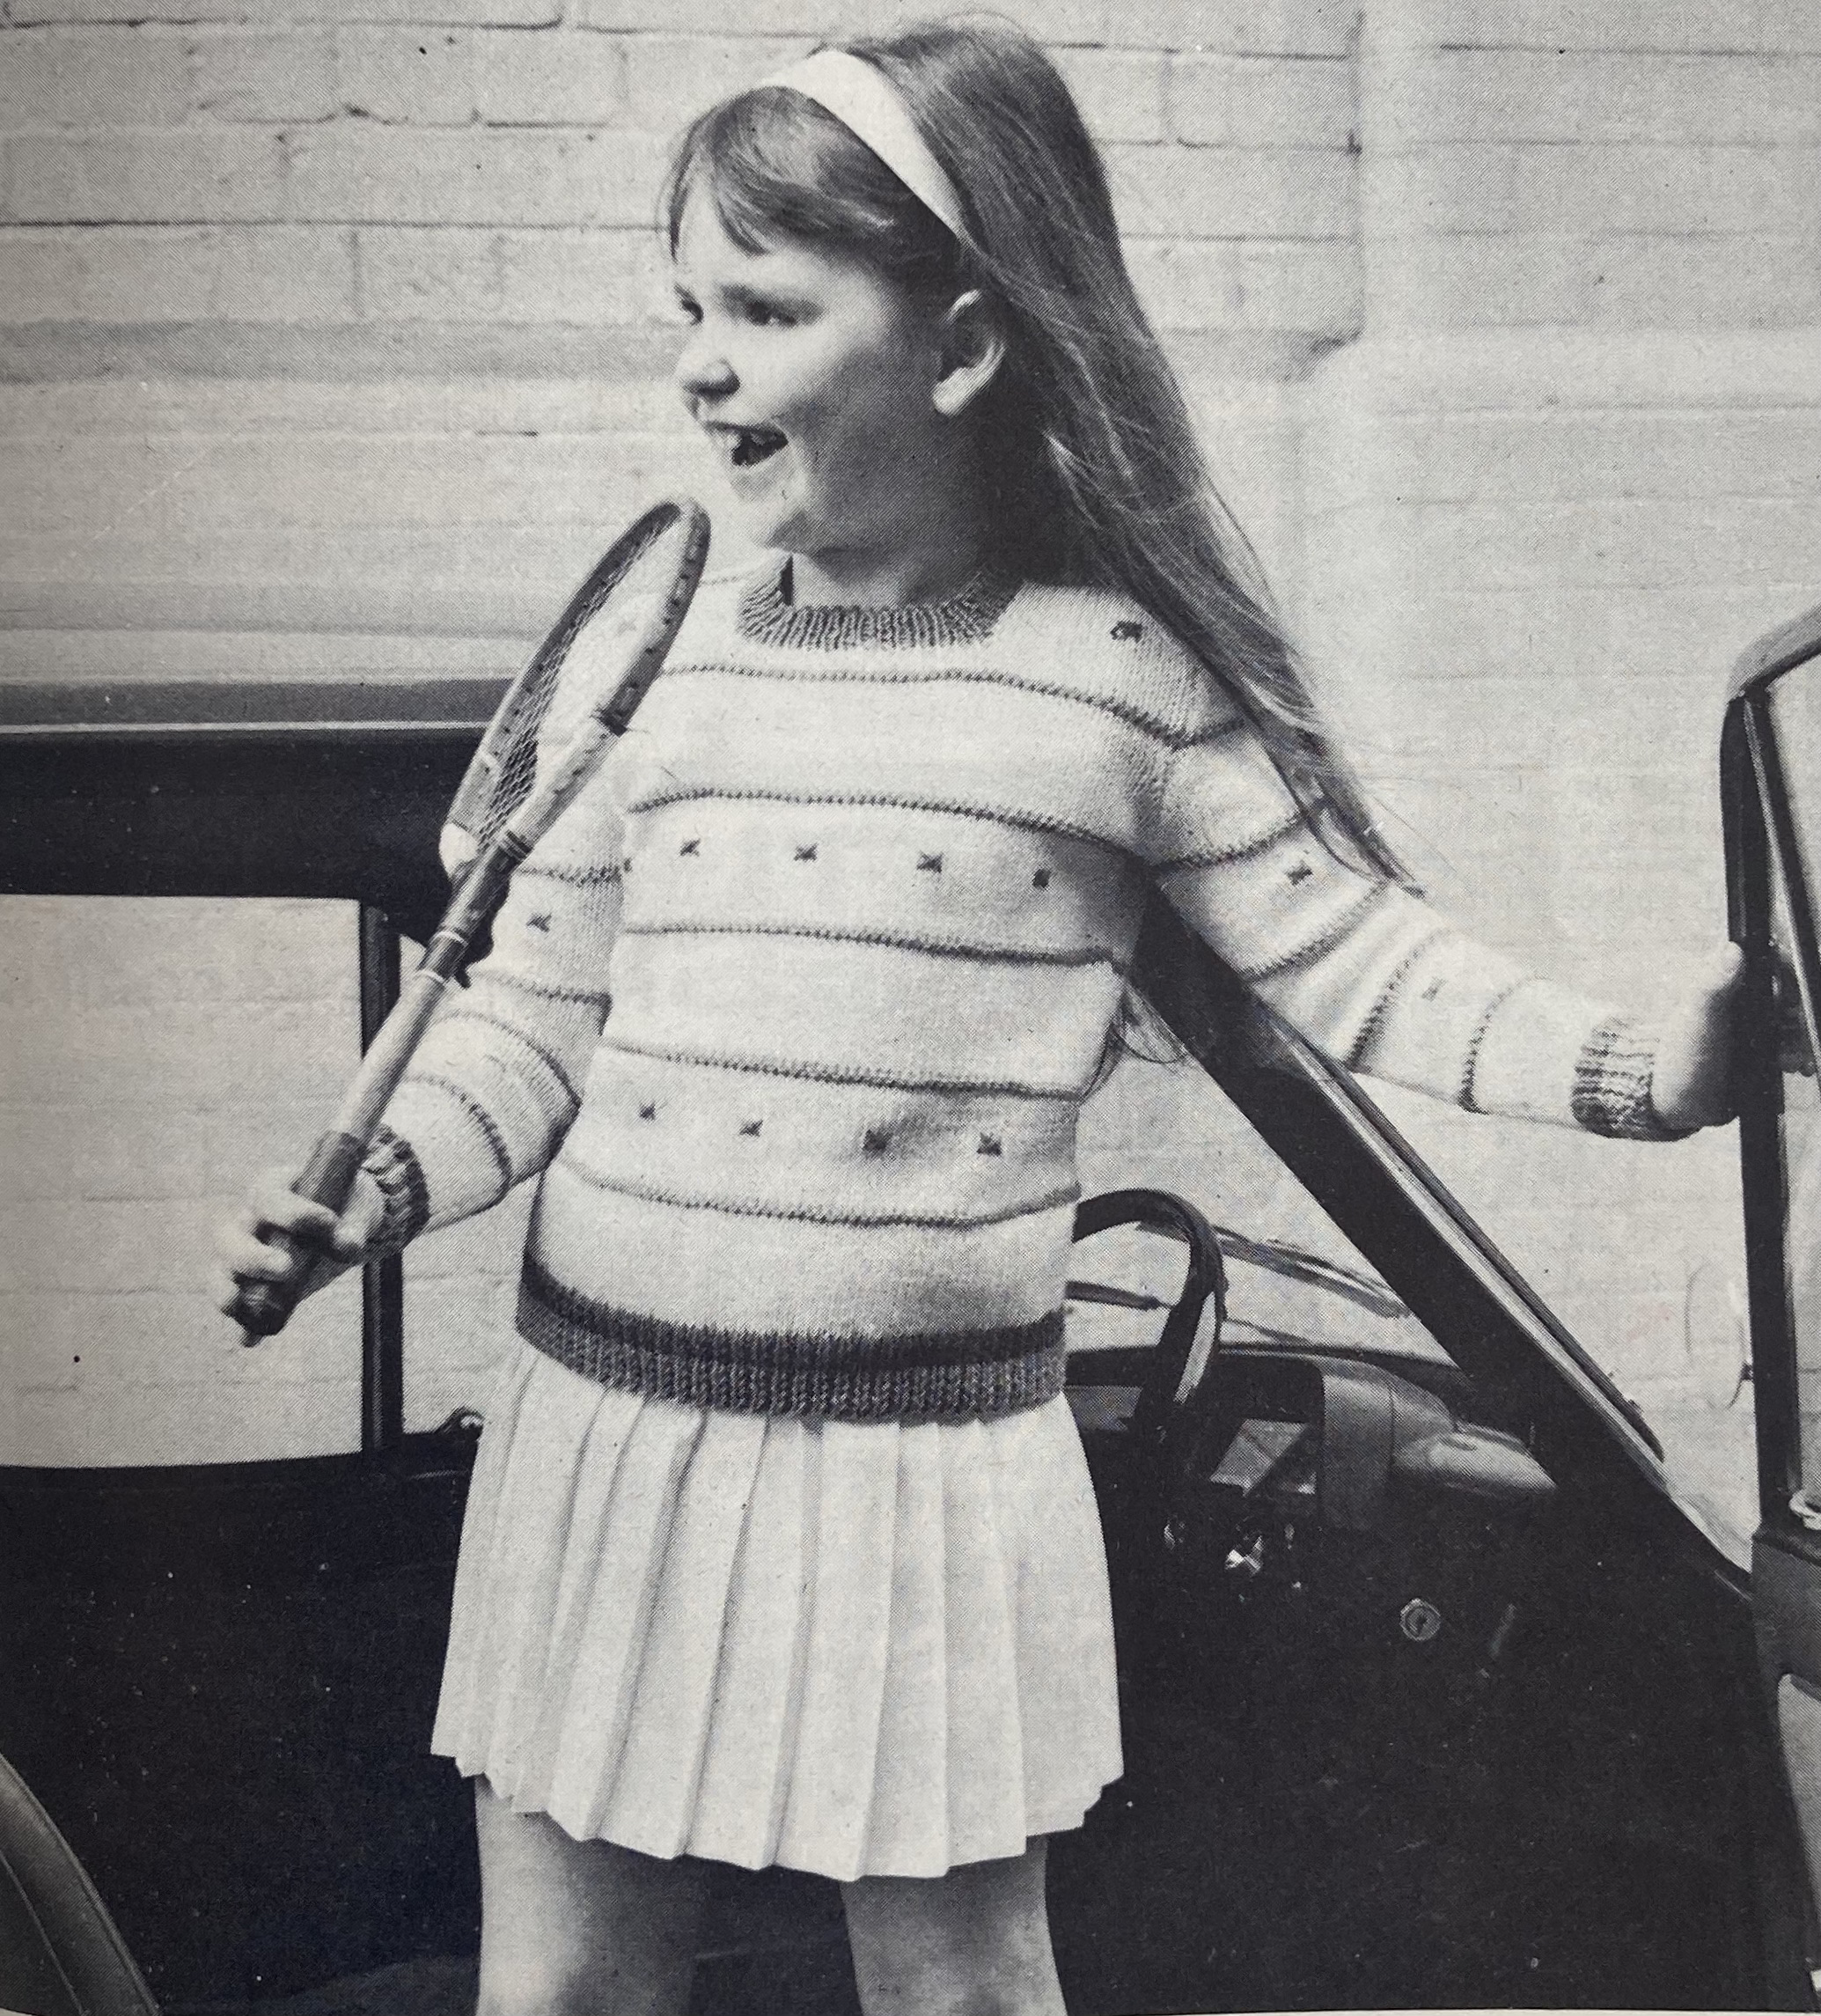
The kids’ designs utilise the same fashion features as the adults: the boys’ striped shirt is the exact same pattern as “Father’s”, and there’s a zip-neck pullover for girls with a stranded border reminiscent of the panel in the womens’ jacket. For younger girls, there’s a quick and easy, slightly striped pullover whose pattern details are embroidered on after knitting. Nautical white and blue, pretty pink and sunny yellow make up the summer colour palette.
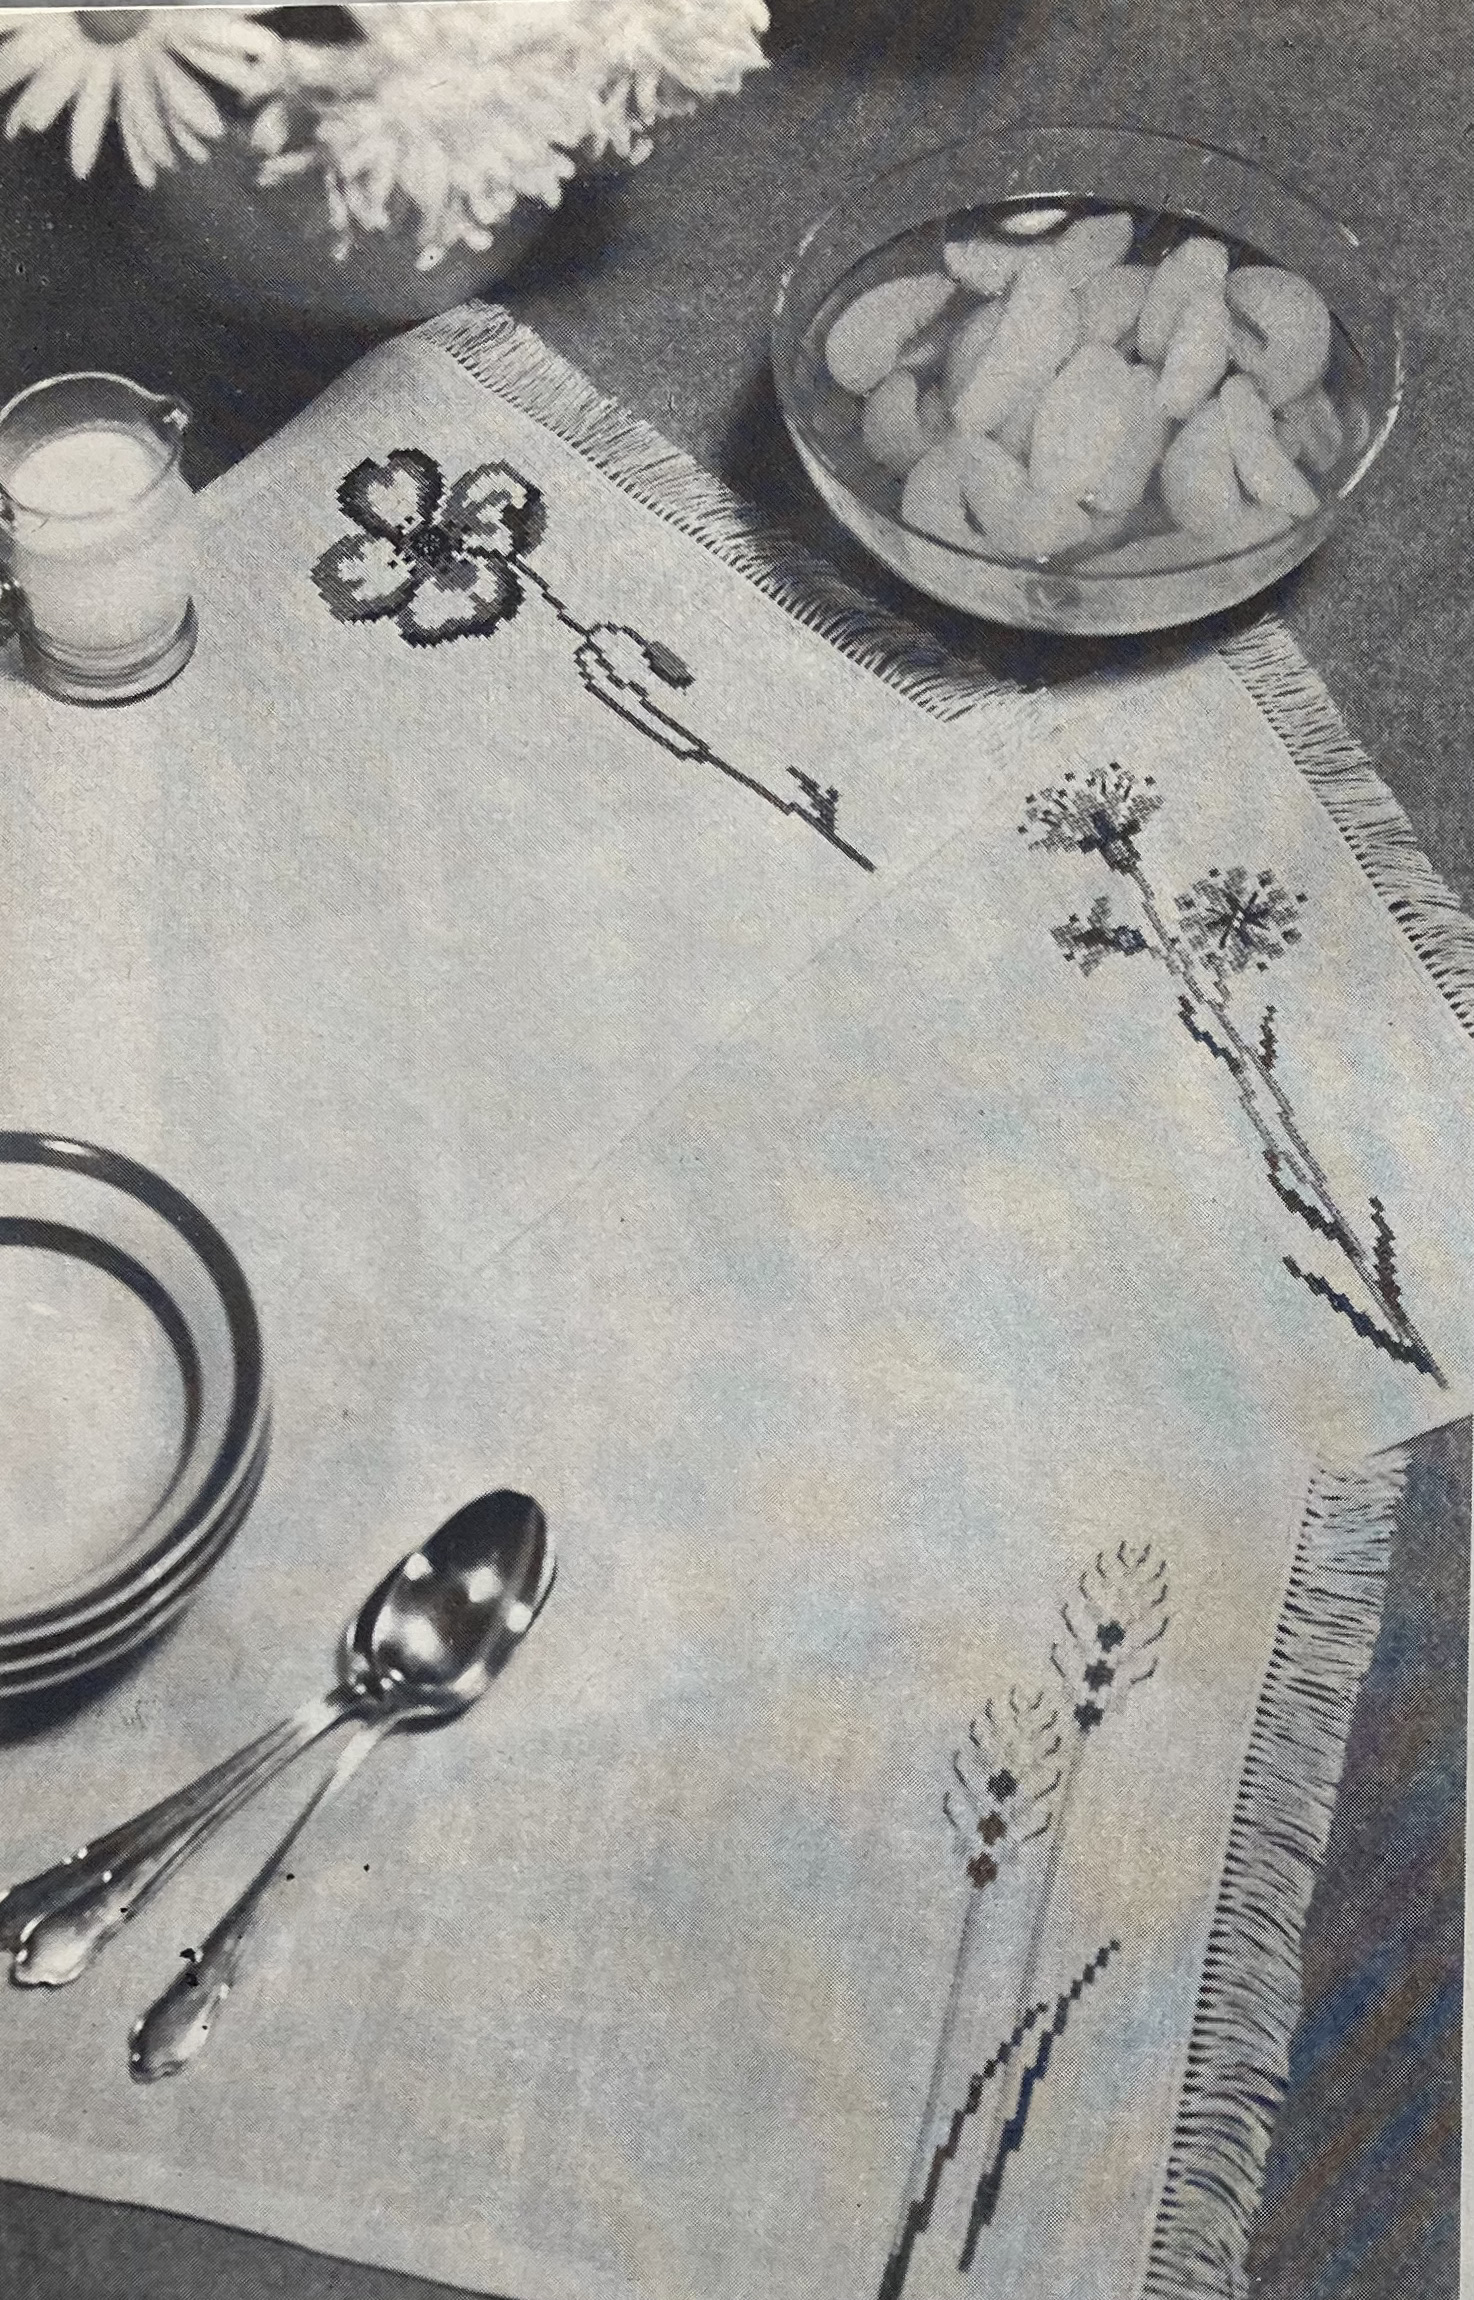
There’s a good selection of easy homeware and embroidery projects: appliquéd garden cushions in “hardwearing hessian” fabric, single flowers cross-stitched on place mats “for an outdoor supper party”, embroidered “needle etchtings” of village scenes (Godshill and Shanklin Old Village on the Isle of Wight), or an easy stitched rug.
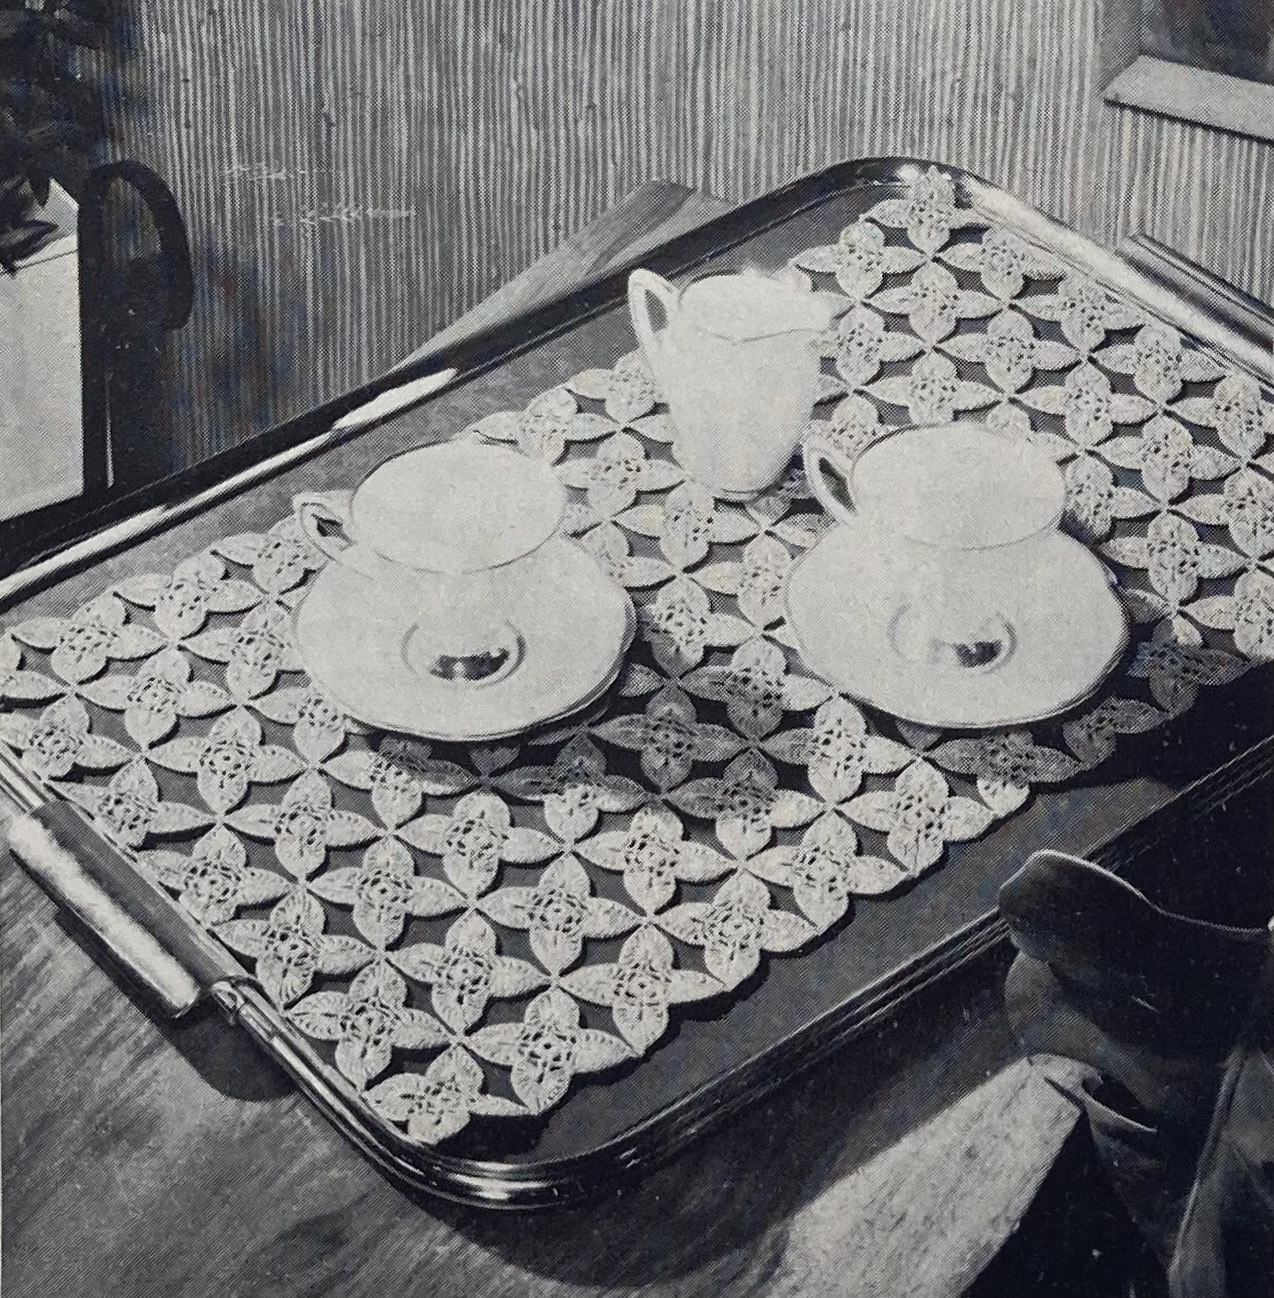
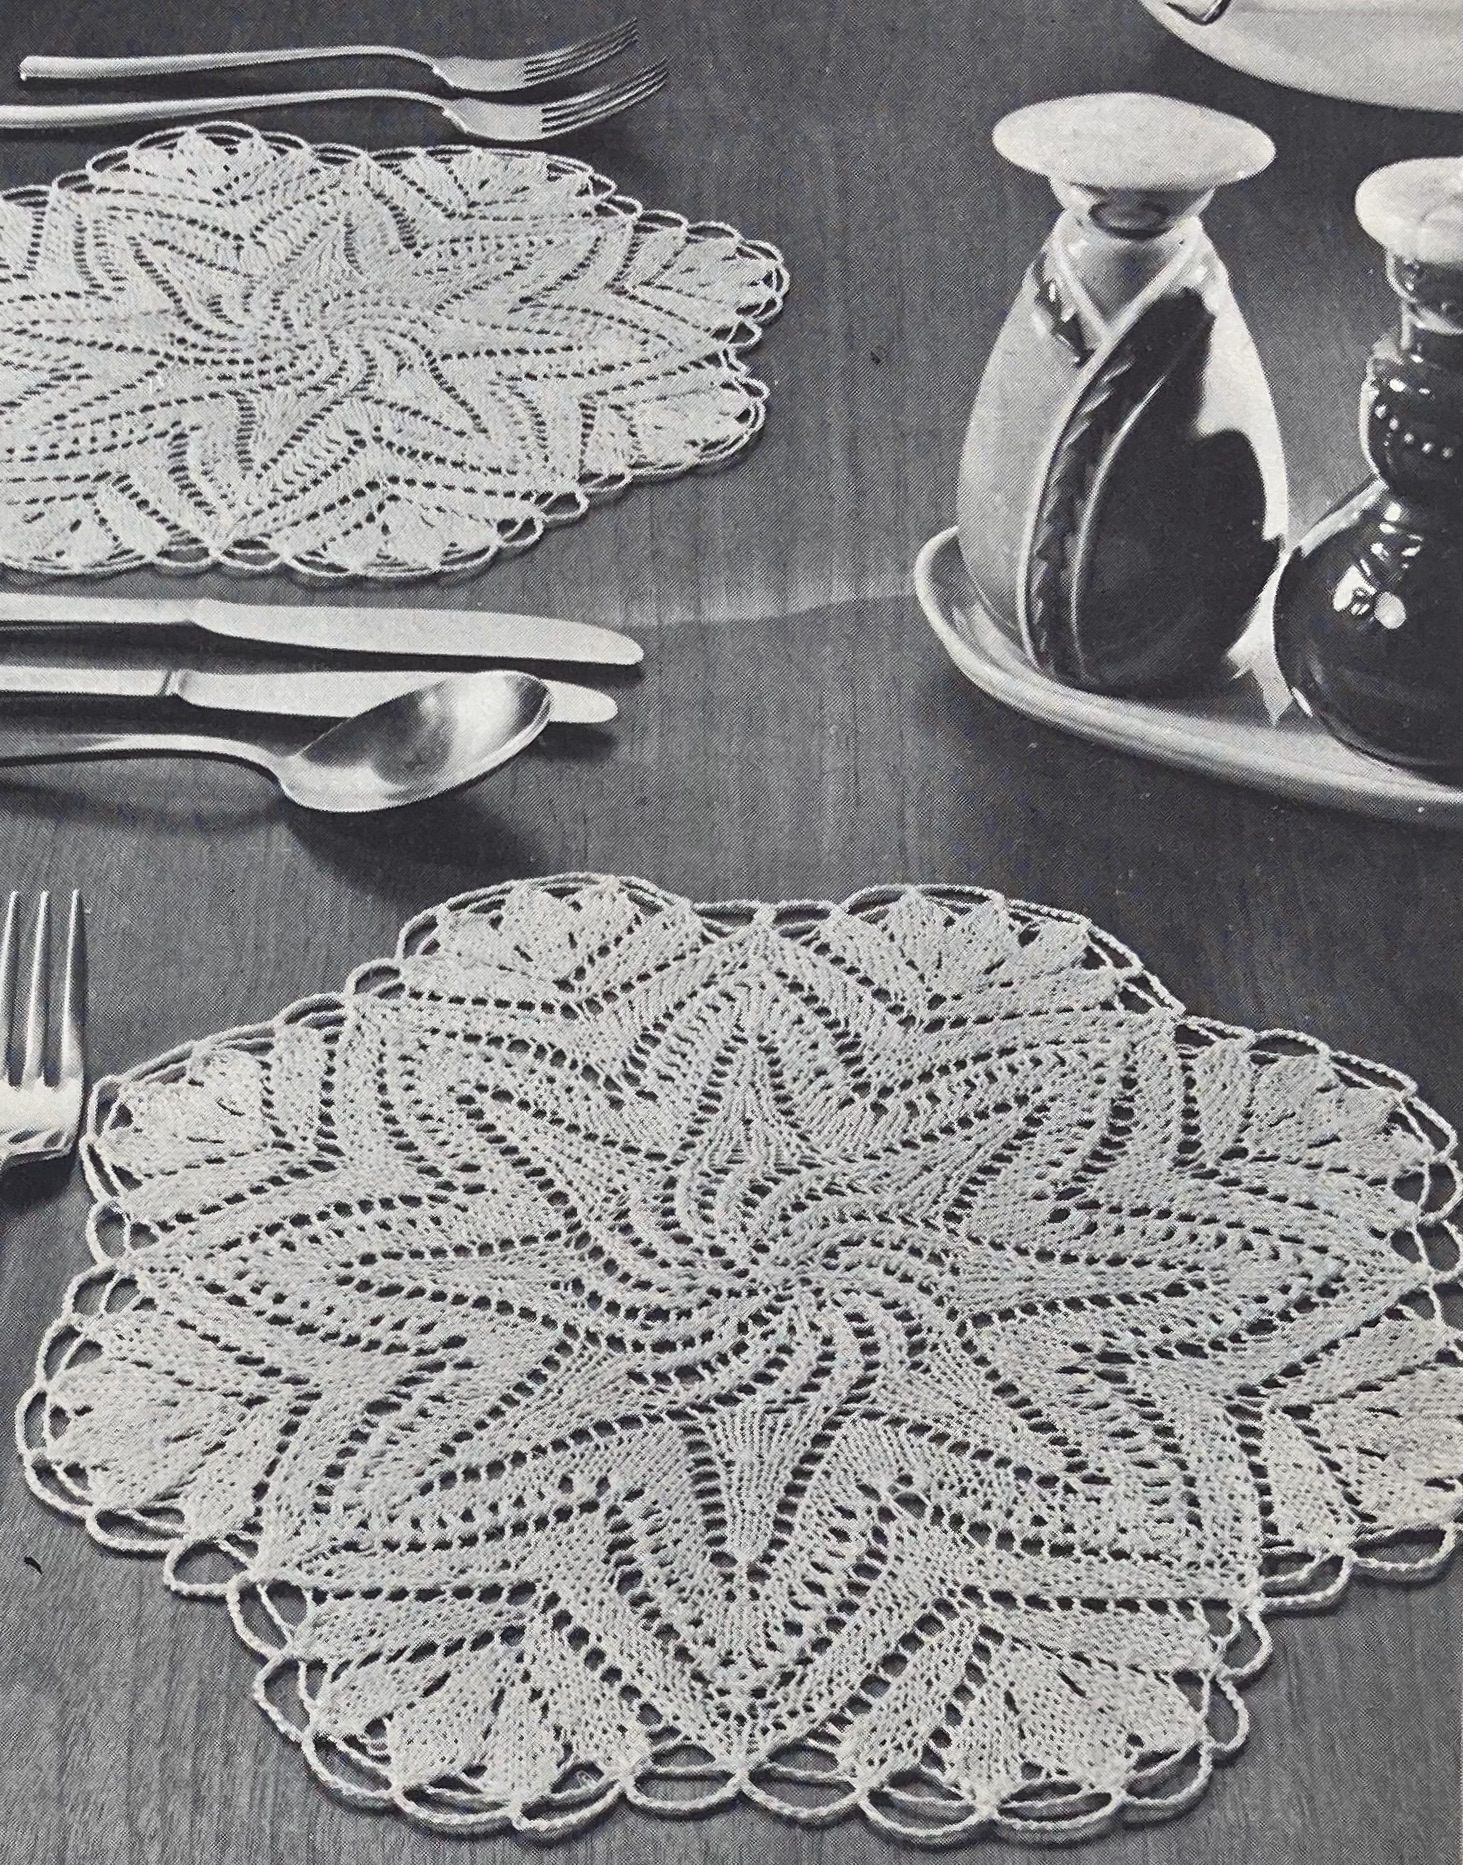
The Danish-design tapestry cushions look more complicated than they are, but are also more complicated than the usual tapestry cushions. Fans of finer work in cotton can make doilies or a traycloth, or pretty trims for bed pillows.
The ads are quite usual: Singer sewing machines, Patons yarns, and a swirly nightgown and negligée from the Scotch Wool Shop. Not to forget: the Turmix knitting machine, Stitchcraft binding cases to store a year’s worth of magazines, and order houses for wools, fabric remnants, etc. The children’s comic follows the adventures of Jill and James searching for a lost stitch and encountering interesting characters such as Spinning Jenny, who shows them how a spinning machine works.
That’s all for this issue! My project will be the appliquéd flower cushion.
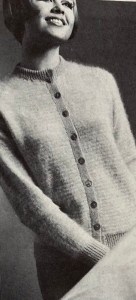
My project from Stitchcraft’s June 1965 issue was inspired by this design for a striped orange cardigan made with “Fuzzy-Wuzzy” (3-ply angora/wool blend) yarn.
I say “inspired by” because I saw the project as a way to use up the different shades of orange wool I used in my “Shaded Blouse” project from last month, as well as the leftover pink from my “Clarel” and even a little bit of leftover orange from this lovely 1961 sleeveless top I made a few years ago. I figured I could just make narrow stripes until the first colour ran out and then see how to best finish the cardigan.
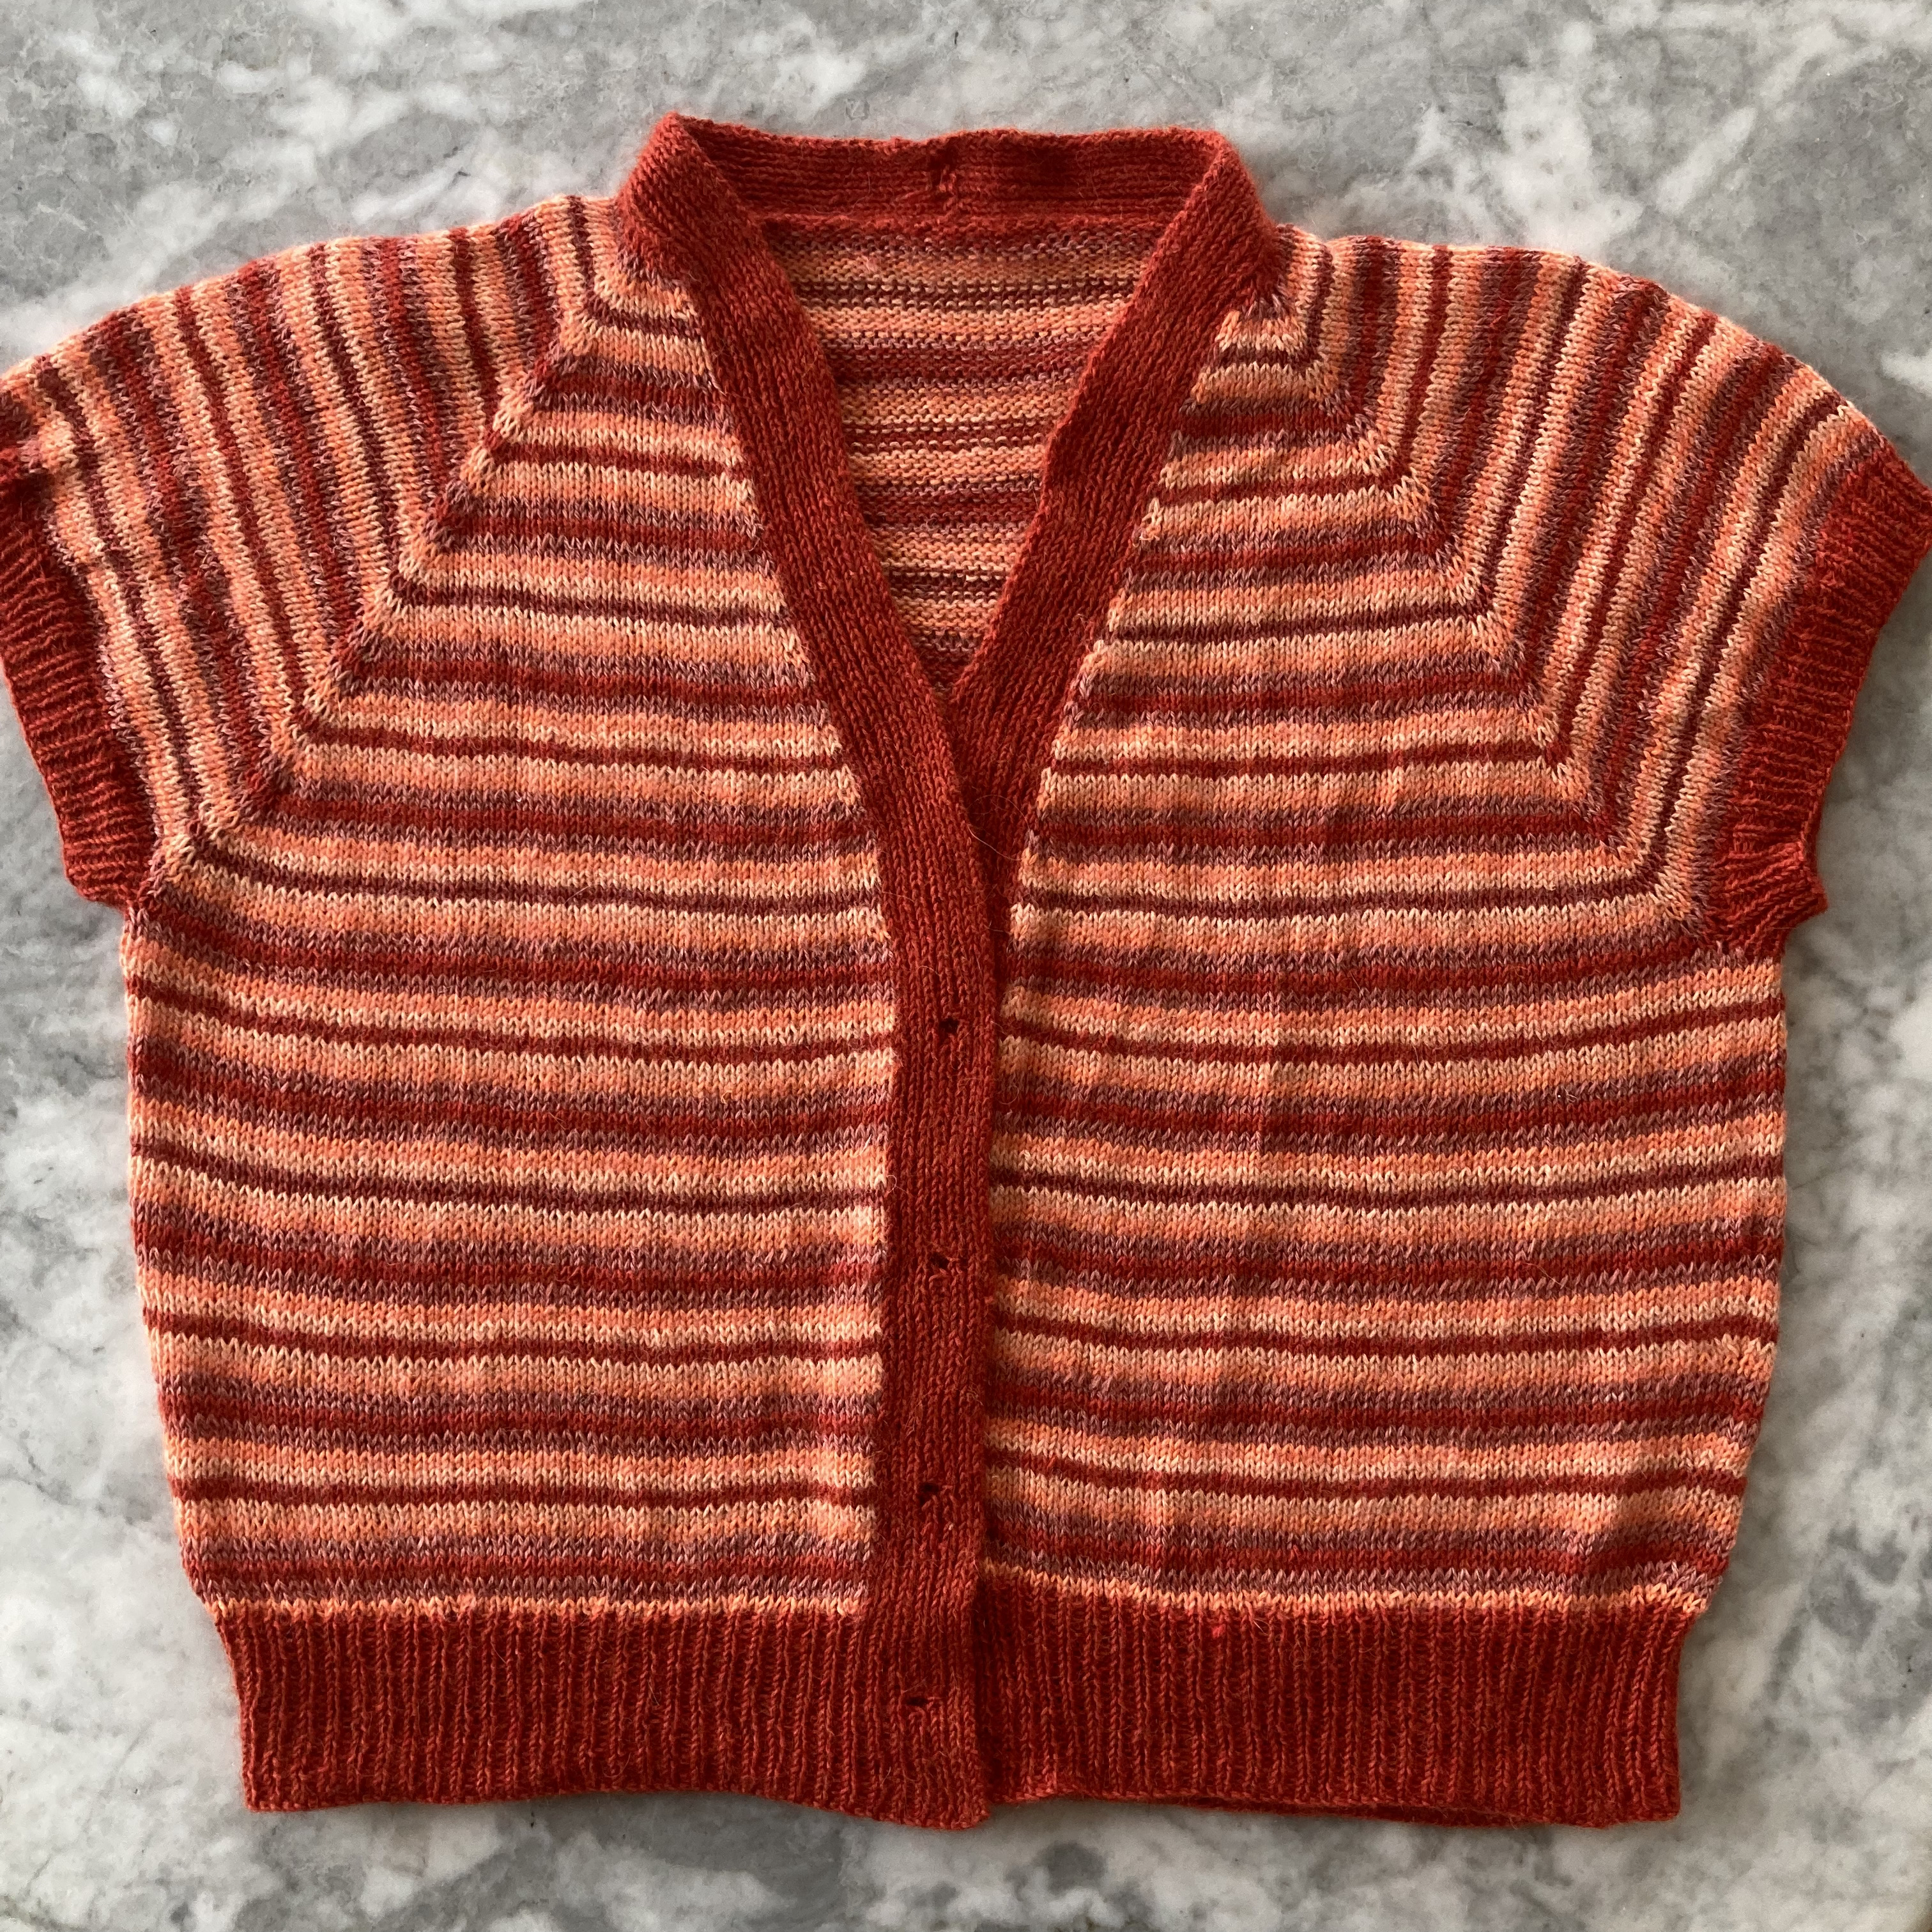
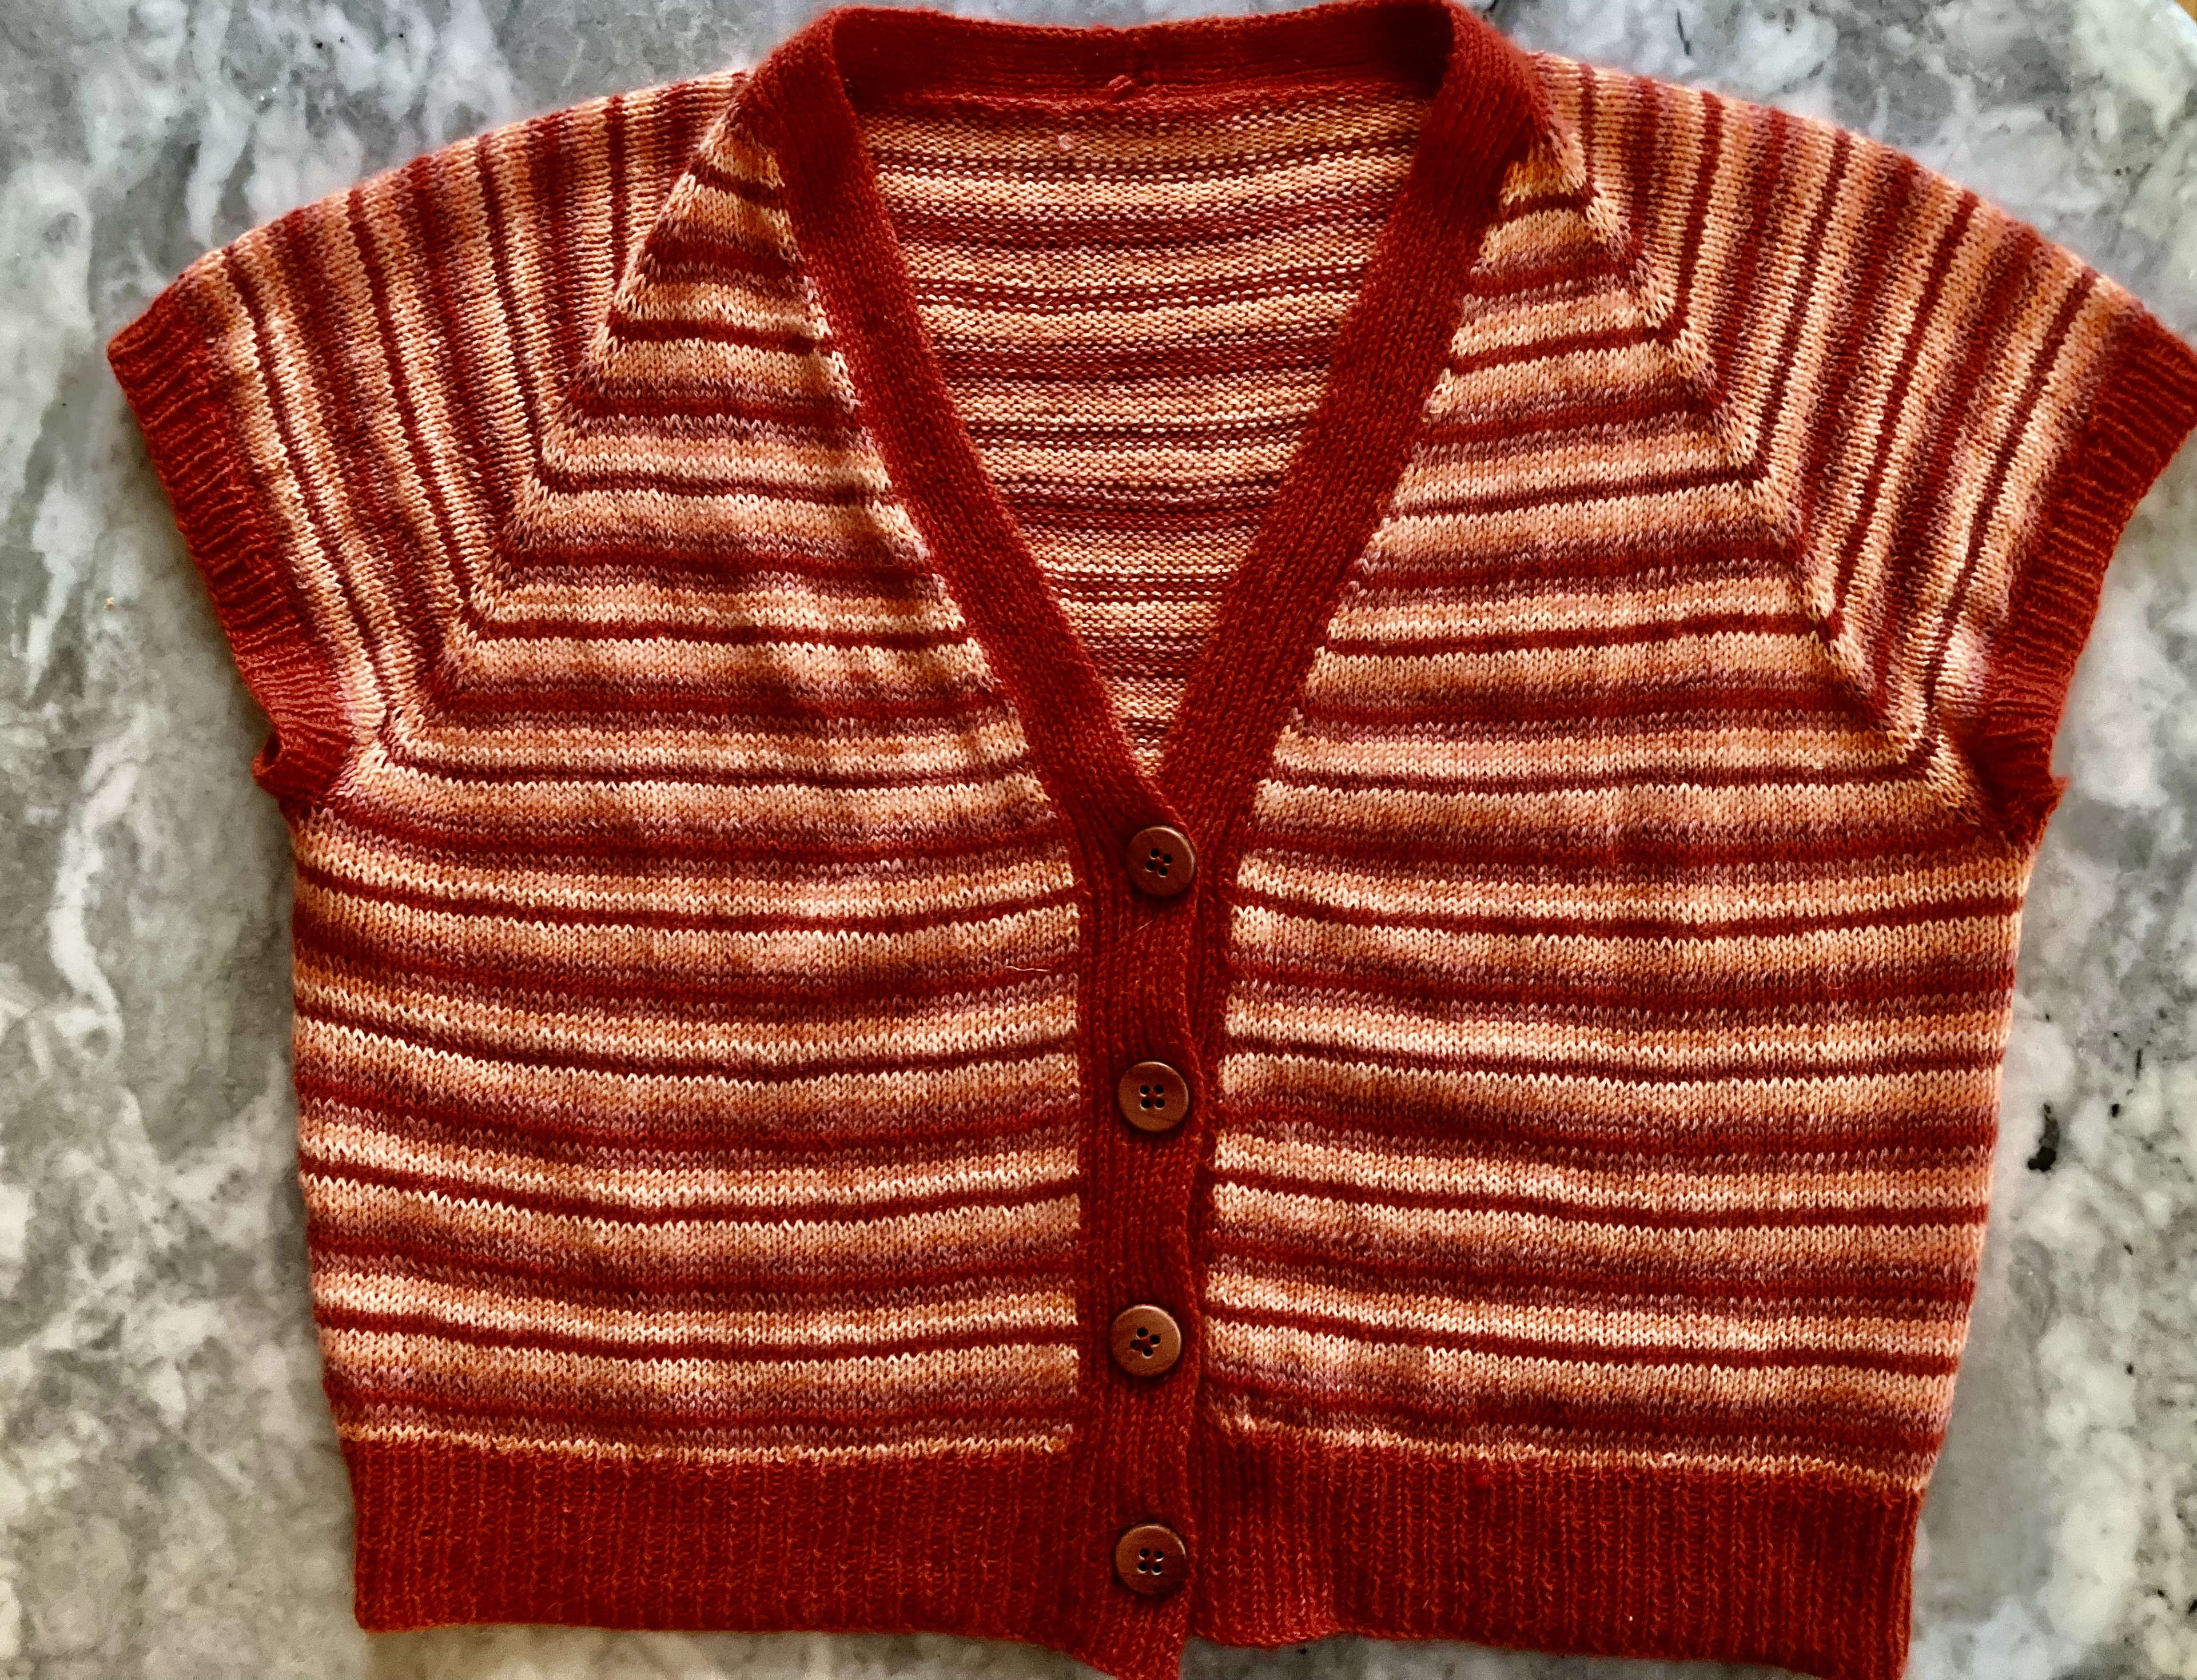
In order to do that effectively, I changed the construction from the standard bottom-up-in-flat-pieces in the pattern to a V-neck made in one piece from the top down, vertical ribbing included. That meant starting with the ribbing for the back neck, then picking up stitches across the long edge and the two short edges to make the curve, then keeping the ribbing in the dark orange colour from then on, using the same needles and two balls of wool for the two sides. It was a little tricky at first, but it was worth it to not have to play “yarn chicken” with the amount of orange needed for the ribbing at the end.
The “Fuzzy-Wuzzy” wool in the pattern is 3-ply and supposed to be knitted at 8 stitches to the inch. My wools were modern fingering/4-ply and I got a nice, even 7 stitches to the inch on 3 mm needles, so I adjusted the stitch counts, increasing up to the smallest size instead of my normal second. I remembered that this wool tended to shrink in blocking, so I wasn’t worried when it seemed generously sized — but maybe I should have been! The cardigan turned out wider than it needed to be, and if I had been able to use less yarn, I could have made the cardigan longer.
I ran out of the light peach yarn first and hardly had any dark orange left at that point, so had to buy another ball of the dark orange to finish off the ribbing (so much for the idea of using up scraps…). I expected to not want to wear or keep the finished garment, since the “cropped and boxy” look is not a great one on me. (It is, however, currently in fashion, so I figured I could sell the cardigan.) Strangely, though, I love it! It looks playful and fun and does not me look nearly as squared-off-and-put-in-a-box as I thought it would. The wool-silk-linen blend yarns and cap sleeves make it a perfect-temperature top for slightly cooler summer days.
I still have a bit of most of the yarns left over. Hat? “Shaded” mitts? Little cowl or scarf? I don’t know. I’ll edit this post if I make something matching!
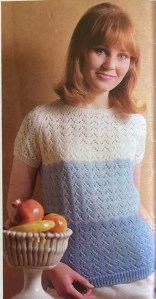
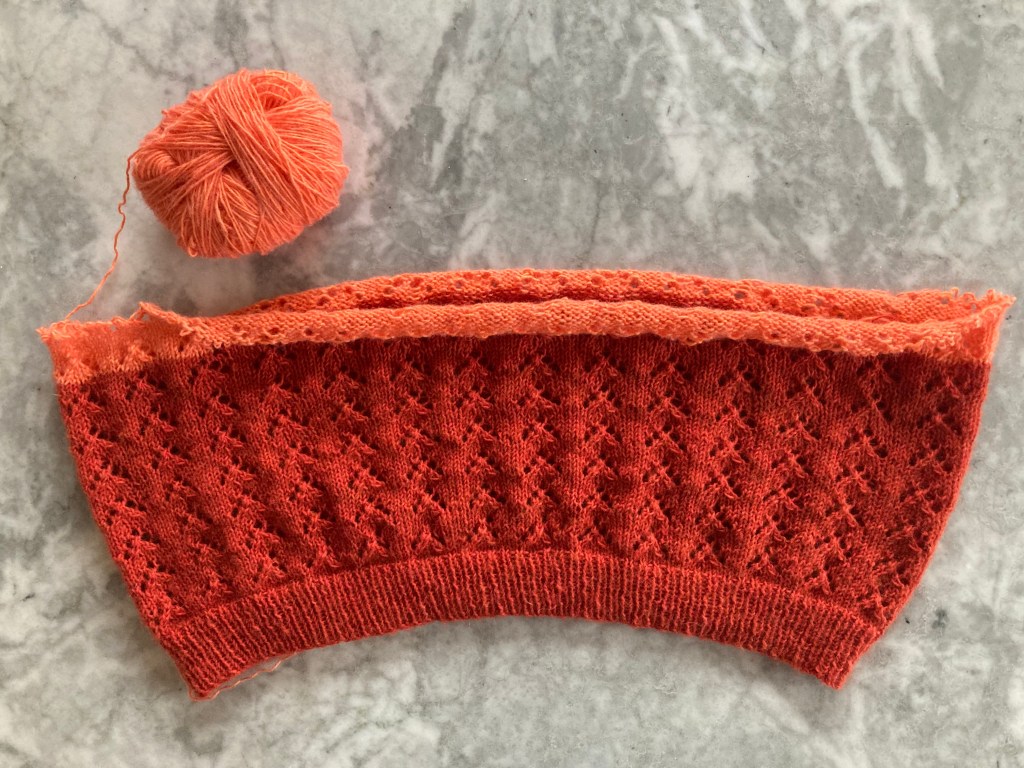
This one (the second of two) was a light, summery blouse in three graded colour blocks and an easy lace pattern. The original is made in medium „Powder Blue“, lighter „Beau Blue“, and white. I found three shades of wonderful Lana Grossa „Ecopuno“ yarn (72% cotton, 17% merino wool, 11% alpaca wool) ranging from a sort of brick orange to light peach. The yarn is beatiful, very lightweight, soft and fluffy.
The yarn is also very tricky as regards to finished size and tension. I got 7 stitches to the inch working back and forth on a swatch with 3 mm needles, which matched the tension and needle size given in the pattern, so I started with the second size (for 36-37 inch bust.) The pattern doesn‘t give any finished measurements or a tension in the pattern (just „equivalent to a tension of 7 stitches and 9 rows to an inch on No. 10 needles“).
First try. Too wide and forgot to make the stranded peaks on the colour change rows.
I made the top in the round with a fake side-seam to save time, which sometimes makes my knitting looser, and was worried about the yarn stretching horizontally, which oftens happens with lightweight and/or cotton yarns. And indeed, my first try just stretched and stretched and was huge. I also forgot to do the stranded peaks at the first colour change, so decided to cut my losses and start over.
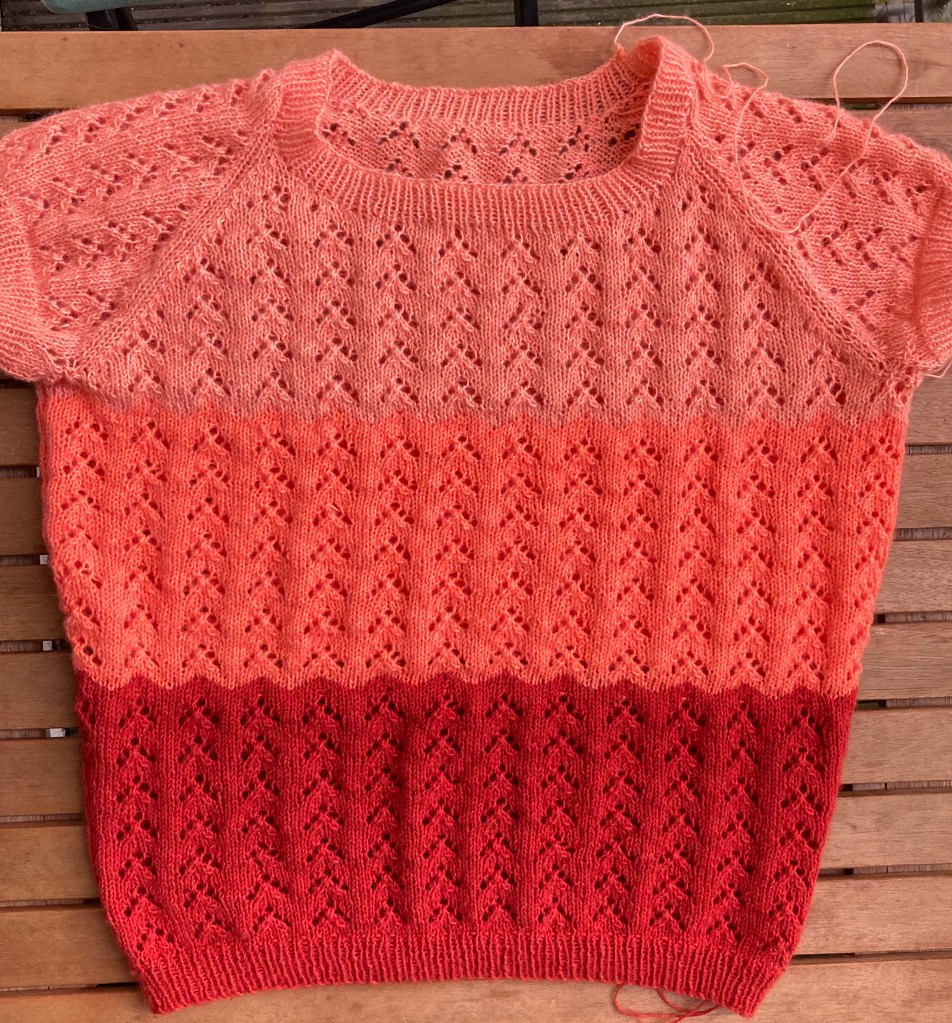
After measuring the first-try piece, I decided to make a size one size smaller than the smallest size given in the pattern, but with the length of the largest size. That seemed fine and it was smooth knitting from there. The pattern has a bit of shaping with increases from hem to bust, which is a bit unusual for a 1965 design – at this point, most garments are made straight up and down. I kept to the increases as written, made the raglans in the round and adjusted the neckline to sit one pattern repeat lower in the front.
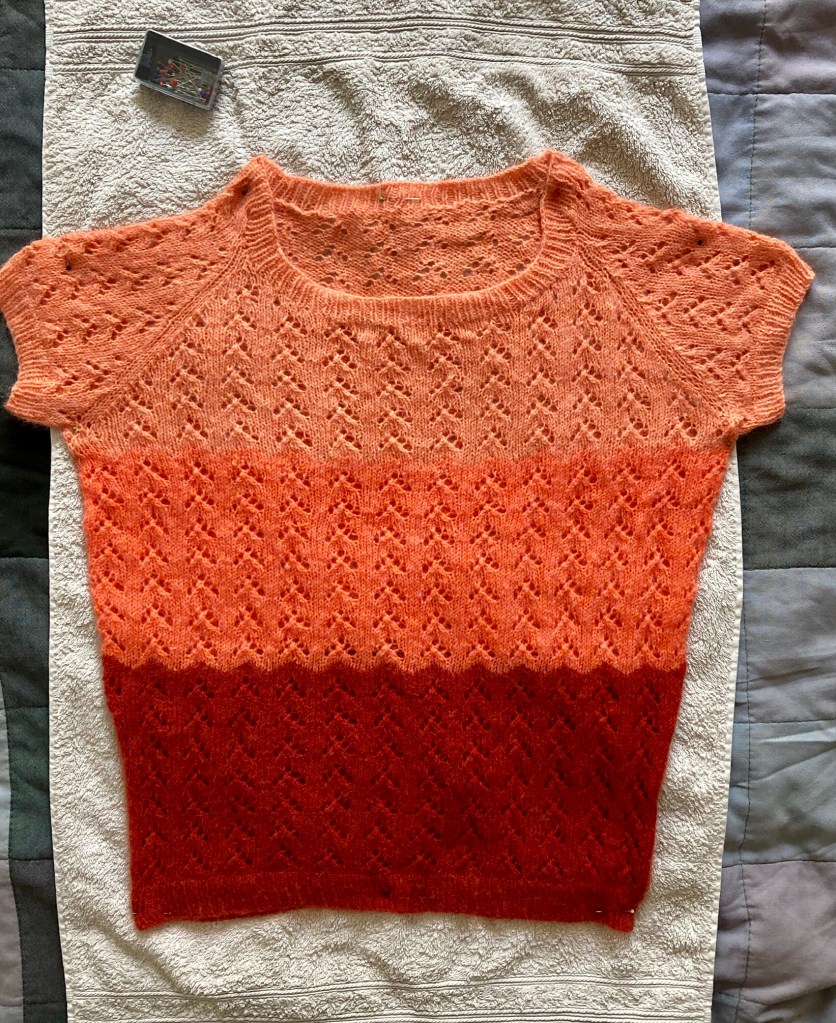
It fit comfortably loosely before blocking and I was worried it might stretch out in the blocking process, as lace generally does. Ha ha, surprise again! This wool actualky shrinks during blocking (hand-washed very gently in cool-cold water) and the stitches cozy up to another, which explains my 7 st/inch swatch. I had to pin it out in a „hard“ block to make it large enough.
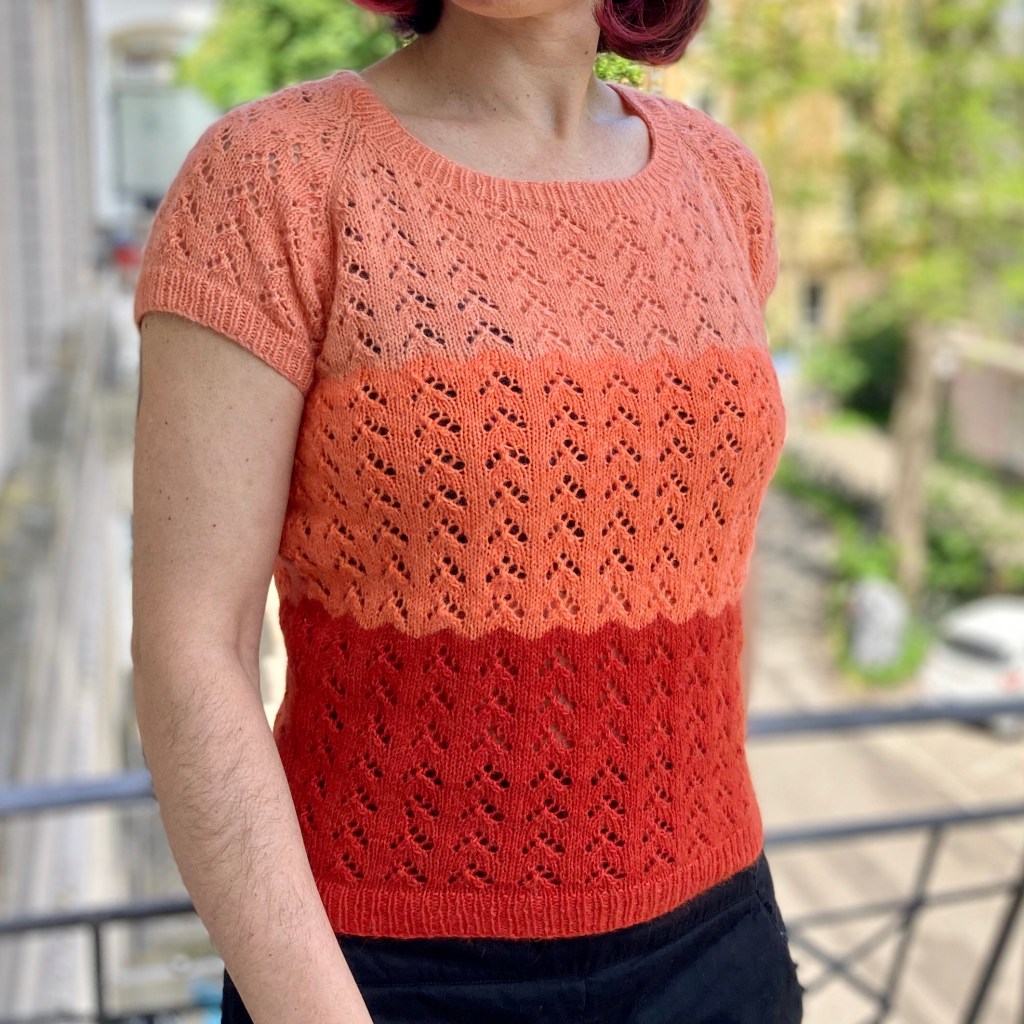
The finished top fit snugly, but not too tight. It‘s the way I like tops to fit, but you can see that the original design is meant to fit more loosely. The smallest size would have worked, or even if I had stuck to my first-try version in the second size, it would have had that casual, loose 60s fit. Whatever, I‘m happy.
As always, we had fun re-creating the original photos, especially the one with the open-mouthed model wondering at her magazine.
I also have a lot of leftover wool, which I could combine with some other leftover wool to make a striped cardigan in June. Stay tuned!
P.S. It was brought to my attention that there is a looper pedal with exactly the same co,our scheme as this jumper! Obviously we both have great taste. https://www.chasebliss.eu/mood
Also, in trying to make that edit in the nightmare that is the Jetpack app, the app un-published the post instead. I was luckily able to revert back to the original and re-publish, but now the posts are in the wrong order. And editing the post now via WordPress on the iPad, the link button doesn‘t work, so I can‘t link directly to the picture of the pedal. Get it together, WordPress!
“Knit for High Summer”! The June 1965 issue of Stitchcraft “covers practically everything the family needs in the way of holiday knits”, i.e. sporty separates, cardigans to be worn as outerwear, and lots of warm, bulky sweaters for that unpredictable British summer weather. Our cover model sports a loose, unshaped, fine-knit blouse in 4-ply “Nylox” yarn, a combination of wool and nylon not unlike many sock yarns popular today. The matching skirt is below-knee length — it will take a little while for the miniskirt to reach high fashion and longer for it to be popular in a more conservative magazine like Stitchcraft.
The “crochet look” is already quite popular at this time, though. Prior to the 1960s, crochet was more often used to make doilies and fancy lace borders in fine thread, or quick and bulky items like hot pads, teapot cosies and mittens. The mid-1960s saw a transition to blouses, suits and other garments, and this issue features a lightweight blouse in an easy shell patter, worn by a model who looks uncannily like the young Barbra Streisand. Those who prefer knitted summer tops can make a little cap-sleeve blouse in fine bouclet wool, unfashionably short in this year of long, unshaped tops. The fine-knit items are rounded out by a striped cardigan in a mixture of plain wool and fluffy “Fuzzy-Wuzzy” angora blend yarn.
It wouldn’t be a proper summer without some cold wind and rain, so be prepared in your warm “bubbly stitch” cardigan made in bulky, but (comparatively) lightweight “Ariel” wool. The photo is so very 1960s! Diagonal camera angle, tilted head, high-contrast lighting for dramatic shadows, unsmiling but alluring facial expression — it’s all there. There are similar, but not quite matching, his-and-hers DK pullovers in ultramarine blue and white. The colour detailing is embroidered on at the end in cross-stitch. The man of the family can also get a bright blue waistcoat in a mock-cable and welt pattern. You know the model is on holiday, since he’s wearing his casual button-up shirt and tie.
“Youngsters” can stay warm (on their upper bodies at least) as well, in a Norwegian-style round-yoke pullover with a simple stranded pattern at hem and yoke or a “tough Lumber-style” zippered cardigan “for hard play”. You can tell the little boy in the picture is playing hard, since he’s wearing his playtime button-up shirt and tie! The girl model gets to wear shorts for once, instead of a tiny miniskirt that barely covers anything.
There are plenty of easy projects to take along on your holiday, or to prepare for it, or even serve as a memento of it — like the embroidered place mats with maps of France, Italy, Spain and Portugal, or Switzerland and their associated stereotypical motifs. Those who prefer to plan ahead can sew a simple folding bag lined with towelling for a bathing kit, or a cross-stitch hold-all for beach take-along items, as well as a little sundress-smock for a toddler.
A tablecloth is probably too big to pack in the beach bag, but the easy cross-stitch pattern is given for a cushion or chair-back as well. Little embroidered animal pictures in cross-stitch “for the nursery” are also quick and easy to pack along on holiday.
The highlights of the homeware designs in this issue are definitely meant to be made at home, particularly the embroidered “Chinese Garden” wall panel. I cannot vouch for any kind of cultural or historical authenticity in the design, but it is very pretty and delicate in shades of blue, green, lilac and orange. I’m glad they included a colour photo.
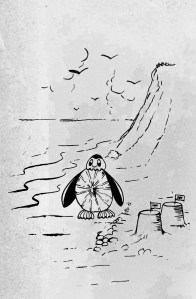
Last but not least, I leave you with this amazing “Practical Set for your bathroom” consisting of a bath mat and “Pedestal Set” made in cross-stitch with rug wool on mesh canvas. With penguins and fish! If you can’t get to Antarctica for your next holiday, the penguins can come to you.
My project this month will be a destash adaptation of the “Fuzzy-Wuzzy” cardigan. Happy holidays, or whatever else June brings for you.
For this month’s project, I couldn’t decide whether to make the pretty 3-colour “Shaded Blouse” (knowing that I have plenty of knitted tops, and that I would have to buy yarn for it when I am trying hard to reduce my stash) or adapt the tablecloth/dressing-table set embroidery pattern for another vegetable bag (quick, easy, useful, environmentally friendly and reduces the stash of embroidery thread and yet-unembroidered bags). Spoiler: I made both, so the stash balance will remain even. The top will take a little while, so here’s the veggie bag in the meantime.
The pattern is a design of yellow primroses and purple violets, but not in the same “bouquet” — there’s an option for a tablecloth with the primrose sprays in the corners and the smaller, individual violets scattered across the middle surface, or a “cheval set” for your dressing table with one large mat (2 primrose sprays and 2 violets) and two small mats (one violet each.) I chose to just make the primrose spray.
The bag is one of several that I bought at an antique sale a few years ago for a euro each. They are literally old moneybags, formerly used to transport money to and from the German national bank (hence the “Deutsche Bundesbank” and date printed on it; this bag was apparently from January 1997.) After 2002, the German Bundesbank replaced the old bags with newer and better ones (better in the sense that they presumably fulfilled new security regulations for the Euro) and you can now buy the disused old bags at antique markets, via ebay, etc. How they got from the bank to there, I do not know, but would love to find out. (If you are an expert in the sale and trade of disused moneybags, please share your wisdom in the comments — I genuinely would like to know.)
Anyway, apart from the fascinating can of worms that is their origin story, the bags are the absolute best for buying vegetables at the grocery store, farmers’ market etc, being made of a very thick linen (?) fabric and just the right size for small amounts of things like mushrooms, green beans, shallots, etc. Because they are both tough and easily washable (of course I washed them thoroughly before starting to use them for food items — money is literally filthy) they are particularly good for sandy or earthy vegetables like the aforementioned mushrooms, new potatoes, or the kind of carrots that I like to eat, which are grown in peat and therefore quite “dirty” (but taste better than regular carrots).
The actual embroidery pattern was not difficult. Of course, I had no transfer, since I would have had to order it in the mail in 1965. But it was no problem to sketch out the flower spray from the photo. I used transfer paper to transfer the design onto the fabric. The ink was quite faint, so I went over it with a ball-point pen (washable), which worked well enough. There were instructions in the magazine and even a helpful close-up of the stitches, which were all extremely easy: satin stitch for the petals, blanket stitch for the leaf outlines and stem stitch for everything else. I ran out of light yellow after embroidering half of the flowers, and the new skein I bought was one colour-shade different. You can tell if you look closely, but I don’t think it’s a flaw — it gives the flowers a little more depth.
This is the third “Bundesbank” bag that I’ve embroidered, as well as another bag of regular cotton fabric. I used the other bags to buy stuff at the local organic supermarket last week and the cashier stopped in the middle of my checkout to say, “I’m sorry, I just need to take a second to admire this beautiful work.” That was sweet! If I ever get enough of these made, I’ll probably start selling them.
Hello, everyone! Just a little in-between post to let you know some news:
First of all, this blog now has its own domain name: http://www.thestitchcraftsixties.com. You can still access it under the old address (www.thestitchcraftsixties.wordpress.com), but the new name is quicker to type. : )
Also, I have finally finished this Little Girl’s Holiday Dress project from last year, and it was worth the wait! It came out beautifully and I’m very happy with it, so check out the link if you want to see how it turned out.
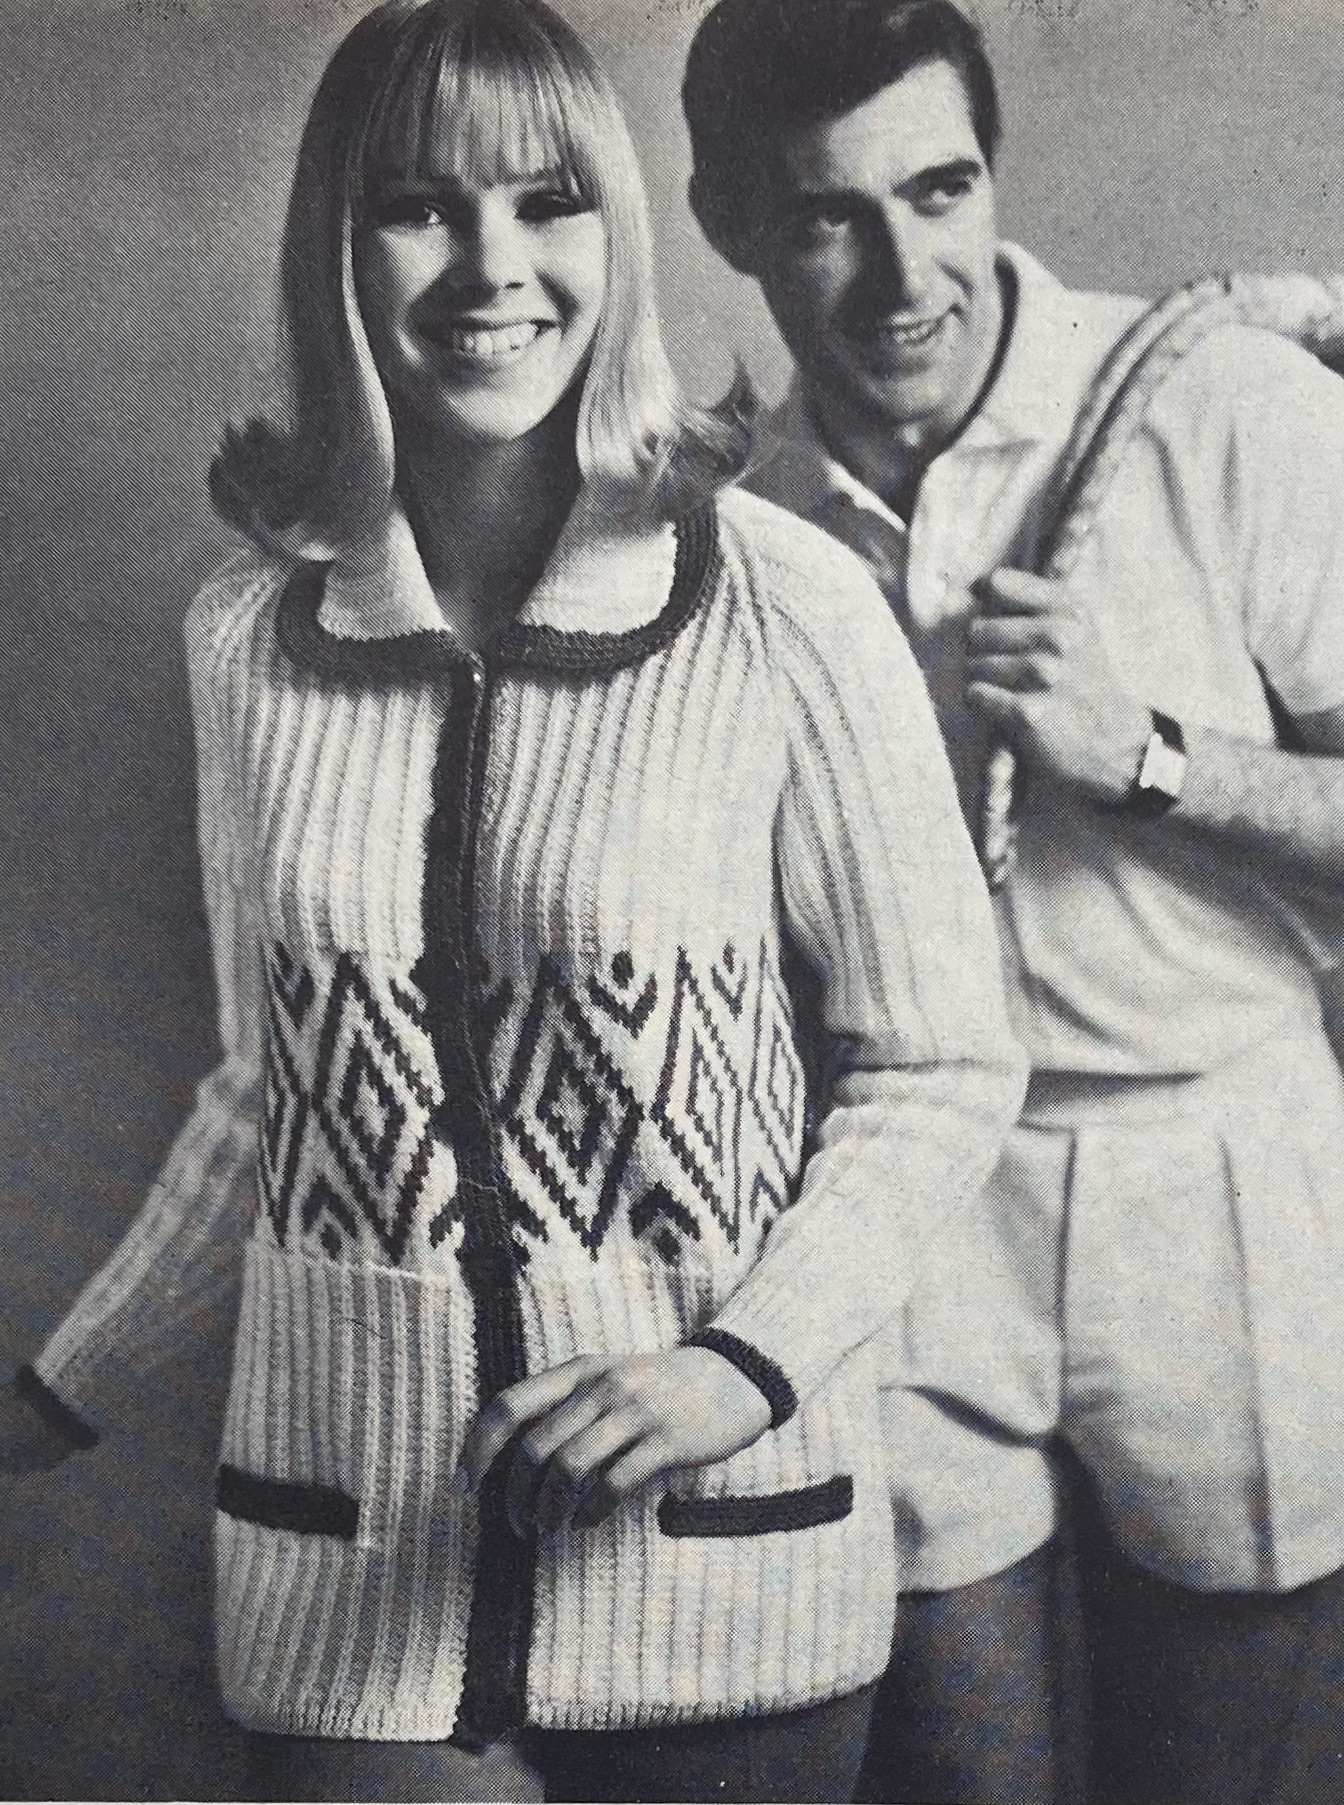
Spring and summer are always time for “holidays” at Stitchcraft, with a mixture of light, pretty blouses, warmer, casual jackets and sweaters for that holiday on a North Sea beach, and easy embroidery to pack in your luggage and work on while lounging in your deck chair. Our cover photo shows matching his-and-hers sweaters made in DK wool, and an intriguing photo begging to be captioned. “It’s for you!” “Not interested” “But it’s my mother!” “I am definitely not home” — Anyway, the sweaters are nice and good to “wear by the sea”, as it says in the caption. They are knitted in Patons “Flair”, a combination of Shetland wool and Courtelle nylon in a slightly thicker DK weight.
The remaining adult knitted “holiday” garments are pretty and practical: a men’s tweedy “country” cardigan, a heavy slip-on jacket for women in a sort of bubble pattern made by purling stitches together, wrapping them and purling them again on one row out of a 4-row rib pattern, a lightweight lacy top with a graded colour scheme, or a slipover in mohair blend “Fuzzy-Wuzzy” wool. There’s also a fashionable dress in bramble-stitch, made to look like crochet, but knitted. Colours are soft, cool pastels — white, natural, sky blue or light pink.
The “crochet look” in knitting, as exemplified by the dress, is the latest trend. If you can’t crochet, you can knit to make it look like crochet, and if you can, you can make a matching mother-daughter blouse set in wool-nylon blend “Nylox” yarn. There’s also a full-page “Learn to Crochet” illustration with clear and helpful instructions for the basic stitches. I keep it around for easy reference.
There’s nothing for very young babies in this issue, but toddlers can get a nice beach set of knitted pants and short-sleeved cardigan. The cable panels supposedly make it hold its shape, but it’s not intended to go in the water. The toddler’s tween sister gets a sunny and colourful “young style” blazer in DK wool and a “continental” design. I still don’t know what is meant by “continental” design — obviously referring to the European continent as opposed to the British isles, but I wouldn’t be able to say what design elements make something “continental.” If you know, do tell.
The summer housewares are fairly standard, with a floral cross-stitch design for either a cushion or tablecloth, and a knitting workbag featuring dancing “gay Tyrolean” figures. I know some gay Tyrolean dancers, but that’s a different story. There’s also an embroidery pattern for an easy tablecloth or “dressing-table set”.
And then there are some genuinely interesting place mats with figures of birds and fish adapted from Peruvian work. The “wingless bird” in the close-up photo looks like a rhea and the black and white one probably a guan. I don’t know about the third bird in the first photo, the squished-up one with a long neck, how about you?
There’s also a rug, for not taking along on holiday, as well as a fancy knitted lace cloth “for a summer table” (It is knitted in cotton and therefore wash- and bleachable, but still, I would be afraid to spill something on it.) And of course, cosies! Both egg- and teapot-, to knit from scraps of tapestry wool held double (not knitting wool as one would expect).
That’s all for this issue. I’m going to close with this wonderful Scotch Wool Shop advertisement for Bri-Nylon swimsuits. I would wear either of these in a heartbeat. Enjoy the Spring!
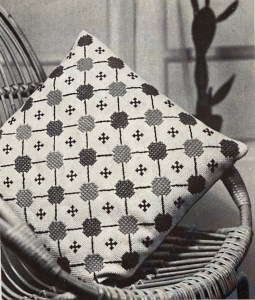
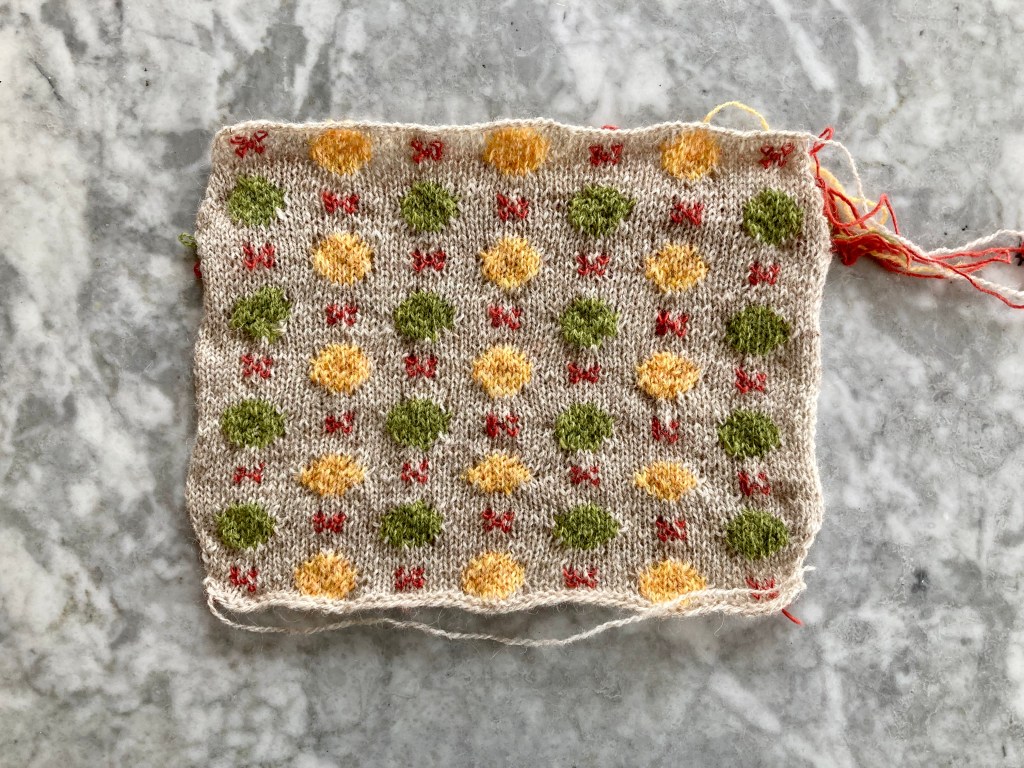
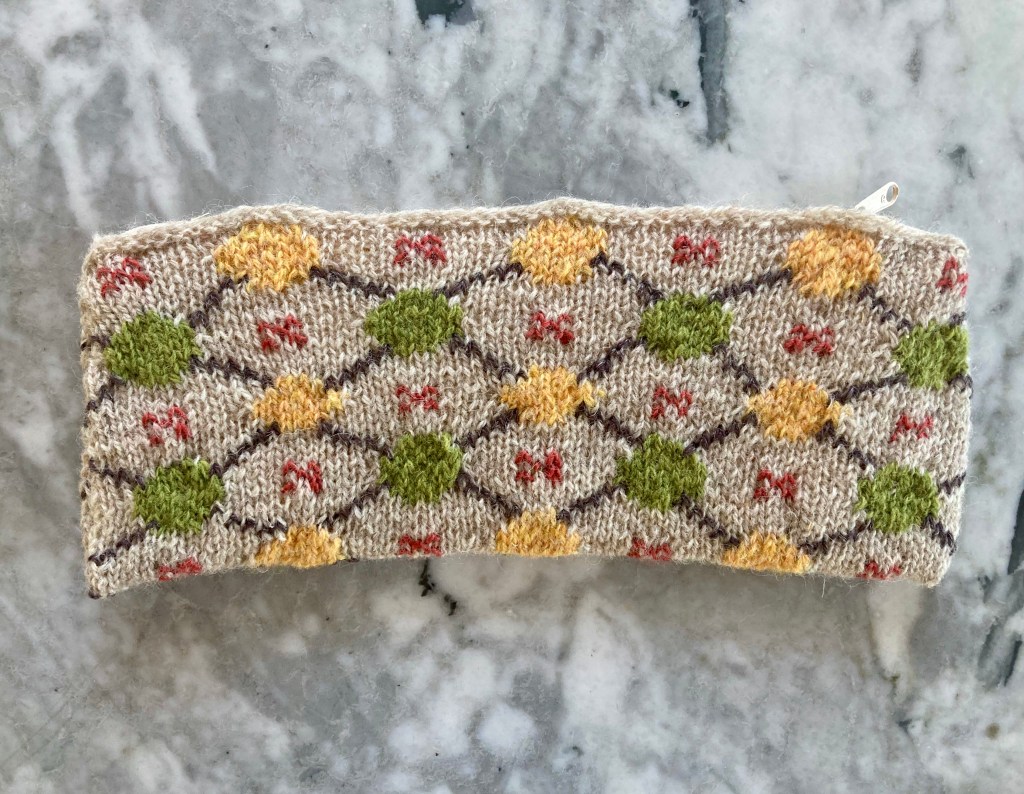
For this month’s project, I wanted to try something different and convert a cross-stitch pattern into knitting. The April 1965 issue of Stitchcraft had two designs for counted-stitch cushions embroidered with tapestry wool on coarse “Portree” cloth. Portree seems to be a grouped-thread fabric similar to Aida, but doesn’t seem to be manufactured under this name anymore. (If you know anything about it, please tell me!)
Anyway, I don’t like counted cross-stitch and I have enough cushions, but I was interested to see how one could convert the cross-stitch pattern into knitted form and what type of object or garment it would be suitable for. Theoretically, any counted-stitch chart can be used as a knitting chart. In practice, many cross-stitch patterns are not suitable for stranded or intarsia knitting due to the number of colours in a row or the placement of motifs. I thought this design would work as an intarsia design because the motifs are small and self-contained. The diagonal lines could be added in later either with embroidery on the finished knitting, or with duplicate stitch.
The original pattern uses Lime, Orange and Brown wools on natural colour cloth (how very 1960s.) I had lots of scraps of Shetland wool and used green (lime, I guess) and yellow (lemon?) for the spots on a slightly pink natural background. For the little motifs between the spots (brown in the original design), I chose some pink silk-wool blend of which I also had a small amount left over. The spots are 3, 5, 7, 7, 7, 5, 3 stitches wide and I stranded the wool on the seven-stitch rows and twisted the background and spot colours together at the changes on the edges of the spots. I made a modified square with slightly rounded edges, thinking if I didn’t know what to do with it, I could always mount it in a circular embroidery hoop-frame and hang it on the wall. Nine rows of spots made a piece about 10 inches wide and 9 inches long. Here it is after blocking, but before adding the duplicate stitch lines:
So far, so good. Of course, there were a million ends to weave in.
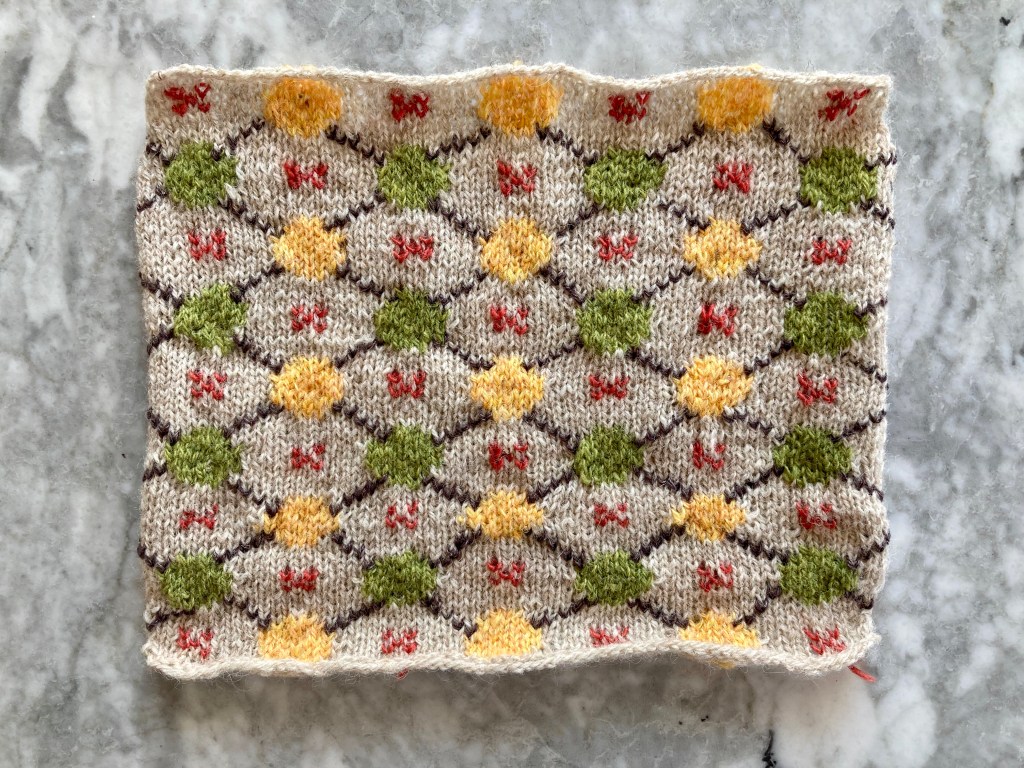
The duplicate stitch lines were surprisingly difficult. They are supposed to go from one 5-stitch-wide row to another, but I couldn’t always make it work out with the diagonals and the number of stitches and rows. Mathematically, it should not be a problem. In practice, I guess I didn’t always find the correct stitch to duplicate.
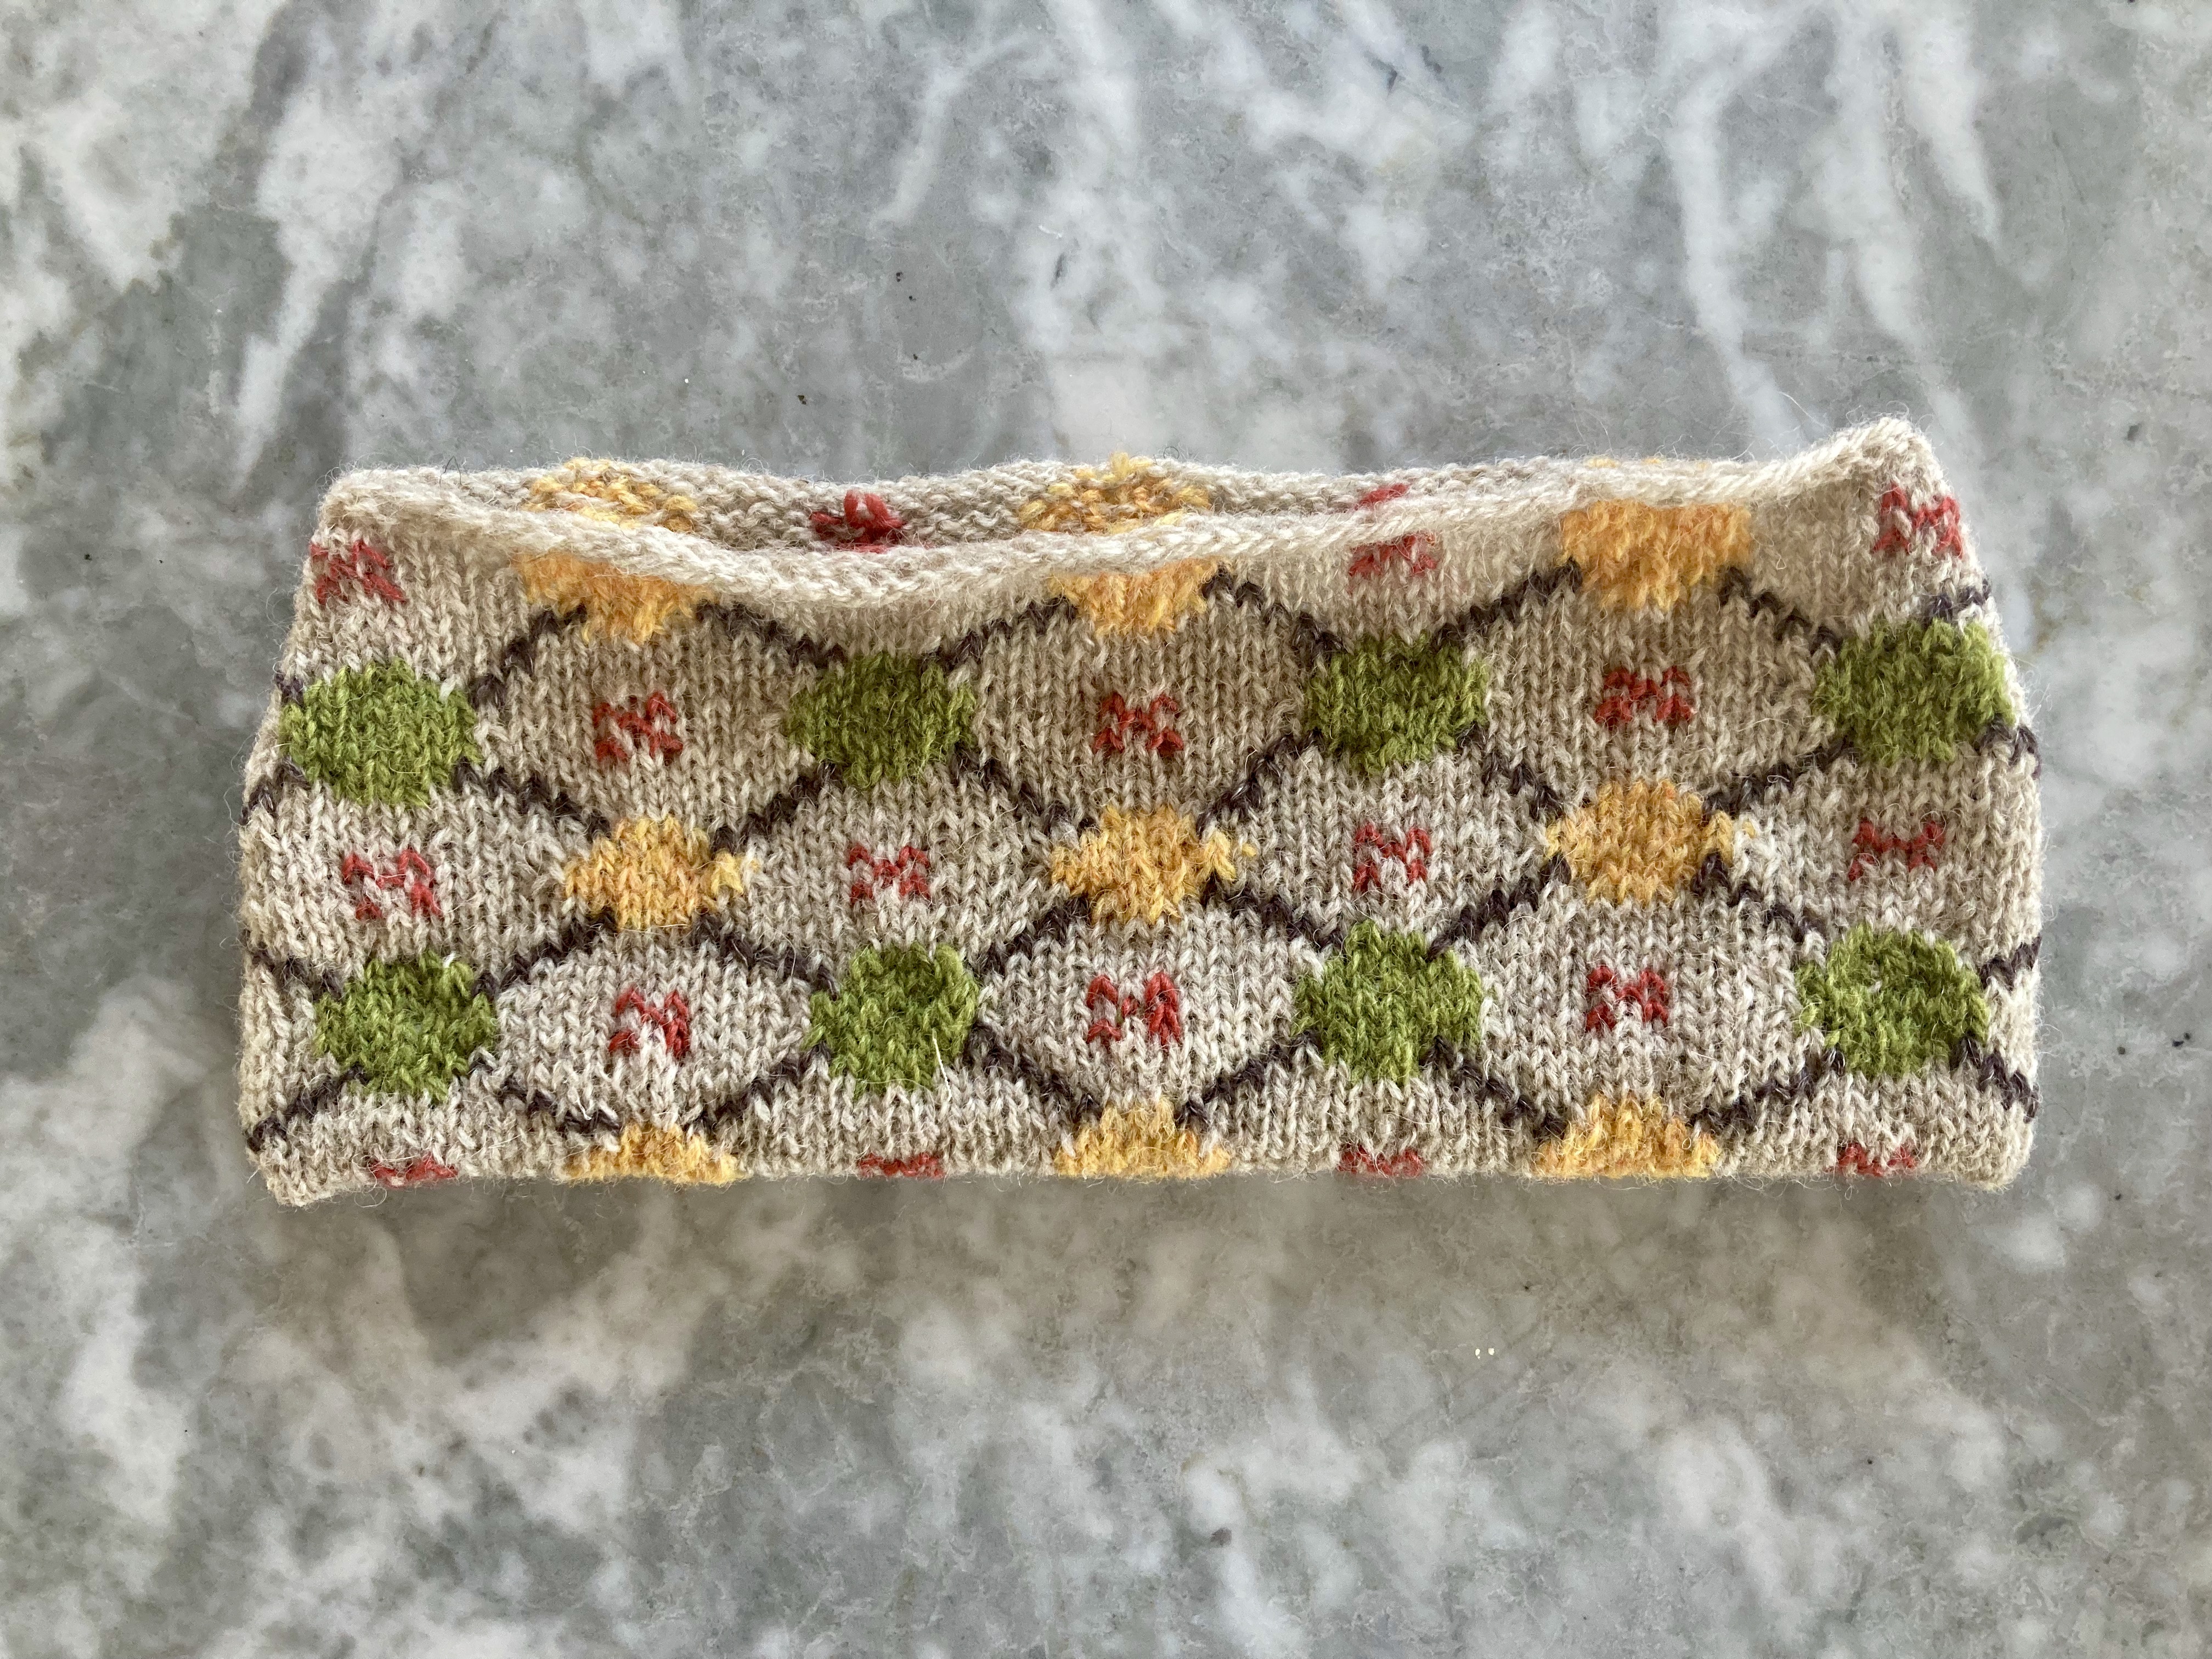
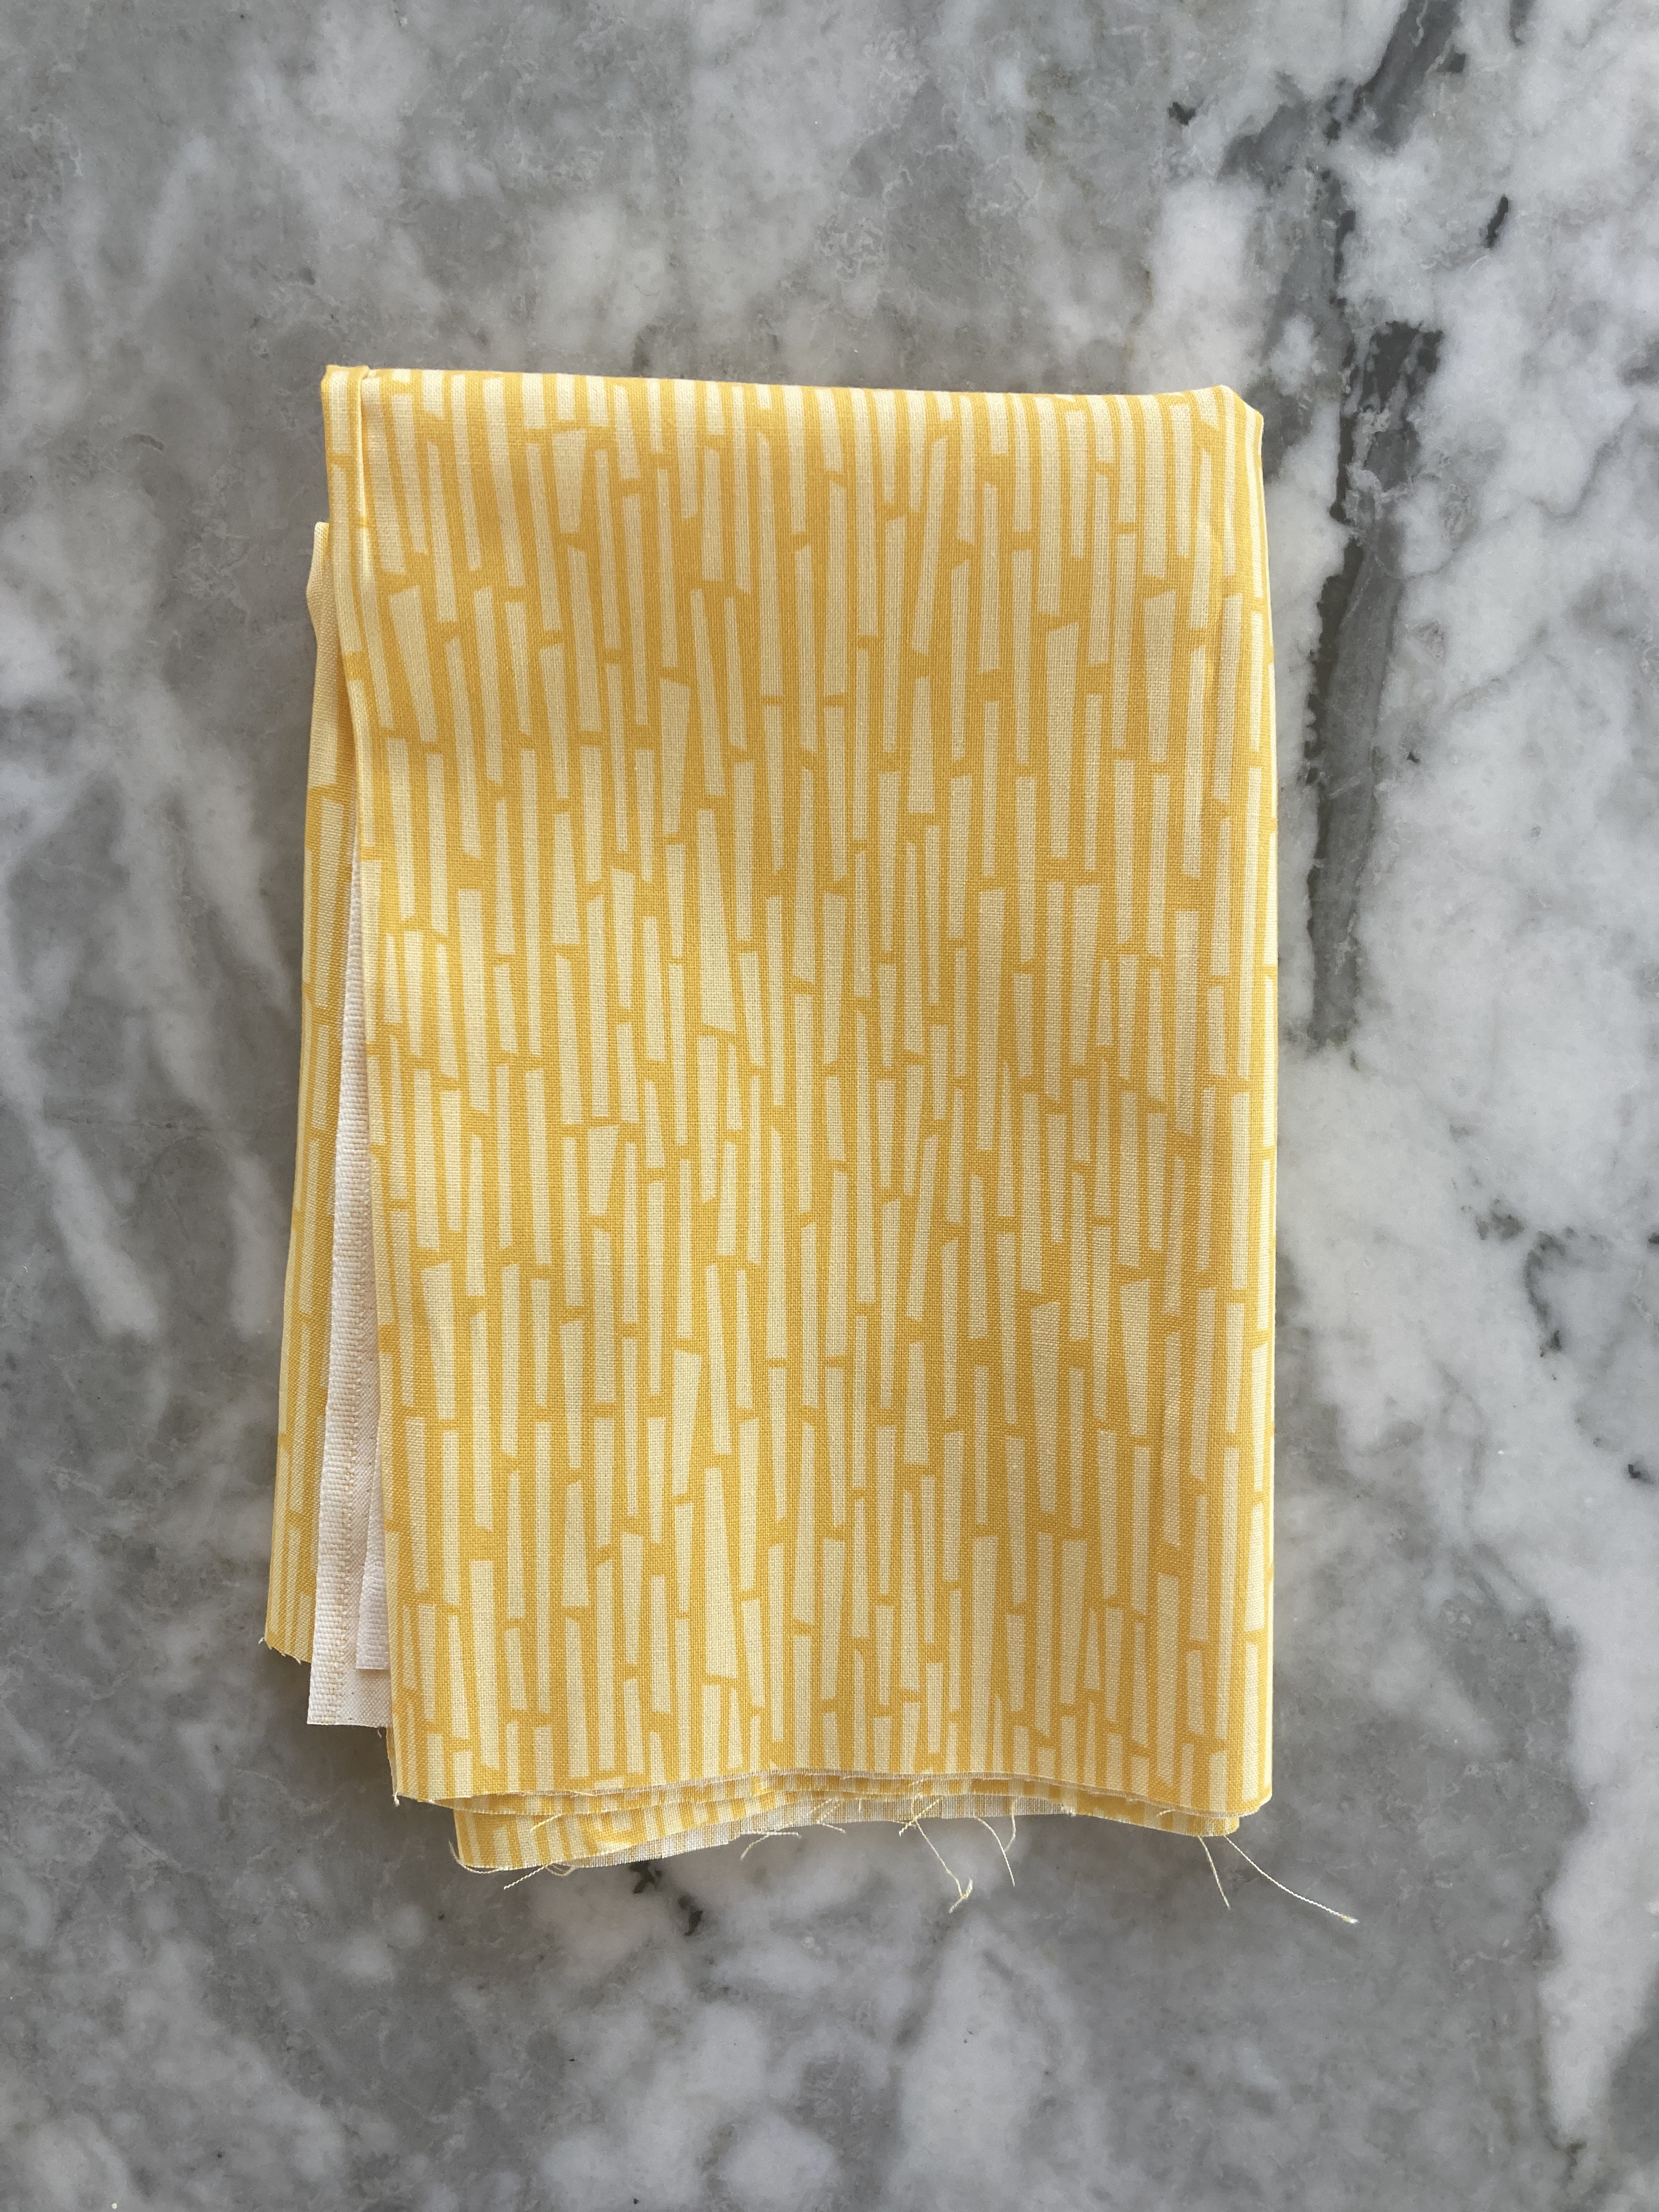
At this point, I had realised that I could fold it in half to make a little rectangular case for pencils or double-pointed needles. Not that I need that, particularly, but if it turned out well enough, I could give it away or sell it or something. I bought a small piece of yellow cotton for the lining and a zipper, sewed it up and there it was.
Sewing in the zipper was a disaster, as it usually is, and for some reason, the finished bag is a bit… warped? It was perfectly flat, as was the lining, before putting in the zipper. I think the knitted fabric pulled a little more on one side than the other. But other than that, it’s fine.
I could imagine a design like this for a rectangular sort of garment, like a slipover/vest/whatever you call it thing with no sleeves — sort of like an argyle design. The only truly annoying part is weaving in the thousand ends. This was a good learning experience and I definitely feel more confident about converting cross-stitch designs after doing it.
Stitchcraft’s April 1965 theme is “Out in the Open Knitting”, with “country” style cardigans and jackets to be worn outdoors, and easy homeware projects that are “just the type of work to do through the lighter evenings and out of doors.” Spring is here!
Our cover photo features a “stroller jacket” made in tweedy “Glenora” wool. At 30 to 32 ounces and made in stocking stitch, I fear it would stretch and sag to much longer than the 34-35 inches given in the pattern. The other adult “outdoor” garments are similarly heavy: a “country jacket” in bulky Big Ben wool and knotted-stitch pattern and a square-shaped men’s jacket in double-moss stitch. Outdoor colours include natural beige and brown tones as well as sky blue.
The “indoor” garments are less bulky and use matching layers to adapt to capricious spring temperatures: a subdued twin set with “braided” bolero-style border on the cardigan and a set of jumper + “overblouse” slipover. The twin set and jumper are in lightweight 4-ply wool, the overblouse in DK.
Colours are muted and match well with the outdoor neutrals: , soft pink, peachy-orange and grey-brown tweed. There’s an “indoor” pullover for men as well, in tweedy green to match the outdoor country theme.
Children of all ages get “bread-and-butter” garments for school and play. There’s a crocheted baby jacket to be made either without shaping (“for a boy”) or with a skirted matinee coat shape (“for a girl”). There’s a tunic dress for a somewhat older girl, featured in one of my favourite photographs ever. Drink your tea… or else! The dress is pretty cool too: decorated with embroidered chain-stitch over nubbly Rimple DK wool.
School-age kids can get a practical unisex waistcoat for school wear, or a very nice fine-knit cardigan in 3-ply “Brilliante” wool. Brilliante was a wool blend using “Orlon” acrylic fiber, which had been invented in 1941 but only started to be popular for hand-knitting use in the mid-1960s. See also: the two advertisements in this issue touting the qualities of Brilliante and Orlon: soft, washable and thoroughly modern.
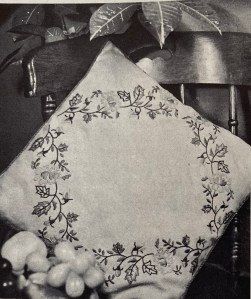
There are all sorts of homewares to choose from, most of them fairly standard: a striped, darned rug, a church kneeler in trammed-stitch tapestry, cutwork place mats, a simple embroidered cushion… There’s a flowery embroidered tablecloth for Easter (Easter Sunday was rather late in 1965, falling on April 18th, but still — better get that tablecloth done soon!) and two more cushions in counted cross-stitch work.
The two more interesting projects are a pattern for tatted place mats and napkin rings, or tapestry chair seats with an oceanic theme. Tatting designs are rare in Stitchcraft, so this was a special “by request” pattern. The sea-life chair seats are quite pretty and elaborate. One design features sea shells and coral, the other “Pond Life” — flowers, insects and butterflies. They are made with tapestry wool on canvas.
That’s all! My project for this month will be unusual: an adaptation of the cross-stitch “spot” design in knitting. I love the design, but I don’t like counted work and I don’t need any more cushions. I think it would work really well as an argyle-like intarsia + embroidered lines pattern for fingerless gloves. We’ll see how that works!
Choosing a project from the March 1965 issue of Stitchcraft was an interesting process. I loved both of the children’s designs (a “continental” cardigan and a textured pullover with a round stranded yoke), but could find no takers among the children / parents of children that size that I knew. I loved the red cardigan in the cover photo, but didn’t feel like going through the work of re-sizing and re-proportioning it for myself and it wasn’t the right style for any knit-worthy men in my life. None of the bulky, large, unshaped garments in the issue would have suited me. Also, I had multiple “endless” WIPs that I wanted to finish and other projects that have been waiting in the queue for a long time. So — I made a little embroidery project.
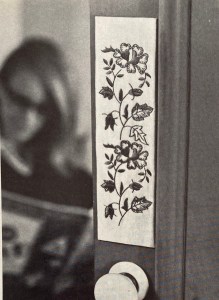
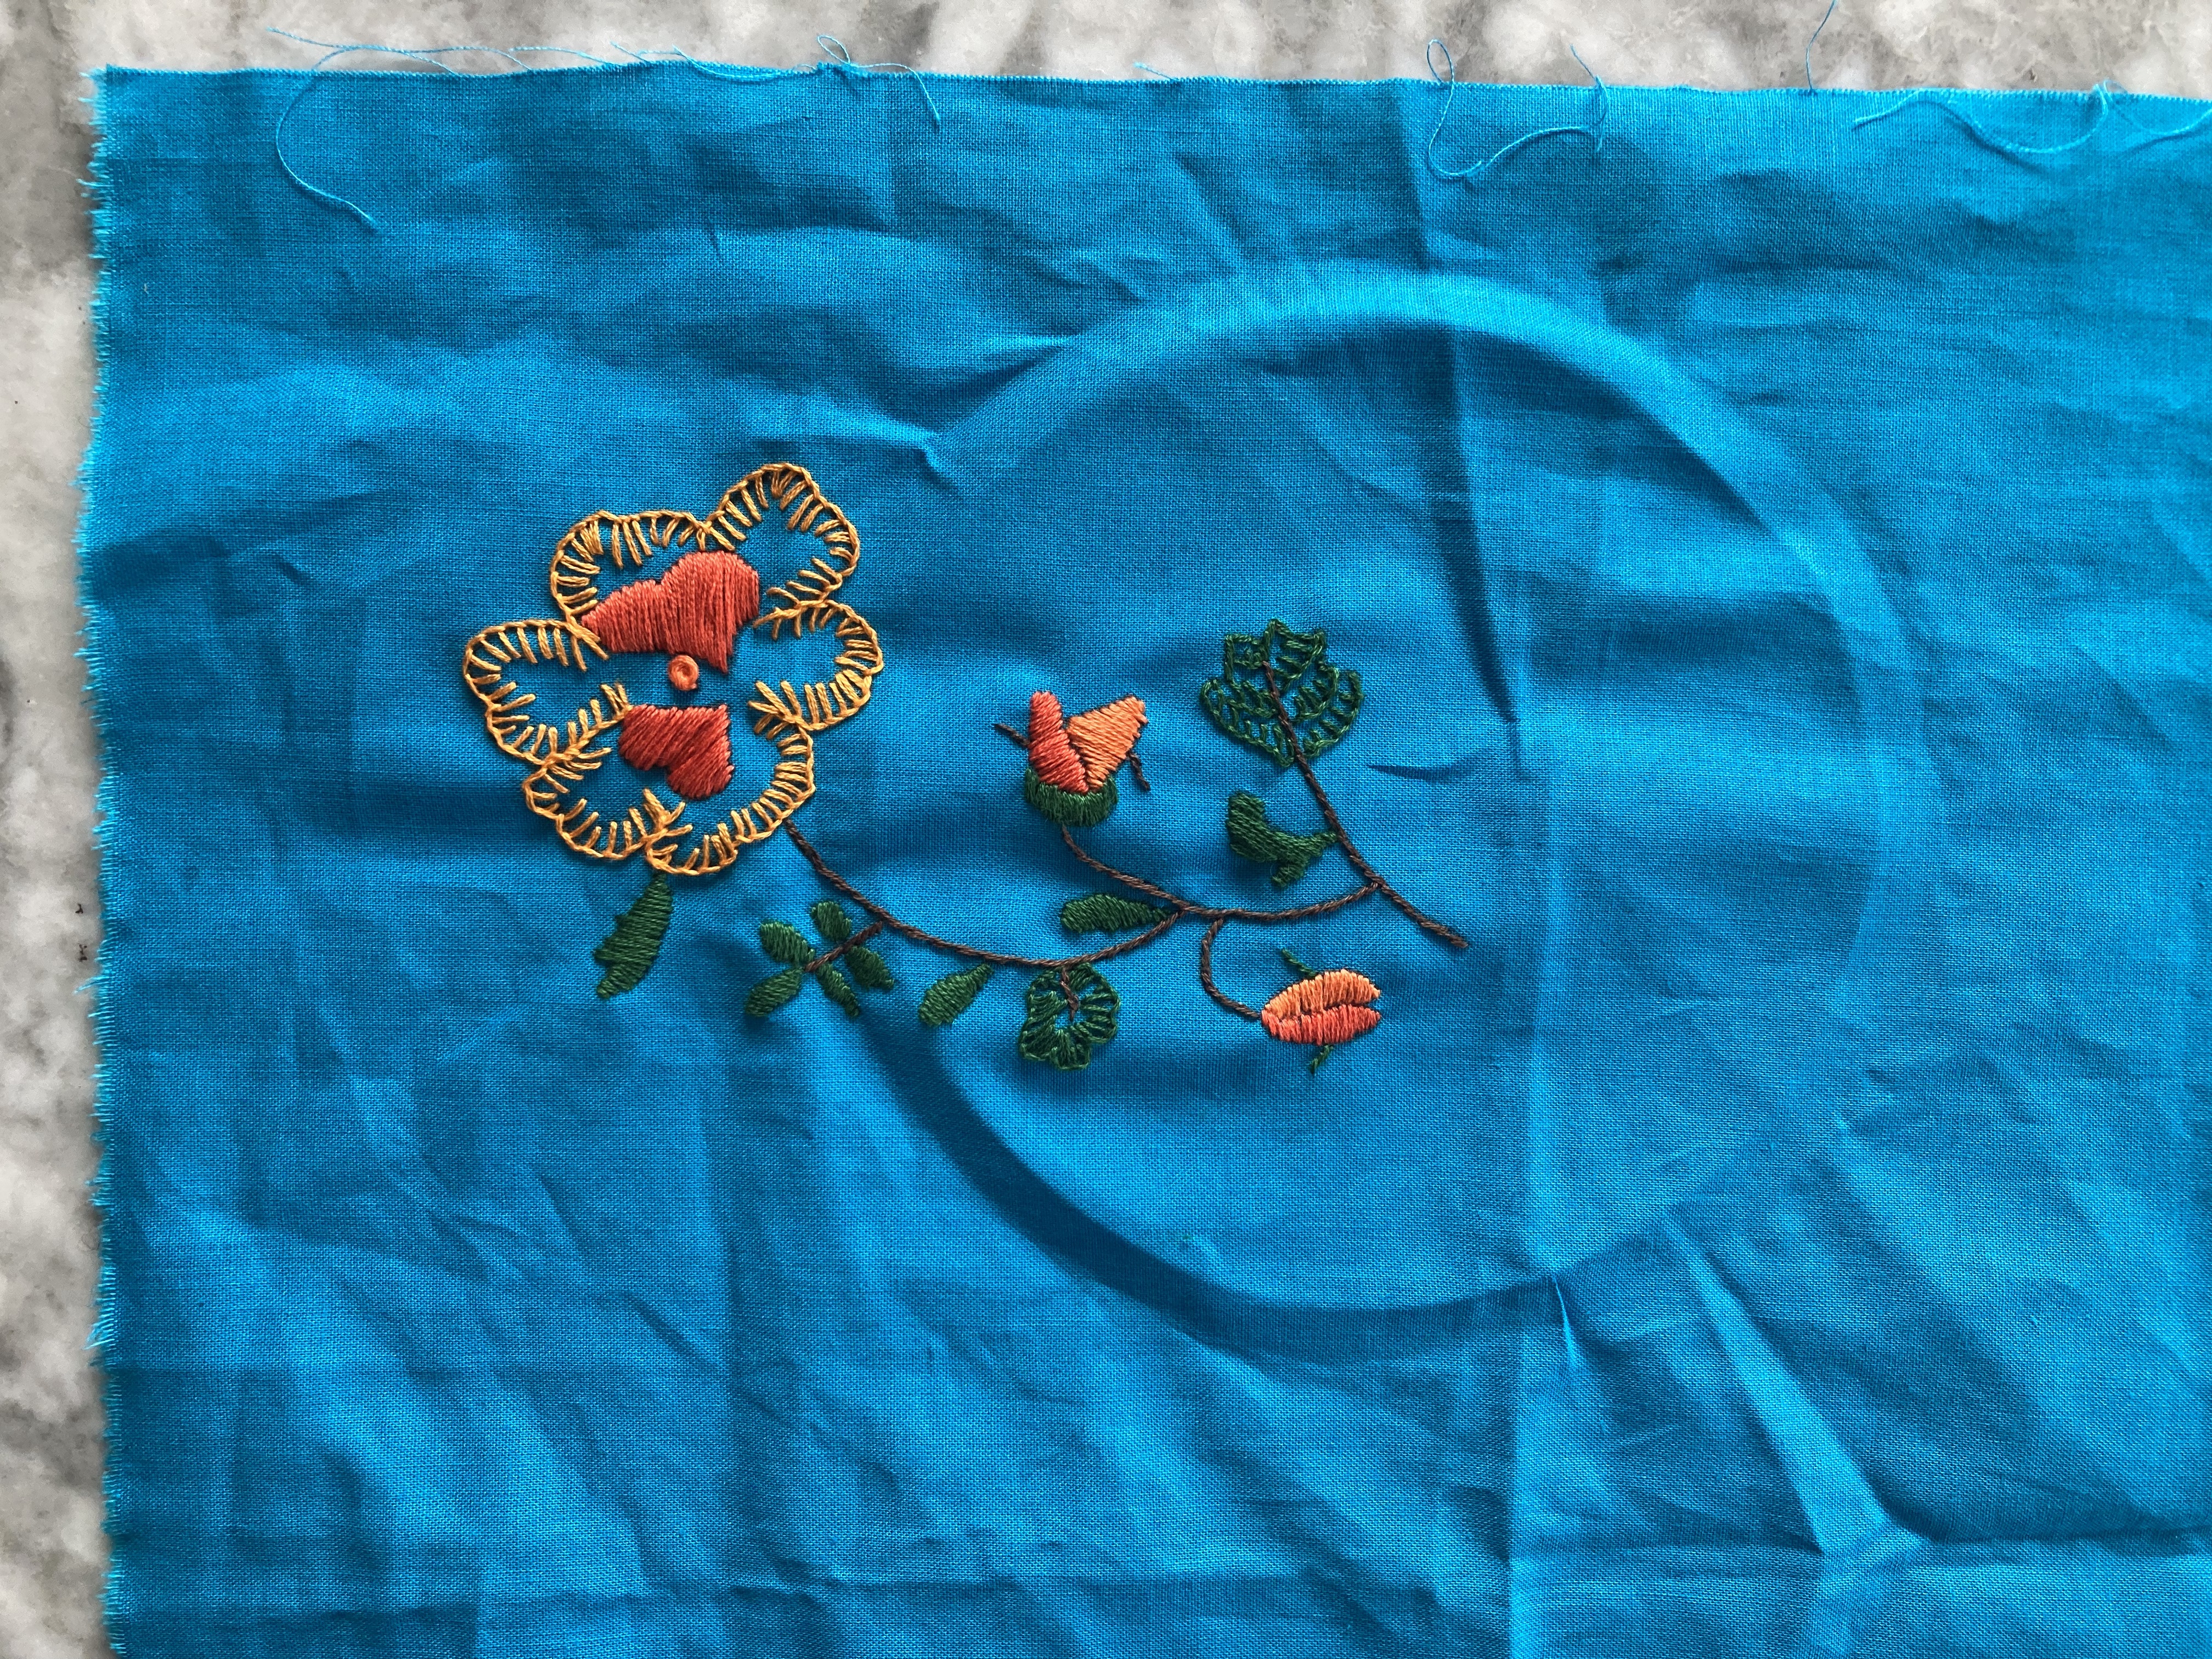
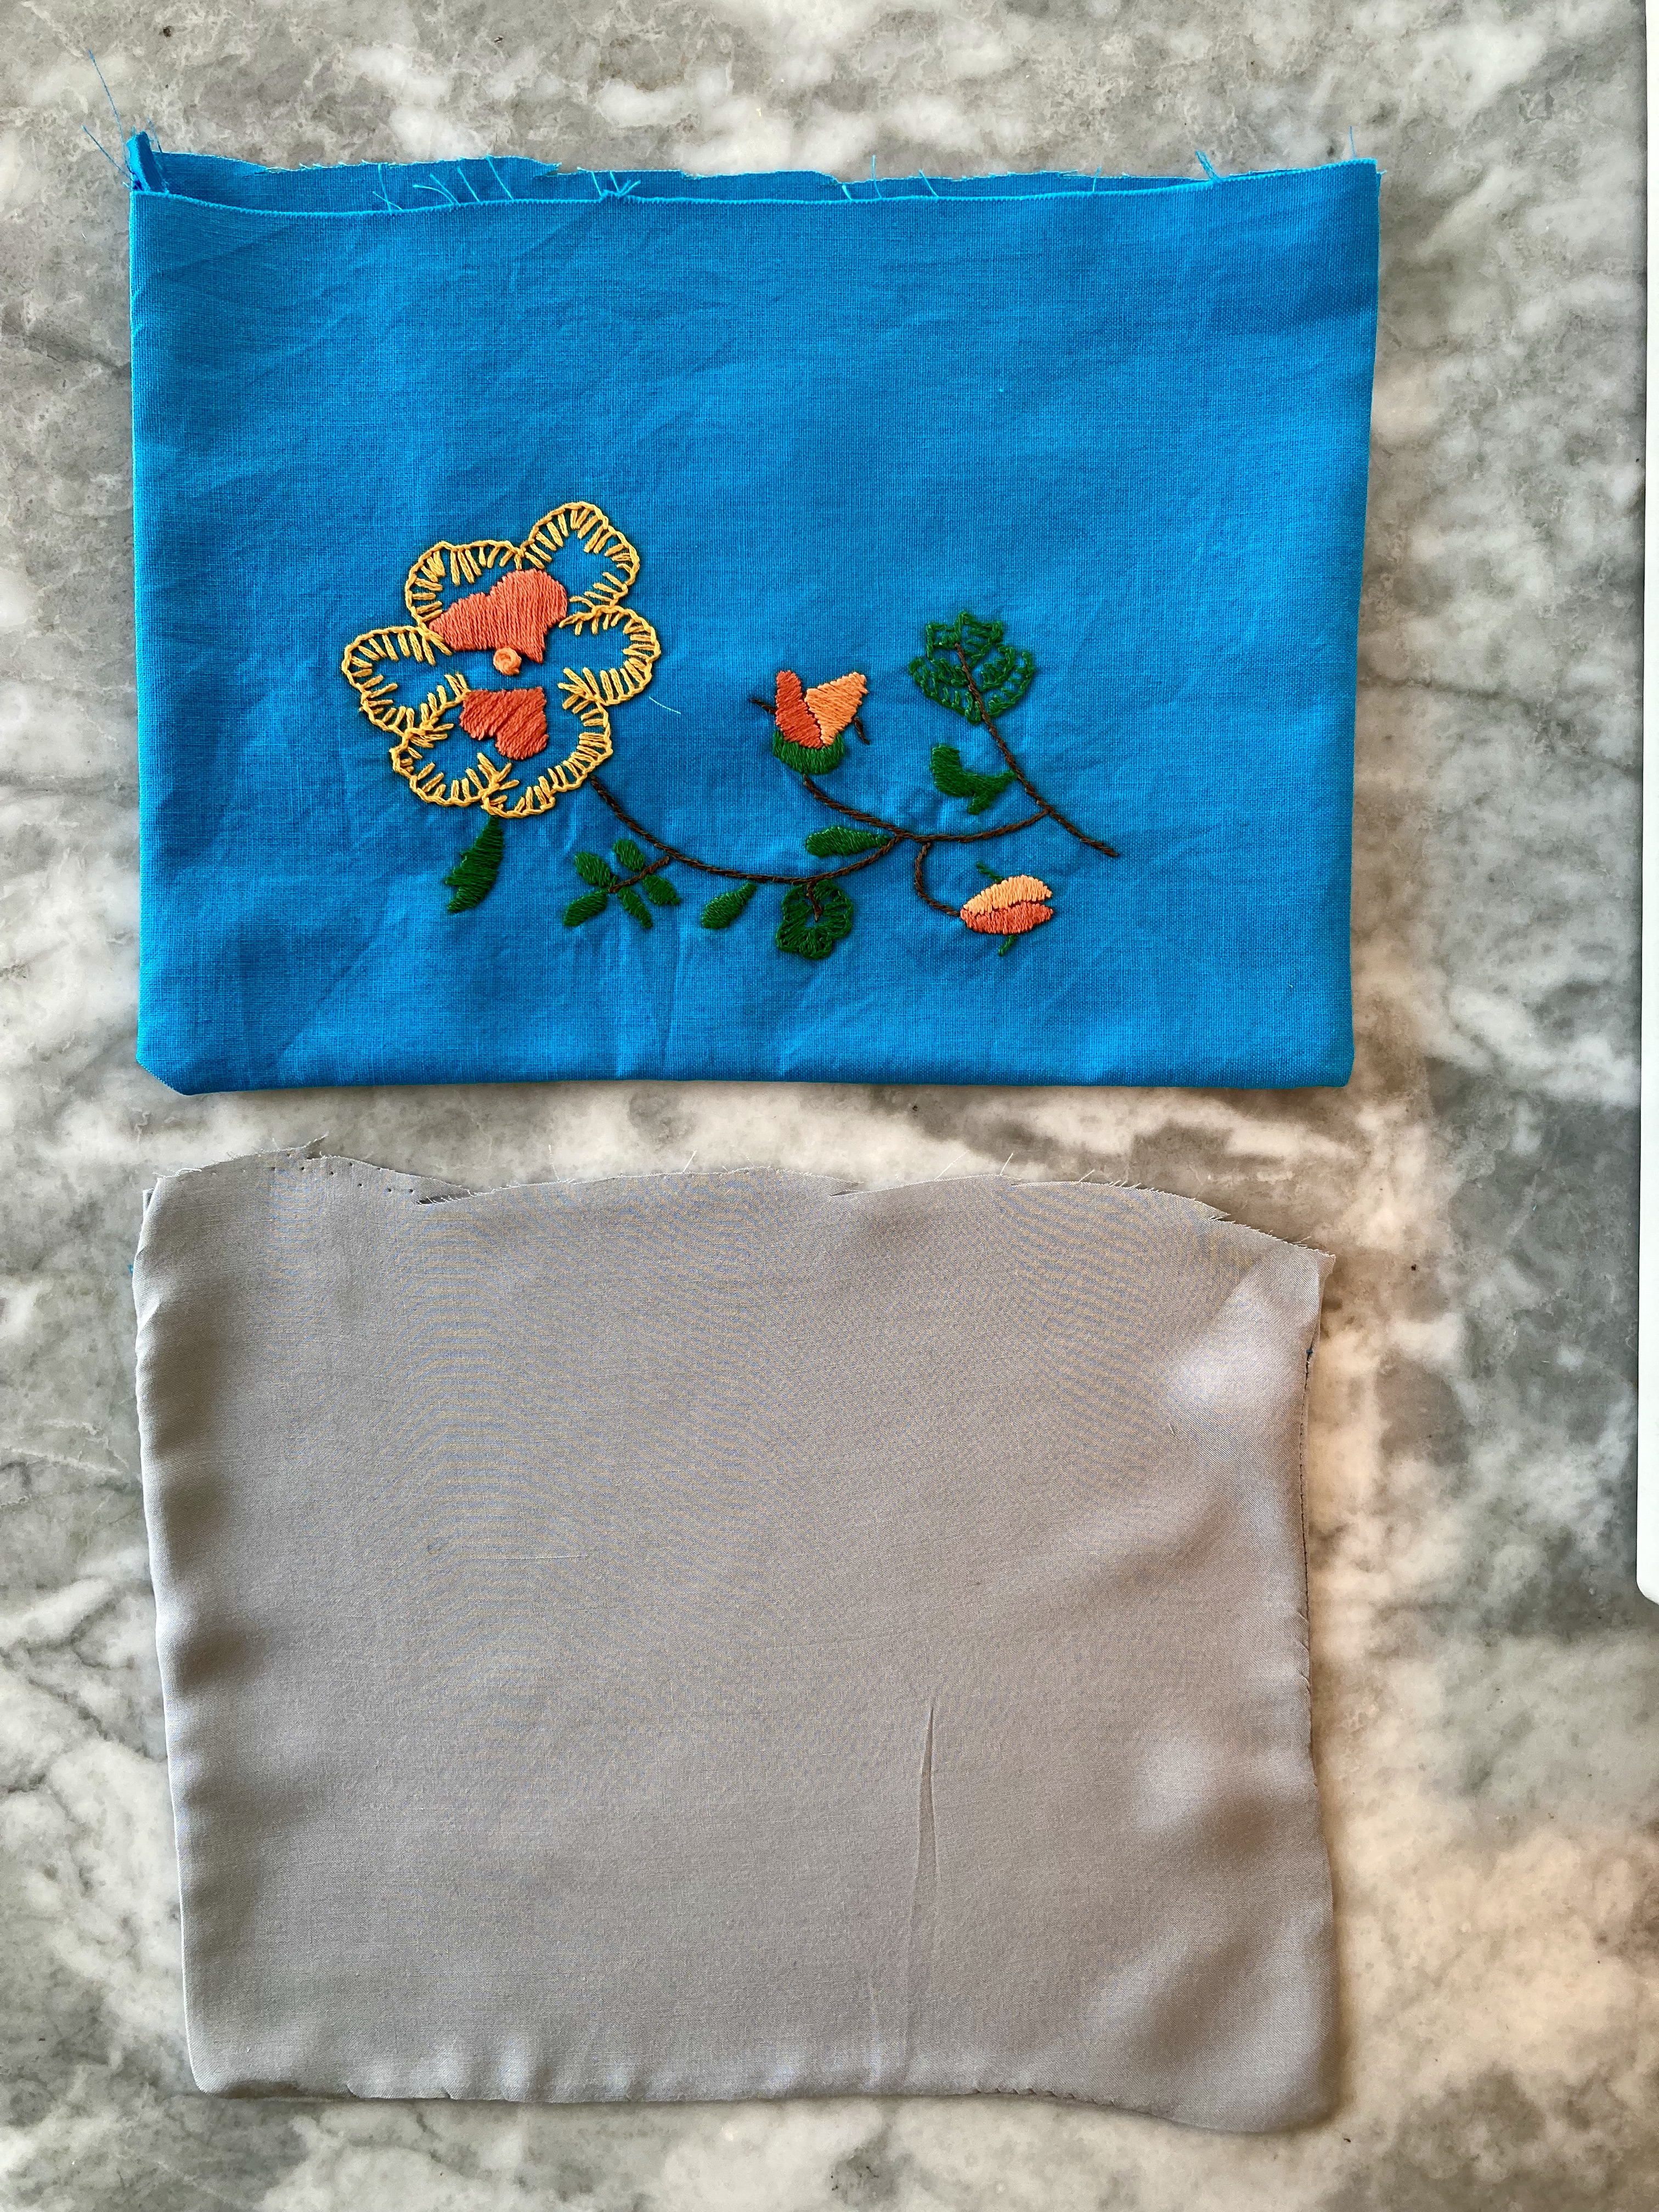
The project as presented in the magazine is a flower border in simple stitches and a limited colour palette (all blue, all “peacock”, or green and orange), to be worked either on a cushion, as a border on a pillowcase, or on satin fabric for a door panel. Not needing any of those things, I embraced the spirit of versatility and made a little embroidered and zippered bag that can be used for spare knitting needles / accessories or any other kind of easy-to-categorise-but-hard-to-contain “stuff”. I have many of these bags around the house, some made by me and some by friends. They are particularly useful for organising things in drawers or travel luggage. You can never have enough… and yet I kind of do! Luckily, they also make great little presents for friends, and one of mine has a birthday coming up, so I made it for her.
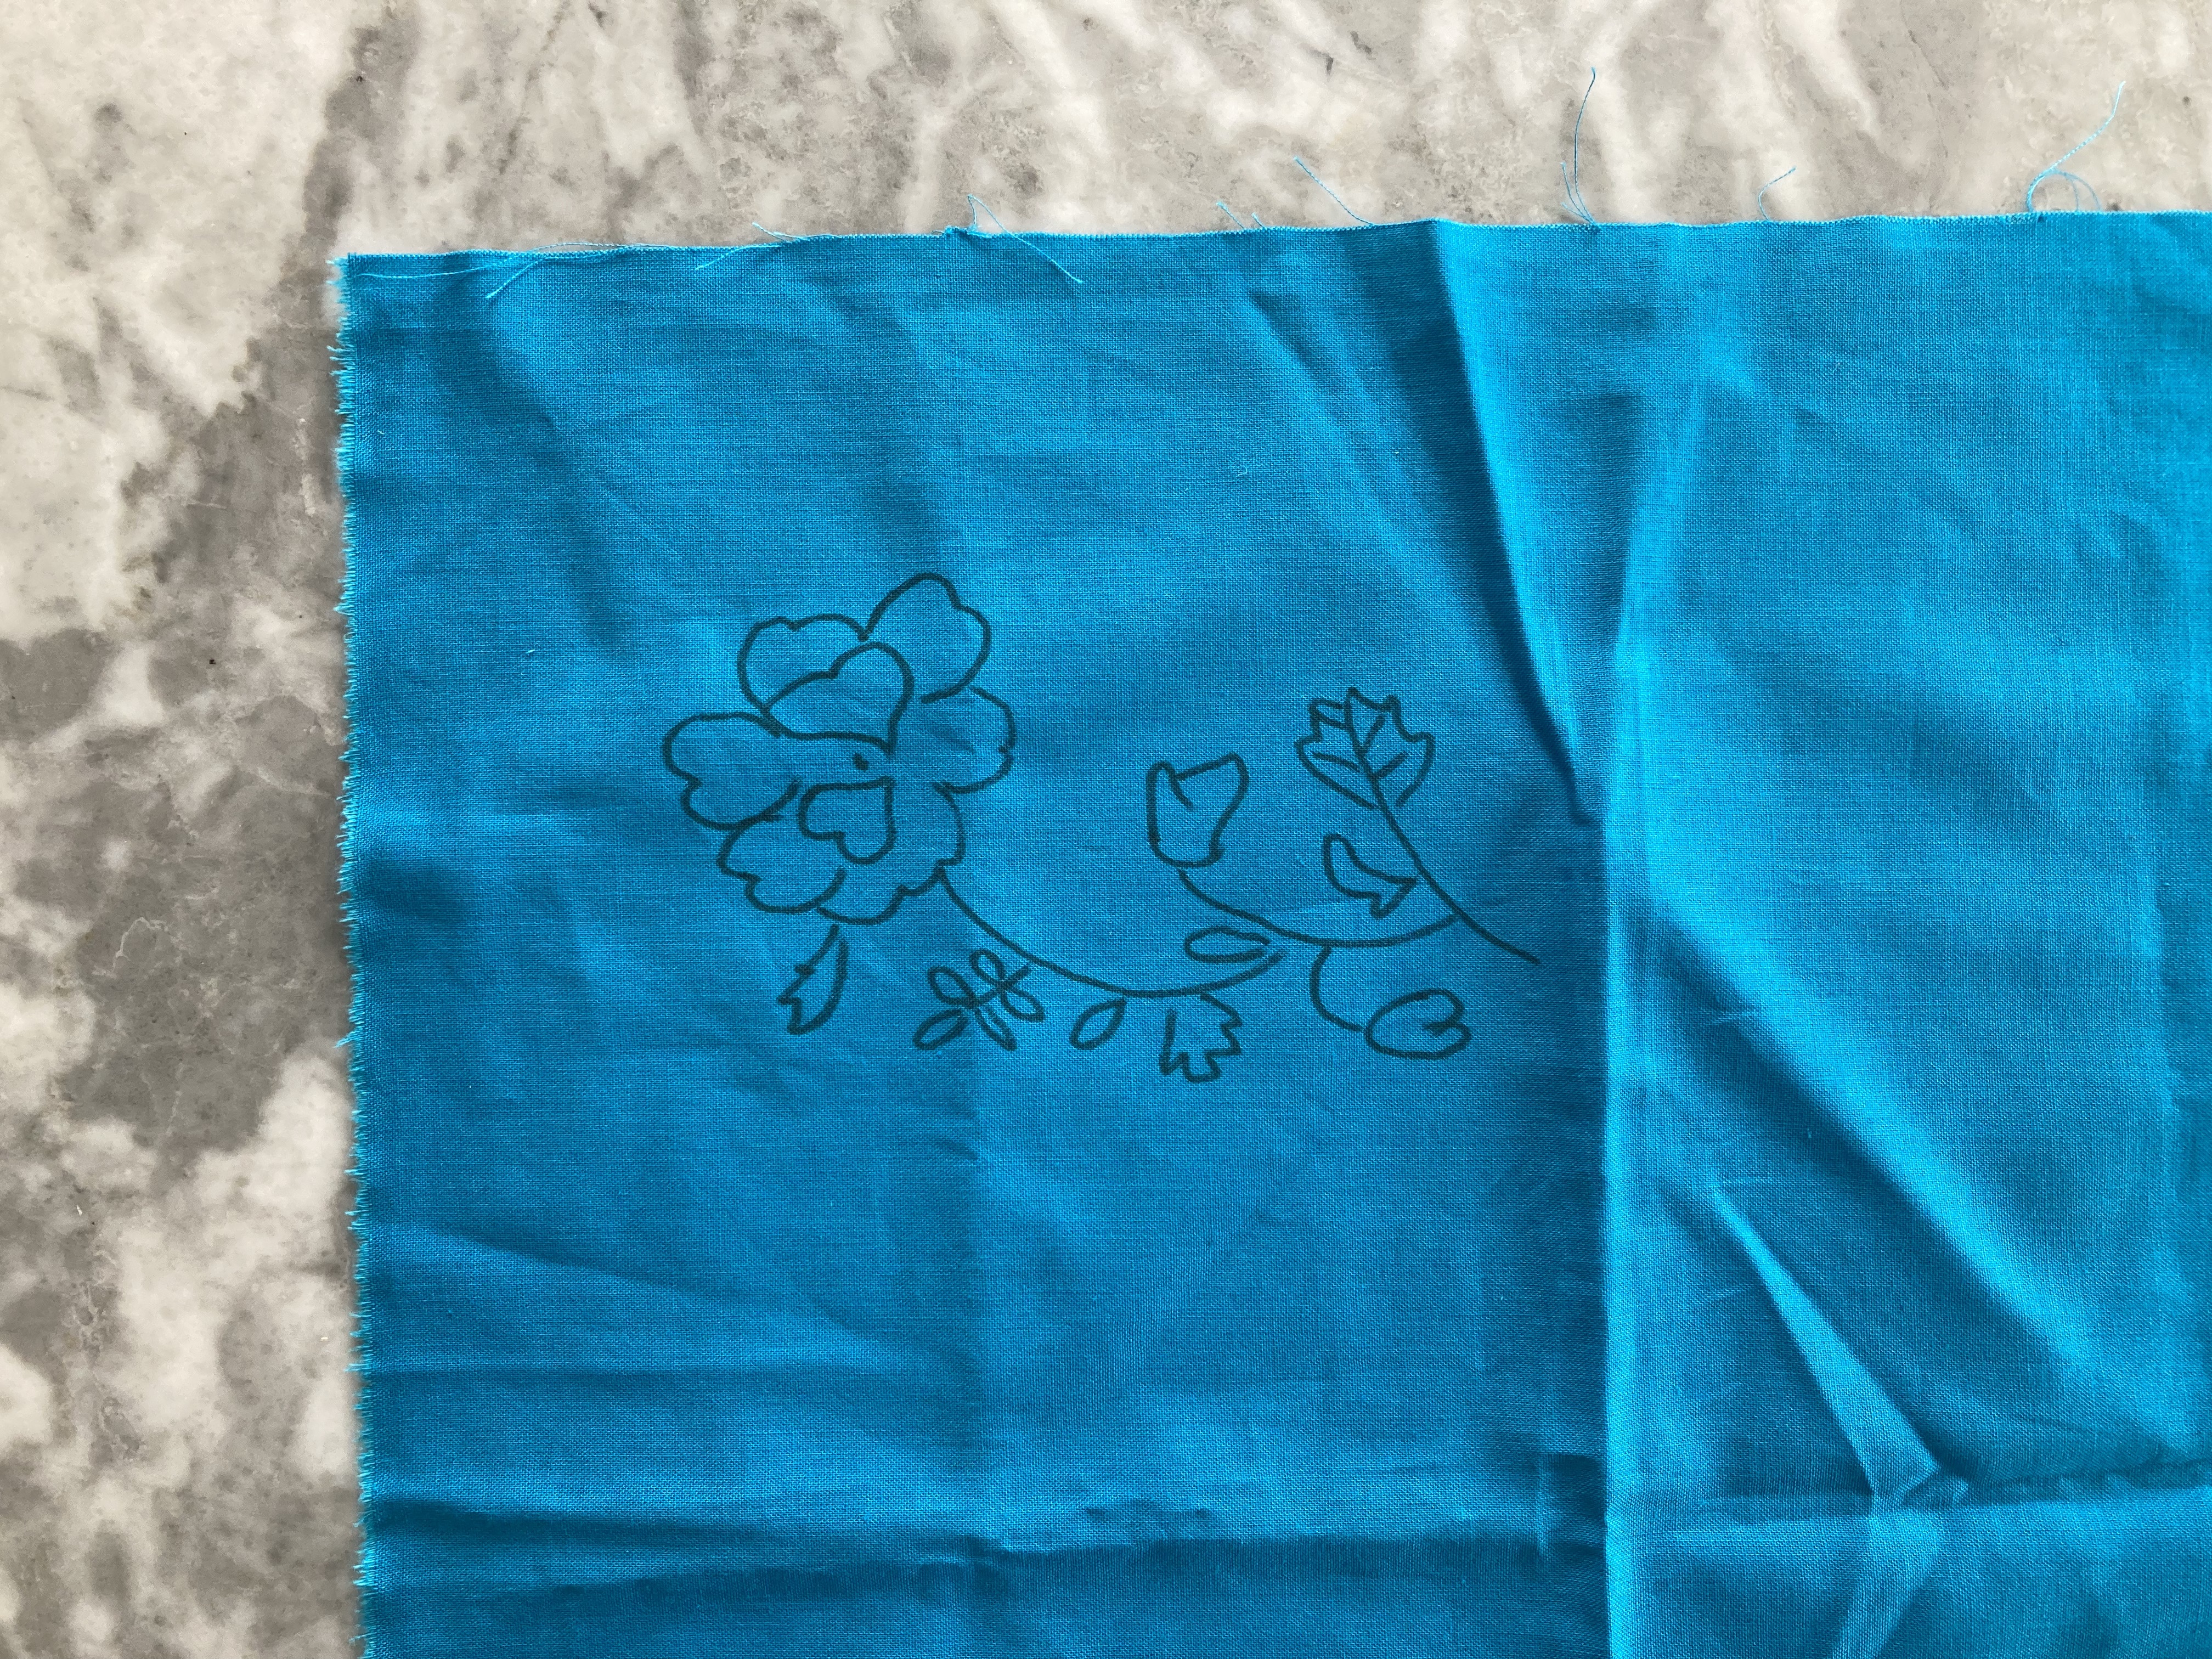
Of course, I don’t have the embroidery transfer from the magazine — readers had to send away for them back in the day. The flower is quite simple, however, and I was able to just copy it onto a piece of paper freehand. I had some nice bright turquoise linen left over from this cushion, some dove-grey viscose for lining left over from whatever, and embroidery floss in several shades of orange left over from this cushion as well as brown, so all I had to buy was a skein of green floss and a zipper. I transferred the pattern to the fabric by taping it up on the window and tracing with a marker pen and was good to go.
The embroidery is done entirely in satin, stem and blanket stitches — really fast and easy. I finished it in one afternoon, washed it out by hand under the tap to get rid of the marker lines and let it dry overnight. The next day, I made it up into a bag and voilà, finished.
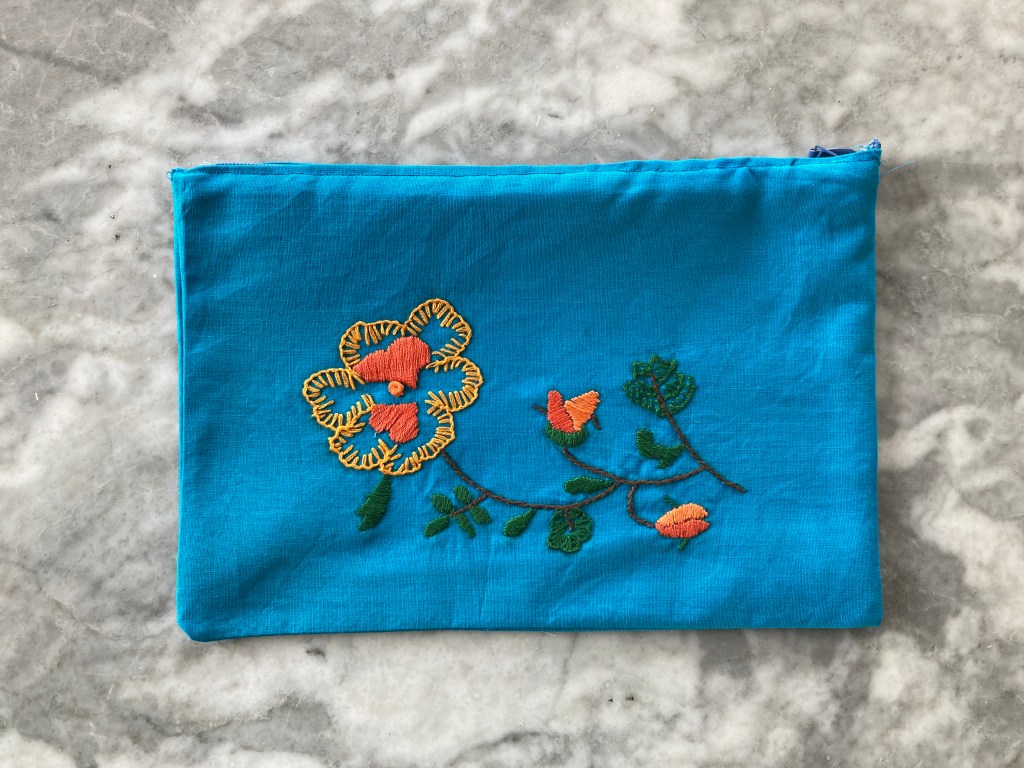
It measures about 24×17 cm or 9.5×6 inches, a practical size, and the design works well. I could have chosen a more vibrant green for the leaves, but the subtlety of the leaves and stems makes the bright orange flower pop even more, and I think the smaller orange buds balance it out nicely. I am also very proud of my zipper-setting skills. All in all, I think this was a great example of how vintage designs can be adapted to fit modern needs and make homeware items that are both useful and attractive.
It’s springtime! And the March 1965 issue of Stitchcraft is celebrating it with a bright, cheerful issue full of fun designs, great photography and very mid-60s hairdos. Our wonderful couple in the cover photo has just returned from the farmers’ and or flea market, proud of their purchases and sporting two of this season’s trends: textured stitch patterns and crochet.
“The interest in Crochet continues” writes “editress” Patience Horne in the first-page notes, reminding readers that crochet is not nearly as difficult as some readers think, as it is “all founded on the simple chain stitch” and one “only requires a little practice and patience” to make a simple item. The cover dress is basically unshaped, and made in a relatively simple cluster stitch with a dashing fringed hem and neckline. Beginning crocheters can start with an easy bathroom mat in rug wool, or a crocheted chicken toy for a toddler.
Men’s fashions, like the cardigan on the cover, have a loose, casual fit and interesting stitch patterns, like the traveling stitches on the cover cardigan or the easy diamond-pattern stitch on the V-neck pullover. The traveling stitches are basically very narrow cables, except the cables never cross, and the diamond pattern is made entirely of knit and purl stitches. Colours are either warm and bold, like the red cardigan, or 1960s natural, like the “Golden Beige” pullover, and buttons are big and round.
The knitted women’s garments show a similar interest in flat, textured stitches, warm or neutral colours and bold buttons and trim. The skirt suit on the inside front cover integrates all three trends. There’s a similarly patterned, buttoned and collared beige-and-orange cardigan in DK weight Brilliante wool/nylon mix, a red belted pullover with a polo (turtle) neck and a more subtle skirt suit with choice of pullover or cardigan and pleated skirt, made in finder Bouclet wool. In all the photos, the warm colours of the outfit — green, red, or gold-beige — are intensified by the warm-toned photo background, and the bolder designs feature models with impressive bouffant hairdos. All of the garments are long, loose and unshaped, with the tops reaching to the hips and a skirt length of 25 to 26 inches.
There are some great designs for school-age children in this issue, with a “continental” cardigan-blazer in “Riviera Blue” for girls and a unisex jersey with a stranded yoke design. Here too, we see the large collar and bold, round buttons on the cardigan, and warm colour palette and textured stitch pattern on the pullover. For babies, there’s a pram blanket with (purchased separately, not home-made) bunny motifs.
The homeware items are mostly practical and versatile. In addition to the crocheted bathmat, there’s a stitched rug/mat “for the bedroom” in an elegant arrowhead stitch and some cushion and/or stool-top designs in counted cross-stitch. A floral embroidery pattern can be adapted to make a door panel, frame a cushion, or decorate the edge of a pillowcase.
I wrote “mostly” practical items, but there is one unusual exception: these “Brass Rubbings to work with your needle.” They are two fairly large (7×16 inches) wall panels with icons of medieval people in the style of “brass rubbings“, which are made by laying heavy paper over one of those brass plaques often seen in medieval churches . The designs were inspired by “the interest in Church embroidery” per the description of the project, but I don’t know if the figures are meant to be specific, recognisable historical people or just representative of a typical medieval brass burial plaque. (Do any of you recognise them? It’s interesting that both of them are portrayed with small dogs at their feet, which seems like it should be a clue.)
Last but not least, Easter is coming soon (well, not that soon — Easter 1965 was on April 19th, which is actually fairly late) and it’s time to get started on those Easter gifts and novelties! Continuing the chicken (and egg) theme from the crocheted toddlers’ toy, there’s a stuffed felt “egg nest” in the form of a chicken with tiny accompanying chicks, and a gloriously huge knitted “Humpty Dumpty”, guaranteed not to break into pieces should he fall off a wall, and featured in colour in the inside back cover photo along with the child’s stranded-yoke pullover.
As much as I love this issue for its general aesthetic and fun, happy vibe, there isn’t a project in it that really grabs me. The mid-60s fashion for long, loose, unshaped upper-body garments is a terrible look for me and the homewares are generally not spectacular. I would love to make either of the children’s garments and am asking around if any friends with kids that age would like me to knit one, but I haven’t had any takers yet. If any of you are interested in a custom order, let me know! Otherwise, I’ll probably embroider the flower design onto something practical, like a little bag or a tablet/iPad cosy.
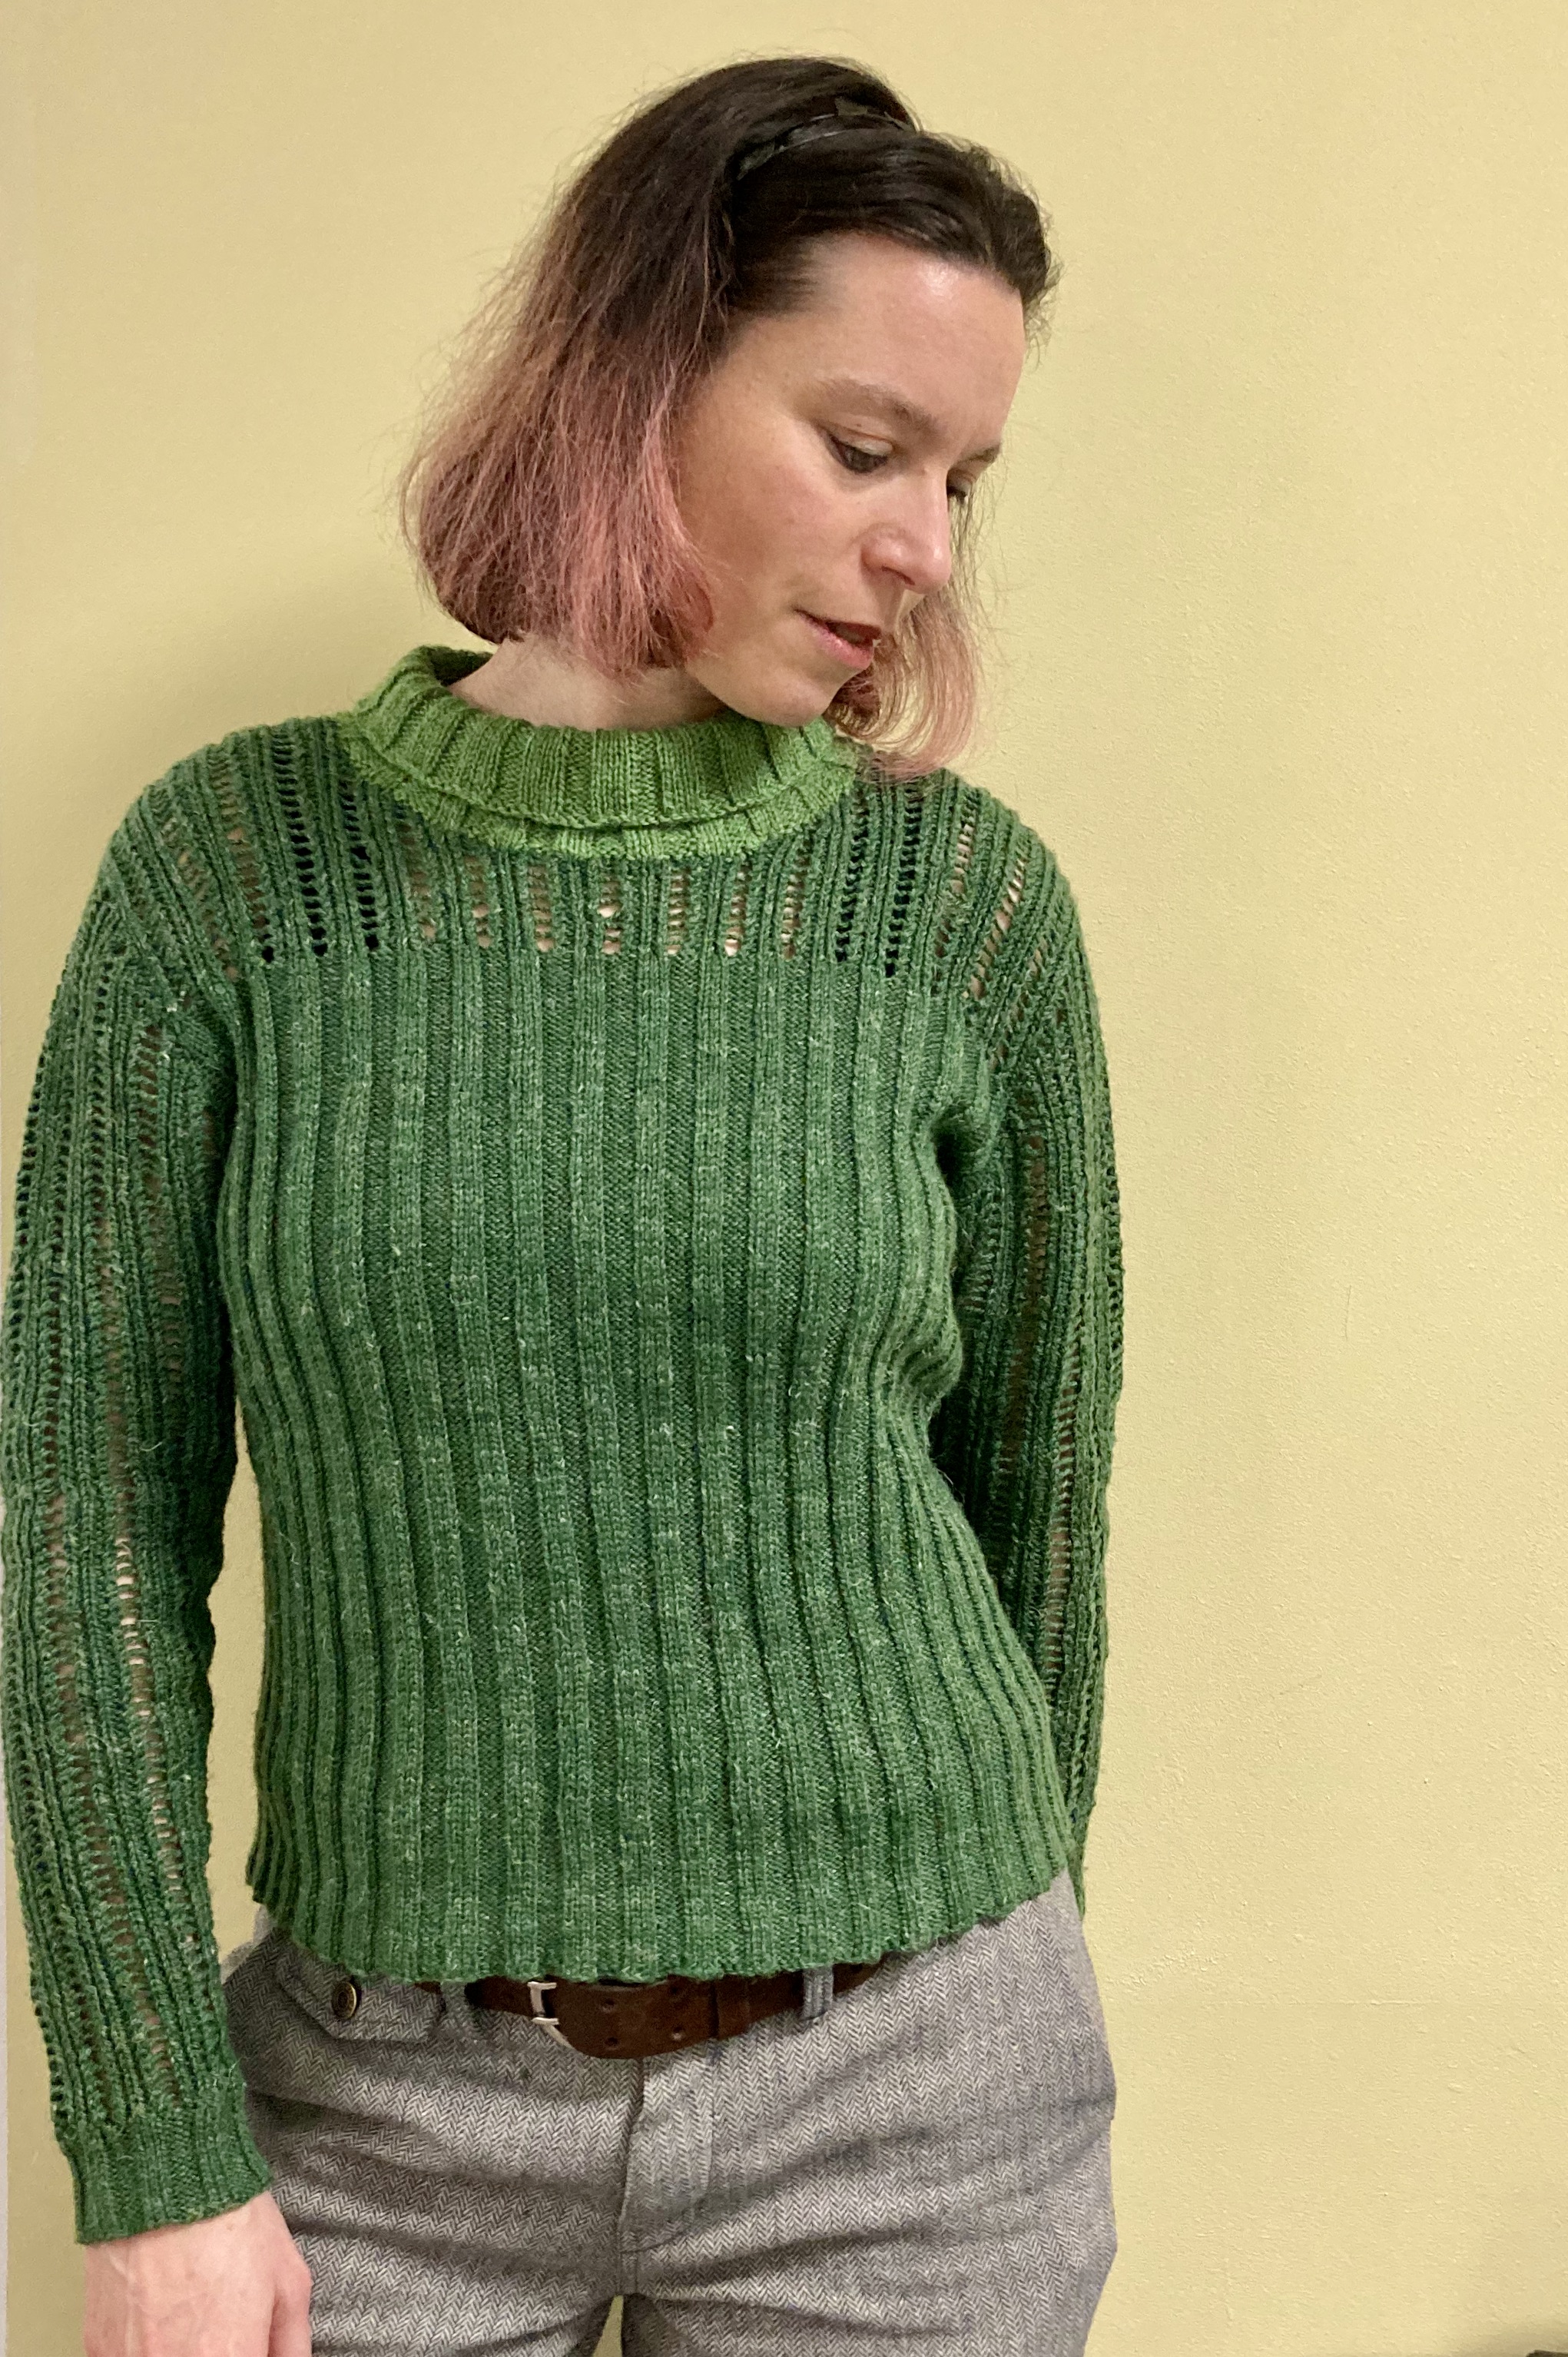
Since the February 1965 issue of Stitchcraft didn’t have any projects that interested me enough to want to make them, I spent this month working on some eternal WIPs. One of them was this “slim style sweater” in a lace-and-rib pattern from Stitchcraft’s January 1967 issue.
If “Fast Forward, January 1967” seems familiar to you, you are not wrong! I had already made this wonderful “Fashion for Tots” children’s jacket a couple of years ago, and tried my hand at a pleated skirt “pinafore” intended to go over this slim-style sweater (see picture below). The pinafore dress was, unfortunately, a failure, as the wool was too heavy and the finished garment just sagged and sagged. I ended up frogging the whole thing and using the wool for my very first blog project, the Green check jumper from January 1960. Notwithstanding the pinafore, the January 1967 issue is incredible and has so many projects in it that I want to make that it’s a go-to when I can’t find anything I like in a current issue.
The lace-and-ribs jumper was a perfect fit for my stash of green Slow Wool Lino yarn that I picked up a couple of years ago while working on a project in a different city. Sadly, the yarn has been discontinued, so the 300 grams I bought was all there was to be had in this colour (I managed to get 400 grams of salmon pink and made this lovely non-Stitchcraft Clarel last year, as well as 400 grams of bright purple and 300 grams of grey-brown for future projects unknown, at least). Would it be enough?
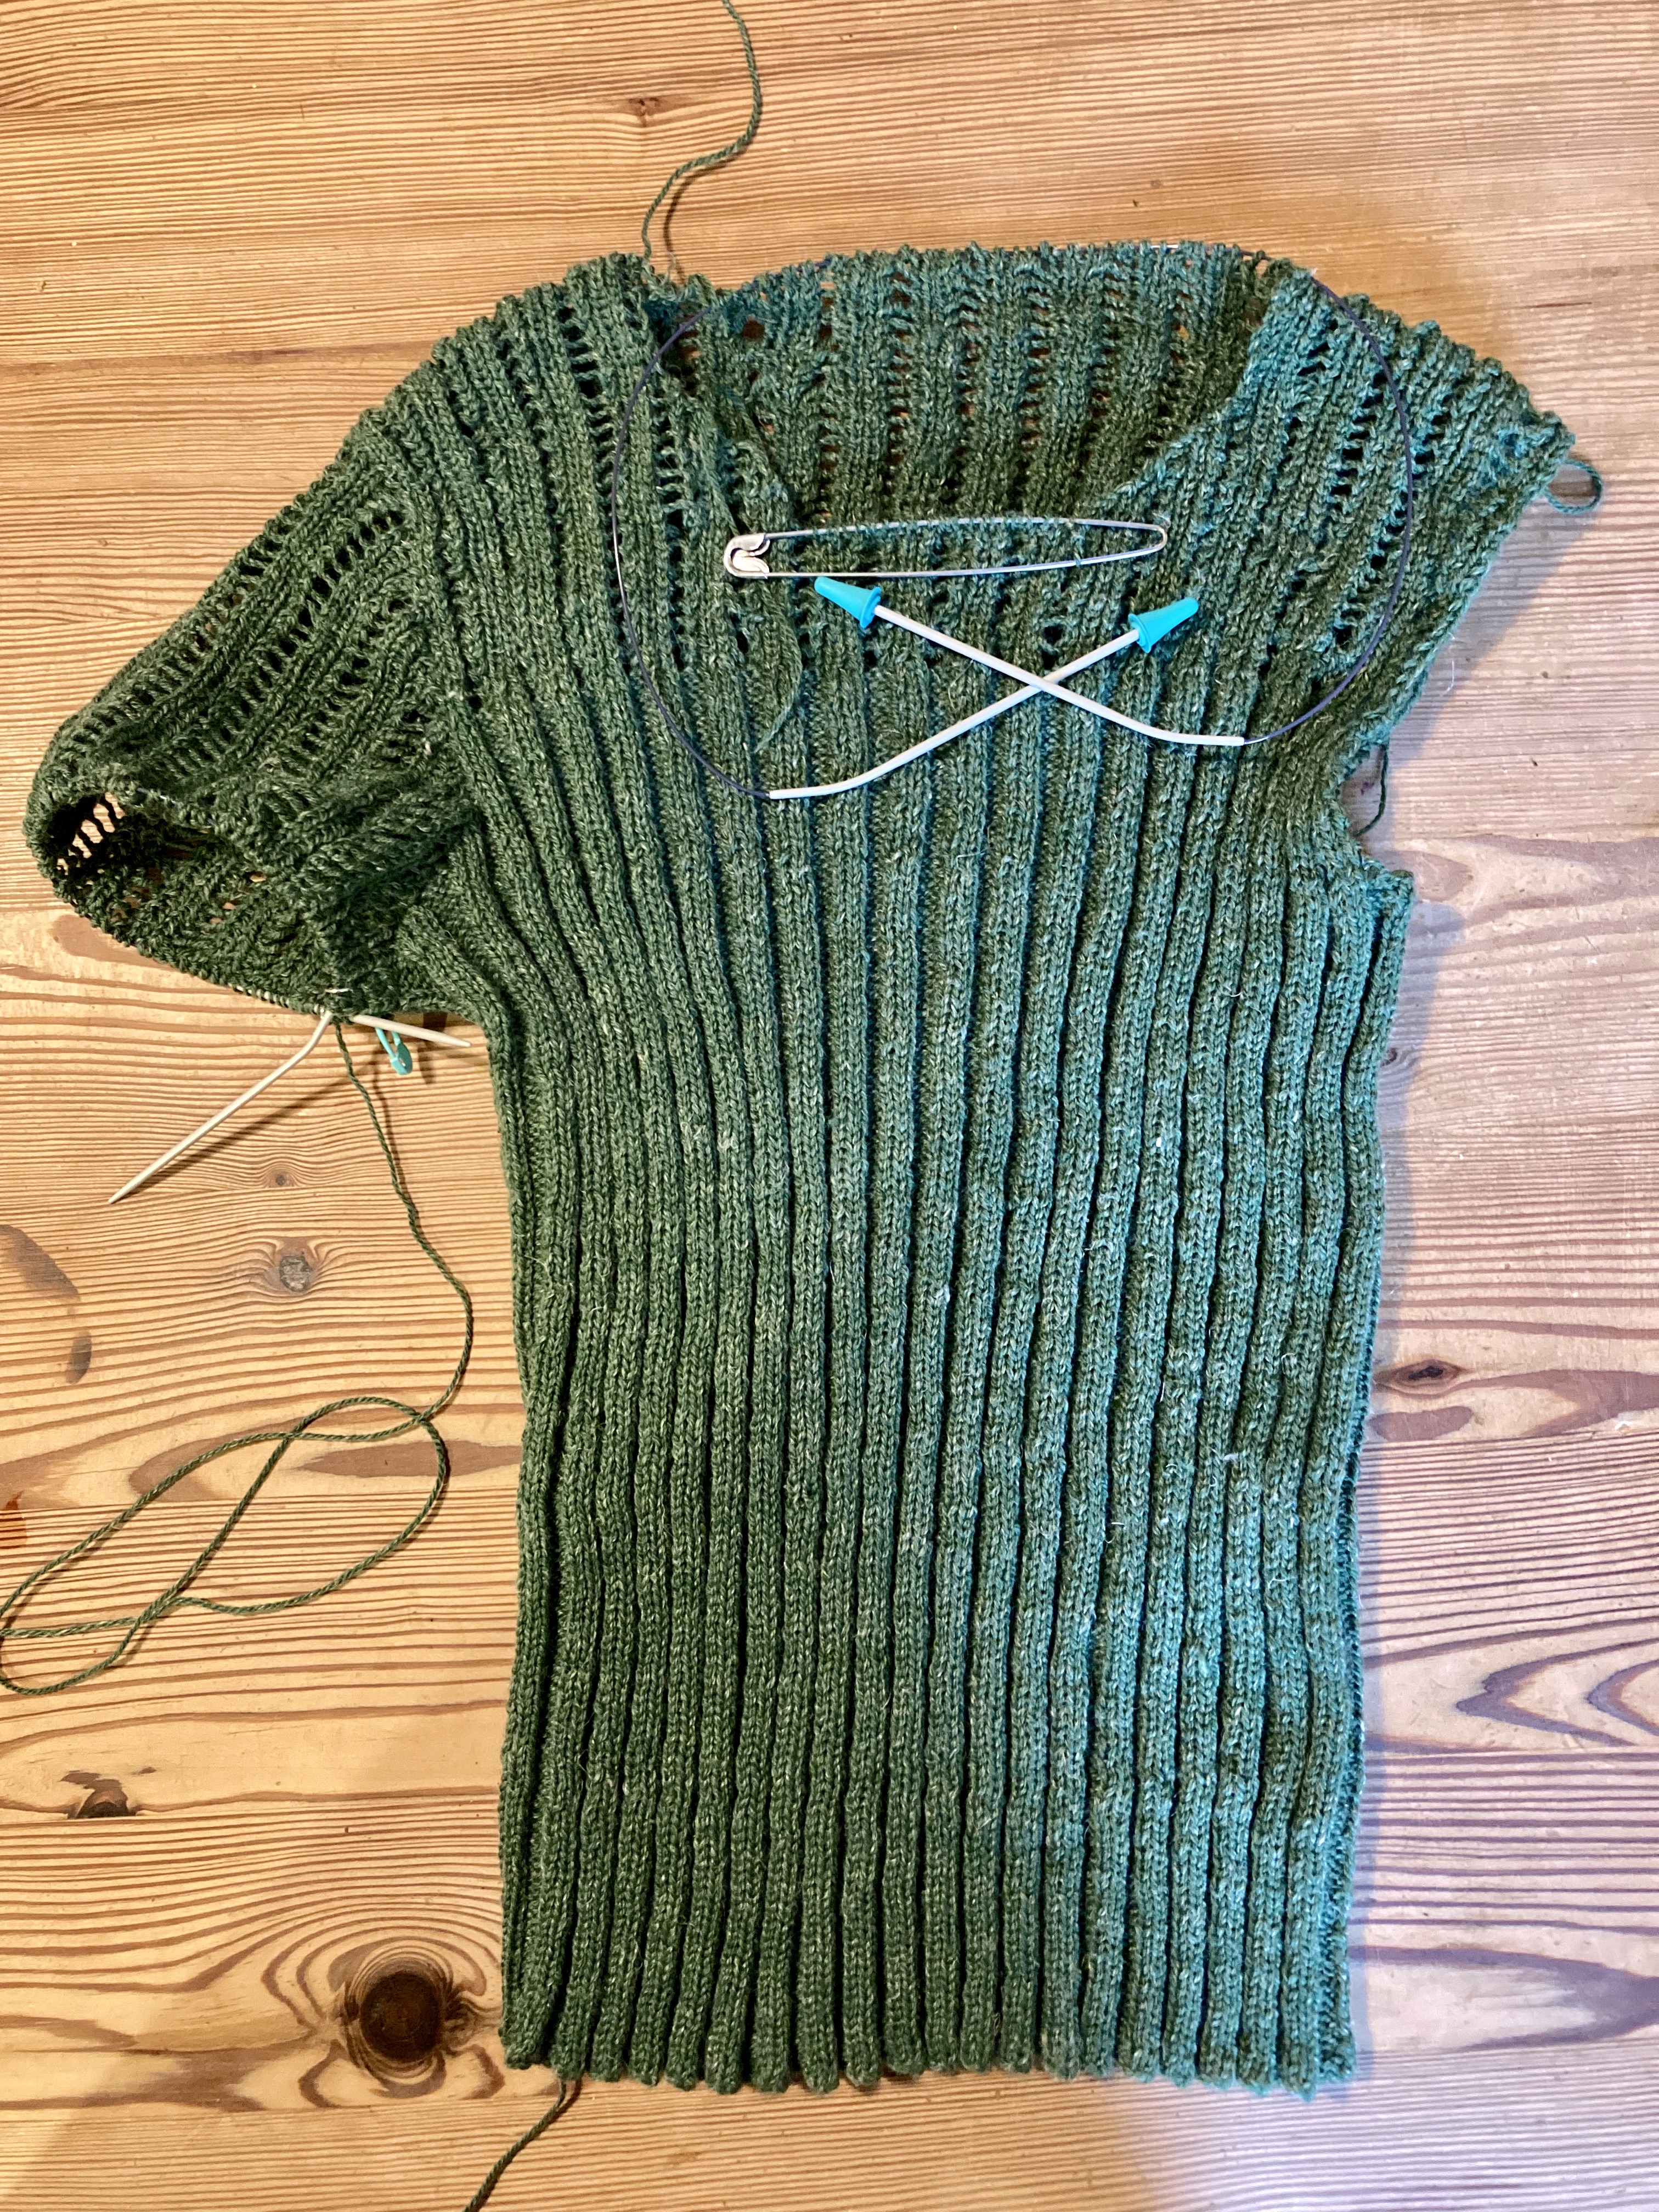
The body is made in 4×3 ribbing and the “lacy” pattern on the yoke and sleeves is made by doing two yarn-overs ater one another and knitting and purling them on the next row or round, making more of an open rib pattern rather than a true lace. Ribbing eats up yarn, but openwork uses less, so it was hard to call. In anticipation that it might not be enough, I made the sweater from the bottom up in the round and the sleeves knitted-on from the top down. That way, I could use a different wool for the sleeve cuffs and/or neck ribbing if necessary, or make short sleeves, or cap sleeves, or no sleeves.
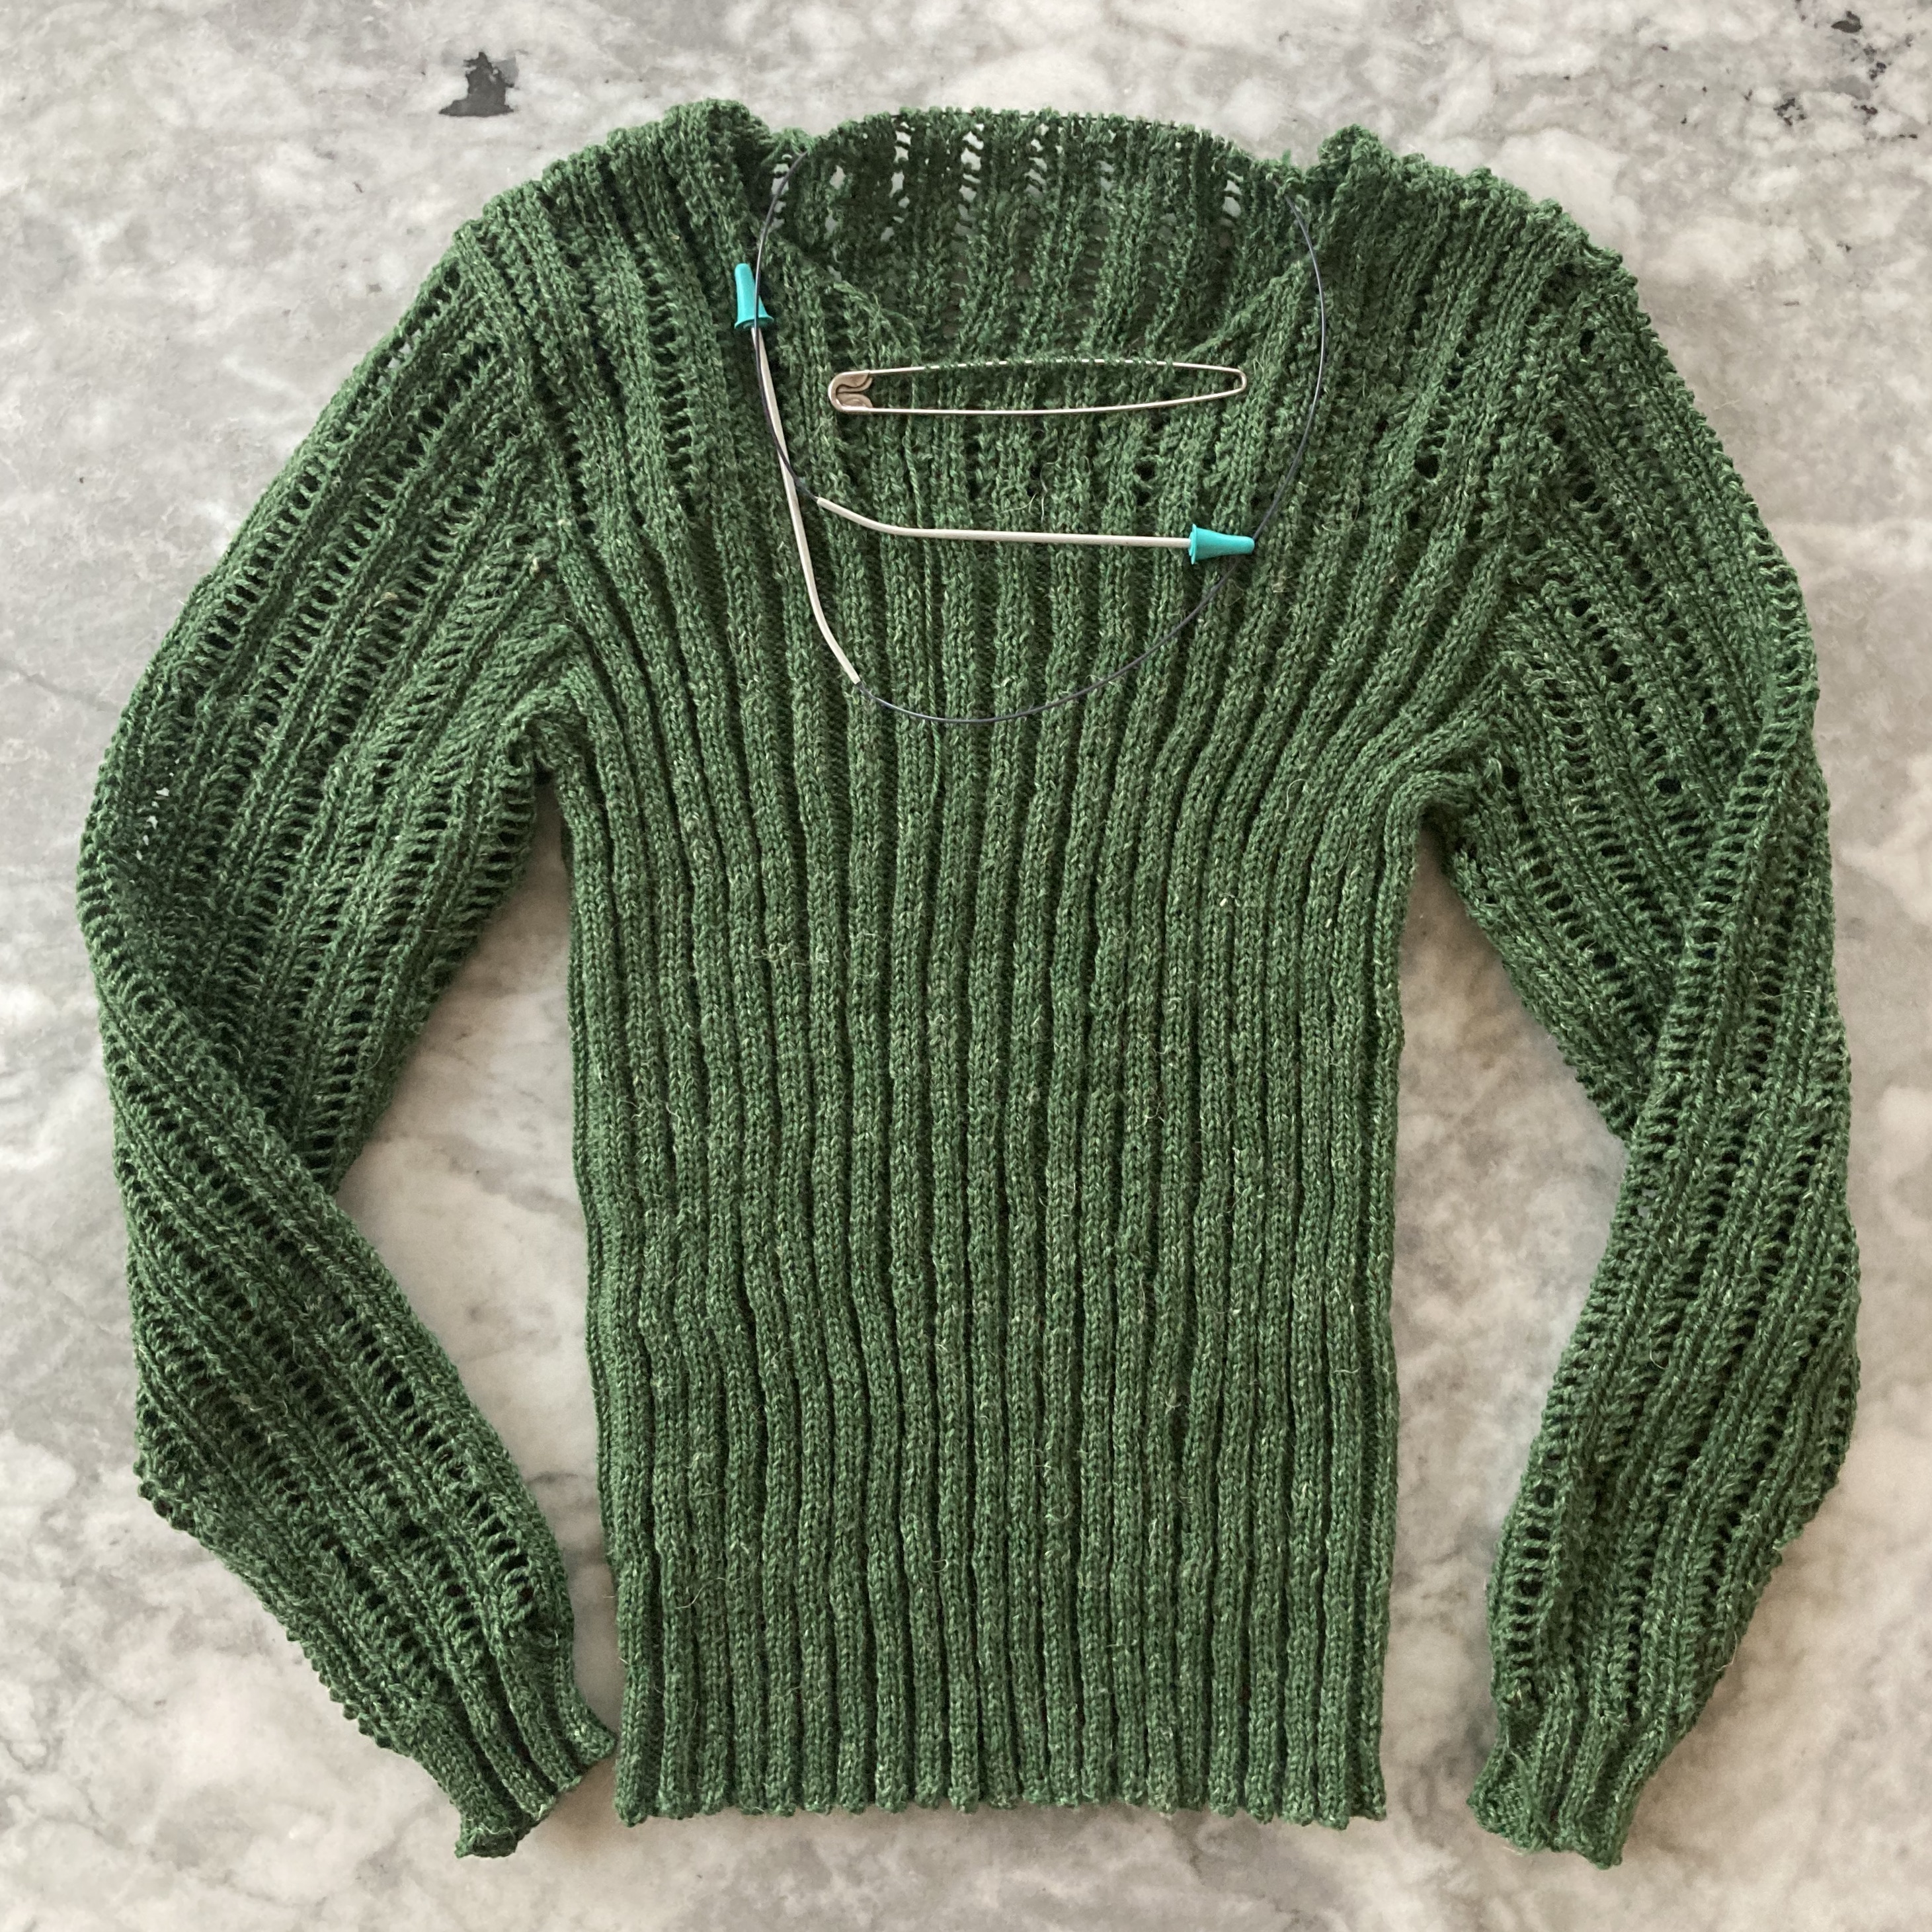
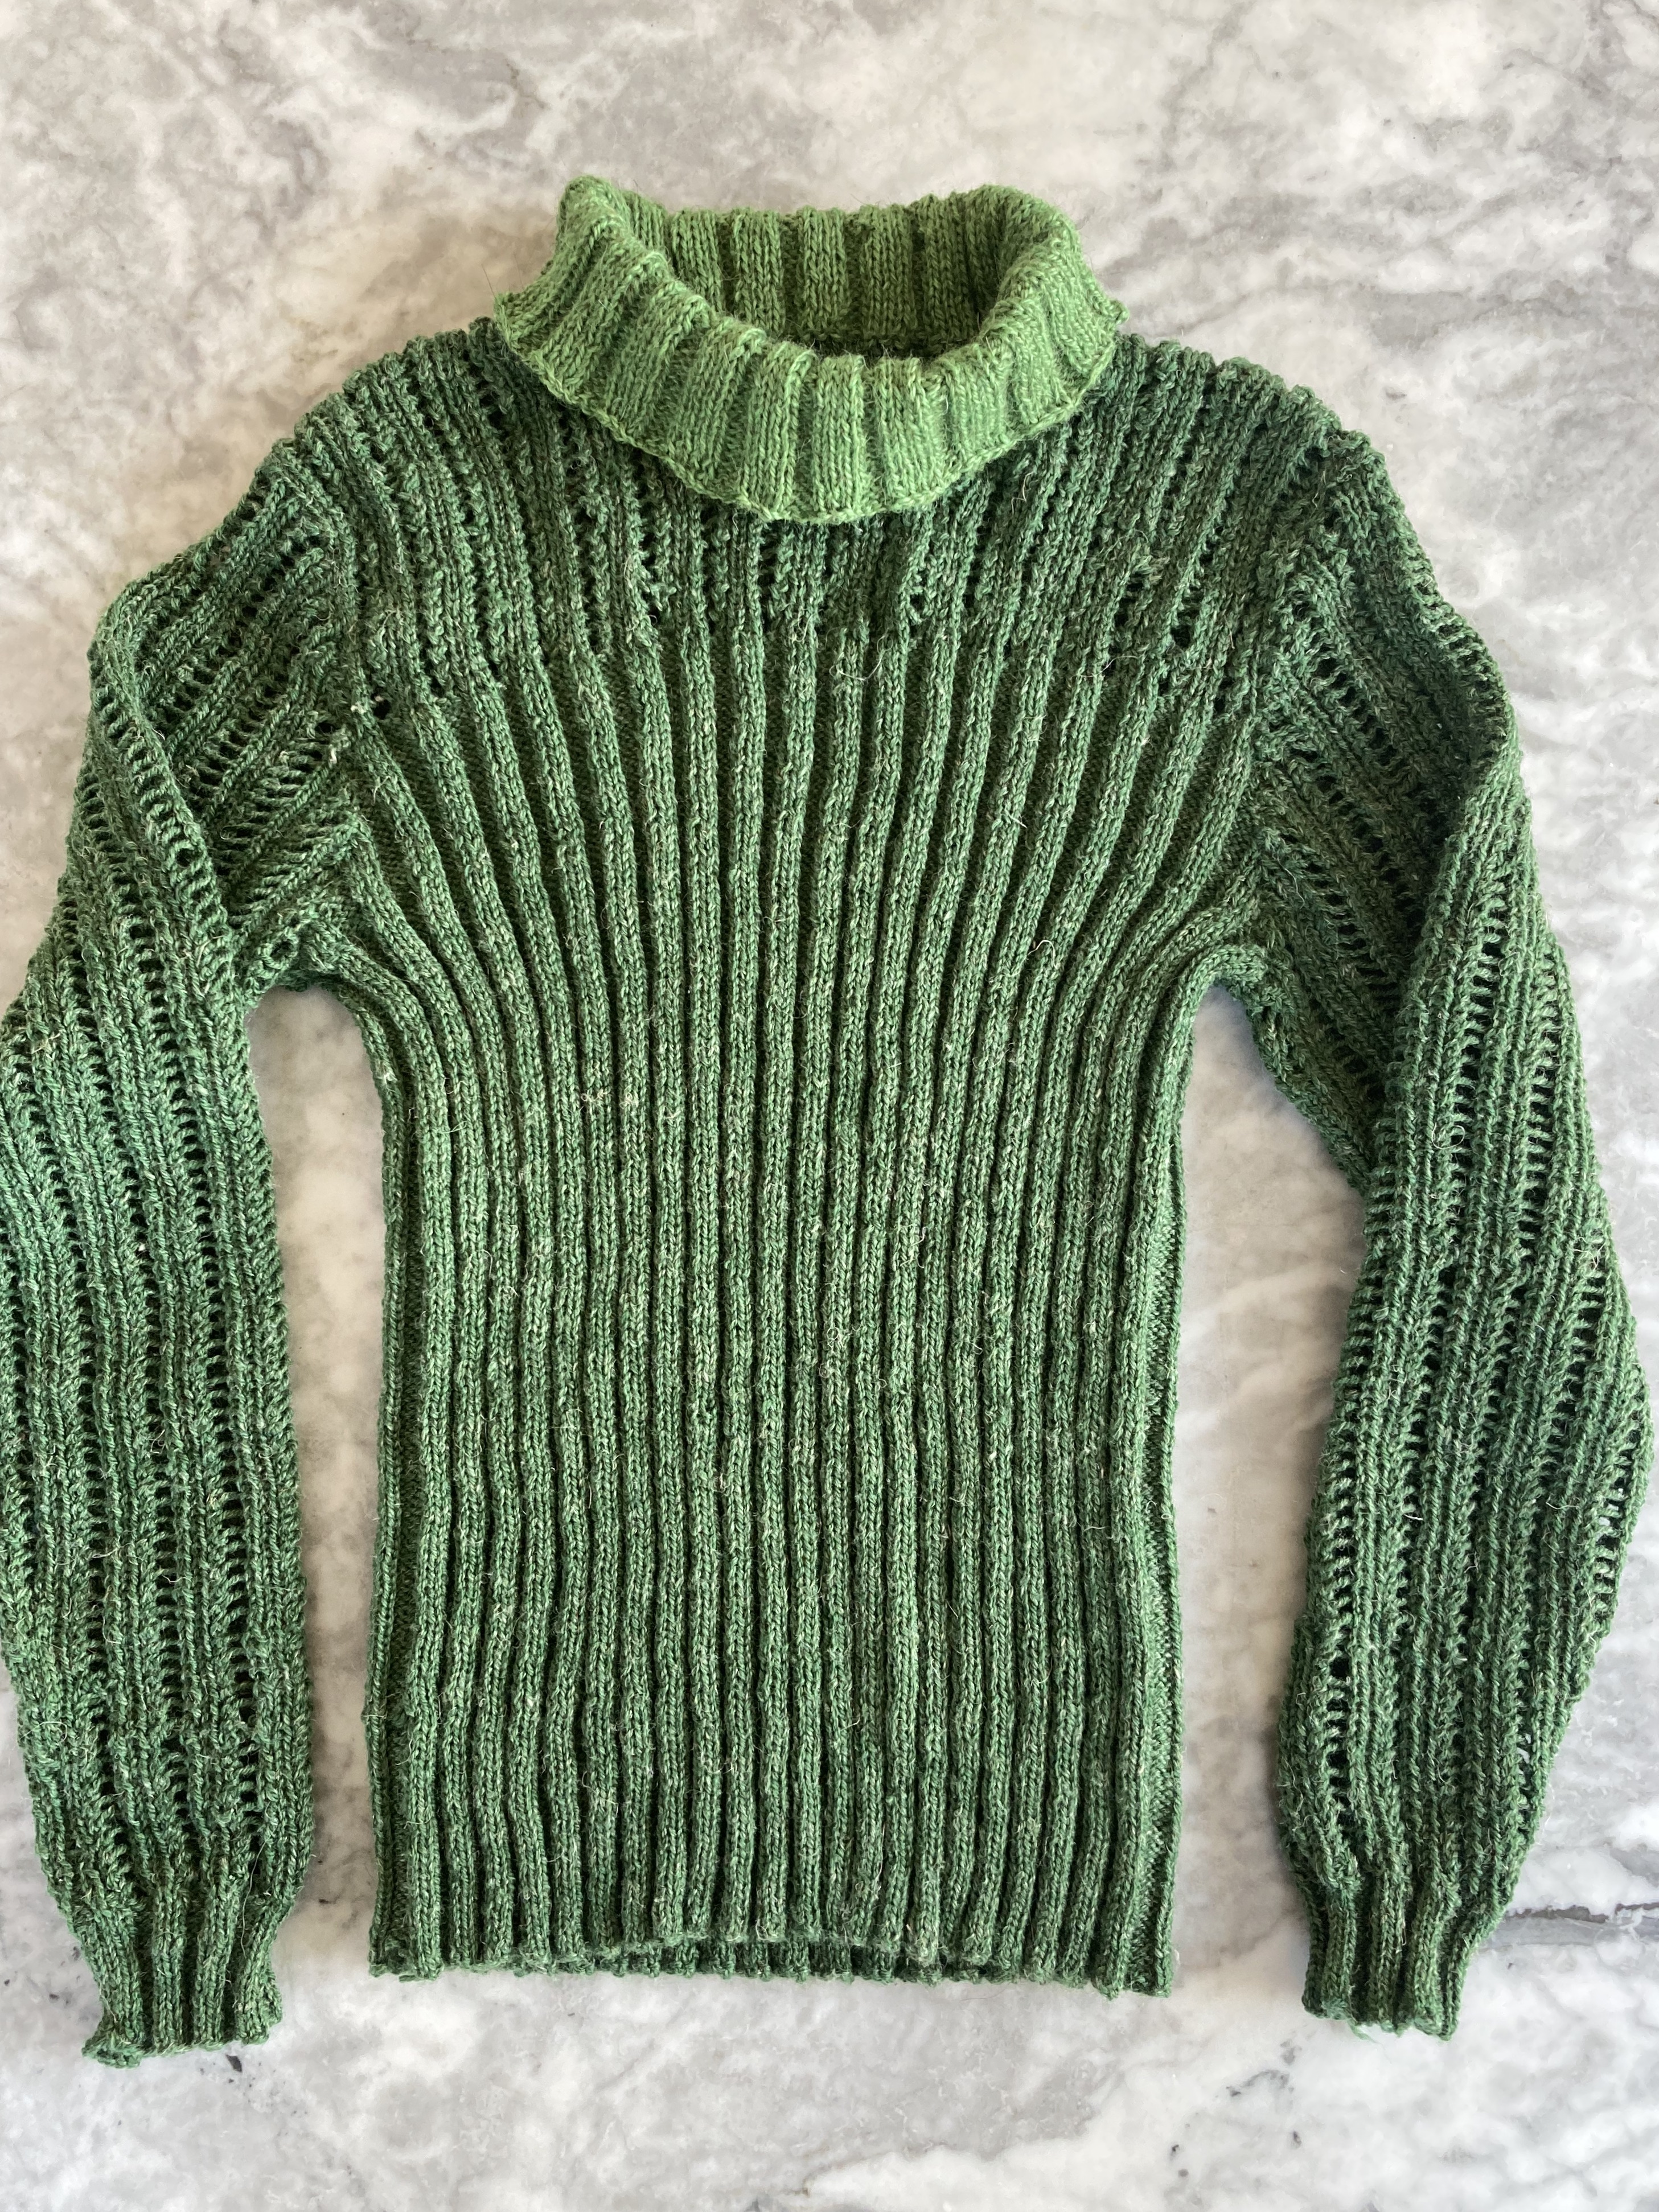
As it turned out, I was able to exactly use up the 300 grams of yarn to make the sleeves in the normal length. Only the neck ribbing remained. Nobody on Ebay or Ravelry had any Slow Wool Lino on offer in this shade, so I visited my lovely local yarn shop and bought a skein of Rowan Moordale in a slightly lighter shade of green. It’s also slightly thicker and fluffier than the Slow Wool Lino and quite soft, so it worked fine for the neck ribbing.
The finished jumper fits fine, feels soft and comfortable, and looks great. I wore it to my Monday night knit group and we had fun recreating one of the original photos.