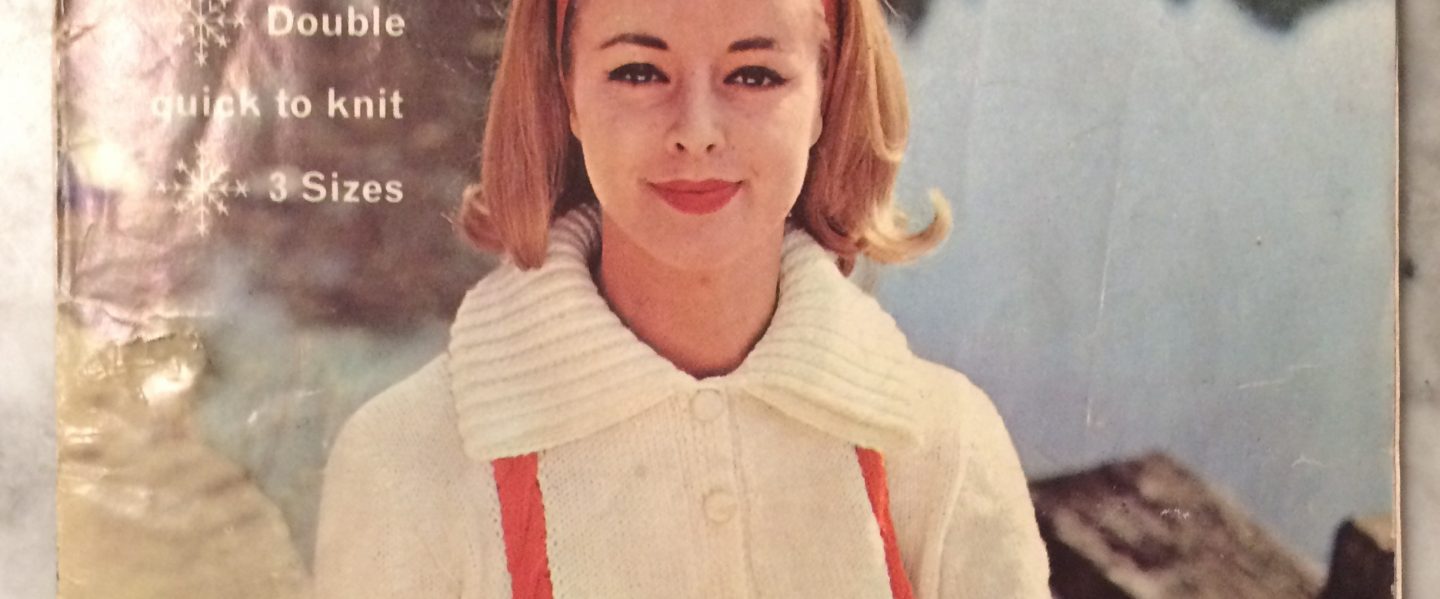
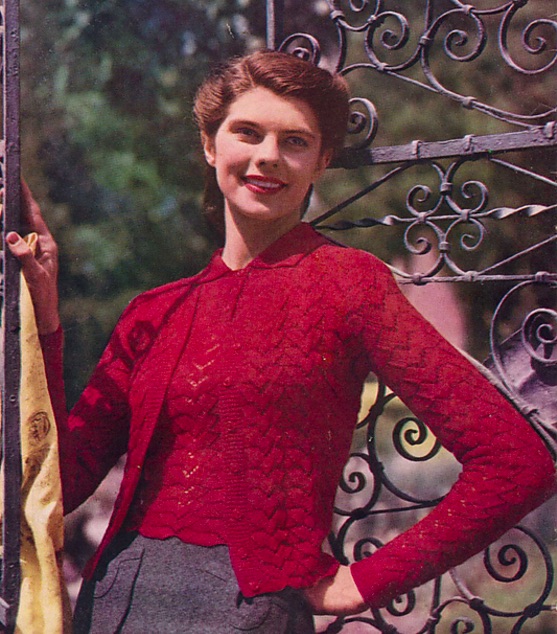
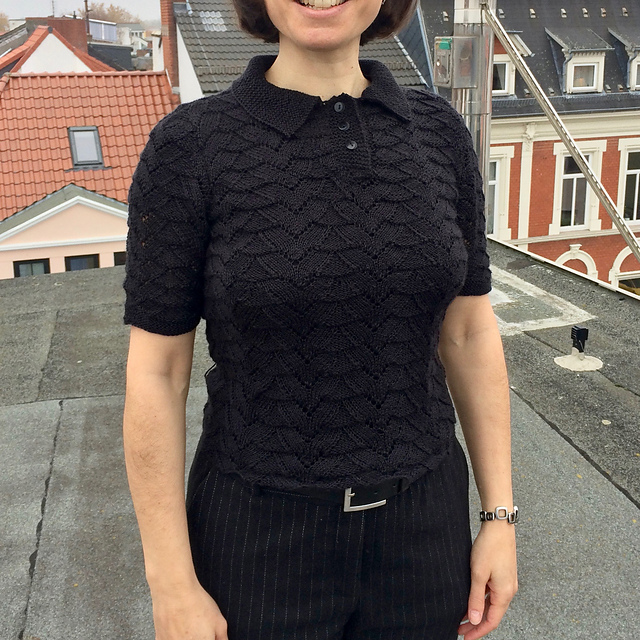
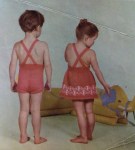
It was very difficult to get a project going this month. The October 1962 issue of Stitchcraft didn’t have any designs that interested me and I had been trying to finish up some larger, non-vintage projects in time for the cold-weather season. But inspiration came from a good friend of mine, who politely reminded me that, way back when I made this “charming blouse”, I had casually offered to knit one for her if she ever wanted one, and wouldn’t this be a good time to make it for her? I agreed! So this month’s project echoed the one I made then. Here are photos from that issue and the finished project:
The original blouse, from the July 1960 issue, was designed for “larger”, curvier figures (37-38 or 39-41 inch bust) and featured horizontal bust darts, which was very unusual for knitting patterns of the time. I was intrigued to see how the bust darts would turn out, since I don’t usually make them on garments for myself. As I probably could have guessed, the bust darts were not only unnecessary for me, but actually negatively impacted the fit — since I am not busty enough to fill out the darts, the front of the blouse was too long compared to the back. That didn’t particularly bother me, but I did note it for future projects.
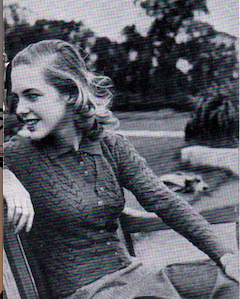
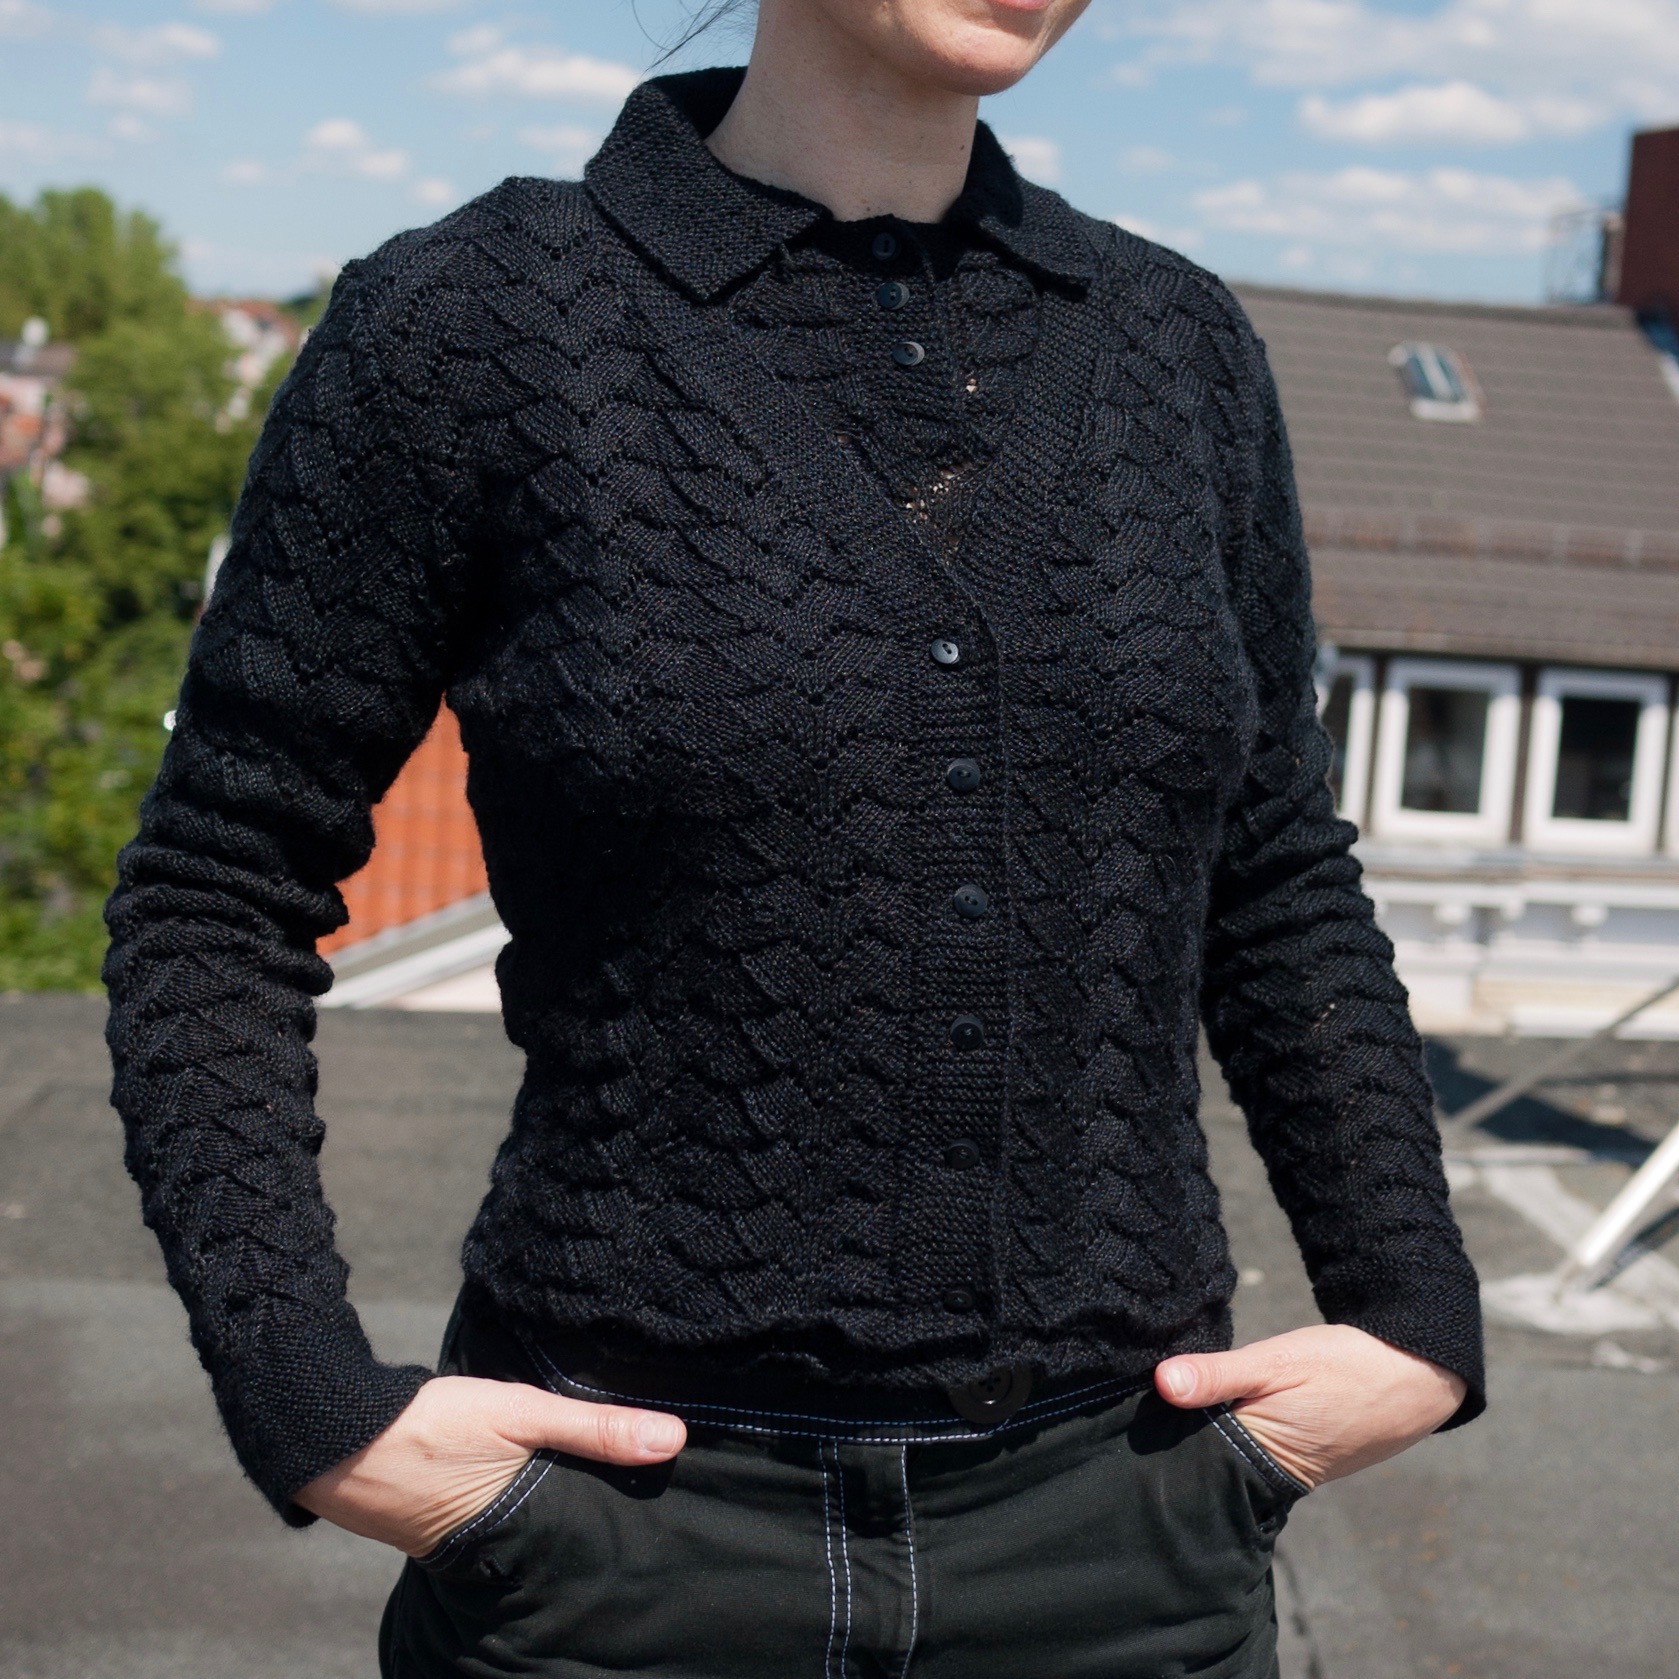
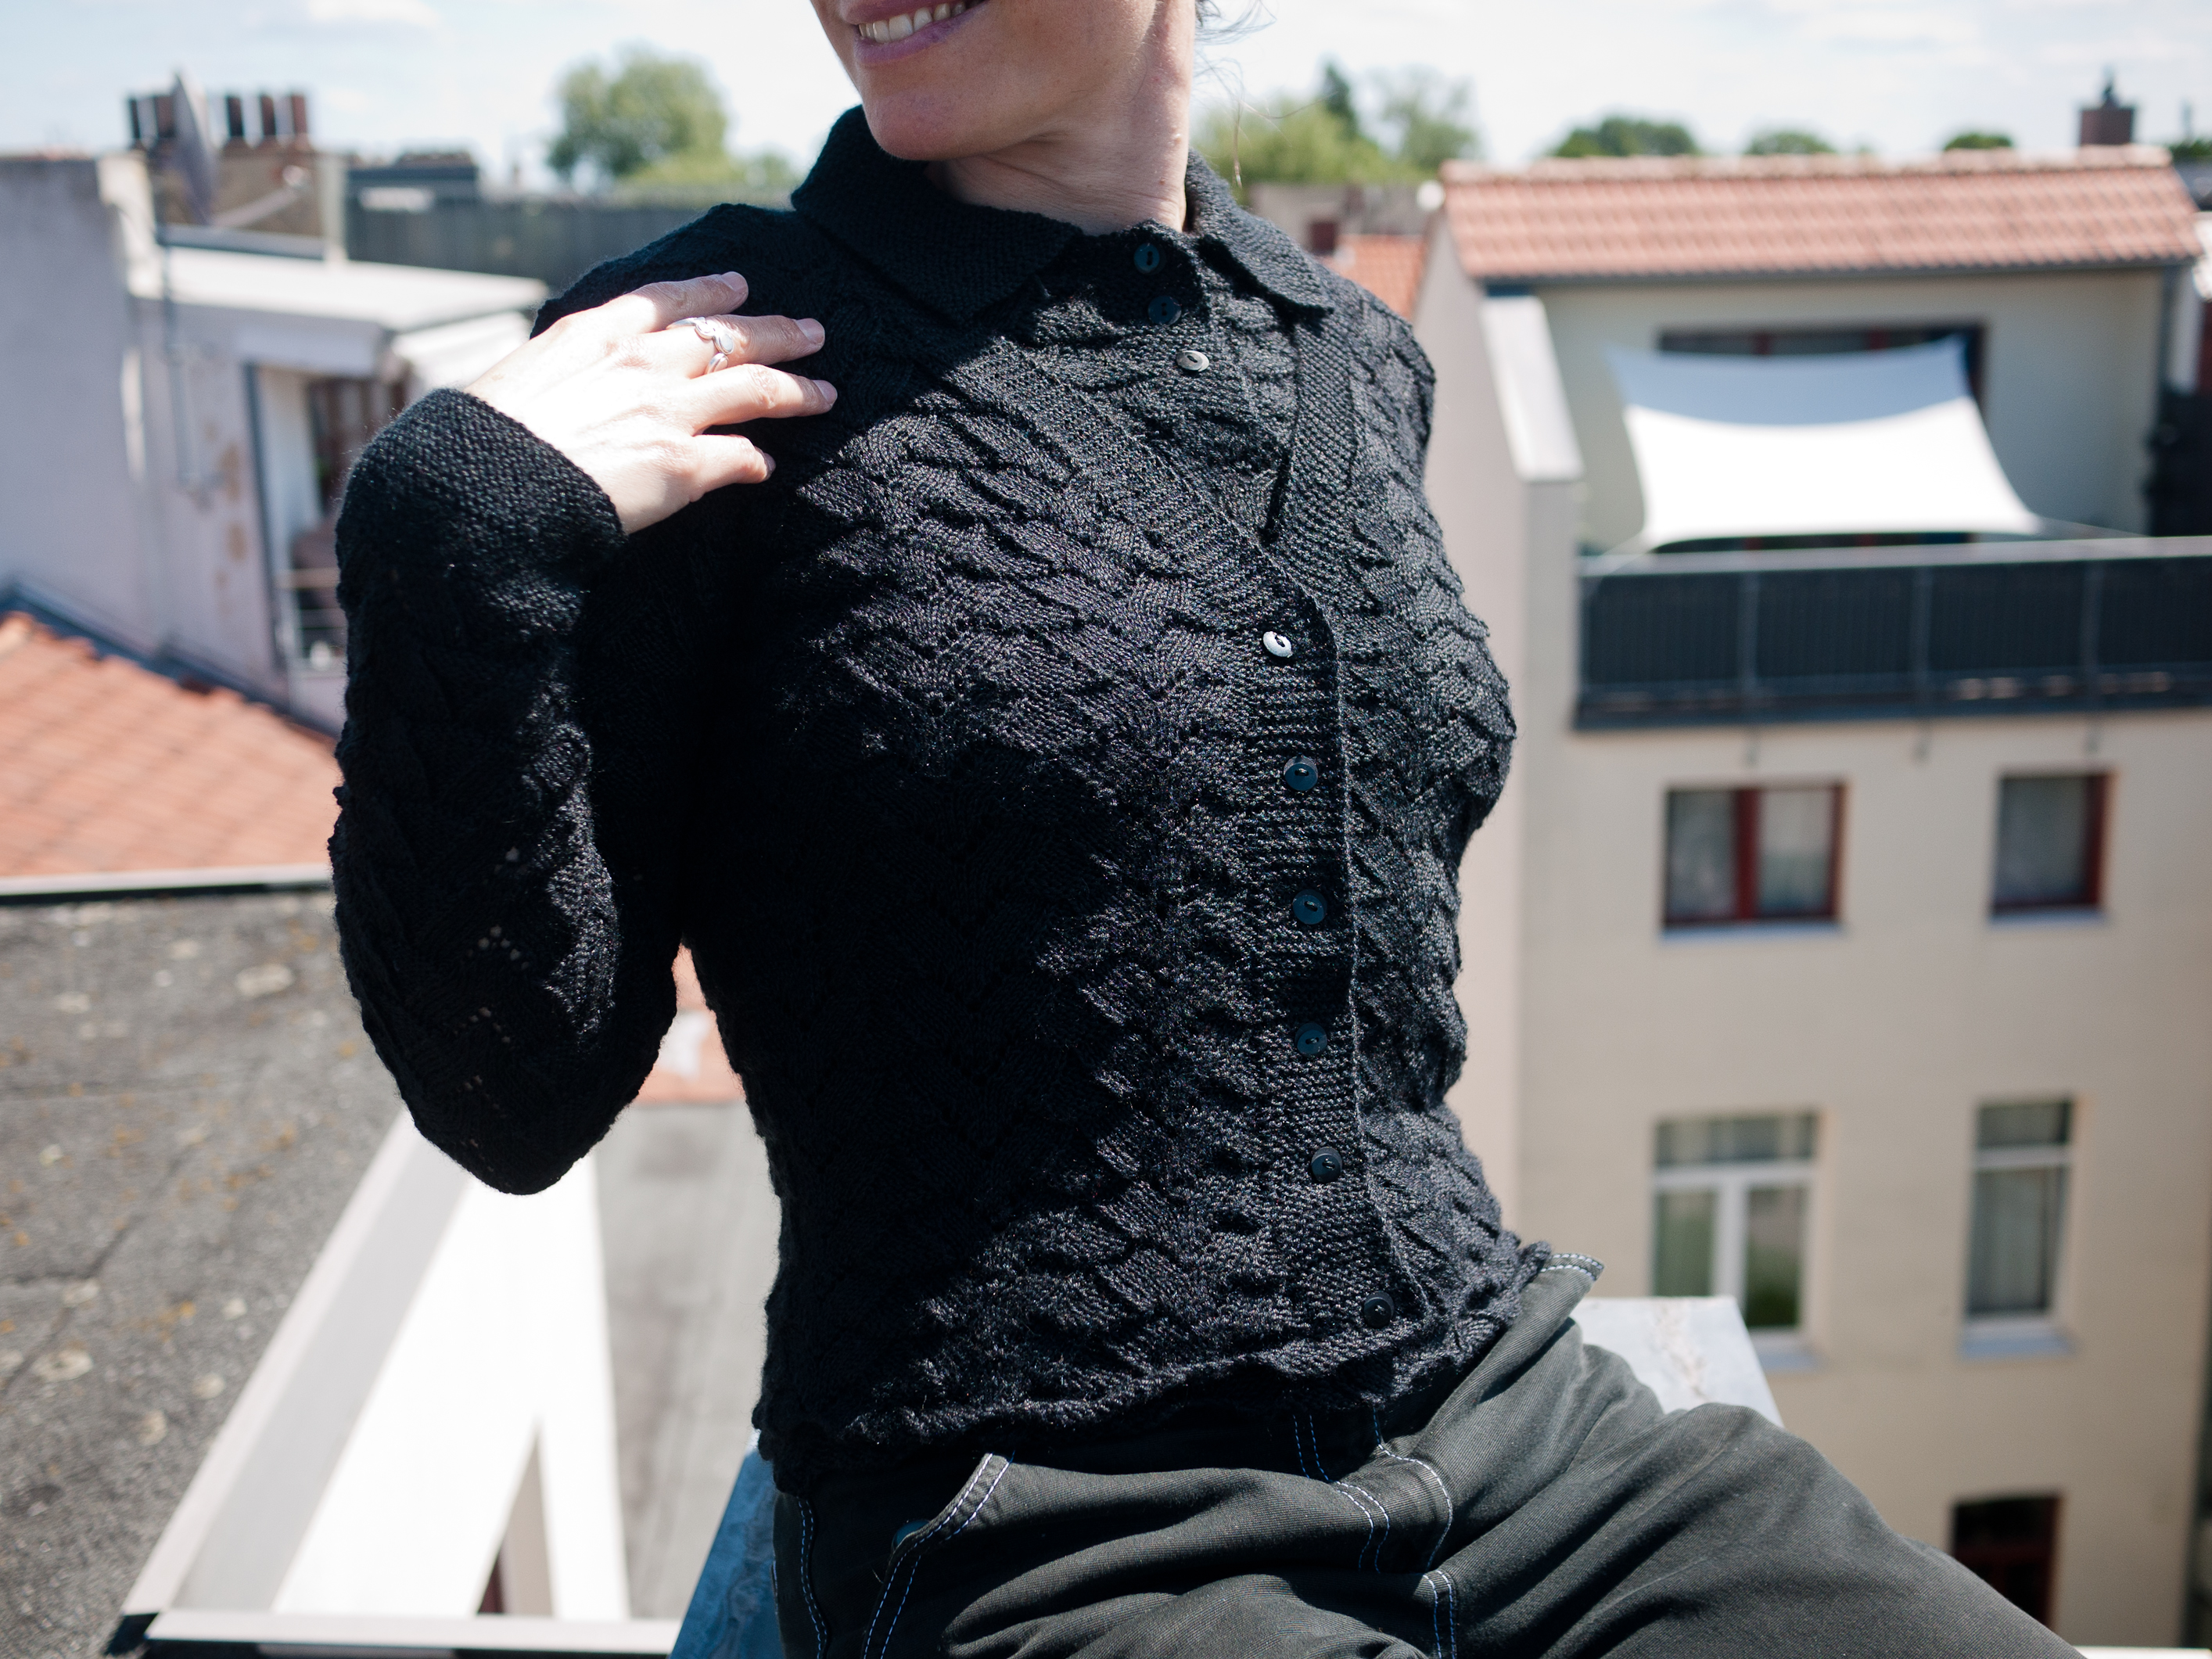
My friend has a more suitable figure for this design, and her version turned out even better. I used the same wool (Juniper Moon Farm Herriot Fine) in a lovely tweedy green colour, and (by request) without a collar or contrasting colour bands along the front.
It turned out perfectly and we were both very happy with the result. Since we’re not meeting indoors and it was still too cold for her to wear just a blouse outside (even a warm knitted one), I’ve only got her selfies for now, so I’m sorry if it’s hard to tell what the finished product looks like. When it’s warm enough to do a socially distanced outdoor photo shoot, we can hopefully get some better photos! According to her it fits perfectly, and it’s obviously a fantastic colour for her.
My friend, by the way, is the wonderful opera and concert singer Andrea Lauren Brown. We have all been out of work for a solid year now due to the pandemic, but you can definitely still buy her CDs, which I heartily recommend to all of you who love classical music. Seriously, she’s amazing.
“The most welcome present you can give to a mother-to-be is something warm and hand-knitted for the layette,” wrote Stitchcraft’s “editress”, Patience Horne, in the September 1962 issue, and it’s still true! If I can’t decide on a project, if I don’t feel like making a full-size adult garment, if I have bits of wool that want to be used up in a useful way, I make a baby jacket. Someone, somewhere is having a baby soon, and I always have a couple of finished objects on hand in case I didn’t know that a colleague or acquaintance was “expecting”.
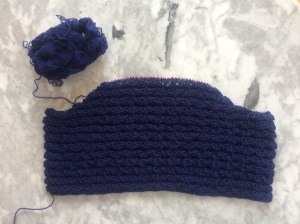
That was the case this month, funnily enough in my own weekly knitting group. We have been “meeting” via Zoom since March due to the pandemic, and I dropped out for a while due to being ill myself, so by the time I came back I had apparently missed some happy news — one of my fellow knitters will be having a baby this winter. What better time to make this cute and easy first size raglan cardigan?
I had 3-ply wool left over from this jumper, so I was even able to achieve the tiny gauge of 8 stitches to the inch. Only… it turned out I did not have enough of this wool, so the raglan yoke part is leftover mystery purple 4-ply. I’m not quite convinced that it’s going to work; the harsh colour line seems weird at the moment.
I don’t know the name of the stitch pattern, but it’s a lovely easy sort of herringbone:
Row 1: knit
Row 2: k1, p3
Row 3: knit
Row 4: p2, *k1, p3*
Except… I decided to make the yoke in one piece, because I didn’t want to sew raglan seams, and the raglan decreases change the pattern at the armholes. I knew that would happen, but was too lazy to work out mathematically exactly what the decreases would do. It turned out that the fronts and back stay in the proper pattern and both sleeves end up in k3, p1 rib. OK, it’s symmetrical and doesn’t looks terrible, so I decided to live with it.
But… then I ran out of the mystery purple wool as well! And had to make the last bit of collar ribbing in another mystery purple-ish wool that was also thicker. Well, at least the colours didn’t clash too much? And I had cute, matching, vintage buttons in the button box!
… except that I somehow utterly failed to sew them on evenly spaced? I could add one more in the gap near the top — there’s a buttonhole there — but somehow the buttonhole in the lower gap got sewn shut while I was weaving in ends or sewing on the front bands. I have enough buttons, but can’t decide whether to cut a new lower buttonhole and add two more buttons or just give up and leave it as it is. At least the gaps are vertically symmetric.
Not my best work, but it will keep a baby warm and clothed. Perhaps I’ll make something else for my knitting friend’s baby — a fellow knitter deserves a more successful project!
August was a pretty blah month this year, what with the never-ending Covid-19 pandemic and associated long-term isolation, illness and unemployment. My knitting motivation is sub-par and the August 1962 issue of Stitchcraft didn’t have any projects in it that really inspired me. Still, I’ve been trying to turn the situation into an “opportunity” to save money and free up space by finishing WIPS and making new projects from stash.
This month’s embroidery flower was the gladiolus, with a special extra design of wild orchids. I chose the gladioli and embroidered them on another one of the recycled moneybags that I bought at an antique market last year. They really do make excellent sturdy little bags for buying small amounts of potatoes, mushrooms or other vegetable items, and with a zipper on the top they would even be good for buying and storing things like beans and lentils in bulk. They also work well as small project bags — I kept this WIP in the bag that I made in December.
The colours that I had in the embroidery-thread scrap box were more or less accurate to the pattern (mauve, mid-mauve, violet, yellow, gold, dark green and light green.) Also, the stitches are technically not very hard to do: the petals are long-and-short buttonhole (blanket) stitch outlined in stem stitch with straight-stitch center lines and satin stitch centres, the buds are satin stitch, the stems are stem stitch and the leaves are fishbone stitch. I like the effect of the dainty flower embroidery on the rough burlap fabric, too.
On the critical side… I am really not that great at embroidery, especially when I don’t have a transfer and I’m working with fabric like this, on which I can’t draw a design outline very well. I drew a few straight lines and dots with a pencil and improvised from there. Also, since the fabric is already made up into a bag, it’s difficult to use a hoop properly or work on the lower edge. The buttonhole/blanket stitch is a strange choice for the flowers, if you ask me — they look very scraggly! (Just like my real plants at home, ha ha.)
I left the top edge unfinished for now, as I couldn’t decide whether to make a simple button closure like on the other embroidered money bag, a fold-over buttoned closure, or a drawstring. (I don’t have a zipper of the right length on hand and I’d like to stay on the “no-buy” wagon for as long as possible, but it would be the most practical solution.)
I still have plenty more of the bags, so I can keep making one every time a little embroidery project presents itself.
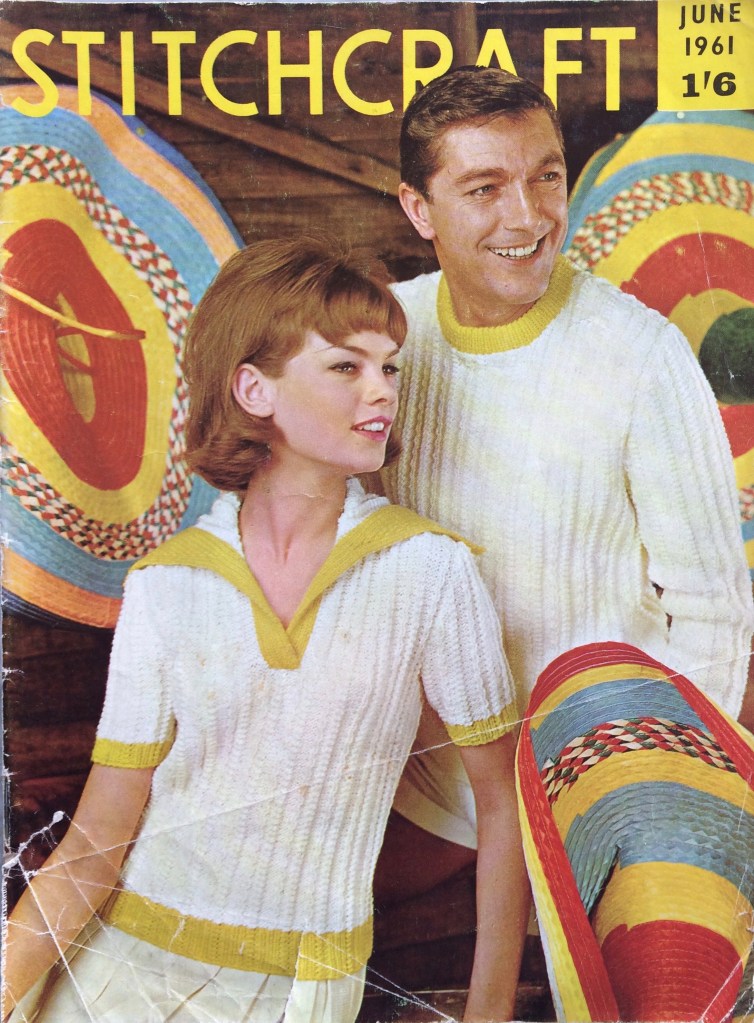
July 1962’s issue didn’t have anything in it that particularly interested me, so I took the time to go back to the June 1961 issue, which had so many nice projects in it that it was hard for me to decide which to make. (I ended up making this lacy top and later, this child’s tunic-dress.)
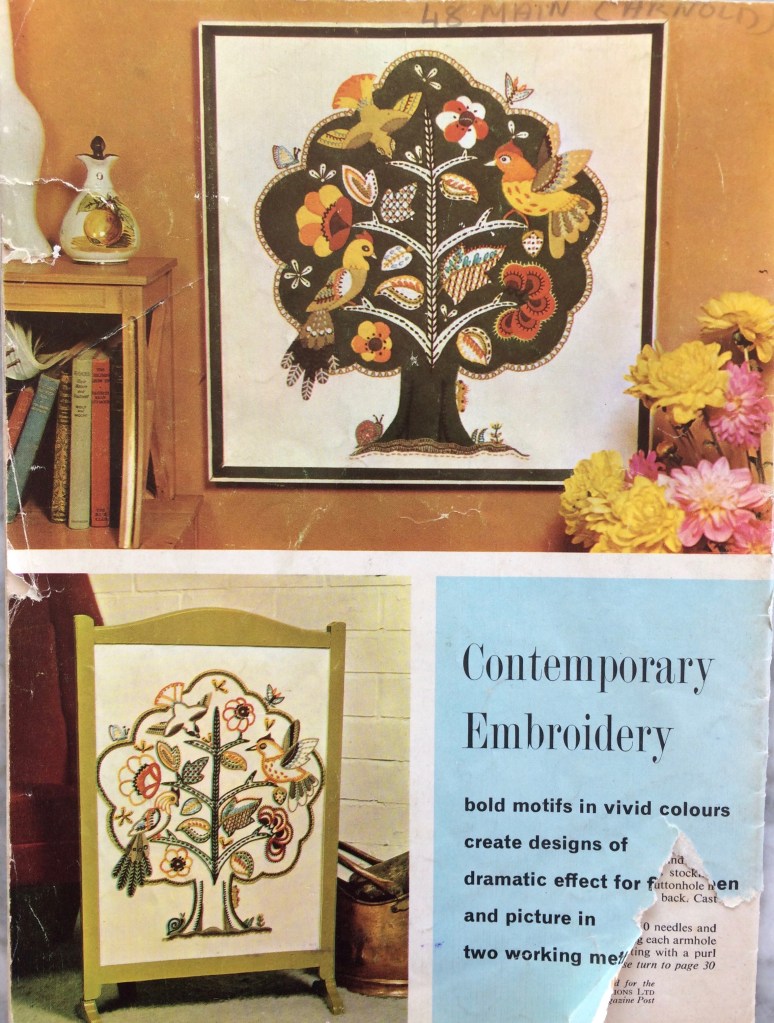
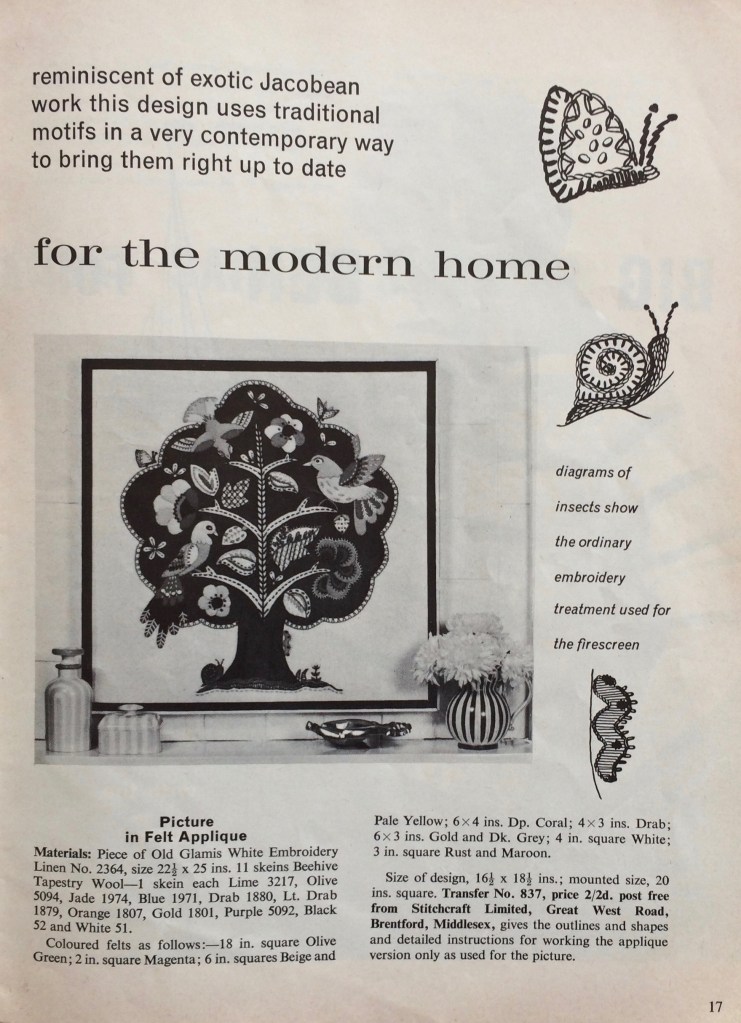
I loved the extremely complicated, heavily embroidered, faux-neo-Jacobean felt appliqué “birds in a tree” extravaganza featured in colour on the back cover, but it was too daunting. For one thing, of course I didn’t have the transfer or pattern for the appliqué pieces, since I would have had to have sent away for them via postal order in 1962. For another, there weren’t even any instructions in the magazine — the design was offered as either an embroidery or an appliqué project (see photo), and the instructions in the magazine only covered the embroidered version in any detail. The appliqué version just gave a list of materials, size of finished design, and the address where one could order the pattern and instructions. And when it comes right down to it, my appliqué and especially, embroidery skills are really not very well developed.
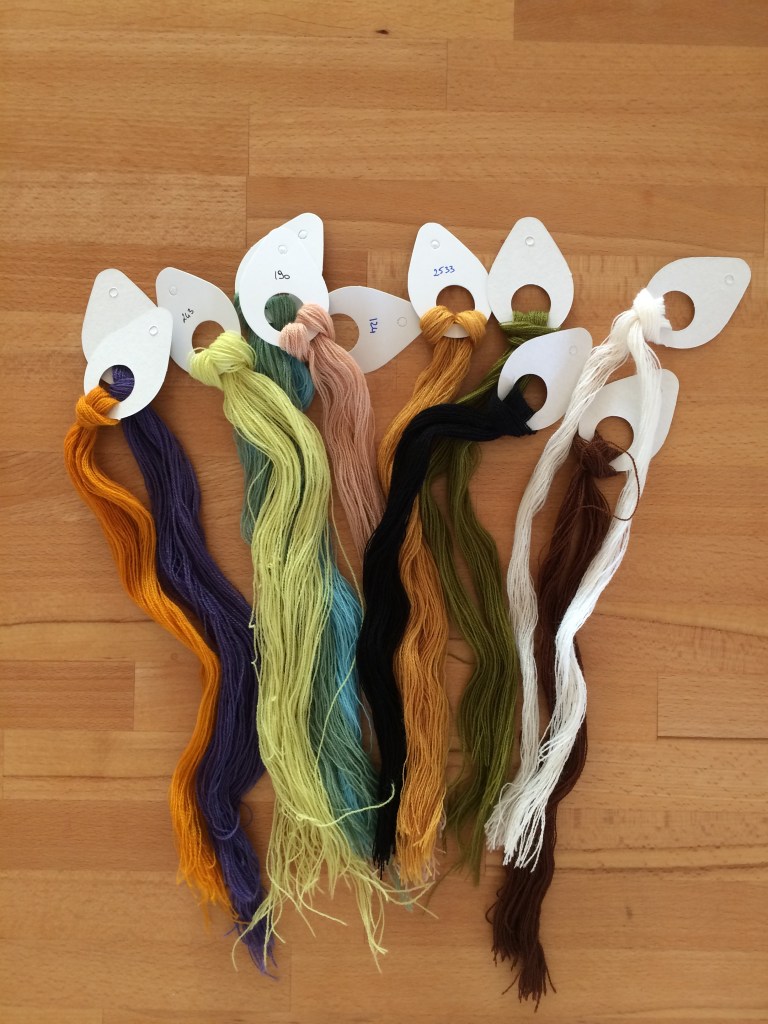
Oh yes, and while felt is easy enough to buy, the materials included tapestry wool for the embroidery, which is impossible to find in stores anywhere near me and even difficult to order online in the right weight (very fine)! Luckily, last year I happened to be in the one city I know that houses the one shop I know that actually specialises in tapestry and sells the right kind of wool, so I was able to get that, at least.
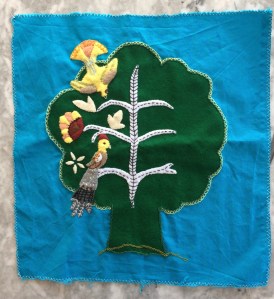
I decided to make it as a cushion, not a wall hanging. The background tree was easy enough. Technically, the white branches and leaves should have been made by cutting holes in the green tree felt and letting the (white/beige) background fabric show through, but since I chose a blue background fabric, I appliquéd them as well. It was predictably difficult to make and cut out my own patterns for the little bits of felt for the birds and leaves, and after making the first two birds, I realised it was easier to just cut the pieces freehand. Since there were no instructions to follow, I went from the photo and the instructions for the embroidered version, which obviously didn’t give much useful information.
Such a detailed project took forever, of course. It needed many tools and materials, so I could only work on it at home at a table, and not during the winter months, as I needed natural light for the fine work.
I made two of the birds on the left first, wasn’t really happy with them, and realised why after making the first flower on the left. I liked the way the flower turned out — it’s much simpler! The birds seemed overdone in comparison. I thought about changing the design and realised at some point that, of course, the who idea of this neo-Jacobean, embroidered and appliquéd extravaganza is that it is supposed to be over the top.
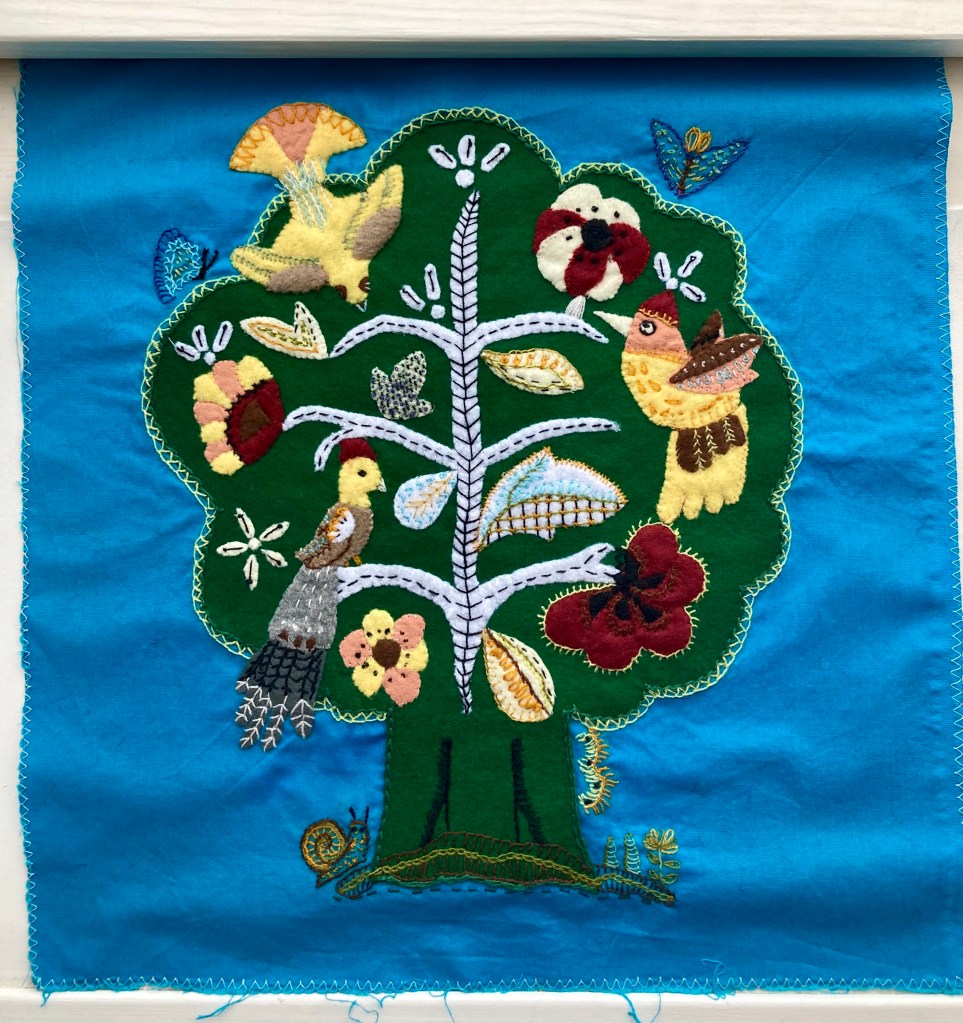
Before ironing…And after ironing
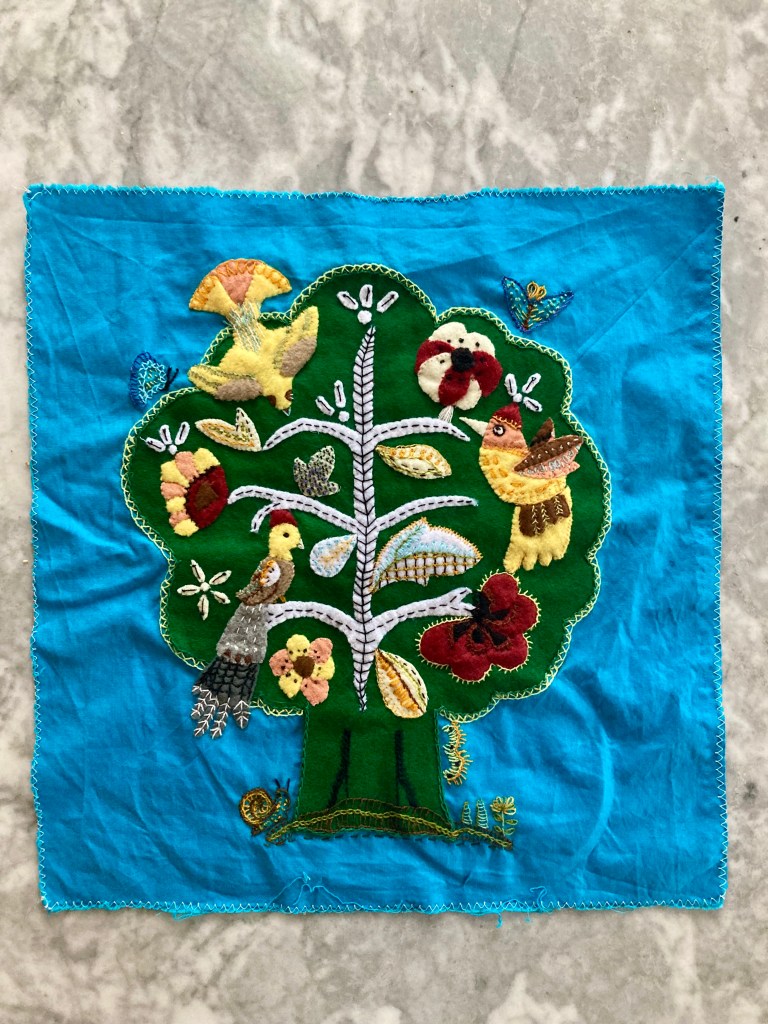
And so, slowly and painstakingly, it got done, one piece at a time. (It also spent a lot of time in the cupboard in between bursts of activity.) The embroidery directions in the magazine were often quite different from the appliqué version, so I did a lot of guesswork and adaptation based on the (rather small) colour photo on the back cover, from which the colours had changed and faded in the 50 years since its printing.
I was determined to get it done before the end of 2021, and I did (on December 31st.) It was a huge milestone for me in my appliqué / embroidery learning process, and I am really, really happy with the way it turned out.
The June 1962 issue didn’t have any projects that appealed to me enough to make them, so I used the time to finish up a project that I’ve been working on off and on for the last few years: a “4-coupon” twin set from Stitchcraft‘s February 1947 issue.
The “4-coupon” title refers to the clothing coupons used when purchasing rationed items during and after World War II. Rationing began for many food products in January of 1940 and extended to clothing in 1941, whereby clothing coupons could also be used for household textiles or wool. The Wikipedia article on rationing in the United Kingdom during World War II gives a sense of the coupons’ comparative value:
There were 66 points for clothing per year; in 1942 it was cut to 48, in 1943 to 36, and in 1945 to 24. This system operated through a “points” system… [ ] …Clothing rationing points could also be used for wool, cotton and household textiles… [ ] … The number of points that each piece of clothing would be valued at was determined by not only how much labor went into making it, but also how much material was used. A dress could run someone 11 coupons, whereas a pair of stockings only cost 2. Similarly, Men’s shoes cost 7 tickets, whiles women’s cost only 5. In 1945, an overcoat (wool and fully lined) was 18 coupons; a man’s suit, 26–29 (according to lining); Children aged 14–16 got 20 more coupons.
The twin-set uses 8 ounces of wool, so apparently one coupon could get you two ounces of (2-ply) knitting wool. (Just to be clear, one also had to pay for the items; the coupons only limited the amount people were allowed to buy, regardless of how much money they had at their disposal.)
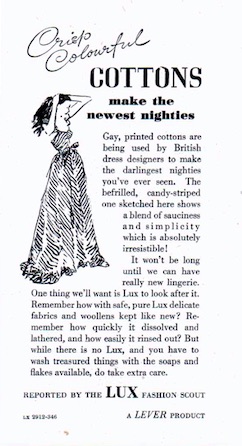
The influence of rationing can be seen in almost every aspect of 1940s issues of Stitchcraft: occasionally titles of designs, such as this one, but more often in recipes and advertisements. These two, from the pages of the 4-coupon pattern, promise that the company in question is “sharing out their dress and lingerie fabrics as fairly as possible” and reassure that “it won’t be long until we can have really new lingerie” (lace and frills were banned, and nylon was needed for parachutes et. al., hence the plain, home-sewn cotton nightgowns).
Many products remained rationed after the war, including clothes rationing, which lasted until March 1949. It was only in 1954 that the last rationing measures were lifted. Since then, the only product that has been subject to rationing in the UK was petrol, briefly, during the Suez crisis of 1956-57. And yet, as the global Covid-19 pandemic continues to rage around us, there have been discussions in many countries — including wealthy countries with excellent medical infrastructures — regarding the rationing of personal protective equipment, ventilators and medical supplies. The past is not as far away as we might think.
Booklet photo, February 1947
I had plenty of time to ruminate on that while finishing this project, which I started as a “home away from home” project in 2016 (a year in which I effectively lived in two different places) and finished in home isolation in 2020. The wool — Onion Nettle Sock — is a mixture of 70% sheep wool and 30% nettle fibre. I would never have thought to knit with nettle fibre, but it works very well! It is smooth and somewhat shiny and the textured lace pattern shows up very well with it. Also, it reminds me of various fairy tales involving our heroine knitting shirts for her brothers out of nettle plants (or aster flowers, depending on the version and translation), like Die Sechs Schwäne (The Six Swans) by the brothers Grimm, or De vilde svaner (The Wild Swans) by Hans Christian Andersen.
As always, I am larger than the 34-inch-bust size for which the pattern is written, but also get a looser gauge, so it worked out for me to make the pattern almost exactly as written. I made the sleeves and the body of the jumper in the round, adjusted for length and changed the sleeve cap slightly for less puffiness, but otherwise I didn’t need to change anything. Of course, the lace pattern is stretchy and can be blocked tighter or looser.
Said pattern was the first one I had worked with that increased and decreased in the course of the pattern repetition, and I was at a loss to deal with the side-seam and sleeve increases and decreases at first. The pattern, like all vintage patterns from this period, assumes you know what you are doing, and there are no charts in any case. I learned a lot and I can see that the side increases on the cardigan are much nicer than on the jumper! (Carefully photographed as to be unnoticeable, but believe me.)
My buttonhole spacing on the cardigan was off, so I ended up sewing most of the holes closed ad carefully cutting new ones after backing the bands with ribbon (a common practice at the time, especially on tight-fitting cardigans, to keep the bands from stretching out and gapping across the chest.)
All in all, this is a wonderful design and very flattering to the figure. Nota bene, my upper body is broad and flat and I am not exactly model-thin, but this ensemble somehow manages to make me look both svelte and curvy. The wool/nettle fingering weight is perfect for fall and spring. I love the buttoned placket and collar of the jumper. Knitting this was definitely worth all the time and hard work and it will be getting a lot of wear for years to come.
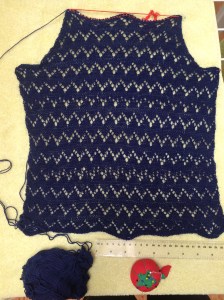
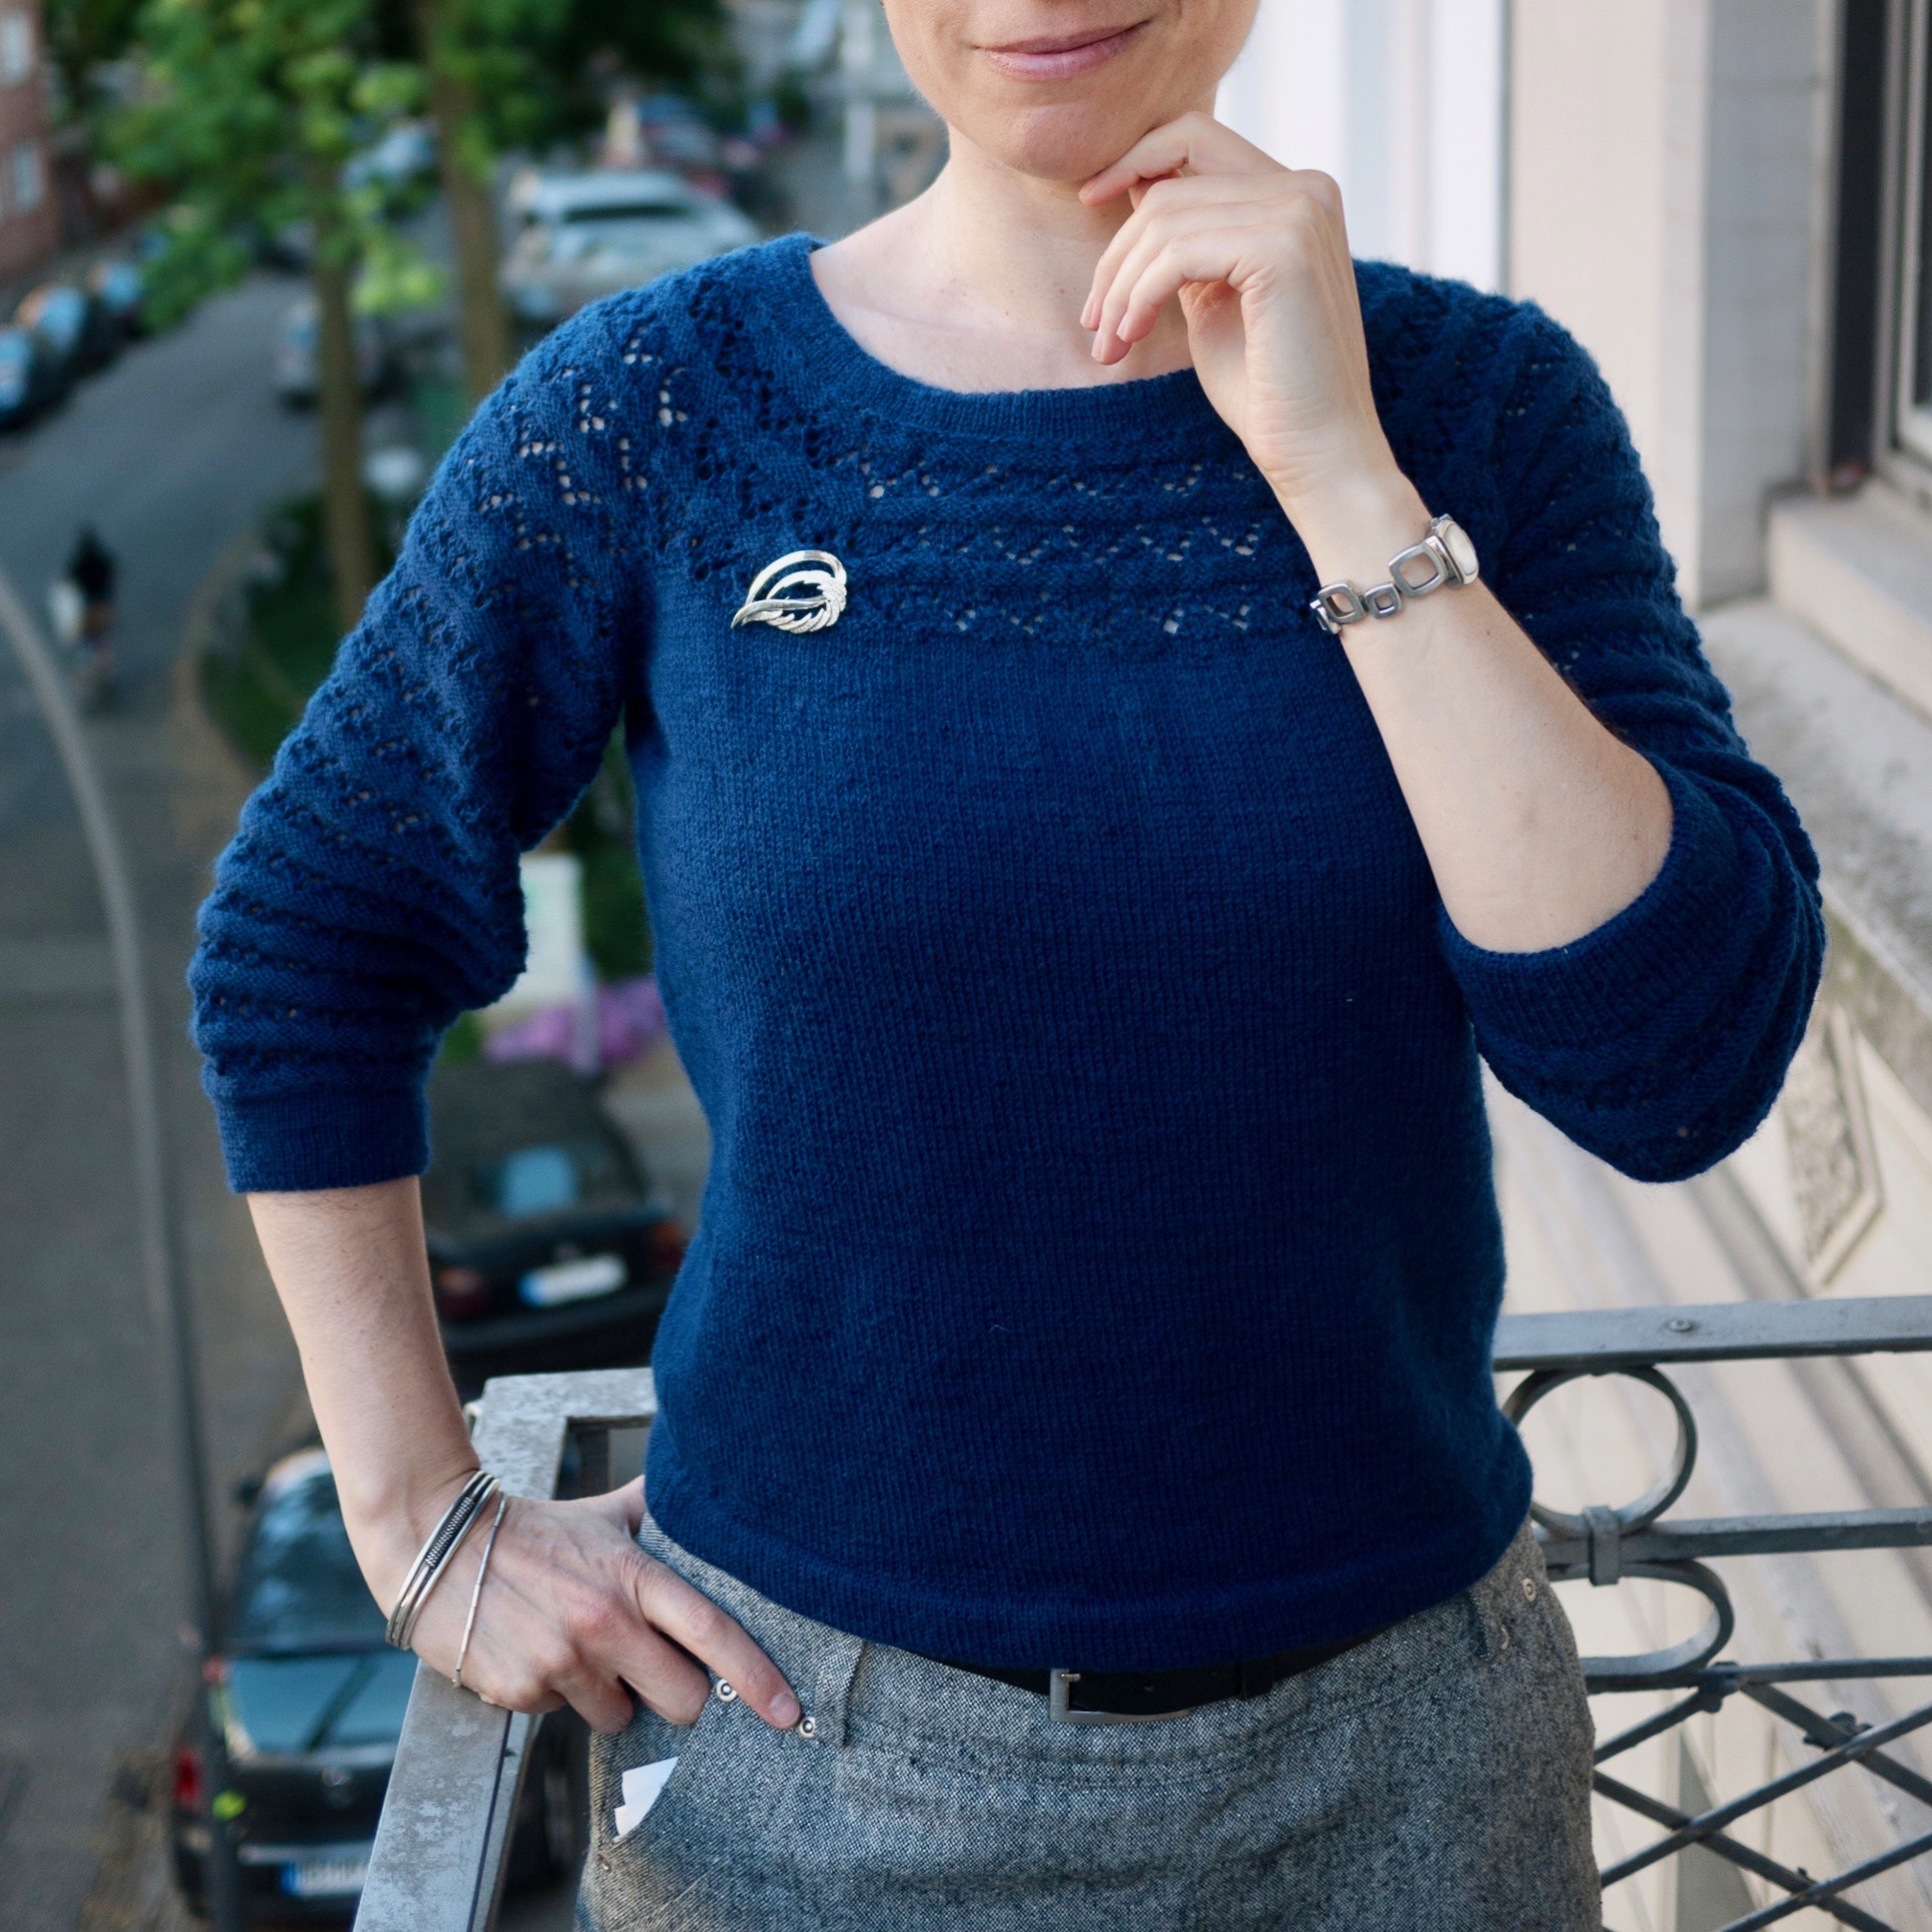
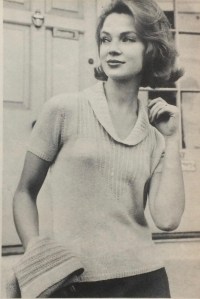
May 2020 went quickly and is already over, but (spoiler…) my May 1962 project didn’t get finished until June. It was a lightweight pullover in 3-ply wool with three-quarter sleeves and a lacy yoke, simple, elegant and “in a cooler trend for summer.”
I bought the wool — Regia 3-ply, which has long been discontinued — from a wonderful little wool shop in my town that used to sell and maintenance hand knitting machines as well. It was a tiny, one-woman operation with unpredictable business hours, whose elderly owner lived in the apartment above the shop. She often had vintage second-hand knitting machines for sale and I always meant to buy one, but the times when she had one available and the times when I was able to actually find the store open never seemed to coincide, and sadly, she passed away last year. There were no knitting machines left in the close-out inventory sale, but still plenty of fine-ply wool, which is almost impossible to find in normal wool shops these days. RIP lovely little store and lovely lady who ran it! I will think of you whenever I wear this jumper.
In spite of the fine wool and small needles (2.5 mm), I was unable to get the required tension of 8 stitches and 10 rows to an inch, so I adapted and made the smallest size, which should come out to fit me. I say “should” because the lace pattern used on the sleeves and yoke bunches together quite a lot before blocking. I blocked both sleeves on the needles to try and measure it out (see photos…) but I still wasn’t sure if they would fit properly onto the yoke. They did, with no further alterations.
The only real alteration that I made (besides making the body in the round to save time and seaming) was to alter the decreases on the front and back after the armhole bind-offs and before the beginning of the yoke. The pattern is written with identical back and front pieces, but I wanted the yoke to hang down further on the neck on the front than on the back, so I make the back pre-yoke part longer and the front pre-yoke part shorter by decreasing more or less frequently than in the pattern.
The lace stitch refused to block out flat, no matter what I did. I wash-blocked, stretched and pinned both sleeves before making the yoke (see photo above) and they had bunched up again by the time I was done knitting. I wash-blocked, stretched and pinned the whole garment after completion and the sleeves bunched up again five minutes after I unpinned it (dry). I pinned the sleeves and steamed them, then ironed them with the same result. Did I mention that this yarn is 75% wool and 25% acrylic, which normally blocks for good when any kind of heat is applied? Well, no matter what I did, it didn’t take. The yoke stretches out naturally while worn, but the sleeves bunch up. Since they are supposed to be below-elbow-length anyway, I decided to call it a design feature and live with it.
On the whole, I’m quite happy with it, and it’s the perfect weight for cooler summer days.
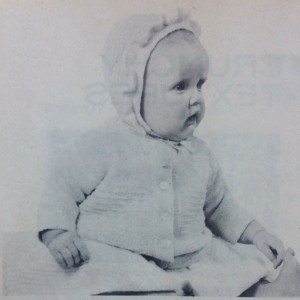
My April project was the cardigan jacket, a.k.a. “matinee coat” from Stitchcraft’s April 1962 layette set “for an Easter baby.” The set included a dress, the jacket, bootees, a bonnet and a blanket to use as a pram cover, plus a sewn “pin-tidy” made out of a tiny baby doll with flannel and satin “skirts” to hold the safety pins for baby’s cloth nappies. The pin-tidy is a bit “uncanny valley” for my taste, but the knitted items are all lovely.
My knitting group has a gift exchange game every December and my prize this last year was 100 grams of Opal “Beautiful World” 4-ply sock yarn, 75% wool, 25% polyamide, multicoloured. I don’t like multicoloured yarns, but hey, a gift is a gift and I knew I would find a use for it! Sock yarn works well for baby things, being washable and non-felting, and 100 grams was the perfect amount for the jacket. The colour is unusually dark for a baby garment, but I don’t this the friend whose baby-to-be I knit it for will mind — they wear a lot of black themselves. (Side note: I did make an all-black baby cardigan for a black-clothed metal fan father-to-be friend once, and he was thrilled, because he knew he would never find one in a store. Take note, baby clothing designers — there is a market out there!)
The construction is a simple dolman, made in pieces from the bottom up with cast-on sleeves. The button band is made with a slip-stitch hem and the stitch pattern in the lower part is an easy broken welt:
Row 1: (RS) knit
Row 2: *k2, p 6* to last 2 sts, k2
Rows 3 and 4: knit
I even found seven buttons — one extra! — in my stash that fit the buttonholes and the style really well (my local stores are still closed).
My only worry is that the neck is too tight. It looks awfully small. Of course, they can just leave the top button open if they have to.
The baby will arrive in June and I will “see” my friend next week (i.e. non-contact delivery of present, perhaps we will literally see each other through a window or something). I hope everything works out for them as well as this project did for me!
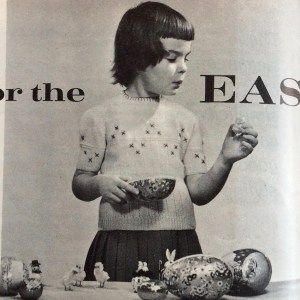
Greetings from the Covid-19 lockdown! March 1962’s project sports the headline “Ready for the Easter Parade” in the magazine, but there are definitely not going to be any Easter parades in March 2020. I hope all of you, dear readers, are staying healthy and staying home.
I made the jumper from this lovely “best-dress” twin-set in an easy flattened-rib pattern with added cross-stitch embroidery. It’s written for 4-ply wool, but the child I knit it for can’t wear wool and the warmer months are coming, so I made it in cotton. And I finally found a cotton yarn that is non-mercerised and fine enough for me to get 7 stitches to the inch with it — Cotton 8/4 by the Danish brand Mayflower. It’s even organic! Sadly, there wasn’t enough yarn left in the shop to make the cardigan, said shop has decided not to re-order this yarn and Mayflower doesn’t seem to do direct sales via its website, so if I want to make the cardigan, I’ll have to see where else I can order some more.
The pattern was easy and my only modifications were to close the back neck opening with snaps and a button instead of a zipper and to forego the blanket-stitch embroidery around the neck, which I thought didn’t go well with the cross-stitch embroidery. It was a fun project and I hope the little girl for whom I made it will enjoy her birthday present.
Sorry for the very short post, but there’s really not much more I can say. Stay tuned for the year-long saga of the 1940s twin-set, which might actually be drawing to a close now that I have lots and lots of time at home to knit.
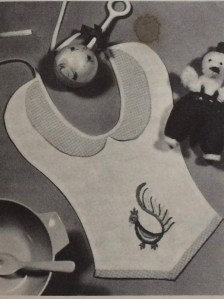
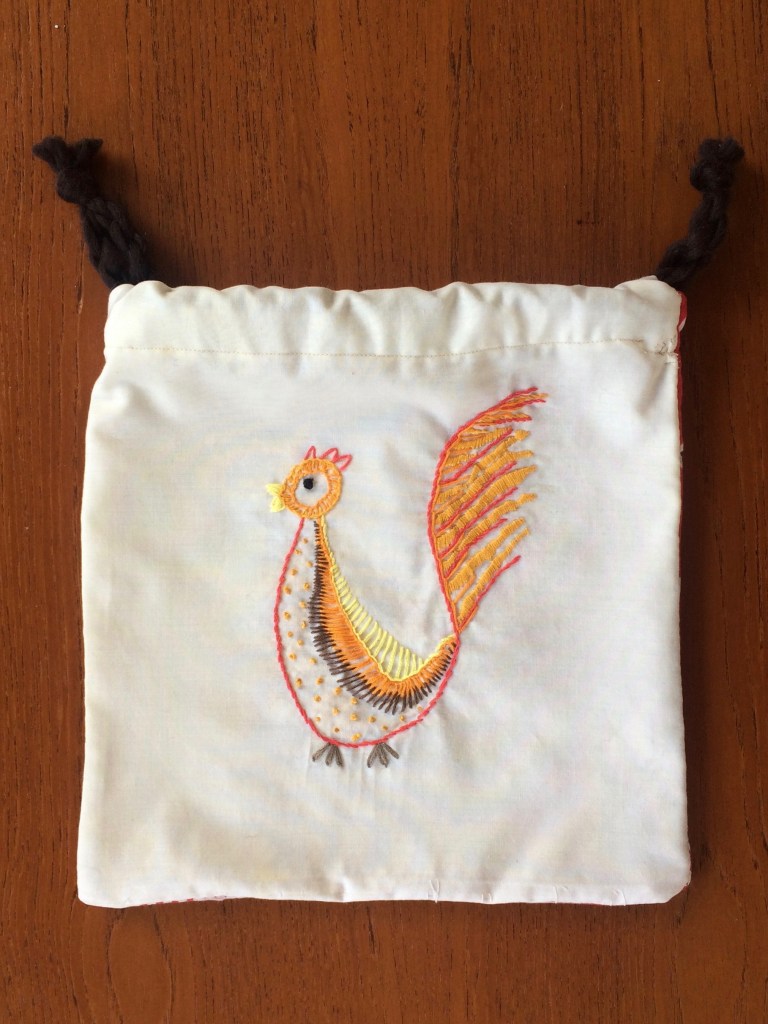
No, it’s not the menu choice for tonight’s dinner, don’t worry. My February 1962 was a little embroidered… animal , originally designed for a toddler’s “feeder” and which I adapted into a bag for vegetables/small projects/”stuff”. I say “animal” in this vague way because it is referred to as a “Squirrel” in the instructions, followed by more specific instructions on how to embroider the supposed squirrel’s beak and feathers. I can maybe, maybe forgive enough poetic license to call a squirrel’s mouth a “beak”, and the creature’s fluffy tail could be mistaken for a squirrel’s, but feathers… no. It also looks suspiciously like a chicken in the photo! So, not a squirrel, but a chicken and a proofreading error.
The photo is about as vague as the animal’s species, so I followed the instructions as best I could and then, ahem, winged it from there. Obviously, I did not have a transfer, so I just drew an approximation of the shape on the fabric with a pencil.
The fabric was up-cycled from a tattered pillowcase and an old red bandana. I embroidered the chicken on one thickness of pillowcase fabric and then flat-lined that piece with another piece of the same fabric for more stability and to keep the back side of the embroidery from fraying. The embroidery floss was all leftover bits and the cord is monk’s cord made from scraps of felting yarn, so this was a 100% up-cycled / didn’t have to buy anything new project, in keeping with the environmentally friendly cloth vegetable bag idea.
It looks quite “homemade” — my embroidery skills are still far from professional level — but cute and very 1960s. I have a friend who actually keeps chickens in her garden and gets most of her food from them, the garden or food-sharing, so obviously this will be a present for her. I think she’ll appreciate it.
I hang out a lot in the “All Things Vintage” forum on Ravelry and try to participate in the make-alongs when I can. Usually, there are two of them per year, and last year’s July-December KAL/CAL (that’s “knit along”/ “crochet along” for anyone not familiar with the abbreviations) had the theme “Fabulous Fifties.” The 1950s were indeed a fabulous time for fashion and I have a small selection of 1950s knitting magazines, including some very nice issues of Stitchcraft, so the most difficult part was choosing a pattern! I went with this “Elegant jerkin for summer wear” from April 1952.
Portrait of Sir Walter Raleigh (wearing a jerkin) by William Segar, 1598. National Gallery of Ireland. Public domain.
First of all, I hear most of you asking: What is a jerkin? I’m glad you asked. Originally, it was a short, close-fitting, buttoned or otherwise fastened jacket with short or no sleeves, worn in the Renaissance over a doublet. It was often nipped in at the waist. Modern versions of the jerkin were revived for military use in the 20th century, and Stitchcraft as well as other mid-century patterns often use the word for a women’s waistcoat with cap sleeves to wear over a blouse, or a knitted blouse-like garment such as this one, which plays off of the historical jerkin shape.
The four-row stitch pattern was quite easy (knit 1, slip 1 on the right-side rows, knit 1, purl 1 on the wrong-side rows in one colour, then slip 1, purl one on the RS and purl 1, knit 1 on the WS in the other colour) but because of the colour change with the slip stitches, it was amazingly difficult to “read” the work and get back on track. At the same time, if just one stitch was wrong, it was immediately visible in the pattern. Of course, I had to pick blue and black, two colours that didn’t offer much contrast and which, I found, only look different in natural light. As a result, I could only work on this project during daylight hours… in the winter, which is pretty dark.
Adding to the frustration: as always, no matter how small the needles or how thin the wool, I could not knit tightly enough to get the minuscule gauge, which itself was only given as a “life-size” photograph in the pattern. Of course, I am also larger than the 34-35 inch bust given in the pattern, but how much larger the garment, calibrated for how much larger the gauge? Right, lots of calculations, estimations, measurements upon measurements, and just plain guesswork. Plus the thing pulled together either more or less, horizontally or vertically, as it got larger — my gauge swatch (a pocket lining) was utterly useless. I had to start three times.
Before sewing
When I finally got it done (too late for the KAL deadline but whatever), it fit perfectly! I was so proud of myself! Then I wash-blocked it and the wool stretched about six inches in width and at least two or three in length above the waist. In desperation, I reached out to the good people of Ravelry, who told me that the yarn I used (Lang Merino 200 Bébé) was superwash and I should put it in the clothes dryer to shrink it back into shape. I did that and it actually did shrink it down, but it still ballooned a bit in the torso, so I sewed side seams into it. At the moment they are just sewn down with yarn, but the next time I get the sewing machine out, I will probably sew them down properly and (aaaaaggggh!!) cut the excess fabric away to reduce bulk
Also, I sewed that moss-stitch bottom band on twice and it still pulls in a little bit. Oh right, and the tour through the dryer dinged up the buttons, even though I turned the garment inside out.
All in all, this jerkin was a jerk. It was jerkin me around! It looks OK though, I guess, and better under a blazer. You will have to take my word for it when I tell you that I look less dumpy in it in real life than in the photo. It was an interesting project in terms of construction and stitch pattern and I’m sure I will wear it, but sadly, in the end I don’t think it was worth all the frustration.
Stay tuned for the update on the really, truly, almost finished January 1962 project and the embroidered chicken squirrel (yes) that will be my February 1962 experimentcatastrophe vegetable bag.
UPDATE AND EDIT February 25, 2020: Project finished!
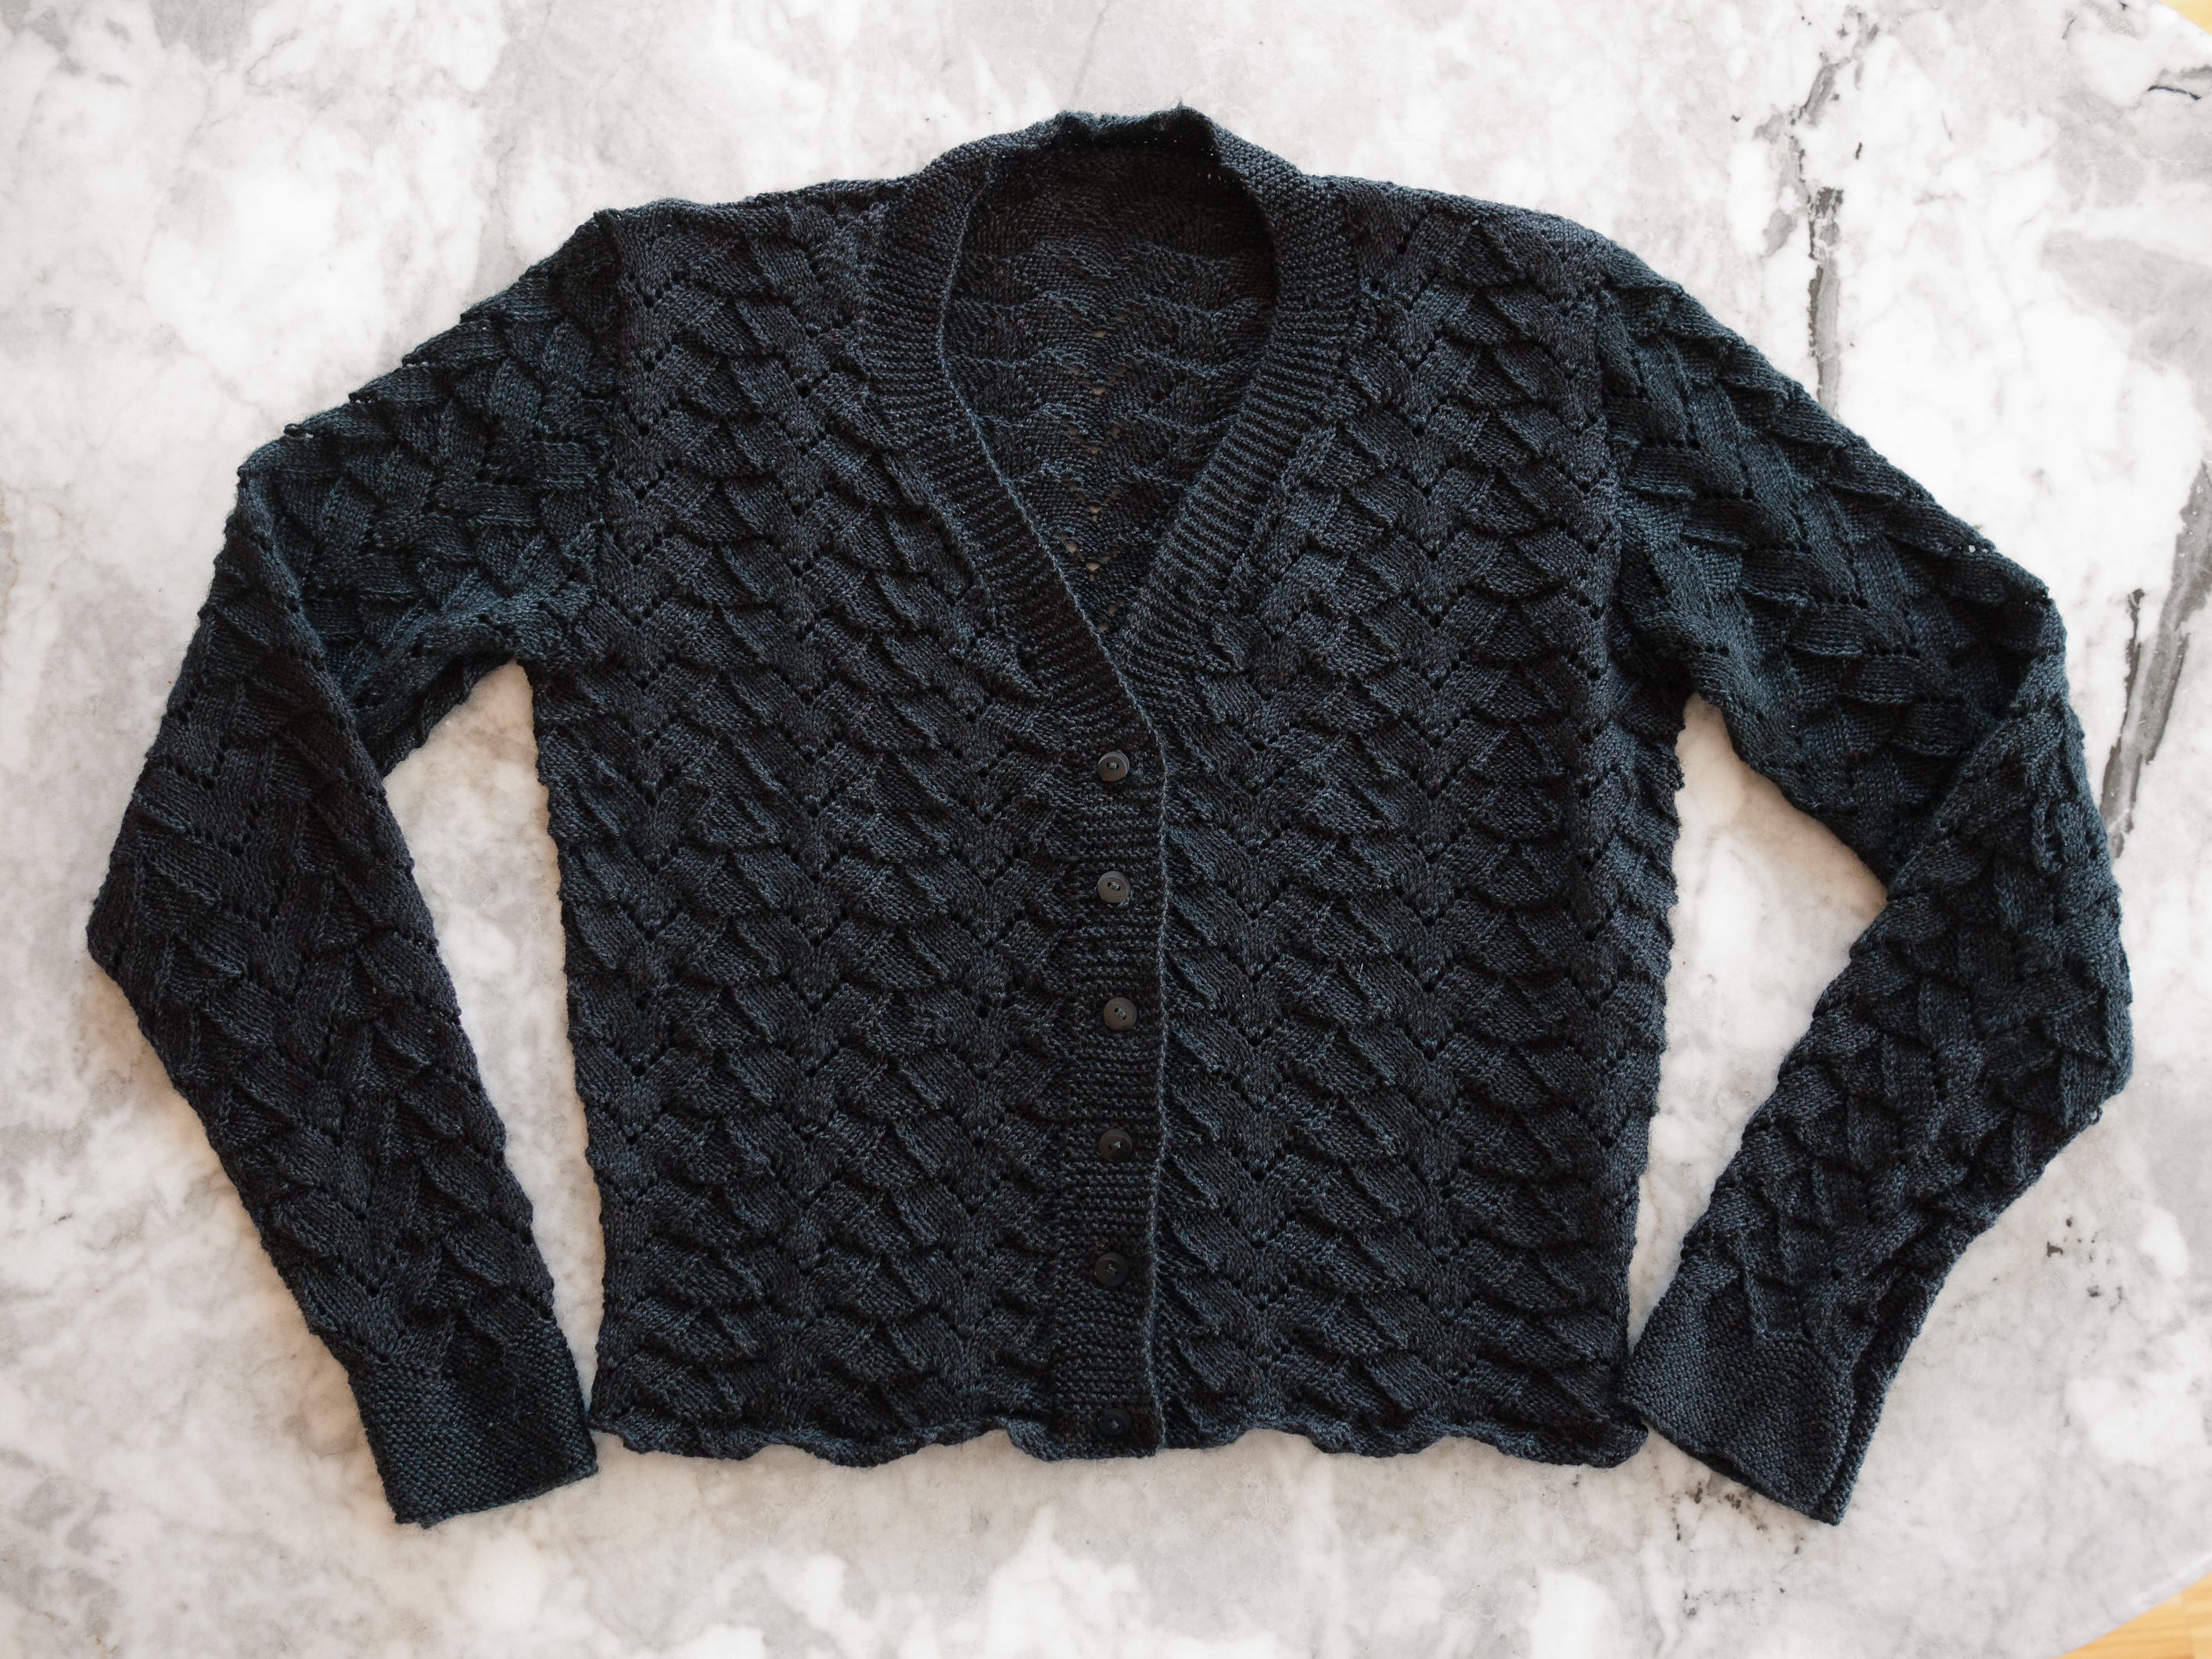
It was hard to decide what to make from the January 1962 issue, since more than one pattern was enticing. The most practical of all of them would have been the cabled cardigan, since I could really use a black, midweight, go-with-everything cardigan right now. However, I decided to go with the jumper from this lovely “softly fitting” twinset (“softly fitting” as opposed to the tighter, waist-length twinsets of the late 1950s). The pattern calls for “Cameo Crepe”, a smooth 4-ply wool, but I knew this project would be perfect for “Concept Silky Lace”, the merino-silk blend from the company Katia from which I made the wonderful orange sleeveless top last summer.
There were only two problems. Problem number one: Concept Silky Lace is only available in colours I don’t wear (shades of white and pastel) as well as orange (great, but I used it for the other project), a sort of light jeans blue (OK, but not exciting) and purple. Purple is not my best colour, but given the limited choice and the fact that I really wanted to use this specific yarn, I went with it. That led to problem number two: there were only two balls of it in the store and they had to order more. Unsure whether the two additional balls I ordered would be from the same dye lot or if it would make a difference if they weren’t, I started by making the sleeves with the yarn I had, and waited.
And waited.
It took more than two weeks for the yarn to arrive, so I was woefully behind. Also, the yarn that arrived was from a different dye lot, so I wasn’t sure how to camouflage the colour changes or if I even had to. After making the ribbing for the body in the “old” yarn and the body (stockinette stitch, and I decided to do it in rounds to go faster) with the new yarn and not noticing any difference, I just used up the old yarn and moved onto the new in the fancy-yoke part. It worked fine and didn’t make a stripe — thank you Katia for your excellent colour-match dye work.
Once the project got started, it was finished very quickly. I was worried about the size, as it seemed to stretch quite a lot width-wise and I though it would be too wide and baggy. Once it was bound off and sewn, it was fine. I made it an inch longer in the body than it said to make it in the pattern, but I could have made it even longer — people were really short fifty years ago!?! Blocking helped stretch out the length.
It is wonderfully soft and clingy and will keep me warm and/or cool in every temperature. I like the colour and it looks good alone or under a blazer, with skirt or trousers, etc. It was easy and fun to knit, has a cool design and the pattern was well-written. A great project all around!
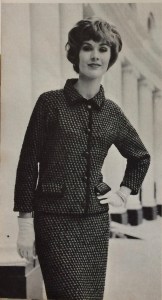
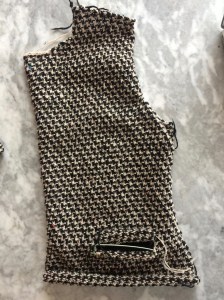
November 2019’s project was the blazer from this wonderful tweed check suit in the November 1961 issue. As it says in the description, “separates in the height of fashion illustrate why hand-knitting is chosen for today’s couture look.” The blazer, especially, is really a timeless, classic piece.
The stitch pattern is very clever and simple: k 1, sl 1, p 1 on the right-side rows, moved one stitch to the left every time, and purl back on the wrong side rows, with 2 rows in each colour. This makes a firm, structured fabric with minimal curling at the edges (which are finished with wool braid binding).
The pattern calls for Patons Rimple DK (nubbly wool with synthetic) in black and Patons Totem DK (smooth “crepe” wool) in “Oakapple”. I admit I had never heard of an an oak apple before and looking at the black-and-white photo, it’s it’s hard to tell what exact colour was used — but it’s obviously some kind of whitish-beige. Which, as it turns out, is pretty much the colour of at least some kind of real oak apple, which, as it also turns out, is not any kind of apple at all, but a wasp gall. My choice of wool, Jamieson’s Double Knitting, was clear from the beginning and I was lucky enough to be able to buy it “in person” at the wonderful Shetland Wool Week. Both the “black” (Mirrydancers) and “white” (Sand) yarns are ever so subtly tweedy, which gives a beautiful depth to the colour.
Why did I even bother?
Calculating the amounts was a nightmare, though. I had thought ahead and written it all out on paper: how many yards of Totem and Rimple there were in an ounce (thank you, Ravelry, for listing discontinued yarns with useful information about them), how many yards I would then need for each colour if making just the blazer, just the skirt or both, then comparing that with the number of metres per gram of Jamieson’s DK, dividing for number of 25 gram skeins, checking it all through and of course adding at least a few skeins of each colour for swatching, making full-length sleeves, extra security, and knowing that I wouldn’t be in Shetland again anytime soon. It was just barely enough! As I learned the other way around while making the green crocheted rug a little while ago, you can calculate all you want, (even with the help of a professional mathematician who knows extra-special secret formulas with Greek letters), or weight your swatches or whatever, but the only real way to know how much wool you are going to need is by making the thing. Argh.
The knitting itself was a dream, though — so nice to work in DK after the fingering-weight projects of recent months past. It knitted up fast and easily and the fabric feels good in the hands. The pattern is quite clear and simple. Even the set-in pockets with flaps and the buttonholes (such a nightmare, always) were successful and the buttonholes evenly spaced. (I used the method that Stitchcraft always suggests: make the side without buttonholes first, then mark the button positions with pins and make the buttonholes to correspond. With a repeating pattern like this one, you can count the rows between buttonholes quite accurately.)
I added a bit of waist shaping for a more tailored look, using a well-fitting blazer from my closet for a guide. I also made full-length sleeves. Originally I thought to make the sleeves from the top down for a better sleeve-cap fit and to make sure I didn’t run out of yarn, but I realised that that would reverse the direction of the diagonal pattern and I wasn’t sure if that would be a problem or not. I made them in the normal way from the cuff up, but made them narrower.
After putting it together and blocking, the back piece had stretched width-wise, the sleeves had stretched length-wise and the sleeve cap didn’t fit well. Also, the shoulders were too wide. What to do? I didn’t want to cut the knitted fabric, nor do everything over. My solution: I re-sewed the sleeve caps in where the shoulder and sleeve line should have fallen, then tucked the resulting extra fabric in towards the neck on the front piece to make a sort of built-in shoulder pad. I normally hate shoulder pads and rip them out of everything I buy, but in this case it turned the droopy, sloppy-looking shoulder into a crisp, tailored-looking one. I’m so sorry I forgot to take a “before” picture — the change was pretty dramatic.
To fix the back width, I added two vertical darts. That wasn’t as elegant as it could have been if I had knitted them in, but it was fine. The sleeve-cap changes pulled the sleeves in a little shorter, so I just finished the cuffs with the same binding that I used for the rest. The buttons are modern, but aren’t they perfect? I even remembered to buy a few extra.
It took a lot of finicky finishing work, but in the end, I was very happy. The blazer is warm, elegant, comfortable and fun to wear. It looks good as part of a retro-style outfit or a modern one. What more could I want? I don’t feel the need to make the skirt. I’m just happy with my blazer the way it is.
There’s always somebody having a baby, and I do try to make something nice for all my friends’ and colleagues’ newborns. Sometimes I don’t manage to finish something until they are out of the newborn stage, which is why it’s nice to have patterns for larger babies! This dolman-sleeve cardigan, made in the smaller size, should fit a 22 inch chest, which should be fine for this particular eight- or nine-month old.
I wasn’t and am not convinced that dolman sleeves are good for babies or anyone else (so much fabric flappage) and originally I thought about converting the pattern to set-in sleeves, but in the end I was just too lazy, so dolman sleeves it was. I guess it does have the advantage of being wide enough no matter what, and easy to get the baby’s arms into the sleeves. Given that, I’m surprised it’s so short! If it were made longer, it would fit longer without the baby getting a cold belly.
The little leaf motifs up the front sides are quite easy and don’t require any cabling or special fuss. You just work into one stitch 5 times on one row, then work those 5 stitches in stockinette (on the reverse-stockinette background) for a few rows before closing off the leaf with decreases. The lace strips on the sides are plain yo, k2tog alternating with k2tog tbl, yo, worked on the right-side rows.
I used Jamieson’s wonderful Shetland Spindrift from a multicoloured stash that I had bought from a nice person on Ravelry. Some may say that Shetland wool is too tough for babies, but it does get softer with washing and since it won’t be worn against the skin, I think it will be fine. The colour — Buttermilk — is really beautiful, a pale yellow ever-so-slightly marled with shades of pink and winter white.
If I remember correctly, the buttons came from a Christmas fair somewhere some years ago and hadn’t found the right garment yet. I only had three and the pattern calls for five, but I preferred the buttons I had to any new ones I might find.
All in all, a quick and easy project that will hopefully keep the baby warm and make its parents happy.
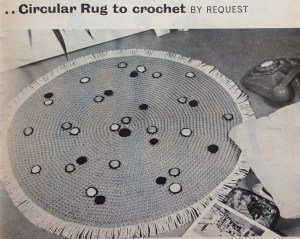
September’s project (finished only one day late) was this extremely 1960s crocheted green rug with black, white and orange embroidered spots (they “add a modern touch”) and fringe. Loved it!
Before I could start, I had to figure out what kind of wool to use. Rug wool, such as the Patons Turkey Rug Wool in the pattern, was available in the 1960s in large skeins by weight and rugs could be made using tapestry stitches on canvas, crocheting, tufting or using the latch-hook method. Latch-hook rug makers had to cut the wool themselves and there were ingenious little tools to help them do that, like this Patwin rug-wool cutter or this “strip slitter” from Bliss. Later in the decade, “cut packs” were introduced for latch-hook use and it is now very difficult to find rug wool in skeins.
Felting wool, like rug wool, is bulky, mostly unprocessed, coarse and strong, so that was my first thought… but would it felt with use or washing? I decided to take the chance, since it’s easy to find, inexpensive and there happened to be some in the perfect colour at my local yarn shop. It’s the exact same shade of green as the embroidered cushion from 1960 that I made last year! It even possibly matches the original colour from the pattern, “Green Haze”.
I had to order more wool than they had in the store. To figure out how much wool I needed, I asked a better mathematician than me if he could work it out using the diameter of the swatch, finished diameter of the rug (29 inches without fringe) and the amount of wool per skein. Then I calculated it myself based on the number of stitches in one skein’s worth of wool and the total number of stitches in the rug. We were both a bit off — he thought I would need 11 skeins (65 grams) and I thought I would need 9, when in fact I only needed 8. Then again, the 8 skeins made a slightly smaller rug when done by the pattern, so I kept on for a few more rounds and used one more skein to get the proper size.
The crochet part was easy — just rounds of double crochet with regular increases — and went very quickly. You can see that the wool I ordered was from a different dye lot than the first skeins from the store, but I don’t mind. The embroidery was a bit tedious and the fringe posed a new problem: this type of old-fashioned cotton sew-on fringe is very much not in fashion and hard to find in stores these days. I hate buying things on the Internet, so I asked my friendly wool-shop owner from the store where I bought the wool what she thought, or if it could be ordered through the store. She suggested hand-knotting the fringe with cotton yarn in a similar colour to the rug. (the fringe in the original seems to be white or a lighter colour). I was eager to get the thing done and not wait for more elements to arrive, so I did it. I like the result! It’s stringier than the original, of course, but it makes the rug look like a sort of friendly amoeba. I like that.
Wash-blocking it gently in cold water worked well and did not felt the wool. Also, it is going to live under my coffee table where it won’t get much foot traffic, so I’m not worried.
A good friend saw it and said, “Wow, it’s so ugly, I love it!” Which stung a bit, but I know what they meant. It’s really 1960s! But it also really goes well with my retro/vintage living room decor and I don’t think it’s ugly at all, just goofy. I’m very happy with the way it turned out.
Stitchcraft‘s August 1961 “Late Summer” issue had multiple cute, easy embroidery and tapestry projects. Mine was this little set of rose sprays. To show the versatility of the designs, the magazine usually had directions for and photos of the designs made on different items: a cushion and/or tray cloth, for example. Overall, there was a huge range of homewares that could potentially be embroidered: an apron, a place mat, a chair-back, a wall hanging, a “nightie case”, a project bag, a finger plate, a fire screen, even a room divider or a waste-paper basket cover. This issue added a new idea to the mix: the rose-spray design on a lampshade, complete with a pattern to cut out, sew and fringe the lampshade cover itself.
Close-up photo from the magazine. Sadly, there was no colour photo.
I don’t need an embroidered lampshade (or finger plate, or fire screen, or tray cloth, or chair-back, or waste-paper basket cover etc. etc.) and I have plenty of cushions and project bags, so I’m often at a loss when I see a nice embroidery pattern and don’t know what to put it on. I’ve made a couple of tablet cosies for myself or for presents for friends, or useful little bags to store “stuff”, but there are limits. I guess I could sell whatever I don’t need, but haven’t gone that route yet. So what to make?
Vegetable bags.
I stopped using plastic bags for vegetables long ago, which wasn’t difficult as I pretty much only buy vegetables at the farmer’s market or organic supermarket, both of which put vegetables in little paper bags (for small or sandy things like mushrooms, potatoes or little tomatoes) or don’t package them at all (I just put them into my basket/cloth shopping bag loose). I try to re-use the paper bags, but my best bag of all is a little linen drawstring sack that originally held soapberry nuts for washing laundry. It’s tough, washable and the perfect size for holding the right amount of potatoes or green beans or whatever. And both the organic supermarket and, incredibly, the regular supermarket in my neighbourhood have now stopped offering even little paper bags for vegetables, so time to make more bags!
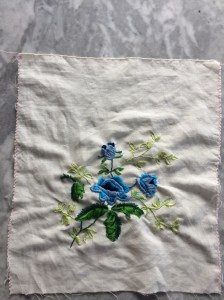
Of course, they don’t have to be embroidered, but why not? Cotton embroidery floss is machine-washable even at high temperatures and I have plenty of scraps and bits of plain linen or cotton materials that can be put to good purpose. The bag I made for this August project was made from a piece of linen from shoes, yes, shoes that a friend bought (the shoes came wrapped in this piece of fabric in the shoe box instead of in paper.) I had enough embroidery floss on hand, so this was an almost 100% up-cycled / didn’t have to buy anything new project. (I say almost because I bought the cord for the drawstrings — then realised I could have made monks’ cord or i-cord from leftover cotton yarn. Next time…)
The design is of blue roses, which don’t exist in the natural world but can be created by putting white roses in blue-tinted water for a few days. (Interestingly, this low-tech process is much more successful than trying to create blue roses via genetic engineering, which so far has only made purplish-lavender roses.) I think blue is an interesting colour choice for embroidered roses, because of course when you see blue flowers you don’t automatically think of roses. I love how the colours turned out though. The stitches are easy stem-stitch, satin stitch and long-and-short stitch. Of course I didn’t have the transfer, but the design was easy enough to copy onto the fabric freehand.
I’m really, really happy with this and look forward to making more unnecessarily pretty, but necessarily environmentally friendly vegetable bags in the future.
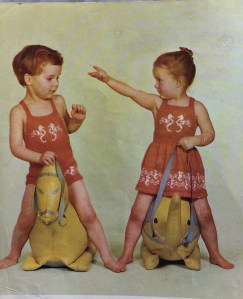
June 1961 was the issue with too many great projects in it and not enough time to make them all. My “official” project was this wonderful knitted blouse which took up the whole month, but there was also a very intricate appliquéd and embroidered cushion that will probably become a long-term learning experience project, as well as a great beach dress for a small child. Summer is waning, but I got the beach dress done.
There’s so much I love about this design: the sea horses, the buttoned straps in the back, not to mention the ridiculous poses and strange inflated? stuffed? animals that the kids in the photos are riding. Also: illustrations in the magazine, done by hand, with bubbles.
The pattern is for a 23-24 inch chest, with an 8 1/2 inch long skirt. The child I knit it for is a little thinner, but taller, so I made the width from the pattern and added 1 1/2 inches to the skirt length and made longer straps with multiple buttonholes for different length options/growing room.
I decided to make it in cotton instead of Nylox (Patons wool-nylon mix from the 1960s) or a modern equivalent. It is always, always a problem to find non-mercerised cotton that is fine enough to give 7 stitches to the inch. Thick, mercerised dishcloth cotton is always available, mercerised crochet cotton is always available, but what passes as 4-ply or fingering weight non-mercerised cotton is just too thick. I decided on Natura “Just Cotton” which is non-mercerised, soft, pretty and supposedly free of harmful substances (Oeko-Tex certification). The label says it gets 27 stitches in 4 inches but that is illusory. The yarn is 8-ply! I don’t know why they don’t use 4 strands, thus making it a true 4-ply fine cotton for soft, light garments. I got 6 1/2 stitches to the inch with some effort, but the resulting fabric is a bit stiffer than I would have liked.
On the first try, the first ball of turquoise ran out shortly after the bottom sea-horse band and I was worried that I wouldn’t have enough, so I started over and made the skirt less full. Of course, the skirt lost a lot of its swing and I ended up with a ball and a half left over at the end… I used some of the rest to make a little kerchief that the kid can wear on her head for extra sun protection and cuteness. Let’s just hope it stays warm enough for her to still wear it this year.


 My April project was the cardigan jacket, a.k.a. “matinee coat” from Stitchcraft’s April 1962 layette set “for an Easter baby.” The set included a dress, the jacket, bootees, a bonnet and a blanket to use as a pram cover, plus a sewn “pin-tidy” made out of a tiny baby doll with flannel and satin “skirts” to hold the safety pins for baby’s cloth nappies. The pin-tidy is a bit “uncanny valley” for my taste, but the knitted items are all lovely.
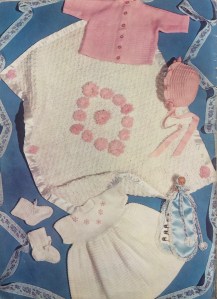 The colour is unusually dark for a baby garment, but I don’t this the friend whose baby-to-be I knit it for will mind — they wear a lot of black themselves. (Side note: I did make an all-black baby cardigan for a black-clothed metal fan father-to-be friend once, and he was thrilled, because he knew he would never find one in a store. Take note, baby clothing designers — there is a market out there!)
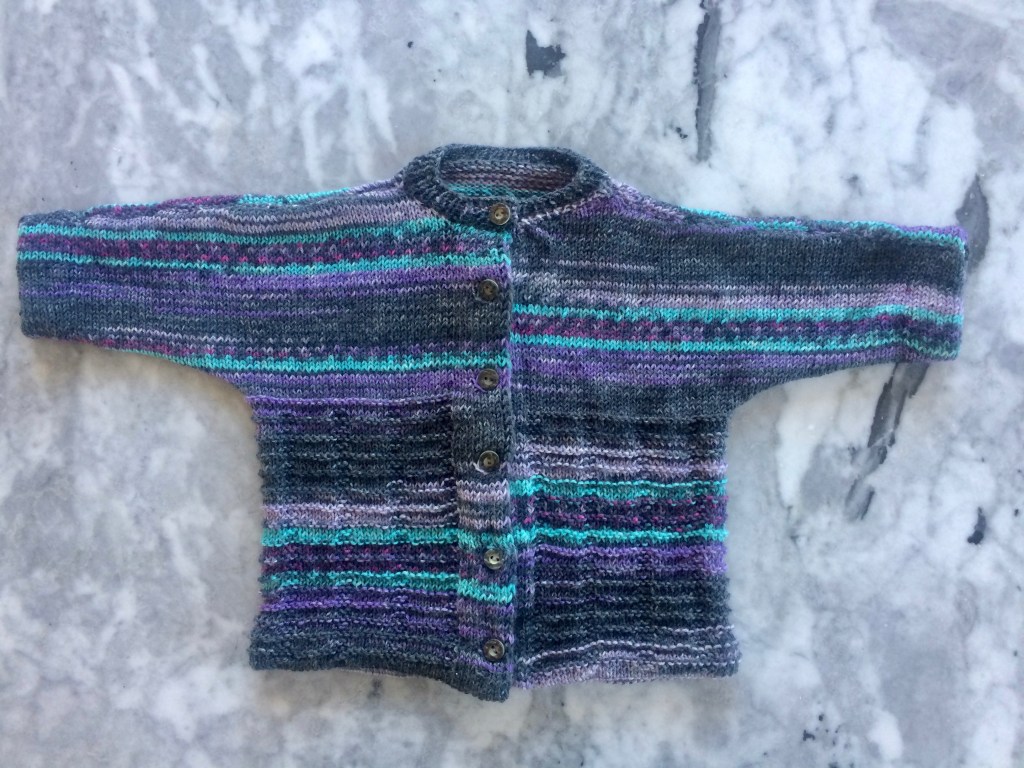
 Greetings from the Covid-19 lockdown! March 1962’s project sports the headline “Ready for the Easter Parade” in the magazine, but there are definitely not going to be any Easter parades in March 2020. I hope all of you, dear readers, are staying healthy and staying home.

 No, it’s not the menu choice for tonight’s dinner, don’t worry. My February 1962 was a little embroidered… animal , originally designed for a toddler’s “feeder” and which I adapted into a bag for vegetables/small projects/”stuff”. I say “animal” in this vague way because it is referred to as a “Squirrel” in the instructions, followed by more specific instructions on how to embroider the supposed squirrel’s beak and feathers. I can maybe, maybe forgive enough poetic license to call a squirrel’s mouth a “beak”, and the creature’s fluffy tail could be mistaken for a squirrel’s, but feathers… no. It also looks suspiciously like a chicken in the photo! So, not a squirrel, but a chicken and a proofreading error.


 I hang out a lot in the “All Things Vintage” forum on
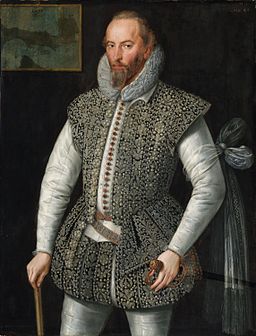
 Adding to the frustration: as always, no matter how small the needles or how thin the wool, I could not knit tightly enough to get the minuscule gauge, which itself was only given as a “life-size” photograph in the pattern. Of course, I am also larger than the 34-35 inch bust given in the pattern, but how much larger the garment, calibrated for how much larger the gauge? Right, lots of calculations, estimations, measurements upon measurements, and just plain guesswork. Plus the thing pulled together either more or less, horizontally or vertically, as it got larger — my gauge swatch (a pocket lining) was utterly useless. I had to start three times.
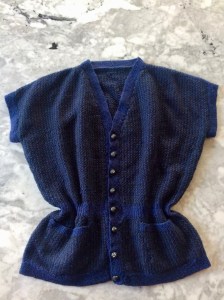

 UPDATE AND EDIT February 25, 2020: Project finished!
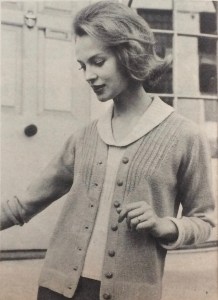 There were only two problems. Problem number one: Concept Silky Lace is only available in colours I don’t wear (shades of white and pastel) as well as orange (great, but I used it for the other project), a sort of light jeans blue (OK, but not exciting) and purple. Purple is not my best colour, but given the limited choice and the fact that I really wanted to use this specific yarn, I went with it. That led to problem number two: there were only two balls of it in the store and they had to order more. Unsure whether the two additional balls I ordered would be from the same dye lot or if it would make a difference if they weren’t, I started by making the sleeves with the yarn I had, and waited.
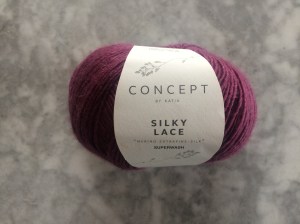 It took more than two weeks for the yarn to arrive, so I was woefully behind. Also, the yarn that arrived was from a different dye lot, so I wasn’t sure how to camouflage the colour changes or if I even had to. After making the ribbing for the body in the “old” yarn and the body (stockinette stitch, and I decided to do it in rounds to go faster) with the new yarn and not noticing any difference, I just used up the old yarn and moved onto the new in the fancy-yoke part. It worked fine and didn’t make a stripe — thank you Katia for your excellent colour-match dye work.
 Once the project got started, it was finished very quickly. I was worried about the size, as it seemed to stretch quite a lot width-wise and I though it would be too wide and baggy. Once it was bound off and sewn, it was fine. I made it an inch longer in the body than it said to make it in the pattern, but I could have made it even longer — people were really short fifty years ago!?! Blocking helped stretch out the length.


 Post updated on December 28, 2019: Finished!
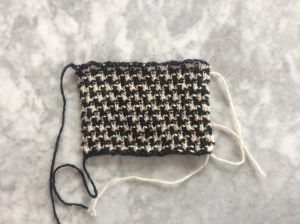 The pattern calls for Patons Rimple DK (nubbly wool with synthetic) in black and Patons Totem DK (smooth “crepe” wool) in “Oakapple”. I admit I had never heard of an an oak apple before and looking at the black-and-white photo, it’s it’s hard to tell what exact colour was used — but it’s obviously some kind of whitish-beige. Which, as it turns out, is pretty much the colour of at least some kind of real
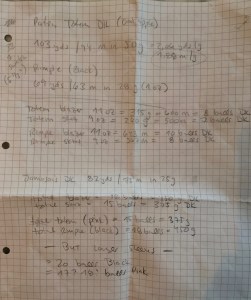
 The knitting itself was a dream, though — so nice to work in DK after the fingering-weight projects of recent months past. It knitted up fast and easily and the fabric feels good in the hands. The pattern is quite clear and simple. Even the set-in pockets with flaps and the buttonholes (such a nightmare, always) were successful and the buttonholes evenly spaced. (I used the method that Stitchcraft always suggests: make the side without buttonholes first, then mark the button positions with pins and make the buttonholes to correspond. With a repeating pattern like this one, you can count the rows between buttonholes quite accurately.)
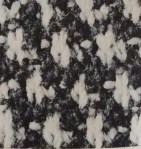 After putting it together and blocking, the back piece had stretched width-wise, the sleeves had stretched length-wise and the sleeve cap didn’t fit well. Also, the shoulders were too wide. What to do? I didn’t want to cut the knitted fabric, nor do everything over. My solution: I re-sewed the sleeve caps in where the shoulder and sleeve line should have fallen, then tucked the resulting extra fabric in towards the neck on the front piece to make a sort of built-in shoulder pad. I normally hate shoulder pads and rip them out of everything I buy, but in this case it turned the droopy, sloppy-looking shoulder into a crisp, tailored-looking one. I’m so sorry I forgot to take a “before” picture — the change was pretty dramatic.
 To fix the back width, I added two vertical darts. That wasn’t as elegant as it could have been if I had knitted them in, but it was fine. The sleeve-cap changes pulled the sleeves in a little shorter, so I just finished the cuffs with the same binding that I used for the rest. The buttons are modern, but aren’t they perfect? I even remembered to buy a few extra.
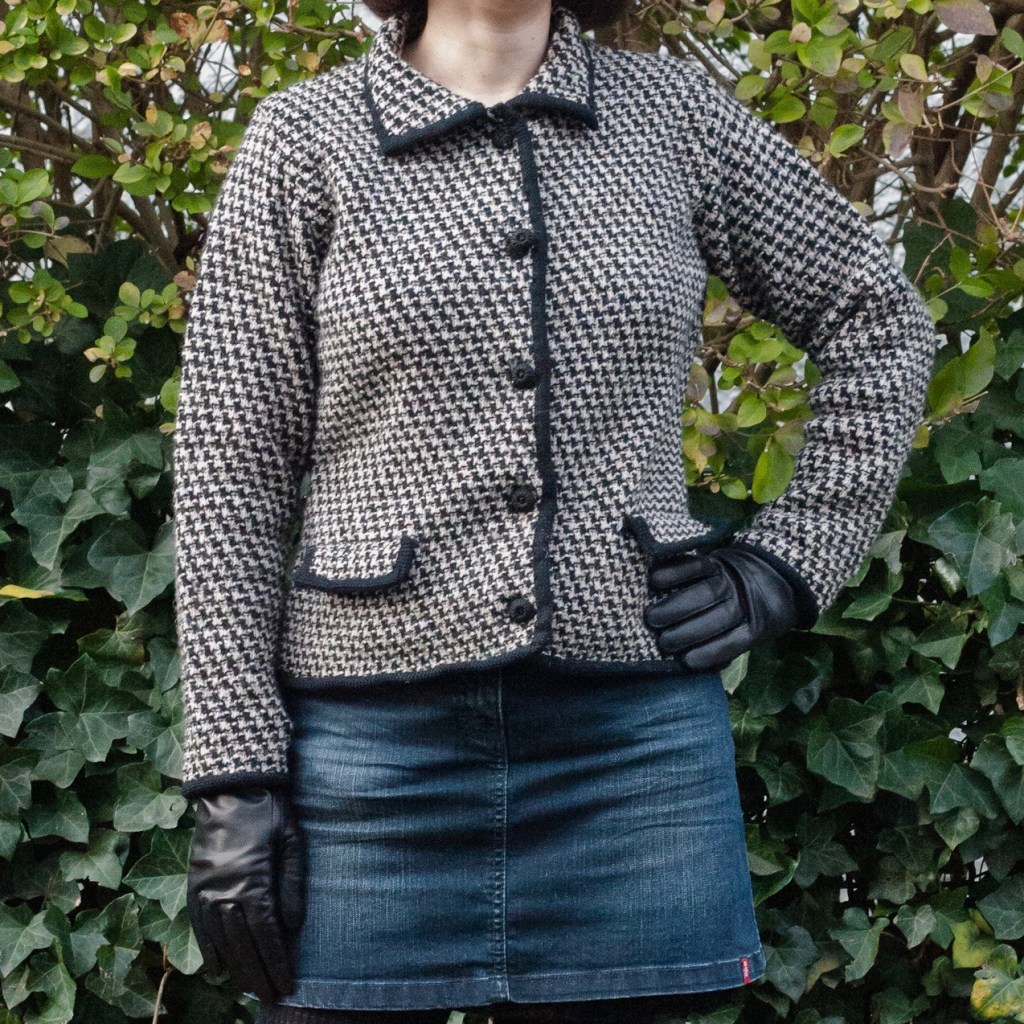
 There’s always somebody having a baby, and I do try to make something nice for all my friends’ and colleagues’ newborns. Sometimes I don’t manage to finish something until they are out of the newborn stage, which is why it’s nice to have patterns for larger babies! This dolman-sleeve cardigan, made in the smaller size, should fit a 22 inch chest, which should be fine for this particular eight- or nine-month old.
 The little leaf motifs up the front sides are quite easy and don’t require any cabling or special fuss. You just work into one stitch 5 times on one row, then work those 5 stitches in stockinette (on the reverse-stockinette background) for a few rows before closing off the leaf with decreases. The lace strips on the sides are plain yo, k2tog alternating with k2tog tbl, yo, worked on the right-side rows.
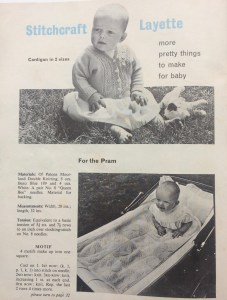 I used Jamieson’s wonderful Shetland Spindrift from a multicoloured stash that I had bought from a nice person on Ravelry. Some may say that Shetland wool is too tough for babies, but it does get softer with washing and since it won’t be worn against the skin, I think it will be fine. The colour — Buttermilk — is really beautiful, a pale yellow ever-so-slightly marled with shades of pink and winter white.
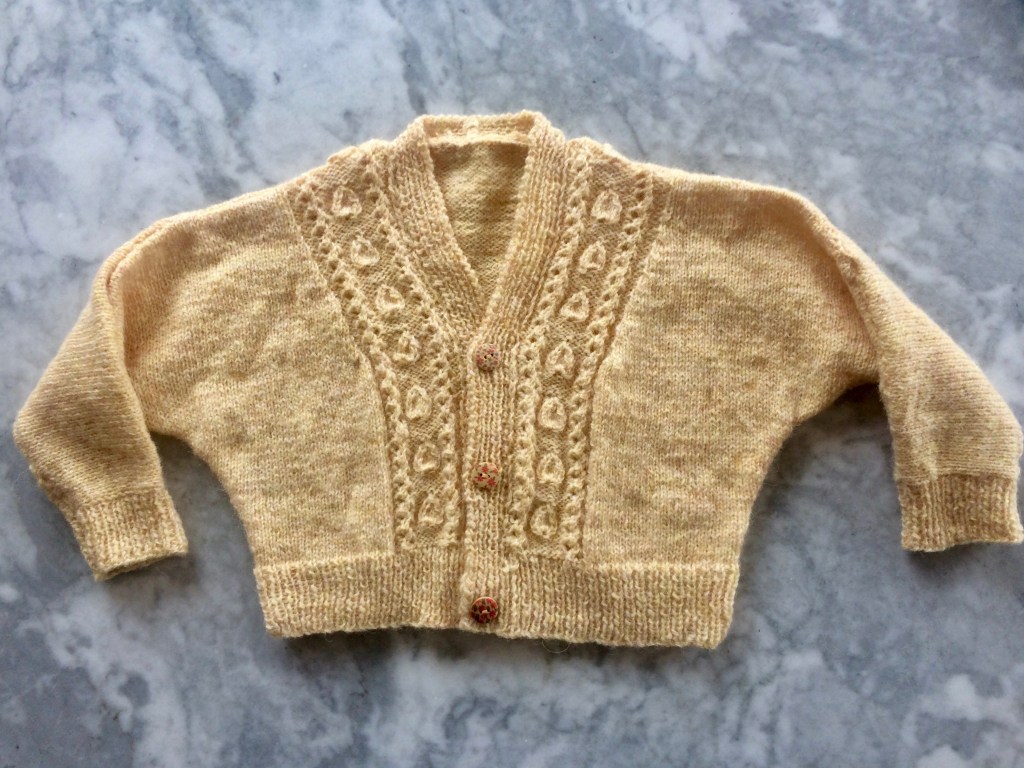
 September’s project (finished only one day late) was this extremely 1960s crocheted green rug with black, white and orange embroidered spots (they “add a modern touch”) and fringe. Loved it!
 Felting wool, like rug wool, is bulky, mostly unprocessed, coarse and strong, so that was my first thought… but would it felt with use or washing? I decided to take the chance, since it’s easy to find, inexpensive and there happened to be some in the perfect colour at my local yarn shop. It’s the exact same shade of green as
  The crochet part was easy — just rounds of double crochet with regular increases — and went very quickly. You can see that the wool I ordered was from a different dye lot than the first skeins from the store, but I don’t mind. The embroidery was a bit tedious and the fringe posed a new problem: this type of old-fashioned cotton sew-on fringe is very much not in fashion and hard to find in stores these days. I hate buying things on the Internet, so I asked my friendly wool-shop owner from the store where I bought the wool what she thought, or if it could be ordered through the store. She suggested hand-knotting the fringe with cotton yarn in a similar colour to the rug. (the fringe in the original seems to be white or a lighter colour). I was eager to get the thing done and not wait for more elements to arrive, so I did it. I like the result! It’s stringier than the original, of course, but it makes the rug look like a sort of friendly amoeba. I like that.
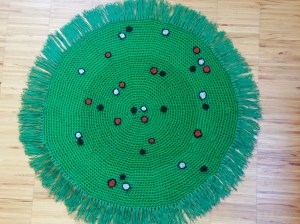 Wash-blocking it gently in cold water worked well and did not felt the wool. Also, it is going to live under my coffee table where it won’t get much foot traffic, so I’m not worried.
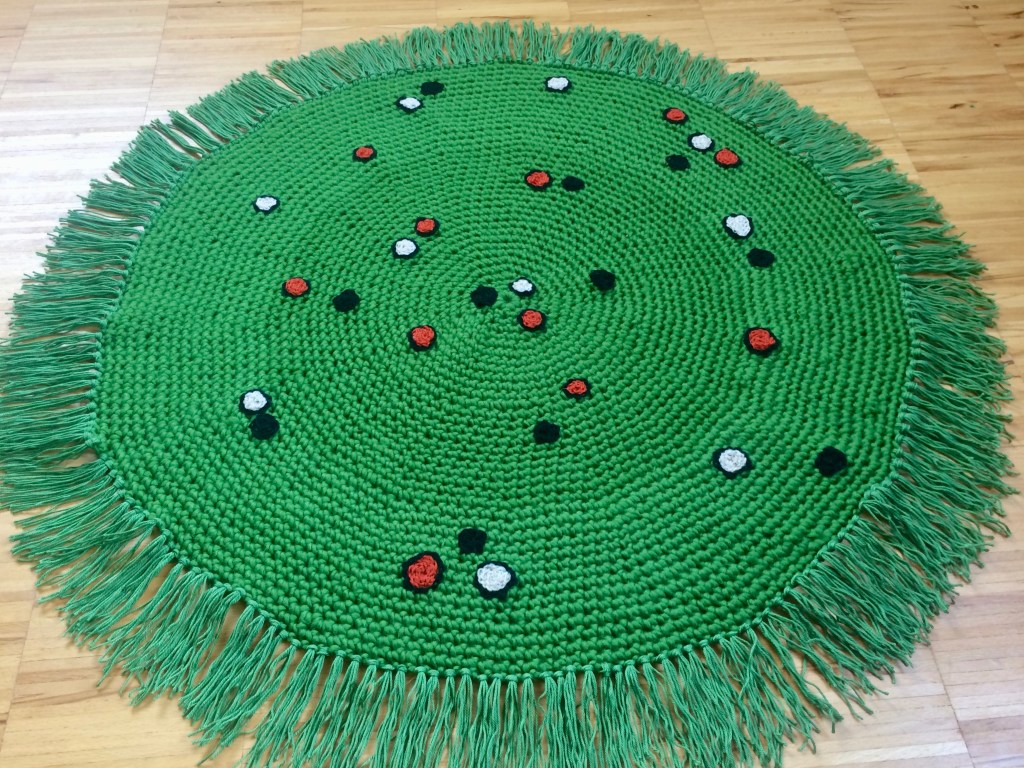
 Stitchcraft‘s August 1961 “Late Summer” issue had multiple cute, easy embroidery and tapestry projects. Mine was this little set of rose sprays. To show the versatility of the designs, the magazine usually had directions for and photos of the designs made on different items: a cushion and/or tray cloth, for example. Overall, there was a huge range of homewares that could potentially be embroidered: an apron, a place mat, a chair-back, a wall hanging, a “nightie case”, a project bag, a finger plate, a fire screen, even a room divider or a waste-paper basket cover. This issue added a new idea to the mix: the rose-spray design on a lampshade, complete with a pattern to cut out, sew and fringe the lampshade cover itself.
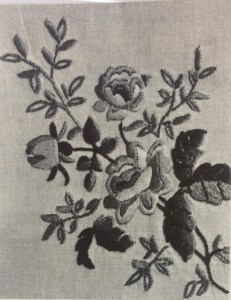
 Of course, they don’t have to be embroidered, but why not? Cotton embroidery floss is machine-washable even at high temperatures and I have plenty of scraps and bits of plain linen or cotton materials that can be put to good purpose. The bag I made for this August project was made from a piece of linen from shoes, yes, shoes that a friend bought (the shoes came wrapped in this piece of fabric in the shoe box instead of in paper.) I had enough embroidery floss on hand, so this was an almost 100% up-cycled / didn’t have to buy anything new project. (I say almost because I bought the cord for the drawstrings — then realised I could have made monks’ cord or i-cord from leftover cotton yarn. Next time…)
 The design is of
 June 1961 was the issue with too many great projects in it and not enough time to make them all. My “official” project was
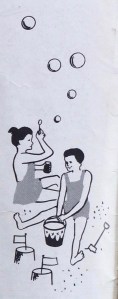
 I decided to make it in cotton instead of Nylox (Patons wool-nylon mix from the 1960s) or a modern equivalent. It is always, always a problem to find non-mercerised cotton that is fine enough to give 7 stitches to the inch. Thick, mercerised dishcloth cotton is always available, mercerised crochet cotton is always available, but what passes as 4-ply or fingering weight non-mercerised cotton is just too thick. I decided on Natura “Just Cotton” which is non-mercerised, soft, pretty and supposedly free of harmful substances (Oeko-Tex certification). The label says it gets 27 stitches in 4 inches but that is illusory. The yarn is 8-ply! I don’t know why they don’t use 4 strands, thus making it a true 4-ply fine cotton for soft, light garments. I got 6 1/2 stitches to the inch with some effort, but the resulting fabric is a bit stiffer than I would have liked.


