 This year (1960 or 2018, take your pick) draws to a close with Stitchcraft’s “Christmas Issue”, which, as you may expect, is full of holiday-themed novelties to decorate and give.
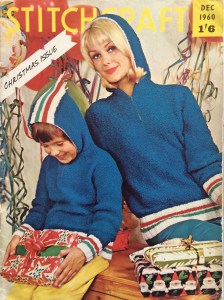
That said, the hoodies on the cover are surprisingly modern and not “Christmas sweaters” in the sense we usually think of them at all. If I just saw a photo of them without the festive vintage backdrop, or the “DEC 1960” in the cover corner, I would be hard-pressed to say from what decade they came from. You could sell them in a regular modern store today and nobody would think they were a vintage design! I love the little tuft on the kid’s hood, too. They are made in nubbly Rimple yarn, still a hit and always featured somewhere in each issue.
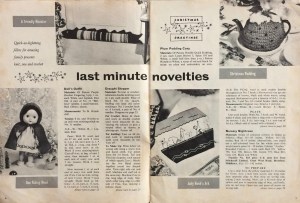
There are “gay ideas” for festive party table decorations of all types: a floral tablecloth for a tea party, a merry-go-round tea cosy for the “Nursery Party” and table sets with playing cards as napkin holders for the grown-ups. “The last minute novelties” take on a fairy-tale theme, with a Red Riding Hood doll, a Noah’s Ark nightcase, a friendly draught-stopping snake and — for your holiday Dickens bedtime reading — a tea cosy that looks like a plum pudding, complete with attached crocheted plate! More pious readers can make an appliqué wall hanging of the Three Wise Men and heathens can make an embroidered wastebasket cosy with a Sagittarius theme (this month’s astrological sign).
Of course, one never has enough time in the holiday season to make everything perfectly, so if you are “really stumped for time” you can make the wall hanging “in bright, shiny papers” (instead of felt), “cutting out the shapes and sticking them down, then adding cut-out strips, etc., for the finishing touches.”
For those who have the time, or don’t go all-out for holiday decorations, there are the usual assortment of knitting projects, starting with a lovely warm dress-booties-mittens set for a baby. I do admire her elegant mitts, but I’m guessing that in real life, they don’t stay on a baby any longer than it takes to take a photo. Older kids can get a striped jumper in a fantastic, very modern colour combination.
Teenagers haven’t been forgotten either, and can enjoy these Italian-inspired colour designs with added embroidery on the young woman’s jumper. I really like both of these designs! The young man’s jumper is fun without being too flashy, and with a little tweaking, would work well on a woman’s figure, with the dark colour band starting just under the bust line. There’s even a little extra “how-to” lesson on embroidering knits, which is still perennially in fashion at this time.
 Adult women, having hopefully embraced the “new length” (long) and “new sleeve style” (3/4 or 7/8) from last issue, can get ready for Paris’ “new necklines” — a high turn-down-and-rib combination or a buttoned-up turtle (polo) neck. No turn-down collars this time — are they on the way out? There’s a new yarn to go with them, Cameo Crepe, which is smooth and less “hairy” than other wools, for good stitch definition.
All this new fashion detailing can be admired in the two-colour twin set from the inside back cover, and to go under it all, why not knit yourself a lovely warm woollen vest (camisole)? I don’t mean that sarcastically — they are really the best! I made a woollen lace under-dress (slip) last year and it is heaven in a cold, damp climate.
It’s hard to decide what to make from this issue. Lots of the items are cute and fun, but nothing jumps out at me that I absolutely have to make. The plum pudding cosy is so silly that it’s cool, but I don’t use tea cosies and it would be a lot of work for a gag. The snake is cute and useful, but I don’t have odds and ends of double knitting at the moment and I do in fact already have a stuffed snake who occasionally gets put to work plugging a “leaky” window. I also have plenty of jumpers and even wollen underclothes (s. above), so don’t need more. I do have a hundred grams of very nice, hand-dyed green fingering wool in search of a project, so maybe I’ll make the baby dress.
In the meantime, Happy Holidays to all my readers! May everything you celebrate be jolly and festive.
 After January’s time- and labor-intensive pullover for me, I wanted to make something quick and easy in February. And there’s always a friend, colleague, or relative having a baby, so I made this simple ” Tiny Cardigan” from the cardigan and slipper set.
 The cardigan has a basic bottom-up raglan construction with the twisted ribbing featured in January’s Snowflake Sweater. I made it in one piece from the bottom up to avoid seams, and was so busy trying to read the front, back, and sleeve directions simultaneously while working the yoke that I forgot to make the little twisted-rib sleeve insertions that would have made this otherwise very basic jacket a little bit more interesting. Whoops! But by the time I realised my mistake, it was already almost done, and I have a feeling this wool really does not like to be frogged. I pepped up the plain marble-grey colour of the jacket with some red flower buttons.


 January’s project was — like


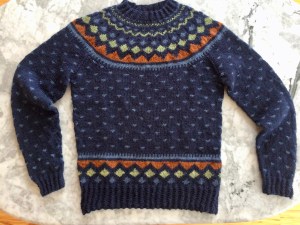 After thinking it over, the most reasonable course was to work the little bit of pre-yoke between the armhole bind-offs and patterned yoke back and forth with raglan decreases as written, but beginning the front neck shaping (pre-yoke, concurrent with the raglan decreases) an inch or so lower than the back. That preserved the proper stitch count, let the sweater hang better, and shortened the yoke a bit. I didn’t mind shortening the yoke, as I like sweaters to be snug under the arms and not too high on the neck. I didn’t need a zipper, so I made the patterned yoke entirely in the round.
 It worked out perfectly! I could hardly believe it. Raglans and round yokes may be somewhat forgiving on the body, but it is a fundamentally tricky mathematical game to make all the interdependent factors of width, depth, and pattern repeat come out right, so I was really proud of myself for making it work. My only other modifications were on the sleeves (longer) and the waist shaping (original pattern had none, I started out narrower at the waist and increased gradually at the sides to give a more figure-flattering look.)
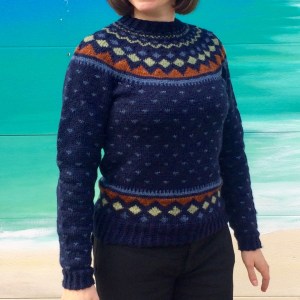


 My December project was a warm winter dress for a baby, part of the “Baby’s Special Outfit” of dress, bootees and mittens that continued the baby set started in the November 1960 issue.
 I used a lovely 100% wool that was hand-dyed by a fellow knitter in my local knitting group. She uses natural dyes from plants in her garden, or the bits of food items that are normally not eaten: walnut shells, onion skins, and so on. This green-melange wool was dyed with red onion skins! She did explain to me how that worked, but please don’t ask me, because I forgot the answer already. Anyway, it’s very nice. I was worried that it might be too scratchy for sensitive baby skin, but wash-blocking it and rinsing with hair conditioner softened it up quite a bit.

 In its earlier decades, Stitchcraft included a page of easy and economical recipes in each issue, mostly for tea-time cakes or pastries. The tradition ended around 1950, so none of my 1960s issues have a recipe page, but I do have a few magazines from the late 1940s and thought this would be a fun time to try out their “Christmas Cooking” ideas.


 November’s project was a little cloche hat, made out of leftover wool from July’s
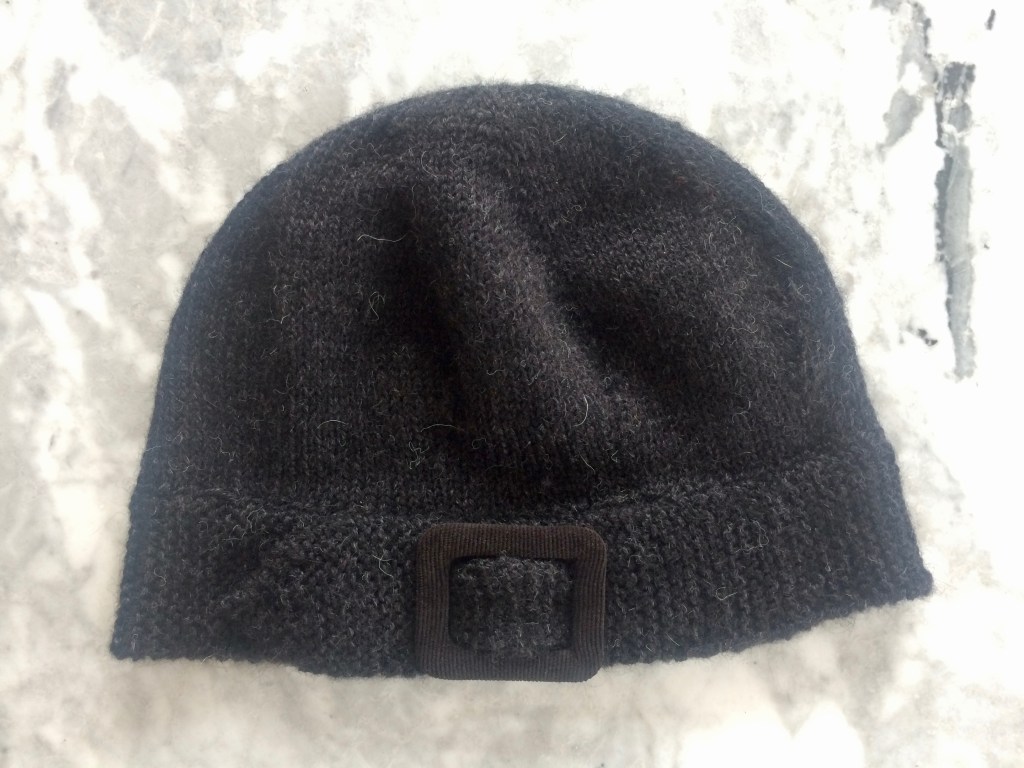
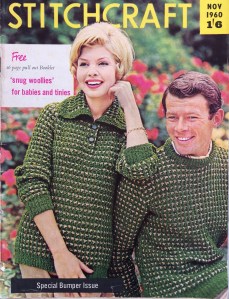 Brrrr! November 1960’s Special Bumper Issue” brings us “Colour for the Cold Days” and an extra 16-page pull-out booklet of baby woollies. Sadly, so sadly, the booklet from my copy of this issue has been pulled out long ago and is missing.


 Homewares are still in a weird phase. The working woman or baby-boom mum (and those were overlapping categories, then as now) of 1960 didn’t have the time or patience to make too many elaborate Jacobean embroidery pieces or huge, detailed tapestries, especially not right before the great rush to get Christmas presents under the tree, so the focus is on quick, easy-to-make novelties for gifts. The aesthetic sense does seem to get lost a bit, though, if you ask me.


 (I notice that Word Press does not recognise the word “chairback”. They have been out of fashion for too many years, I guess, having fallen victim to cheaper furniture, more frequent hair-washings and less
 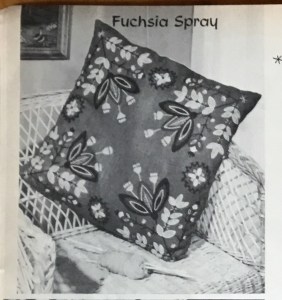 I really, really liked the idea of this embroidery project. Sadly, there was no colour photo, but the design is fun and very 1960 and I imagine the colours (Plum and Magenta with Cream and Fawn shades on deep green) to be quite striking. Working with tapestry wool instead of crewel cotton was (or would have been) another first, so all in all, I was eager to try it.


 October and November are really the best months for knitting. The weather has gotten cold enough that you really want to wear and make warm, woolly things, and there’s the nice “surprise” of packing the winter clothes out of storage, and so remembering what nice hand-knitted pieces you made in other years. At least, that’s my experience.


 September’s issue had a fantastic design of blackwork fish on a cushion. Blackwork is a type of embroidery combining counted-thread patterns (the fillings) with regular crewel embroidery stitches for outlines and details. I loved the way it looked but had never tried it before, so this was another Stitchcraft Sixties debut.


 The pillow was easy to make up, as I didn’t use piping (I thought the design was bold enough that a plain edge would be nicer.) All in all, I love the look of blackwork but don’t like the effort. I guess it’s easier on a looser-weave fabric where you can really see the holes in the weave to count them. It was made as a gift for a friend who I think will really like and appreciate it, and I feel happy giving it to her, as I am quite satisfied with the final result.
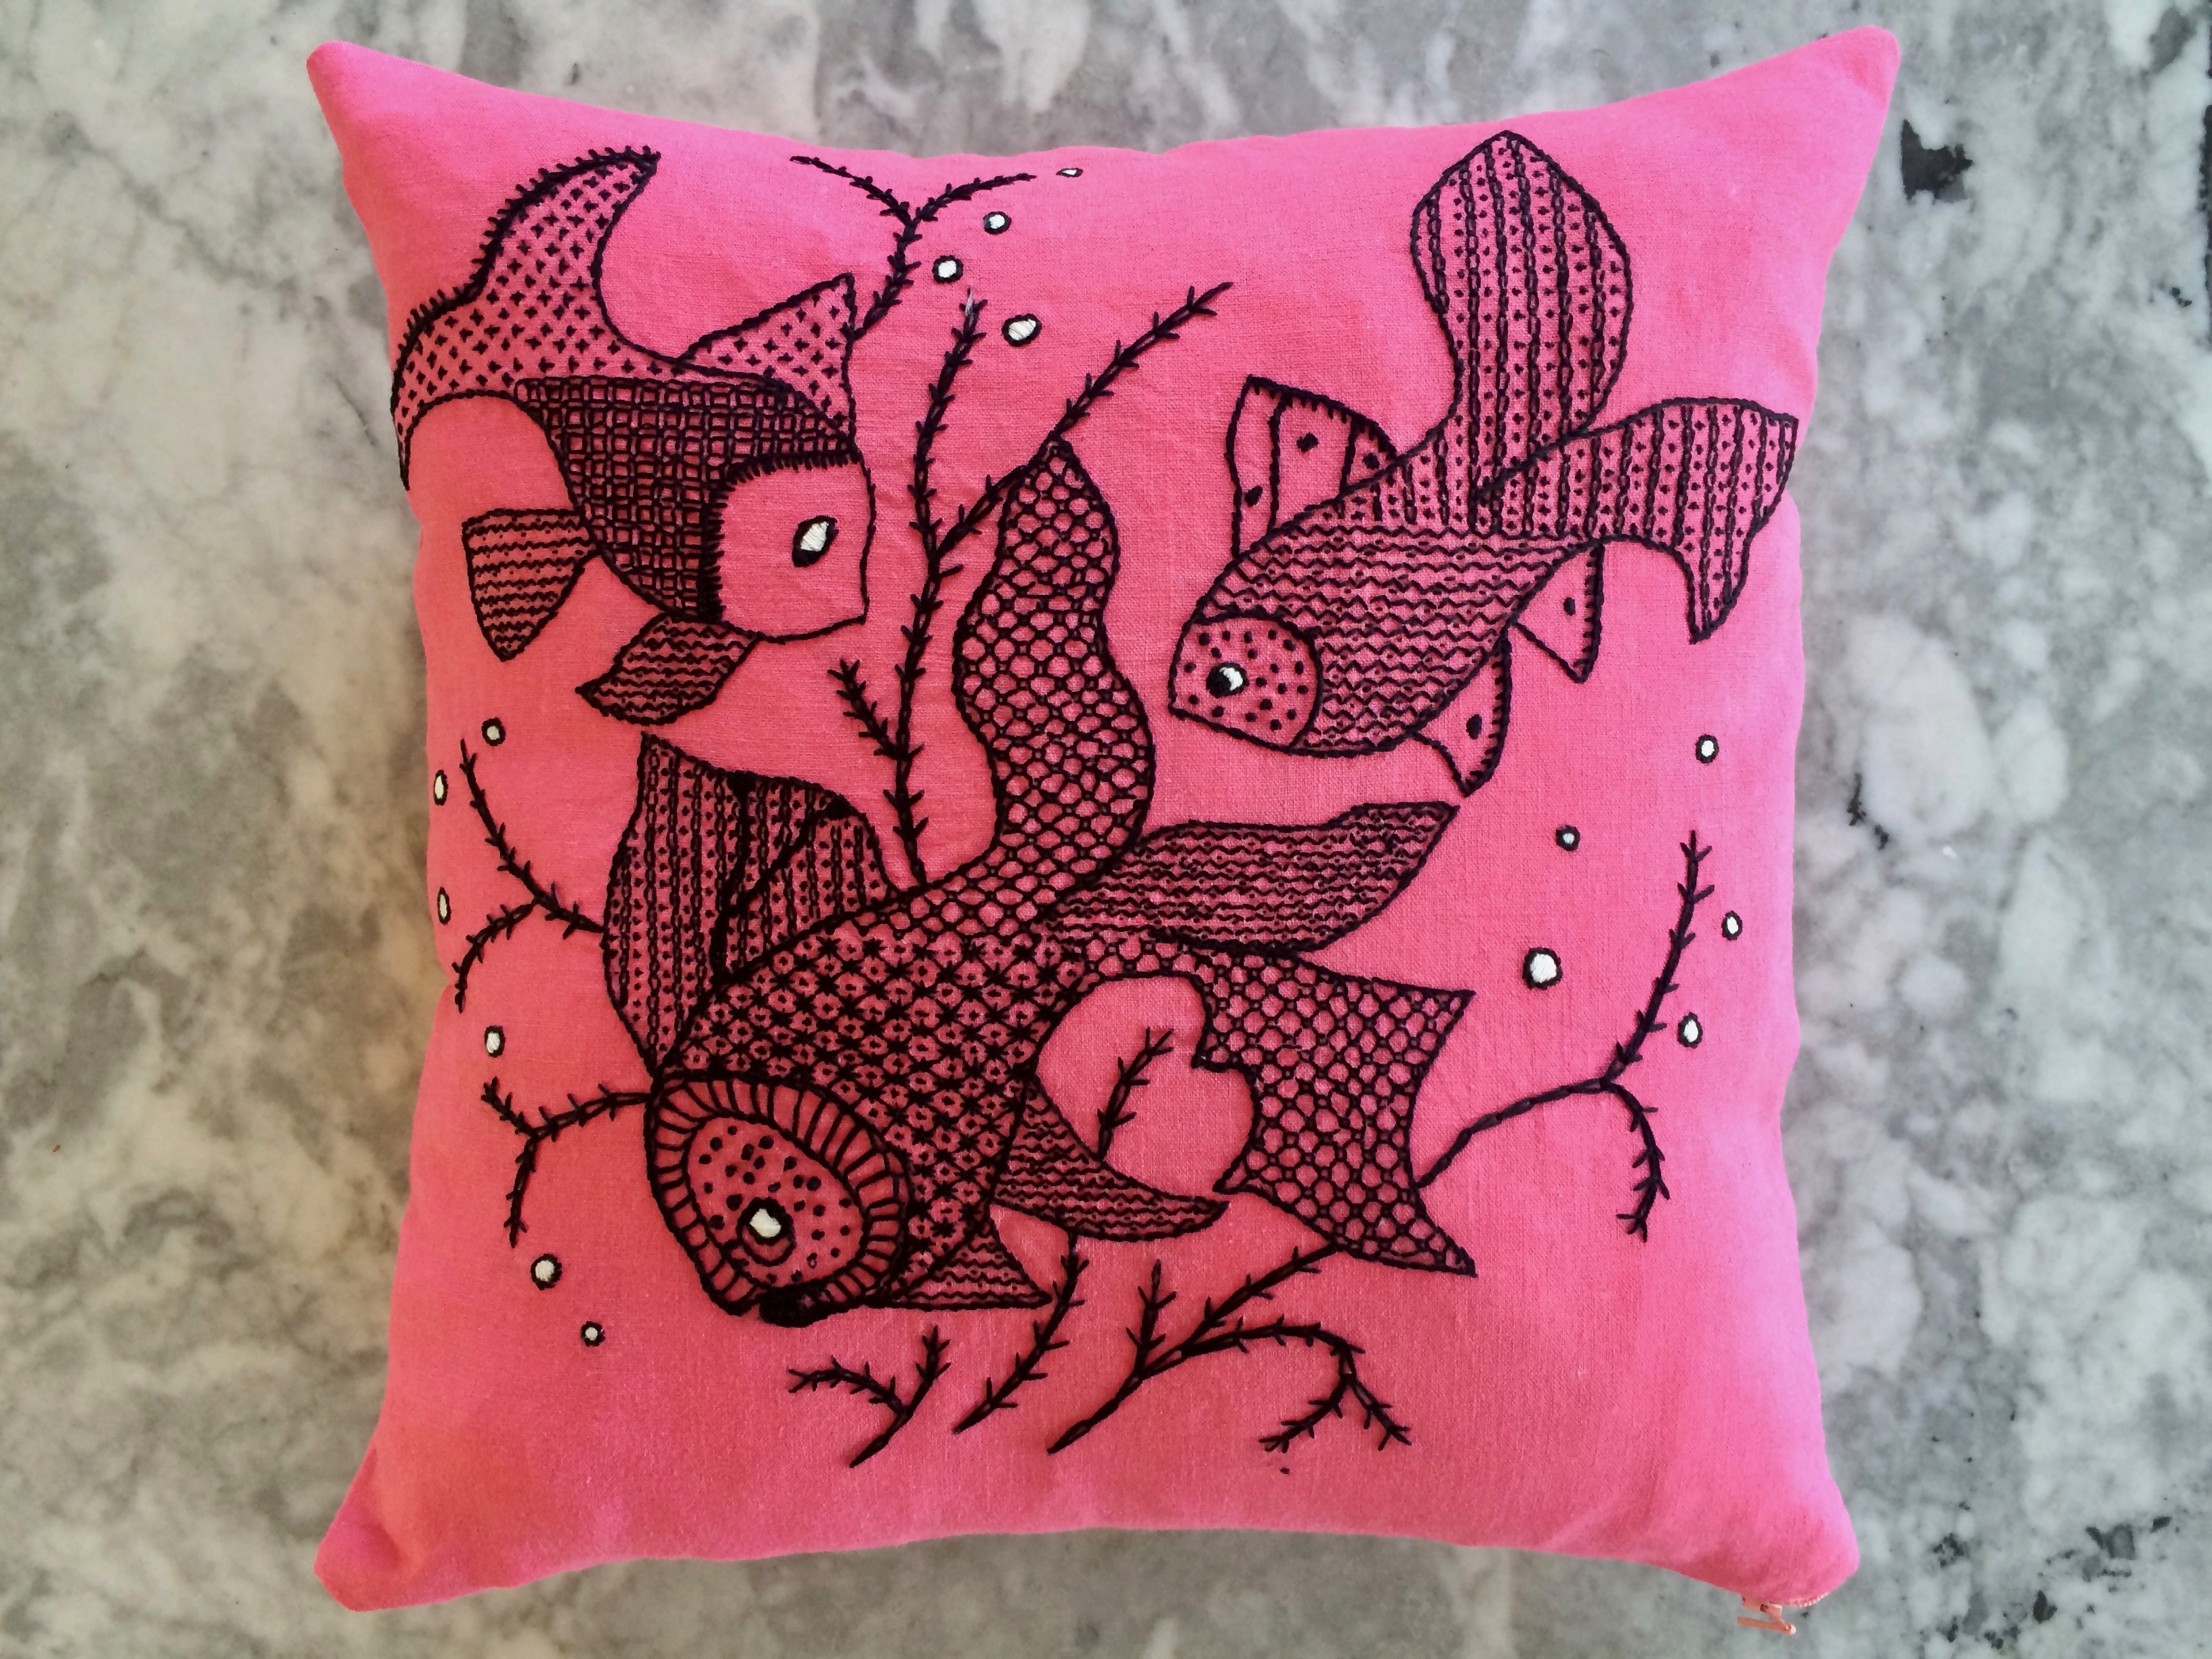
 September 1960 is supposedly a “Special Number” of autumn knitting fashions. I’m not sure what exactly makes it so special, since it doesn’t seem to have any more, or particularly different, projects than the average issue. I guess it’s special in that September is finally a bit cooler weather-wise, so you can start to make some nice wool garments for the colder months — very appropriate in 2018, where we had the summer to end all summers. Things have cooled down a bit now, so I’m looking forward to wearing my (still unfinished) projects from July and August soon.


 I loved this twinset at first sight. I loved the short raglan sleeves on the pullover, the cable-and-mesh panel on the front and the very original mock-turtleneck-meets-peter-pan collar. It’s one of the reasons I started this whole long-term Stitchcraft blog project, so I’m thrilled to have it come to life.
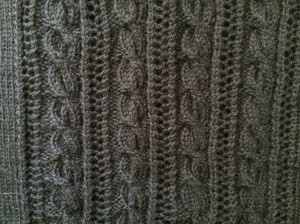 The cables have an interesting twist — literally. You put four stitches on the cable needle, knit the other four and then give the cable needle an extra 360 degree clockwise twist before knitting the stitches off of it. This gives them a cool extra definition. I forgot to do it once and it was almost unnoticeable — almost — but I didn’t want to rip back that far, so when everything was done I looped a little tiny thread around one of the cable stitches and just pulled it over more to the side and tacked it down by tying the thread ends in a knot on the wrong side. Look at the close-up picture above — can you tell which cable it was? I can’t on the finished garment. Good to know.


 The cardigan is somewhat more plain, as it doesn’t have the cables, but it makes such a lovely set with the pullover — not to mention it’s an excellent “everyday” cardigan to go with lots of other outfits. The sleeves came out a bit long — I was obviously over-compensating for my long arms and the fact that I always have to lengthen the arms a bit — but it looks just as good with the cuffs turned back, and I can turn them down for extra warmth under a coat and gloves. I hadn’t expected the raglan sleeves to have so much armhole depth. I thought about adding facing ribbon to the button bands, but it turned out to not be necessary, as the cardigan fits fine whether buttoned or unbuttoned. In short, I am thrilled with my new twin-set and it will surely get a lot of use this winter.


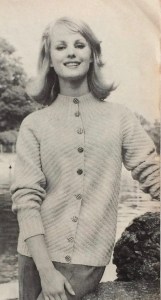
 This “charming and unusual design for larger sizes” (37-38 or 39-41 inch bust) features narrow dolman sleeves, crochet insertions, and horizontal bust darts.
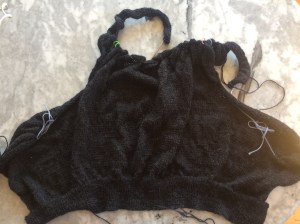 I was interested to see how it worked out with the dolman sleeves. When I think of “dolman sleeves”, I think of those 1950s, or worse, 1980s garments with a huge triangle of fabric under the arm, which must have been very uncomfortable and inconvenient to wear. But after my April 1960 blouse with the horizontal cap sleeves worked out so well, I was willing to give this one a try. And it turned out great! There is no more extra fabric under the arms than there would be with set-in sleeves, and the horizontal construction gives plenty of room in the upper chest/back area, where I am quite wide. I guess the secret lies with the number of stitches cast on for the sleeves per row — this one had 2×8 rows and then 10×16 rows, making the sleeves narrow and more horizontal, thus less triangle-like.
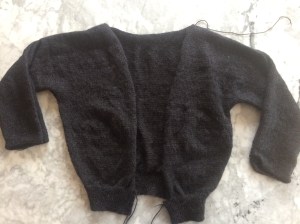 The knitting was slow-going at 7 stitches to the inch, but of course once the body was done, so were the sleeves. Seaming was a nightmare, as the yarn (Herriot Fine from
 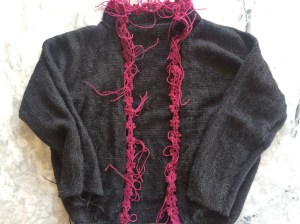 What took longer than expected was the whole crocheted edging-collar-button-band extravaganza. The crochet bands are extremely fiddly — they are crocheted onto each other as you go, it’s difficult to make them all exactly the same size, and each one needs its own, new piece of yarn. There are a total of 50 elements, so that’s 100 yarn ends to weave in right there. Then there’s the “inner” collar, the “outer” collar and the button bands, all of which are made separately and sewn on, and somehow need to end up symmetrical and fit properly on both sides. Of course, I sewed the collar on backwards the first time, forgot to switch the right and wrong sides at the collar fold, etc, etc. It all worked out in the end, though.
