EDIT March 6th, 2023: Finished!
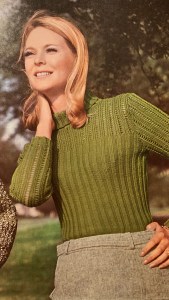
Since the February 1965 issue of Stitchcraft didn’t have any projects that interested me enough to want to make them, I spent this month working on some eternal WIPs. One of them was this “slim style sweater” in a lace-and-rib pattern from Stitchcraft’s January 1967 issue.
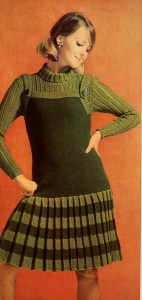
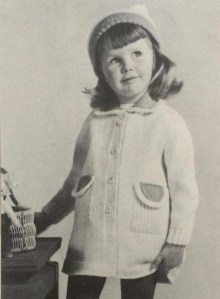
If “Fast Forward, January 1967” seems familiar to you, you are not wrong! I had already made this wonderful “Fashion for Tots” children’s jacket a couple of years ago, and tried my hand at a pleated skirt “pinafore” intended to go over this slim-style sweater (see picture below). The pinafore dress was, unfortunately, a failure, as the wool was too heavy and the finished garment just sagged and sagged. I ended up frogging the whole thing and using the wool for my very first blog project, the Green check jumper from January 1960. Notwithstanding the pinafore, the January 1967 issue is incredible and has so many projects in it that I want to make that it’s a go-to when I can’t find anything I like in a current issue.
The lace-and-ribs jumper was a perfect fit for my stash of green Slow Wool Lino yarn that I picked up a couple of years ago while working on a project in a different city. Sadly, the yarn has been discontinued, so the 300 grams I bought was all there was to be had in this colour (I managed to get 400 grams of salmon pink and made this lovely non-Stitchcraft Clarel last year, as well as 400 grams of bright purple and 300 grams of grey-brown for future projects unknown, at least). Would it be enough?
The body is made in 4×3 ribbing and the “lacy” pattern on the yoke and sleeves is made by doing two yarn-overs ater one another and knitting and purling them on the next row or round, making more of an open rib pattern rather than a true lace. Ribbing eats up yarn, but openwork uses less, so it was hard to call. In anticipation that it might not be enough, I made the sweater from the bottom up in the round and the sleeves knitted-on from the top down. That way, I could use a different wool for the sleeve cuffs and/or neck ribbing if necessary, or make short sleeves, or cap sleeves, or no sleeves.
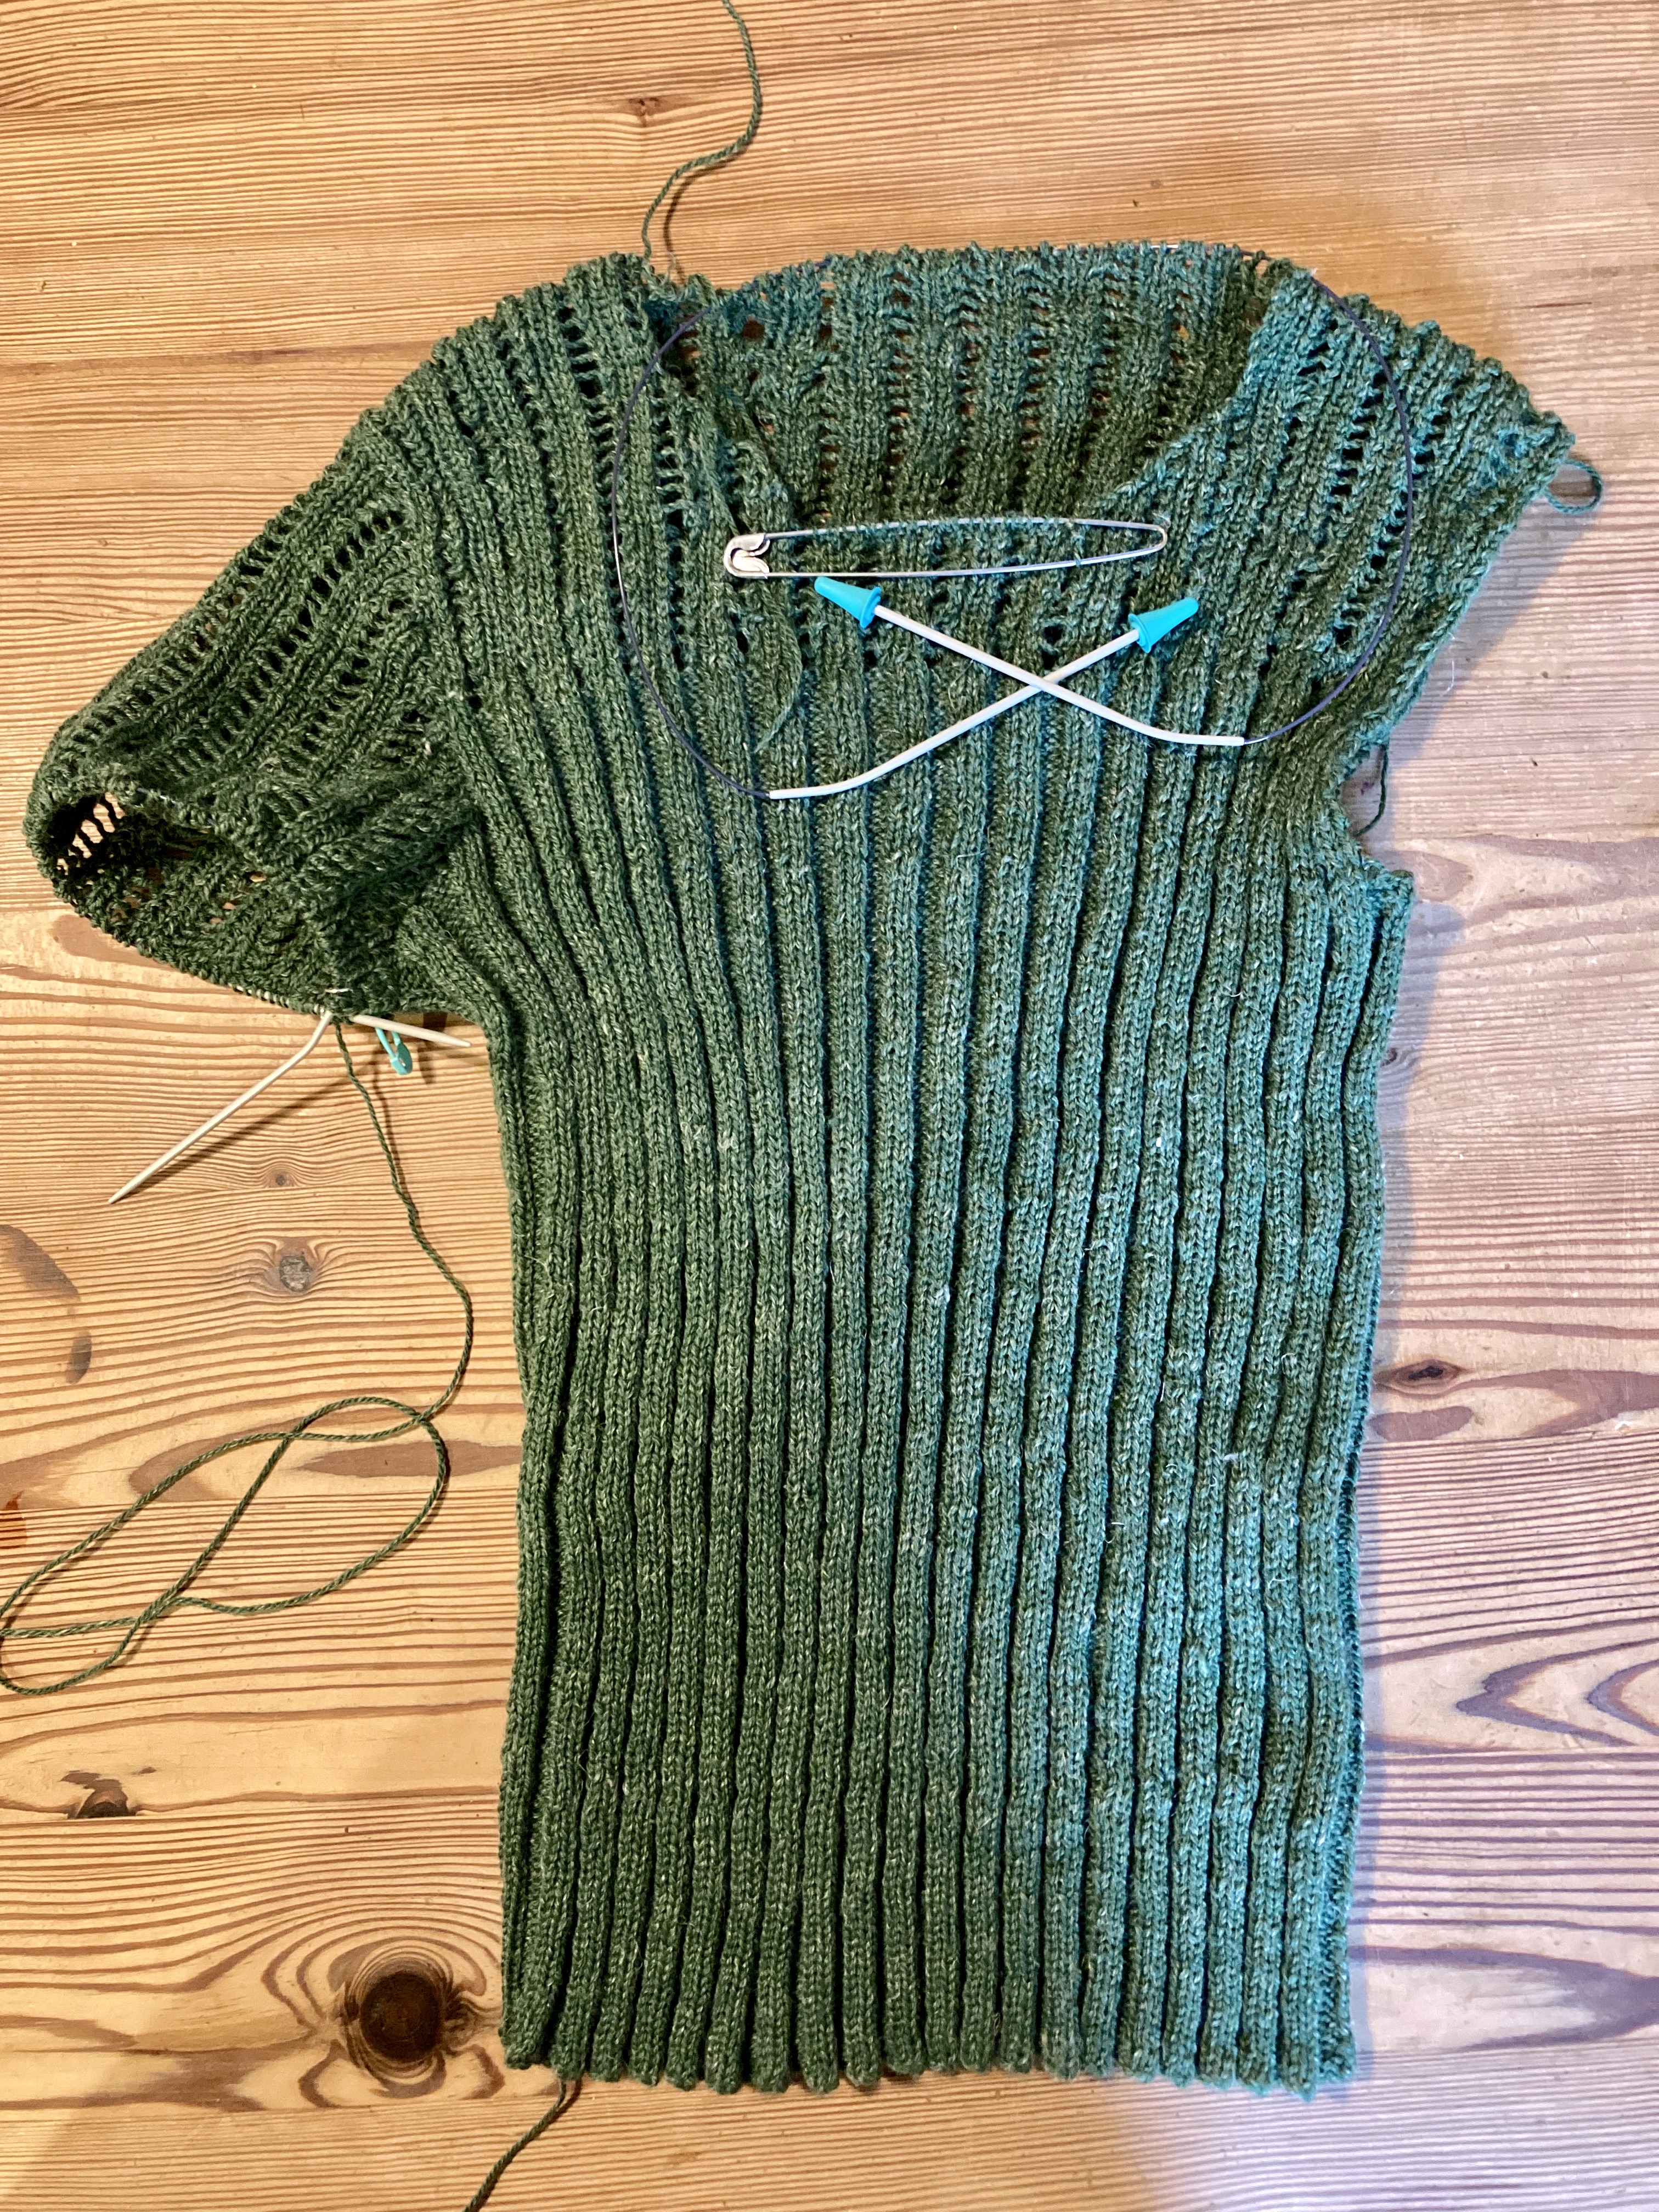
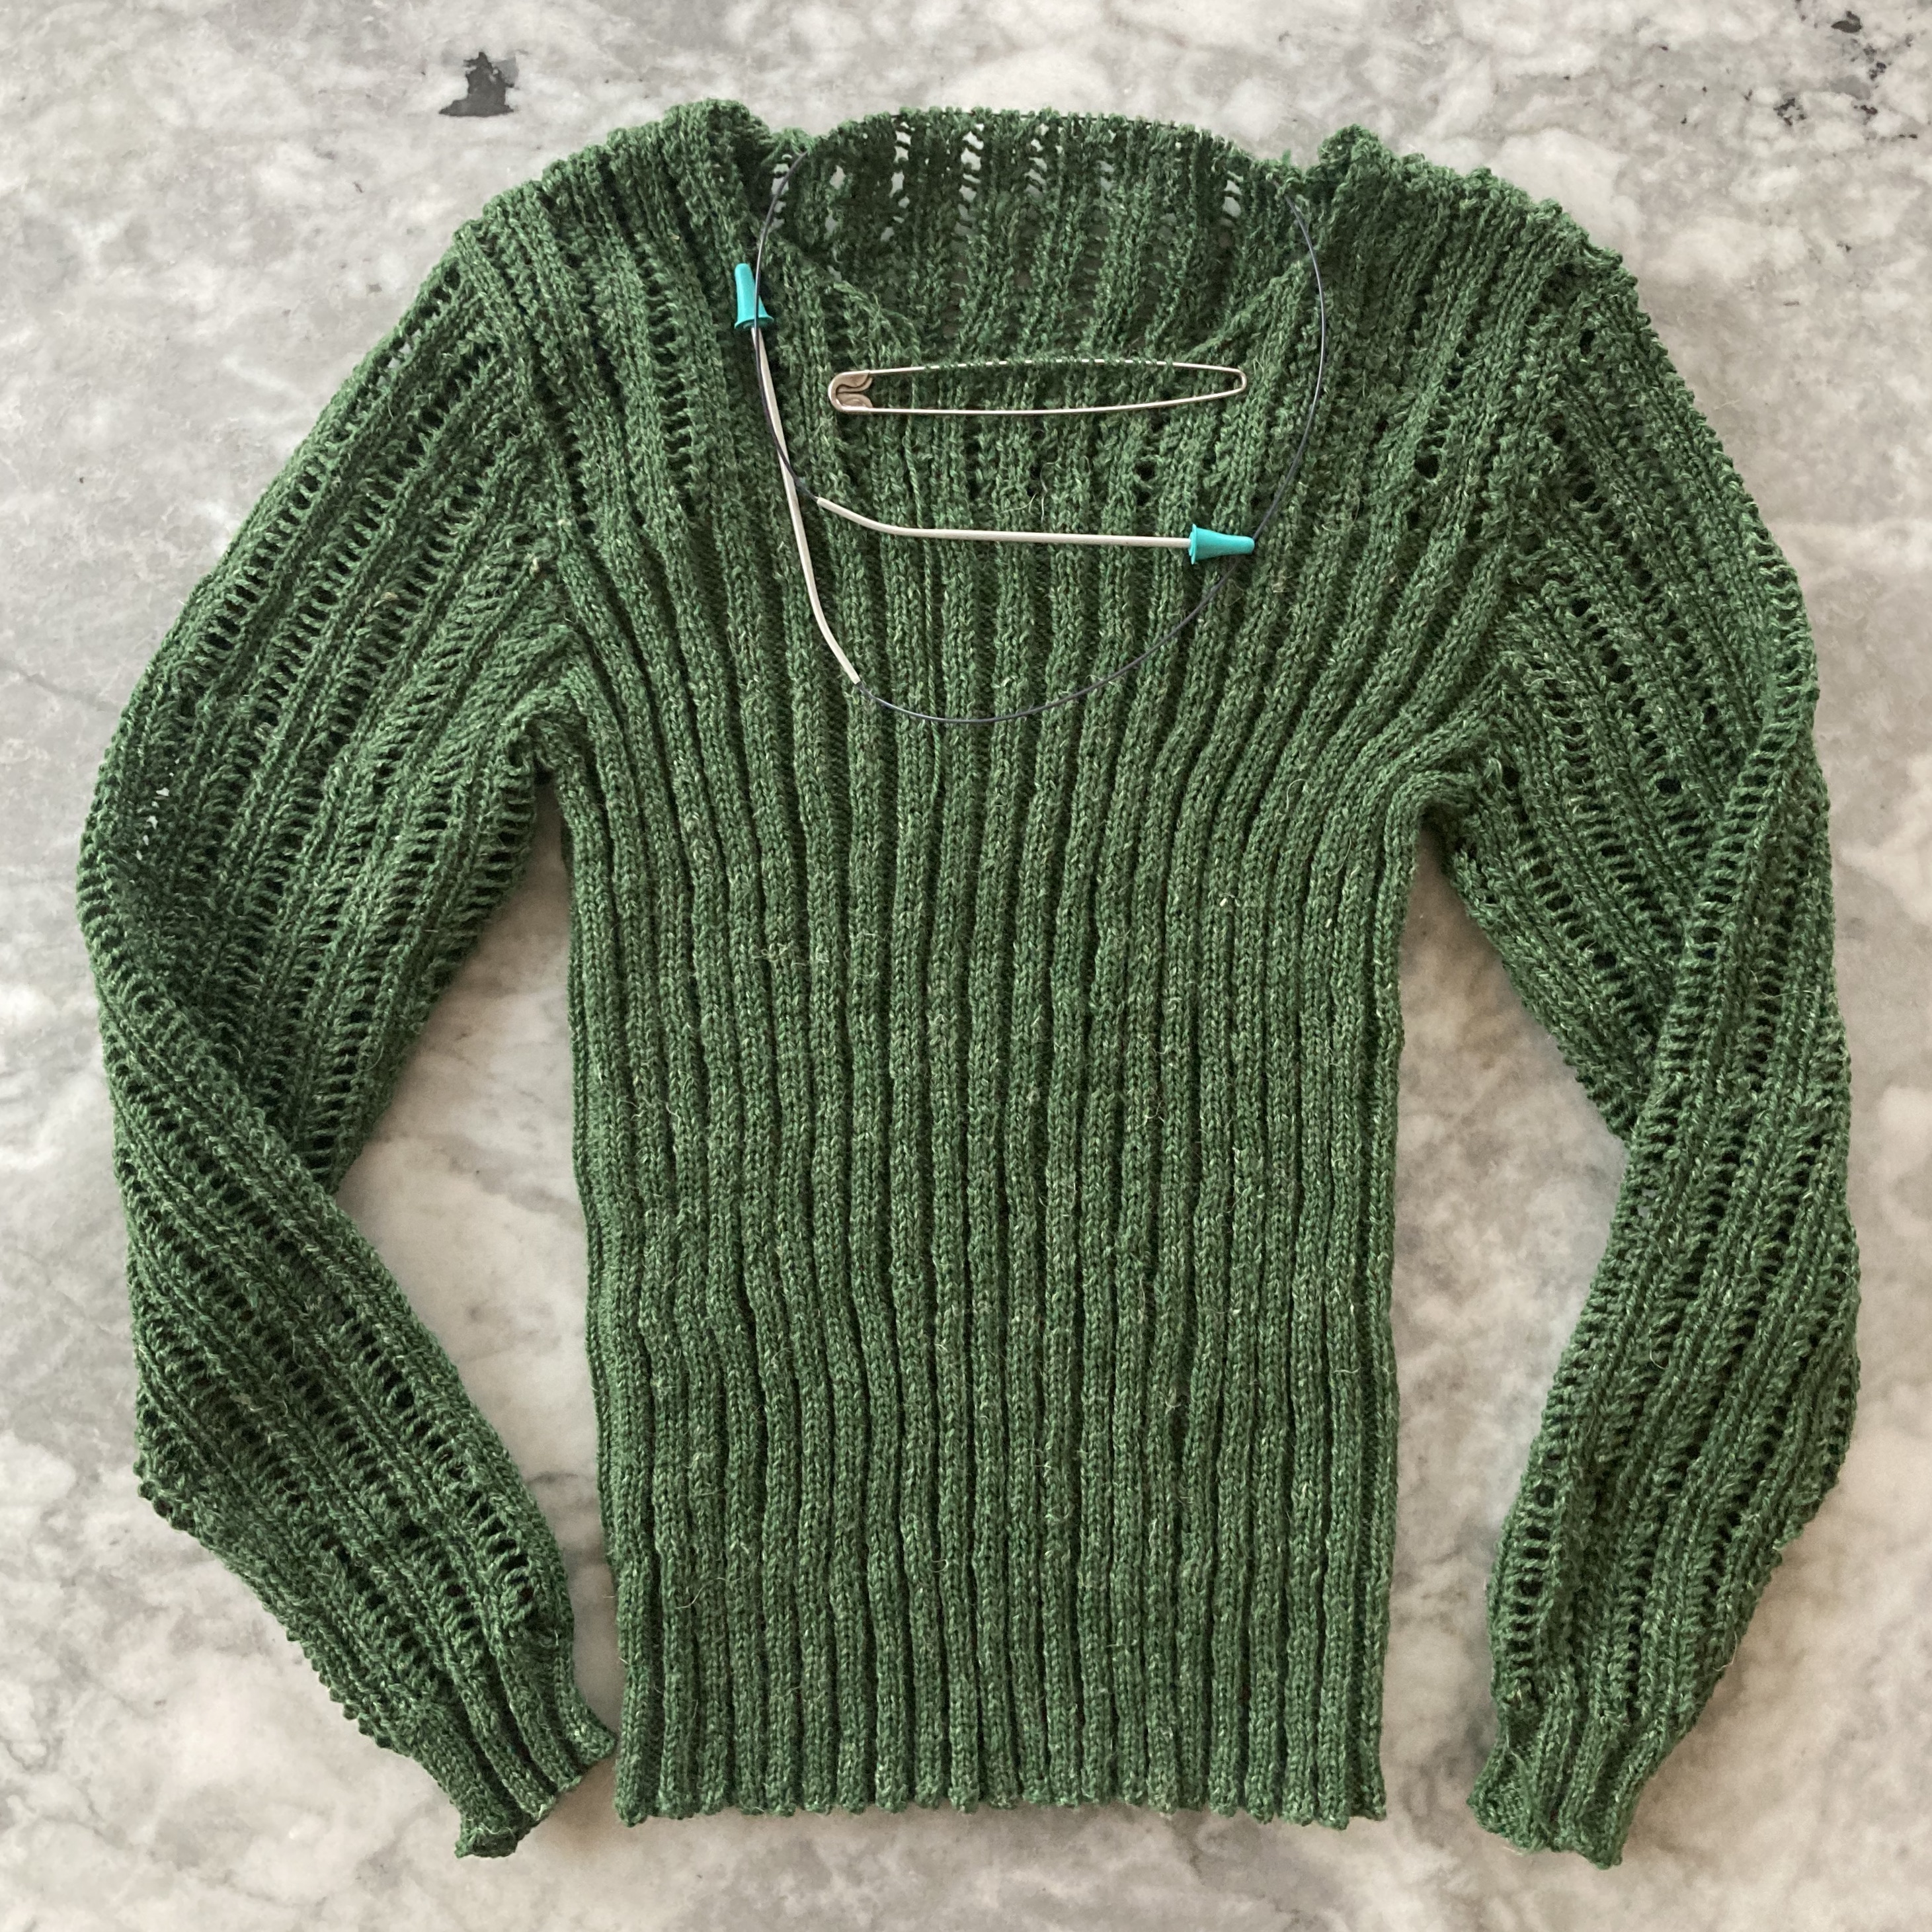
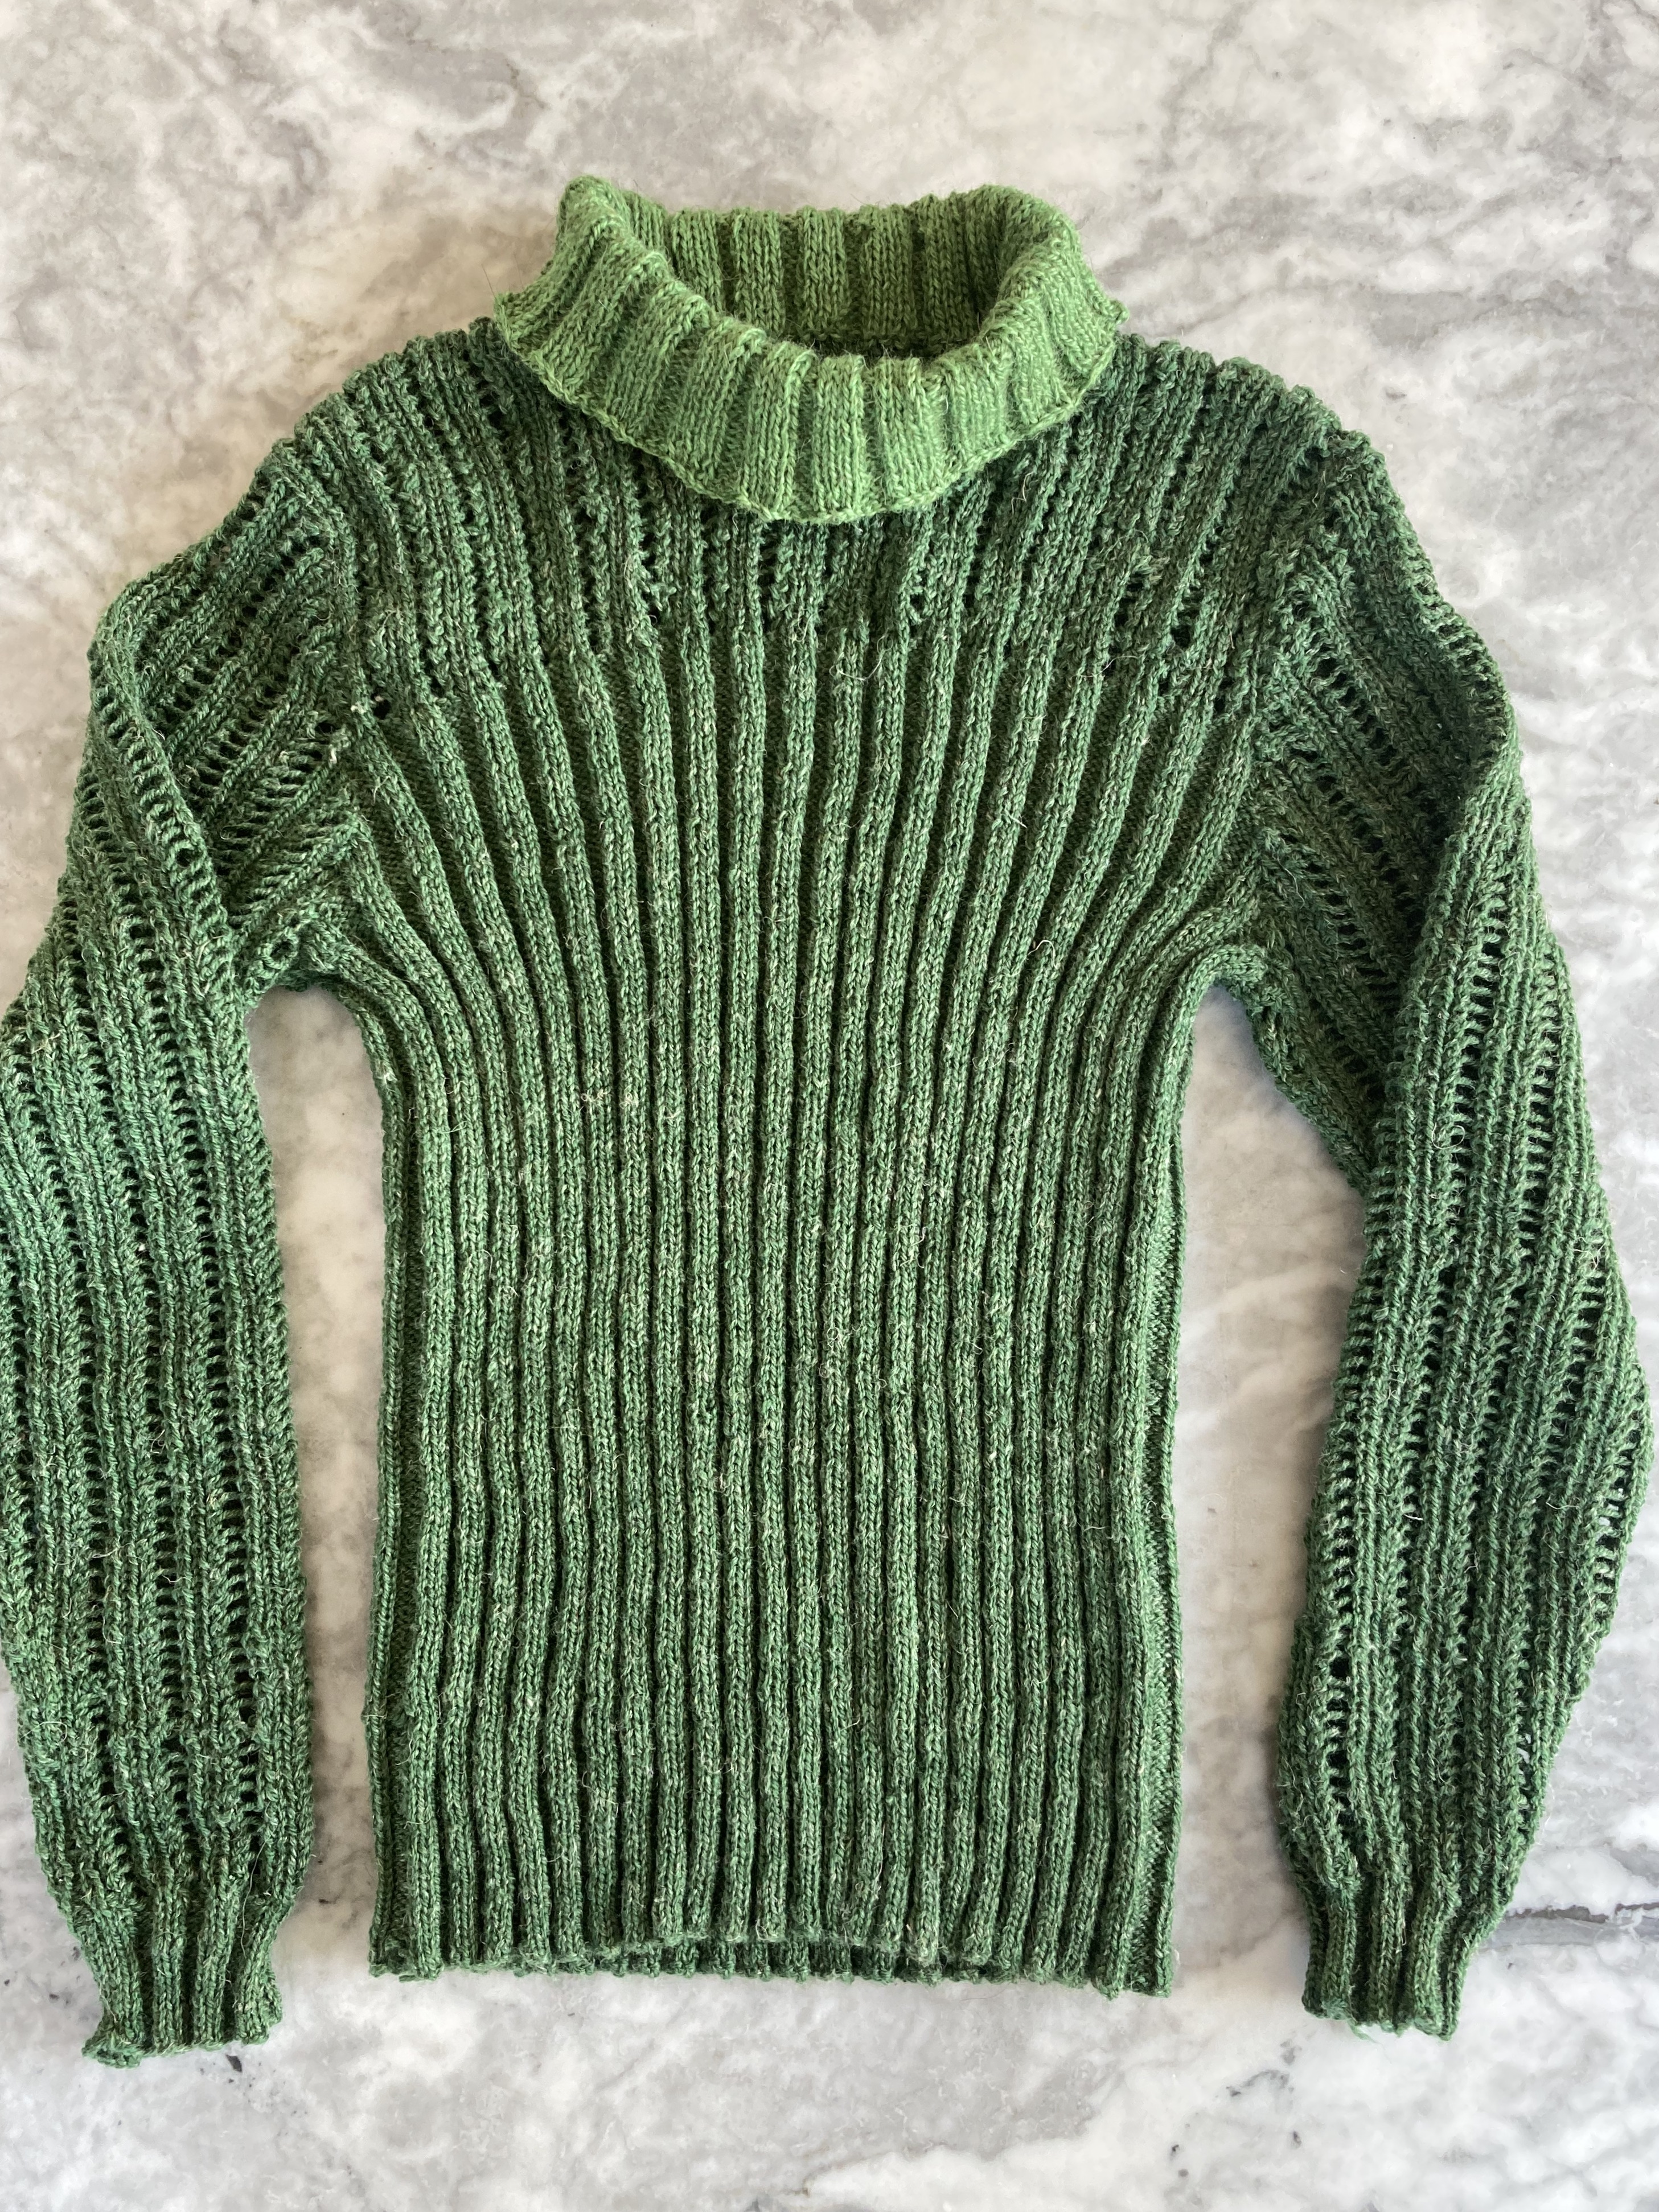
As it turned out, I was able to exactly use up the 300 grams of yarn to make the sleeves in the normal length. Only the neck ribbing remained. Nobody on Ebay or Ravelry had any Slow Wool Lino on offer in this shade, so I visited my lovely local yarn shop and bought a skein of Rowan Moordale in a slightly lighter shade of green. It’s also slightly thicker and fluffier than the Slow Wool Lino and quite soft, so it worked fine for the neck ribbing.
The finished jumper fits fine, feels soft and comfortable, and looks great. I wore it to my Monday night knit group and we had fun recreating one of the original photos.

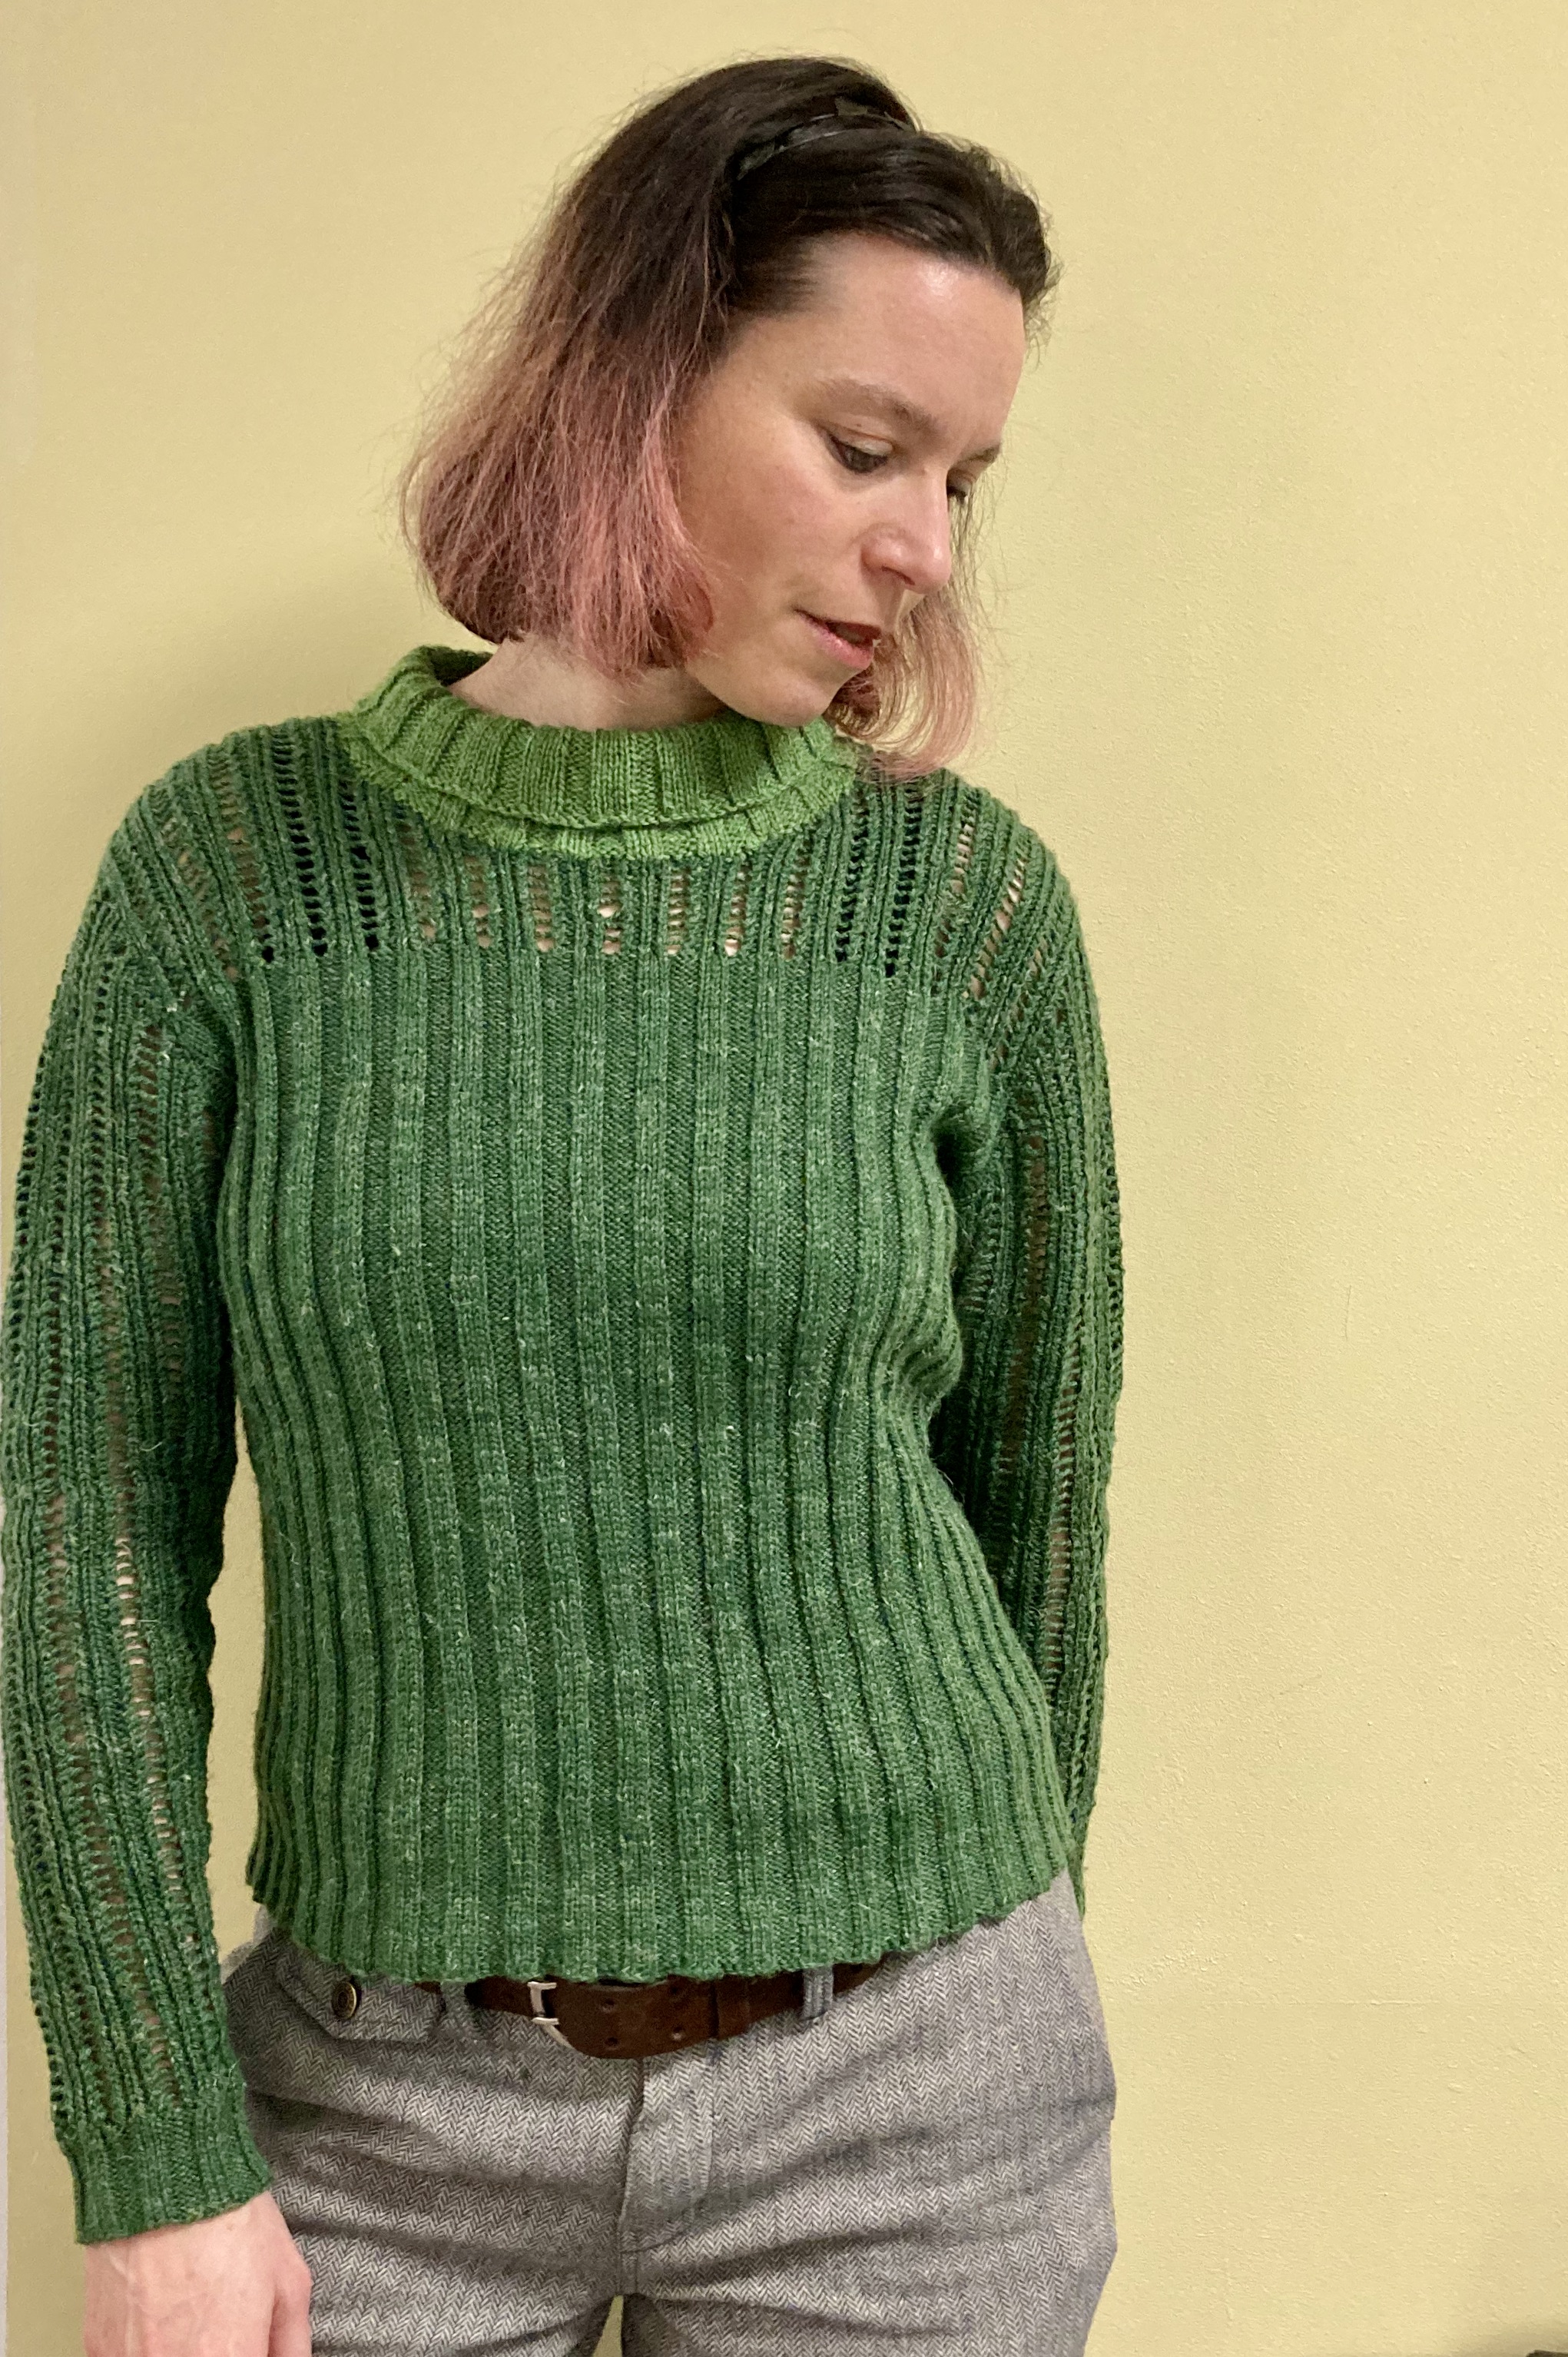

Very happy with this project!
 I do have a project from the May 1961 issue and will post about it soon, but it won’t be done by the end of May. In the meantime, I made a very cute coat for a friend’s child from the January 1976 issue of Stitchcraft, using the leftover yarn from the
 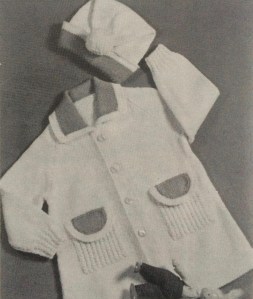 As usual, you’re supposed to make everything in separate pieces, and for once, I almost did! That is to say, I made the back, fronts and sleeves up to the raglan underarm join in pieces, then made the raglan yoke all in one piece working back and forth. Sewn raglans always look so messy (when I make them…), so it was worth it for that, and making the rest in pieces gave the sides some stabilising seams and didn’t take any longer than making the body in one piece working back and forth would have done.
 I noticed that it wasn’t quite going to work out with the total amount of yarn in the proper colour scheme, so I played with the amounts of red and blue and ended up just perfectly using up the rest of the red with a few metres left over should the coat ever need repairing. Of course, that meant I couldn’t make the hat. The project was fast and fun, though, so who knows, maybe I’ll make another one when January 1967… wait, when will that be again… January 2025 ?!? comes around. If we’re all still here! Hang in there and stick around.
 To be honest, the June 1960 issue didn’t really have any designs that enticed me. The little summer tops were nice, but I still hadn’t finished the little summer top I started
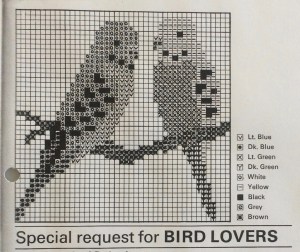
 This was my first time working in counted cross-stitch and I thought it would be easy. You just have to count the squares and thread the embroidery cotton through the holes in an x, right? I was so, so wrong. First of all, I didn’t know what “gauge” fabric to buy, so I chose one that seemed medium-sized to me, where I could see the holes pretty clearly. I should have chosen a size bigger, since the holes were still absolutely tiny to my (perfectly good) eyes. Counting the holes was much more difficult than I expected, since they all looked the same and seemed to move around when I tried to count them.
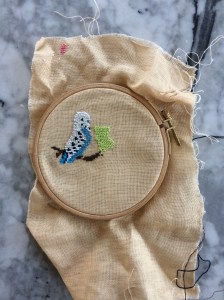 The embroidery itself was slow-going and not totally accurate, i.e. I do not think I always got the right number of threads (2×2 for each cross). Even when I did, the stitches were uneven and raggedy. (I did make sure that the stitches are all going in the same direction and the same top-bottom stitch pairing.) Also, it was just plain no fun to work. What a pity — the idea was so good!
 After I finished the birds, I embroidered the initials of the happy couple underneath in simple block letters (not that it was simple to get the right stitch count and center it) and framed it in an embroidery hoop with the help of
