Remember this project from a couple of years ago, which I made in conjunction with a 1920s serial story posted on the All Things Vintage forum on Ravelry? Short recap: one of the group’s wonderful moderators transcribes serial stories from early twentieth-century newspapers into a dedicated forum thread, one chapter a day, and she and the readers comment and discuss it and add everything from fashion photos to other newspaper headlines to silent film links for historical and cultural perspective (and fun, obviously.)
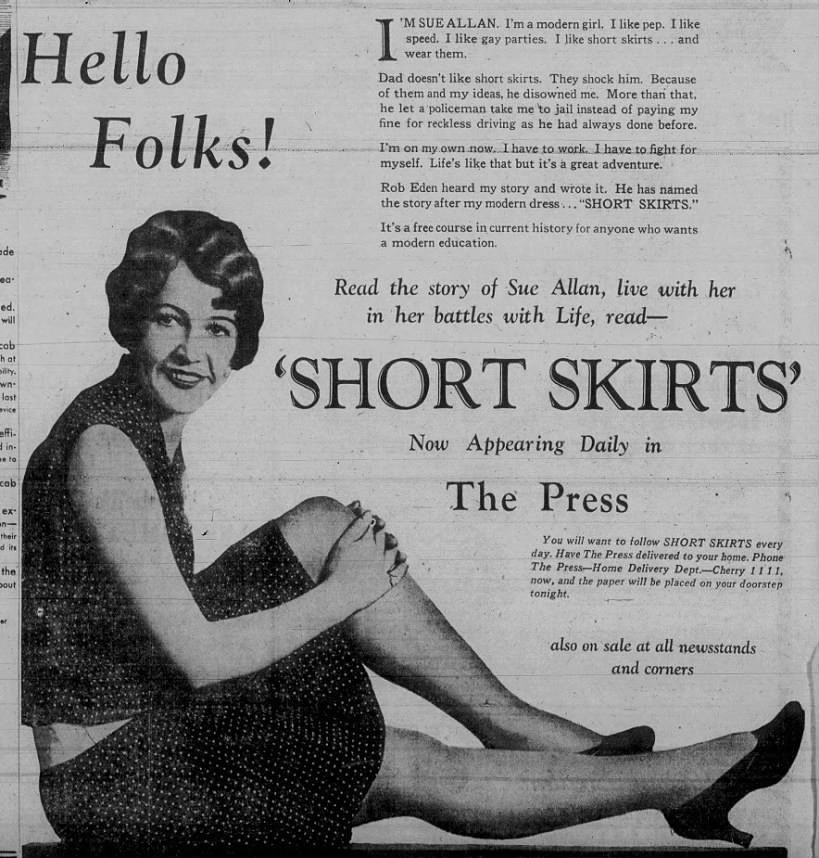
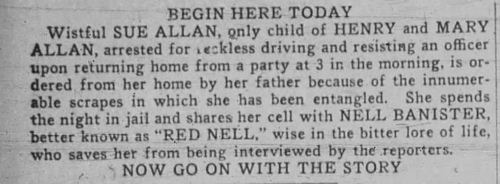
Well, the current story is… drum roll, please… the 1929 novelette “Short Skirts” by Rob Eden (the pen name of the husband-and-wife duo of Eve and Robert Ferdinand Burkhardt.) It recounts the thrilling adventures of Sue Allan, who crashes Daddy’s car in the first chapter, gets both arrested and disinherited, and spends the night in jail. There, she makes the acquaintance of Nell Bannister, a girl who has been around the block many more times than sweet, innocent Sue and takes her under her wing.
It’s thrilling, it’s exciting — and it enjoyed an incredible promotional campaign by the newspaper, including an essay-writing contest:
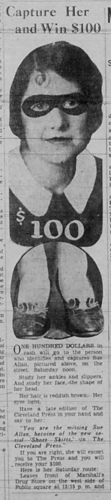
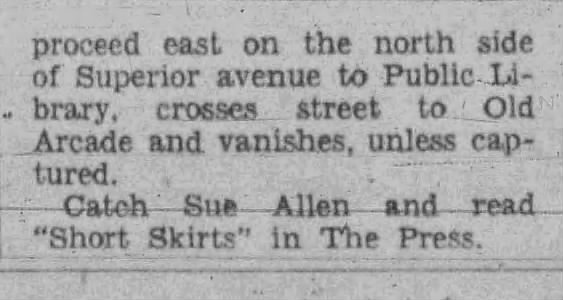
a “find-the heroine-on-the-real-life-street” contest (I really hope no women were actually “captured”):
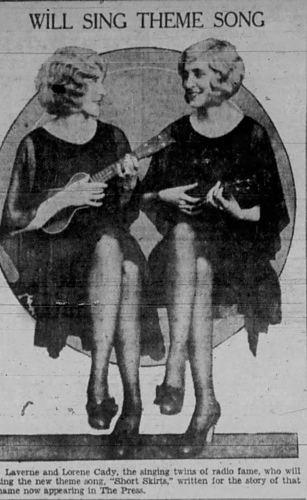
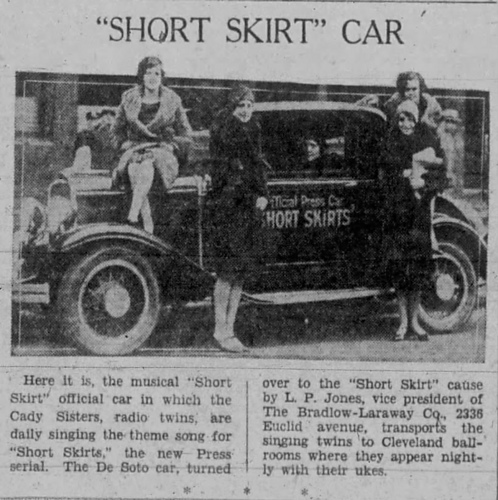
and my favourite, a theme song written especially for the story and performed live in a moving DeSoto motor-car by singing twins Laverne and Lorene Cady, accompnying themselves on ukeleles:
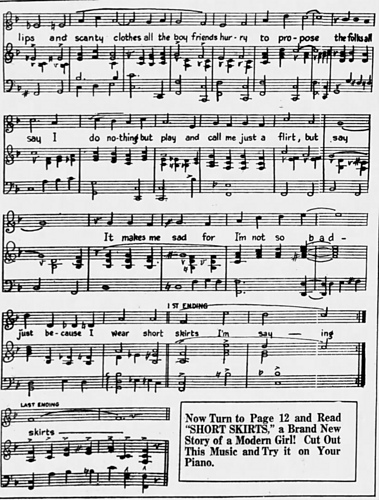
The sheet music to the song was printed in the newspaper too, so you could cut it out and “Try it on Your Piano”:
Of course, I had to sing it! Here’s a little living-room recording, featuring the wonderful Willy Schwarz on the accordion:
What does any of this have to do with Stitchcraft, the 1960s, or knitting, you ask? The answers: 1) nothing, 2) the 1960s were also a decade of short skirts, and 3) I’m knitting a shorter version of a retro-1930s chevron-pattern dress from the 1967 issue of Stitchcraft for both this blog and the accompanying All Things Vintage “Short Skirts” knit-along. That will have its own blog post, so this post is just a fun excursion. If you’re on Ravelry, definitely check out the All Things Vintage forum and the “Short Skirts” serial, and say hi to me (onkelscotty) if you’re there! Many thanks to lavs on Ravelry for posting this story, and giving me the sheet music, and for all the promotional photos and extra information.
Welcome to Spring! Is it snowing where you live? The March 1967 issue of Stitchcraft had some nice designs, but nothing that was fast, easy or practical enough for my knitting life at the moment, so for this month’s post I’ll write about a cardigan I finished in mid-February: the Snow Daisies cardigan from the Spool Cotton Company’s issue No. 189: “Women’s Sweaters: America at Work and Play” from 1942. The booklet with all the patterns is available for free here.
The “Snow Daisies” cardigan is touted as a “heavy cardigan for outdoors”. Knitted somewhat oversized (esp. for 1940s sweater standards) in thick wool, it has “plenty of room for a sweater underneath.” What you don’t see in the magazine photo is the fact that not only the sleeves, but also the back is made in 2×2 ribbing. This was an excellent design feature on many “sport” garments from the first half of the 20th century, allowing for generous movement without extra fabric to flop around and get in the way of your golf swing or ski poles or whatever. The front is made in reverse stocking-stitch with an open cable on each side, and decorated with embroidered daisy flowers. It’s a nod to all the “Bavarian”, “Tyrolean”, “Alpine” etc. traditional southern German and Austrian styles, though of course an American pattern from 1942 doesn’t use those words as I imagine they did not want the association.
I made my version in Hjertegarn New Life, a very interesting recycled wool — if I understood correctly, it’s reclaimed from older knitted items. Mine was 65% recycled wool and 35% recycled “other” fibres (synthetic, I guess?). It felt like strong, nice wool, tough but not too scratchy.
My tension was a little larger than the pattern and I wanted the cardigan to not fit too loosely, so I adjusted the stitch counts. The sleeves were fine, though the ribbing didn’t pull in as much as I thought it should. I guess that comes from wool that is only 2/3 actual wool and 1/3 mysterious “other”? So I made the back even narrower than I had calculated. It was too narrow. I made extra panels on the sides to make up for it. On the front, I placed the cables slightly differently to couter-balance having fewer stitches. I forgot to do one extra cable twist in the center twist part, but if you can’t see it in the photo, I won’t tell you where it is. The daisies were easy to embroider on.
I was not so happy with the final result. The overall look is quite square — the ribbed shoulders add bulk in an area where I am plenty wide enough. Worse, the ribbing just doesn’t pull in at all — it expands horizontally, especially after washing and with wearing, as ribbing is not supposed to do. I took out the extra side panels, which helped a little. I’m just not happy with the wool, though. It’s too bulky and not springy enough. Also, the button band is “wavy”, though I think that might be a design feature, since it looks like that in the photo, too?
(Not having any winter sports gear, here I am posing with a croquet mallet and ball…)
I’ll see what I can do with it, but I might end up giving it away.
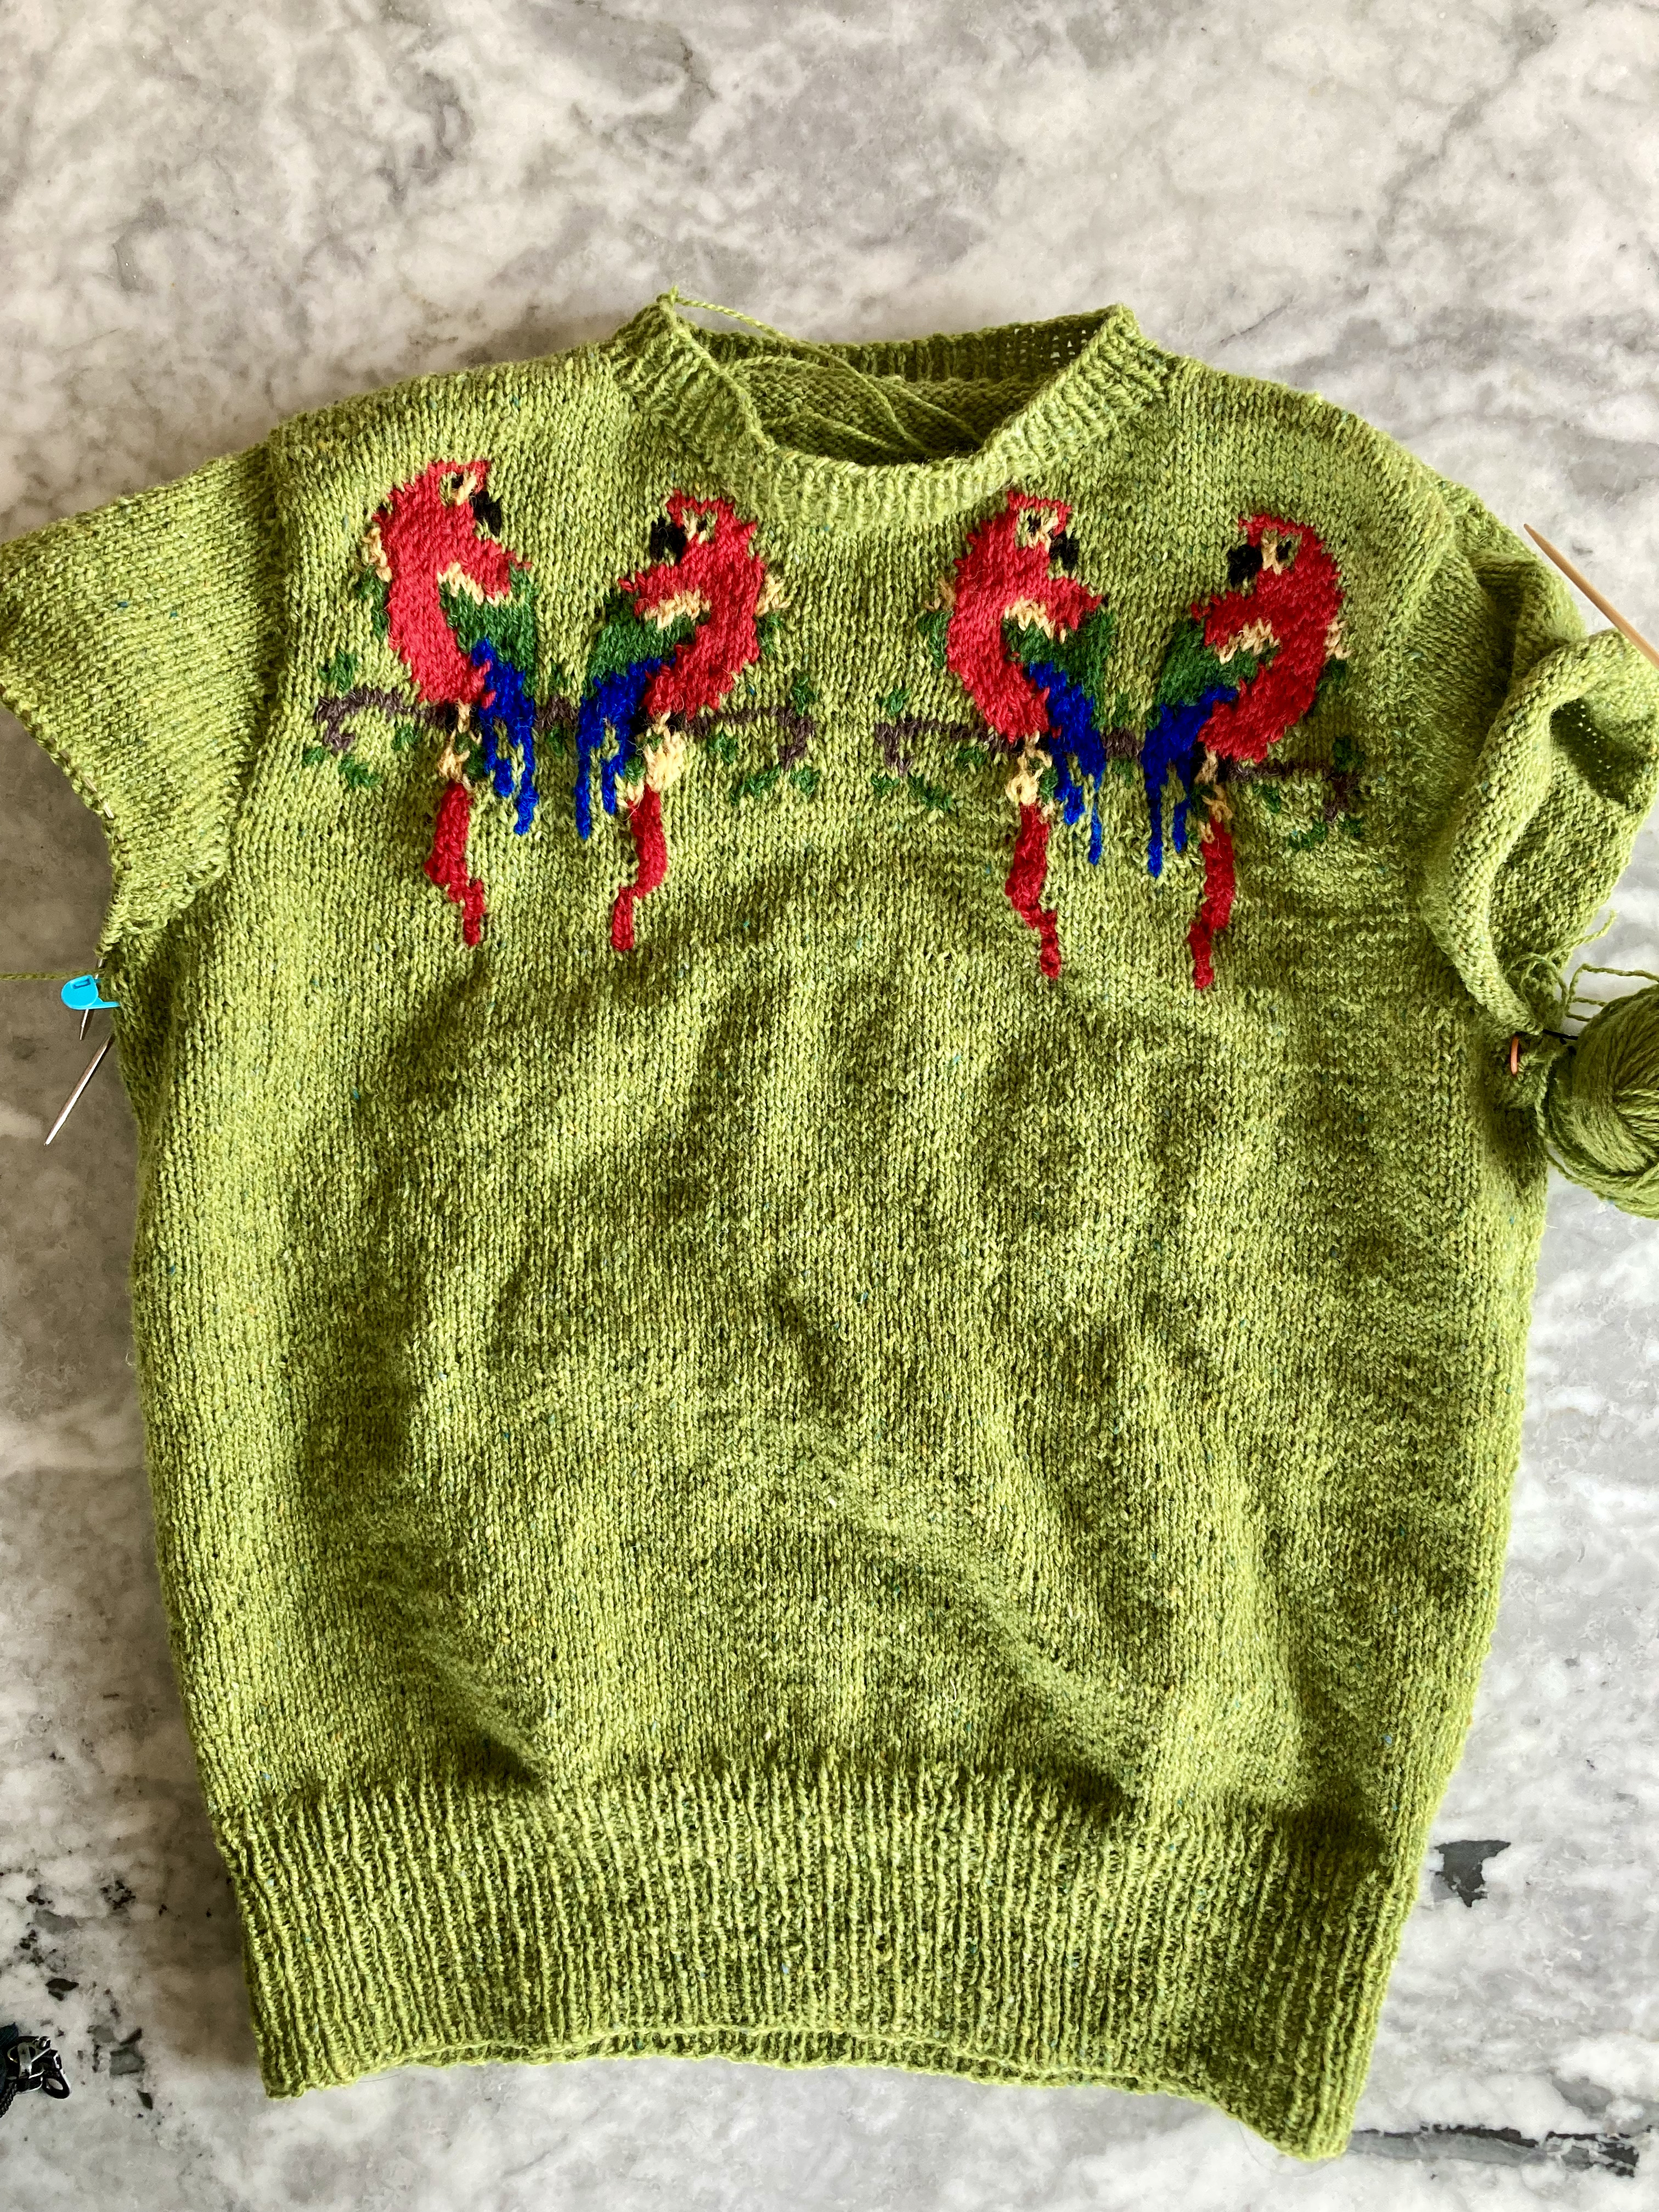
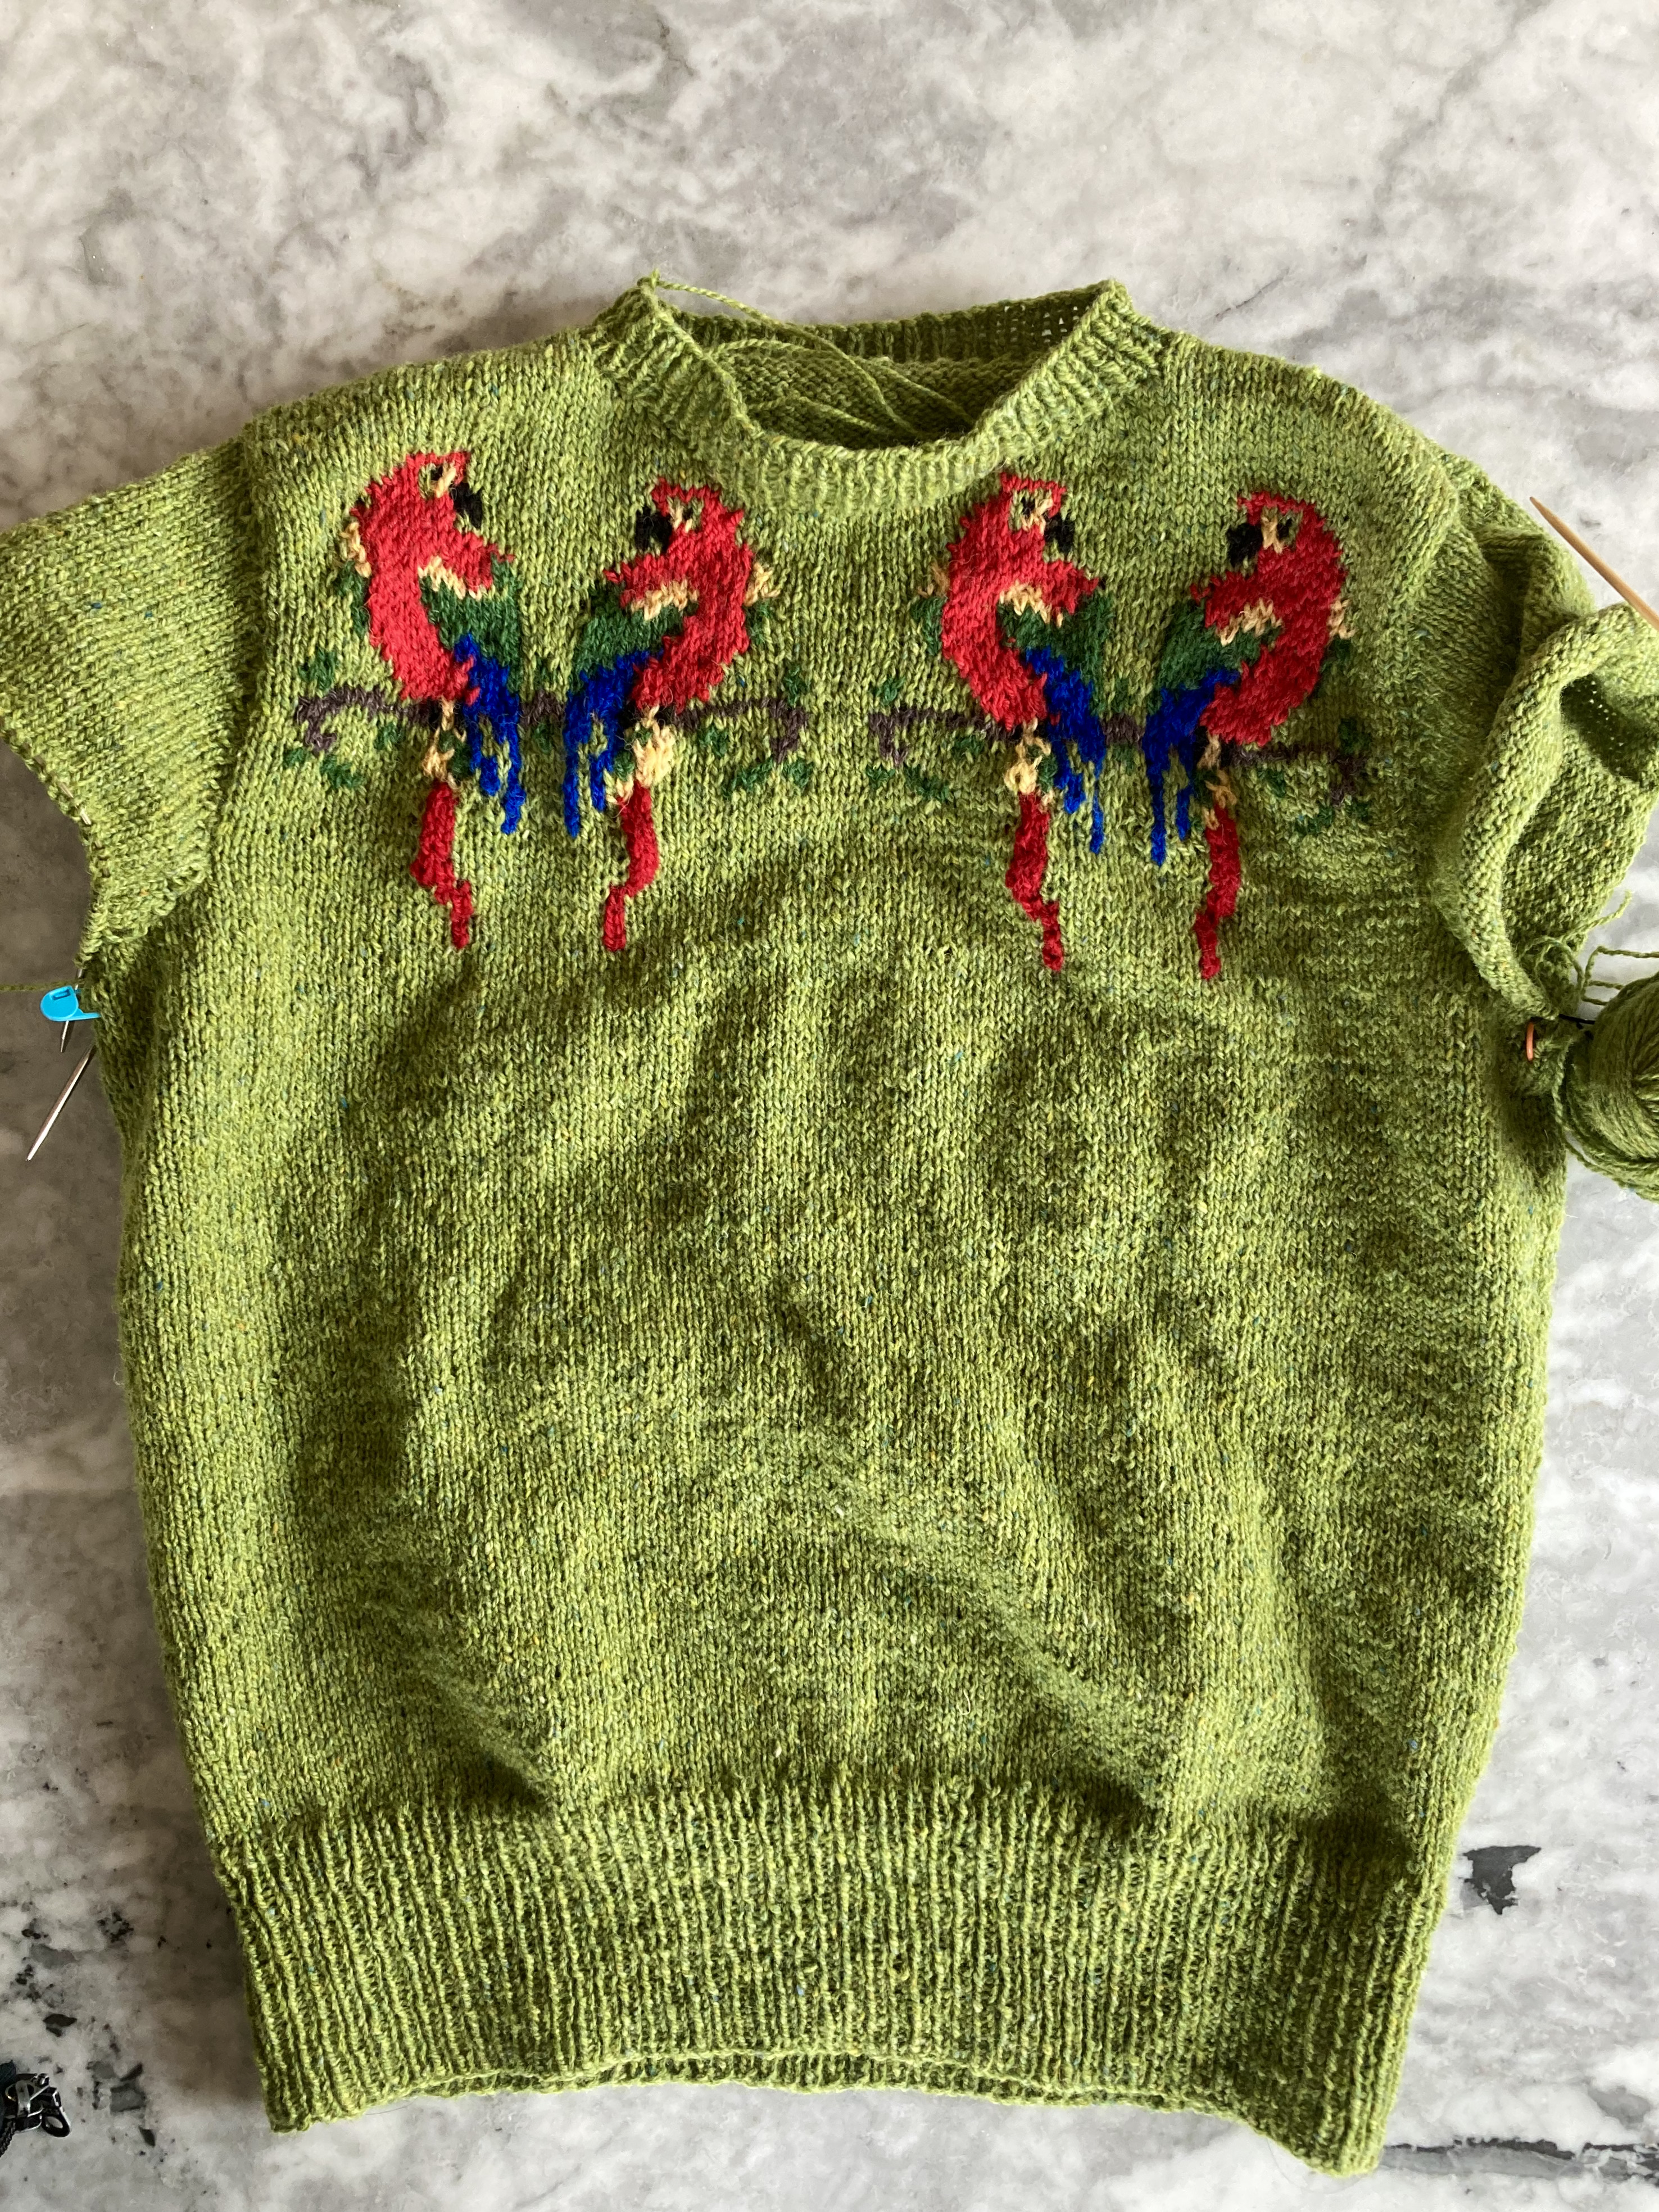
The November 1966 issue of Stitchcraft was perfectly nice, but the projects in it that interested me were either too much of an undertaking (i.e. an entire suit) or something I would like to knit later when I have more time to plan it out (the top-down round-yoke cardigan). I decided instead to make a project whose pattern and wool had been sitting around for a long time waiting for me to use them: the Bestway A2063 “Love Bird” jumper.
The booklet isn’t dated, but presumably from the 1940s. I got the pattern as a PDF from the wonderful Subversive Femme website. A few years ago during the horrible wildfires in Australia, Bex, who runs the site, offered a free pattern to anyone who donated to the fire relief fund. I did, and was very kindly given this pattern as a thank-you. The wool is “Darnie” by Studio Donegal, a fingering-weight lambswool in the perfect shade of green, which I bought in Galway while on a work trip to Ireland.
The original pattern has a tension of 8 sts/inch, which I don’t get even with the finest of wools and smallest of needles, but I am also larger than the 34 inch/stretch to fit 36 inch bust finished size. I have had good results in the past with making 8 sts/inch, 34-inch jumpers at 7 sts to the inch with the original stitch counts and just adding an inch or two to the waist-to-armhole length, but that didn’t work here. I love the wool — it’s quite soft and not at all scratchy, and the little bits of tweed catch the light beautifully — but it was impossible to calculate the tension even with a good-sized, blocked swatch. The wool is so lightweight that it stretches more in width the longer it gets in length, so the tension is variable even when knitted closely and evenly. So at some point around rib height, I had to rip back quite a lot and adjust the waist-to-armhole increases. I tried to keep it close to the original proportions, but make it fit me. That worked out pretty well, though I hoped it wouldn’t shrink or stretch too much in blocking.
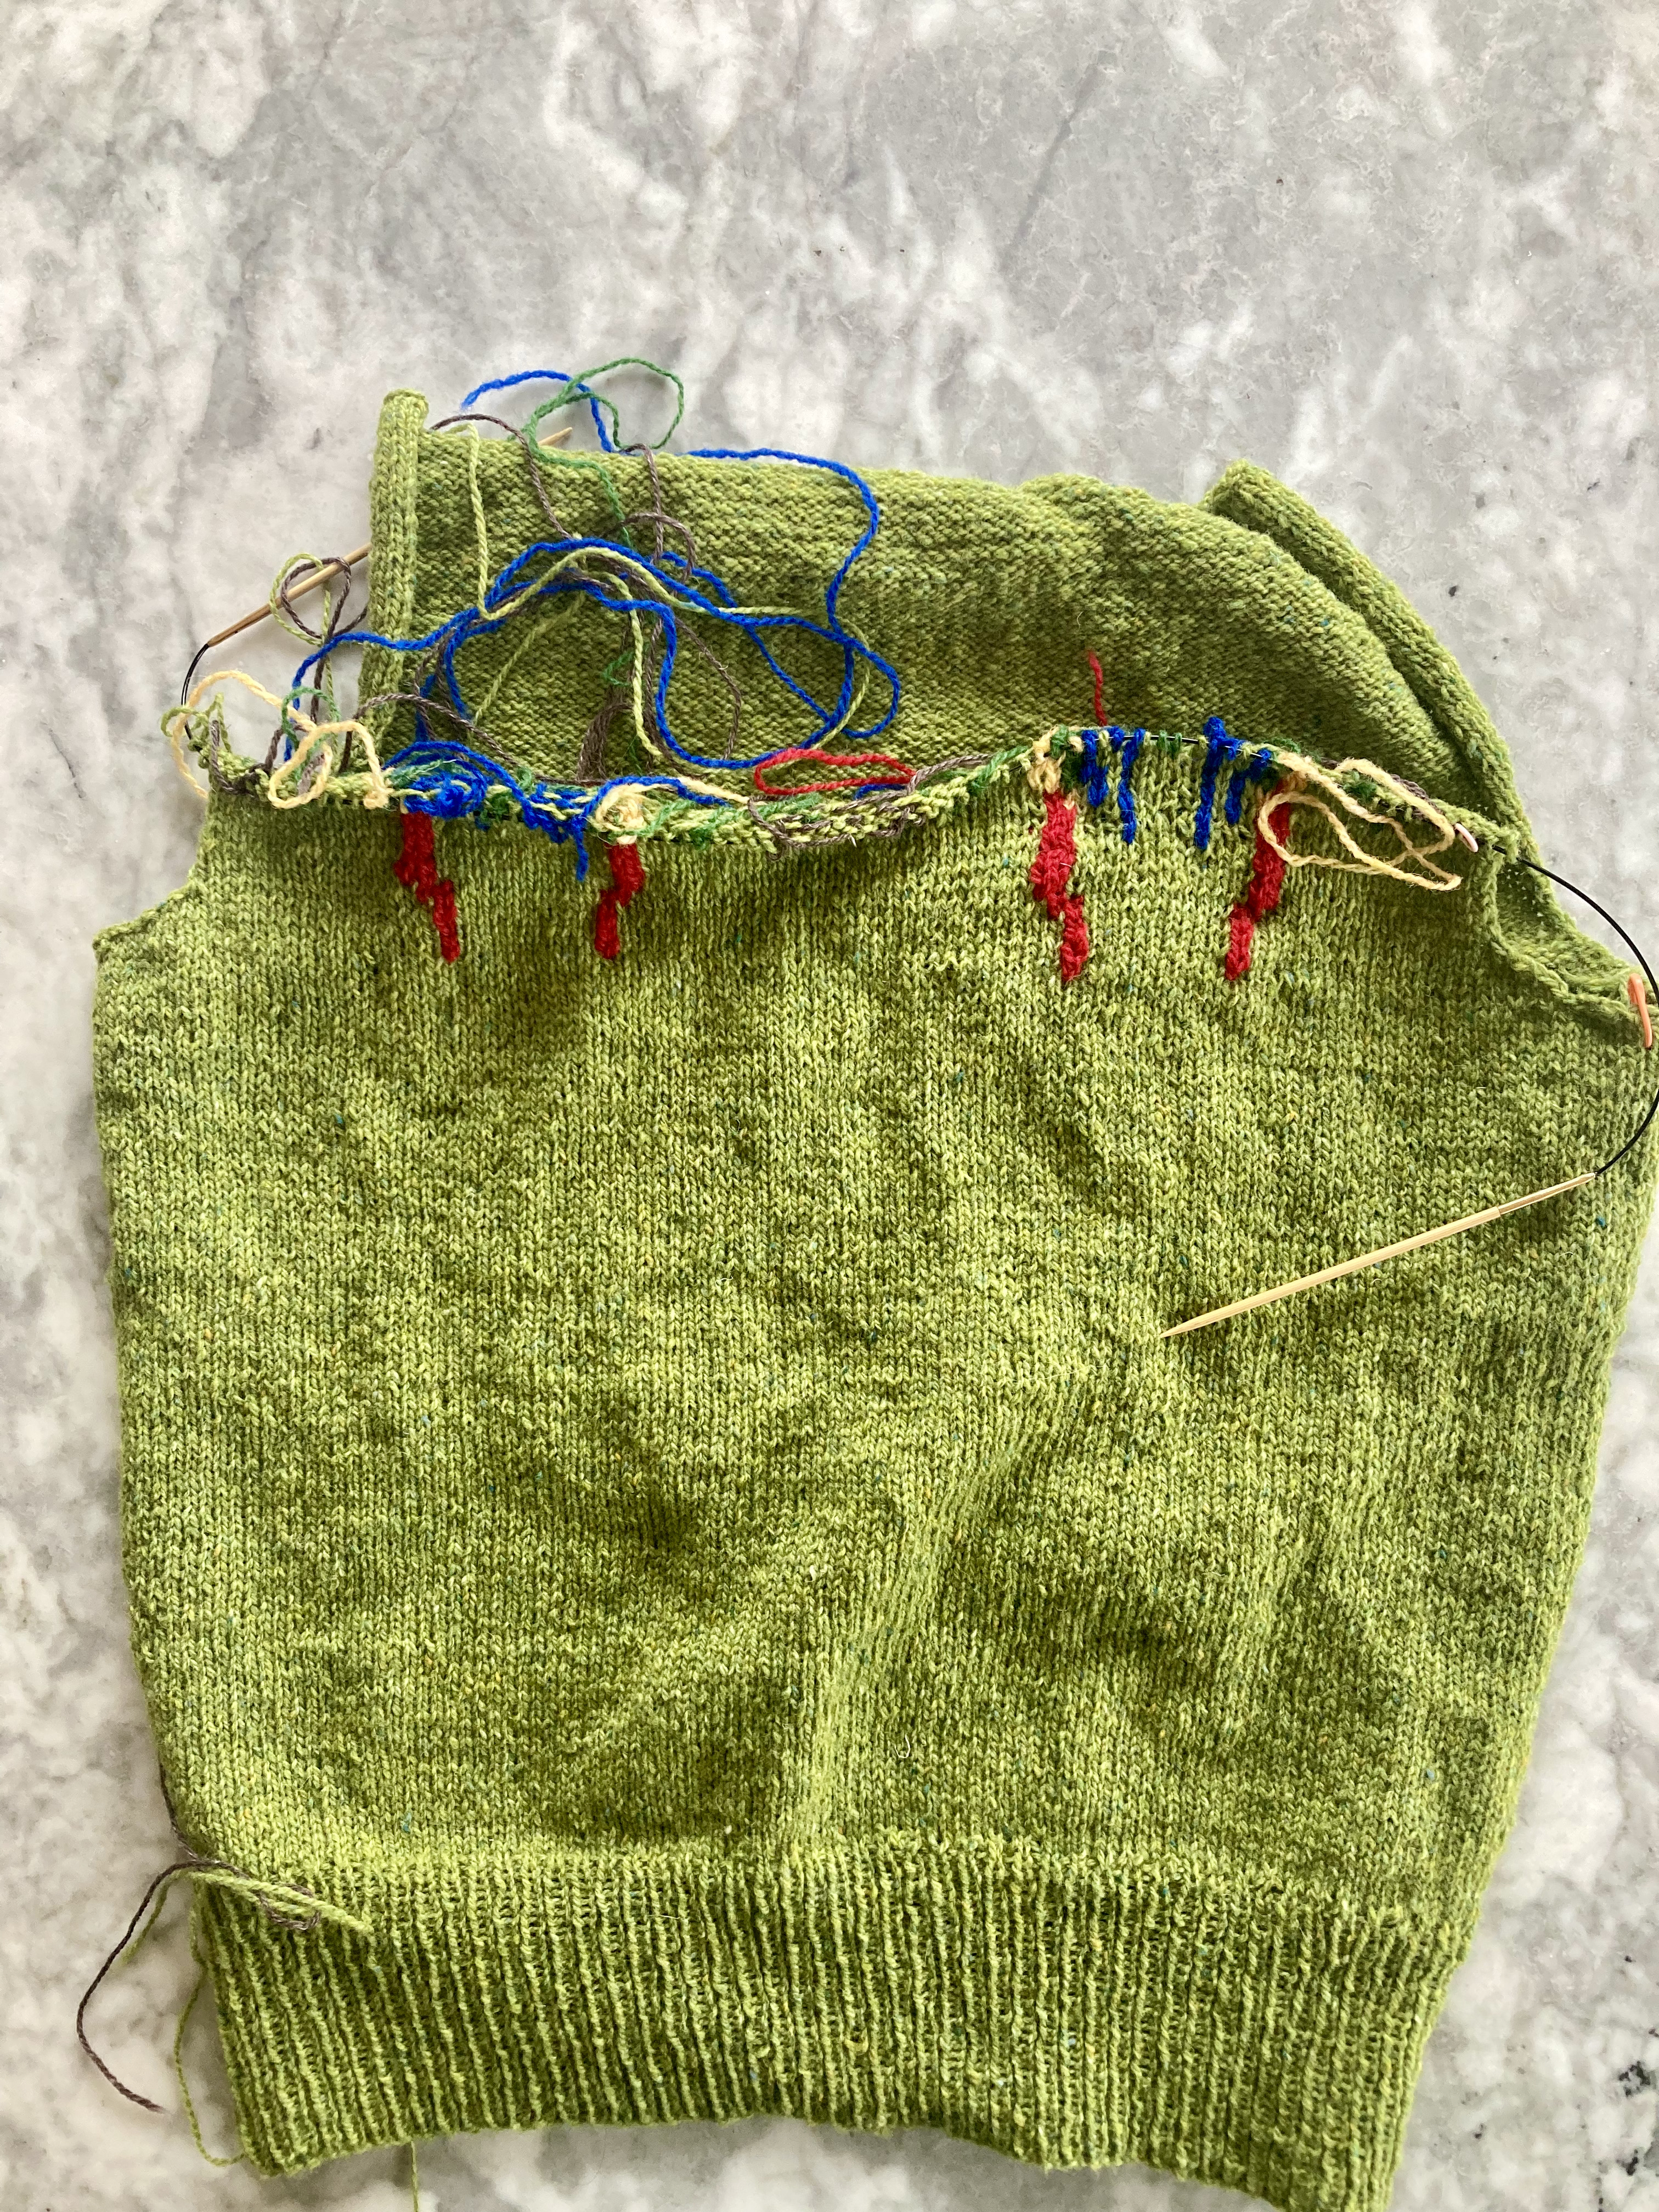
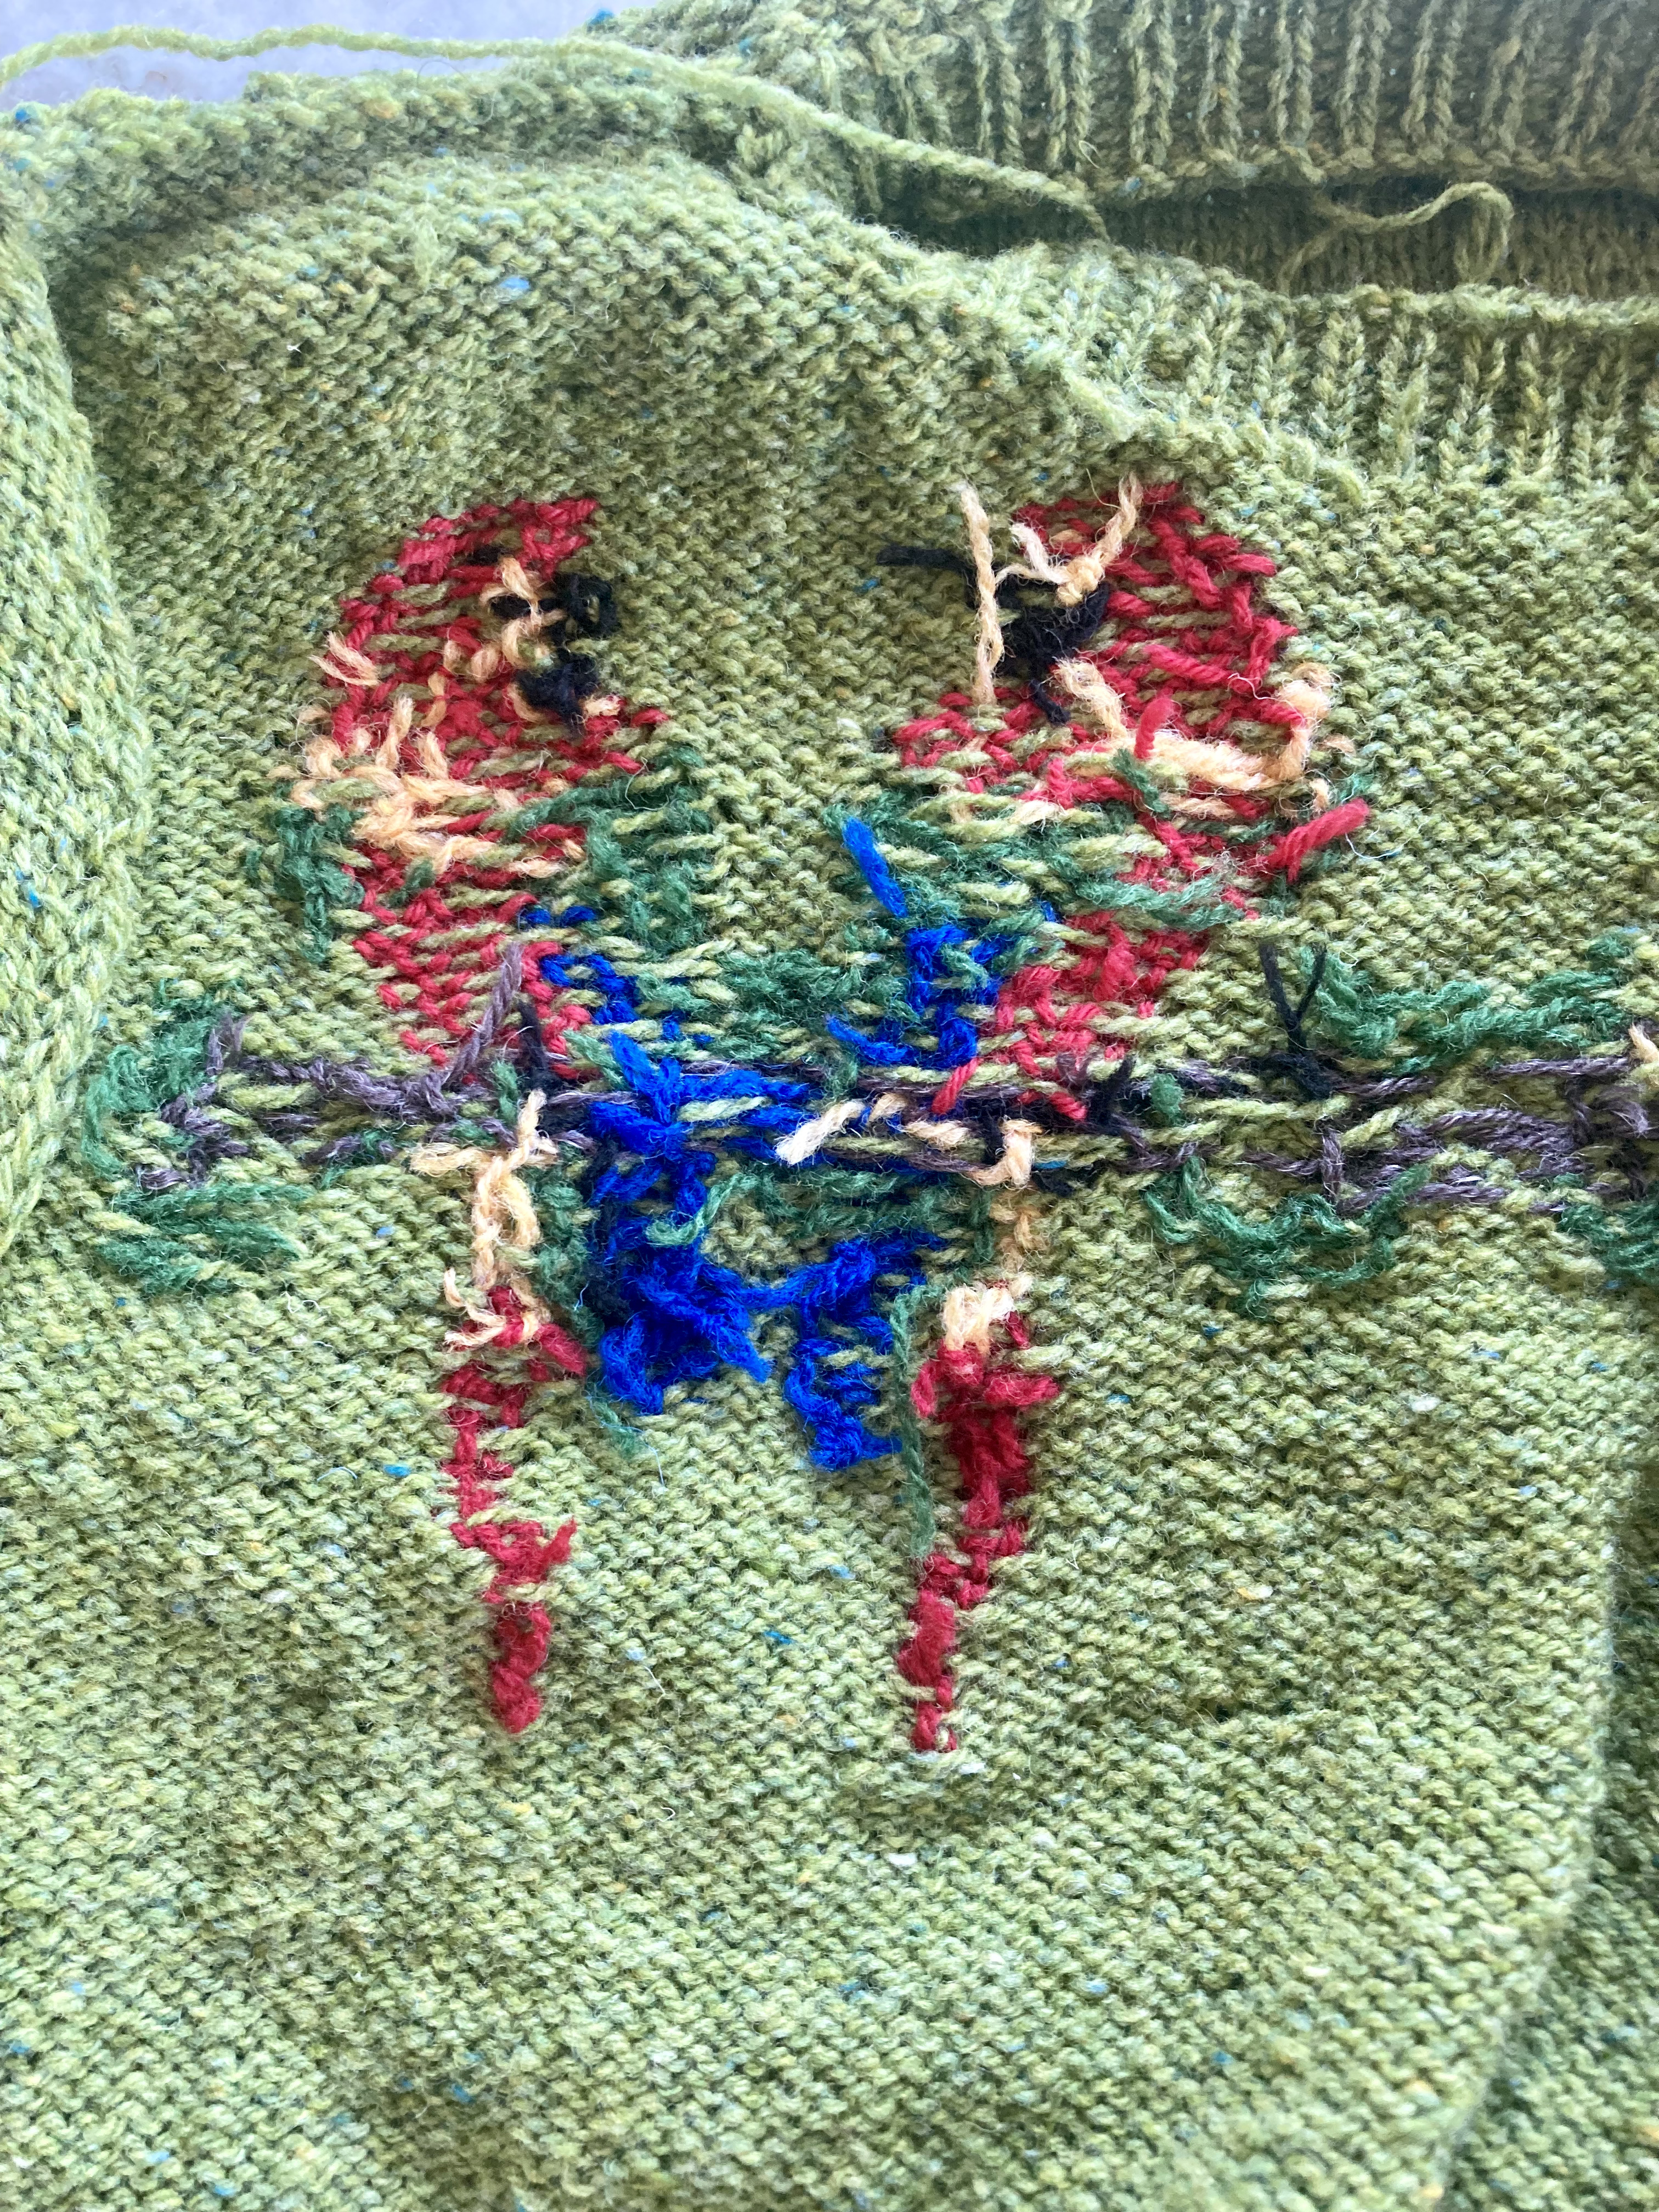
The birds are worked in stranded intarsia, i.e. you use different short lengths of the colours for the four birds, and strand the light green main colour behind. I am very good at stranded work and not bad with intarsia, but I found the combination of the two very tricky! The yarns bulk up at the back and/or leave holes (in spite of twisting together and weaving in) and it is hard to gauge whether the strands are too tight or too loose. There are a hundred ends to weave in and they are all in roughly the same spot, so the back side is very “full” and doesn’t lie down flat easily. Presumably, it should block out?? Also, I should have used a larger needle for the bird section — too late!
Not to mention that the bird tails start BEFORE the armhole decreases, and since I didn’t read ahead (I know…), I had already finished the body to the armholes in the round and the entire back part above the armholes before I realised it. Yes, I should probably read ahead and also think ahead! Yes, I am also too lazy to rip everything back, especially since I had to re-do the upper back once already to get the sizing right. Oh yeah, and I also forgot, twice, to make an opening in the back neck to accommodate the close, high neck, AND since I started the birds at the armhole instead of below, the neck was even higher and tighter than it should have been. Sigh.
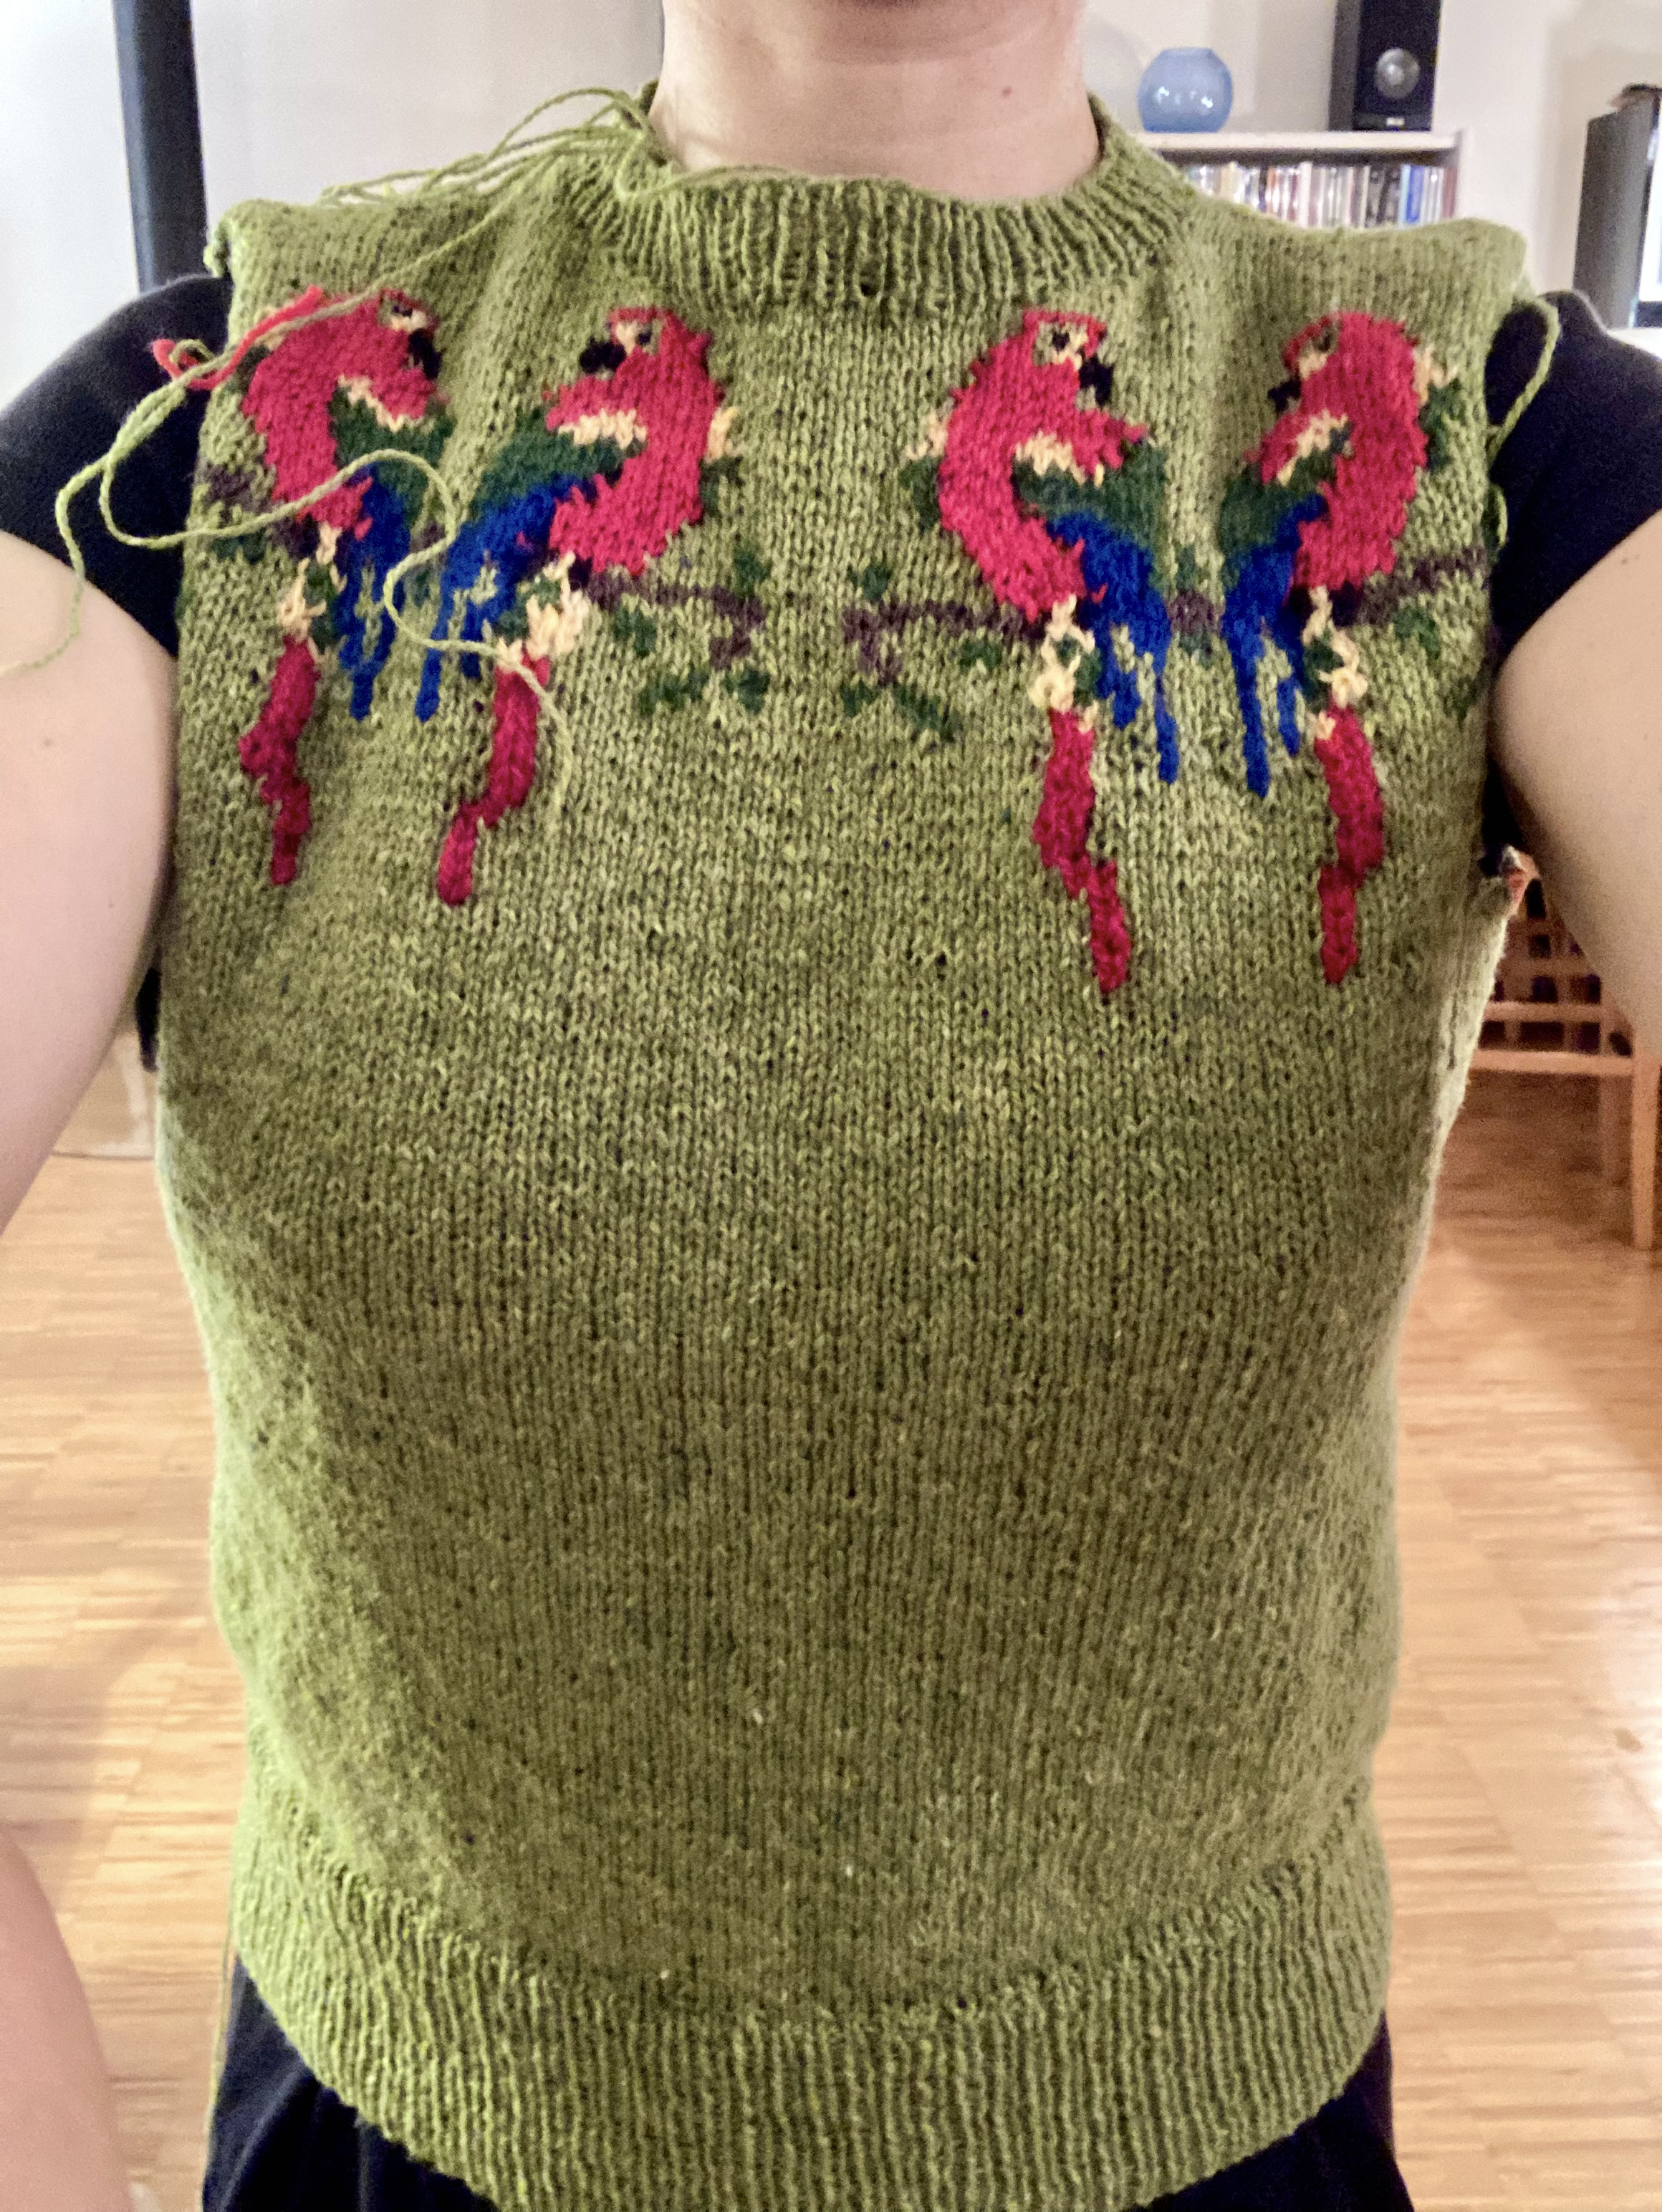
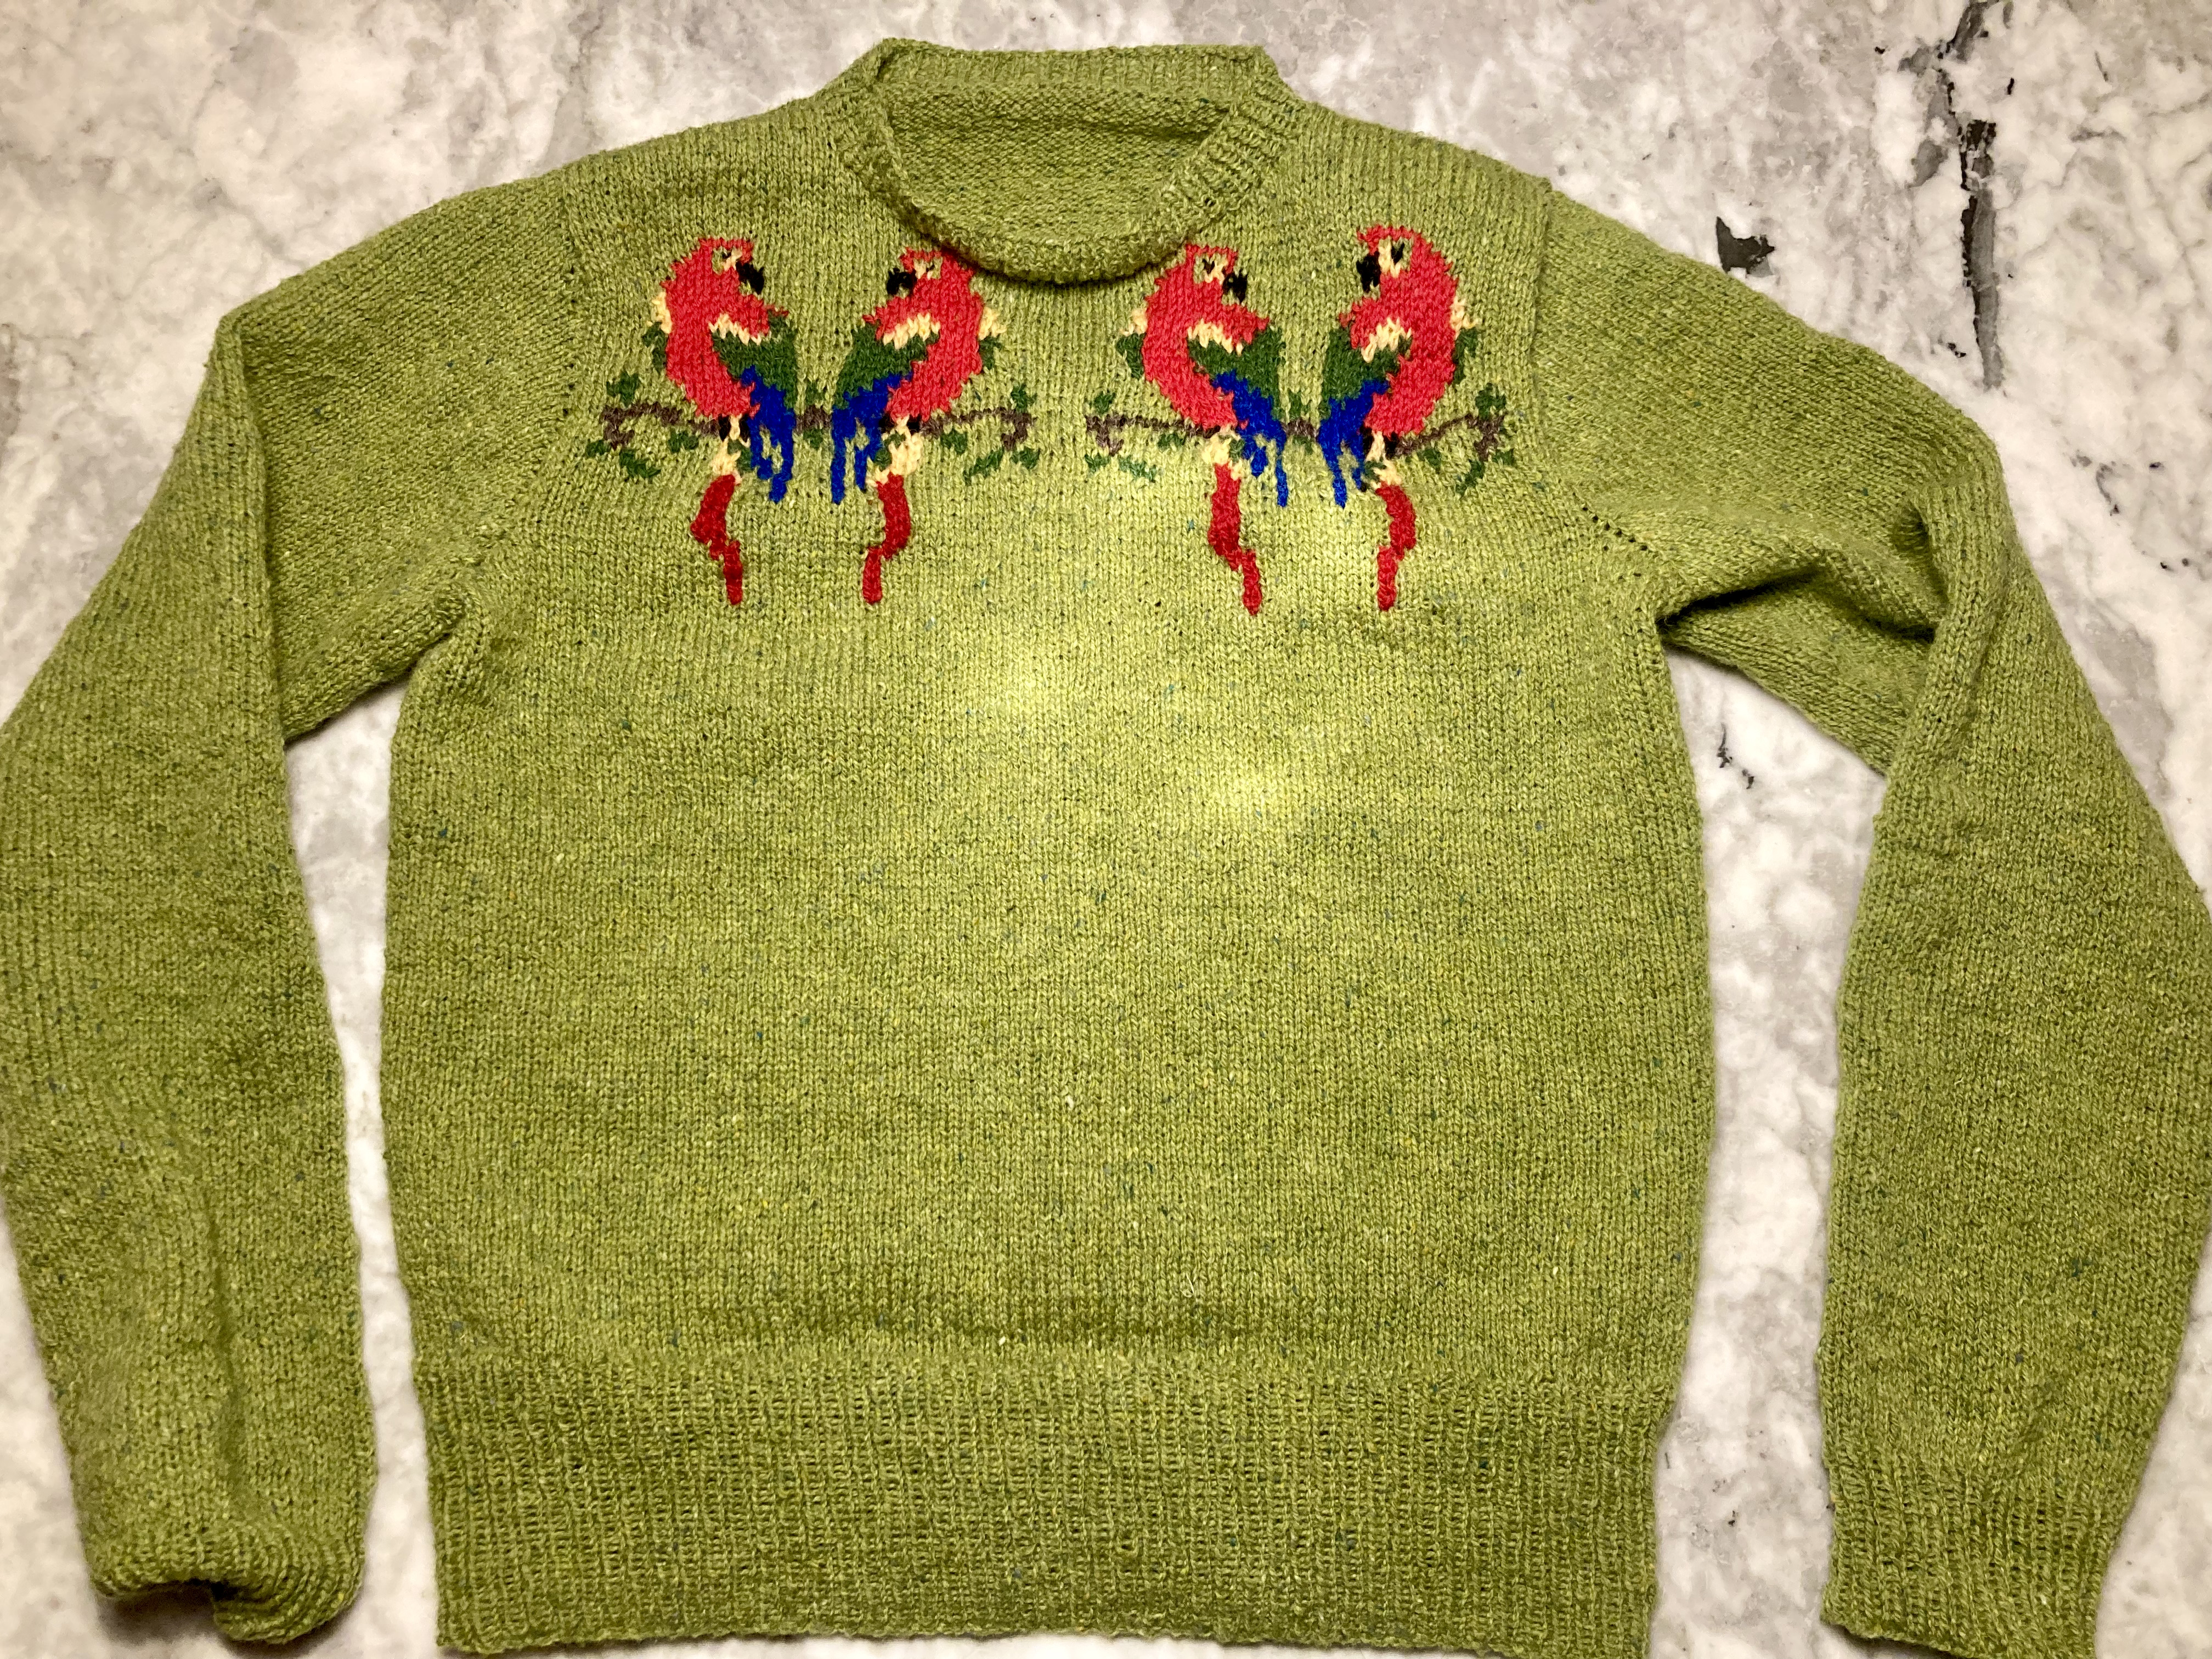
In spite of all of that, it looked good (even before blocking) and fit great (ditto). It does fit over my head and I don’t think it’s a problem that the birds sit a little higher than they should. I made the sleeves from the top down, picking up stitches around the armhole, and only had to restart them twice to get the decreases right.
It was so worth it, though! It blocked to exactly the knitted proportions without shrinking or stretching, and the birds flattened out well enough. (The tails, which I made in a different, slightly thicker red wool than the bird bodies, are still bulkier than the background. I will call it a “3-D effect” design feature.)
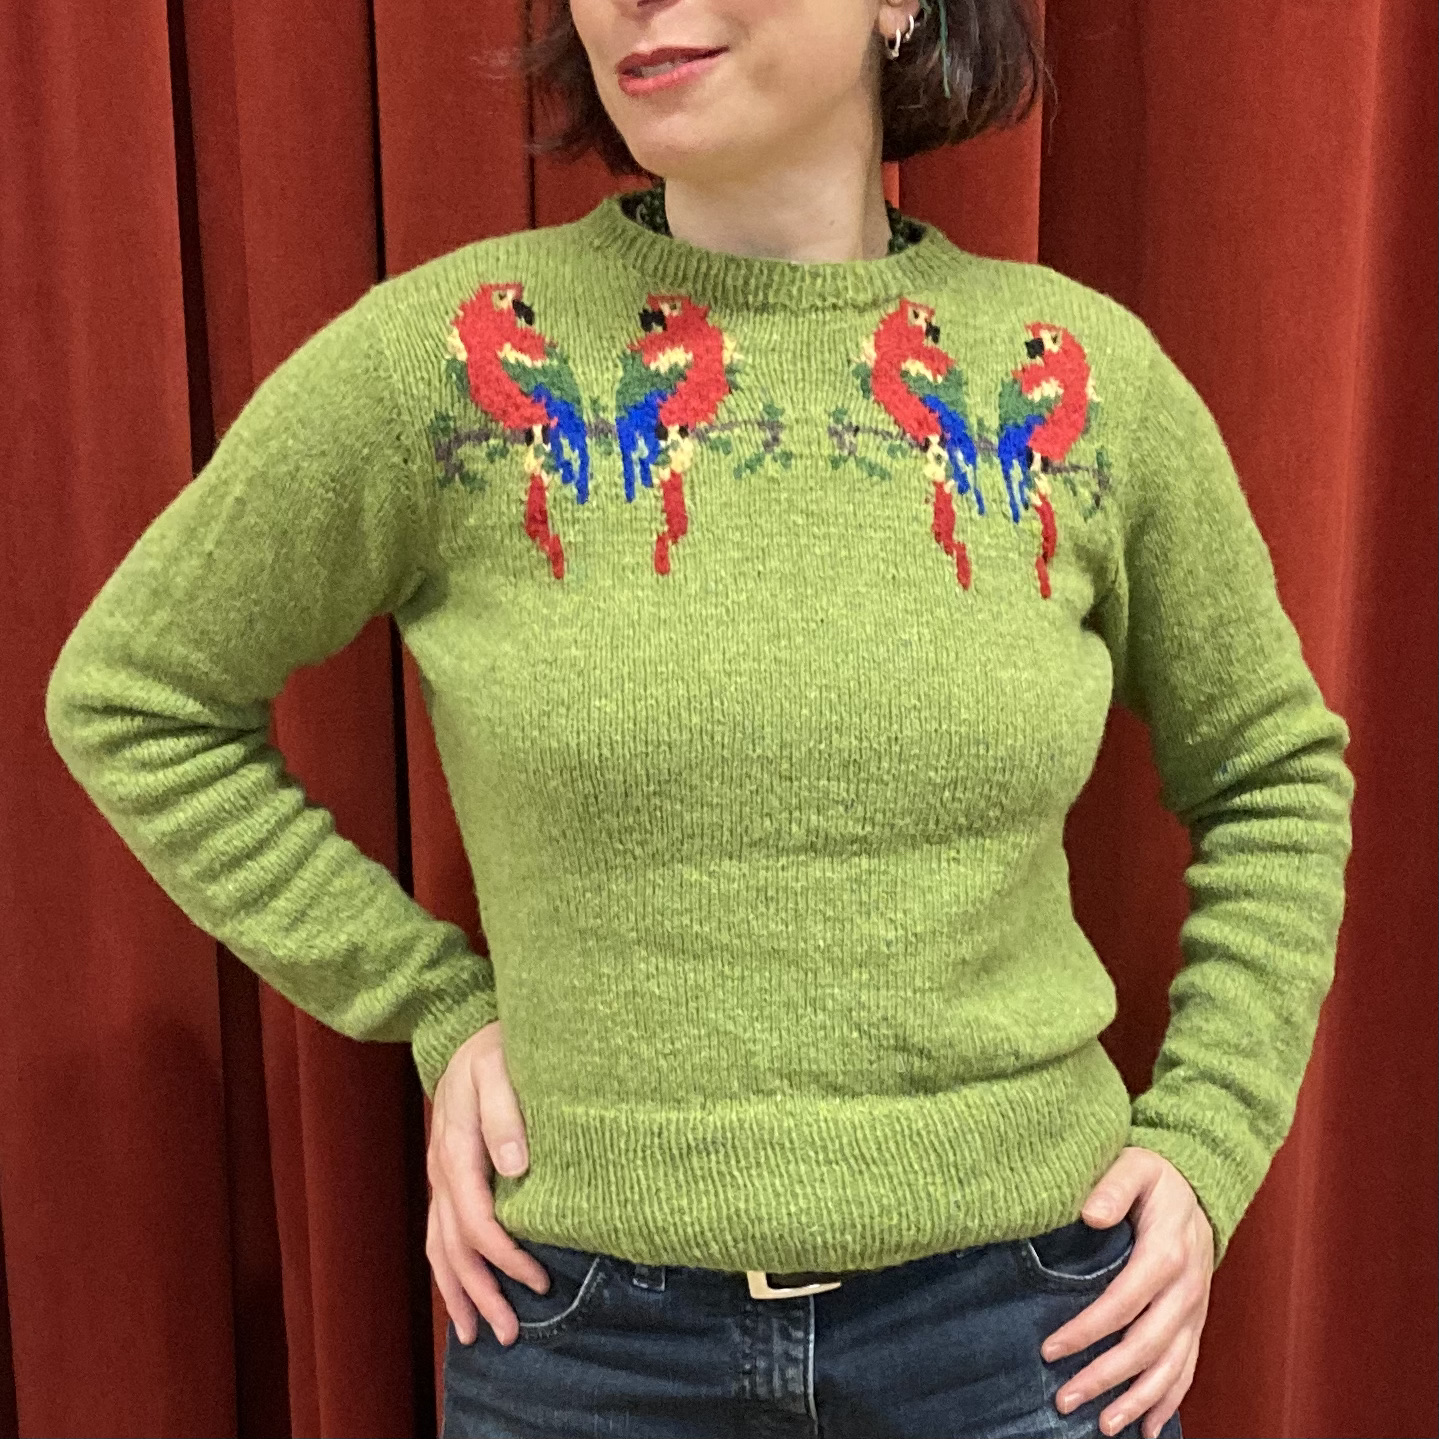
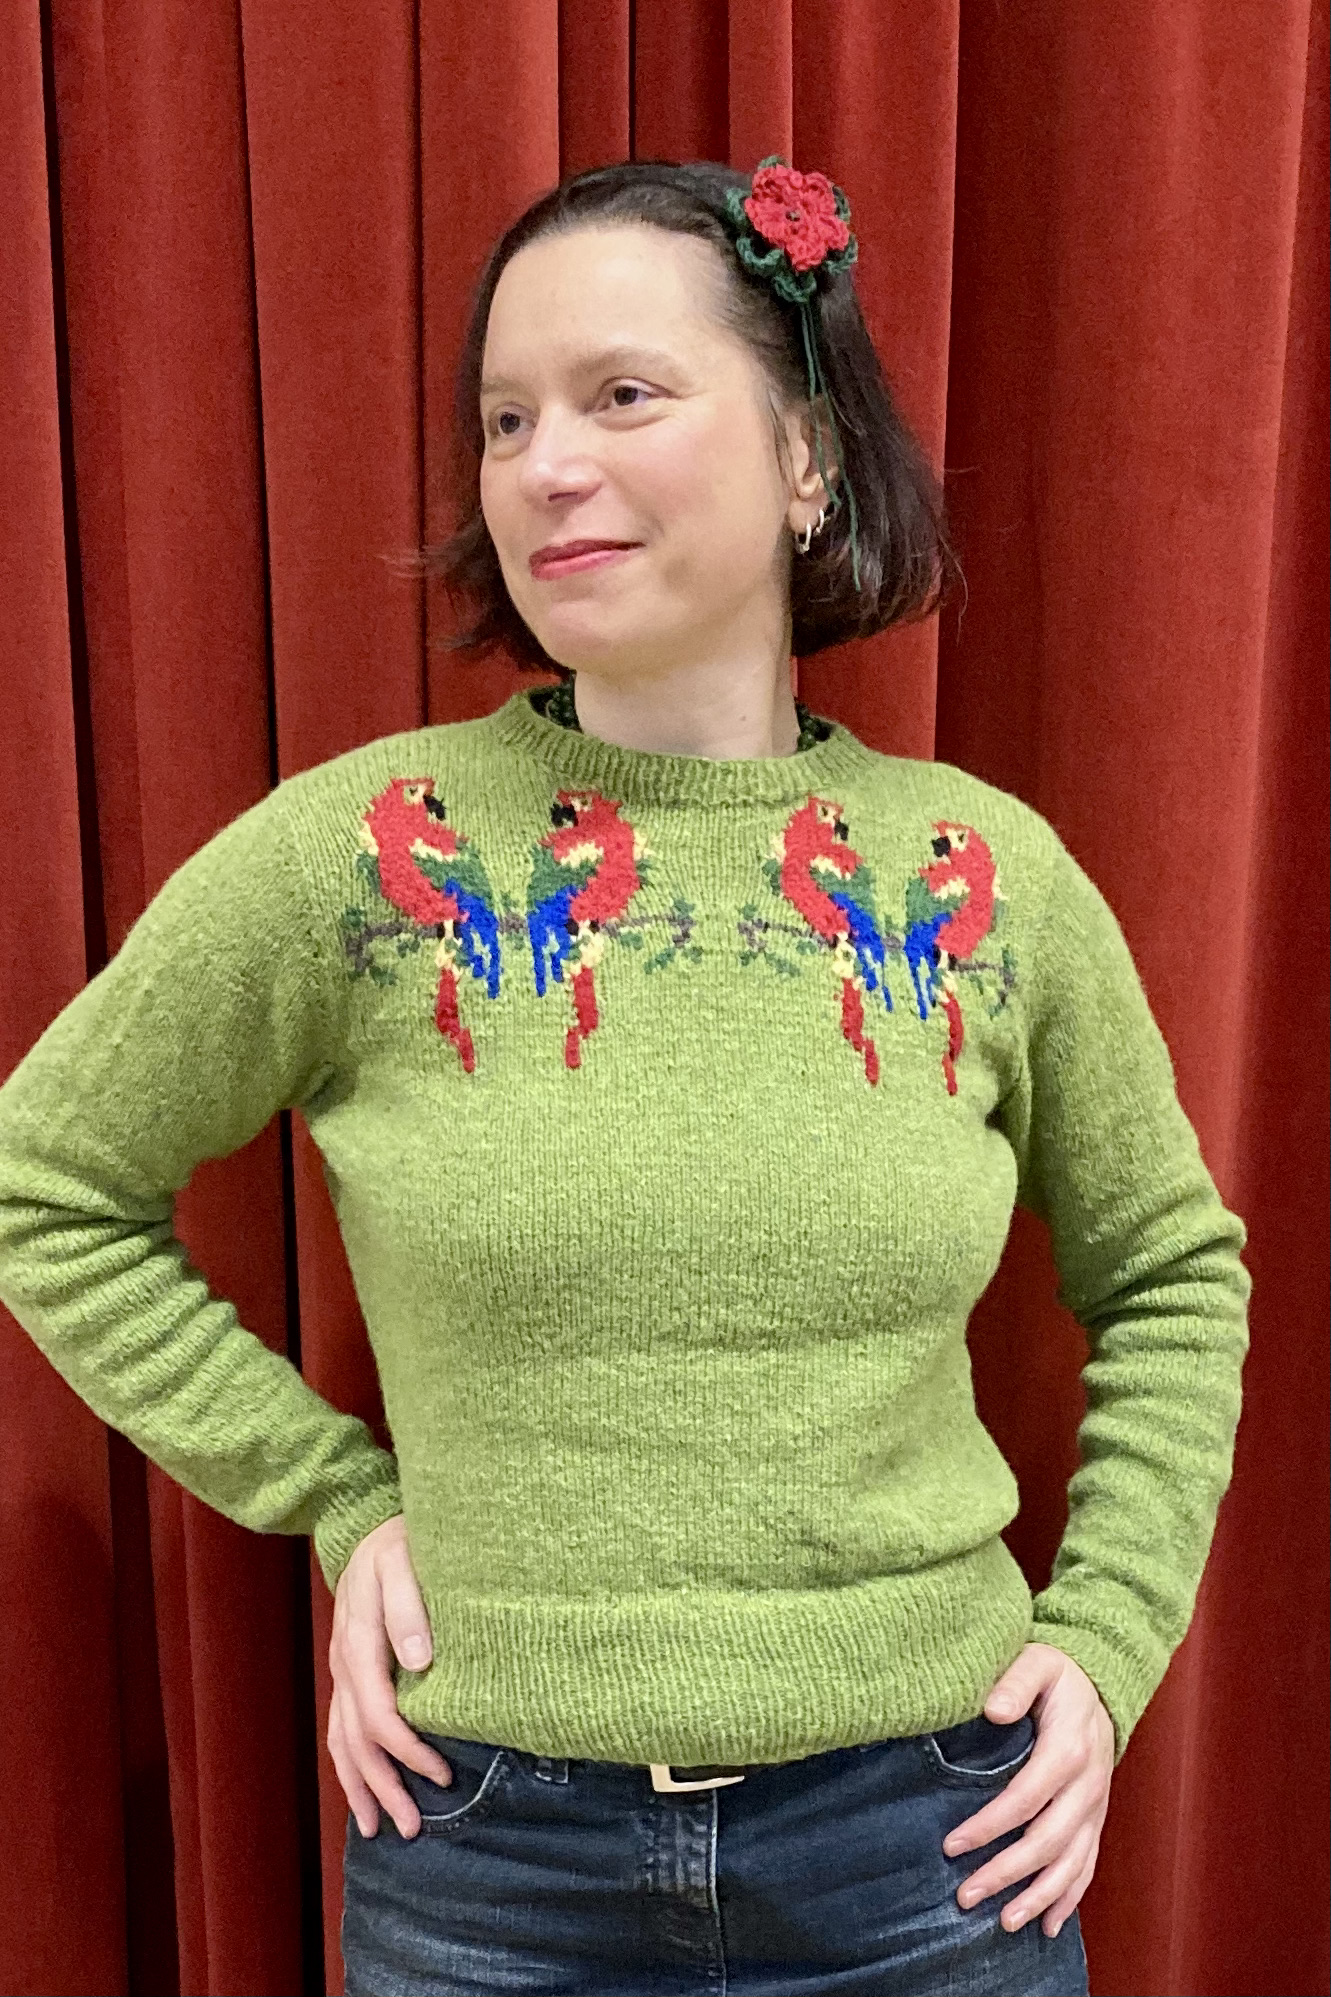
I am very happy with this jumper and it has gotten a lot of compliments already. Didn’t get the pose quite right for the photo re-creation — head tilted the wrong way! — but I thought the red curtain made a nice background.
Hello, everyone! Just a little in-between post to let you know some news:
First of all, this blog now has its own domain name: http://www.thestitchcraftsixties.com. You can still access it under the old address (www.thestitchcraftsixties.wordpress.com), but the new name is quicker to type. : )
Also, I have finally finished this Little Girl’s Holiday Dress project from last year, and it was worth the wait! It came out beautifully and I’m very happy with it, so check out the link if you want to see how it turned out.
Since the June 1964 issue of Stitchcraft didn’t have any projects that I really wanted to make, I thought I would share another non-Stitchcraft, non-1960s “blast from the past” project that I recently completed.
A little back story: for the last couple of years, one of the wonderful mods from the “All Things Vintage” group on Ravelry has been transcribing serial stories from 1920s newspapers and posting them, one chapter a day. She supplements them with posts of photos or postcards from the era, as well as clippings from the same newspapers with advertisements, fashion advice, and all kinds of details that give context to the stories. The stories themselves are often quite hare-brained in terms of plot (the authors had to keep readers interested through 100+ chapters, so cliffhangers and ridiculous plot twists abound) but thoroughly entertaining, and give a lot of insight into social mores and lifestyles of the time.
As you might expect, we (the group’s members) enjoy these stories immensely and add to the entertainment by guessing the outcome or the next plot twist, making insightful or humorous comments on the characters and action, or adding our own spin-off ideas to the story (one member even re-wrote a chapter in the style of a post from the popular moral-advice-seeking “AITA” subreddit.) Out of all this fun, the idea was born to have a Knit-Along / Crochet-Along relating to the current story, where participants could make an item of clothing that one of the characters might have worn, and explain how the item would fit that character’s personality.
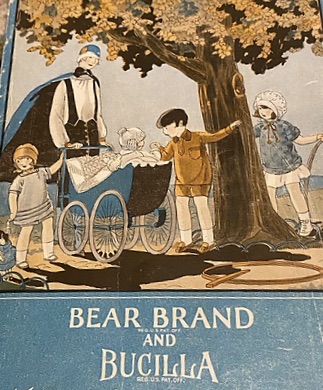
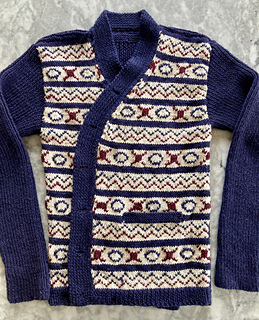
For my part, I love the stories but don’t usually knit items from the 1920s — unshaped, flowing upper-body garments make me look like I am wearing a sack. I do like the Fair Isle patterns which were enjoying a renaissance at the time, so looked for some of those, thinking I might make a slipover/vest/waistcoat for myself. Then a fellow All Things Vintage member helped me find the pattern shown above, which I knew would perfectly suit a friend of mine who is a huge 1920s fashion aficionado. Isn’t it dashing?
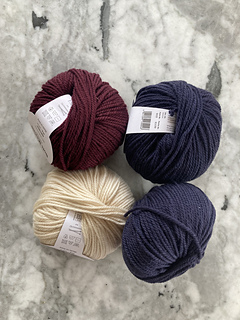
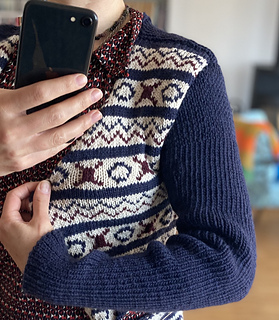
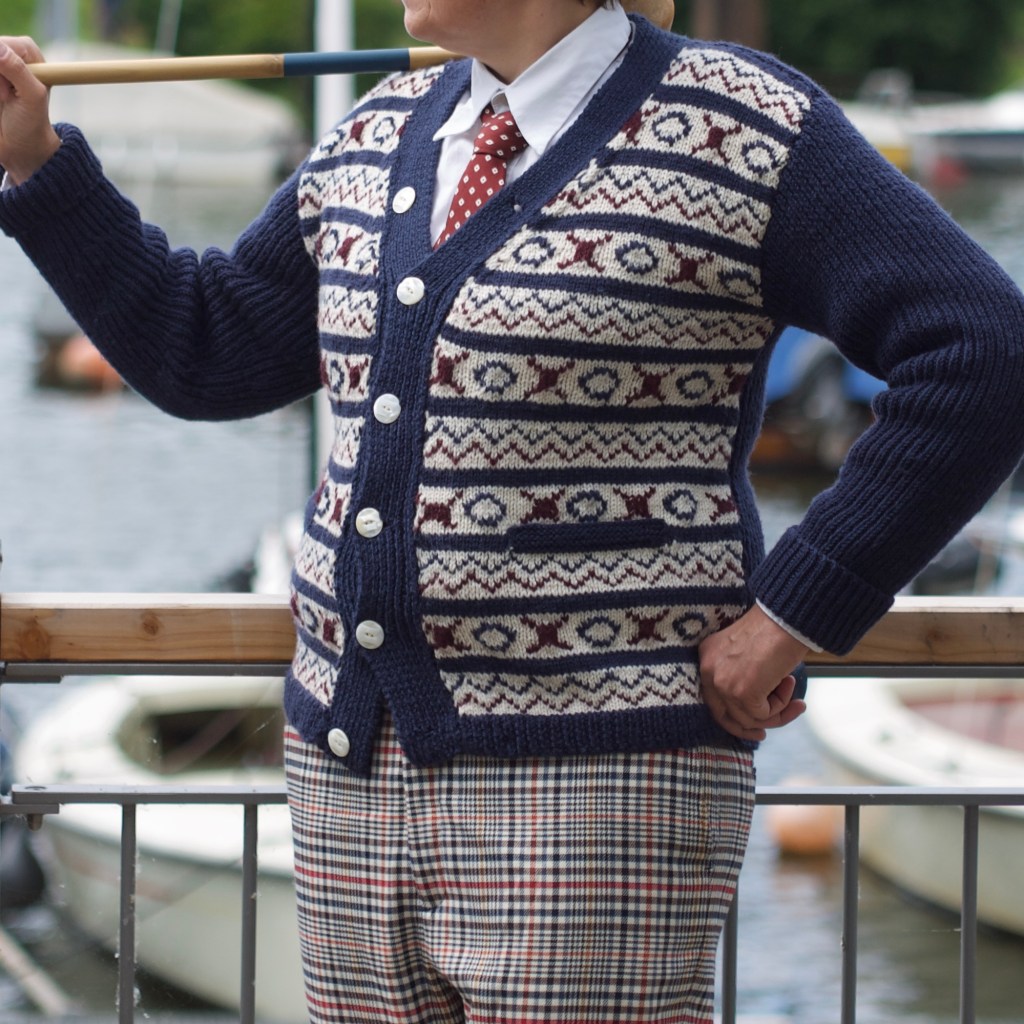
The pattern, from 1923, is written for Bear Brand Bucilla wool in stripes of fawn and brown, with additional contrast motifs in “Henna”. My friend did not want a beige and brown cardigan but did want a period-appropriate colour scheme, so we settled on navy blue and white with burgundy-red contrast, a popular “sport” combination of the time. My yarn was “Soft Merino” by Wolle Rödel, a very normal, easy-to-knit-and-care-for DK 100% wool.
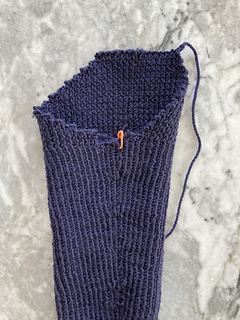
The pattern was full of surprises, starting with the back, which is knit entirely in single-colour 1×1 ribbing. It is consequently very narrow, much more so than the wearer’s back, but stretches with movement. I was convinced it would make the cardigan too tight, or make the bands gap too much in the front, but the ribbing has enough “give” that it works out perfectly with the flat-knit Fair Isle fronts. The overall effect is sleek and slim-fitting, but allows for plenty of easy movement — I can see why it was intended to be worn for playing golf or other sports with lots of upper-body movement.
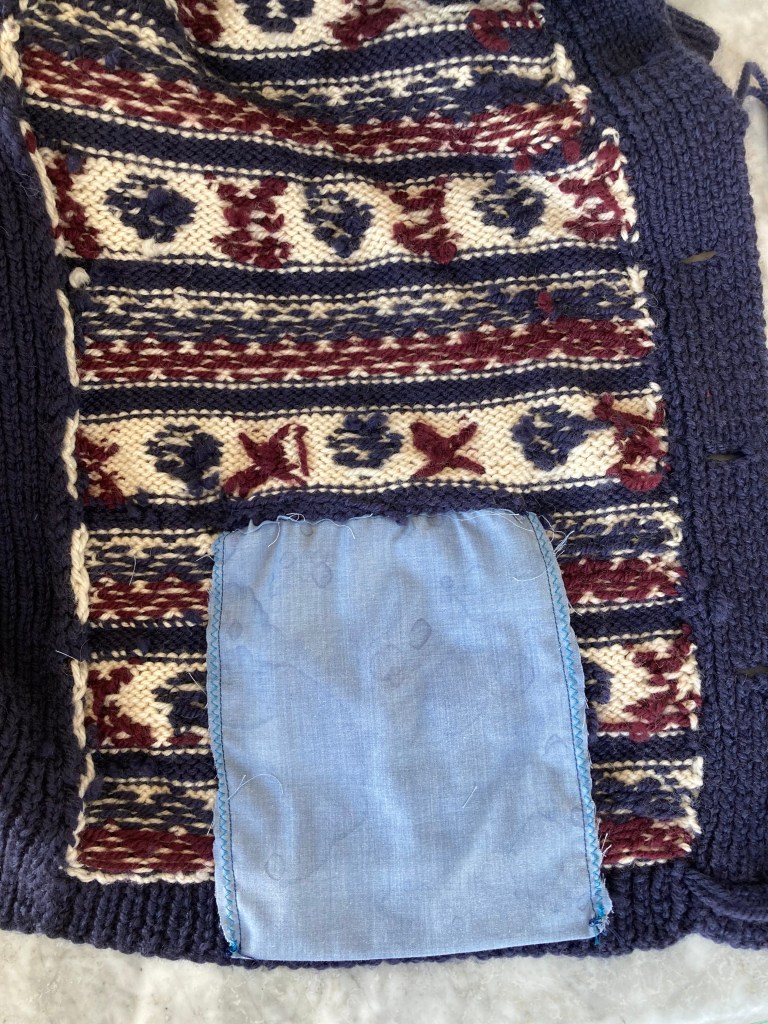
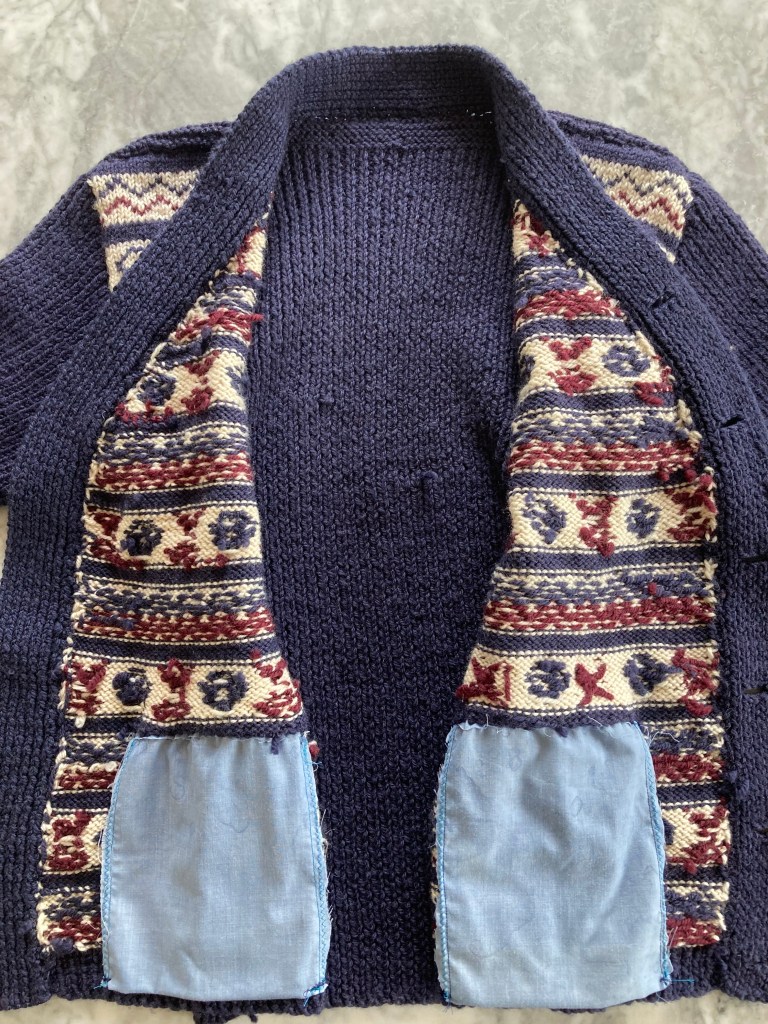
Speaking of those Fair Isle fronts, though… a closer read-through of the pattern revealed that they are not supposed to be knit in stranded Fair Isle technique. You are supposed to knit them in plain stripes and them embroider the motifs on later using Swiss darning aka duplicate stitch! I was truly flabbergasted to see that, as I had assumed the 1920s interest in stranded knitting designs extended to stranded knitting technique. Not so — in fact, as I learned, many other “Fair Isle” designs of the time were also produced via duplicate stitch embroidery.
I like embroidery on knitwear in moderation, but all the motifs on both fronts of the entire jacket was too much for my liking. I experimented with different techniques on the first couple of stripes — should I strand all three strands across the whole row (bulky and the dark colours show through the white background)? Not strand at all, but make each motif in intarsia using separate short lengths of wool (so many ends to weave in)? Strand the colour for one set of motifs across the row and embroider the other (worst of both worlds?) Interestingly, making all the motifs in intarsia technique and weaving in the ends turned out to be the least amount of effort, so that was my choice.
The sleeve cap construction was fascinating. Because the back is done entirely in ribbing and the front in flat colourwork, the front and back pieces have a naturally different shape above the armhole even though the bind-offs and decreases are symmetrical. The sleeve cap accounts for this by casting off three stitches every other row on the front-facing sleeve side and one on the back sleeve side. That made a very lopsided sleeve cap which fit perfectly into the lopsided armhole. Wow. I would never have thought of designing a sleeve cap like that, but it makes perfect sense and produces a very neat, squared-off shoulder.
For a final surprise, the pockets are not knitted, as I am familiar with from 1950s and 1960s pocketed garments, but made of “some strong fabric” and sewn in. Thinking along with the sportswear theme, that makes sense if you are going to put a heavy golf ball in your pocket — a knitted pocket would sag under the weight, but the woven fabric (I used a bit of cotton-poly ex-pillowcase from the upcycling drawer) keeps its shape nicely. The pockets were made extra large by request and it was surprisingly difficult to sew them in place, but they turned out fine.
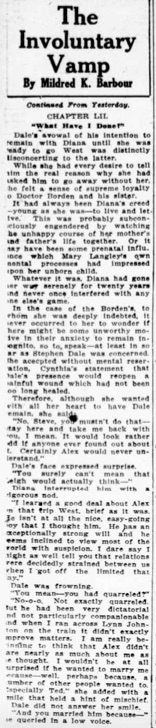
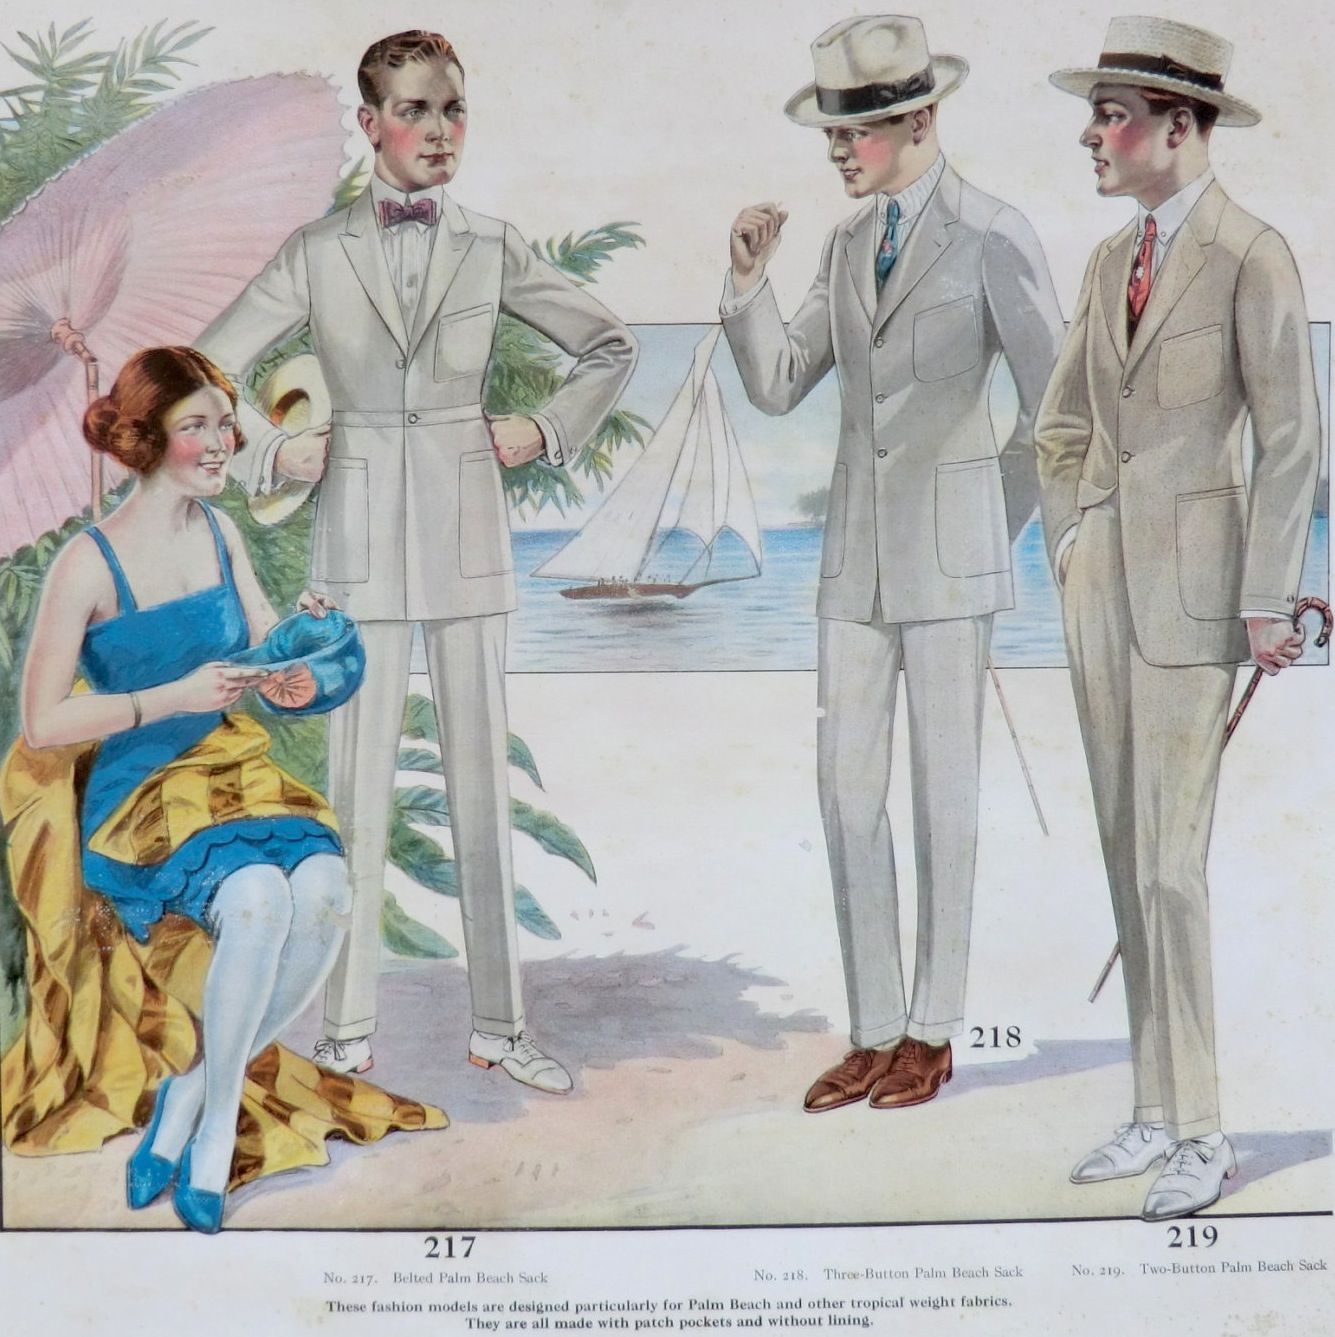
And that was that! The story, by the way, was “The Involuntary Vamp” by Mildred K. Barbour, published in 1921 in the Washington Herald, and concerns itself with the adventures of young Diana Langley, who was “cursed” by her aunt Marjorie with the “gift” of “lure” — all the men are after her, but the only one she really wants (Stephen Dale, an older friend of the family) cannot marry her, as insanity runs in his family. So she marries another man out of spite, jumps off her honeymoon train in the southwestern U.S. desert with a different man, gets semi-kidnapped by yet another man, gets away and finds sanctuary with yet another man (and his sister) who we later find out is responsible for the whole hereditary insanity situation… or non-situation, as it turns out (did I mention that the plots of these stories are often ridiculous, but thoroughly entertaining?) and then has more adventures before being united with Stephen Dale, who is actually quite mentally healthy and was in love with her the whole time. Diana’s first-husband-out-of-spite has meanwhile conveniently died, leaving the happy couple free to marry!
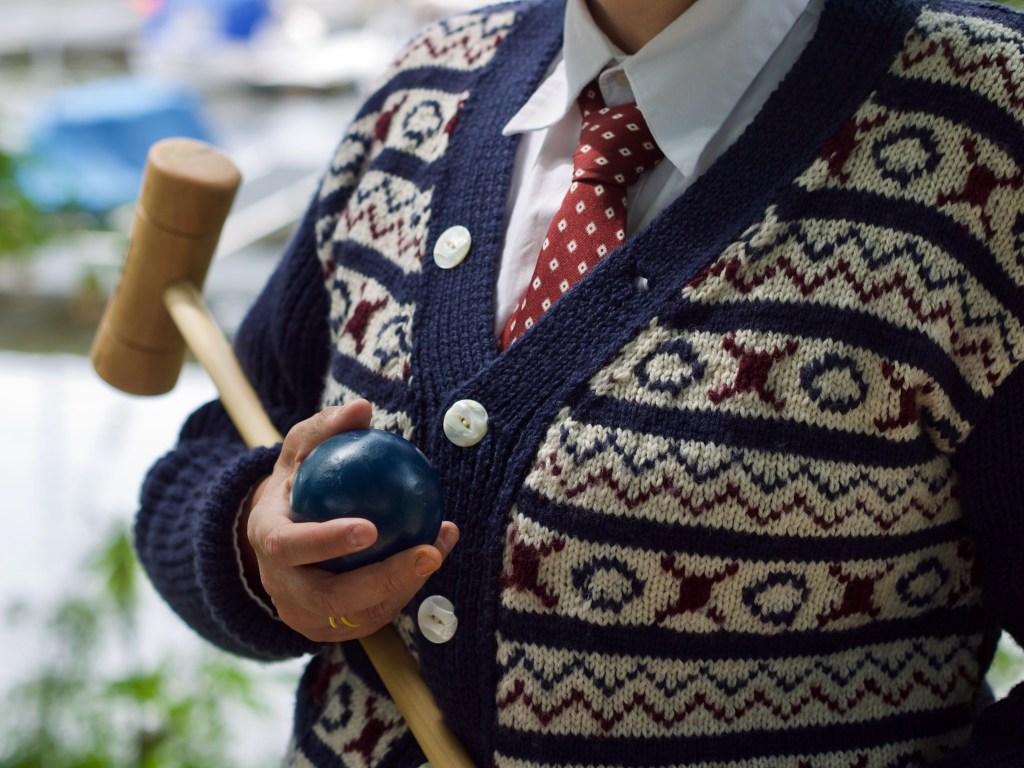
The Stephen Dale in the story is quite rich (of course), has a yacht and participates in all the usual 1920s upper-class sports, so here is my “Stephen Dale” wearing his all-purpose sport cardigan to play a round of croquet on a lovely leisurely Sunday afternoon:
There are such nice details in the cardigan, from the turned-up ribbed sleeves to the neat pocket flaps. The buttons are real mother-of-pearl, vintage buttons from the 1920s.
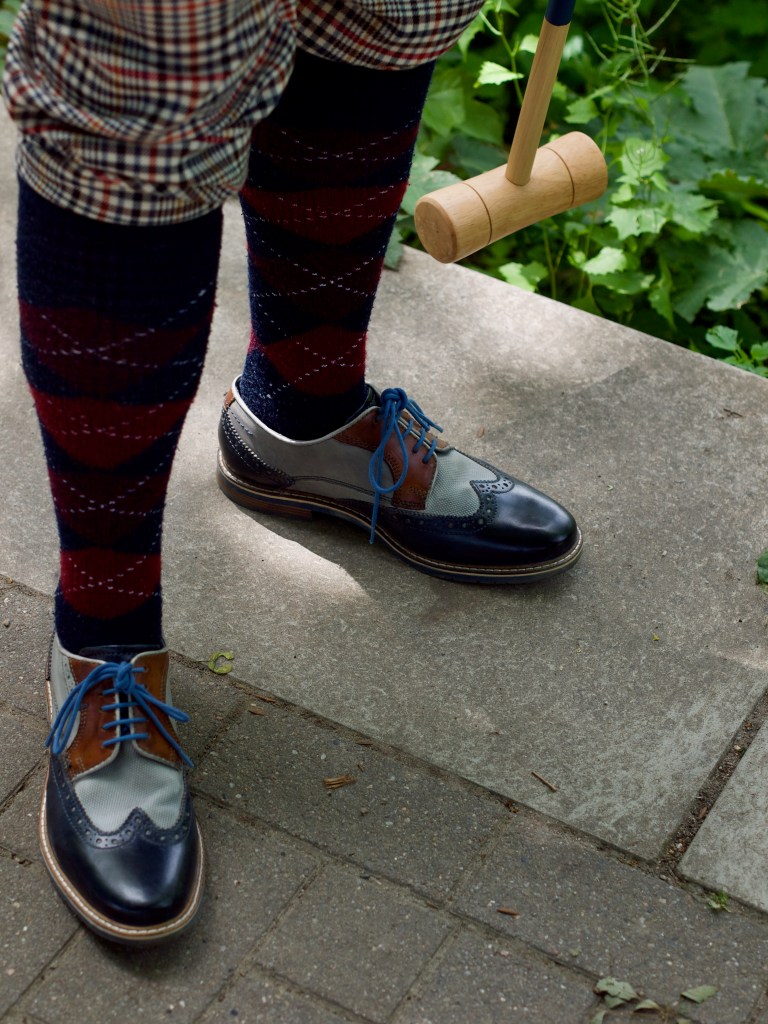
And with that, they boated off into the tropical sunset! May all your adventures have such a happy ending.
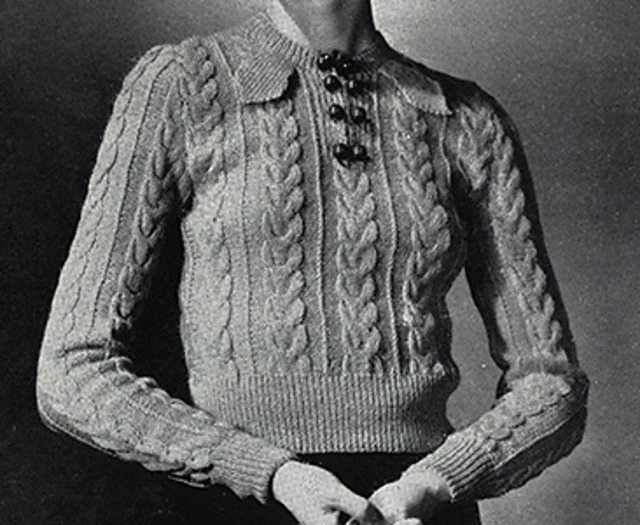
This month’s project (finished just on time!) is somewhat different from usual, as it is neither from Stitchcraft, nor from the 1960s. It’s a sleek little knitted blouse from 1937, from a pattern originally published by the Spool Cotton Company and now available on the wonderful Free Vintage Knitting website.
Unlike Stitchcraft, which I have been collecting in paper form for some time now, this was my first acquaintance with the Spool Cotton Company, and I have to admit that I hadn’t heard of it before. A Wikipedia search turned up the Clark Athletic Association, an American soccer team from New Jersey that was sponsored by the Clark Mile End Spool Cotton Company. I don’t know if this was the same Spool Cotton Company that published the pattern, but I suspect it could be. In any case, the Clark name and company are of course well known in the knitting/crochet world, having existed for centuries in various forms and mergers (Clark Thread Company –> Coats and Clark –> Coats Patons, which in a roundabout way even leads us back to Stitchcraft…).
From what I can see in the Ravelry database, Spool Cotton Company patterns were primarily for accessories and homewares crocheted in cotton (as one might expect with a brand named “cotton”). The leaflet which contained “Clarel” was entitled “New Knitted Fashions”, with coats, dresses and suits as well as knitted blouses, and was inspired by British fashion of the time (though “fun to knit because of their easy-to-follow American instructions”.) Apparently they were written to be used with Red Heart yarn.
If anyone knows more about this company or publication, or if my guesswork in the last two paragraphs was incorrect, please let me know!
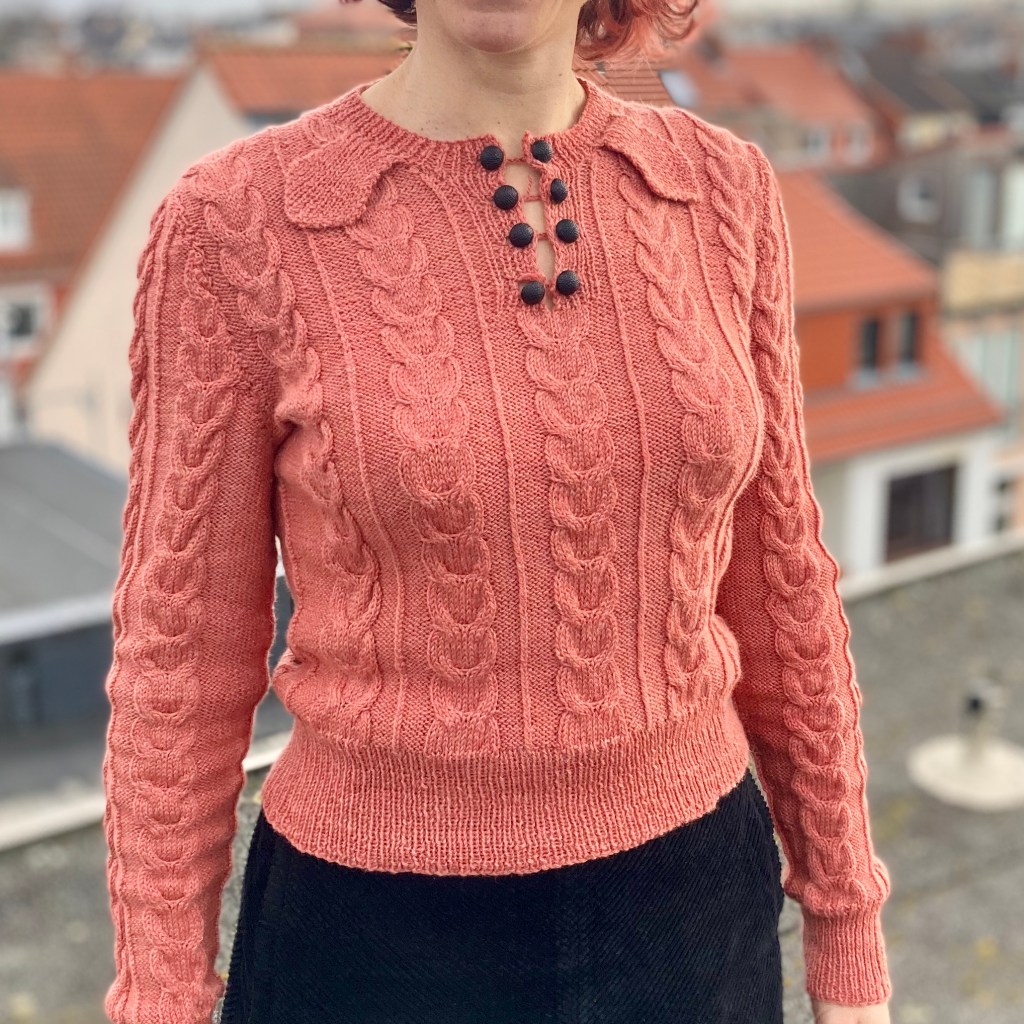
“Clarel” is written for fingering-weight wool at 7 stitches to the inch, and I had some lovely (why oh why was it discontinued?) Lana Grossa Slow Wool Lino on hand, which was perfect for it. The 15% linen makes a very smooth yarn that hold cables well, but the overall texture is quite soft and stretchy.
As most patterns of this era, there is only one size given, for 34 inch bust. I calculated out a somewhat larger size using a percentage multiplier (no. of sts x 1.05) and just added the extra stitches onto the reverse stocking-stitch base that extends on the sides. I also added 2 patterns to the length and 2 patterns to the sleeve length.
I particularly love the little design details of this pattern: the mini-rib lines (just ktbl on a reverse st st background) dividing the cables, the funny tabs at the neck and the double buttons (attached together with a crochet chain.) I could make the chains a little shorter to make the placket line up straight.
All in all, I am very, very happy with this project. It fits perfectly, is lightweight, warm and soft, and makes me look like I have much more of a figure than I actually have. It even matches a tam I just knitted, as well as my fading dyed-pink hair. What more could a person want?
Next month will be a return to Stitchcraft and the 60s!
I was invited to be a guest on Show and Tell Knitting, a wonderful video podcast about vintage knitwear (and accessories, vintage styling, and more) produced and hosted by billietoy. Her guests are all amazing knitters who share their favourite or most noteworthy projects and explain their process and the stories behind them.
Billie and most of the other guests focus more on 1930s to 1950s styles in their knitting and collecting, so I believe I was her first guest with a 1960s collection. We had a wonderful chat about 1960s fashion and history, I showed some projects and some vintage magazines and explained a crazy local tradition in my town that you probably won’t find listed in a tourist guide. (Hint: it involves kale, cold weather and lots of alcohol.)
The link will go live this Saturday, November 20th, 2021, at 17:00 GMT (18:00 in western Europe, 9:00 US west coast, 12:00 noon US east coast, check your time zone to make sure…). There will be a live chat at the premiere if you want to check in and say hi.
This has nothing to do with Stitchcraft, neither is it vintage, but I had a design published in a brand-new magazine and just wanted to share that with all of you.
The Valiant Tailoress takes its name from the Grimm Brothers’ fairy tale “The Valiant Tailor” (or “the Gallant Tailor” or “Brave Little Tailor”, original title Das tapfere Schneiderlein) and combines sewing, knitting and crochet to create outfits that look great together. The theme of the first edition is “The Enchanted Forest” and was, fittingly, photographed in the beautiful Black Forest area of Germany.
I hesitate to call it a “magazine” because it is really a book — 260 pages long on glossy paper, with articles on unusual fibres, traditional hat-making, different techniques for lining a sleeveless dress, and pages and pages of gorgeous photos. Seriously, even if you don’t knit, crochet or sew, you could use it as a coffee-table book — it’s that beautiful. The knit/crochet patterns are excellently tech edited with full charts, schematics etc. and the sewing patterns are printed on real paper.
My design was a long, lacy cardigan called “Lemon Leaves” and was paired perfectly with a floral bustier dress.
As an only semi-professional designer (I’ve had one other pattern published until now, a stranded tam and mitts set in Knit Now magazine), I was really honoured that my design was chosen to be part of this project. And I love the idea of combining sewing and knitting/crochet in one publication! In a way it does tie back to vintage publications like Stitchcraft that combined knitting and crochet with embroidery, tapestry, rug-making, etc.
The Valiant Tailoress is available to purchase in print form from their website, www.valiant-tailoress.com. It’s published in Switzerland (in English) and can be shipped around the world.
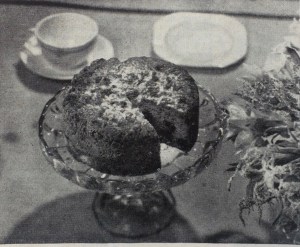
“Someone coming to tea, nothing much in the house and you are short of materials?” None of those things are likely to be true in our pandemic-stricken December 2020, but if it were September 1949, you might very well find yourself making one of Stitchcraft‘s recipes from this issue. After having excellent results with December 1949’s nut loaf recipe and fairly disastrous results with September 1949’s (this same issue) “oat crunchies”, I was cautiously excited to try out the date and ginger cake, which was promised to be “very welcome” and have a “delicious flavour”. It certainly looks appetising in the photo.
It claimed to make a 2-pound cake (weight, not price …) and that sounded huge to me, so I decided to make a half recipe for the first experimental run, using my little 16-centimetre-diameter round spring-form pan. The measurements in the original recipe are all in old-fashioned ounces by weight, so I did some halving and rounding to convert to gram measurements. (Apologies to any of my American readers who may want to try my version of the recipe at home — I meant to notice and record the measurements by volume as well, but I was too caught up in adapting that I forgot!)
Admittedly, there was a lot to adapt. The Stitchcraft recipe starts off with 8 ounces of self-raising flour, which I don’t use, so I had to figure out how much baking powder I should use for one-half of 8 ounces i.e. 4 ounces i.e. approximately 113 grams of flour. One teaspoon seemed right to me. One egg can’t reasonably be halved, so, one egg. Three ounces of margarine divided by two converts to about 40 grams — not very much for a cake! Then there’s one tablespoon of syrup or black treacle (“the latter for preference”) — I am lucky enough to be able to buy actual date syrup in my local yuppie organic supermarket, so I used a whole tablespoonful of that and reduced the sugar (I used Demerara brown sugar) to 1 tablespoon, so a bit less than half of the 3 tablespoons called for. Then 5 to 6 ounces of chopped dates (about 70 grams?), 3/4 cup aka a generous 1/4 cup milk (I used oat milk), and 1/2 = 1/4 teaspoon bicarbonate-soda i.e. baking soda. Plus almond and lemon essences (“although not essential, they do improve the flavour”) and/or a teaspoon or half teaspoon of lemon juice.
Are you still with me? Is your head spinning? You understand why I forgot to record the volume measurements. Also… where is the ginger??
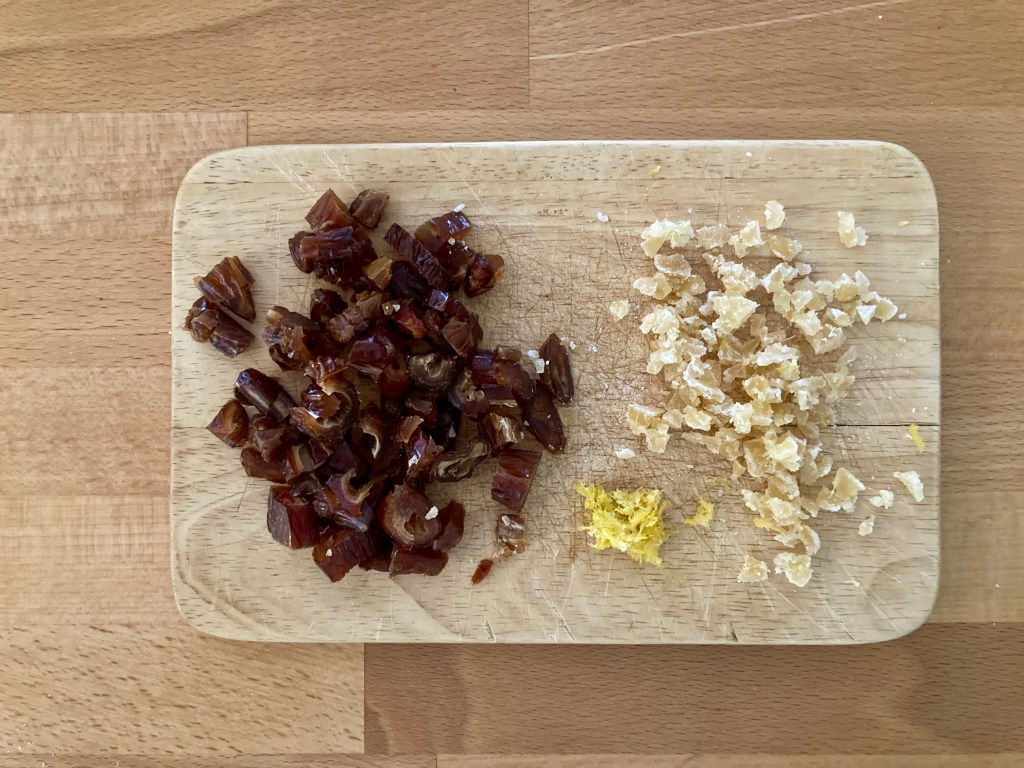
I read the recipe again. Definitely called “Date and Ginger Cake”. The description definitely mentioned the it was the combination of “dates, ginger and essences” (emphasis mine) that gave this cake its delicious flavour. And definitely no actual ginger mentioned in the list of ingredients! I think the cooking editress needs a proofreader. So I chopped up about 60 grams of dates and 20 grams of candied ginger, which looked like a good amount for a small cake, and added about a half or maybe it was closer to a whole teaspoon of grated lemon peel.
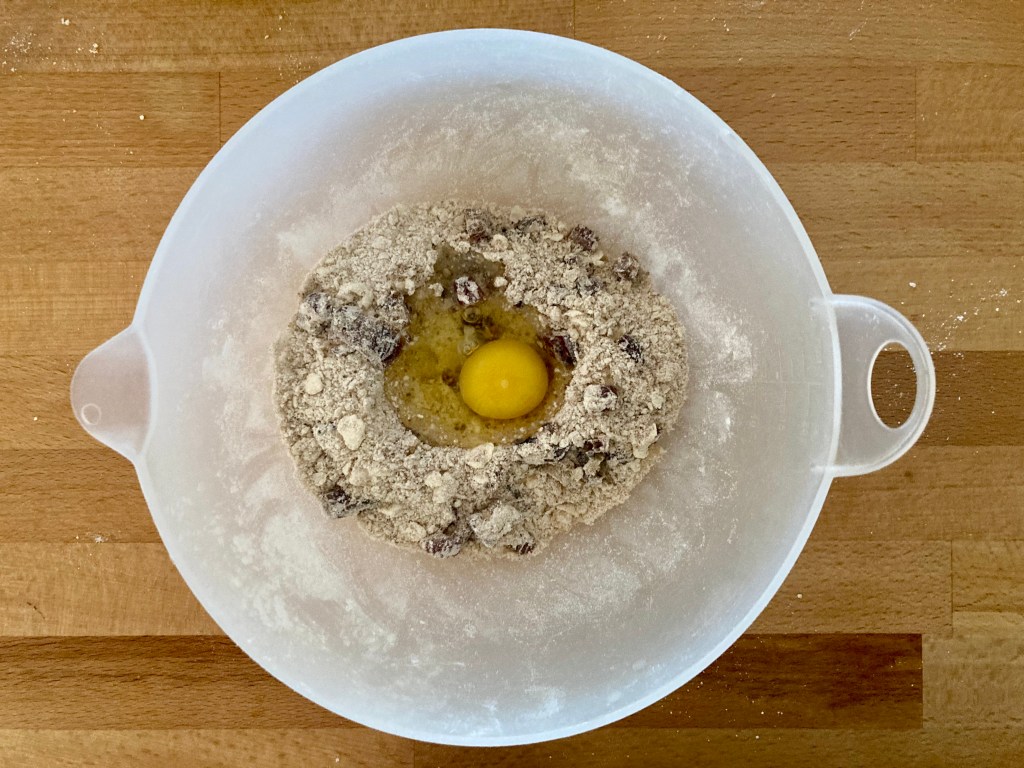
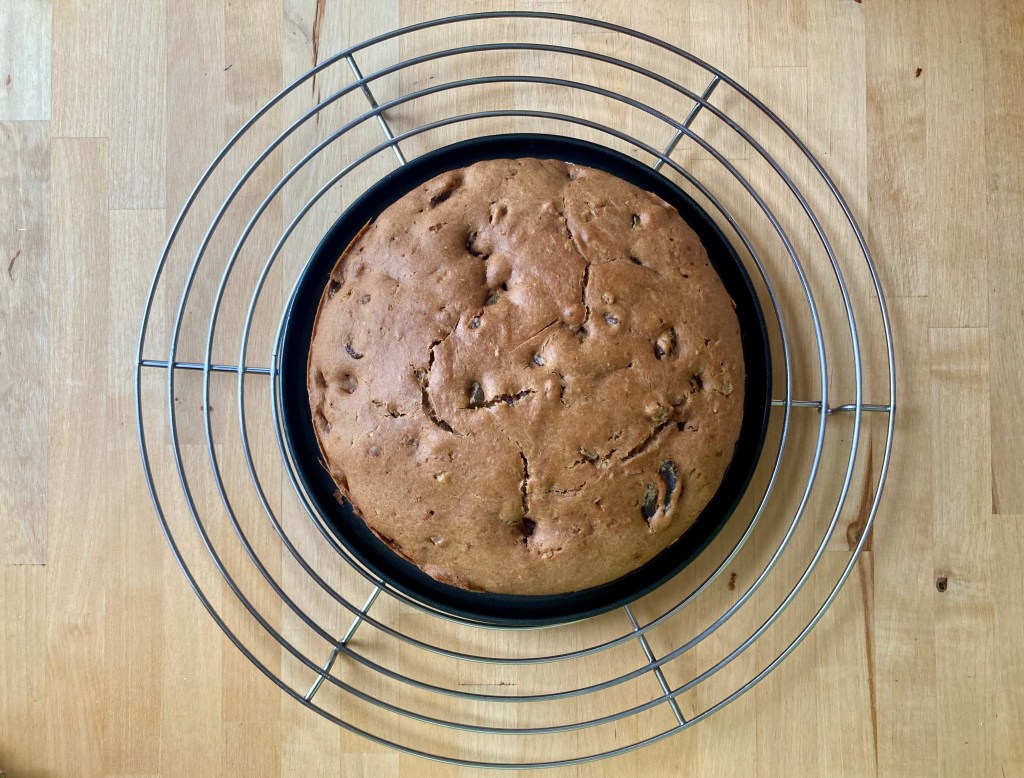
On to the recipe itself. “Rub fat into flour” — I was again impressed at the relatively small amount of margarine — “add dates, sugar and ginger”. Ah, so it is supposed to have ginger in it after all! Pro tip: toss the chopped dates in some of the flour before adding it to the mixture, so they don’t stick together. “Break egg straight into dry ingredients; stir in treacle.” The italics are original and I wonder what that “straight” is supposed to mean. Don’t beat the egg first? Don’t throw it in at an angle? “Dissolve bi-carbonate soda and essences in milk, add to mixture and mix thoroughly.” Okay. According to the recipe, the resulting batter should be fairly sticky and mine had a bit more liquid, so I added some more flour, then put it in the cake pan and baked it. The recipe said to bake it at Regulo 4, or 375 degrees, for … one and a half hours? That seemed excessive even when reduced for a half recipe, so I set a timer for 30 minutes.
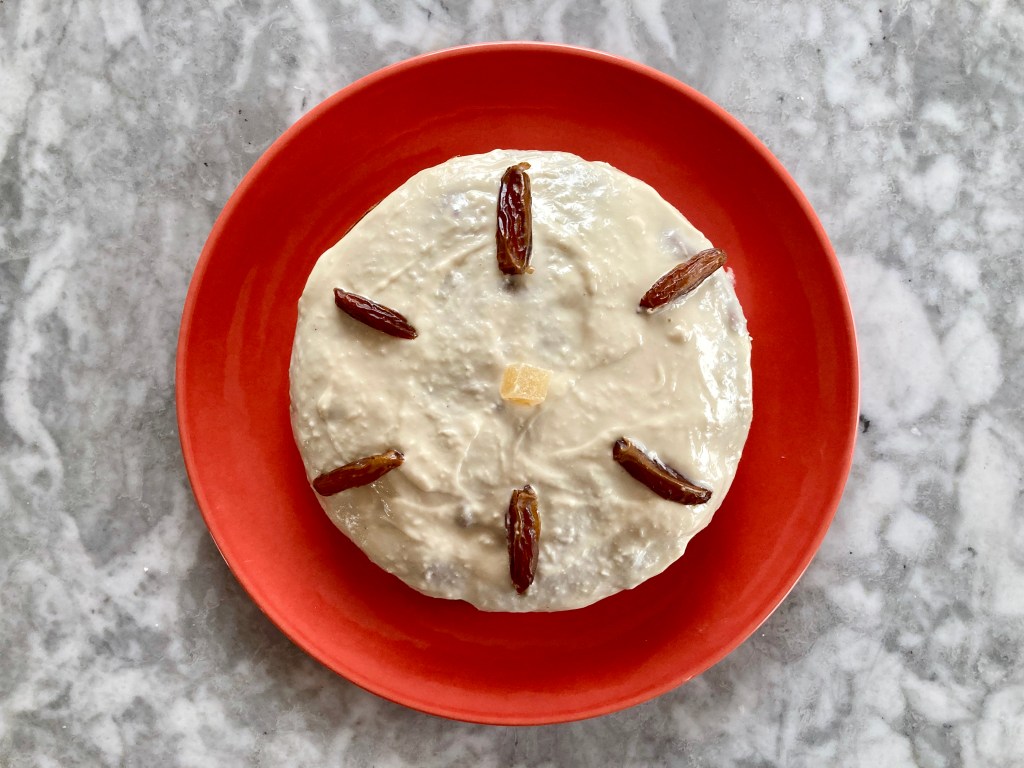
It baked fine in that time, though a little less would have been even better. Then I added my own personal secret ingredient: coconut icing. Nothing goes better with dates and ginger than coconut! I used a sweet coconut spread from the same organic supermarket, slightly warmed and then smoothed over the top, but it’s easy enough to make it yourself from coconut oil, dried coconut whizzed through a grinder to make a sort of powder, powdered sugar and a little coconut milk. Heat together in a double boiler until liquid enough to spread and spread it on the still-warm cake, then let it cool well.
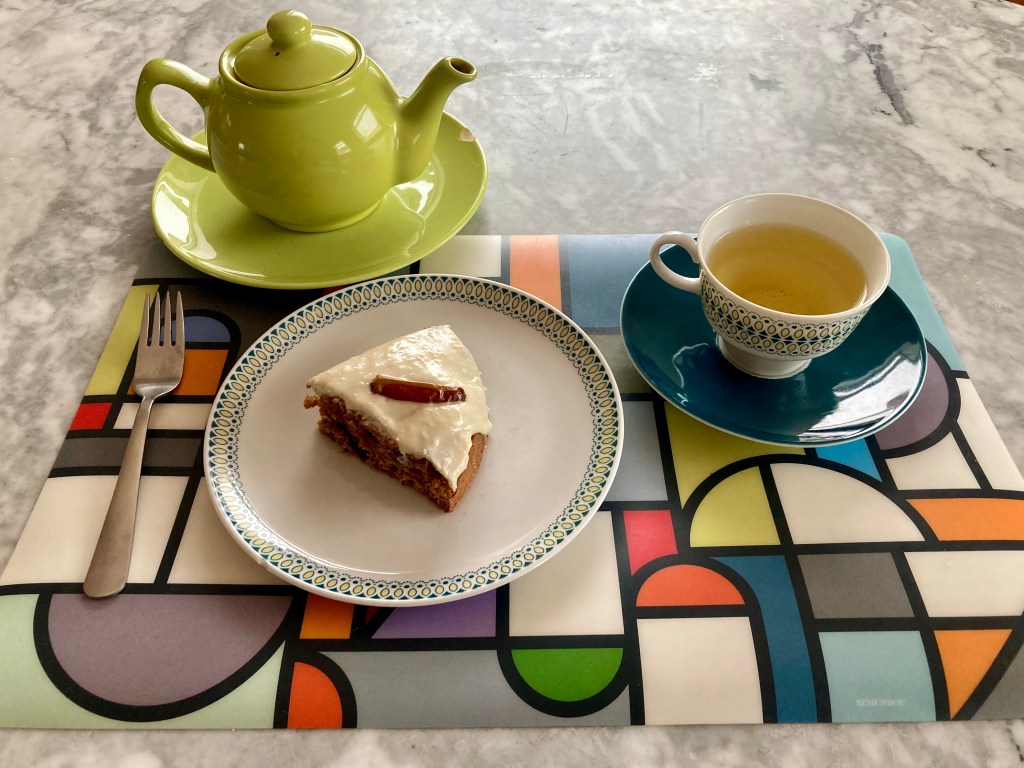
It looked good, but did it taste good? Yes! It tasted delicious. The consistency was a bit on the dry and crumbly side, which I guess is to be expected with so little fat in the batter, but the icing balanced that out perfectly. The date and ginger flavours came through well and harmonised. And it had that depth of flavour that comes from good gingerbread or spice cake, although I used no extra spices. The half-recipe cake is small, but rises well and will surely keep for a while if covered and in the refrigerator. It makes the perfect cake for your socially distanced, one-person 2020 holiday teatime. (If that’s any consolation.)
Here’s my version of the recipe, for a small cake:
DATE AND GINGER CAKE
125 grams flour (you can mix 1/2 whole grain and 1/2 white)
1 tsp baking powder
Pinch salt
40 grams margarine
60 grams chopped, dried, pitted dates
20 grams chopped candied ginger
1/2 tsp grated lemon peel
1 tbsp brown or Demerara sugar
1 tbsp date syrup, dark sugar syrup or molasses/treacle
1 small egg
1/4 cup milk or milk substitute (almond, oat)
1/4 tsp baking soda
Coconut icing
Toss dates in a small portion of the flour. Mix rest of flour, baking powder and salt in a large bowl; add margarine in small chunks and rub into the flour with fingers until crumbly. Add dates, sugar, ginger and lemon peel and mix. Make a small well in center of mixture and break the egg into it. Add syrup. Dissolve baking soda in milk; add to mixture and mix everything until blended. Drop into a greased and floured 16-centimetre-diameter round spring-form cake pan, smooth surface evenly and bake at 180 degrees C for approximately 30 minutes. Set on a rack to cool. Warm the icing in a small double boiler or microwave until spreadable and smooth over the still-warm cake. Decorate with date slivers, ginger or shredded coconut as desired and let cool completely before serving.
Progress on actual projects has been going slowly this month, but here’s a fun extra: a video about the connections between performing early music and knitting from vintage patterns, written, directed by and starring yours truly.
In “real life” (i.e. what I do for a living when I am not knitting) I’m a professional concert and opera singer, and as you all may imagine, work has been more or less non-existent since the pandemic hit. Among other upheavals, my friends and colleagues Yonit Kosovske and Vlad Smishkewych had to first postpone, then completely overhaul the launch of their new organisation for early music, H.I.P.S.T.E.R. (Historically Informed Performance Series, Teaching, Education and Research). Being the creative people that they are, they re-imagined part of the launch as a new video series exploring connections between music and artisanry, called WAVE~LINKS.
Many of us professional musicians perform or engage with other artistic genres, and the idea behind WAVE~LINKS was to showcase those “other” passions and serve as a platform to discuss and reflect upon the shared spaces between (early) music and other artistic disciplines. And we are a very creative bunch! The online H.I.P.S.T.E.R. launch on November 7th, 2020 featured videos from creative artists around the globe sharing their insights into links between music and poetry, painting, pottery, photography, dance, knitting, weaving, fermentation, wood working, and more.
My video is about knitting, obviously, and the similarities that I find between historical performance practice as it relates to singing early music, and historical “knitting practice” as it relates to working with and from vintage pattern sources. I hope it is interesting to musicians and knitters alike.
Enjoy it, and if you like it, check out the other WAVE~LINKS videos on the H.I.P.S.T.E.R. web site, their Facebook page or their YouTube channel. I can especially recommend the video by Rosemary Heredos, a fellow singer and knitter whose video explores the connections between singing, knitting and spinning wool.
“Someone coming to tea, nothing much in the house and you are short of materials? Here are three recipes that don’t need much in the way of ingredients, don’t take long to mix and are delicious to eat.”
I’m obviously not going to have anyone over for tea anytime soon, since Covid-19 social distancing and isolation restrictions are still in full force. Not being able to go out to buy groceries very often if at all and having to use many non-perishable items that had been lingering in the back of cupboards did make me think of those recipes in earlier Stitchcraft issues, though. In Great Britain, many items were rationed even years after World War II ended, and easy, economical recipes in women’s magazines from the late 1940s reflected that situation.
Previously, I had made a “nut pie” from a recipe in Stitchcraft‘s December 1949 issue, and having found cashews, walnuts and almonds in the cupboard, I made it again last week. It was delicious, came out perfectly and I can really recommend that recipe with whatever combination of nuts you have on hand. Today, I felt like baking something sweet and found these recipes for a date-and-ginger cake, cheese scones and “oat crunchies” on the cooking page of the September 1949 issue. I didn’t have dates but I did have oats, margarine and dark sugar beet syrup (black treacle / molasses), so oat crunchies it was.
The recipe is simple: 3 ounces lard and 3 ounces margarine, softened in the oven and mixed with 14 tablespoons oats, 3 tablespoons syrup and 1/2 teaspoon “bi-carbonate soda” (baking soda), then baked in a greased tin, cooled and cut into squares. What could be easier? I don’t cook with lard, but I did actually have two kinds of margarine, so that was the only substitution, and I made a half recipe to try it out. The consistency of the mixture before baking should have been “fairly stiff” but it was surprisingly liquid. I guessed the margarine had softened too much, i.e. melted, so I added more oats. Then I baked it at “Regulo 4, or 375” (190 C) for 30 minutes as specified.
NAILED IT!
Oh, dear.
It bubbled up and sort of exploded in the oven while baking, burning a little on the top but still staying quite liquid throughout. It has cooled down by now and solidified slightly, but is still nowhere near “crunchy” territory — more like mushy granola. The recipe did say 3 ounces lard and 3 ounces margarine — maybe it should have been 3 ounces total? (I did remember to halve all the measures, so I definitely didn’t use twice as much fat as I should have.) It tastes absolutely delicious, though, as you might expect from something that is essentially fat mixed with sugar and a few oats!
Moral of the story: I probably won’t make this recipe again, definitely wouldn’t serve it to company (if anybody is allowed to visit ever again), but if anyone needs some fat- and sugar-packed lockdown comfort food that can be made without leaving the house for supplies, and doesn’t need to photograph said food for a blog or be seen eating it out of the baking pan with a spoon (ahem), this will probably fit the bill.
In its earlier decades, Stitchcraft included a page of easy and economical recipes in each issue, mostly for tea-time cakes or pastries. The tradition ended around 1950, so none of my 1960s issues have a recipe page, but I do have a few magazines from the late 1940s and thought this would be a fun time to try out their “Christmas Cooking” ideas.
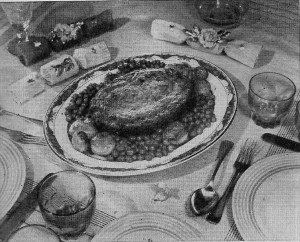
December 1949 gave us a savoury recipe for nut pie and a very easy recipe for candy made of condensed milk, sugar and vanilla. I had some ground nuts on hand, so decided to try the nut pie. The recipe is quite simple and calls for 2 parts by weight of finely ground nuts of any kind, 1 part each of cooked rice or semolina, breadcrumbs, and sautéd onions, plus mixed herbs, nutmeg and salt and pepper to taste. My version had ground almonds and hazelnuts, Arborio (risotto) rice which I thought would stick together better than other sorts of rice, no breadcrumbs as I forgot to buy bread and didn’t feel like going out again in the rain, and some sunflower seeds for topping. Here’s my adaptation of the 1949 recipe:
Cook the rice in 2 parts water to 1 part rice and let it absorb all the water. Chop the onion finely and sauté it in a bit of olive oil until soft and golden. Grease a small loaf pan with olive oil and sprinkle with sunflower seeds (they will come out on top when the pie is inverted.) Mix all ingredients except butter or margarine thoroughly with oiled hands and press the mixture evenly into the pan. Top with butter or margarine and bake in a 190°C (375°F) oven for about 30 minutes, or until slightly browned on top. Remove from oven and let cool for 5 minutes, then invert onto a board or serving platter.
This is about half the amount of the original recipe and makes enough for 1-2 portions. It was hard to tell when it was “done” — after all, all the component parts had either already been cooked, or didn’t need to be — but I figured it was ready when the top began to brown a little. It didn’t hold together as well as I had hoped, so I might add a beaten egg next time I make it.
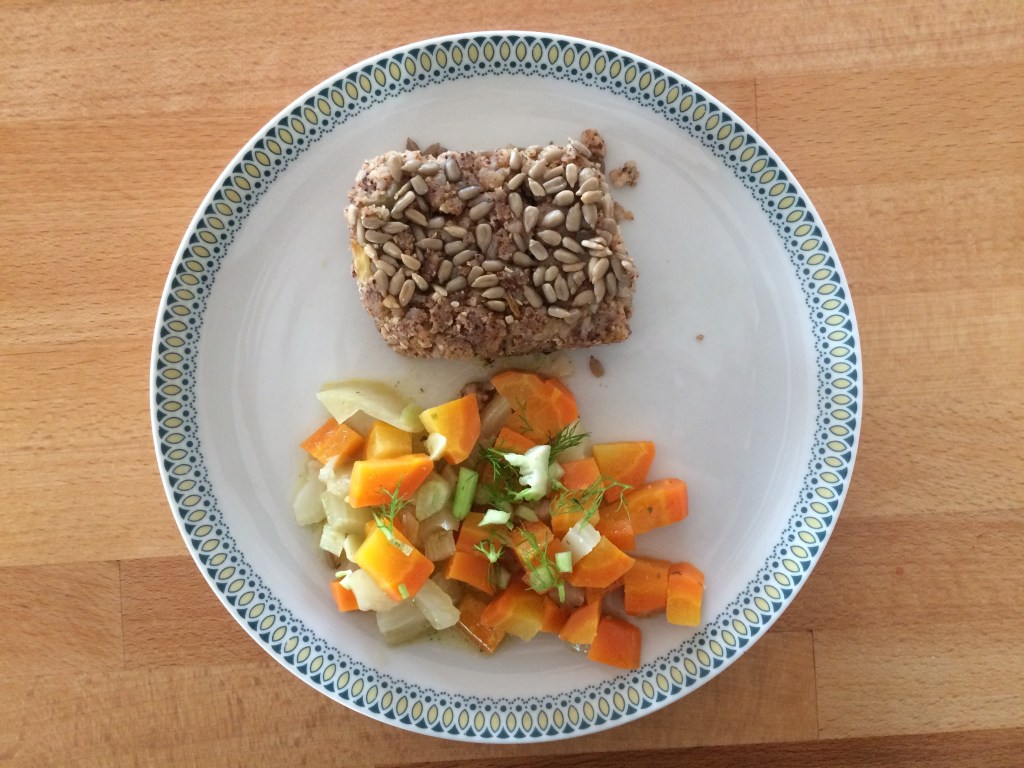
The original recipe suggests serving it with thick, brown gravy, baked potatoes, peas or stewed celery, or “apple-sauce goes well, too”. I didn’t see the need to eat potatoes with something that already had rice in it, so I made some simple sautéd carrots and fennel to go with it. Gravy or applesauce would have been a good idea, as the loaf was a little dry, but it tasted absolutely delicious.
I imagine this recipe would make an excellent stuffing for a holiday goose, duck or turkey, as it can be cooked as long as needs be and has a nice nutty, meaty taste. You could cook a loaf of it outside of the bird for vegetarians. Nota bene: if you use margarine instead of butter, this recipe is vegan, and if you make it without breadcrumbs as I did, it is also gluten-free. Just don’t expect it to hang together in a compact loaf that you can slice, and do serve some kind of sauce to go with it. Also nota bene: I am not a food photographer and this is what it actually looked like. Bon appetit and happy holidays!


 “Someone coming to tea, nothing much in the house and you are short of materials? Here are three recipes that don’t need much in the way of ingredients, don’t take long to mix and are delicious to eat.”
 Previously, I had made a “


 In its earlier decades, Stitchcraft included a page of easy and economical recipes in each issue, mostly for tea-time cakes or pastries. The tradition ended around 1950, so none of my 1960s issues have a recipe page, but I do have a few magazines from the late 1940s and thought this would be a fun time to try out their “Christmas Cooking” ideas.