Remember this project from a couple of years ago, which I made in conjunction with a 1920s serial story posted on the All Things Vintage forum on Ravelry? Short recap: one of the group’s wonderful moderators transcribes serial stories from early twentieth-century newspapers into a dedicated forum thread, one chapter a day, and she and the readers comment and discuss it and add everything from fashion photos to other newspaper headlines to silent film links for historical and cultural perspective (and fun, obviously.)
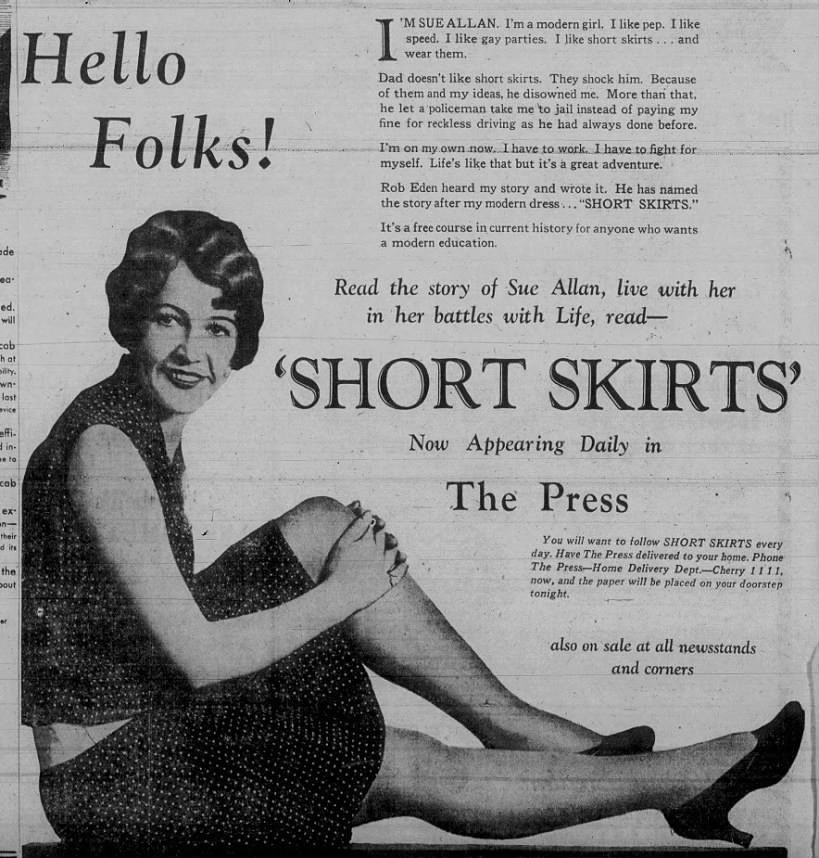
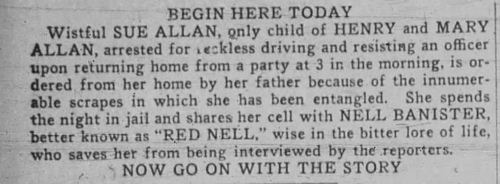
Well, the current story is… drum roll, please… the 1929 novelette “Short Skirts” by Rob Eden (the pen name of the husband-and-wife duo of Eve and Robert Ferdinand Burkhardt.) It recounts the thrilling adventures of Sue Allan, who crashes Daddy’s car in the first chapter, gets both arrested and disinherited, and spends the night in jail. There, she makes the acquaintance of Nell Bannister, a girl who has been around the block many more times than sweet, innocent Sue and takes her under her wing.
It’s thrilling, it’s exciting — and it enjoyed an incredible promotional campaign by the newspaper, including an essay-writing contest:
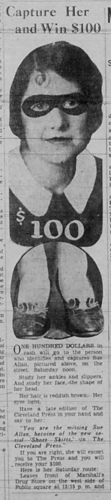
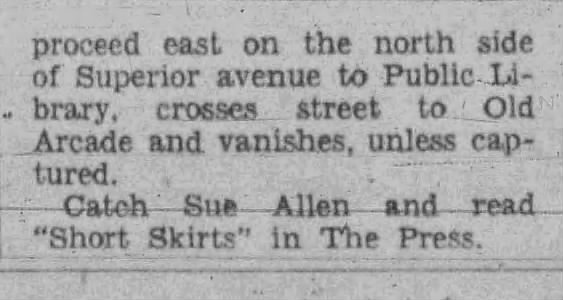
a “find-the heroine-on-the-real-life-street” contest (I really hope no women were actually “captured”):
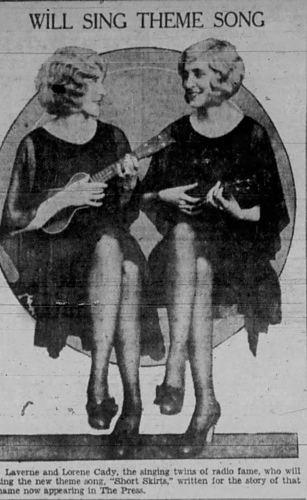
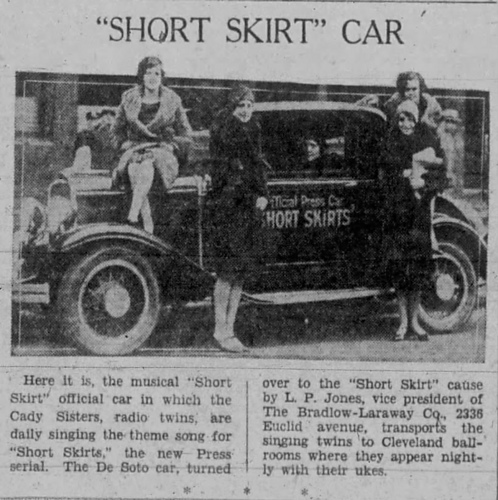
and my favourite, a theme song written especially for the story and performed live in a moving DeSoto motor-car by singing twins Laverne and Lorene Cady, accompnying themselves on ukeleles:
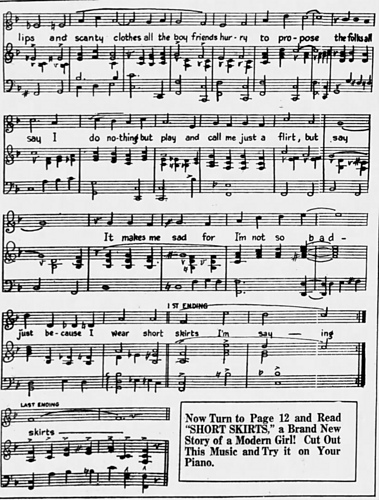
The sheet music to the song was printed in the newspaper too, so you could cut it out and “Try it on Your Piano”:
Of course, I had to sing it! Here’s a little living-room recording, featuring the wonderful Willy Schwarz on the accordion:
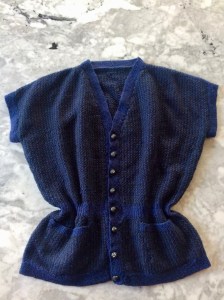
What does any of this have to do with Stitchcraft, the 1960s, or knitting, you ask? The answers: 1) nothing, 2) the 1960s were also a decade of short skirts, and 3) I’m knitting a shorter version of a retro-1930s chevron-pattern dress from the 1967 issue of Stitchcraft for both this blog and the accompanying All Things Vintage “Short Skirts” knit-along. That will have its own blog post, so this post is just a fun excursion. If you’re on Ravelry, definitely check out the All Things Vintage forum and the “Short Skirts” serial, and say hi to me (onkelscotty) if you’re there! Many thanks to lavs on Ravelry for posting this story, and giving me the sheet music, and for all the promotional photos and extra information.
The November 1966 issue of Stitchcraft was perfectly nice, but the projects in it that interested me were either too much of an undertaking (i.e. an entire suit) or something I would like to knit later when I have more time to plan it out (the top-down round-yoke cardigan). I decided instead to make a project whose pattern and wool had been sitting around for a long time waiting for me to use them: the Bestway A2063 “Love Bird” jumper.
The booklet isn’t dated, but presumably from the 1940s. I got the pattern as a PDF from the wonderful Subversive Femme website. A few years ago during the horrible wildfires in Australia, Bex, who runs the site, offered a free pattern to anyone who donated to the fire relief fund. I did, and was very kindly given this pattern as a thank-you. The wool is “Darnie” by Studio Donegal, a fingering-weight lambswool in the perfect shade of green, which I bought in Galway while on a work trip to Ireland.
The original pattern has a tension of 8 sts/inch, which I don’t get even with the finest of wools and smallest of needles, but I am also larger than the 34 inch/stretch to fit 36 inch bust finished size. I have had good results in the past with making 8 sts/inch, 34-inch jumpers at 7 sts to the inch with the original stitch counts and just adding an inch or two to the waist-to-armhole length, but that didn’t work here. I love the wool — it’s quite soft and not at all scratchy, and the little bits of tweed catch the light beautifully — but it was impossible to calculate the tension even with a good-sized, blocked swatch. The wool is so lightweight that it stretches more in width the longer it gets in length, so the tension is variable even when knitted closely and evenly. So at some point around rib height, I had to rip back quite a lot and adjust the waist-to-armhole increases. I tried to keep it close to the original proportions, but make it fit me. That worked out pretty well, though I hoped it wouldn’t shrink or stretch too much in blocking.
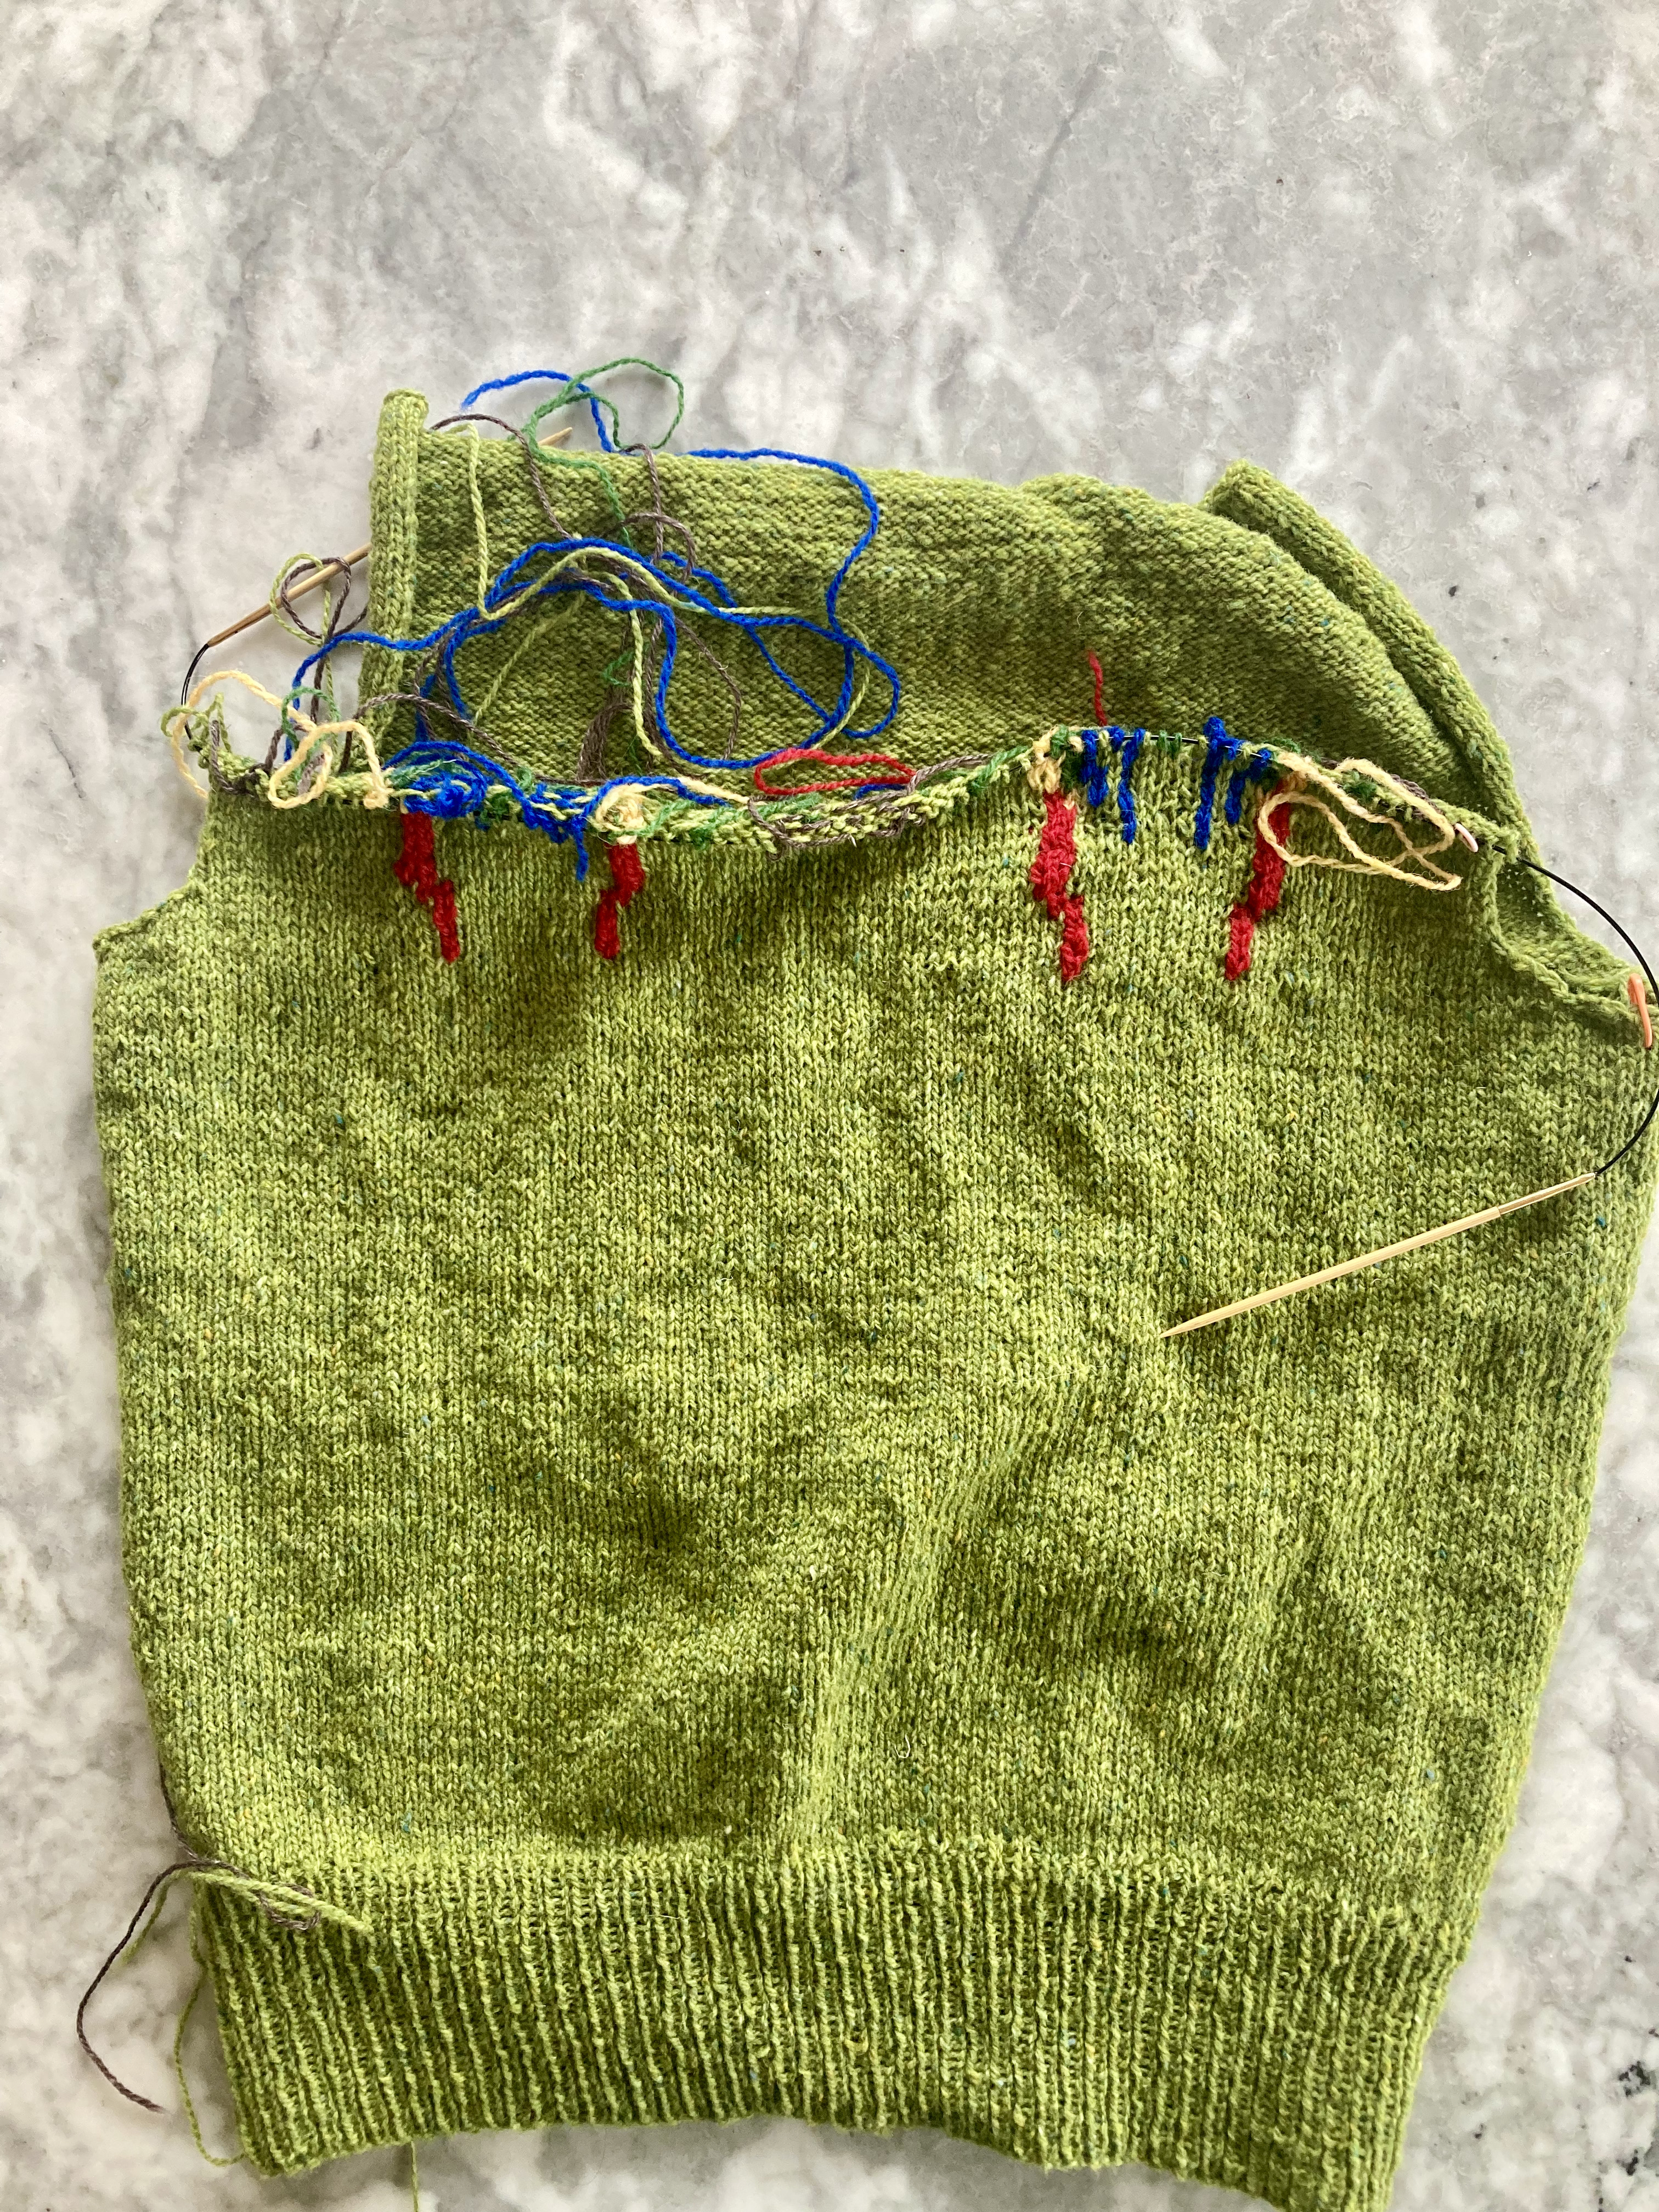
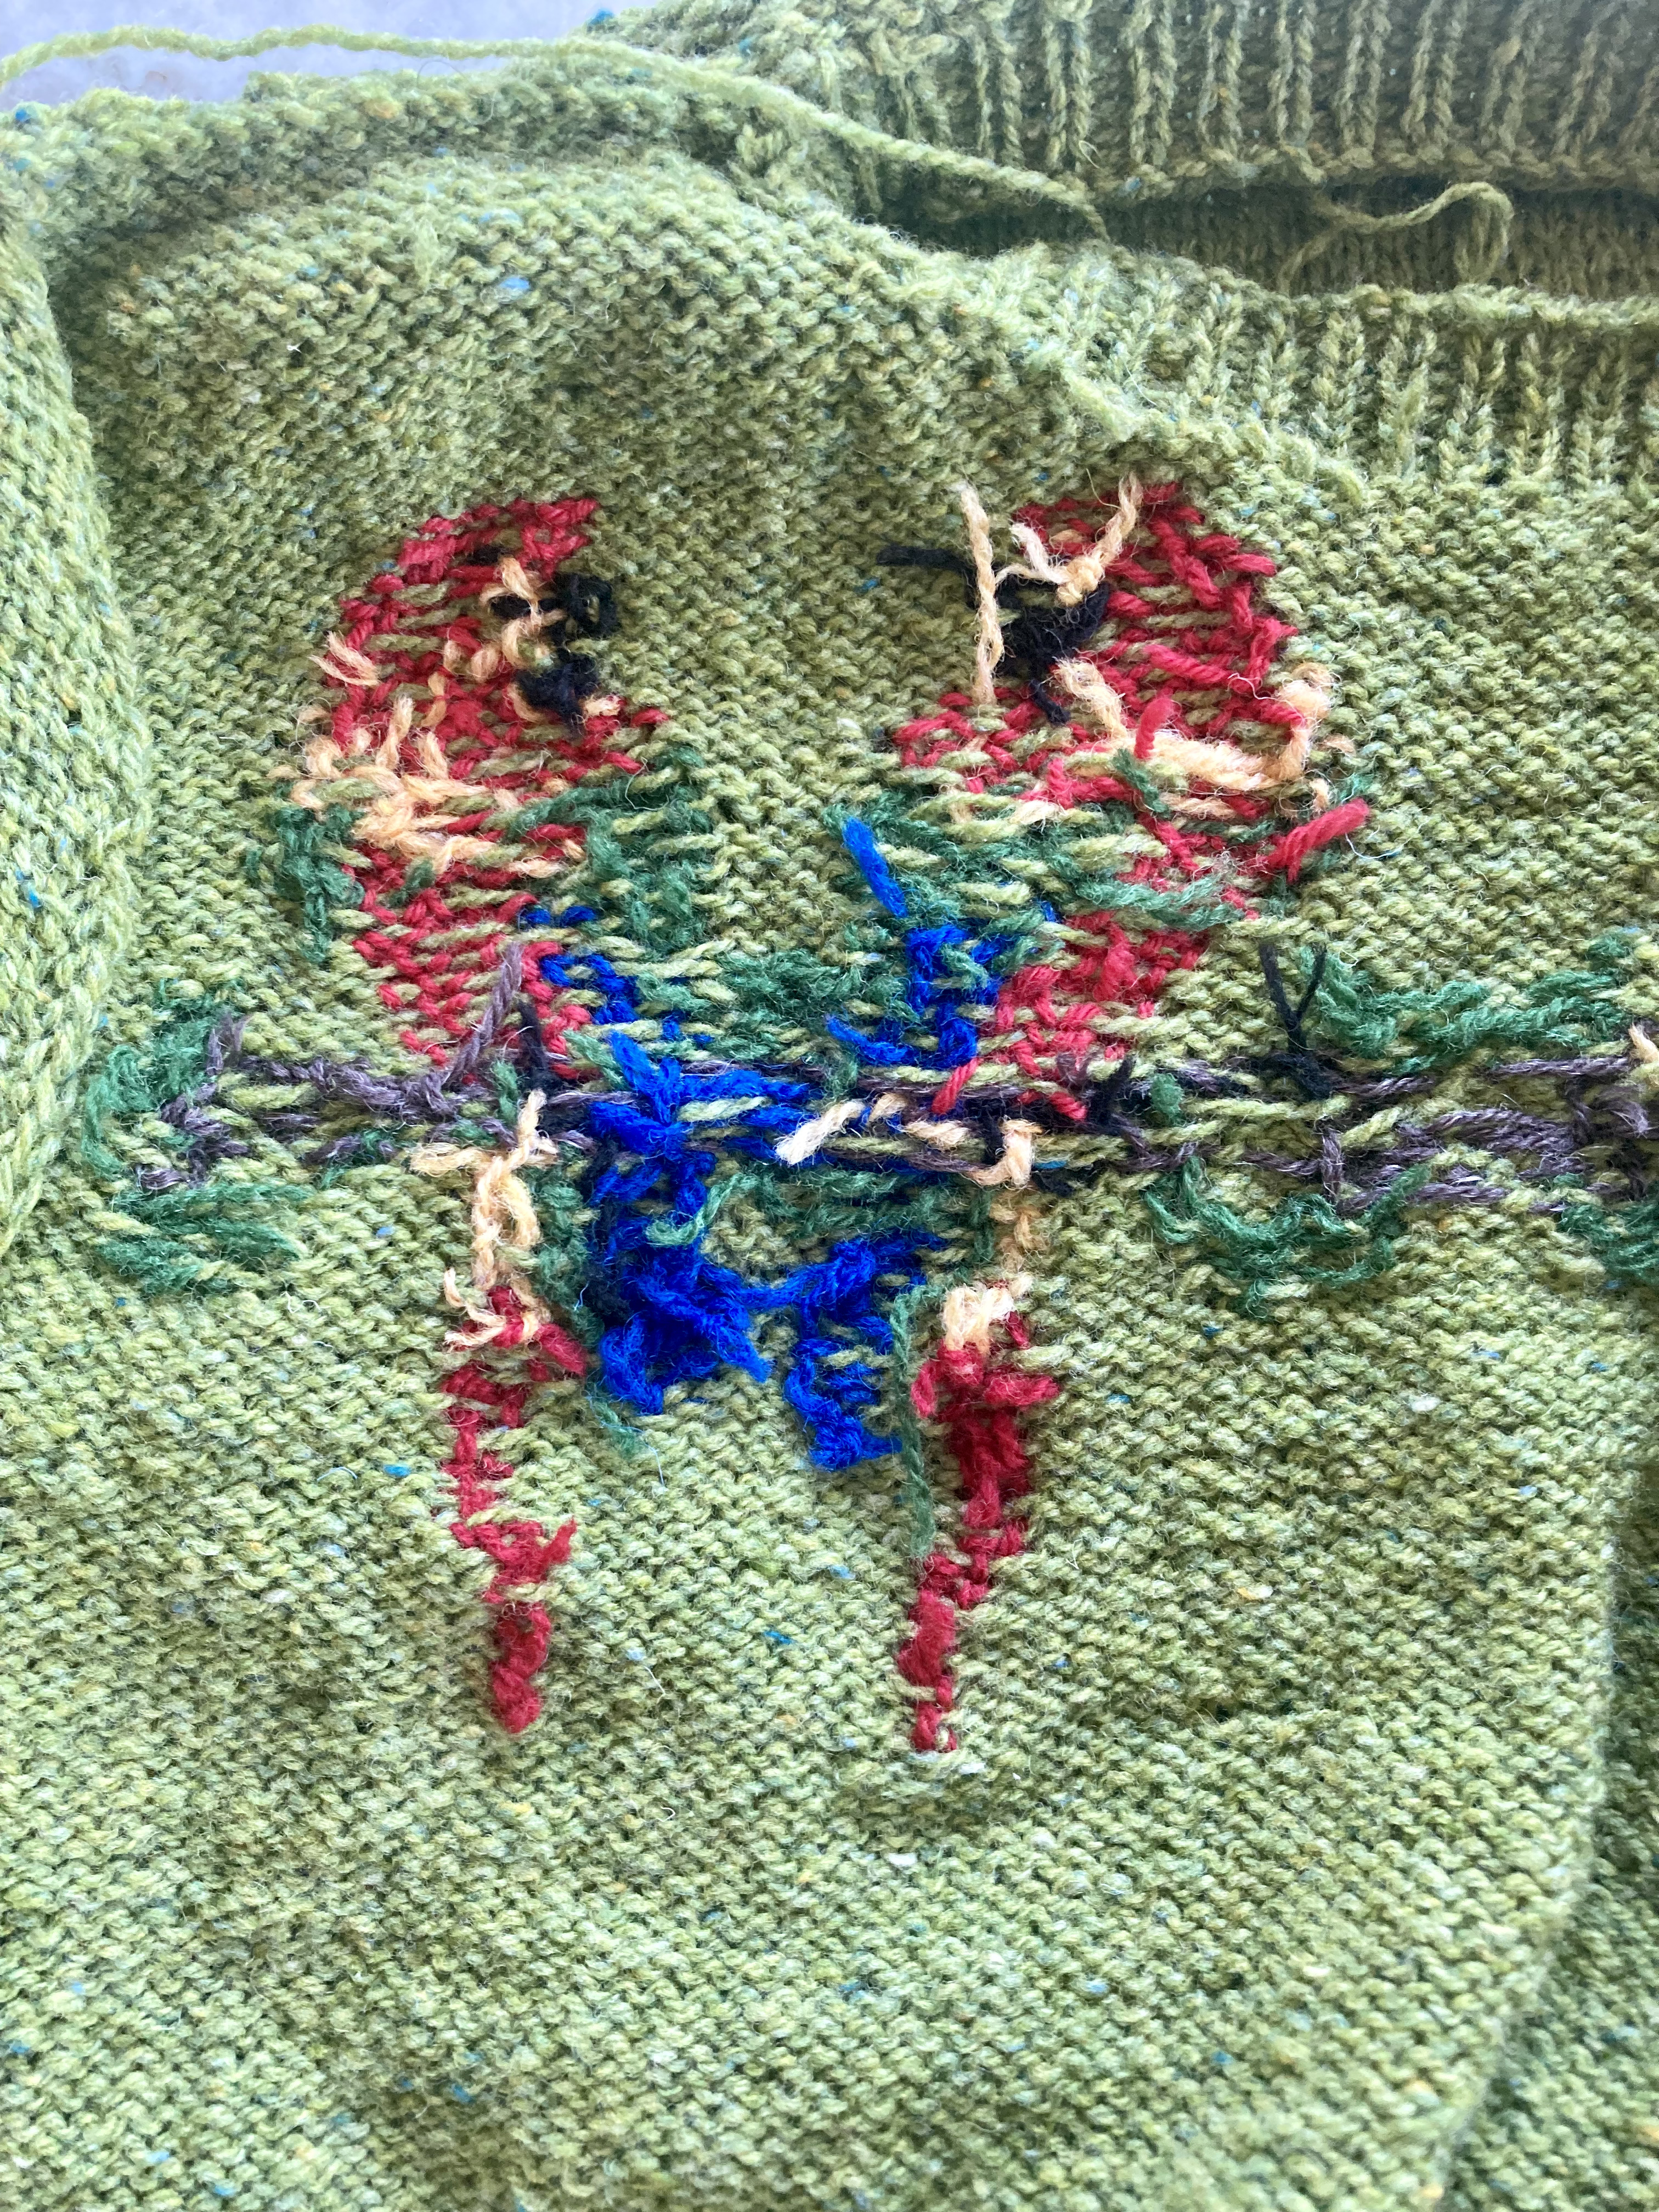
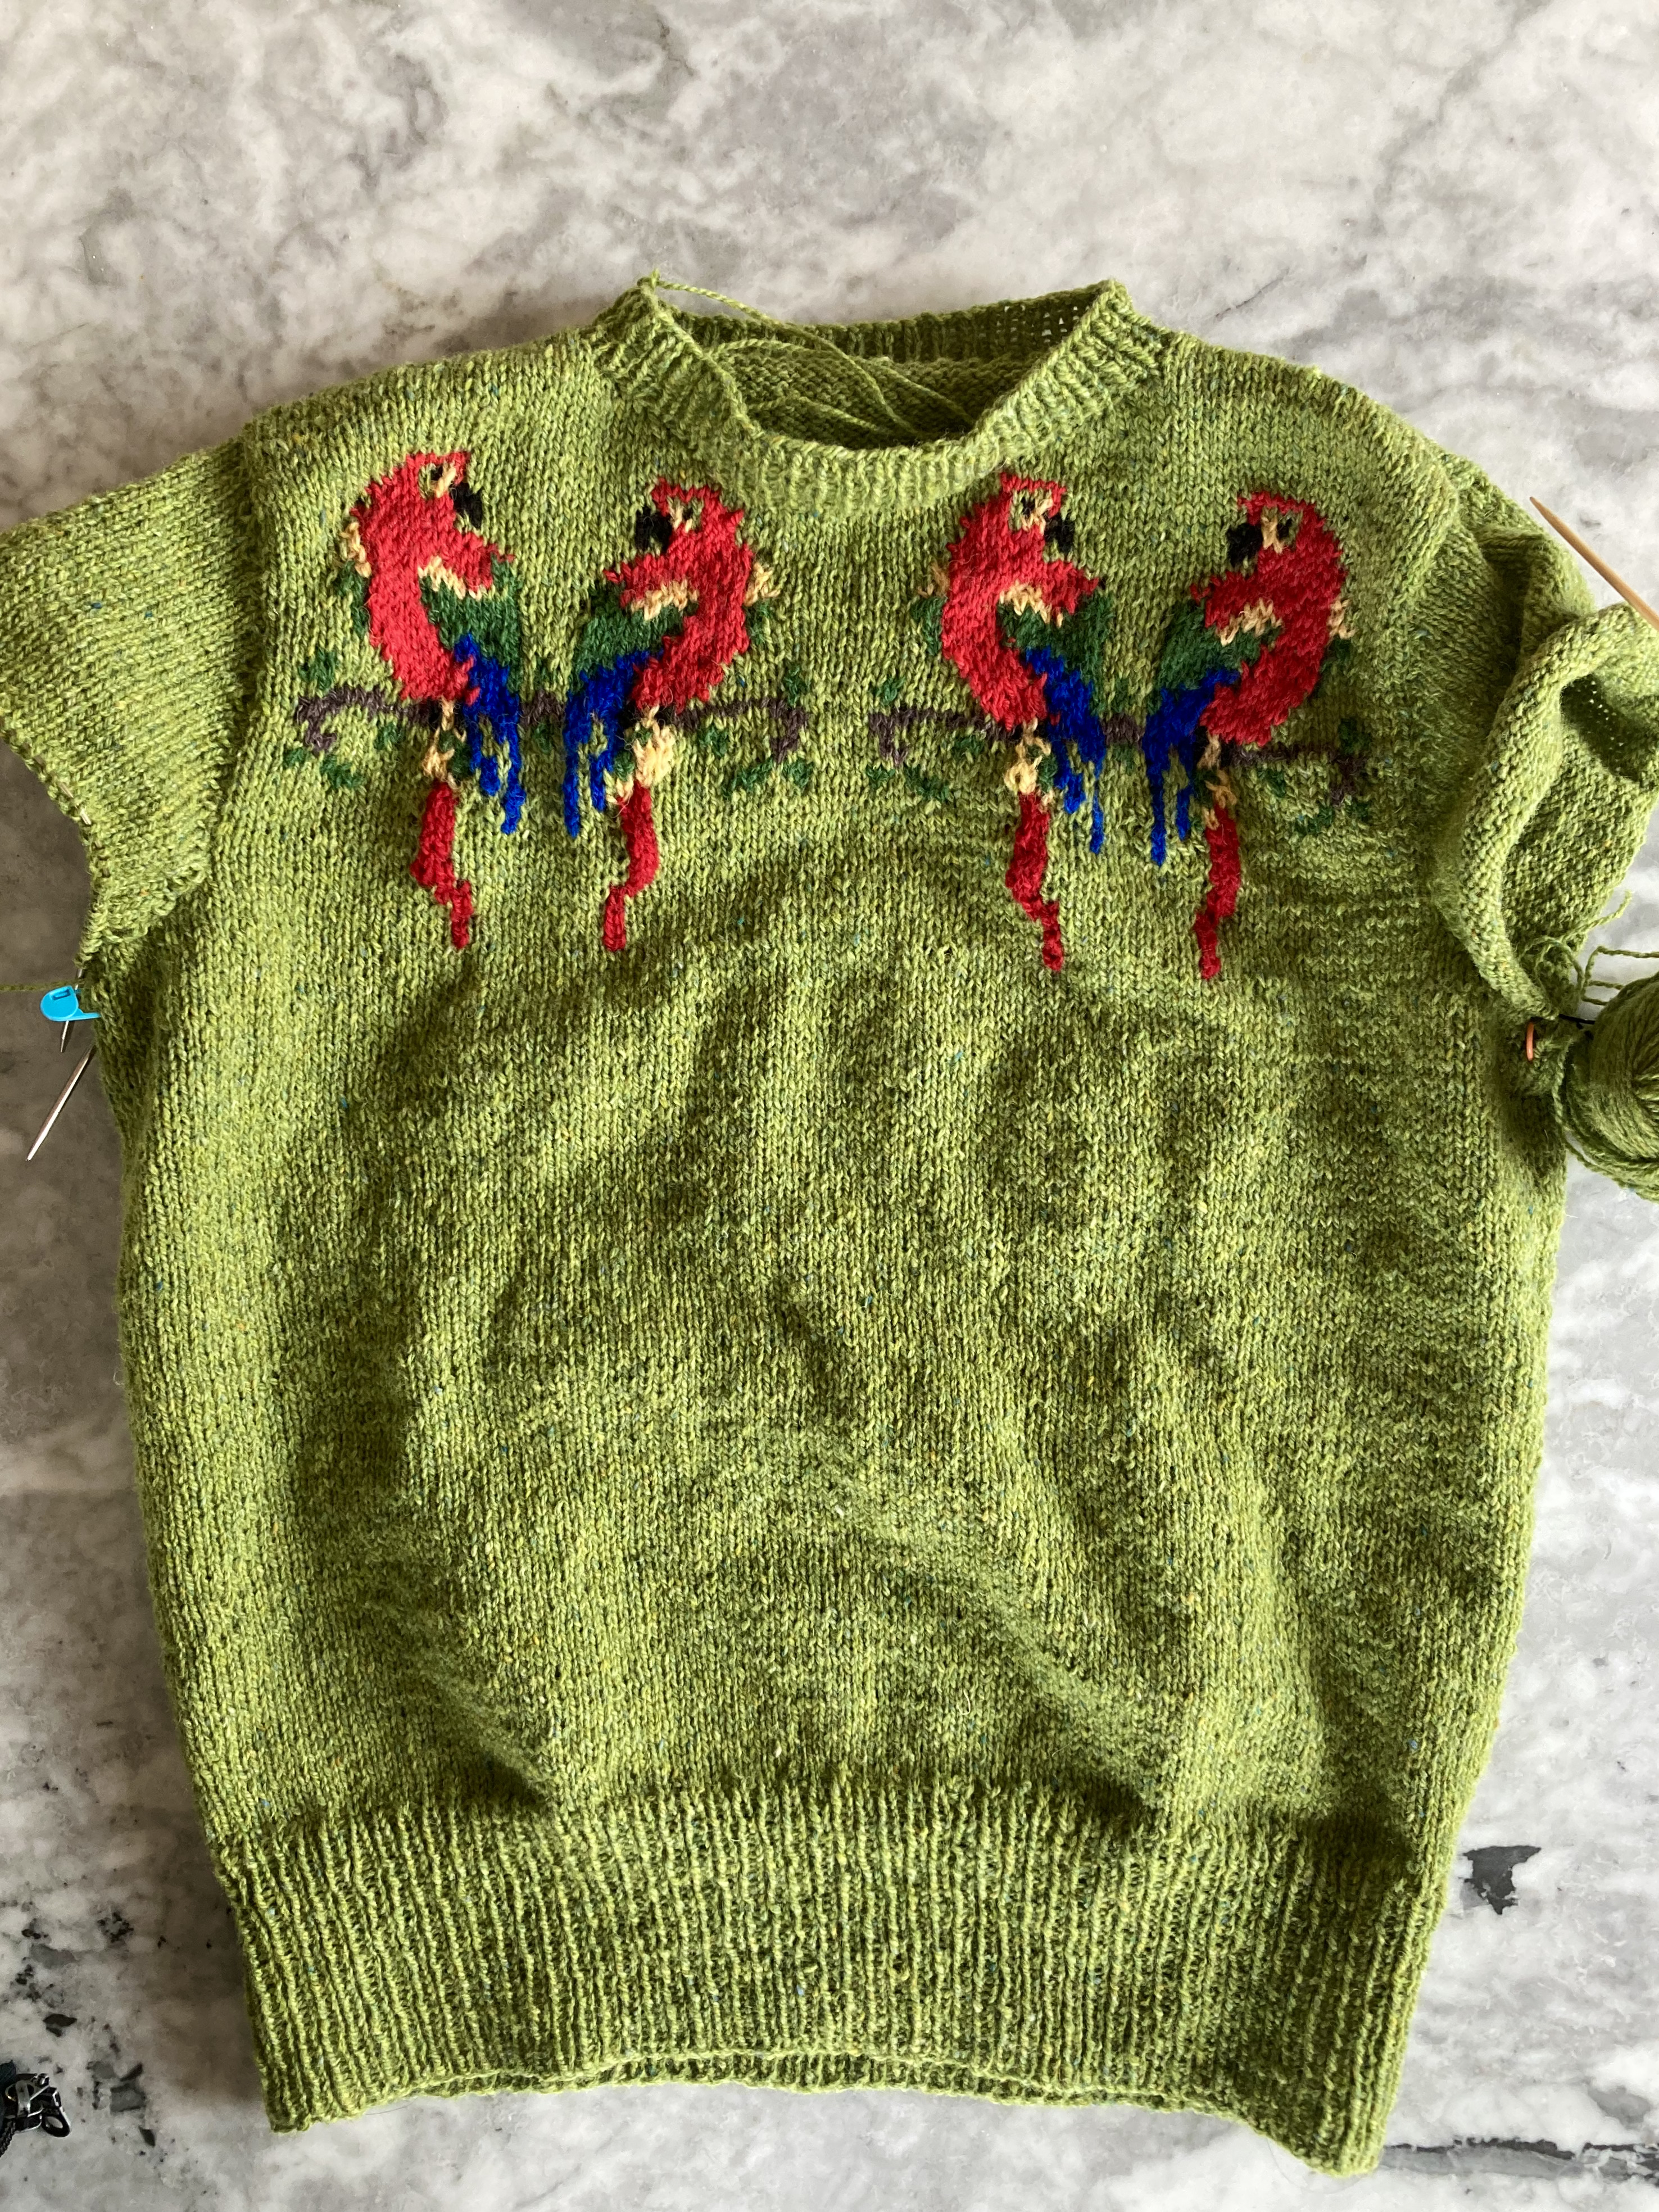
The birds are worked in stranded intarsia, i.e. you use different short lengths of the colours for the four birds, and strand the light green main colour behind. I am very good at stranded work and not bad with intarsia, but I found the combination of the two very tricky! The yarns bulk up at the back and/or leave holes (in spite of twisting together and weaving in) and it is hard to gauge whether the strands are too tight or too loose. There are a hundred ends to weave in and they are all in roughly the same spot, so the back side is very “full” and doesn’t lie down flat easily. Presumably, it should block out?? Also, I should have used a larger needle for the bird section — too late!
Not to mention that the bird tails start BEFORE the armhole decreases, and since I didn’t read ahead (I know…), I had already finished the body to the armholes in the round and the entire back part above the armholes before I realised it. Yes, I should probably read ahead and also think ahead! Yes, I am also too lazy to rip everything back, especially since I had to re-do the upper back once already to get the sizing right. Oh yeah, and I also forgot, twice, to make an opening in the back neck to accommodate the close, high neck, AND since I started the birds at the armhole instead of below, the neck was even higher and tighter than it should have been. Sigh.
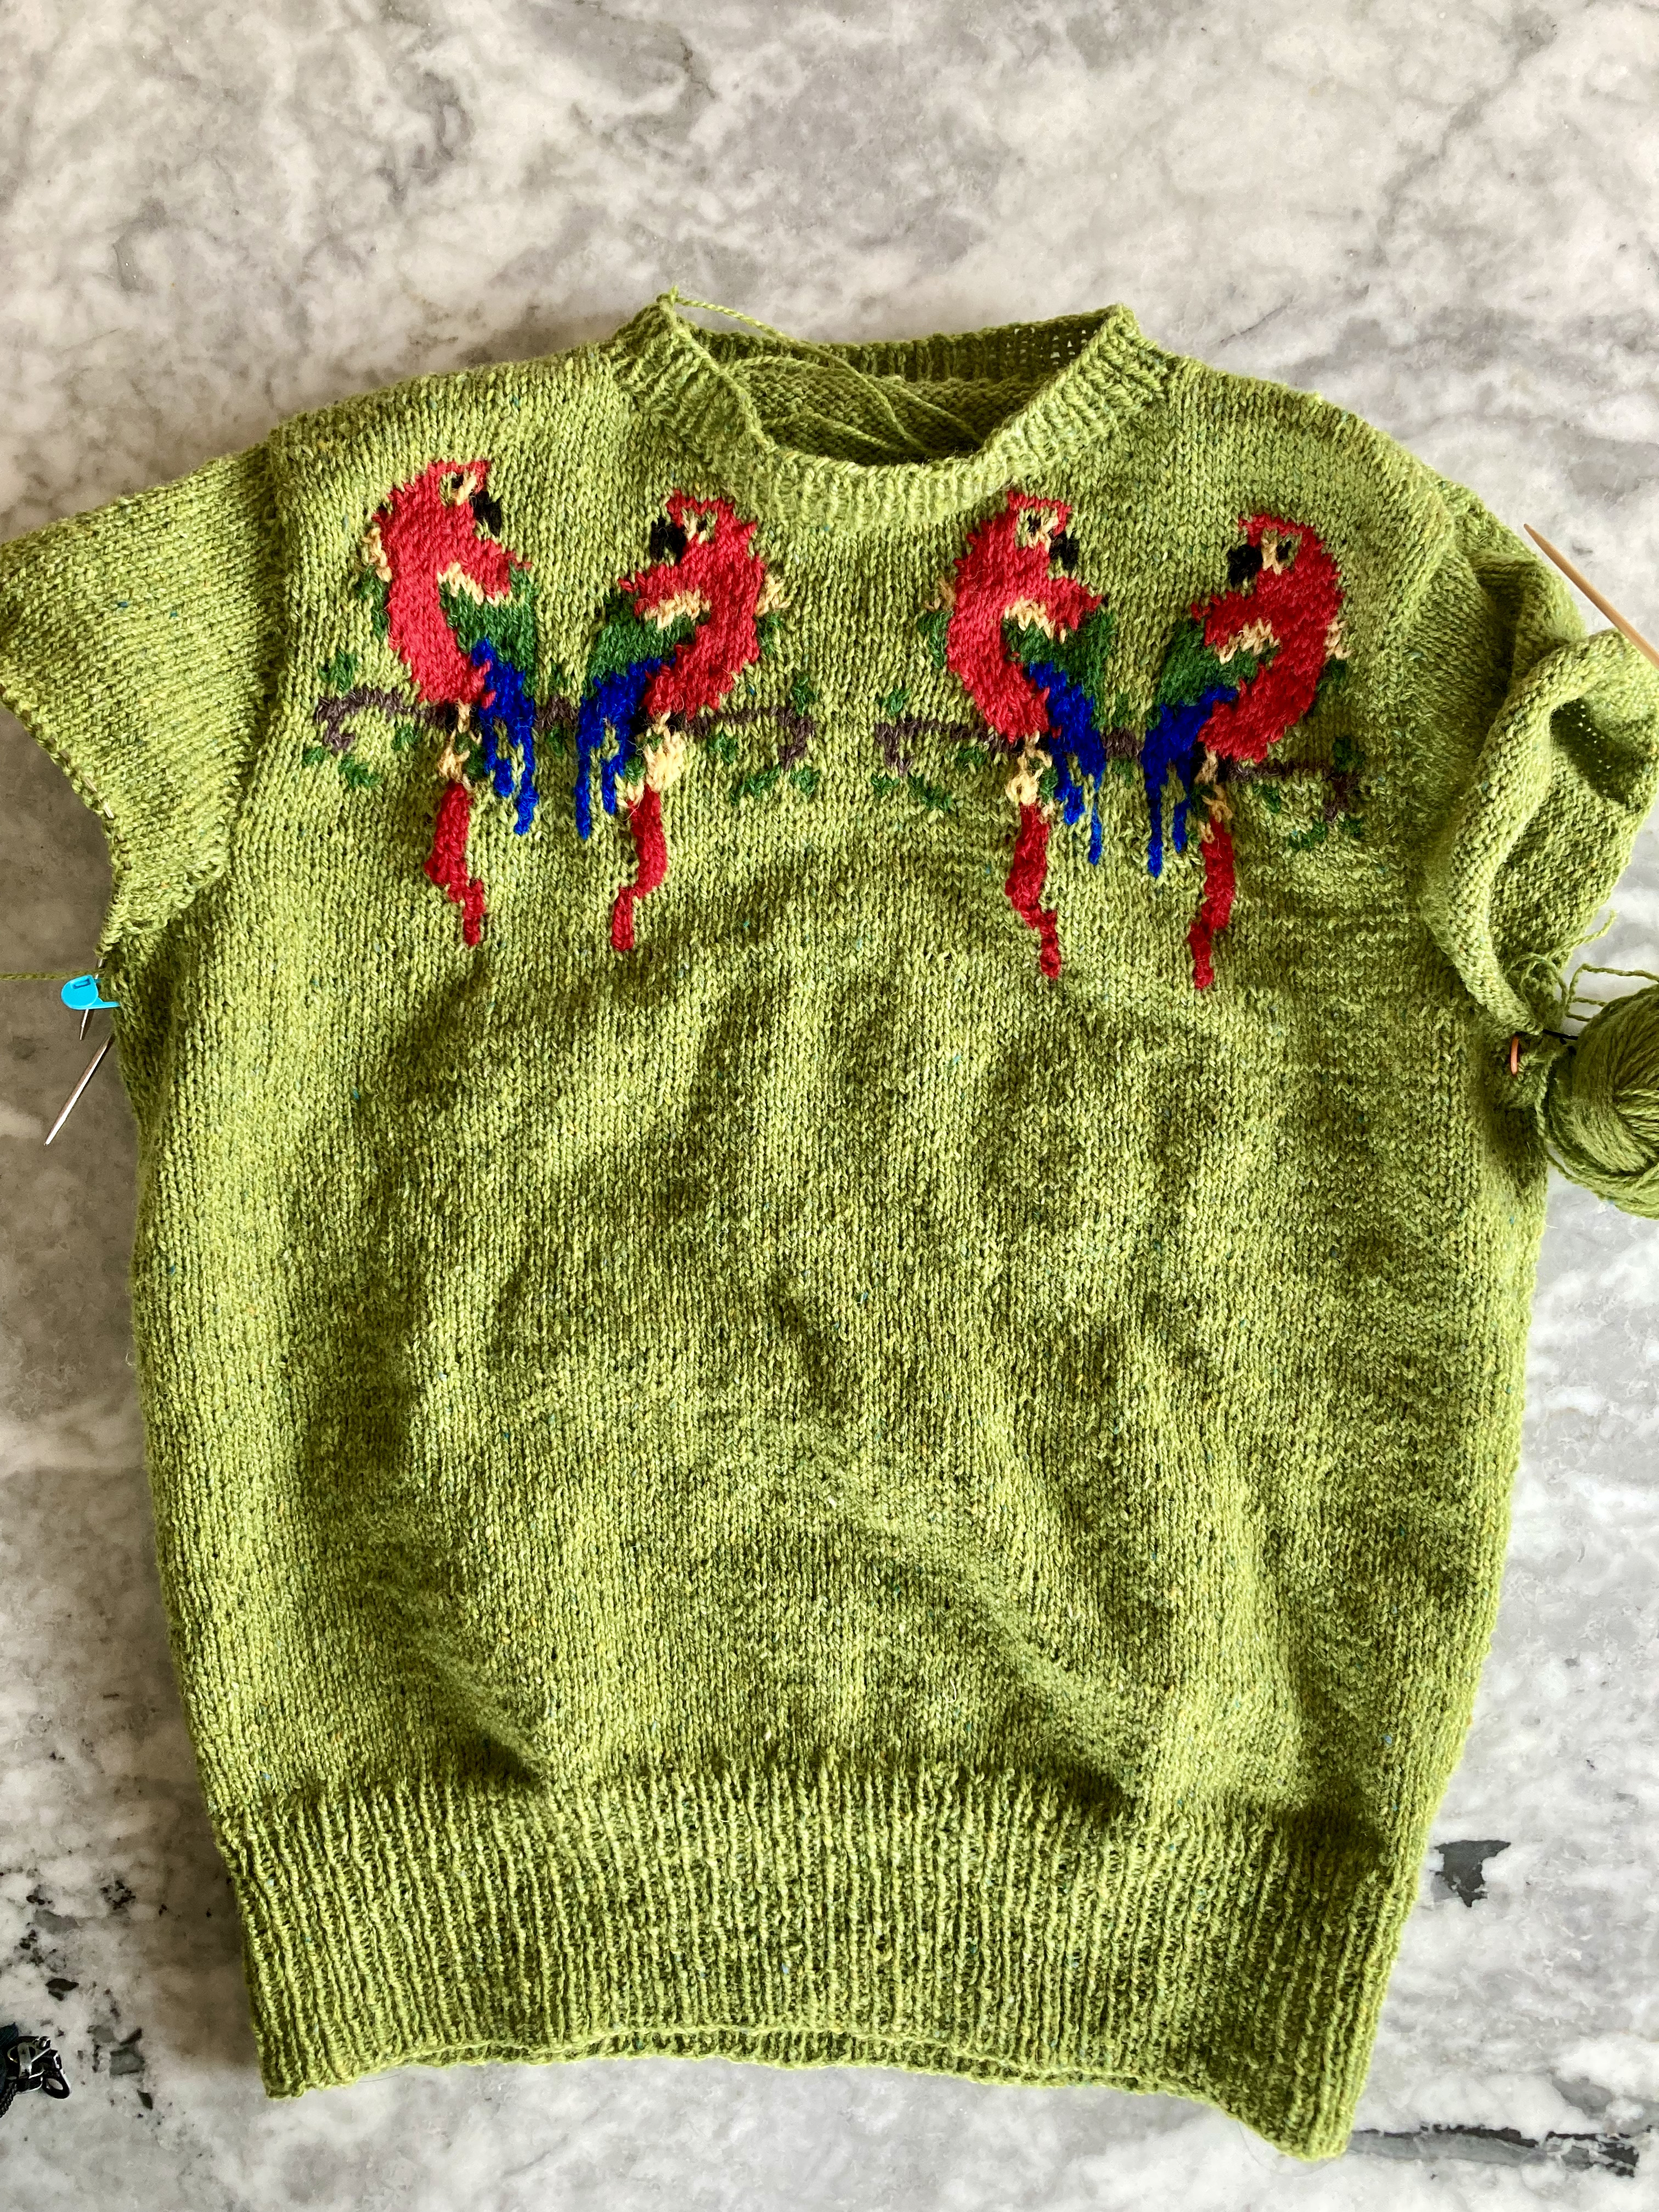
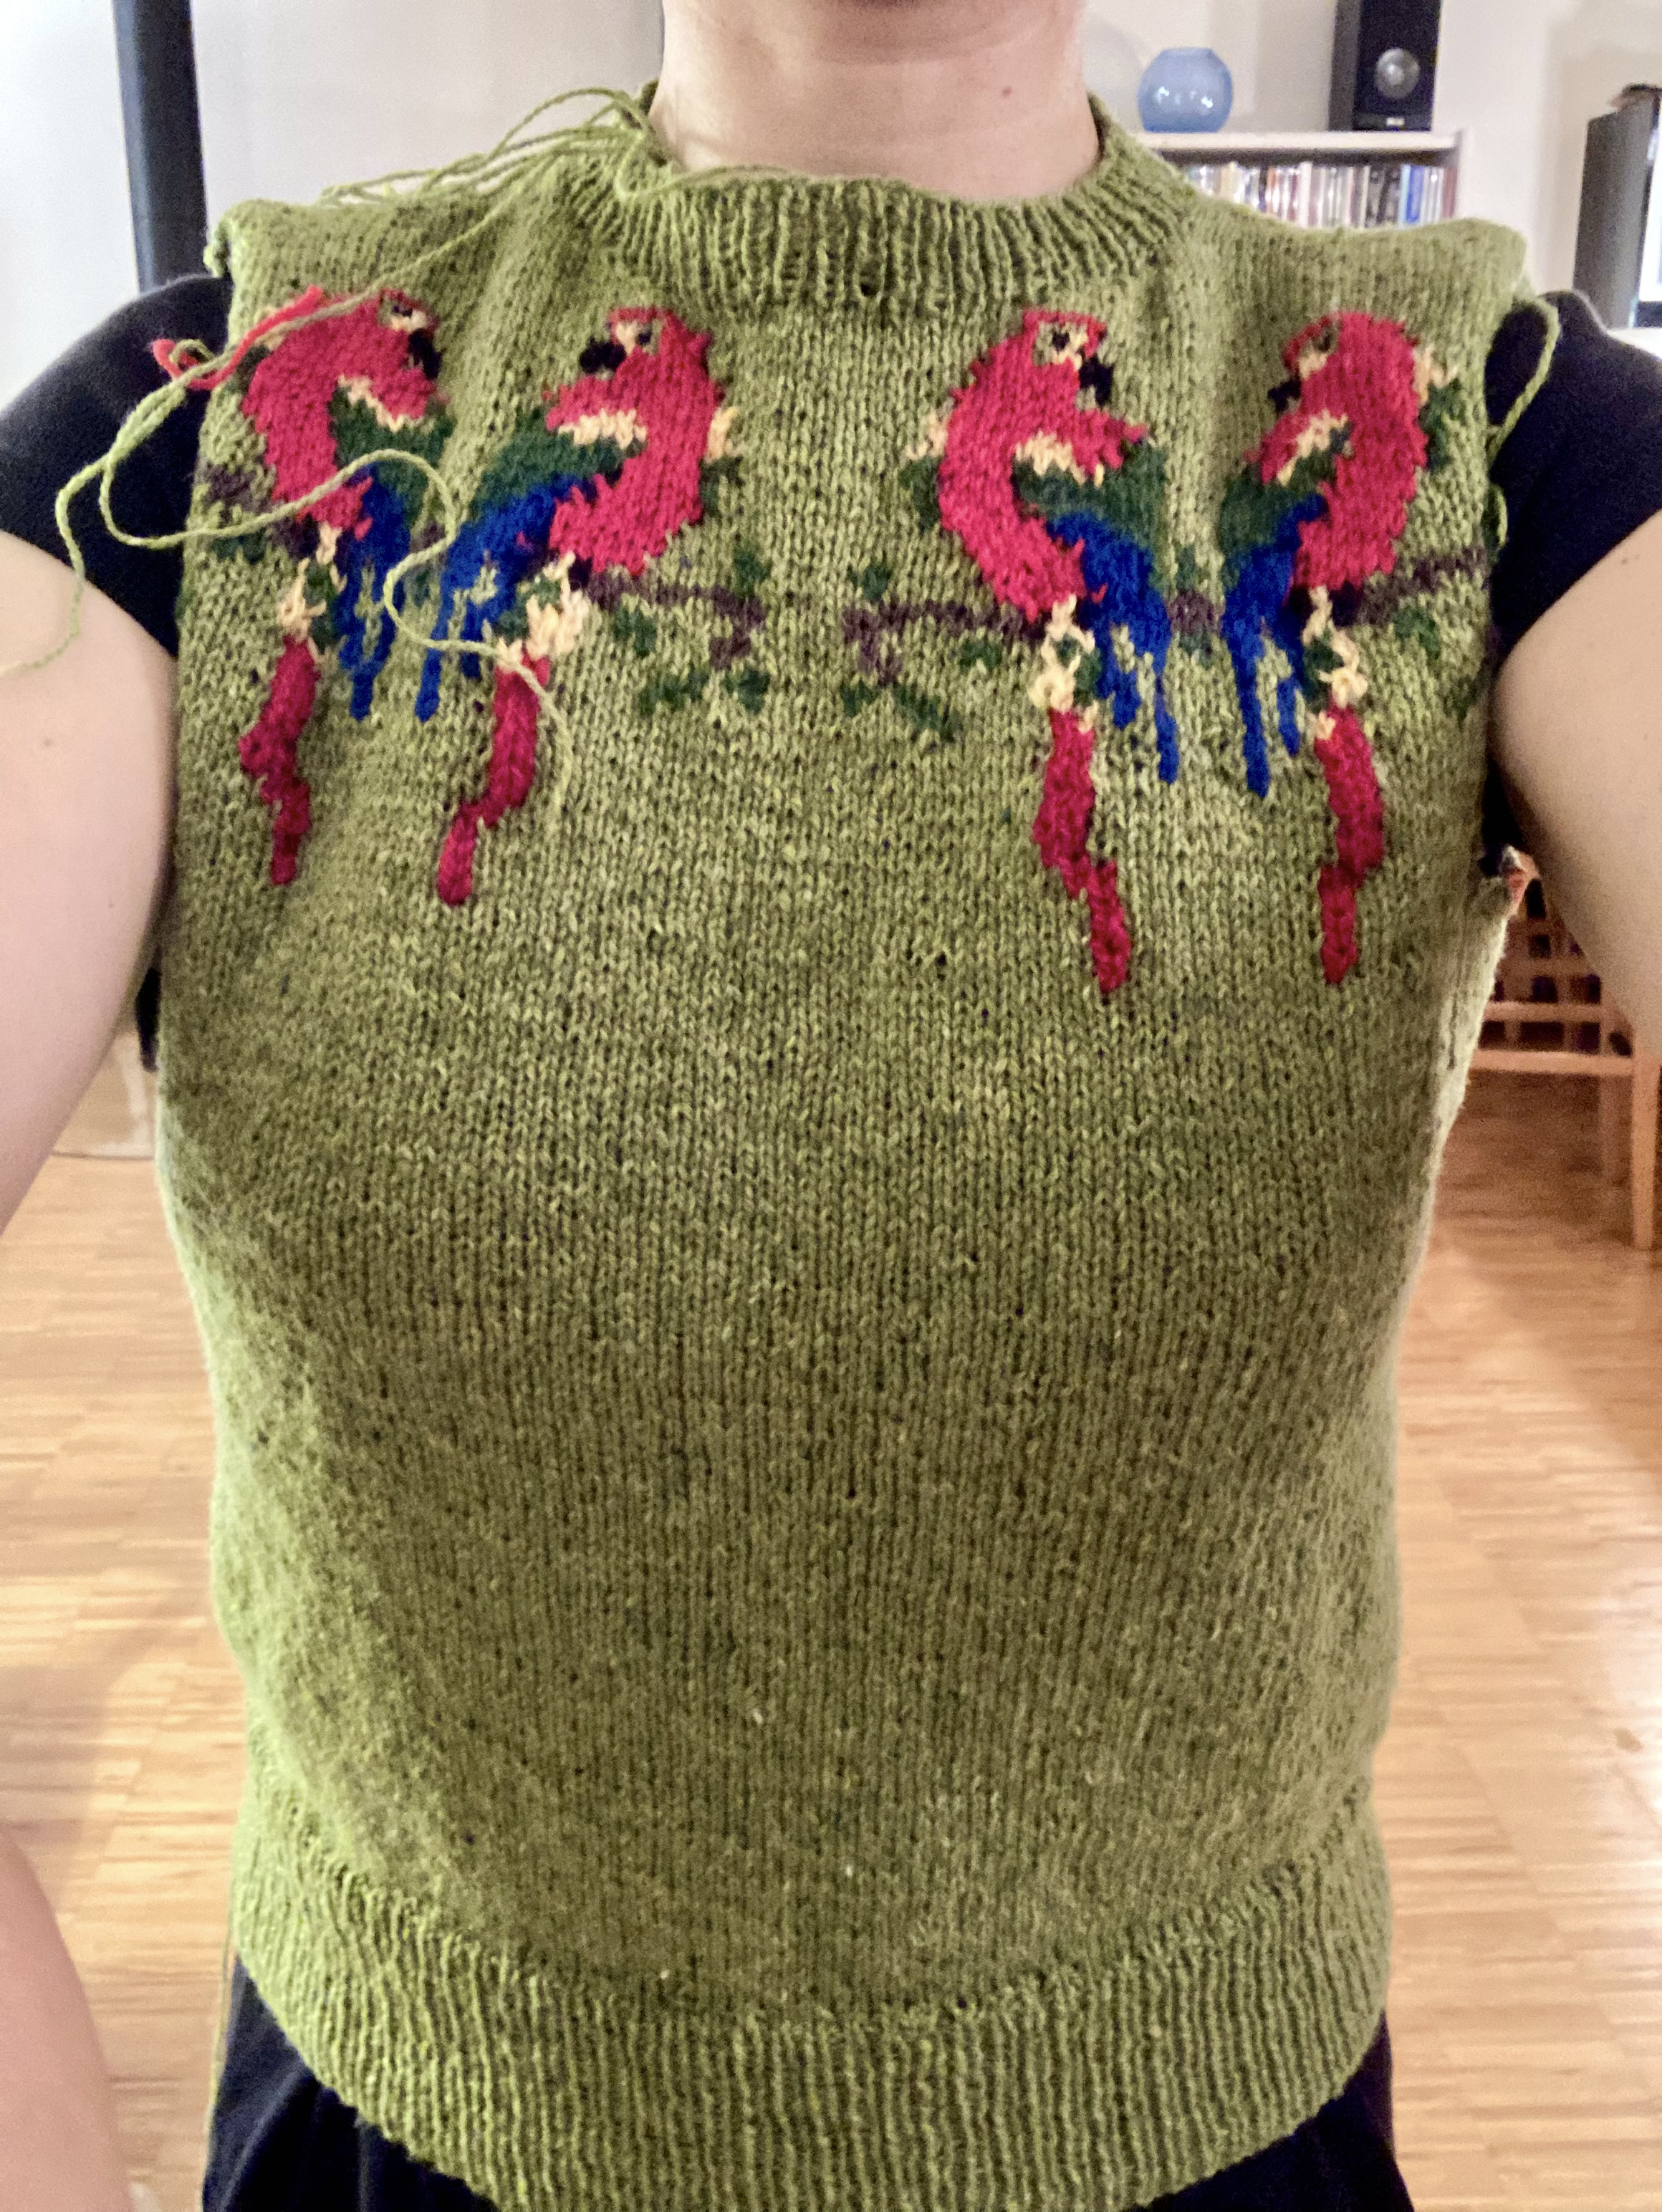
In spite of all of that, it looked good (even before blocking) and fit great (ditto). It does fit over my head and I don’t think it’s a problem that the birds sit a little higher than they should. I made the sleeves from the top down, picking up stitches around the armhole, and only had to restart them twice to get the decreases right.
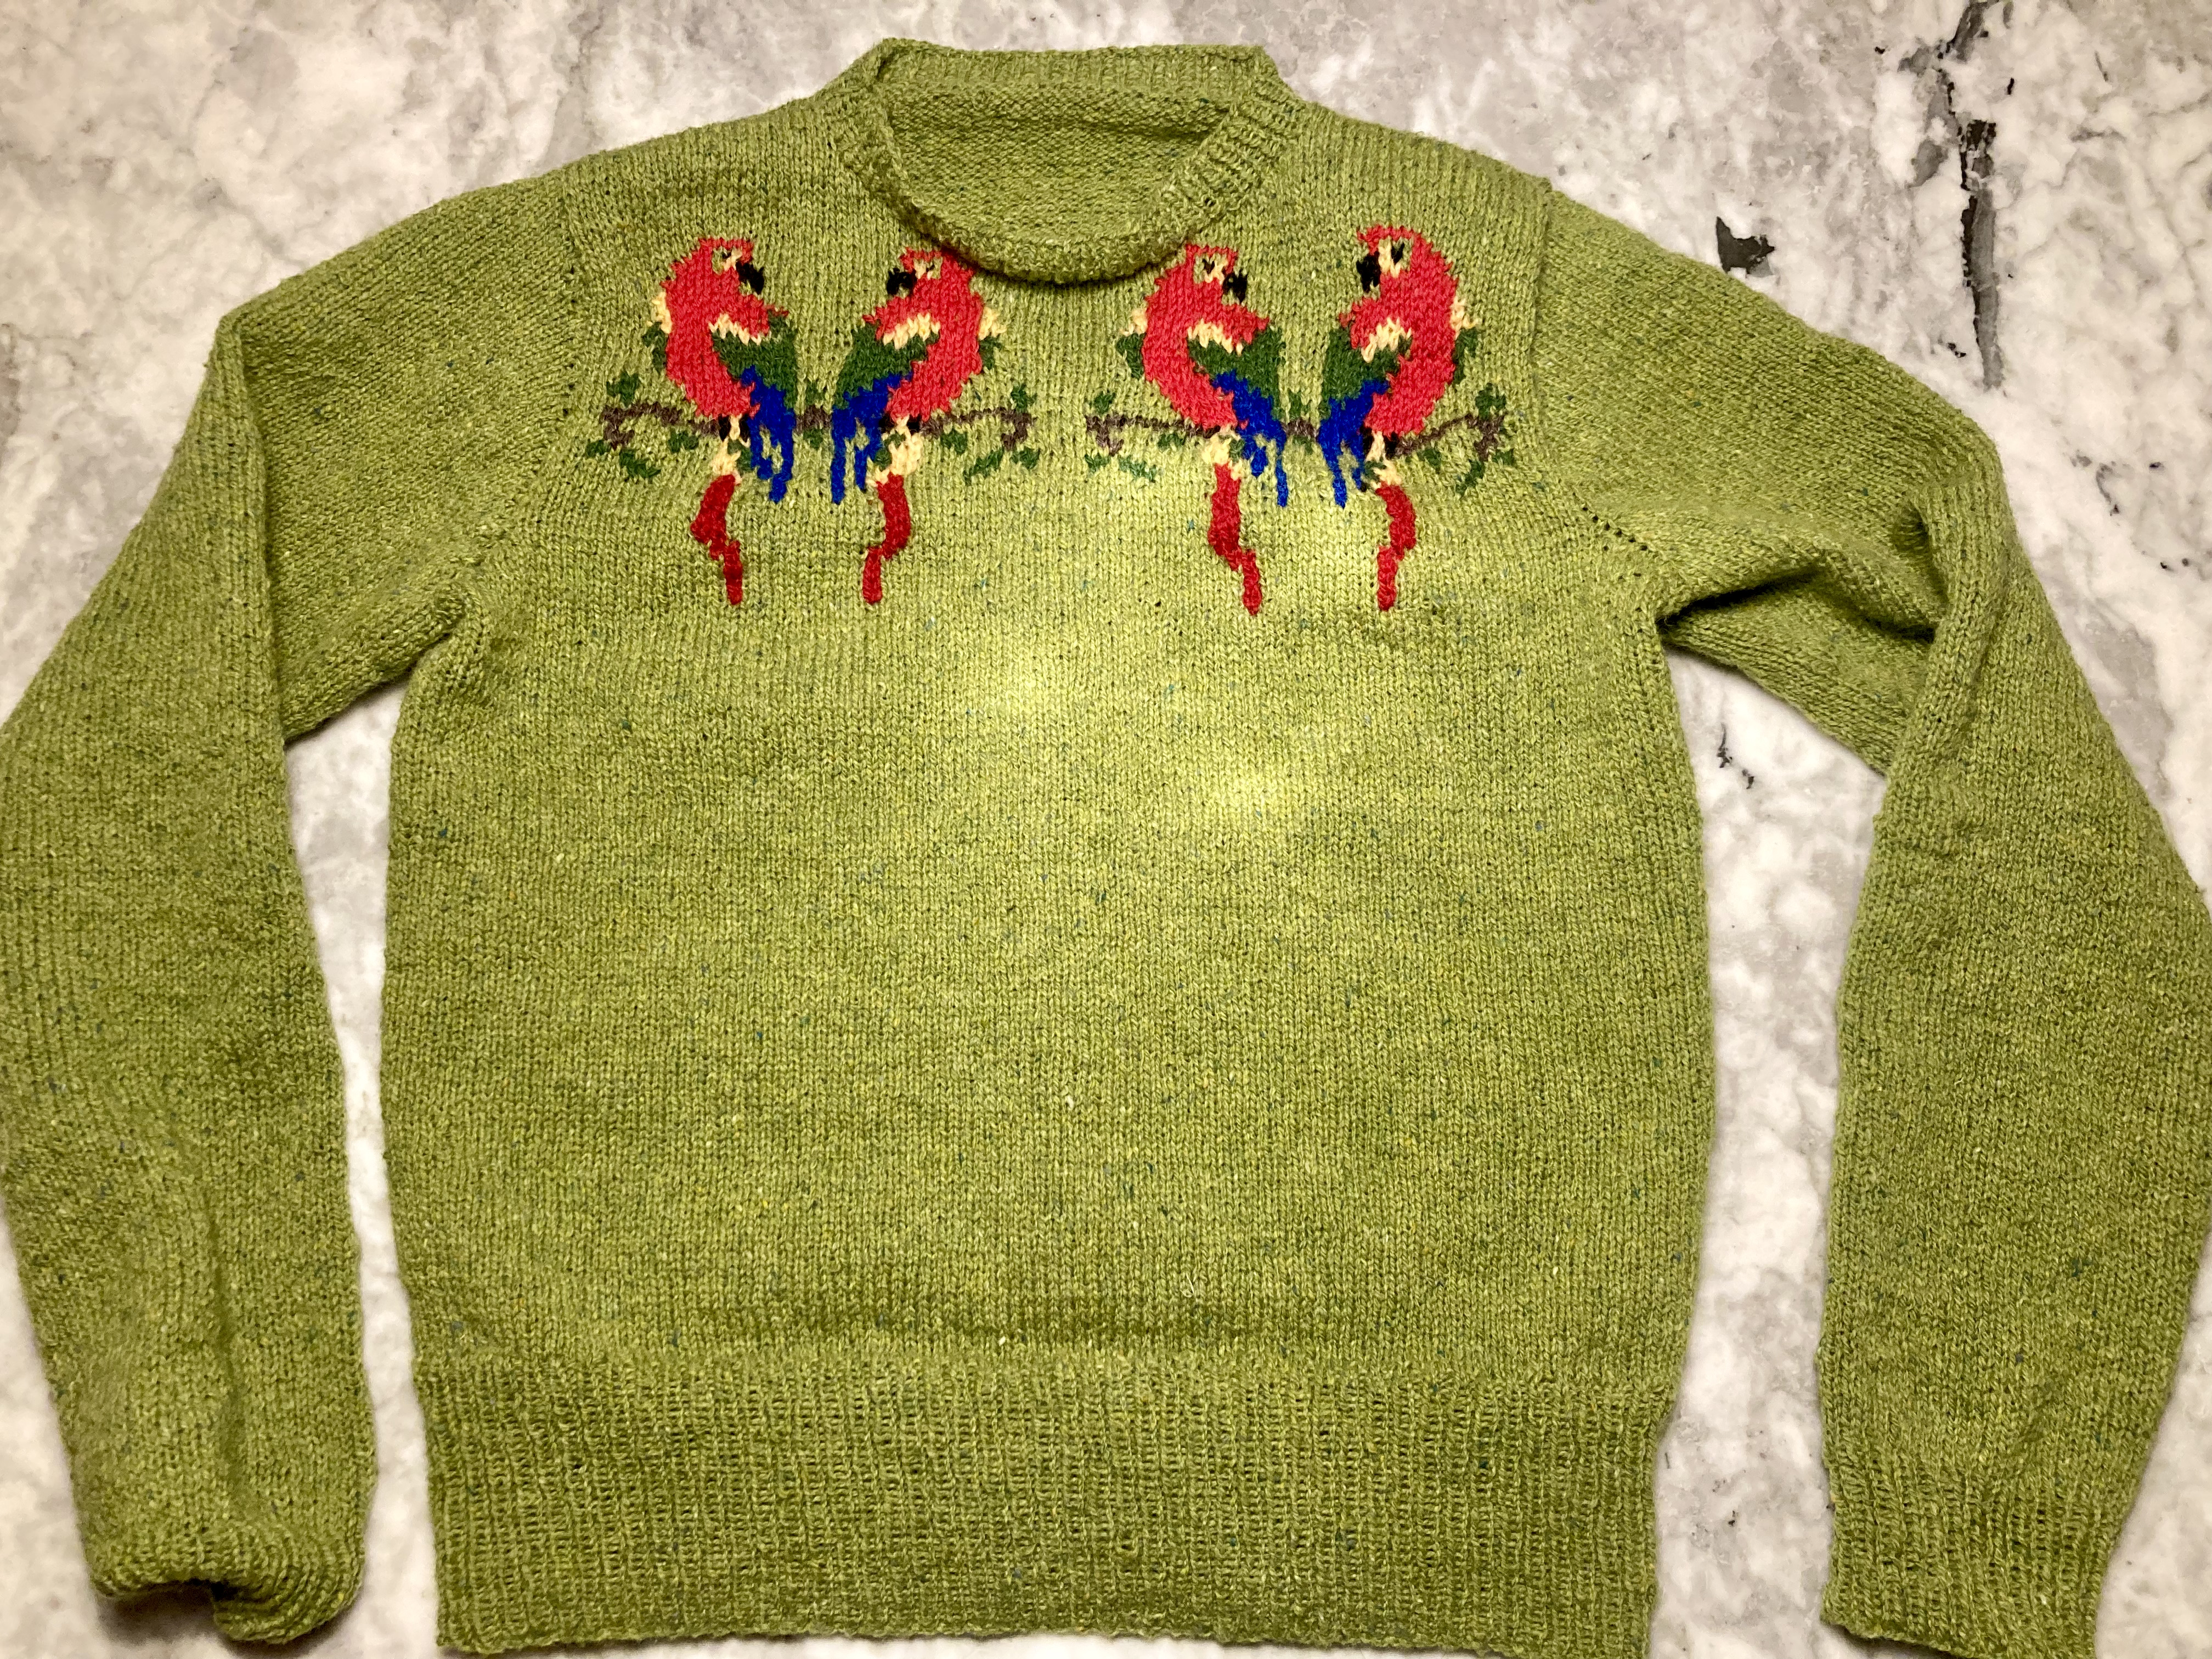
It was so worth it, though! It blocked to exactly the knitted proportions without shrinking or stretching, and the birds flattened out well enough. (The tails, which I made in a different, slightly thicker red wool than the bird bodies, are still bulkier than the background. I will call it a “3-D effect” design feature.)
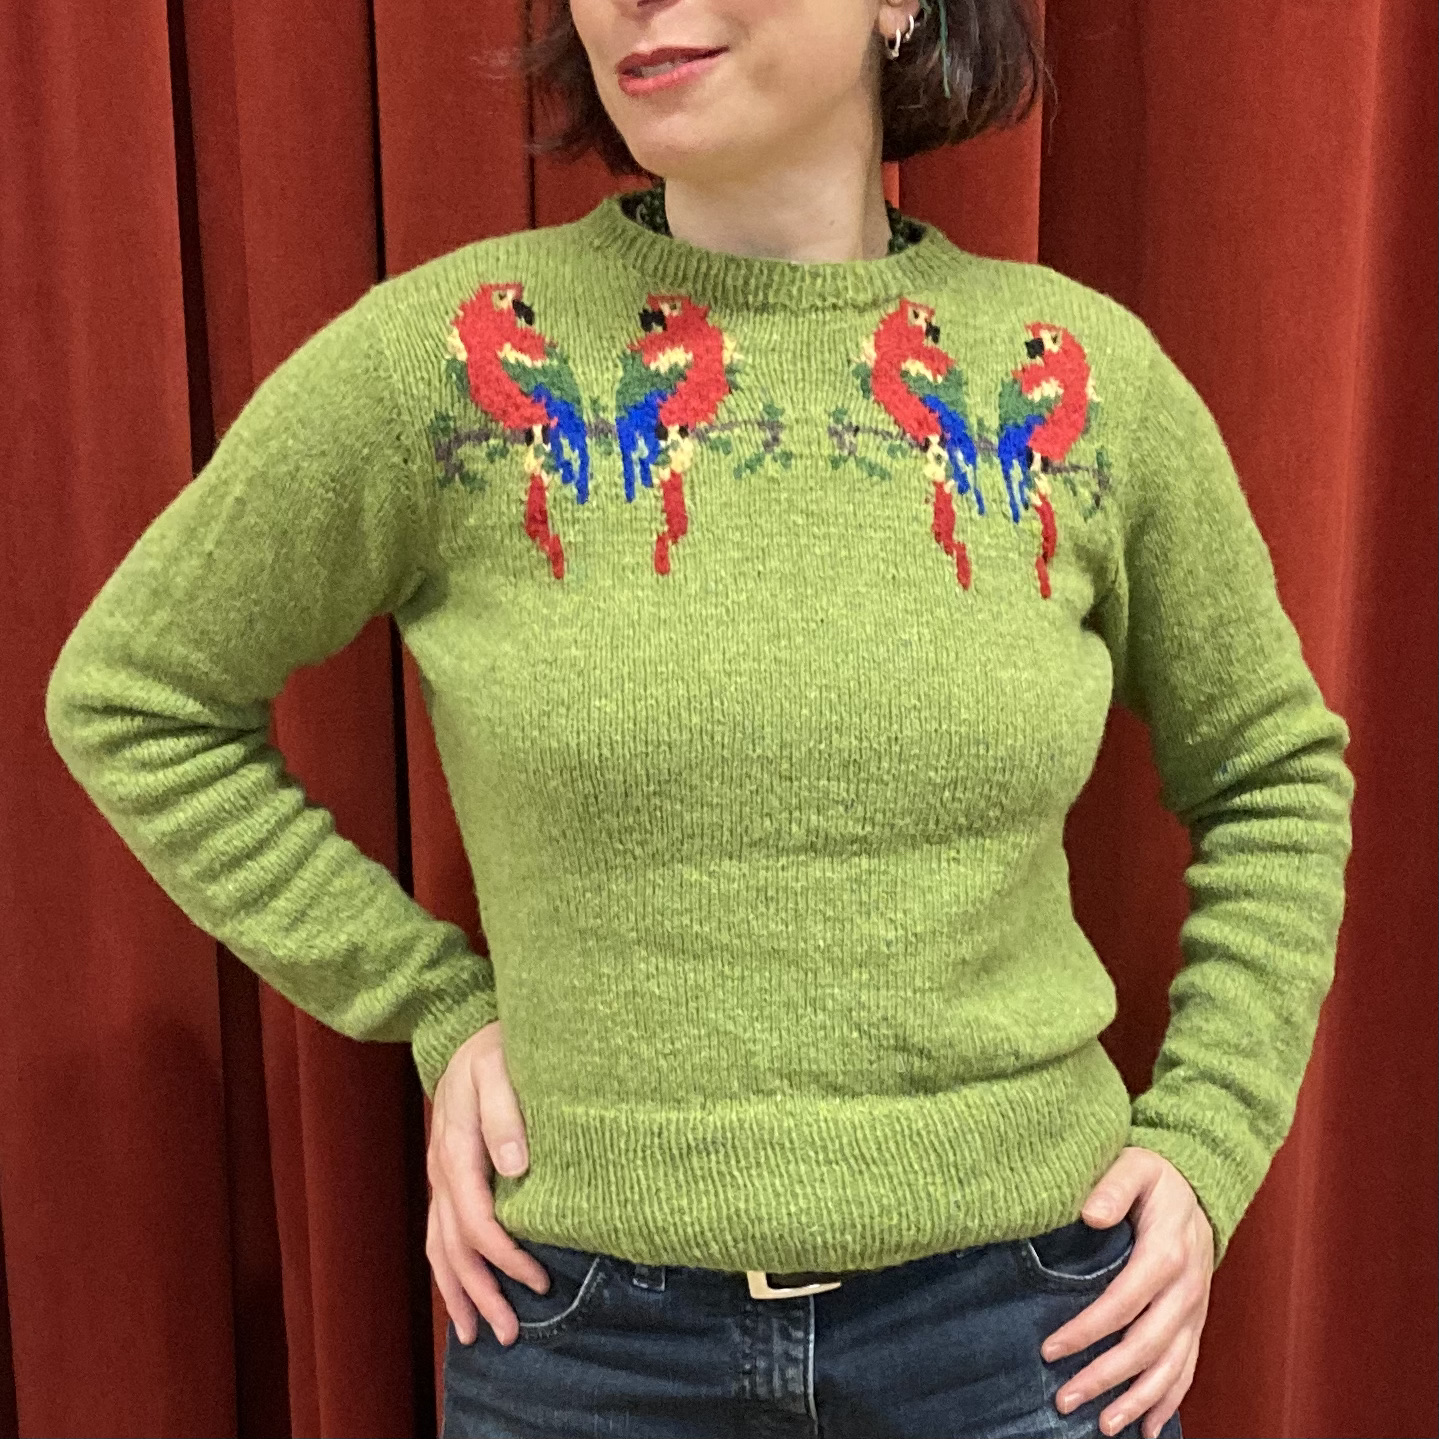
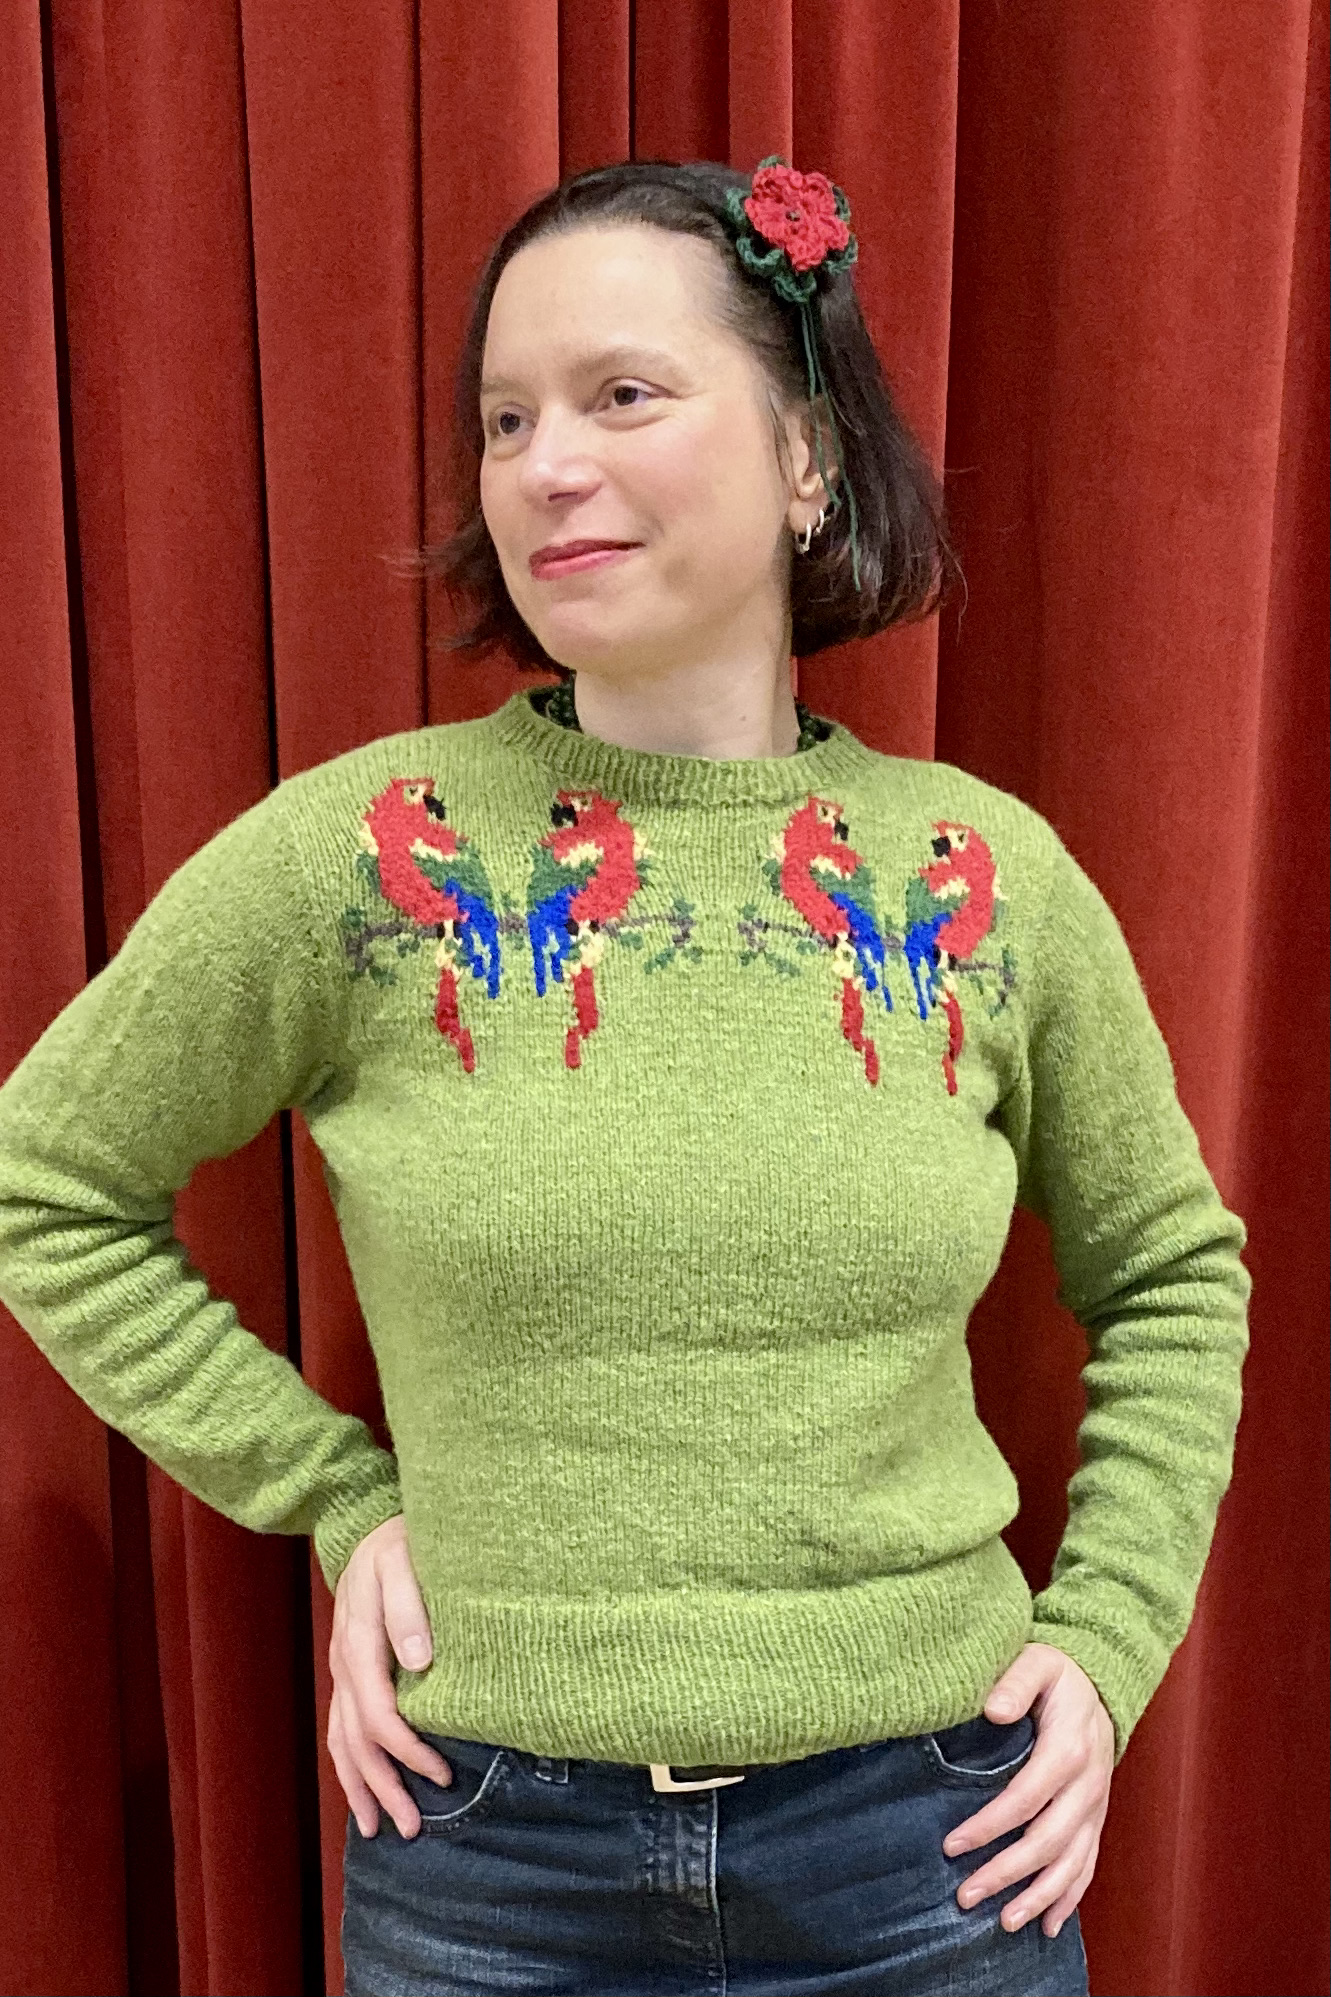
I am very happy with this jumper and it has gotten a lot of compliments already. Didn’t get the pose quite right for the photo re-creation — head tilted the wrong way! — but I thought the red curtain made a nice background.
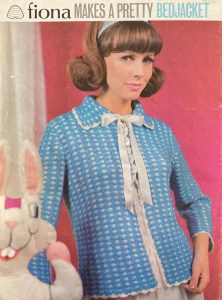
It’s been another month of much knitting and comparatively little to show for it. There was a wonderful bed-jacket in a cute, spongy slip-stitch pattern in the November 1965 issue that I very much wanted to make. I thought I had the perfect yarn (DROPS Lima) and chose green and black for the colours — very much my taste — and started on a swatch to better understand the stitch pattern. I made it correctly, but it didn’t look good. I tried with different wool and different colours. Still didn’t like it. The way the two colours played with each other didn’t harmonise and didn’t give the effect I wanted. I couldn’t make it work with the wools I had and didn’t want to make it in baby blue and white (I don’t wear white). On top of it all, I had a pile of endless WIPs at home and two pregnant colleagues, one whose baby was probably being born just in time for this blog post at the end of November, and another due in January. So I decided to put the bed jacket plans on ice and make some baby things instead.
For the November colleague, I made a simple baby blanket in thick cotton yarn of the “dishcloth” variety. The pattern wasn’t vintage — just the traditional crochet “American square” motif with white edge and different colour centres — but the yarn actually was! A couple of years ago, another colleague (not the pregnant one) had to clear out her mother-in-law’s flat after the elderly lady moved to a nursing home, and gave me a huge bag of yarns that had been left behind. In that sense, the blanket does have a vintage connection, though this type of craft cotton honestly hasn’t changed much in fifty years. Here’s the finished product:
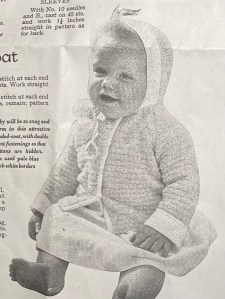
For the January baby, I looked through a few earlier Stitchcrafts from the 1950s, which often had the best baby patterns, and found an intriguing hooded “pram-coat” jacket from the October 1956 issue. I say “intriguing” because it had some unusual design aspects, like the front hem facings that fold under to make a hidden button band, the wide-edge hood and the turned-back-and-crocheted-on sleeve cuffs. I still had some light blue and white-ish Lana Grossa Meilenweit from the March 1964 Slipover for a Smart Tot — probably not enough for the whole jacket with hood, but I thought I might make the sleeves in dark blue (left over from the same project).
The stitch pattern is a nice basket-weave over 3+3 stitches, with 2 rows of stocking-stitch interspersed to even it out a bit. There isn’t supposed to be a hem at the bottom, but it curled so badly, even in the basket-weave pattern, that I picked up stitches from the cast-on and made one with a purl row for turning. Similarly, the sleeve cuffs were supposed to be knit separately, sewn on later, turned back and then crocheted over, but why so much effort? I made a hem the same way. Continuing in the spirit of saving time and energy, I made the fronts and back in one piece up to the armholes, the sleeves flat and two at a time on one needle, and the raglan yoke in one piece back and forth. There wasn’t enough light blue to even make the whole fronts and back, so I bought more to the whole thing in light blue, as in the pattern.
Of course it occurred to me, when halfway finished, that I could have made the bed-jacket pattern after all, just adjusted the size and yarn to fit a baby... and then it would have had the same colour scheme as the original, too. Too late! What can I say. My brain had been occupied with too many “real-life” things.
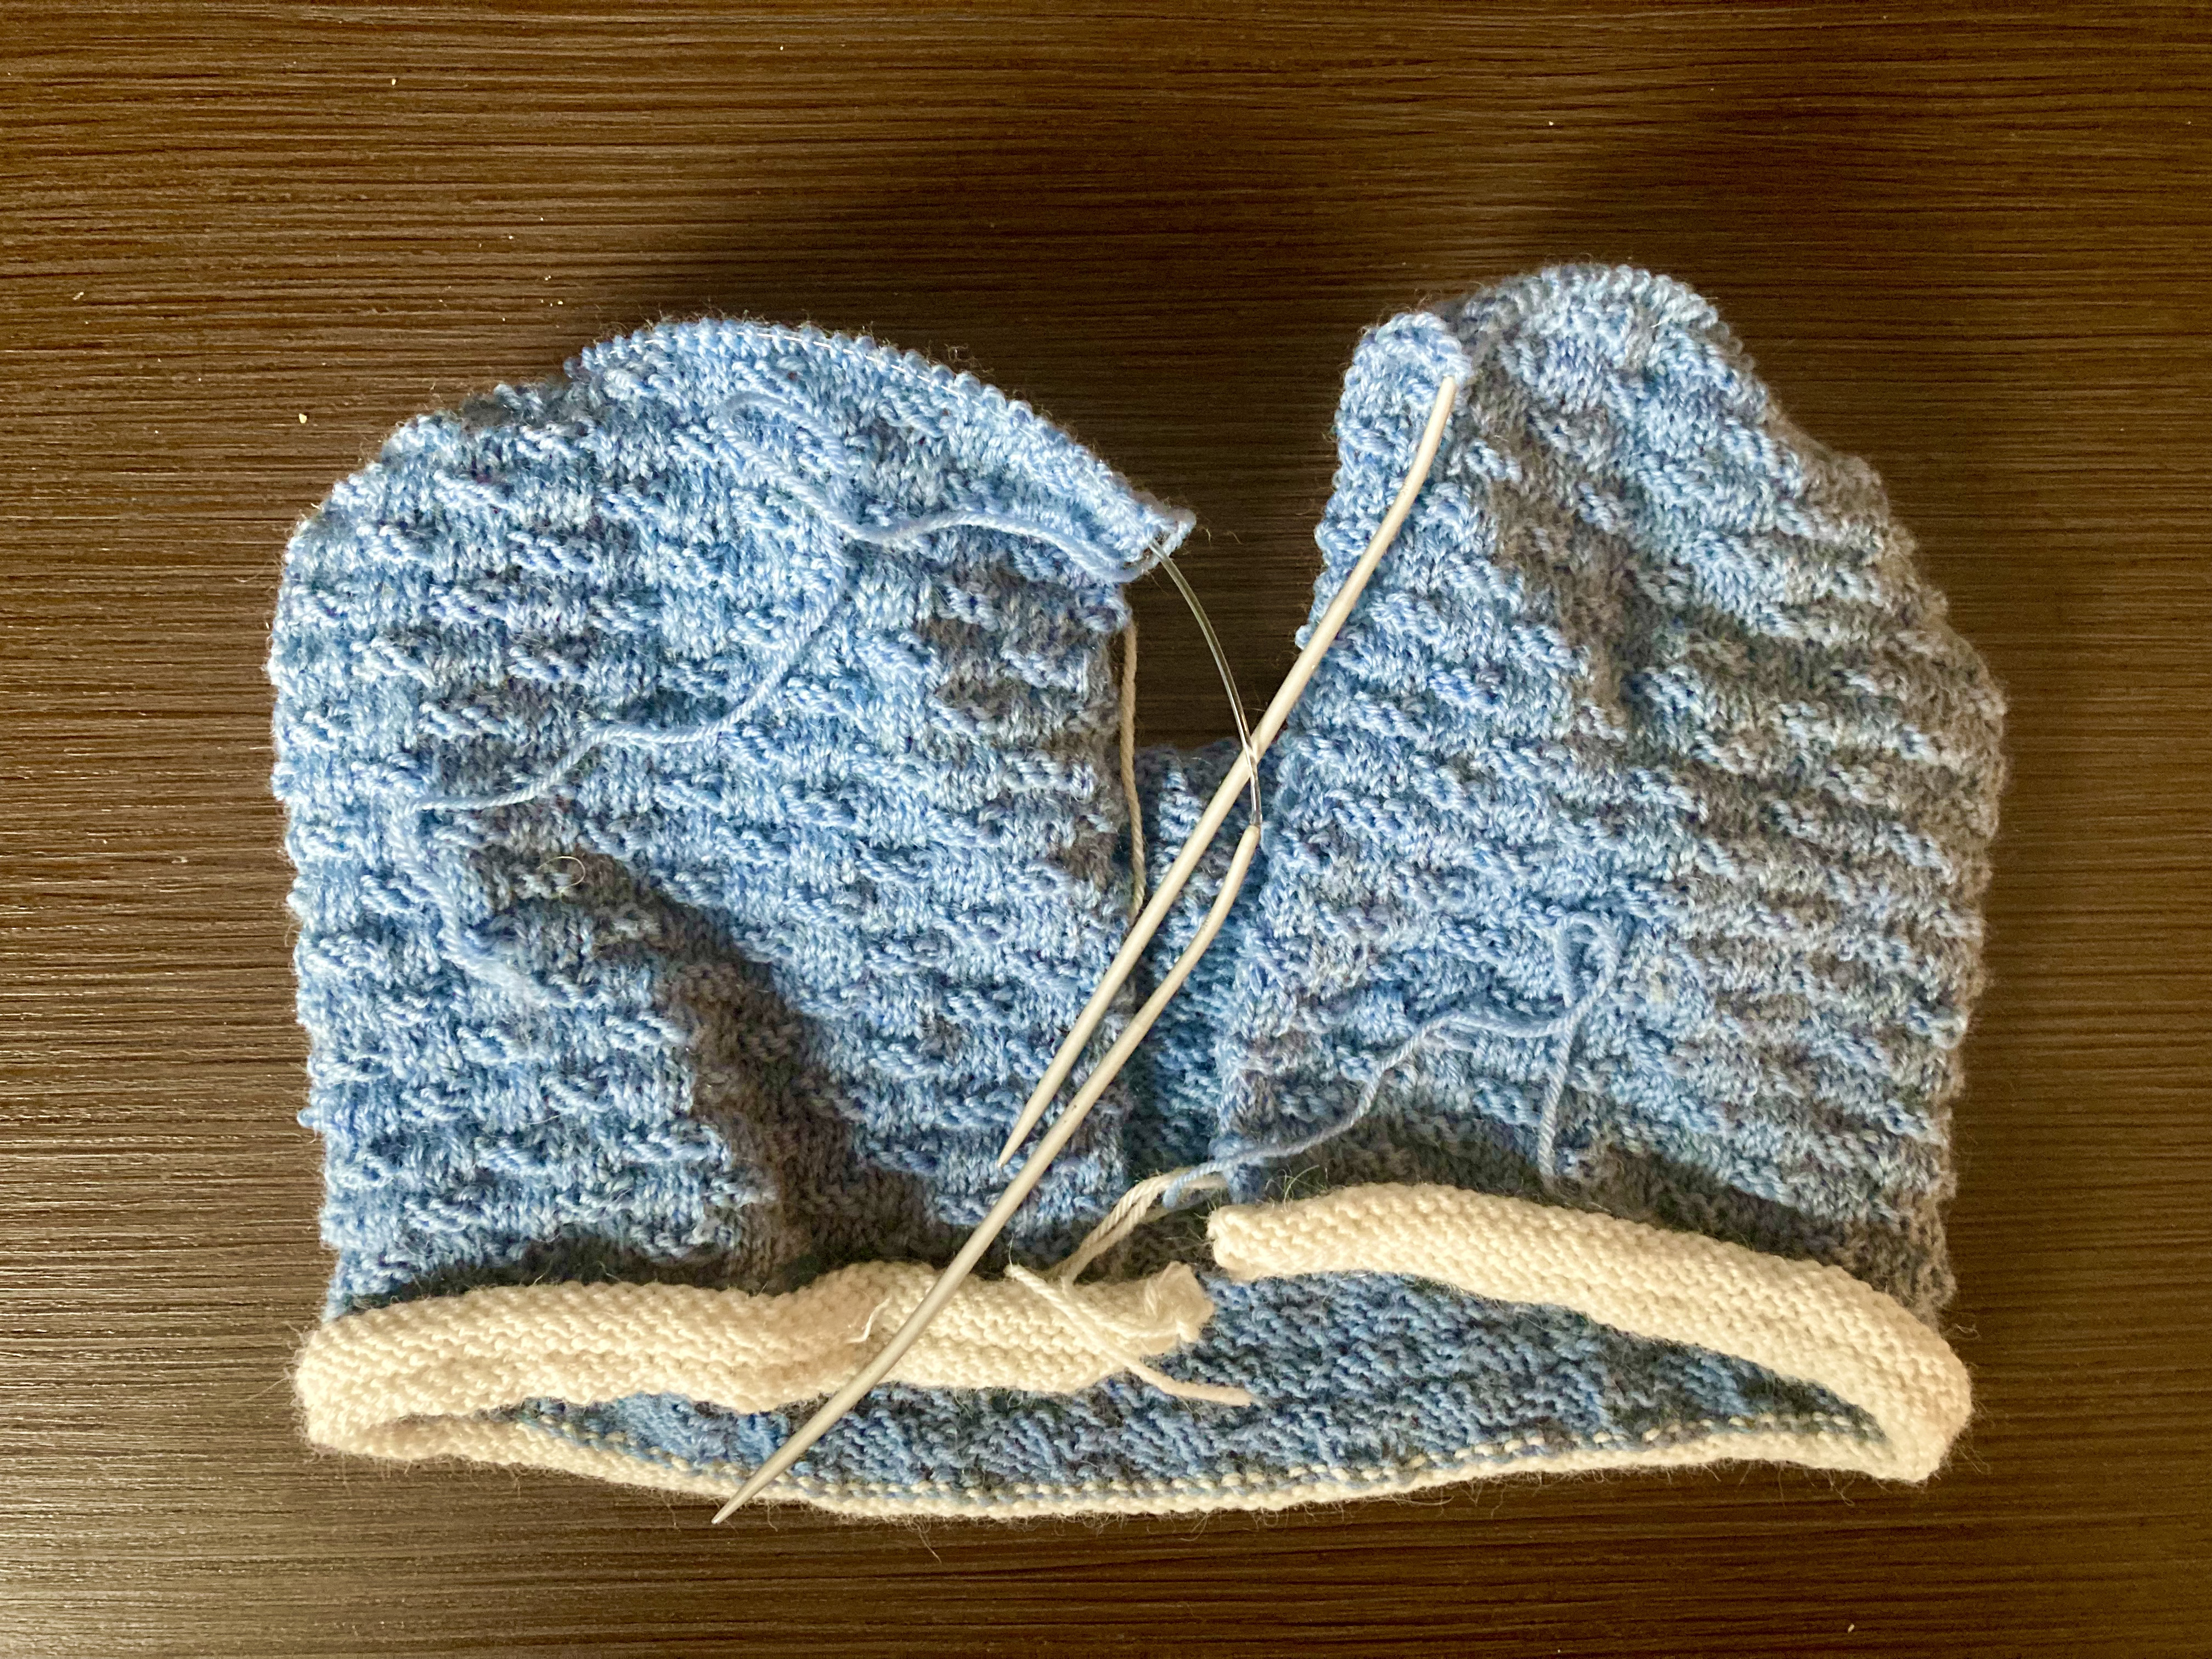
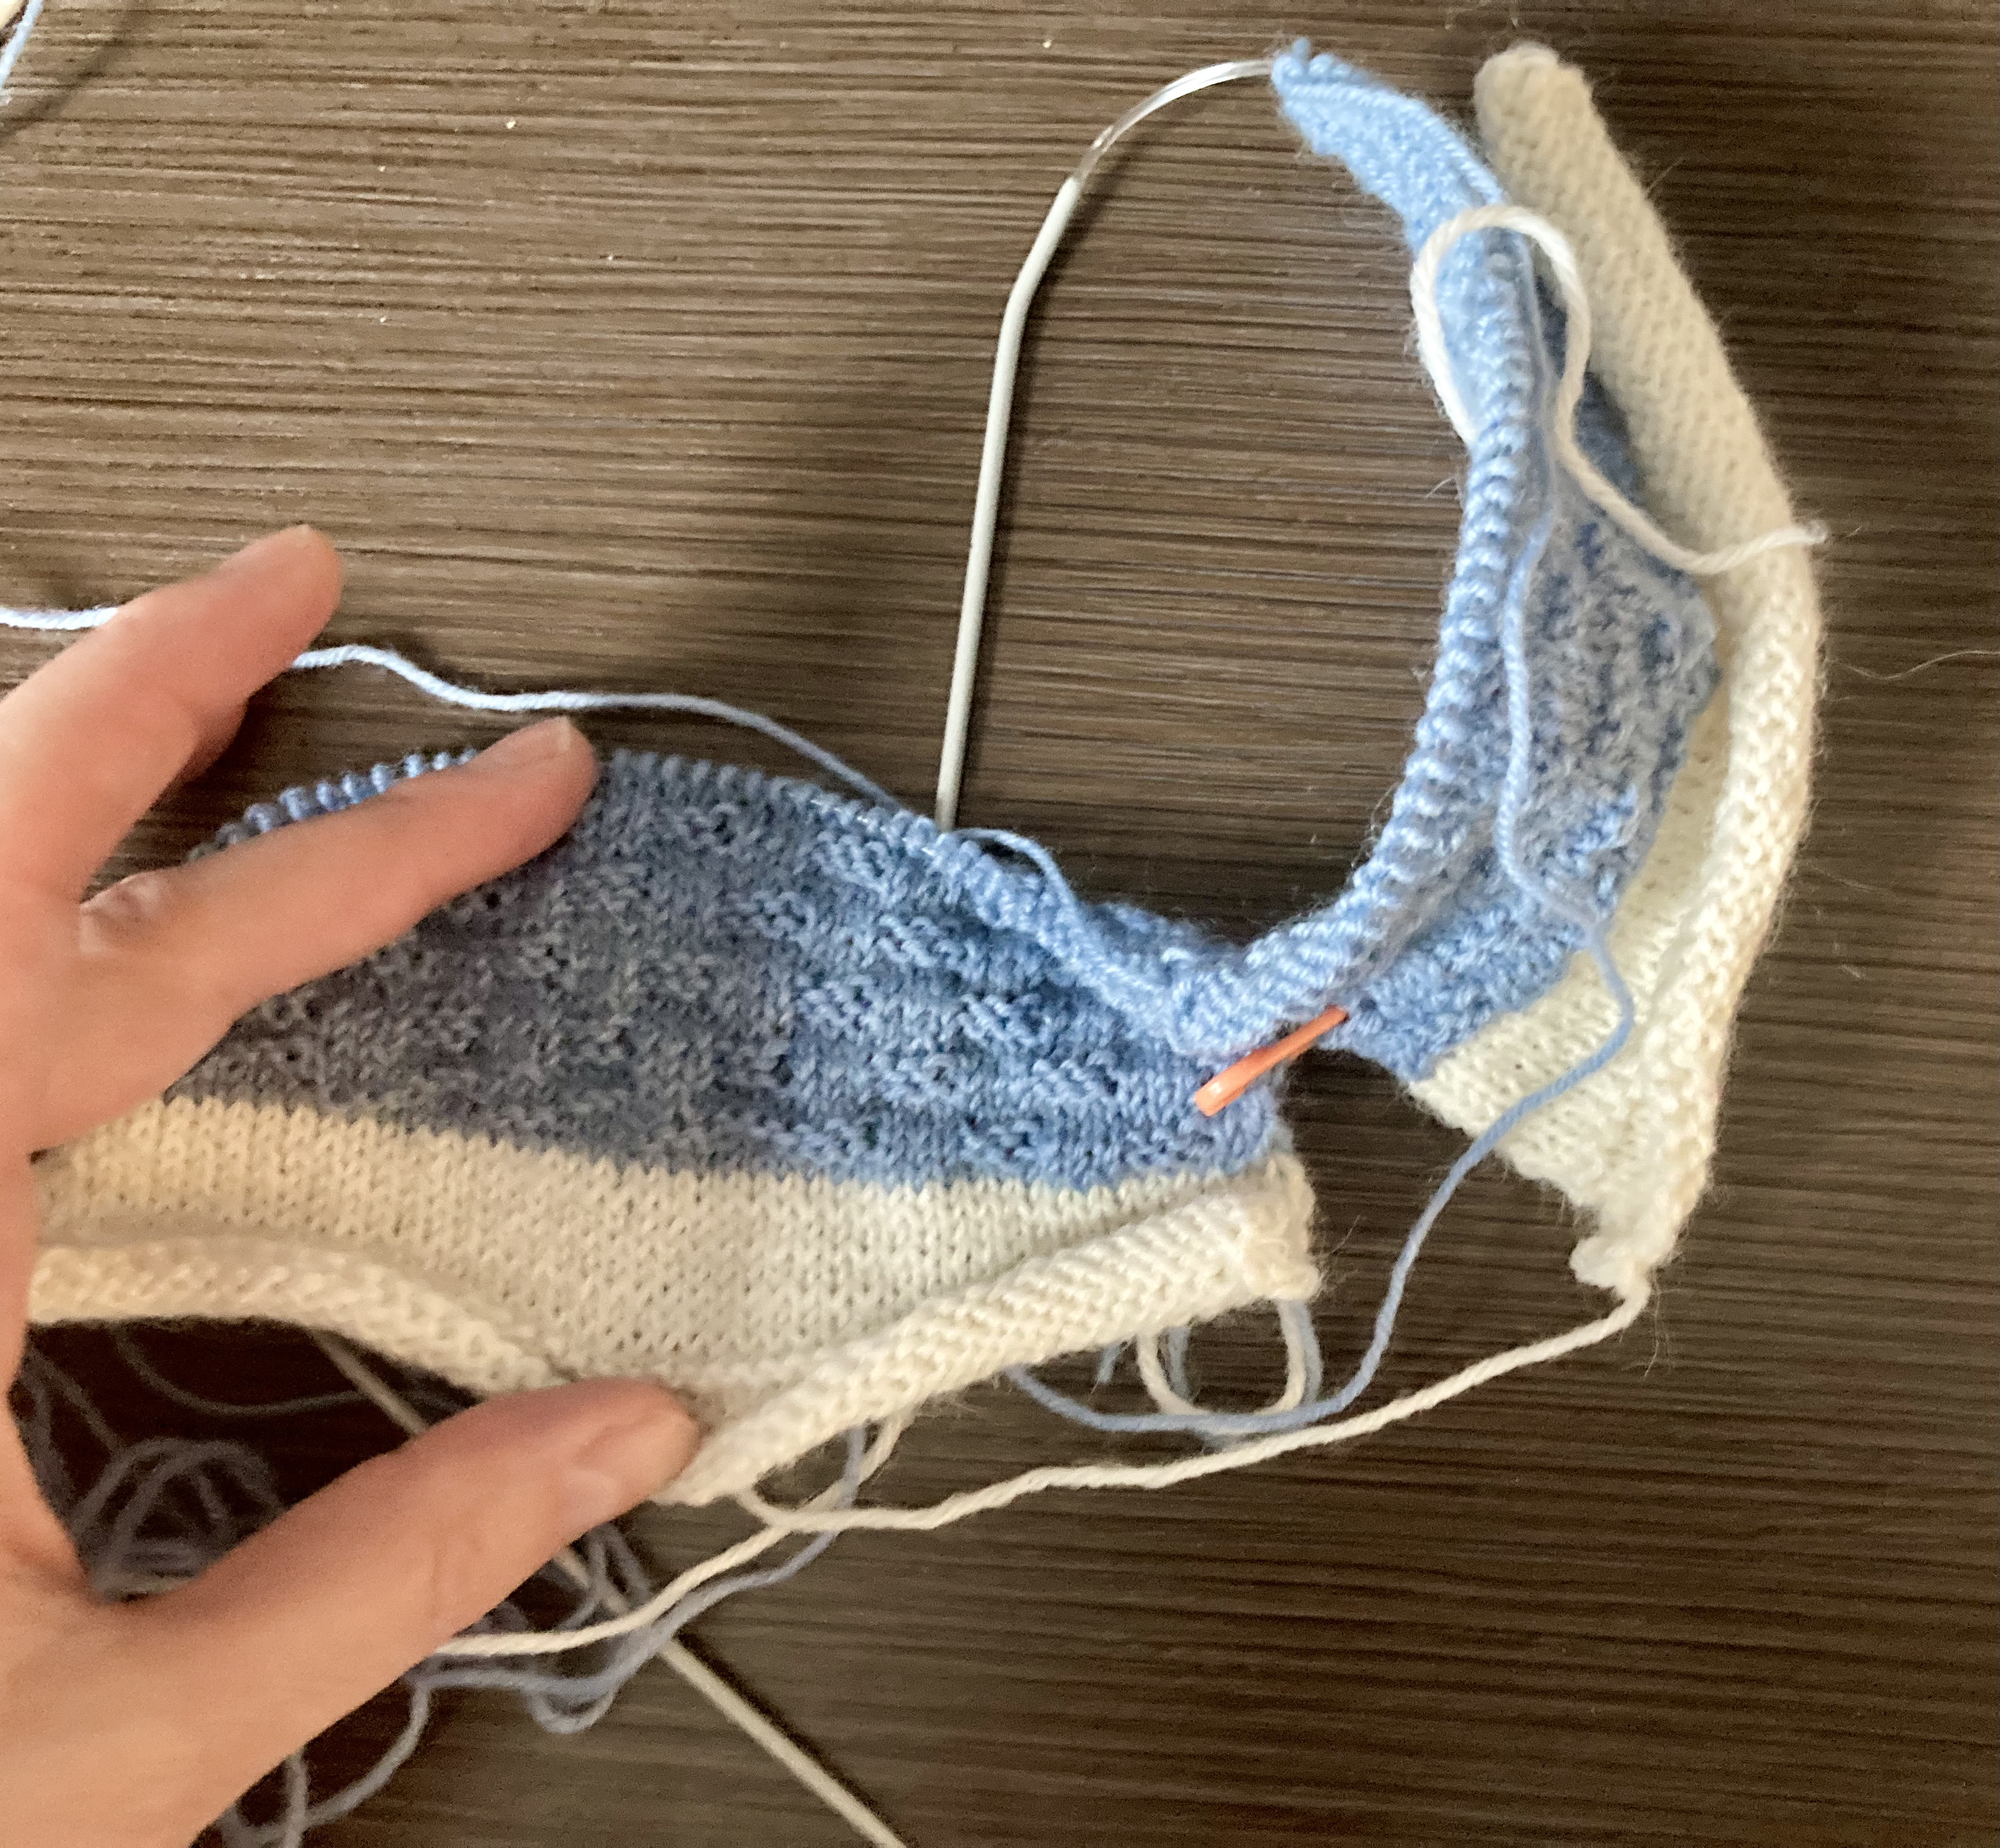
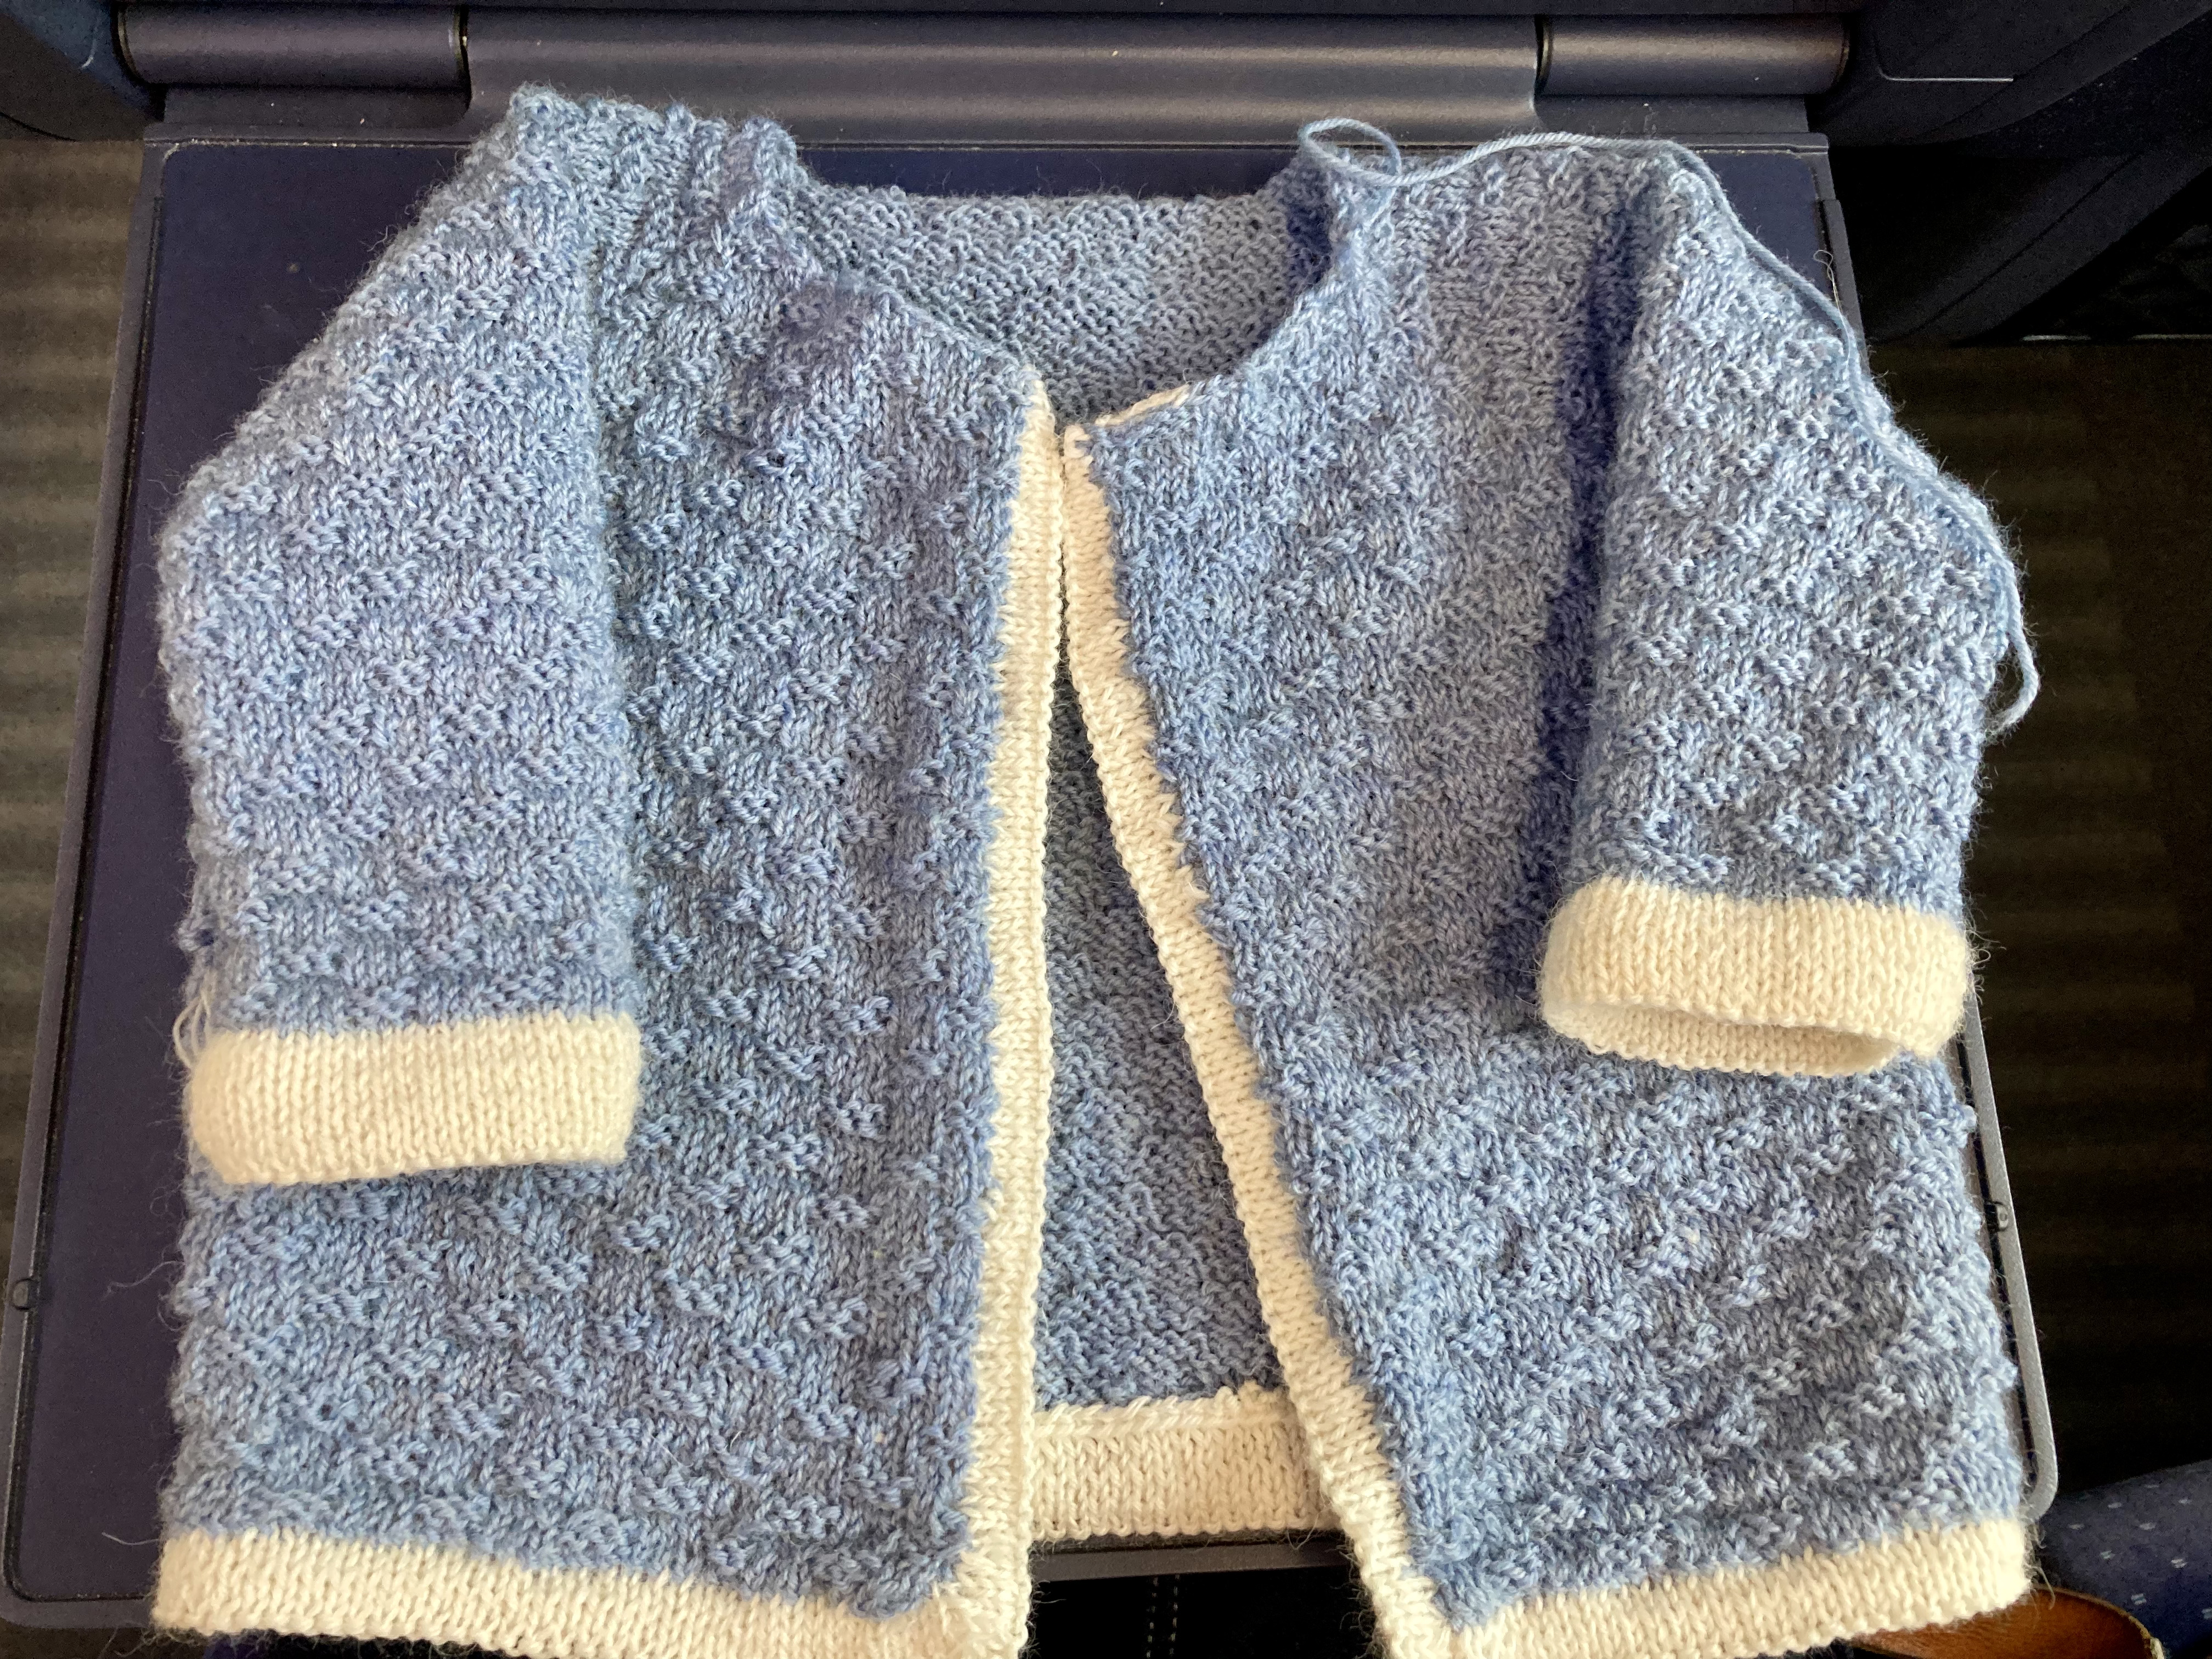
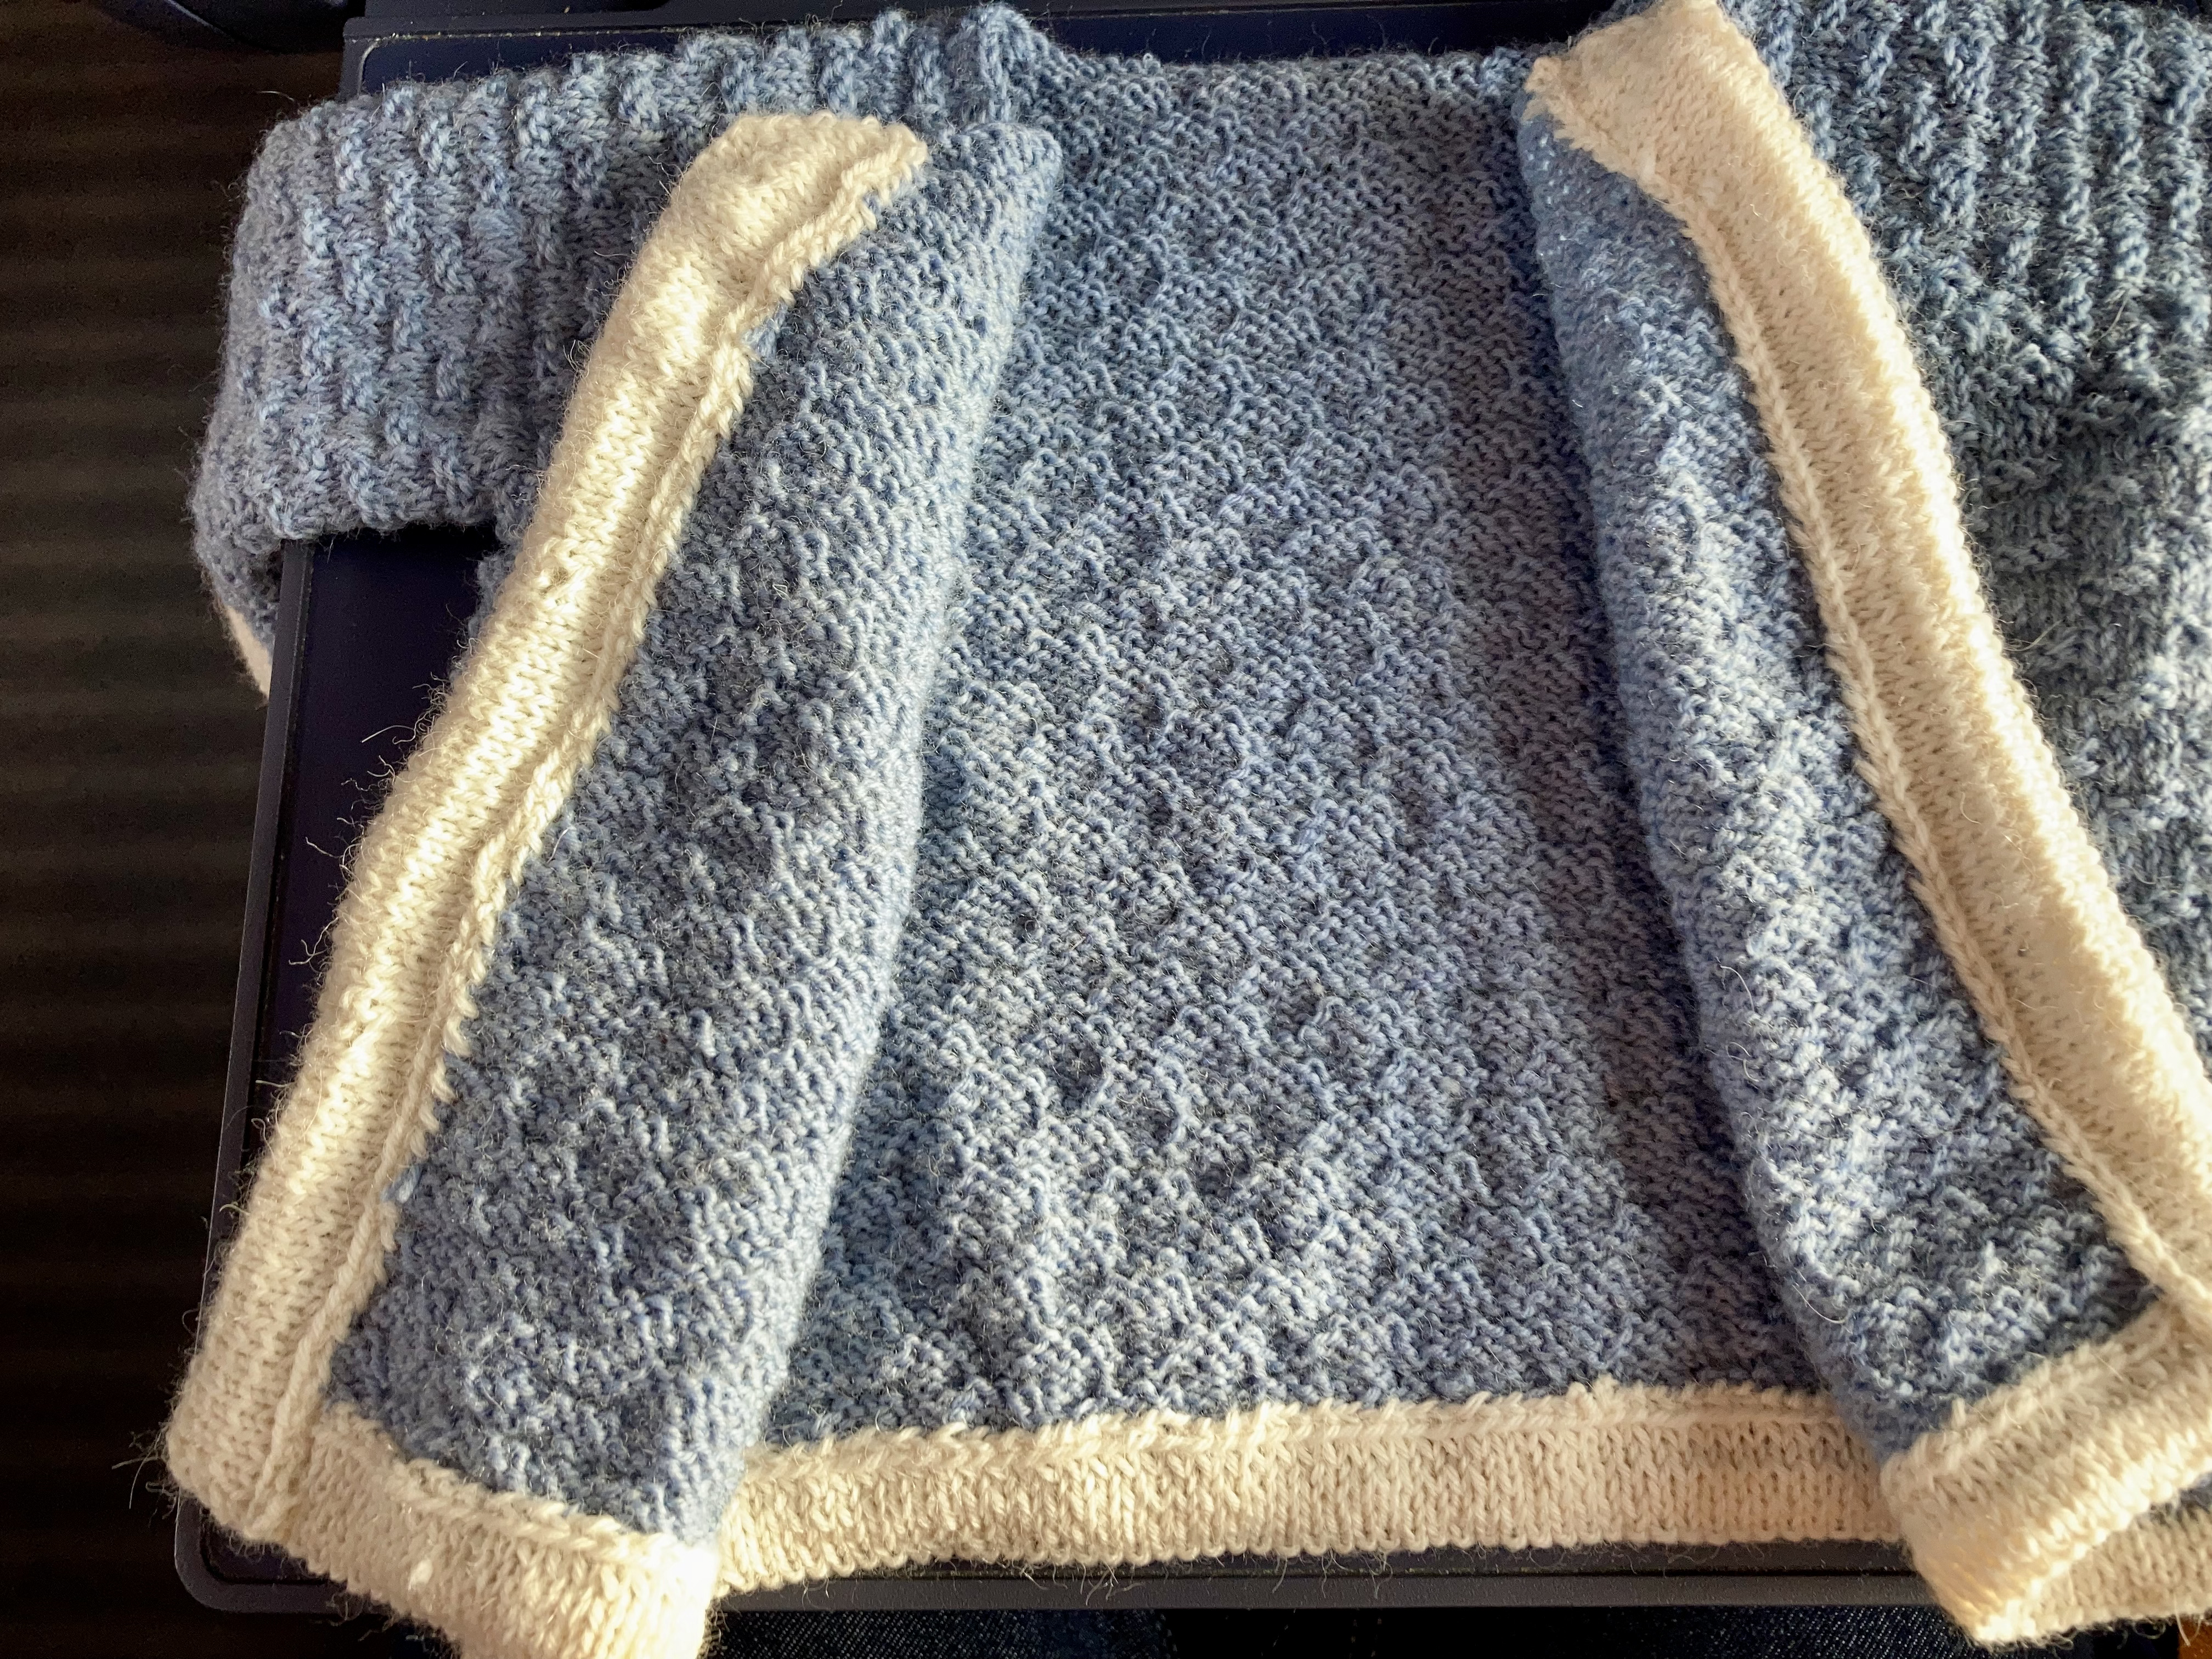
Part of those real-life things included a lot of work-related travel on trains, which has the advantage of giving me lots of time to knit — and the disadvantage of not being able to take good in-progress photos. Here are some of the jacket after completing the body and knitting the front bands, with a lovely background of train floor. The front bands are picked up and knitted horizontally in the usual way and folded under, so double thickness, and the buttonholes are only on the inside part of the fold, so that they are hidden when the jacket is buttoned. There are increases at the neck edge to make a sort of top facing in the front “corners” where the hood join ends.
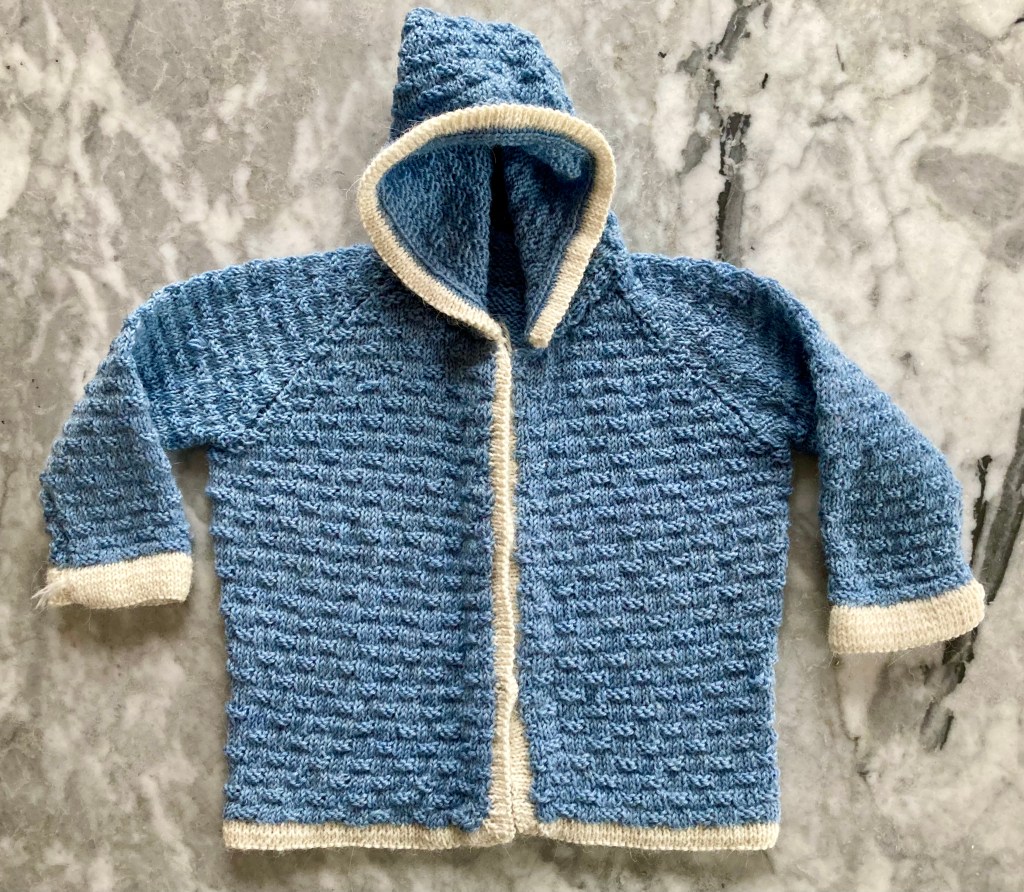
The hood is made in a separate piece from the brim to the neck, with short rows to round out the top part. Here again, the instructions said to make the hood in blue first and pick up for the facing later. I could have just cast on with white and made the facing first to avoid having to pick up along the cast-on edge later, but I was happy not to, since I had limited white wool — I ran out and had to switch to blue for the under-facing part (after the fold). That wasn’t a problem and the white wool remnant has now been successfully de-stashed.
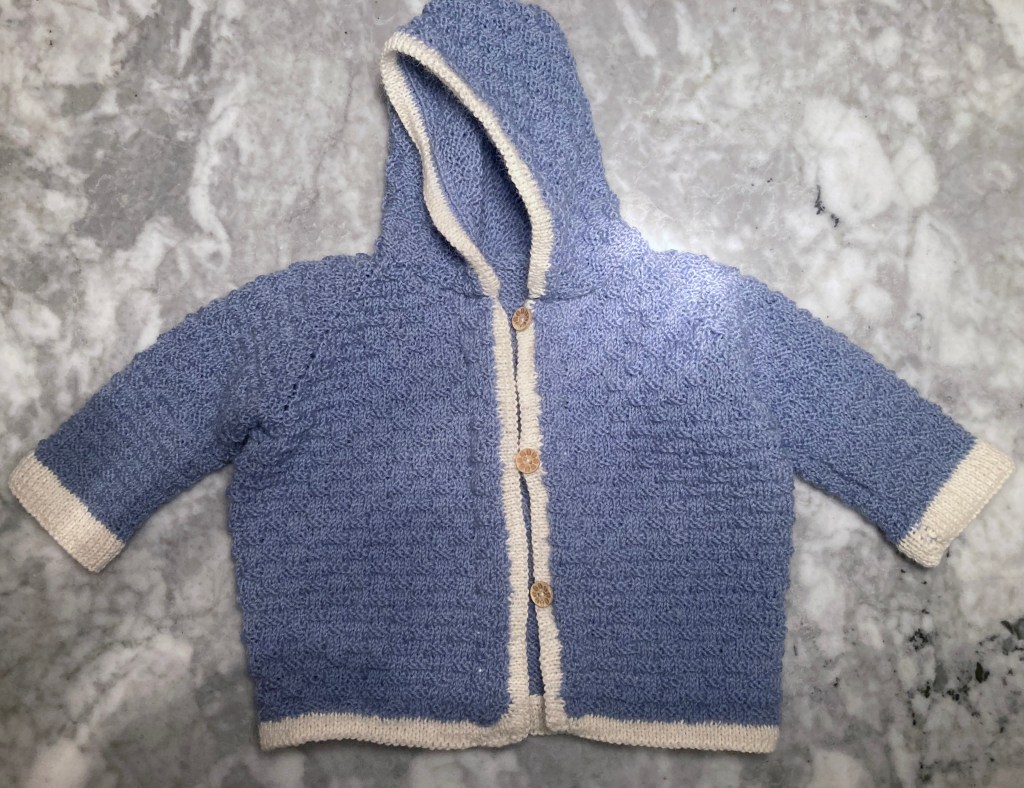
I added lightweight wooden buttons. The covered-button design didn’t really convince me, in the end, since I imagine it will be unnecessarily difficult to button up if the baby is squirming around, and the doubled facings are a little bulky even in 4-ply, fingering-weight wool. That said, the facings will put up with a good amount of wear and tear. The finished jacket is really cute and should fit a larger baby in the first few months as an “outdoor” pram jacket, or maybe a six-month old as a cover-up on cooler summer days.
I hope the my colleagues will be happy with this baby jacket! The mother is herself an expert knitter and seamstress, so the bar was set high. But I’m quite satisfied and I think they (and the baby, of course) will be too.
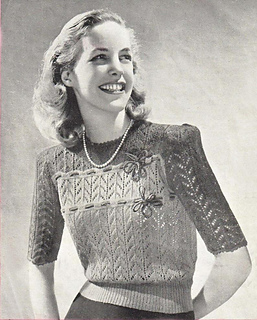
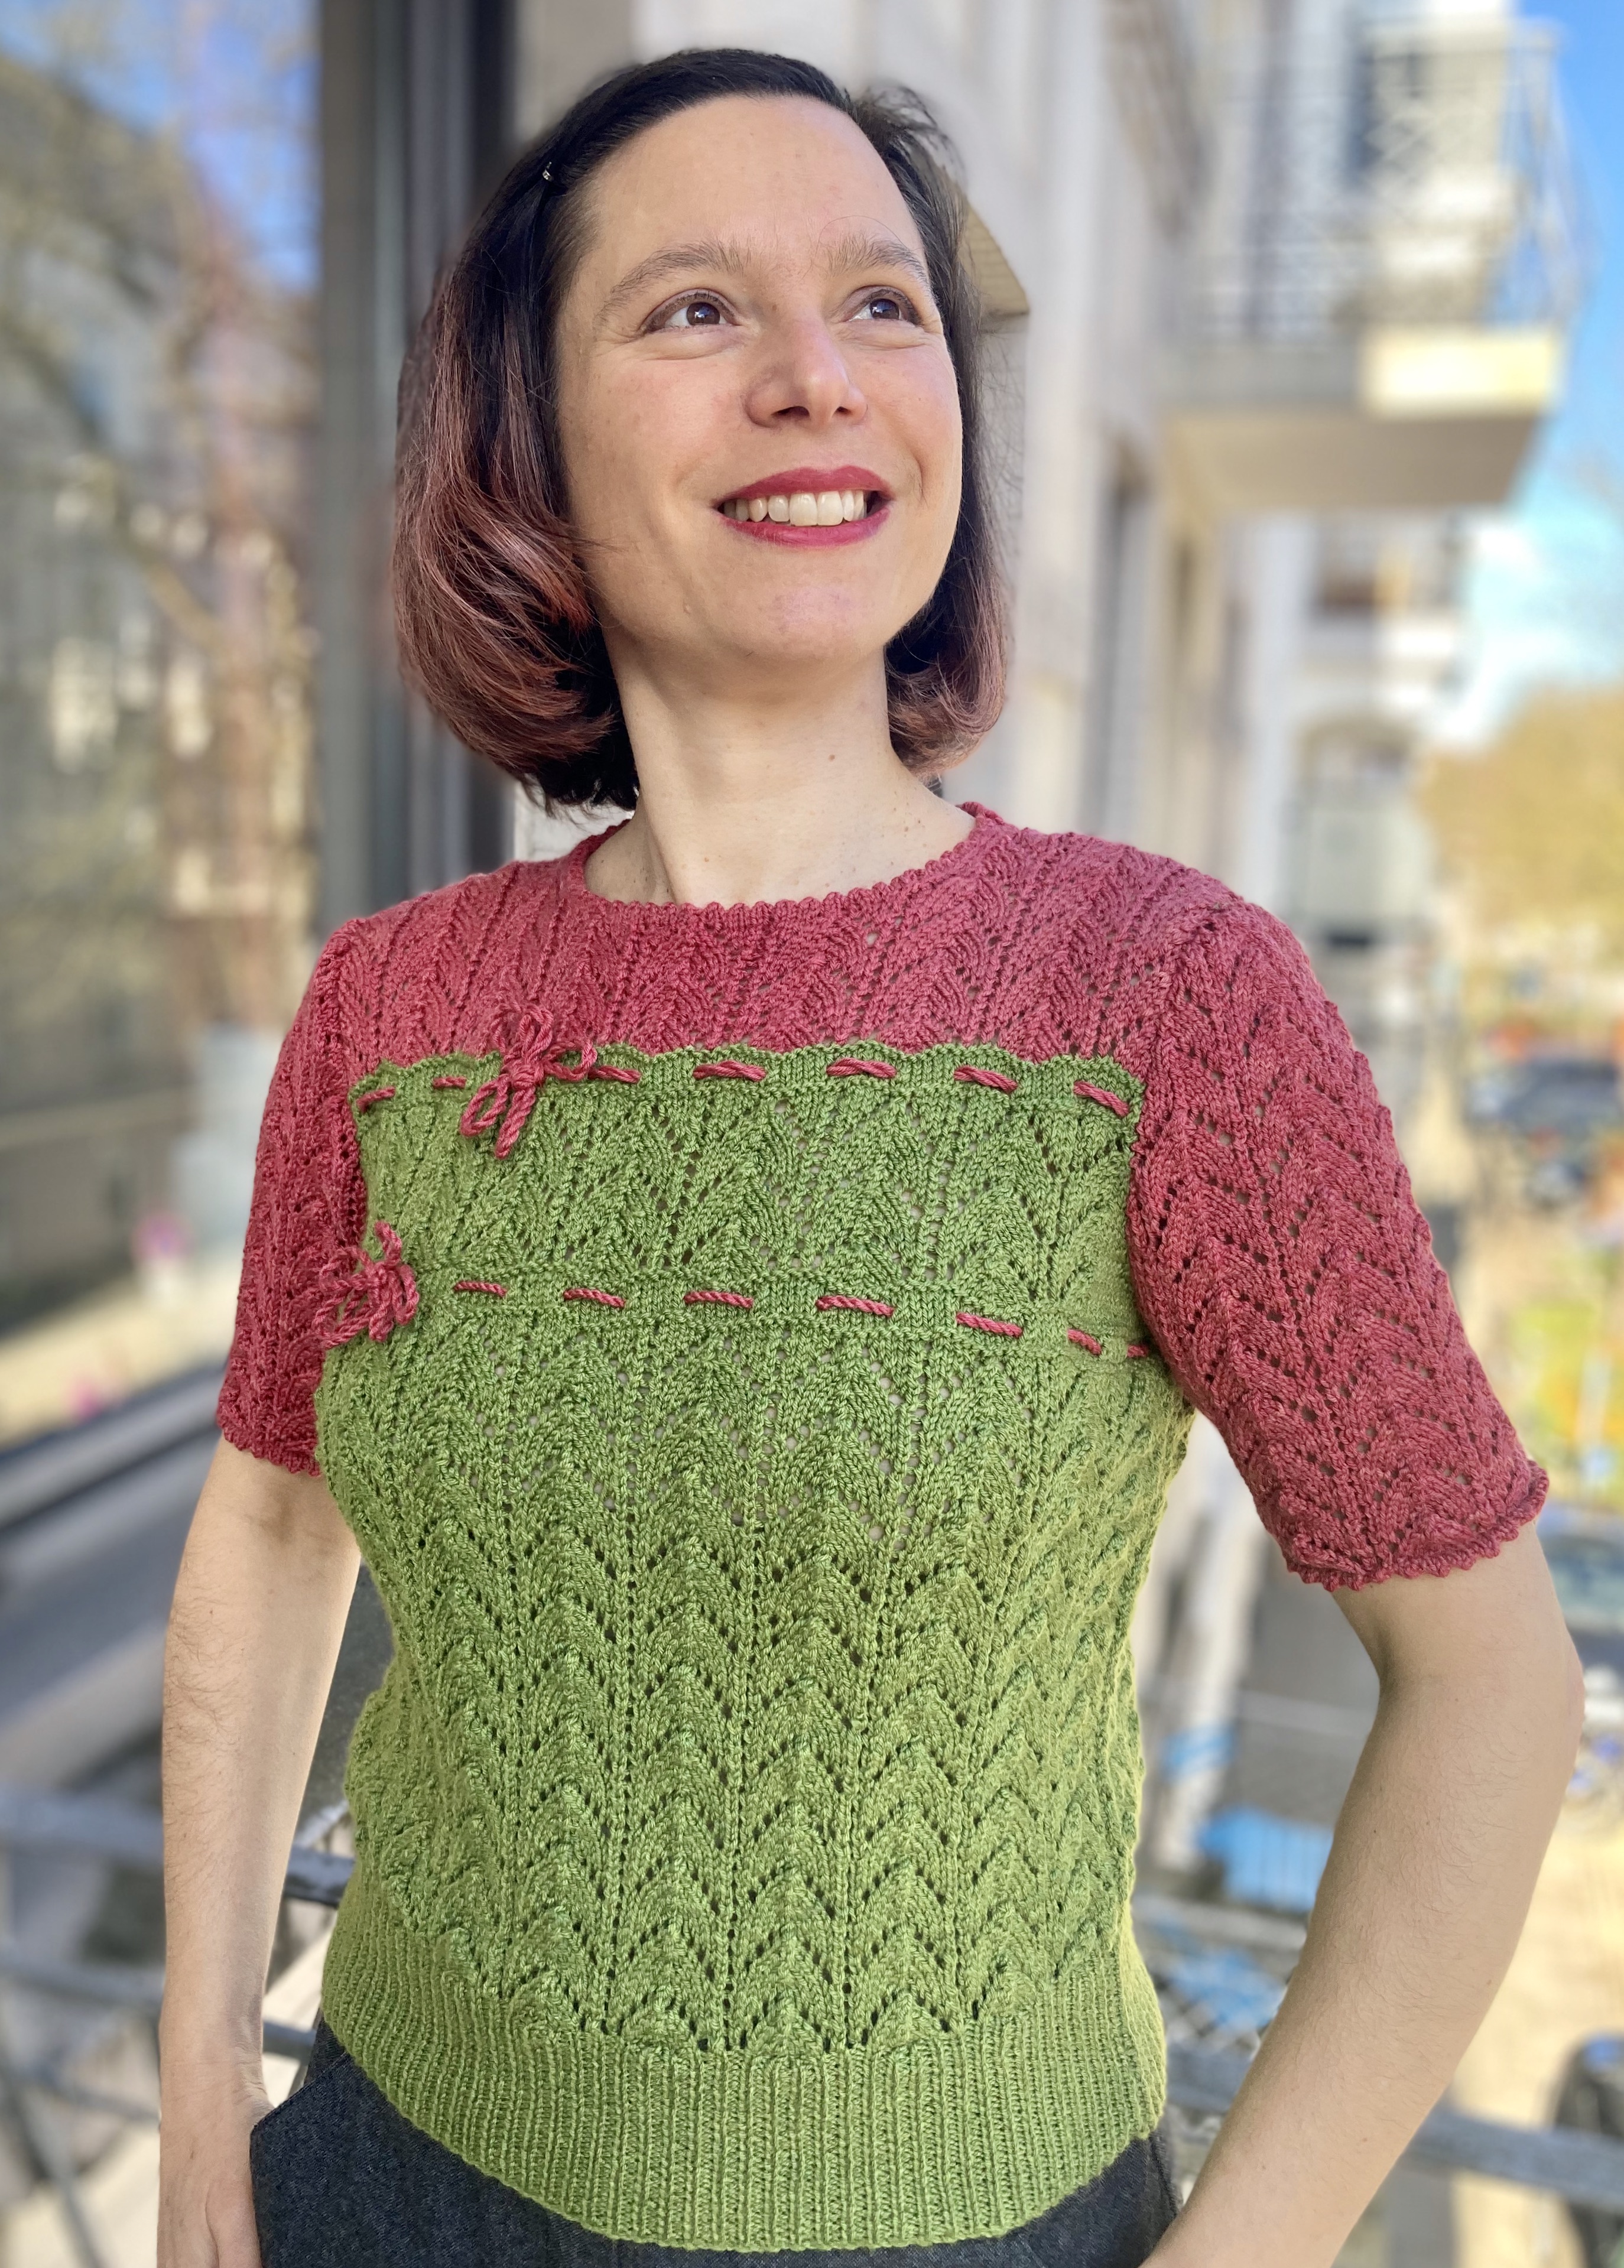
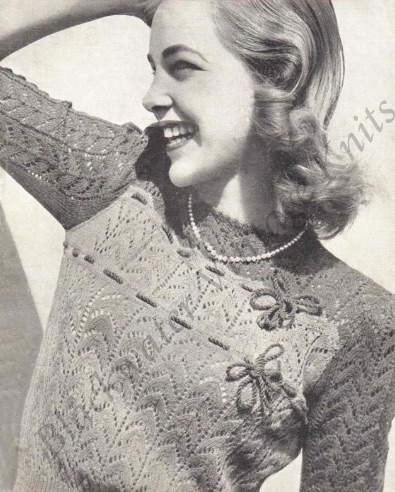
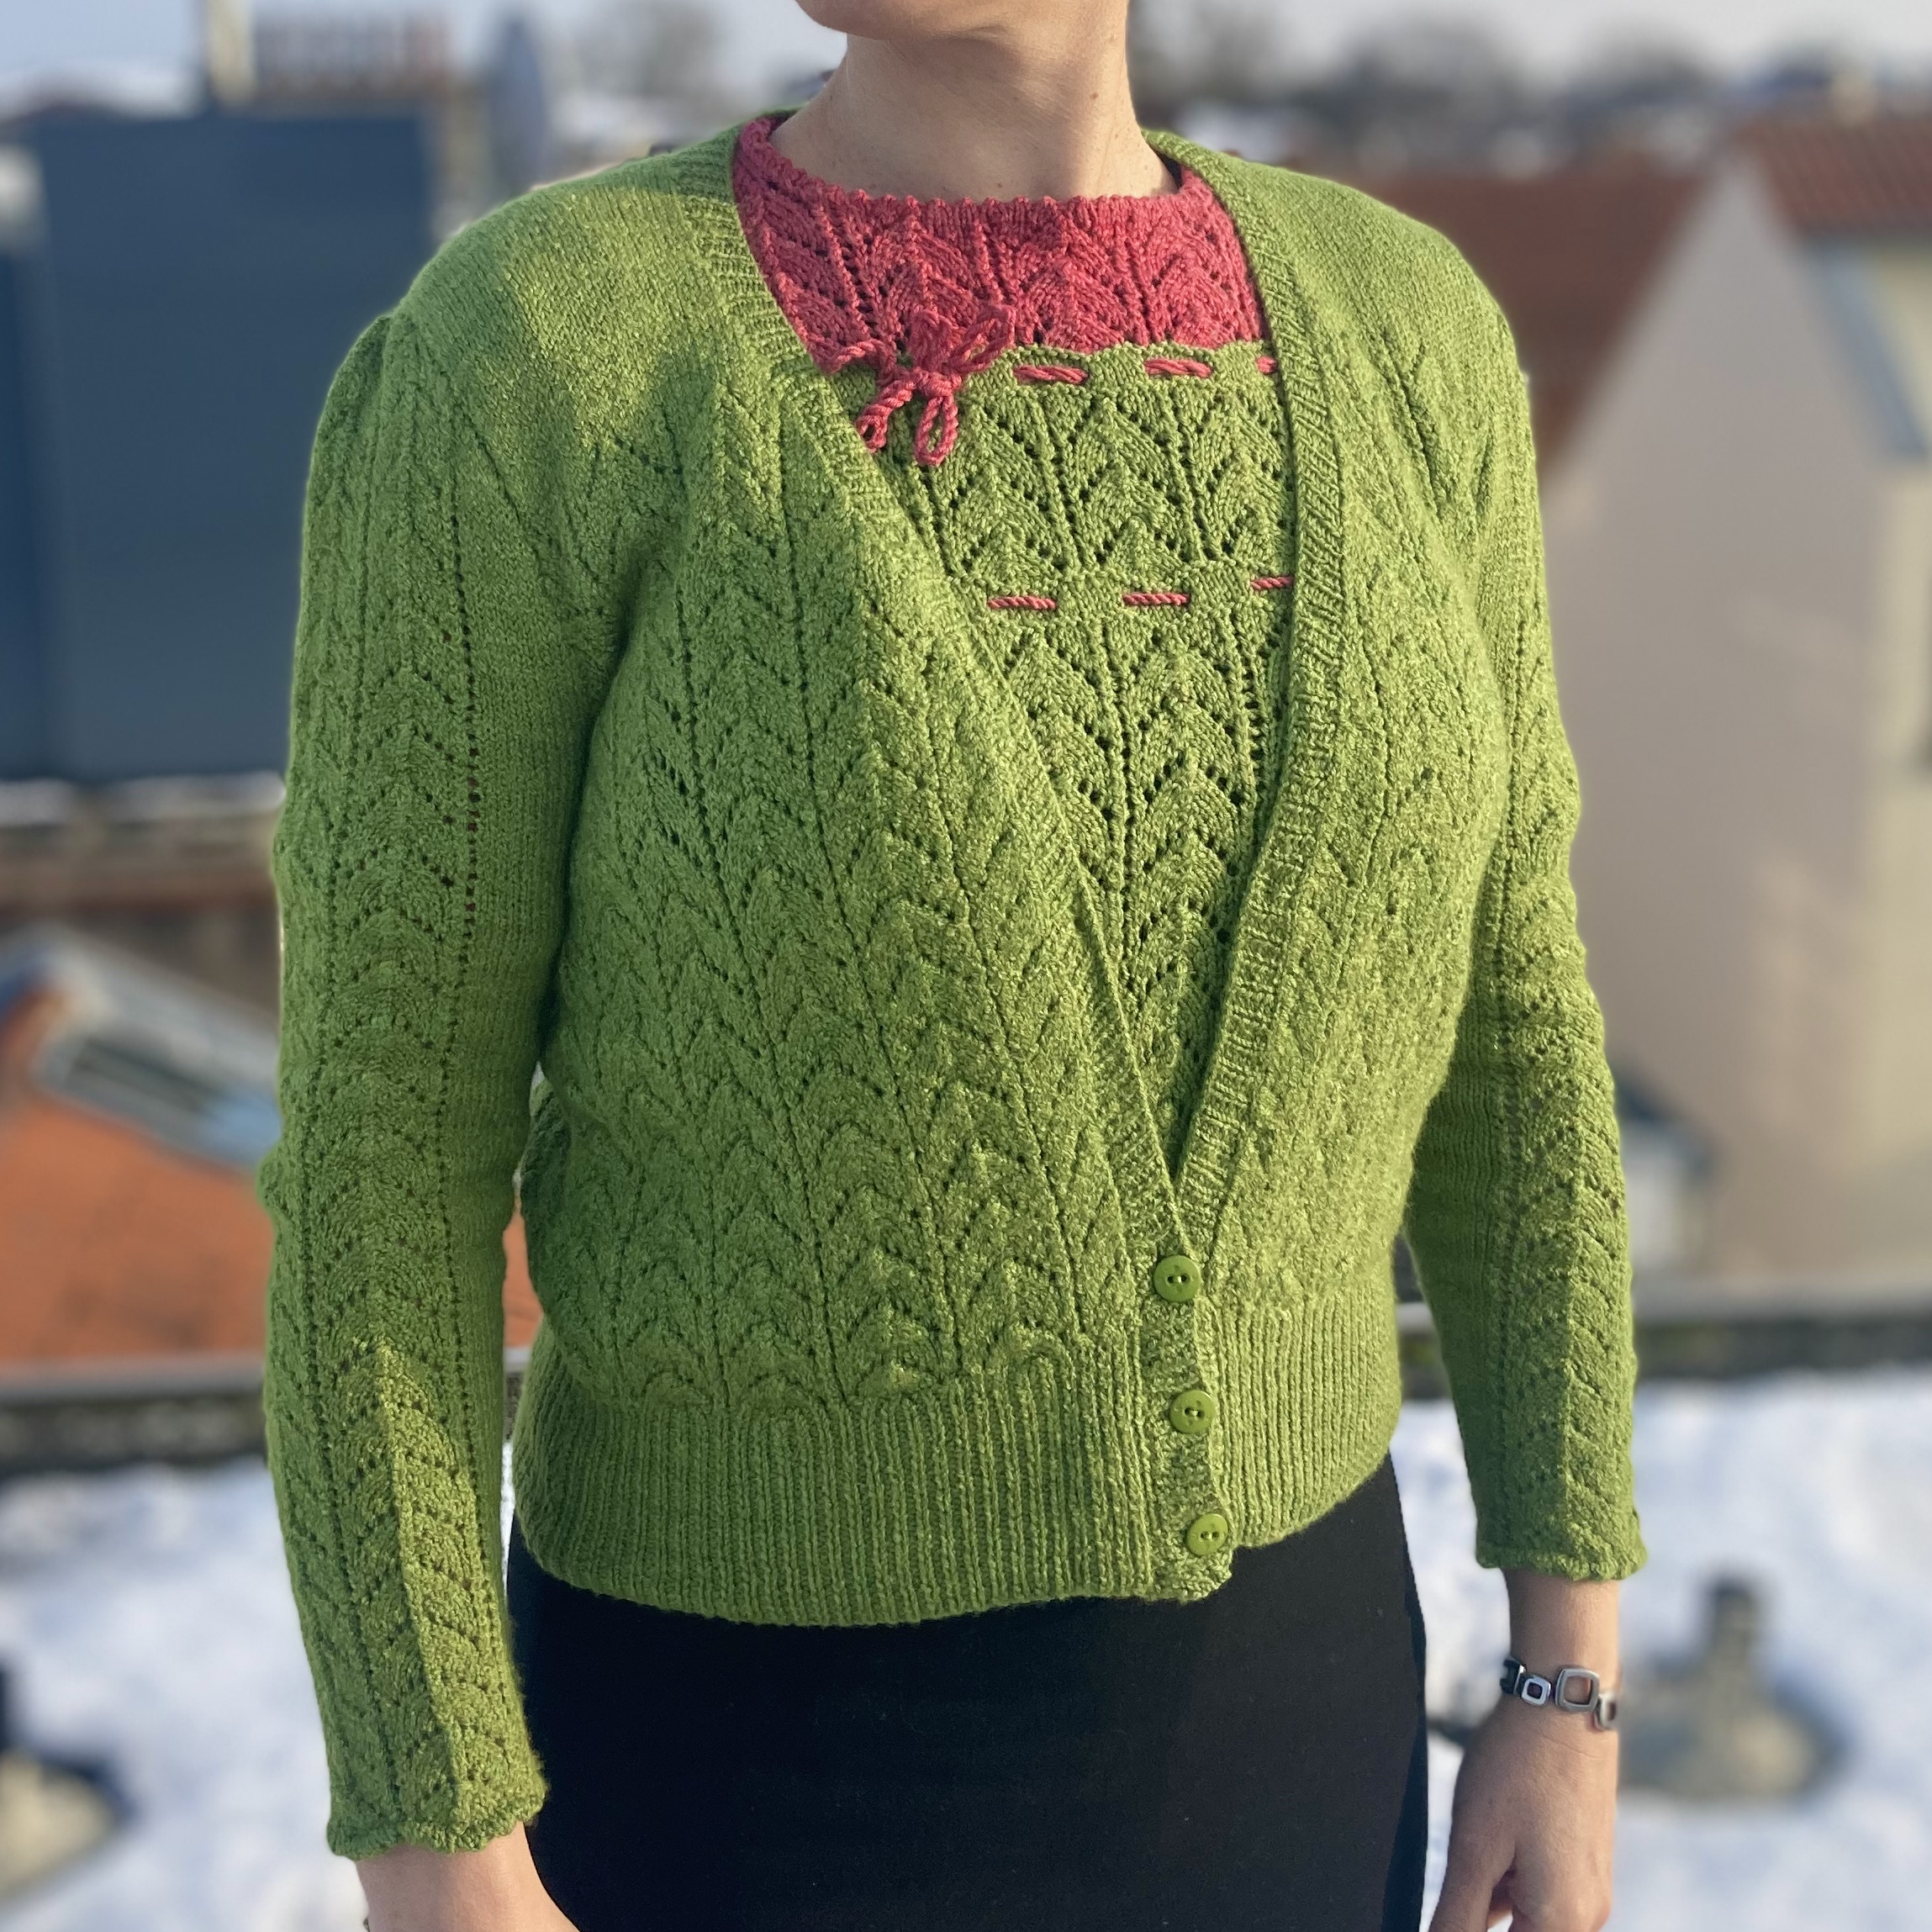
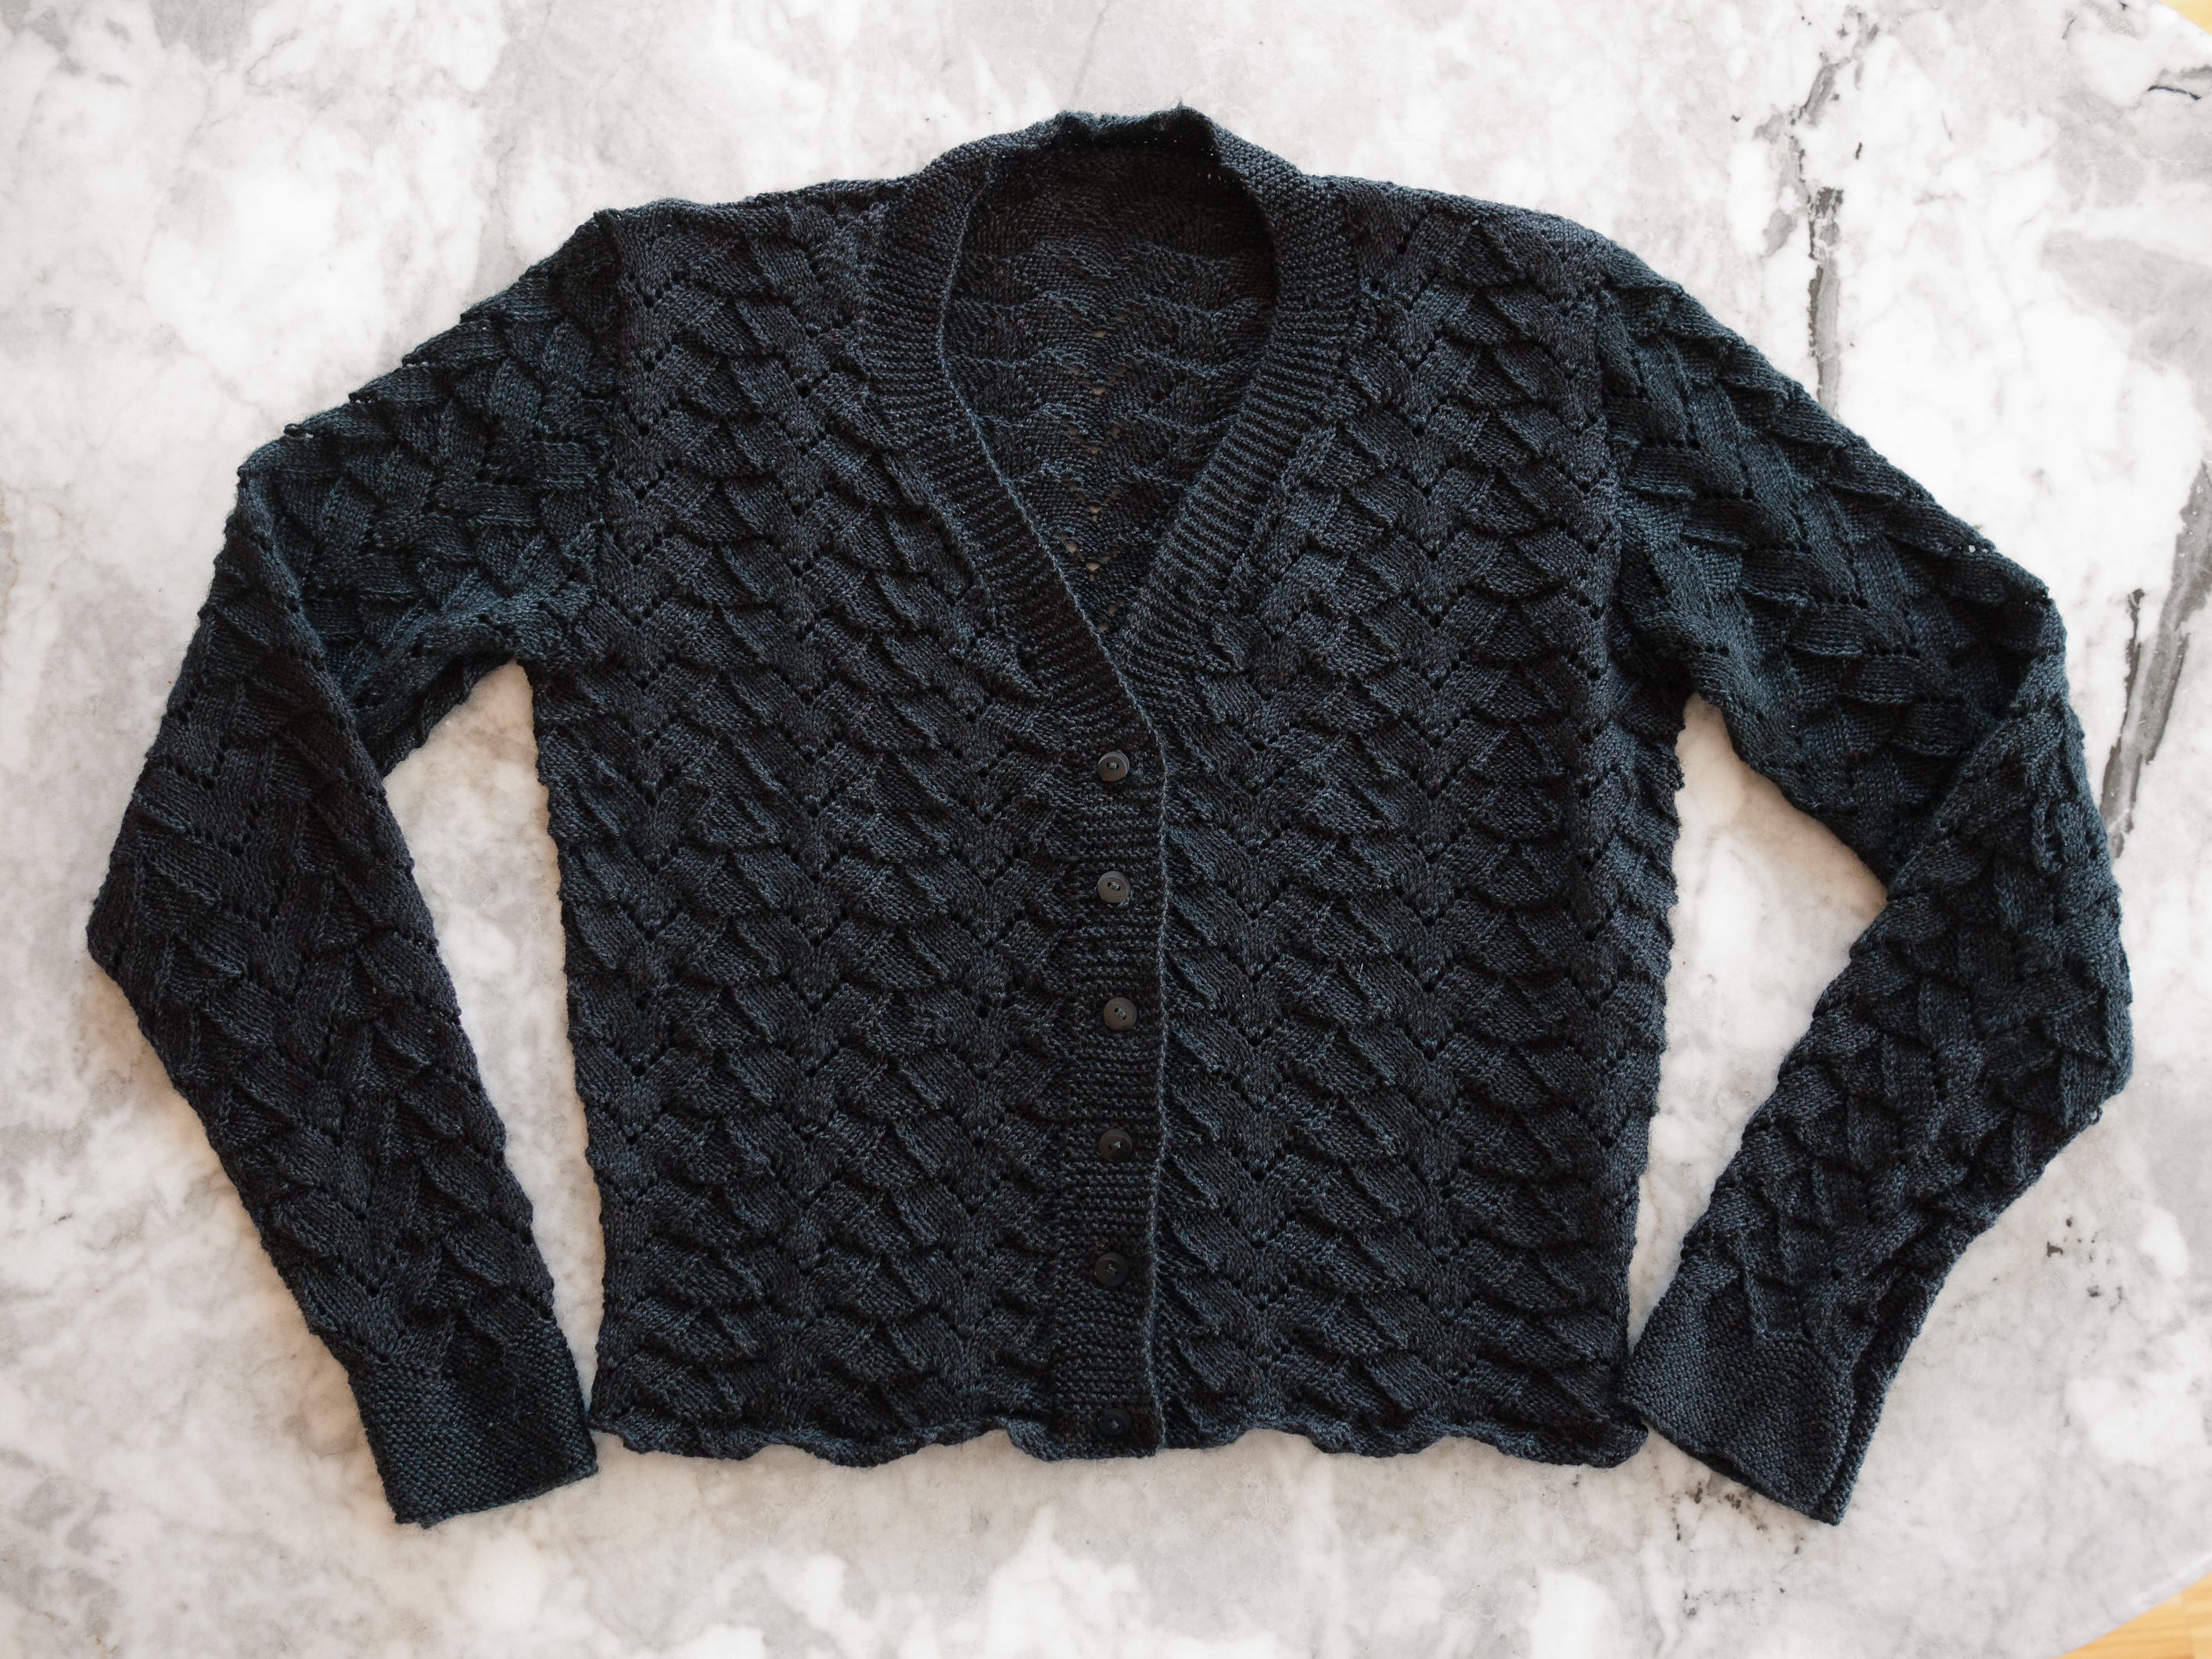
Since there wasn’t anything I really wanted to make from the August 1965 issue, this month’s project is taking us back to 1946. It’s technically not a Stitchcraft pattern (though Stitchcraft magazine was around then), but it is a pattern from Stitchcraft‘s patron wool company, Patons, so close enough for this blog, and conveniently fit into a lace-themed KAL on the All Things Vintage Ravelry forum. The pattern is for a short-sleeved jumper and I’m working to make it into a twin set.
I bought the pattern from the wonderful BlackwaterVintageNtz shop on Etsy and the wool (Yundi & Grete Felice Fingering Puro) from last year’s wool festival in Sulingen (Germany). The wool is a mix of 75% merino and 25% silk, which gives it a lovely softness and shine. I bought 500 grams of green and 200 grams of pink with no set plans for what to do with it, and as often happens, it lay around for a while before it found the right project.
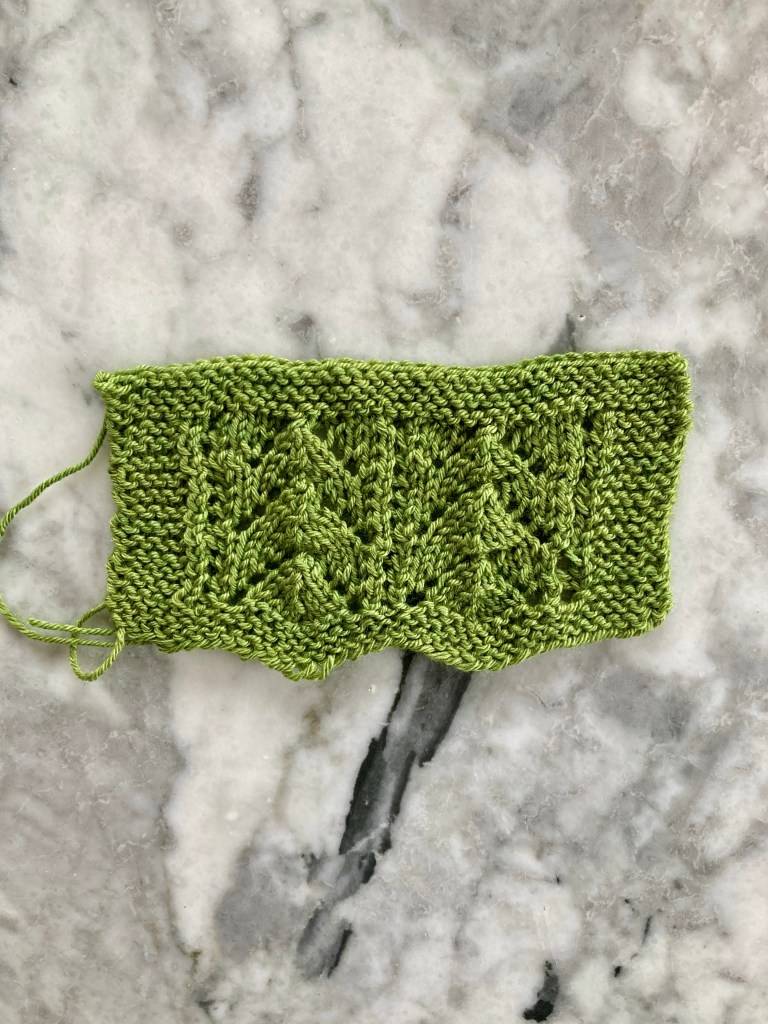
The pattern is from 1946 and, as with many patterns from that decade, information about sizing, ease, tension etc. are minimal. It’s written in one size, for 32 inch bust, with (calculating from the tension given in the pattern) 2 inches of positive ease in the bust — odd for a 1940s pattern, actually, which usually have a quite a bit of negative ease, as do lace patterns, since they stretch so easily. The vintage knitting expert and owner of the BlackwaterVintageNtz Etsy shop Gunwaru on Ravelry had conveniently knitted the jumper herself and wrote in the notes that — made to gauge as specified — her version easily fit a 38 inch-bust dress form. I wasn’t sure if my wool would stretch as much and wanted to reproduce the easy looseness of the pattern photo, so I made a swatch on 3.5 mm needles (pattern calls for 3.75) and added one pattern repeat to each of back and front. This should have given me a 37 inch finished bust, which is a bit of negative ease, but shouldn’t look too tight. I made it one pattern repeat longer as well, as I do for all pre-1960s patterns (I am taller than an “average”-sized woman of the 1940s or 50s and long-waisted).
Well, that all goes to show that swatching and calculating work most of the time. Though my lace swatch hardly stretched in blocking, the finished jumper was generous after knitting and then blocked huge — I could have just made the normal size. Or even smaller! My swatch had no relation to the knitting on the finished garment. Even the sleeves, which were fine before blocking, stretched in both length and width. I had made them shorter since I don’t like just-above-elbow length… if I had made them according to pattern, they would have practically been long.
I couldn’t block it down small enough and in the end, I put it in the dryer to shrink (delicate cycle and not hot, I am not a complete monster.) Strangely, it worked and didn’t ruin the fabric! It is now a reasonable size and fits me. I don’t recommend drying non-superwash merino and silk in a clothes dryer as it is generally really risky (don’t try this at home! I am not responsible for damages!), but in this case, it worked. The yarn did lose a little bit of its sheen and silkiness, but I am willing to sacrifice that if I can get a wearable garment.
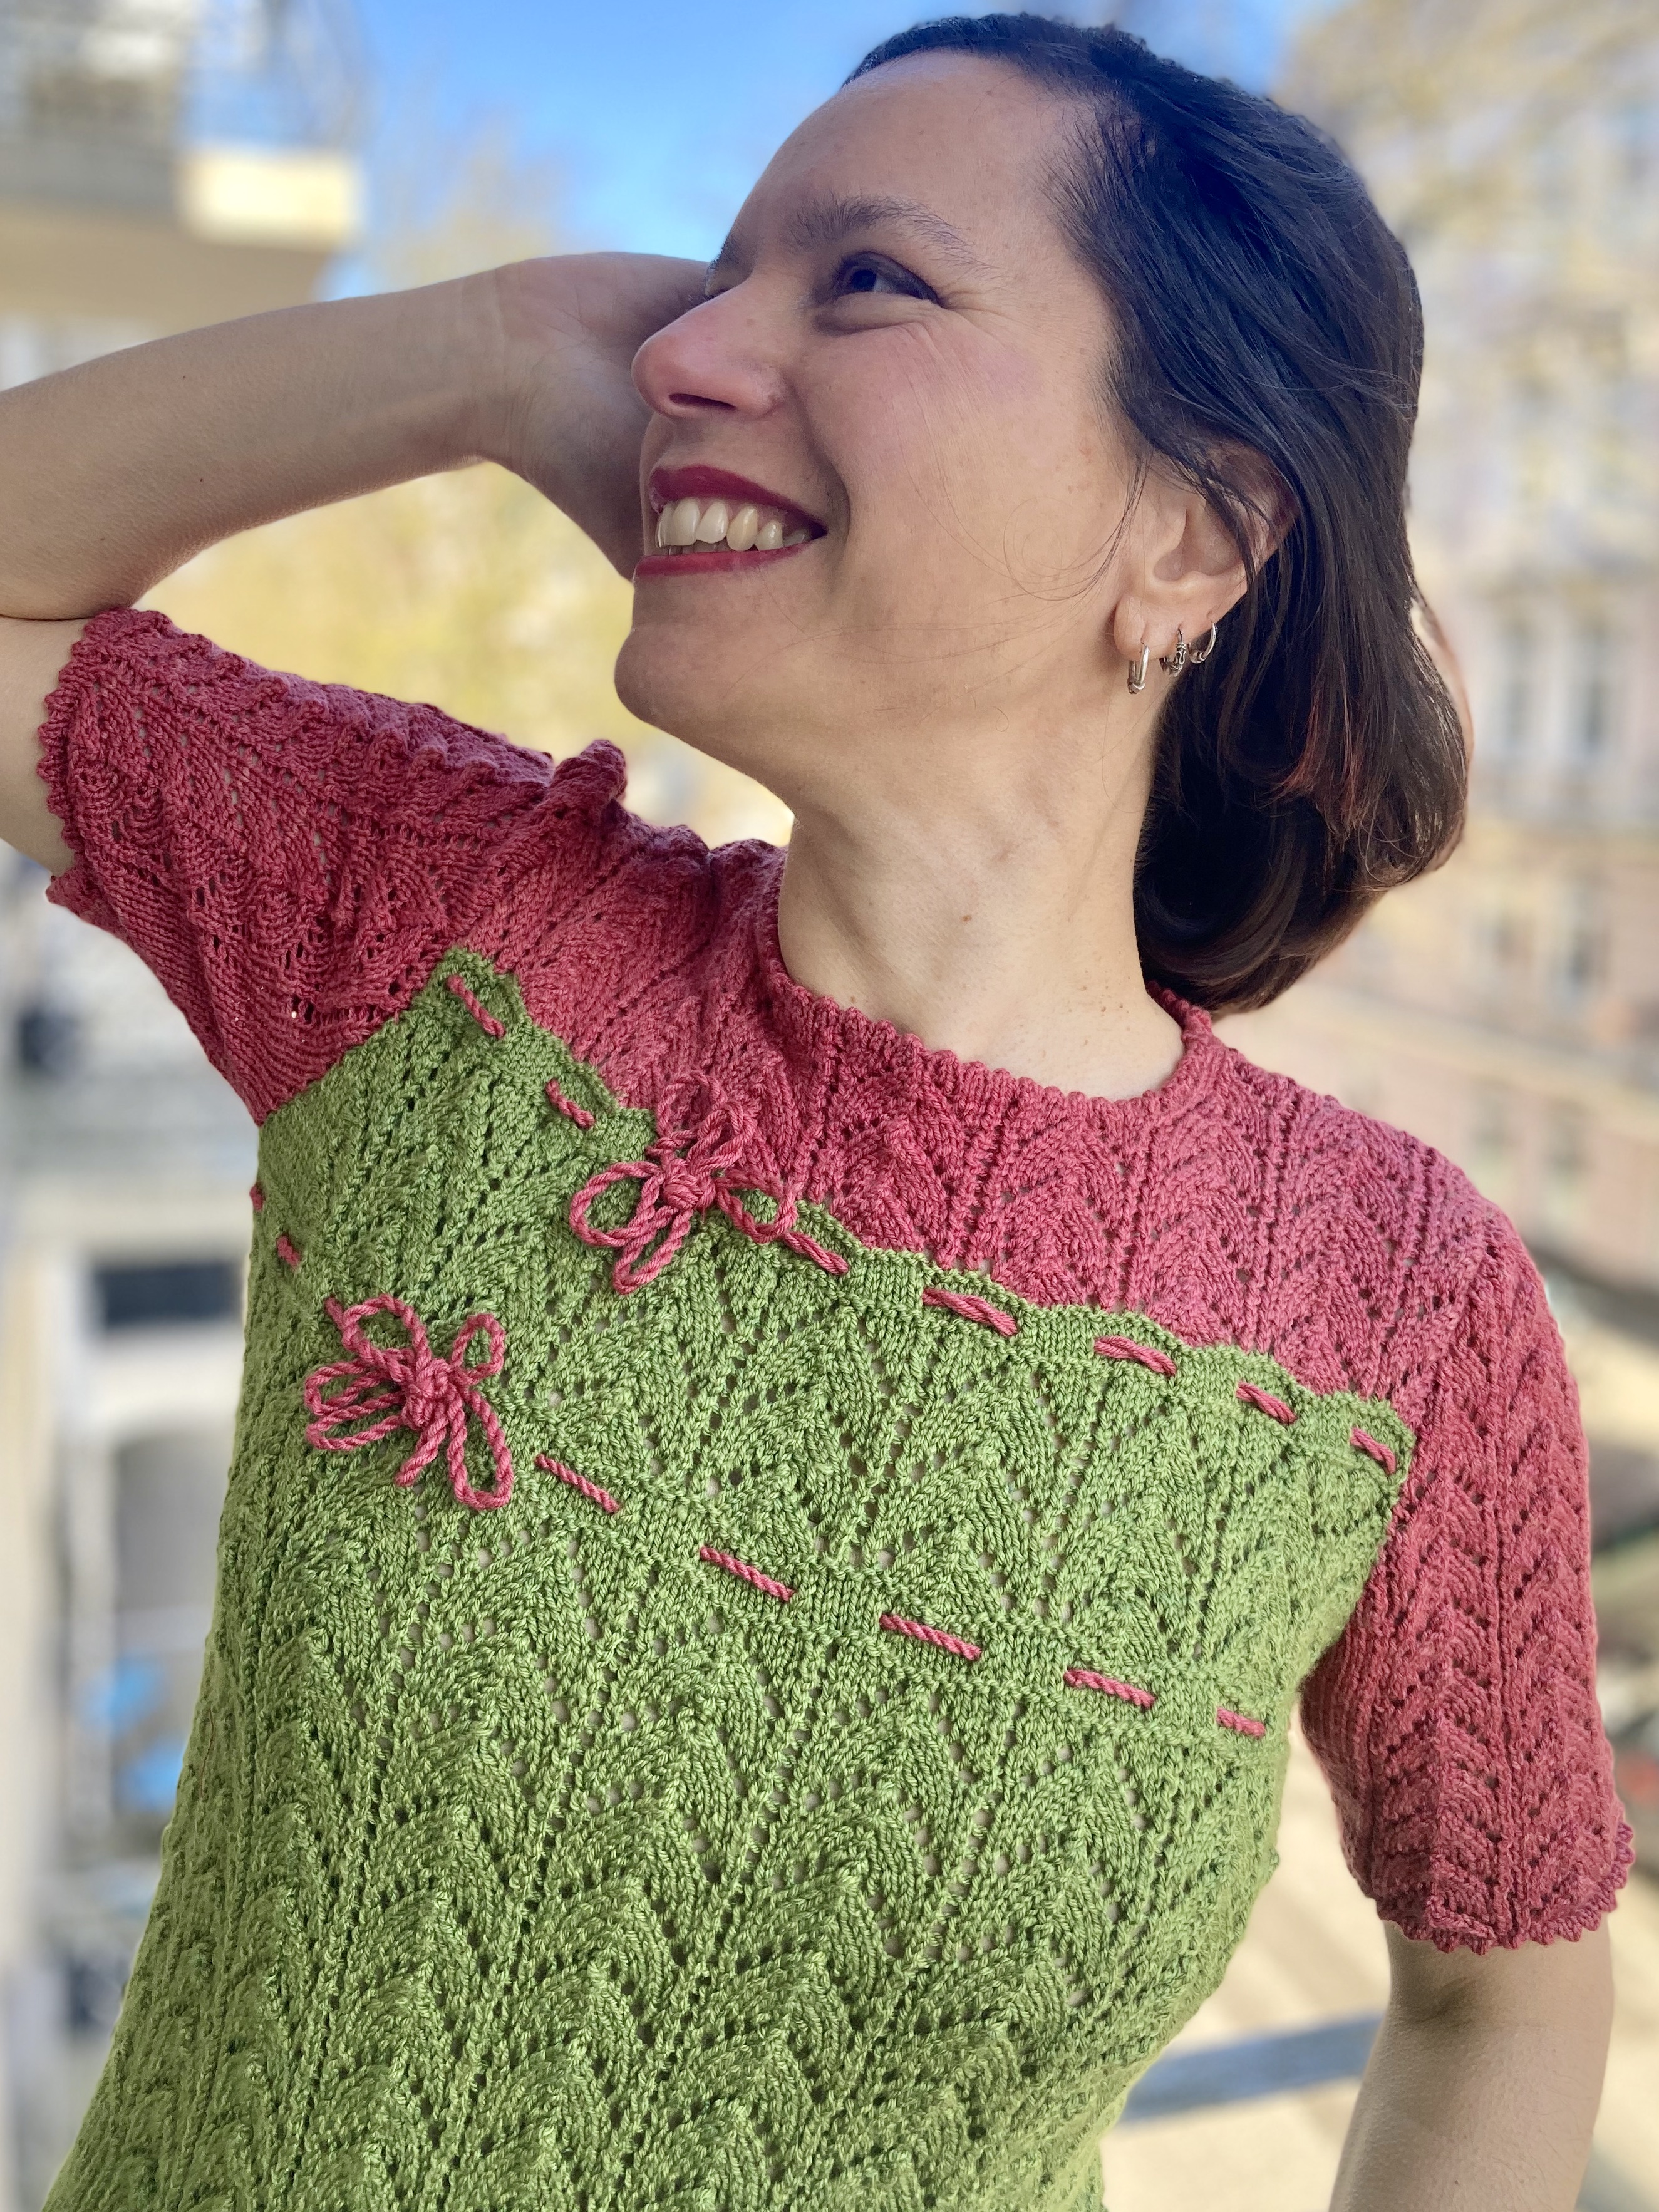
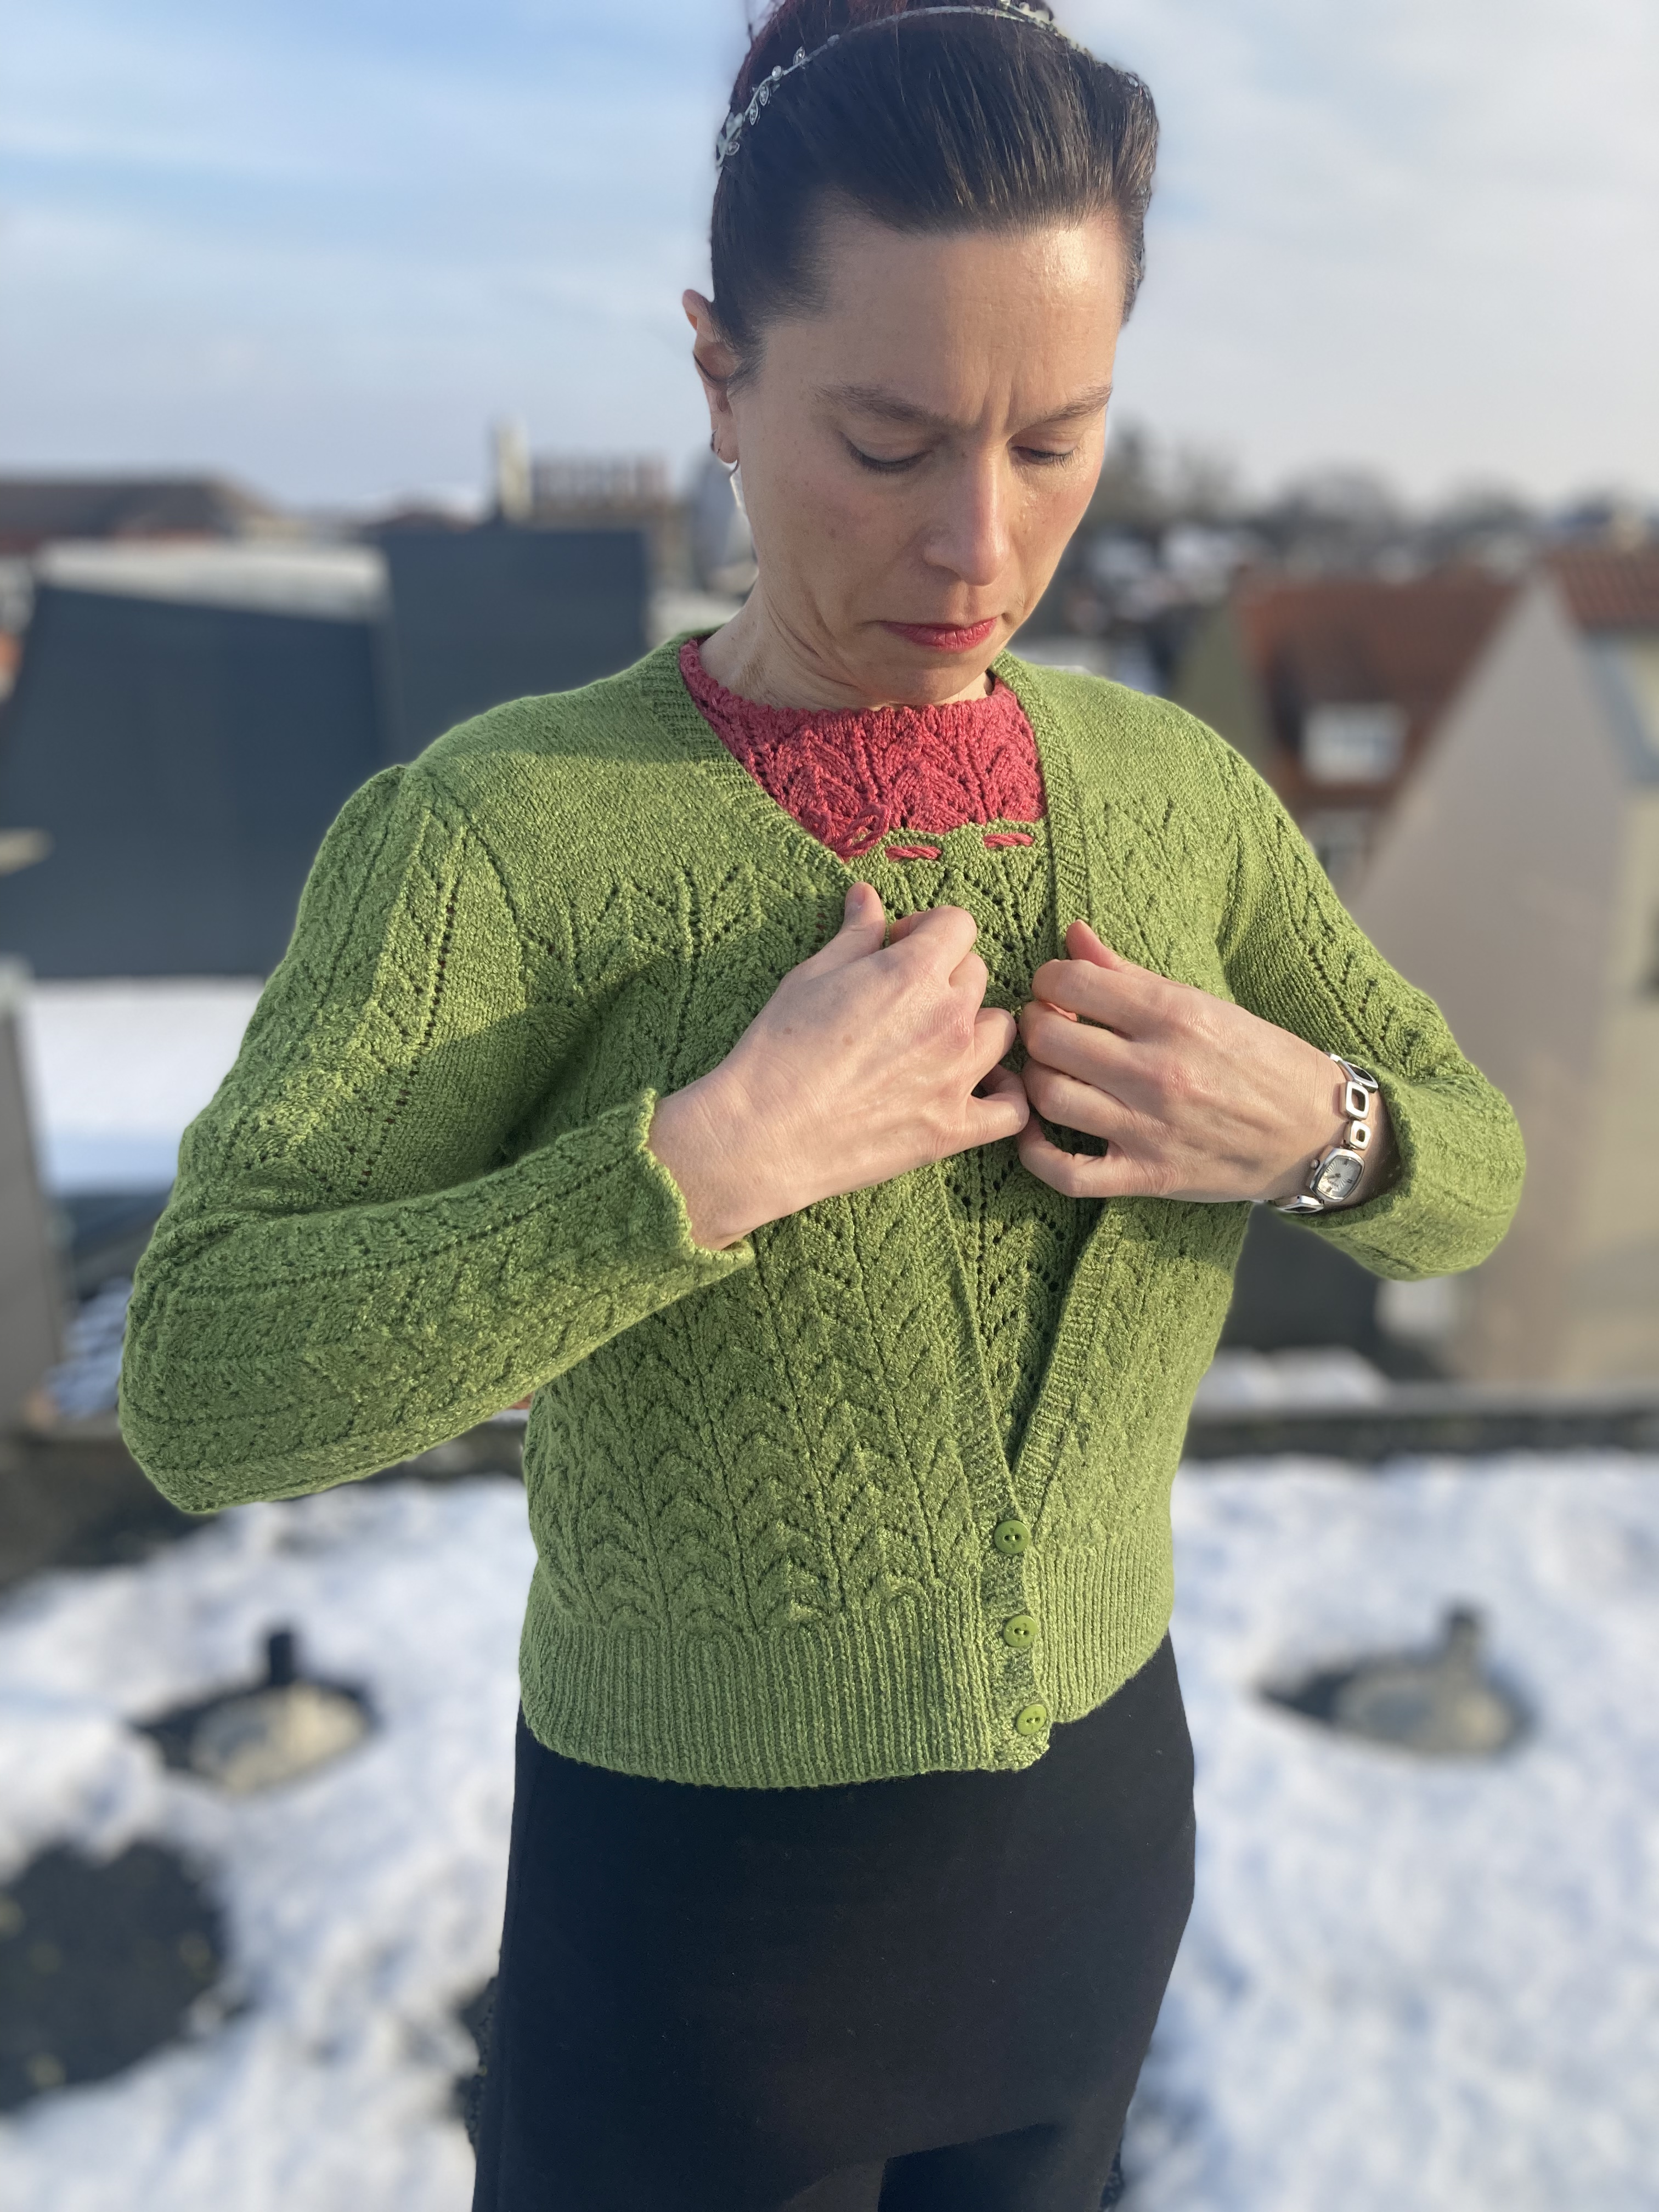
As always, we had fun re-creating the pattern photos.
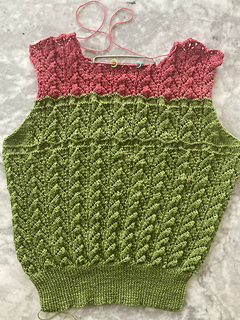
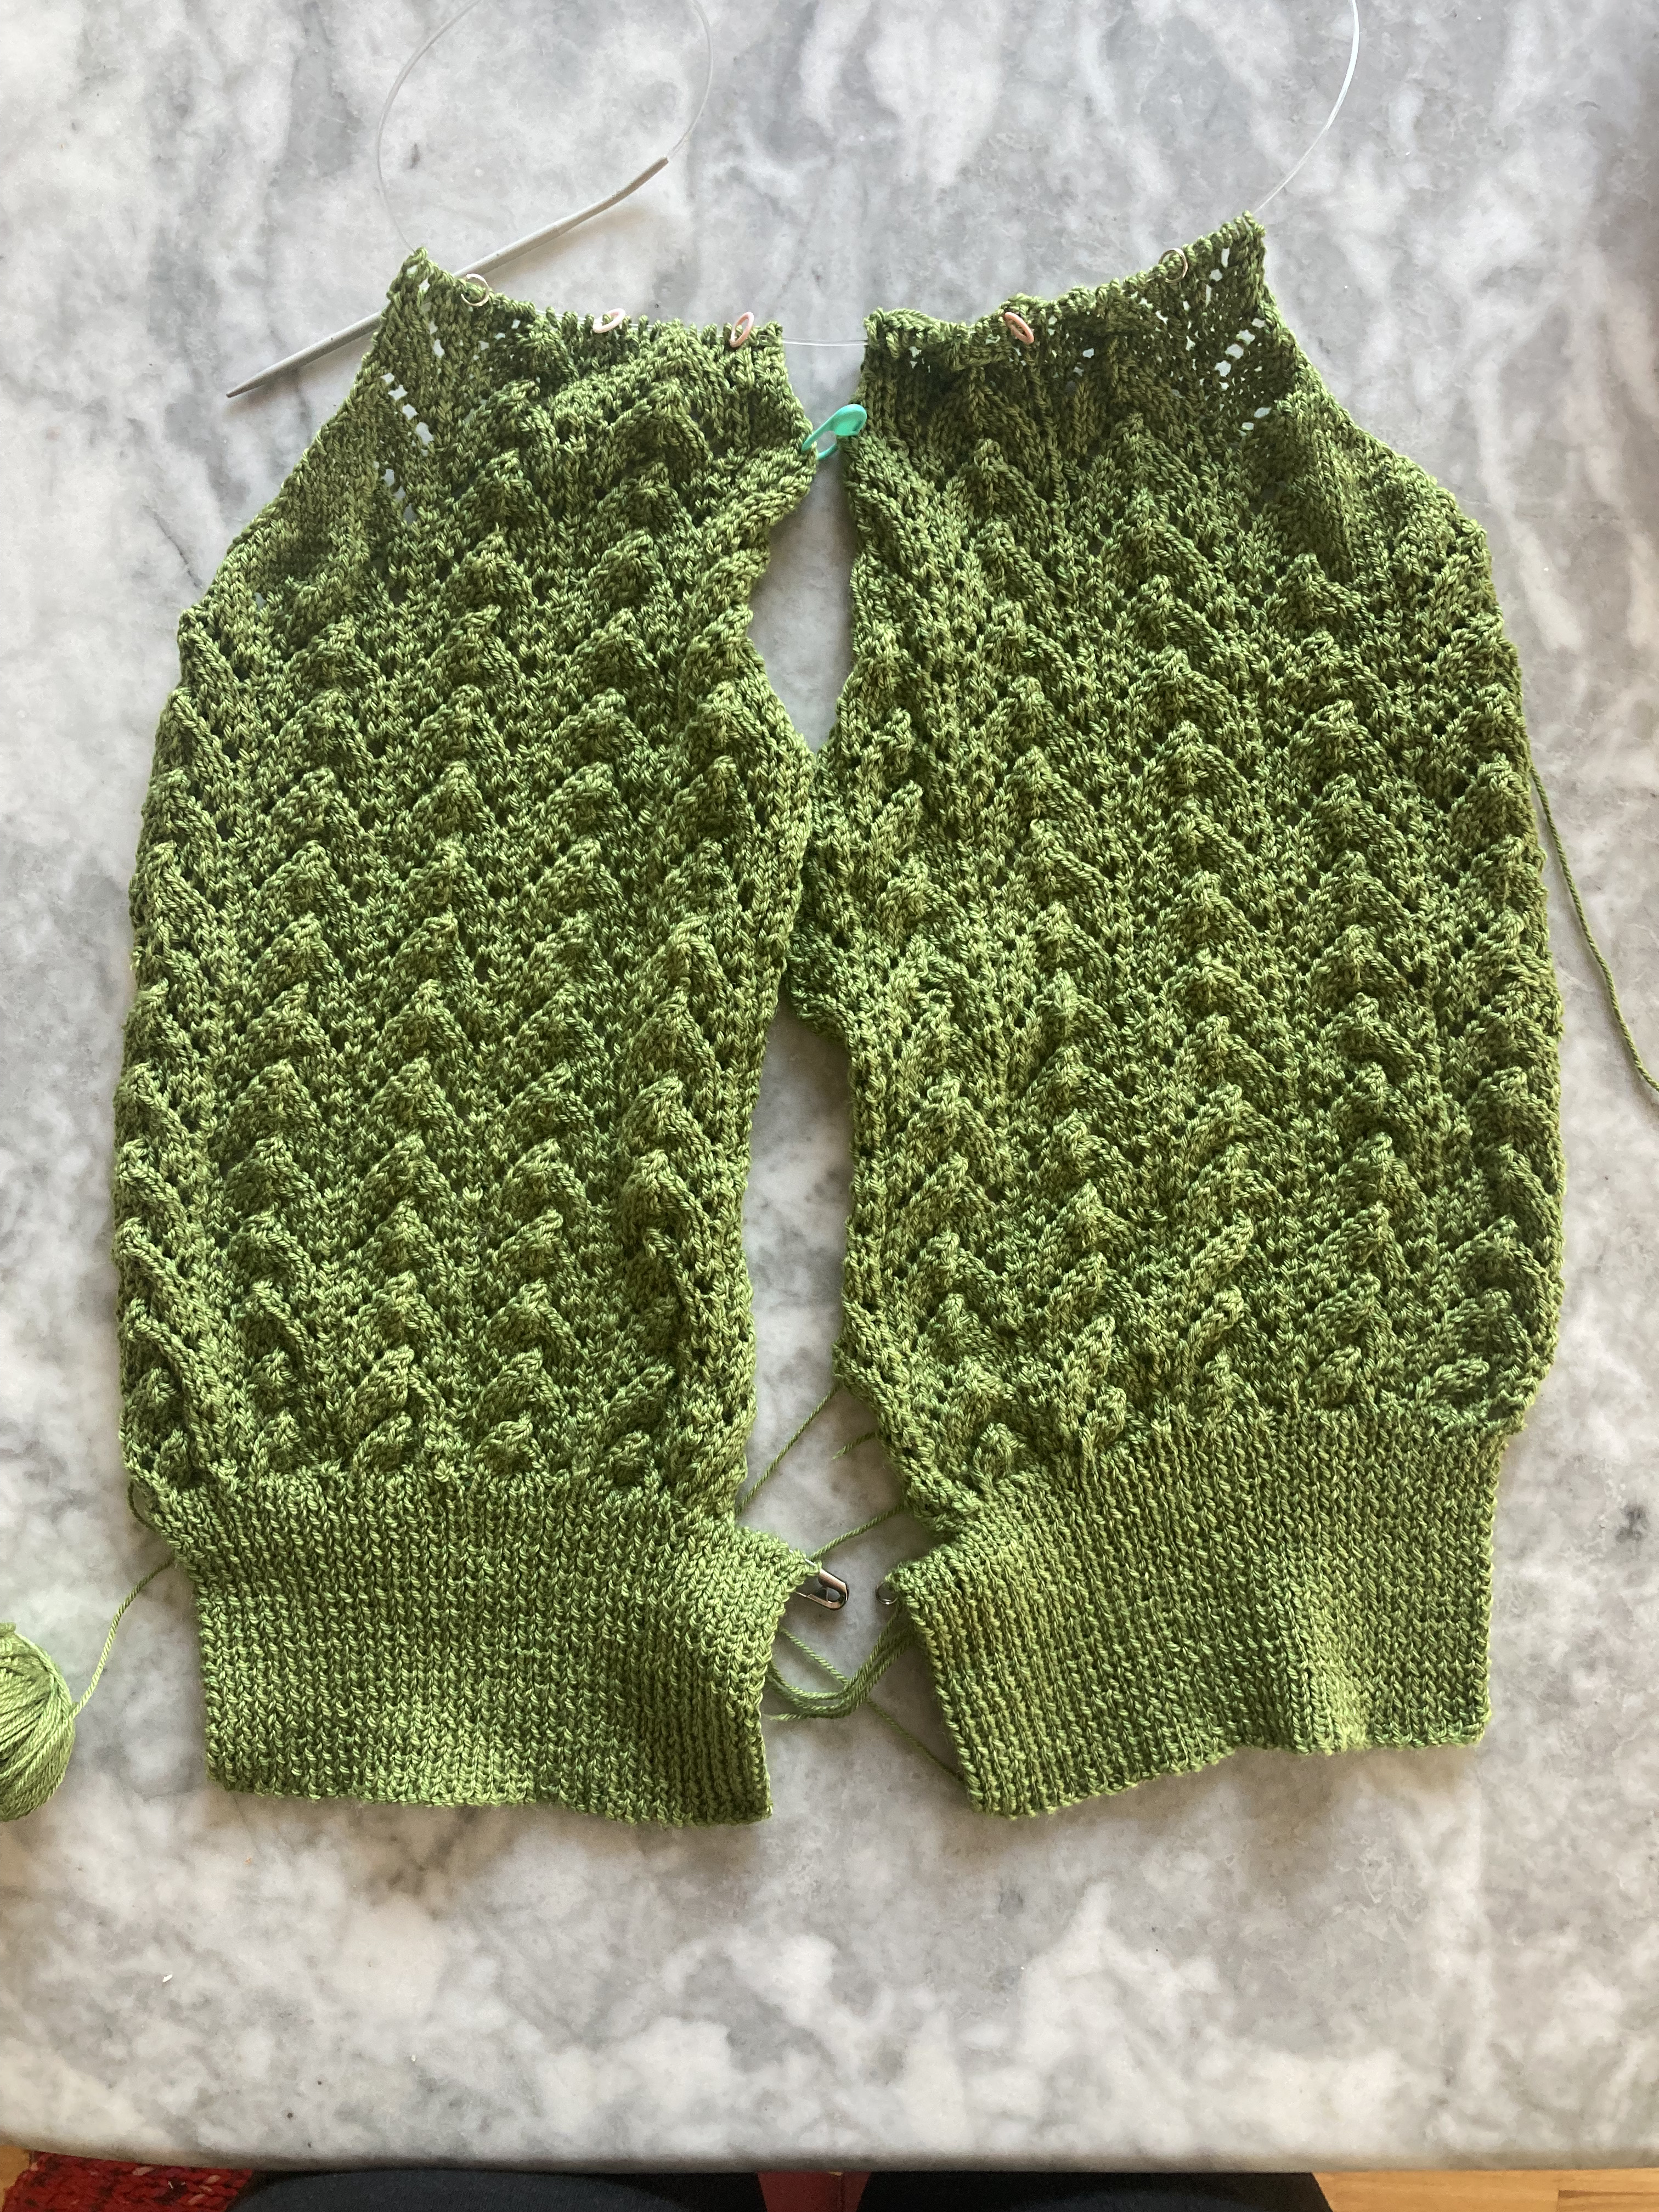
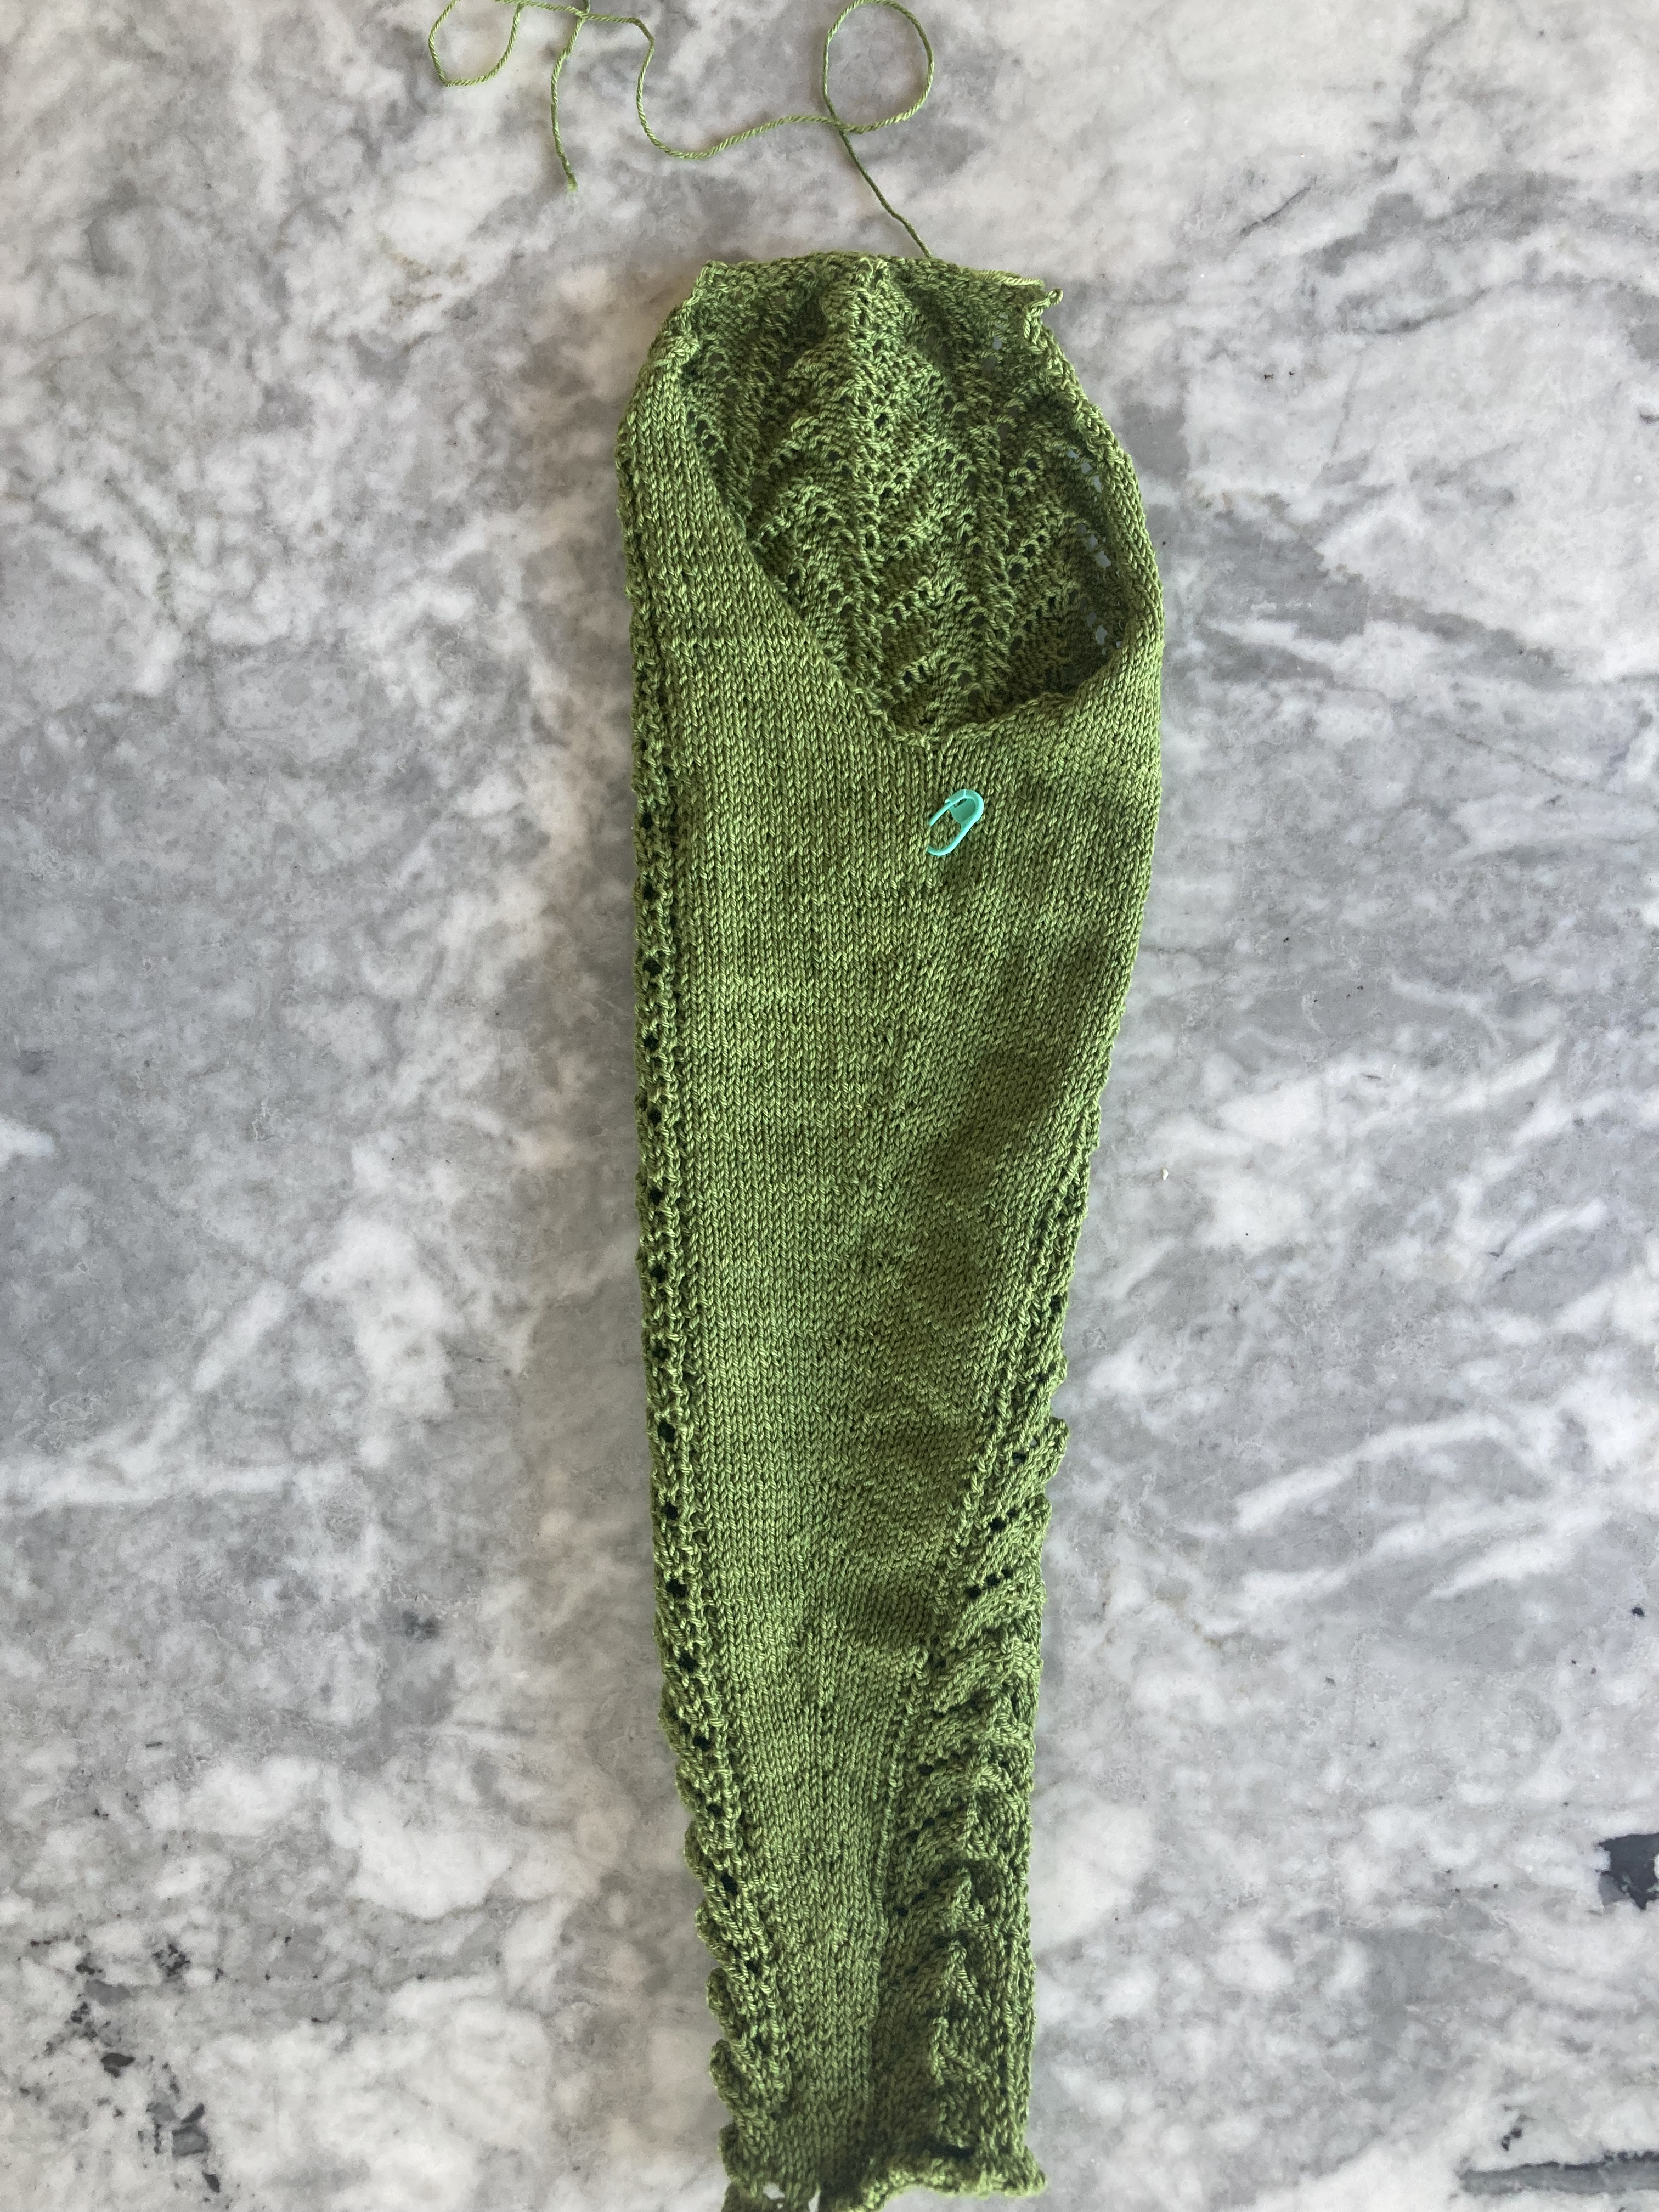
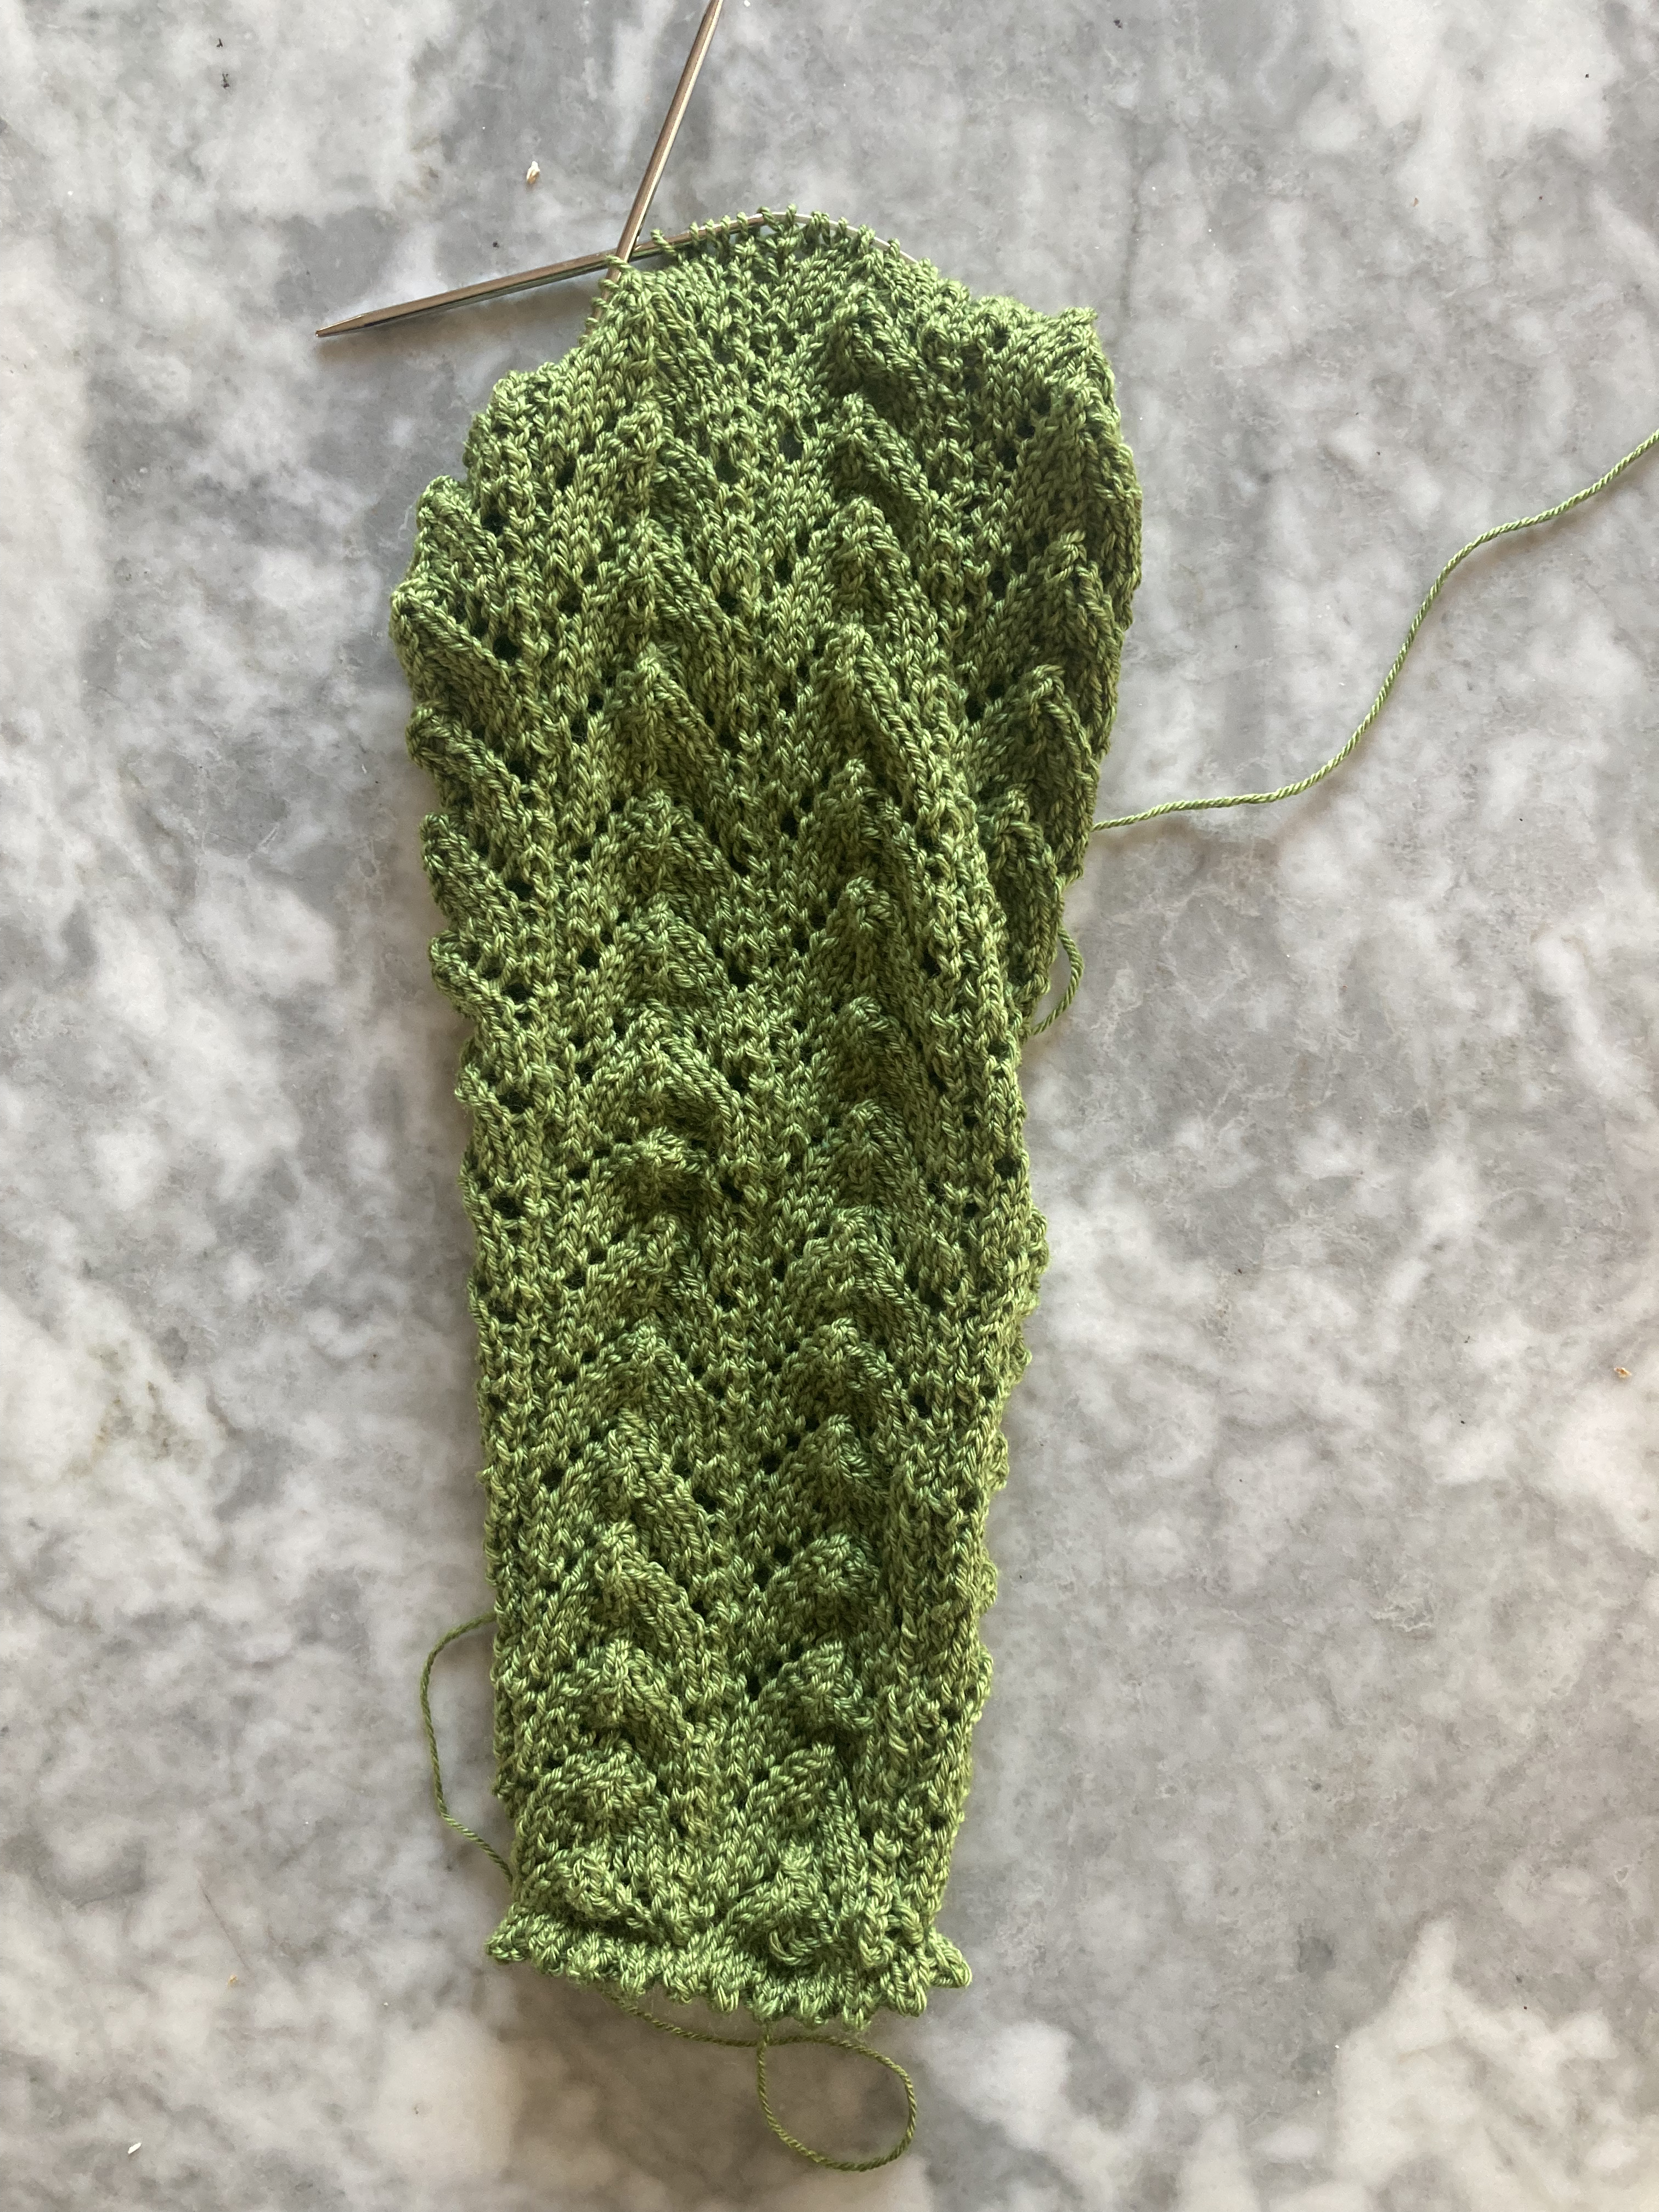
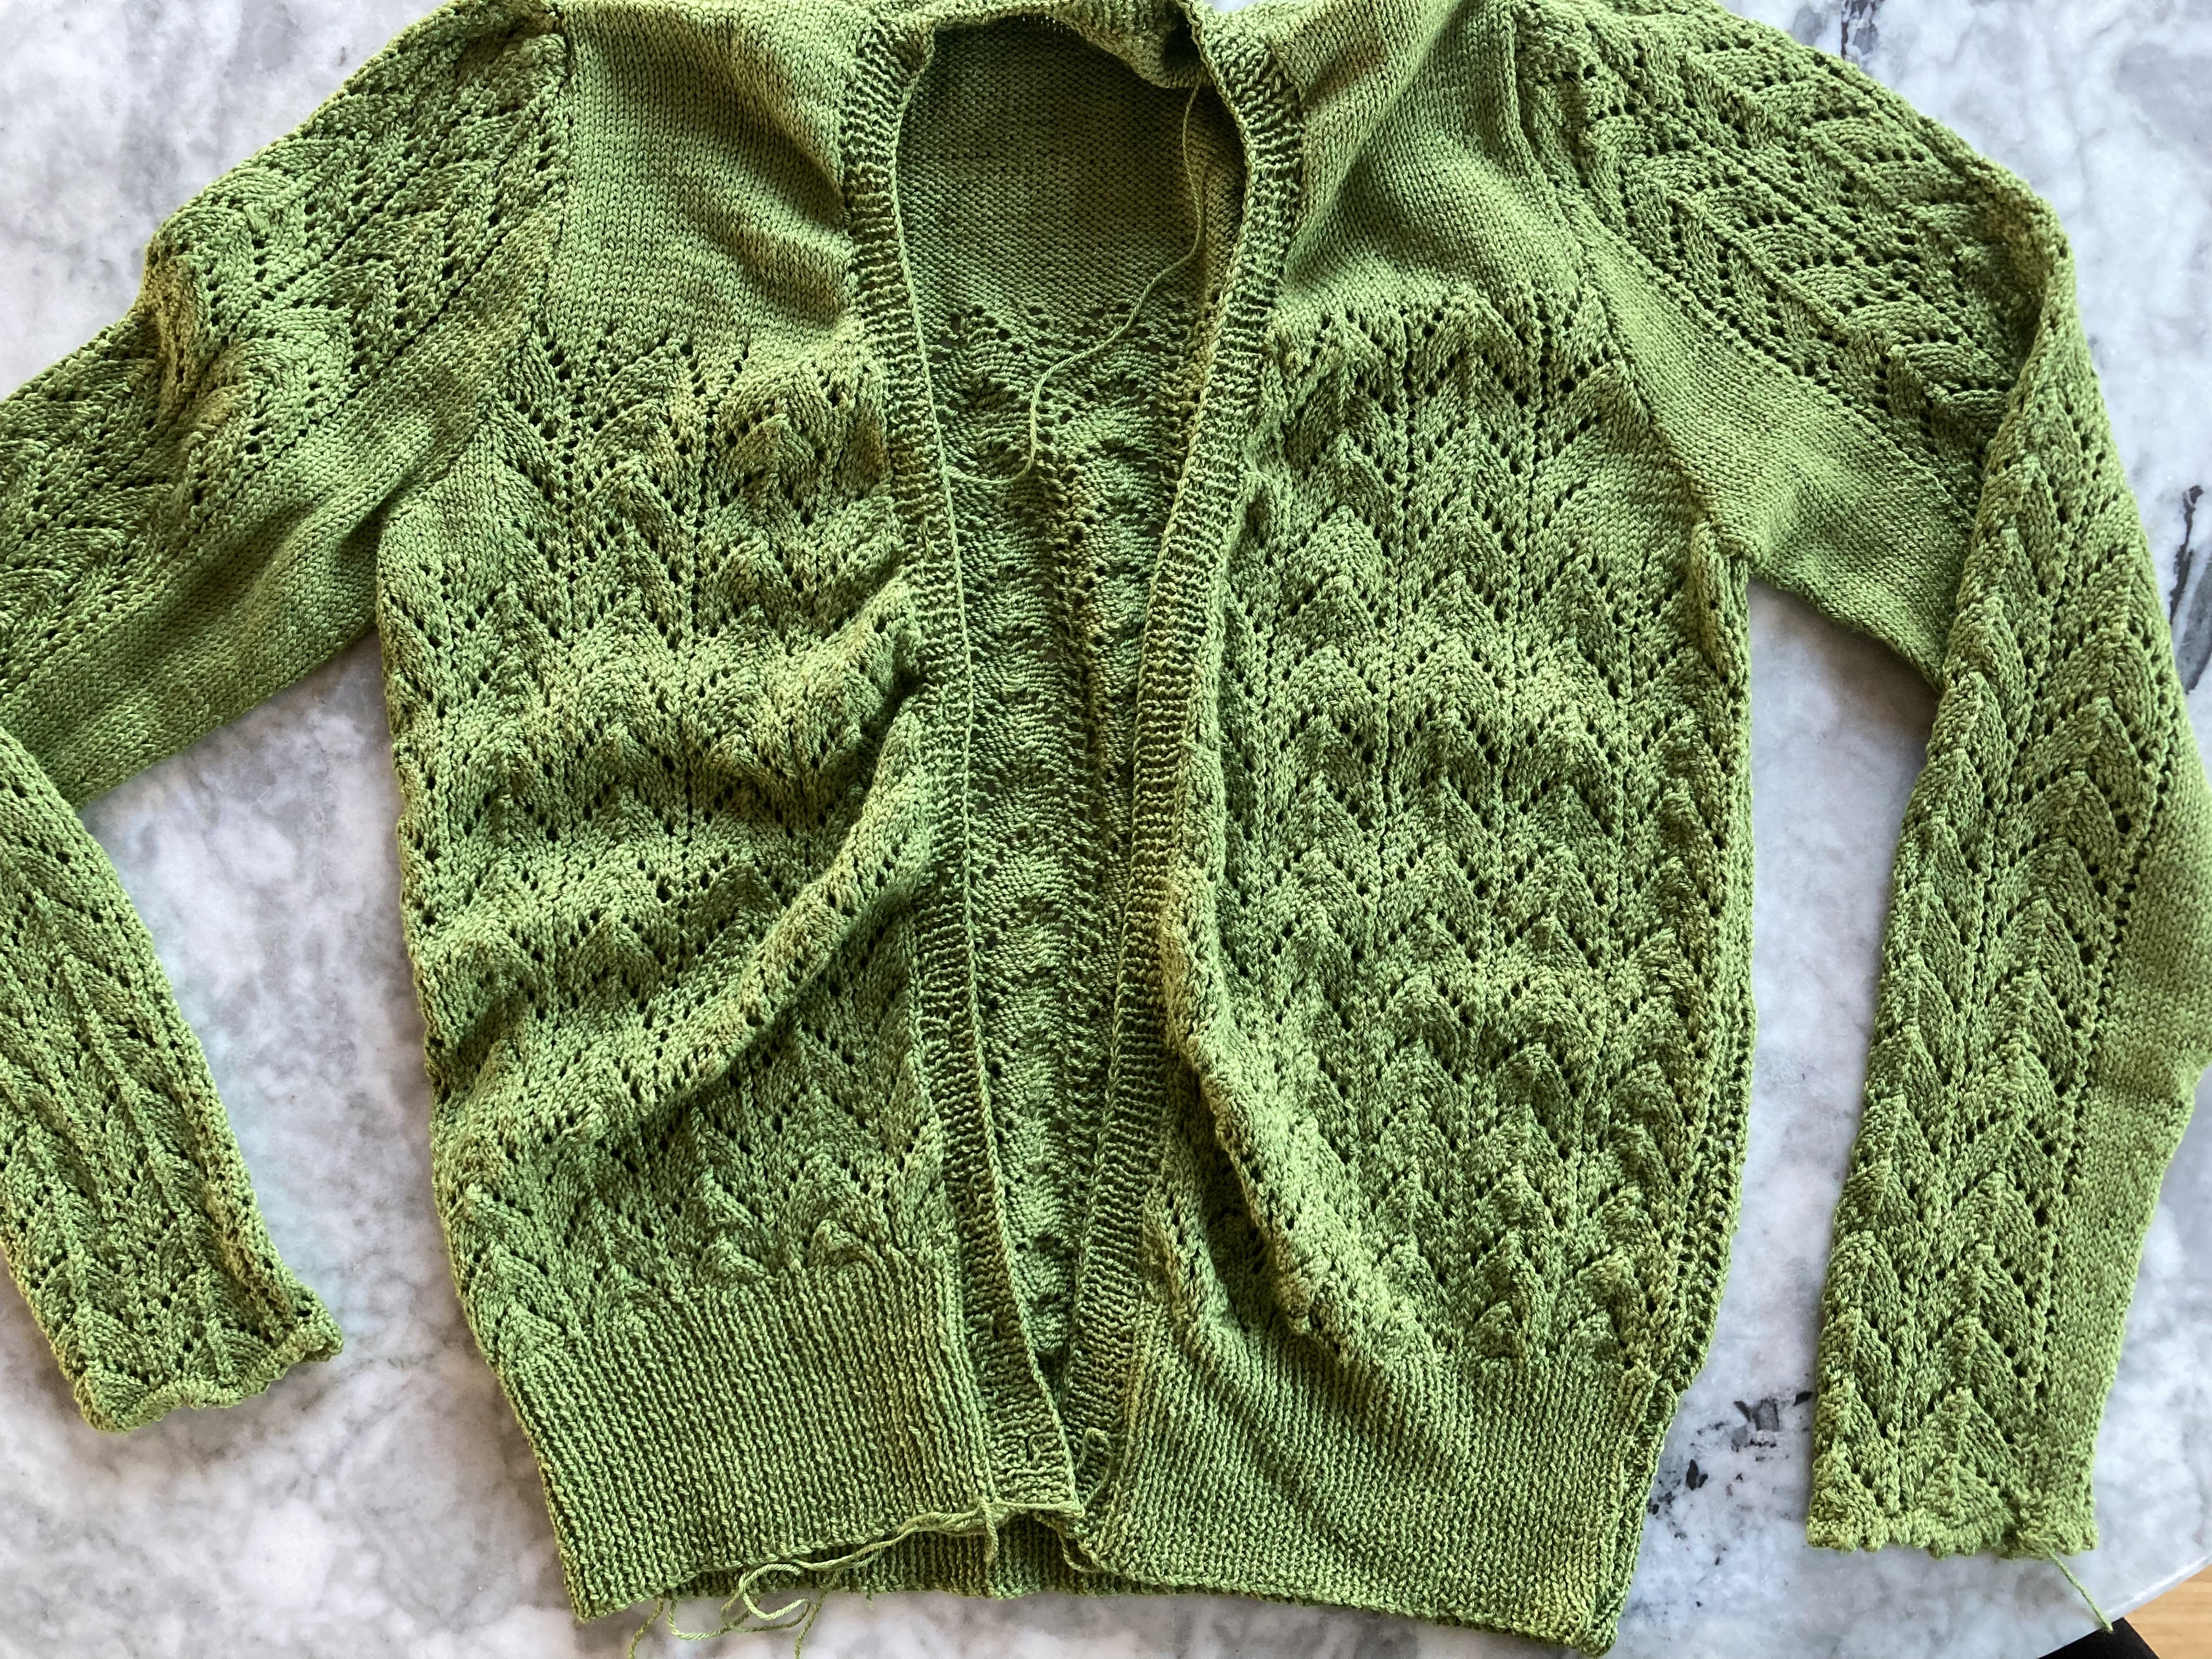
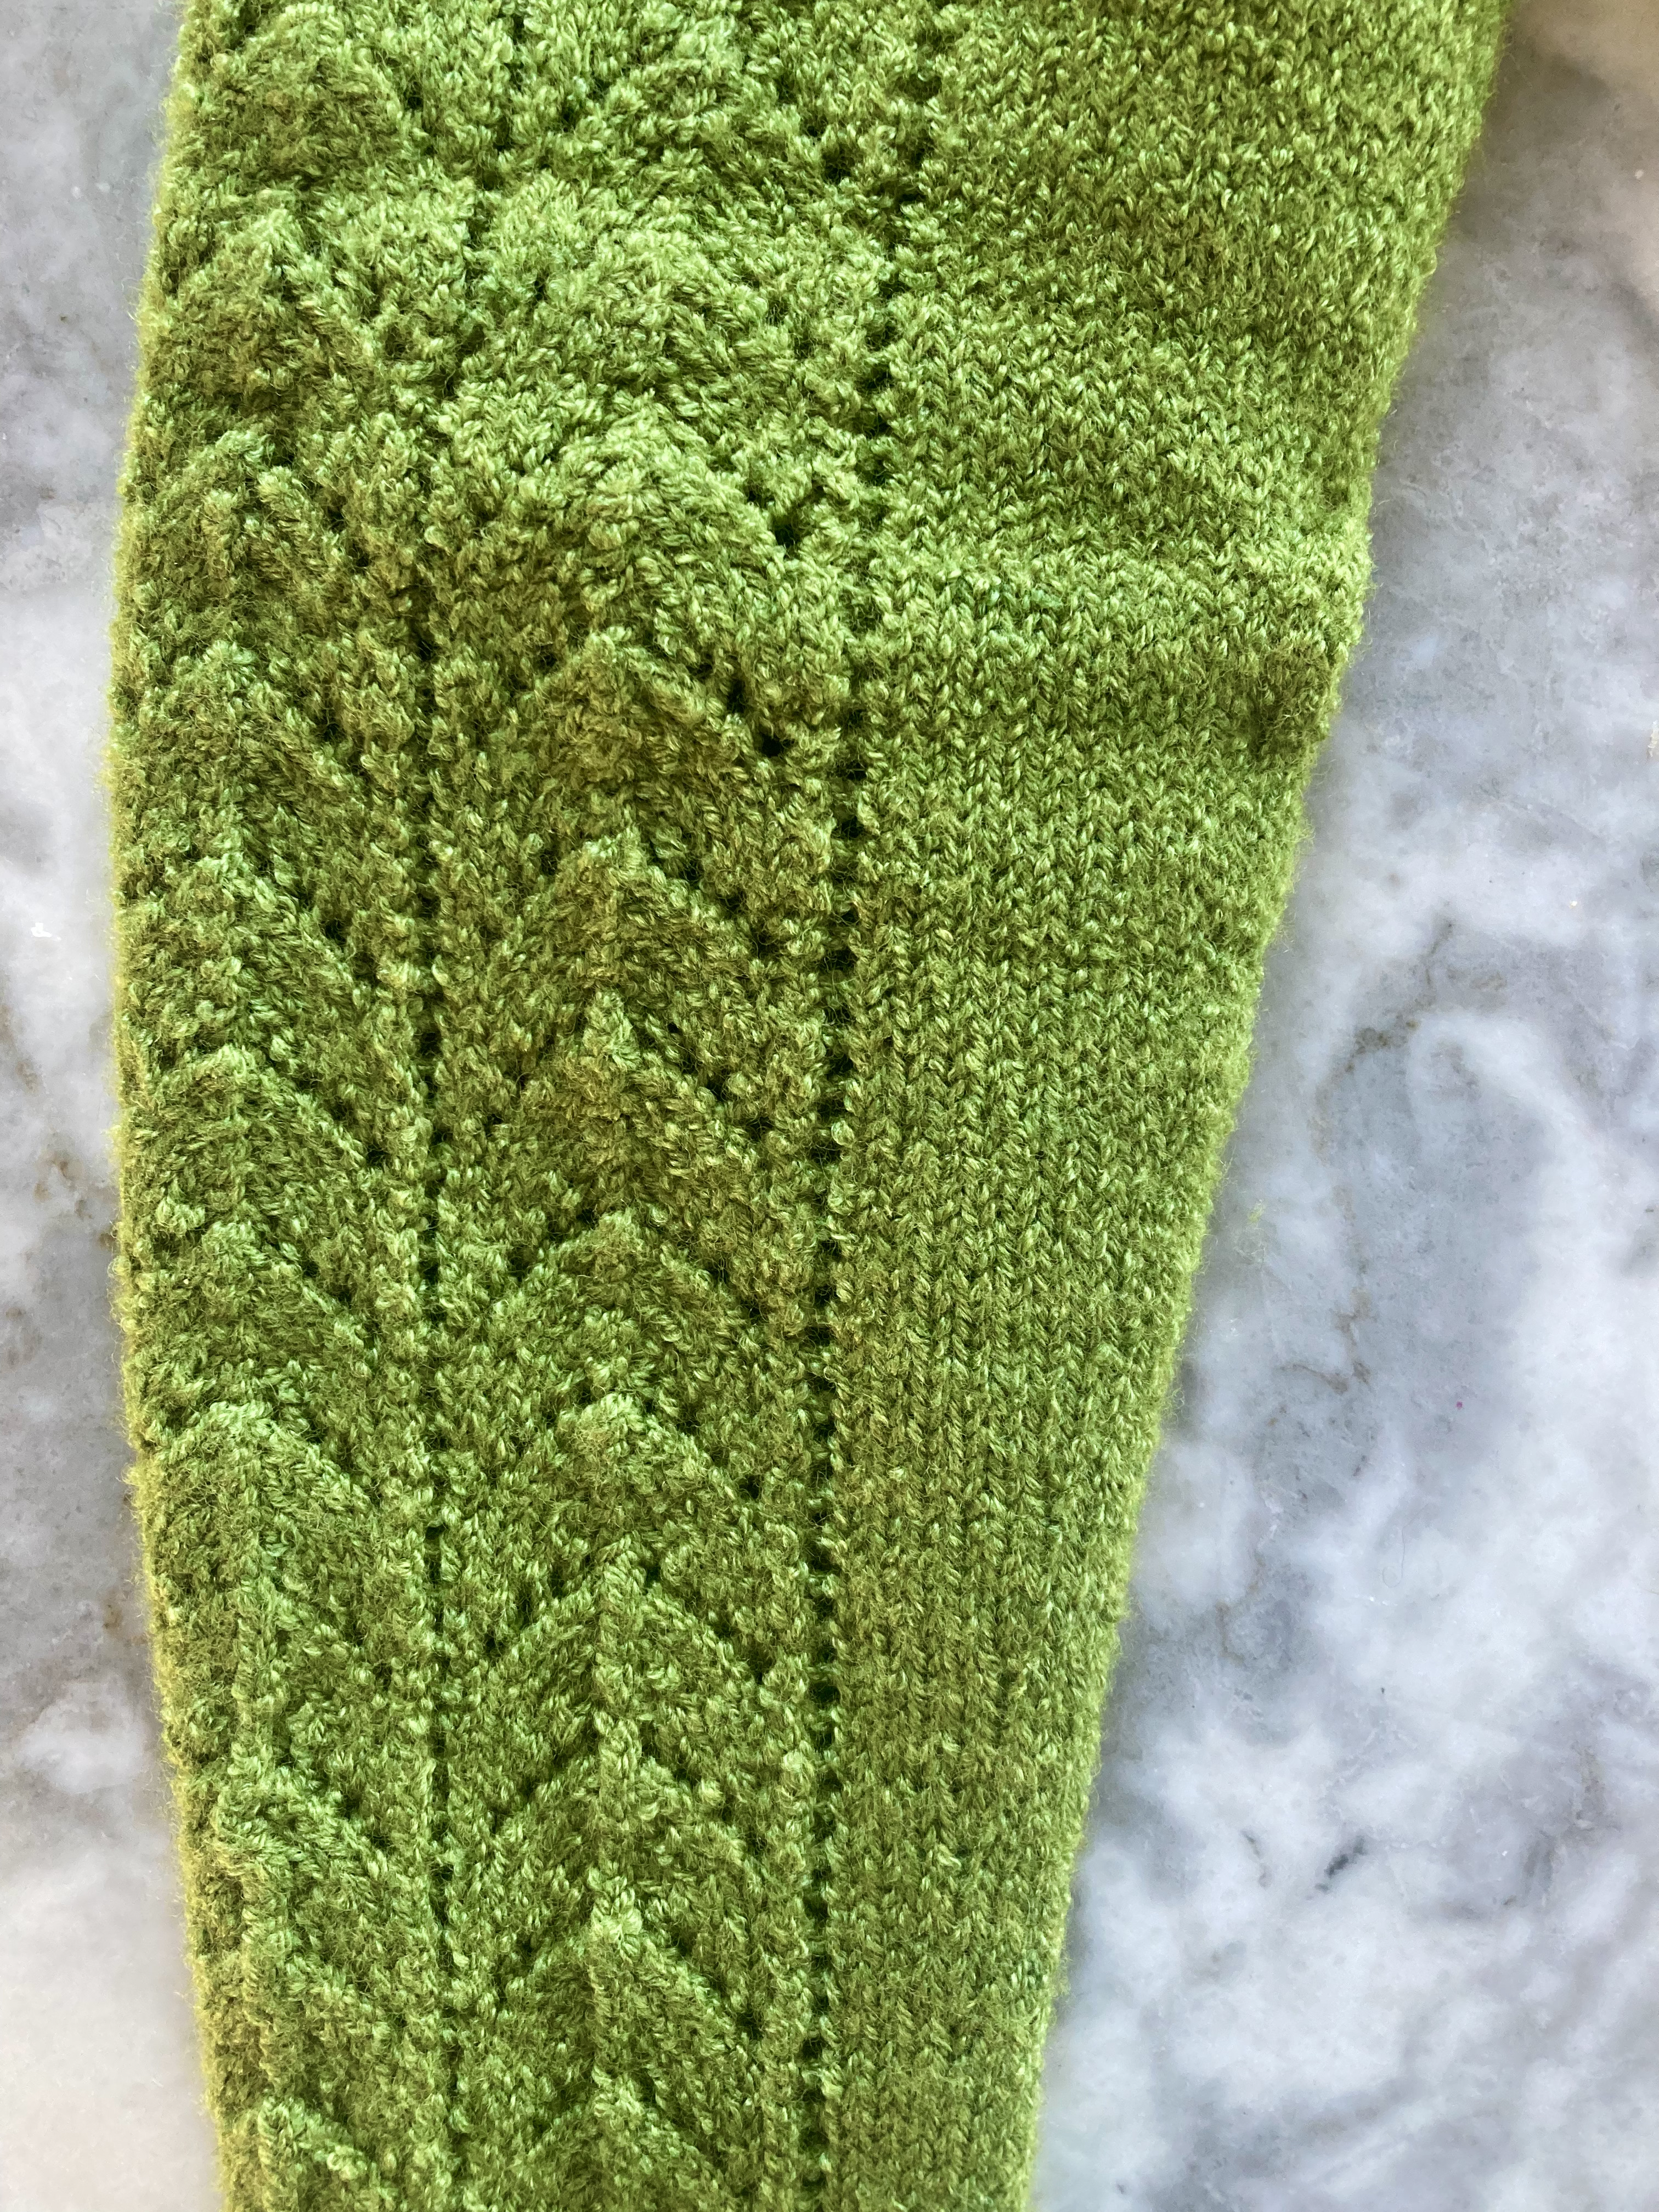
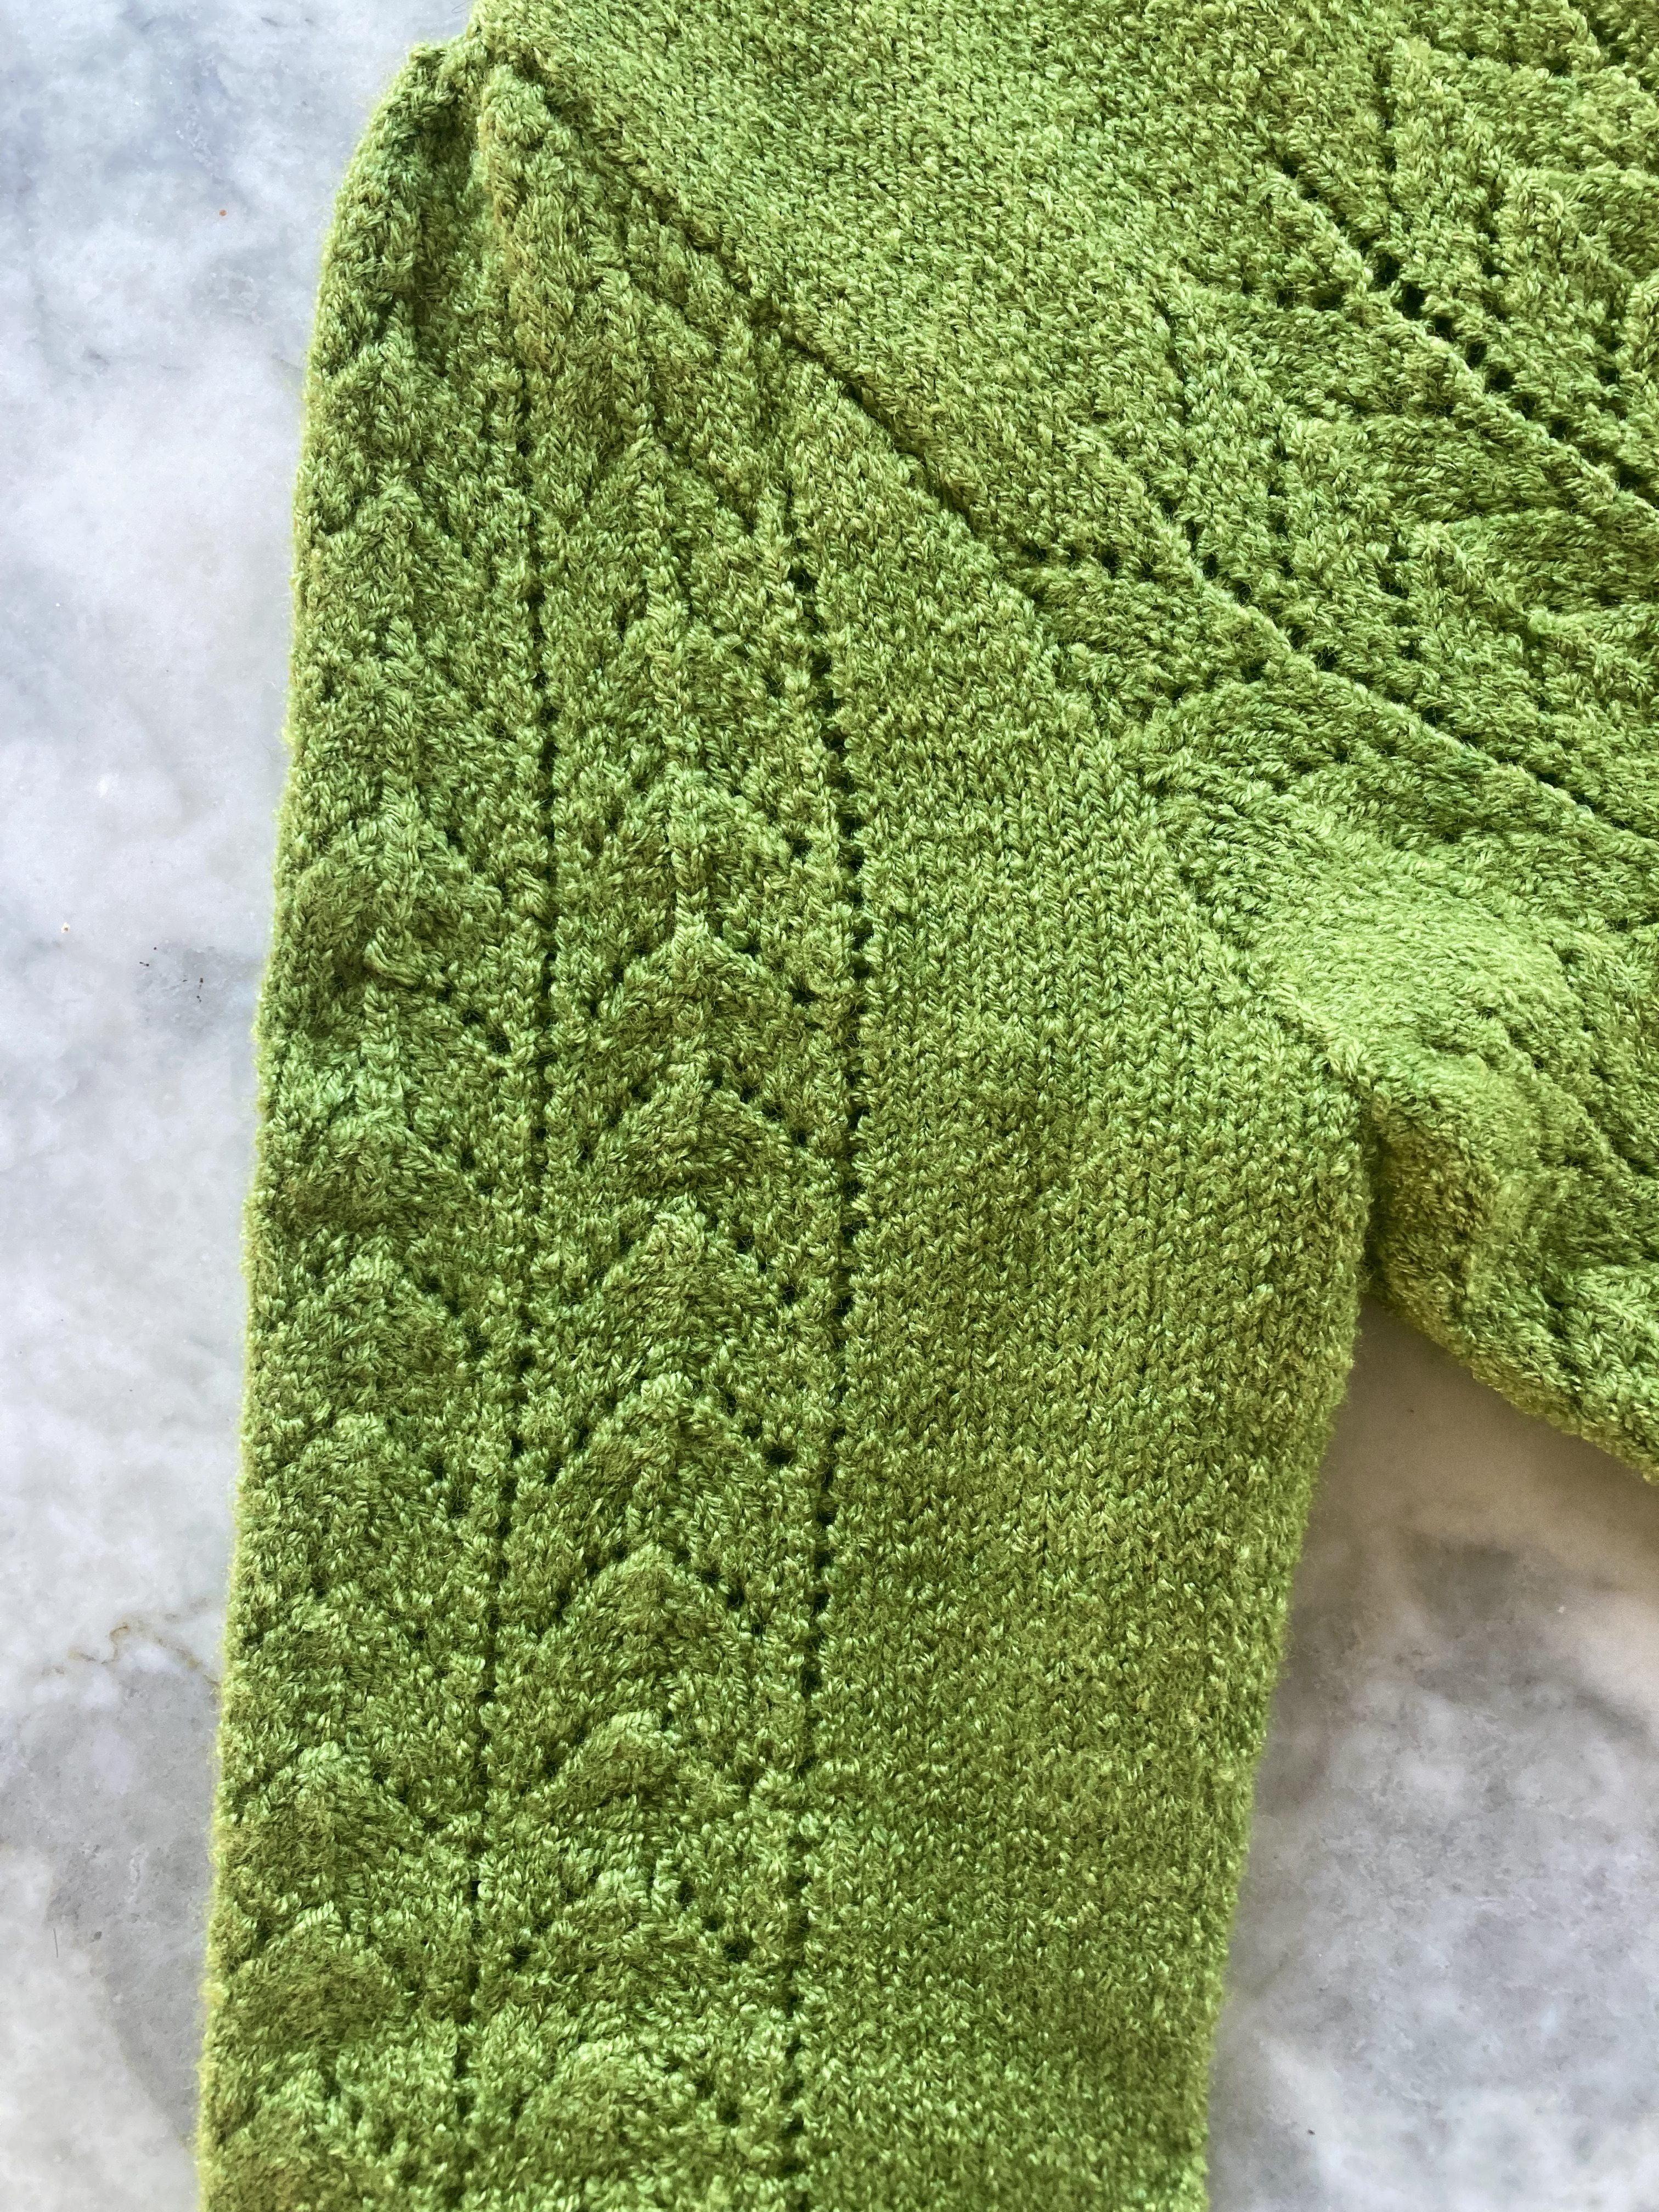
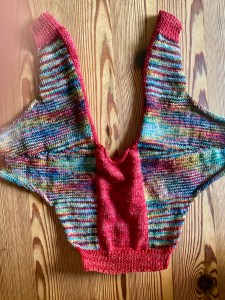
On to the cardigan. There is no pattern for it, so I adapted ideas from the jumper. Sizing was a dilemma, since the jumper was so huge before the dryer manoeuvre, but of course you can’t make the cardigan smaller than the jumper. I decided to make it exactly the same size (plus front bands) and hoped for the best. As for the colour scheme, I wasn’t sure if I would have enough pink yarn left to make both sleeves and yoke, but also not sure if I would have enough green yarn to just make the whole thing in green. This led to a piecemeal approach, since (for example) it would look fine to have just the upper yoke in pink, but not one shoulder of one sleeve. I made at least the start of the front bands together with the fronts for this reason as well. I didn’t want to deal with too many increases in the lace pattern on the sleeves, so I made 4 pattern repeats on a base of stocking-stitch (similar to the way the increases and armhole decreases were made on the jumper.)
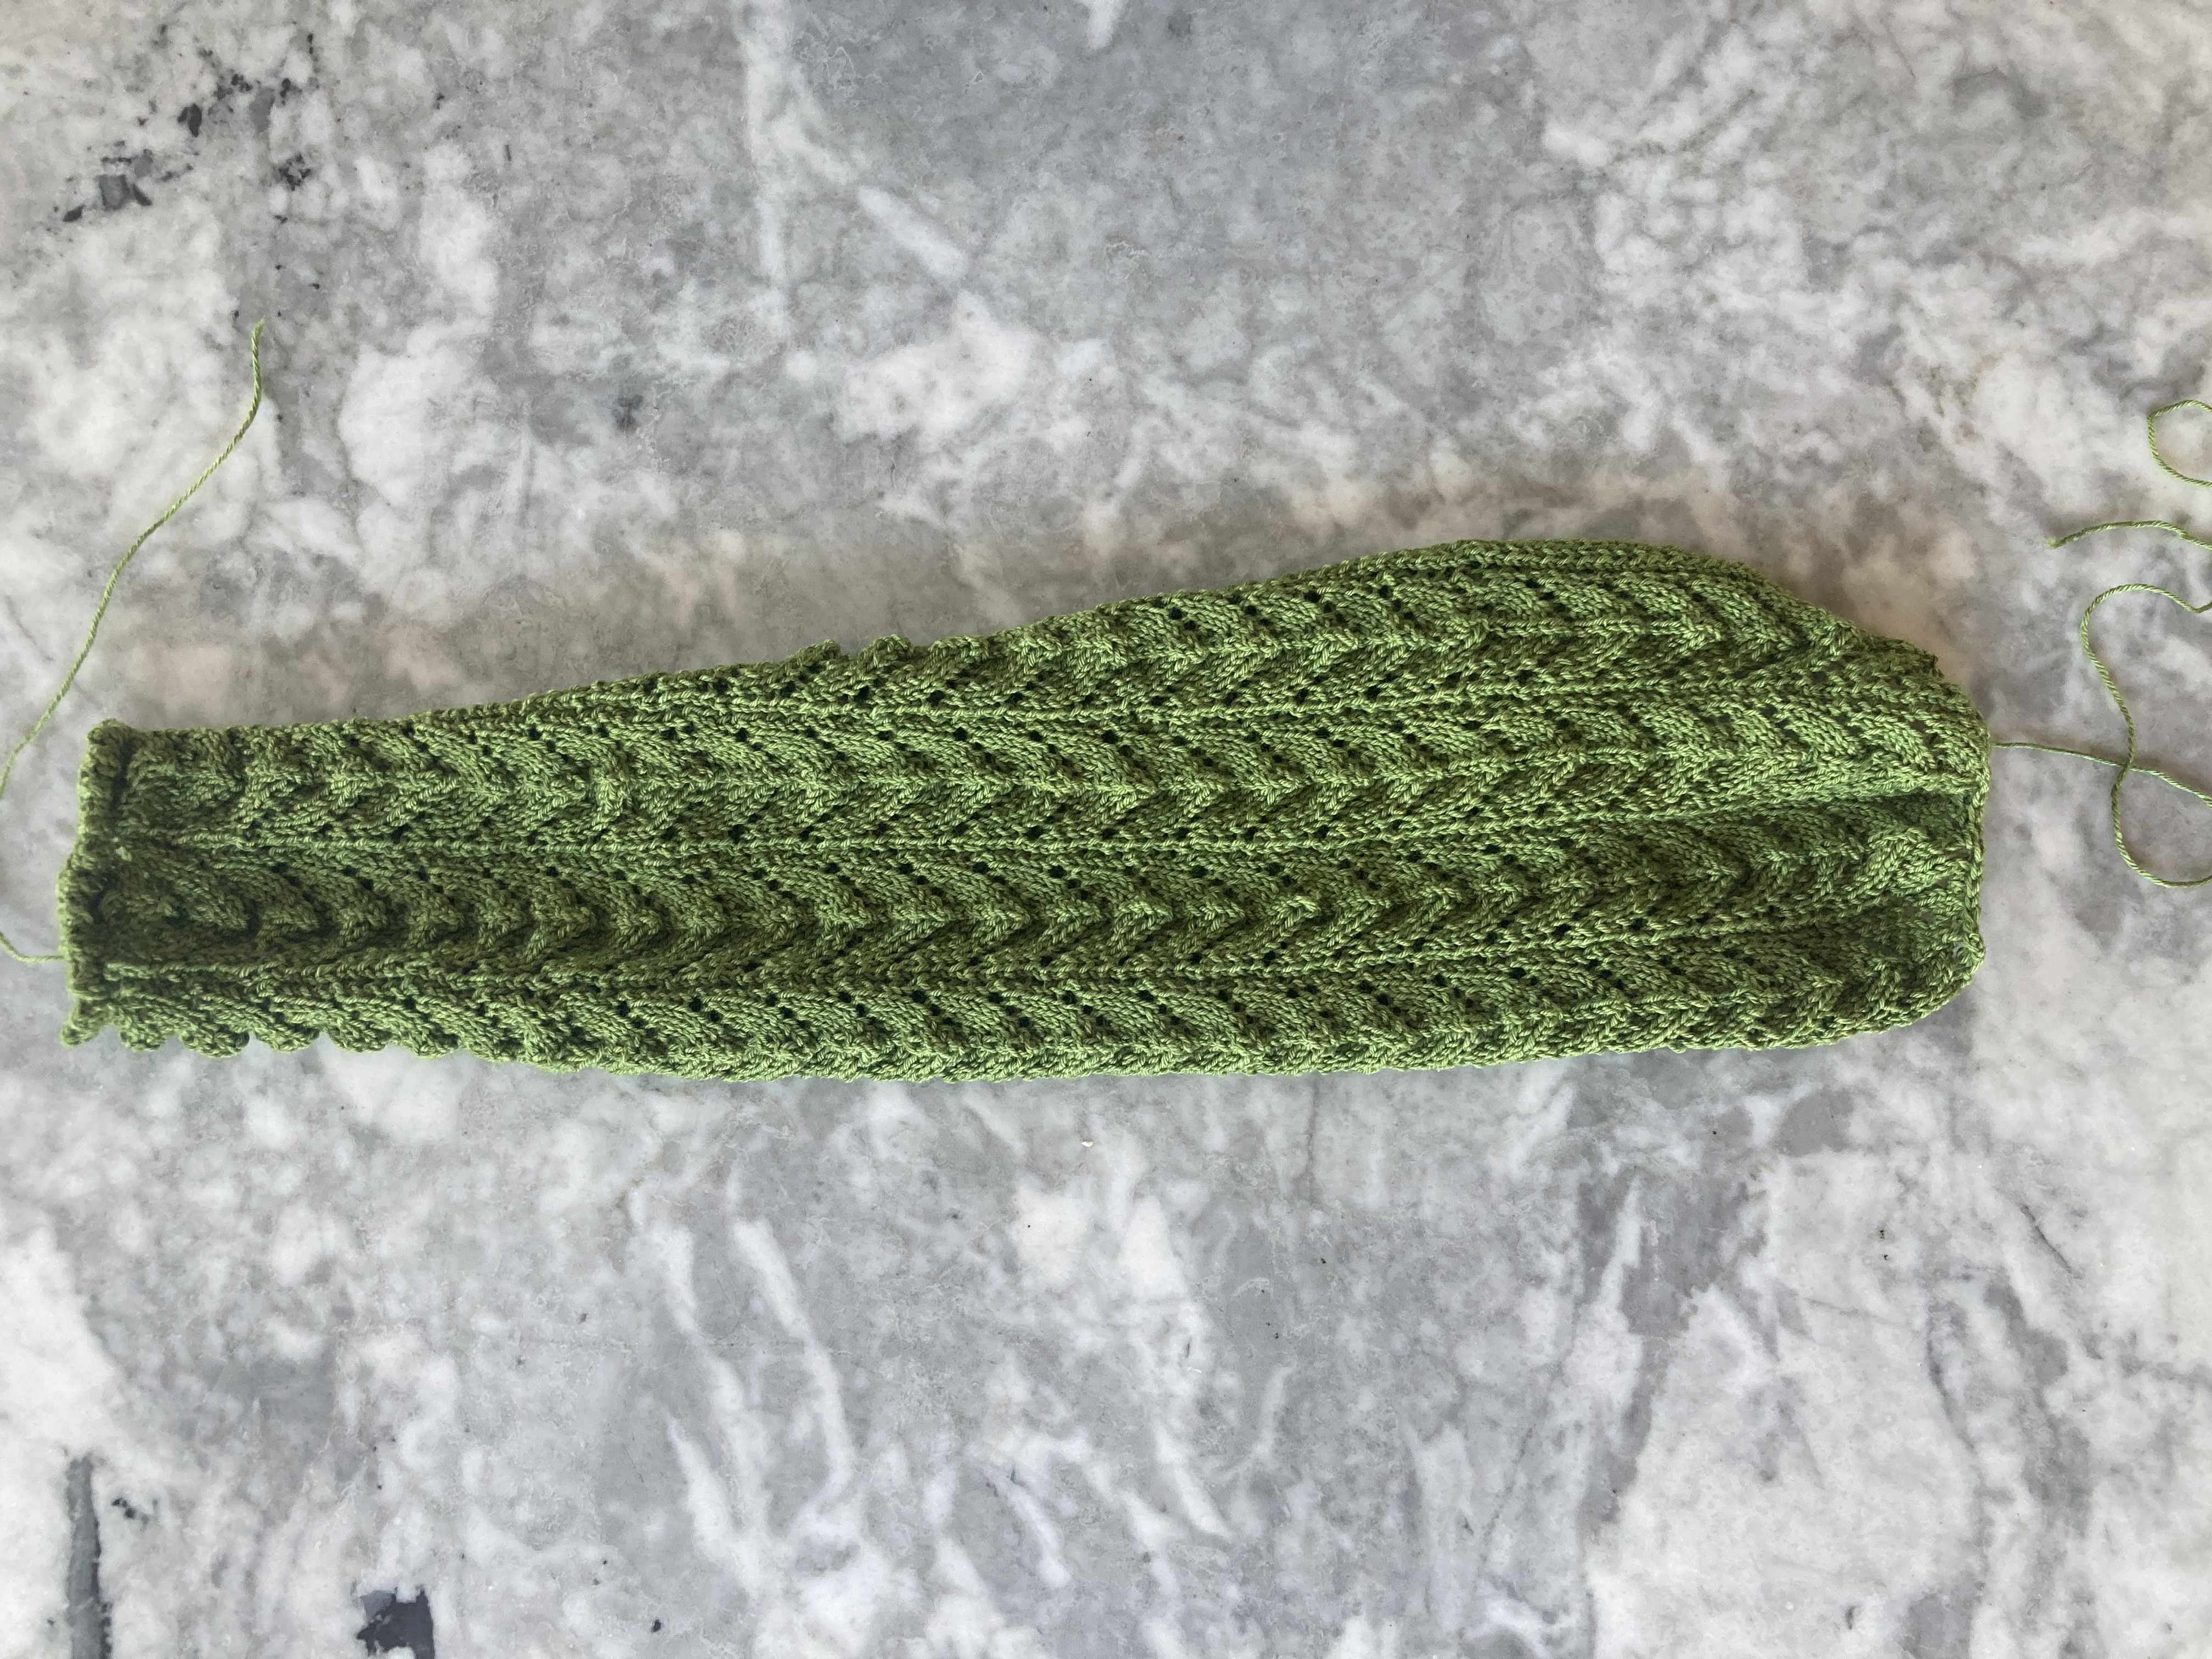
It went well in pieces, though I was nervous about the sizing and whether I would have to shrink the cardigan in the dryer as well, or if I could get it down to a size just slightly larger than the jumper. I made the back and fronts (with bands) and finished to the yoke where the colour change would come in the pattern, then finished one sleeve which was quite snug. I blocked the sleeve and it was a fine size after blocking, so made the other one to match.
Crossing fingers that it would all work out, I finished the front and back yokes in stocking-stitch in all green (leaving about 10-15 grams of green yarn over, so that was fine) and sewed it together. It was hard to tell whether it was a good size or not, since the lace pattern scrunches up a lot while knitting and I knew that blocking would stretch it out a lot. I didn’t want to complete the button bands on the scrunchy lace, so I blocked the almost-finished cardigan first.
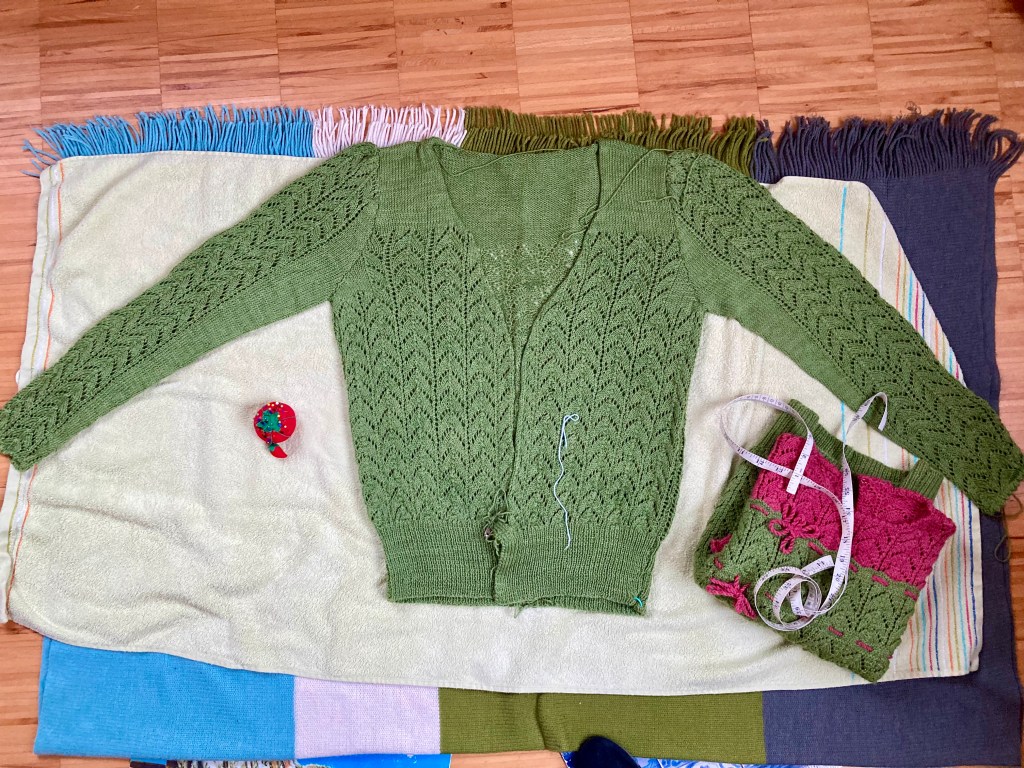
Unfortunately, though the width was OK, and the sleeves were OK if a little narrow at the wrists, the length was unacceptably long. I had made it one pattern repeat longer than the jumper (ca. 3/4 inch) to allow for wearing it over the jumper. But whereas the finished jumper was about 20 inches long (i.e. a little short for me, but appropriate for 1940s style), the cardigan was now 25 inches. The yarn was that unpredictable.
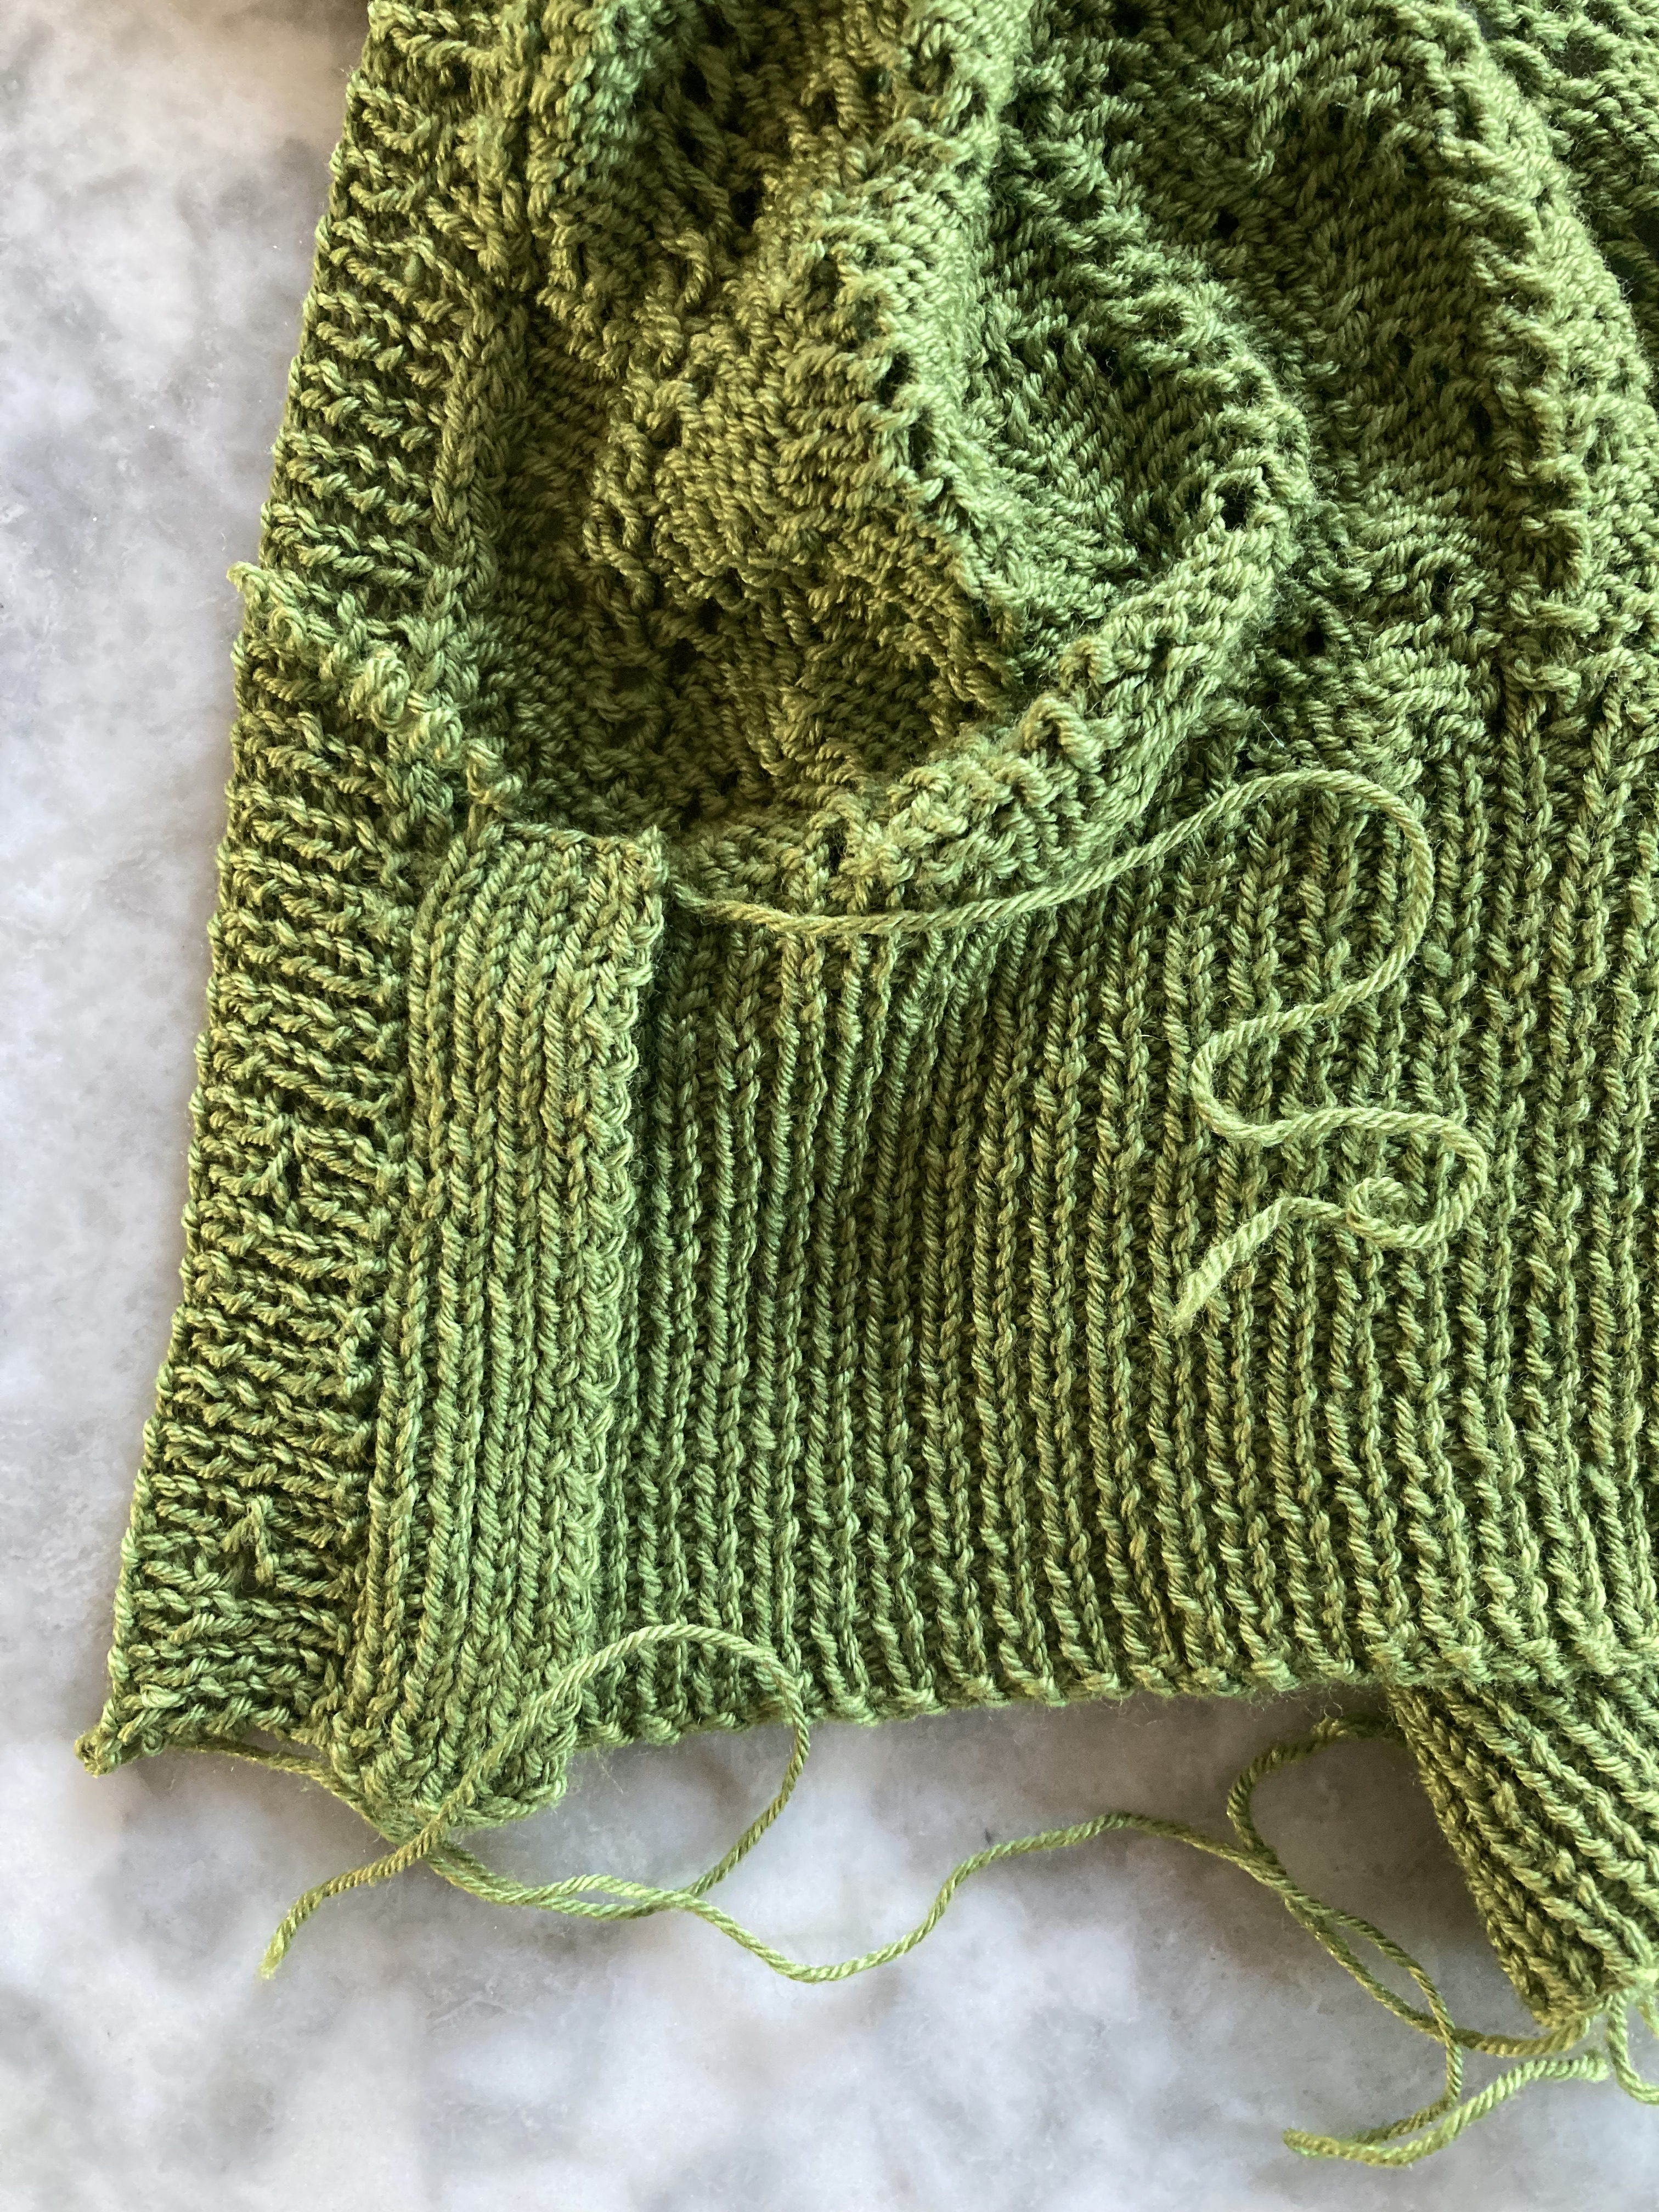
What to do? It ballooned out terribly, of course. It also still didn’t have button bands. I had originally planned vertically-knit bands, started them along with the waist ribbing and left the band stitches on safety pins to continue knitting after the rest was finished. Now I changed tactics, cast off the truncated bands and folded them inward, and picked up stitches for horizontal bands. I calculated the number of stitches to pick up based on the length the cardigan should have been, with the idea that the bands would pull the length together and I could then re-block the cardigan and try to get it smaller.
That actually helped quite a lot — now it was a matter of the back part ballooning still, and of course nothing lying flat in the front. I probably picked up too few stitches along the back neck and upper part of the “V” neck. But I tried blocking it again… Still too long, and not behaving. Well, a short run in the dryer worked for the jumper and didn’t hurt it, right?
Alas, a short run in the dryer (here too, gentle cycle, cool air) was not a good idea this time. After only 10-15 minutes, the cardigan had shrunk massively and already begun to felt. I tried to save it by re-wetting and wearing (while wet, ugh), then pinning it out flat. That got it to a barely acceptable length, but the damage had been done. The sleeves were too tight and too narrow and the fabric had lost its beauty and “bounce”.
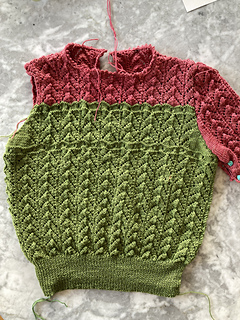
I finished it up with buttons and tried to make the best of it, but it’s not good. The cardigan is actually smaller than the jumper and doesn’t stretch any more. The shoulders and upper sleeves are particularly problematic where the jumper fabric bunches up under the cardigan and brings the shoulders out of line. Combined with the puffy 1940s sleeve tops and the too-short sleeves, it makes me look hugely bulky in the upper body. I feel like a gorilla wearing it.
I’m very sad and disappointed, in myself of course for risking the dryer a second time which was obviously a bad decision, but also with this yarn, which I so loved in the skein, but which turned out to be impossible to work with. Swatches, a jumper and a cardigan all knitted from the same pattern on the same needles turned out so wildly different both from each other and before and after blocking. How is anyone supposed to make a wearable garment without being able to calculate how big the finished fabric will be?
Not sure what to do with the cardigan. Maybe I will give it to someone smaller than me who is less picky about fabric perfection. I’ll keep the jumper, of course.
That’s all for this project… May it be a lesson to me!
This month’s blog project was a bit different than planned. The August 1964 issue didn’t have any projects that particularly called to me. There was a nice baby set of “vest and pilch”, but I didn’t know anyone who was having a baby soon… or did I? In fact, I did know that a friend of mine was expecting twins, but we hadn’t seen each other for a while and unfortunately that fact slipped my mind until the babies were almost due! At which point I could have made two vest-and-pilch sets, but I wanted to get the project done quickly and also destash some yarn that was more suitable for a top/middle layer than to be worn right next to delicate baby skin.
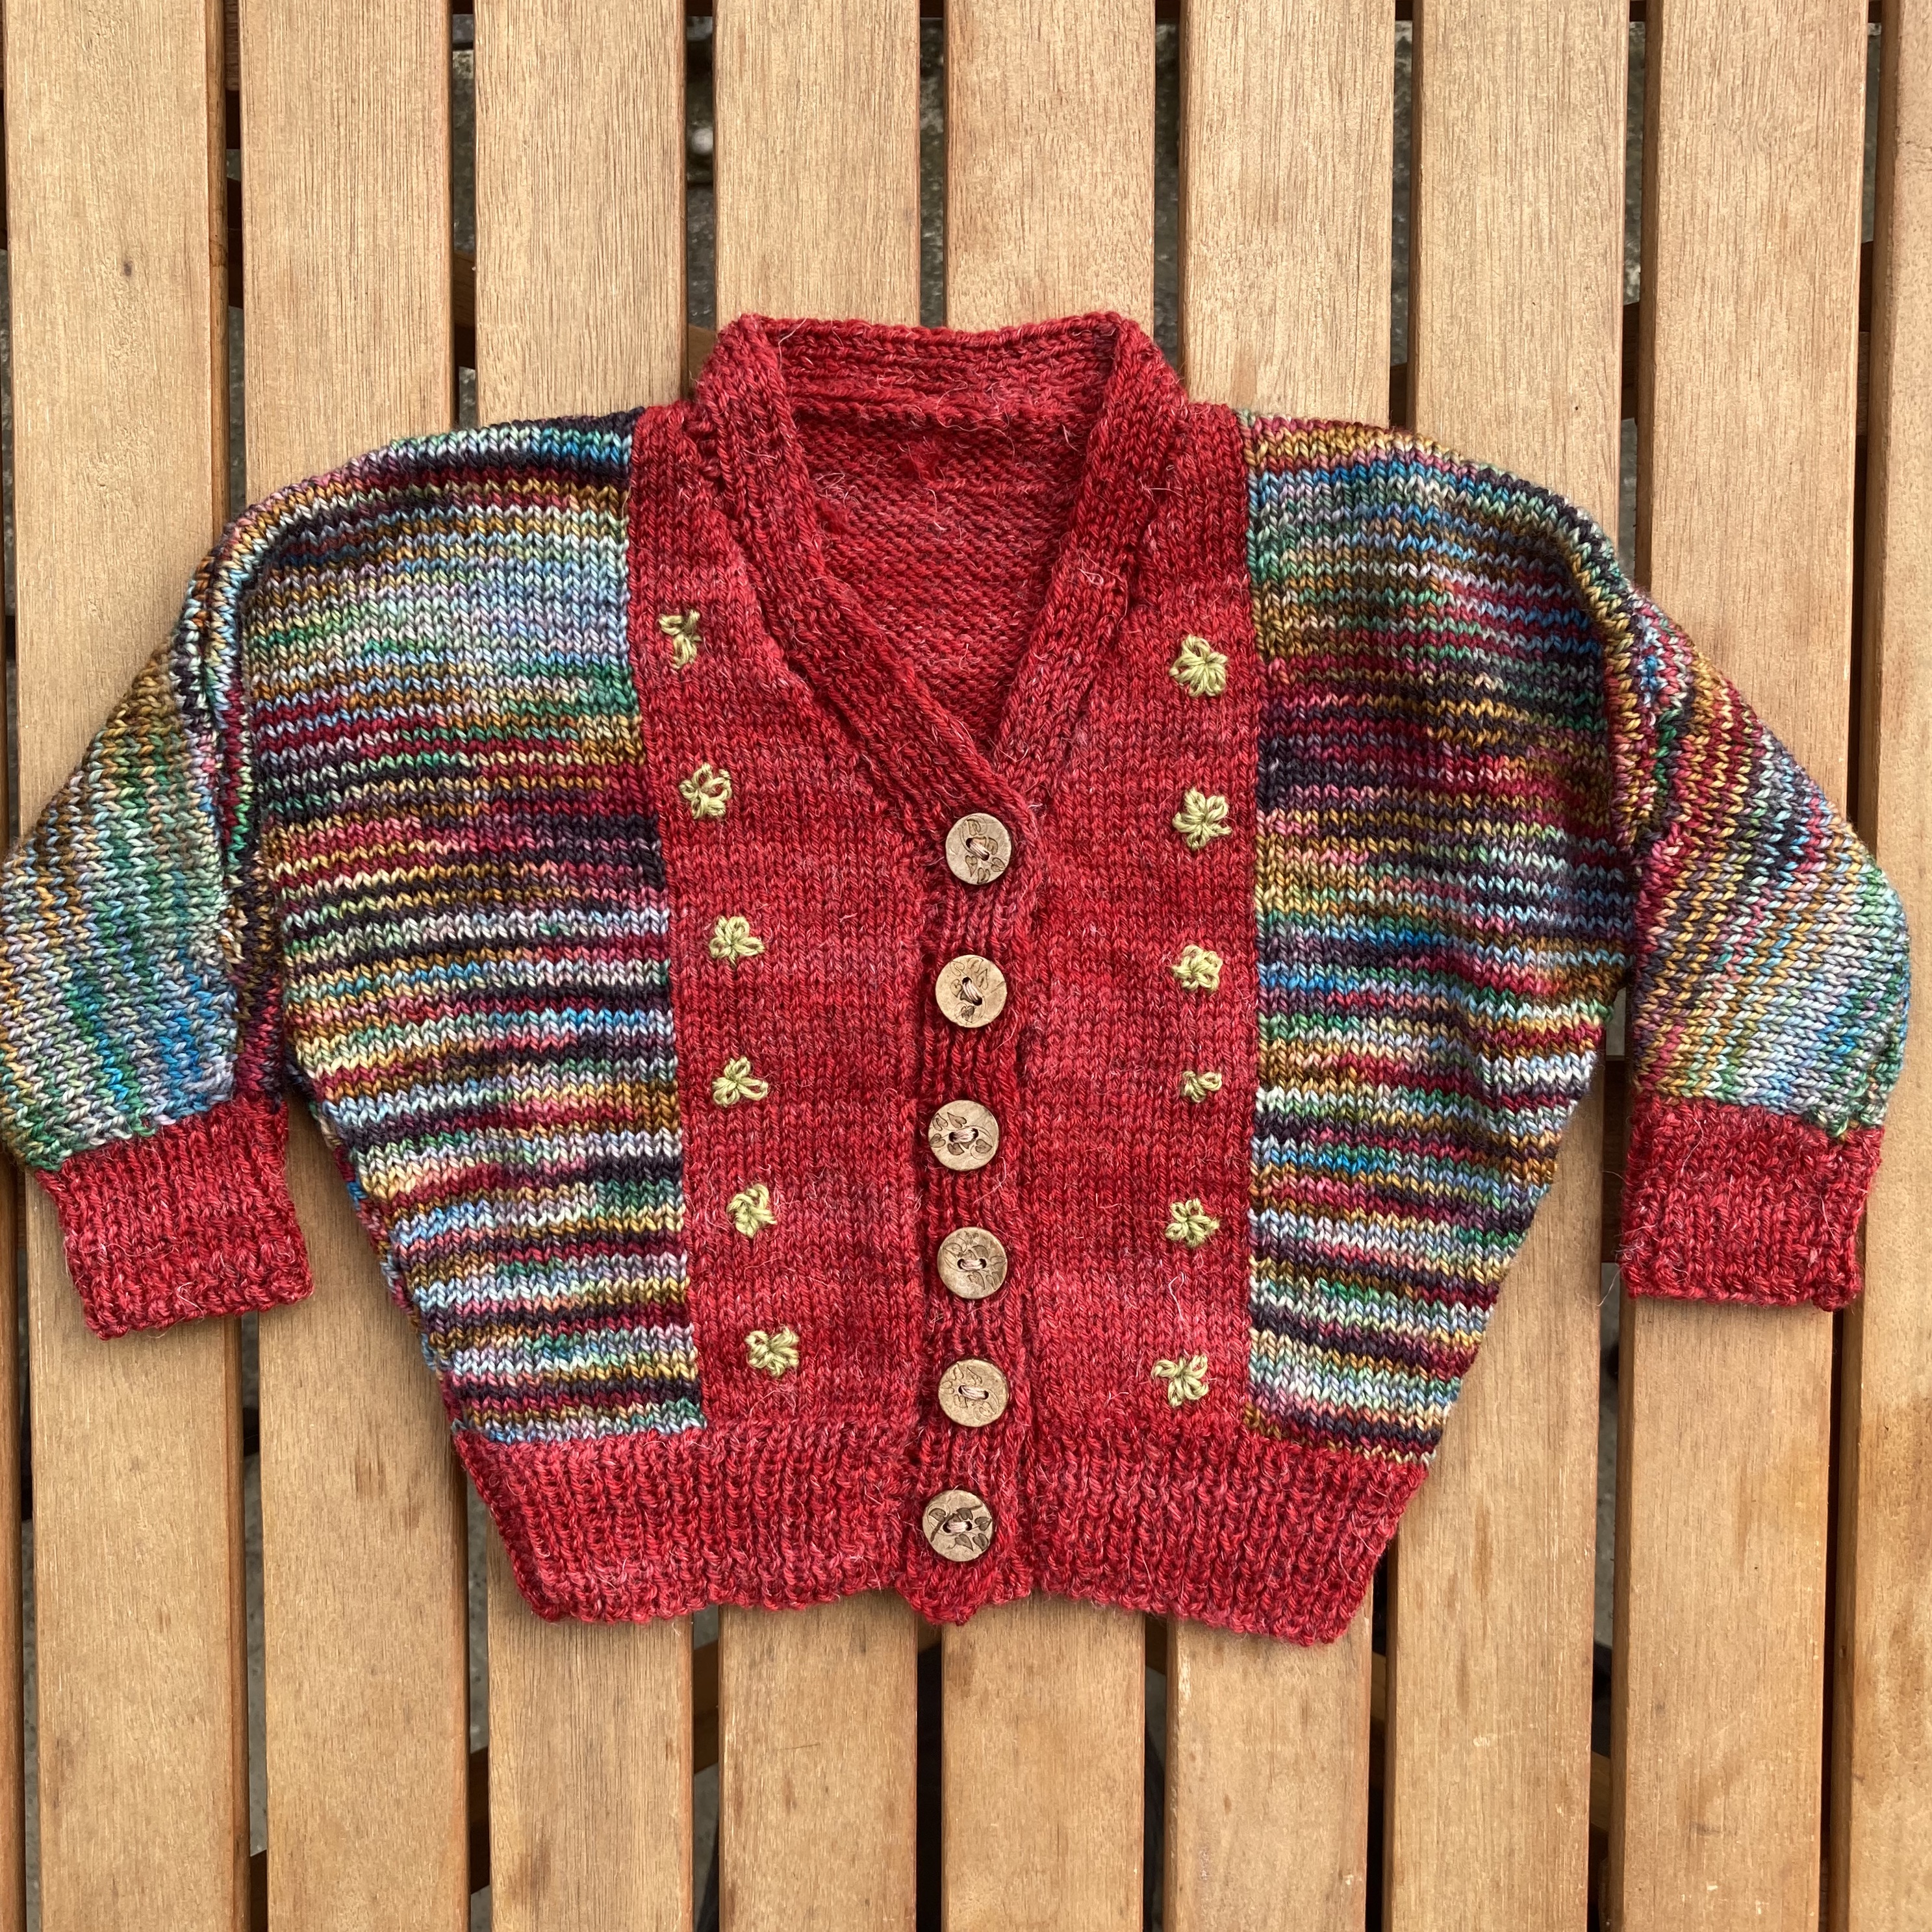
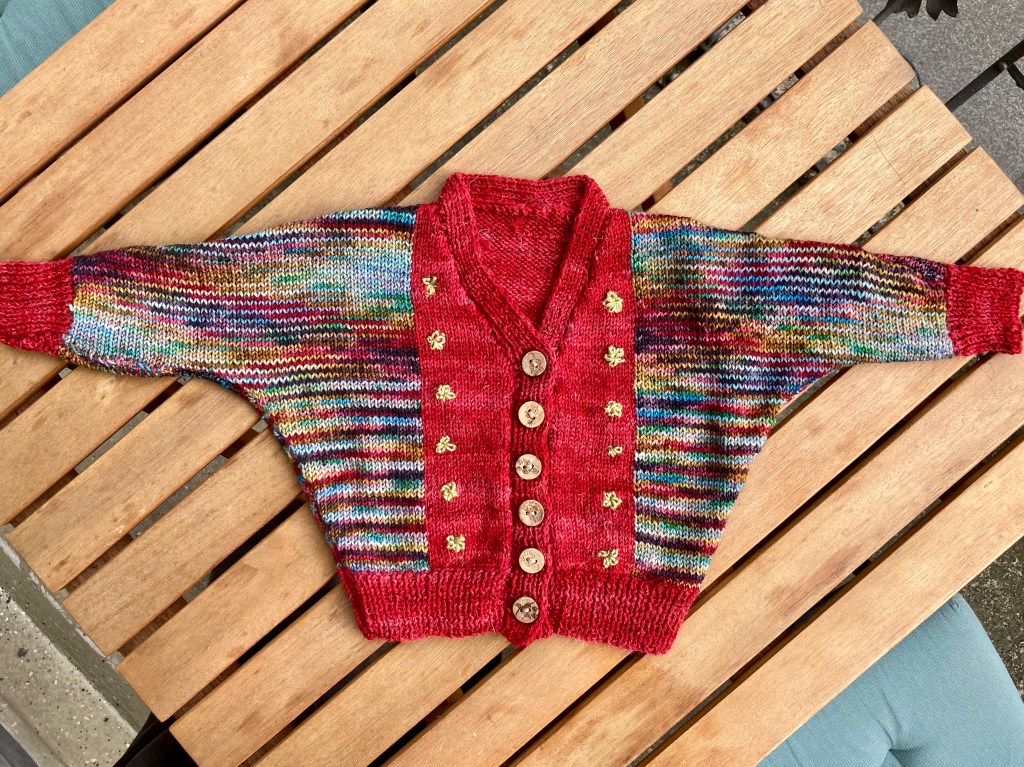
I decided to make two similar, but non-identical cardigans and opted to make one without a pattern and one from this pattern for a dolman-sleeve cardigan from Stitchcraft‘s October 1956 issue. The use of two block colours made it a good choice for the two yarns I wanted to use, and the embroidery was a cute touch.
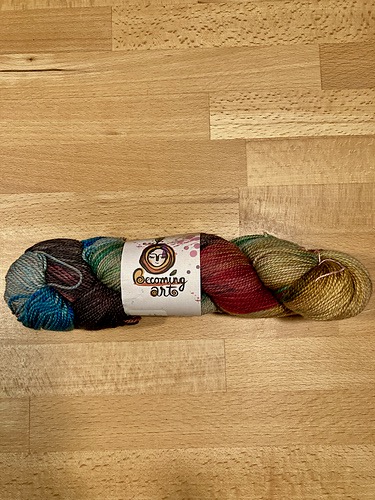
The pattern calls for Patons Beehive 3-ply Baby Wool at a tension of 8 stitches to the inch for a cardigan that is 19 inches around the underarms. My wools were Becoming Art Cielo fingering in the colour combination “Carousel” (multi) and Schöppel Admiral Hanf in red — admittedly not a very vintage colour combination or standard baby-pastel, but I like knitting bright colours for babies, and the mother’s favourite colour to wear is red, so I loved it.
Both wools were gifts — the Admiral Hanf from my knitting group’s holiday “secret Santa” and the Cielo Carousel a prize from the last KAL at the All Things Vintage forum on Ravelry. “Hanf” is German for hemp, which makes up 10% of the red yarn and gives it strength and durability. It’s not scratchy, but also not super-soft. The Cielo fingering is delightfully springy and squishy. I got 6.5 stitches to the inch with each of them on 3 mm needles, but saw no need to change the pattern, as a larger cardigan would be more practical for autumn/winter wear, when the babies will be bigger and wear more clothing underneath.
The cardigan is knit from the bottom up in three pieces — back and two fronts, with the sleeves cast on horizontally. The colour-block effect is made by using separate balls of wool and twisting them together at the colour change, intarsia-style. I made both the fronts together with separate balls of yarn on one needle to insure symmetry. The cuff ribbing is picked up and knit in rib after the main pieces are done and the front button bands are knitted separately and vertically in rib and sewn on. (I’m not a fan of this type of button band and would just as soon have knitted the bands together with the fronts, even if technically they’re supposed to be made on a smaller needle.)
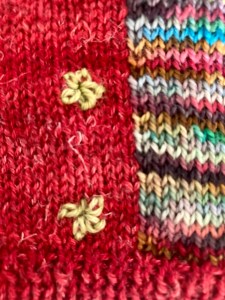
The little flowers on the fronts are embroidered on in loop stitch after everything else is finished. It was surprisingly difficult to get all the “petals” to be the same size and distributed evenly around the centre. Perhaps I should have made them larger. I’m always happy to practice embroidery on knitting, since I think it looks really cool, but it continues to be a challenge. The wool is a bit of leftover Onion Nettle Sock yarn.
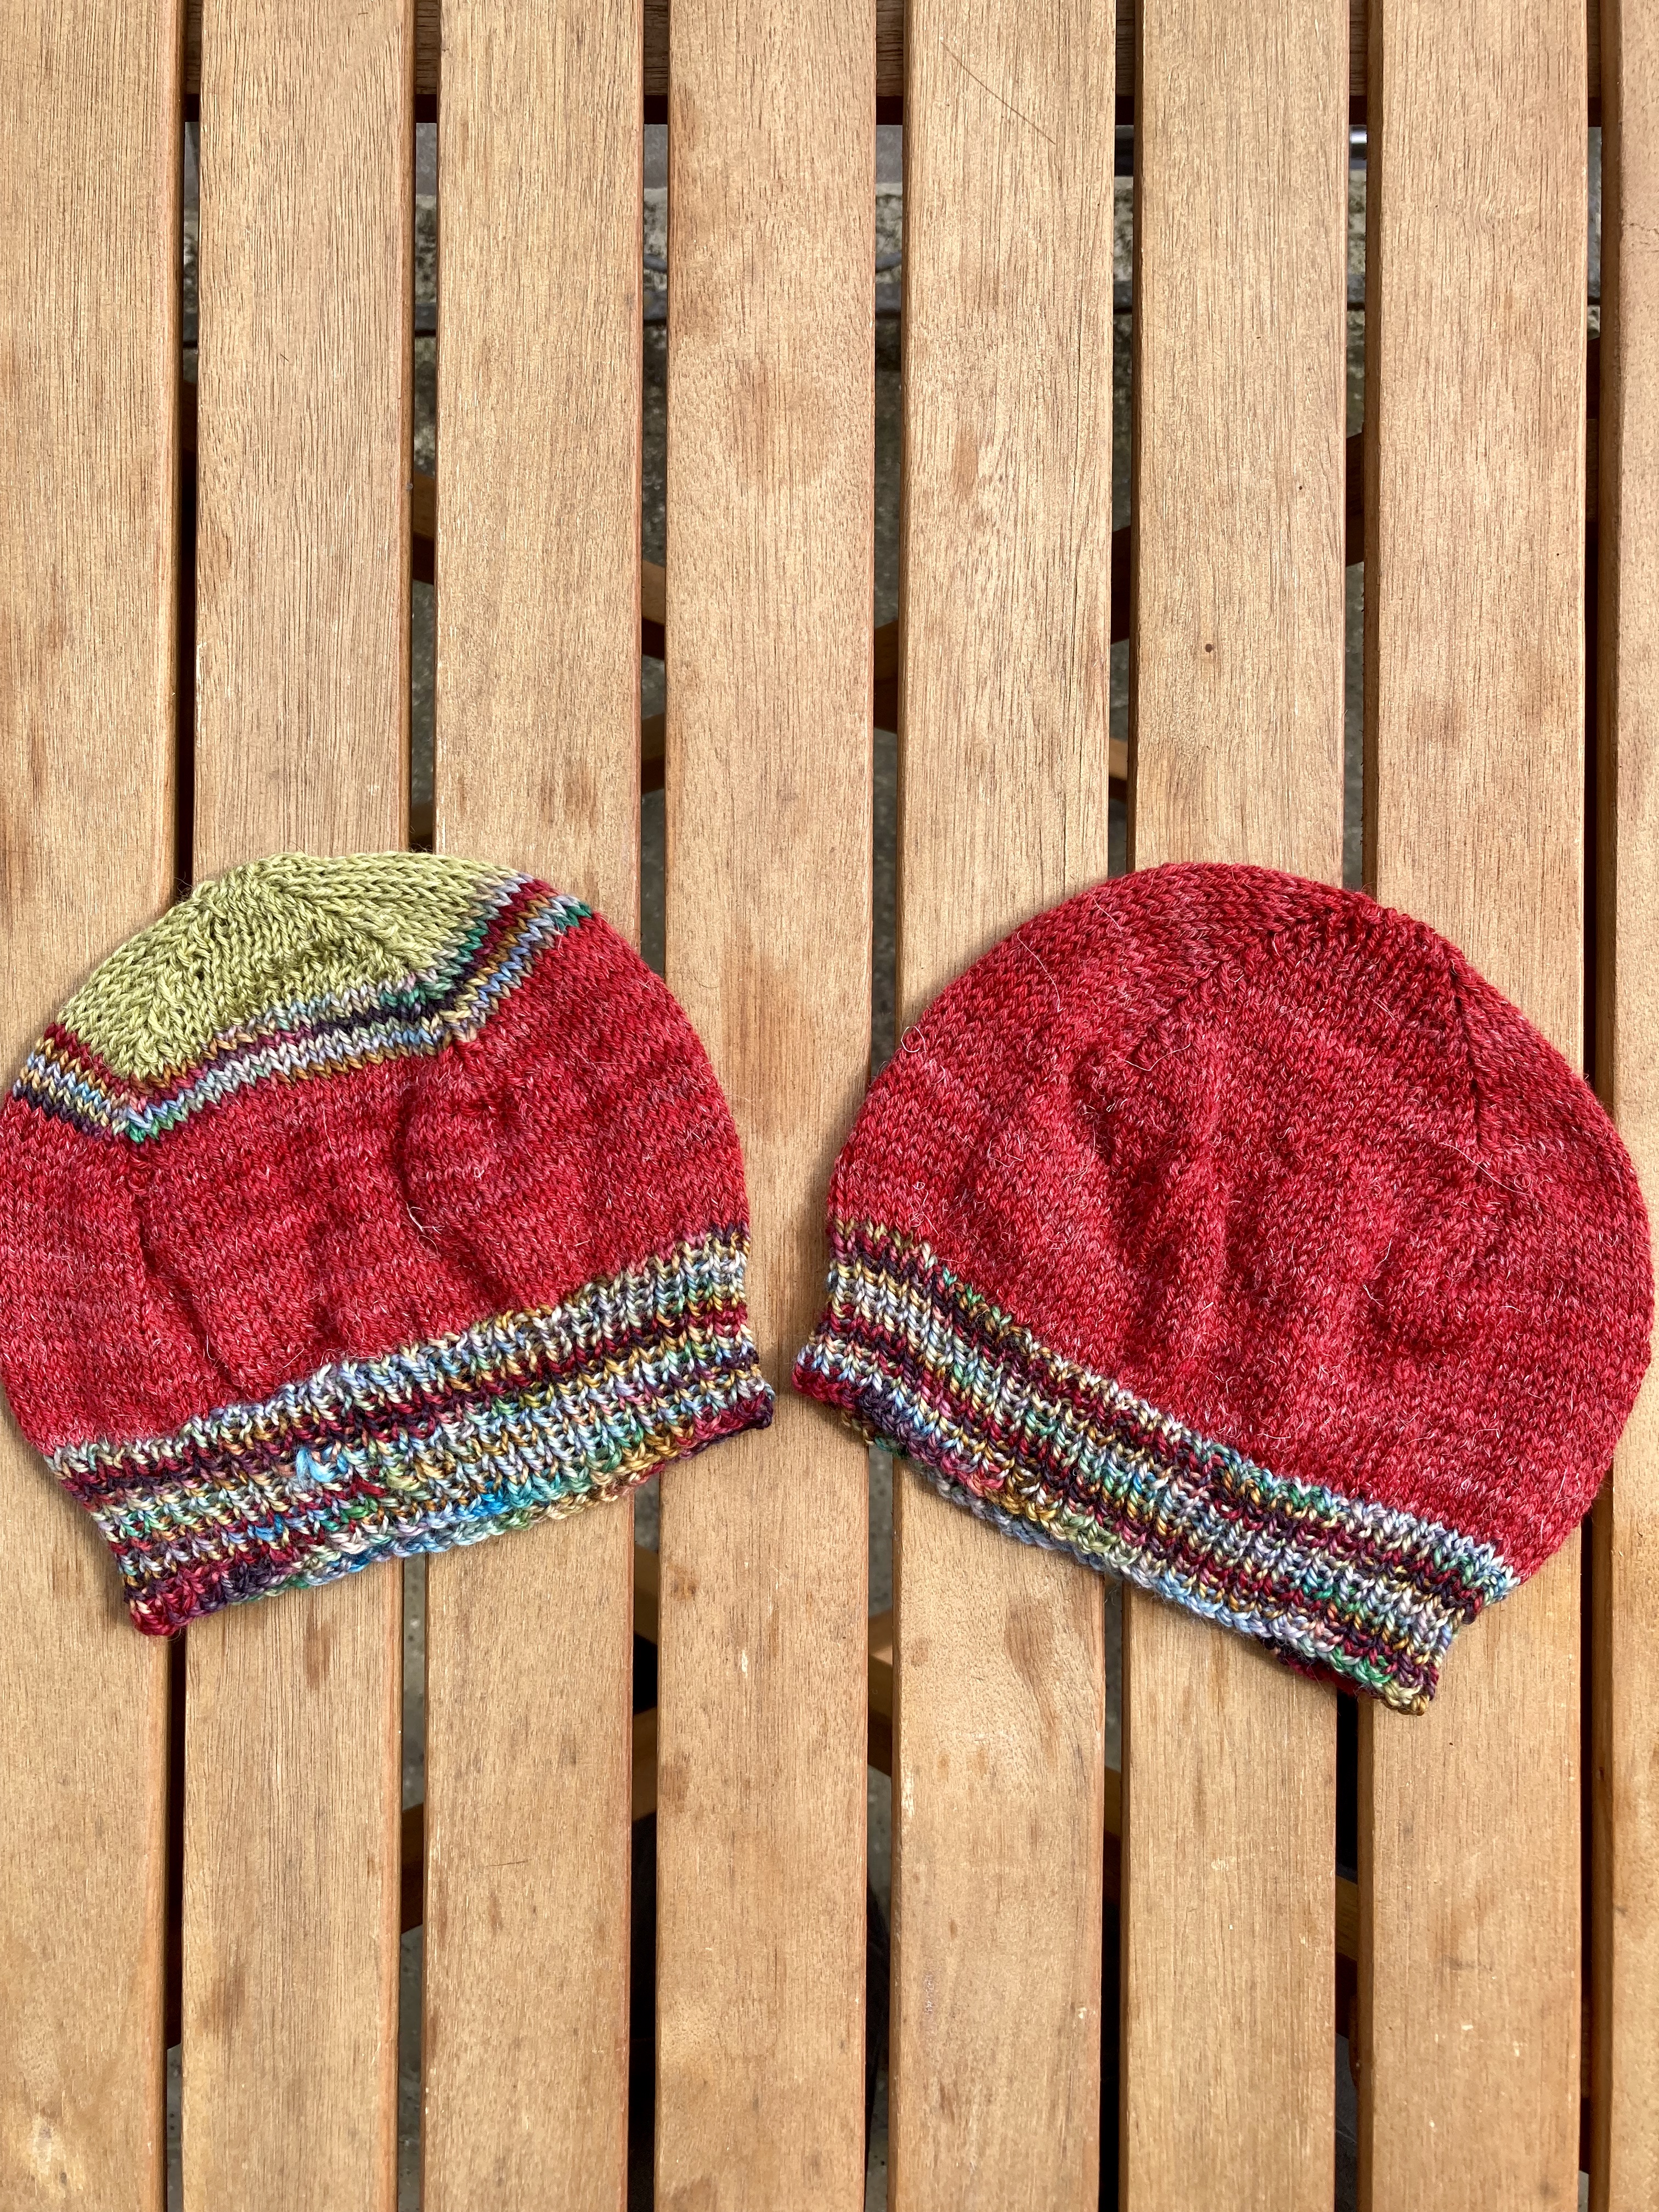
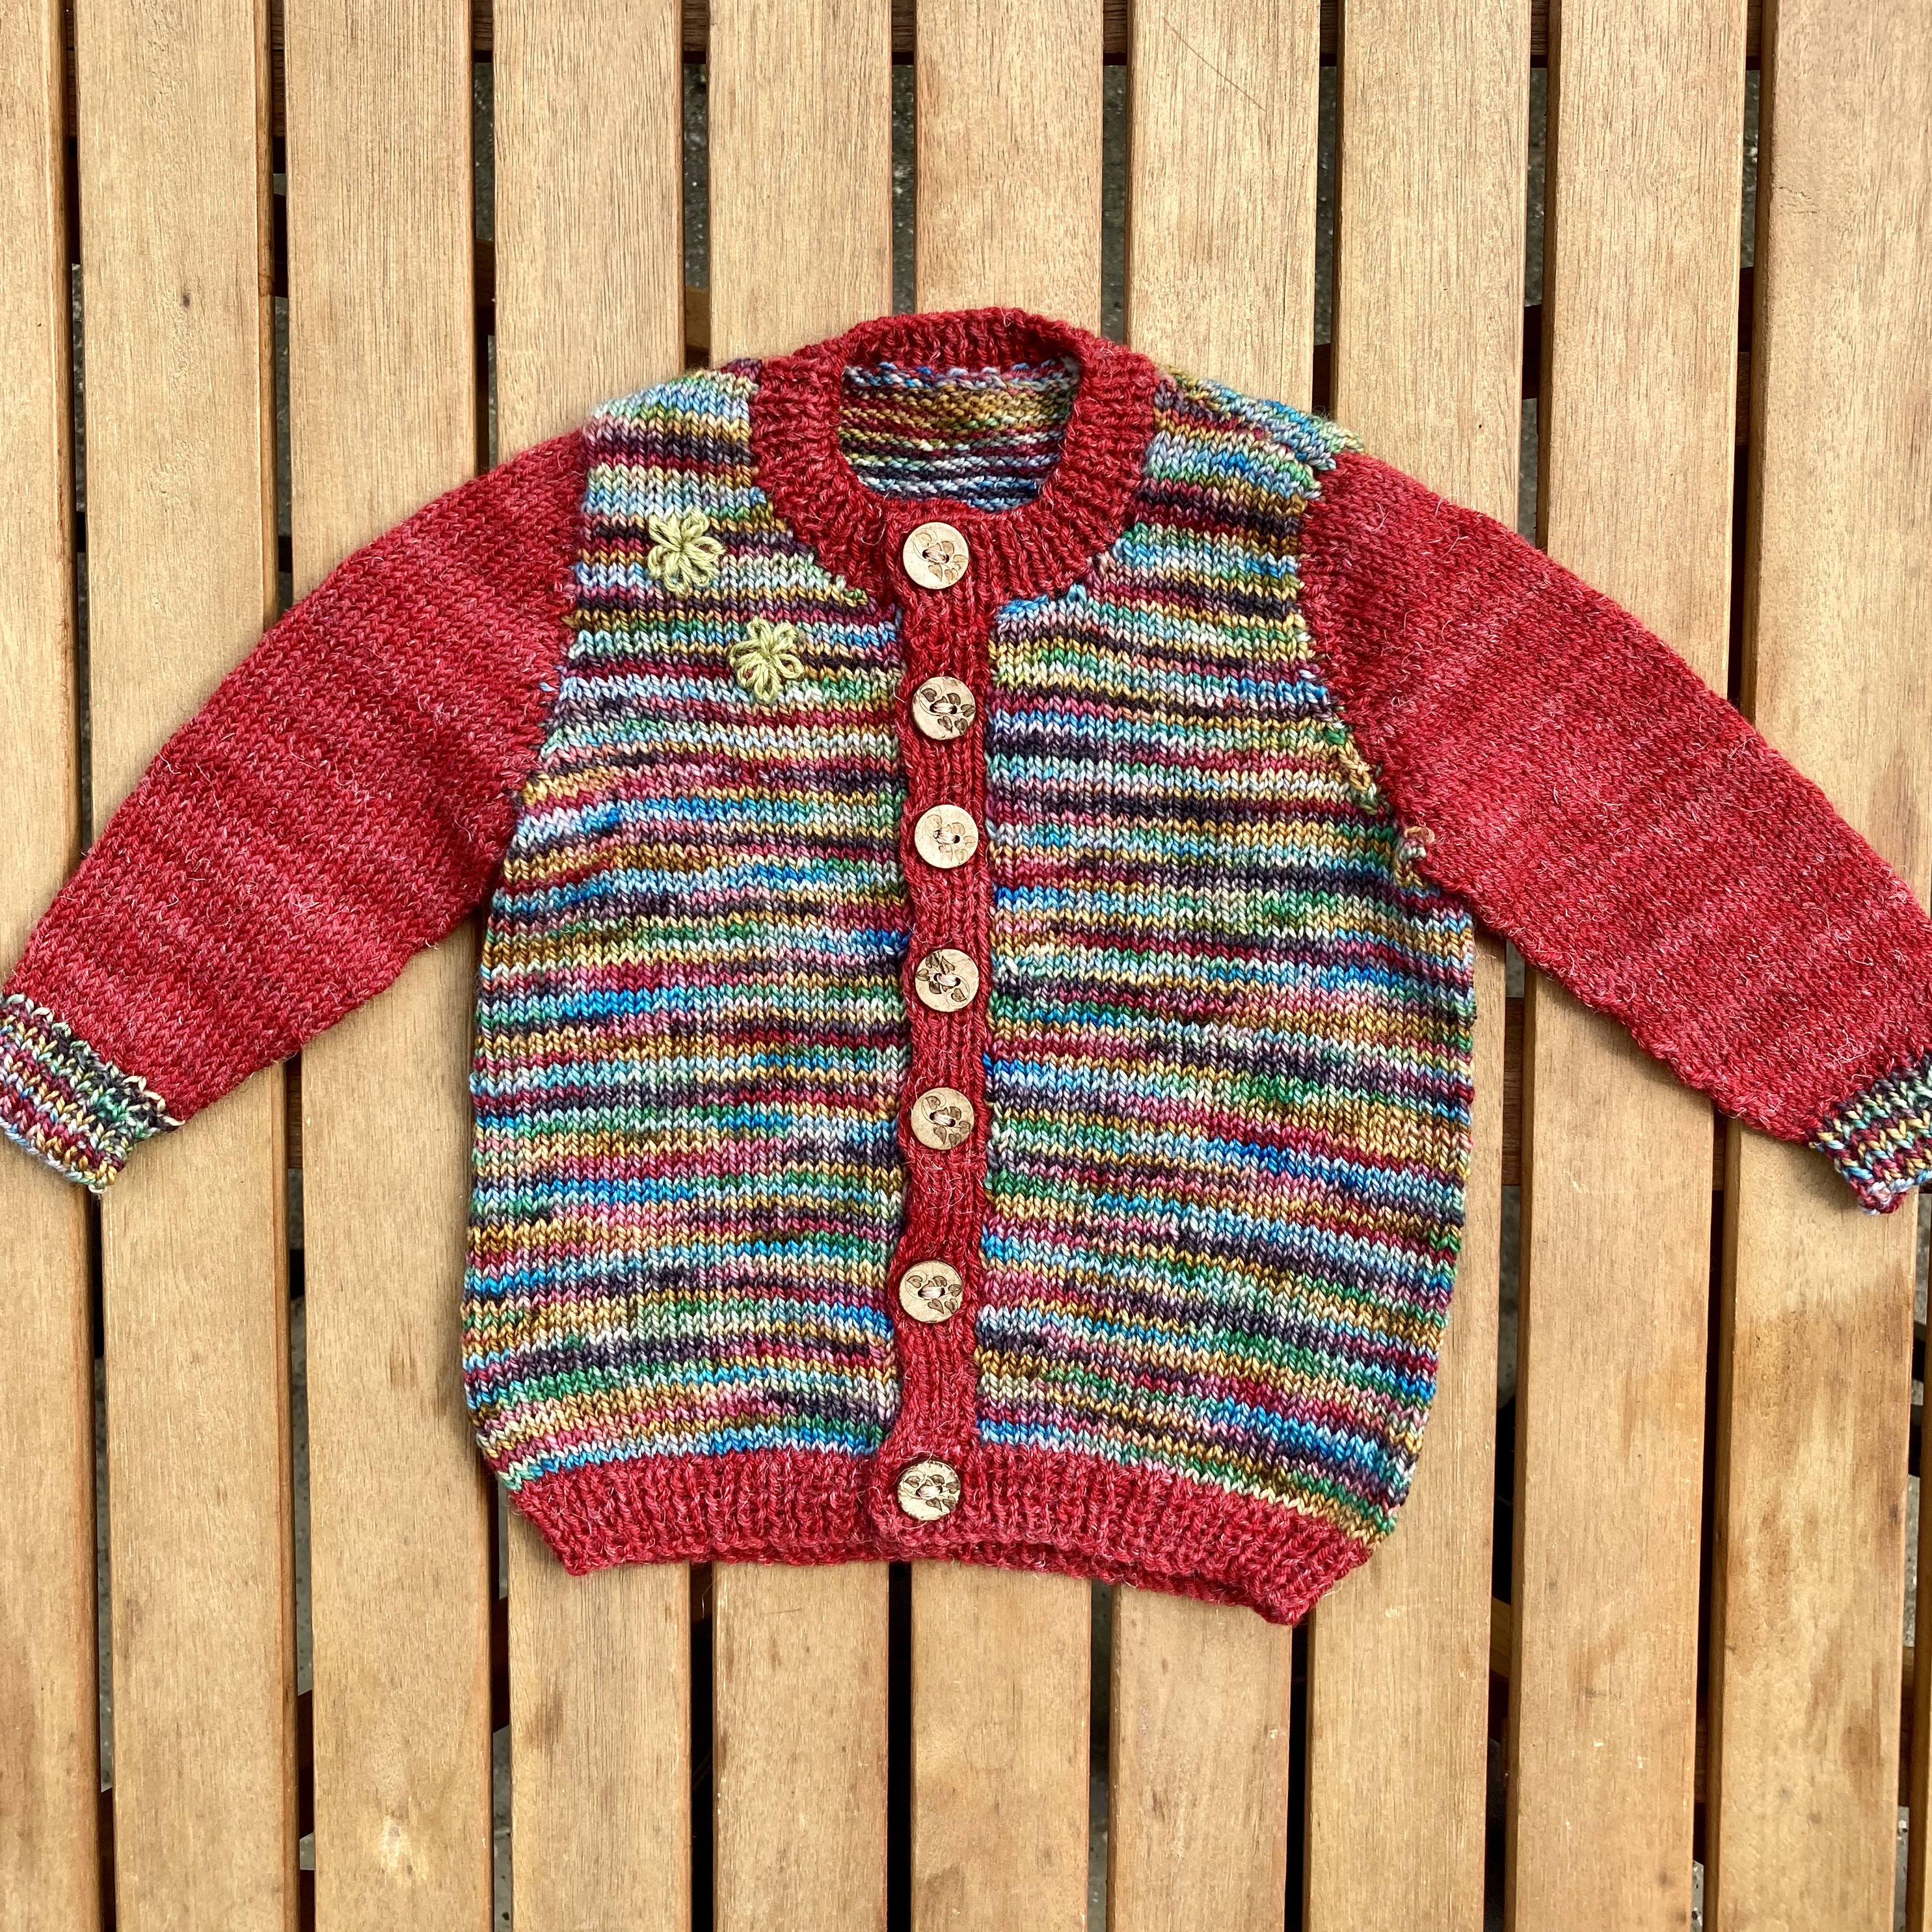
One 100 gram skein of the multi-colour wool and one 50 g ball of the red were enough to make this cardigan, another “fraternal” cardigan (plain crew-neck with set-in sleeves) made without pattern using the multi-colour yarn for the body and the red for the sleeves and ribbing, and almost two hats with multi-colour ribbing and a red body. The crown of one hat was finished in the green Onion sock, which I also used to embroider two larger flowers near one shoulder of the no-pattern cardigan.
I loved the dolman pattern and will surely use it again for another baby. I love the similar, but not identical cardigans for (fraternal) twins. I love matching hats and cardigans. I love the bright colours! And I think these sets will be very useful for the twins and make the parents happy.
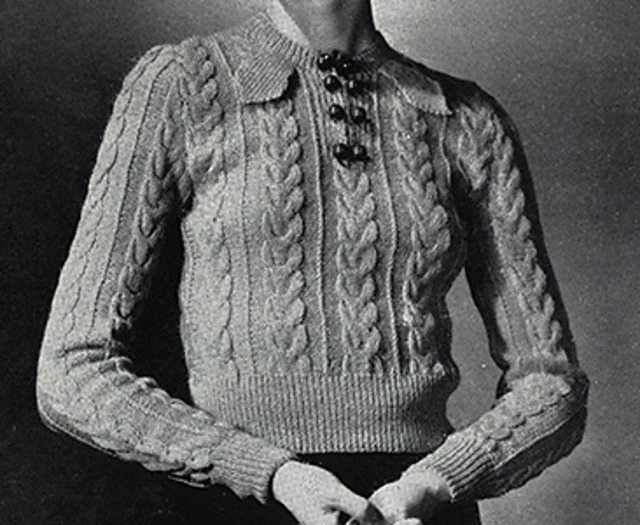
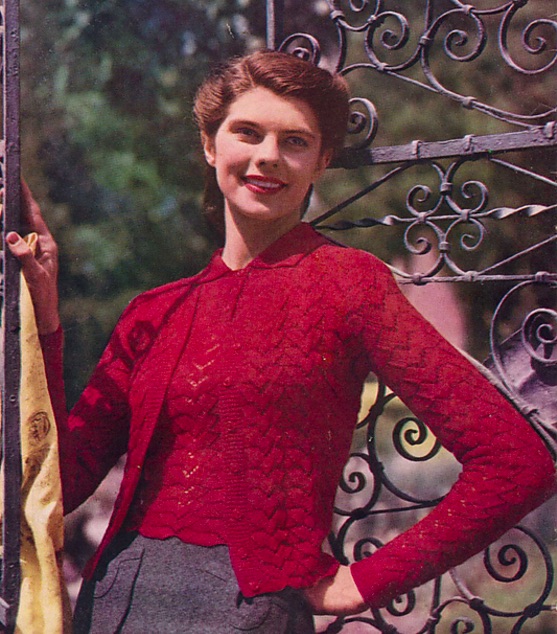
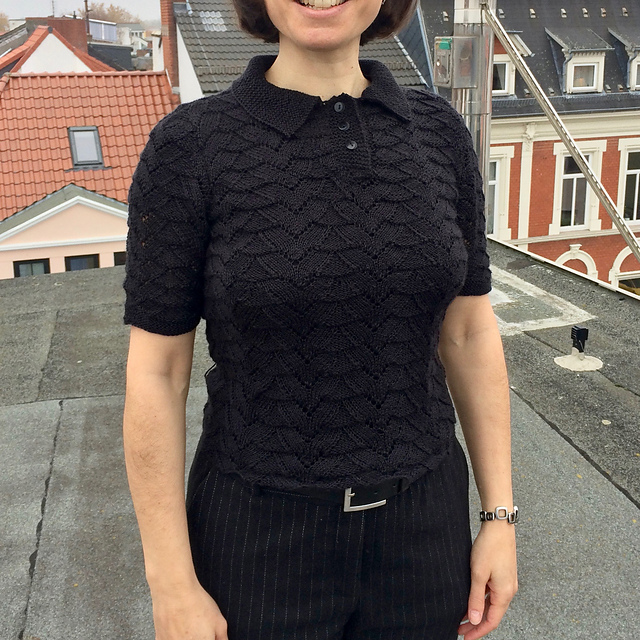
This month’s project (finished just on time!) is somewhat different from usual, as it is neither from Stitchcraft, nor from the 1960s. It’s a sleek little knitted blouse from 1937, from a pattern originally published by the Spool Cotton Company and now available on the wonderful Free Vintage Knitting website.
Unlike Stitchcraft, which I have been collecting in paper form for some time now, this was my first acquaintance with the Spool Cotton Company, and I have to admit that I hadn’t heard of it before. A Wikipedia search turned up the Clark Athletic Association, an American soccer team from New Jersey that was sponsored by the Clark Mile End Spool Cotton Company. I don’t know if this was the same Spool Cotton Company that published the pattern, but I suspect it could be. In any case, the Clark name and company are of course well known in the knitting/crochet world, having existed for centuries in various forms and mergers (Clark Thread Company –> Coats and Clark –> Coats Patons, which in a roundabout way even leads us back to Stitchcraft…).
From what I can see in the Ravelry database, Spool Cotton Company patterns were primarily for accessories and homewares crocheted in cotton (as one might expect with a brand named “cotton”). The leaflet which contained “Clarel” was entitled “New Knitted Fashions”, with coats, dresses and suits as well as knitted blouses, and was inspired by British fashion of the time (though “fun to knit because of their easy-to-follow American instructions”.) Apparently they were written to be used with Red Heart yarn.
If anyone knows more about this company or publication, or if my guesswork in the last two paragraphs was incorrect, please let me know!
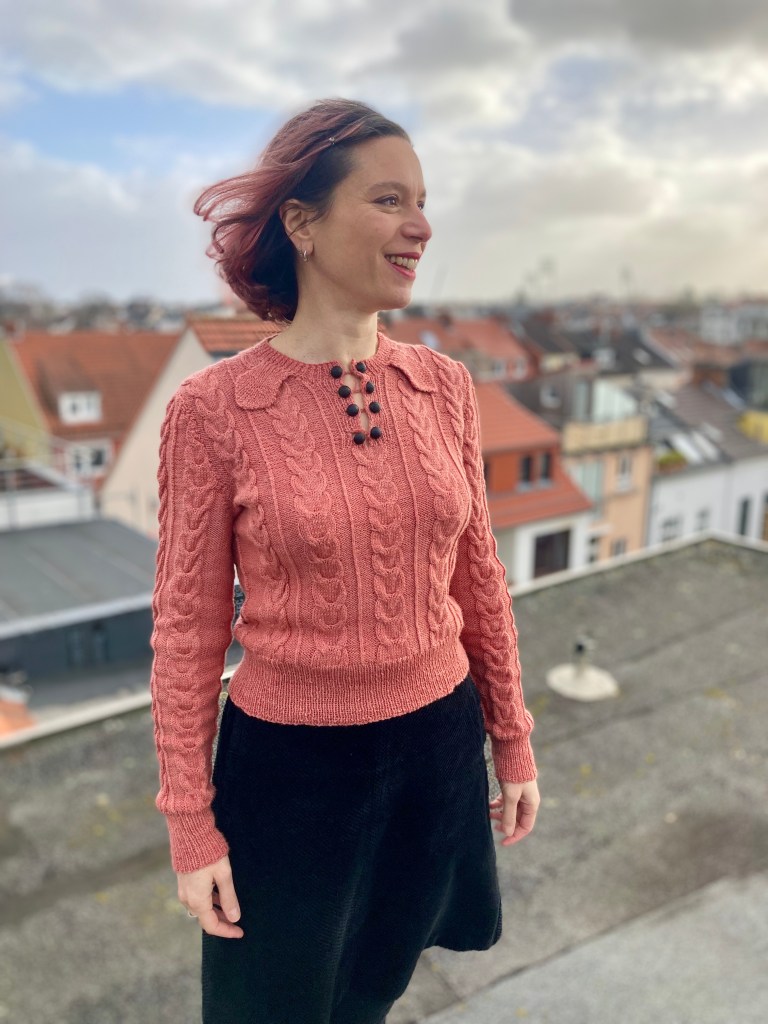
“Clarel” is written for fingering-weight wool at 7 stitches to the inch, and I had some lovely (why oh why was it discontinued?) Lana Grossa Slow Wool Lino on hand, which was perfect for it. The 15% linen makes a very smooth yarn that hold cables well, but the overall texture is quite soft and stretchy.
As most patterns of this era, there is only one size given, for 34 inch bust. I calculated out a somewhat larger size using a percentage multiplier (no. of sts x 1.05) and just added the extra stitches onto the reverse stocking-stitch base that extends on the sides. I also added 2 patterns to the length and 2 patterns to the sleeve length.
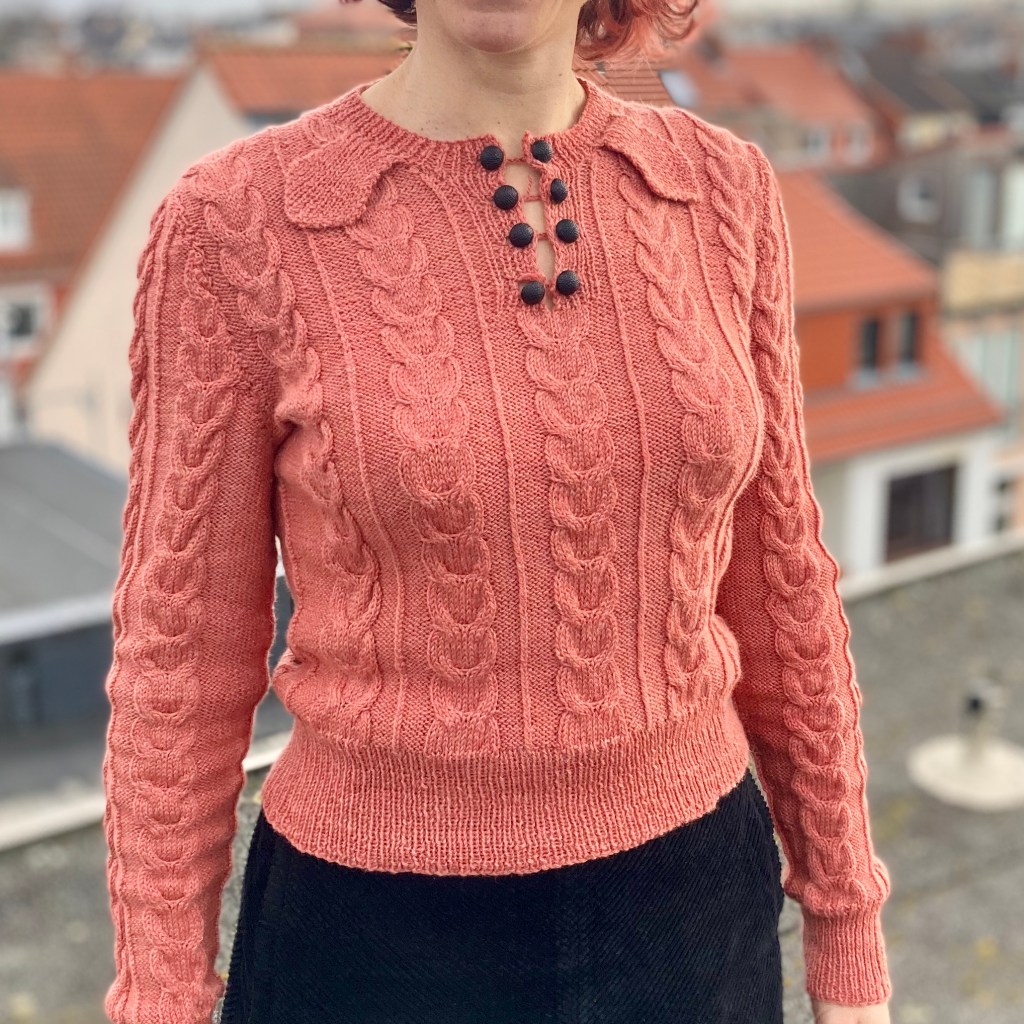
I particularly love the little design details of this pattern: the mini-rib lines (just ktbl on a reverse st st background) dividing the cables, the funny tabs at the neck and the double buttons (attached together with a crochet chain.) I could make the chains a little shorter to make the placket line up straight.
All in all, I am very, very happy with this project. It fits perfectly, is lightweight, warm and soft, and makes me look like I have much more of a figure than I actually have. It even matches a tam I just knitted, as well as my fading dyed-pink hair. What more could a person want?
Next month will be a return to Stitchcraft and the 60s!
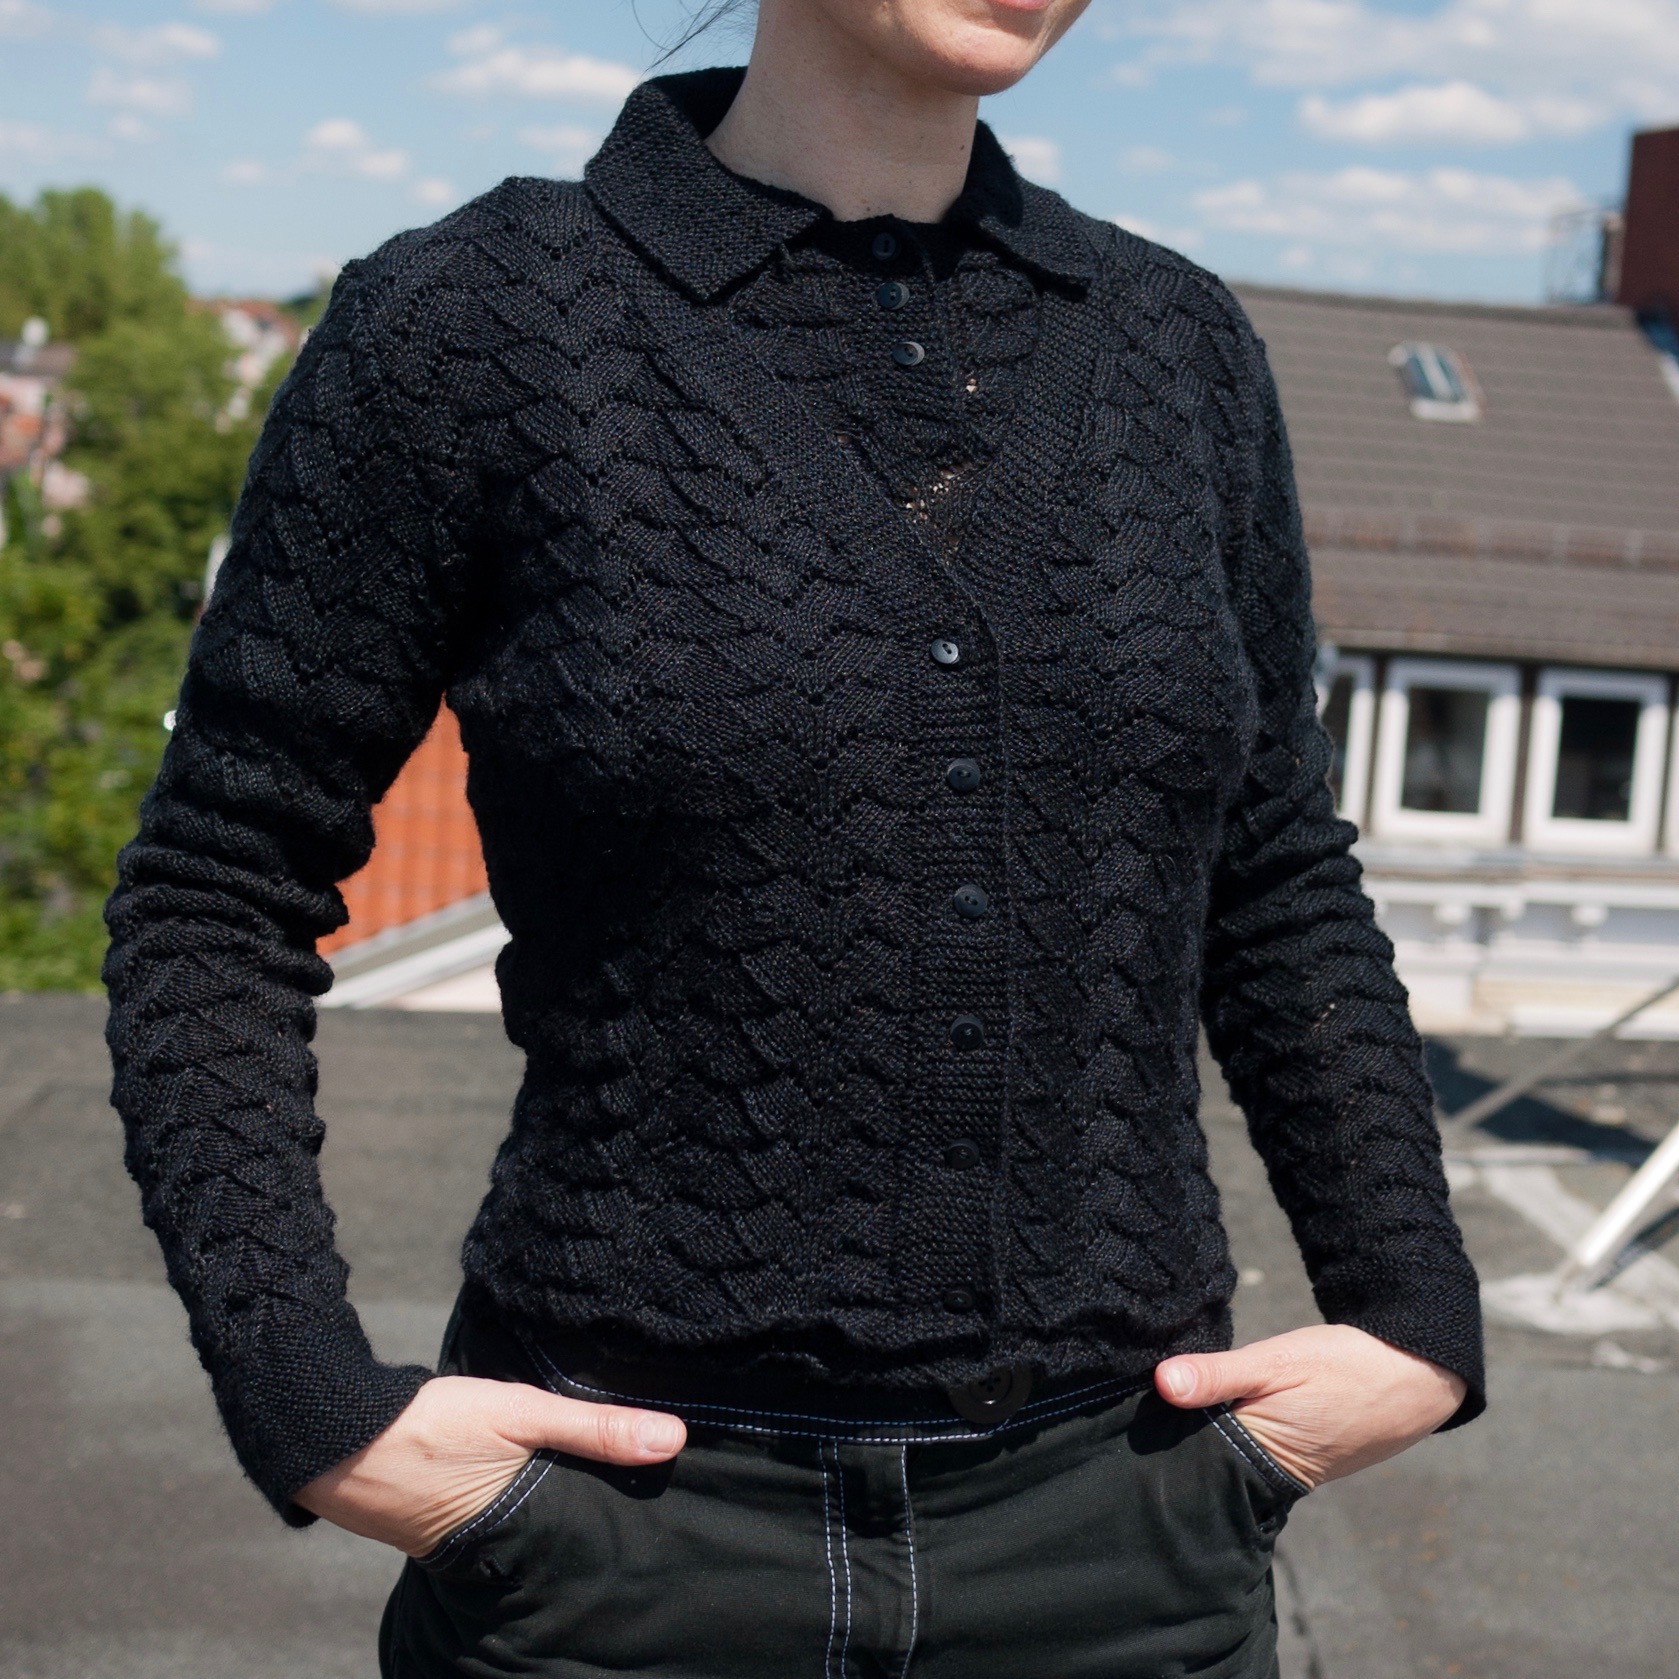
The June 1962 issue didn’t have any projects that appealed to me enough to make them, so I used the time to finish up a project that I’ve been working on off and on for the last few years: a “4-coupon” twin set from Stitchcraft‘s February 1947 issue.
The “4-coupon” title refers to the clothing coupons used when purchasing rationed items during and after World War II. Rationing began for many food products in January of 1940 and extended to clothing in 1941, whereby clothing coupons could also be used for household textiles or wool. The Wikipedia article on rationing in the United Kingdom during World War II gives a sense of the coupons’ comparative value:
There were 66 points for clothing per year; in 1942 it was cut to 48, in 1943 to 36, and in 1945 to 24. This system operated through a “points” system… [ ] …Clothing rationing points could also be used for wool, cotton and household textiles… [ ] … The number of points that each piece of clothing would be valued at was determined by not only how much labor went into making it, but also how much material was used. A dress could run someone 11 coupons, whereas a pair of stockings only cost 2. Similarly, Men’s shoes cost 7 tickets, whiles women’s cost only 5. In 1945, an overcoat (wool and fully lined) was 18 coupons; a man’s suit, 26–29 (according to lining); Children aged 14–16 got 20 more coupons.
The twin-set uses 8 ounces of wool, so apparently one coupon could get you two ounces of (2-ply) knitting wool. (Just to be clear, one also had to pay for the items; the coupons only limited the amount people were allowed to buy, regardless of how much money they had at their disposal.)
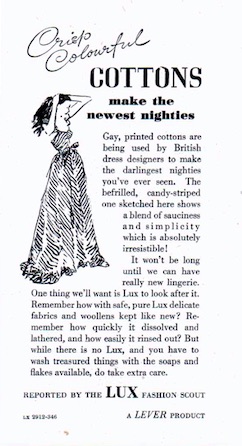
The influence of rationing can be seen in almost every aspect of 1940s issues of Stitchcraft: occasionally titles of designs, such as this one, but more often in recipes and advertisements. These two, from the pages of the 4-coupon pattern, promise that the company in question is “sharing out their dress and lingerie fabrics as fairly as possible” and reassure that “it won’t be long until we can have really new lingerie” (lace and frills were banned, and nylon was needed for parachutes et. al., hence the plain, home-sewn cotton nightgowns).
Many products remained rationed after the war, including clothes rationing, which lasted until March 1949. It was only in 1954 that the last rationing measures were lifted. Since then, the only product that has been subject to rationing in the UK was petrol, briefly, during the Suez crisis of 1956-57. And yet, as the global Covid-19 pandemic continues to rage around us, there have been discussions in many countries — including wealthy countries with excellent medical infrastructures — regarding the rationing of personal protective equipment, ventilators and medical supplies. The past is not as far away as we might think.
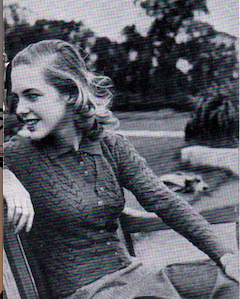
Booklet photo, February 1947
I had plenty of time to ruminate on that while finishing this project, which I started as a “home away from home” project in 2016 (a year in which I effectively lived in two different places) and finished in home isolation in 2020. The wool — Onion Nettle Sock — is a mixture of 70% sheep wool and 30% nettle fibre. I would never have thought to knit with nettle fibre, but it works very well! It is smooth and somewhat shiny and the textured lace pattern shows up very well with it. Also, it reminds me of various fairy tales involving our heroine knitting shirts for her brothers out of nettle plants (or aster flowers, depending on the version and translation), like Die Sechs Schwäne (The Six Swans) by the brothers Grimm, or De vilde svaner (The Wild Swans) by Hans Christian Andersen.
As always, I am larger than the 34-inch-bust size for which the pattern is written, but also get a looser gauge, so it worked out for me to make the pattern almost exactly as written. I made the sleeves and the body of the jumper in the round, adjusted for length and changed the sleeve cap slightly for less puffiness, but otherwise I didn’t need to change anything. Of course, the lace pattern is stretchy and can be blocked tighter or looser.
Said pattern was the first one I had worked with that increased and decreased in the course of the pattern repetition, and I was at a loss to deal with the side-seam and sleeve increases and decreases at first. The pattern, like all vintage patterns from this period, assumes you know what you are doing, and there are no charts in any case. I learned a lot and I can see that the side increases on the cardigan are much nicer than on the jumper! (Carefully photographed as to be unnoticeable, but believe me.)
My buttonhole spacing on the cardigan was off, so I ended up sewing most of the holes closed ad carefully cutting new ones after backing the bands with ribbon (a common practice at the time, especially on tight-fitting cardigans, to keep the bands from stretching out and gapping across the chest.)
All in all, this is a wonderful design and very flattering to the figure. Nota bene, my upper body is broad and flat and I am not exactly model-thin, but this ensemble somehow manages to make me look both svelte and curvy. The wool/nettle fingering weight is perfect for fall and spring. I love the buttoned placket and collar of the jumper. Knitting this was definitely worth all the time and hard work and it will be getting a lot of wear for years to come.
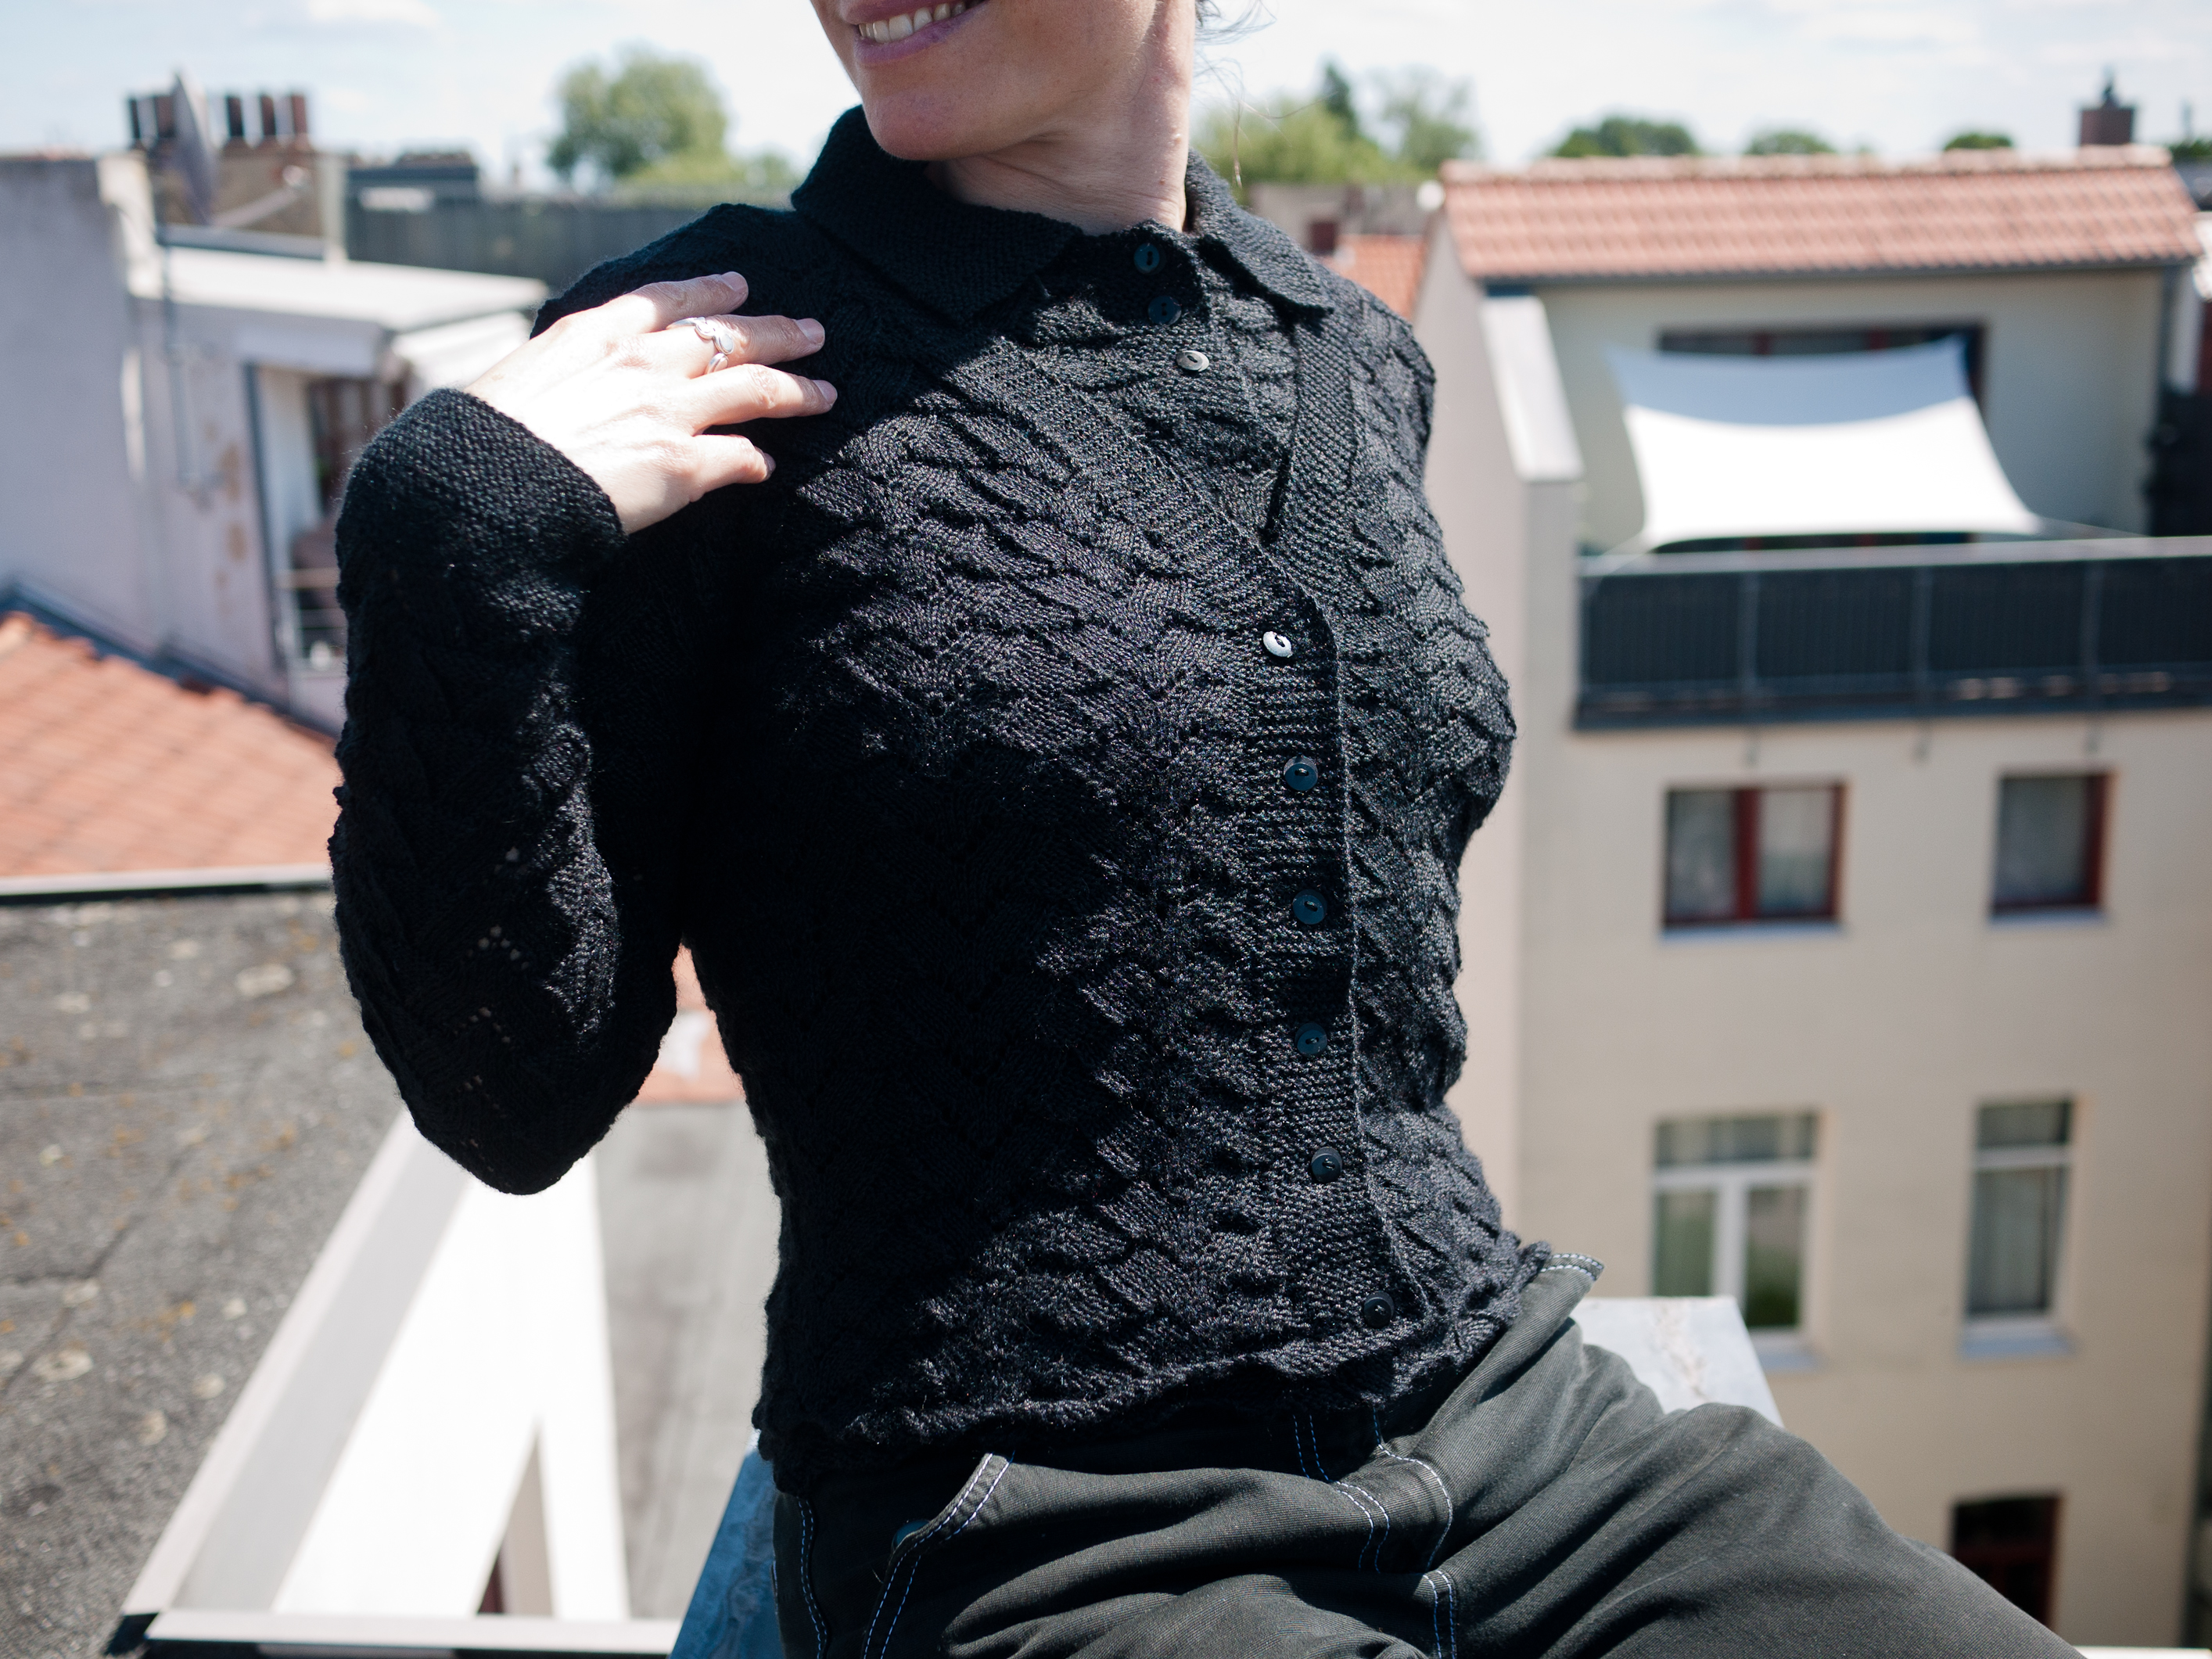
I hang out a lot in the “All Things Vintage” forum on Ravelry and try to participate in the make-alongs when I can. Usually, there are two of them per year, and last year’s July-December KAL/CAL (that’s “knit along”/ “crochet along” for anyone not familiar with the abbreviations) had the theme “Fabulous Fifties.” The 1950s were indeed a fabulous time for fashion and I have a small selection of 1950s knitting magazines, including some very nice issues of Stitchcraft, so the most difficult part was choosing a pattern! I went with this “Elegant jerkin for summer wear” from April 1952.
Portrait of Sir Walter Raleigh (wearing a jerkin) by William Segar, 1598. National Gallery of Ireland. Public domain.
First of all, I hear most of you asking: What is a jerkin? I’m glad you asked. Originally, it was a short, close-fitting, buttoned or otherwise fastened jacket with short or no sleeves, worn in the Renaissance over a doublet. It was often nipped in at the waist. Modern versions of the jerkin were revived for military use in the 20th century, and Stitchcraft as well as other mid-century patterns often use the word for a women’s waistcoat with cap sleeves to wear over a blouse, or a knitted blouse-like garment such as this one, which plays off of the historical jerkin shape.
The four-row stitch pattern was quite easy (knit 1, slip 1 on the right-side rows, knit 1, purl 1 on the wrong-side rows in one colour, then slip 1, purl one on the RS and purl 1, knit 1 on the WS in the other colour) but because of the colour change with the slip stitches, it was amazingly difficult to “read” the work and get back on track. At the same time, if just one stitch was wrong, it was immediately visible in the pattern. Of course, I had to pick blue and black, two colours that didn’t offer much contrast and which, I found, only look different in natural light. As a result, I could only work on this project during daylight hours… in the winter, which is pretty dark.
Adding to the frustration: as always, no matter how small the needles or how thin the wool, I could not knit tightly enough to get the minuscule gauge, which itself was only given as a “life-size” photograph in the pattern. Of course, I am also larger than the 34-35 inch bust given in the pattern, but how much larger the garment, calibrated for how much larger the gauge? Right, lots of calculations, estimations, measurements upon measurements, and just plain guesswork. Plus the thing pulled together either more or less, horizontally or vertically, as it got larger — my gauge swatch (a pocket lining) was utterly useless. I had to start three times.
Before sewing
When I finally got it done (too late for the KAL deadline but whatever), it fit perfectly! I was so proud of myself! Then I wash-blocked it and the wool stretched about six inches in width and at least two or three in length above the waist. In desperation, I reached out to the good people of Ravelry, who told me that the yarn I used (Lang Merino 200 Bébé) was superwash and I should put it in the clothes dryer to shrink it back into shape. I did that and it actually did shrink it down, but it still ballooned a bit in the torso, so I sewed side seams into it. At the moment they are just sewn down with yarn, but the next time I get the sewing machine out, I will probably sew them down properly and (aaaaaggggh!!) cut the excess fabric away to reduce bulk
Also, I sewed that moss-stitch bottom band on twice and it still pulls in a little bit. Oh right, and the tour through the dryer dinged up the buttons, even though I turned the garment inside out.
All in all, this jerkin was a jerk. It was jerkin me around! It looks OK though, I guess, and better under a blazer. You will have to take my word for it when I tell you that I look less dumpy in it in real life than in the photo. It was an interesting project in terms of construction and stitch pattern and I’m sure I will wear it, but sadly, in the end I don’t think it was worth all the frustration.
Stay tuned for the update on the really, truly, almost finished January 1962 project and the embroidered chicken squirrel (yes) that will be my February 1962 experimentcatastrophe vegetable bag.


 I hang out a lot in the “All Things Vintage” forum on
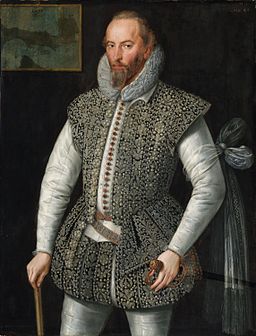
 Adding to the frustration: as always, no matter how small the needles or how thin the wool, I could not knit tightly enough to get the minuscule gauge, which itself was only given as a “life-size” photograph in the pattern. Of course, I am also larger than the 34-35 inch bust given in the pattern, but how much larger the garment, calibrated for how much larger the gauge? Right, lots of calculations, estimations, measurements upon measurements, and just plain guesswork. Plus the thing pulled together either more or less, horizontally or vertically, as it got larger — my gauge swatch (a pocket lining) was utterly useless. I had to start three times.