December 1965: Workbag & Pretty Idea

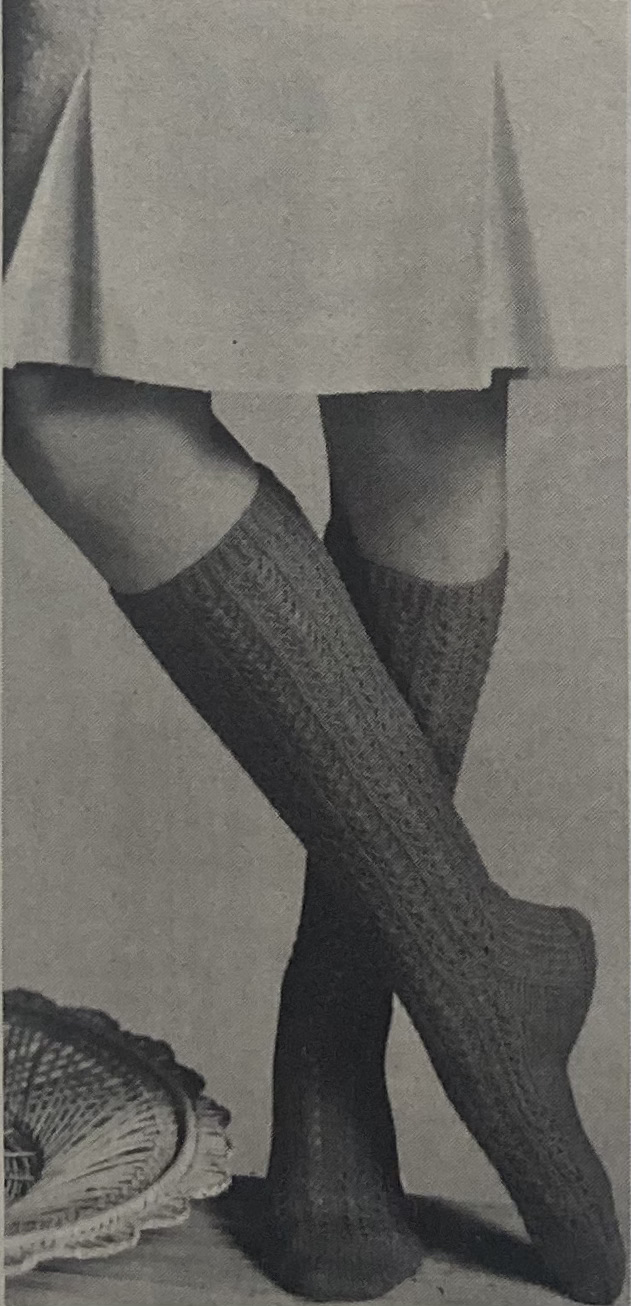
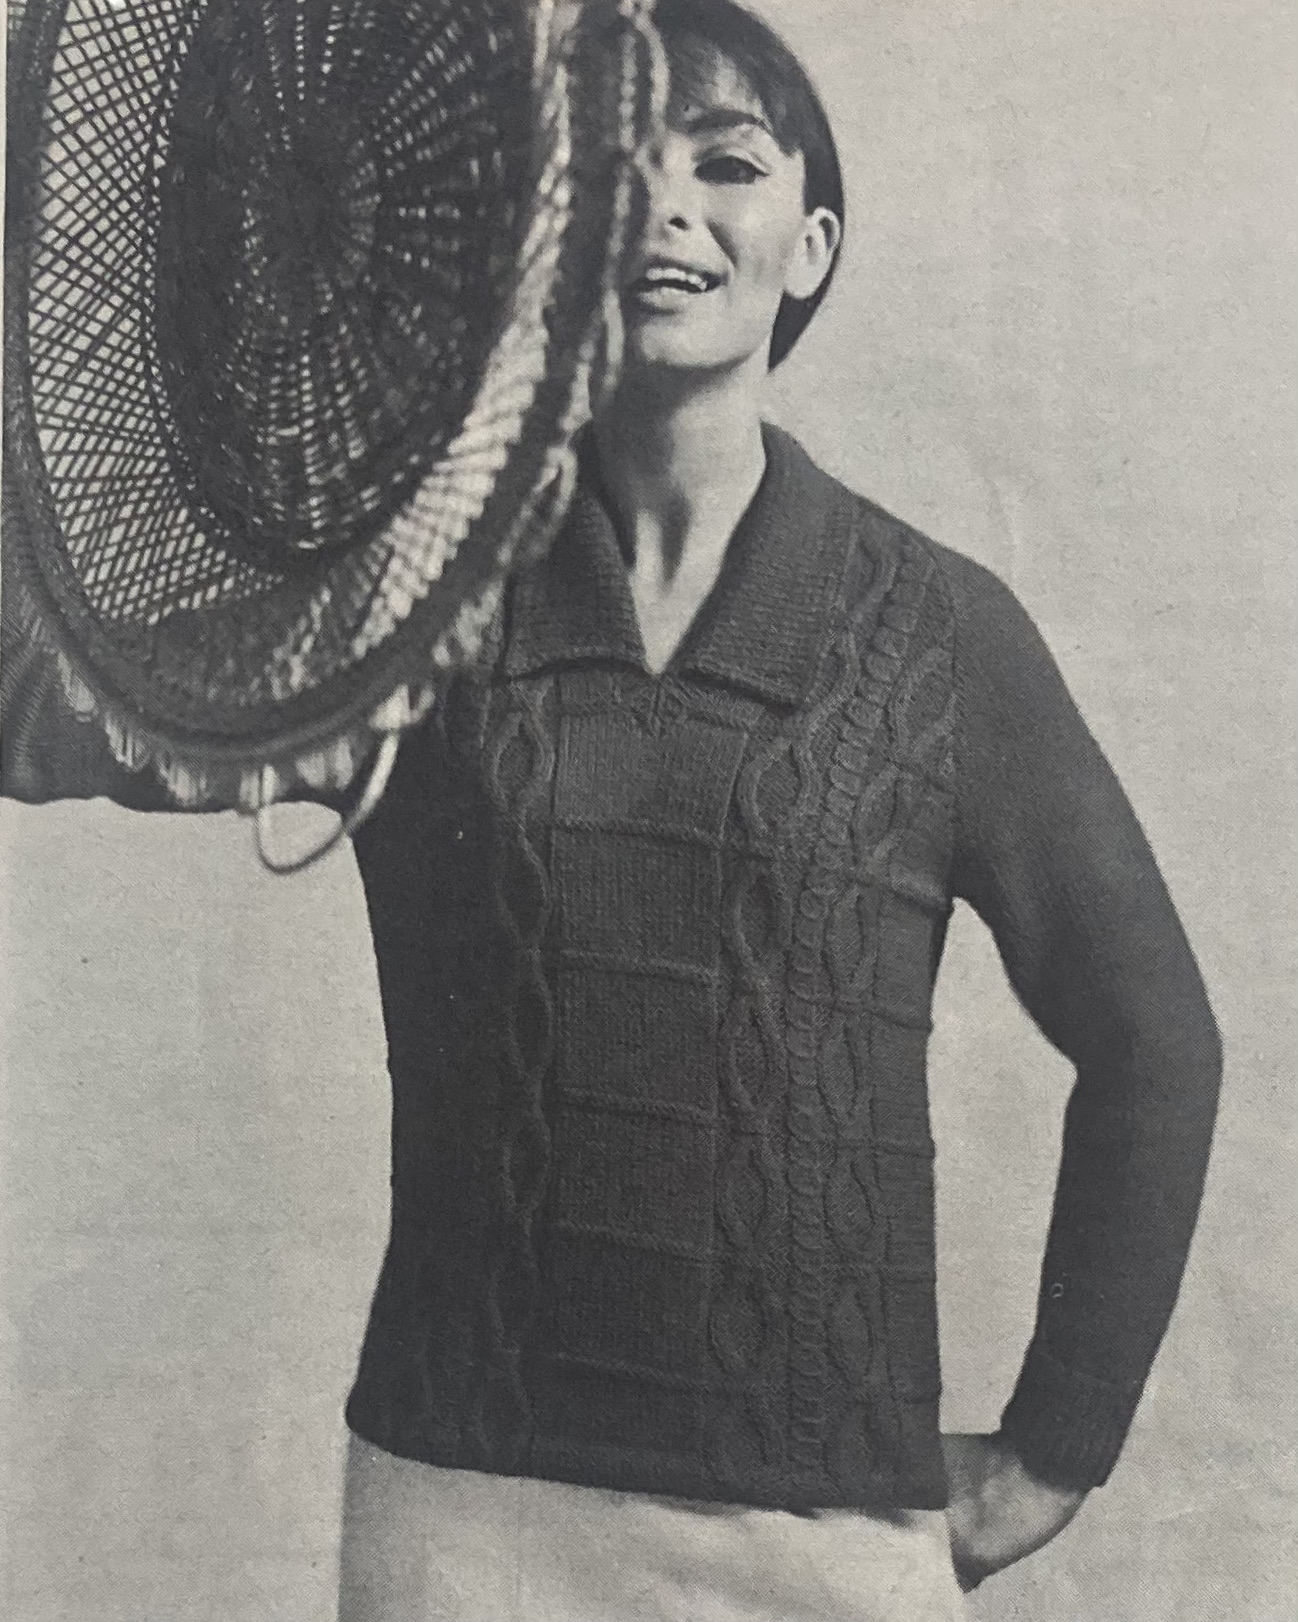
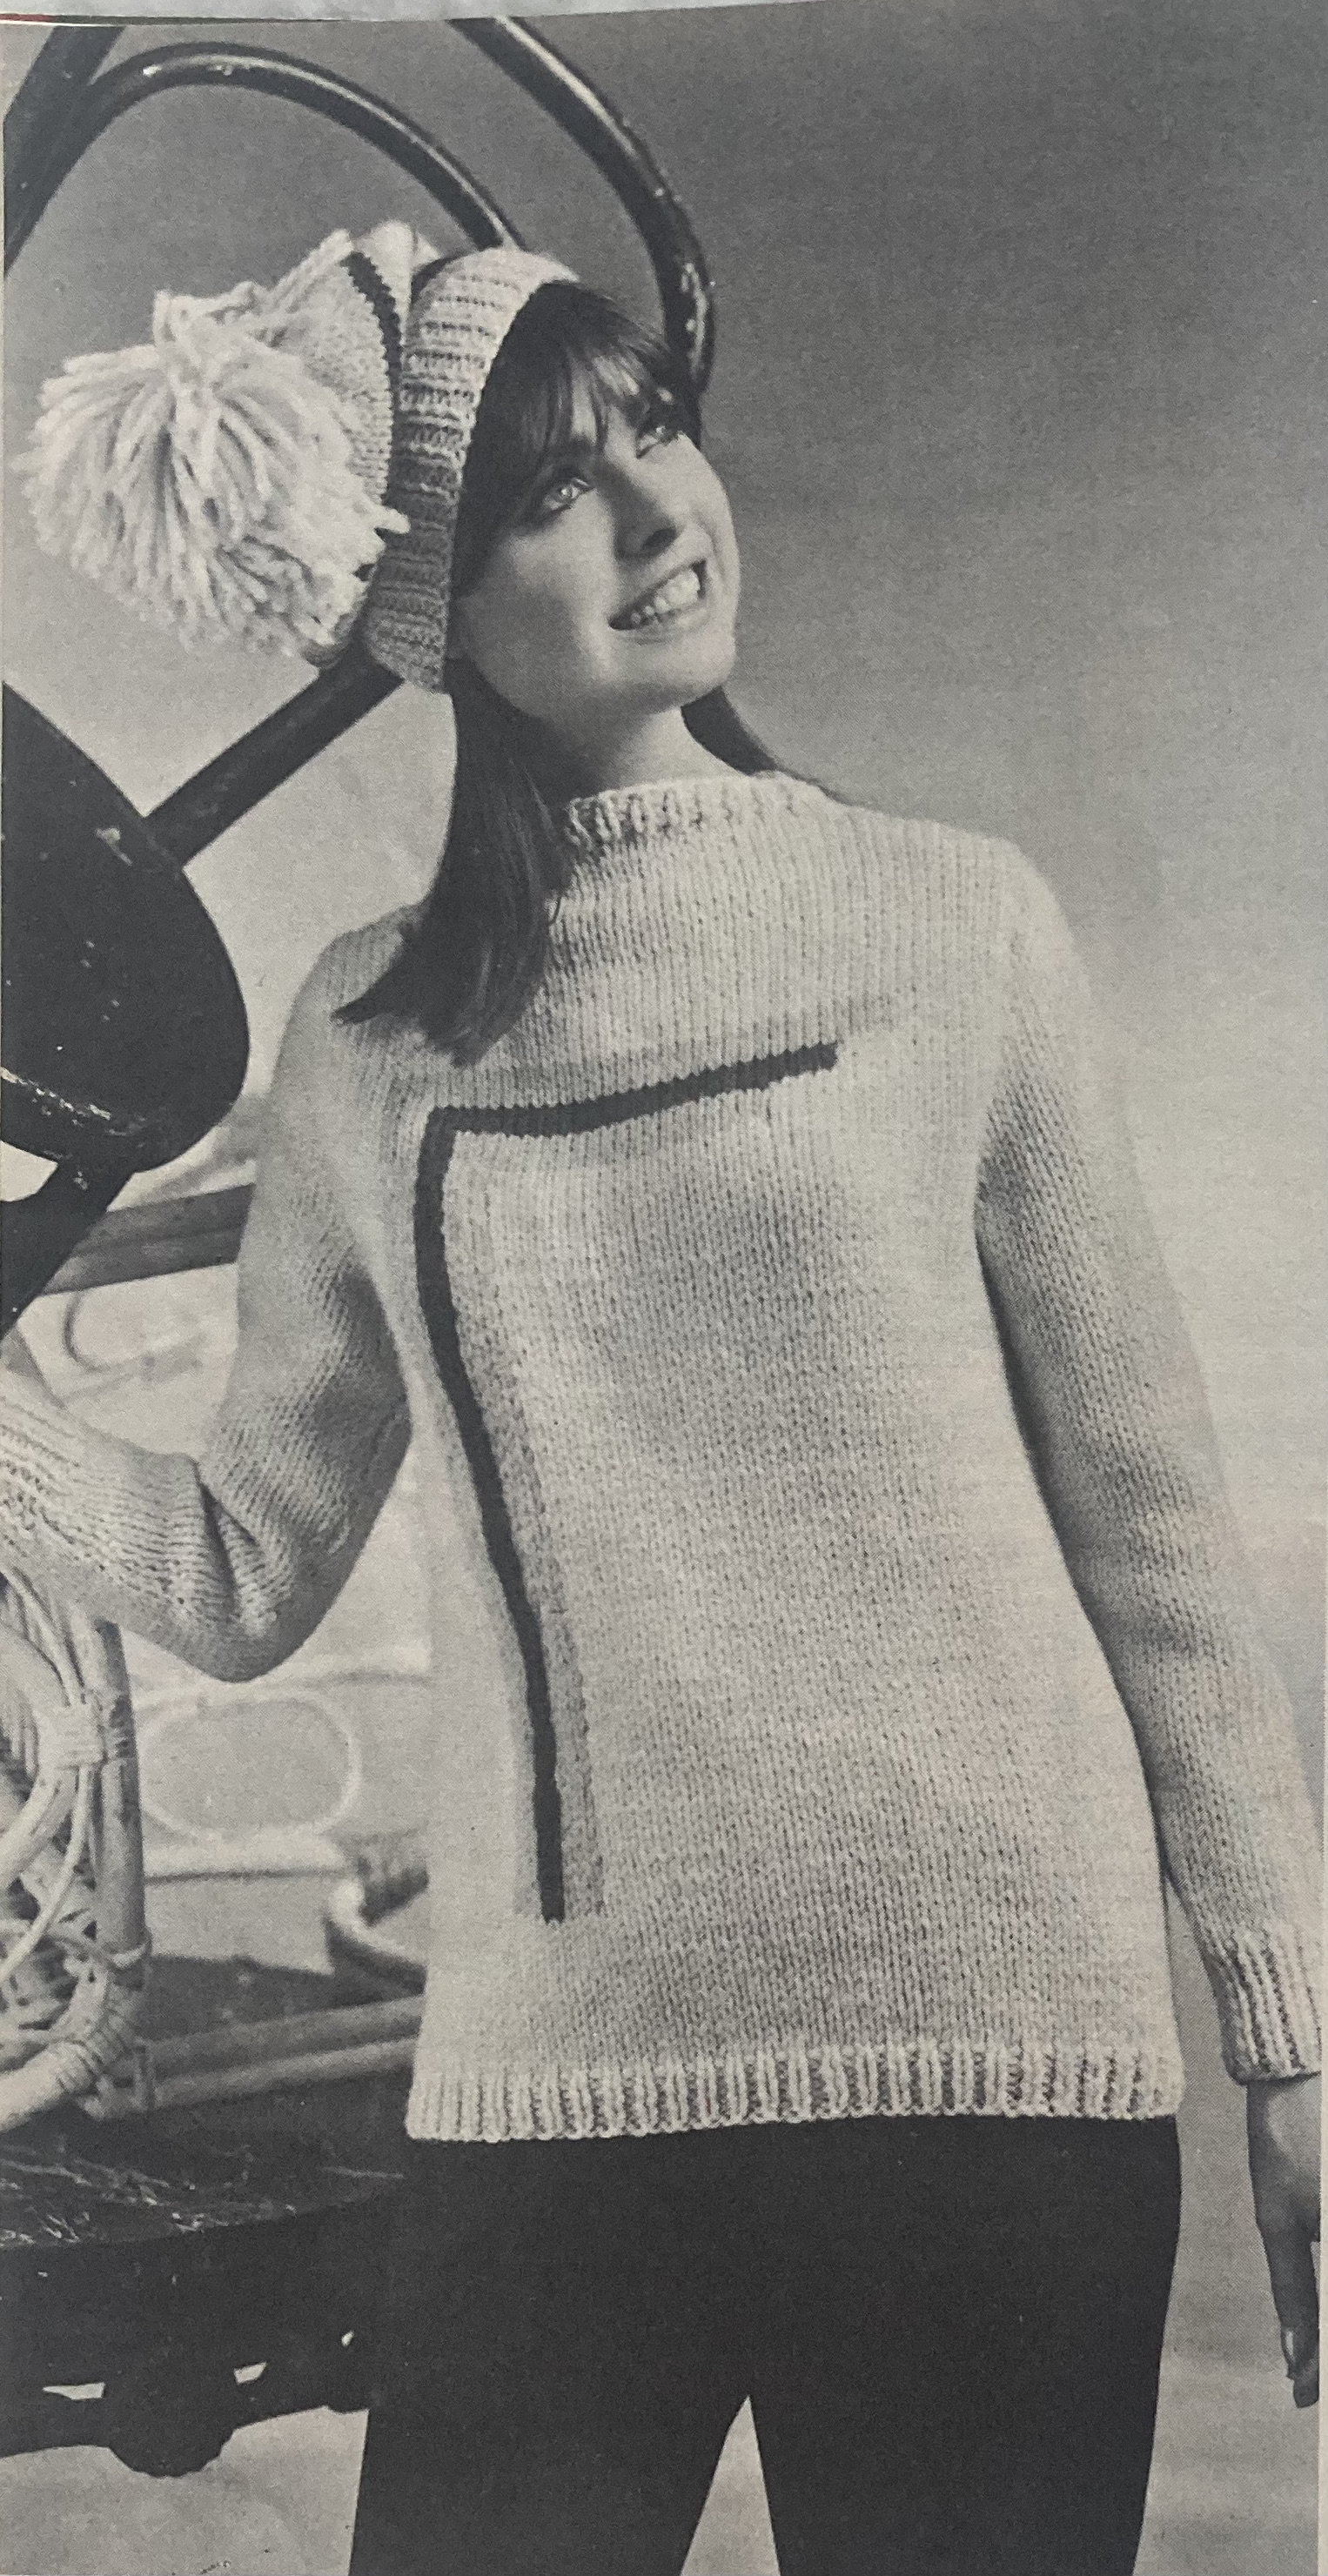
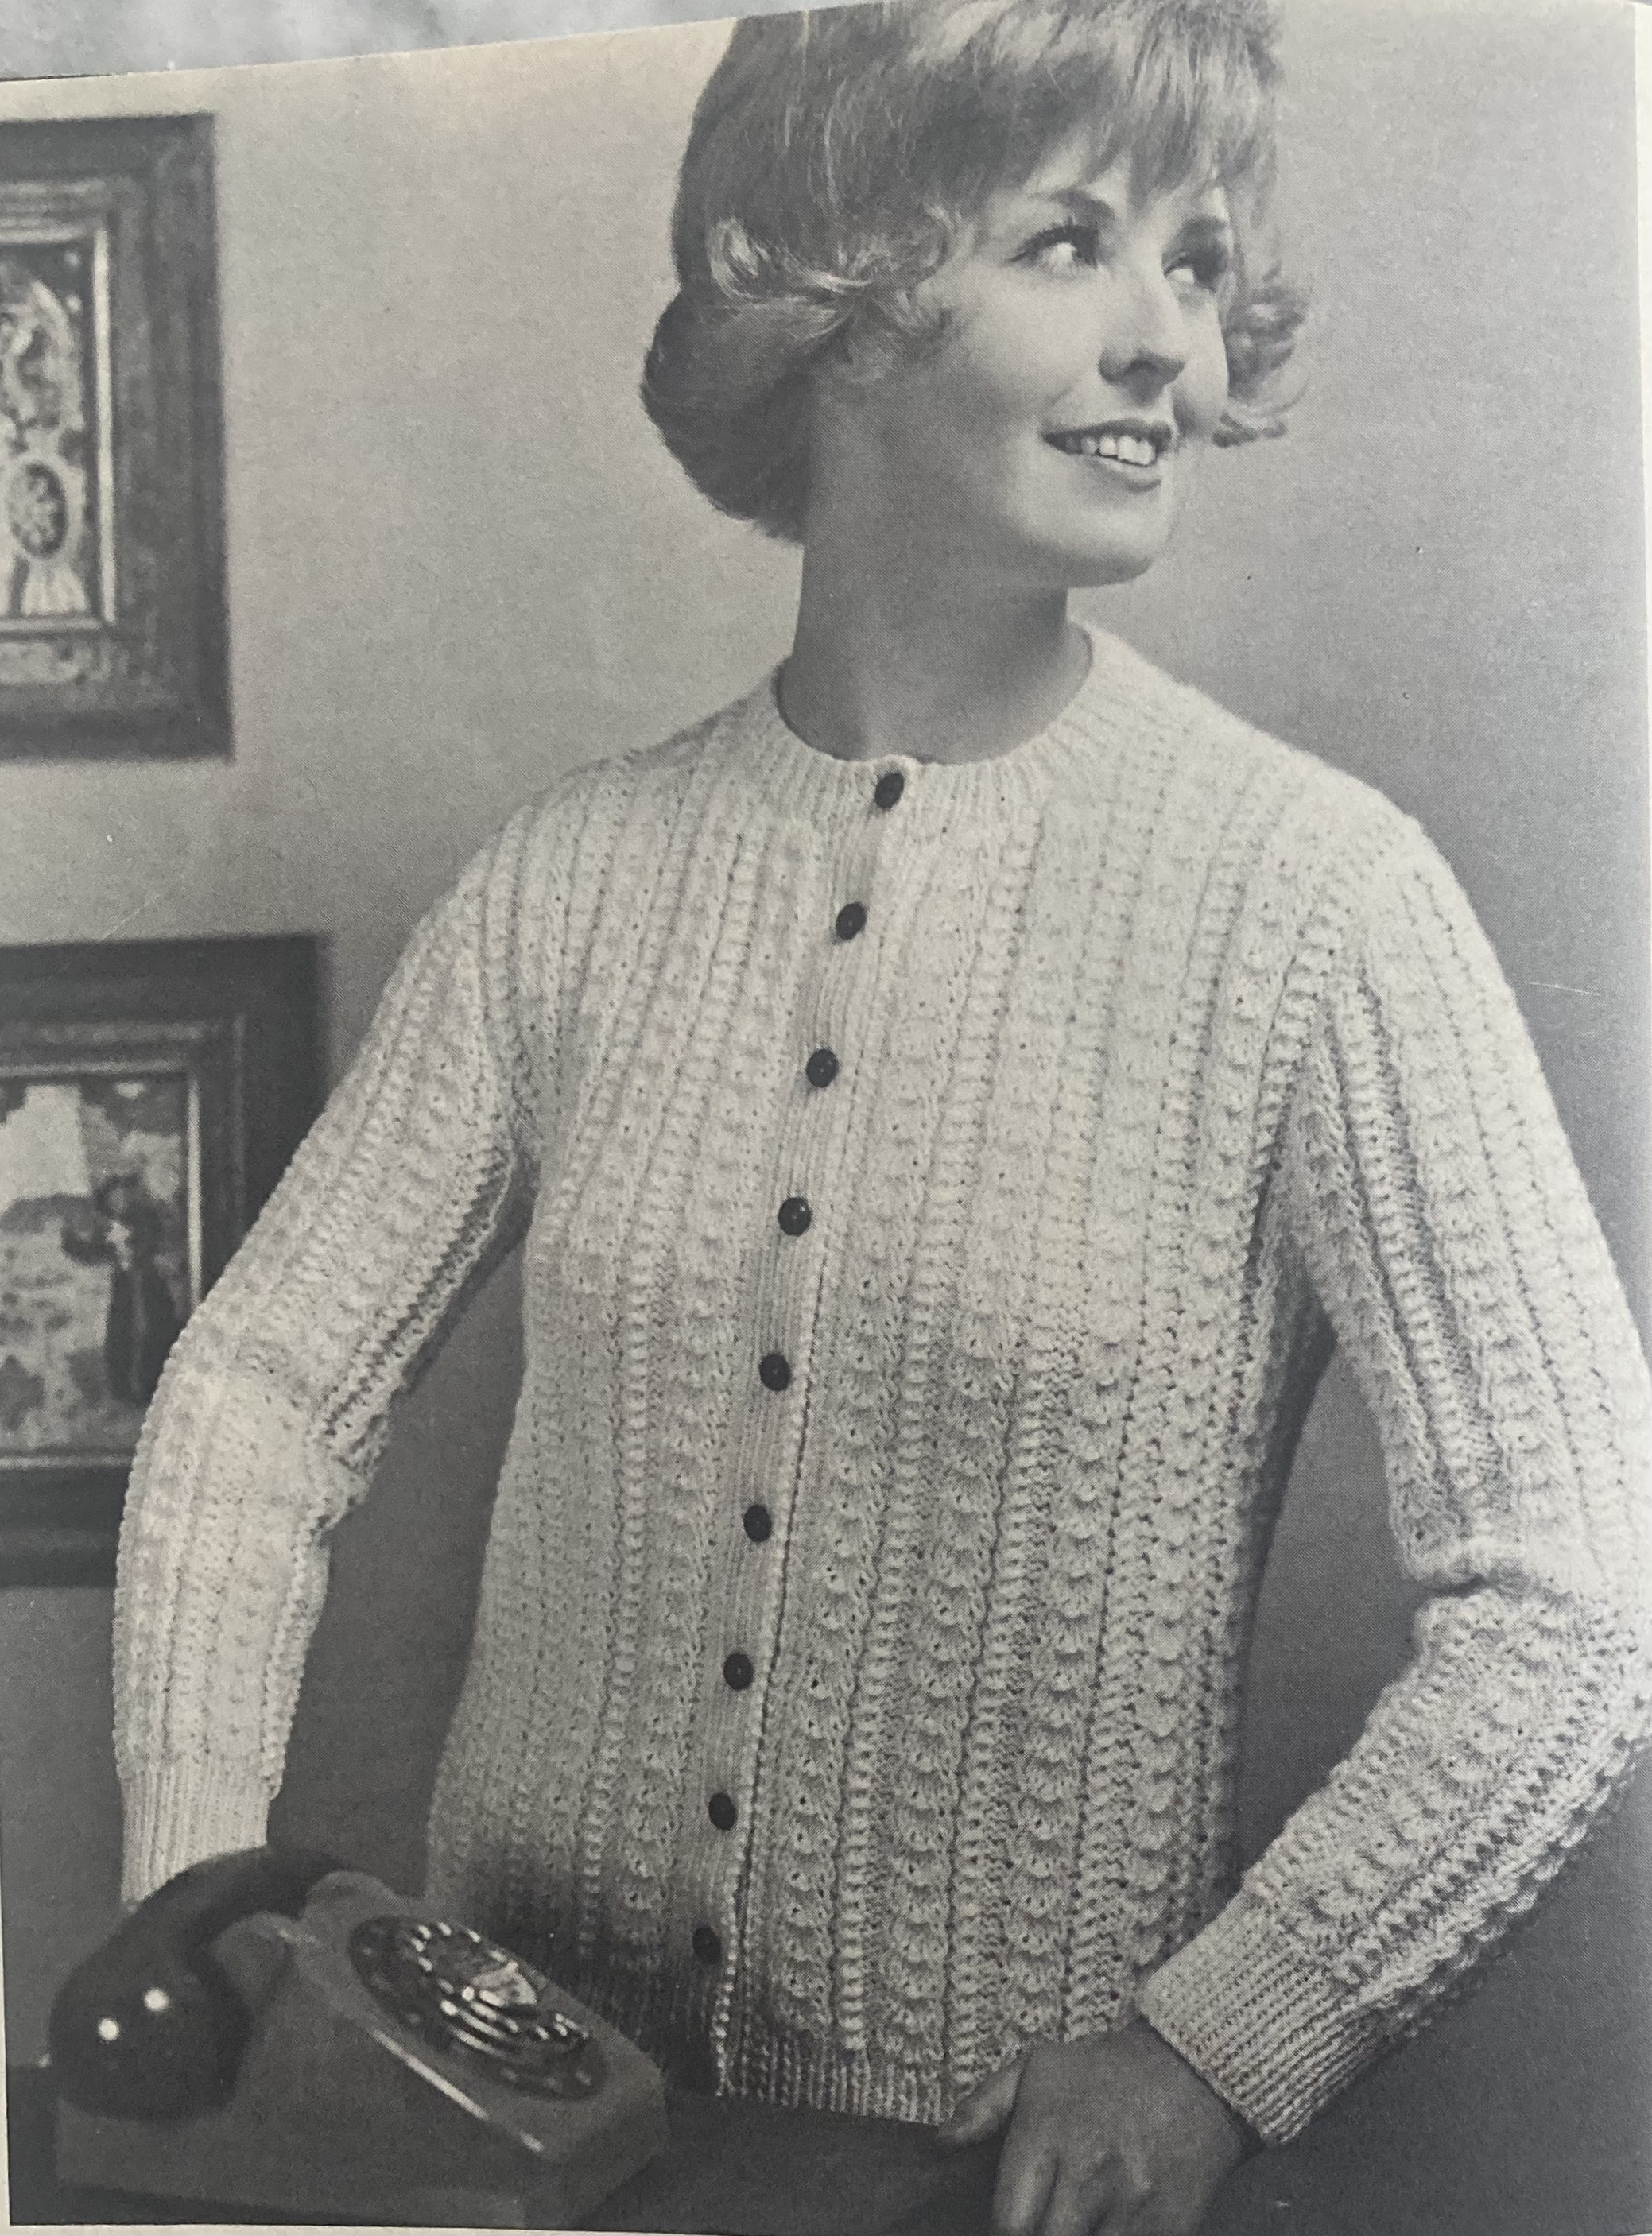
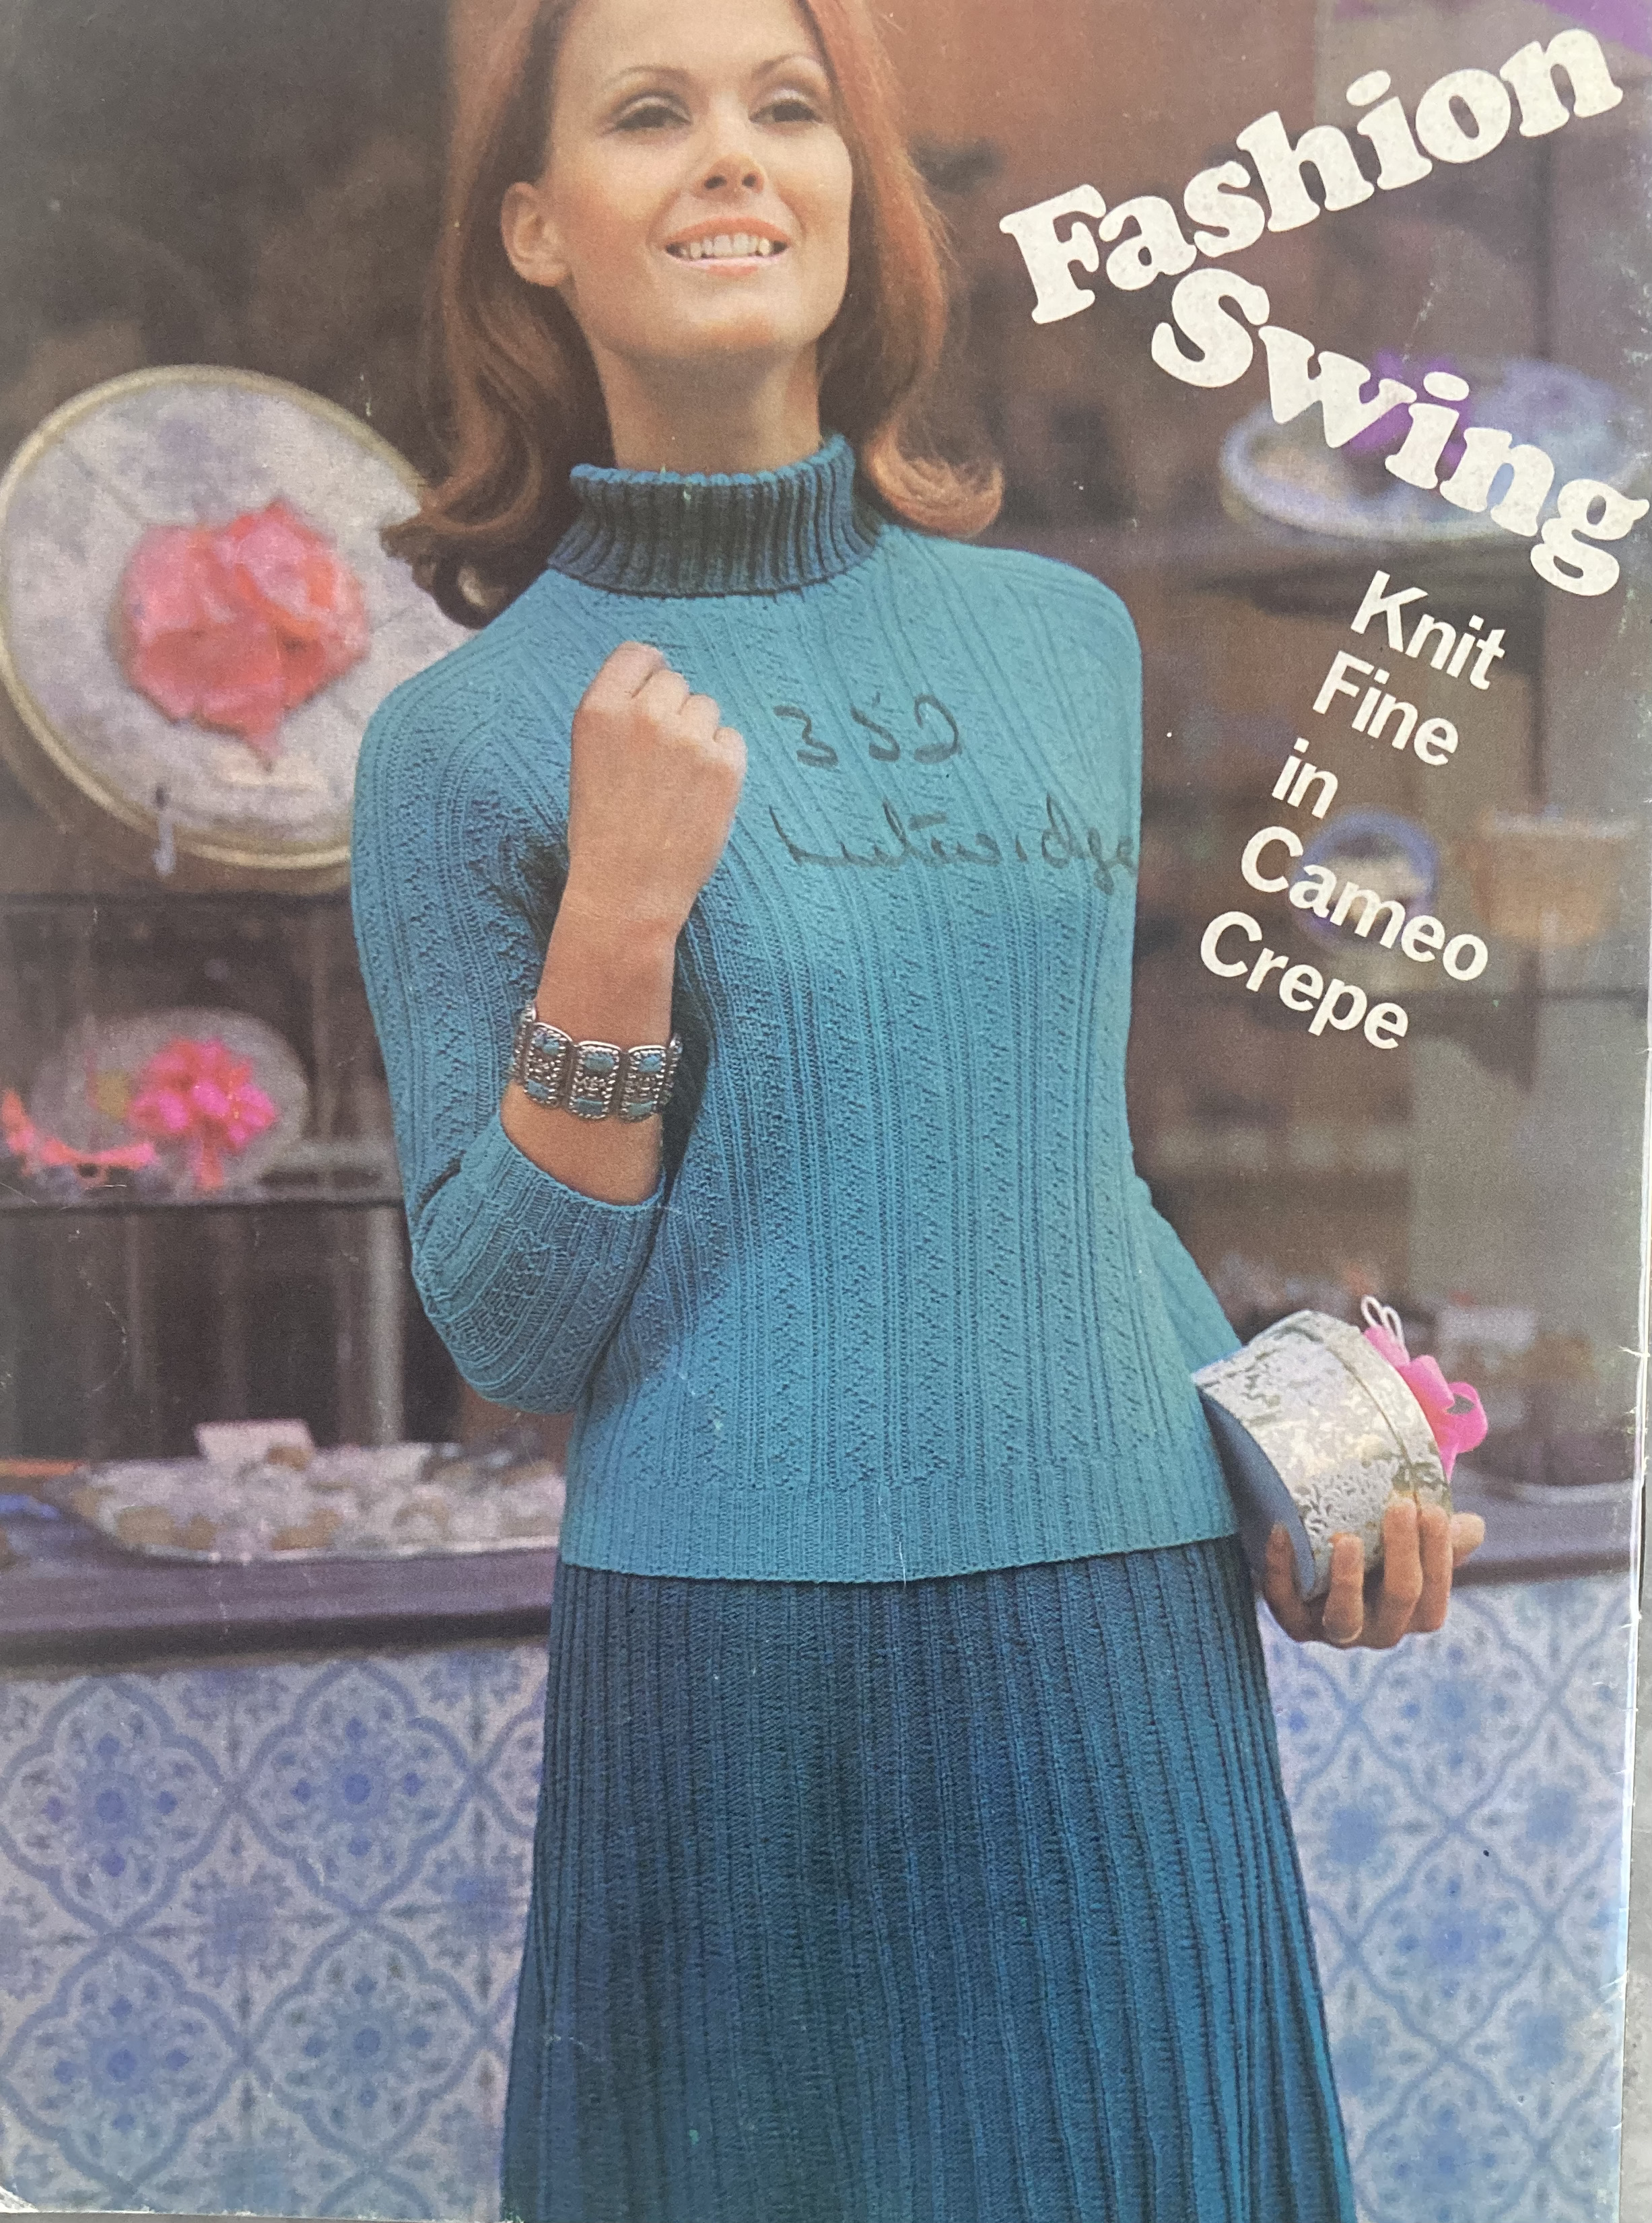
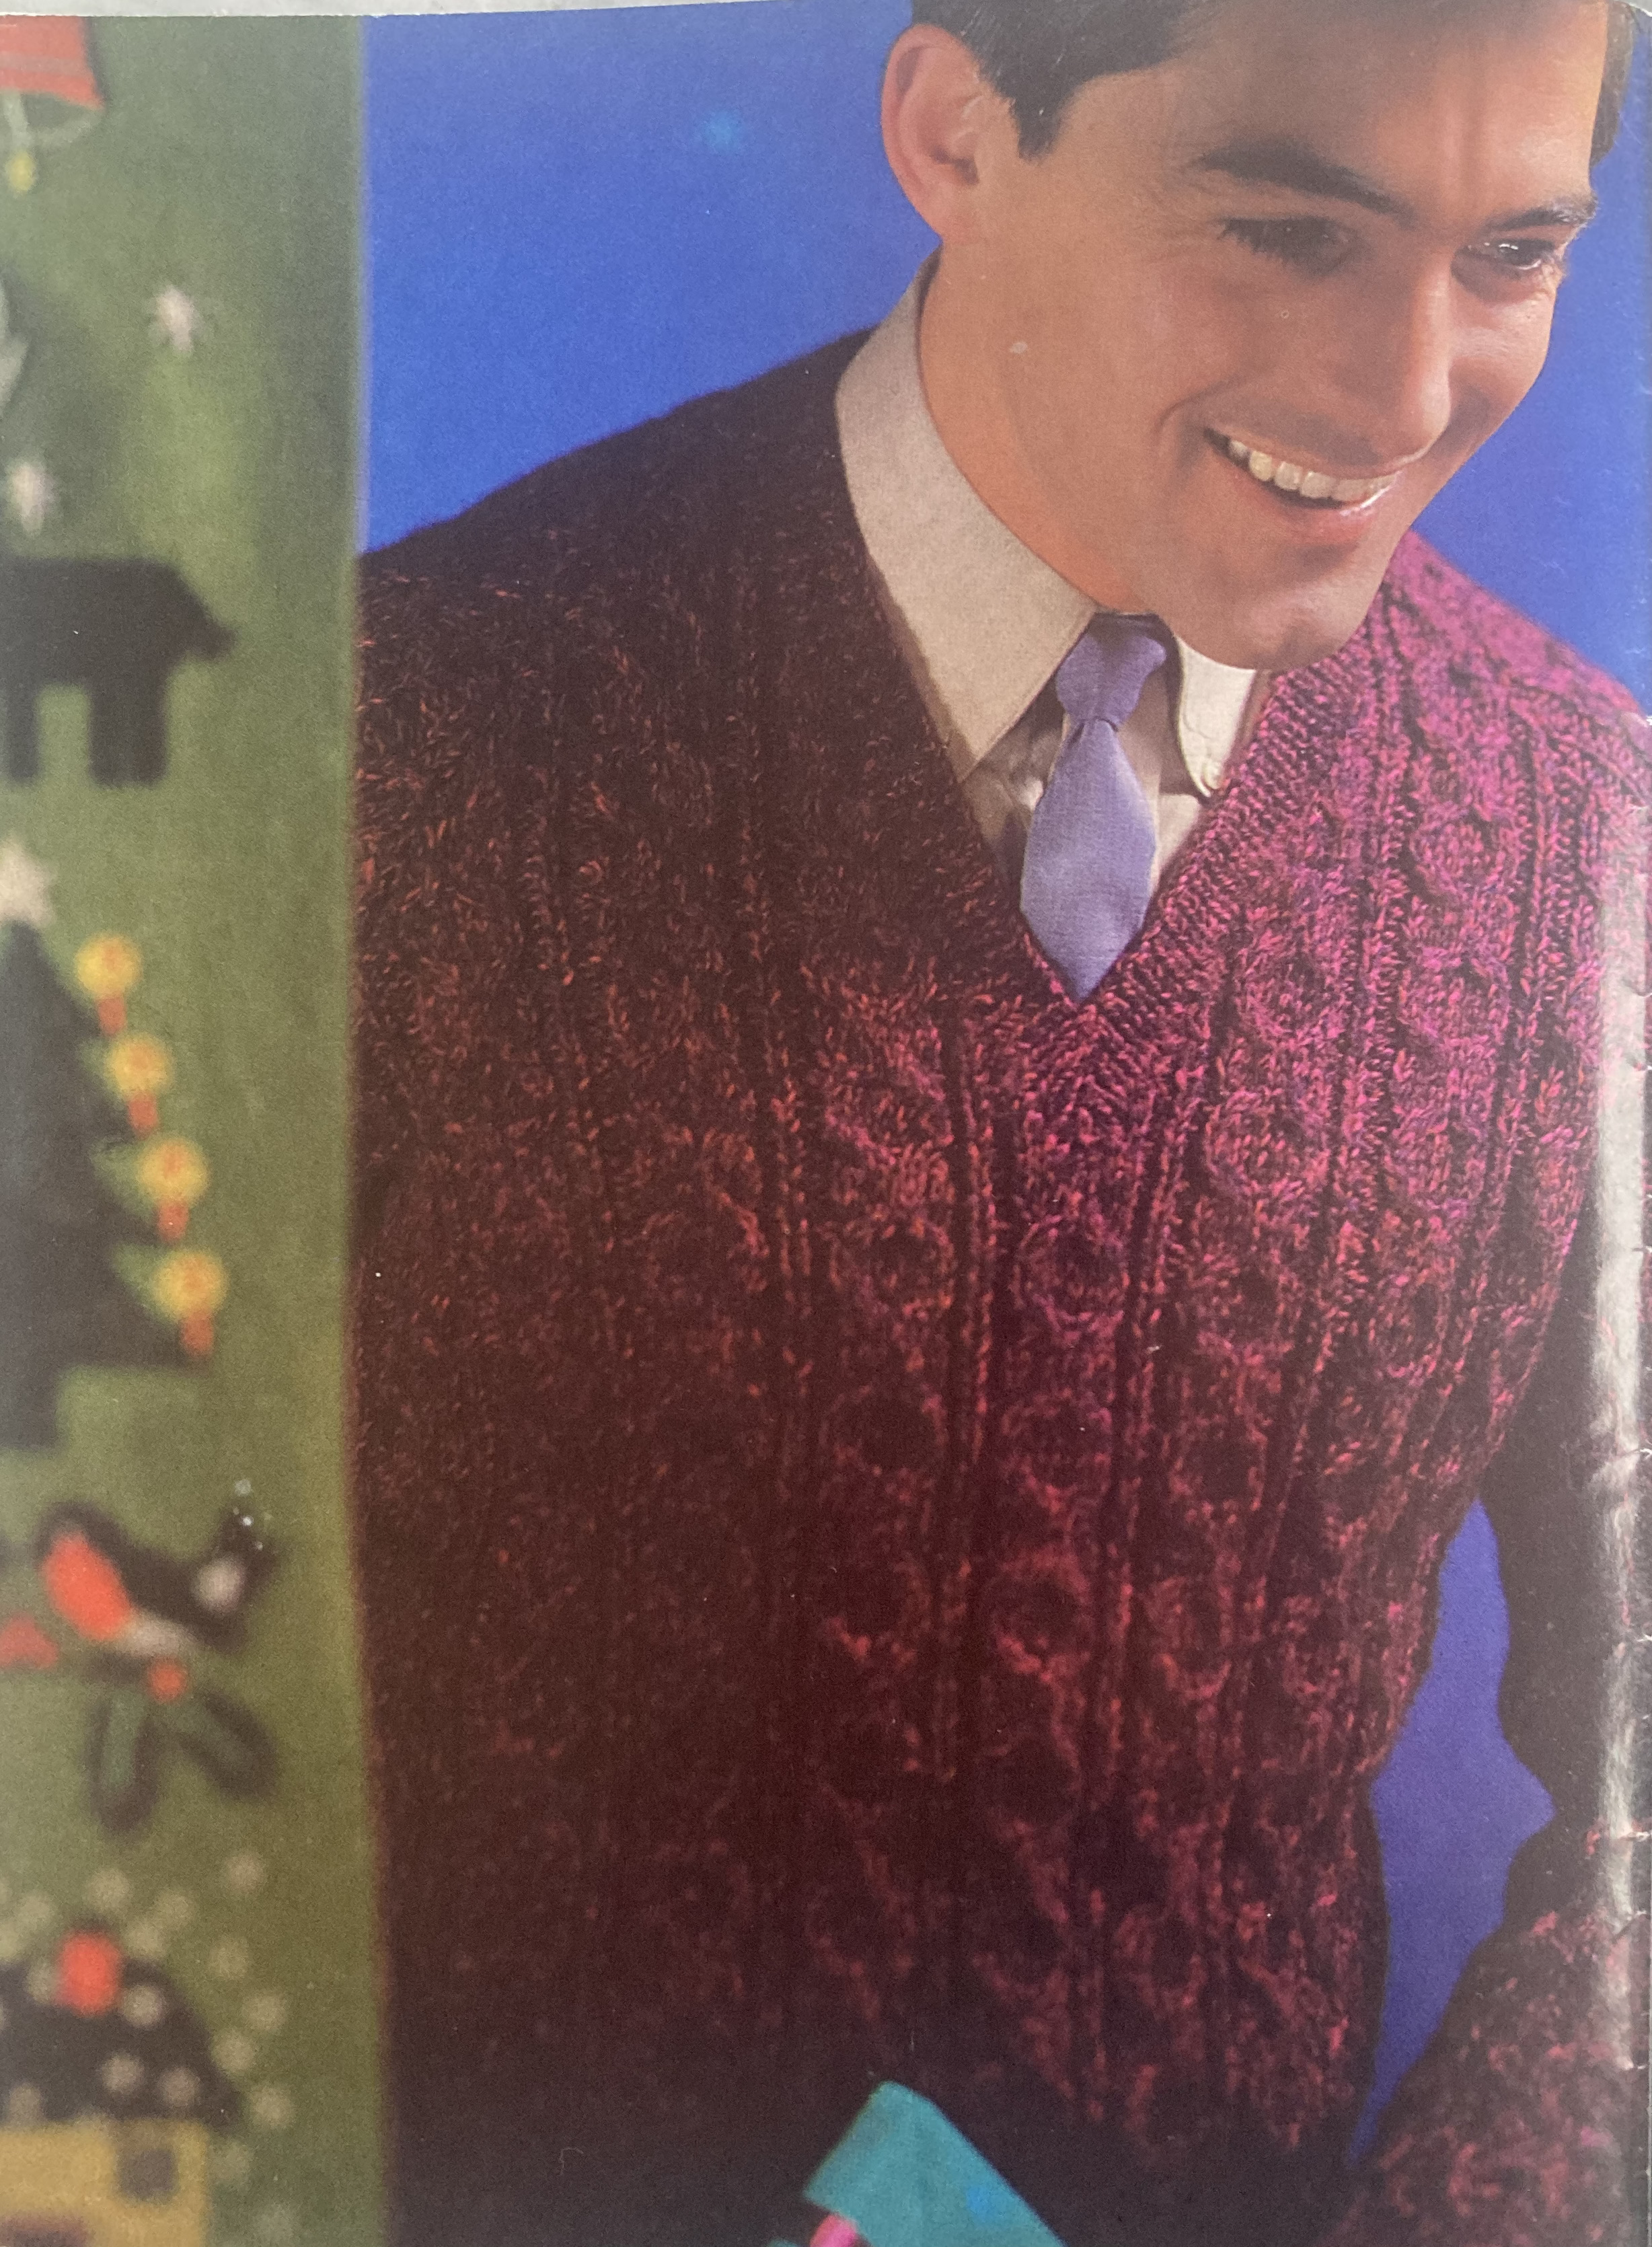
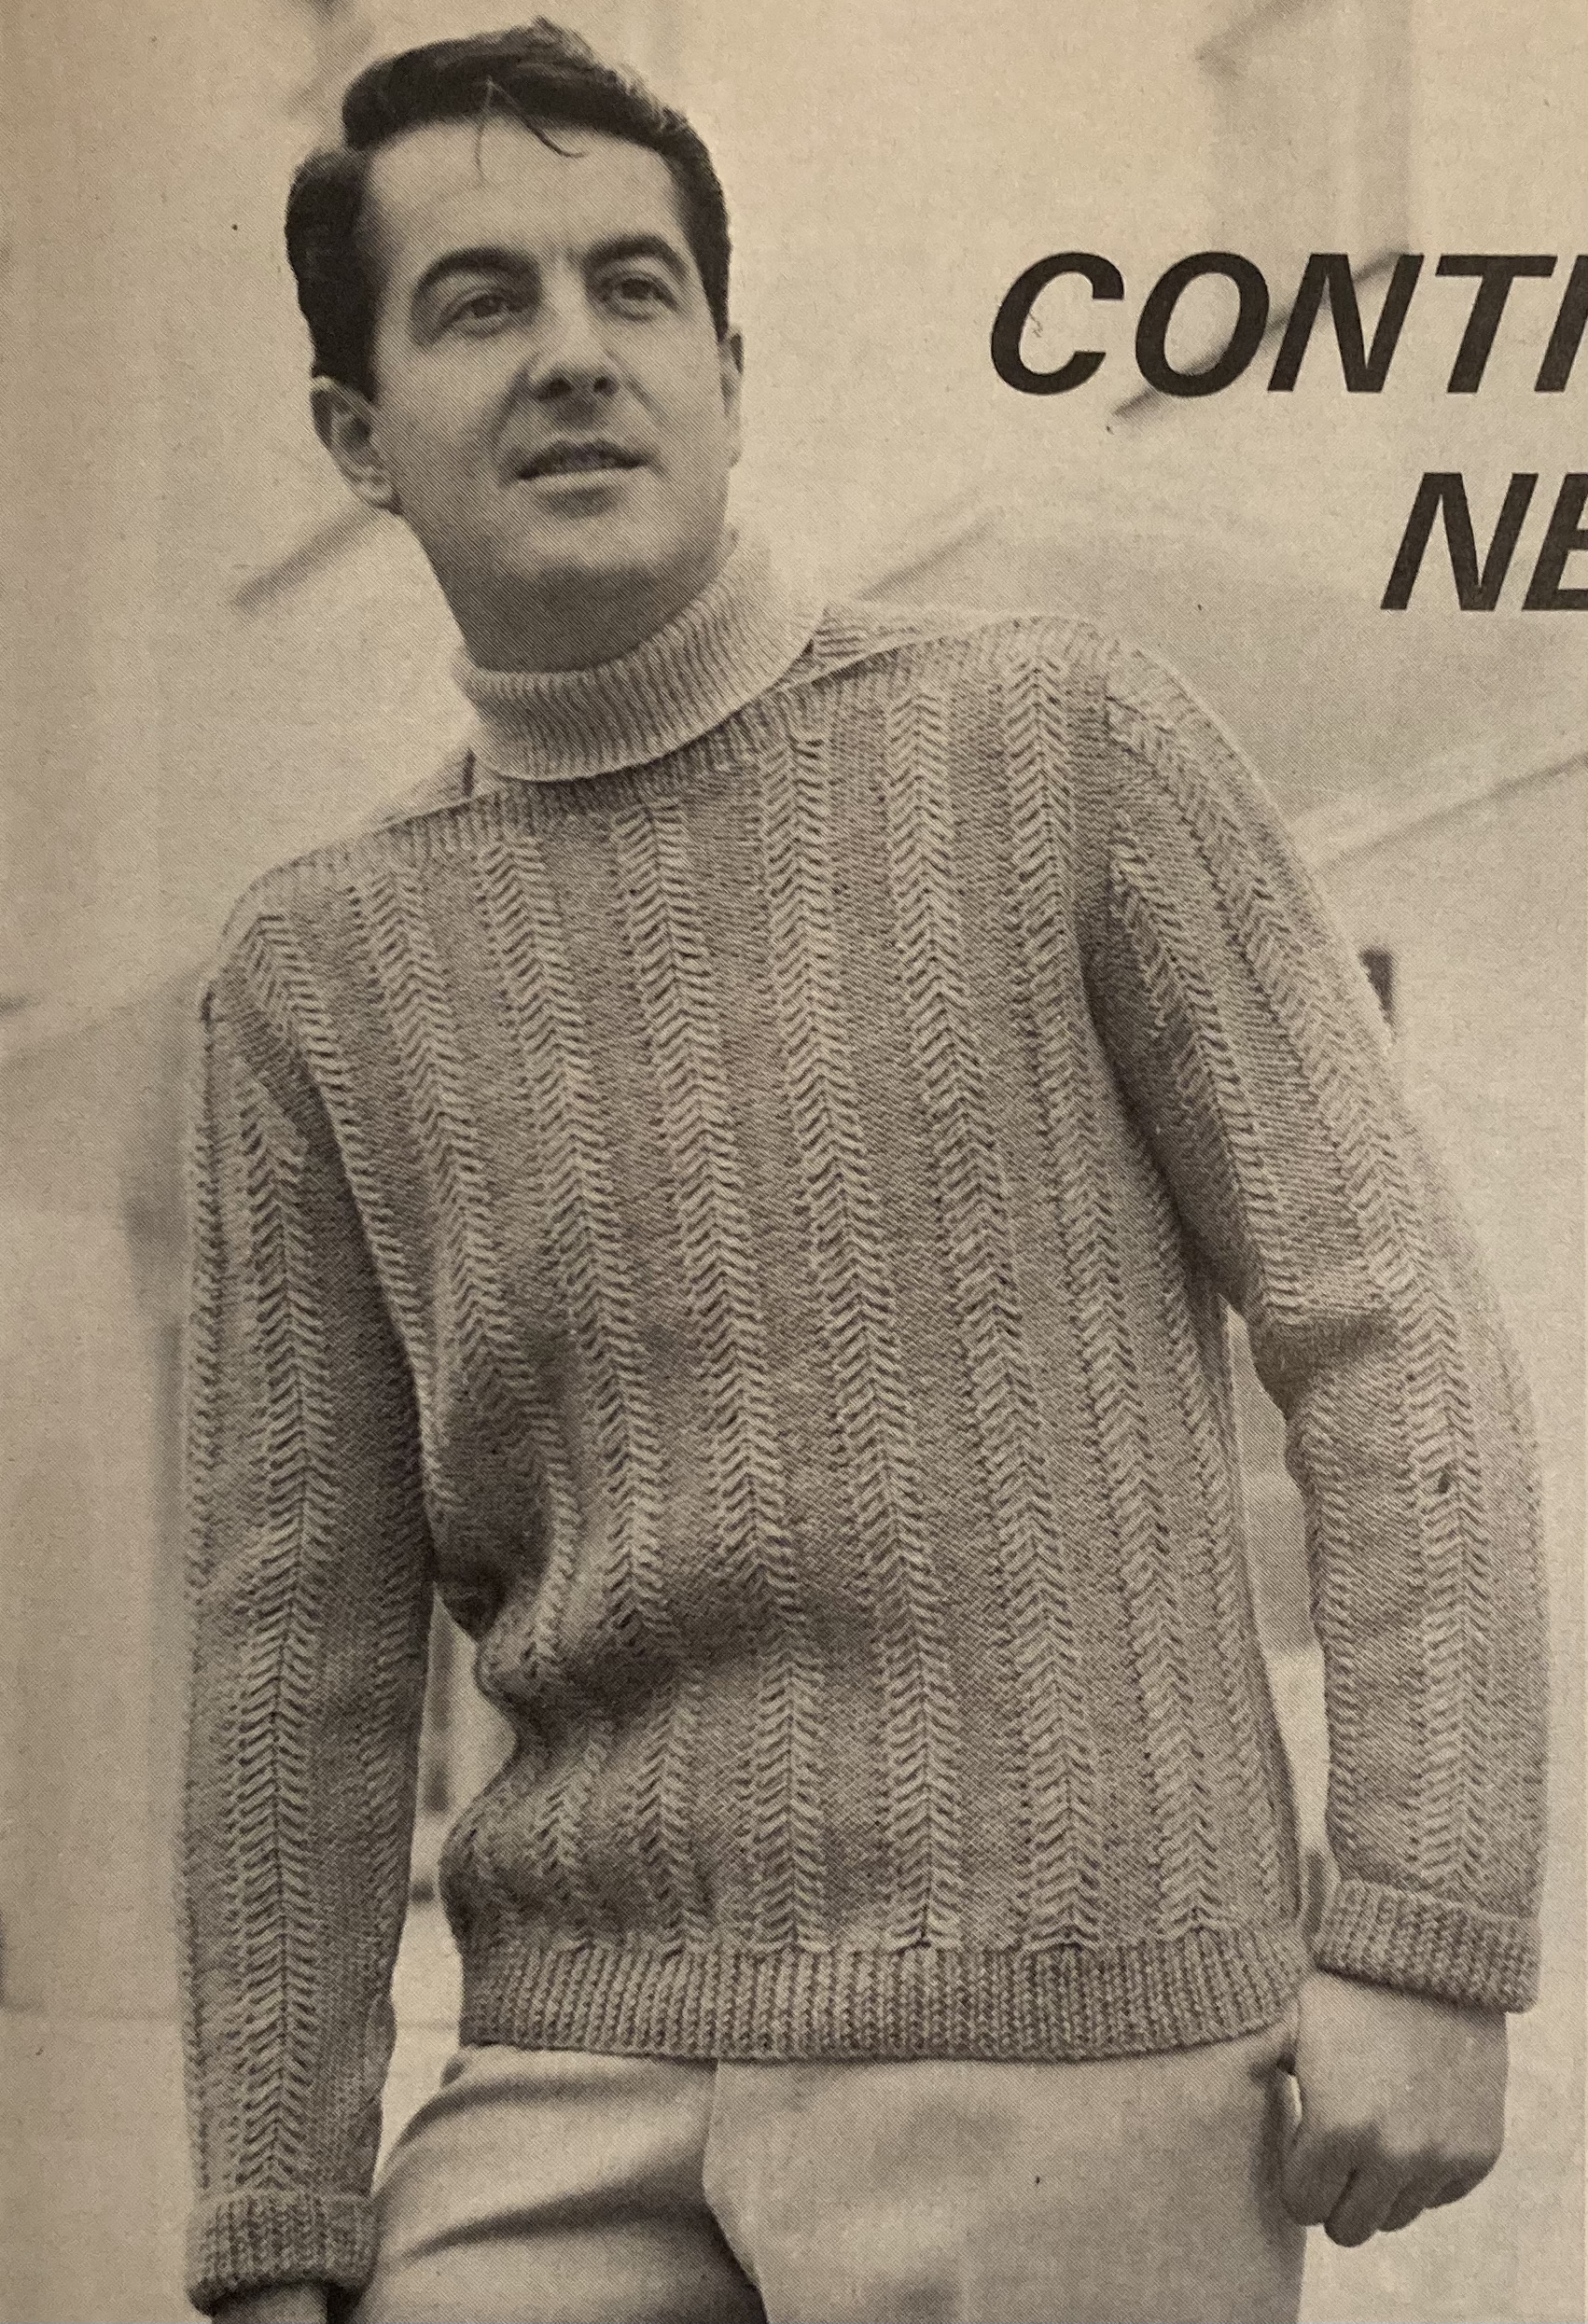
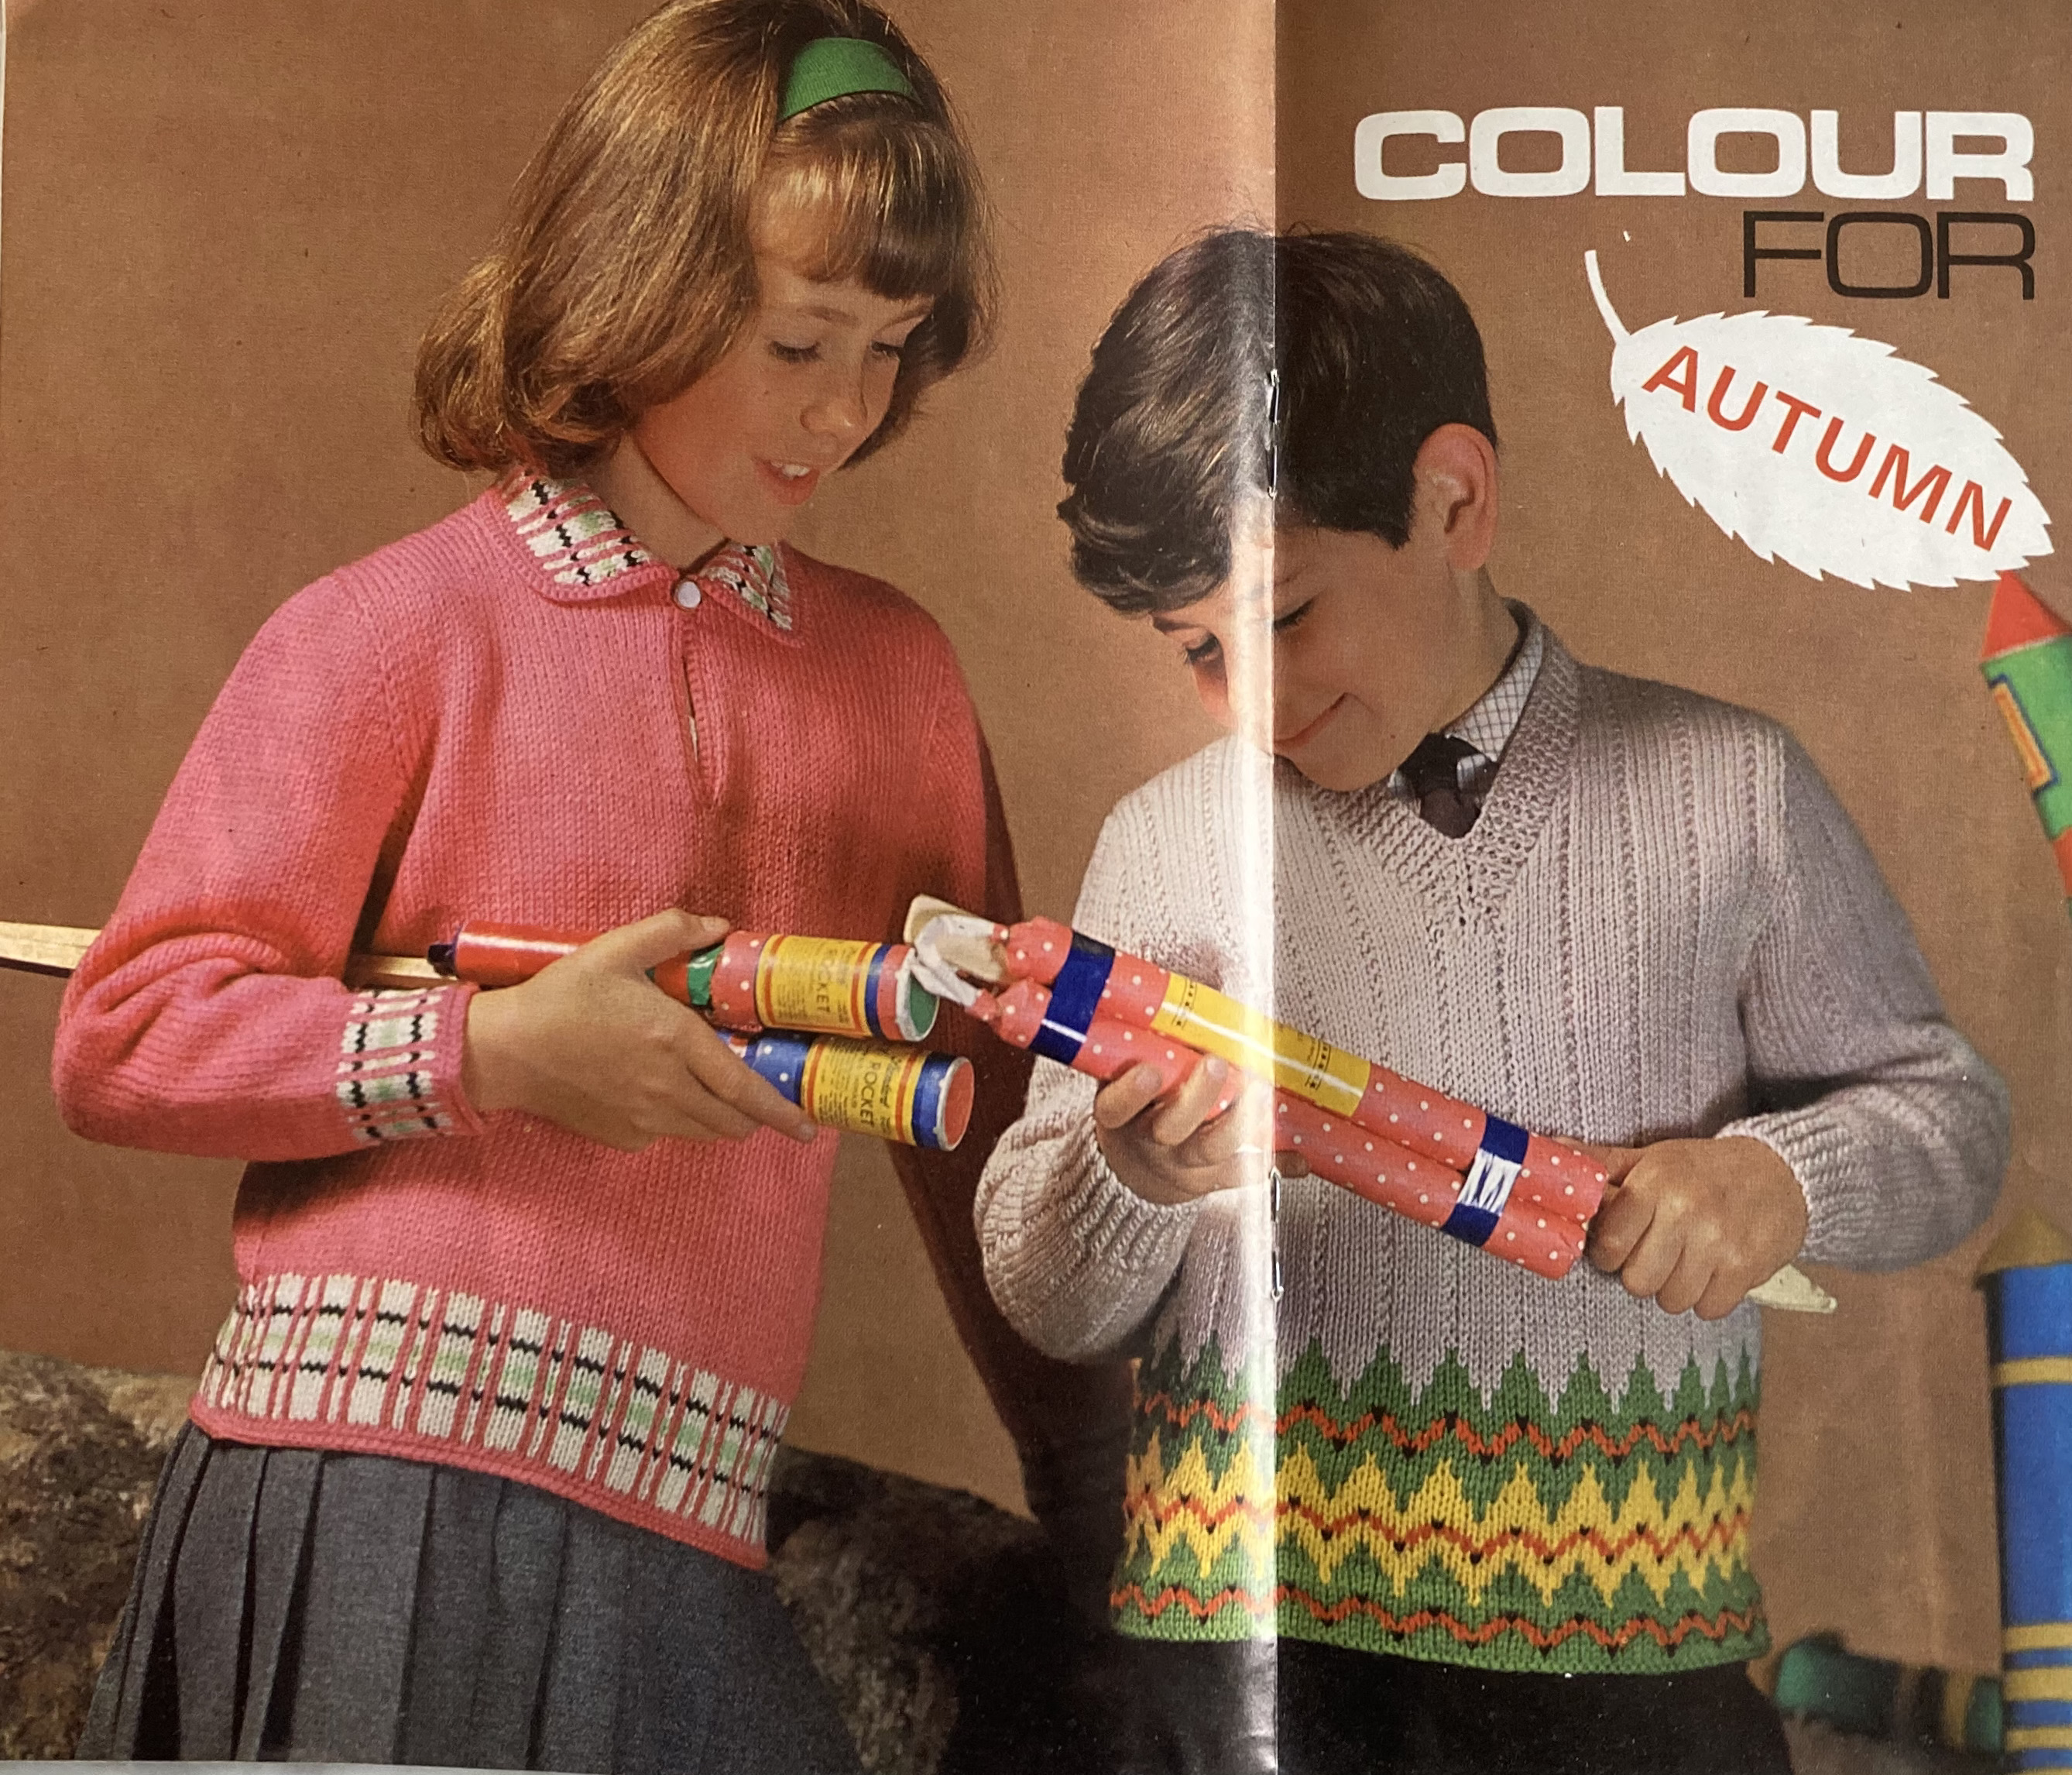
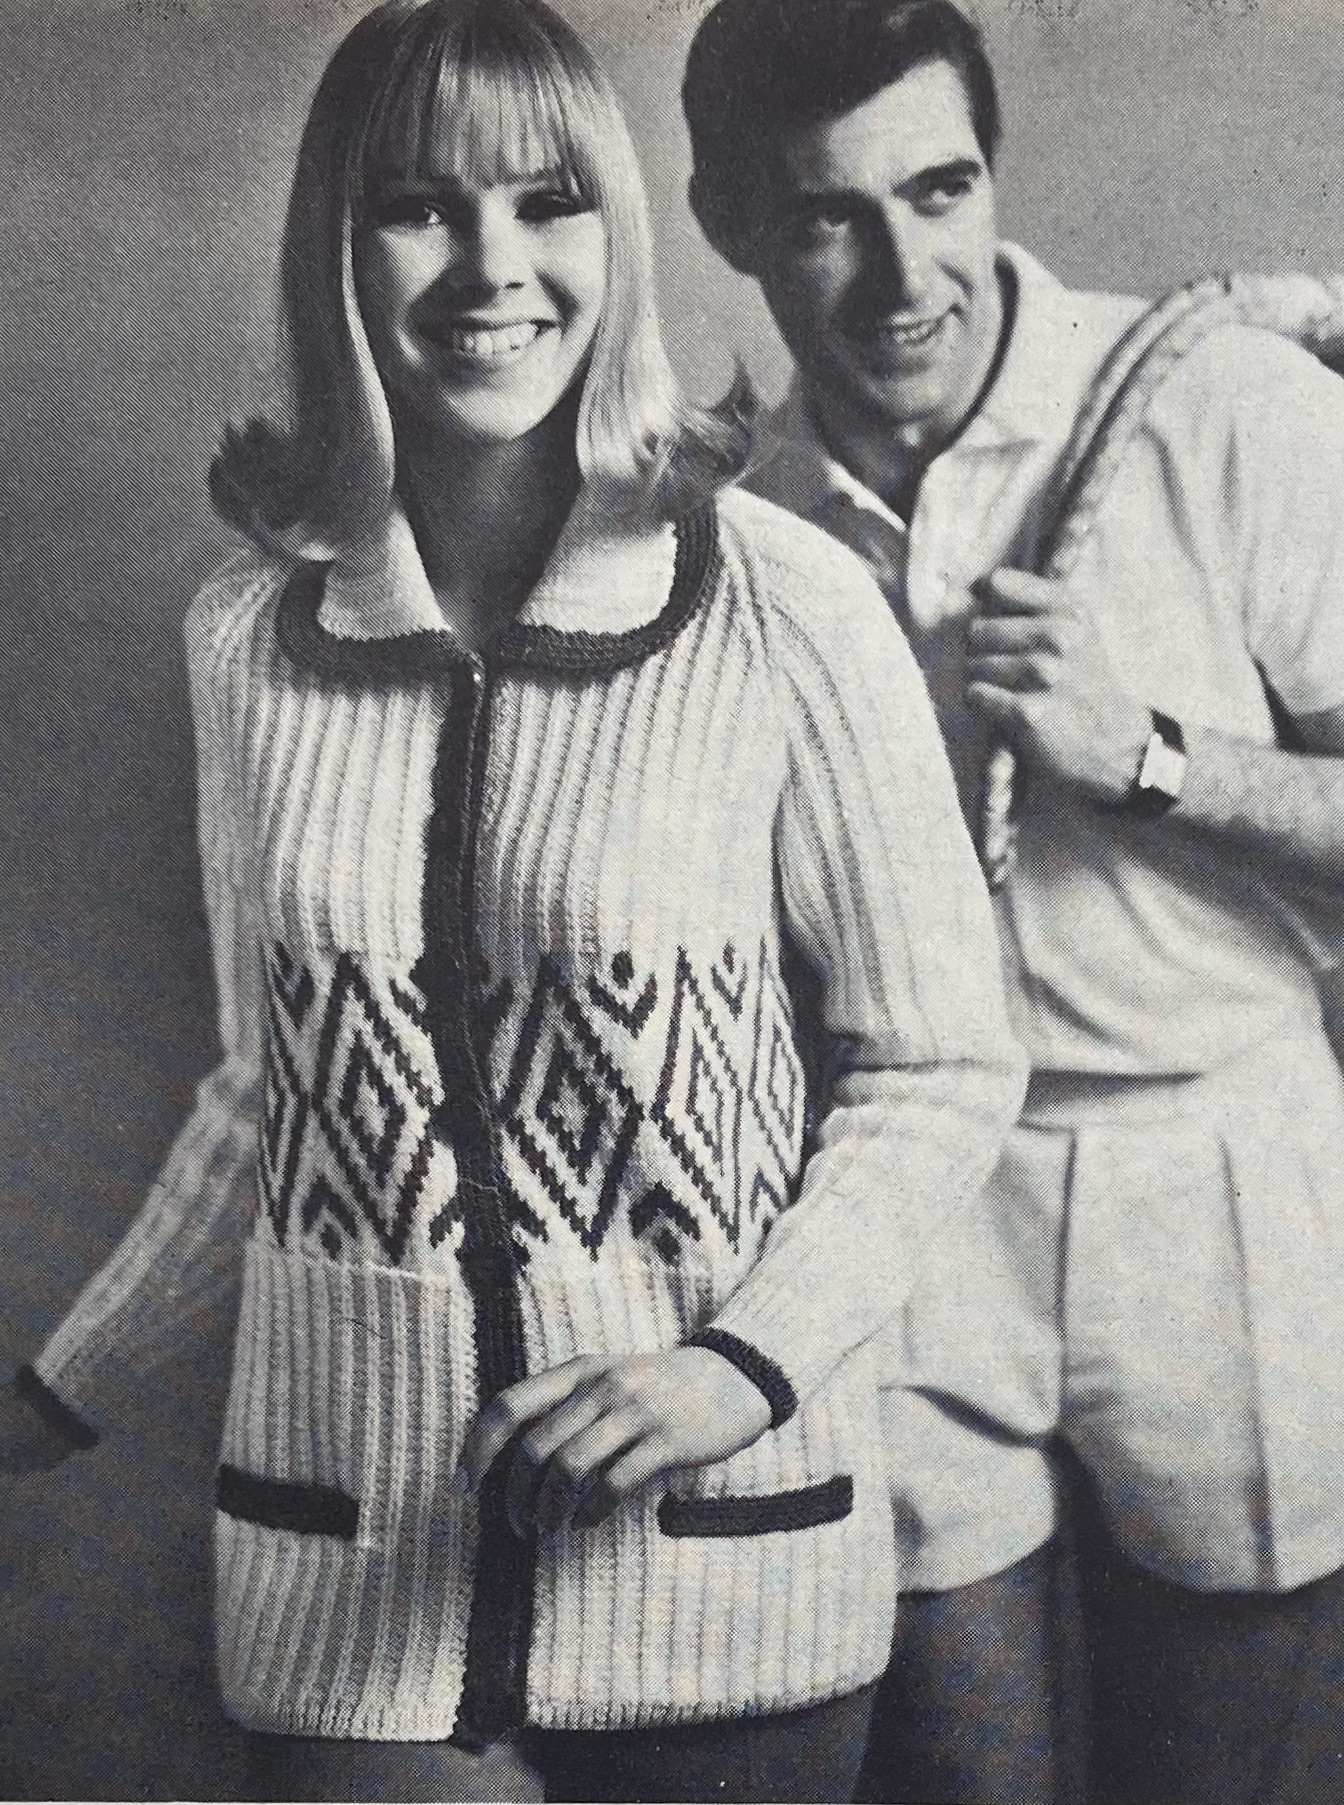
It was hard to choose a project from the December 1965 issue. There were lots of nice things in it — the red pullover on the cover, the men’s classic cable V-neck, the two-piece wool dress, the fun knee-high socks, the swingy ribbed skirt — but I was not feeling any of it. I have so many large, unfinished projects and so much wool in stash (of which none would be suitable and/or enough for any of the nice garments in the issue.) Also, I have way too many finished knitted projects! My closet is past full. I need to start knitting exclusively for other people.

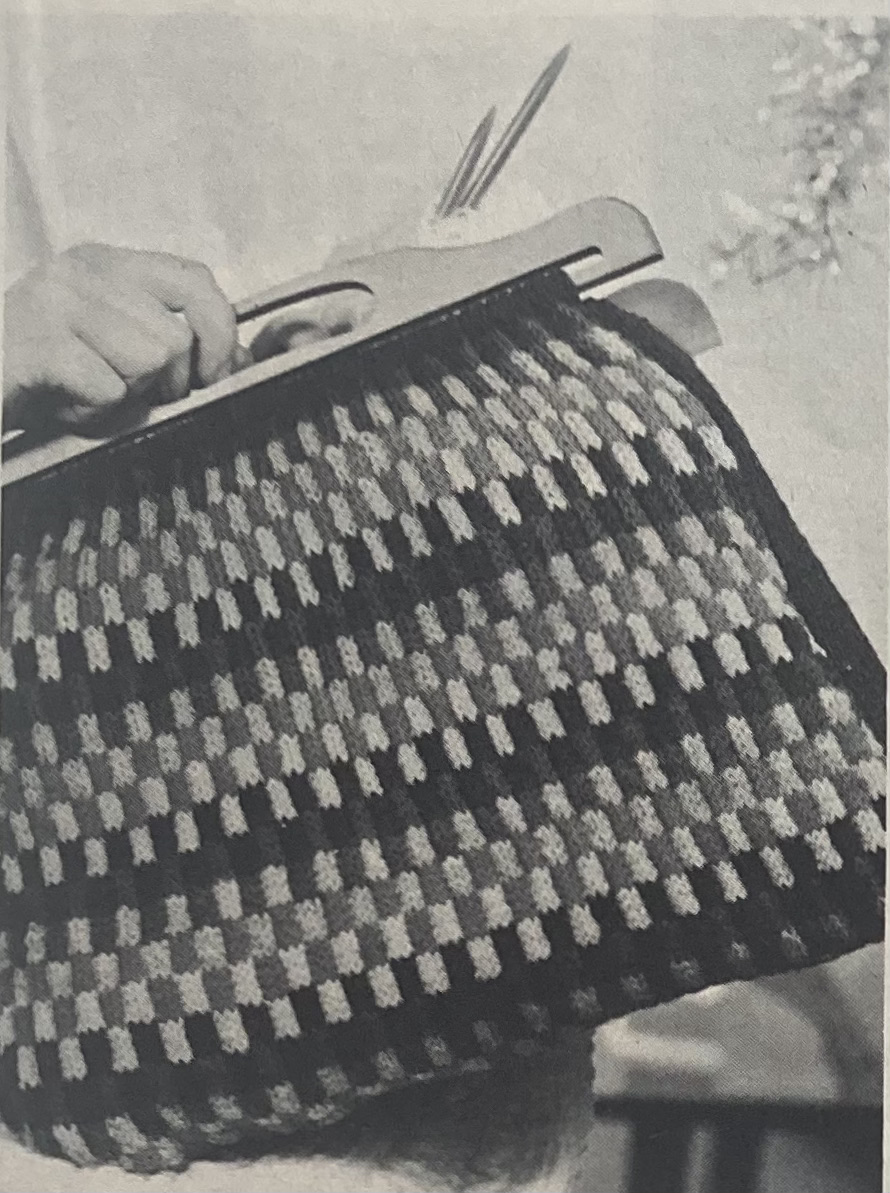
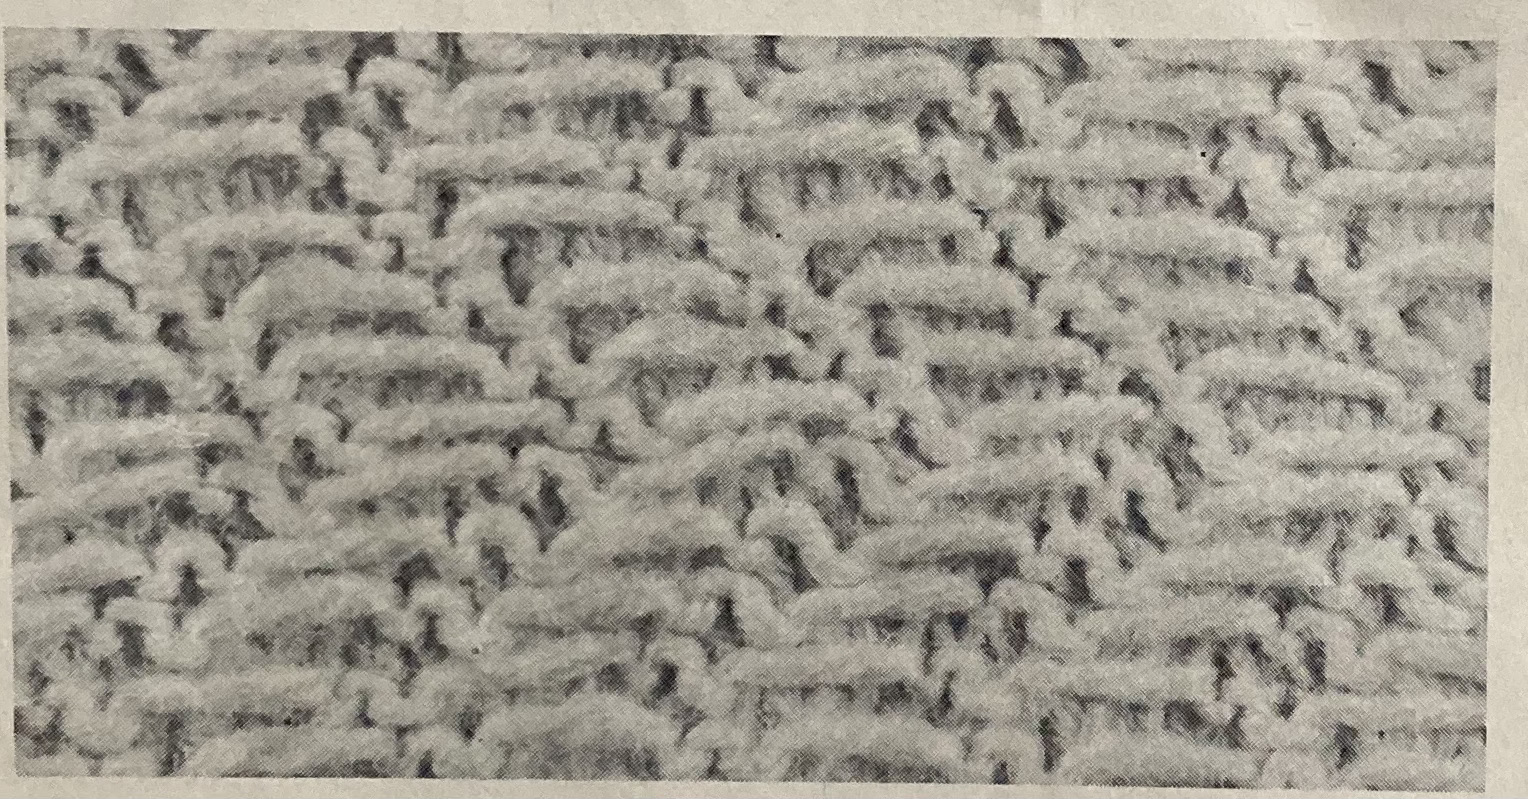
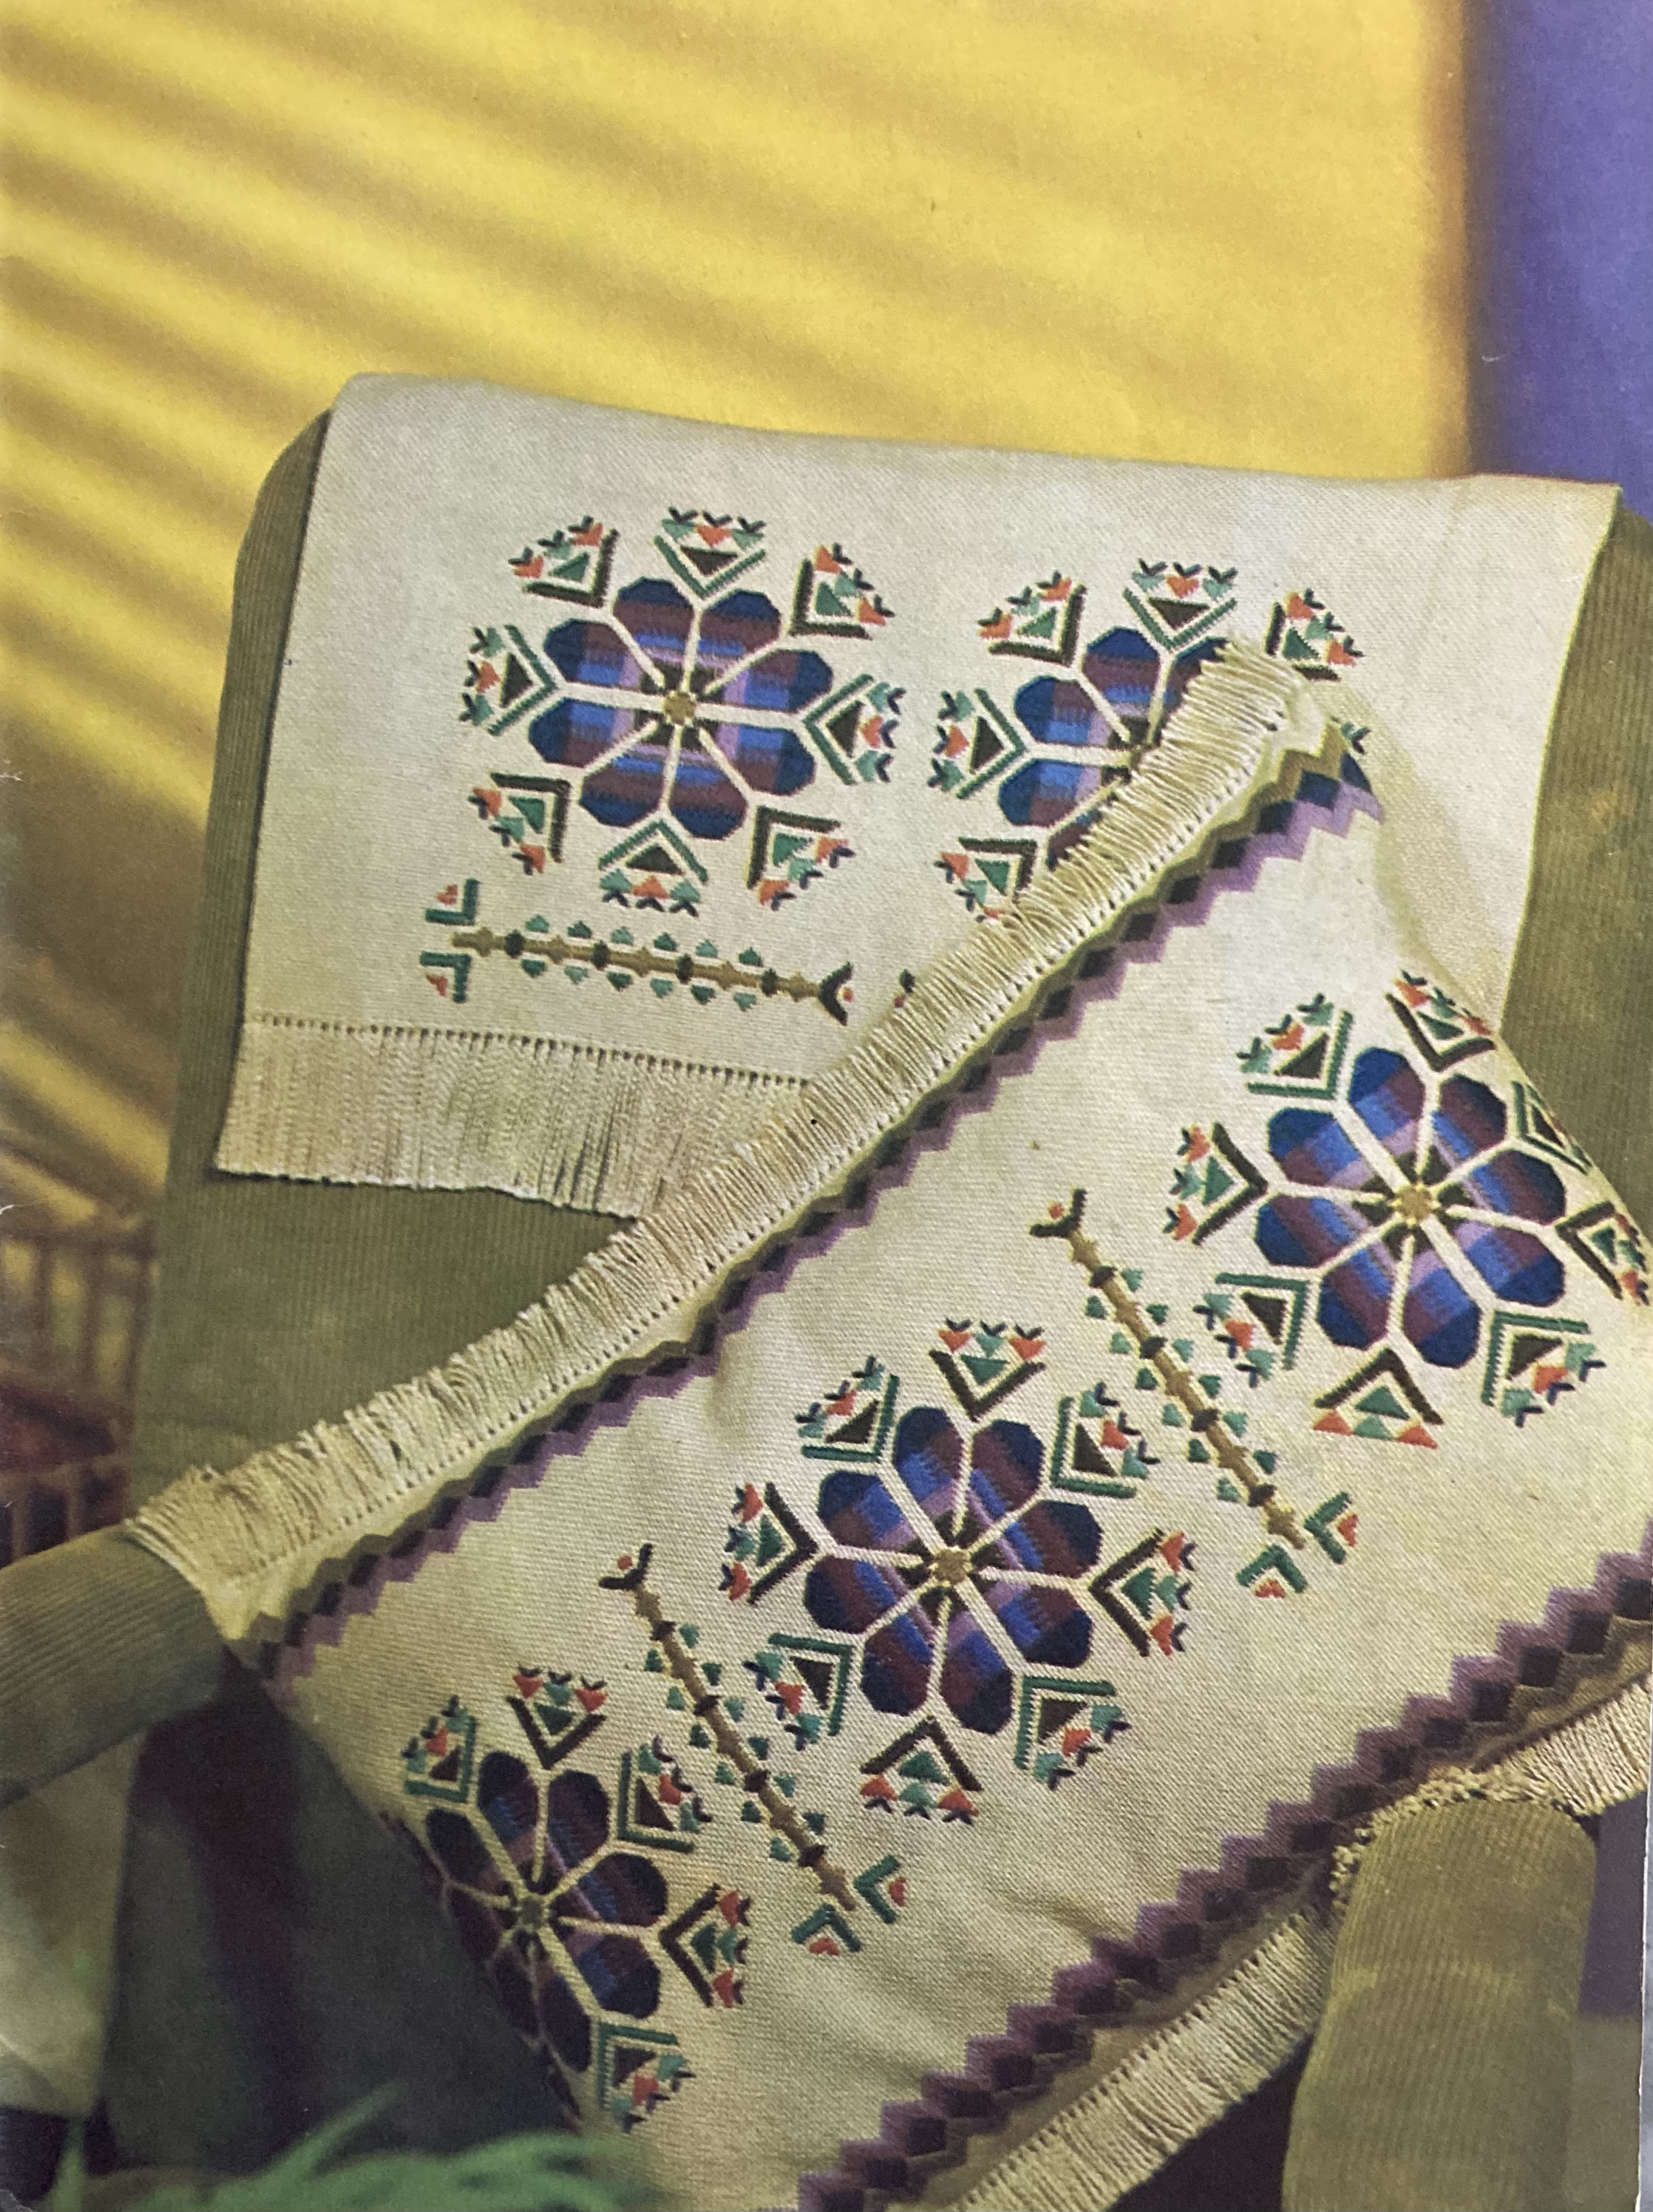
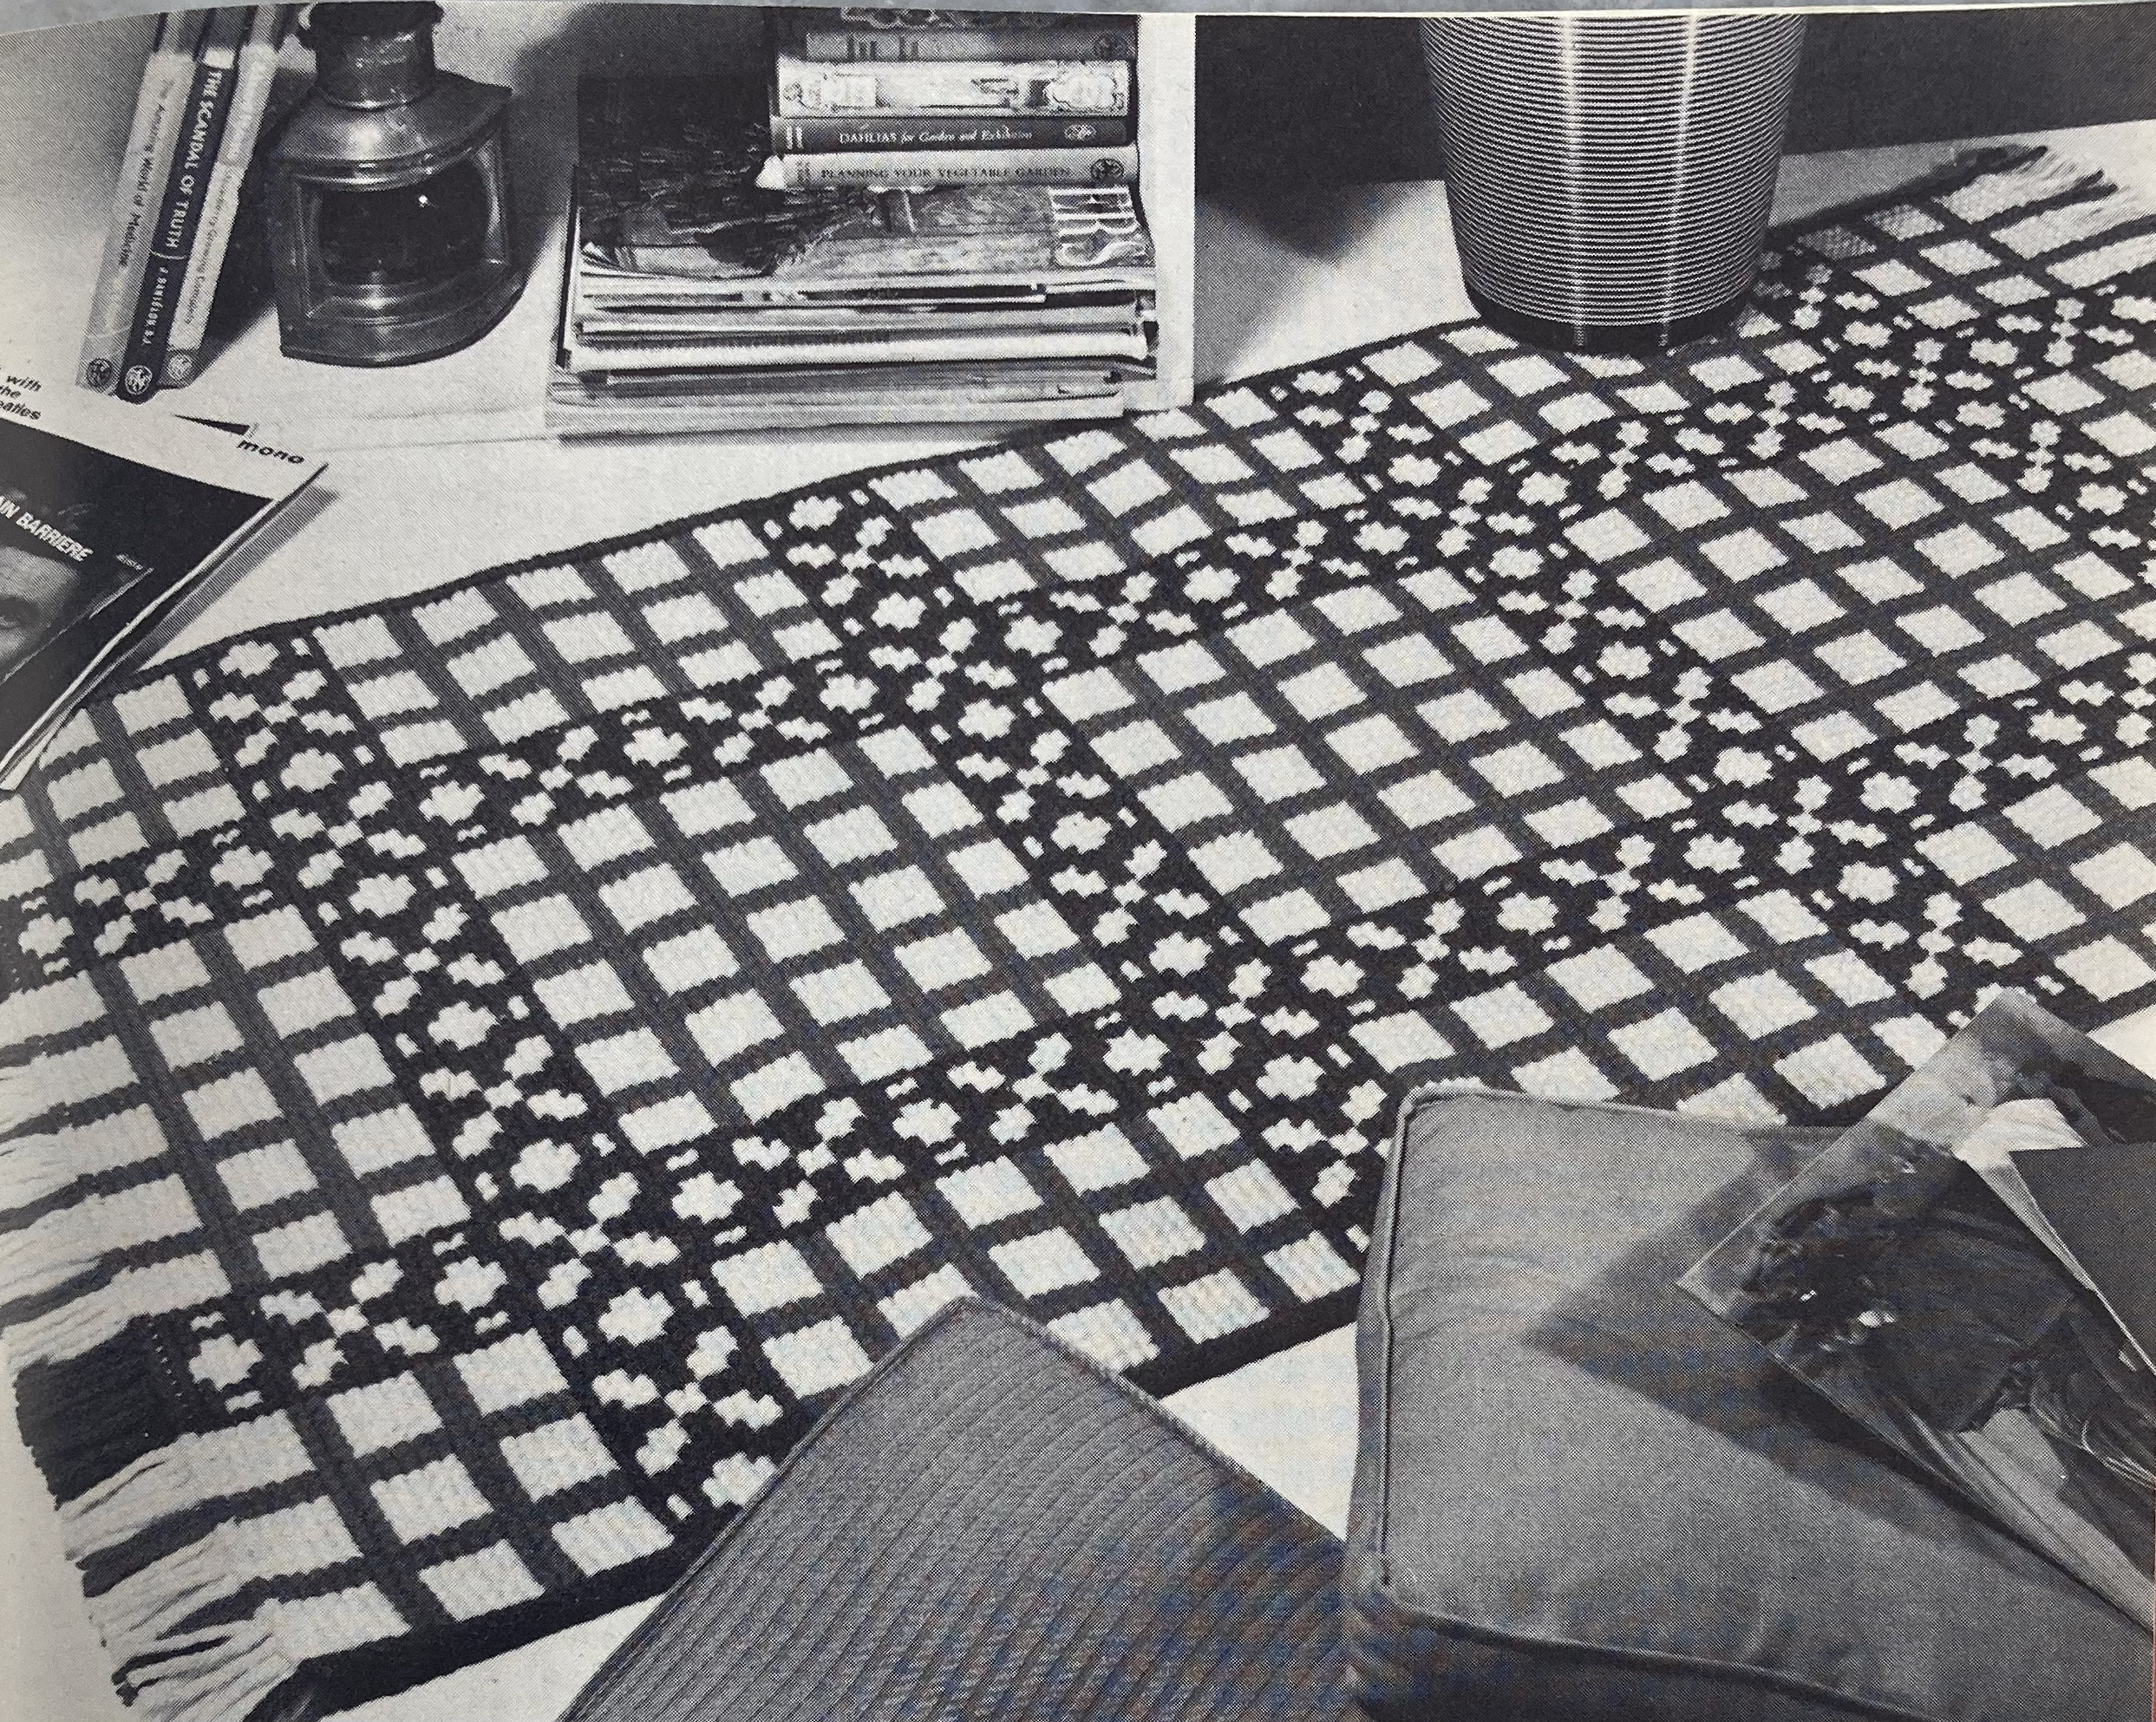
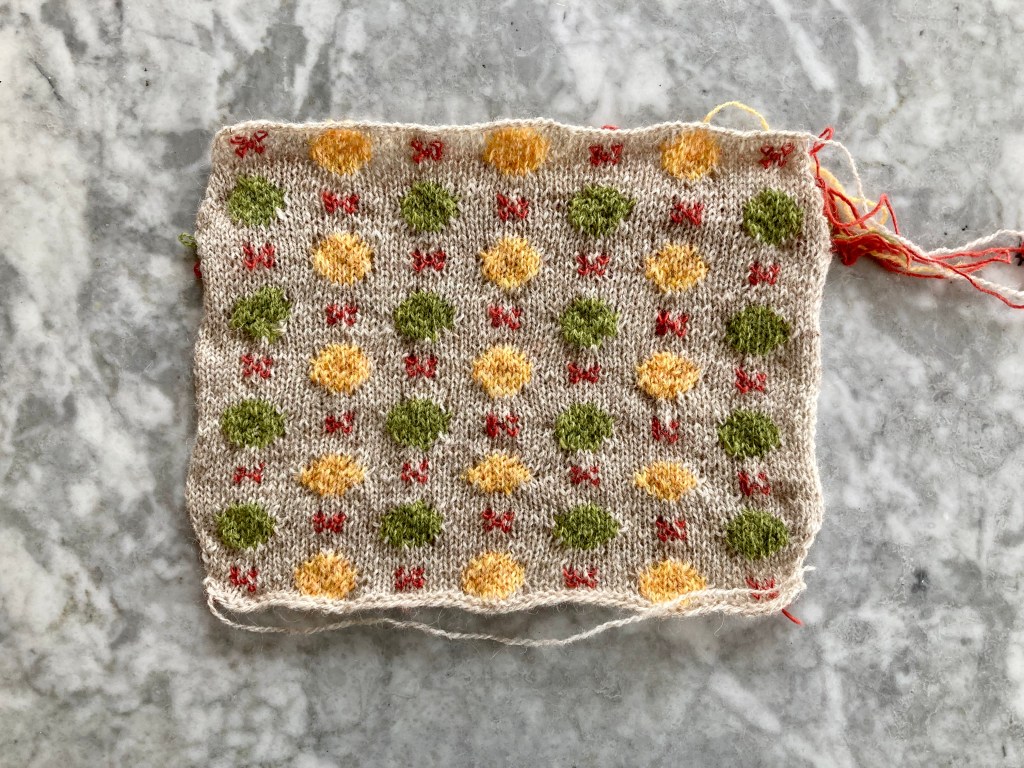
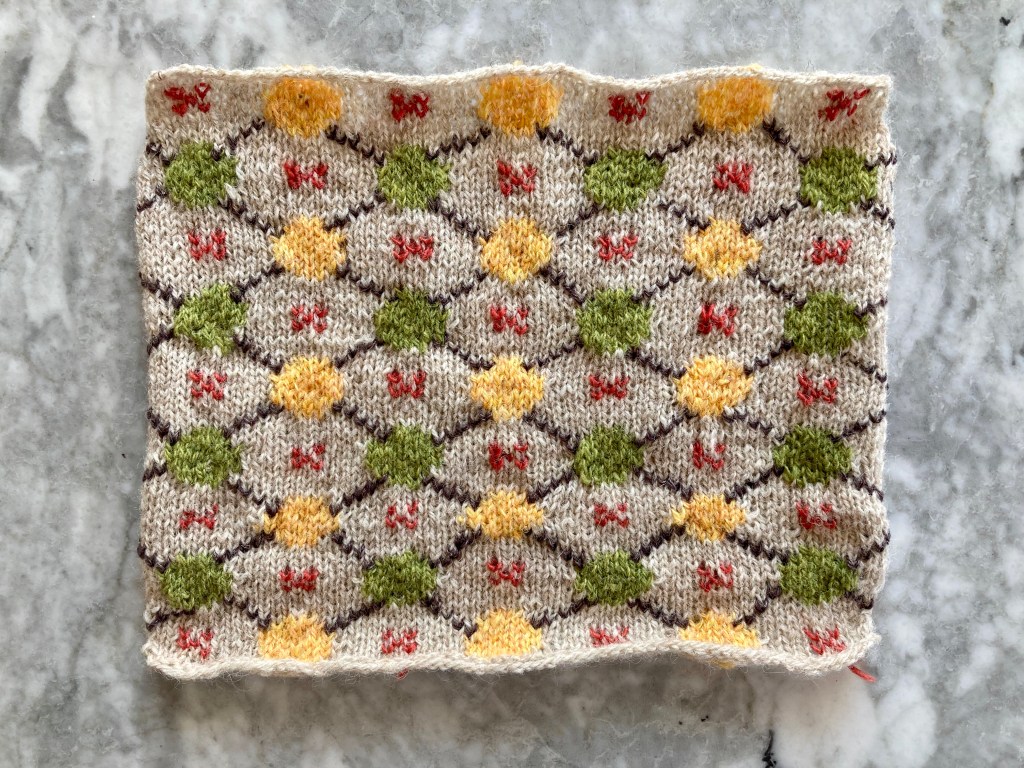
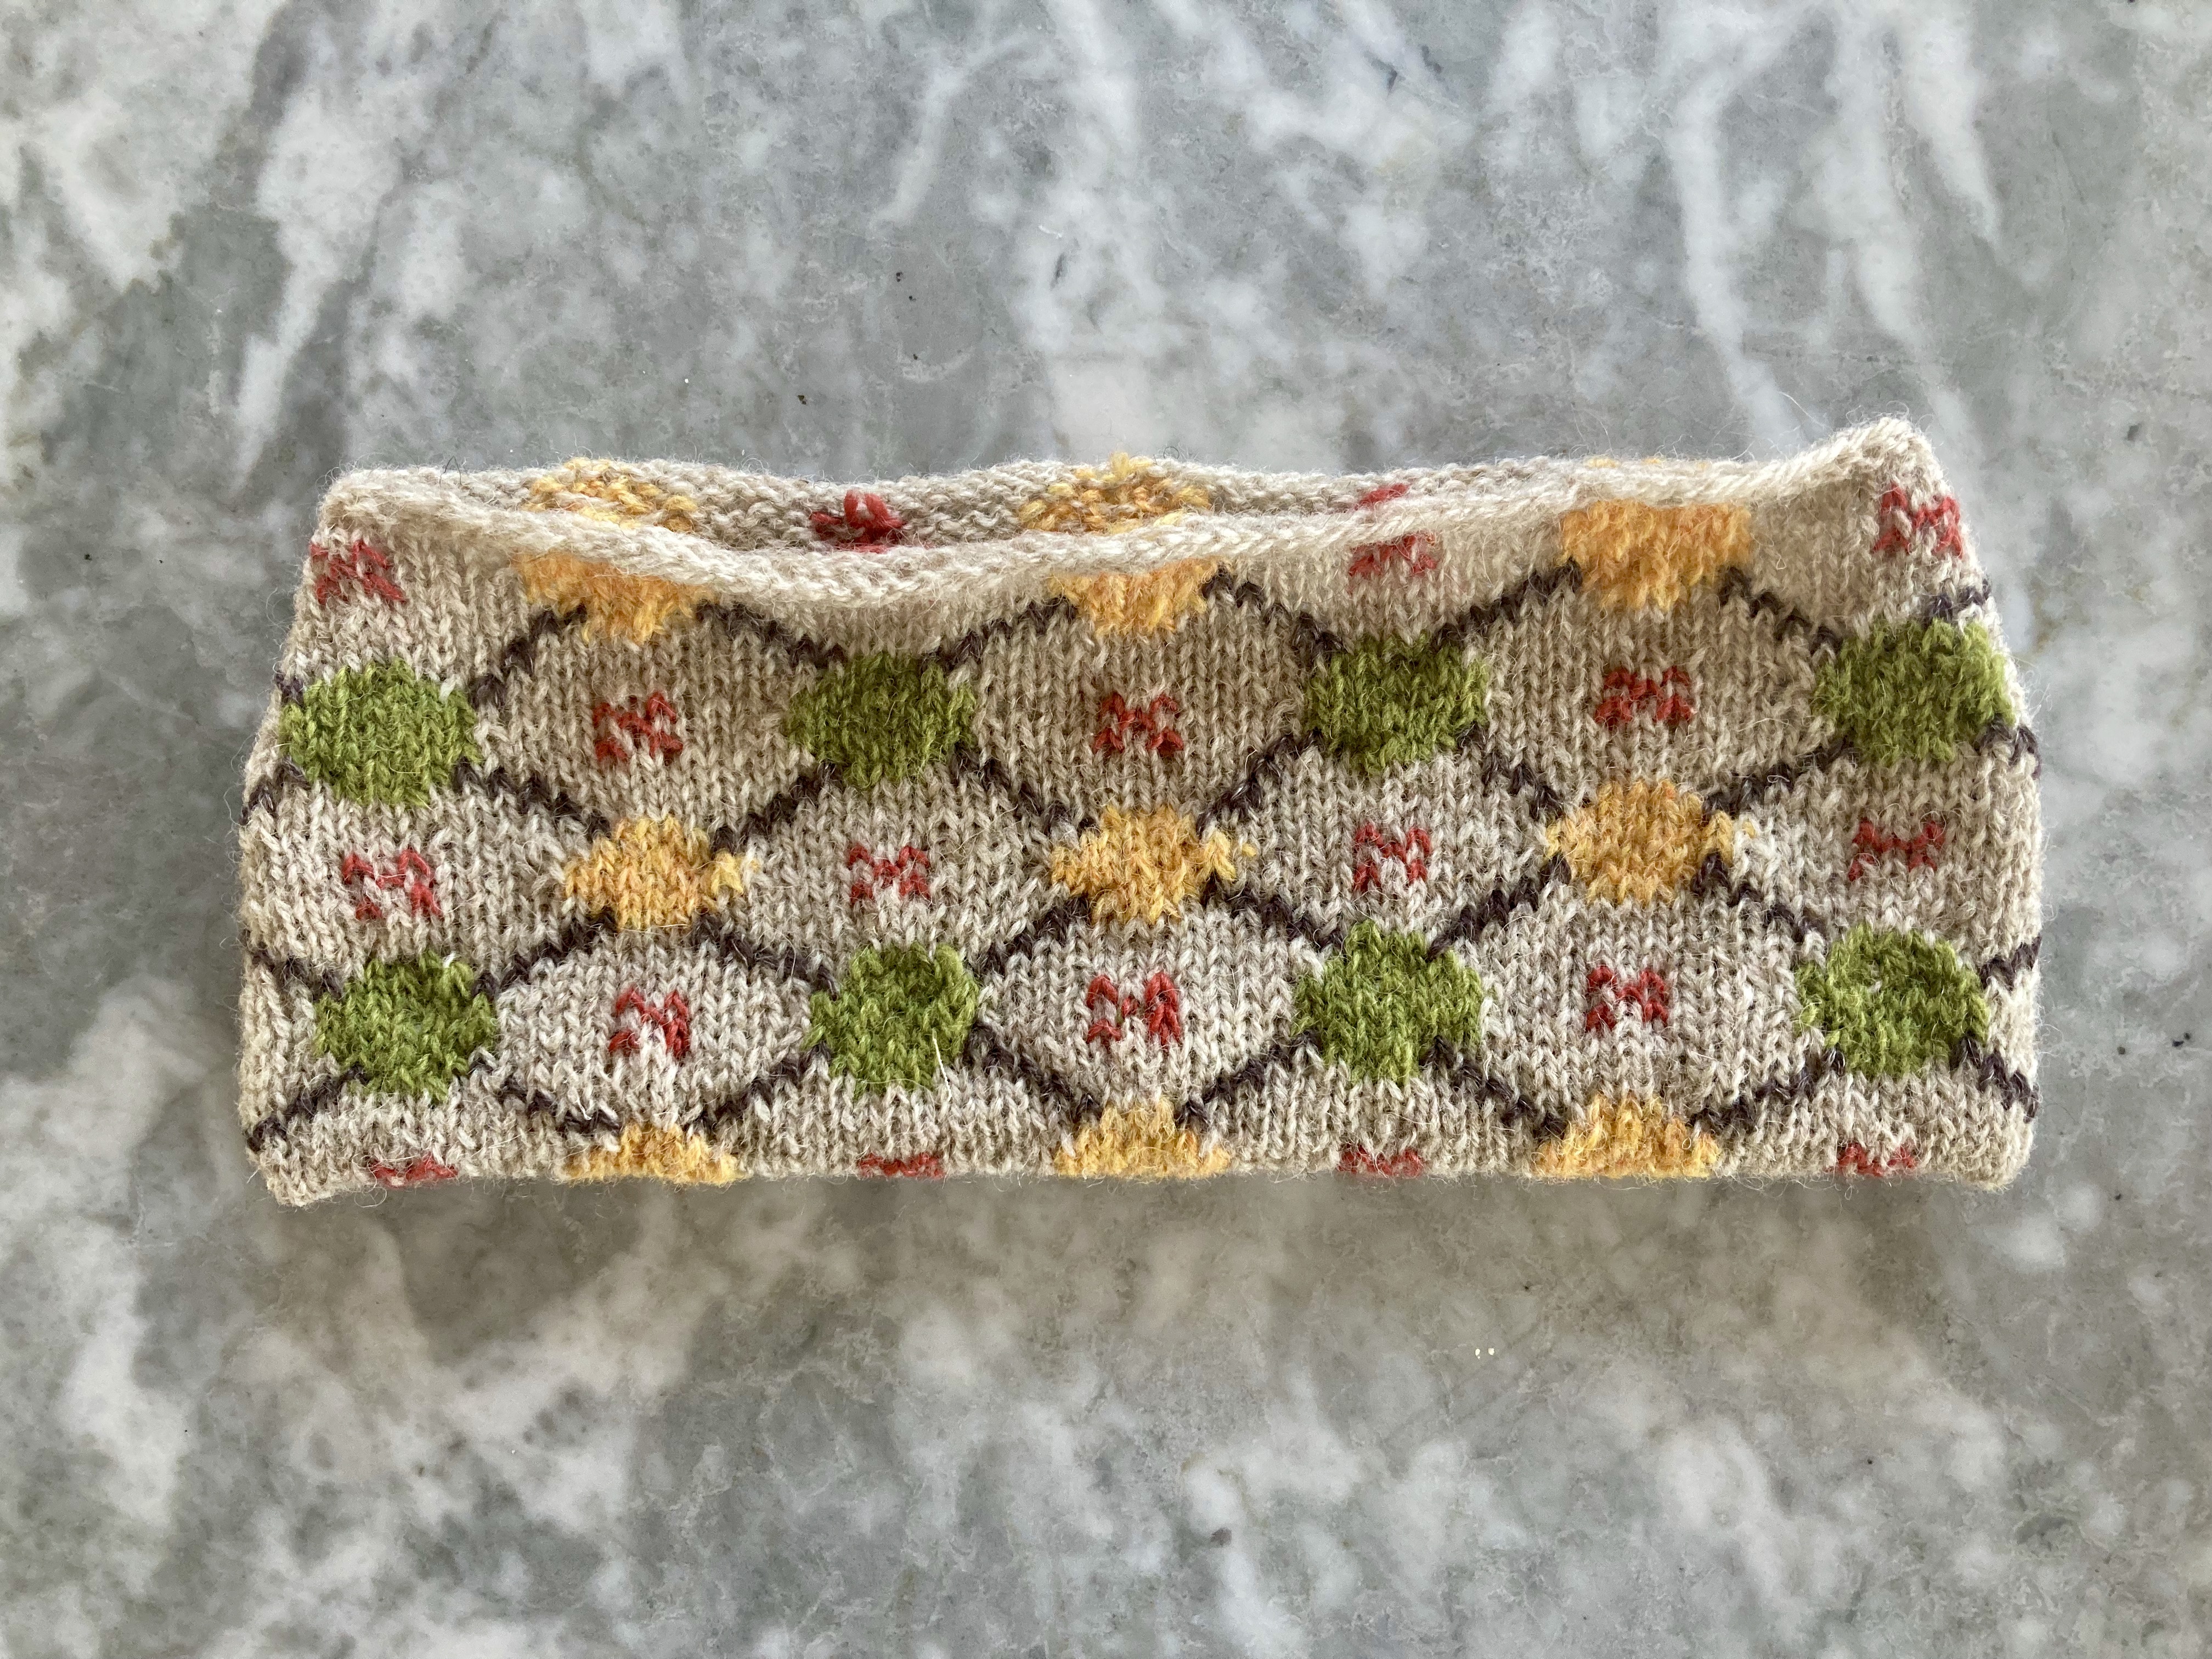
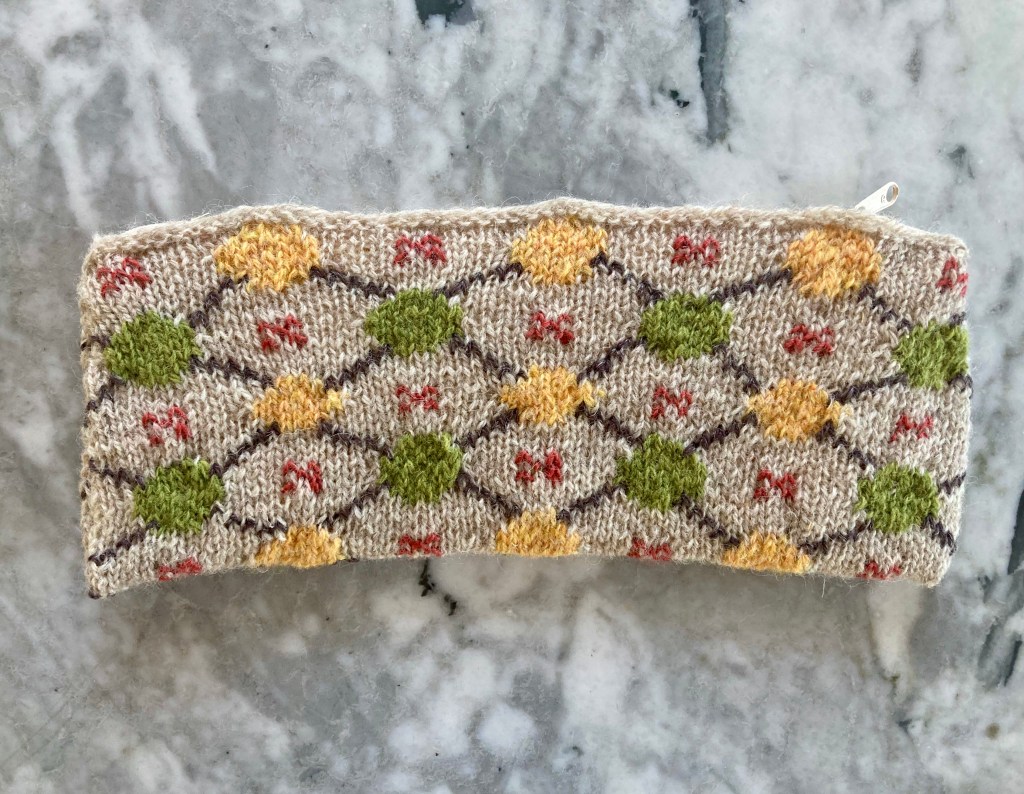
Though, as it turned out, I had also already made one of the projects from this issue, back before I started the blog. At the time, I had lots and lots of leftover Rauma 3-ply (which is double-knitting weight, not what you normally would expect “3-ply” to be) and Jamieson’s Double Knitting in stash from a tam and mitts combo that I had designed for Knit Now. And here in the December 1965 issue of Stitchcraft was this wonderful “Workbag for a friend” that was perfect for using up leftovers. The check pattern is easier than it looks — the colours are just staggered every four rows. I adapted the stitch counts to make it work with DK wool instead of the 4-ply called for in the pattern.

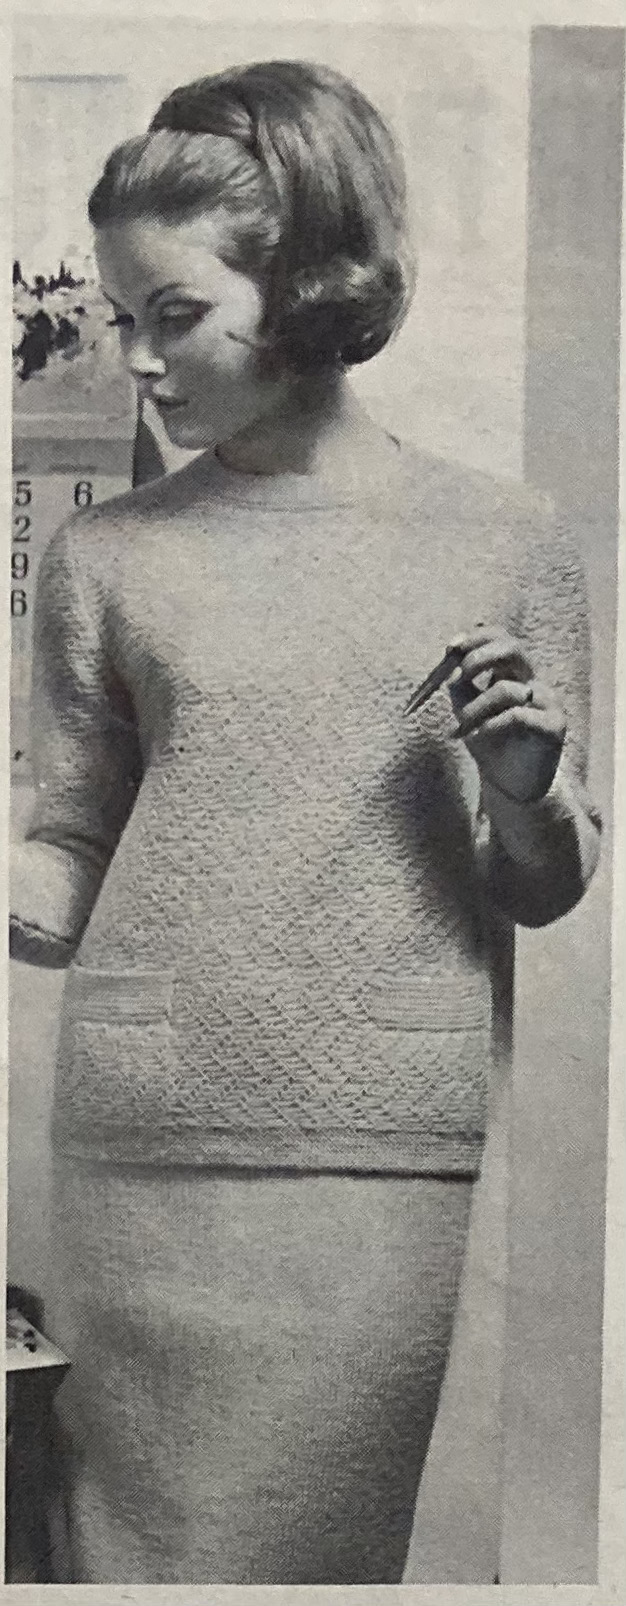
The bag is made in two pieces for front and back, with two separate gussets made in 1×1 ribbing, for the sides. This makes a nice, big bag. I bought non-vintage handles which were unfortunately not real wood, but accurate reproductions of the type in the magazine photo. They have a slot at the bottom through which you insert the ribbed top of the bag, fold it over to the inside and sew in place. Very easy. Although it’s not called for in the pattern, I lined the bag with non-stretchy, woven cotton material to keep it from stretching. It’s a great bag and I use it for large projects. (I apologise for having only a finished photo and no in-progress pictures. At the time, i didn’t know I was going to start writing a blog, and only took pictured of finished objects, if at all.)

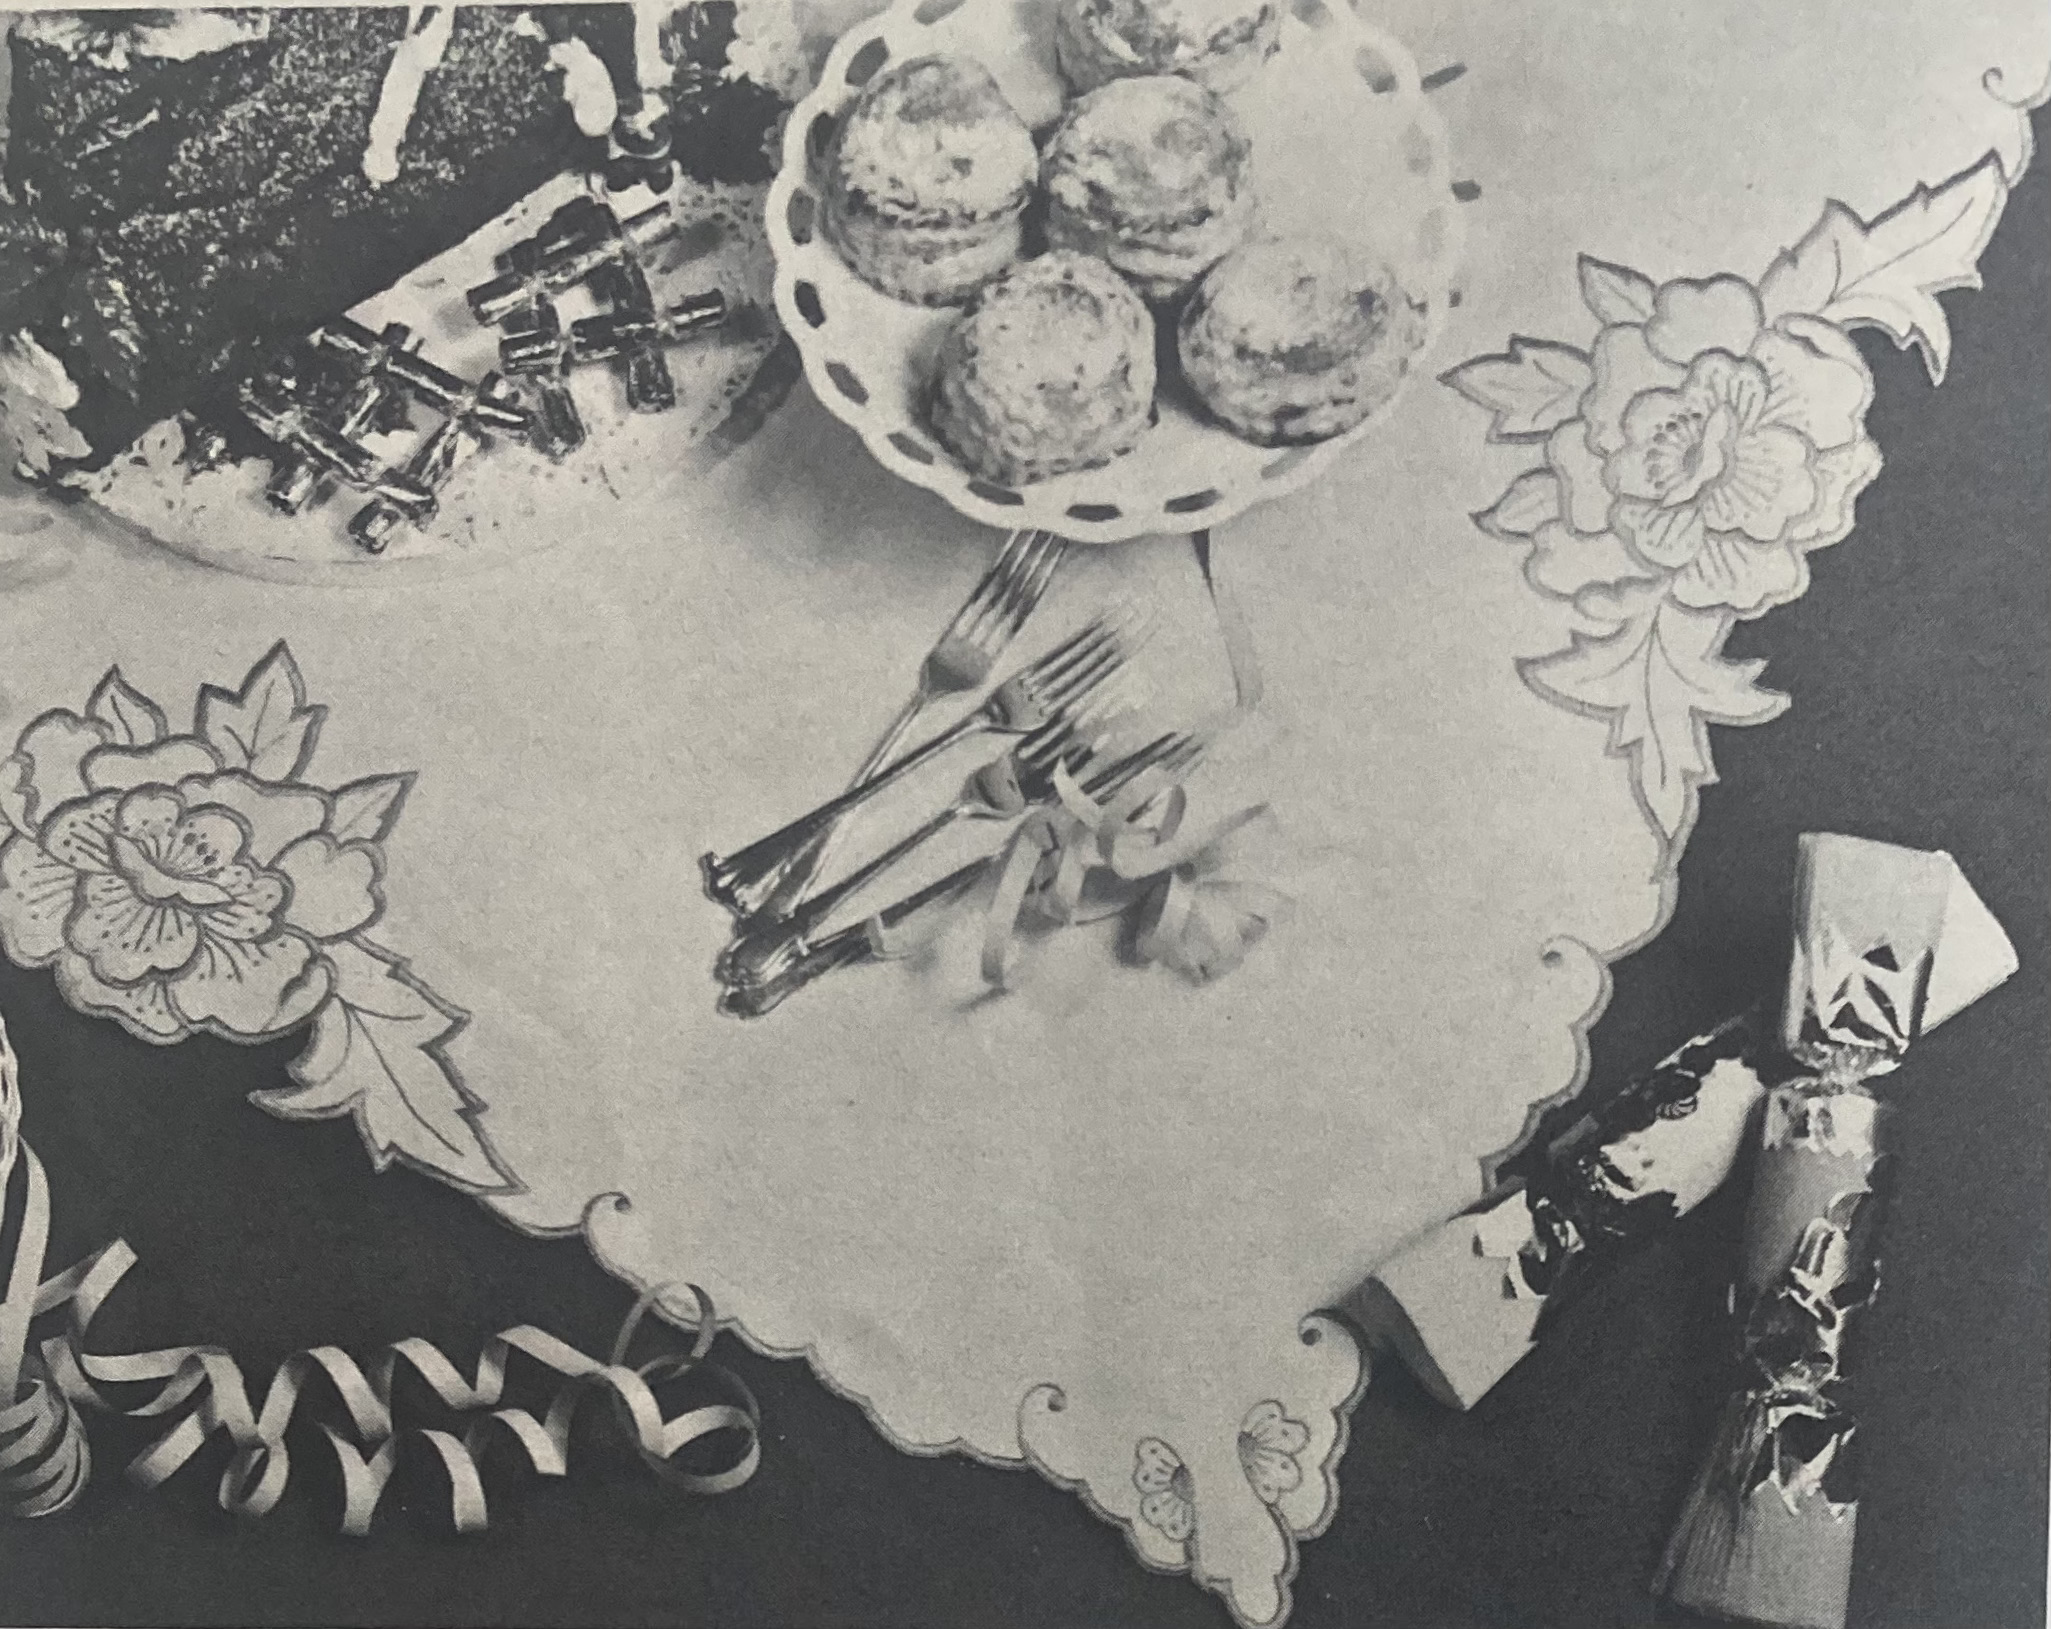
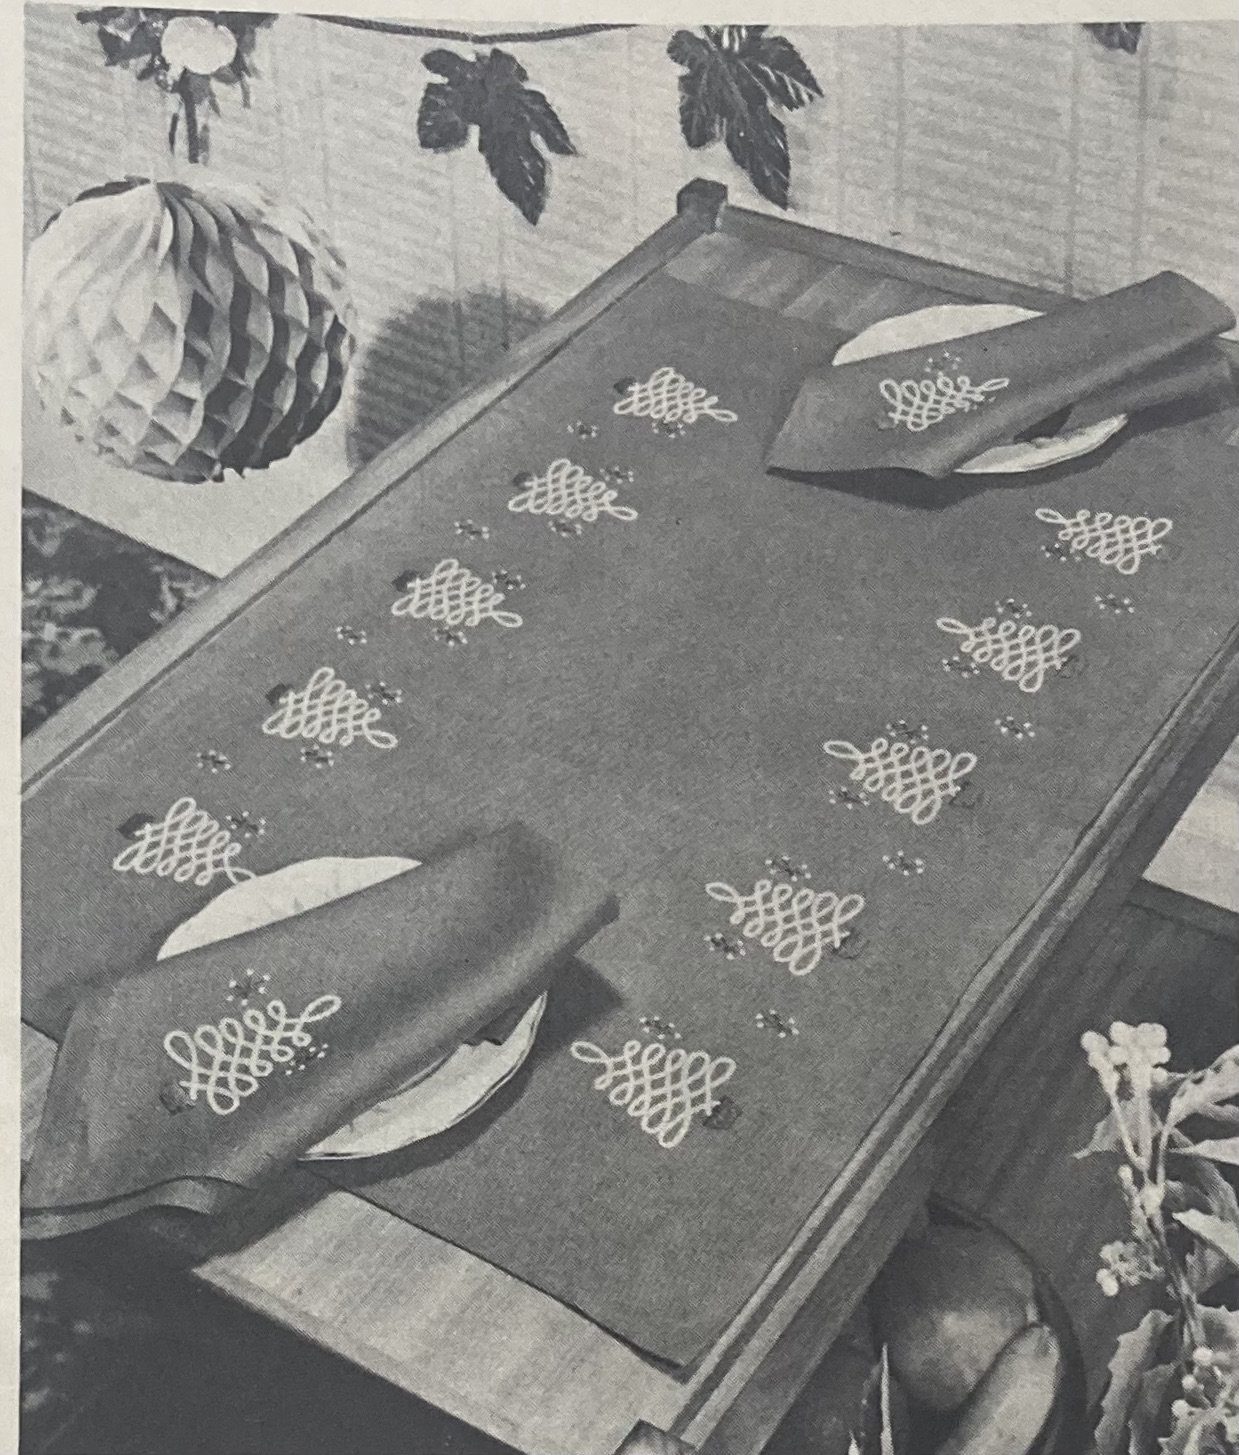
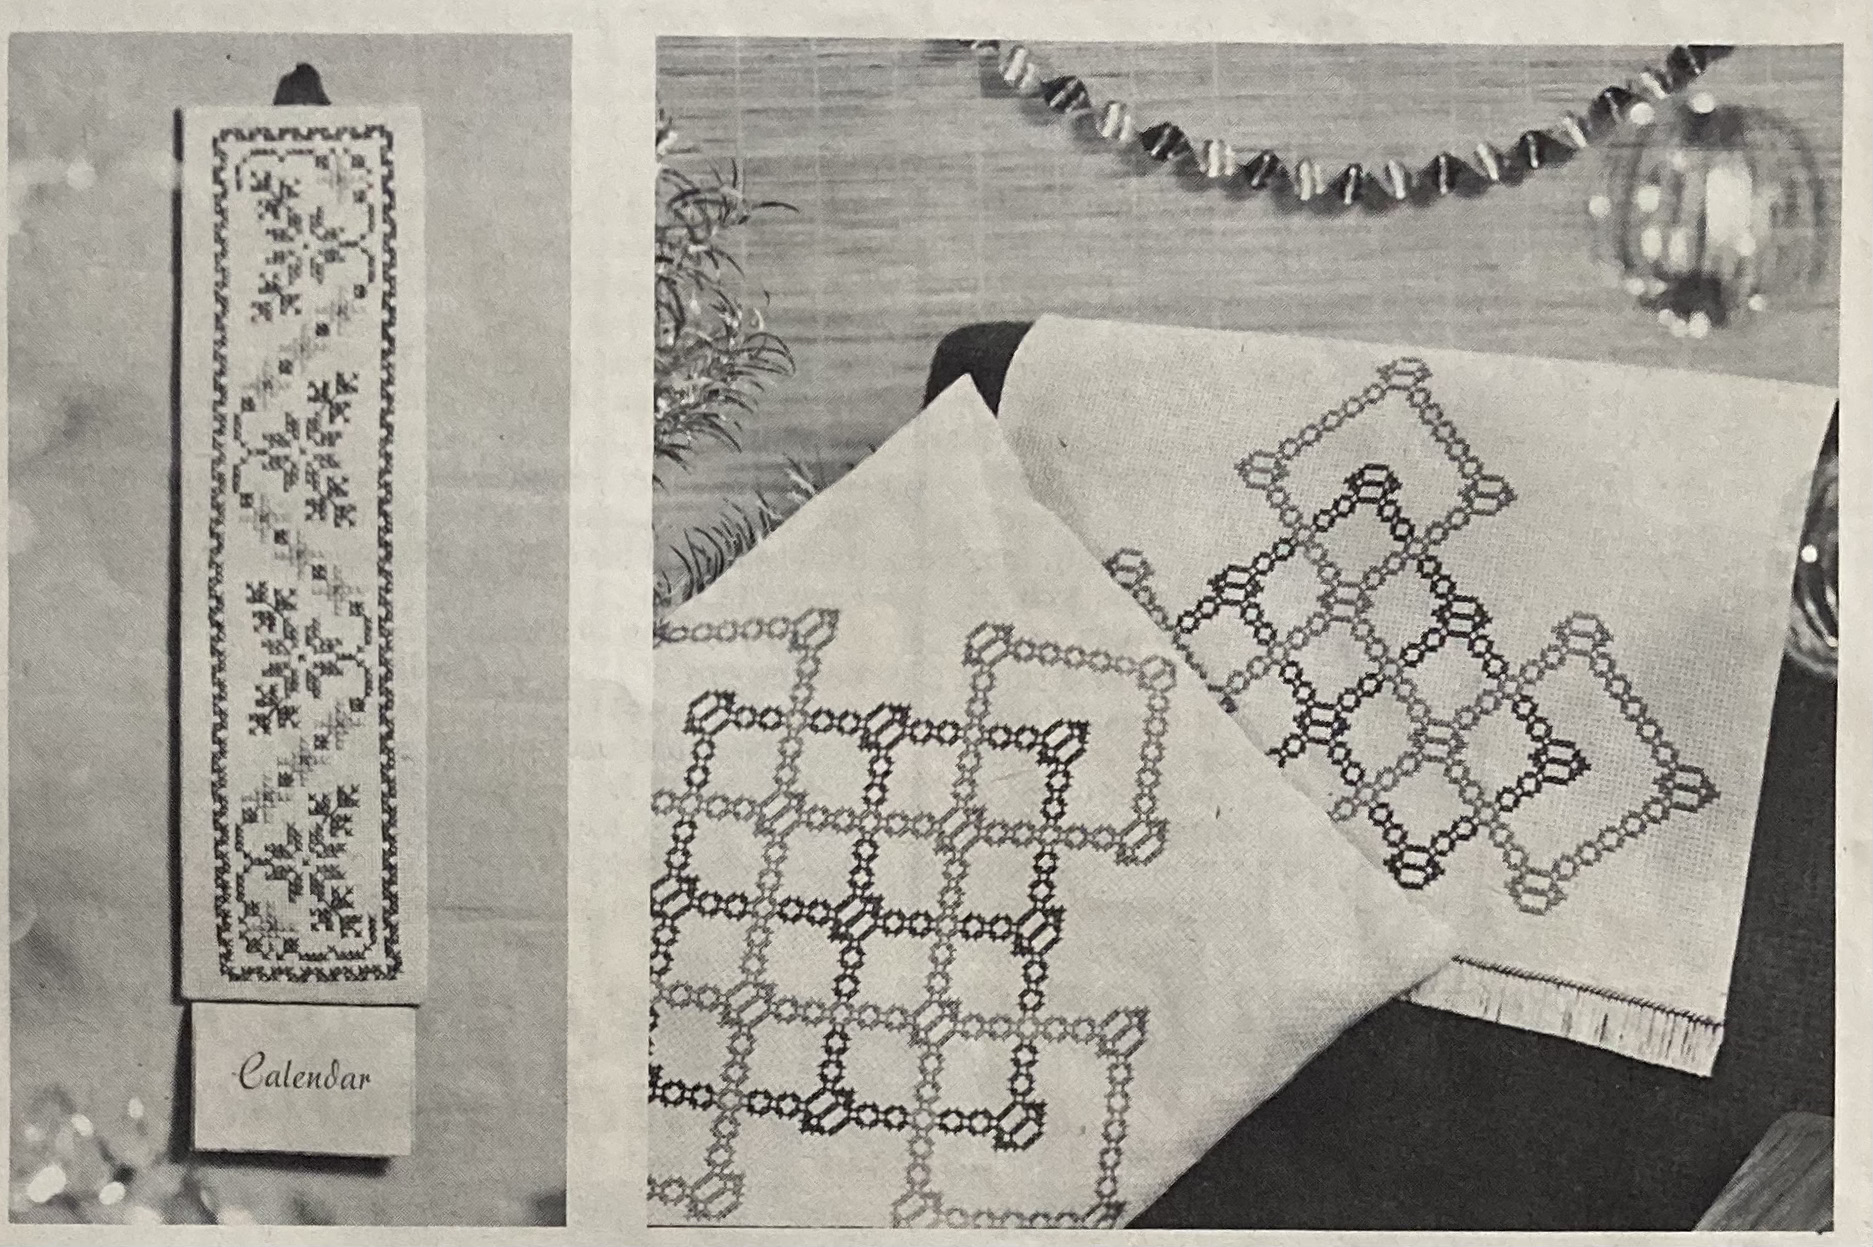
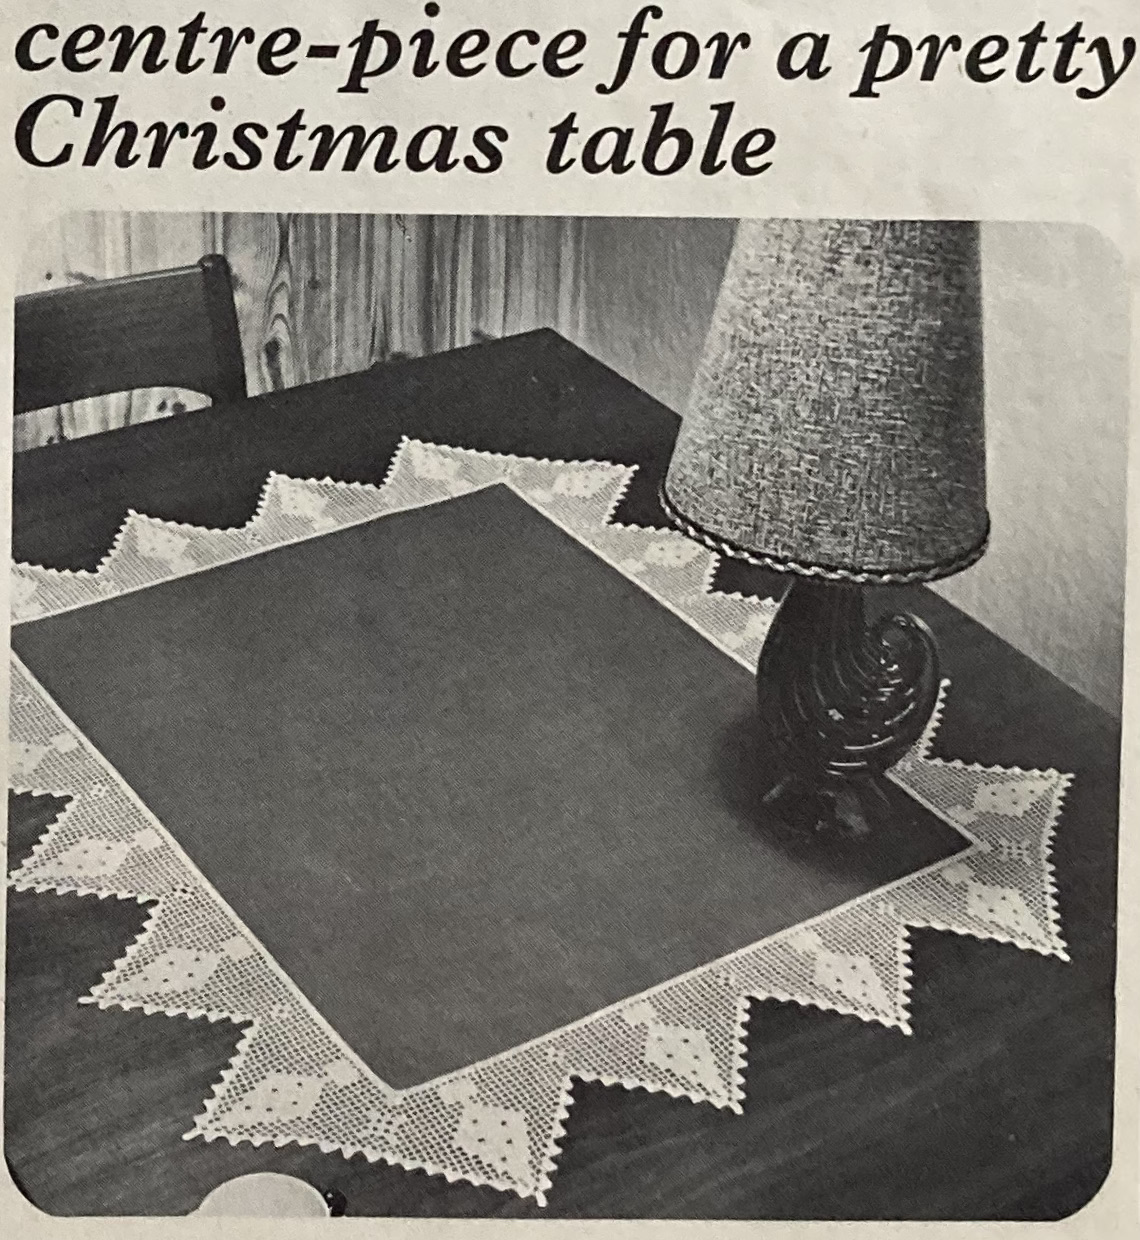
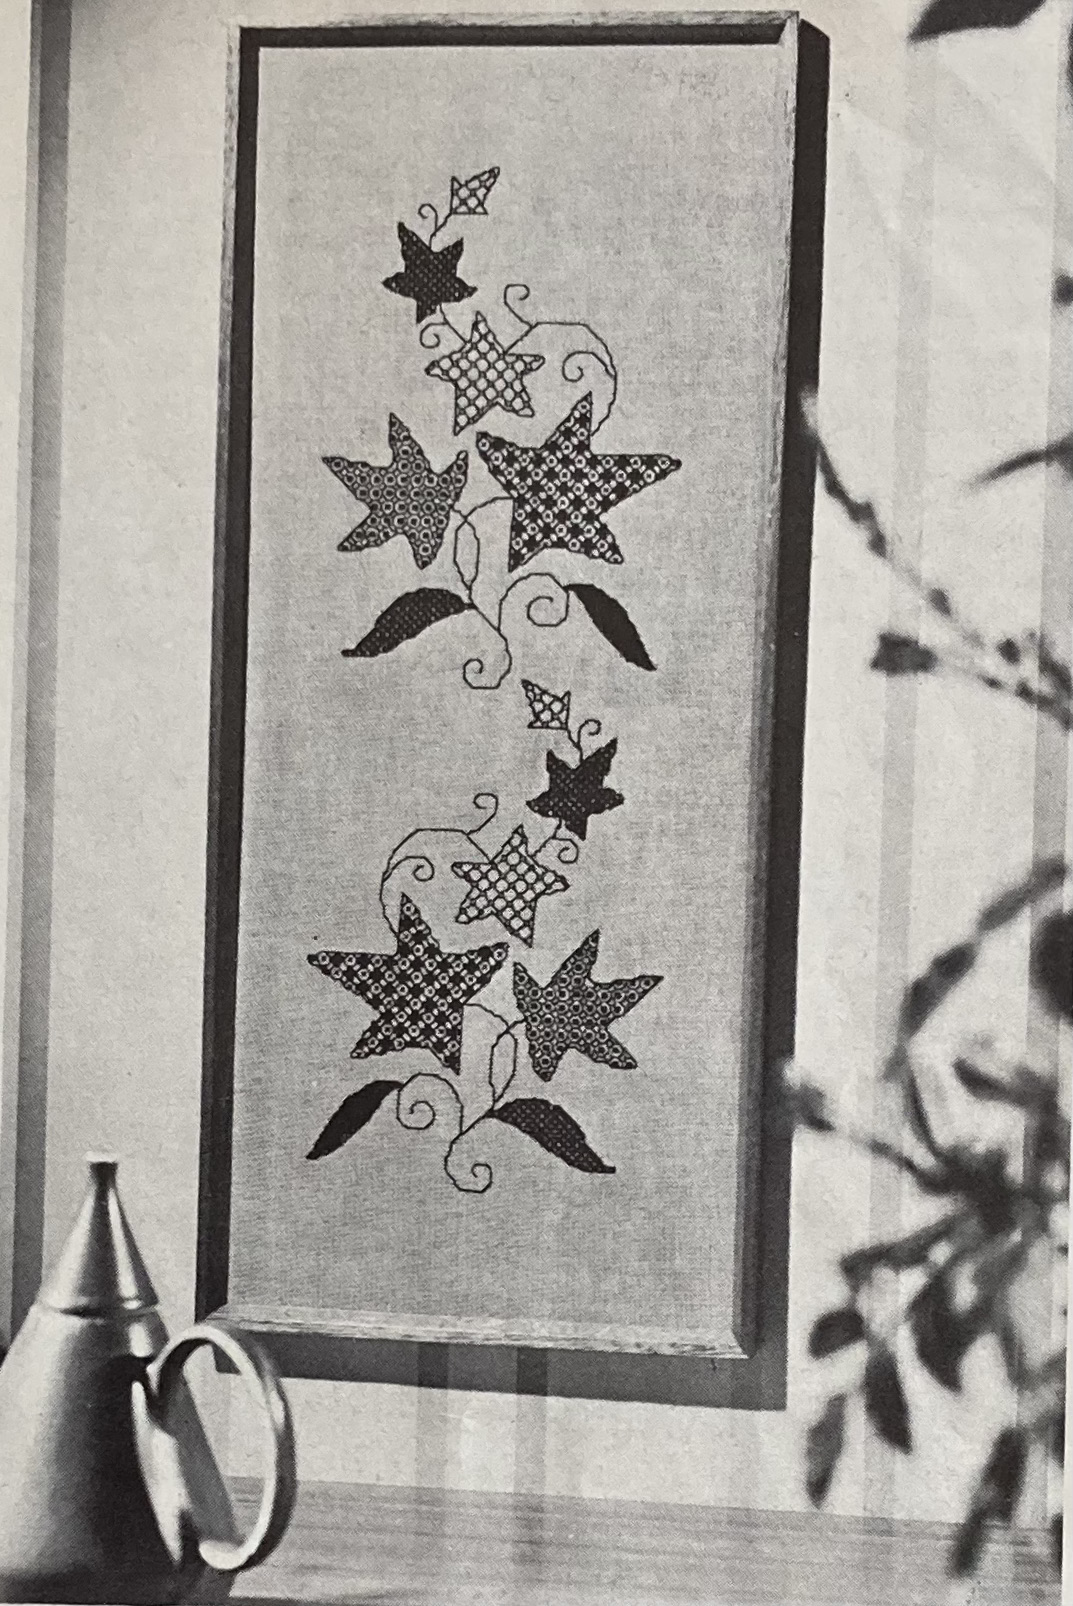
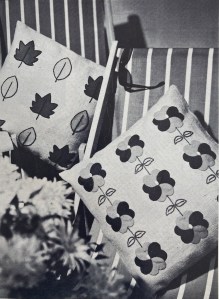
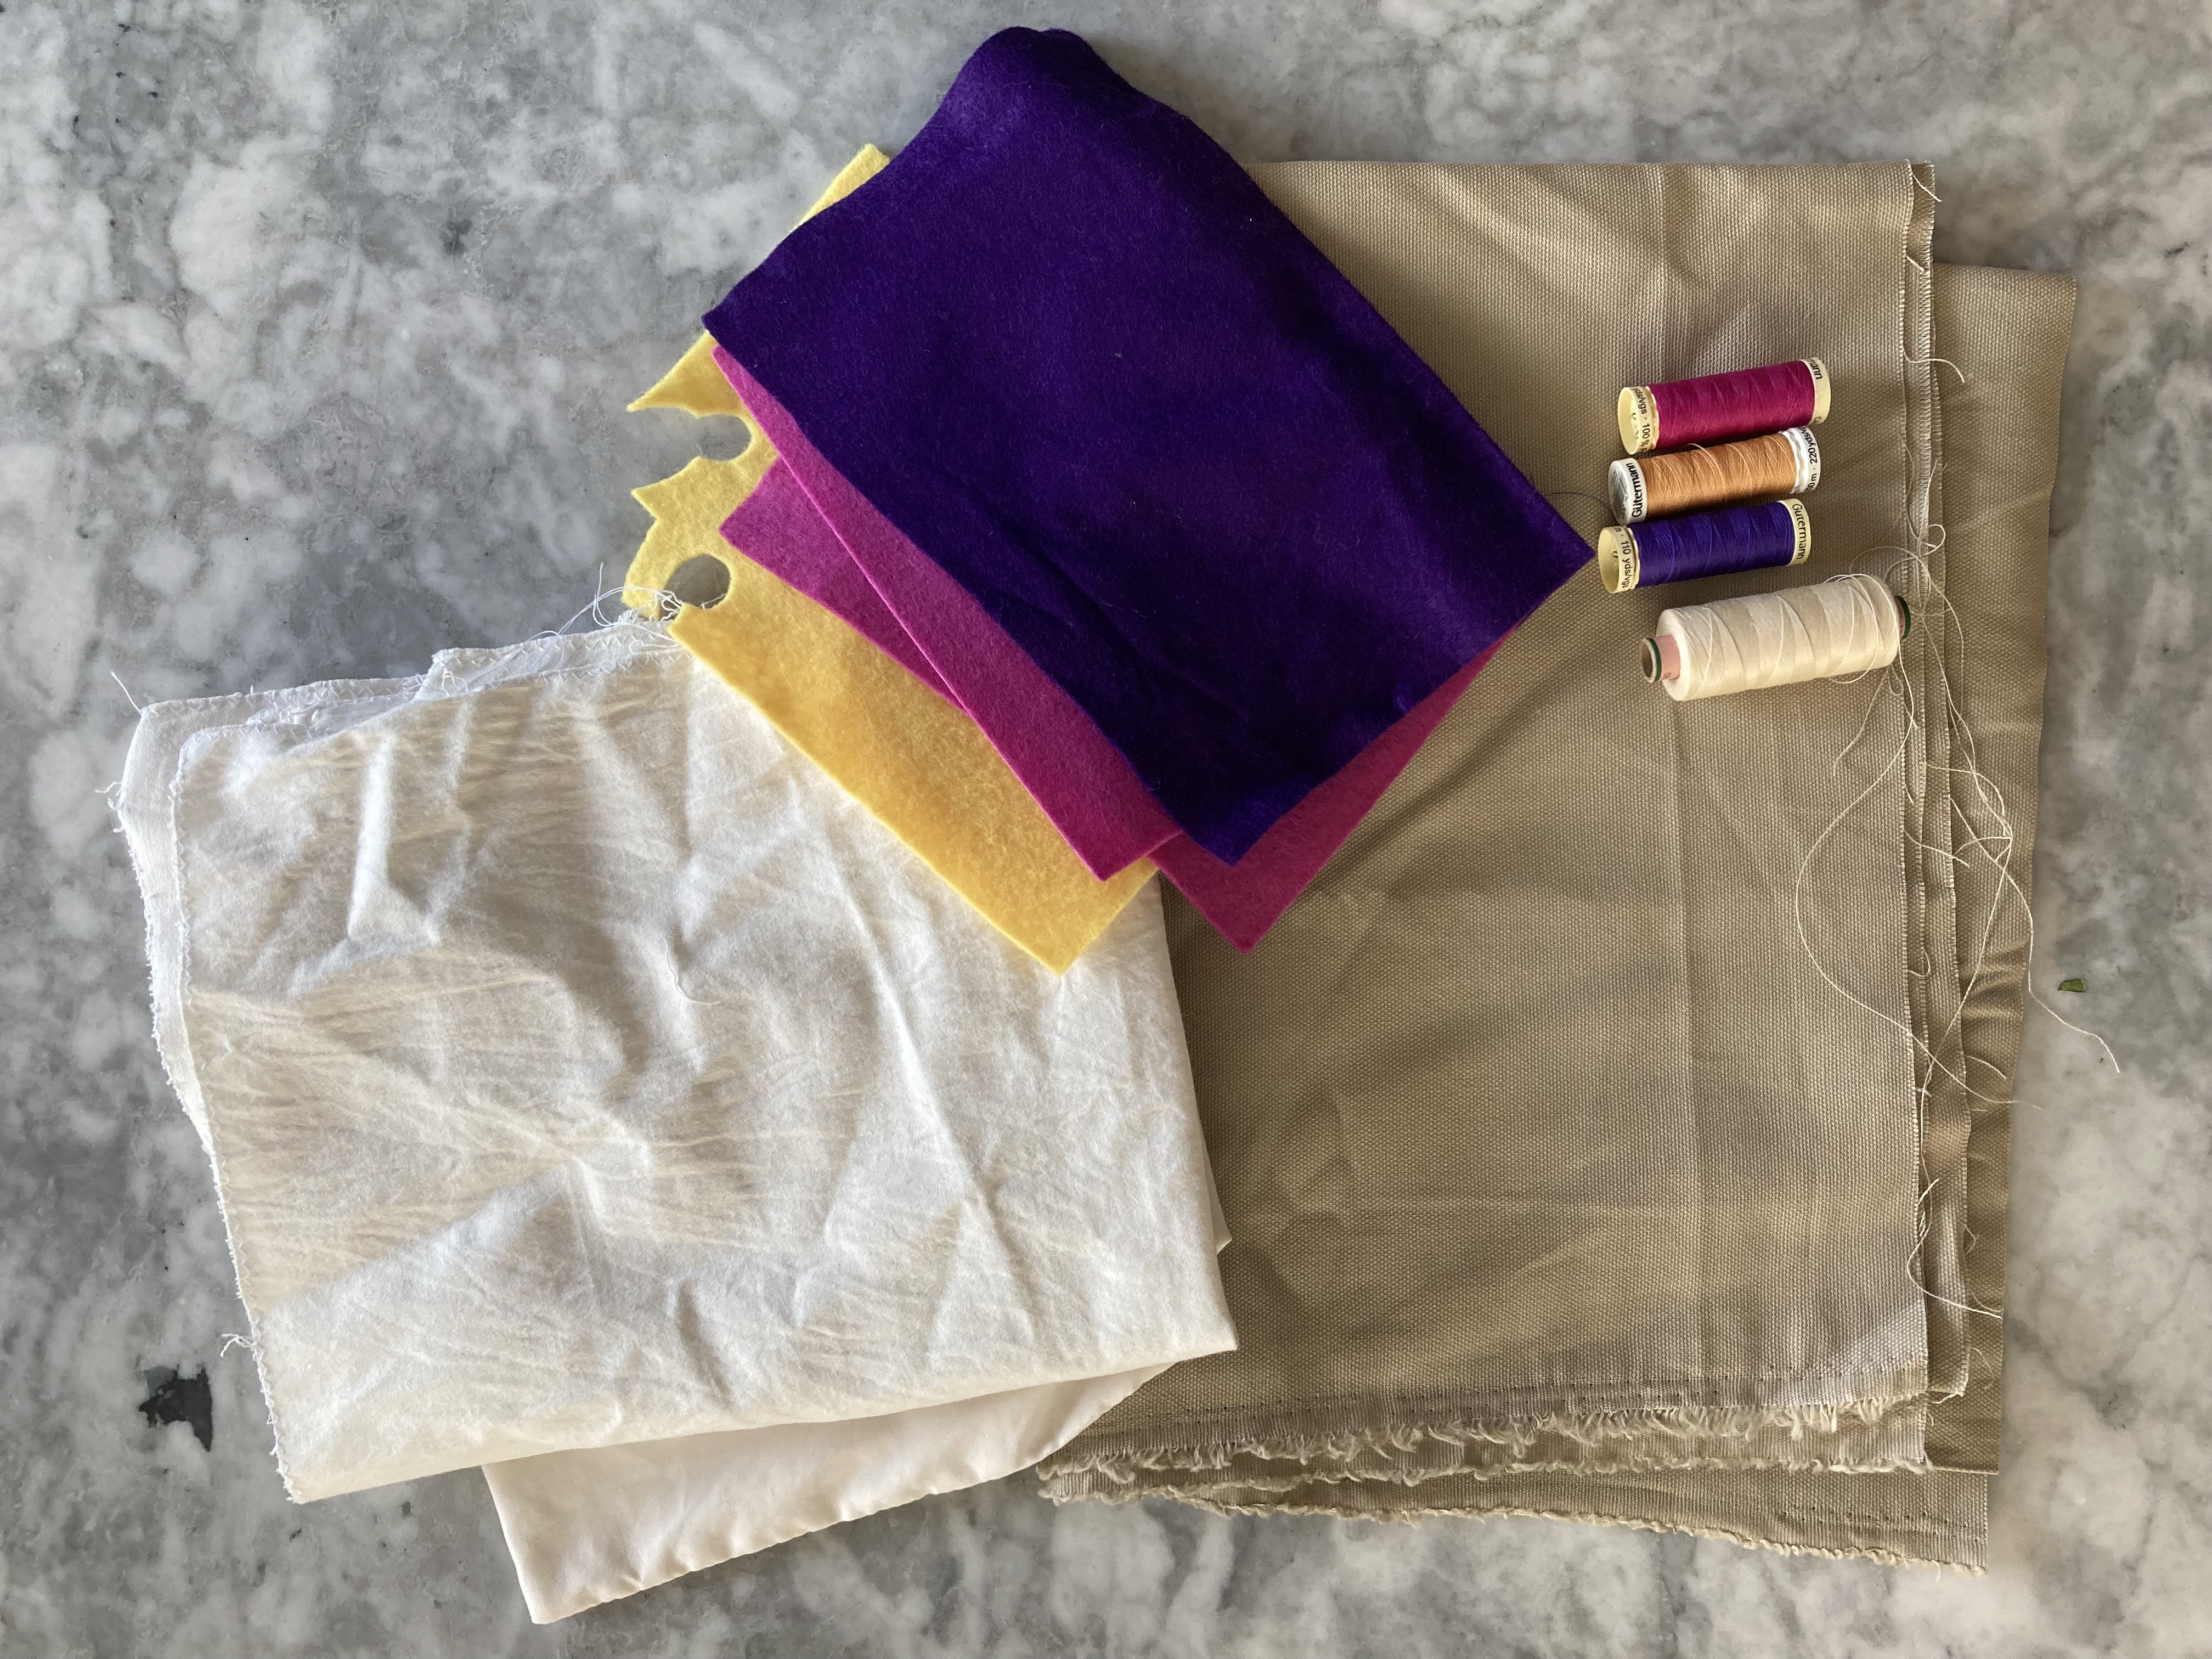
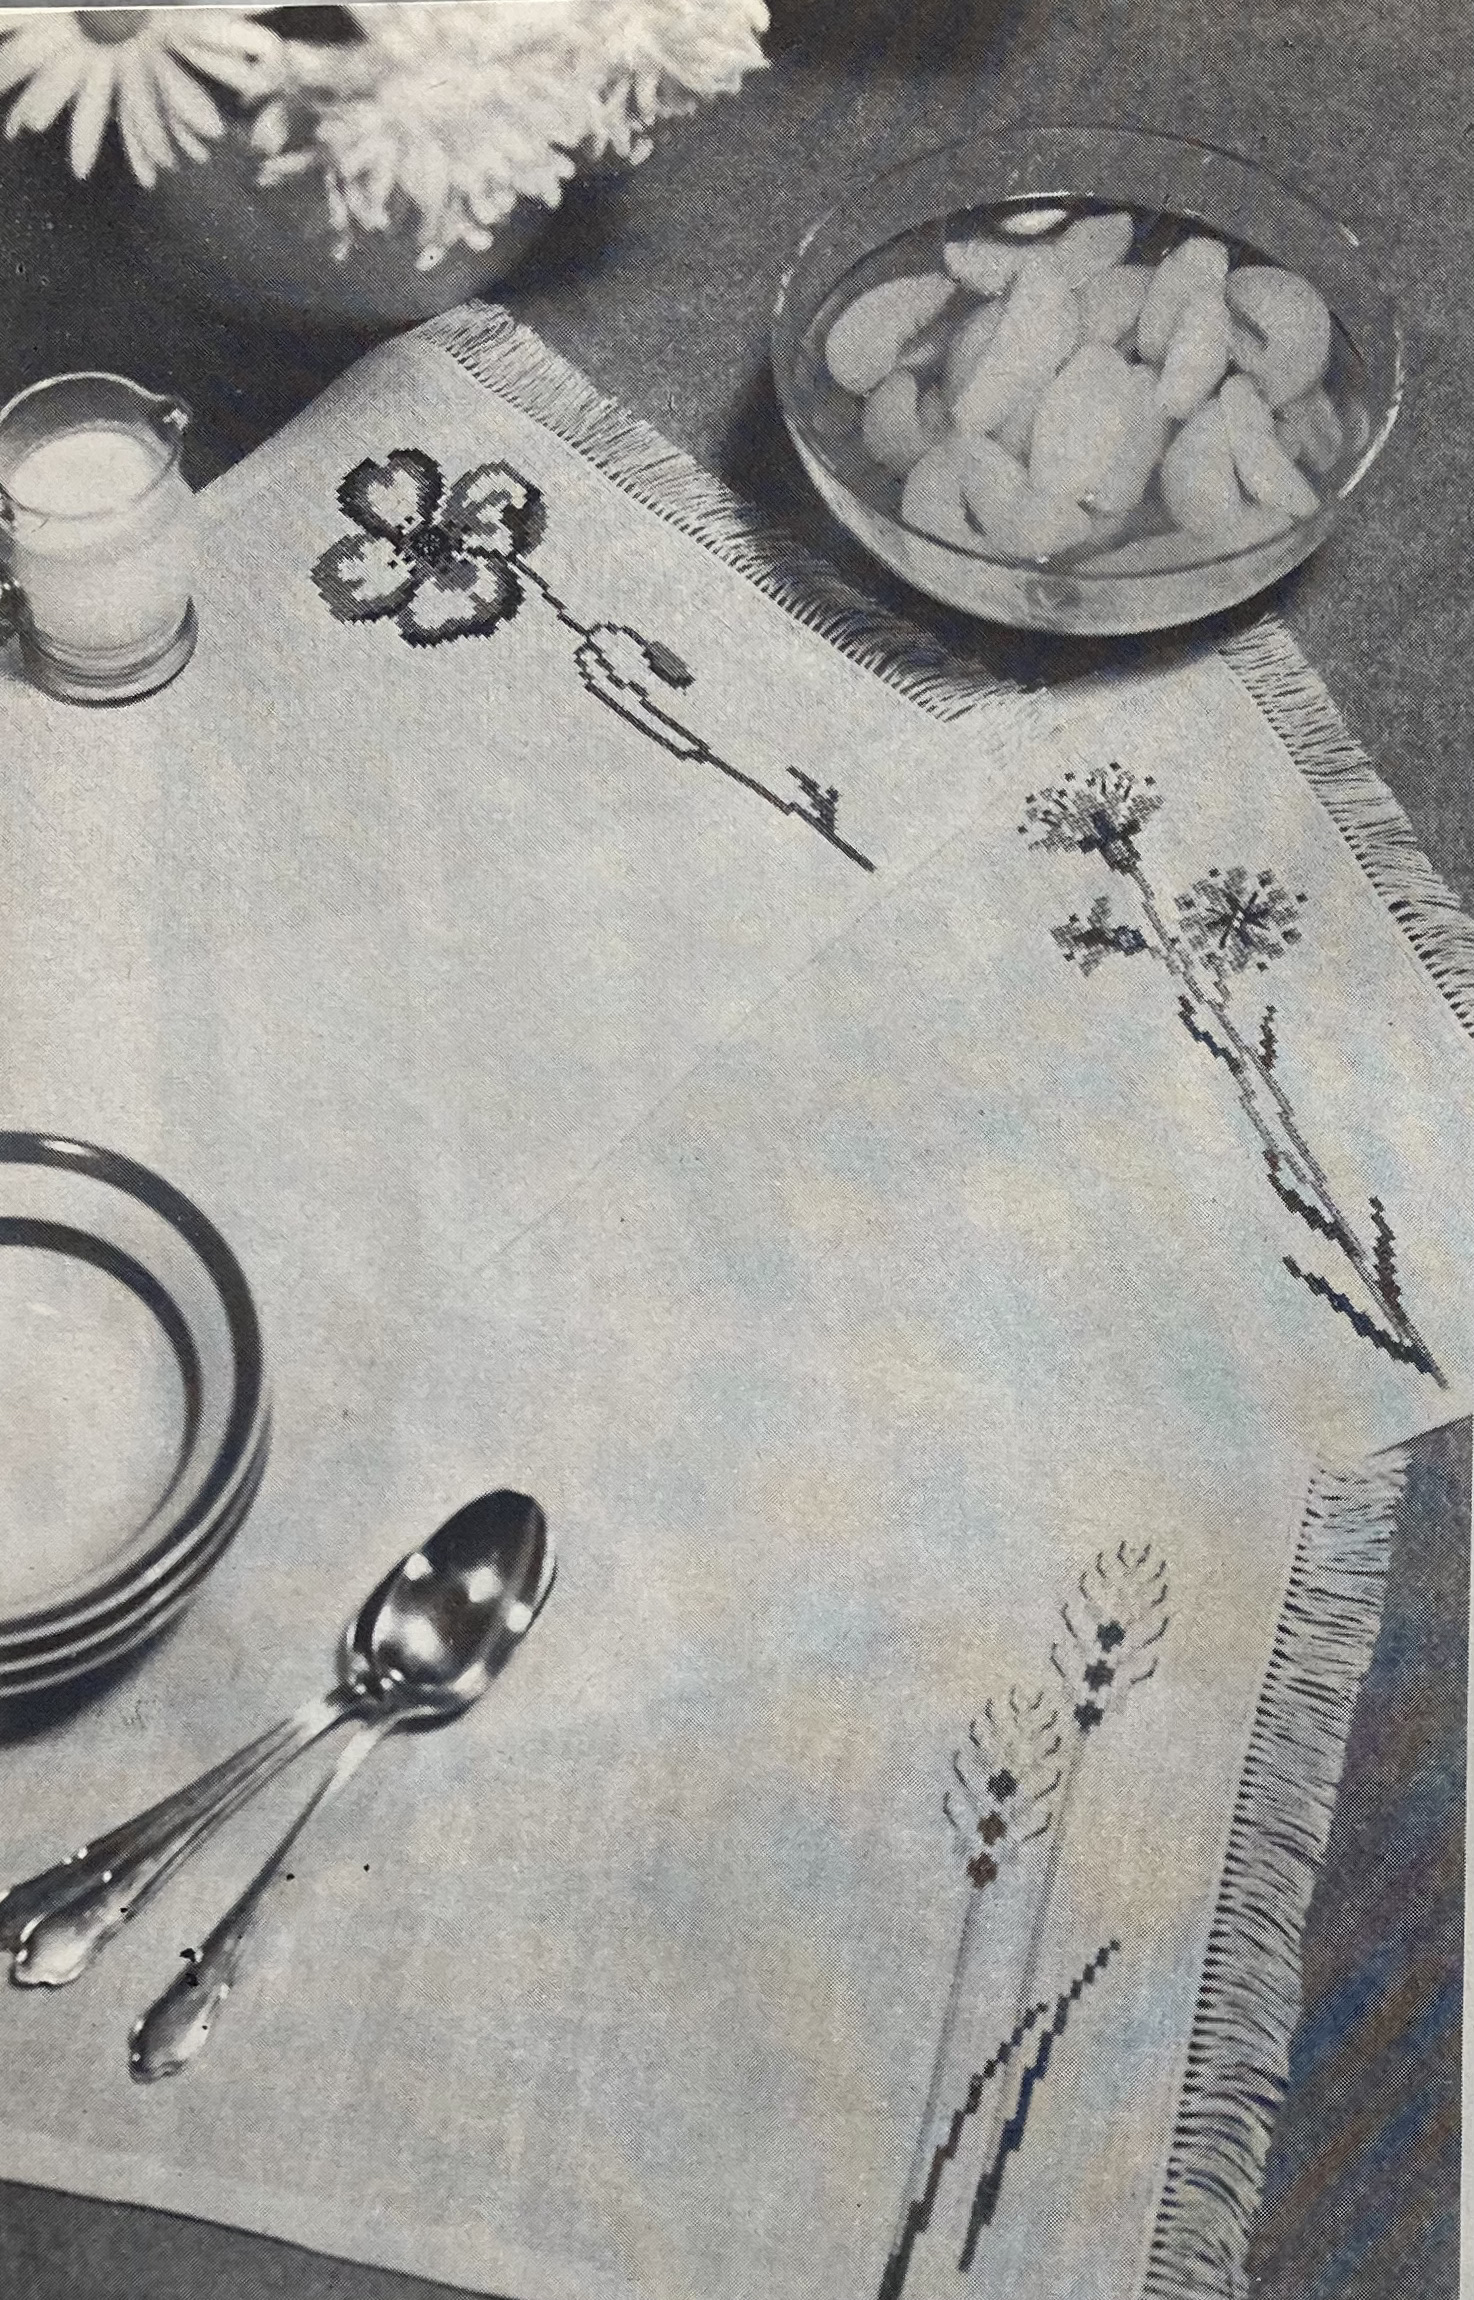
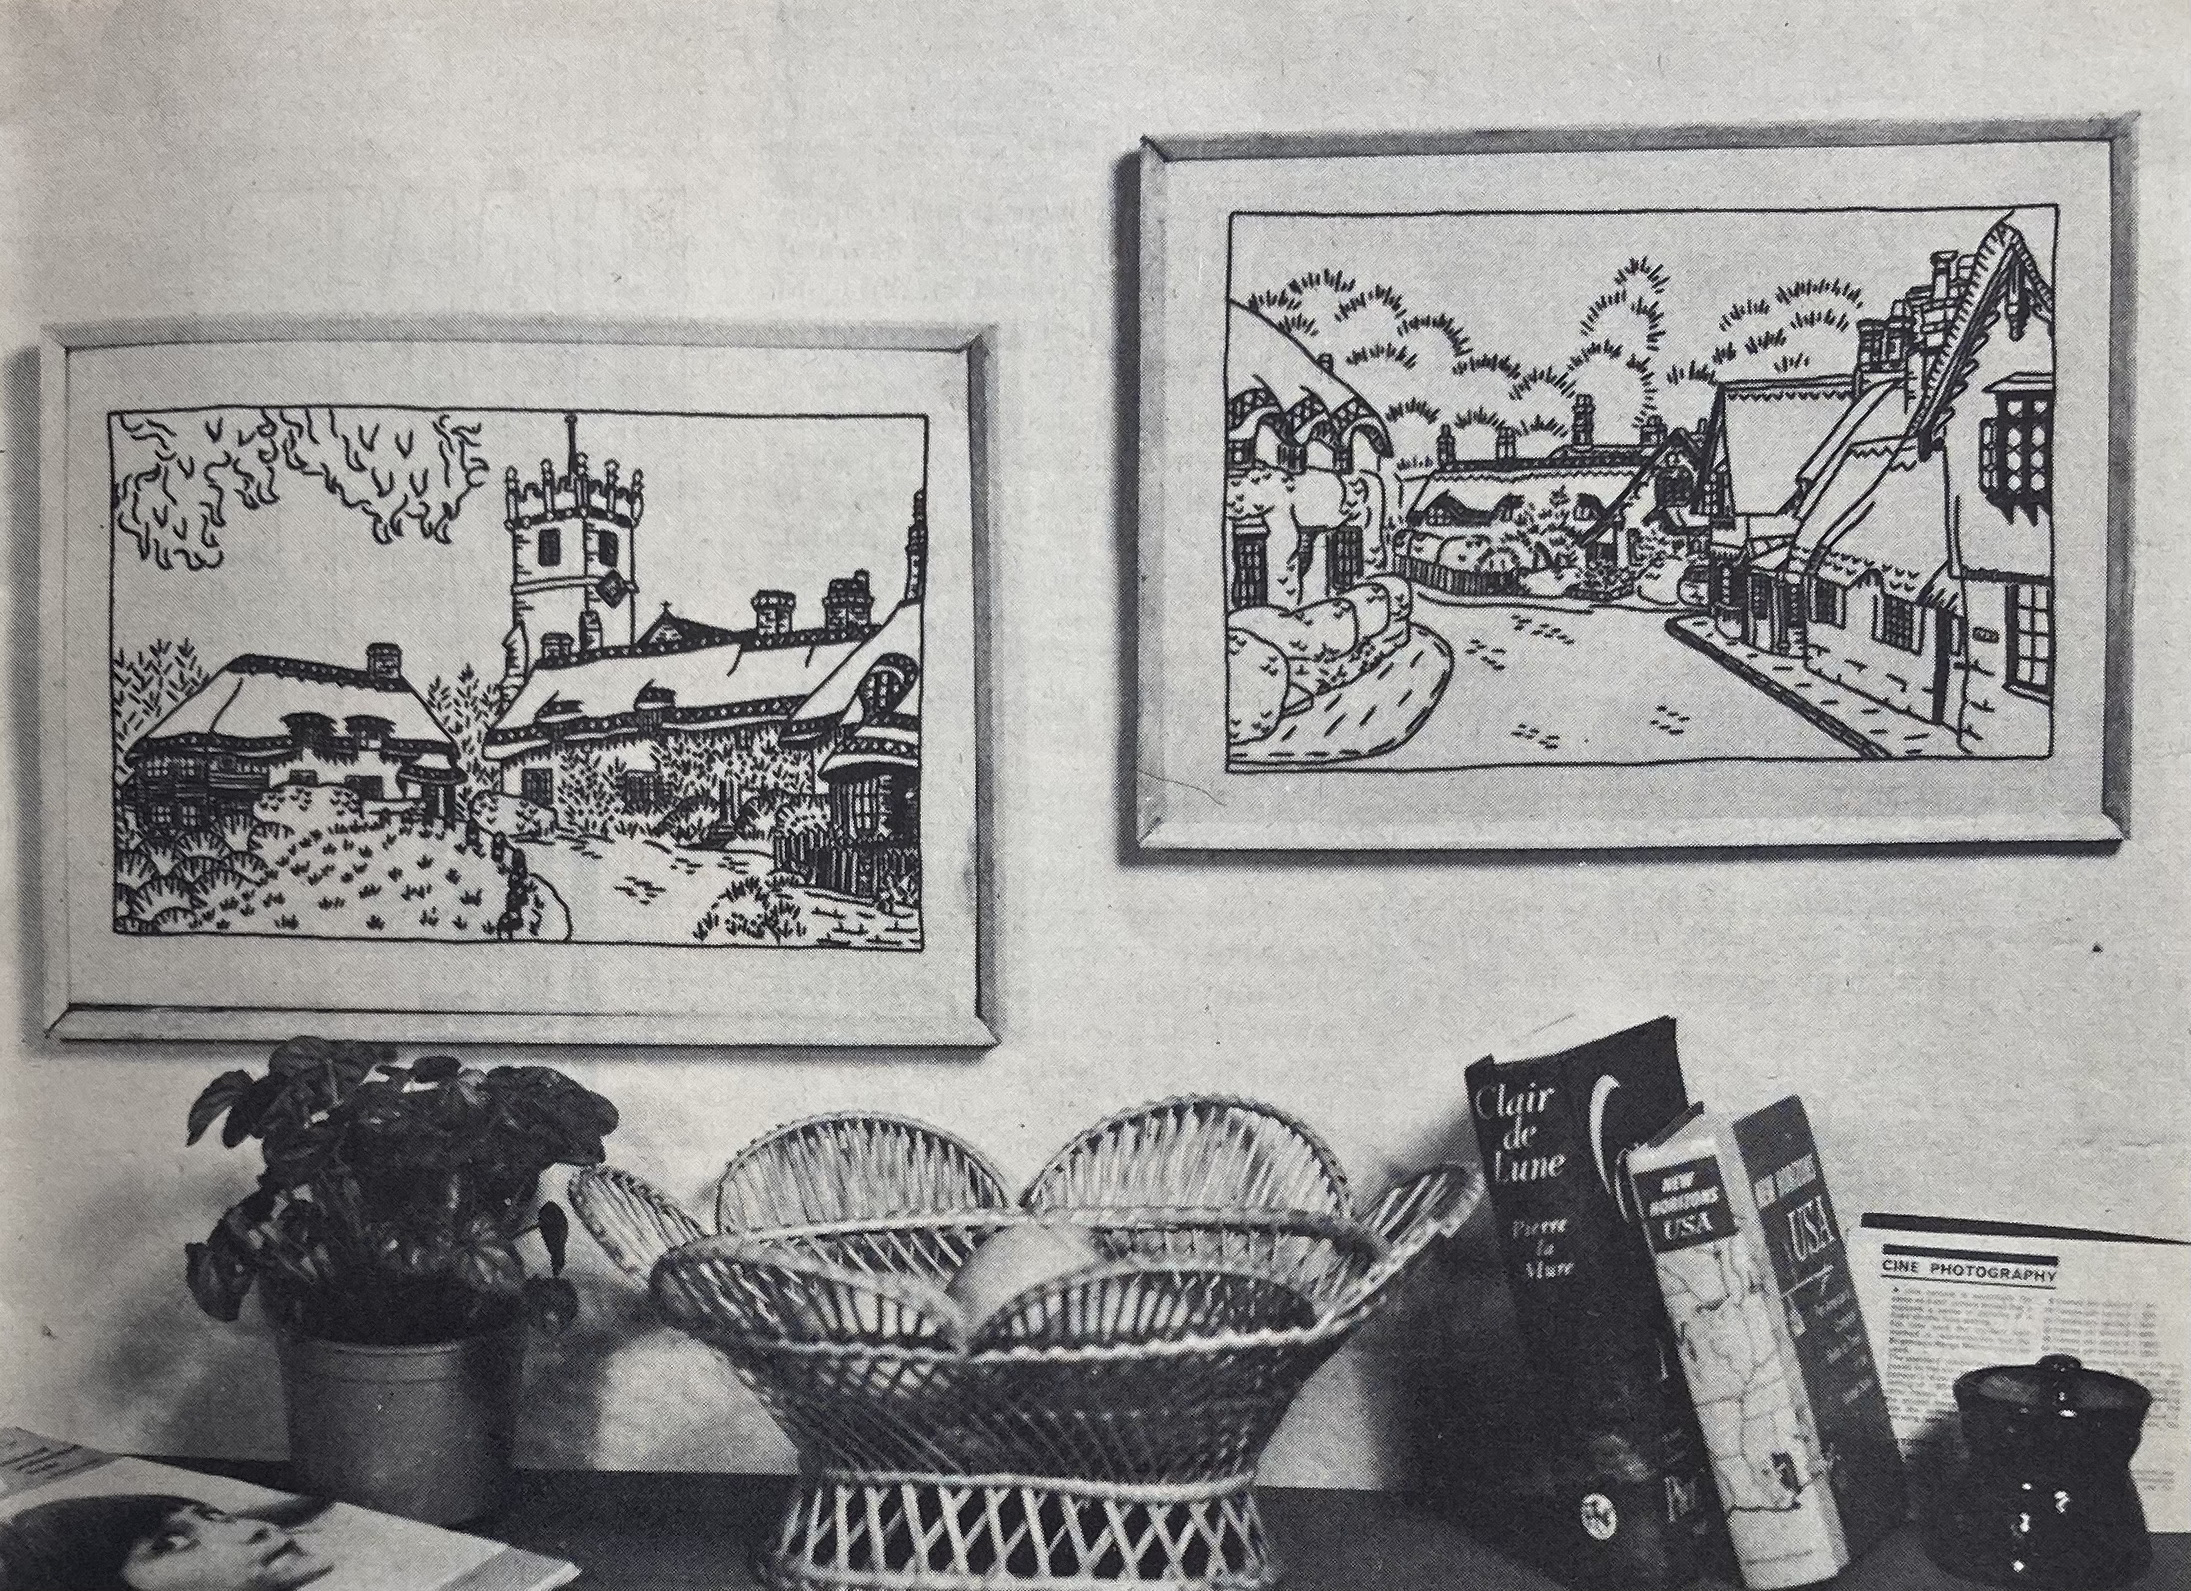
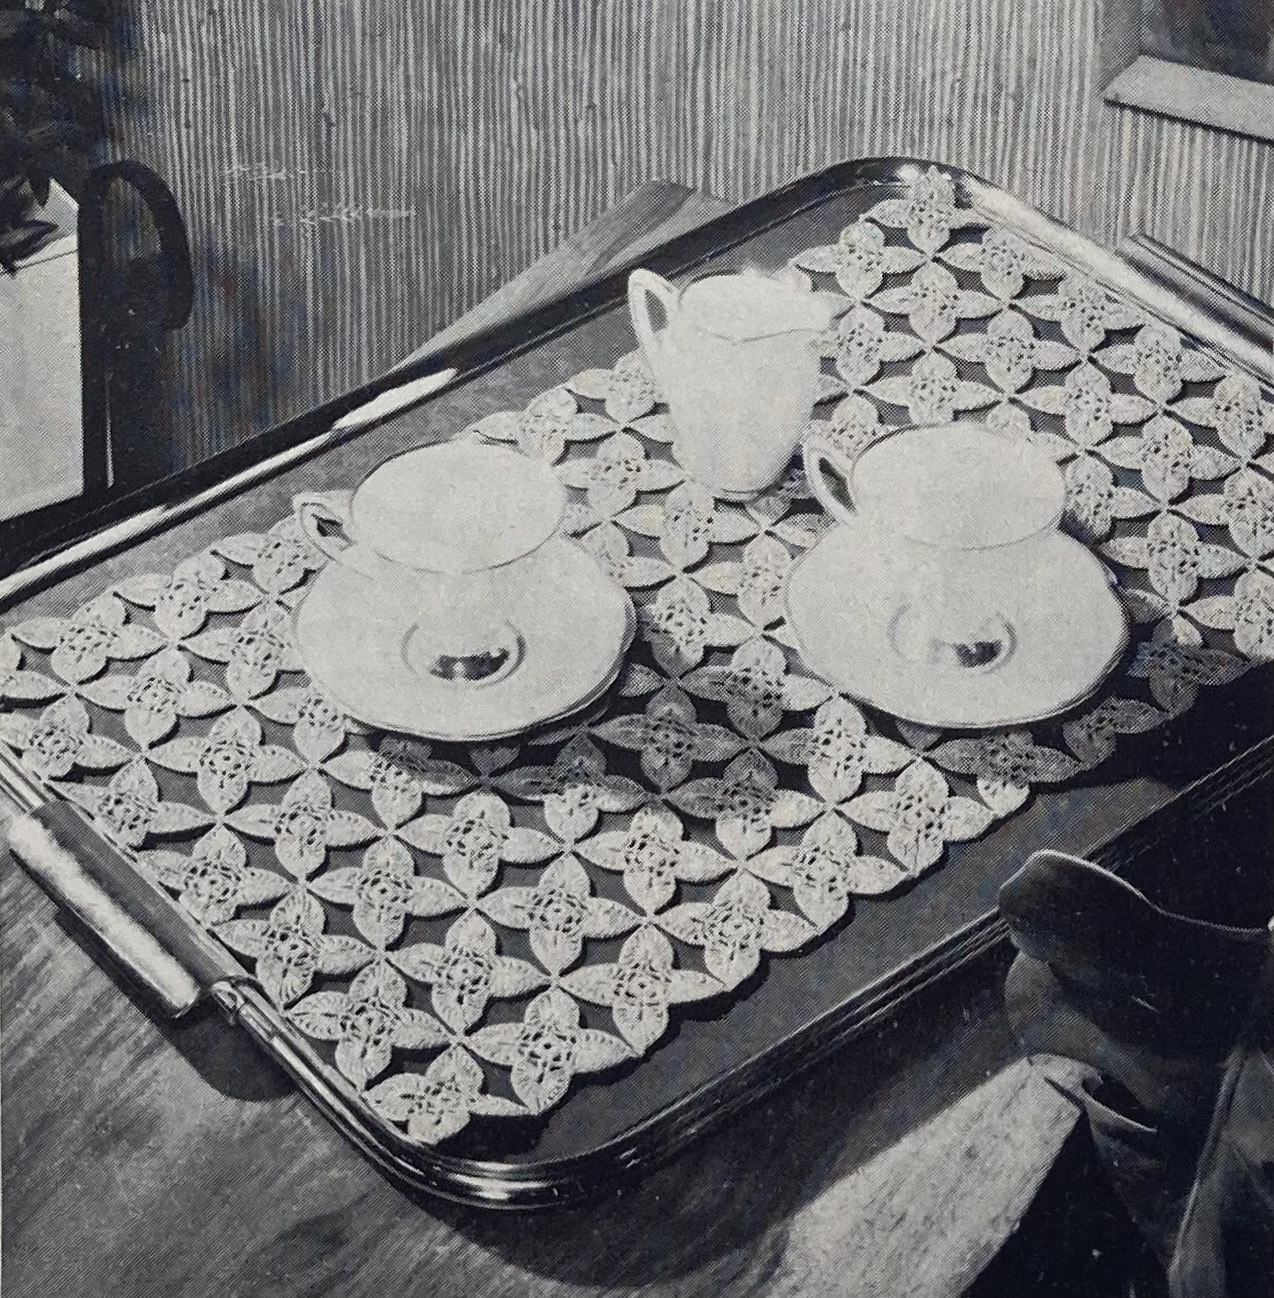
Still, I felt like I was “cheating” by not making at least something new from this issue. How about a “Pretty idea for a Buffet Party” i.e. a trolly cloth and napkins embroidered with Christmas trees? Too much work… but how about one little embroidered Christmas tree on green felt, made from stash and sewn into a little bag to use for a tiny present? Okay! I had plenty of green felt scraps from various other projects and plenty of white, brown and gold embroidery cotton.

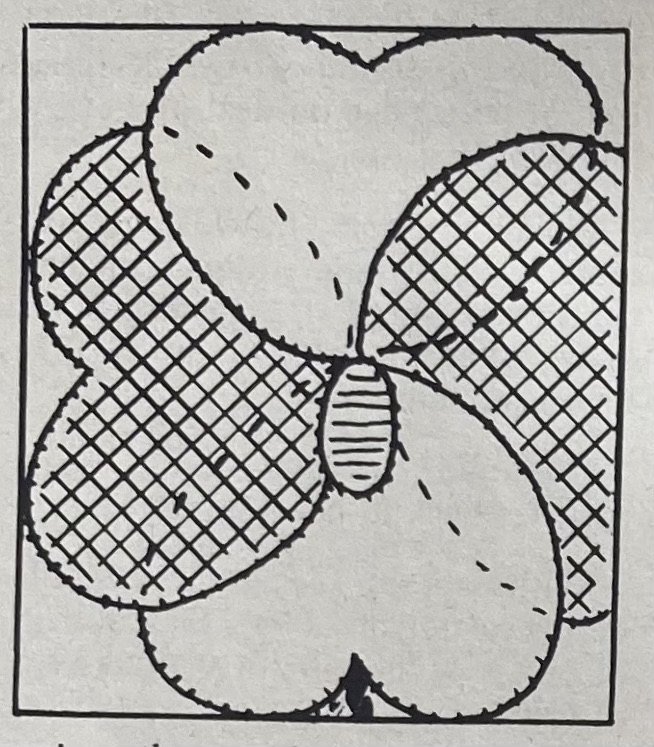
The tree is cleverly “drawn” in one single swooping line and worked in easy chain stitch. The pot is brown long-and-short stitch and the stars, straight stitch with French knots. Since nothing writes or transfers onto dark green felt, I traced the pattern directly from the magazine page onto sewing-pattern paper, embroidered over the paper and dissolved the paper under running water.

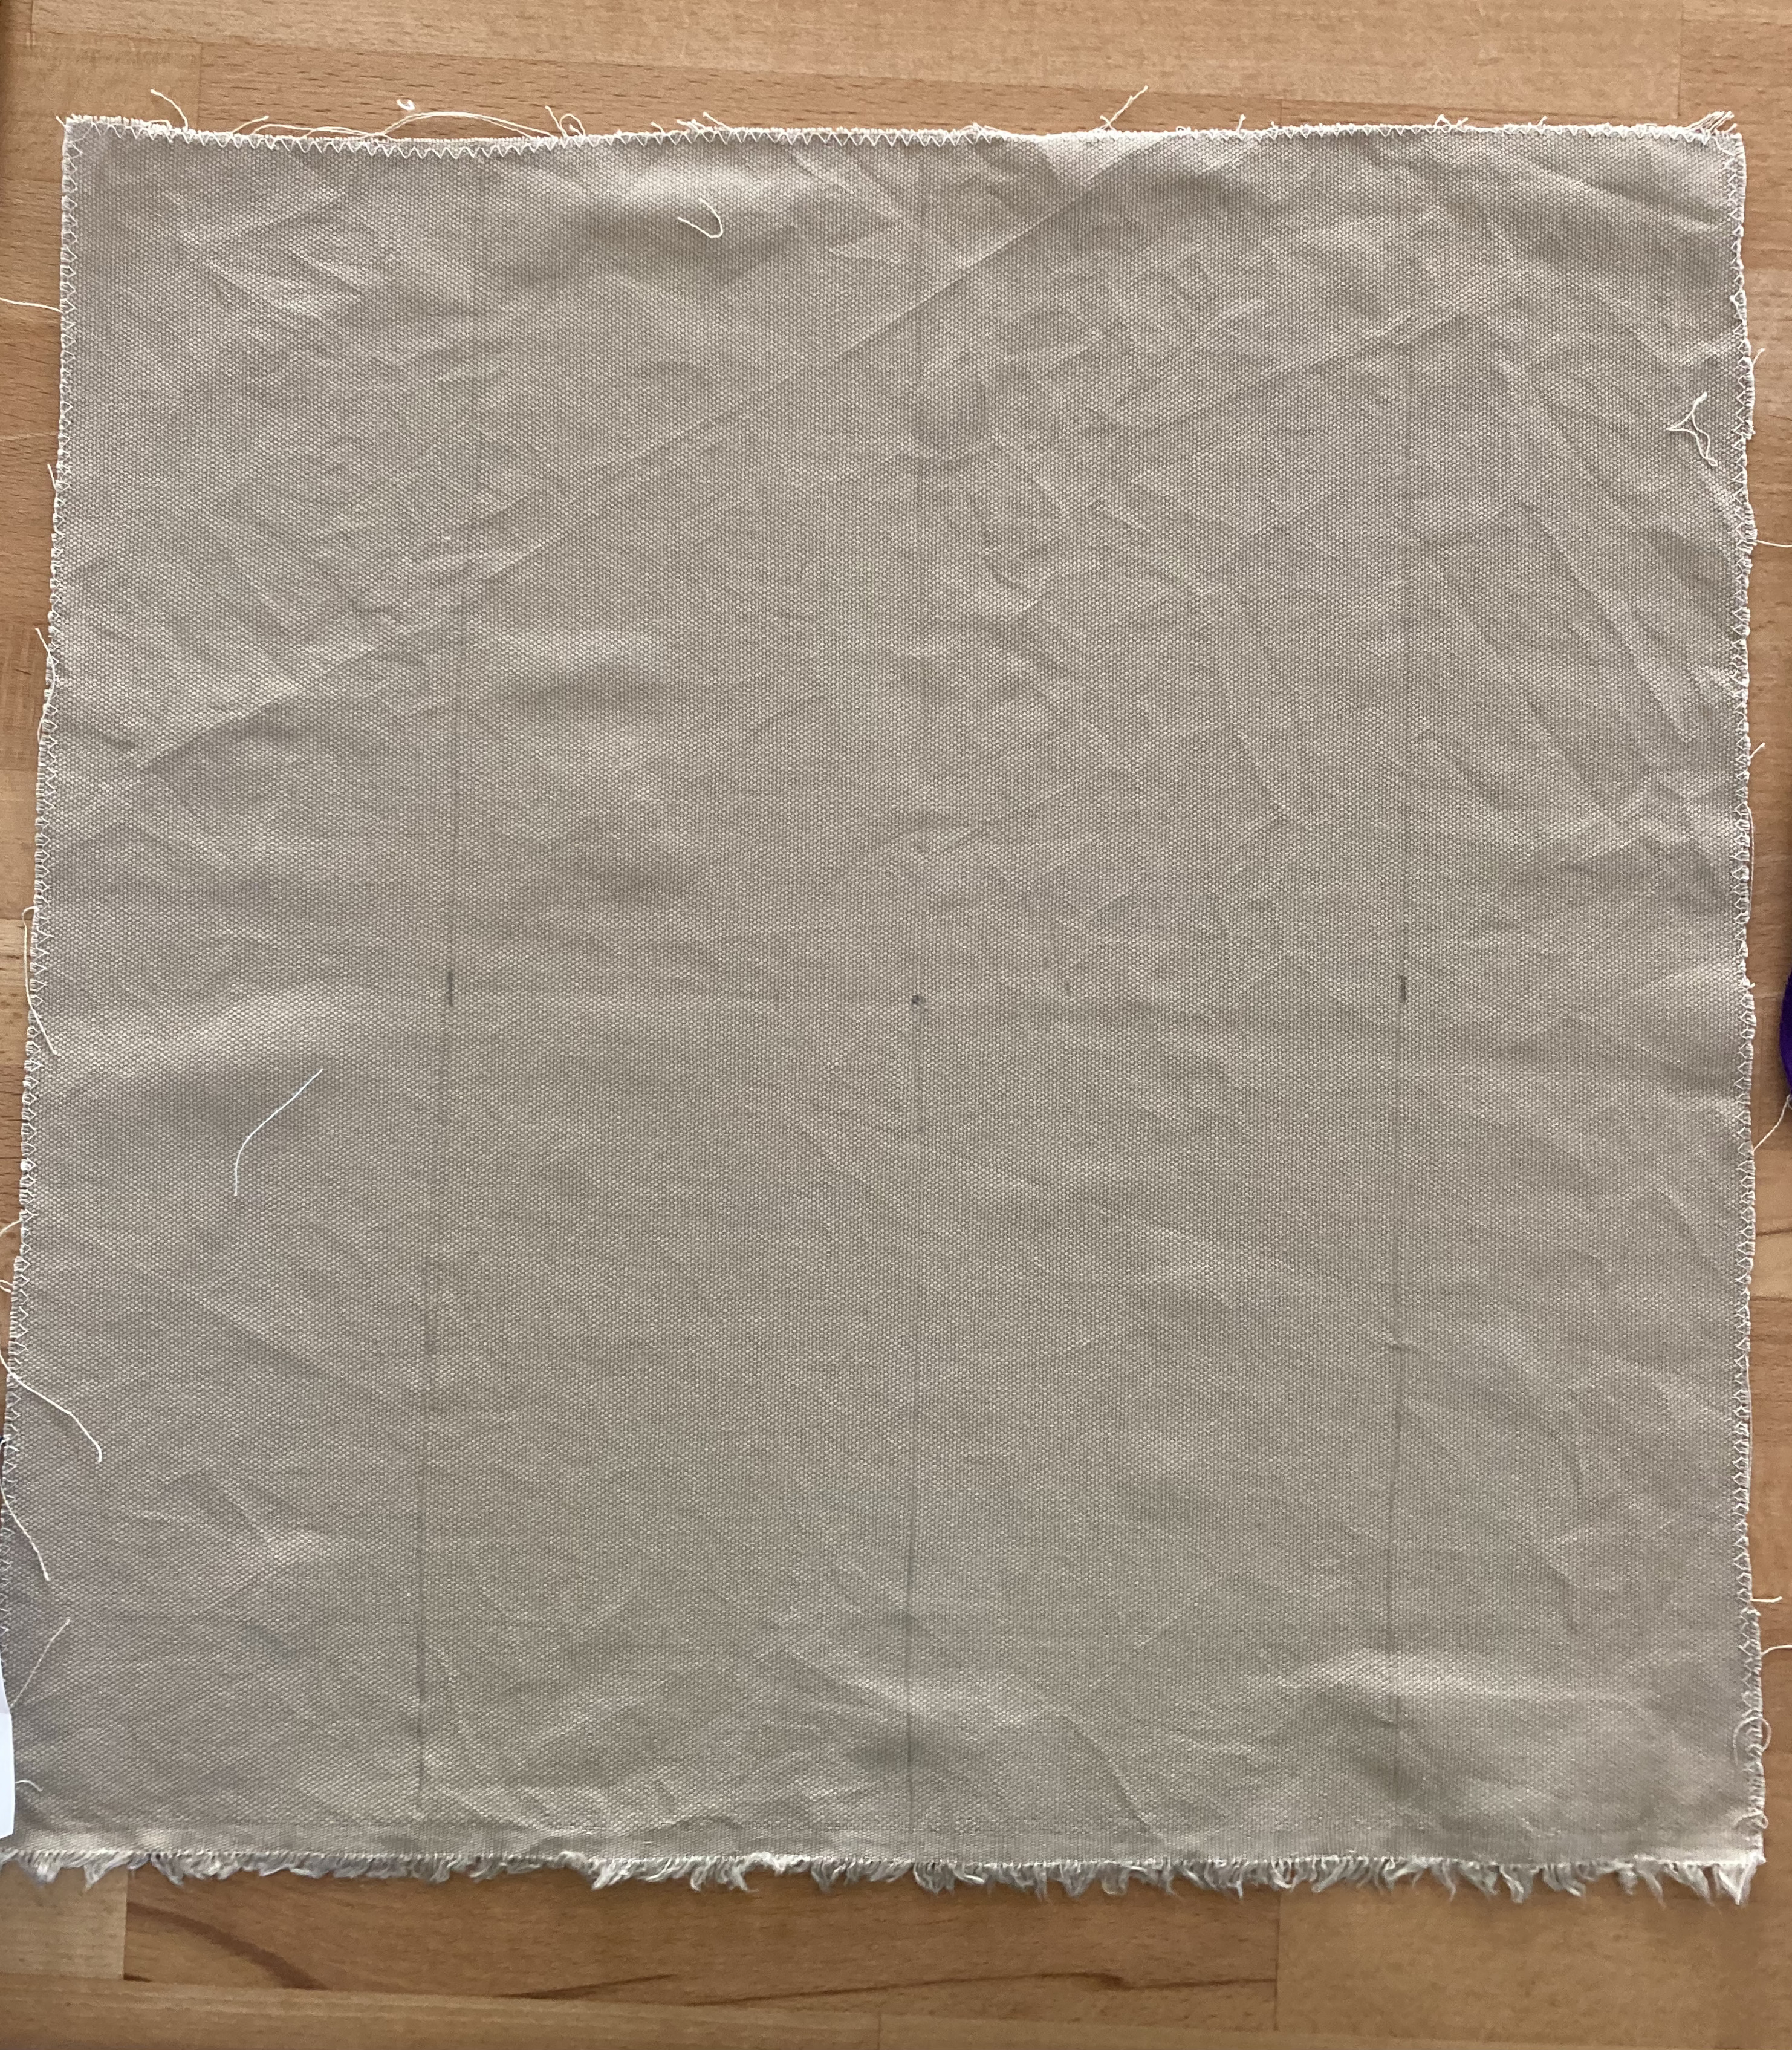
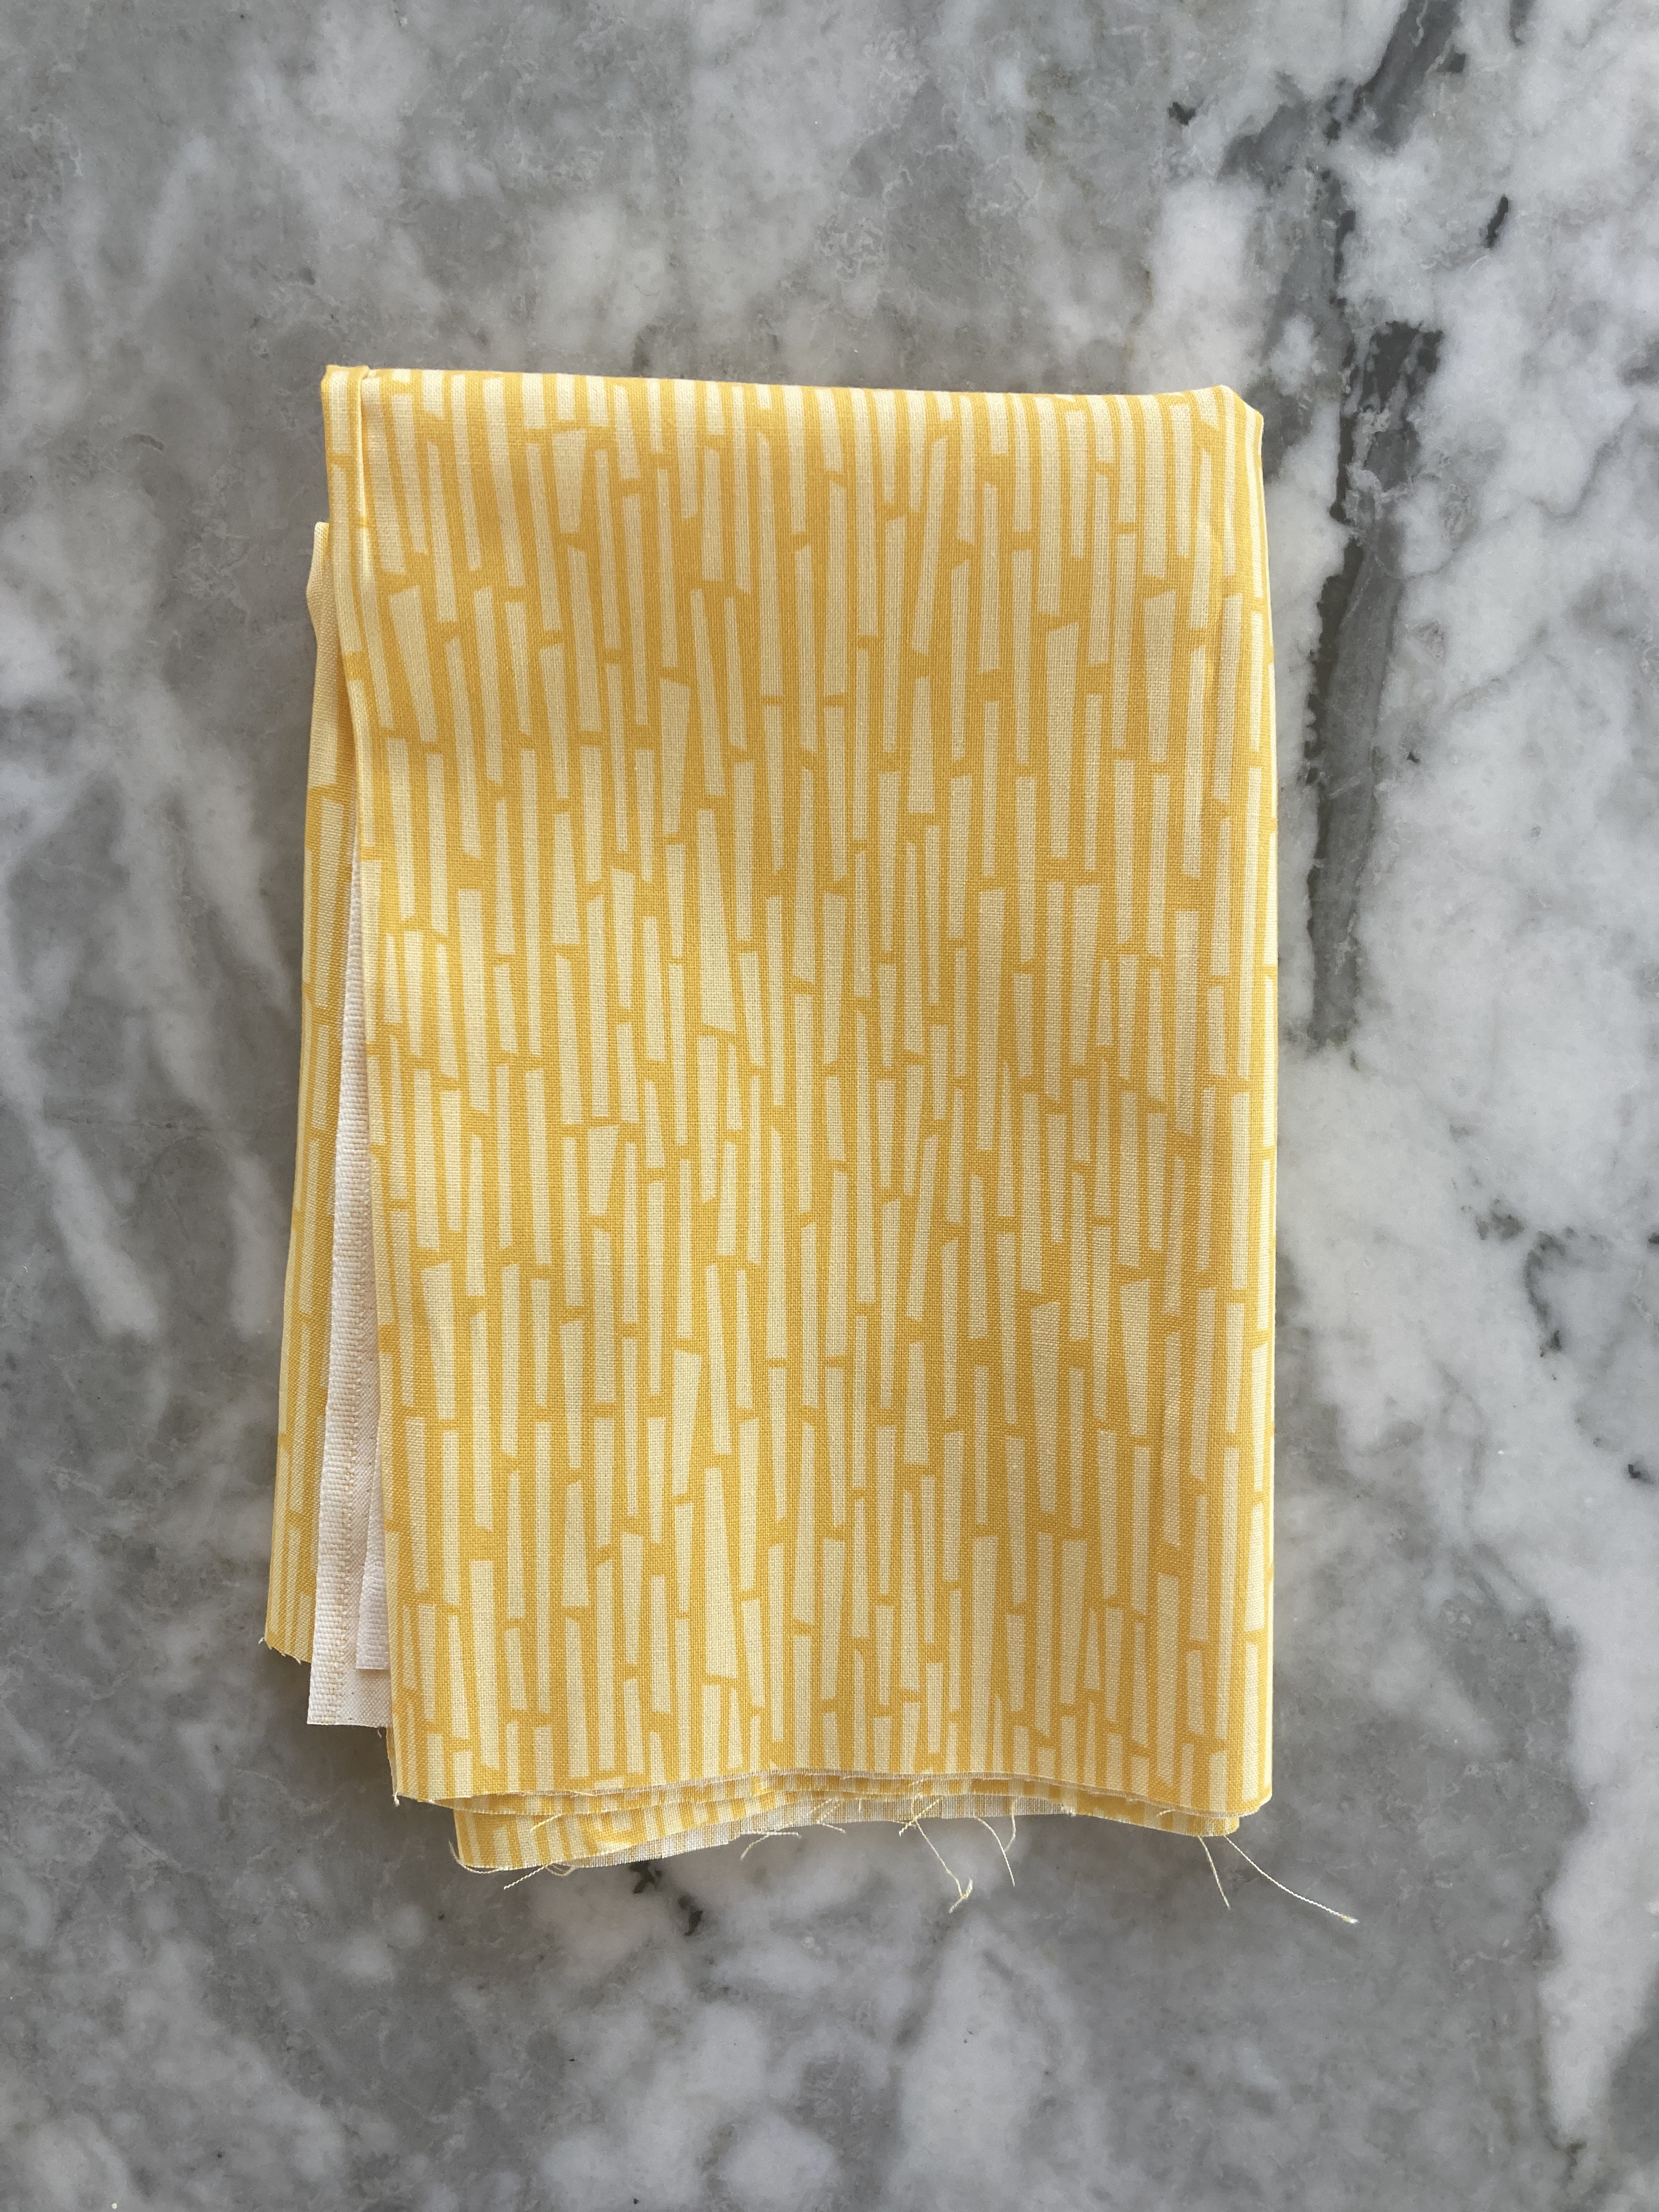
Too lazy to set up the sewing machine, I sewed it into a little bag (approx. 4 x 4.5 inches or 10.5 x 12 cm) by hand (very badly, very crookedly. Sorry, it is the end of the year, and I am tired) and fastened it with a snap. The yellow cotton I used for lining seemed familiar… Oh right, it was left over from lining the workbag, six years ago! I guess that brought everything full circle.

On that full-circle note, I hope you all have a very happy New Year. See you in 1966!

December 1965: Overview

Here it is — the 1965 “Christmas Number”! December at Stitchcraft is always a month of “quick” holiday trimmings and small gifts, mixed with warm winter clothing and party ideas.

Our cover model is wearing a cable-block pullover (with non-crossing cables) in bright red double-knitting weight wool and matching knee-high socks in a lacy rib pattern. The caption on the pattern page is “Fashion feels Young” — Stitchcraft is finally getting into the children’s-fashions-for-adult-women idea that influenced so much of mid-60s fashion. Note the short skirt on the cover model, along with the knee-high socks, the playful kerchief and the big straw hat accessory in the black and white photo. It’s not quite Twiggy or Mary Quant (spoiler: Stitchcraft was never that fashion-forward), but it’s starting to show their influence. “Young Fashion” fun is reflected in the matching cap and pullover set as well. Look at the enormous pom-pom on the hat, outdone only by the model’s fake eyelashes!

The other women’s fashions in this issue remain conservative: a warm tweed dress made in two parts sewn together at the waist (thus the obligatory belt), a cabled cardigan for larger sizes in thick, undyed “Capstan” wool, a lightweight wool jumper and swingy knee-length skirt in a “gay note” of blue or a “harlequin” pattern jumper in “bold” 1960s colours of white, gold and brown. I feel exactly the same way as the model in the colour photo when I finish a project and find that perfect gift on the same day.

Men can get a cabled pullover in a glorious shade of purple tweed and the reassurance that cables are manly (like our model’s eyelashes, which are almost as impressive as his colleague’s with the pom-pom hat). There’s a boatneck pullover in herringbone stitch as well, meant to be worn over a simple polo- ( aka turtle-)neck jumper, for which a pattern was given in the previous issue.

The manly-cable idea is continued on a lovely warm pullover for boys, and his younger sister can get a button-up cardigan in a frothy textured stitch pattern, made in synthetic-wool “Brilliante” for easy washing. Younger tots can enjoy warm ears with a chin-strap “helmet” hat that is guaranteed not to fall off or get lost.

The real focus of the issue is of course, Christmas preparations. Felt appliqué makes a big appearance this year, with place mats and name cards for the holiday table as well a winter-scene wall hanging. The appliqués are quite simple and designed to be used with scraps, and the instructions give ideas on alternate uses such as glueing the felt pieces onto paper for home-made Christmas cards. The place markers have a butterfly motif, making them appropriate for any time of year. Cutwork and embroidery fans can make a tablecloth with peonies, or a Christmas-tree-themed trolley cloth and napkins embroidered in simple chain-stitch. More religiously-minded readers can make a tapestry wall hanging of a Nativity scene (colour photo on inside back cover).

After dinner, it’s on to the gifts! The knitted tea cosy is supposed to represent a holly plant. The “workbag for a friend” is a fun way to use up leftover wool and I made one a couple of years ago. The “cushion for Granny” is a similar stash-buster. One would think it would be made in two squares either fron the center outwards or the edge inwards with raglan-type shaping, but no, you are supposed to make 4 identical triangle pieces for each side of the cushion and sew them together.

And let us not forget the other cushions: a simple cross-stitch number with a woodland design and a tough woven-tapestry chairback cushion in soumak and herringbone stitch. The colour scheme is brown with brown, with touches of orange and lime green for contrast. In the “just for fun” category, you can knit cosies for golf clubs.

Our two brave bunnies from the Readers Pages are still on their quest to find a real live rabbit. Thinking they might find one in a department store (why not), they get stuck on a moving staircase, try to eat a plastic apple, and find a stuffed rabbit who, unlike our co-protagonist Sale Price (also a stuffed rabbit), sadly cannot talk. Next month, they will try the seaside, which is not known for being home to very many rabbits, but I suppose a better chance than a department store, a movie theatre or a merry-go-round. Of course, around Christmas time, one of the surest places to find a real rabbit would be on the dinner table, ha ha. I guess that storyline might be considered inappropriate for a light-hearted children’s comic. At least our two toy rabbit protagonists aren’t in danger of being eaten.

Finally, there’s another wonderful advertisement from my favourite Stitchcraft-ad store, the Scotch Wool Shop. Here is a nice little article about a knitting book produced by the Fleming, Reid company, proprietors of the chain of shops. The ads always make me want to go out and buy things from the stores… which, sadly, no longer exist. These little gift ideas are marvellous.

That’s all for this issue — and this year! I don’t know what I will make from this issue, or if I will just write a post about the knitted workbag that I already made a while ago. I quite like the ribbed skirt, and could use one, but one look at the gigantic WIP pile discourages me from starting any long and boring project. Hopefully I’ll get a couple of those WIPs finished and can write about that for a 1965 / 2023 wrap-up. Until then, I leave you with this graphic from the December 1965 issue. Happy Holidays!

November 1965: Overview

Colour Radiance for Winter and Christmas Plans! At Stitchcraft, it’s generally either preparing-for-Christmas time or spring-summer holidays. This month, they countered the cold, grey days of November with bright, cheerful colours and easy homewares. Let the festive preparation begin.

The knitted sweater suit on the cover is made in an intriguing pattern stitch designed to give “the look of woven texture.” There’s a helpful close-up photo of the stitch pattern as well. Essentially, it’s made by making a wool-forward (yarn over) on the right-side row and then slipping that stitch over a garter-stitch base to make a horizontal “line”. The placement of the slipped stitch is staggered, to make a diagonal herringbone-type effect. Made in DK wool, I’m guessing the finished result is quite warm. The matching skirt is made in plain stocking-stitch. Note that the mini-skirt, or even anything-above-knee-length skirt, still hasn’t caught on with Stitchcraft’s more conservative readership.

Other women’s fashions include a bobbly-cabley “overpull” in undyed “Capstan” wool, made to be worn over a roll-neck knitted underblouse with or without sleeves. The underblouse keeps up the warm colour trend with the suggested colour of “Old Gold”. I love the model’s hairstyle!

There’s also a jumper for larger sizes with very ill-thought-out decorations going right over the bust, and a collared almost-cardigan with a deep placket and Peter Pan collar. The collared number is made in tweedy “Glenora”, one of the multicolour wools gaining popularity at the time. Men get a corollary set to the women’s “overpull” and “underblouse” with a slightly oversized bobbly-cabley cardigan and a 4-ply polo-neck in the same “Nylox” wool as the ladies’ underblouse. The “colour radiance” theme apparently does not extend to the men’s garments, being made in undyed Capstan and “Oystershell” off-white, respectively. The photo backgrounds colours are nicely chosen, though, to set off the diagonal poses and camera angles.

The photo of the girl’s twin set in the inside front cover photo also does a great job of harmonising the backdrop to the subject. Her set consists of a pullover with unbuttoned waistcoat in cheerful pink and blue. Her little brother or sister can go out in the pram or “toddling” in a warm set of hooded jacket and leggings. The child in the photo looks somewhat apprehensive, but the set looks quite snuggly.

And can we have a moment of appreciation for this “special gift” of a bedjacket? I love it! I would make it without the ribbon at the neck and wear it as a normal cardigan. The two-colour pattern is made by working and then dropping yo’s to make a “long” stitch, which is then carried up through the slip-stitch background. I am guessing it is quite spongy and squishy, and was also nice and warm in those unheated 1960s bedrooms. Love the hairstyle in the colour photo, too!

If the model on the left is looking a little suspicious, it’s probably because she was photo-bombed by Homer the Rabbit, star of our current children’s serial comic, “Two Brave Bunnies.” For the uninitiated: Homer (a home-made stuffed rabbit) and Sale Price (a store-bought stuffed rabbit) are on a quest to find a real live rabbit friend. So far, they have only met a merry-go-round rabbit, who assured them that he was not real, as he could carry children on his back. In this month’s episode, our two brave bunnies head to the Town, where they are eager to see “Miss Rosabelle Rabbit” on the cinema screen. Alas, she is only a film rabbit, so cannot communicate with our friends. No matter — they will persevere! Oh, right — and this month’s issue includes instructions on how to make your very own home-made Homer doll from felts.

Home-made Homer is one of this issue’s many small, fun “colour novelty” gift and decoration ideas, along with a felt Nativity panel mimicking stained glass, a couple of pot holders and a colourful ball to use as decoration or a baby’s toy. Embroidered gift ideas include a whimsical sewing apron and a cross-stitch calendar and chairset. I don’t really understand the calendar — it seems to be just a vertical wall panel that you attach the (tear-off?) small calendar onto. OK, I guess, but maybe not necessary?

You can also knit a stuffed panda bear, a snowman, or a garter-stitch blanket rug, or crochet a round disc to be adapted into either a girl’s beret or a round cushion. There’s a filet crochet table centerpiece and tapestry wall pictures of caravans or Bibury. Last but not least, there’s a counted-embroidery cushion-and-chairback set with a vivid purple flower design.

I don’t know about you, but I feel cosier already. My design for this month will be the bedjacket! The October 1965 cardigan blouse is almost finished, too, and I’ll update that post soon.

October 1965: Picot Trims

EDIT November 12, 2023: Finished!

This month’s project was the simple, yet elegant “Cardigan with Picot Trims” from the October 1965 issue. It is made in stocking-stitch with 3/4 length raglan sleeves and hems at the lower edge, front bands, cuffs and neck. The fronts are then trimmed with simple crochet picot edging and the back is left plain.

It was the perfect project for the Rohrspatz & Wollmeise “Lacegarn” wool (100% merino wool, superwash, hand-dyed) that I had bought at the Sulinger Wollfest this past summer. The pattern calls for Patons Beehive 4-ply, so a little thicker than my laceweight, but that meant that for once, I could use the intended needle size and get the intended tension (7 sts and 9 rows/inch on No. 10 (3.2g mm) needles — I used 3 mm and it worked perfectly.) The yarn is glorious, with its deep, glowing green colour, which is deepened by the slight marling that results from the hand-dying process. This hank (300 g) was even discounted due to possible knots, breakages or dying errors, but there were none of any of those that I could find.

I had resolved to never again make a garment with a stocking-stitch hem in lightweight wool, since in my experience it stretches out horizontally and the whole garment shrinks vertically, turning even a slim long-line into a boxy tent. In an attempt to counteract it, and to avoid the ballooning back and general dumpiness of 1960s unshaped style, I added some waist shaping, decreasing every 6 rows to just below my natural waist, knitting 2 inches plain and then increasing up to the required number of stitches. I decided to make the decreases not at the sides, where one would expect, but 12 stitches in from each front edge (where the picot trim is sewn on later) as well as 12 stitches in from each back side edge and 12 stitches in from the middle back symmetrically. Yes, this meant I decreased twice as many stitches on the back as on the fronts. And it worked! The back fits well without being too tight or ballooning out over the waist and the front has an elegant curve. Plus, the picot trims will cover up the decrease/increase line on the fronts.

In that vein, I increased up to the correct amount of stitches for the second size on the fronts, but kept the back at a stitch count between the first and second sizes, to allow the front to be wider than the back even before allowing for the extra inch or so of the front bands. The sleeves (which I actually knit first) were a bit tight, so I went ahead and increased up to the third size. I also made them longer. The 14 inches specified in the pattern for 3/4 length is closer to elbow length on me, and didn’t look quite right. I increased to 16 inches, which gives a nice “bracelet” length.

I made the raglan decreases as intended — sleeves decreasing every 4th row at first, then every other row, and always every other row for the fronts and back. Of course, the counts didn’t match exactly, since the stitch counts were from different sizes. Also, I wanted the neckline to sit a little lower and I was concerned that the yoke might be too long — I didn’t check row tension, but it seems to be not 9 rows/inch. I ended up making the initial neckline decrease about an inch below where it would have been in the pattern, ending where it fit the best and just making some extra decreases on the last row to pull the back neck in a bit for the neckband.

The front bands are made separately and sewn on. I guess I could have knitted them with the fronts and back, which I made in one piece anyway, but I didn’t think of it in time. And anyway, making them separately meant I could make them on smaller needles. For once, I got the spacing of the buttonholes right! Stitchcraft always tells you to make the button band first, sew it on as you go, then mark the places for the buttons with büpins and make the buttonholes on the other band to correspond. It does not always work as well as you think it should.

After the button bands and the neck band were finished, and the underarm seams grafted (terribly. So terribly. I can not seem to master the Kitchener stitch no matter how it is taught), it was time for the picot trims. I thought it might be possible, and easier, to crochet them directly onto the fabric instead of making them separately and sewing them on, as the pattern indicates. I tried it on a swatch, crocheting into the horizontal bar between stitches and working into 2 of every 3 rows. That gave a good length, but also made the trim stand up straight instead of lying flat to the side as it should have. So I crocheted the trims separately and sewed them on, handily covering up the line of decreases and increases from the waist shaping in the process.

That left the buttons! Which were, strangely, the most difficult part. I wanted round, flat buttons with a back hook (not holes), as in the photo. So very 60s and in my opinion, they really make the outfit. But neither the colour of the wool (a deep, slightly blue pine green, none of the photos here really do it justice) nor the style of button seem to be in fashion. I looked at different stores, online button shops, vintage buttons on ebay… Nothing close. Luckily, my local wool/sewing shop can cover buttons with fabric if you have the right fabric. What do you know, this colour is not in fashion for fabric either! I finally found some gorgeous green stretch velvet and used the wrong side (not the velvet side) for the fabric buttons. Perfect.

In fact, everything about this project was perfect. The fit is perfect and the waist shaping worked perfectly. The sleeves blocked out to exactly long-sleeve length. The wool is wonderful, the colour is wonderful, and the finished blouse looks exactly like the photo except for the colour choice. I even managed to twist my back into almost as hard an S-curve as the model in the photo… (Rotating the finished photo helped too.)

May all your projects work out so well!

October 1965: Overview

Colour and Tweed for Autumn! This is a “bumper” issue full of many beautiful designs for adults, children, homewares and “novelties”, all with an autumn theme. My apologies for the slightly late post — I was traveling last week with no computer.

The cover photo is a “Chanel Style Suit” in Bracken Double Knitting tweed wool. 1965 was the heyday of Coco Chanel’s pioneer boxy, tweedy suit that was all the rage with celebrities and modern women. Her designs combined Scottish tweeds and multi-colour fabric patterns by Bernat Klein with her signature comfort, ease of movement and simple elegance to make a modern, essential wardrobe staple. Here is an excellent short introductory film about it (I’m sure readers of this blog will need no introduction; still, it’s great.) The knitted suit design in this issue of Stitchcraft is very true to the Chanel model, with its thick, tweedy wool, above-knee skirt and functional, square pockets in the jacket. There’s a short-sleeved knitted blouse in turquoise to match.

Other women’s garment designs include a brilliant red dress in Paton’s newest wool, Fiona; a “continental” pullover in a broken-cable design in regular Patons DK wool, a plain pullover with “new styling”, also in Fiona; and a fine-knit cardigan with crochet picot trim.

“Fiona” wool was a mix of Shetland wool and synthetic “Orlon”, made to combine the best qualities of both — warm, and lightweight like the wool, but easy-care and less scratchy. The “new styling” of the plain pullover means it is longer (23-24 inches) and looser-fitting than previous classic designs, and the raglan armholes are deeper, for an all-around casual fit. Colours are bright and snappy with yellows (“Maize”, “Celtic Gold” and “Inca Gold”) complementing the bright red of the dress. There’s a slipover for men as well, in bright “Peacock” shade and made in slightly thicker “Flair” — also a wool-synthetic mix. Cables of all sorts are popular, and the longer length can be seen in the Fiona advertisement as well as the garment photos.

The accessories are limited to one hat — but what a hat! The “tucked” pattern is made by inserting a “life-line” type extra thread every 5 rows and then knitting those stitches together with the current row. I love it, though the model has an unfortunately ridiculous expression on her face in the photo. No designs for babies this issue, but two wonderful and colourful sweaters for children with stranded hem and yoke accents.

In the embroidery and homewares department, we have the usual designs for cushions, chair-backs and chair-seats, plus a granny-square crochet pattern to use up scrap wool that, backed with woven fabric, can be used to make a workbag or cushion. Like the garment designs, colours are bright and bold, with reds and blues prevailing, along with black and white.

More advanced needleworkers can make a very pretty firescreen or a blackwork wall panel. Finally, there are embroidered cushions with flower designs — cornflower, corn not-flower-but-actual-corn, and red poppies. The loose, almost flowing style of the cushion designs looks ahead to later and even simpler patterns — complicated Jacobean work was on its way out. There’s a practical stitched rug in a geometric design as well.

The bizarre-bazaar “novelties” never fail to amuse and wonder, and this month’s issue gives us a knitted tea cosy (festooned with pom-poms) that looks like a giant orange and/or lemon, and a crazy-eyed “Pete Puppy” doll in sewn and embroidered felt fabric that can be used for storing sewing implements — just poke those spare pins right into his belly like a voodoo doll. The “Readers Pages” offer some reprints of popular designs from earlier issues: a doll’s clothing set from November 1940 and a crocheted pram cover from … when was it exactly? It doesn’t say in the instructions and couldn’t find it in my previous posts, but I know I have seen it in another issue — possibly pre-1960.

In the current comic (really, one of the best ones), homemade rabbit doll Homer (because he’s home-made, get it?) and his friend, the store-bought rabbit doll Sale Price (self-explanatory) go on a quest in search of a real, live rabbit. Here’s they find a rabbit on a merry-go-round, who explains to them (logically enough) that he cannot be a real rabbit, as he can take children for rides, which a real rabbit cannot. Pedagogical message for children: do not try to ride on a real rabbit! Alas, Homer and Sale price must look further, and will continue their adventures in next month’s issue.

I will leave you with this ad for the Scotch Wool Shop, purveyors of knitting wool, stockings, underwear, and fashionable clothing for women. Always keeping up with the times, the ad shows a crocheted dress in Mary Quant style, named “Troy” and perfectly photographed for the Swinging Sixties.

That’s all for now! I have so, so many unfinished projects, but cannot resist the temptation to make the fine-knit cardigan blouse with picot crochet trim. It will definitely not be finished on time, but as always, I will update project posts when progress has been made.

September 1965: Comfortable Cushion

EDIT 2 October 7, 2023: Finished!

This month‘s project was another modern adaptation of a 1960s homeware object. In this case, the original design was for a knitted „comfortable cushion” in a use-up-your-scraps striped slip-stitch pattern. I had plenty of scraps to use up and a request to make a little wrist cushion for someone who works a lot on the computer and had been padding their wrists with a folded scarf. The yarns I used were some more of the lovely Slow Wool Lino from Lana Grossa with bits of leftover sock wool for the contrast colours.

The original cushion measures 15×12 inches using a cast-on of 83 stitches of DK wool. I wanted a 14×4 inch cushion in fingering weight and calculated that out at 79 stitches in width. The stripes are made in slip 1, knit 3 pattern in alternating colours.

Everything worked out out fine on the first cushion piece. The width was perfect and three rows of stripes with 6 plain rows at beginning and end were a good height. The pattern was so very, very 1960s! Especially in the brown and brown and grayish brown and blue colour scheme (by request from the intended recipient.)

It was, in fact, a bit too authentically 1960s for the recipient, who requested a different pattern to use on the other side of the cushion. How about Space Invaders monsters? (i.e. hipster 80s retro instead of grandpa‘s 60s retro.) Space Invaders it was! I adjusted the number of blank rows on the Space Invaders piece, since the slip-stitch pattern pulls the knitting together even more than stranded work.

Then I made two more smaller squares in the same design, to make a pad for when the recipient might want to hold their wrists farther apart. All of the pieces curl a lot, as you would expect from stranded and/or slip-stitch patterns worked flat, but when I uncurled them, they seemed to be just the right size.

I wash-blocked the pieces, which flattened out both patterns admirably, and realised that I had made the Space Invaders piece too narrow. Not wanting to knit it again, I made two little strips to sew onto the sides — not elegant, but it fit.

I sewed up three sides and tacked 2 layers of quilt wadding to each of the insides, then turned around and sewed up the fourth side.

It’s… OK, I guess? The slip-stitch side definitely looks like a brown-on-brown 1960s home-made pillow, so you could call it authentic. But it’s not really one of my more interesting or beautiful projects. It should be useful, at least.

September 1965: Overview

Autumn is here, and the September 1965 issue of Stitchcraft is, as promised by its editress, a “bumper” issue with more colour photos (to offset the price increase to 2s. per single issue) and a new yarn from Stitchcraft’s patron wool company, Patons. 

Called “Fiona”, it was DK-weight and made of 50% Shetland wool and 50% “Orlon” (one of the very first acrylic yarns). Shetland wool is beautifully warm and lightweight due to its being very lofty and “hairy”, and “Fiona” was marketed as combining these positive aspects with the easy-care, less scratchy and non-tangling qualities of synthetic yarn — a sort of “Shetland lite”, if you will. Real Shetland wool is excellent for traditional “Fair Isle” stranded colourwork patterns, since the hairs lock into each other in the stranding, but the “Fiona” designs in this issue employ smoother, textured stitch patterns. The cover cardigan-jacket has a bobbly lace pattern and the his-and-hers pullovers use a broken cable rib. 

The other two designs for adults are made in standard 100% wools: a “young-looking sweater” with really, really unfortunately placed bobbles (directly along the bustline) in Patons Double Knitting or Crepe, and an Aran-patterned jacket in bulkier “Capstan”. An older brother might get this “Husky polo style” pullover in Patons DK and a fun reversed stocking-stitch pattern with more (and better placed) bobbles. 

The trend for textured stitch patterns continues with garments for the younger set. The toddlers’ “walking-out set” of pullover, leggings and snug helmet-style cap (with more bobbles on the tie at the neck) is made in easy 2×2 ribbing in blue and white DK wool. Love the pre-Photoshop-era addition of a tree in the photo, to show you that he’s playing outside! His big brother gets a warm slipover in an easy zig-zag pattern, and tomboy sister, (with short hair and trousers) gets a set of cap and sweater in a fisherman’s rib pattern that is more complicated to do than it looks. You purl the RS rows and and on the WS rows, you *k1, purl into next st. but through loop of row below at the same time slipping st. above off left needle; rep from * to last st, k1. The vertical stripes are added later via Swiss darning aka duplicate stitch embroidery.

Above all, this is a bumper issue for homewares. There are multiple pages of easy projects for a “Sale of Work” stall at the church bazaar or what have you, including a “house” and “windmill”-themed apron, mat/cosy set and a “peg bag” for holding laundry pegs. Other quick novelties include a knitted scottie-dog toy and a cosy or cushion made out of odds and ends of wool. 

More ambitious needle-workers can decorate an entire room from top to bottom with designs from this issue, starting with a needle-etched picture of a steam engine — a throwback to the Victorian nostalgia of the late 1950s and early 1960s — or a tapestry picture of the seaside village of Clovelly to hang on the wall. 

For the furniture, there’s a beautiful “peasant” (their word, not mine) design for a cushion and chairback, made in embroidery wool on linen, and for the floor, a hand-made “Tartan” rug. It uses a latch-hook and the “Turkey knot” to make a soft, three-dimensional pile. Finally, church-goers can make a tapestry “kneeler” cushion in a pattern inspired by Gothic stonework. 

And there’s a new children’s comic serial in the Readers Pages! This is a really cute and creative story about Homer the plush rabbit (so called because he was home-made) and Sale Price, the store-bought plush rabbit, who go out into the big wide world to try and find a real rabbit to befriend. Will they find one? Stay tuned! Oh, and I bought this issue on Ebay, so received a special… bonus? picture of an embroidered Christmas tree with no transfer or pattern instructions (and not from Stitchcraft.). If anyone can identify it, I will be very impressed!

My project from this issue will be the knitted cushion, by special request from someone who works on the computer a lot and would like a soft underlay to rest their wrists on.

August 1965: Overview

It’s “late summer” over at Stitchcraft magazine, and this month’s designs are still summery-looking, but warmer, with an eye towards the coming autumn and cooler weather. Also, production costs were apparently increasing, so readers were informed that as of September 1965, the price for individual issues would be raised to 2s. 0d. The increase to the current subscription rate of £1 8 s 0d for one year or 14s for six months, post-free to any part of the world (!) was scheduled to be explained in the September issue, with existing subscriptions running out at the old price.

To make up for the price increase…

How much was that in today’s currency? I cannot vouch for the accuracy or lack thereof from either of these sources, but the currency converter website of the National Archives tells me that a year’s subscription at the old price would be the equivalent of £24.67 in 2017 (the latest year the website calculates to), so quite inexpensive for 12 issues. A six-month subscription would cost £12.33, so pretty much exactly half (if you round up a penny, since a six-month subscription certainly wouldn’t have cost less than half of the yearly price.) A single issue at the new price would cost £1.76. According to this inflation calculator (again, take all of this with a grain of salt as such converters are always approximate), in 2023 prices that would come out to £2.21 for a single issue at the new price and £31.01 for a year’s subscription at the old price — again, quite reasonable, if the converters are at all accurate. Stitchcraft was published by Condé Nast as an independent publication, but of course was a co-product of Patons / Patons and Baldwins / at this point the company had been merged with J&P. Coats / yarn company, so served as an advertisement for their wools. As was common for knitting magazines at the time as well as today.

But I digress! The cover photo shows Aran sweaters in the partner-look for him and her, made in slightly-heavier-than-DK “Flair”, a wool-synthetic mix. Other fashions for women strike a balance between “cool to look at… warmer to wear” and include a two-piece DK dress with a short-sleeved top or a DK sweater in “ice-cream” colours of bubblegum pink and white. For the coming autumn days days, there’s a DK cardigan made warmer and heavier by the use of trellis-stitch panels on the front and back, or for a lighter touch, there’s a 4-ply jumper with diagonal stripes, knit diagonally — basically two rectangles for front and back, then picking up stitches for the vertically-knit yoke, and separate sleeves. The colour scheme is definitely still summery, with the striped jumper in navy blue and white and the trellis cardigan in light “Beau Blue”.

For men, in addition to the Aran-pattern sweater on the front cover, there’s a nice 4-ply slipover, made warmer by the use of a sort of broken garter stitch pattern: every 4th stitch is knit through the back on the RS rows and purled on the WS rows to create a pseudo-ribbing effect.

This month, we once again have children’s fashions for all ages. There’s a dolman cardigan for girls up to a 29 inch chest and a cute unisex “play shirt” up to 28 inch chest, all in sunny colours of gold, white, “Gay Turquoise” and “Sunglint”. Baby’s turquoise “extra jacket” is worked in one piece up to the armholes in a stitch pattern that looks a bit like the one for the man’s slipover, but is more complicated:

  • 1st row: WS facing, knit.
  • 2nd row: *k3, k3 tog and leave on needle, then k. 1st st again, then k tog the other 2 sts and slip off needle, k 3*, rpt to last 3 sts, k3 tog and leave on needle, k 1st st again, then k tog the other 2 sts and slip off needle
  • 3rd row: purl
  • 4th row: knit
  • 5th row: knit
  • 6th row: *k3 tog and leave on needle, then k. 1st st again, then k tog the other 2 sts and slip off needle, k 3*, rpt to last 3 sts, k3 tog and leave on needle, k 1st st again, then k tog the other 2 sts and slip off needle
  • 7th row: purl
  • 8th row: knit

I’ve never seen this stitch before — does anyone know it, or know if it has a name?

In the homewares department, we have the usual selection of versatile designs for different items and uses. The cross-stitch ivy border, for example, is suggested for “cushions, table mats and chair-backs, or as a border for curtains” , the wavy “design from Greece” is featured on a chair-back, cushion and rug, and the Swedish-inspired design “for bold counted embroidery” works on table mats as well as cushions. Even the tapestry hydrangeas can be used as a wall picture or fire-screen.

It wouldn’t be a proper issue of Stitchcraft without bizarre-bazaar ideas, though these are not nearly as weird as some of the items that we’ve seen in the past. The theme is clearly “kitchen” this time, with embroidered or appliquéd aprons and pot holders. Sometimes the chef looks happy with the food, and sometimes he definitely has l’air déçu!

The back pages feature a “special request” tatted doily edging, a great “leg lively” ad for nylon stockings from the Scotch Wool Shop. In the final chapter of the current children’s serial comic, “The Lost Stitch”, Jill and her brother James fall back through the magic portal that appeared in a dropped stitch, to find themselves back at home with the stitch magically mended. May all your dropped stitches heal this way!

There isn’t a specific design that I like enough to make from this issue, so my August project will be another non-Stitchcraft “Blast From the Past.” Happy late summer and if it’s still too hot where you live, enjoy that ad for Lightning zips that promises to keep you cool as a cucumber in your summer cottons.

July 1965: “Pansies” Garden Cushion

This month’s project was an appliquéd and embroidered cushion. Or, as the description in the magazine put it:

Attractive appliqué cushions in hardwearing hessian add a gay touch for garden lounging — ideal for deckchair comfort or to use on the lawn. Children will love them too, and they are tough enough to stand up to the rough-and-tumble of garden play.

Two cushion designs are given, one with autumn leaves and one with pink and purple pansies. I chose the pansies, which were bright and fun and very 1960s. As luck would have it, I had exactly the right amount of pink and purple felt in stash, and almost enough green embroidery thread for the stems and leaves, so I didn’t have to buy many materials and could use the project to de-stash. I did have to buy the backing fabric, and decided on a tough decorating/upholstery cotton instead of real Hessian fabric (aka burlap, jute, gunny-sack), since I don’t think this cushion will be subjected to any “rough-and-tumble of garden play” on my friend’s balcony.

Since I didn’t have a transfer, I made a little paper pattern for the felt petals, estimating the size based on the amount of felt and the size of the background fabric. One modern “standard size” piece of decorating felt made exactly 18 petals and I think it came very close to whatever size the original transfer pattern was. I overlapped the leaves in a sort of pinwheel layer (following the helpful illustration), using a little bit of stick glue to help keep them in place, and then secured them with pins. For placement, I simply folded the background fabric in quarters and used the fold lines for the two middle axes, then measured evenly from there for the corner flowers.

I sewed the flowers down with matching thread and added the yellow centres. The diagram shows them a bit above or below the actual centre of the petals, but I like symmetry, so I made the yellow pieces more round and put them right on the centre. (The layers of felt weren’t too heavy.)

All that was left to do after that was the leaf and stem embroidery, which was done in easy stem-stitch in green thread. The pattern didn’t say how many strands of thread to use, but seeing as it was a bold design, I used all six threads together and ran out of thread. (Up until this point, I had done all of the work in one day, but alas, I had to pause because it was Saturday late afternoon and the shops wouldn’t open again until Monday.)

Monday came, I bought more thread and finished the surface of the cushion. Sewing it up was easy enough. I had enough muslin in stash to make up one half of the inner cushion pad (pro tip: the inner cushion should always be a little bit larger than the outer cover, to prevent sagging) and enough of the beige cotton to make the other half. I did not, as suggested in the pattern, line the pad with plastic to make it waterproof “for use on the grass”. After making the pad, I had exactly enough beige fabric left to make strips for “piping”, so added that as well (not part of the original design). It was not “real” piping, which is made on a bias strip, and thus came out a bit uneven. Oh well. At least the zipper was no problem this time.

And that was that! I stuffed the inner cushion with fluff, sewed it up, zipped it into the cover and voilà. I have no garden, no balcony and too many cushions already, so this will be a gift for a friend.

July 1965: Overview

July is still “holiday” season over at Stitchcraft, but this summery issue is already looking towards cooler autumn temperatures and the return to post-holiday life. For women’s fashions, this means a “revival of the more feminine line” (as if there were ever a fashion for “the masculine line” in 1960s women’s fashions.) I guess they mean a slightly closer-fitting silhouette, or a little more shaping of upper-body garments between hem and bust. At the same time, “quick and easy yarns” or “easy-to-wear loose front styling” jackets are still in fashion, emphasising comfort and wearability.

Our cover model sports a white blouse made in 4-ply “Cameo Crepe” wool and twisted stocking-stitch for a little more texture. The navy blue accents on shoulder and pocket match the knitted skirt, which is just below-knee length. That may seem surprising if you associate mid-1960s fashions with miniskirts, but it took a while for the ideas of cutting-edge designers like Mary Quant or André Courrèges to trickle down to the general public, and hand-knitting magazines, even the more fashionable / aspirational ones, were oriented towards designs that “regular people” could wear in everyday life . The dresses and skirts in Vogue Knitting’s 1965 Spring/Summer issue, for example, all fall between just-barely-above and solidly-below knee-length — and Stitchcraft was a more conservative magazine than Vogue Knitting. We won’t be seeing miniskirts here for a while yet.

The upper-body fashions for women show, if not an extreme “revival of the feminine line”, a definite attention to cute colour and pattern details, particularly in the use of twisted stitches or ribbing variants. The pink raglan pullover on the inside front cover combines a sort of twisted rib on the sides with a “v” pattern, also made by twisting stitches, up the front and back midline and on the sleeves, and tops ot off with a black necktie bow. Nice touch to put it on a red-haired model! The combination of colour detail and ribbing variant (here: stranded panel and narrow slip-stitch rib) is also used on the warm blue-and-white cardigan. The “knitting that looks like crochet” trend continues in a short-sleeved blouse for larger sizes in 4-ply wool and a textured-lace pattern.

The men’s fashions use a predictably less dainty, but no less interesting use of colour and pattern: there’s a loose.fitting, sideways-knit and vertically-striped dolman-sleeve shirt for beach wear in “father and son” sizes for adults and children (though the “adult” model in the photo looks hardly older than a teenager himself) and a slipover in an Aran-style pattern of cables, ridges and zig-zags.

The kids’ designs utilise the same fashion features as the adults: the boys’ striped shirt is the exact same pattern as “Father’s”, and there’s a zip-neck pullover for girls with a stranded border reminiscent of the panel in the womens’ jacket. For younger girls, there’s a quick and easy, slightly striped pullover whose pattern details are embroidered on after knitting. Nautical white and blue, pretty pink and sunny yellow make up the summer colour palette.

There’s a good selection of easy homeware and embroidery projects: appliquéd garden cushions in “hardwearing hessian” fabric, single flowers cross-stitched on place mats “for an outdoor supper party”, embroidered “needle etchtings” of village scenes (Godshill and Shanklin Old Village on the Isle of Wight), or an easy stitched rug.

The Danish-design tapestry cushions look more complicated than they are, but are also more complicated than the usual tapestry cushions. Fans of finer work in cotton can make doilies or a traycloth, or pretty trims for bed pillows.

The ads are quite usual: Singer sewing machines, Patons yarns, and a swirly nightgown and negligée from the Scotch Wool Shop. Not to forget: the Turmix knitting machine, Stitchcraft binding cases to store a year’s worth of magazines, and order houses for wools, fabric remnants, etc. The children’s comic follows the adventures of Jill and James searching for a lost stitch and encountering interesting characters such as Spinning Jenny, who shows them how a spinning machine works.

That’s all for this issue! My project will be the appliquéd flower cushion.

June 1965: Fuzzy-Wuzzy & 3-ply Cardigan

My project from Stitchcraft’s June 1965 issue was inspired by this design for a striped orange cardigan made with “Fuzzy-Wuzzy” (3-ply angora/wool blend) yarn.

I say “inspired by” because I saw the project as a way to use up the different shades of orange wool I used in my “Shaded Blouse” project from last month, as well as the leftover pink from my “Clarel” and even a little bit of leftover orange from this lovely 1961 sleeveless top I made a few years ago. I figured I could just make narrow stripes until the first colour ran out and then see how to best finish the cardigan.

In order to do that effectively, I changed the construction from the standard bottom-up-in-flat-pieces in the pattern to a V-neck made in one piece from the top down, vertical ribbing included. That meant starting with the ribbing for the back neck, then picking up stitches across the long edge and the two short edges to make the curve, then keeping the ribbing in the dark orange colour from then on, using the same needles and two balls of wool for the two sides. It was a little tricky at first, but it was worth it to not have to play “yarn chicken” with the amount of orange needed for the ribbing at the end.

The “Fuzzy-Wuzzy” wool in the pattern is 3-ply and supposed to be knitted at 8 stitches to the inch. My wools were modern fingering/4-ply and I got a nice, even 7 stitches to the inch on 3 mm needles, so I adjusted the stitch counts, increasing up to the smallest size instead of my normal second. I remembered that this wool tended to shrink in blocking, so I wasn’t worried when it seemed generously sized — but maybe I should have been! The cardigan turned out wider than it needed to be, and if I had been able to use less yarn, I could have made the cardigan longer.

I ran out of the light peach yarn first and hardly had any dark orange left at that point, so had to buy another ball of the dark orange to finish off the ribbing (so much for the idea of using up scraps…). I expected to not want to wear or keep the finished garment, since the “cropped and boxy” look is not a great one on me. (It is, however, currently in fashion, so I figured I could sell the cardigan.) Strangely, though, I love it! It looks playful and fun and does not me look nearly as squared-off-and-put-in-a-box as I thought it would. The wool-silk-linen blend yarns and cap sleeves make it a perfect-temperature top for slightly cooler summer days.

I still have a bit of most of the yarns left over. Hat? “Shaded” mitts? Little cowl or scarf? I don’t know. I’ll edit this post if I make something matching!

June 1965: Overview

“Knit for High Summer”! The June 1965 issue of Stitchcraft “covers practically everything the family needs in the way of holiday knits”, i.e. sporty separates, cardigans to be worn as outerwear, and lots of warm, bulky sweaters for that unpredictable British summer weather. Our cover model sports a loose, unshaped, fine-knit blouse in 4-ply “Nylox” yarn, a combination of wool and nylon not unlike many sock yarns popular today. The matching skirt is below-knee length — it will take a little while for the miniskirt to reach high fashion and longer for it to be popular in a more conservative magazine like Stitchcraft.

The “crochet look” is already quite popular at this time, though. Prior to the 1960s, crochet was more often used to make doilies and fancy lace borders in fine thread, or quick and bulky items like hot pads, teapot cosies and mittens. The mid-1960s saw a transition to blouses, suits and other garments, and this issue features a lightweight blouse in an easy shell patter, worn by a model who looks uncannily like the young Barbra Streisand. Those who prefer knitted summer tops can make a little cap-sleeve blouse in fine bouclet wool, unfashionably short in this year of long, unshaped tops. The fine-knit items are rounded out by a striped cardigan in a mixture of plain wool and fluffy “Fuzzy-Wuzzy” angora blend yarn.

It wouldn’t be a proper summer without some cold wind and rain, so be prepared in your warm “bubbly stitch” cardigan made in bulky, but (comparatively) lightweight “Ariel” wool. The photo is so very 1960s! Diagonal camera angle, tilted head, high-contrast lighting for dramatic shadows, unsmiling but alluring facial expression — it’s all there. There are similar, but not quite matching, his-and-hers DK pullovers in ultramarine blue and white. The colour detailing is embroidered on at the end in cross-stitch. The man of the family can also get a bright blue waistcoat in a mock-cable and welt pattern. You know the model is on holiday, since he’s wearing his casual button-up shirt and tie.

“Youngsters” can stay warm (on their upper bodies at least) as well, in a Norwegian-style round-yoke pullover with a simple stranded pattern at hem and yoke or a “tough Lumber-style” zippered cardigan “for hard play”. You can tell the little boy in the picture is playing hard, since he’s wearing his playtime button-up shirt and tie! The girl model gets to wear shorts for once, instead of a tiny miniskirt that barely covers anything.

There are plenty of easy projects to take along on your holiday, or to prepare for it, or even serve as a memento of it — like the embroidered place mats with maps of France, Italy, Spain and Portugal, or Switzerland and their associated stereotypical motifs. Those who prefer to plan ahead can sew a simple folding bag lined with towelling for a bathing kit, or a cross-stitch hold-all for beach take-along items, as well as a little sundress-smock for a toddler.

A tablecloth is probably too big to pack in the beach bag, but the easy cross-stitch pattern is given for a cushion or chair-back as well. Little embroidered animal pictures in cross-stitch “for the nursery” are also quick and easy to pack along on holiday.

The highlights of the homeware designs in this issue are definitely meant to be made at home, particularly the embroidered “Chinese Garden” wall panel. I cannot vouch for any kind of cultural or historical authenticity in the design, but it is very pretty and delicate in shades of blue, green, lilac and orange. I’m glad they included a colour photo.

Last but not least, I leave you with this amazing “Practical Set for your bathroom” consisting of a bath mat and “Pedestal Set” made in cross-stitch with rug wool on mesh canvas. With penguins and fish! If you can’t get to Antarctica for your next holiday, the penguins can come to you.

My project this month will be a destash adaptation of the “Fuzzy-Wuzzy” cardigan. Happy holidays, or whatever else June brings for you.

May 1965: Primroses and Violets

For this month’s project, I couldn’t decide whether to make the pretty 3-colour “Shaded Blouse” (knowing that I have plenty of knitted tops, and that I would have to buy yarn for it when I am trying hard to reduce my stash) or adapt the tablecloth/dressing-table set embroidery pattern for another vegetable bag (quick, easy, useful, environmentally friendly and reduces the stash of embroidery thread and yet-unembroidered bags). Spoiler: I made both, so the stash balance will remain even. The top will take a little while, so here’s the veggie bag in the meantime.

The pattern is a design of yellow primroses and purple violets, but not in the same “bouquet” — there’s an option for a tablecloth with the primrose sprays in the corners and the smaller, individual violets scattered across the middle surface, or a “cheval set” for your dressing table with one large mat (2 primrose sprays and 2 violets) and two small mats (one violet each.) I chose to just make the primrose spray.

The bag is one of several that I bought at an antique sale a few years ago for a euro each. They are literally old moneybags, formerly used to transport money to and from the German national bank (hence the “Deutsche Bundesbank” and date printed on it; this bag was apparently from January 1997.) After 2002, the German Bundesbank replaced the old bags with newer and better ones (better in the sense that they presumably fulfilled new security regulations for the Euro) and you can now buy the disused old bags at antique markets, via ebay, etc. How they got from the bank to there, I do not know, but would love to find out. (If you are an expert in the sale and trade of disused moneybags, please share your wisdom in the comments — I genuinely would like to know.)

Anyway, apart from the fascinating can of worms that is their origin story, the bags are the absolute best for buying vegetables at the grocery store, farmers’ market etc, being made of a very thick linen (?) fabric and just the right size for small amounts of things like mushrooms, green beans, shallots, etc. Because they are both tough and easily washable (of course I washed them thoroughly before starting to use them for food items — money is literally filthy) they are particularly good for sandy or earthy vegetables like the aforementioned mushrooms, new potatoes, or the kind of carrots that I like to eat, which are grown in peat and therefore quite “dirty” (but taste better than regular carrots).

The actual embroidery pattern was not difficult. Of course, I had no transfer, since I would have had to order it in the mail in 1965. But it was no problem to sketch out the flower spray from the photo. I used transfer paper to transfer the design onto the fabric. The ink was quite faint, so I went over it with a ball-point pen (washable), which worked well enough. There were instructions in the magazine and even a helpful close-up of the stitches, which were all extremely easy: satin stitch for the petals, blanket stitch for the leaf outlines and stem stitch for everything else. I ran out of light yellow after embroidering half of the flowers, and the new skein I bought was one colour-shade different. You can tell if you look closely, but I don’t think it’s a flaw — it gives the flowers a little more depth.

This is the third “Bundesbank” bag that I’ve embroidered, as well as another bag of regular cotton fabric. I used the other bags to buy stuff at the local organic supermarket last week and the cashier stopped in the middle of my checkout to say, “I’m sorry, I just need to take a second to admire this beautiful work.” That was sweet! If I ever get enough of these made, I’ll probably start selling them.

Stay tuned for the “shaded blouse”!

May 1965: Overview

Spring and summer are always time for “holidays” at Stitchcraft, with a mixture of light, pretty blouses, warmer, casual jackets and sweaters for that holiday on a North Sea beach, and easy embroidery to pack in your luggage and work on while lounging in your deck chair. Our cover photo shows matching his-and-hers sweaters made in DK wool, and an intriguing photo begging to be captioned. “It’s for you!” “Not interested” “But it’s my mother!” “I am definitely not home” — Anyway, the sweaters are nice and good to “wear by the sea”, as it says in the caption. They are knitted in Patons “Flair”, a combination of Shetland wool and Courtelle nylon in a slightly thicker DK weight.

The remaining adult knitted “holiday” garments are pretty and practical: a men’s tweedy “country” cardigan, a heavy slip-on jacket for women in a sort of bubble pattern made by purling stitches together, wrapping them and purling them again on one row out of a 4-row rib pattern, a lightweight lacy top with a graded colour scheme, or a slipover in mohair blend “Fuzzy-Wuzzy” wool. There’s also a fashionable dress in bramble-stitch, made to look like crochet, but knitted. Colours are soft, cool pastels — white, natural, sky blue or light pink.

The “crochet look” in knitting, as exemplified by the dress, is the latest trend. If you can’t crochet, you can knit to make it look like crochet, and if you can, you can make a matching mother-daughter blouse set in wool-nylon blend “Nylox” yarn. There’s also a full-page “Learn to Crochet” illustration with clear and helpful instructions for the basic stitches. I keep it around for easy reference.

There’s nothing for very young babies in this issue, but toddlers can get a nice beach set of knitted pants and short-sleeved cardigan. The cable panels supposedly make it hold its shape, but it’s not intended to go in the water. The toddler’s tween sister gets a sunny and colourful “young style” blazer in DK wool and a “continental” design. I still don’t know what is meant by “continental” design — obviously referring to the European continent as opposed to the British isles, but I wouldn’t be able to say what design elements make something “continental.” If you know, do tell.

The summer housewares are fairly standard, with a floral cross-stitch design for either a cushion or tablecloth, and a knitting workbag featuring dancing “gay Tyrolean” figures. I know some gay Tyrolean dancers, but that’s a different story. There’s also an embroidery pattern for an easy tablecloth or “dressing-table set”.

And then there are some genuinely interesting place mats with figures of birds and fish adapted from Peruvian work. The “wingless bird” in the close-up photo looks like a rhea and the black and white one probably a guan. I don’t know about the third bird in the first photo, the squished-up one with a long neck, how about you?

There’s also a rug, for not taking along on holiday, as well as a fancy knitted lace cloth “for a summer table” (It is knitted in cotton and therefore wash- and bleachable, but still, I would be afraid to spill something on it.) And of course, cosies! Both egg- and teapot-, to knit from scraps of tapestry wool held double (not knitting wool as one would expect).

That’s all for this issue. I’m going to close with this wonderful Scotch Wool Shop advertisement for Bri-Nylon swimsuits. I would wear either of these in a heartbeat. Enjoy the Spring!

April 1965: “Spot” Design Adaptation

For this month’s project, I wanted to try something different and convert a cross-stitch pattern into knitting. The April 1965 issue of Stitchcraft had two designs for counted-stitch cushions embroidered with tapestry wool on coarse “Portree” cloth. Portree seems to be a grouped-thread fabric similar to Aida, but doesn’t seem to be manufactured under this name anymore. (If you know anything about it, please tell me!)

Anyway, I don’t like counted cross-stitch and I have enough cushions, but I was interested to see how one could convert the cross-stitch pattern into knitted form and what type of object or garment it would be suitable for. Theoretically, any counted-stitch chart can be used as a knitting chart. In practice, many cross-stitch patterns are not suitable for stranded or intarsia knitting due to the number of colours in a row or the placement of motifs. I thought this design would work as an intarsia design because the motifs are small and self-contained. The diagonal lines could be added in later either with embroidery on the finished knitting, or with duplicate stitch.

The original pattern uses Lime, Orange and Brown wools on natural colour cloth (how very 1960s.) I had lots of scraps of Shetland wool and used green (lime, I guess) and yellow (lemon?) for the spots on a slightly pink natural background. For the little motifs between the spots (brown in the original design), I chose some pink silk-wool blend of which I also had a small amount left over. The spots are 3, 5, 7, 7, 7, 5, 3 stitches wide and I stranded the wool on the seven-stitch rows and twisted the background and spot colours together at the changes on the edges of the spots. I made a modified square with slightly rounded edges, thinking if I didn’t know what to do with it, I could always mount it in a circular embroidery hoop-frame and hang it on the wall. Nine rows of spots made a piece about 10 inches wide and 9 inches long. Here it is after blocking, but before adding the duplicate stitch lines:

So far, so good. Of course, there were a million ends to weave in.

The duplicate stitch lines were surprisingly difficult. They are supposed to go from one 5-stitch-wide row to another, but I couldn’t always make it work out with the diagonals and the number of stitches and rows. Mathematically, it should not be a problem. In practice, I guess I didn’t always find the correct stitch to duplicate.

At this point, I had realised that I could fold it in half to make a little rectangular case for pencils or double-pointed needles. Not that I need that, particularly, but if it turned out well enough, I could give it away or sell it or something. I bought a small piece of yellow cotton for the lining and a zipper, sewed it up and there it was.

Sewing in the zipper was a disaster, as it usually is, and for some reason, the finished bag is a bit… warped? It was perfectly flat, as was the lining, before putting in the zipper. I think the knitted fabric pulled a little more on one side than the other. But other than that, it’s fine.

I could imagine a design like this for a rectangular sort of garment, like a slipover/vest/whatever you call it thing with no sleeves — sort of like an argyle design. The only truly annoying part is weaving in the thousand ends. This was a good learning experience and I definitely feel more confident about converting cross-stitch designs after doing it.

April 1965: Overview

Stitchcraft’s April 1965 theme is “Out in the Open Knitting”, with “country” style cardigans and jackets to be worn outdoors, and easy homeware projects that are “just the type of work to do through the lighter evenings and out of doors.” Spring is here!

Our cover photo features a “stroller jacket” made in tweedy “Glenora” wool. At 30 to 32 ounces and made in stocking stitch, I fear it would stretch and sag to much longer than the 34-35 inches given in the pattern. The other adult “outdoor” garments are similarly heavy: a “country jacket” in bulky Big Ben wool and knotted-stitch pattern and a square-shaped men’s jacket in double-moss stitch. Outdoor colours include natural beige and brown tones as well as sky blue.

The “indoor” garments are less bulky and use matching layers to adapt to capricious spring temperatures: a subdued twin set with “braided” bolero-style border on the cardigan and a set of jumper + “overblouse” slipover. The twin set and jumper are in lightweight 4-ply wool, the overblouse in DK.

Colours are muted and match well with the outdoor neutrals: , soft pink, peachy-orange and grey-brown tweed. There’s an “indoor” pullover for men as well, in tweedy green to match the outdoor country theme.

Children of all ages get “bread-and-butter” garments for school and play. There’s a crocheted baby jacket to be made either without shaping (“for a boy”) or with a skirted matinee coat shape (“for a girl”). There’s a tunic dress for a somewhat older girl, featured in one of my favourite photographs ever. Drink your tea… or else! The dress is pretty cool too: decorated with embroidered chain-stitch over nubbly Rimple DK wool.

School-age kids can get a practical unisex waistcoat for school wear, or a very nice fine-knit cardigan in 3-ply “Brilliante” wool. Brilliante was a wool blend using “Orlon” acrylic fiber, which had been invented in 1941 but only started to be popular for hand-knitting use in the mid-1960s. See also: the two advertisements in this issue touting the qualities of Brilliante and Orlon: soft, washable and thoroughly modern.

There are all sorts of homewares to choose from, most of them fairly standard: a striped, darned rug, a church kneeler in trammed-stitch tapestry, cutwork place mats, a simple embroidered cushion… There’s a flowery embroidered tablecloth for Easter (Easter Sunday was rather late in 1965, falling on April 18th, but still — better get that tablecloth done soon!) and two more cushions in counted cross-stitch work.

The two more interesting projects are a pattern for tatted place mats and napkin rings, or tapestry chair seats with an oceanic theme. Tatting designs are rare in Stitchcraft, so this was a special “by request” pattern. The sea-life chair seats are quite pretty and elaborate. One design features sea shells and coral, the other “Pond Life” — flowers, insects and butterflies. They are made with tapestry wool on canvas.

That’s all! My project for this month will be unusual: an adaptation of the cross-stitch “spot” design in knitting. I love the design, but I don’t like counted work and I don’t need any more cushions. I think it would work really well as an argyle-like intarsia + embroidered lines pattern for fingerless gloves. We’ll see how that works!