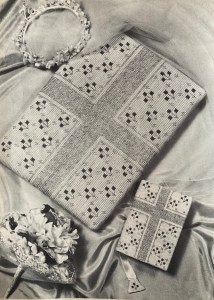
I was a bit uninspired by the February 1963 issue, which had several nice garments that were either too bulky for my taste or would just take too long to finish. I’m also trying to work from stash as much as possible. With that in mind, I adapted this “Prayer book cover and kneeler for a bride” tapestry design for a small, simple needlepoint bag.
My first, and until now, only tapestry/needlepoint project (what is the difference, anyway? Stitchcraft always uses the word “tapestry”and often qualifies it with gros point or petit point, but I see “needlepoint” used just as often in other sources) was this unfinished failure from the May 1961 issue. I still had the wool and enough canvas to make a smaller bag using the flower part of the design from the prayer-book cover.
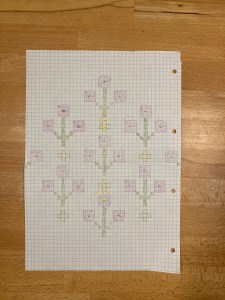
Since the original chart was not printed in the magazine but had to be ordered via post, I had to recreate it myself on graph paper, which wasn’t too difficult. The basic stitch is a half cross stitch, which works much better with this combination of wool thickness and canvas density than the earlier project, which was all in cross-stitch. The flower heads are made with eye stitch — 8 stitches all going into the same center hole. The stems of the flowers and the little hash marks between them in the original are supposed to be embroidered over the tapestry using gold Lurex thread, but I changed that to add some little pink and yellow blossom-like accents and just worked the stems in green wool.
So far, so good. I ordered a little bag clasp, marked out the approximate area of the needlepoint and started on the first half. In the middle of the large piece of canvas. Obviously that was a bad move, because a bag has to be worked symmetrically along the bottom fold line, no? The canvas was just large enough to divide it into two parts, but obviously it would have been better to work the whole thing in one mirrored piece and not have to sew a seam on the fraying bottom edge.
Once that problem was solved, I found the actual work to be relaxing, if somewhat boring (lots and lots of grey background). Also, I just barely squeaked through with enough grey wool to finish both pieces. The hard part came when fitting the finished tapestry into the clasp frame and dealing with the lining. The tapestry was… strangely twisted? The two sides of the bag did not lie flat over each other even though both pieces were perfectly identical and perfectly mirrored. I steamed the life out of it with the steam iron and managed to get it flatter, but… why? How? Things only got worse when I added the lining. I hate sewing and I hate linings. No matter how carefully I cut out a lining to the correct size and pin it and mark it and all the other boring things you are supposed to do, it never, ever comes out to the right size, or lies flat, or looks neat and deliberate. (I did manage to get the lining into the bag with a nice neat edge at the top… then realised it made no difference, as the top edge was going to be sewn to the metal clasp.)
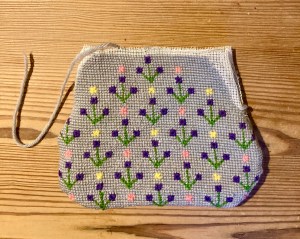
The clasp has holes in it to sew the bag and lining in on the top and sides, and it was clear enough how that should be done, but theory was easier than practice and there was much clenching of teeth and growling. Also, a lot of that nice neat edge needed to be painstakingly ripped out to fit it over the clasp rim, reducing the nice neatness considerably. Did I mention how much I hate sewing? In the end, the edge was quite messy on the inside and not perfectly aligned on the outside. Both the needlepoint and the lining are oddly twisted and uneven and steaming it didn’t help anymore.

My take from this project: Needlepoint is fine, but not as much fun as knitting. Some older issues of Stitchcraft give an address where you can send tapestry projects in to be professionally made up into a bag or cosy or whatever “for a reasonable price” and if that service still existed, I would definitely take advantage of it! I have to make up the project myself, it is not worth it.
